


aydingocer
-
Posts
858 -
Joined
-
Last visited
Content Type
Profiles
Forums
Gallery
Events
Posts posted by aydingocer
-
-
-
14 hours ago, wefalck said:
"Figure 153: Bottles (probably containing Eau de Cologne). They will be hanging on the wall above the sink."
From the distance they look like the dispensing bottles for liquid soap. They were made either from glass (so that you could see the level of filling) or porcelaine. At the bottom there was a sprung valve (the sping is in the cylindrical part sticking out from the top). You pushed the knob at top to let soap out. In another variant you pushed the valve up with your hand underneath - the always leaked. Until the 1970s they were ubiquitous in railways, public toilets, hotels etc., when they were replaced by plastic bottles.
Nice progress on little details ...
Interesting information, thanks for sharing. I didn't know they had soap dispenser back then.
-
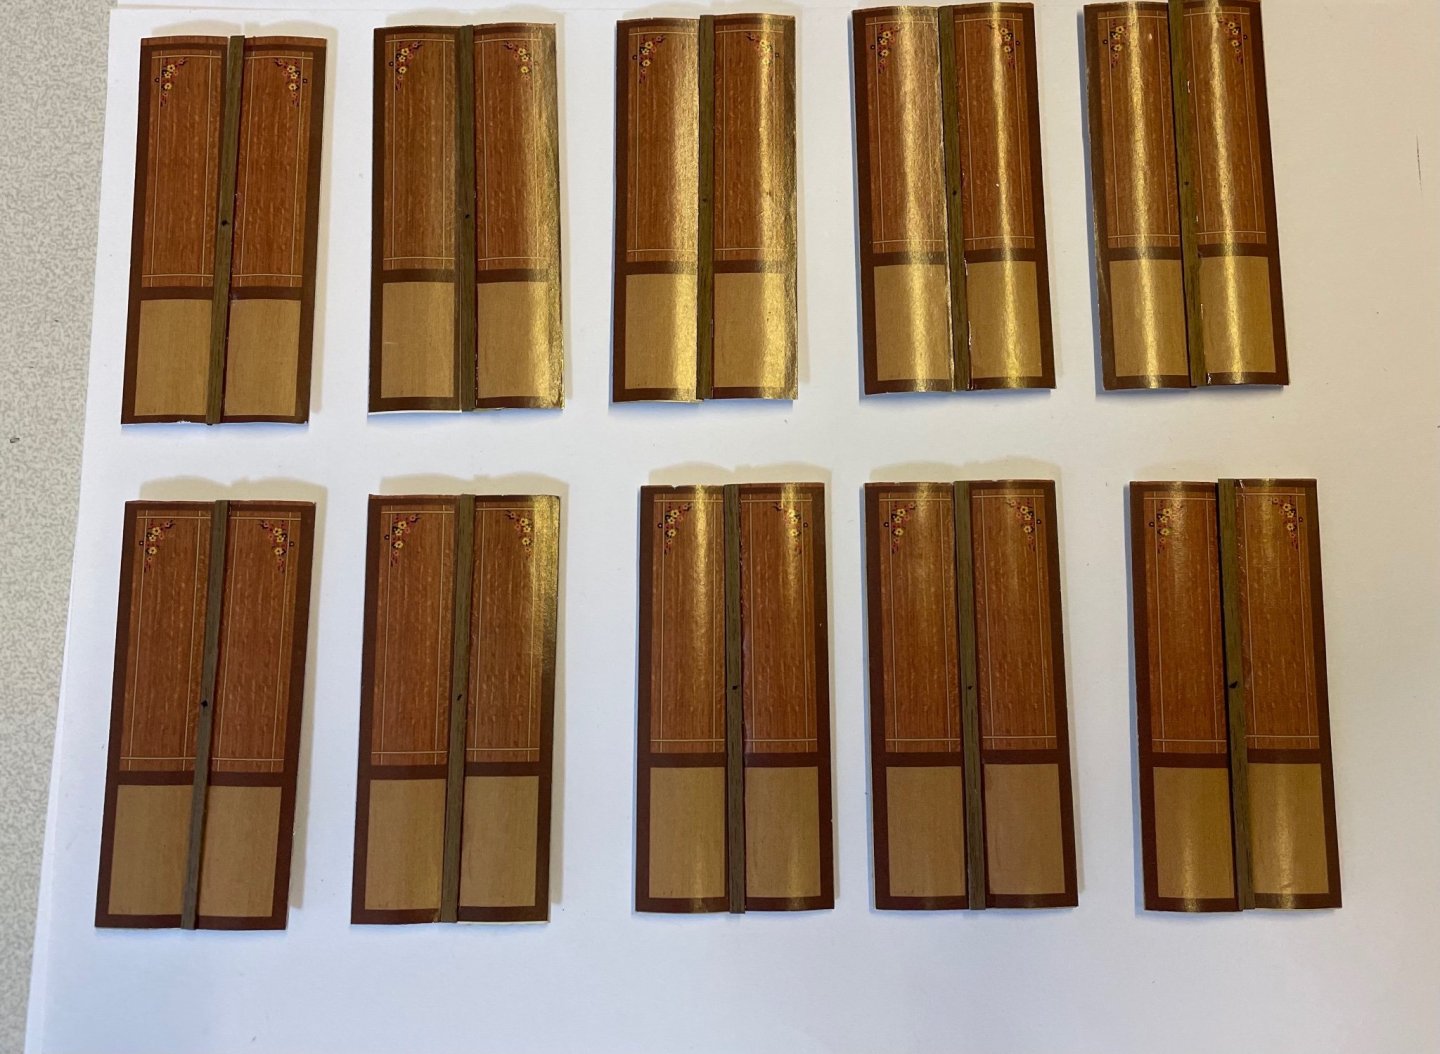
Figure 168: Doors ready, though not fully. They are missing handles and the hinges.
That's all for today!
Thanks for watching! -
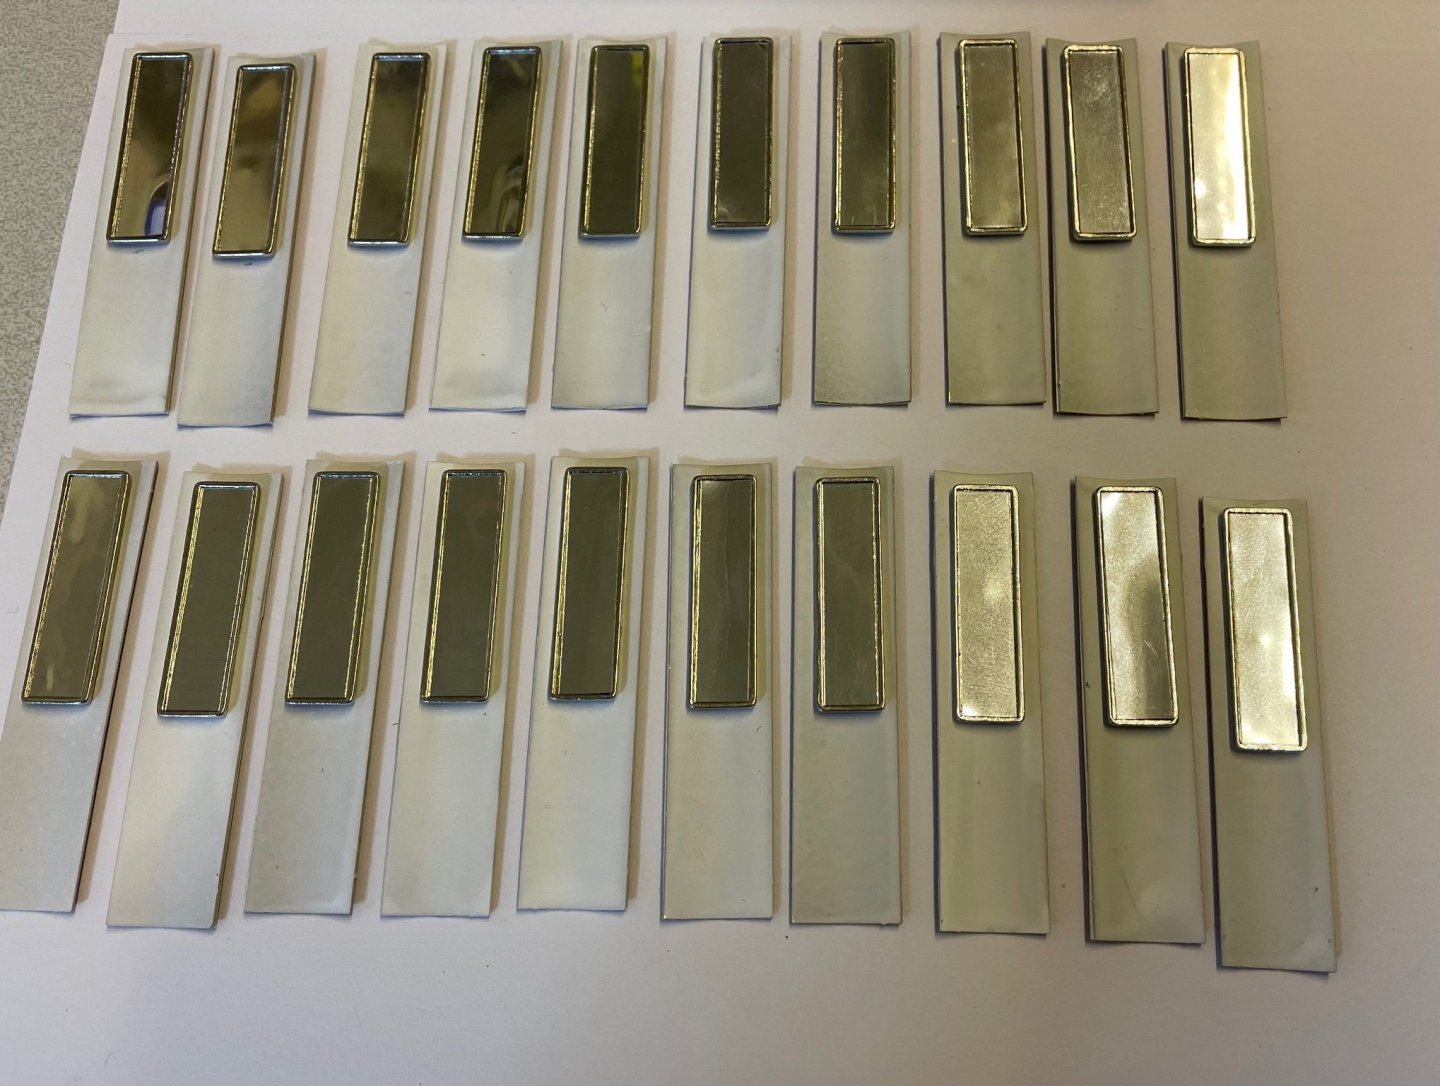
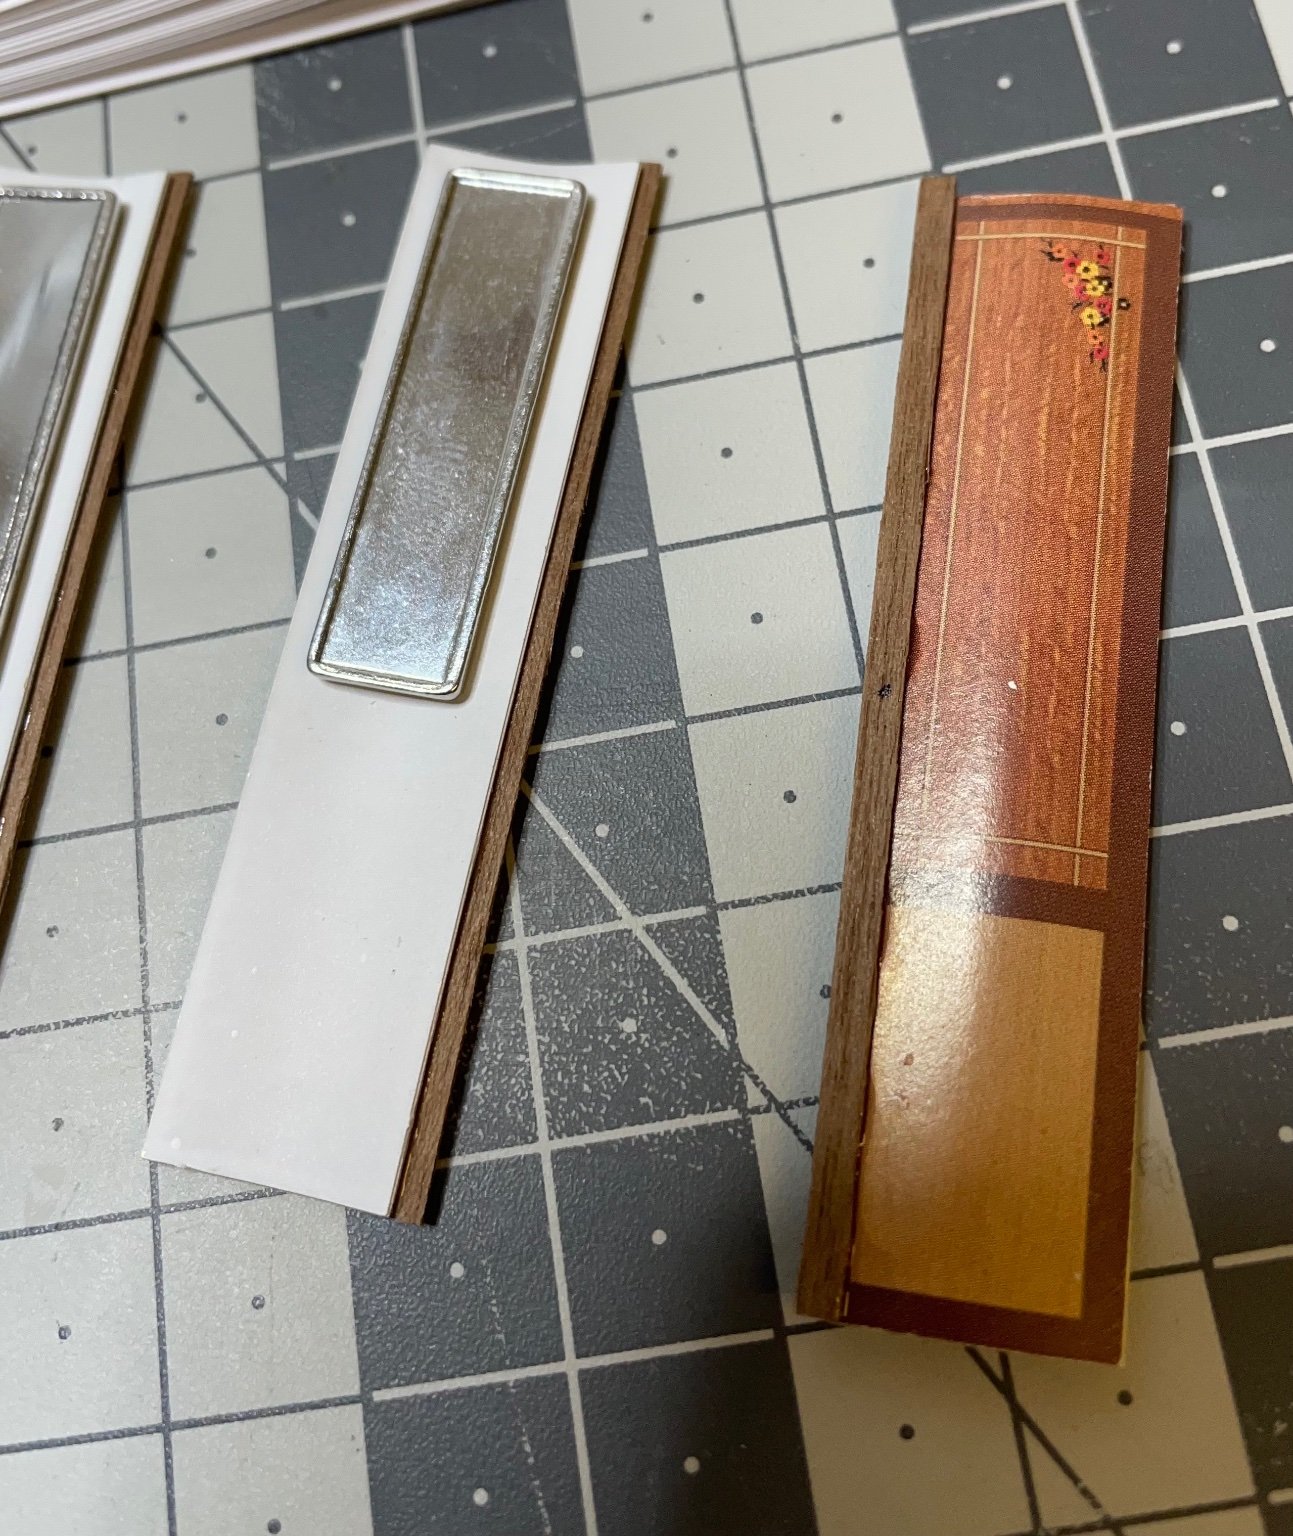
Figures 166, 167 : Mirrors on both door wings. Note also the wooden trims with an offset on the right door wings. When the doors are closed, this offset will overlap with the edge of the the left wing.

- Egilman, king derelict, oneslim and 7 others
-
 10
10
-
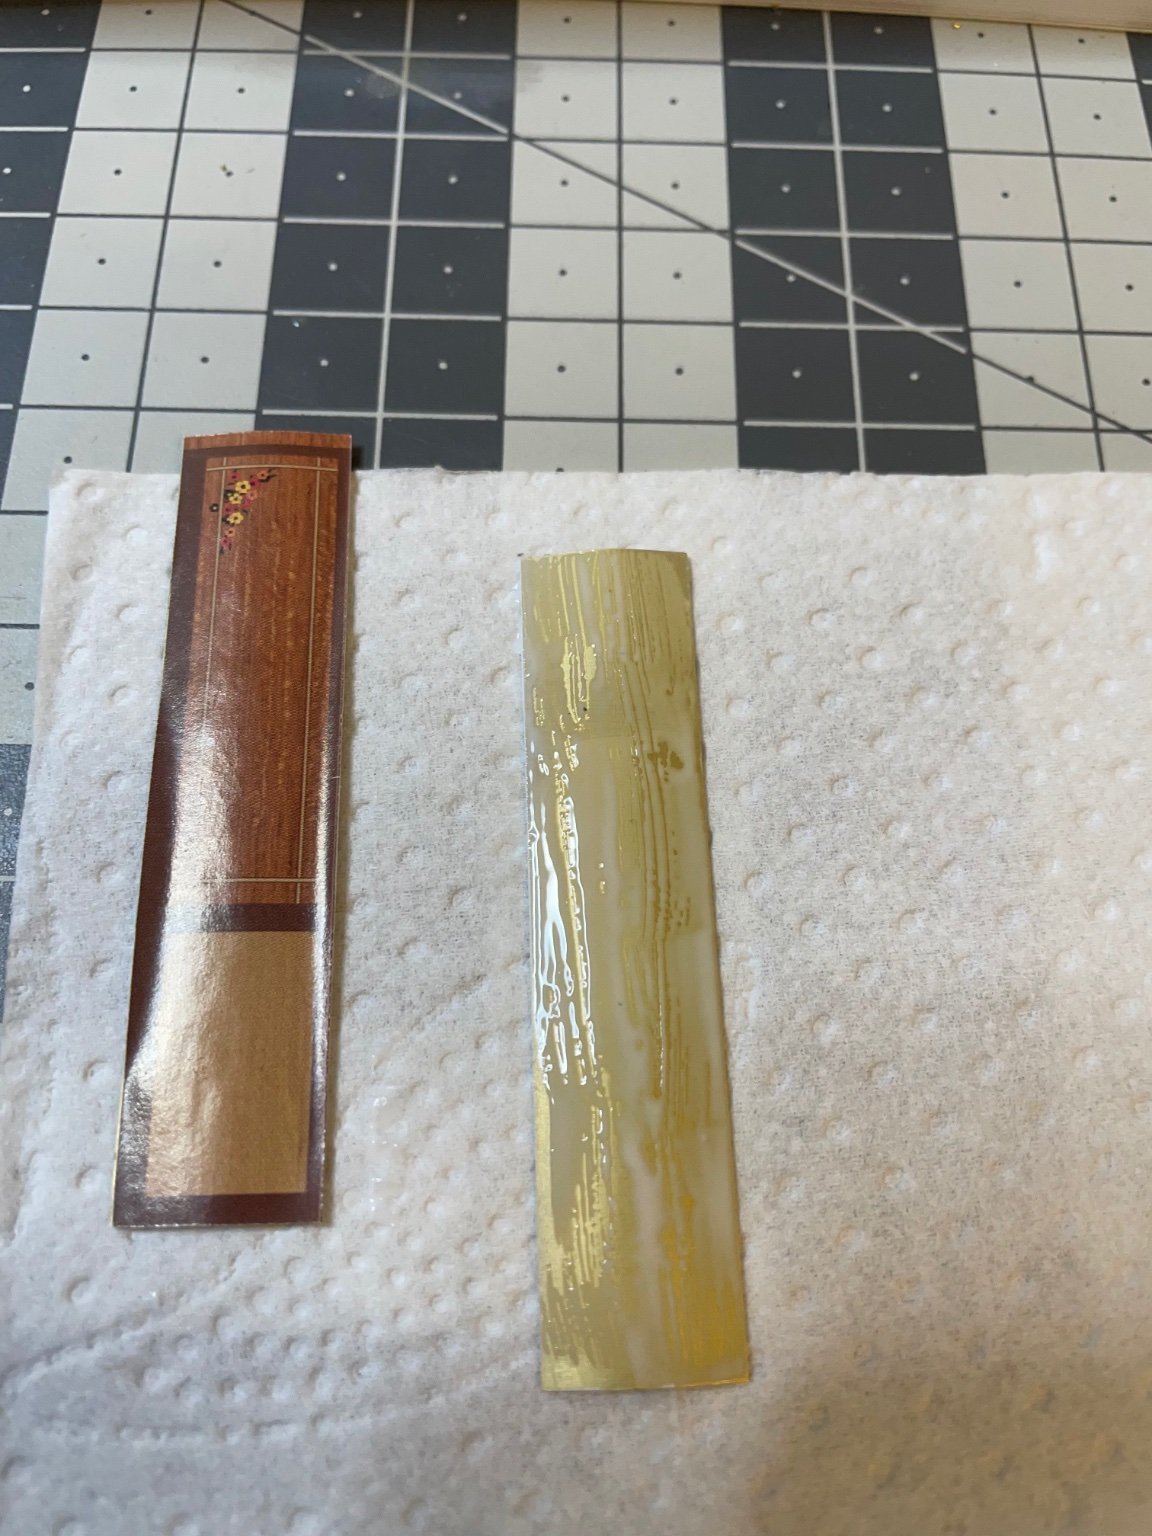
Figure 165: At this stage I applied white stationary glue with a brush for gluing the paper.

-
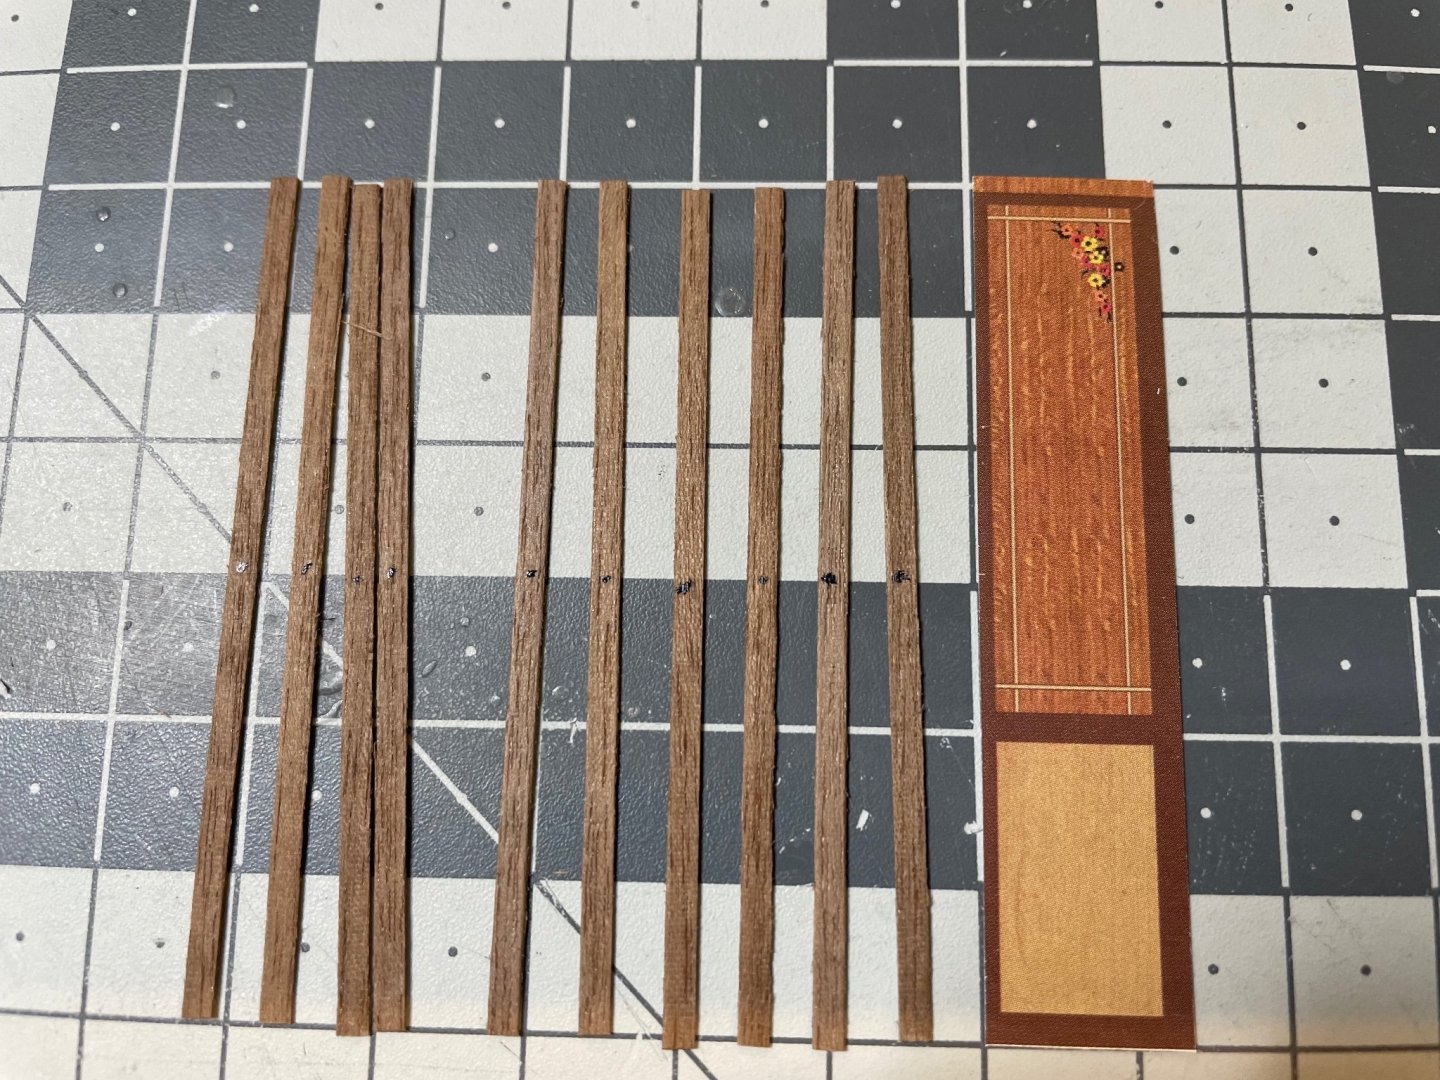
Figure 164: There is a + mark on the paper decorations indicating the location of the door handle. That mark is to be transferred on the wooden trim. The handle will then be glued on the wooded trim.
- lmagna, Old Collingwood, wefalck and 7 others
-
10
-
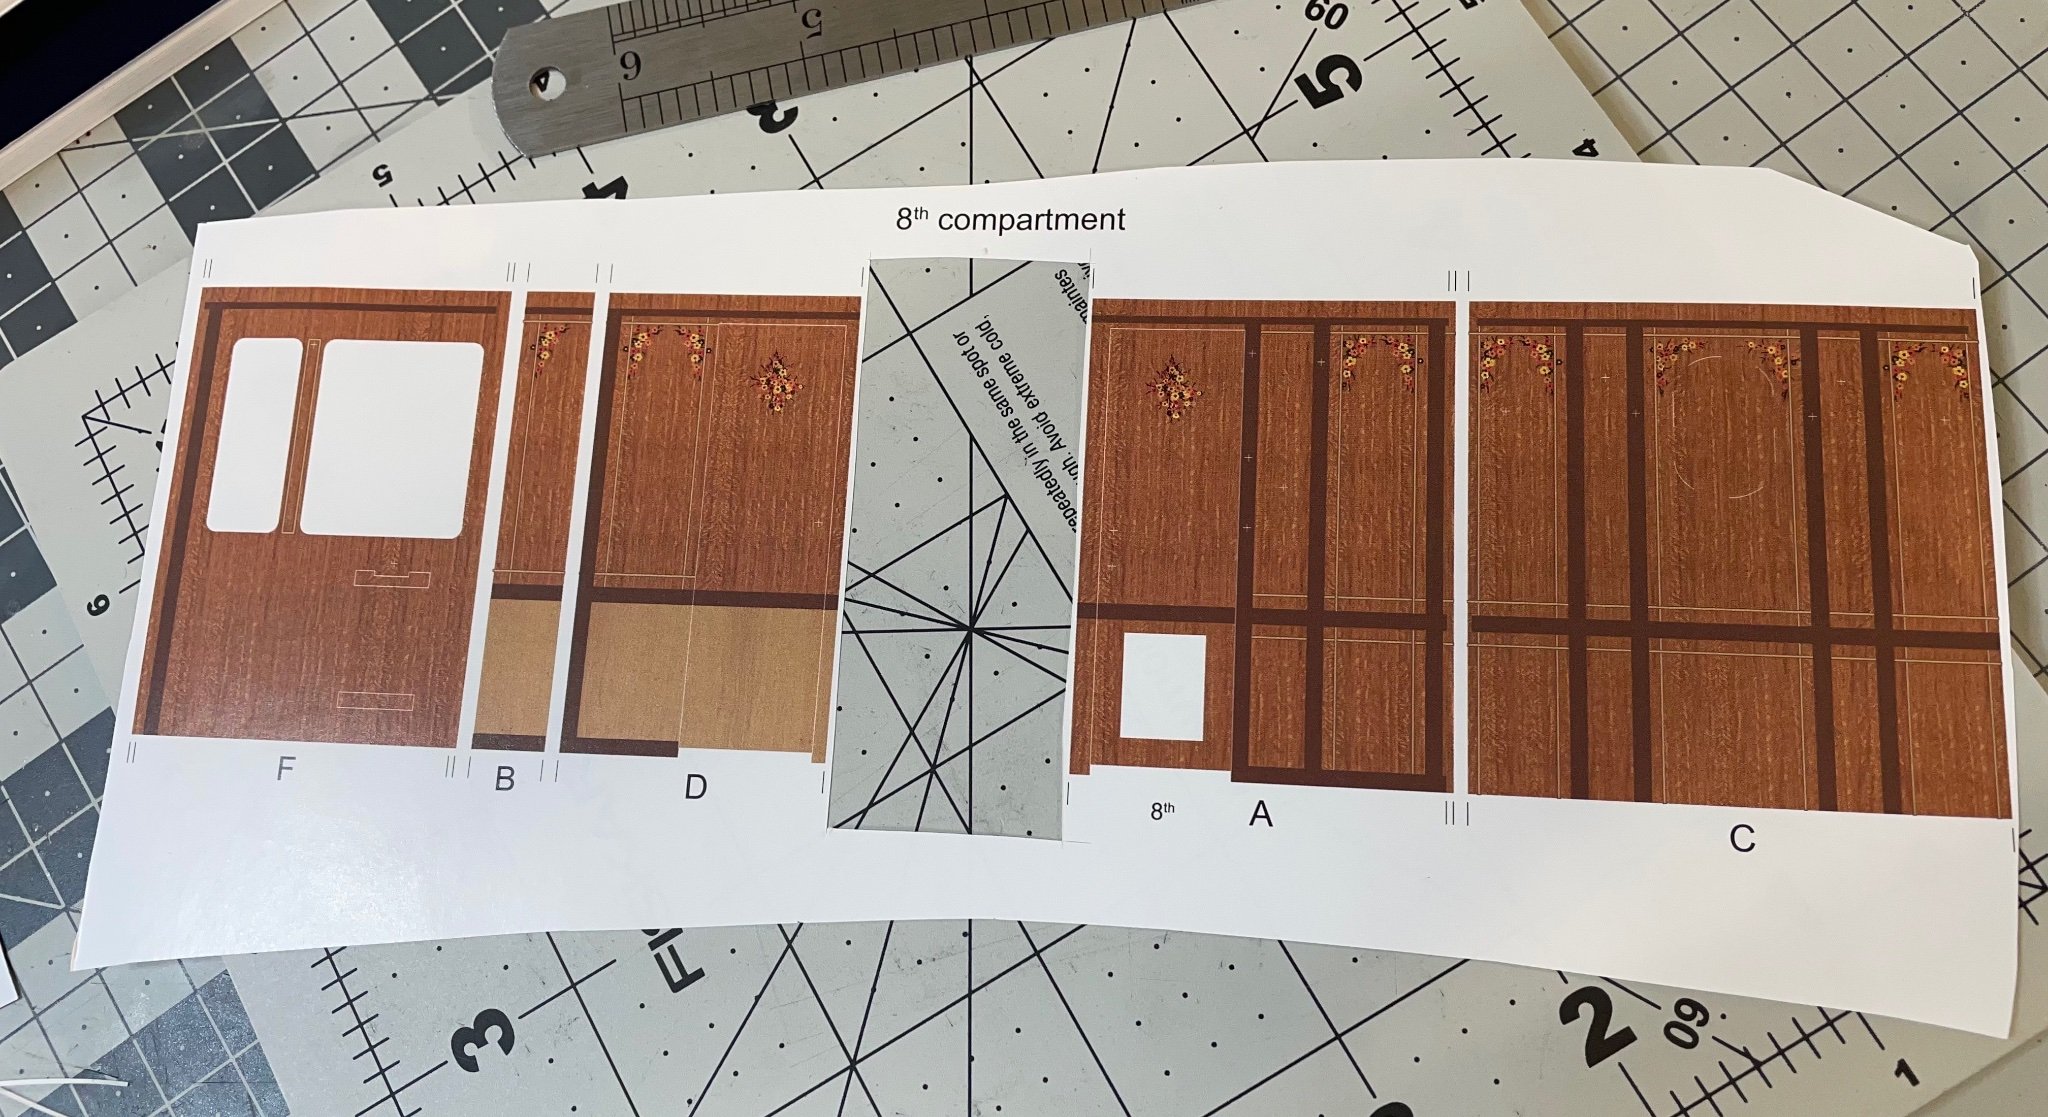
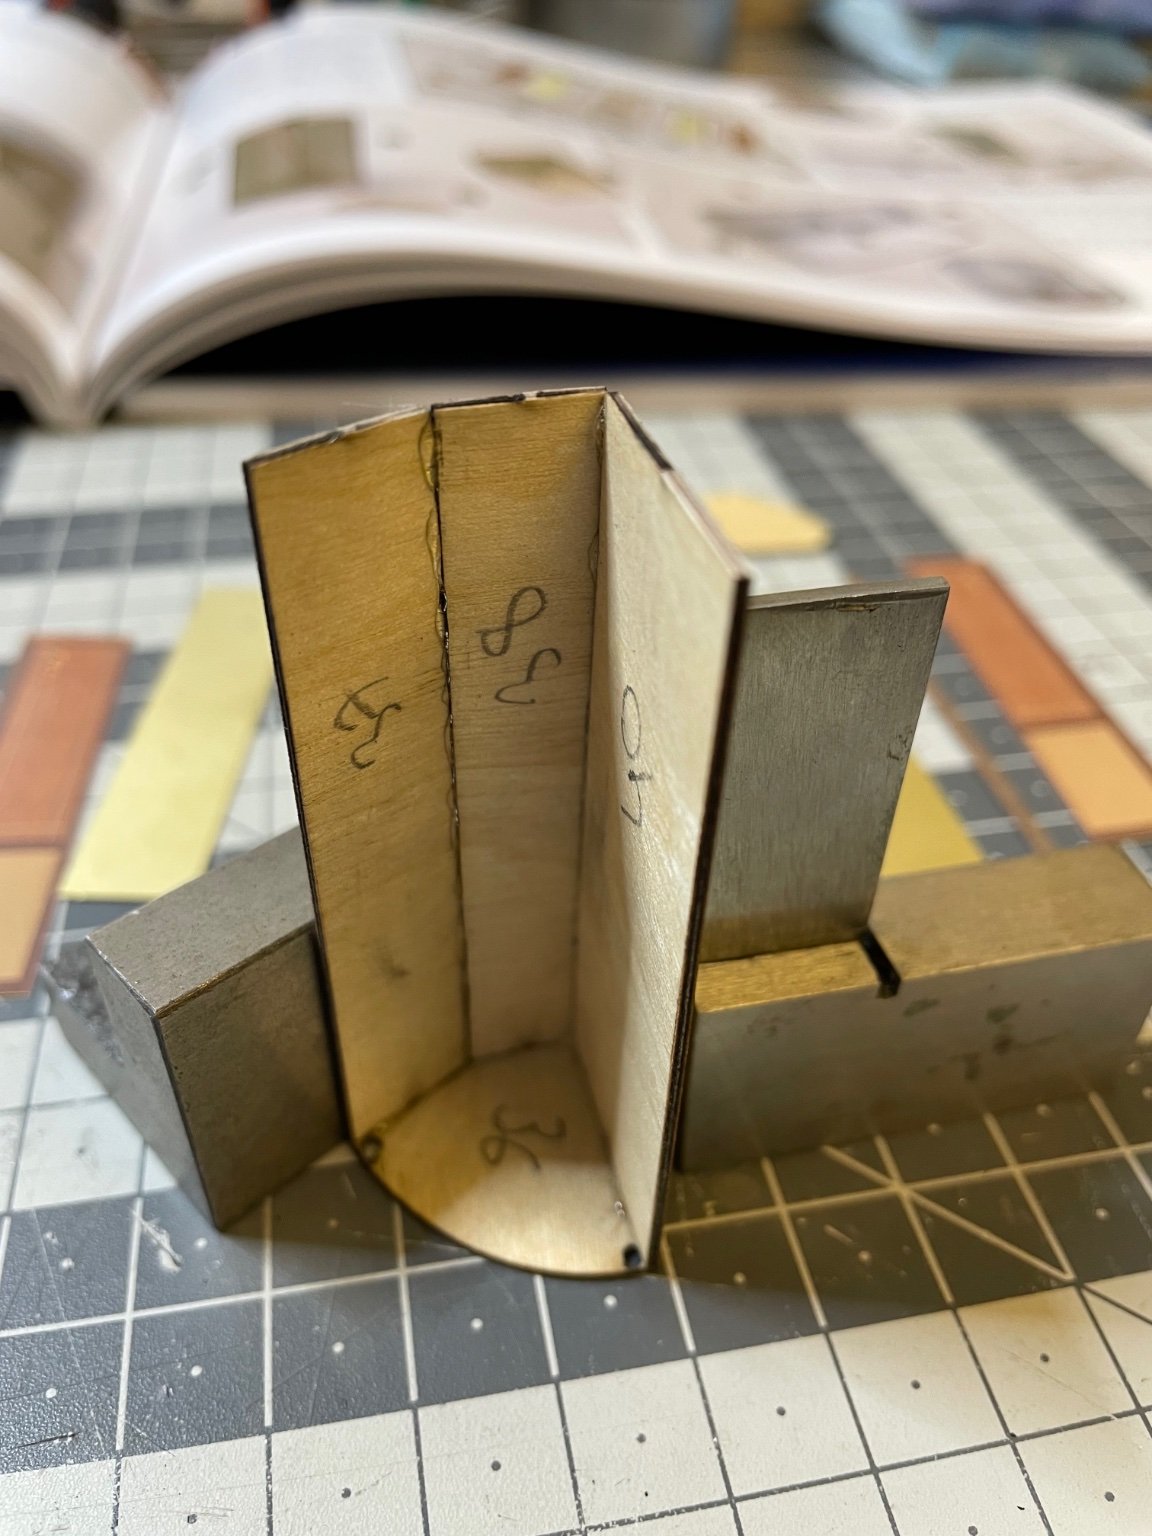
Here is how I always keep the paper sheets intact, removing only the part needed, so that I can identify the parts. In this case I know that this sheet belongs to compartment 8, as well as the labels of each piece (F, B .. etc).
Figure 163

- yvesvidal, Egilman, Old Collingwood and 5 others
-
8
-
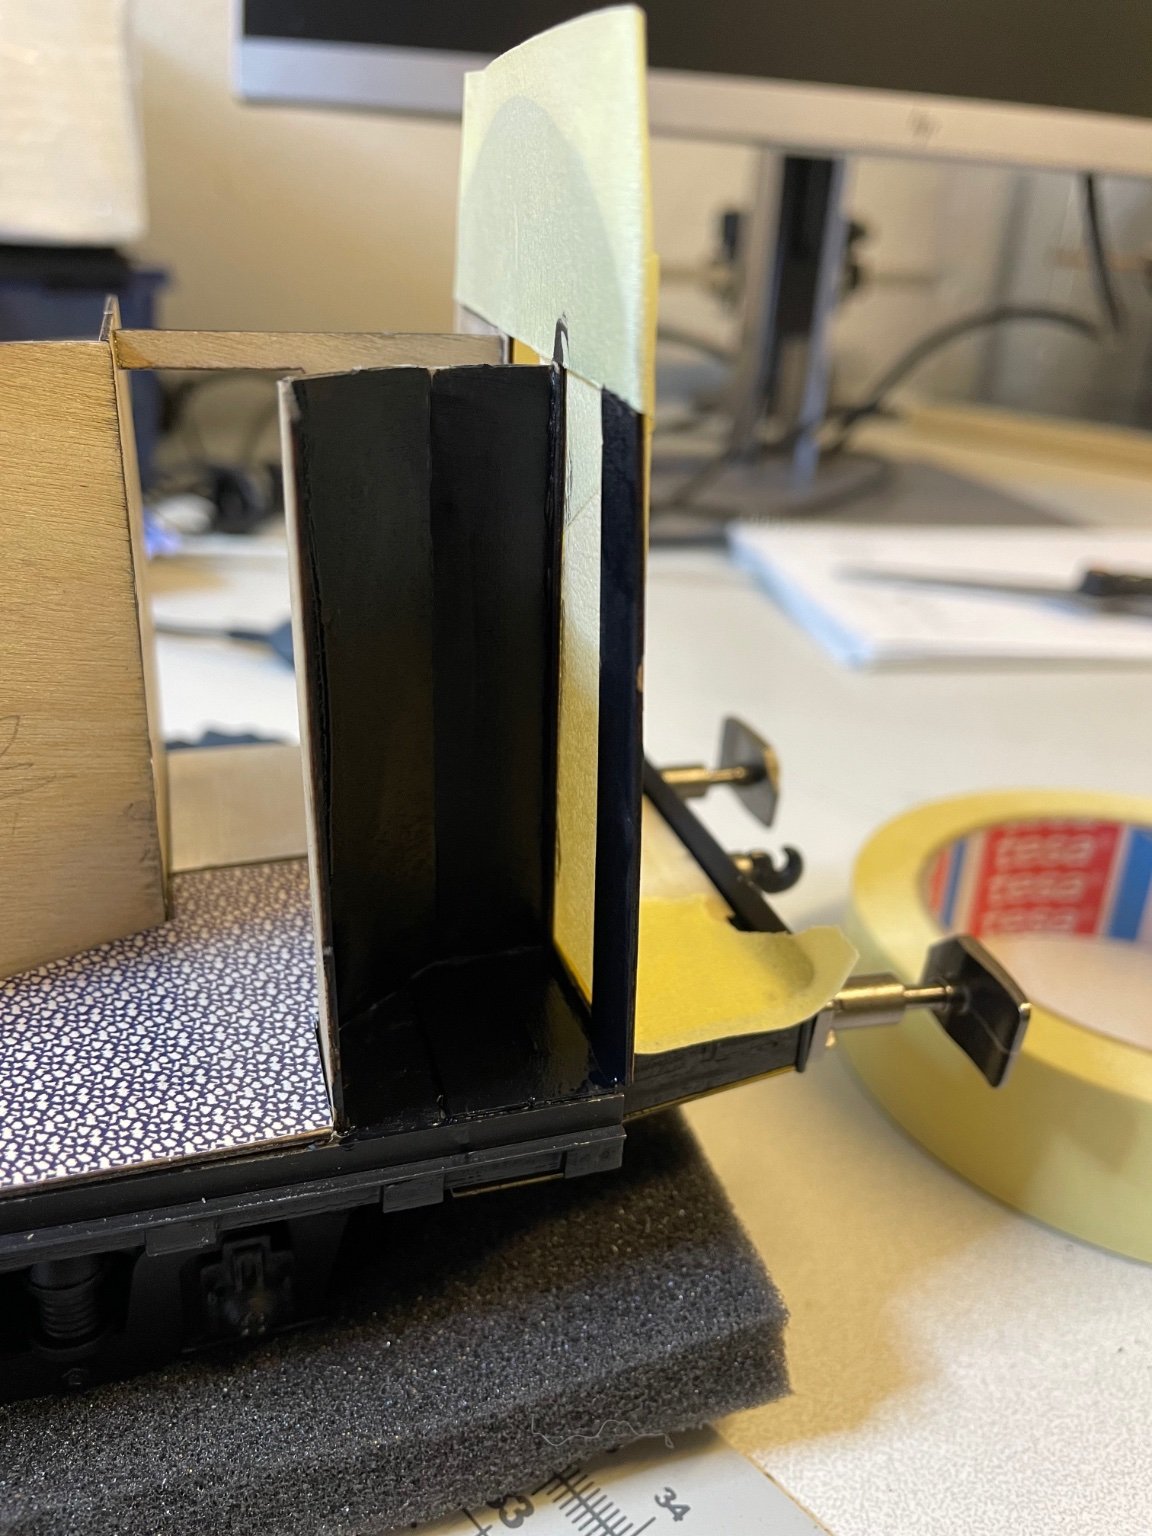
Figure 161: Doors ready for painting their inner side. The instructions address to glue the paper decoration outside first and then paint inside, but I see it too risky. Paint will definitely leak on the back surface. There should be no paper decoration at that time.

Figure 162: Doors painted matt white.
- popeye the sailor, mtaylor, wefalck and 5 others
-
8
-
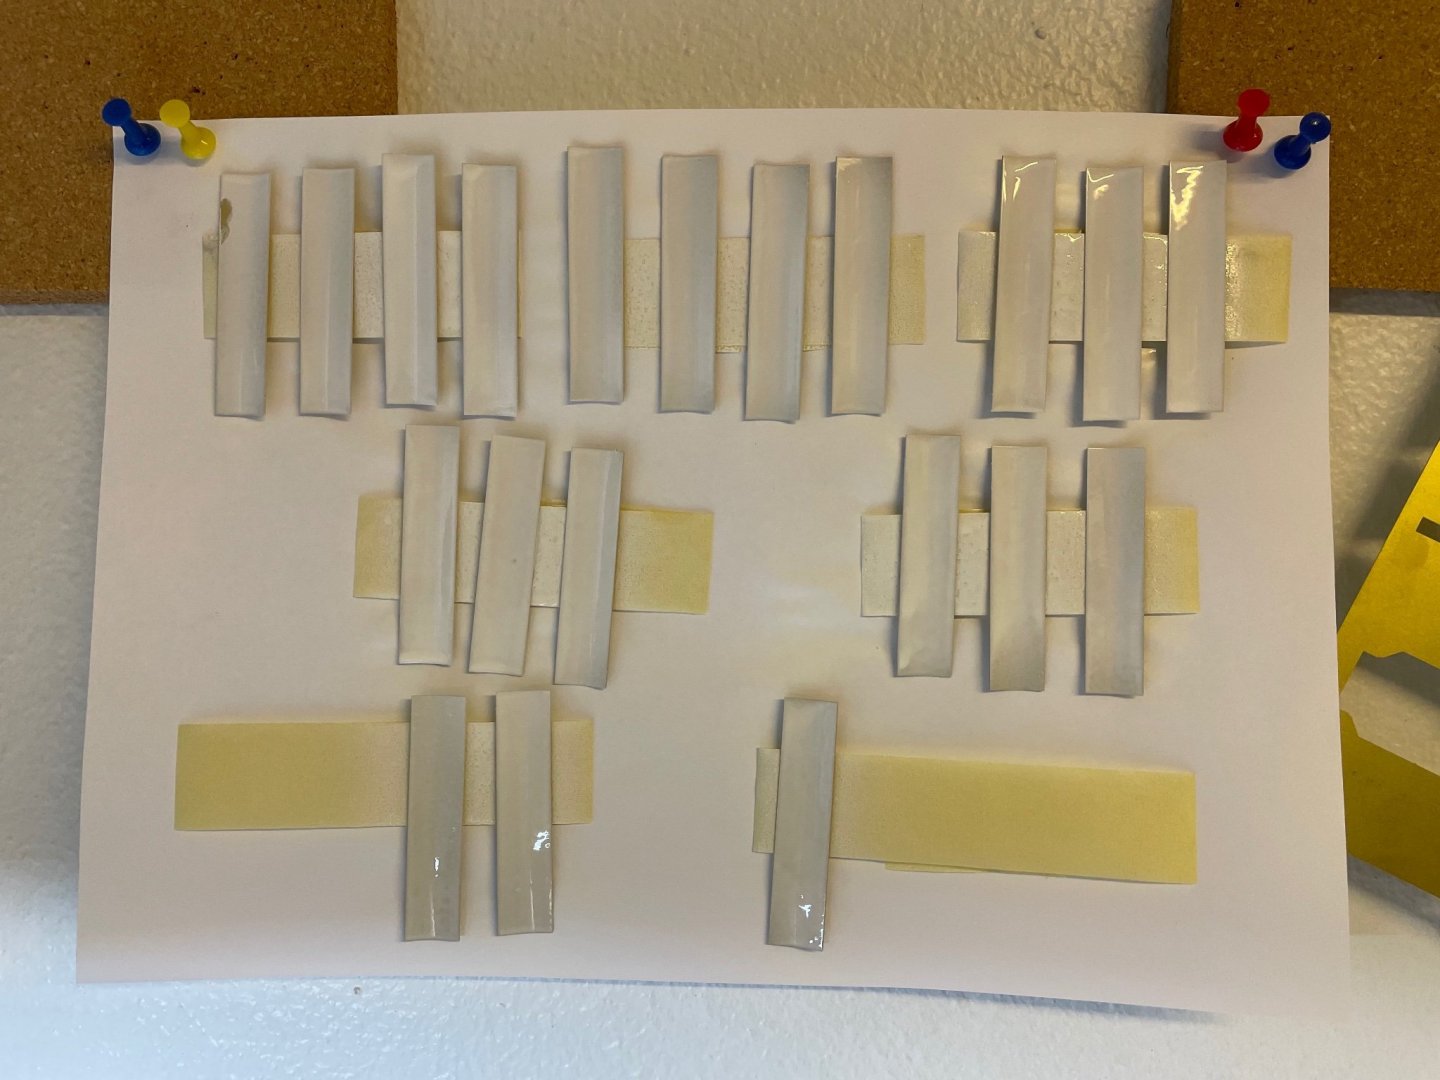
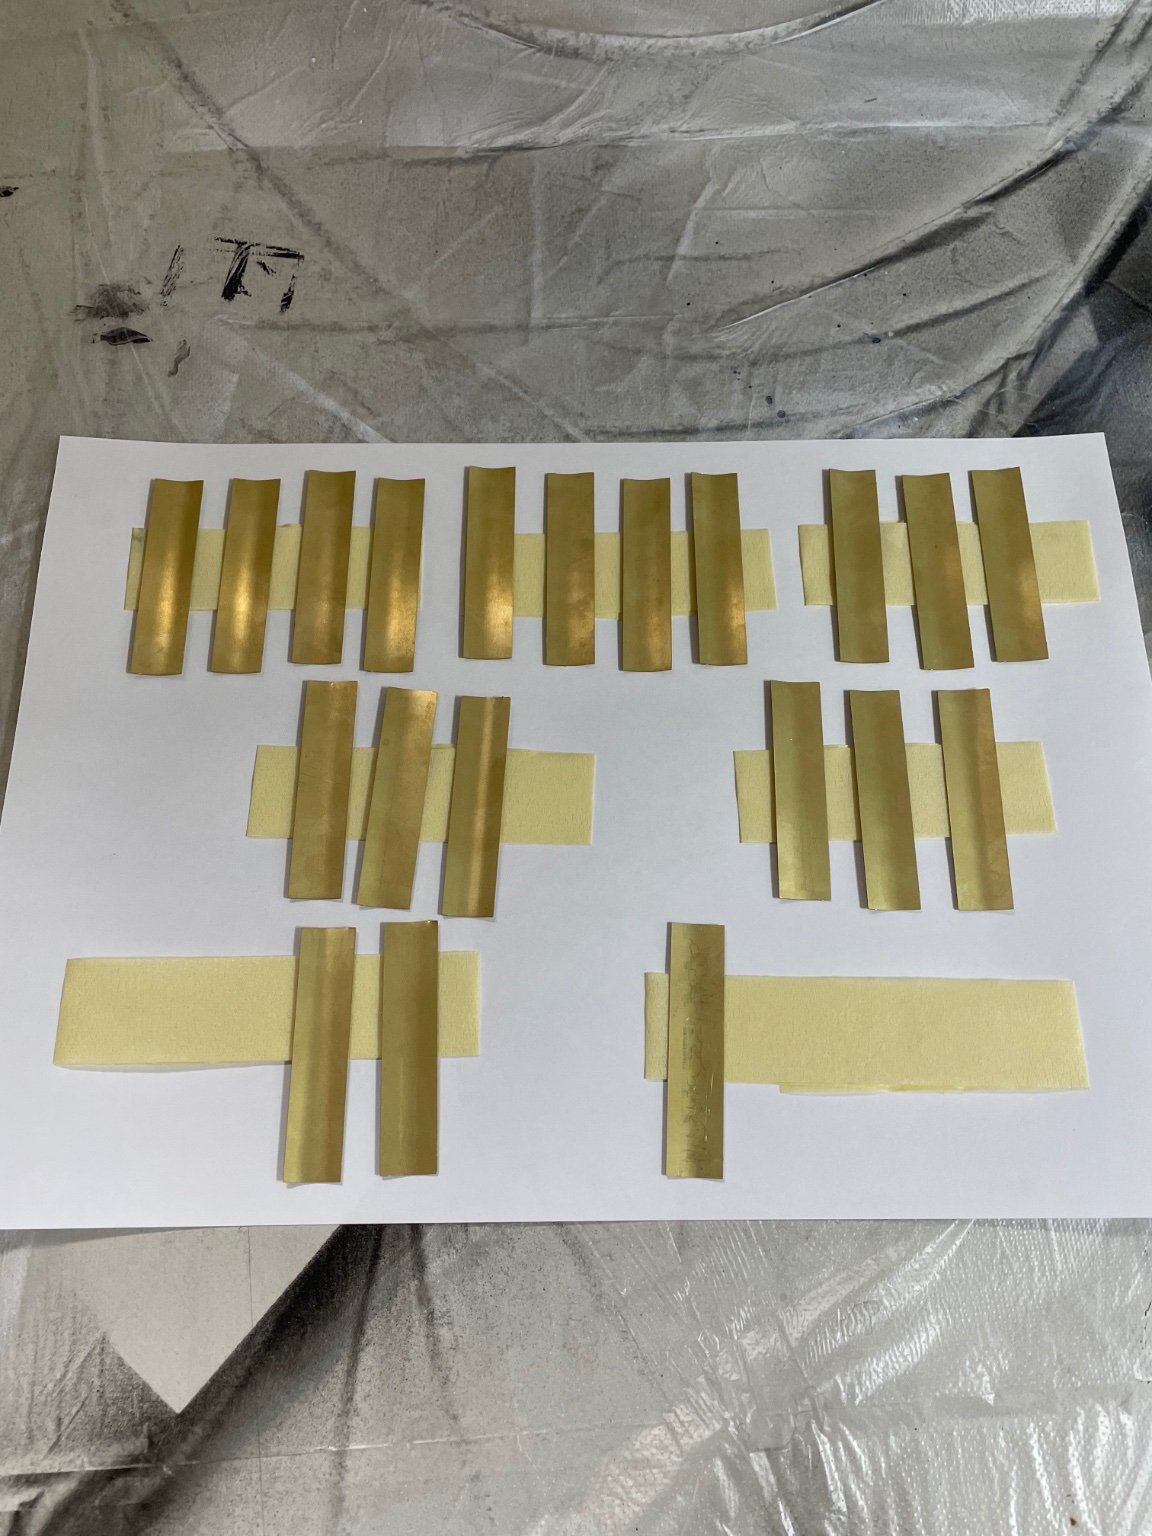
Figure 160: Here are all 20 doors curved.
-
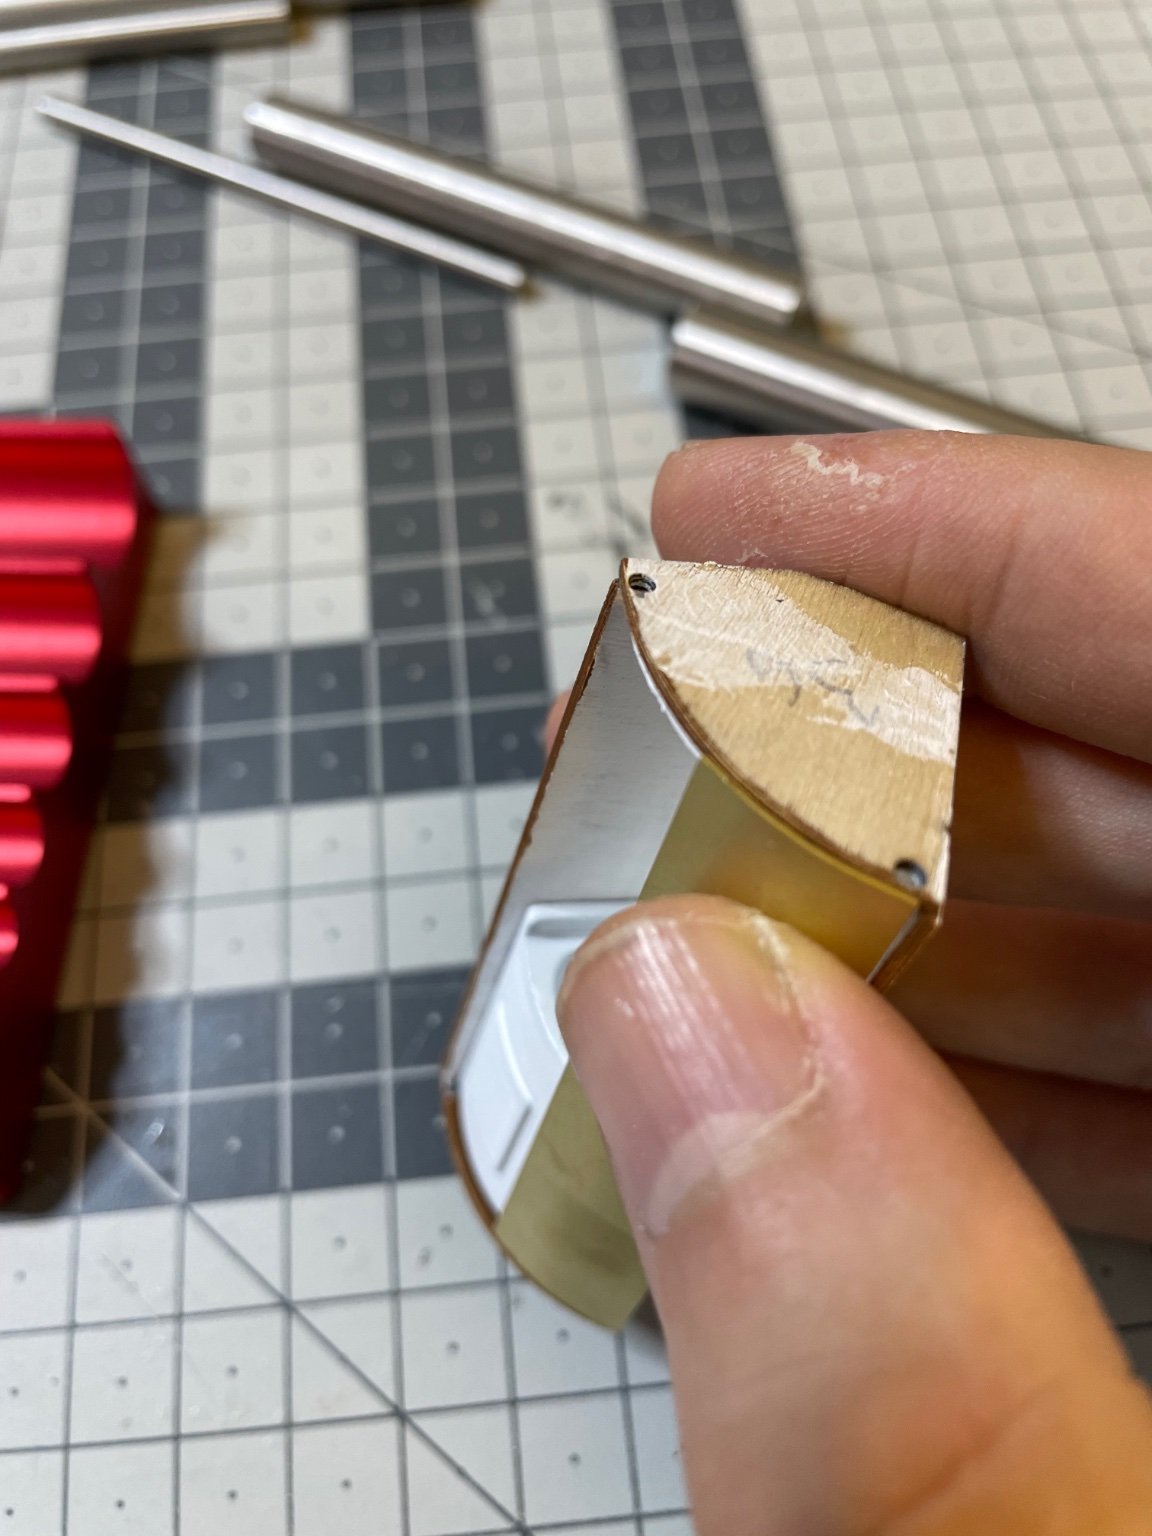
Figure 159: The result looks good for the first one. It fits the cabinet nicely.

-
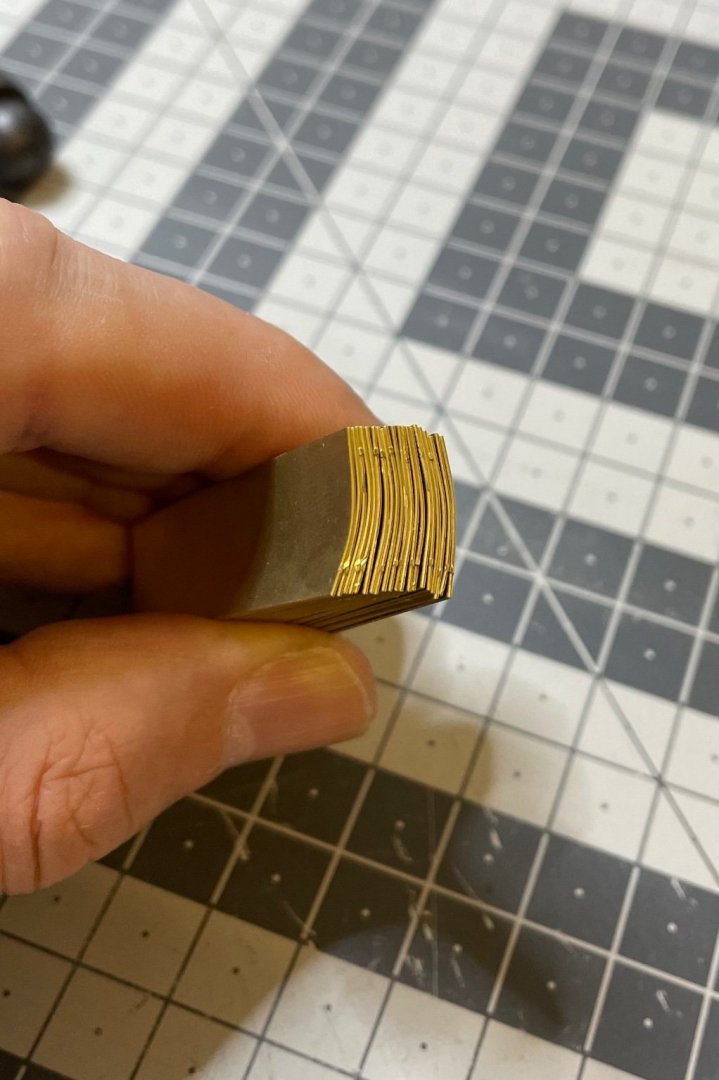
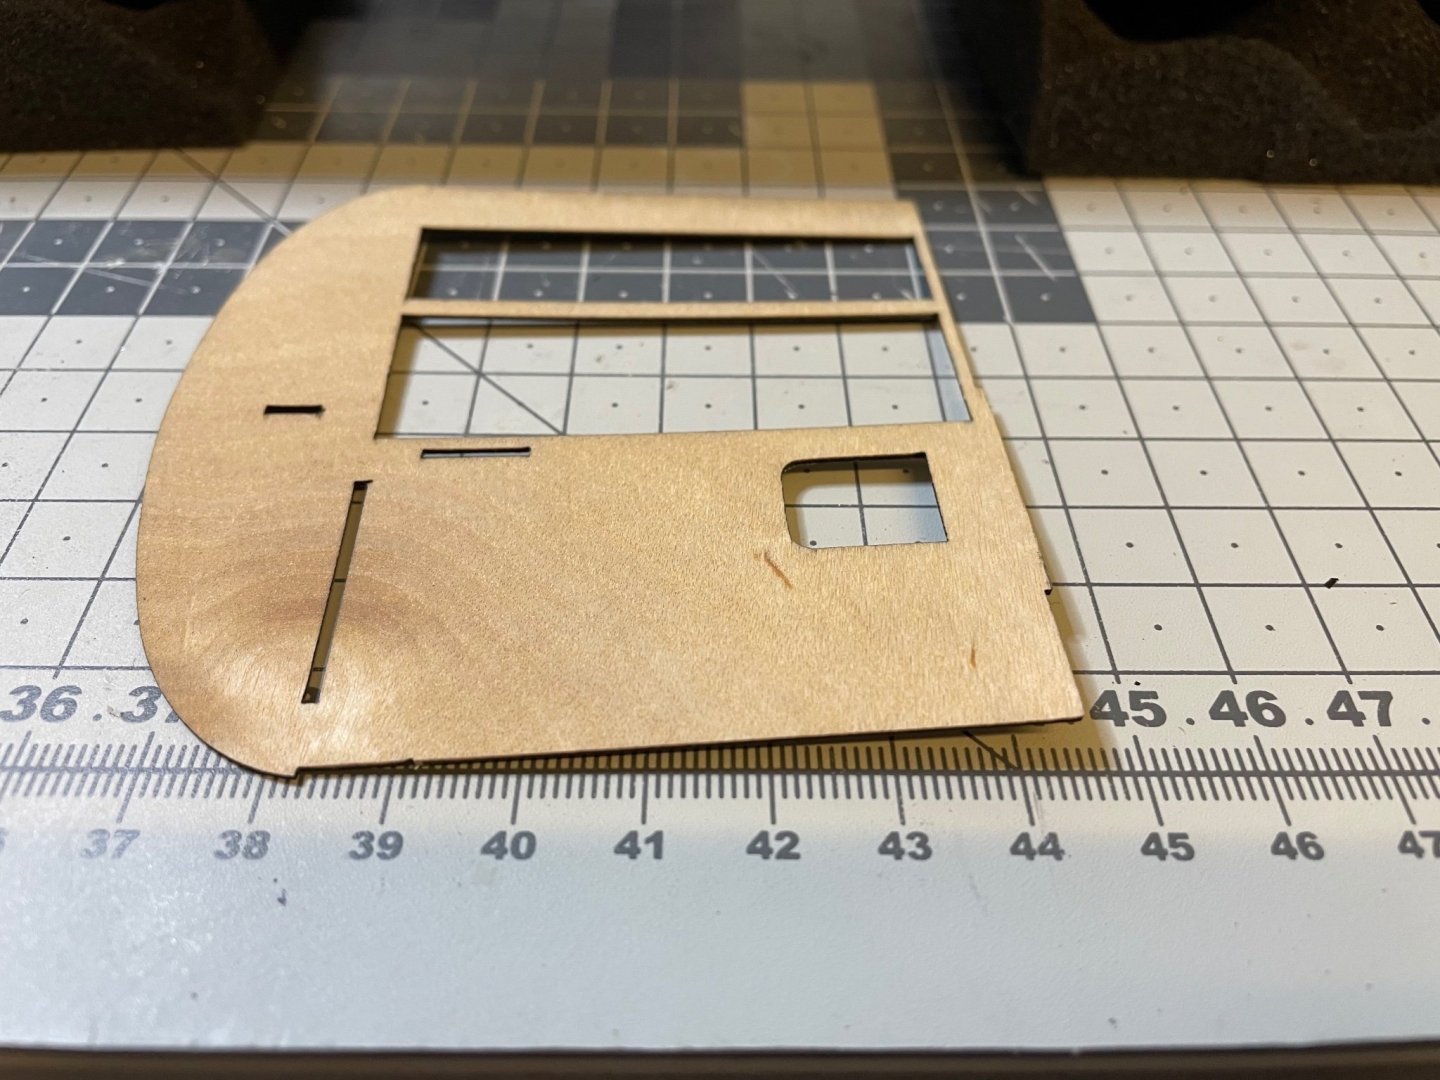
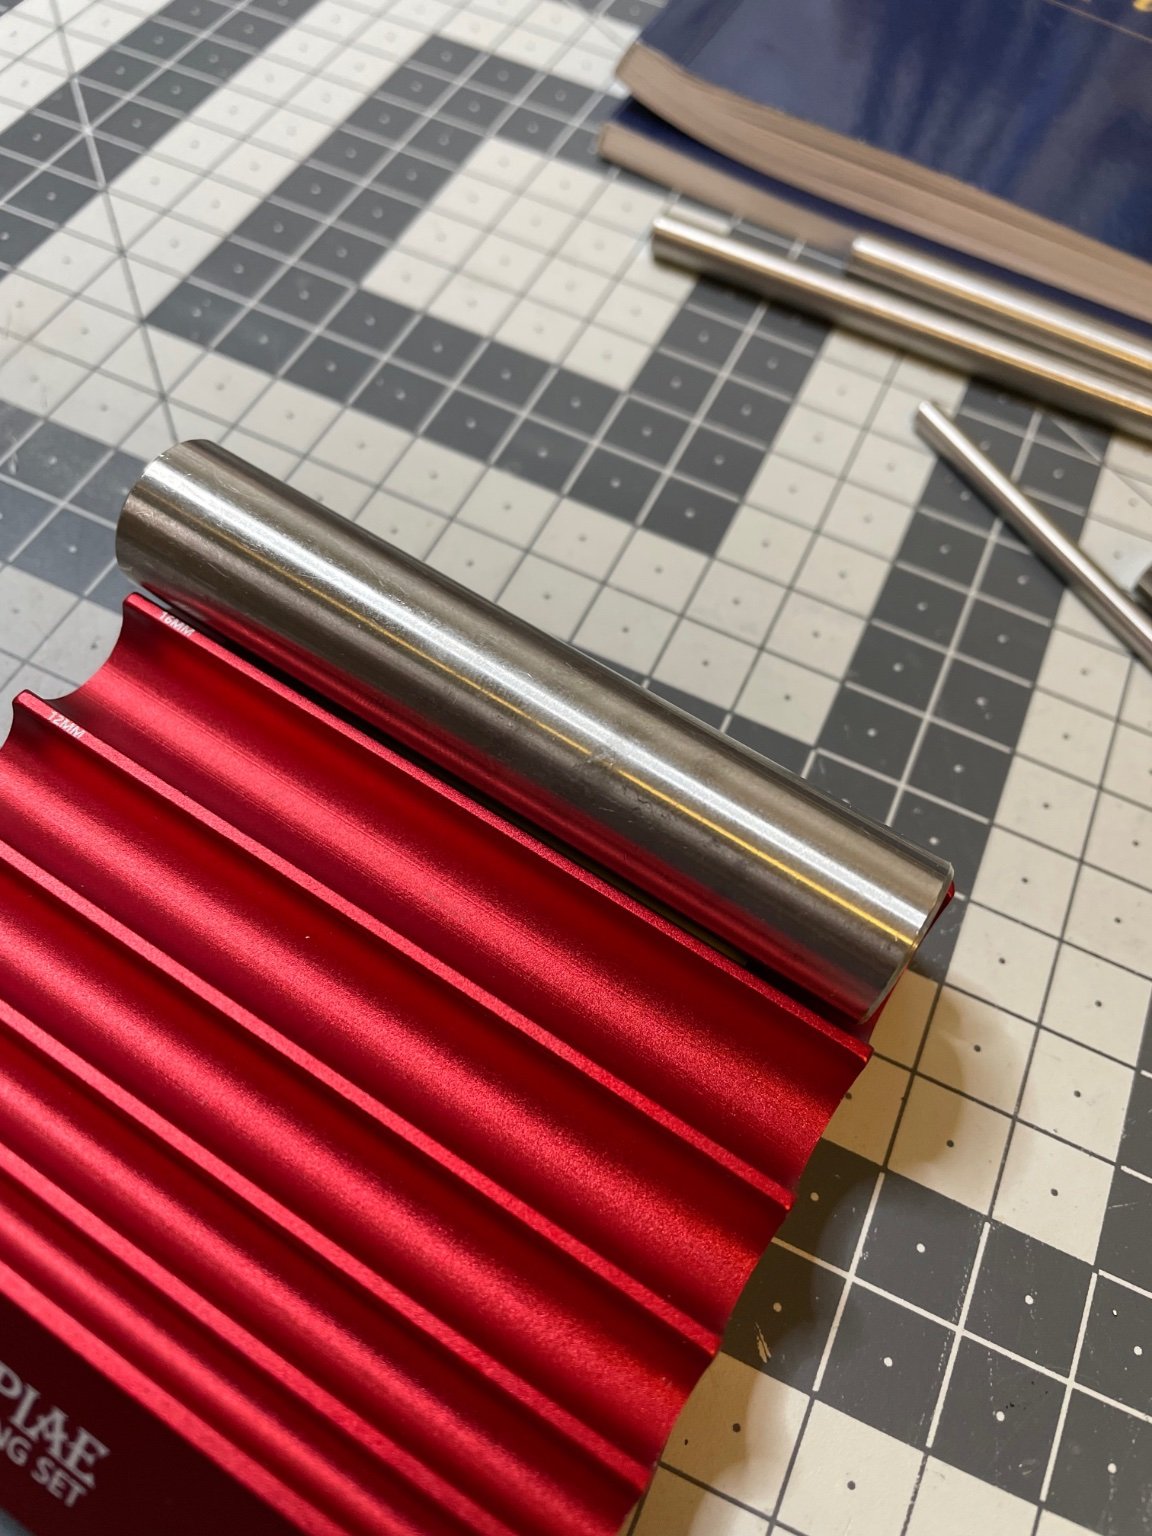
Bathroom doors. One pair per bathroom. They are made of 0.4mm photo etched brass, to be bent to match the curvature of the bathroom cabinet.
The bathroom doors are identical regardless of the cabin numbers therefore I build all 10 at once.
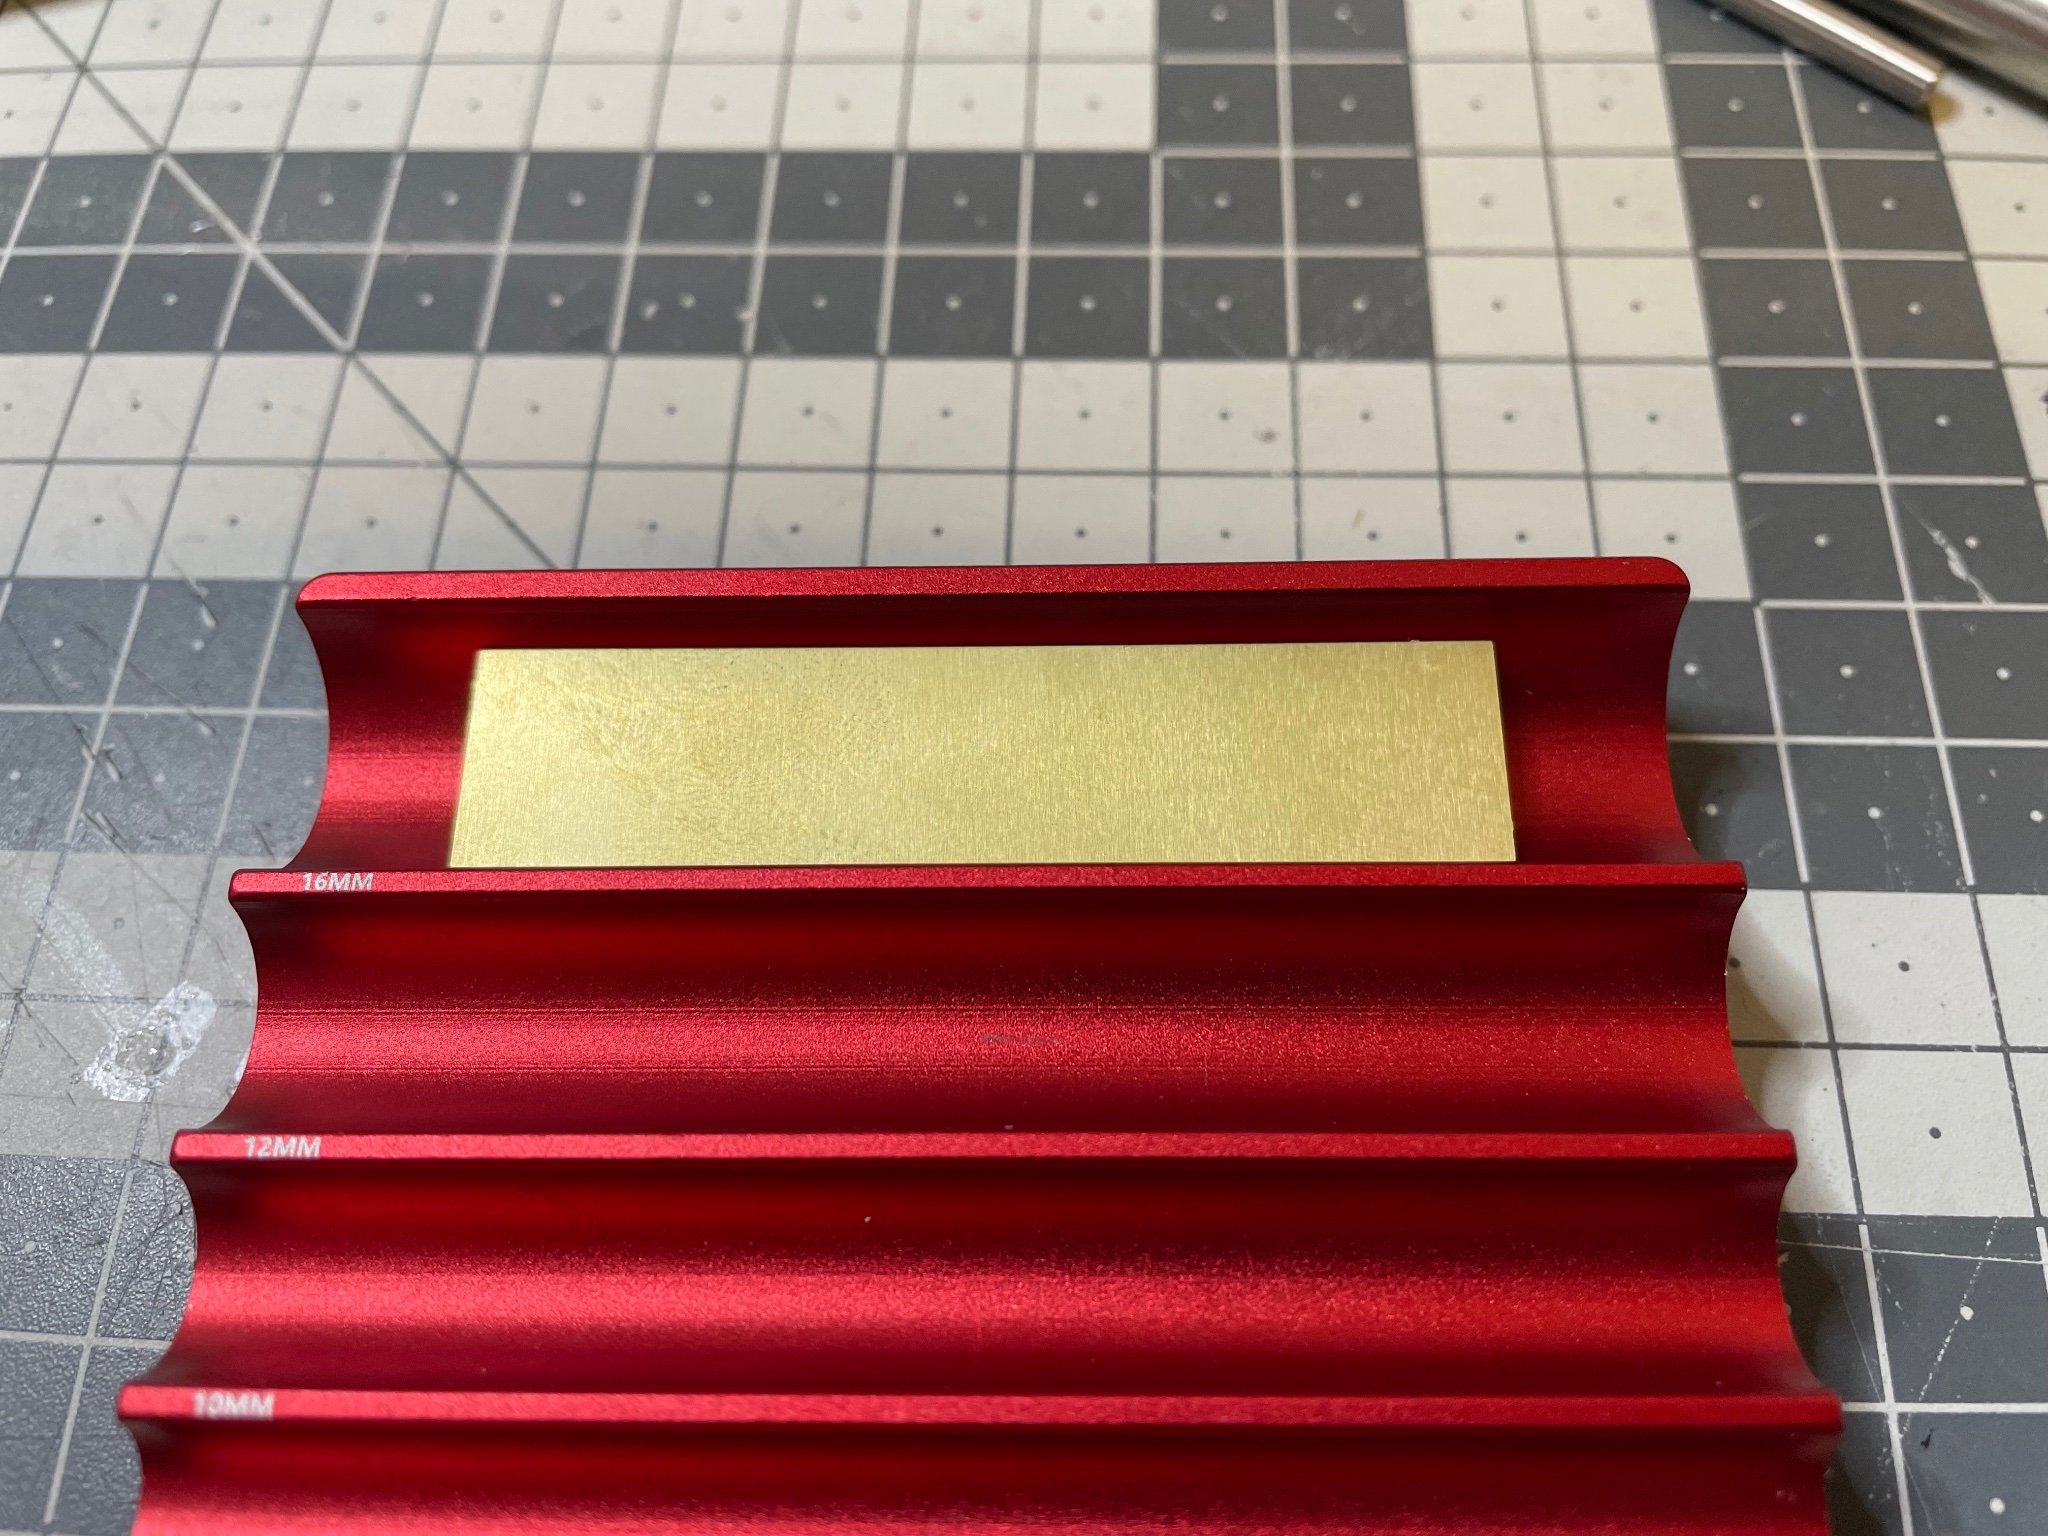
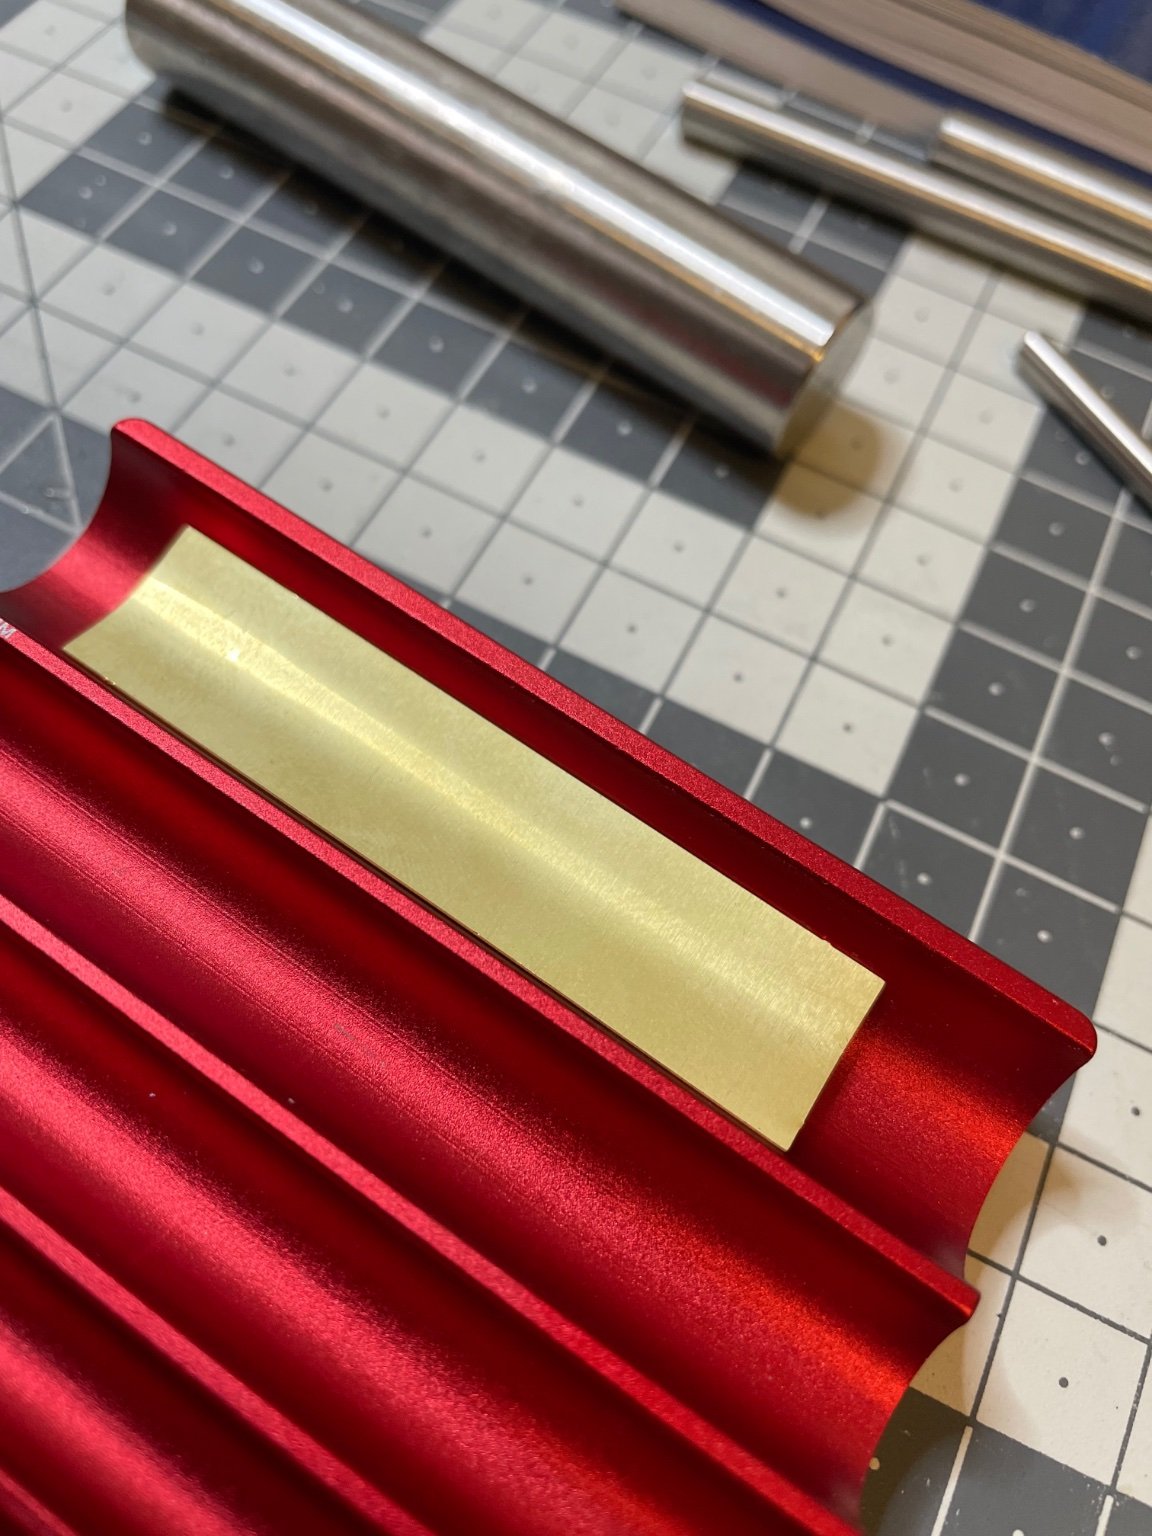
Figure 155, 156: I use my DSPIAE photo etched roller for this purpose. I tried first with a scrap piece of same thickness and decided to use the 16mm curvature.


Figure 157: I press with my both hands on the steel cylinder as hard as I can.

Figure 158: I over-bent the parts and then widened the curvature by soft hits with a hammer, until it aligns with the structure.

- thibaultron, wefalck, Egilman and 4 others
-
7
-
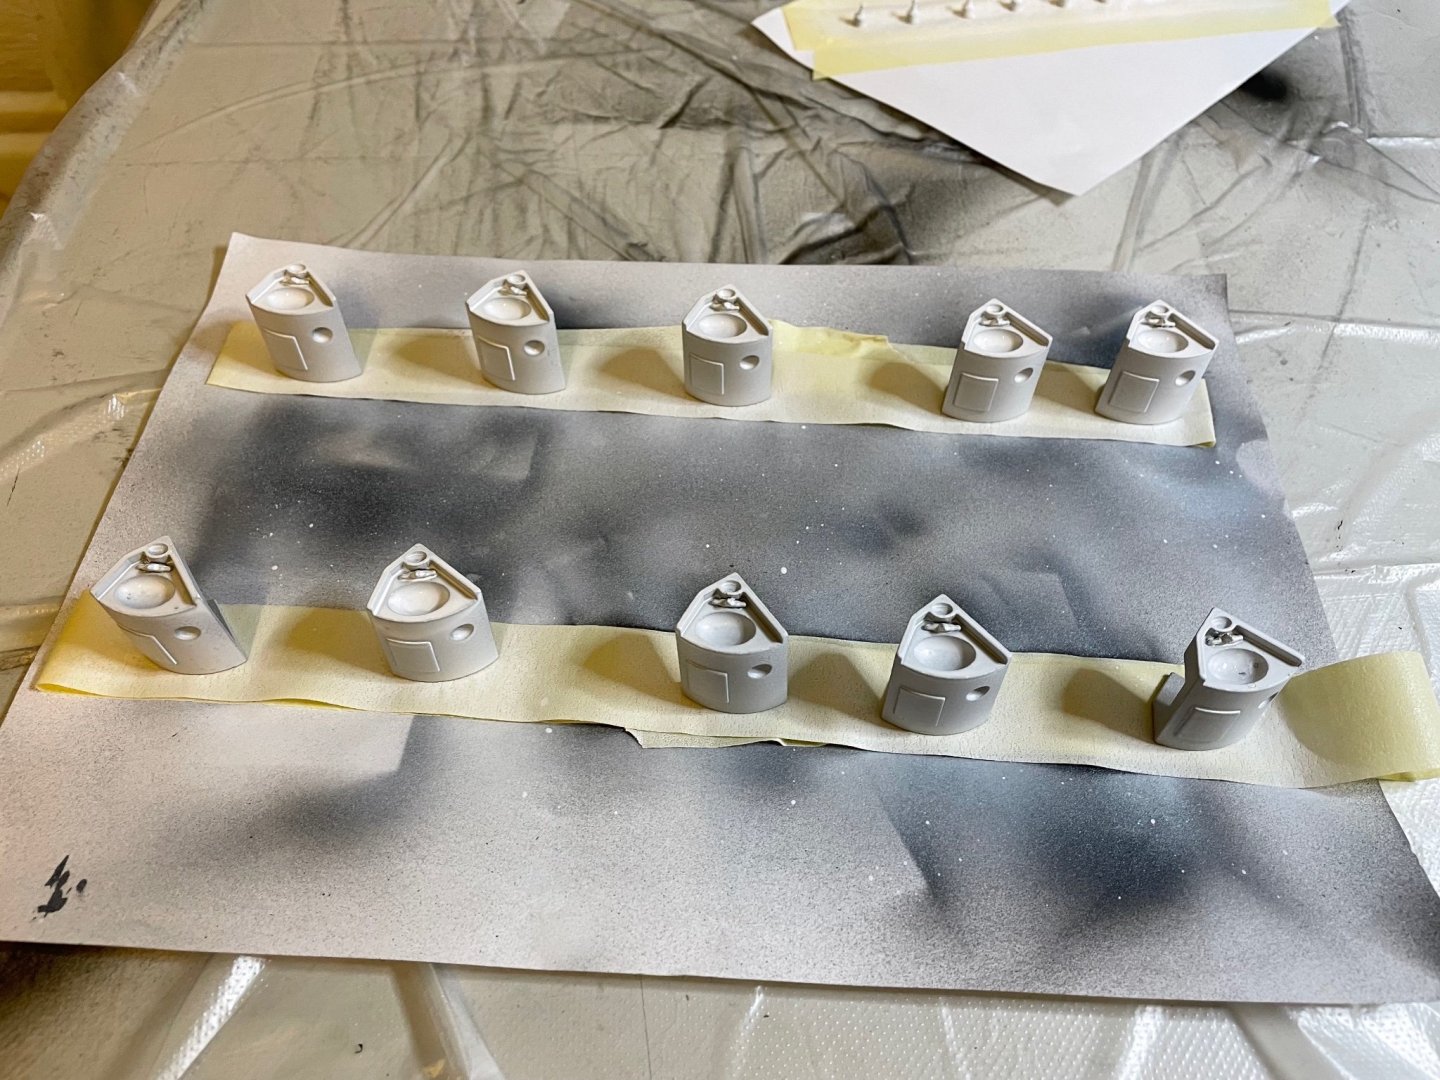
Figure 154: Painted inside matt white. Some brown trims will be put later.

- popeye the sailor, lmagna, wefalck and 4 others
-
7
-
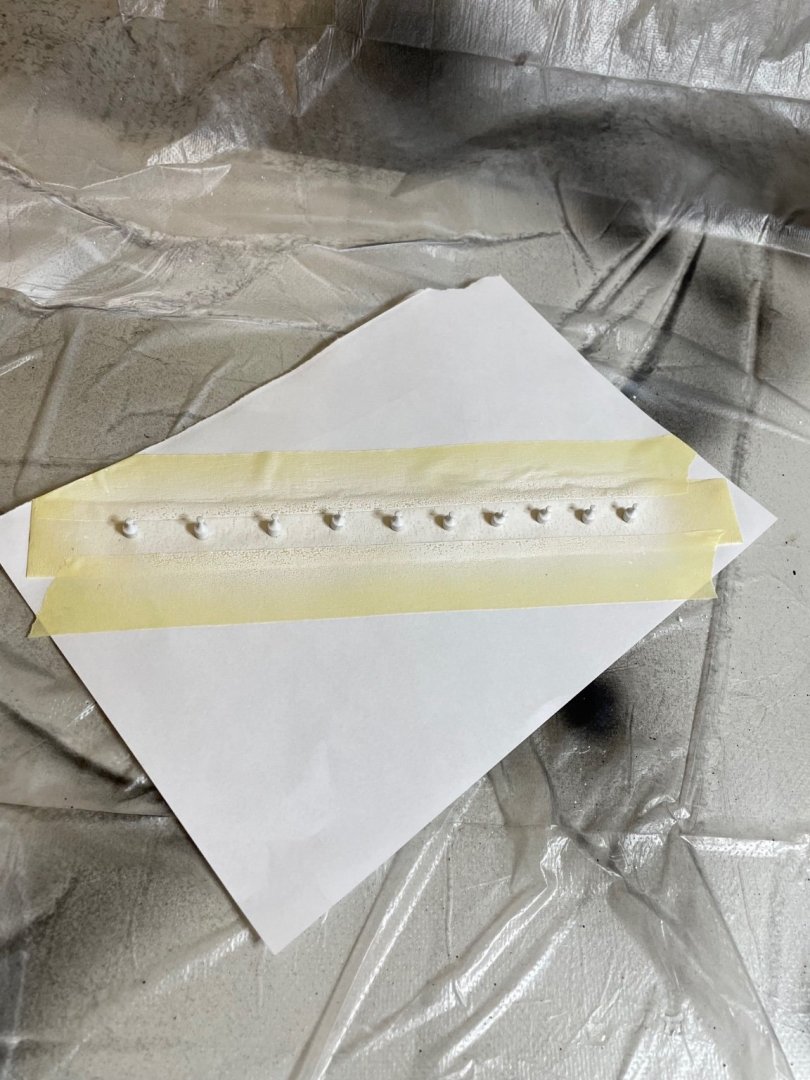
Figure 153: Bottles (probably containing Eau de Cologne). They will be hanging on the wall above the sink.
- lmagna, Jack12477, thibaultron and 5 others
-
8
-
Figure 152: The was basins. They are made of die cast metal. I paint them to white as instructed. I see some videos where the builder has painted the taps to silver color, but I will leave them white just like in the instruction manual. I haven't made a research but I guess they were more likely white porcelain, instead of metal. Look more elegant in white.
-
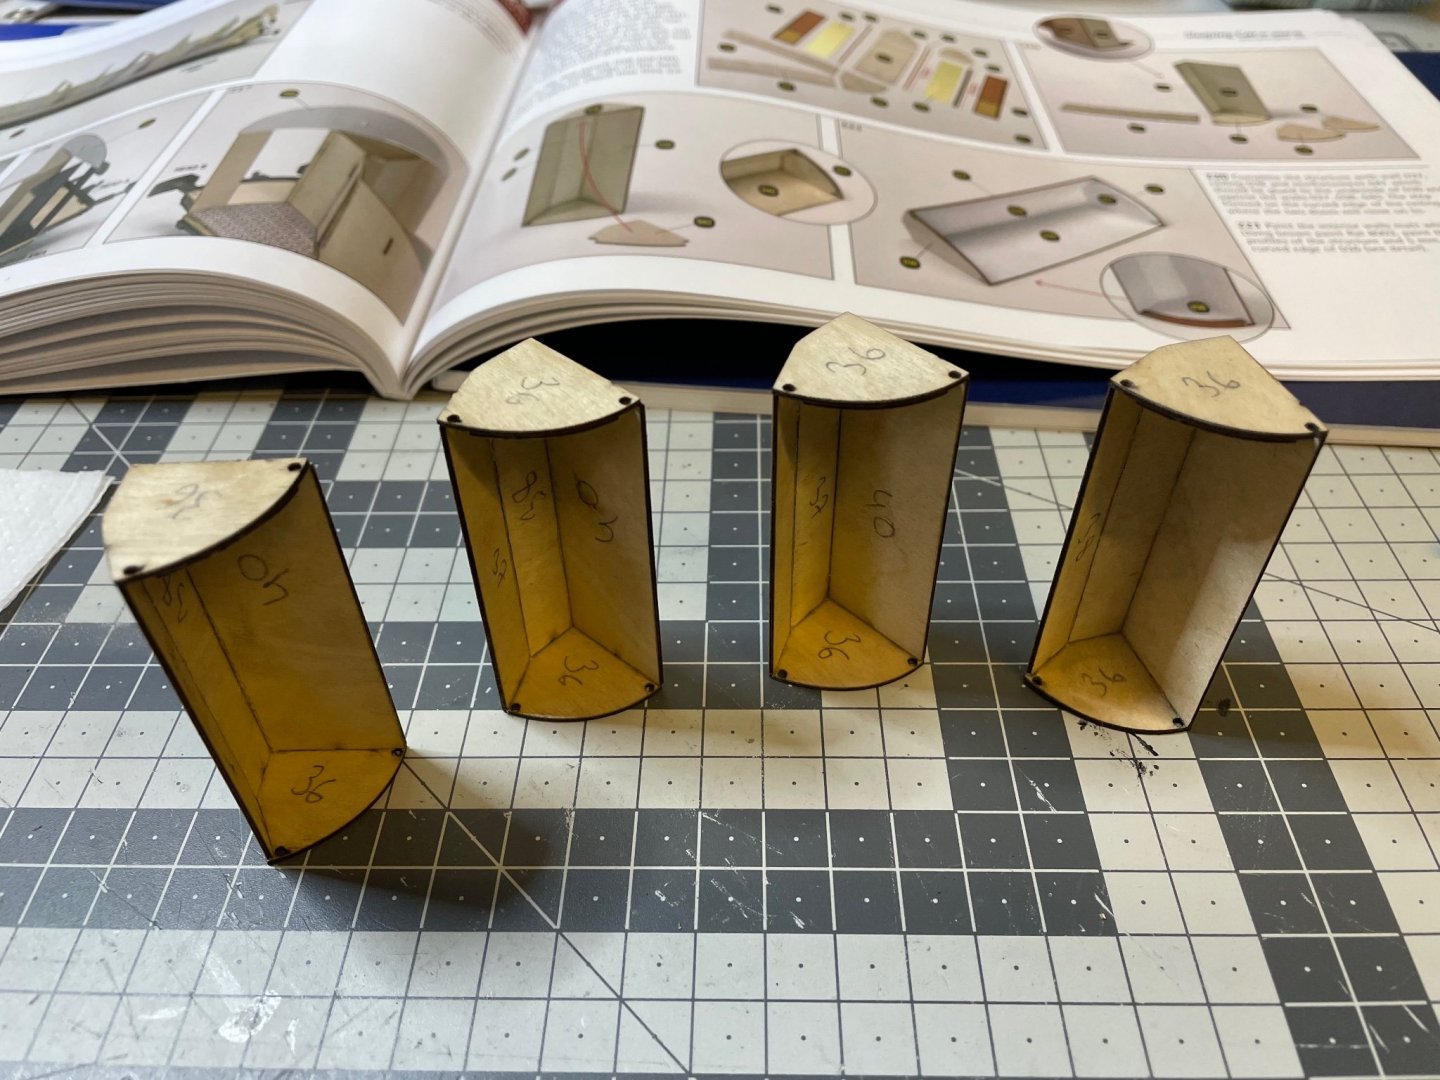
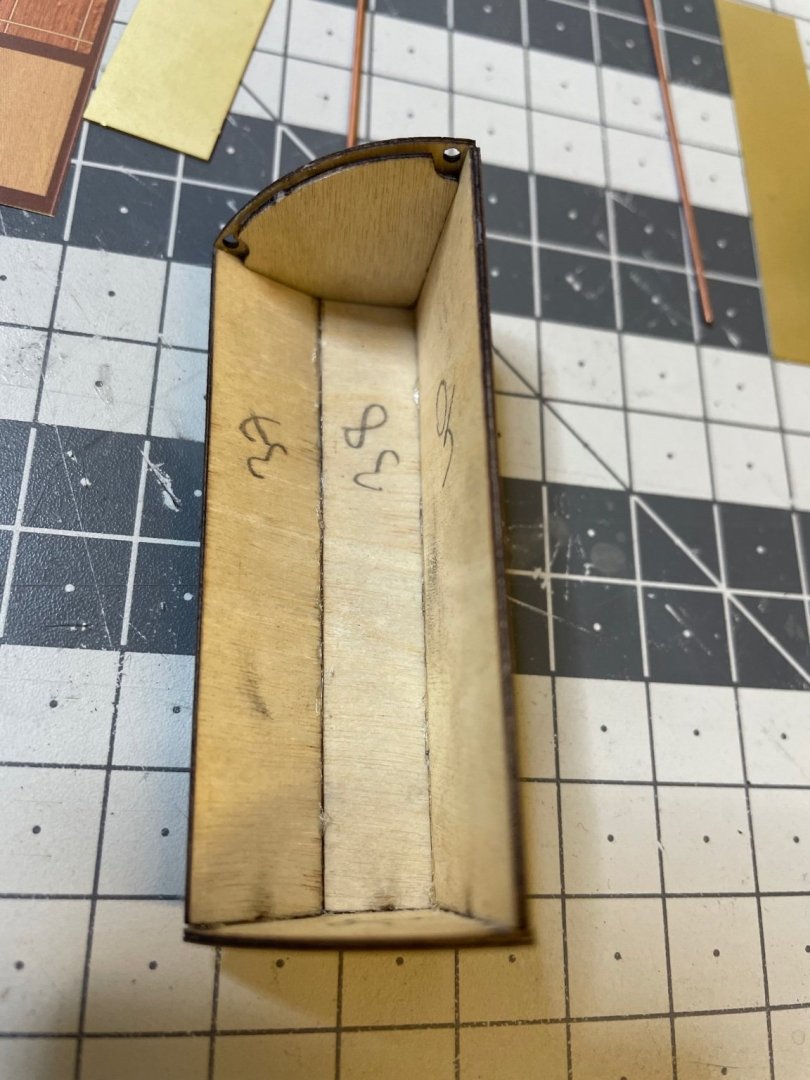
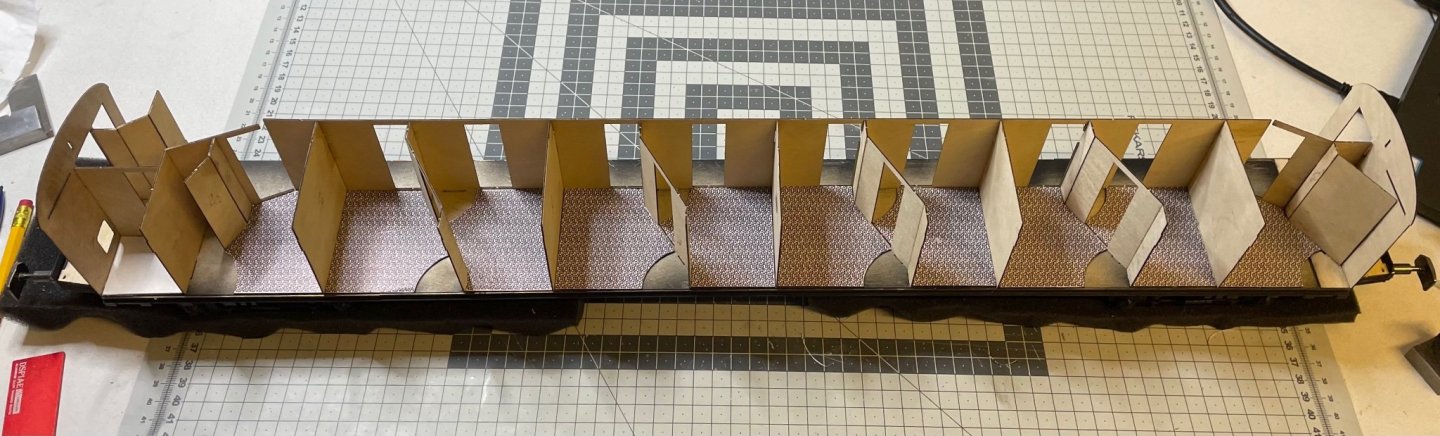
Figure 151: Basic structures of the bathrooms for cabins 2,4,6,8 are ready.
-
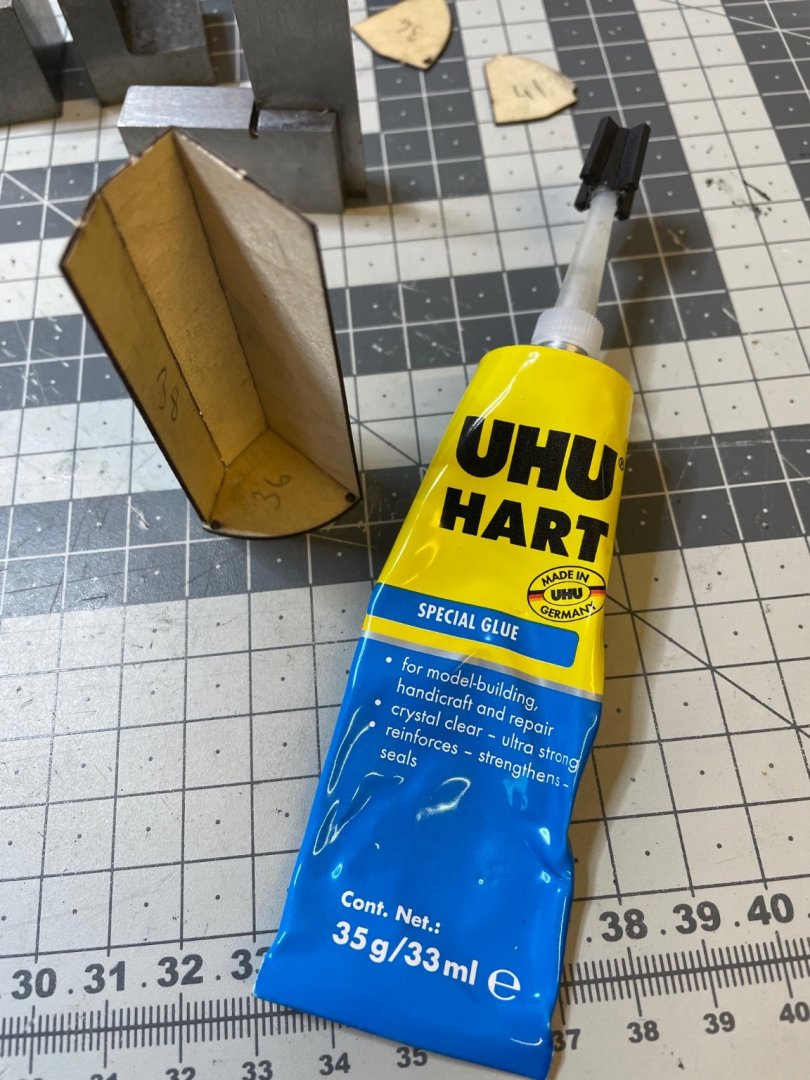
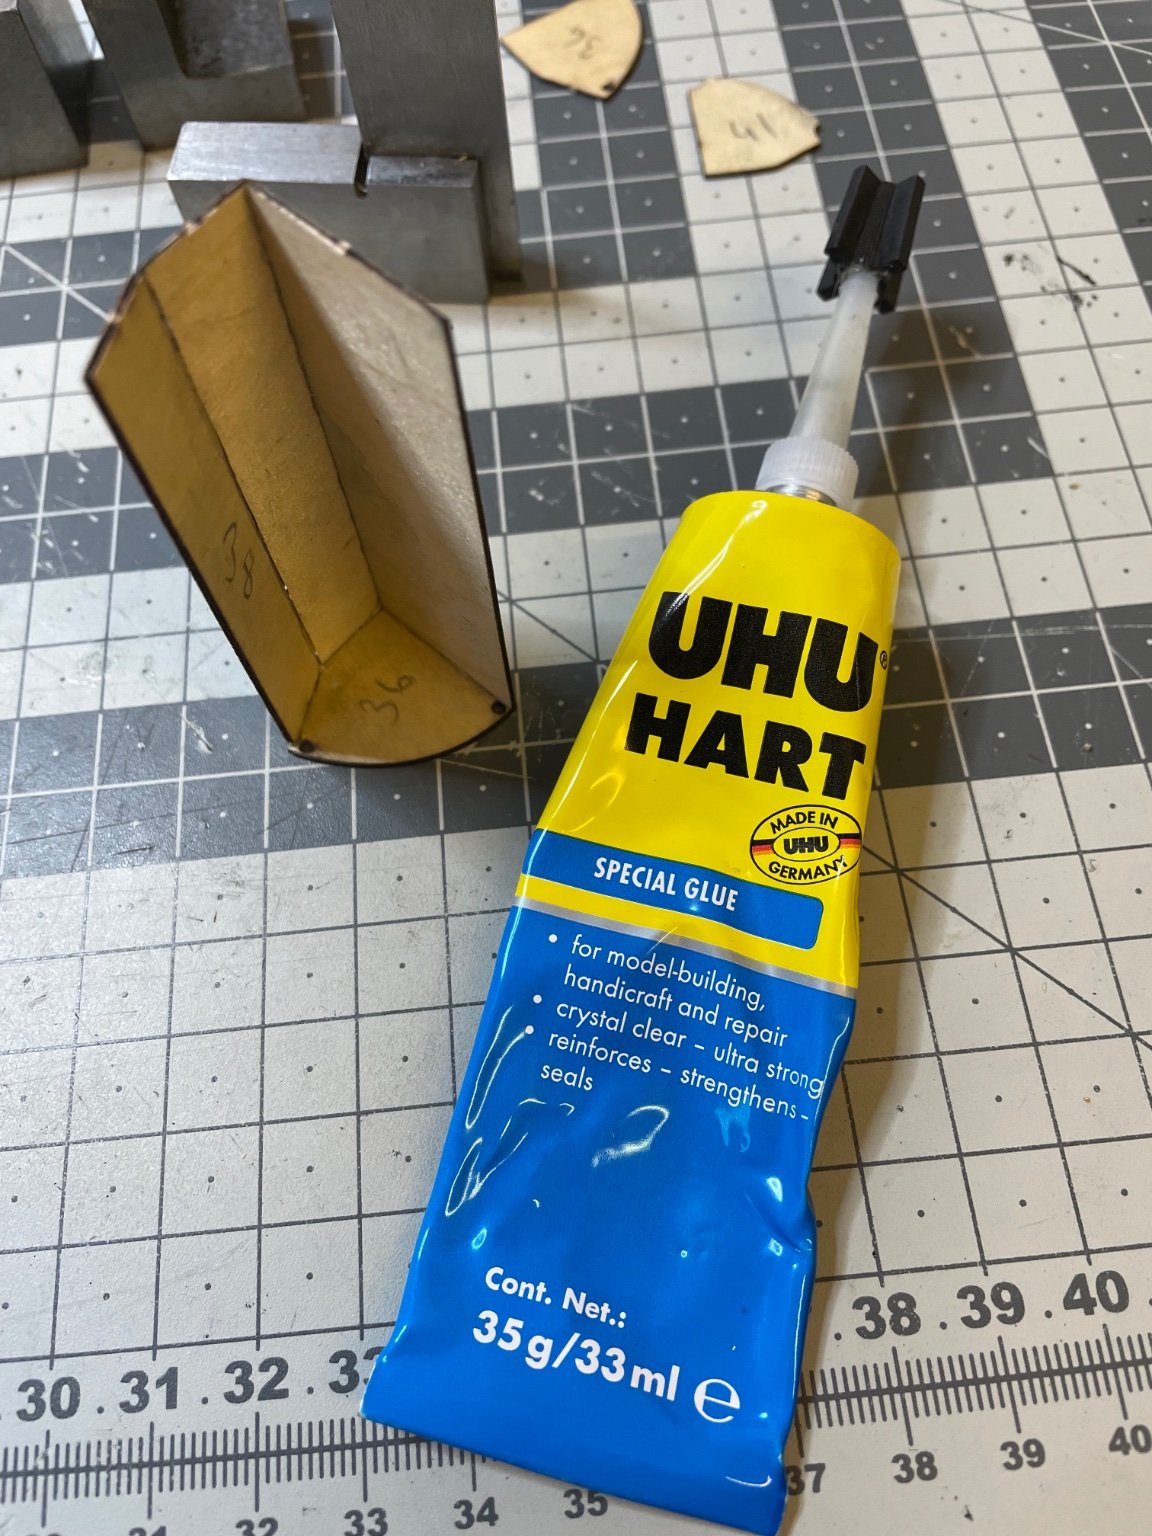
Figure 150: At this step I use UHU Hart, the pinnacle of German chemical engineering 🙂. My favourite modeling glue. Excellent stuff.
- Rik Thistle, Canute, Jack12477 and 6 others
-
9
-
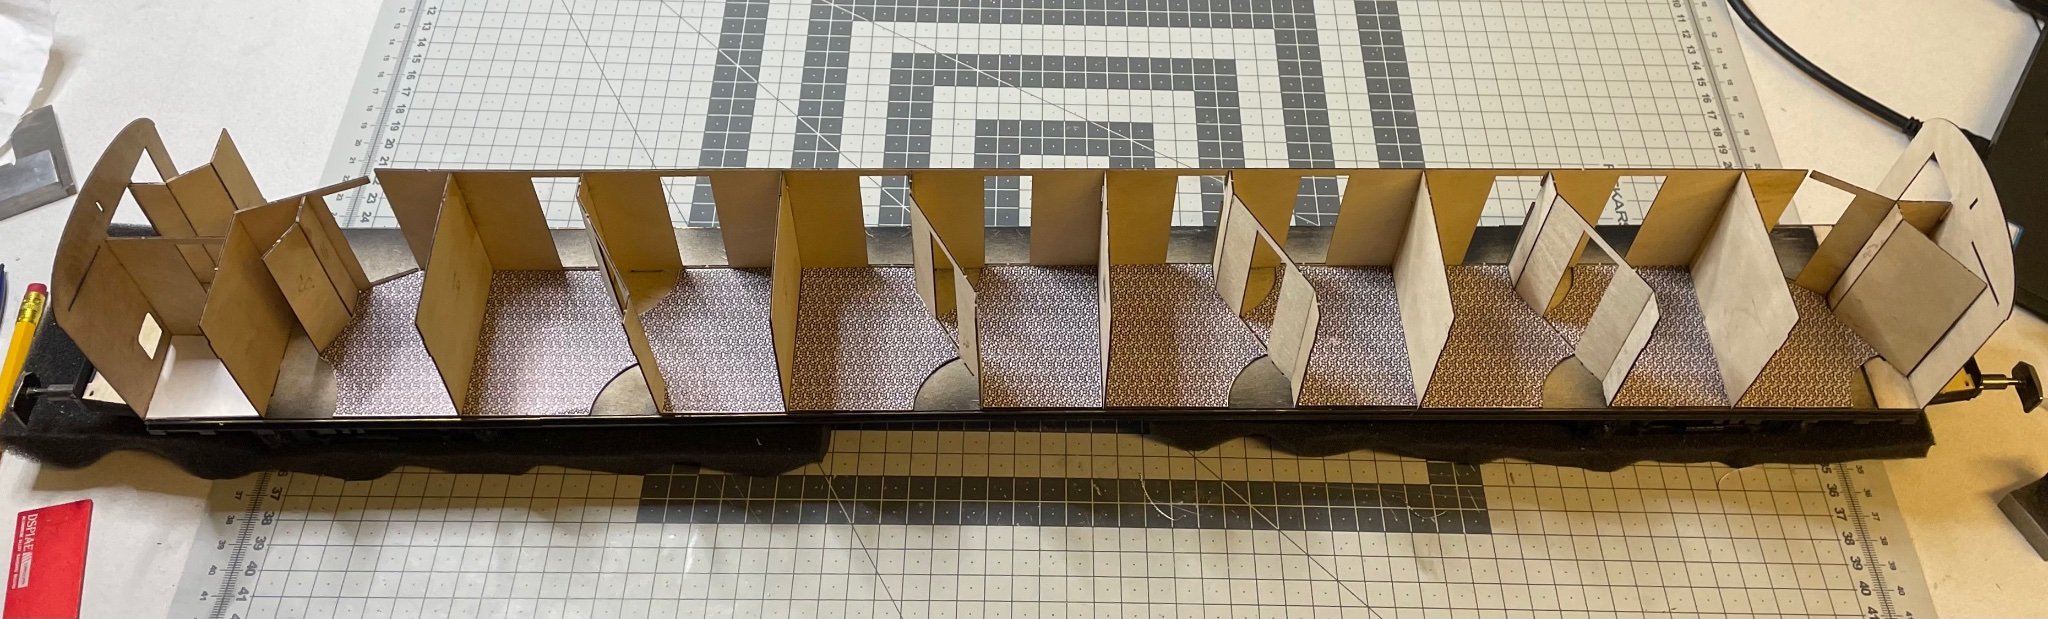
Next, construction of the bathrooms.
This is another exciting chapter. There are altogether 10 bathrooms in the shape of a quarter cylinder. The bathroom is only a sink with toilet amenities. Otherwise the wagon has only one common toilet.
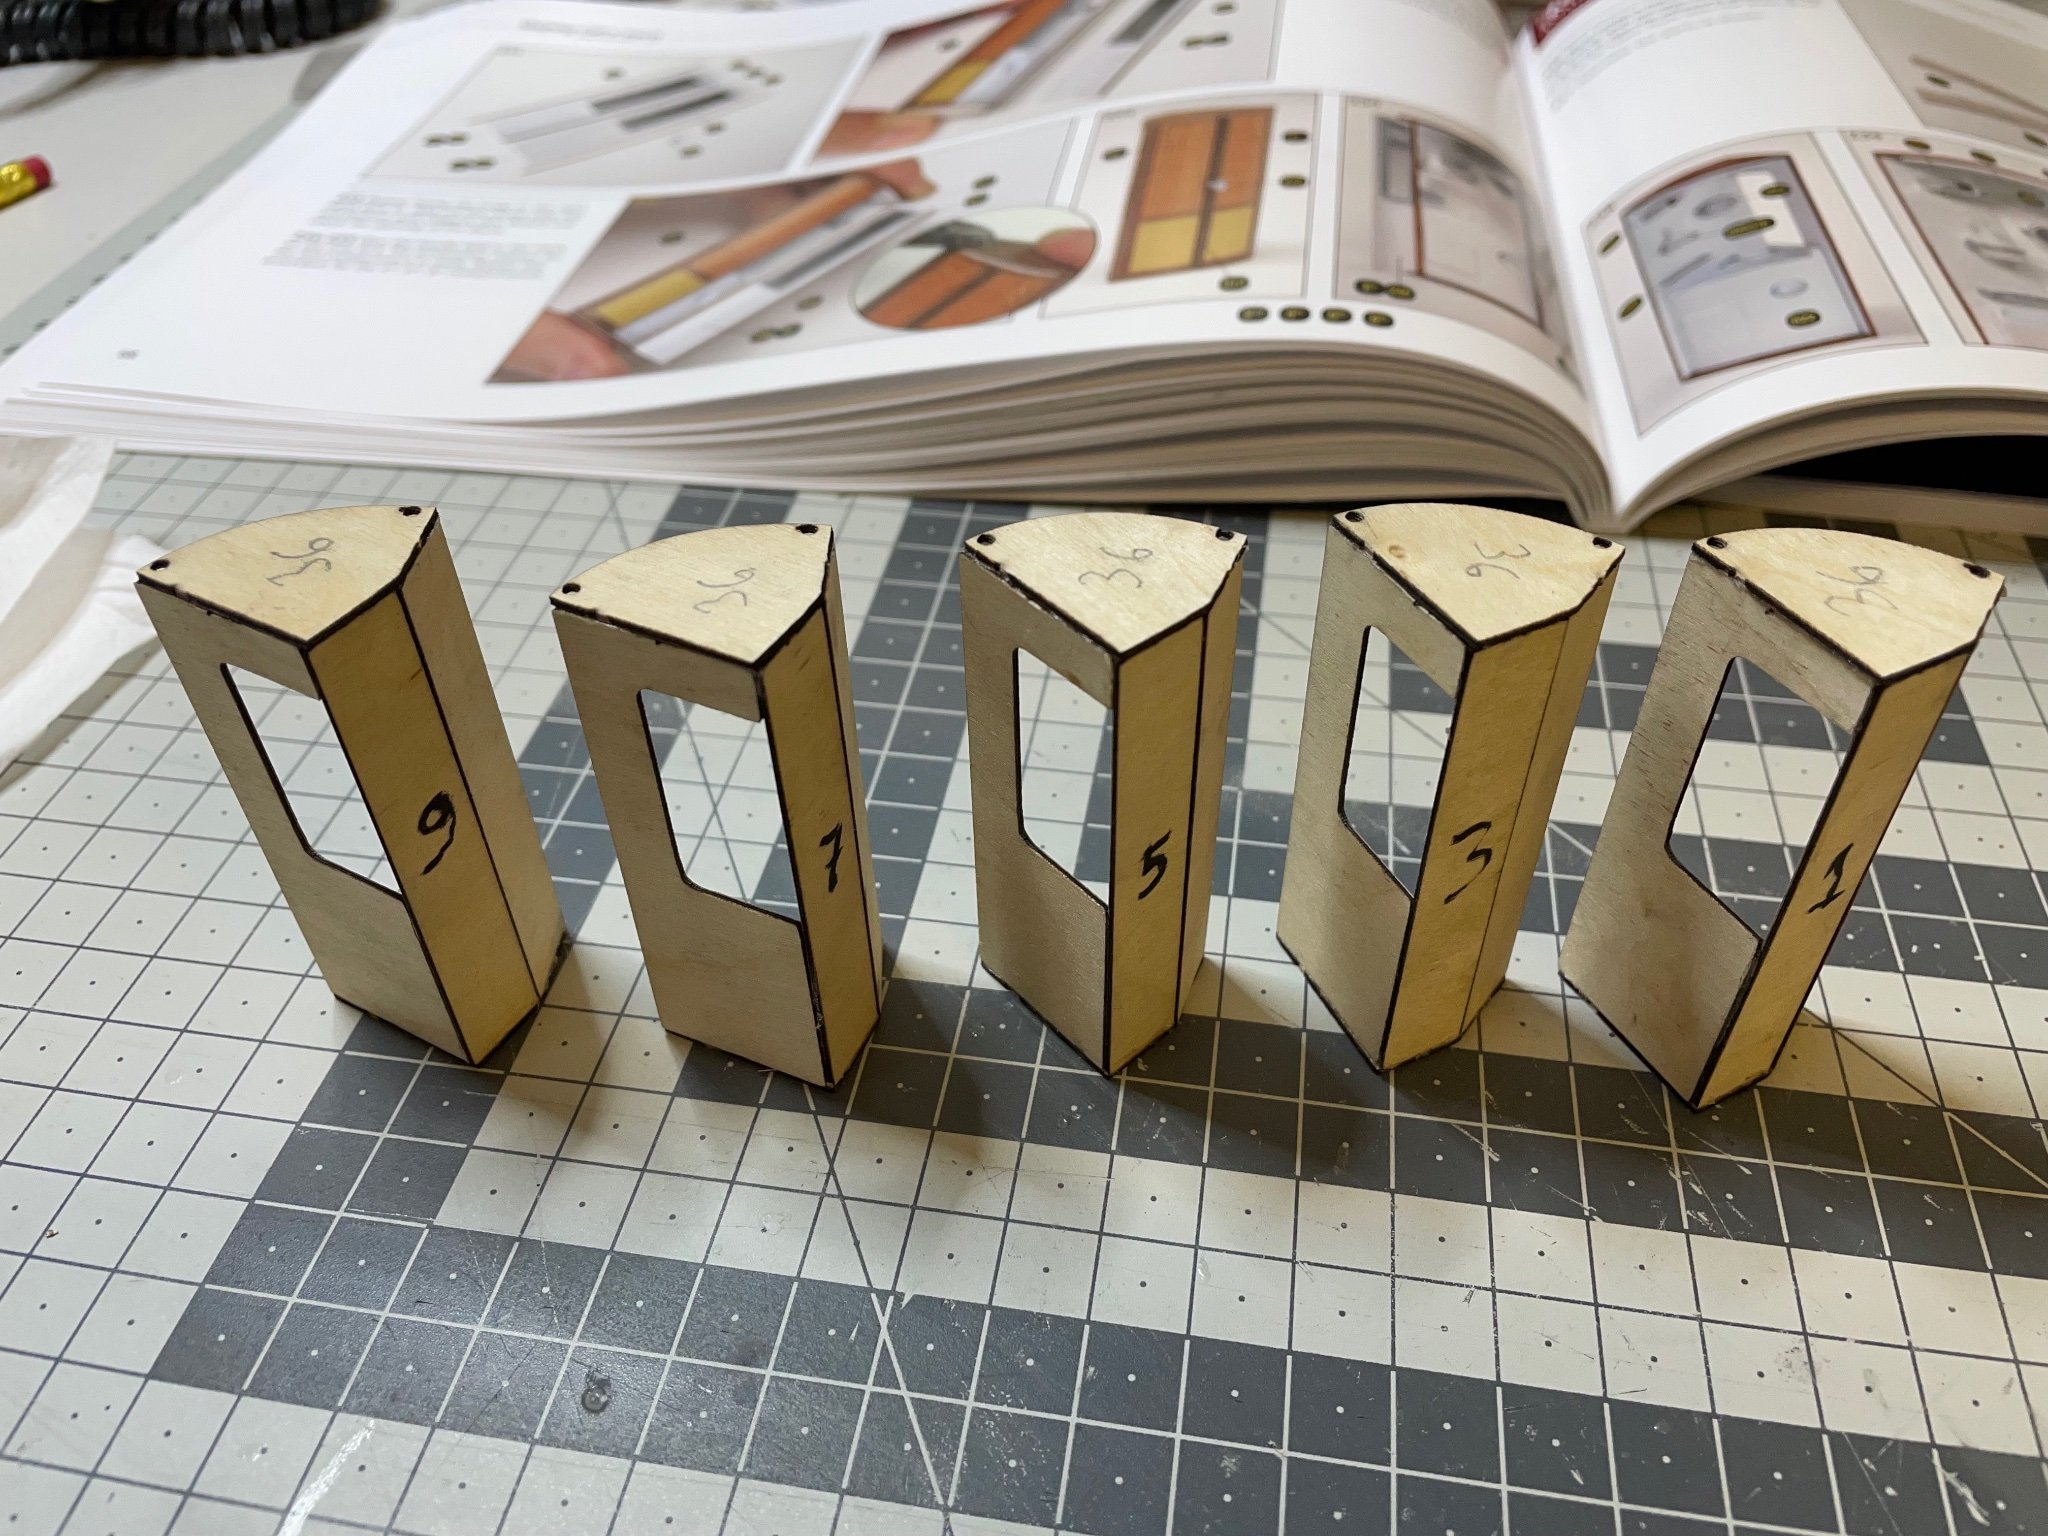
There are altogether 10 bathrooms. Their construction differ slightly depending on where they are located. This means three different constructions: Those for cabins 2,4,6,8 are identical, similarly those for cabins 1,3,5,7 and finally cabin 10 alone.
I start with the first group just like in the instructions: 2,4,6,8.
It goes without saying that the parts are so similar yet they are different, one must always mark them before removing from their places. A slight mistake will guarantee some size of a disaster.
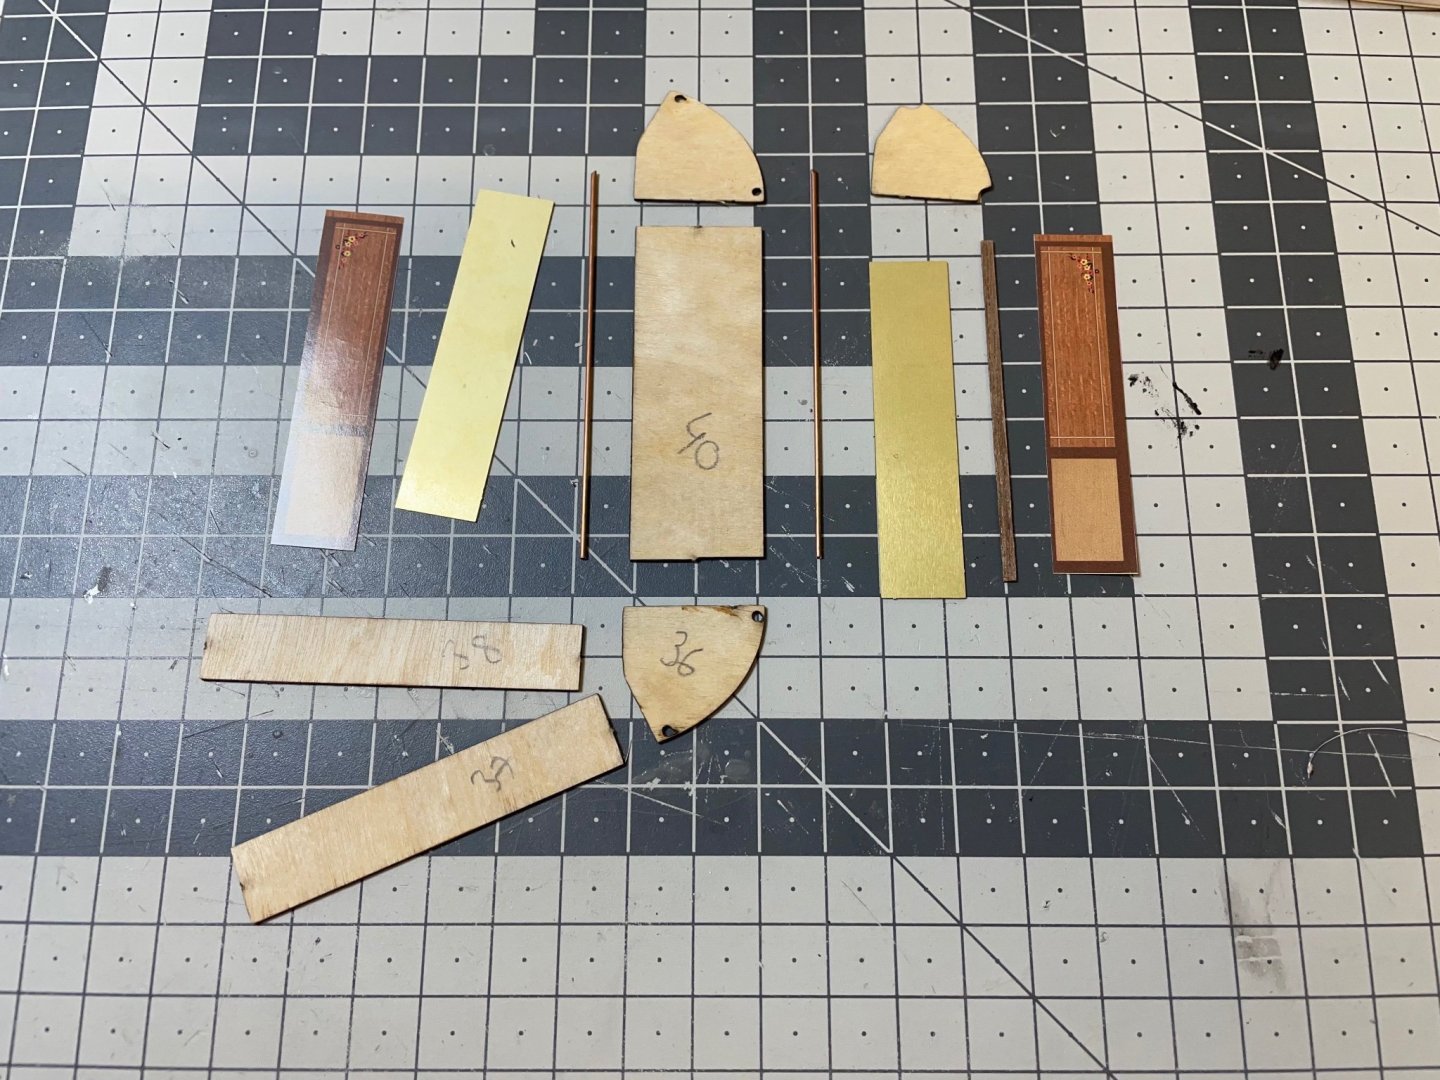
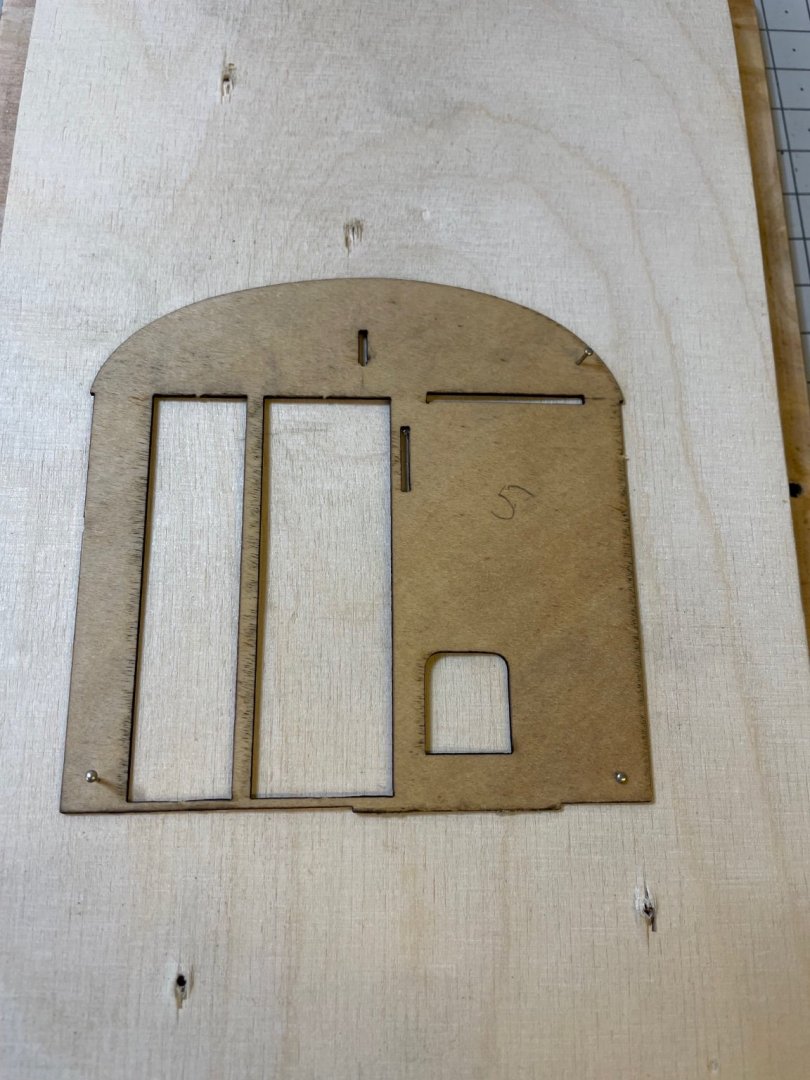
Figure 147: Parts lined up. These are for the foundation structure.
Figures 148, 149: First parts installed.

-
BUILD DAY 14: 3 hrs (TOTAL: 36 hrs)
Figure 146: Boiler room painted in black. The area covered by the masking tape in the photo will be painted in matt white, at both sides of the wagon. After this, the wagon structure can be put aside until the bathrooms have been constructed.

- Egilman, popeye the sailor, Canute and 5 others
-
8
-
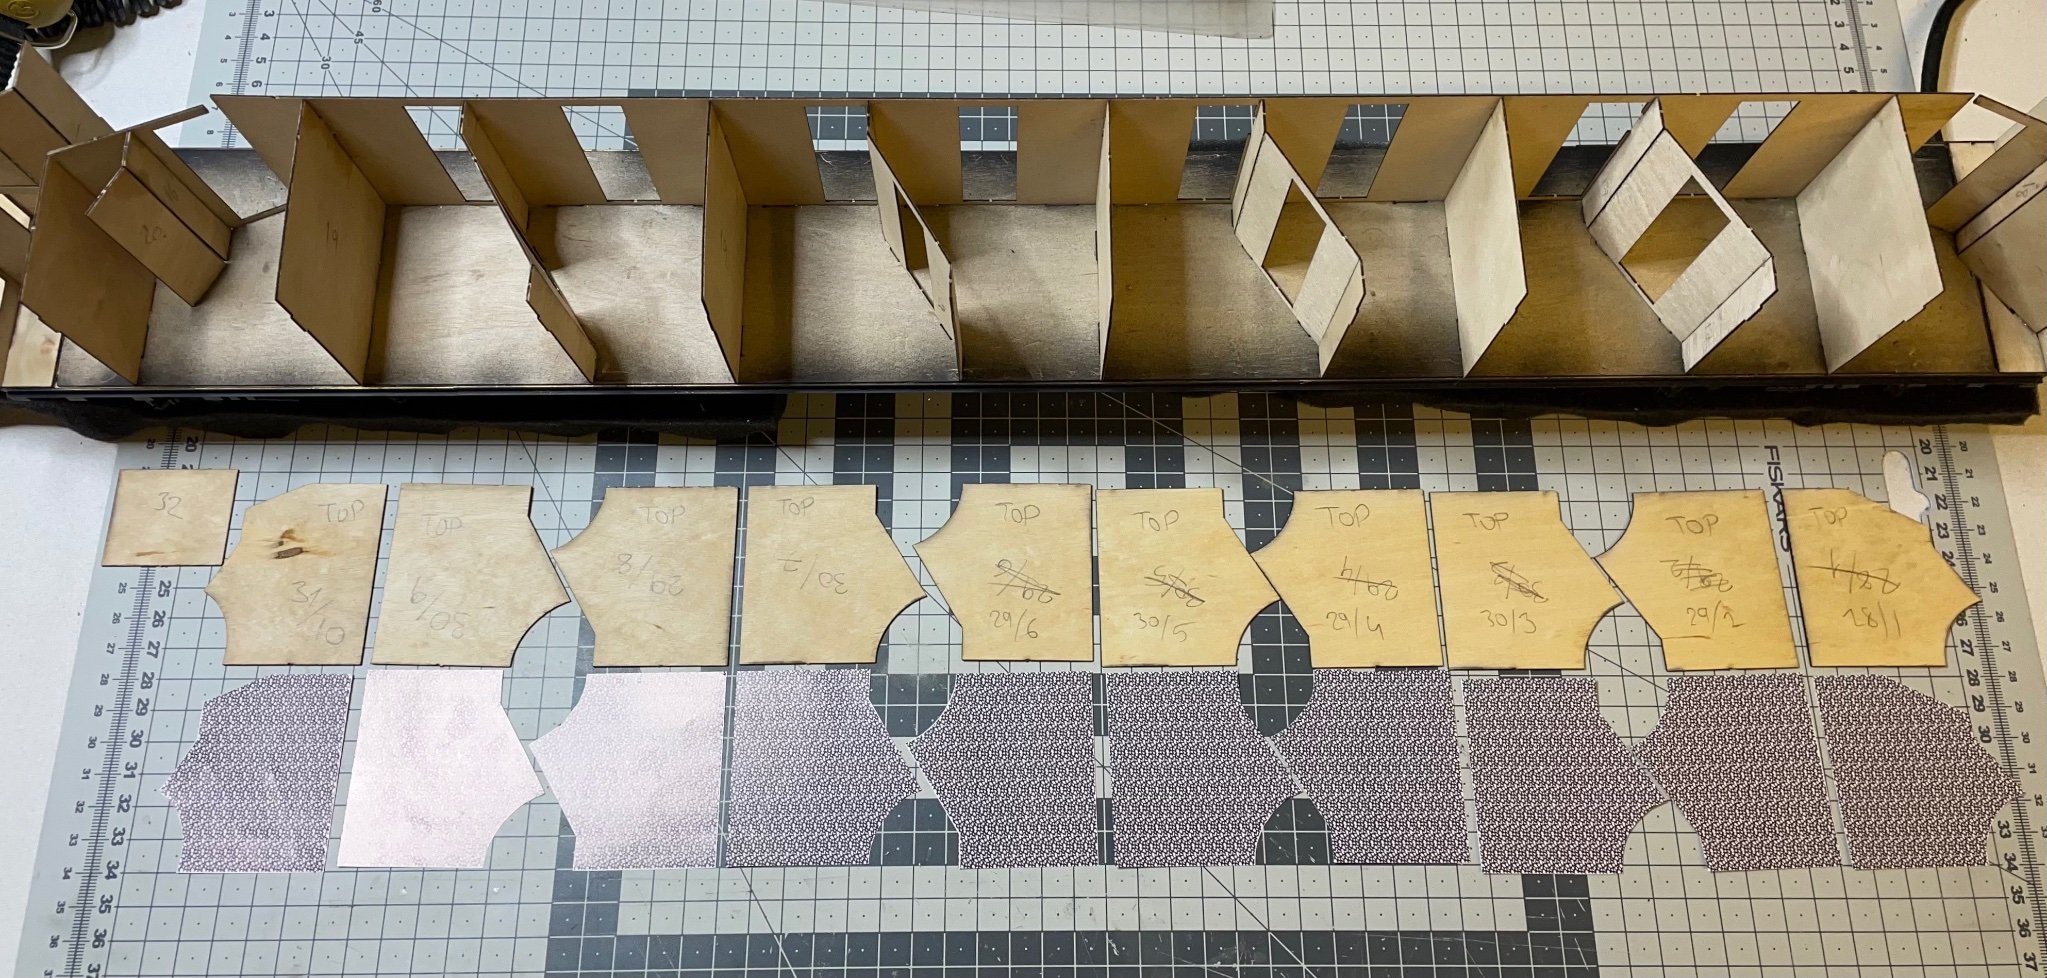
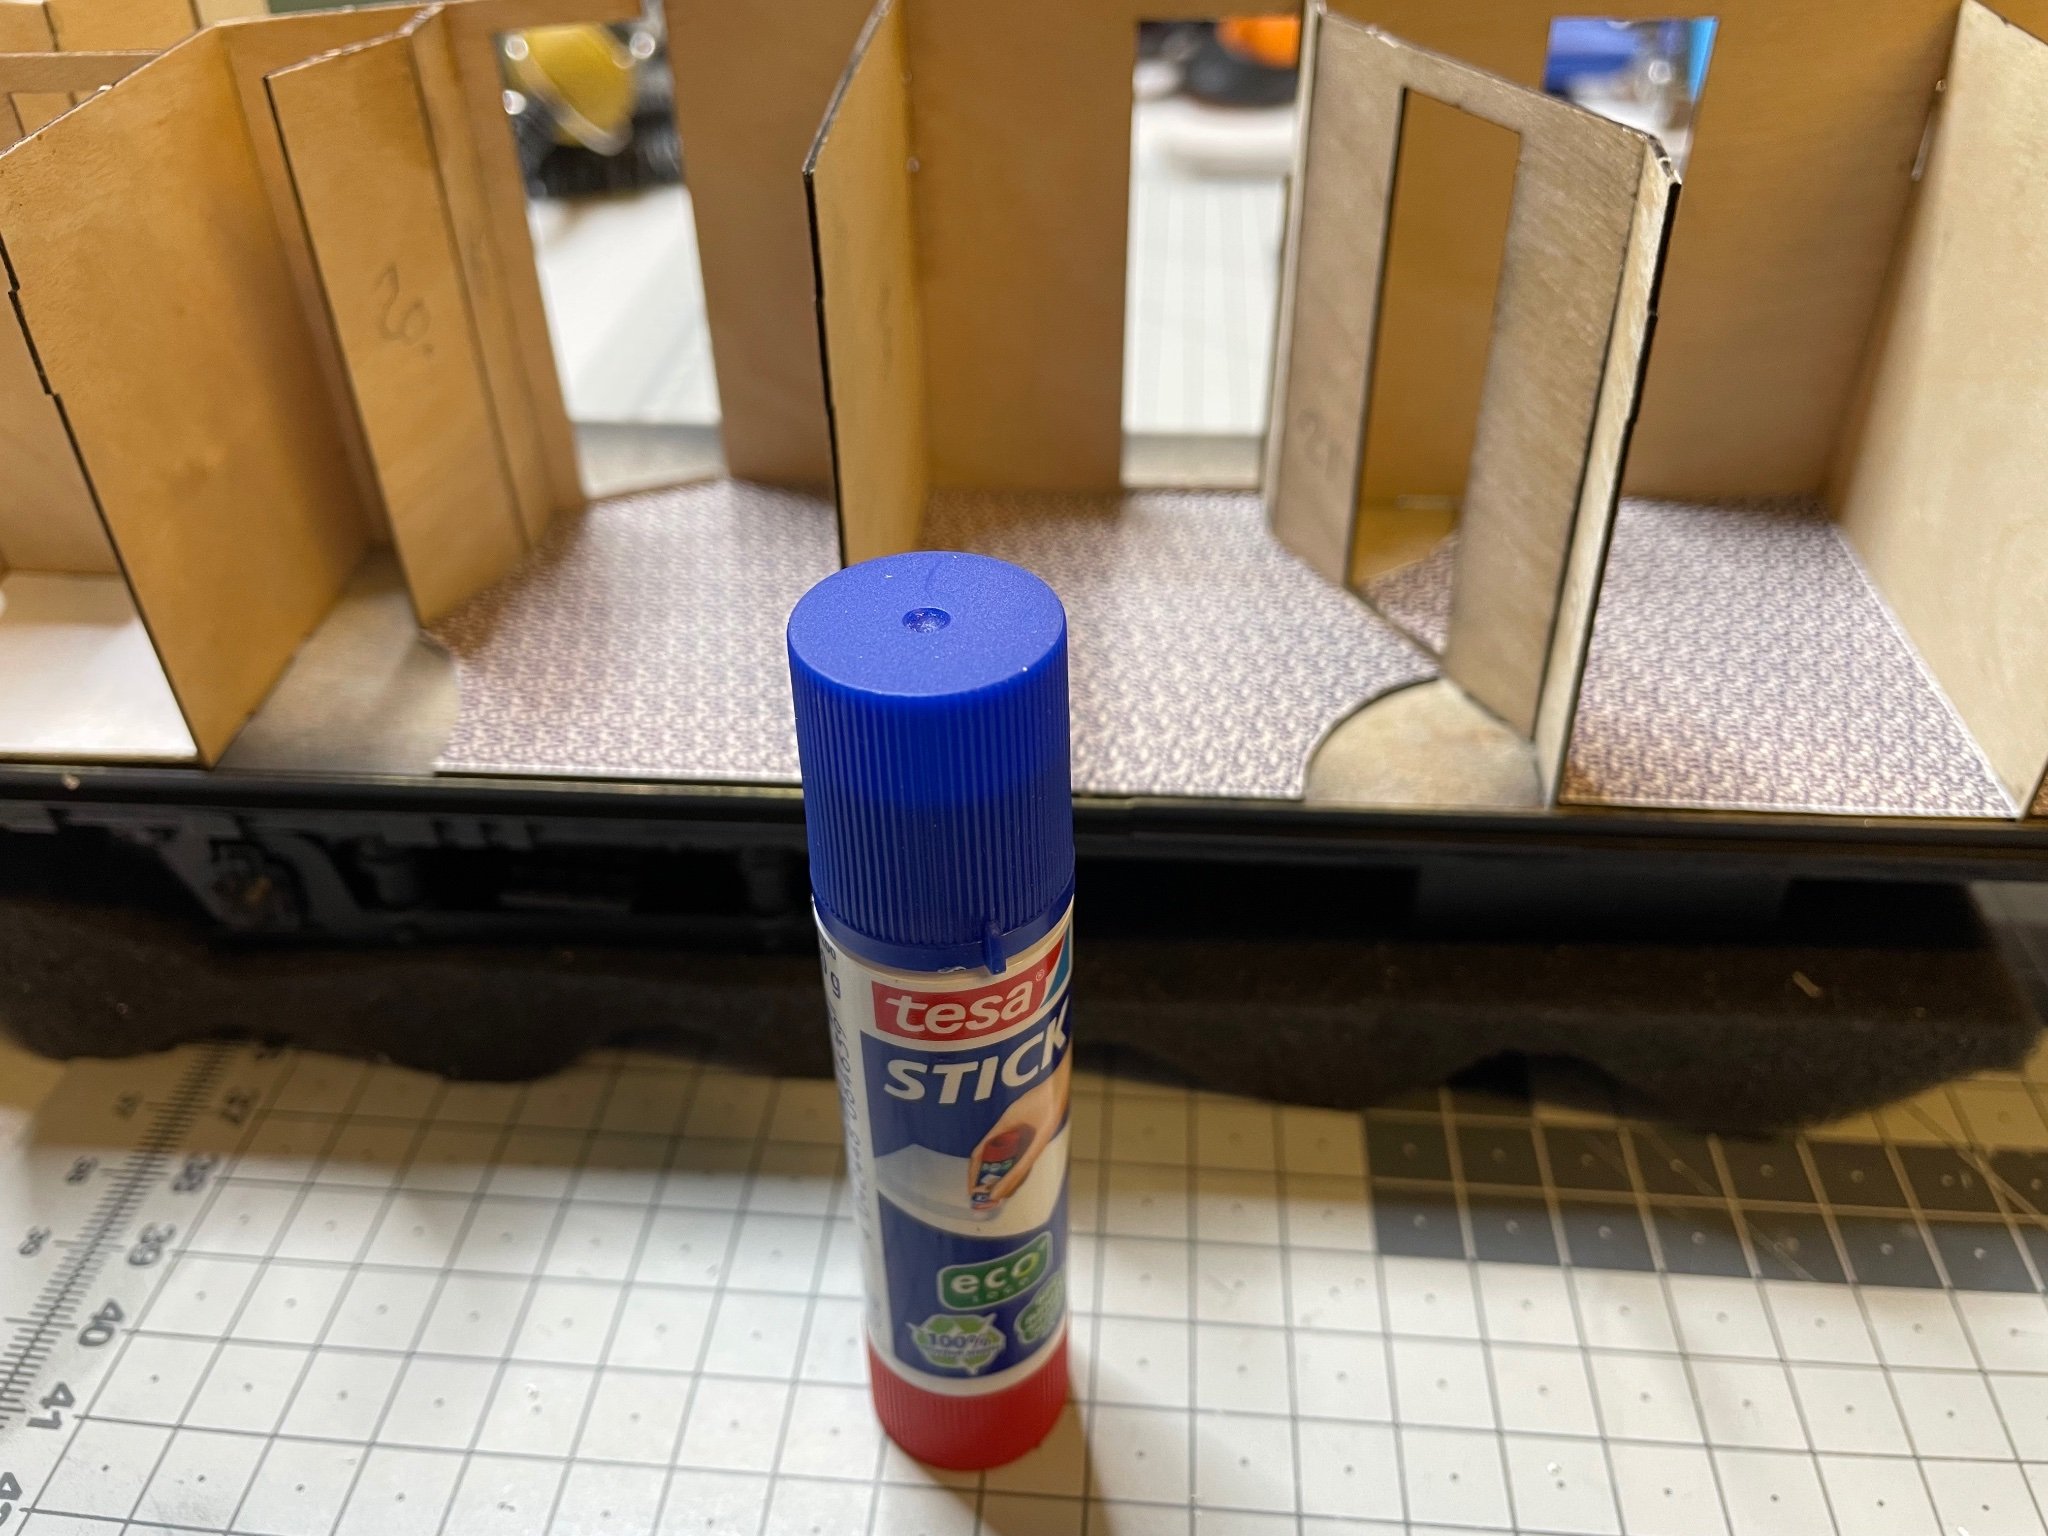
Laying the carpets. In a real construction I am sure the carpets are installed after everything else, not while even the walls are not complete.😃
Figure 143: Carefully mark the numbers on all the parts, lay them in correct orientation and align them with matching carpets (i.e. paper). They are so similar it is very easy to get them mixed up.
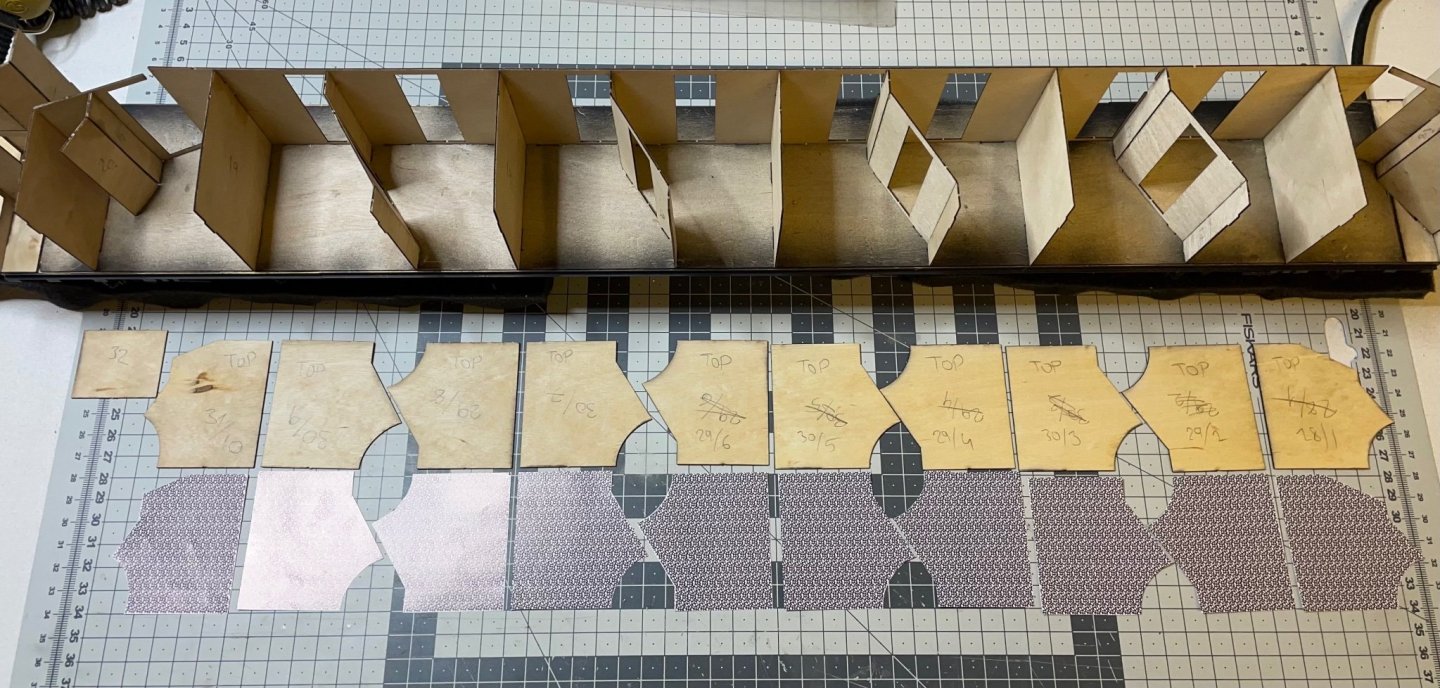
Figure 144: I use this paper glue stick. Not because anything special about it. I just found this in the local supermarket. Works well and is much more convenient than working with liquid white glue on large surfaces.
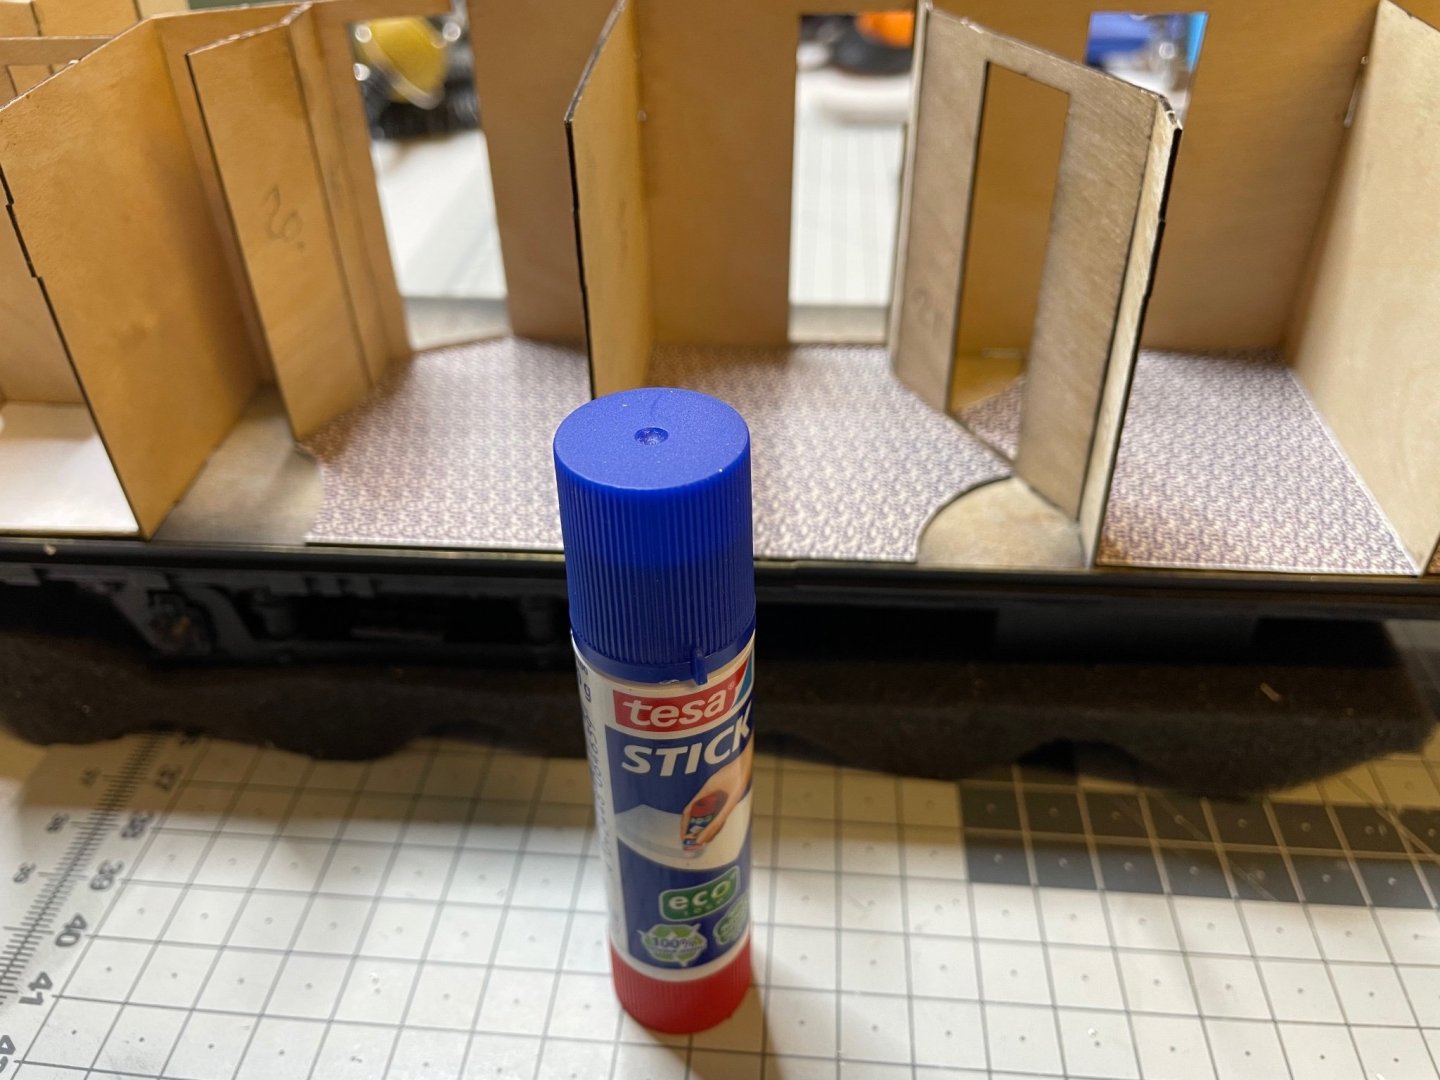
Figure 145: If you have been very careful with gluing the walls, these carpet parts will fit in their places like a glove. I didn't have to any adjustments. They just snapped in their places.
That's all for today!
Thanks for watching! -
BUILD DAY 13: 1 hr (TOTAL: 33 hrs)
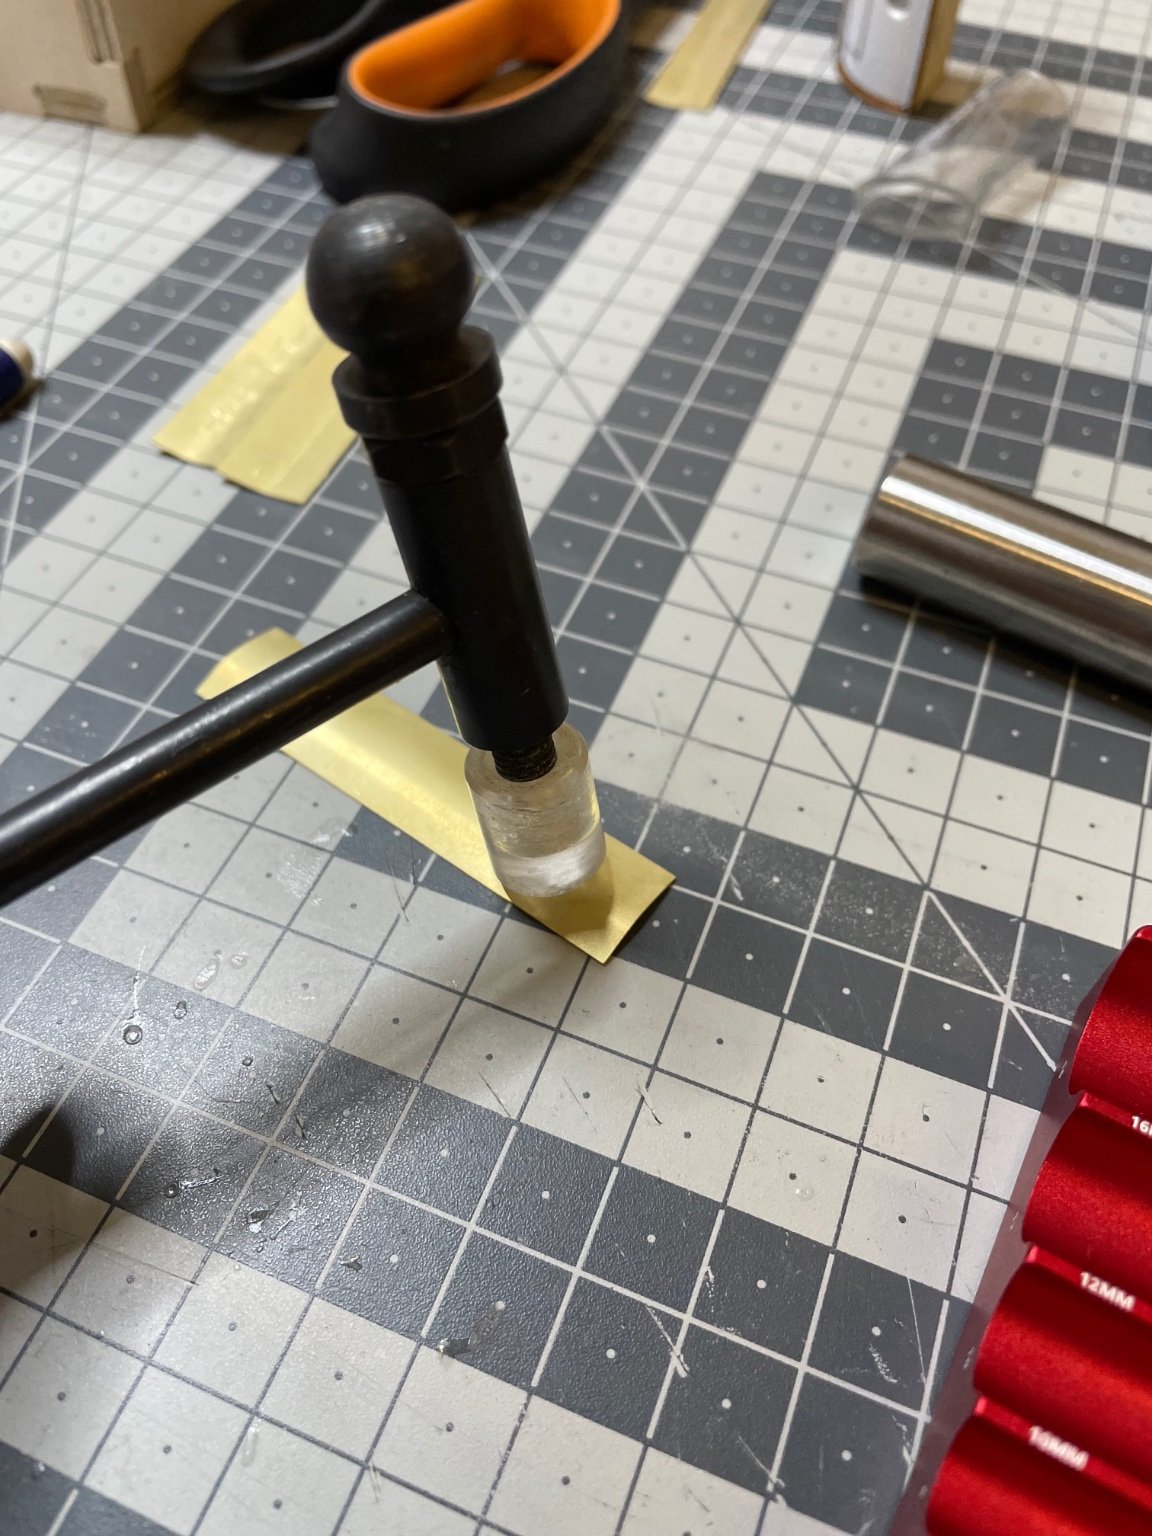
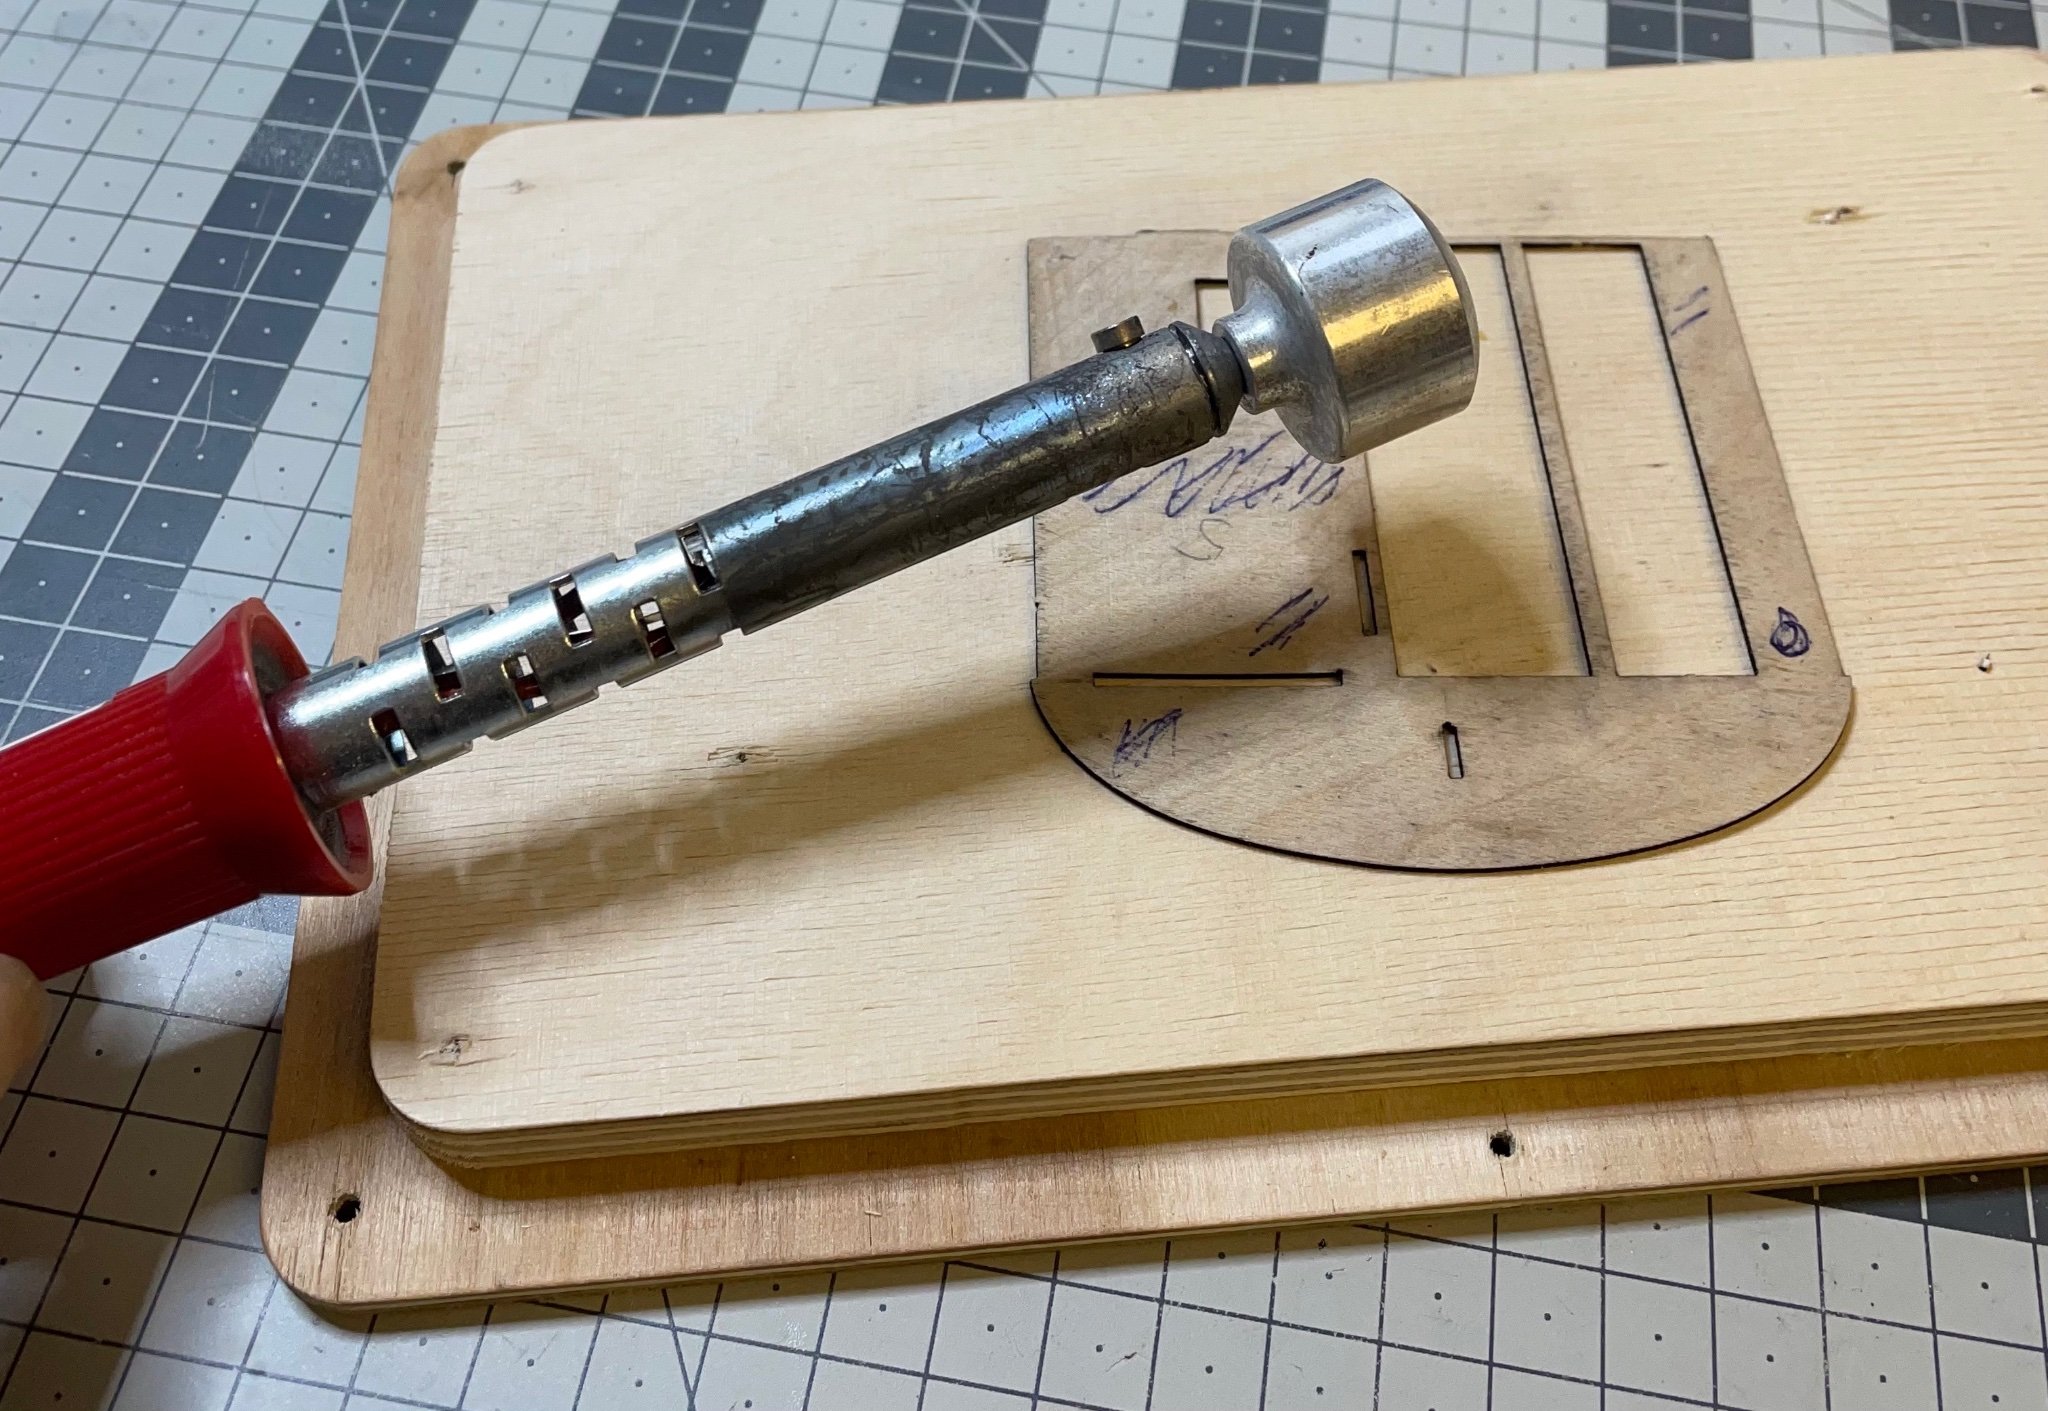
My previous method of flattening this warped part did not work very well (see Figures 138, 139 above).
I had soaked it, then clamped between two wooden pieces and even put in the oven 50 degrees (celcius) for several hours, but it was still warped, though less, after it dried.
So here is what I did:
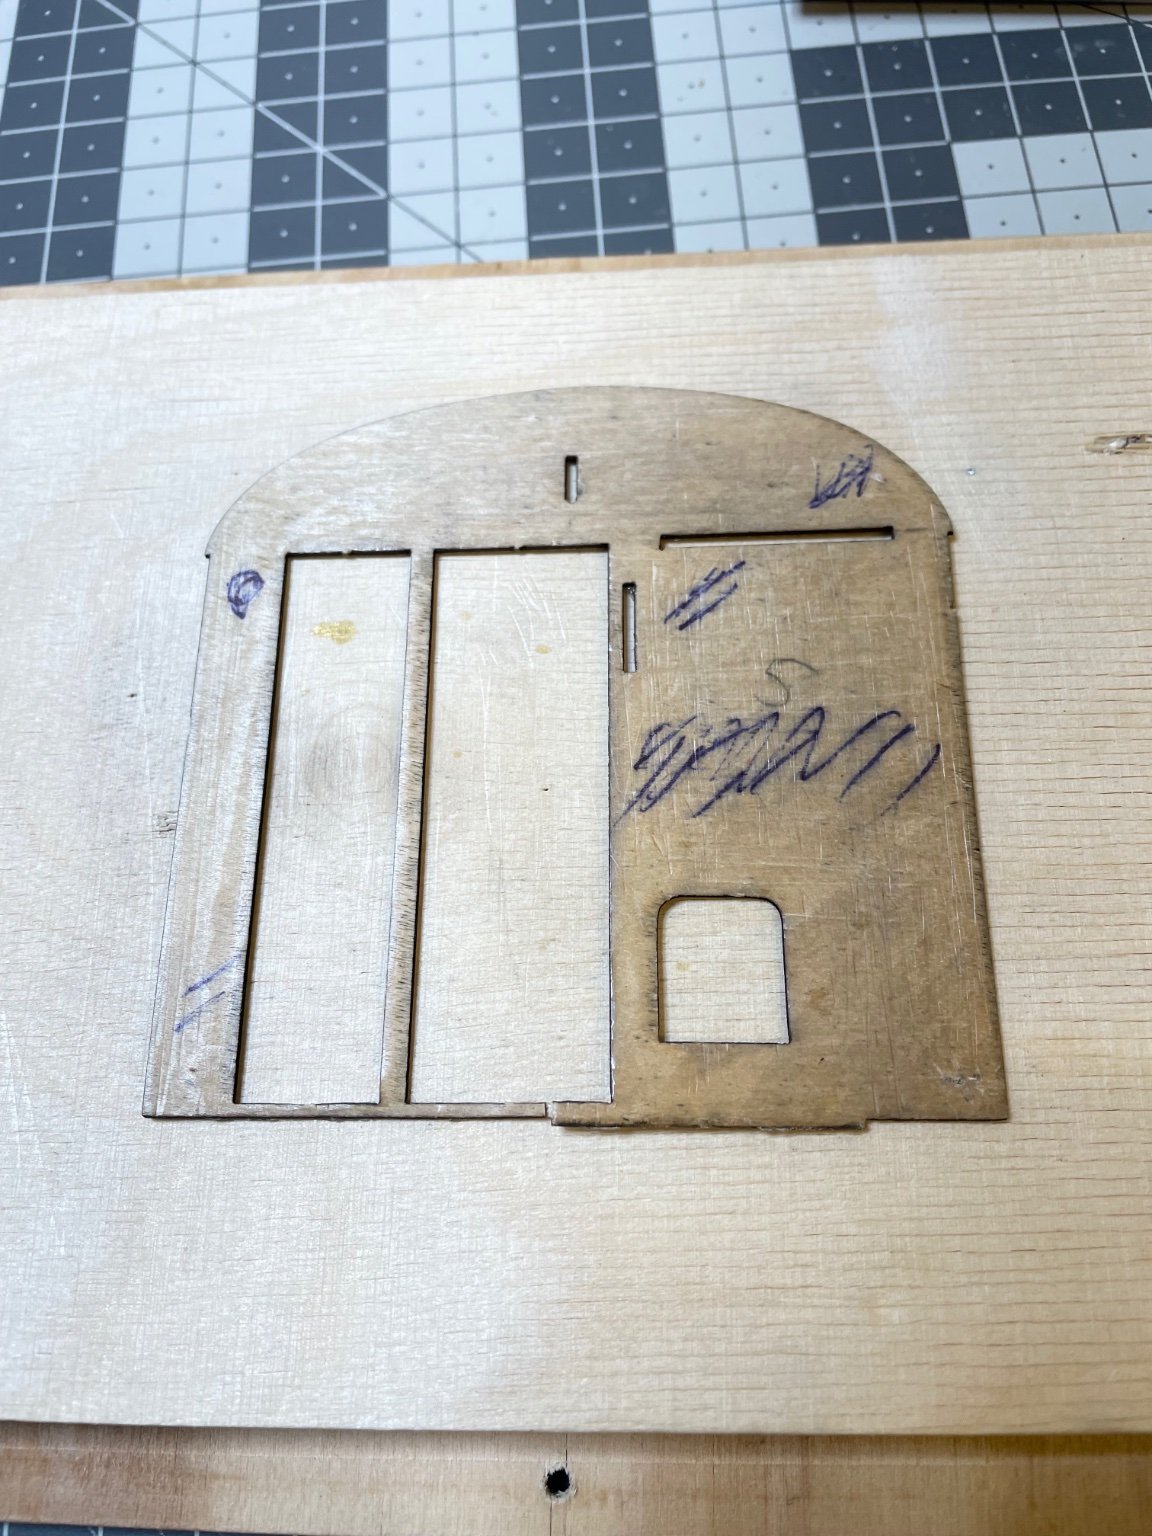
I soaked it in warm water for about an hour, then laid it on a wooden flat surface, then used my hot strip bender to treat the curvy surfaces locally. The pen marks on the piece are where the curves are. After treating those, I rolled the bender on all the areas while flipping the piece frequently until it is totally dry. The hot treatment took about half an hour. But finally it was well worth the effort.
Figure 141:

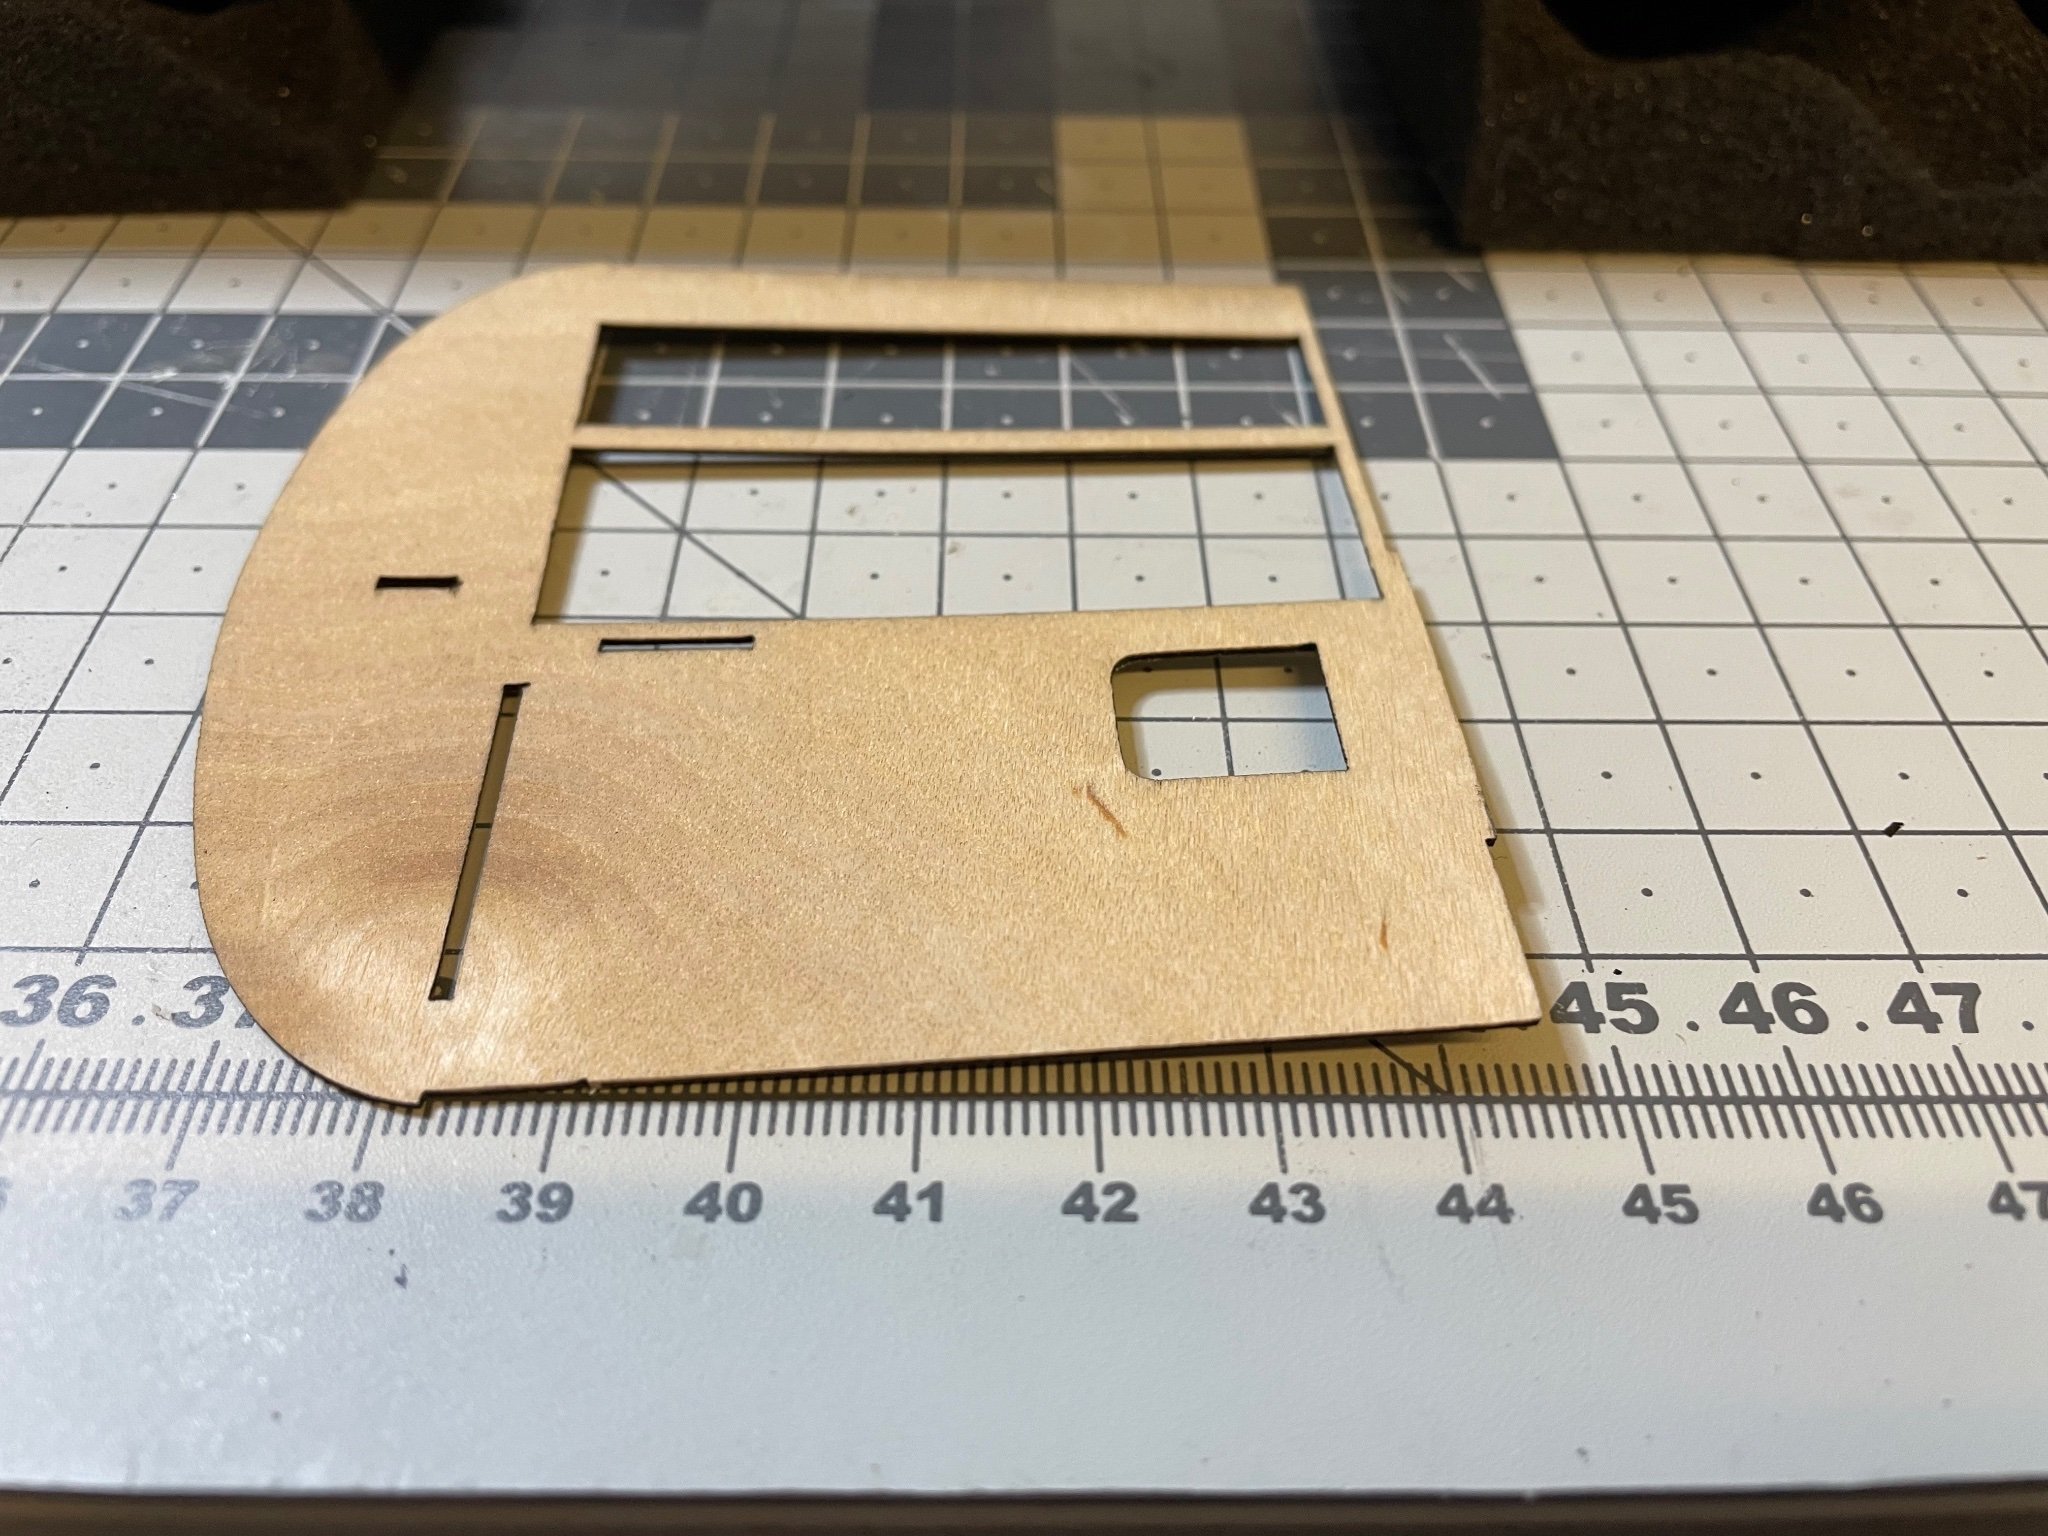
Figure 142: The piece, laying flat after treatment.

- lmagna, Egilman, popeye the sailor and 6 others
-
9
-
20 hours ago, Canute said:
Will there be any kind of piping running under the frame? Brake piston(s), steam and air lines. I assume with quality of the kit so far, these items will be added further in your build. As Wefalck says, using a mirror may enhance the views.
Right now I intend to build as far as what is available in the current kit. Maybe I dare to add other things later.
- mtaylor, popeye the sailor, Canute and 5 others
-
8
-
22 hours ago, wefalck said:
With all the detailed undercarriage work, you may consider displaying the coach on a mirror, as it is sometimes done in museums ...
Yes, part of my head is thinking of a nice display solution, which allows under part as well as inside visible. The roof will be removable allowing to look inside. Maybe something like a mirror on the bottom and roof partly open to the side.
-
Figure 140: After a careful work, this is the status.
That's all for today!
Thanks for watching!- thibaultron, Blackreed, wefalck and 11 others
-
14
-
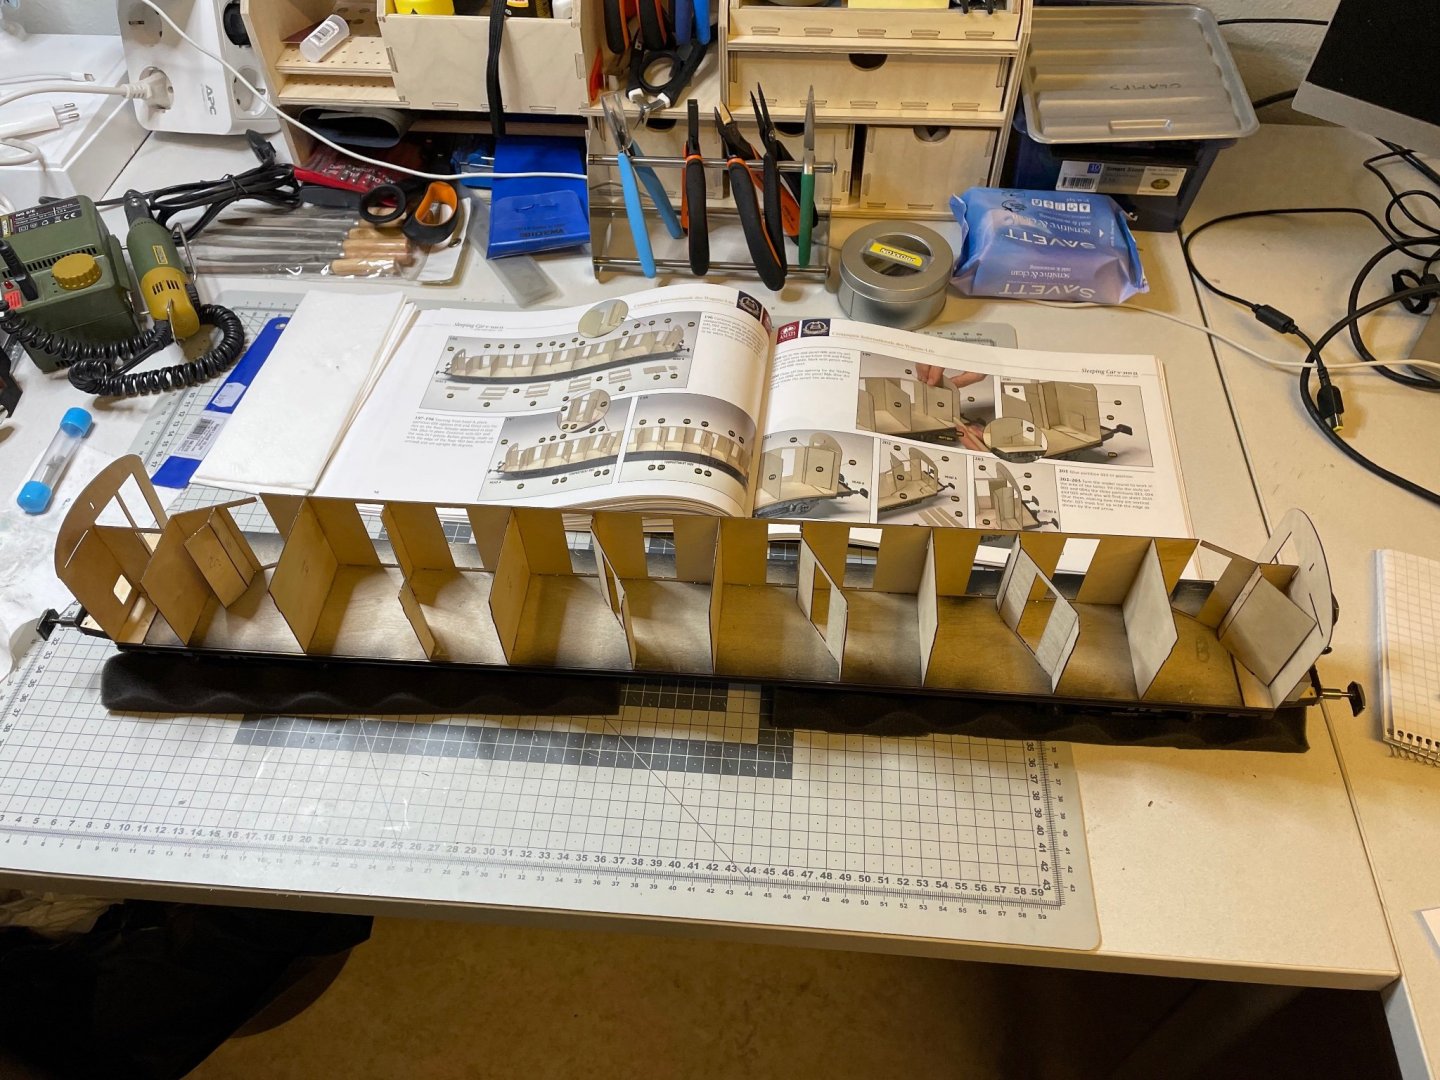
BUILD DAY 12: 2 hrs (TOTAL: 32 hrs)
A new milestone: Starting the wall partitions today.Figure 138, 139: Treating a warped piece. They have to be as flat as possible. I soaked it in water and nailed on a flat surface. Will wait for some time (maybe overnight).


Orient Express Sleeping Car 1929 by aydingocer - FINISHED - Amati - Scale 1:32
in Non-ship/categorised builds
Posted · Edited by aydingocer
Figures 170, 171: Bathroom of compartment 10. This one is slightly different from all the others. By the way, all the bathroom cabinets have the same accessories, but because of the slightly varying shapes of the cabinets, their placement on the walls will differ.