


aydingocer
-
Posts
898 -
Joined
-
Last visited
Content Type
Profiles
Forums
Gallery
Events
Posts posted by aydingocer
-
-
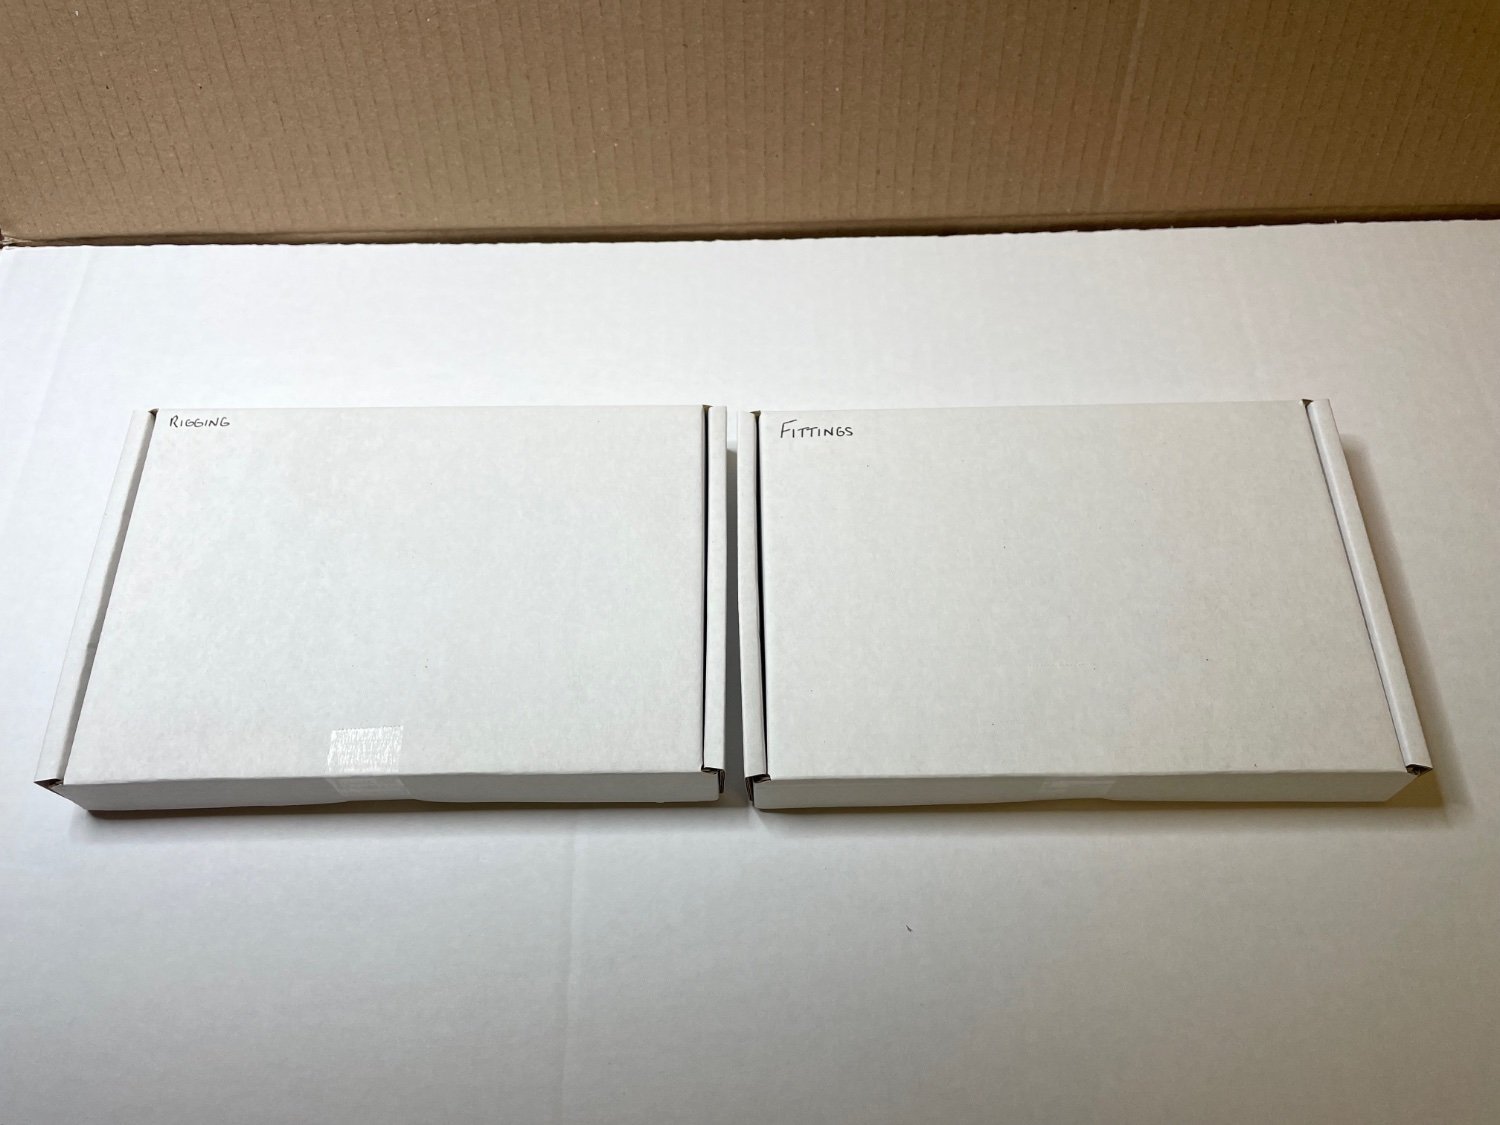
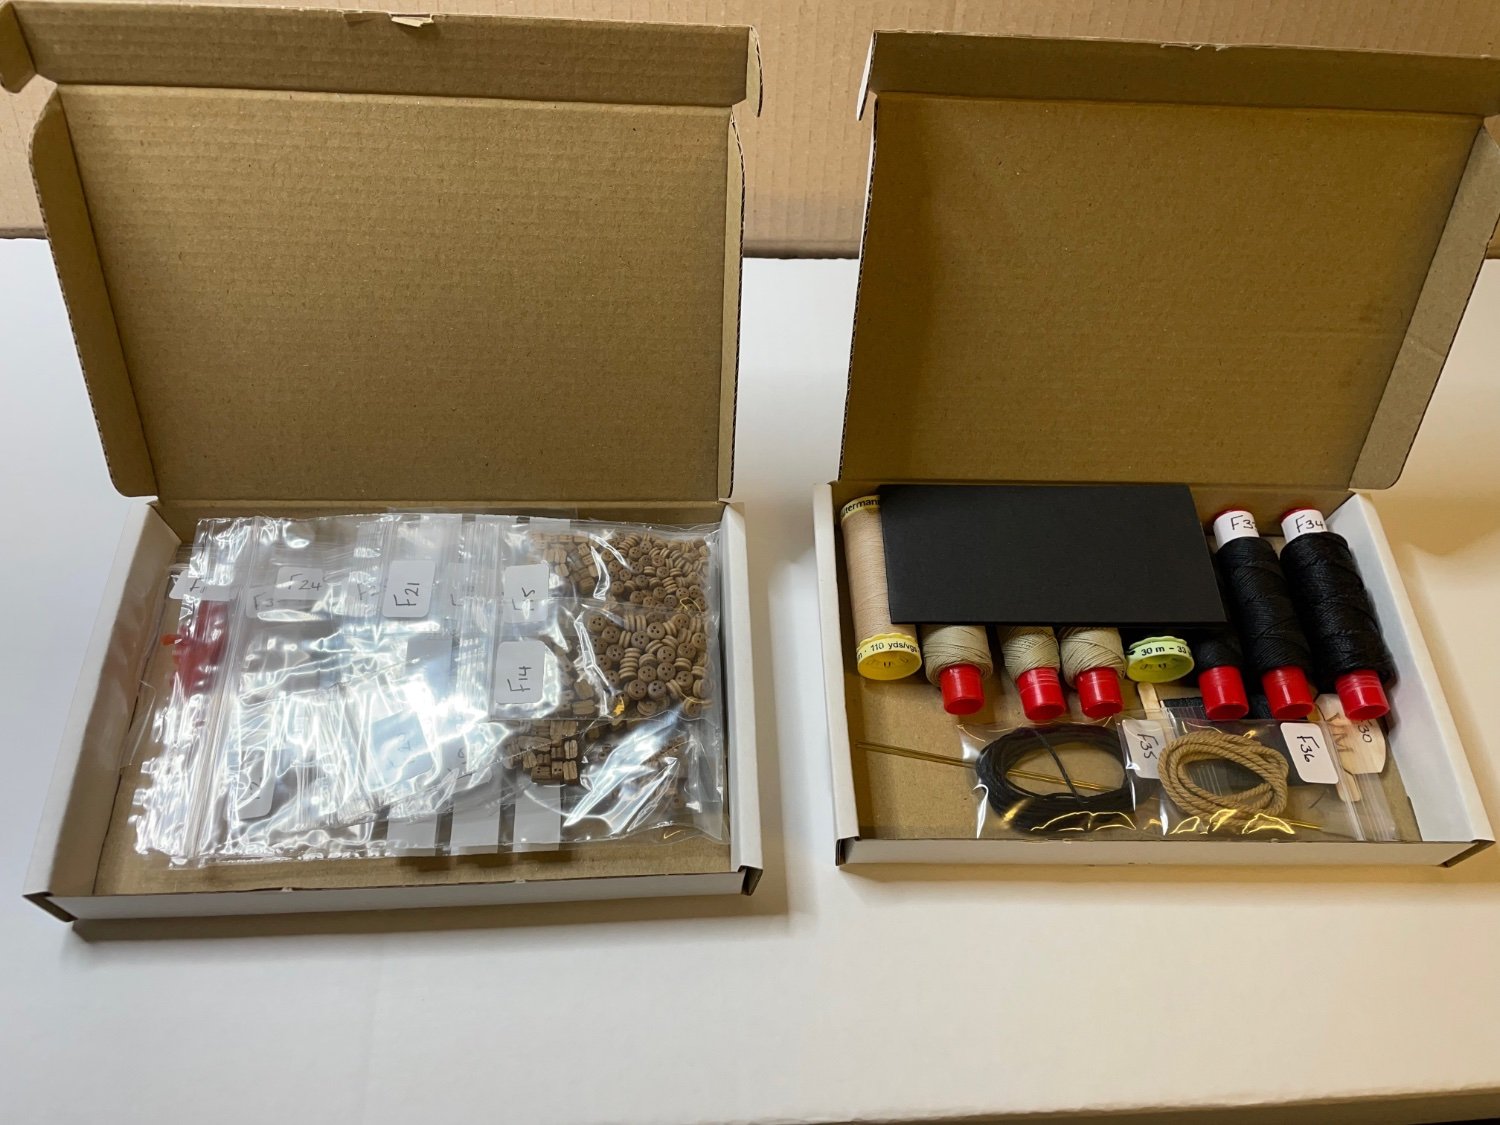
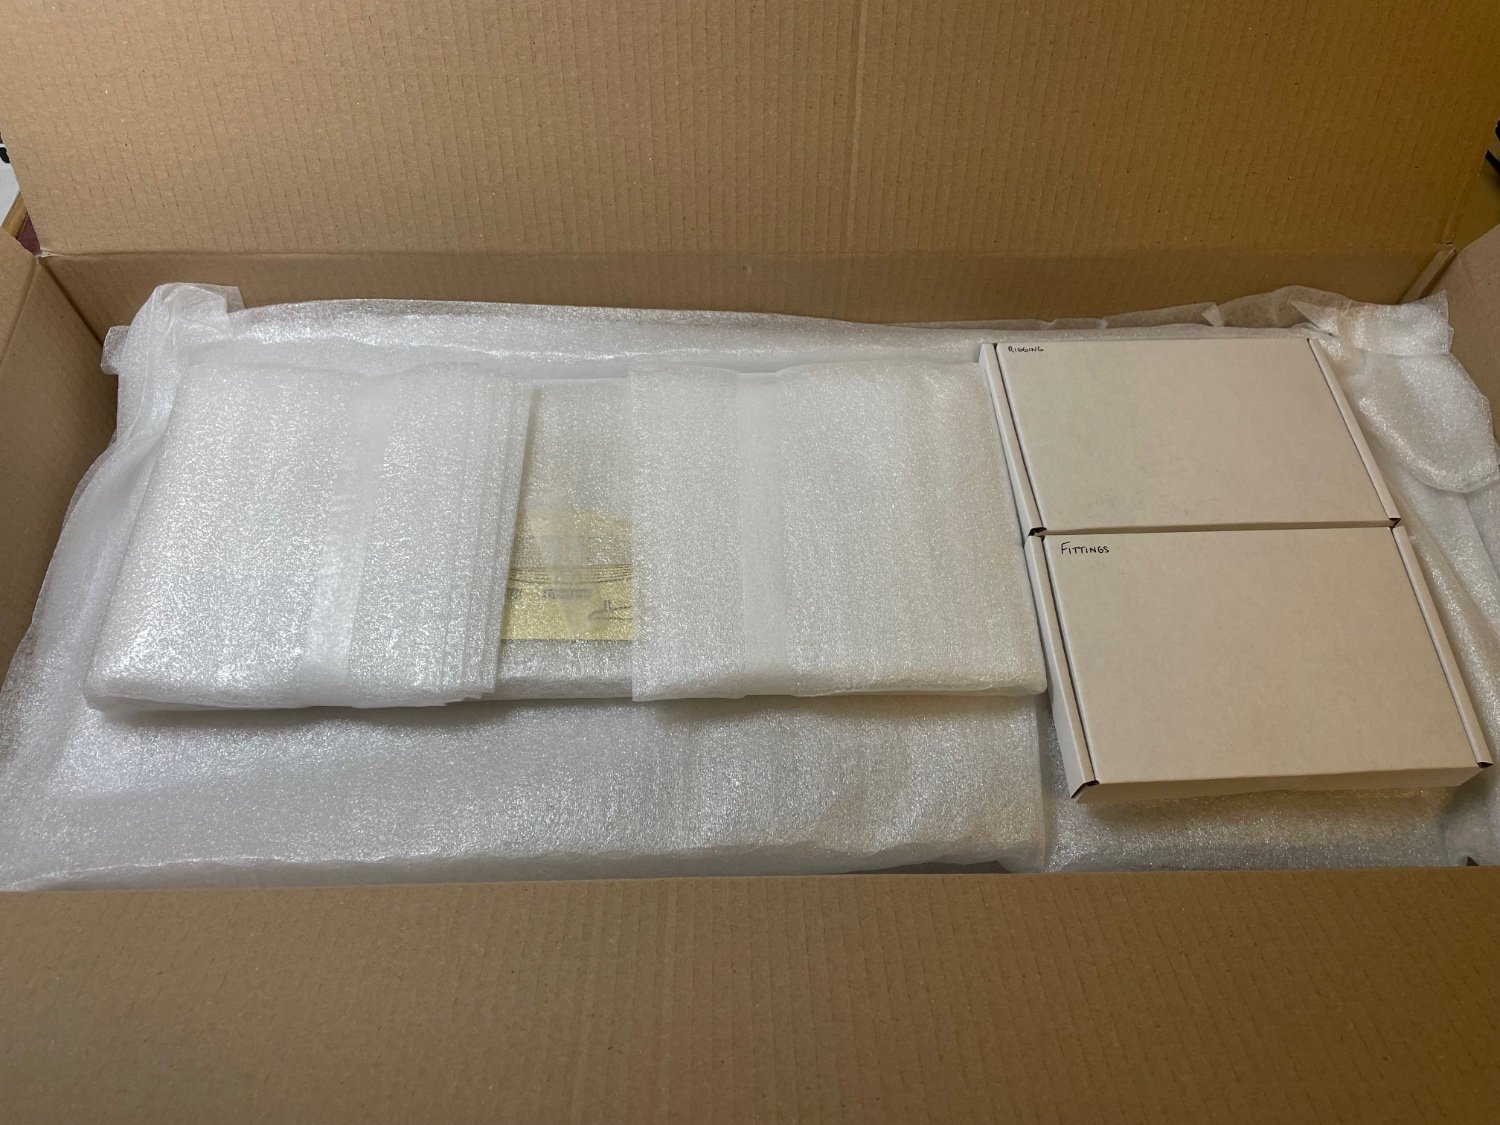
Photos 6-7: Rigging and fittings in their own boxes, marked with what I bet is Chris's own handwriting.


- Theodosius, UMH, GrandpaPhil and 6 others
-
 9
9
-
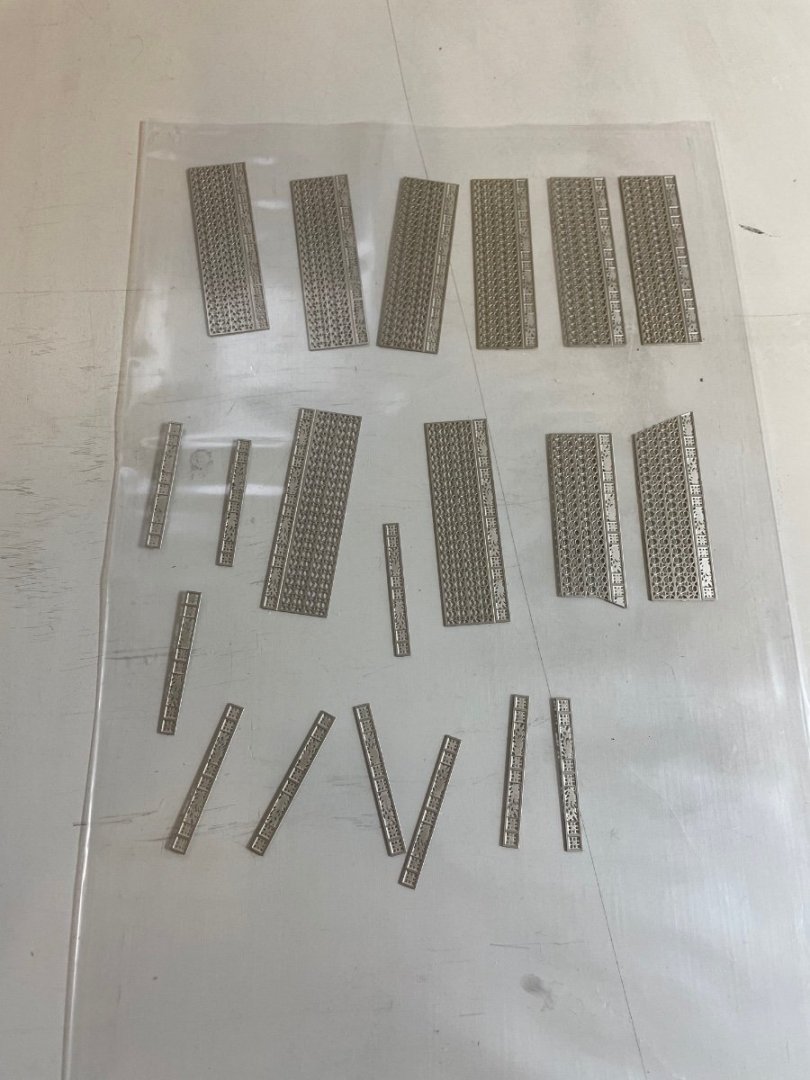
Photo 4: Diving deeper, you find the photo etched sheets and wooden sheets, again each wrapped in soft sheet.

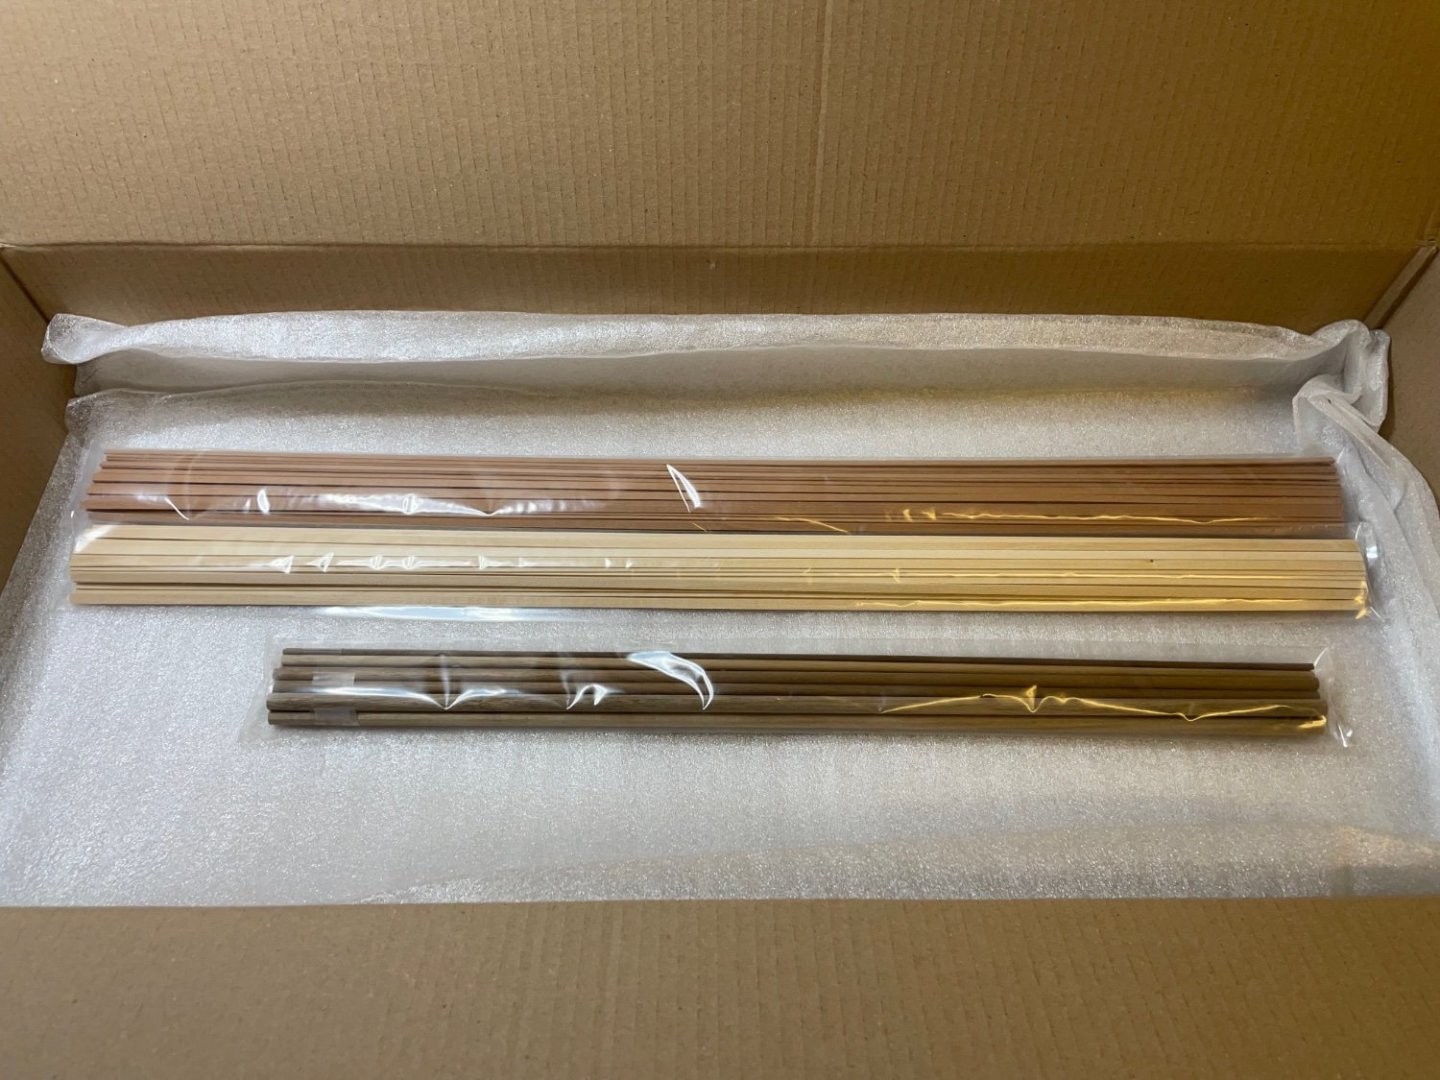
Photo 5: The wooden strips are in their own plastic nylon.
- UMH, chris watton, etubino and 5 others
-
8
-
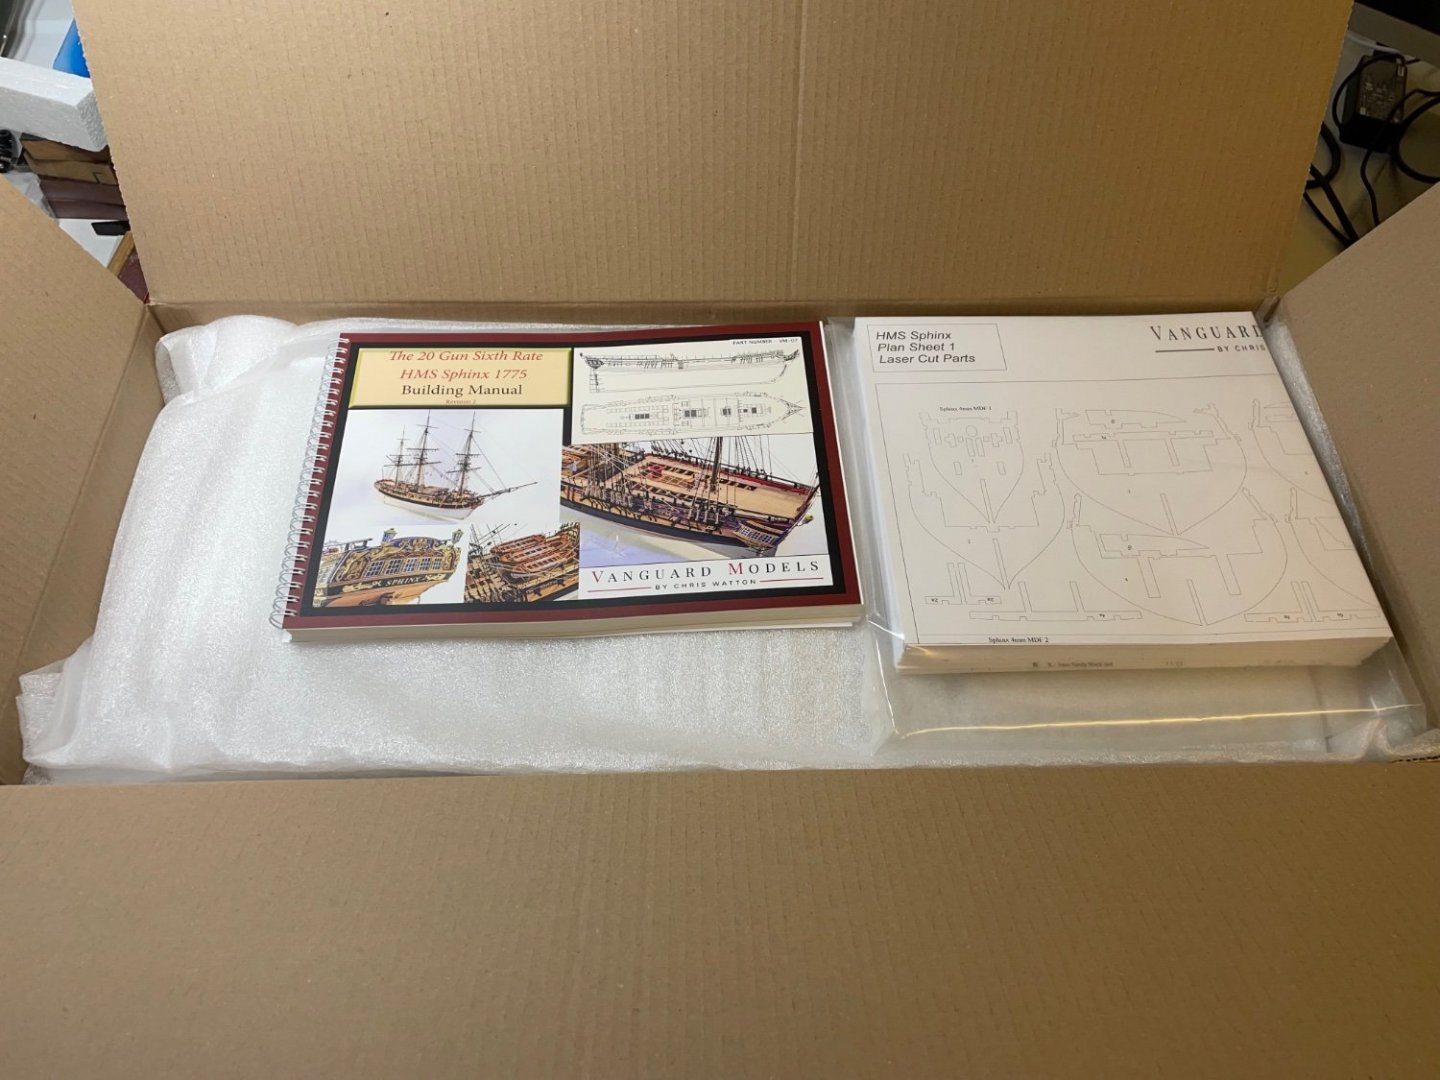
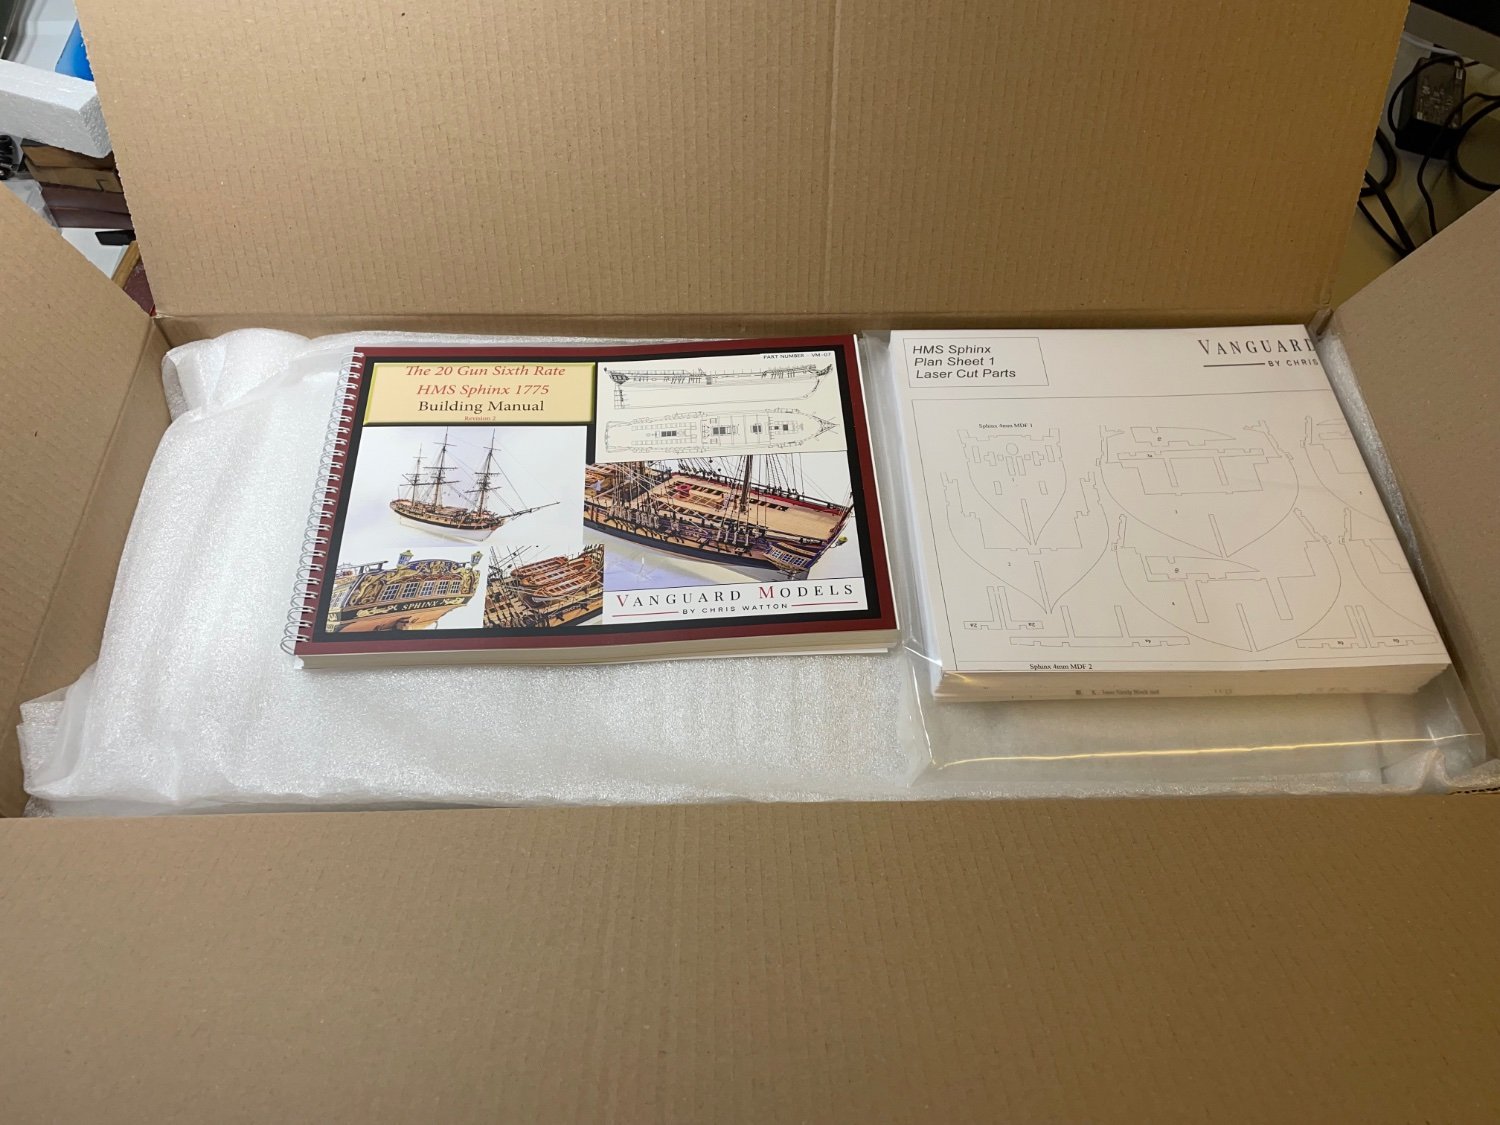
Photo 3: Opening the box you immediately see how much effort Chris has given to packaging. Each group of parts is generously wrapped in soft sheet. On the top of the stack the thick instruction manual and plan sheets welcome you.
-
Here it finally arrived yesterday!
I want to take all the time I need with this model and make the best I can. I know this means it will sit on my table a looong time therefore I cleaned my table and moved everything else away to dedicate it all the space it needs.
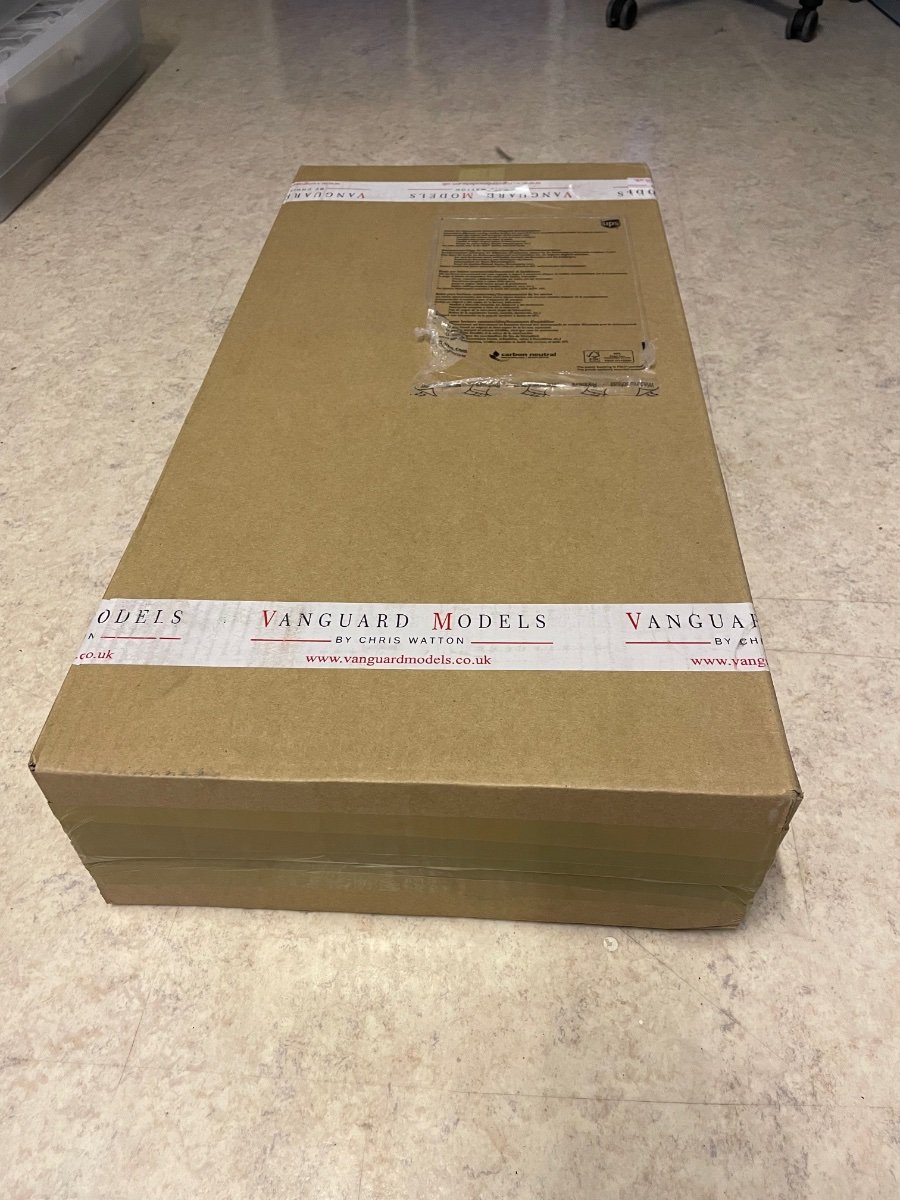
Now some unboxing photos. I will not go through all the details, will show just enough to let you admire Chris's exceptionally well packaging.Photo 1 : This is how it arrived via UPS. Box was fully intact, no bumps or dents or any signs of damage. The package measures ca 75x36x14cm and according to the airwaybill it weighs 7.2kgs.

Photo 2: The actual kit box is 70x31x13cm. The space in the shipment box was neatly filled with cardboard for cushion.

-
My recent Orient Express Sleeping Car project was a real challenge combining metal, wood, paper and electrics in the same box. Though when I was done, I thought I really missed the smell of wood.
So, when I decided to build a wooden period ship as my next project, Sphinx was an easy choice for me. I finally ordered mine in Vanguard webshop yesterday. Chris, ship it already please!! 😁. Needless to say I will share build log in this forum.
/Aydin
- chris watton, mtaylor, James H and 2 others
-
5
-
10 hours ago, yvesvidal said:
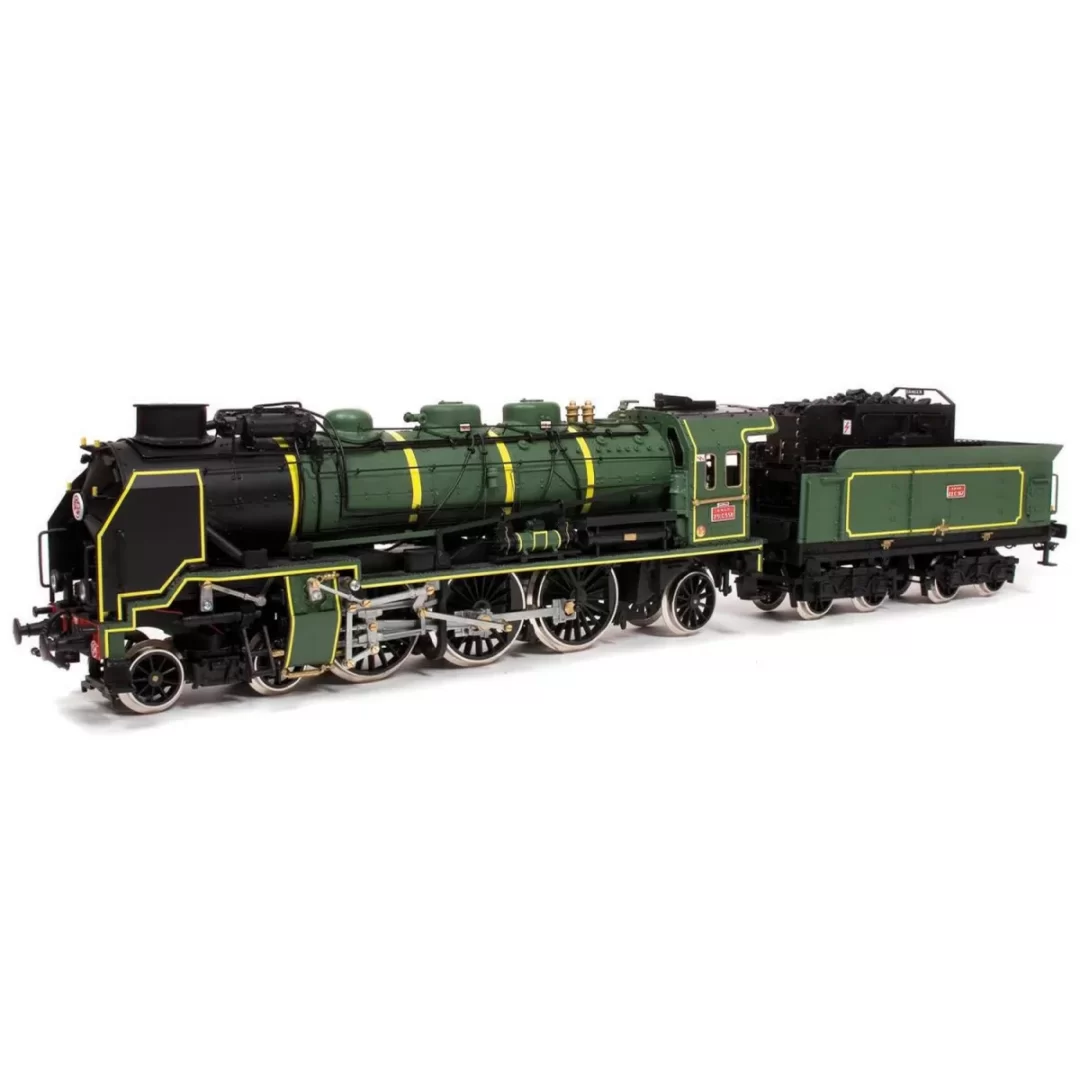
This is a superb model. Now, you need an engine in the scale of 1/32nd to pull it.
If you can afford a very expensive SNCF Pacific 2-3-1 from LEMACO, FULGUREX or MARKLIN at 1/32nd scale, that would be perfect. Otherwise, OCRE proposes a Pacific steam engine for a few hundreds euros, that you may be able to turn into a little jewel, with your skills.
Yves
I have been seriously thinking of this OCCRE actually, I am just undecided between an HMS Sphinx or this one, as next project. I kind of missed the smell of wood :). But OCCRE is in my list!
- yvesvidal, druxey, Old Collingwood and 6 others
-
9
-
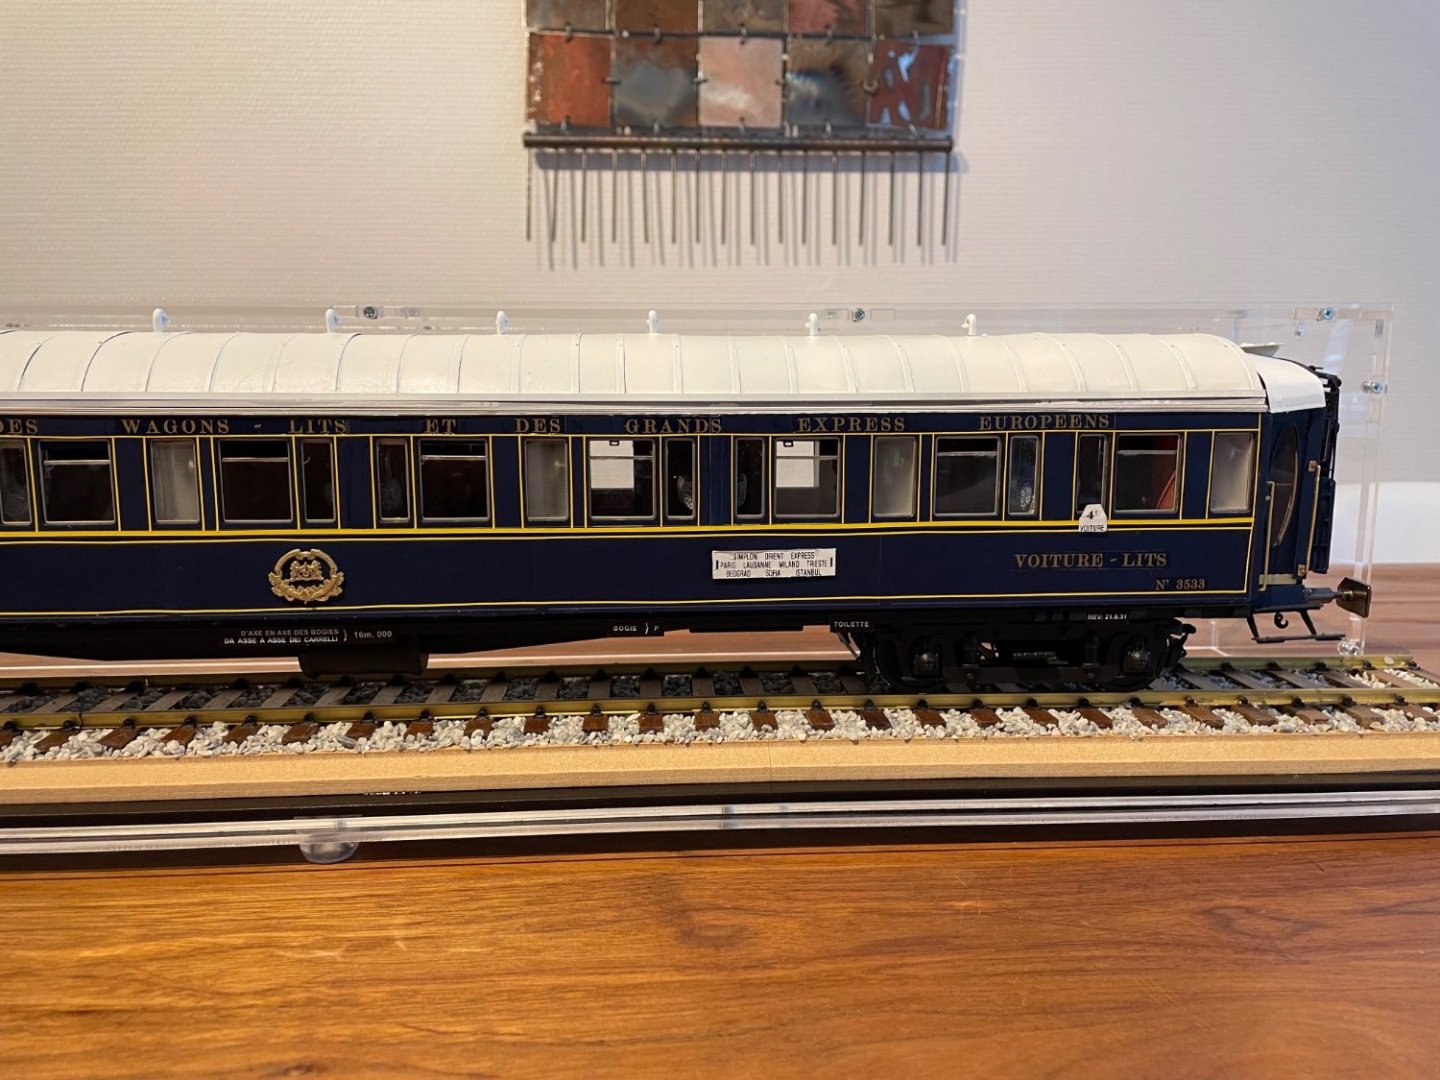
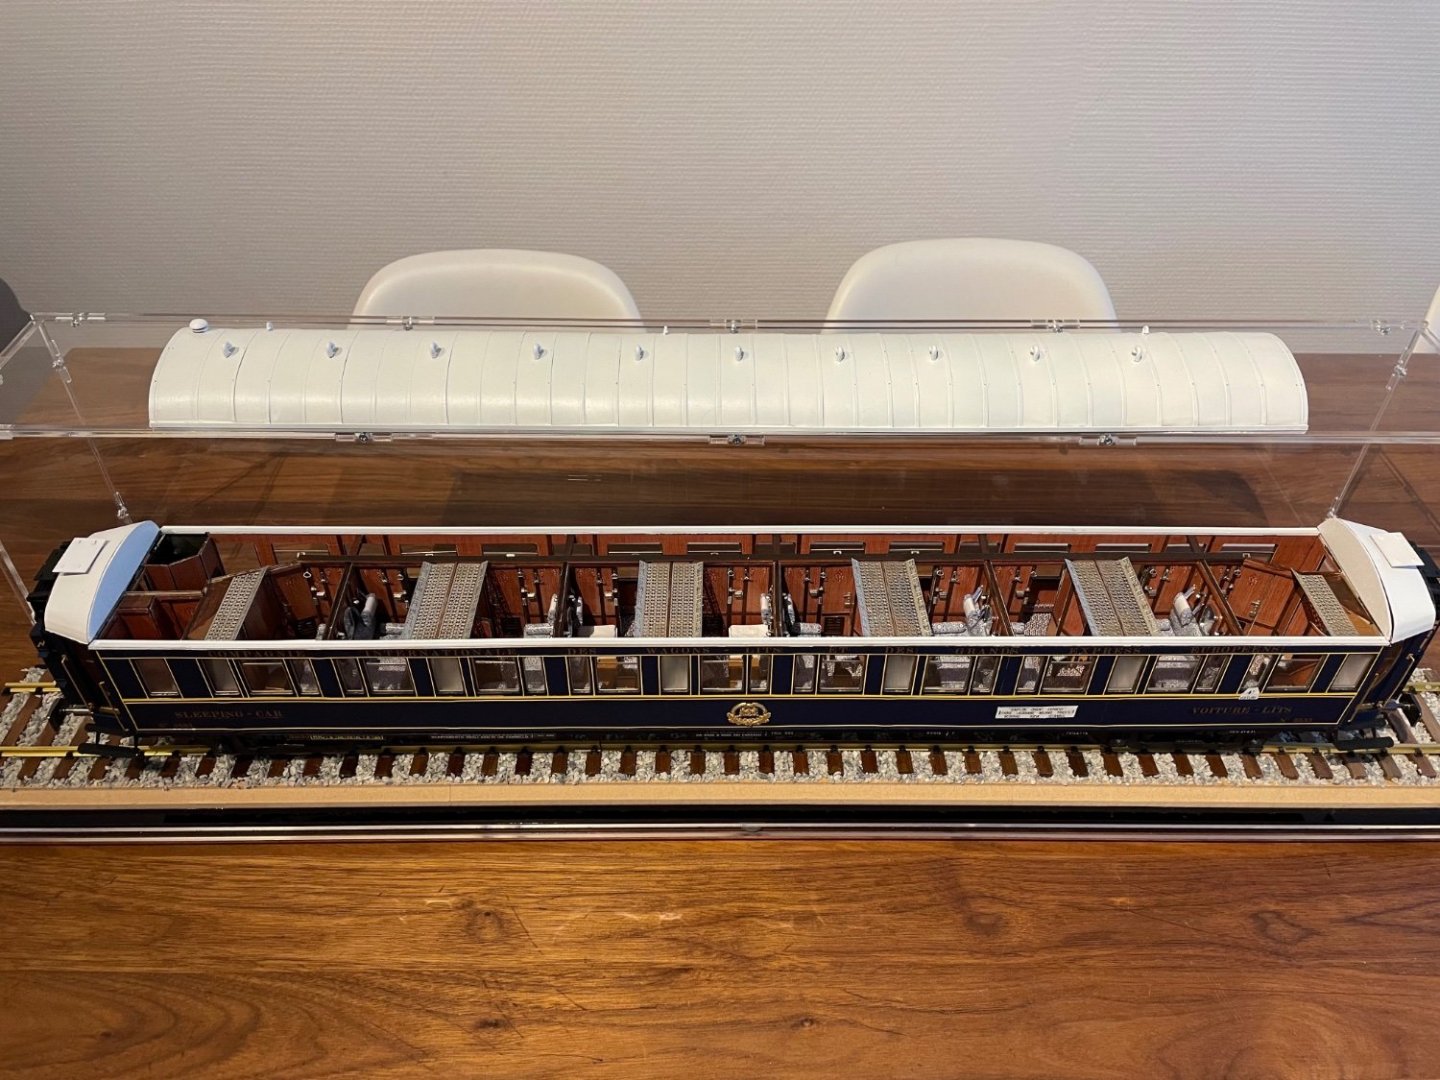
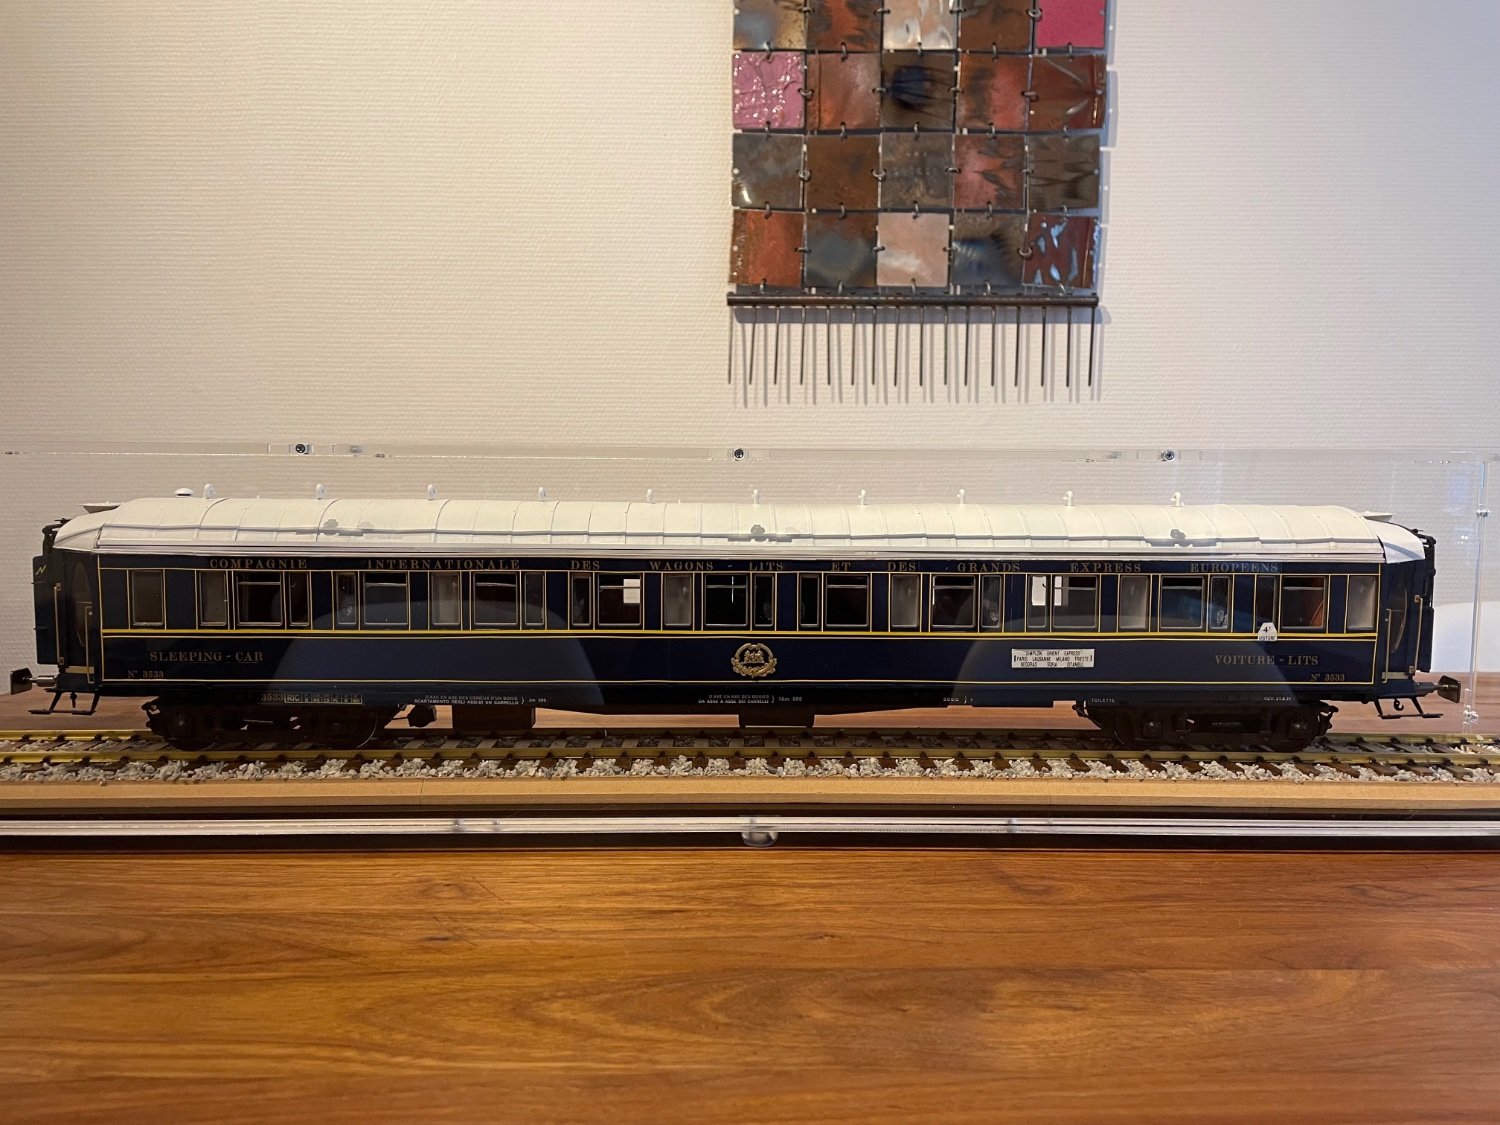
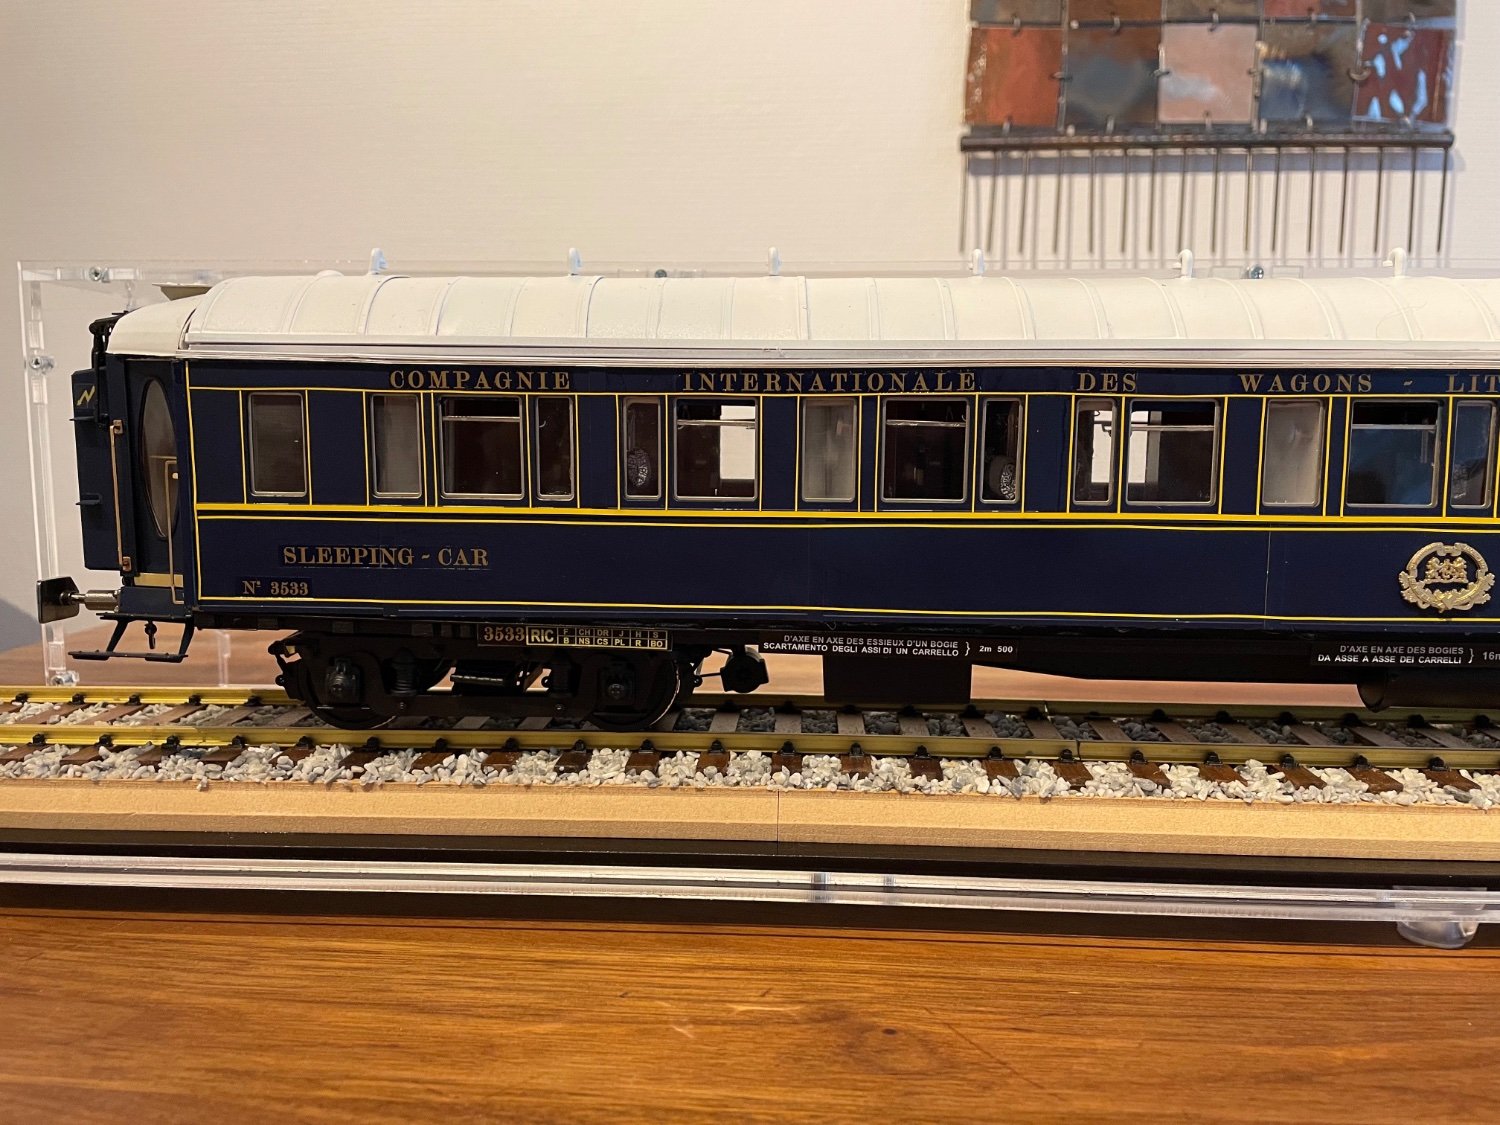
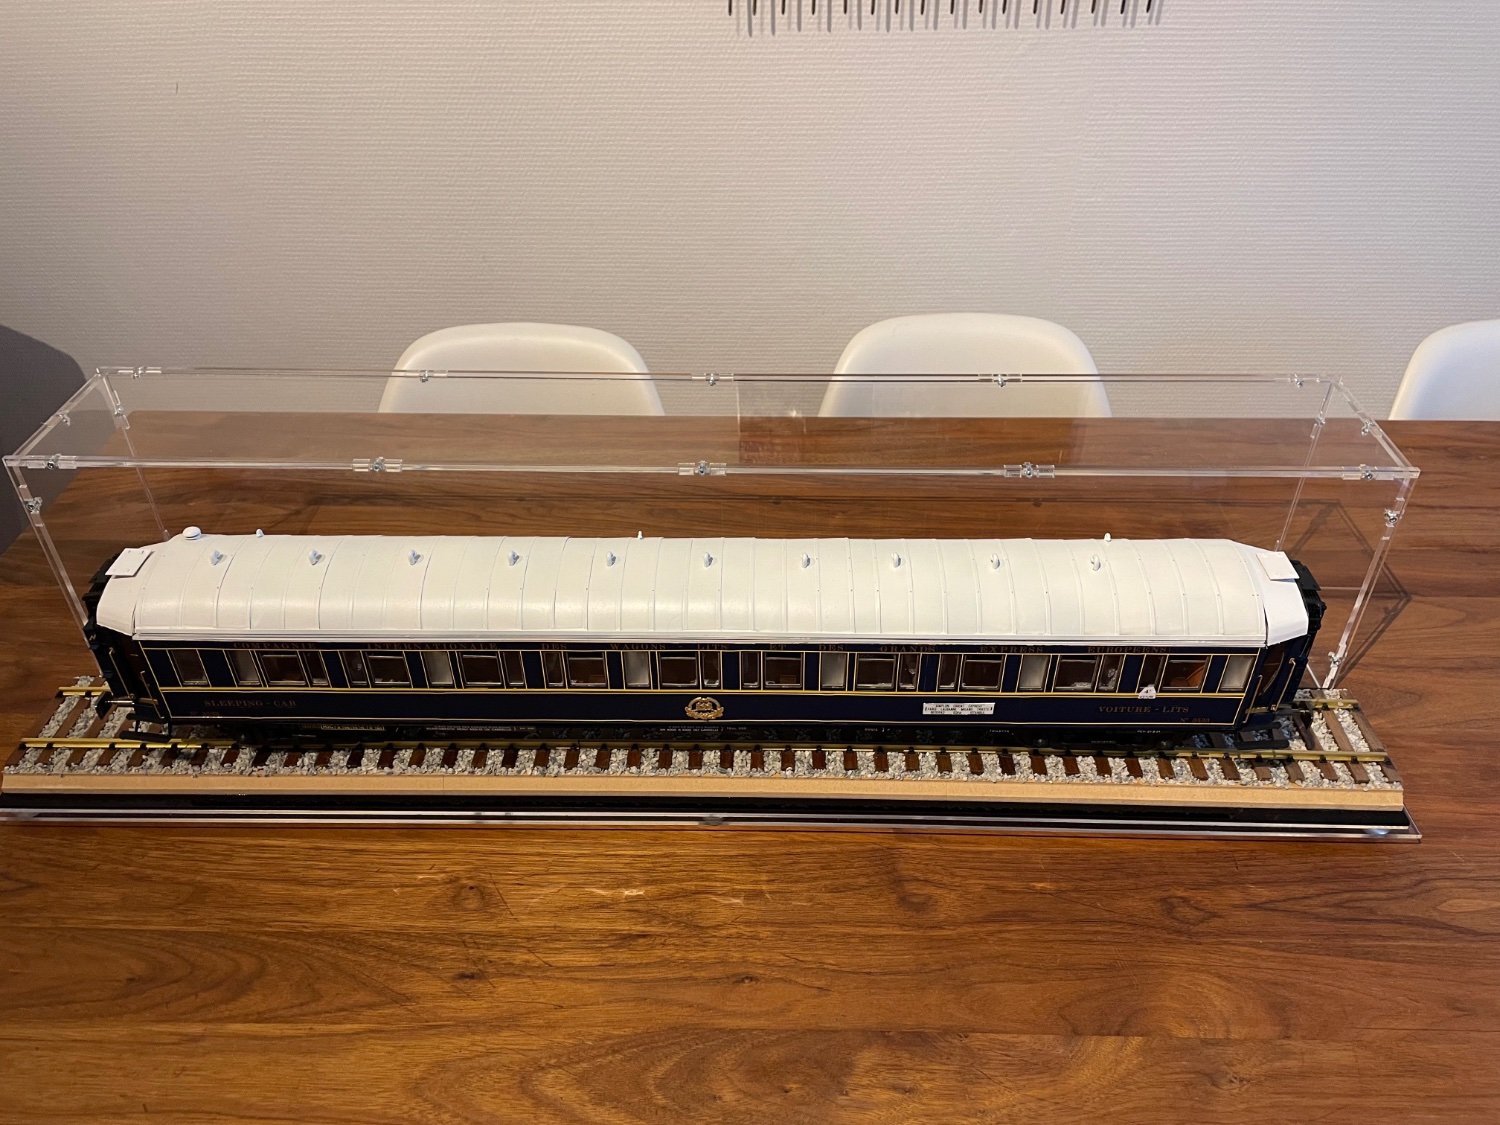
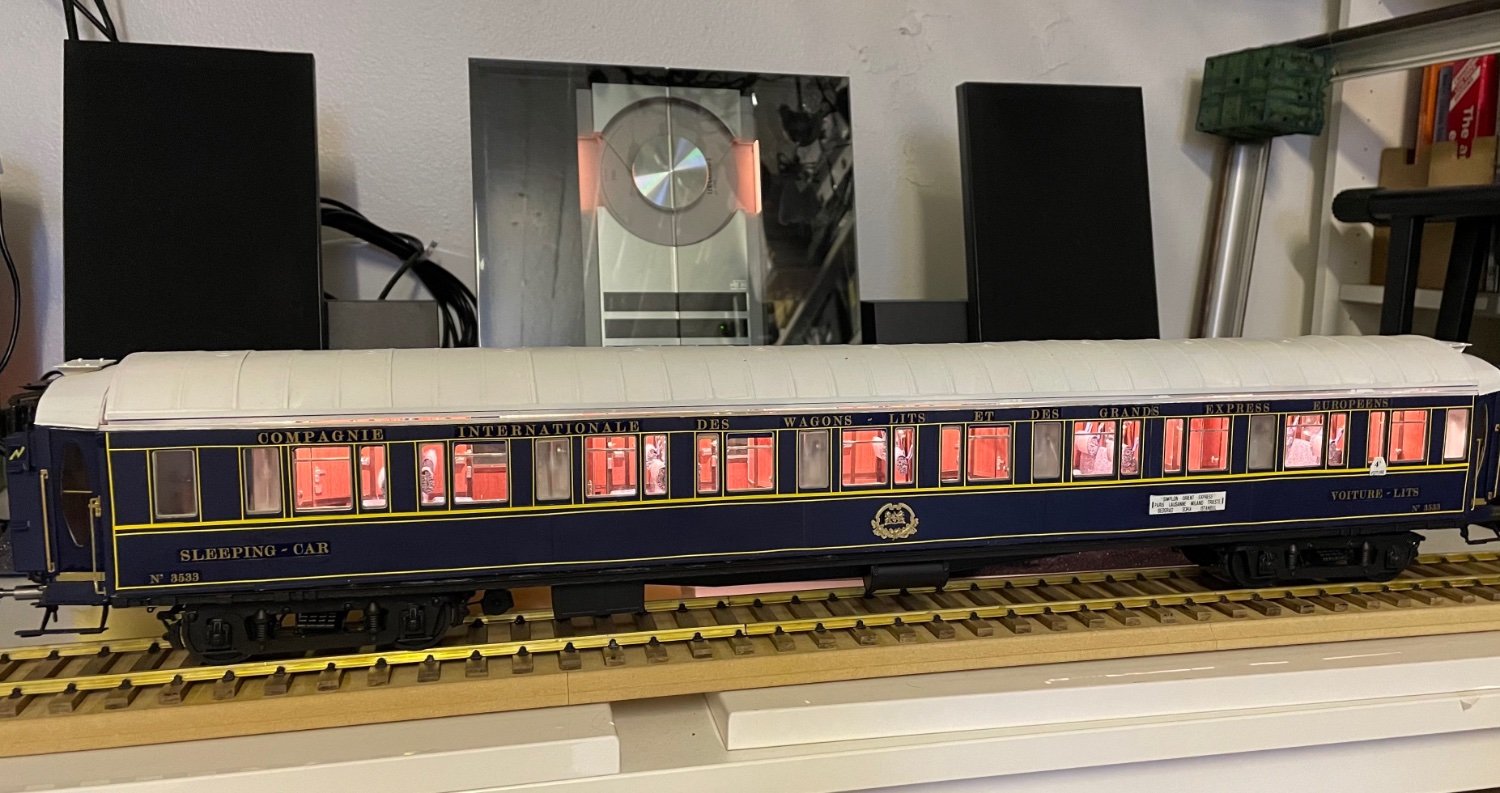
Figure 476 - 485: Final photos
Orient Express is finally ready.
I ordered the custom size display case from Sora Shop in Germany (sora-shop.com). Highly recommended. This one cost me around 53€ + 13€ shipment to Finland.
Thank you all for watching, following and your inspiring messages!
Aydin.


-
-
1 hour ago, Veszett Roka said:
Aahah, a BeoCenter 2300
") You're a man! Listening it must be a pleasure when modeling.
You're a man! Listening it must be a pleasure when modeling.
Indeed!! 😃
-
-
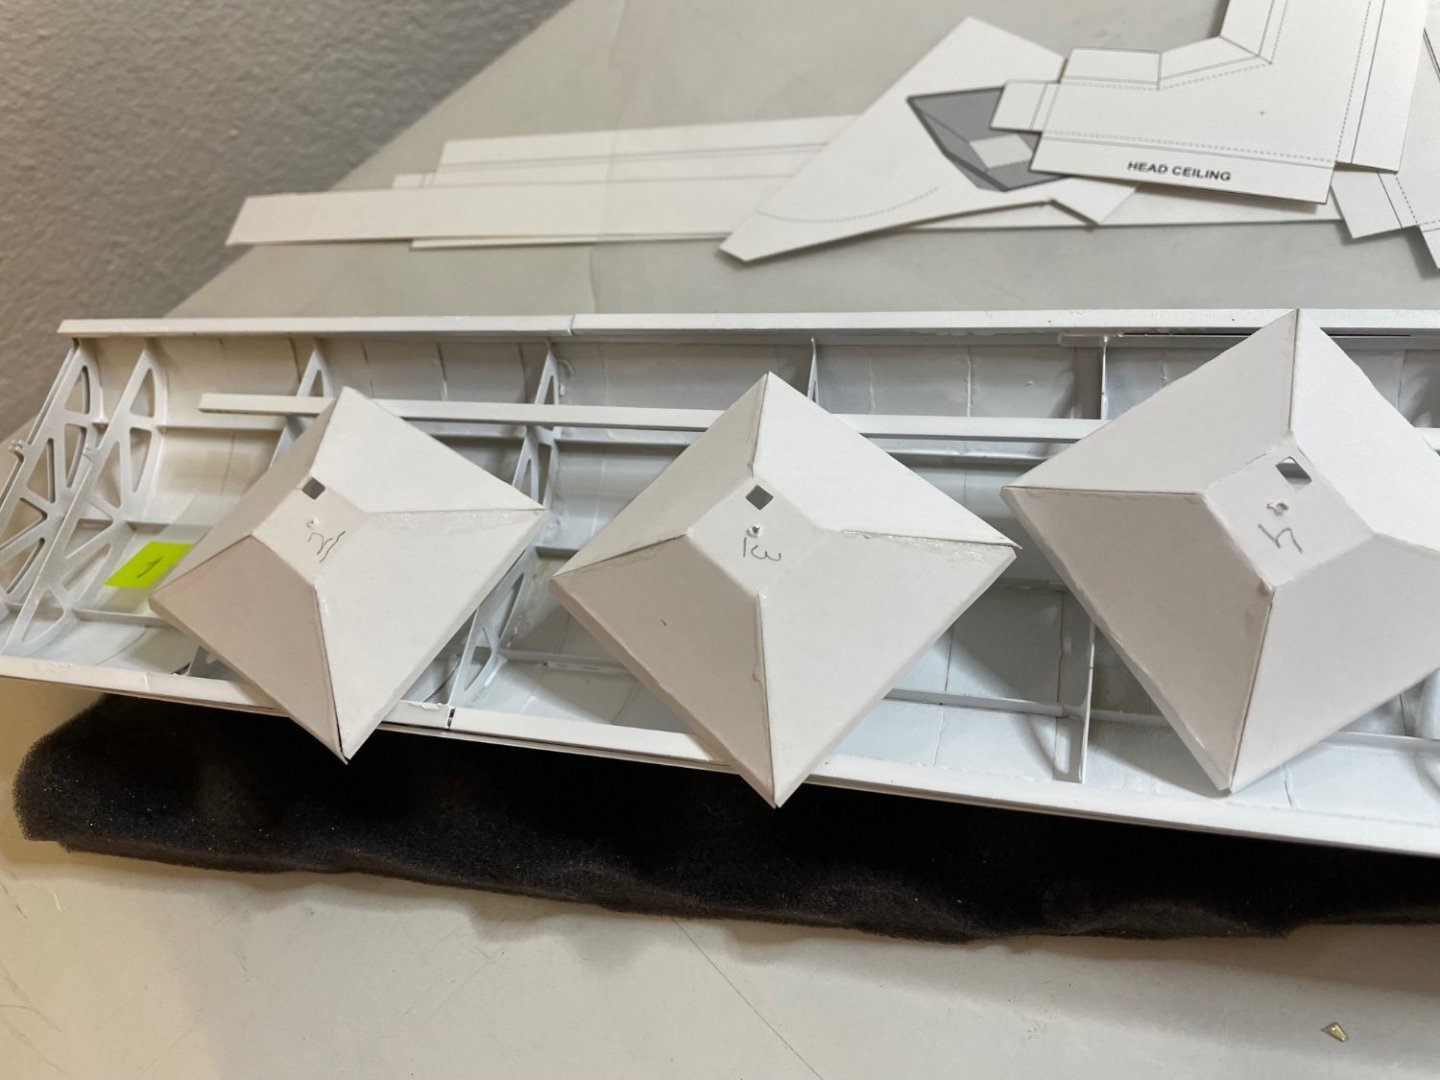
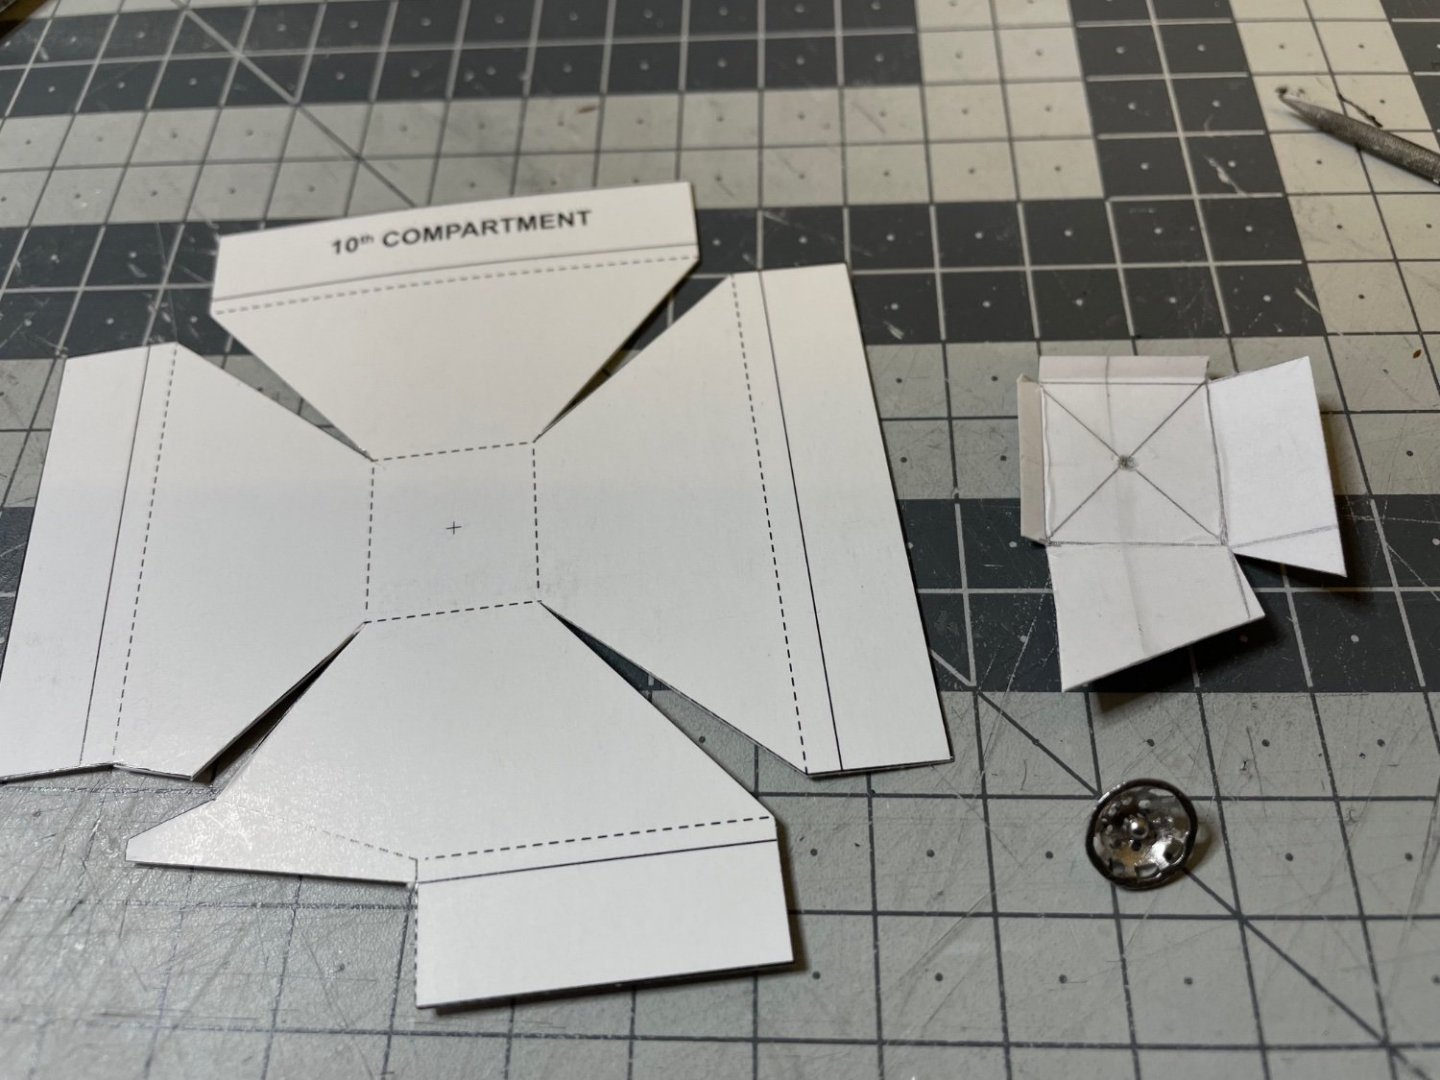
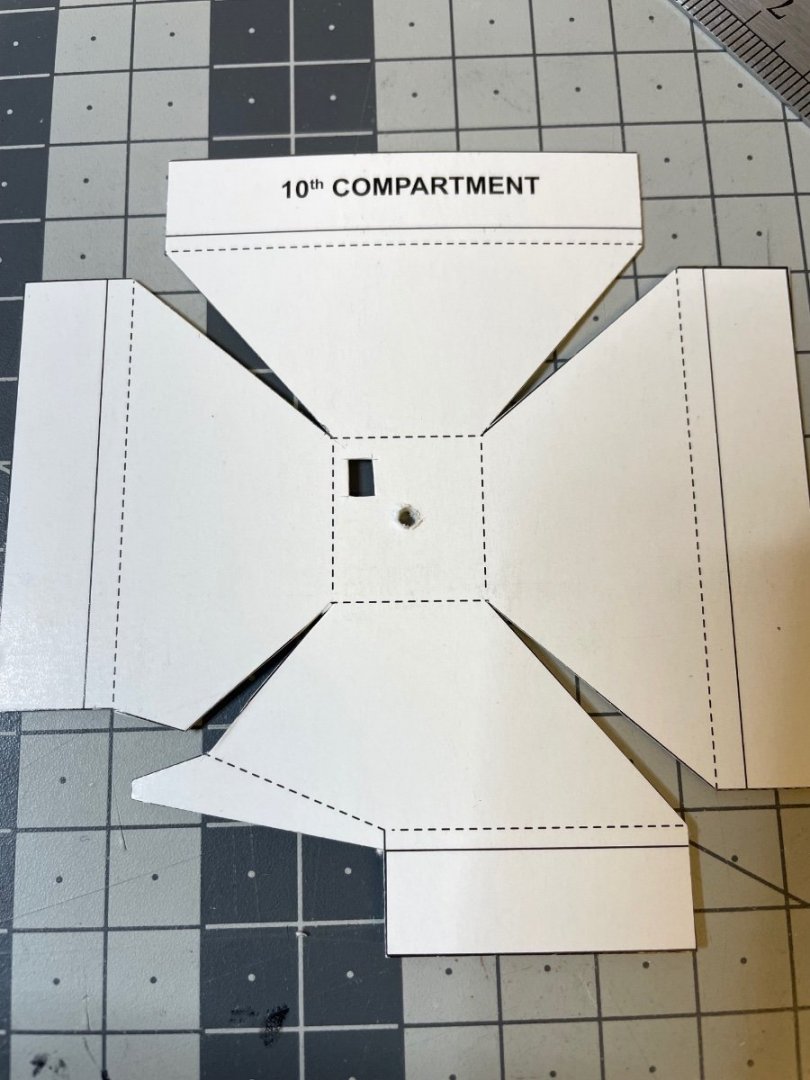
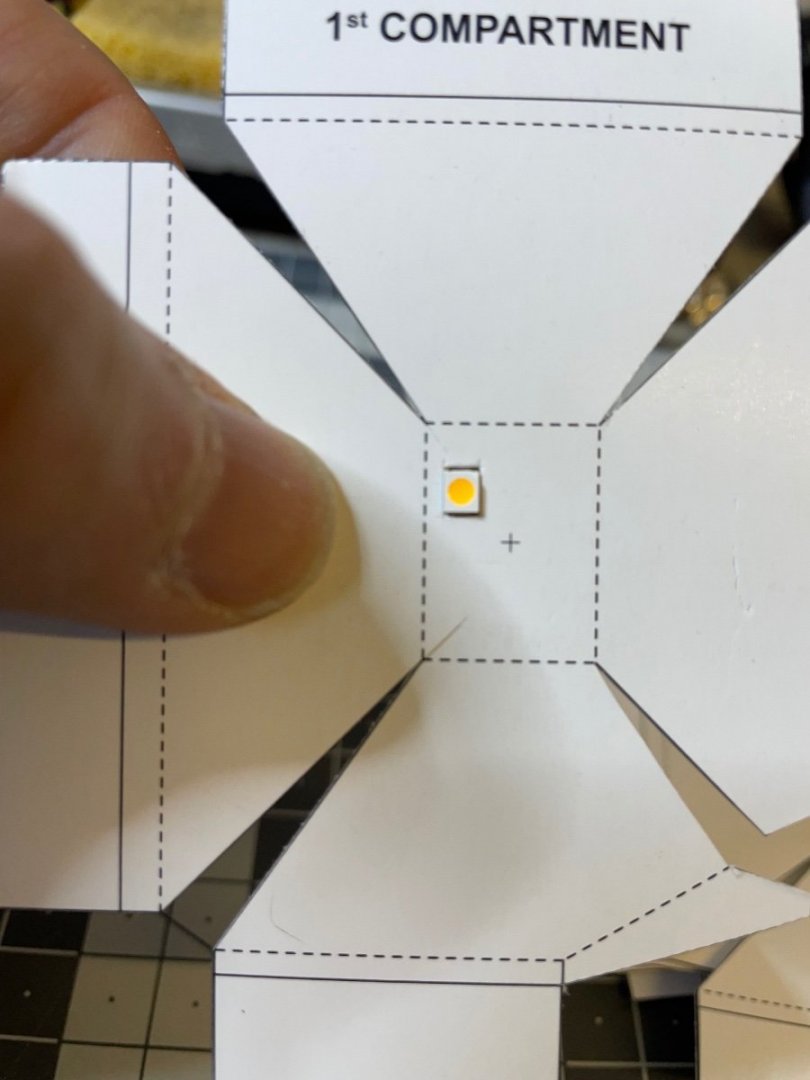
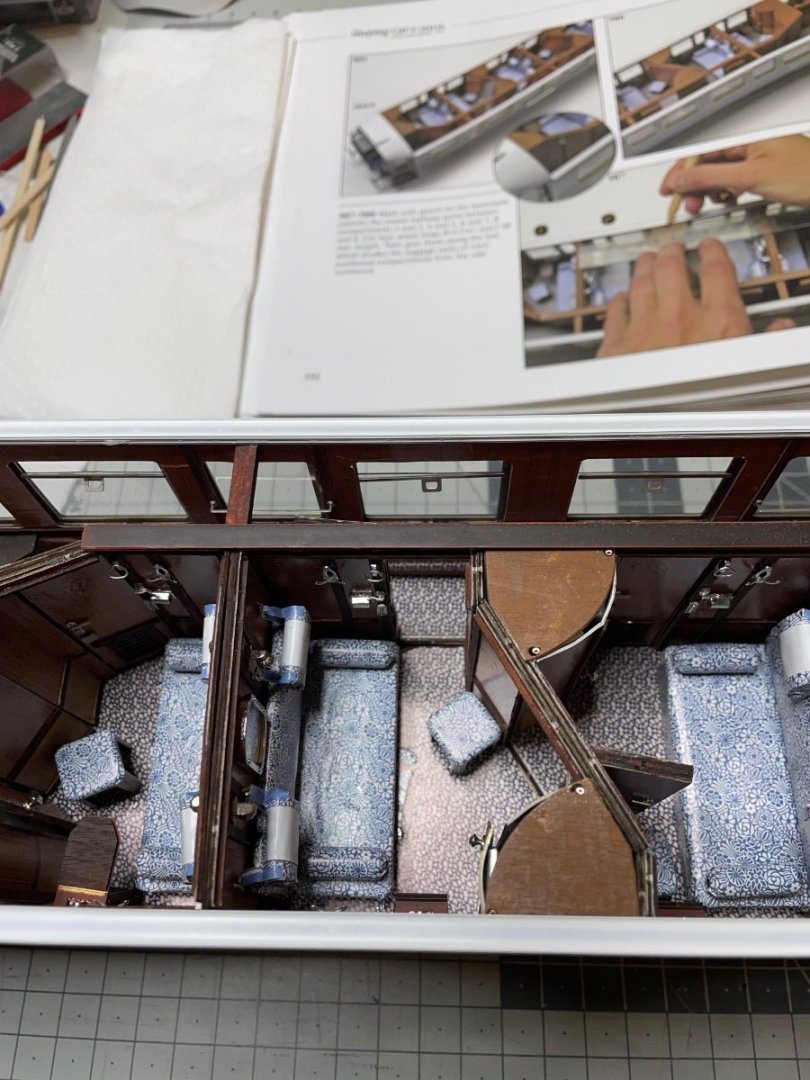
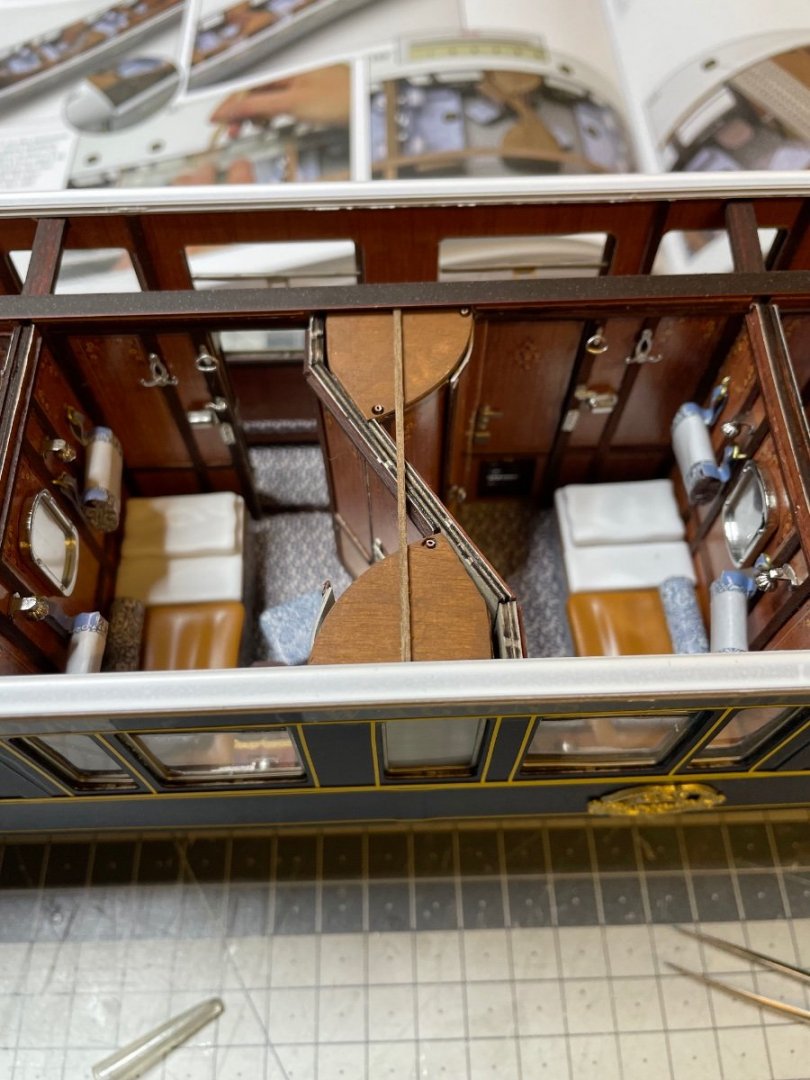
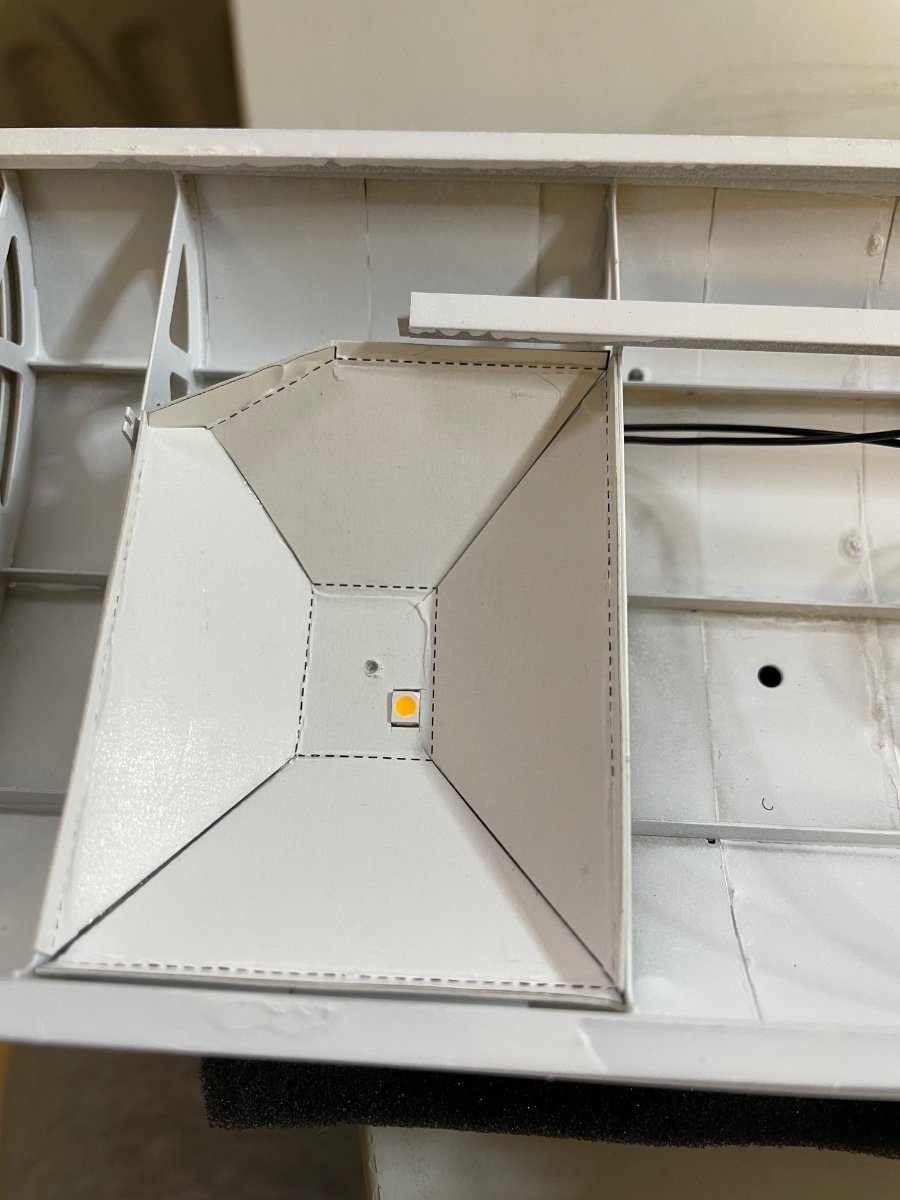
Figures 467-472: Ceiling structure, made of carton, to be bent at the designated lines and glued to the roof structure. I had to follow a certain order as I install the leds and wiring during the construction.


- mtaylor, lmagna, popeye the sailor and 9 others
-
12
-
BUILD DAY 45 / 6 hrs / (TOTAL 115 hrs)
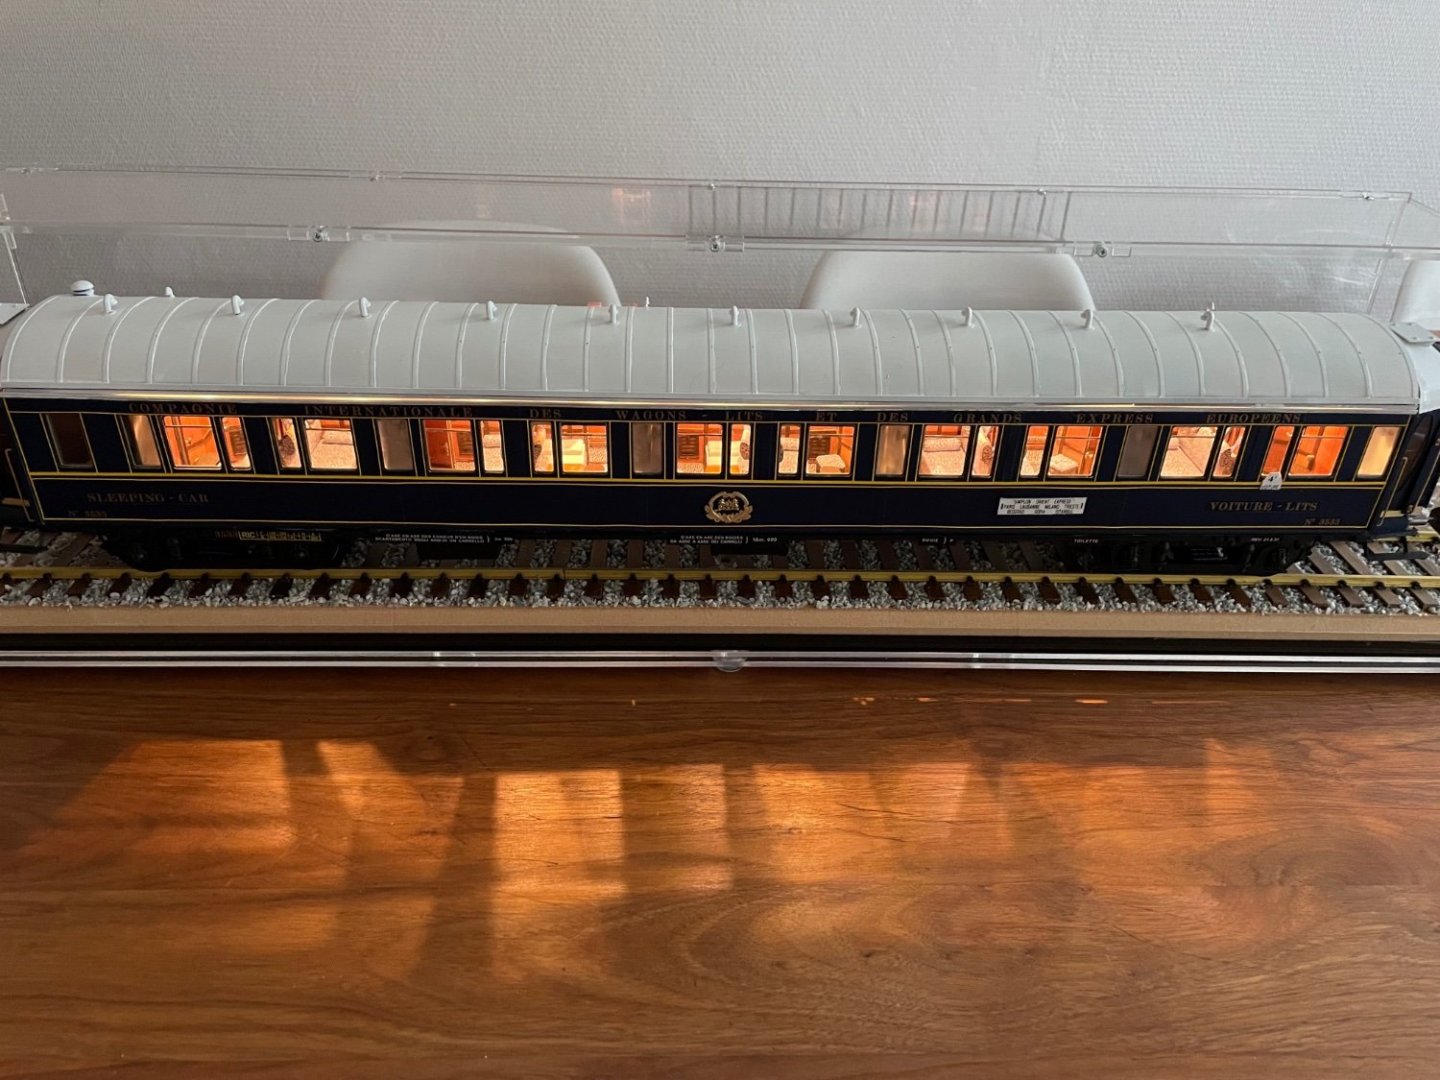
It has been a while since my last build post. I have been traveling and time to time investigating how to install lighting on the ceiling. As I wrote earlier it had to be close to original lighting with at least one per compartment, not just some spots here and there.
I also wanted to fit all the lighting elements (i.e. incl batteries, switch, wires) into the roof structure to avoid hanging of wires around and be able to remove the roof freely without any obstacles.
Here in this post I will show my ceiling structure and light installation.
Finally I was able to find led lamps, small batteries and switch with suitable specs.
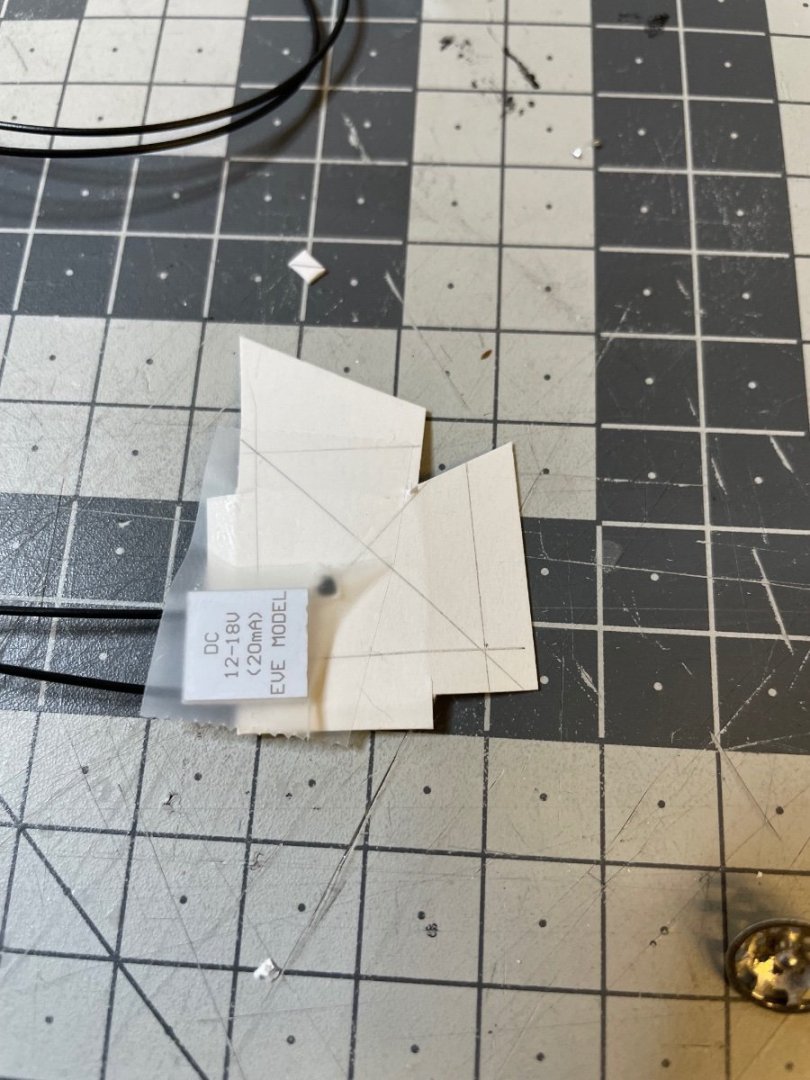
LEDs: They are 12 volt and resistors already soldered on the PCB board. They are from a small supplier in UK, https://www.smallscalelights.co.uk. The owner of the webshop, Jennifer, is the same person who is actually producing most of the nice railroad lighting items. Not all the countries are available for shipment, I sent an email request and she sent my order to Finland. So, if you like something on her webshop but your country is not in the list, it may be worth sending an email to her!
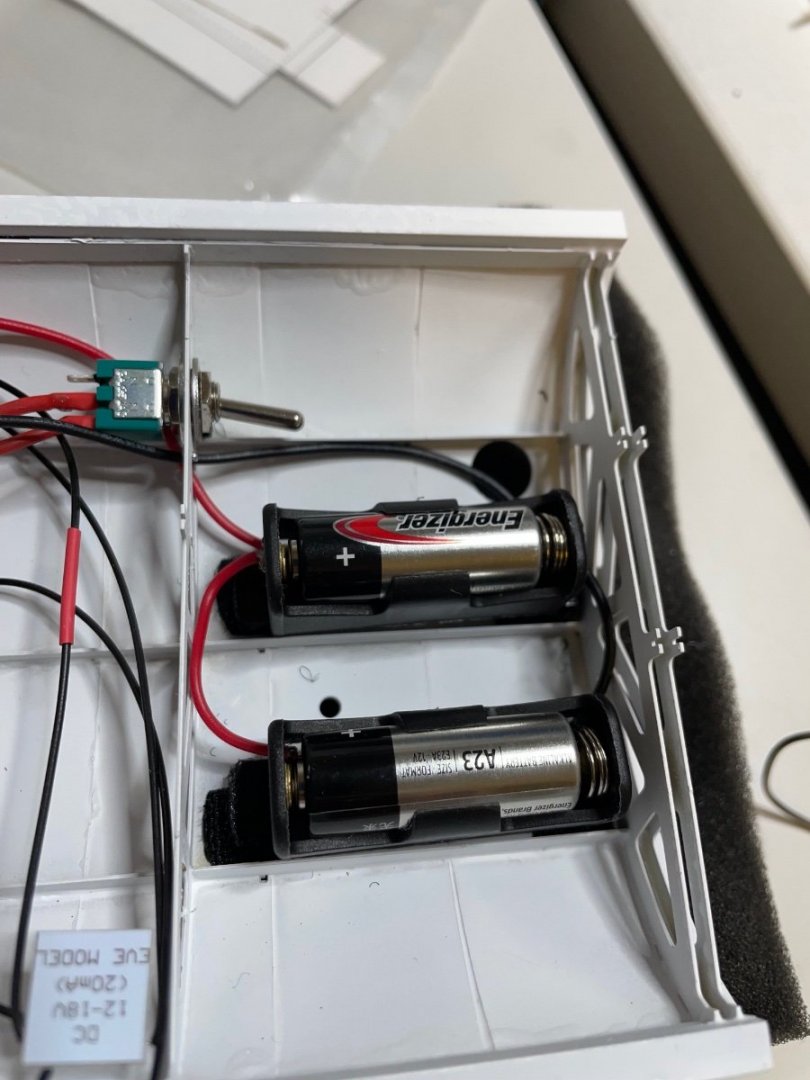
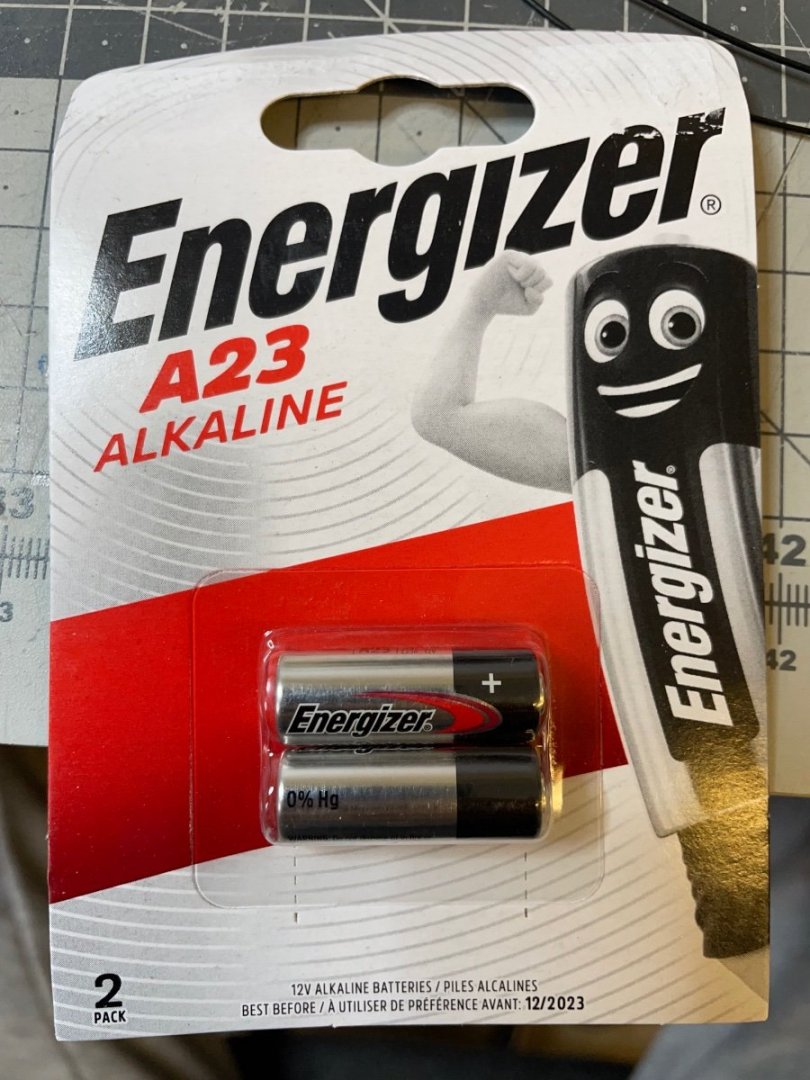
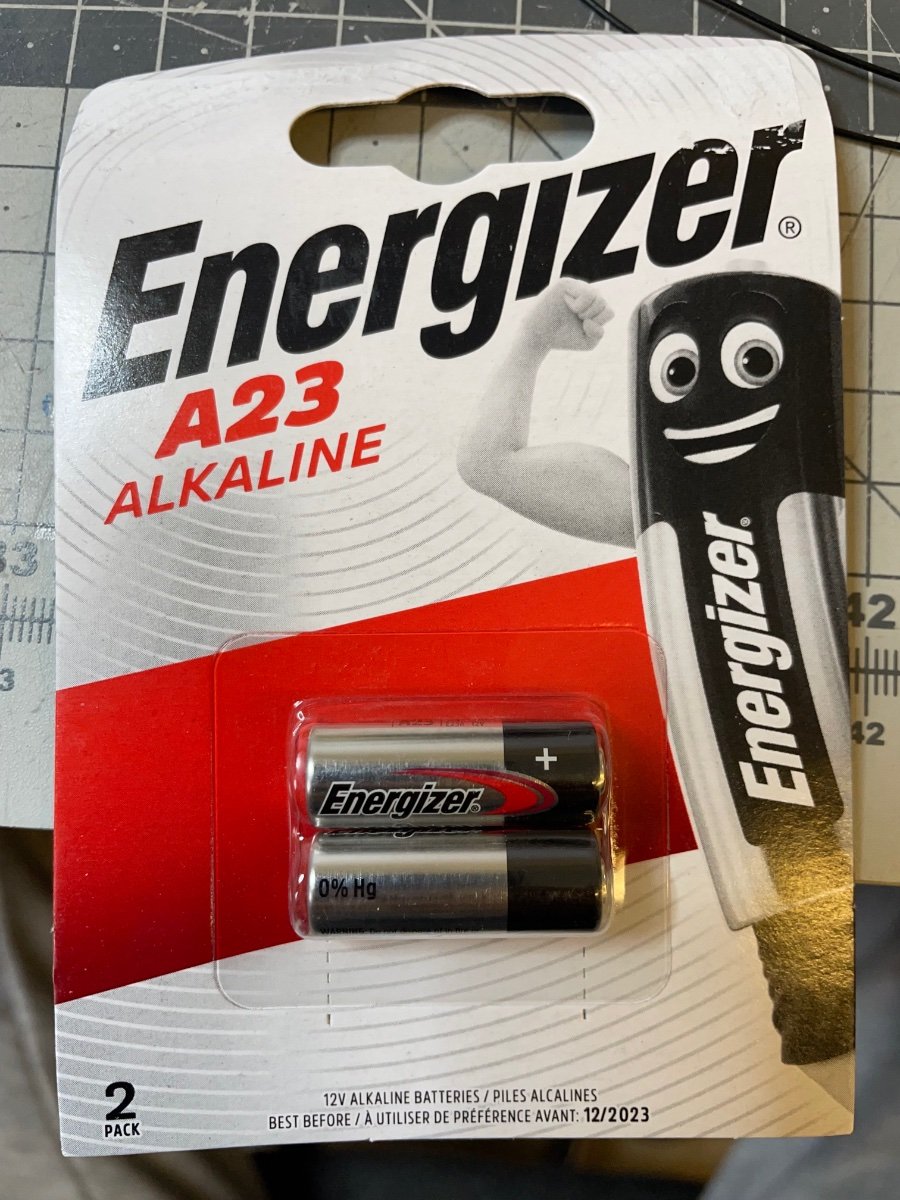
Switch: Simple small size 1-pole toggle switch.Battery: A23 12 volt batteries. Here I installed two of them in parallel. So, still 12 volts but more power to light all 12 leds.
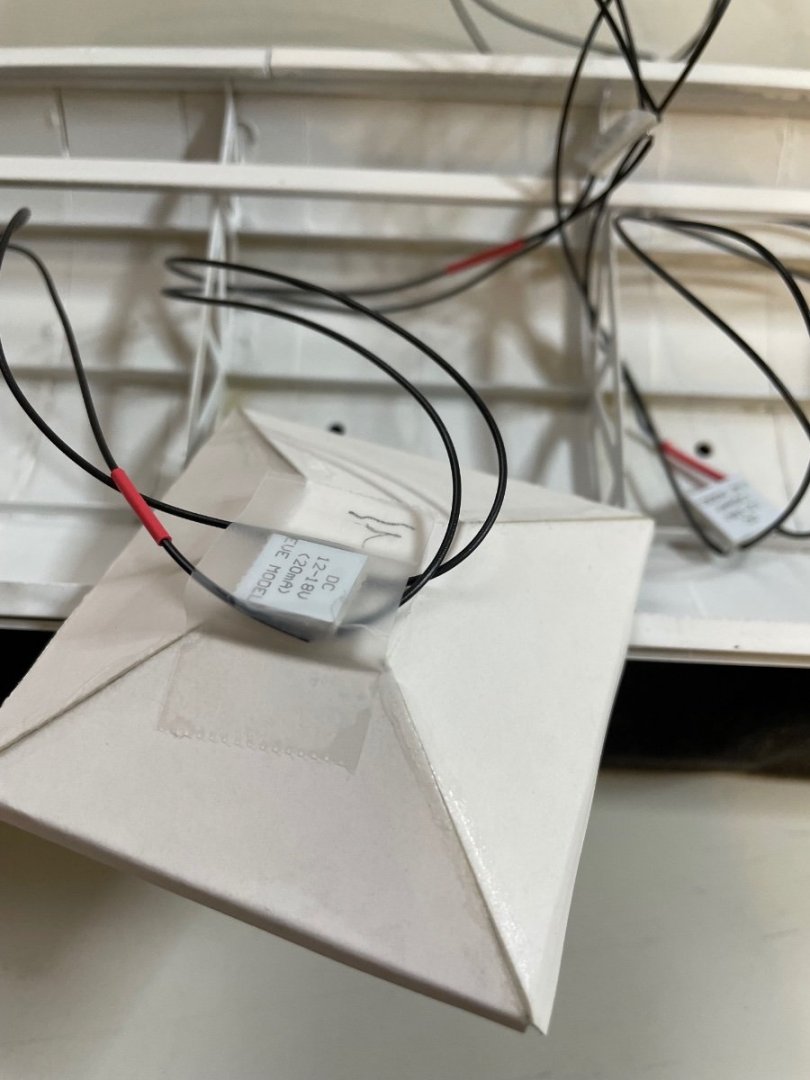
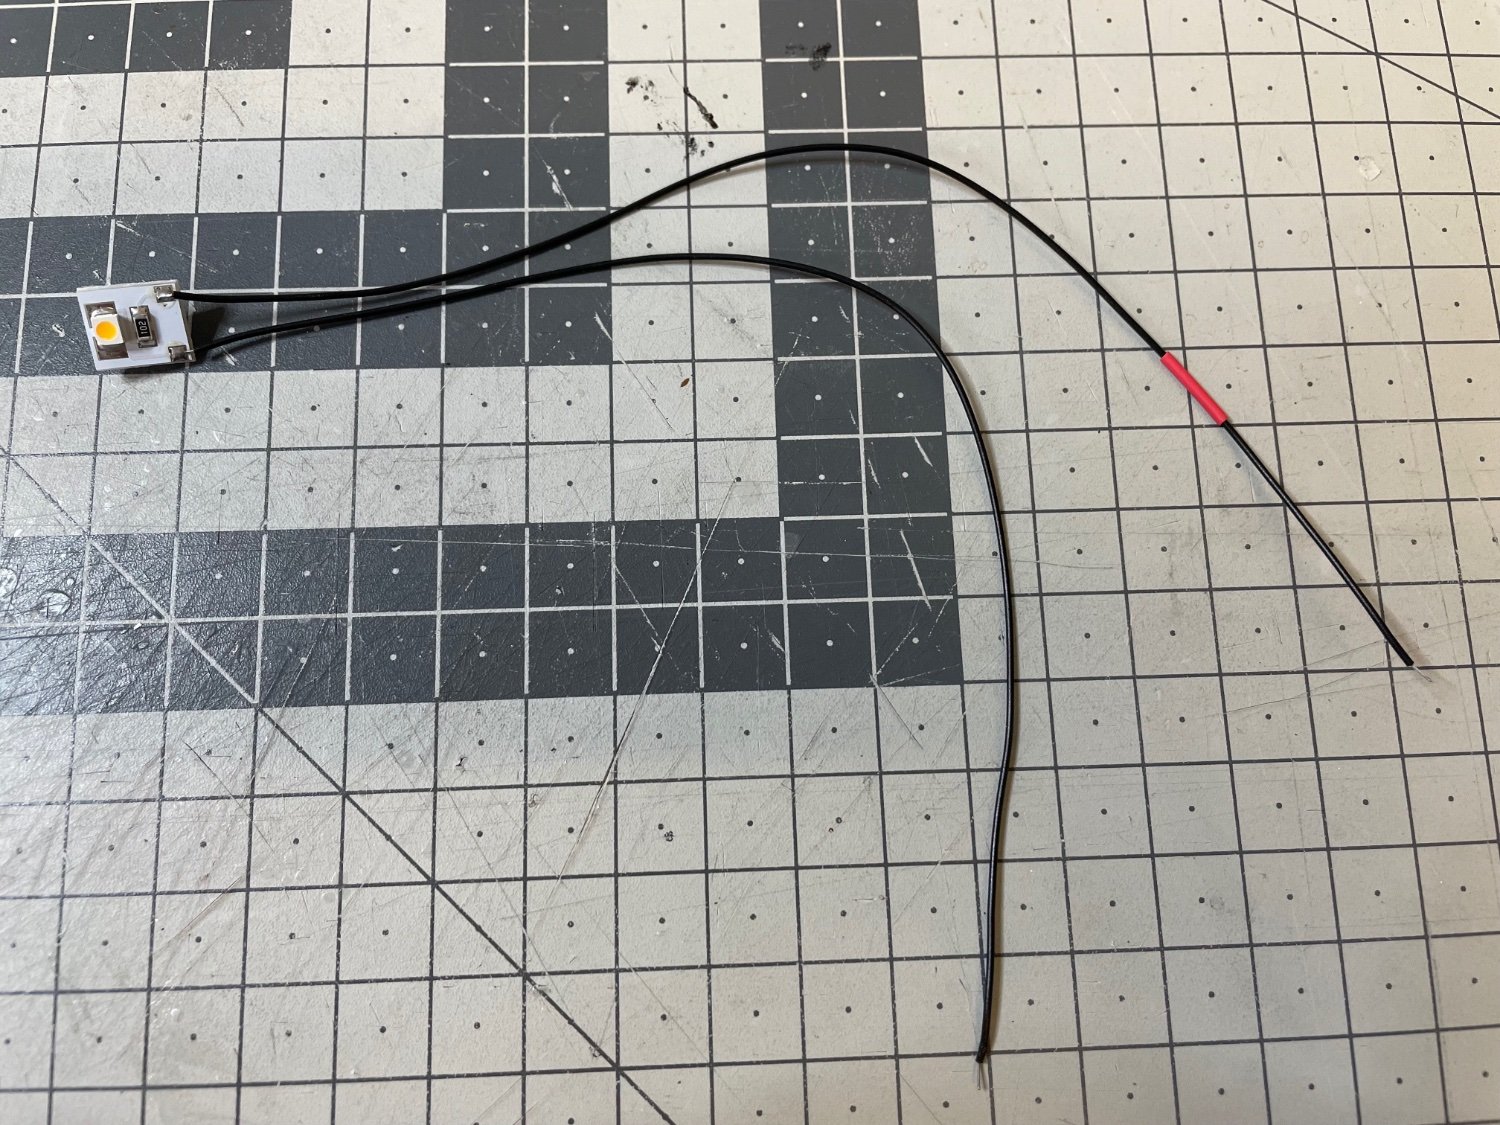
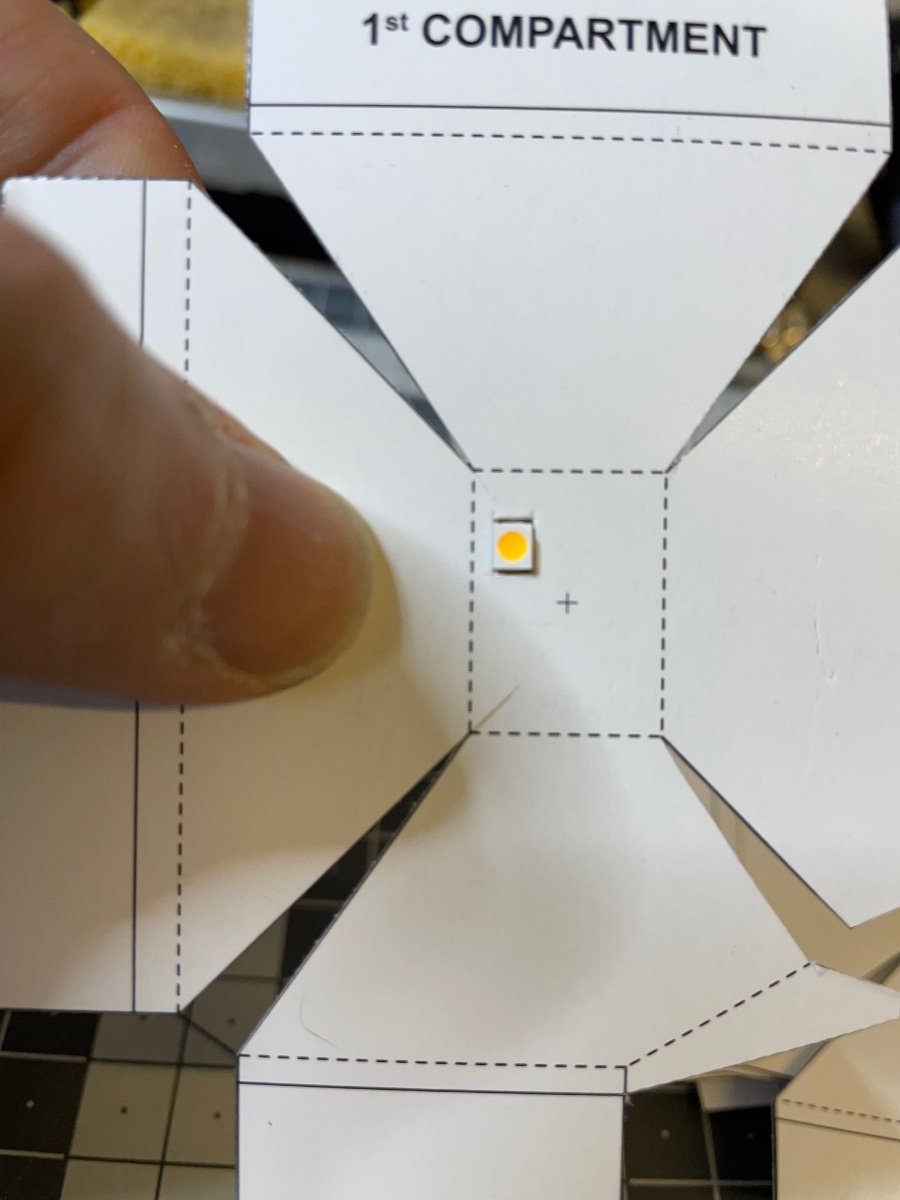
Figure 458: Here is a single LED. It is ready to use if you just hook it up to a 12V battery source.

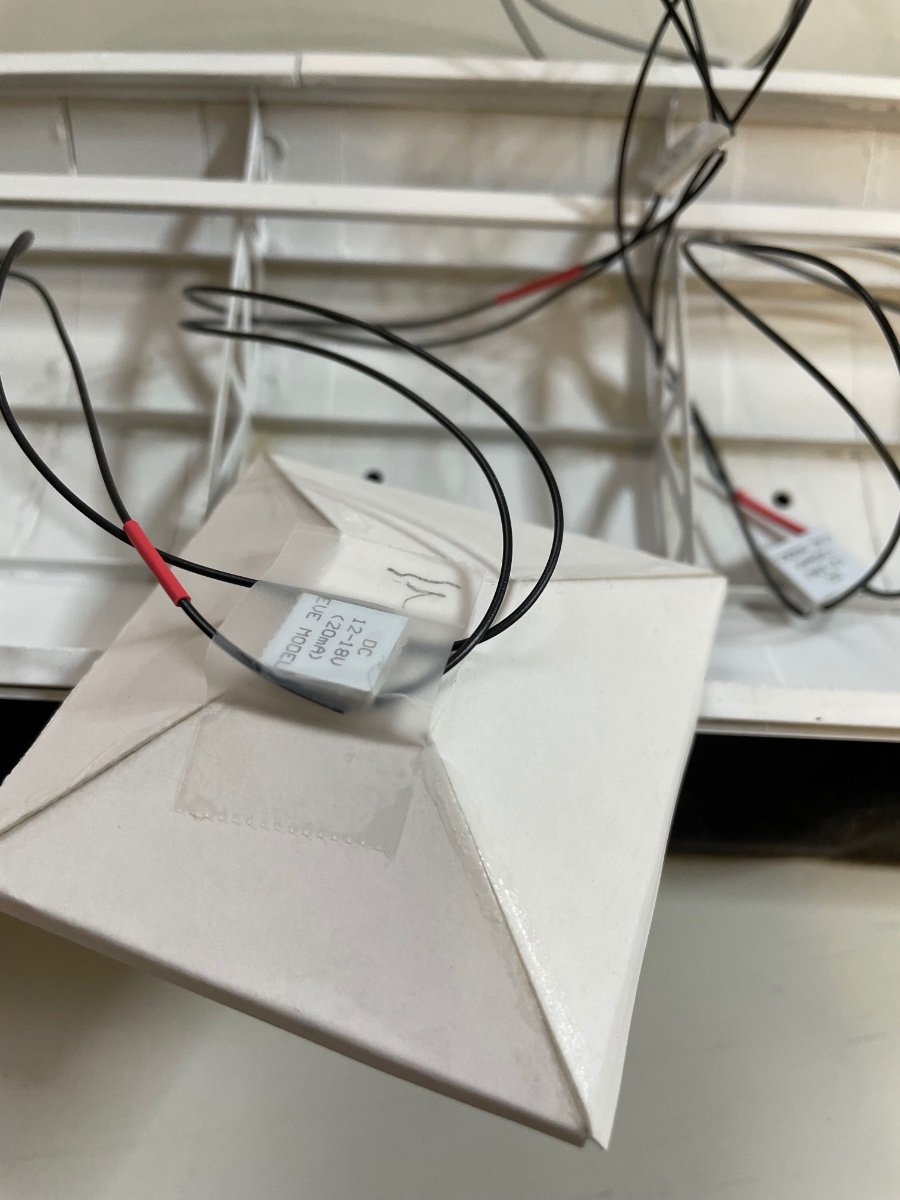
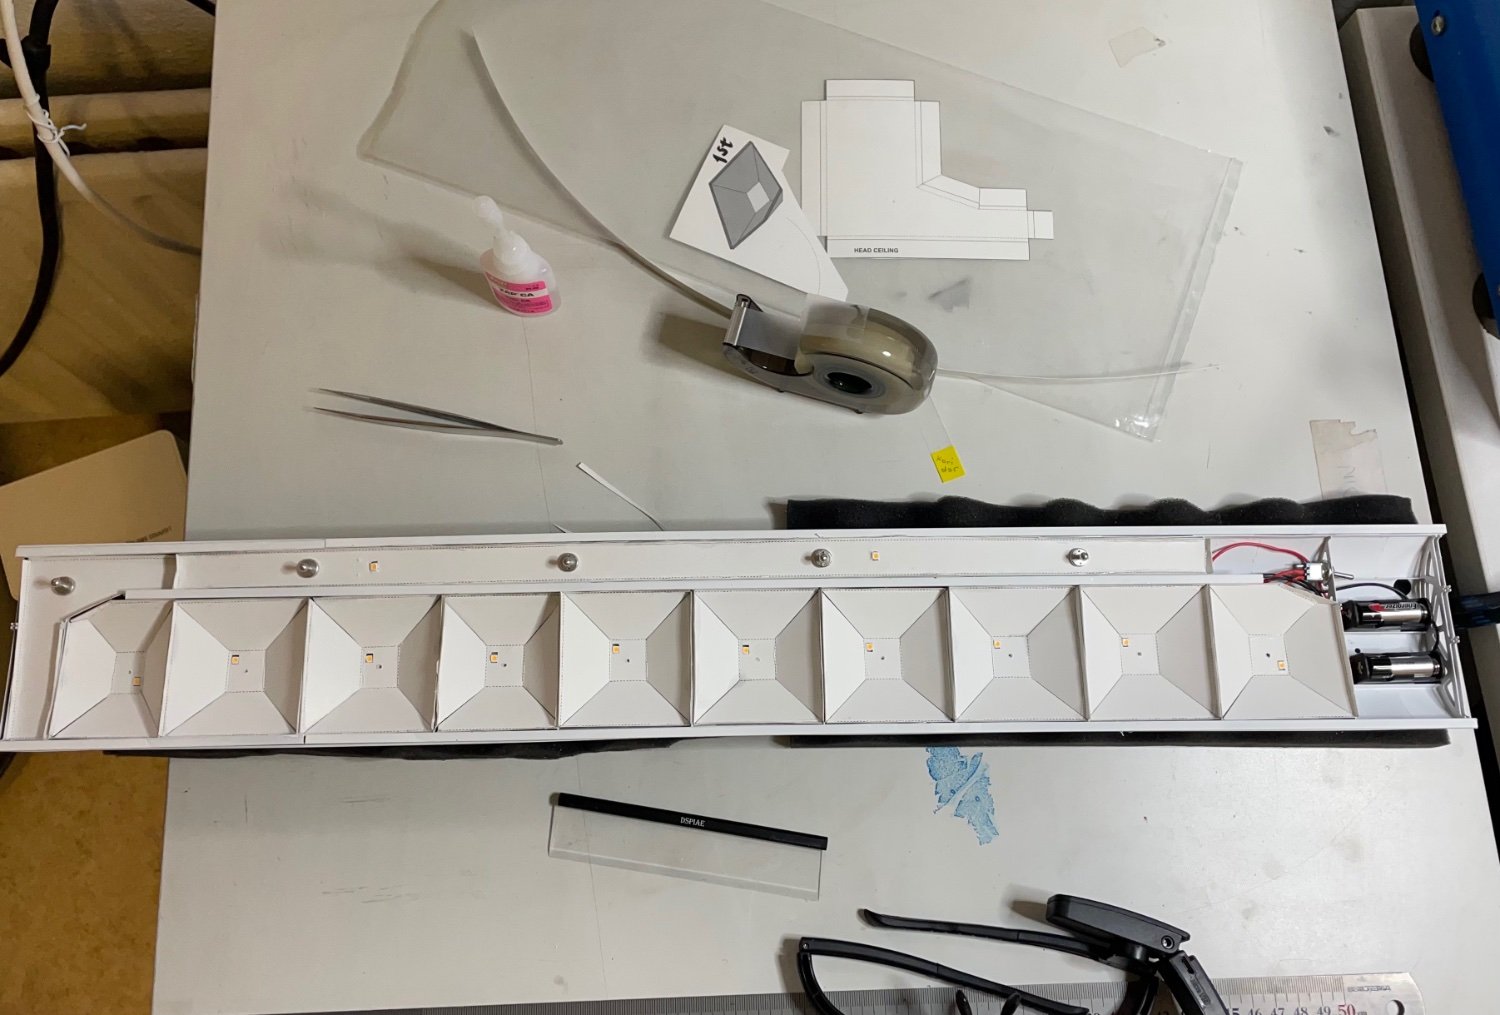
Figure 459: Here I soldered them to each other in parallel to make a strip of 12 leds, with enough cable in between for installation. Test with the battery looks good.
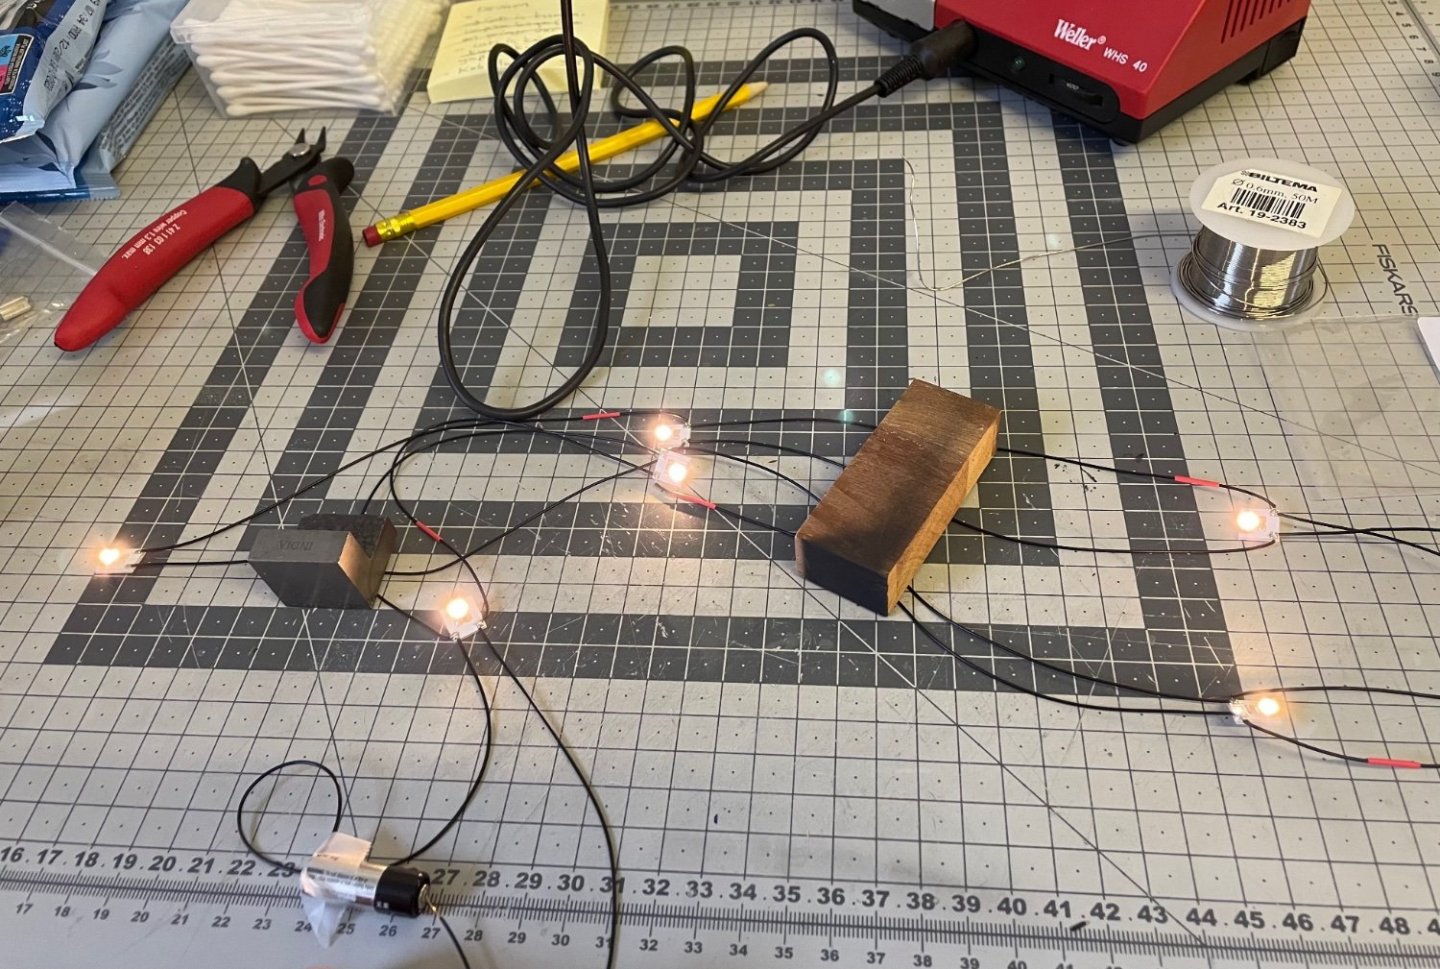
Figure 460: These are the batteries I use.
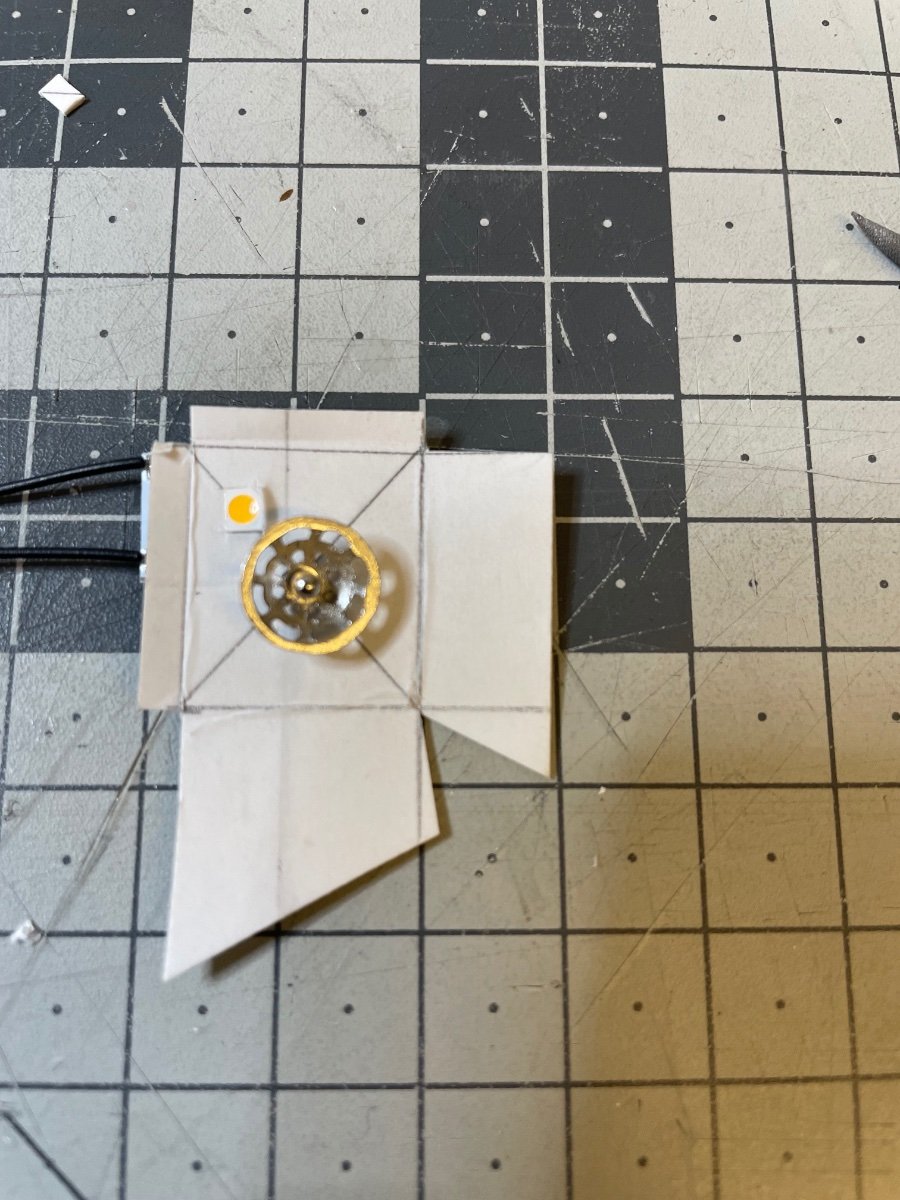
Figures 461-464: Experimenting the installation on a scrap test piece (on the right)
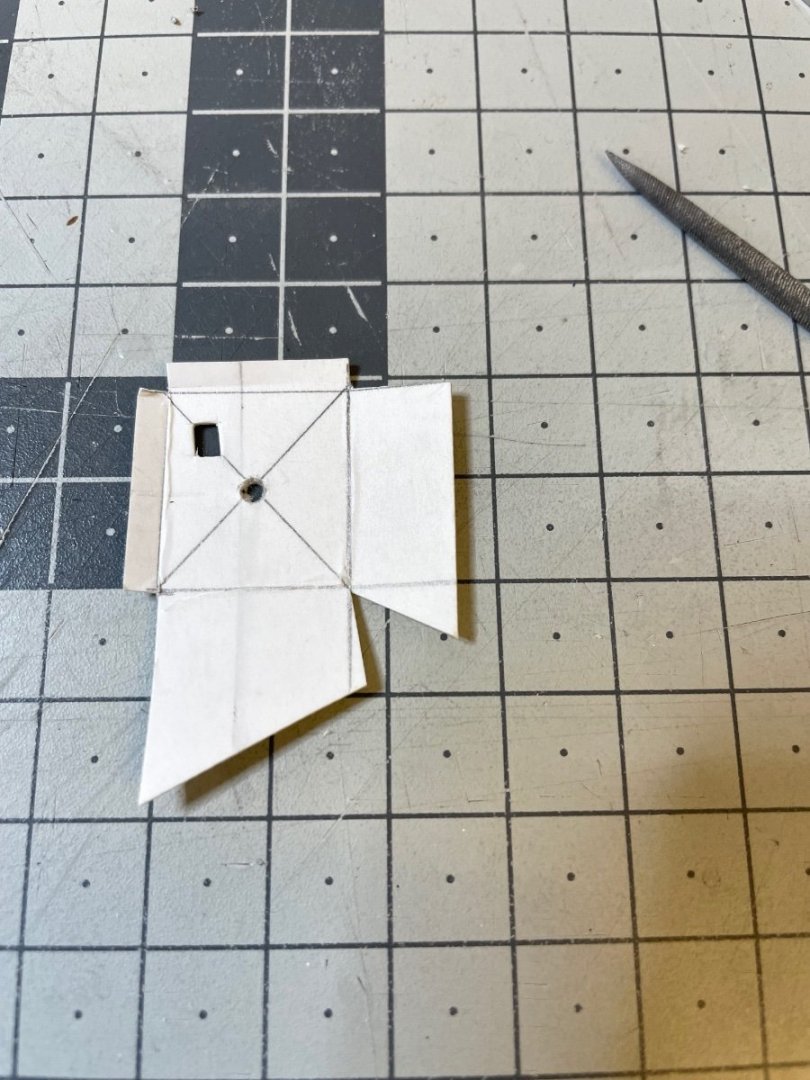

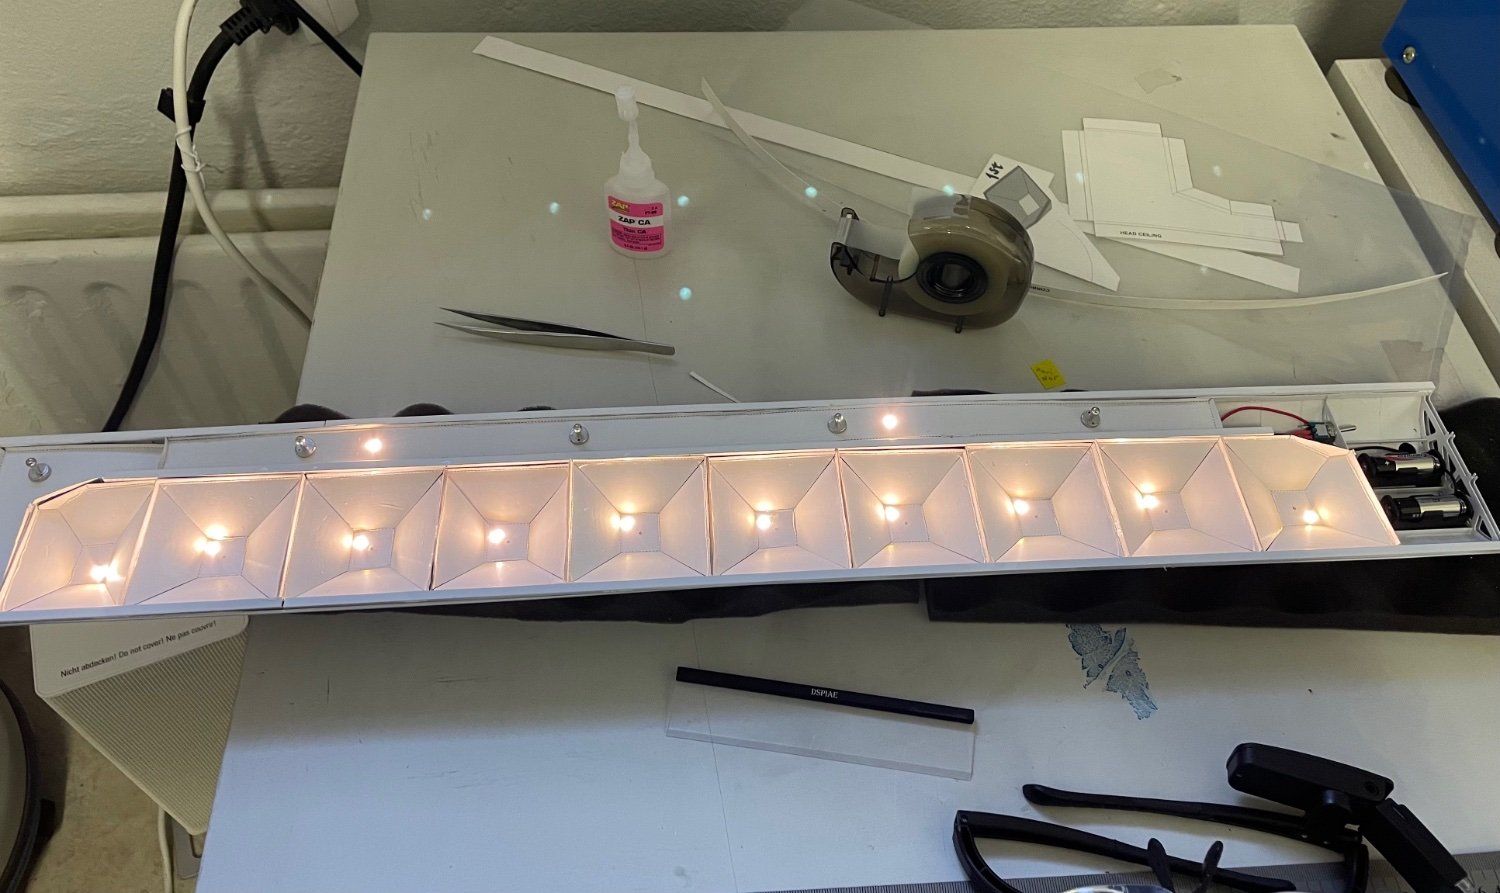
Figures 465-466: Testing the installation on the real ceiling piece. I think it looks pretty OK like this
-
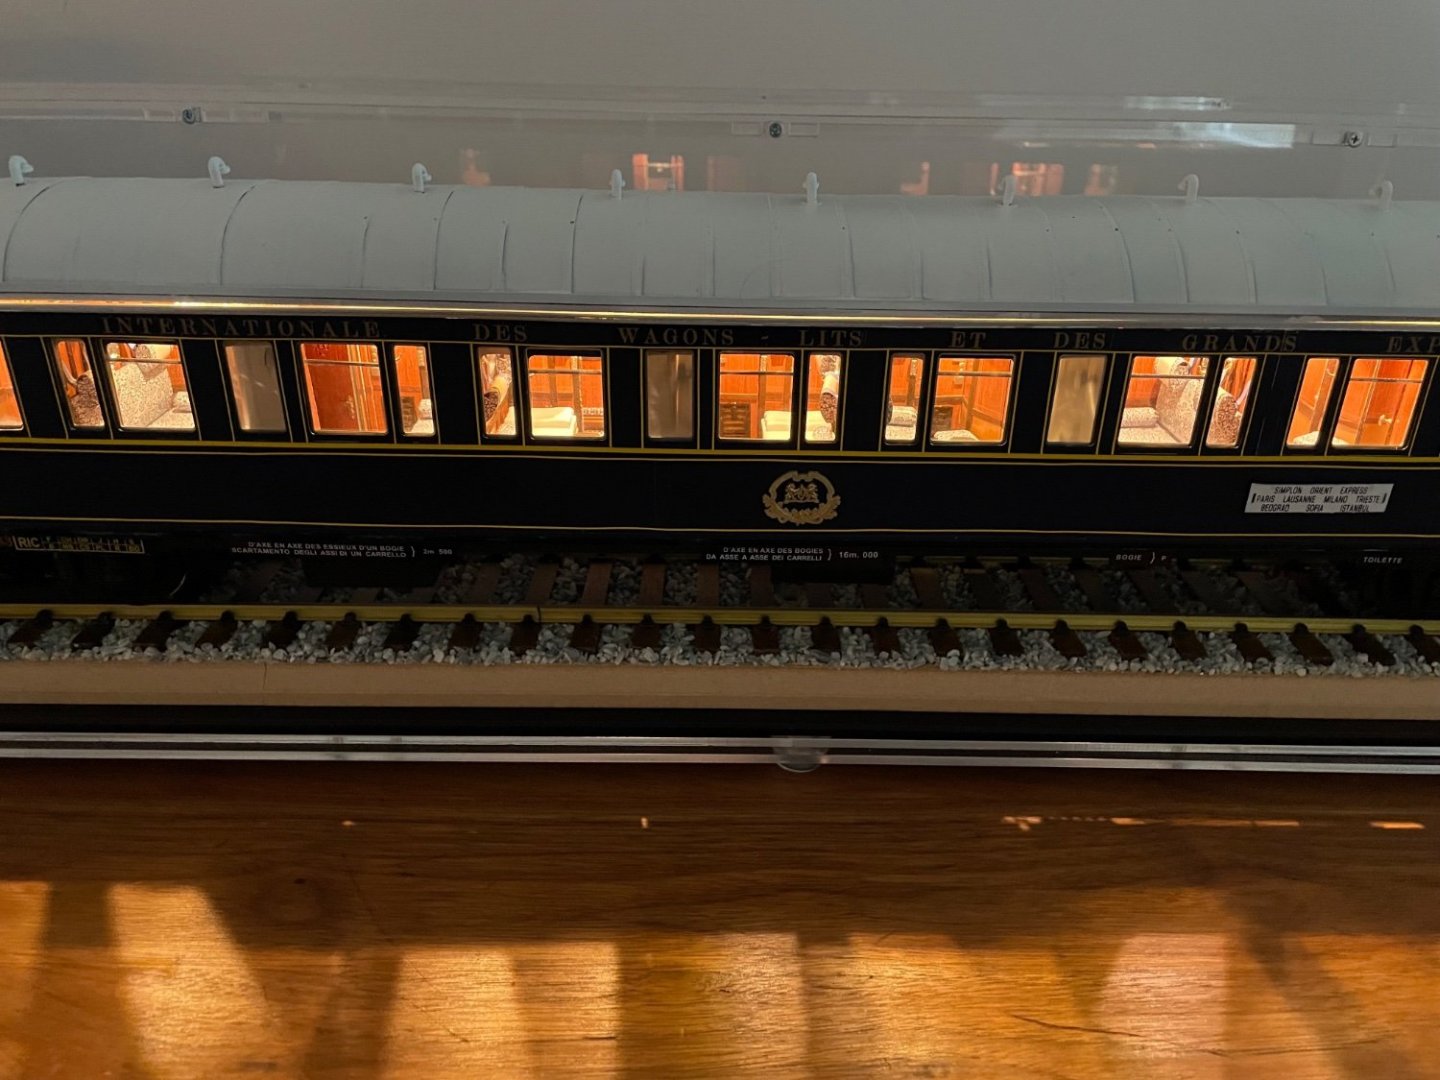
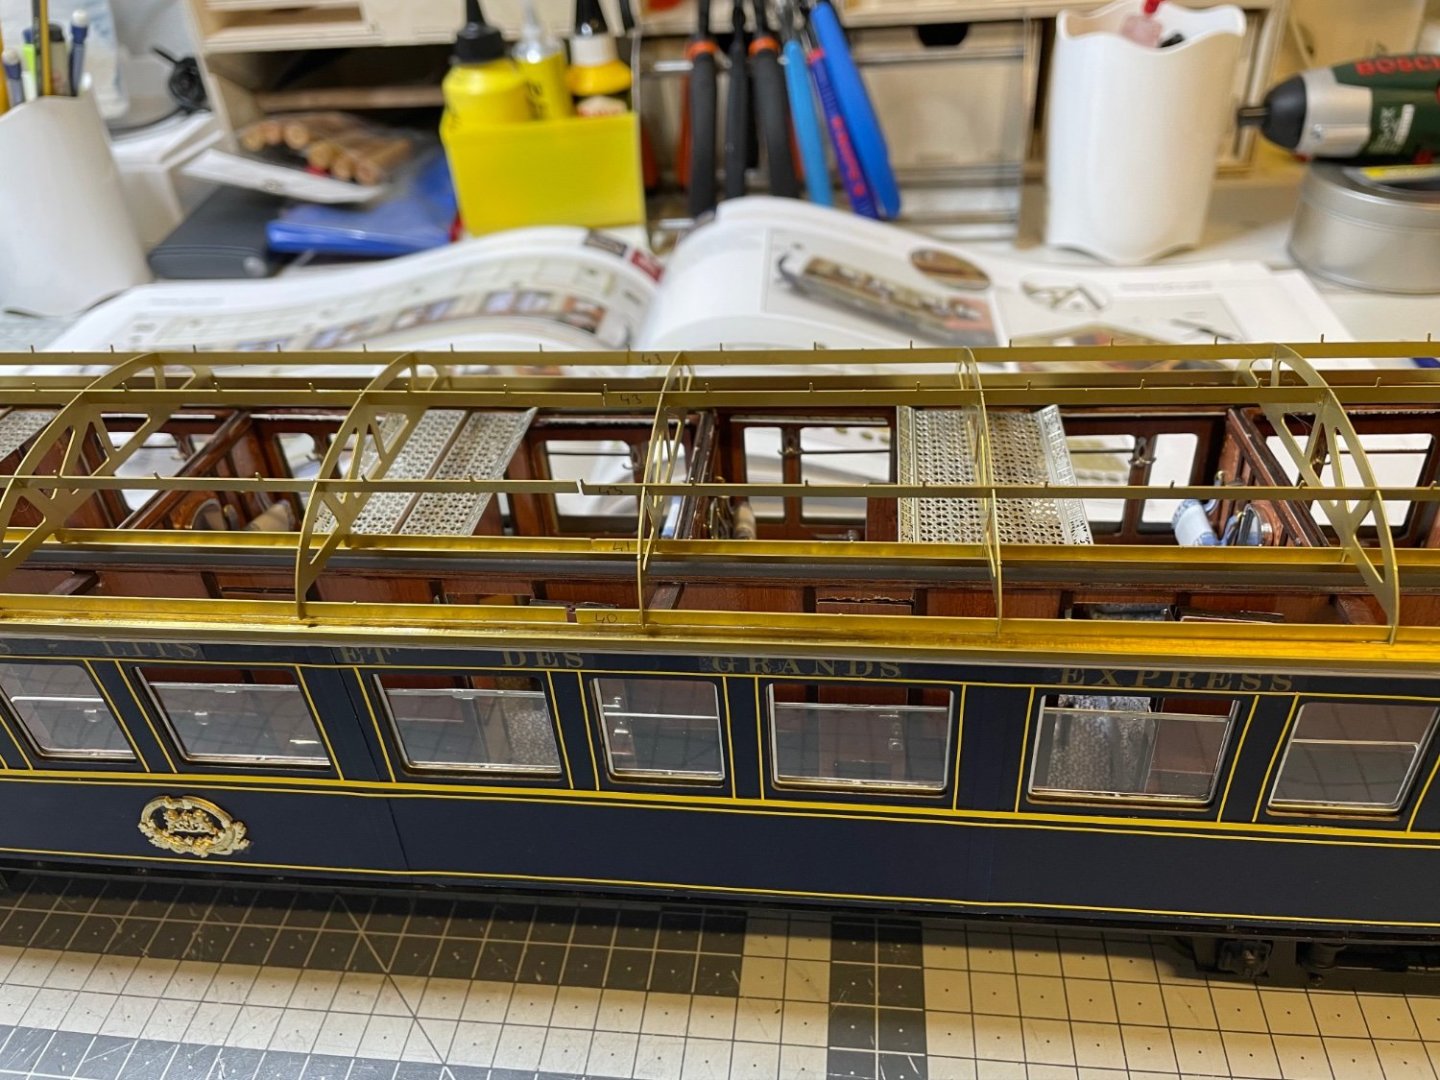
10 minutes ago, wefalck said:
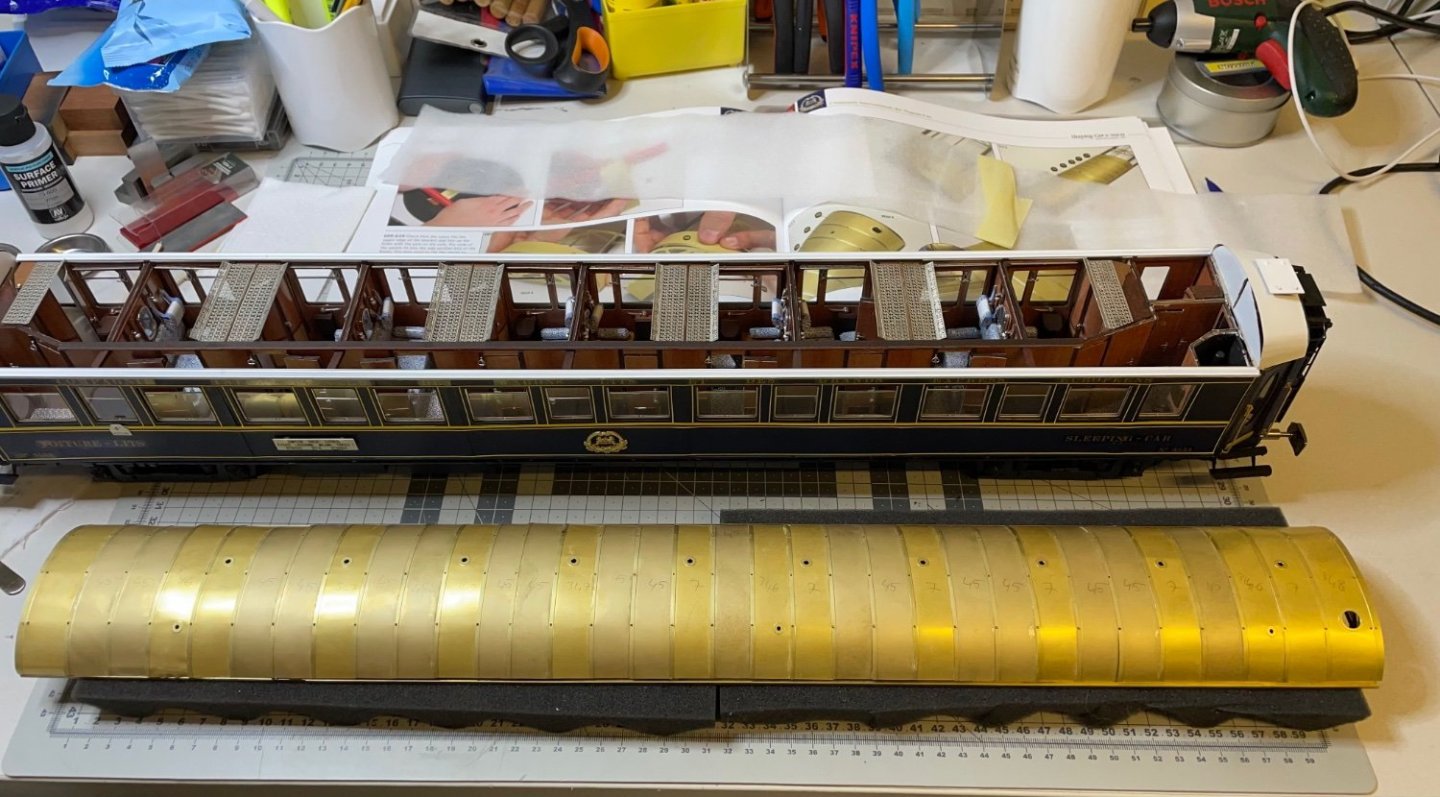
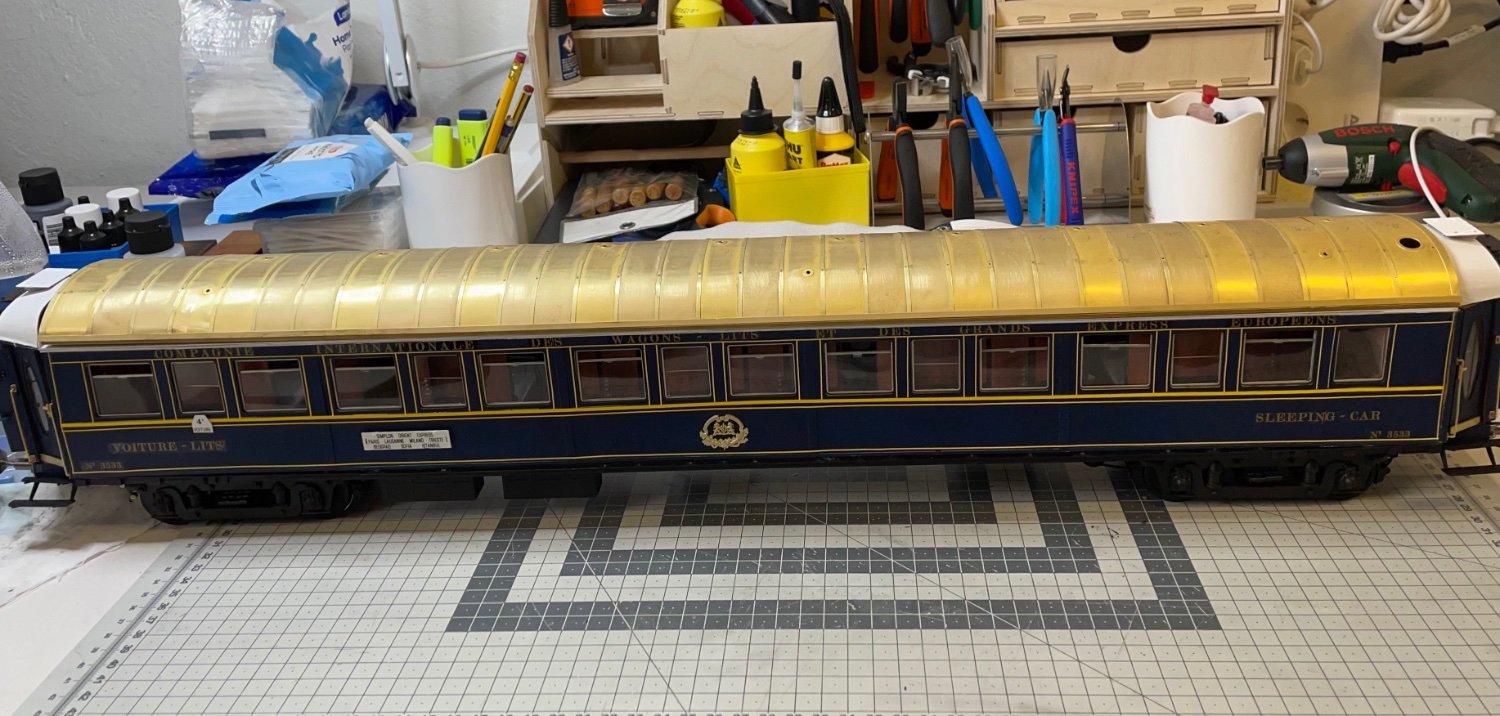
Looks really like thing - ignoring for the moment the 'brassy' appearance of the roof.
Yep, it is ready for painting in white!
-
BUILD DAY 44 / 2.5 hrs / (TOTAL 109 hrs)
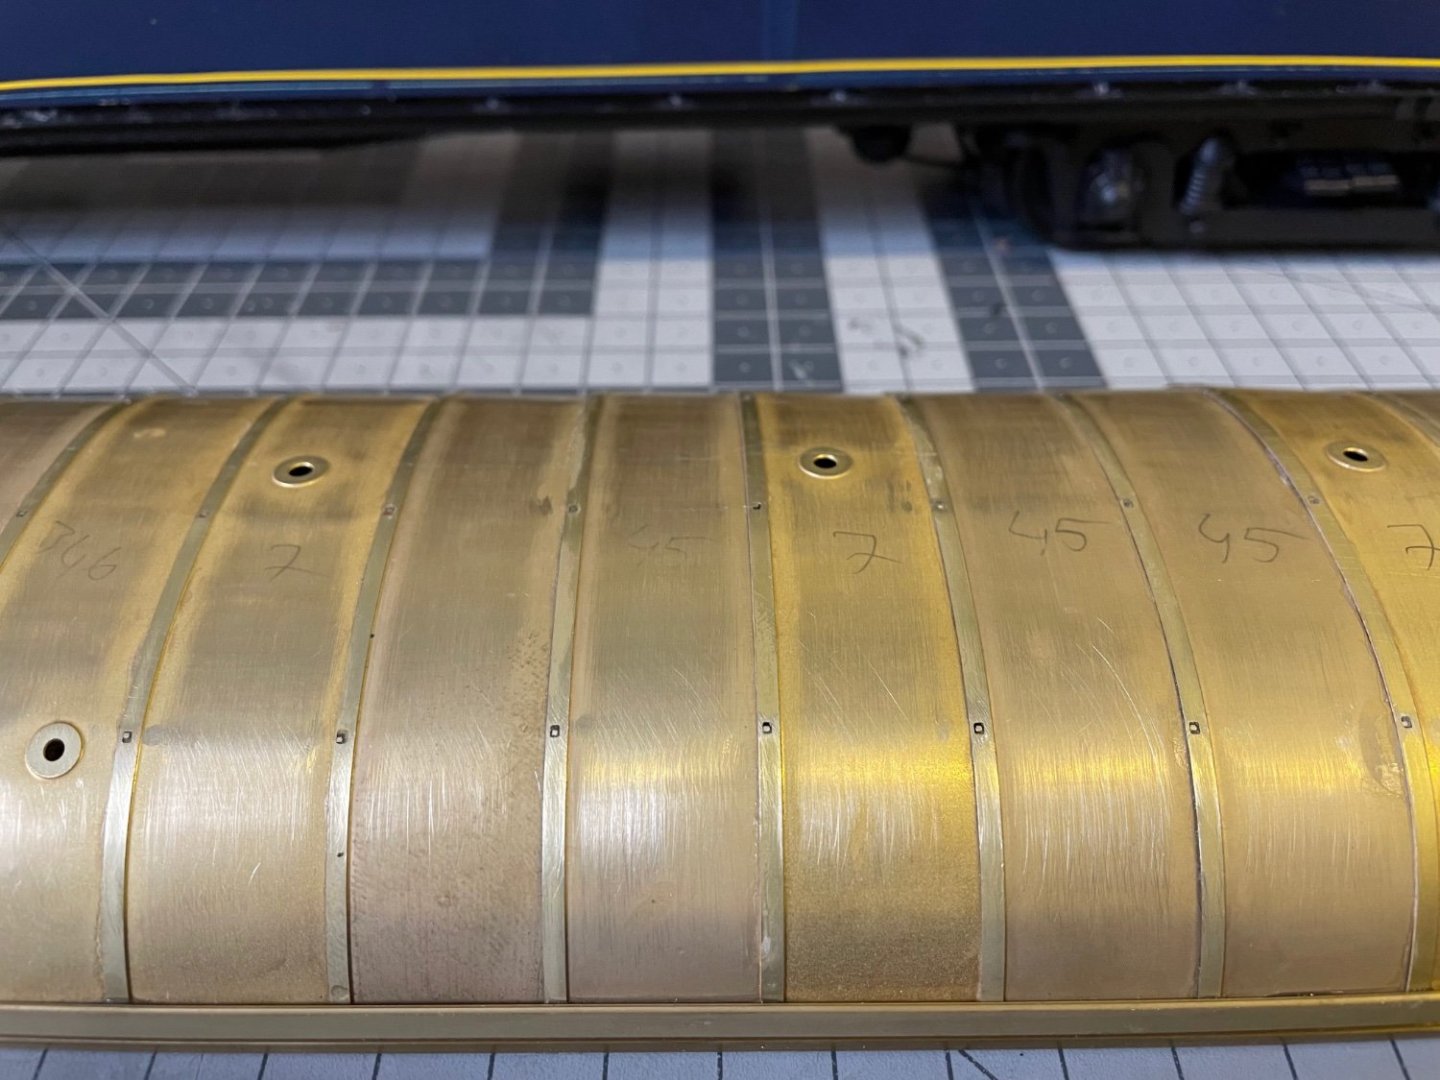
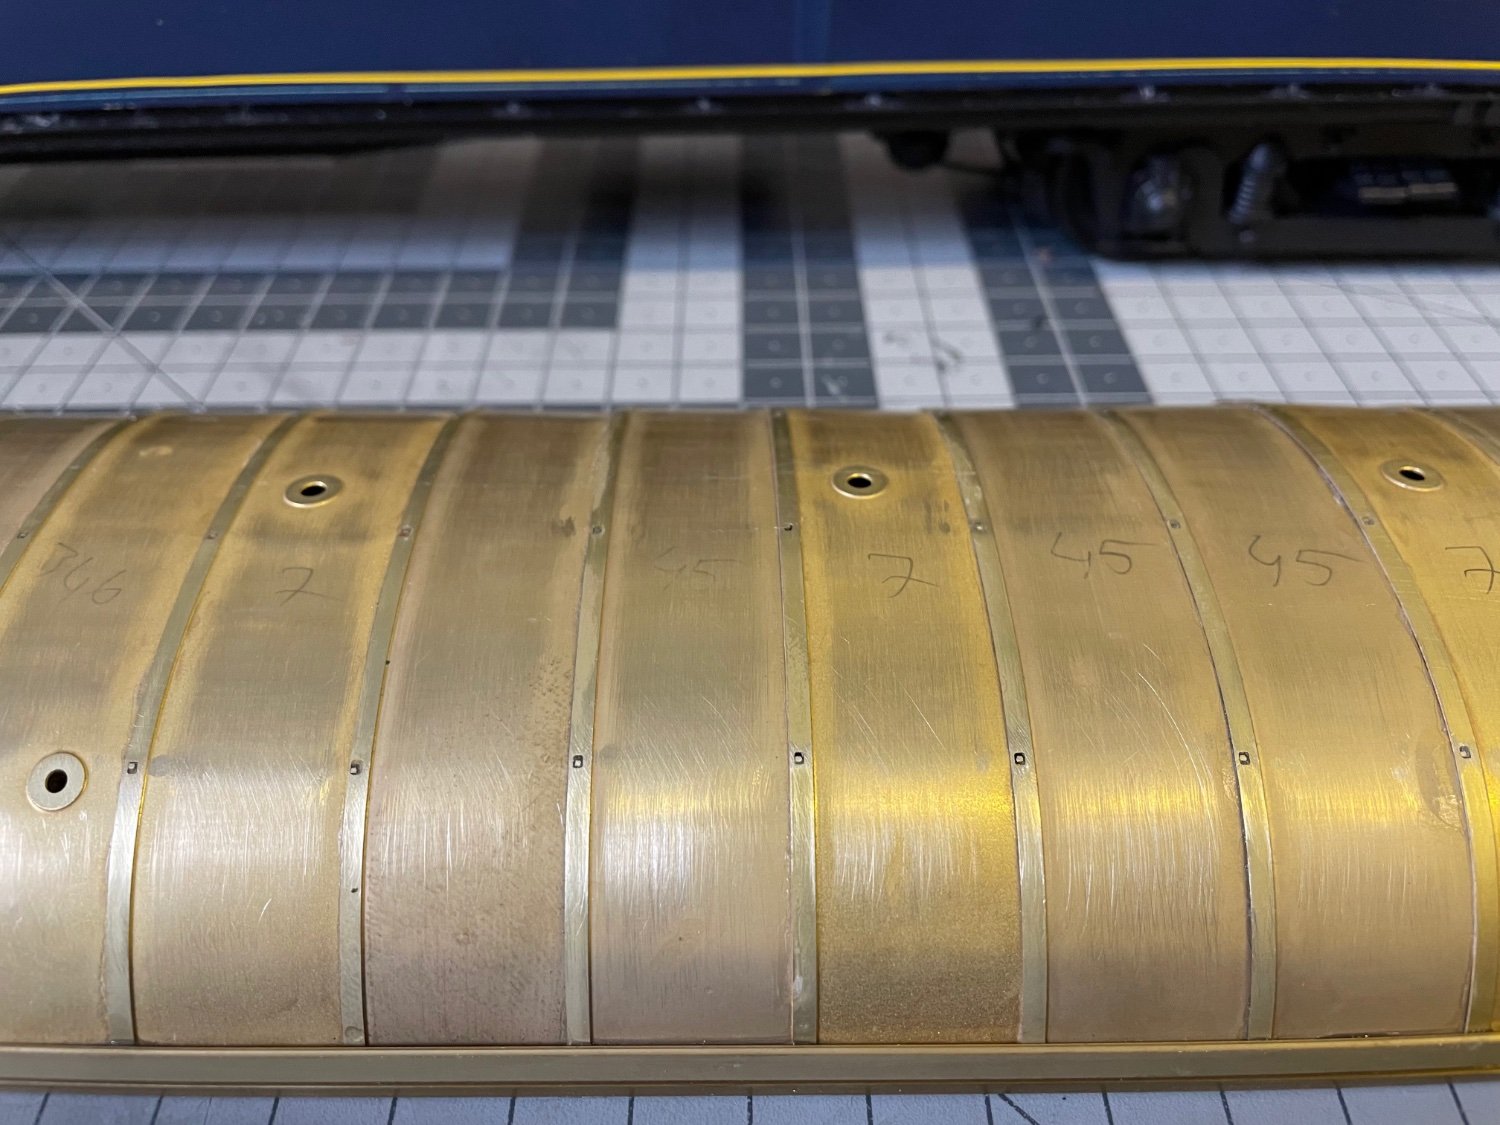
Figures 451-457: Here is a series of photos from the roof construction. Overall it went smoothly. Once all parts glued, the next task was to do some surface finishing: remove the spikes coming out of the roof and smoothen the surface using sandpaper and file, especially to get rid of any glue residue. It was pretty much like finishing the hull planking of a ship model.


That's all for now.
Thanks for watching! -
8 hours ago, druxey said:
Very nice! Are you going to put lighting inside so that the interior can be seen?
Though I am not a big fan of "bringing a model to life" (e.g. with human figures, lights, sounds etc), I am considering to add leds to this model, only if I am truly convinced with the possible options. I will try to plan the lights at as accurate as their original spots, such as one on the ceiling of each compartment and a few on the corridors, if this approach works. That would mean I will not install just one or two lights to give a general illumination.
For this purpose I ordered the special leds below:
https://www.smallscalelights.co.uk/product/3528-12-18v-chip-leds-on-pcb
- mtaylor, druxey, popeye the sailor and 8 others
-
11
-
Thanks for all the encouraging comments!
- Egilman, Canute, thibaultron and 4 others
-
7
-
-
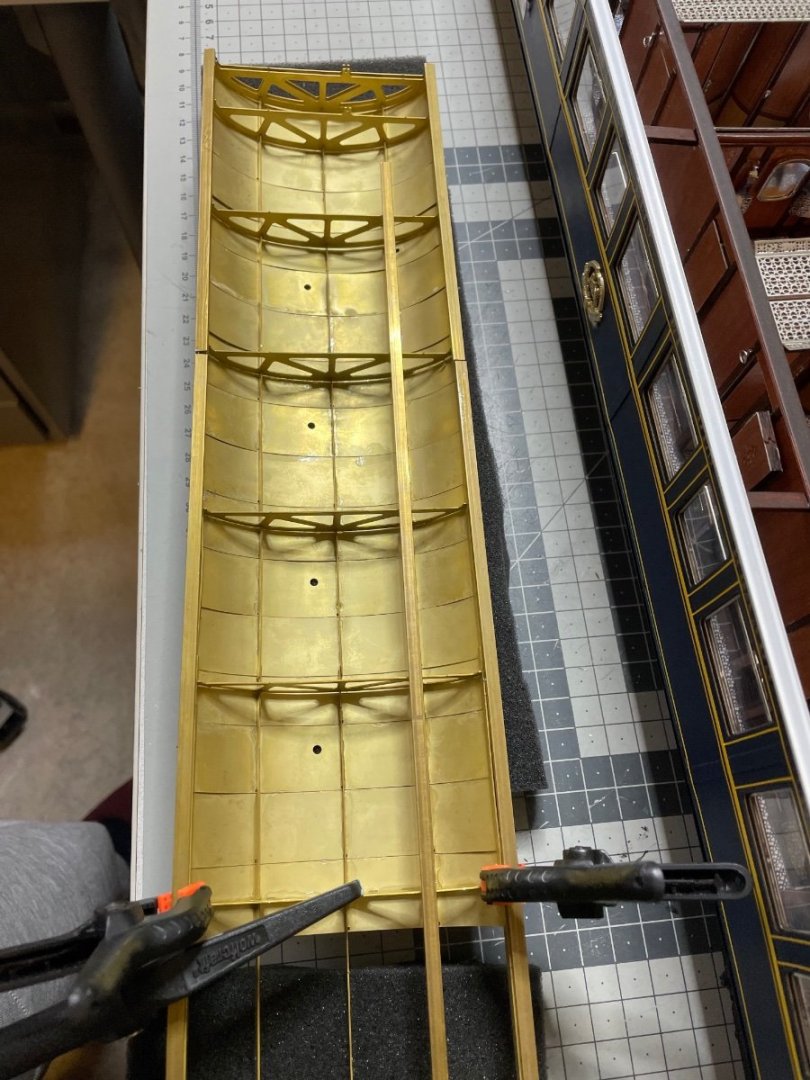
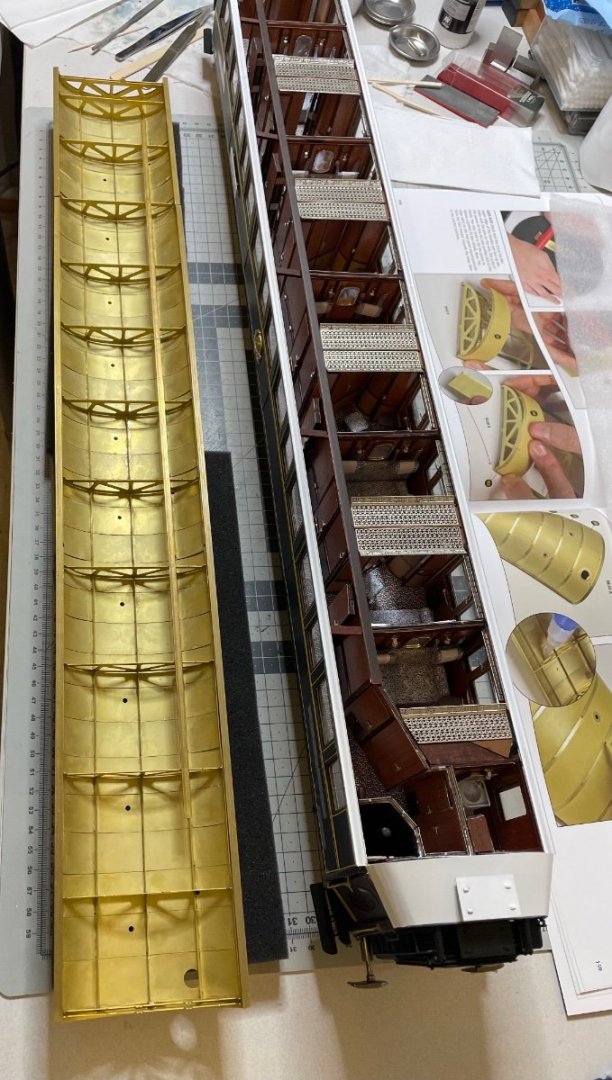
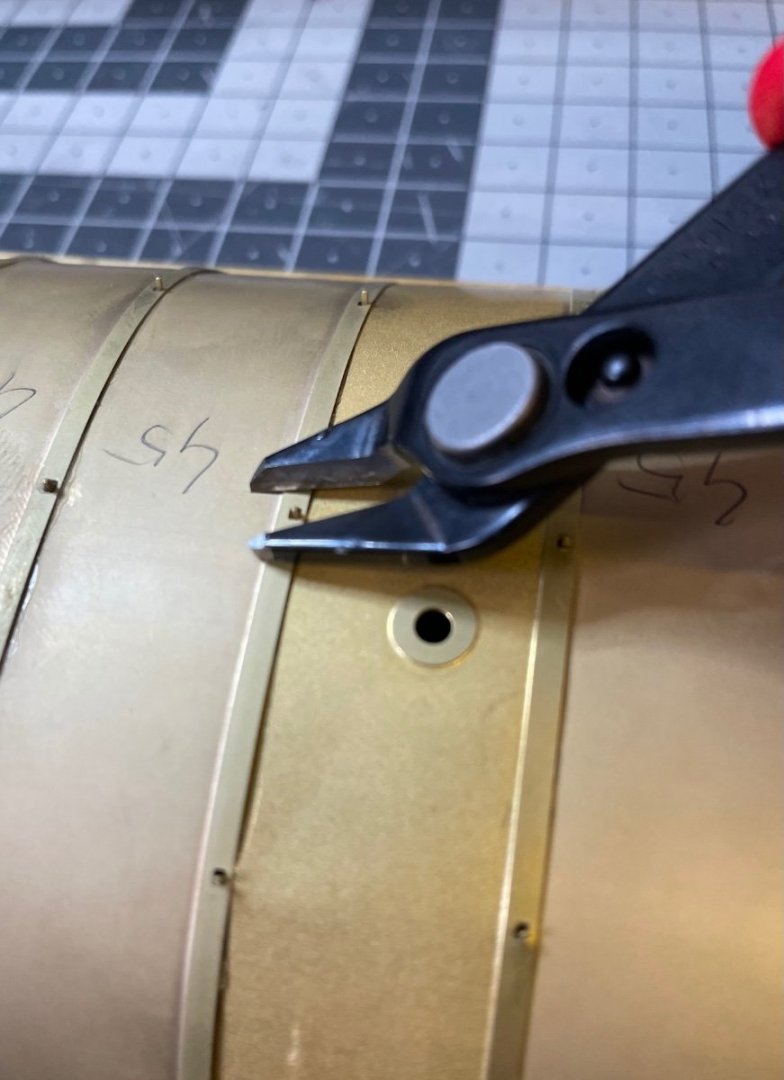
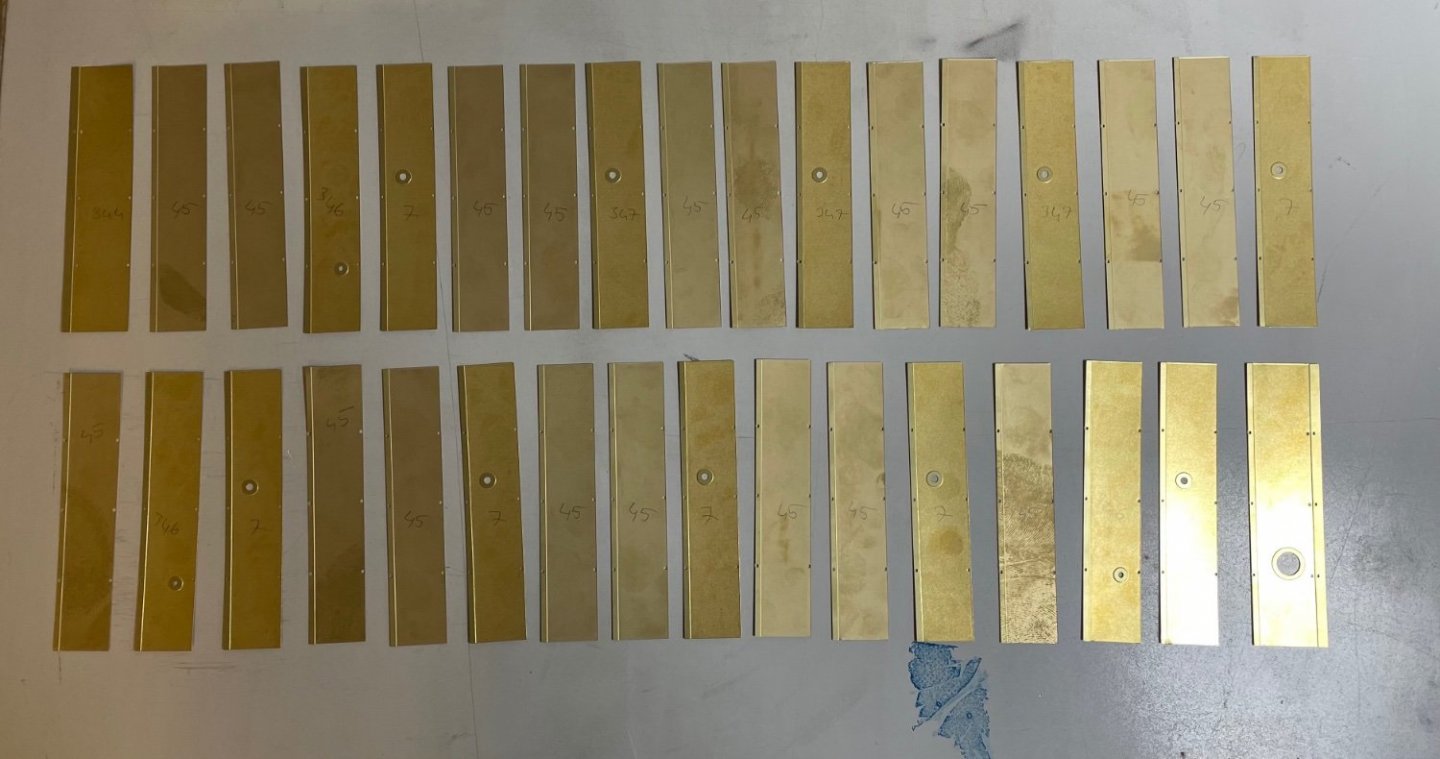
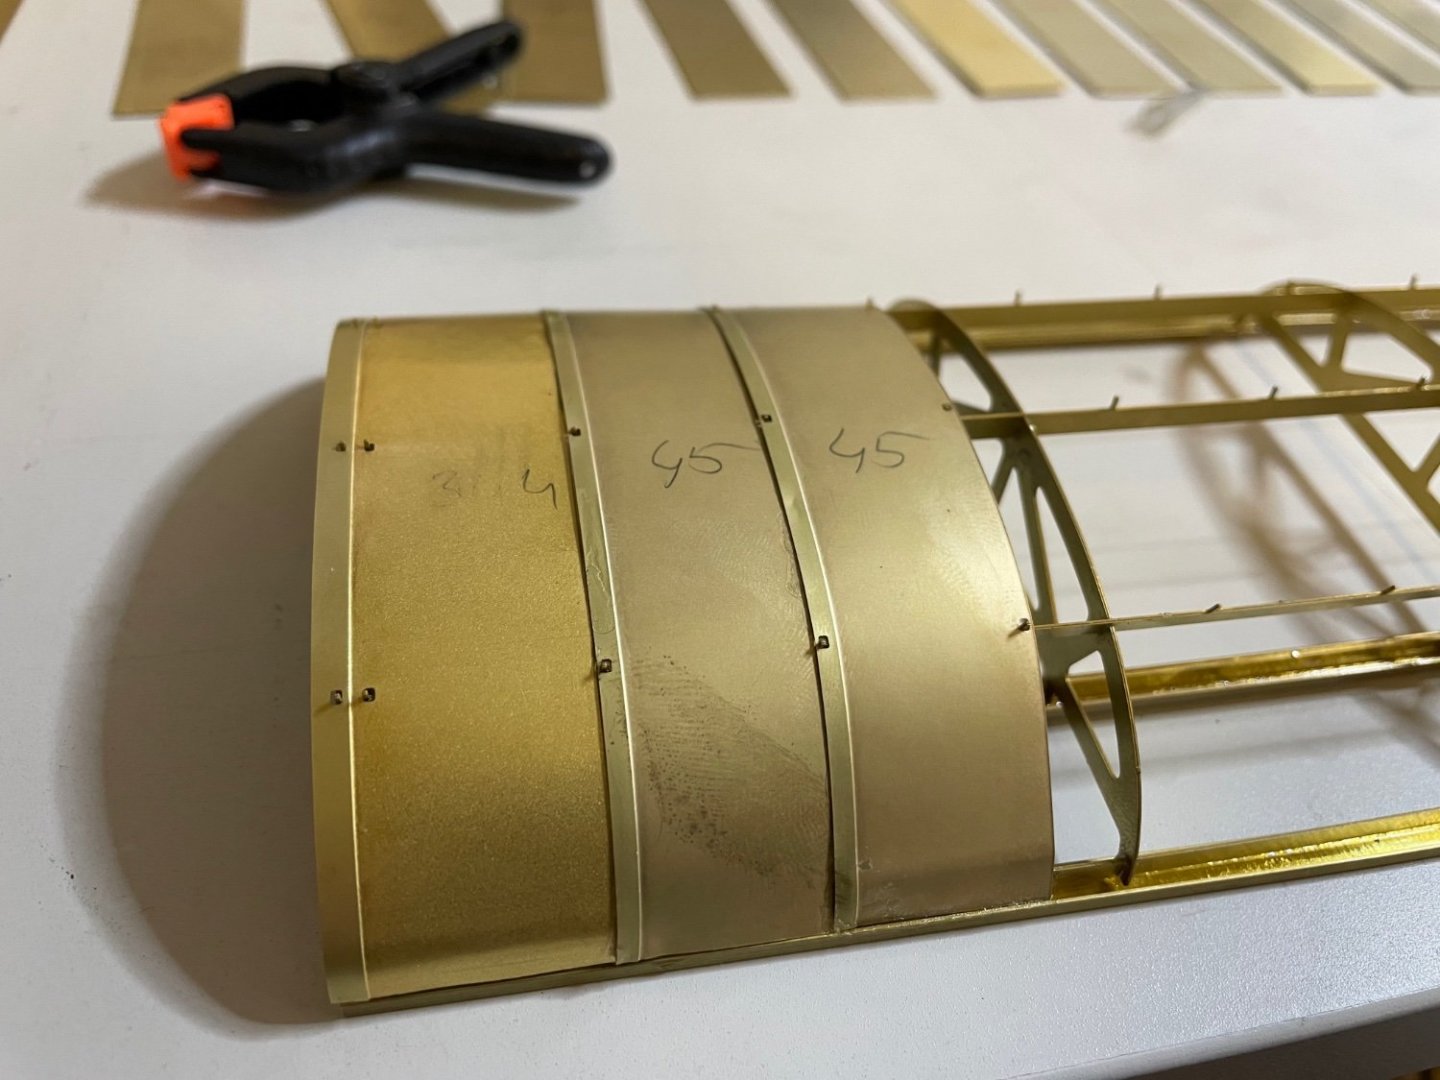
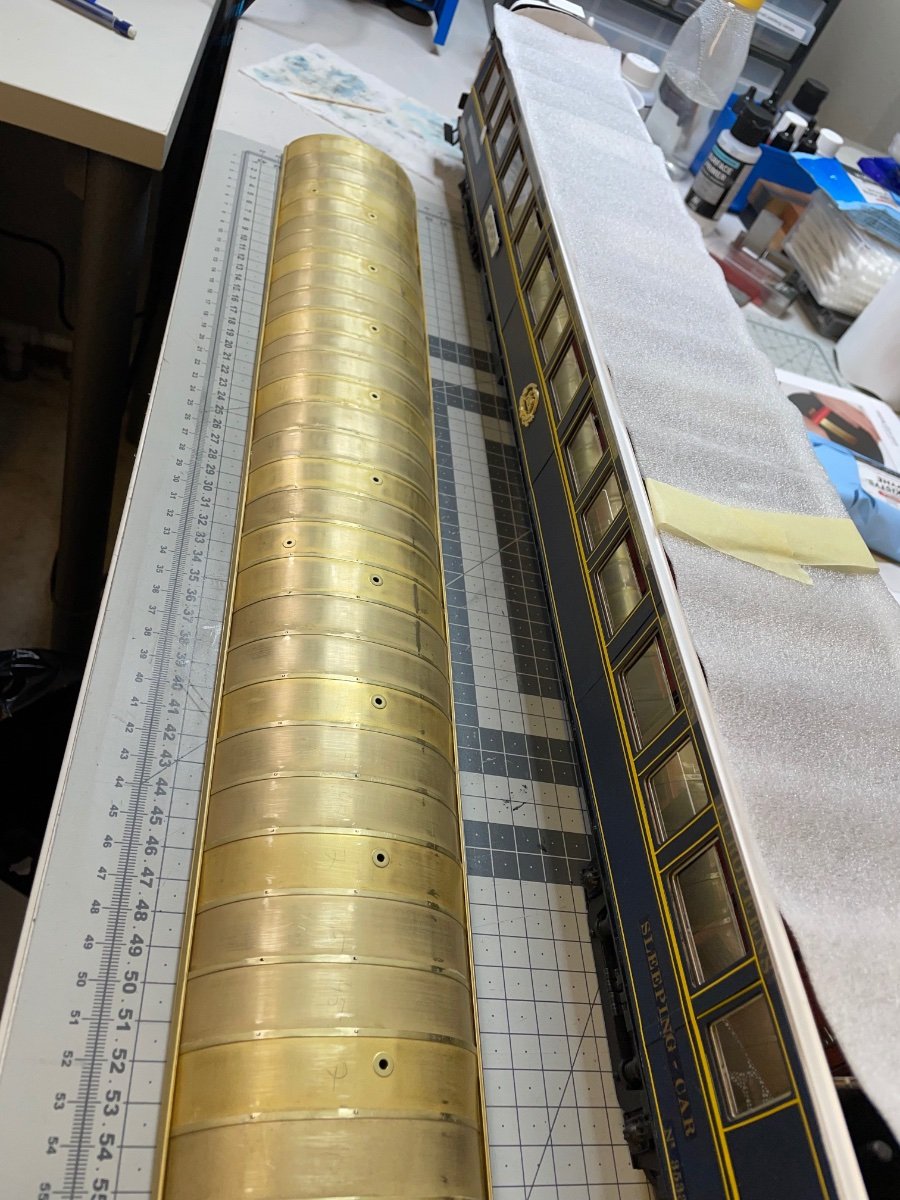
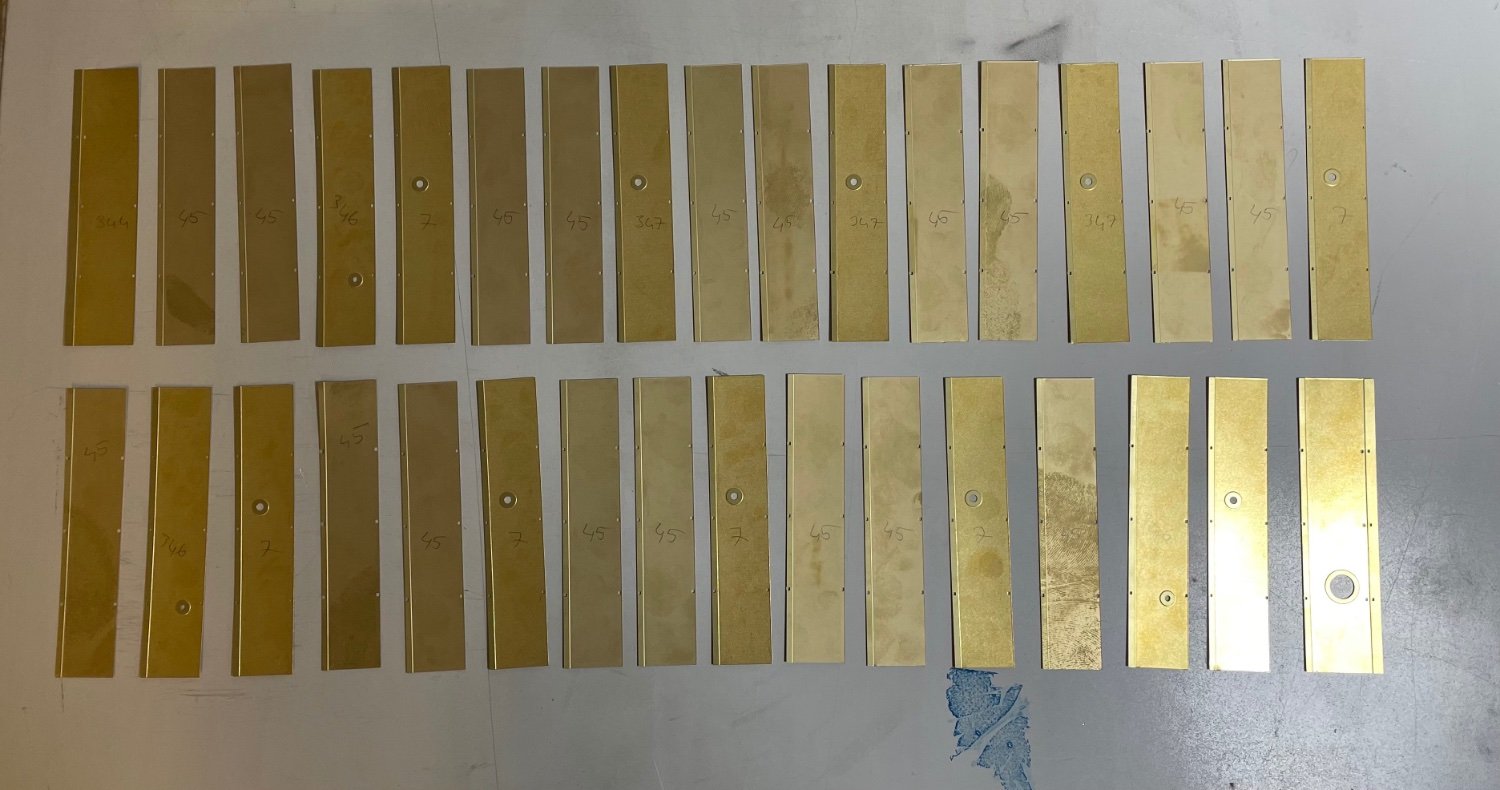
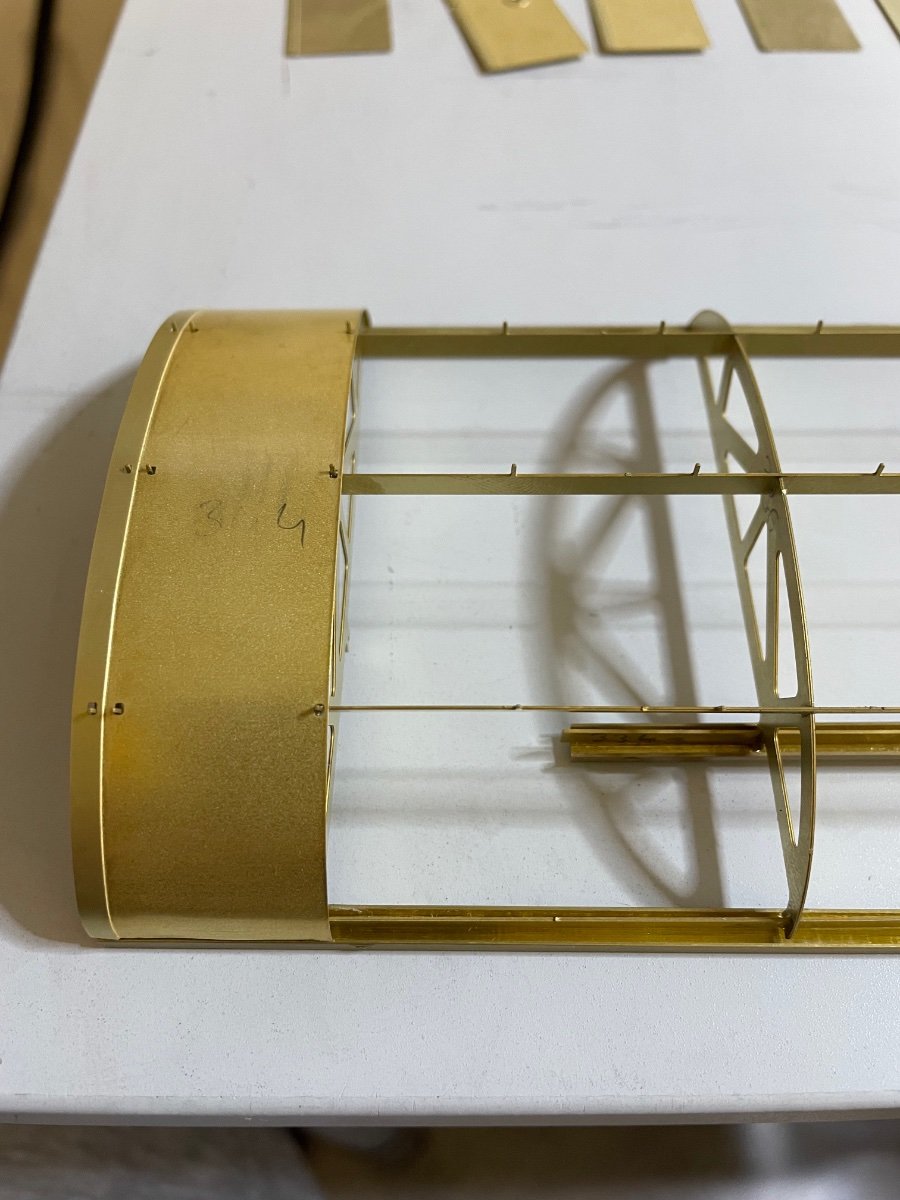
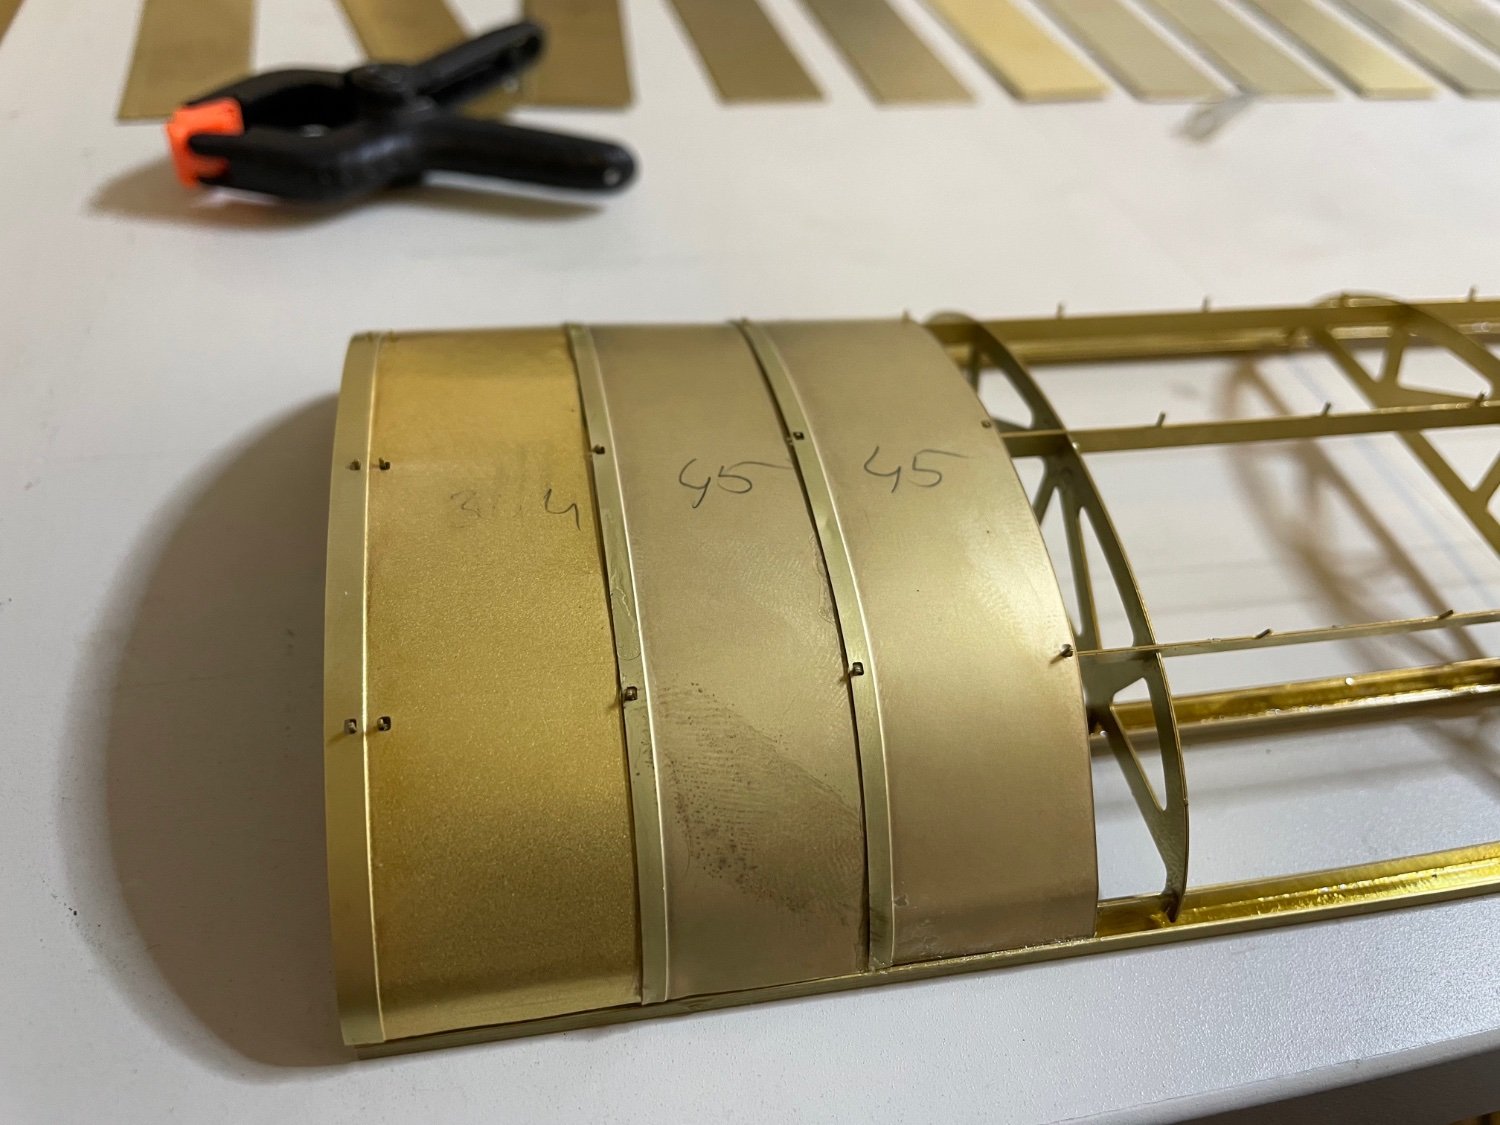
Figures 447-449: Roof sheets from etched brass. There are 33 of them. I was going to stop for today but then got tempted and started installing a few of them.

- druxey, Egilman, thibaultron and 9 others
-
12
-
BUILD DAY 43 / 0.5 hrs / (TOTAL 106.5 hrs)
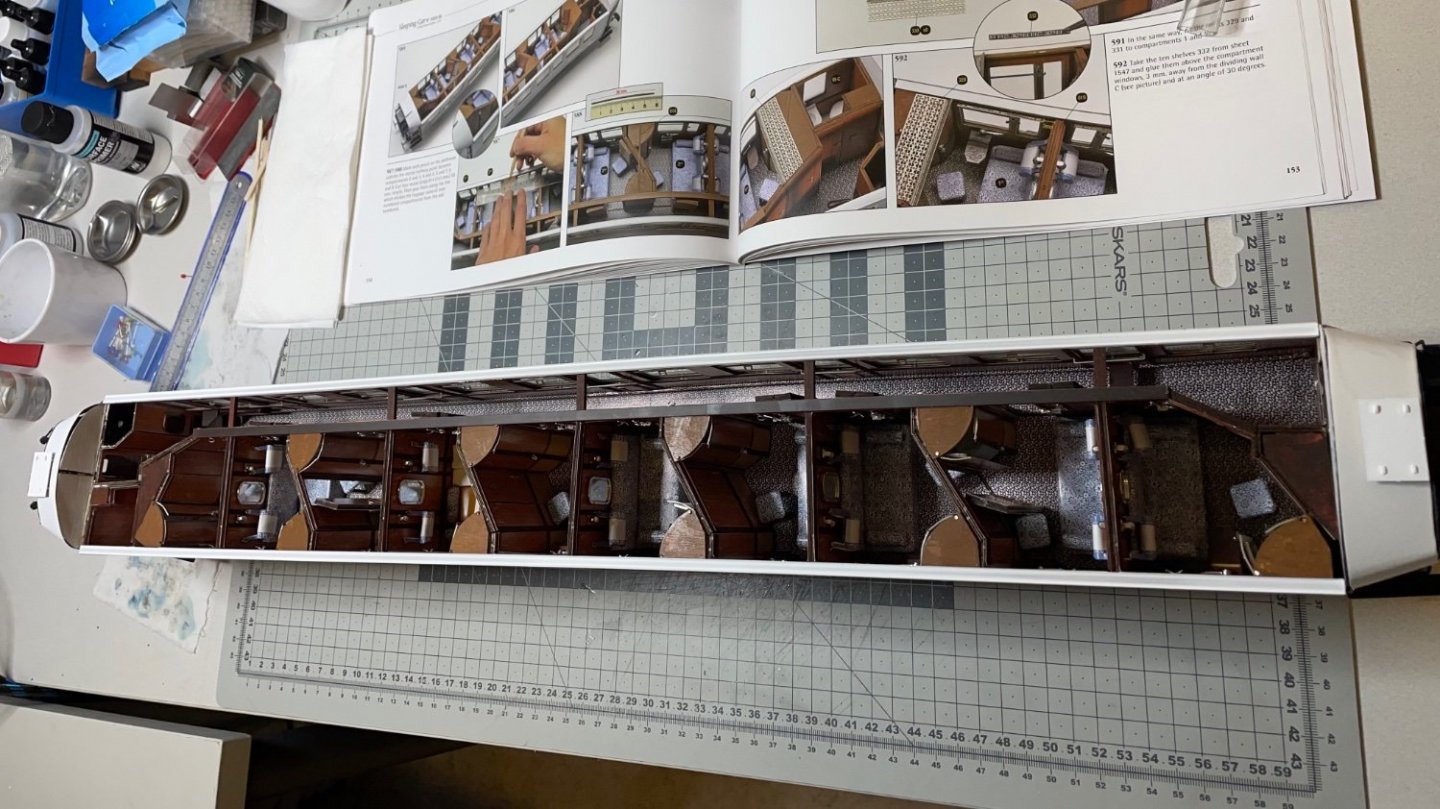
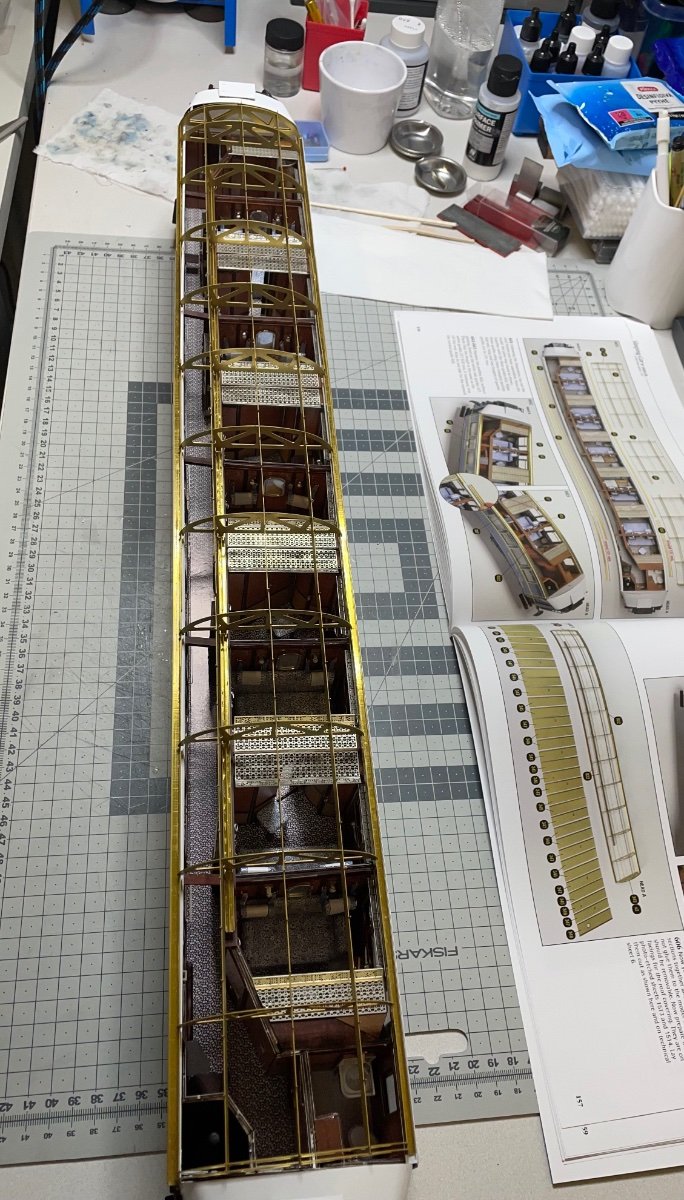
Figures 444-446: Dry fitting the roof structure on the rails, which I installed in the previous step. After ensuring the positions, I will glue the roof structure on its own rails. These rails then will sit on top of those on the wagon.


-
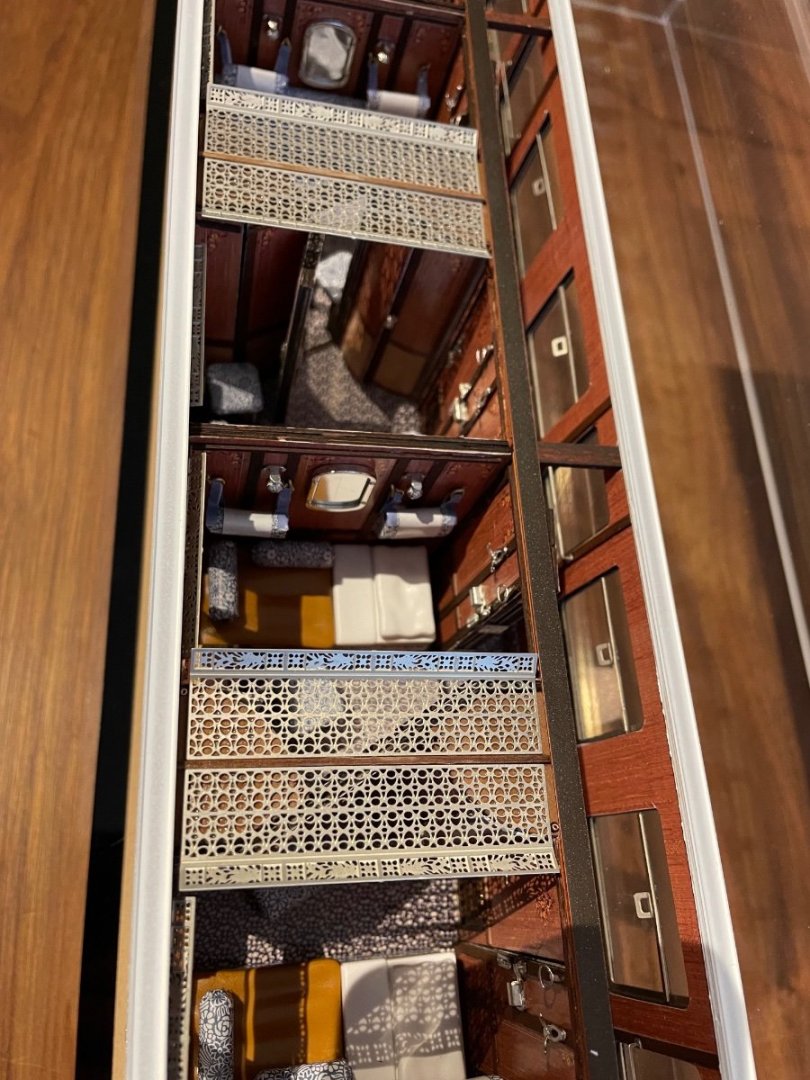
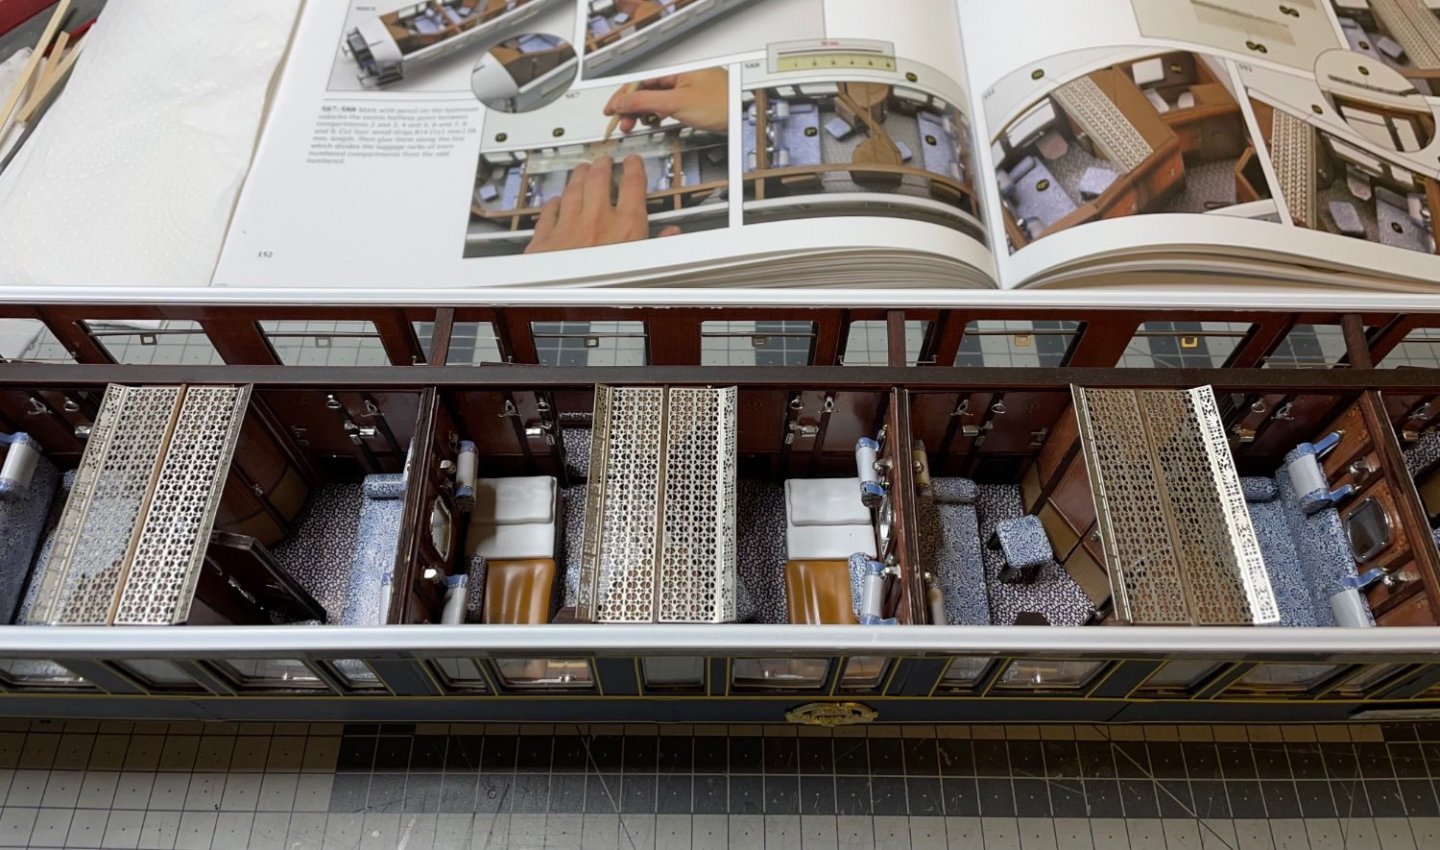
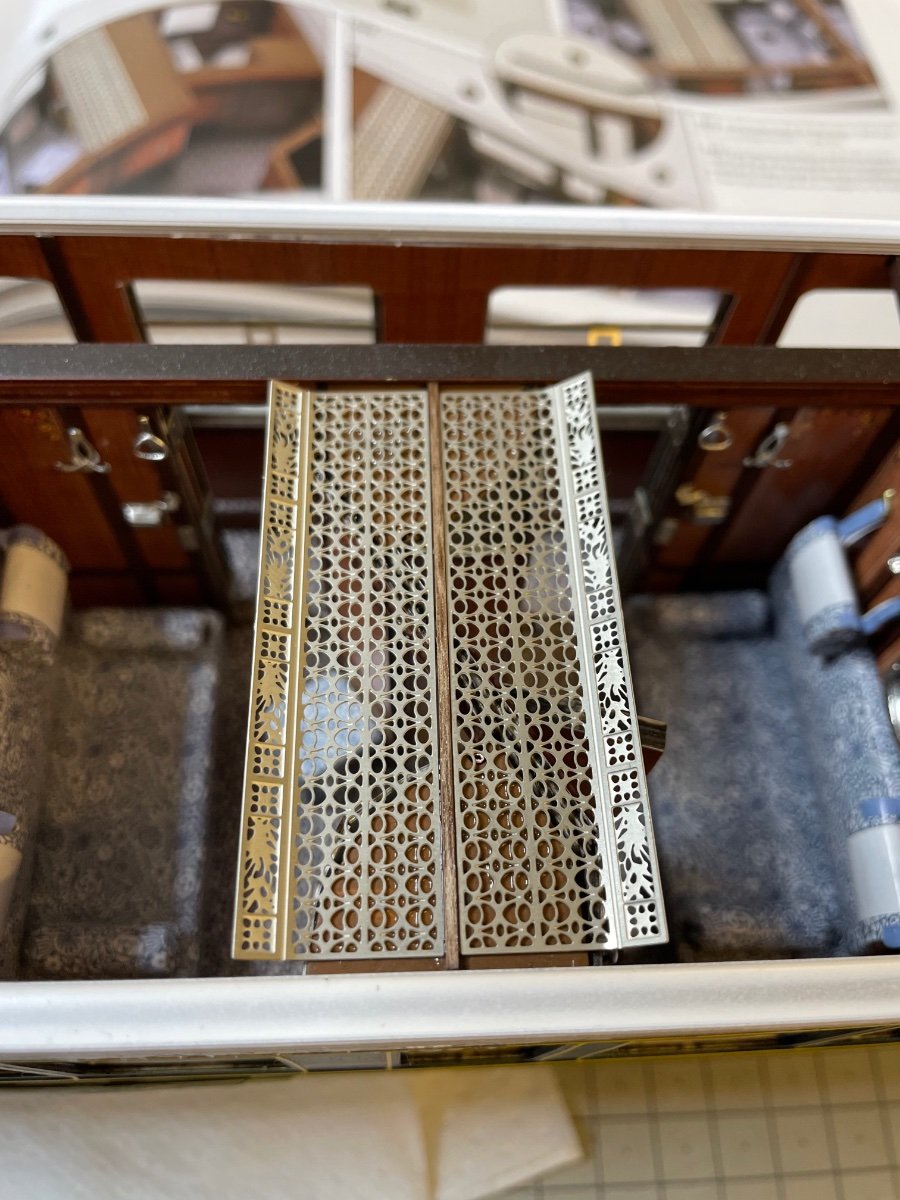
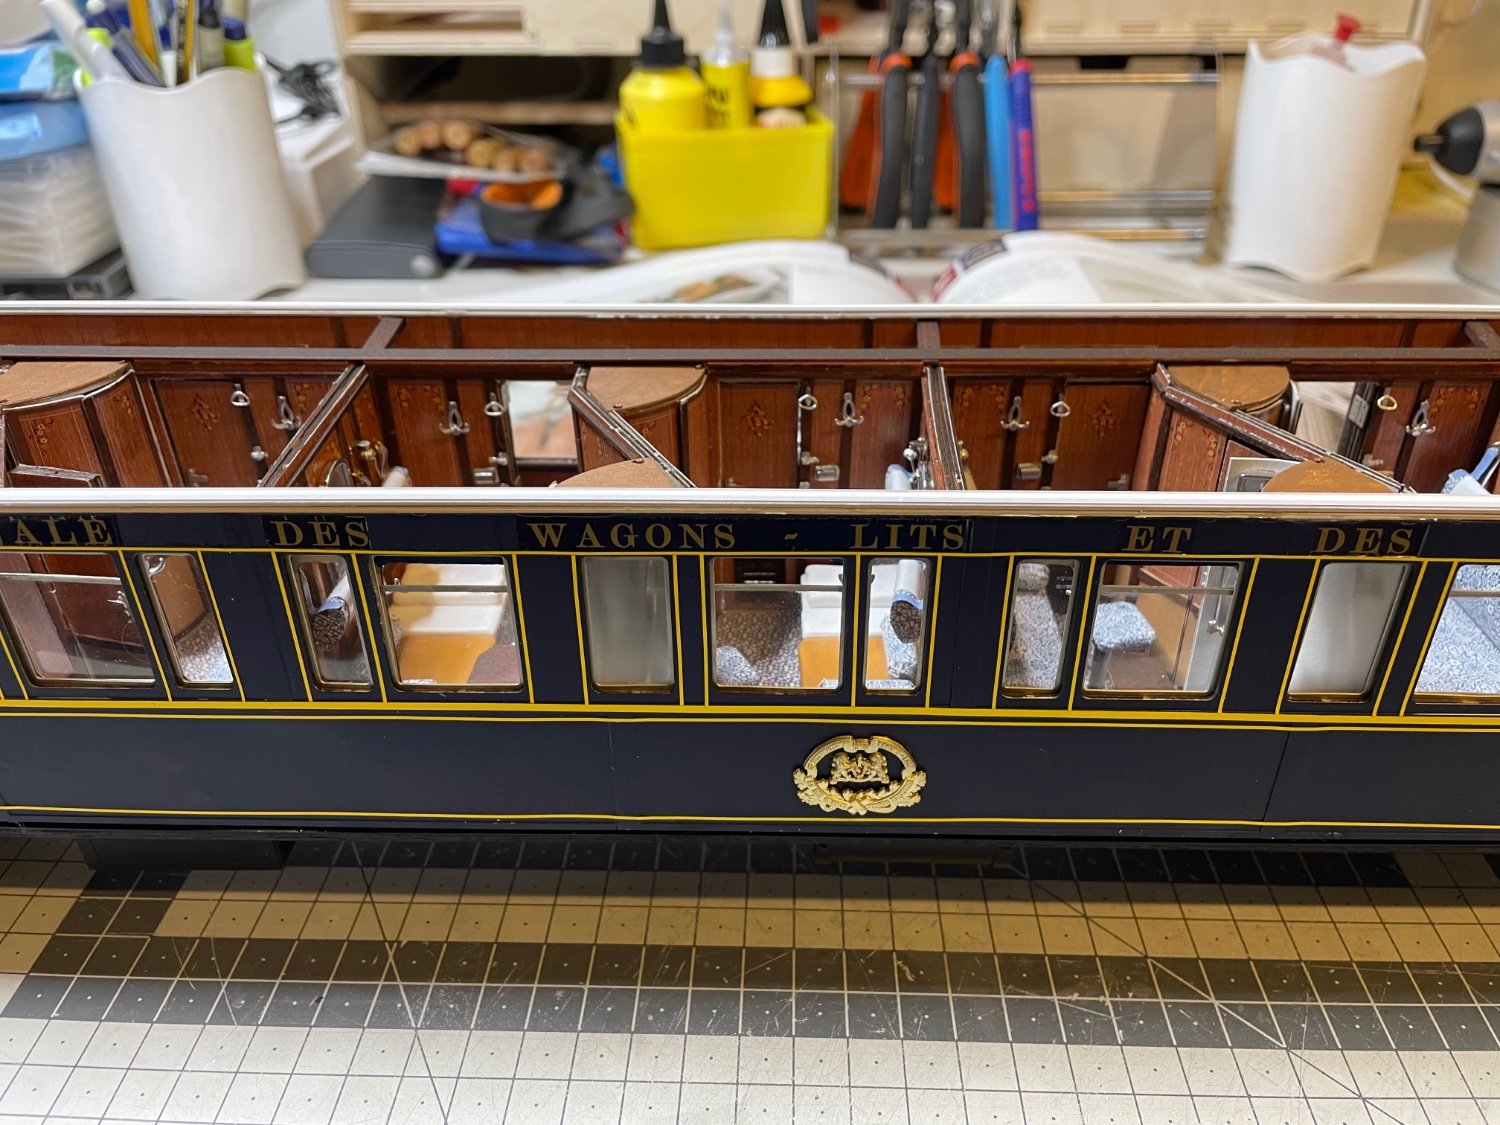
Figure 439: Overhead luggage/hat shelves. One for each compartment. The shelves for the 1st and 10th compartments are slightly different shape. The thin shelves are to be placed over the windows.
Figures 440-441: The overhead shelves are bent around 30 degress on the compartment side, in order to prevent the stuff from sliding and falling.
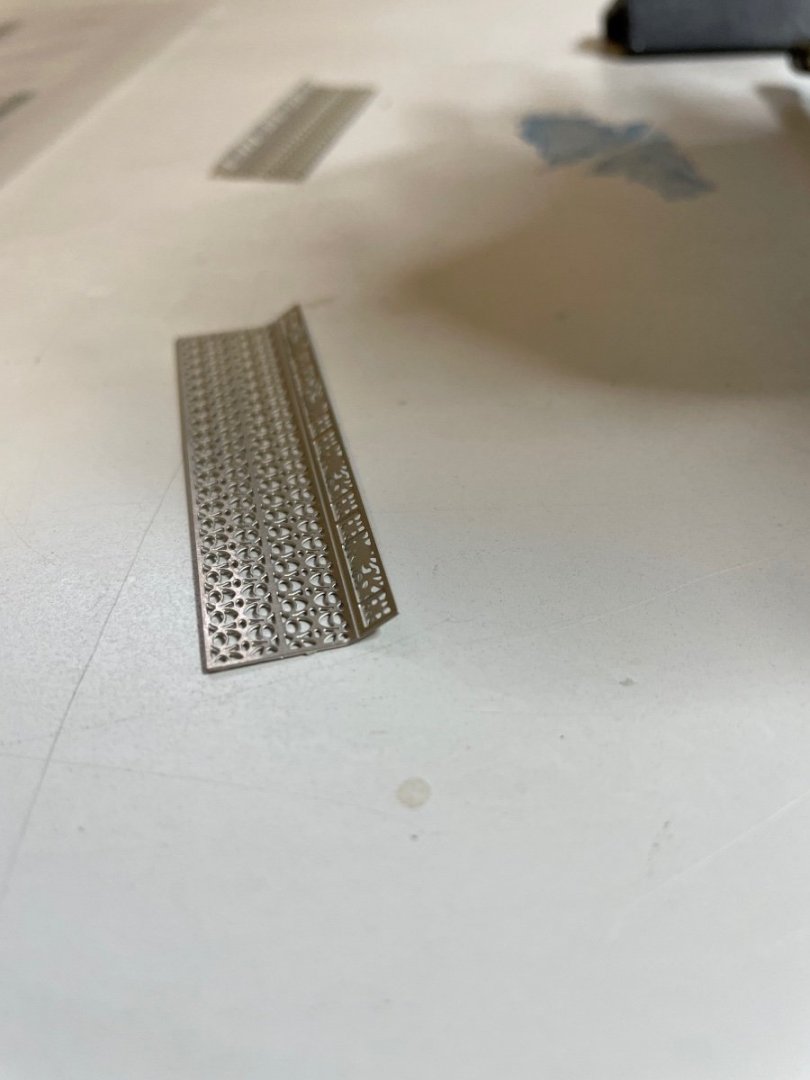
Figures 442-443: Some photos showing the shelves in place.

-
BUILD DAY 42 / 2 hrs / (TOTAL: 106 hrs)
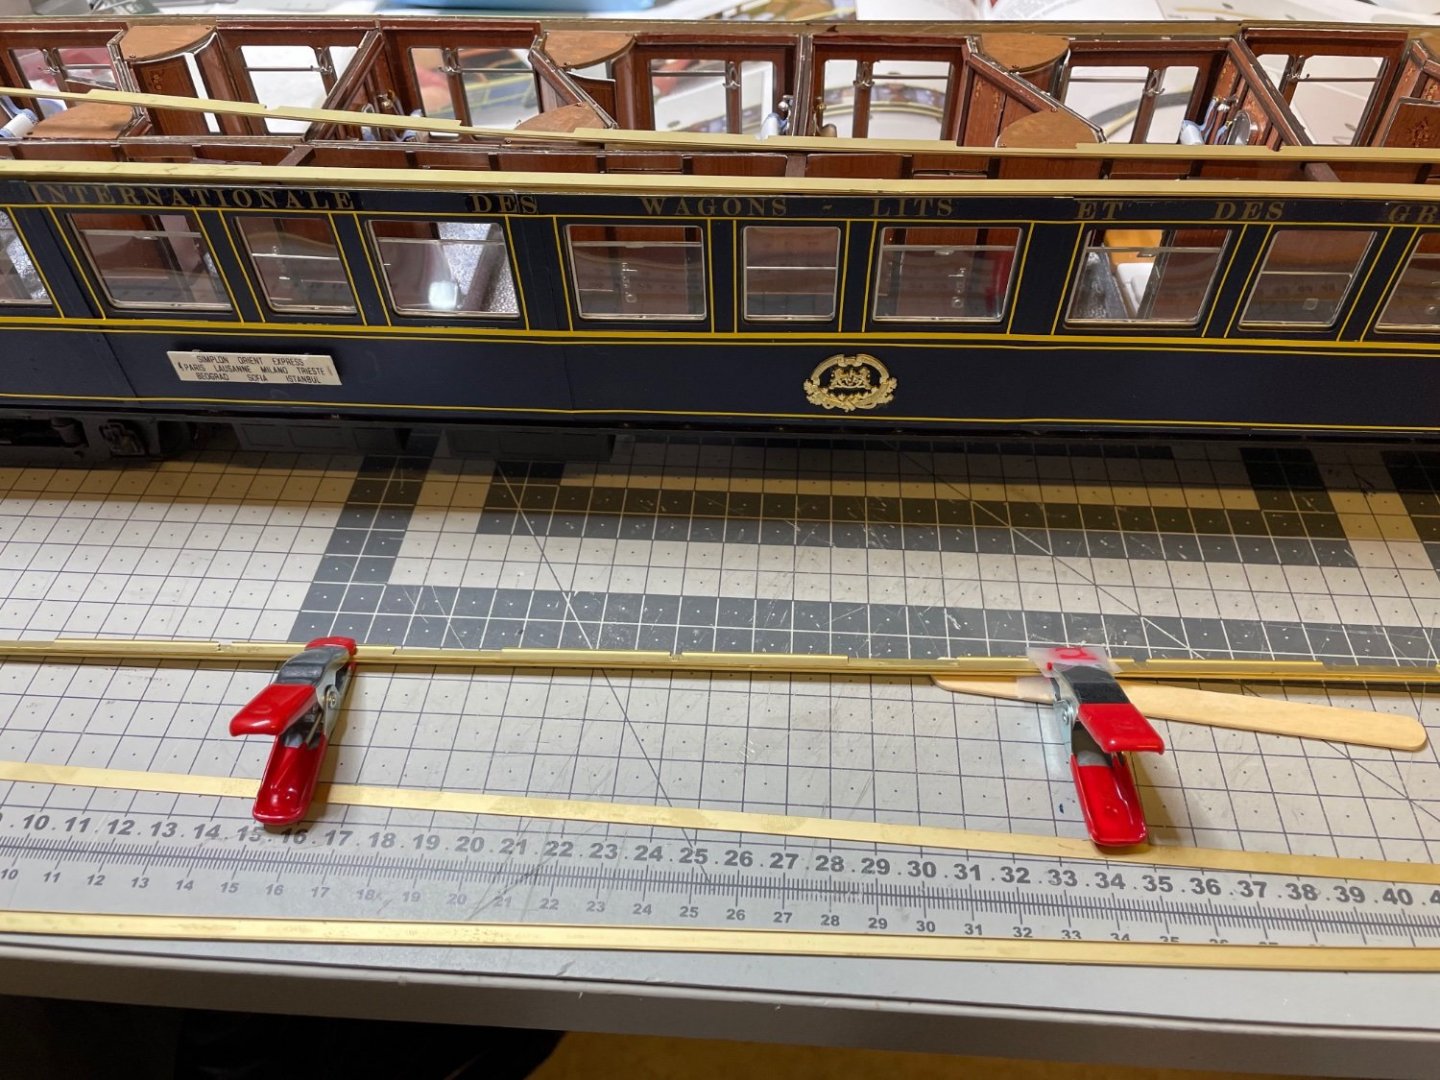
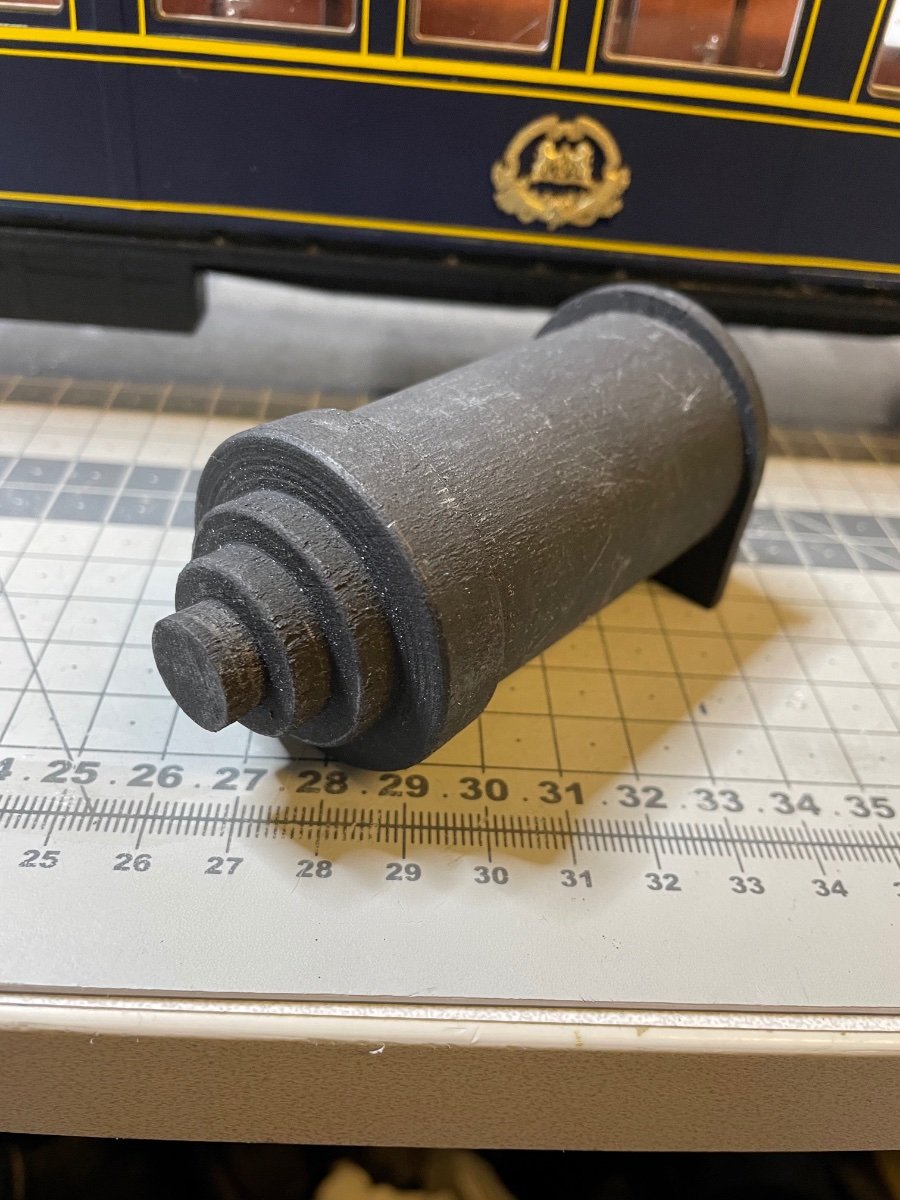
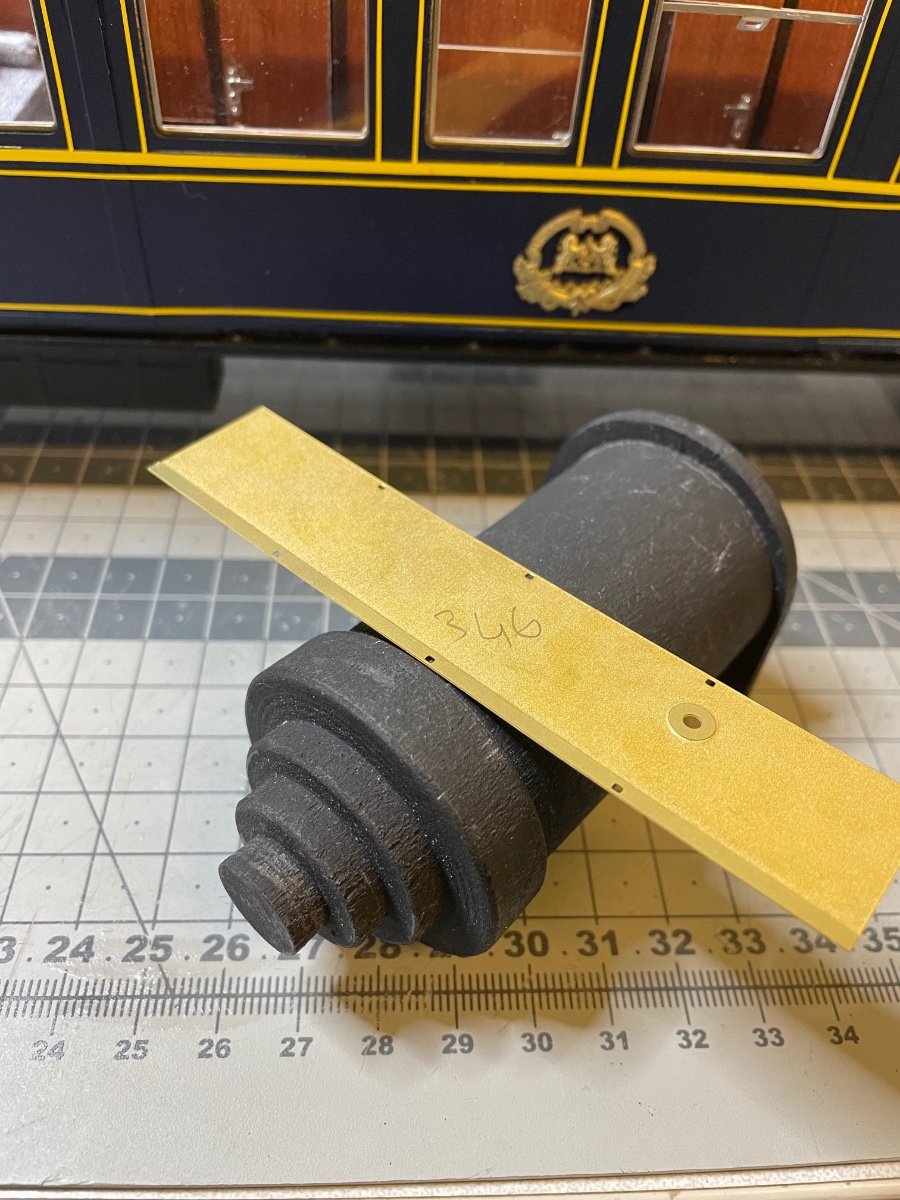
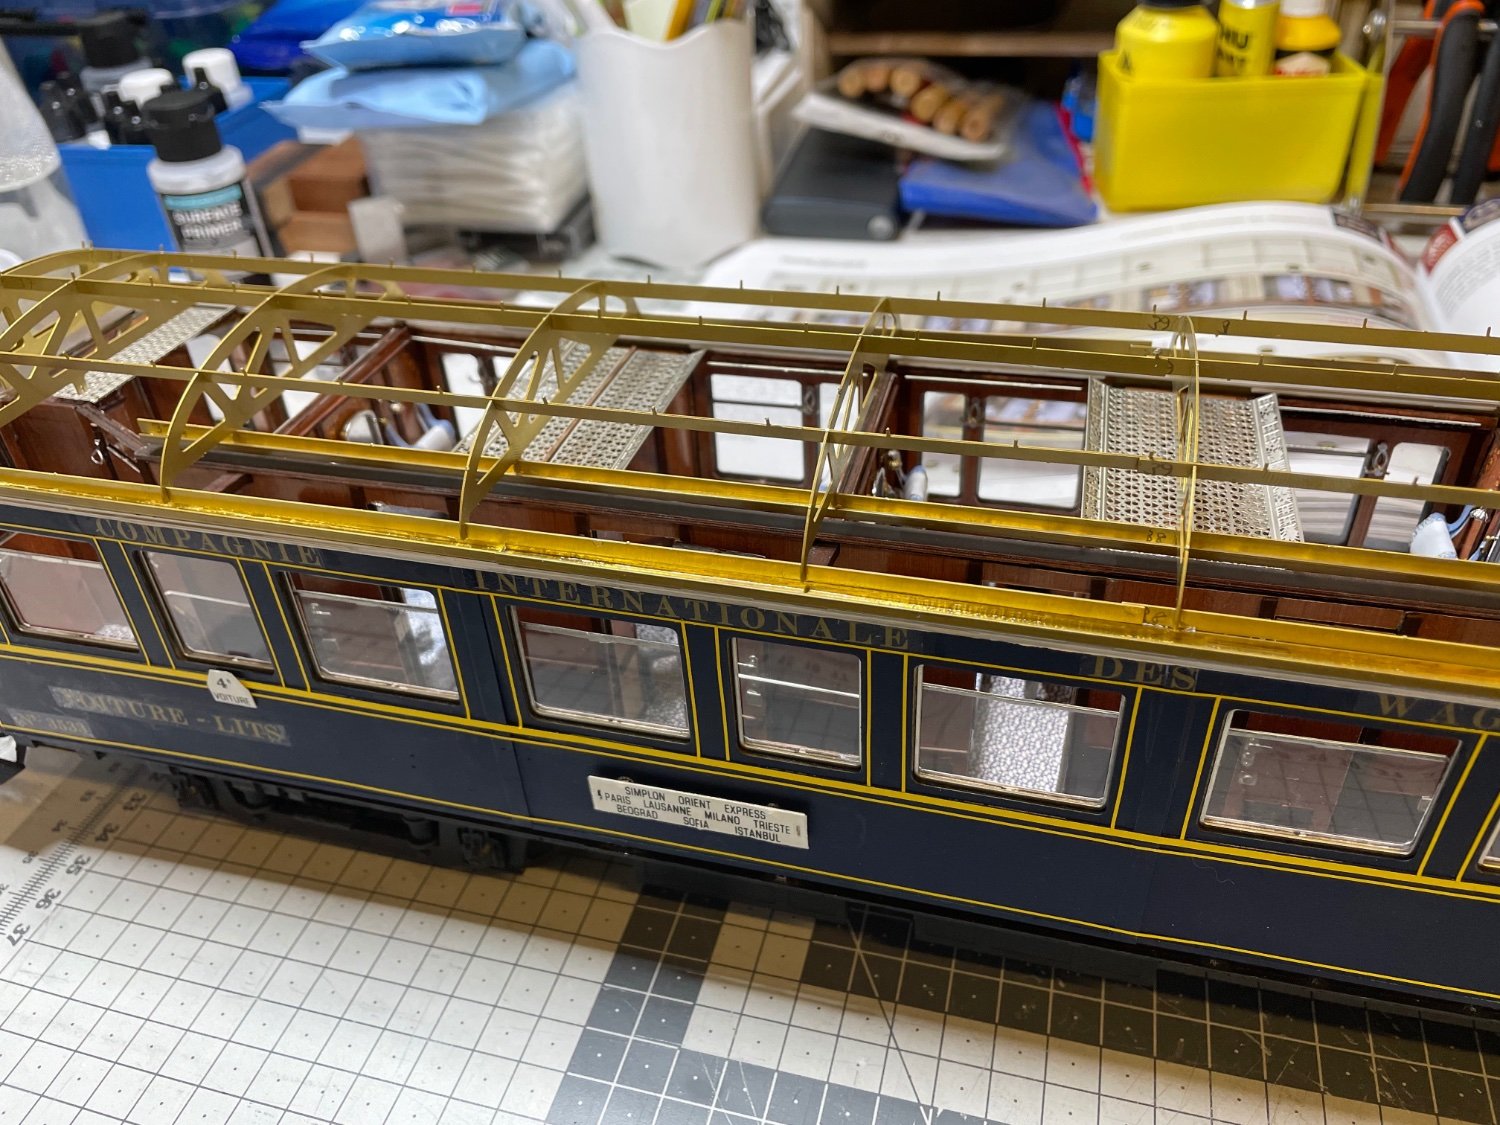
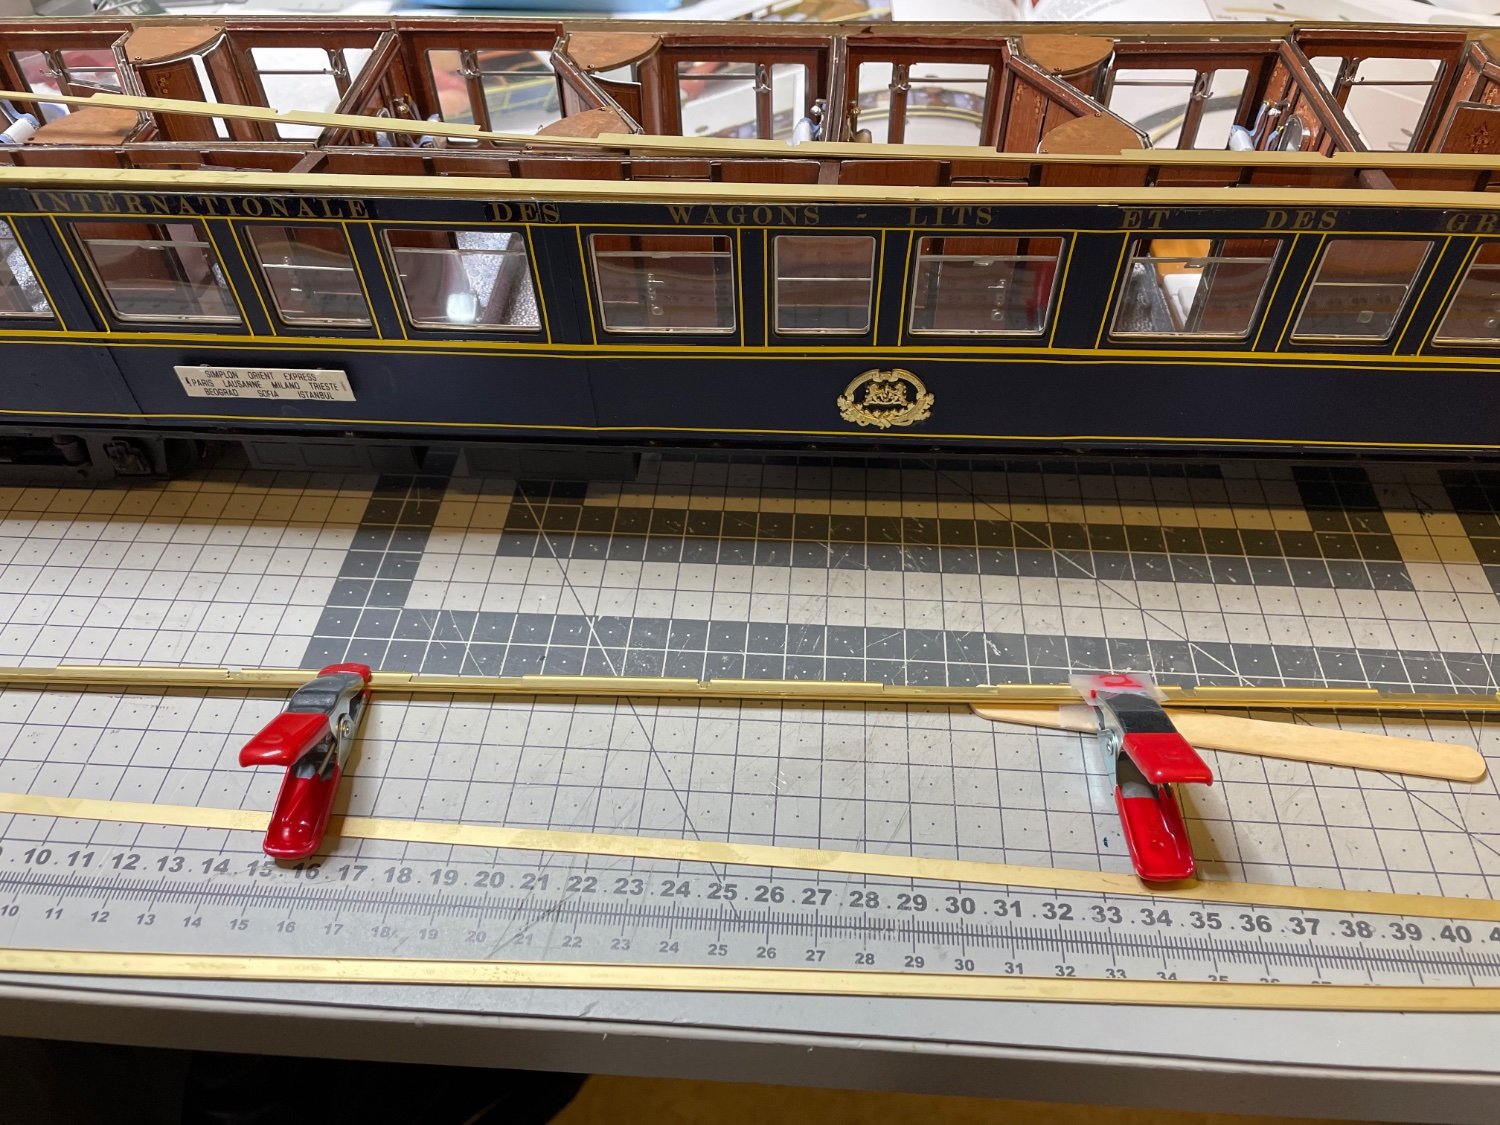
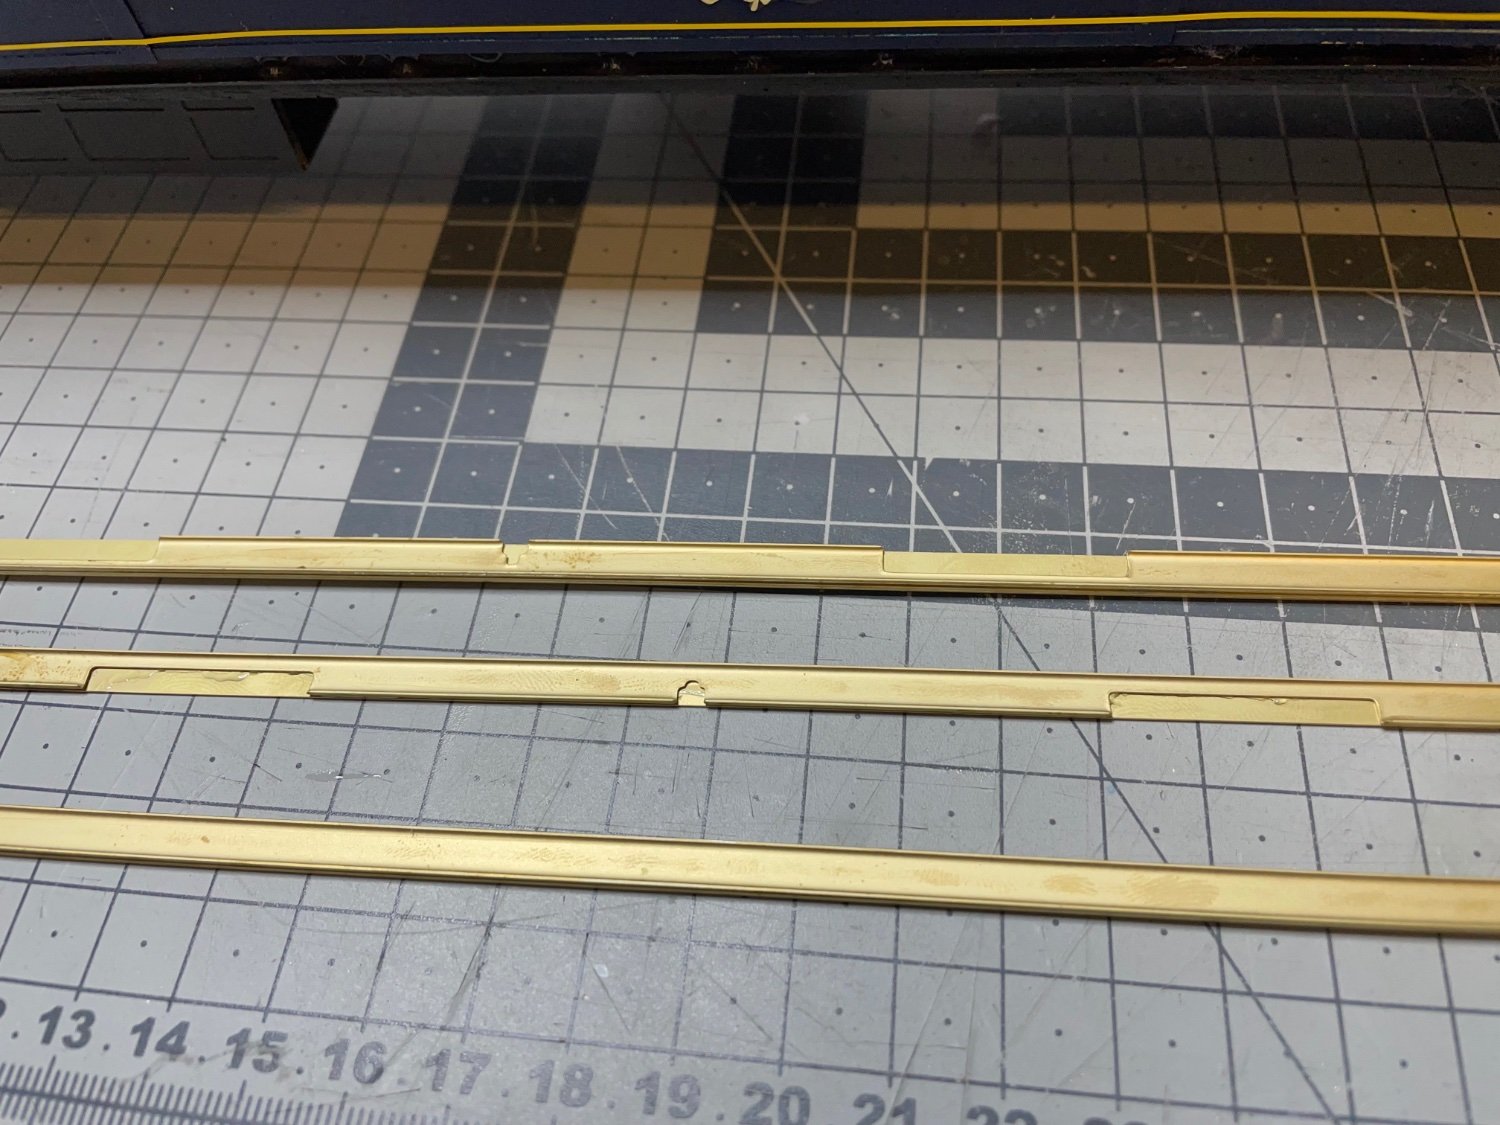
Figures 433-438: Rails for sitting the roof on.
There are 3 rails: 2 on the sides and one going over the compartment doorline. The latter is to be painted in brown while the two on the sides will be white.
The rails are composed of two pieces each. The lower part has grooves to fit the structure while the upper part is flat to accomodate the roof structure.


-
-
I found this one and ordered it.

- druxey, Canute, Old Collingwood and 4 others
-
7
-
37 minutes ago, wefalck said:
. Easy to in Germany, but I don't know about Finland.
I can check Amazon Germany

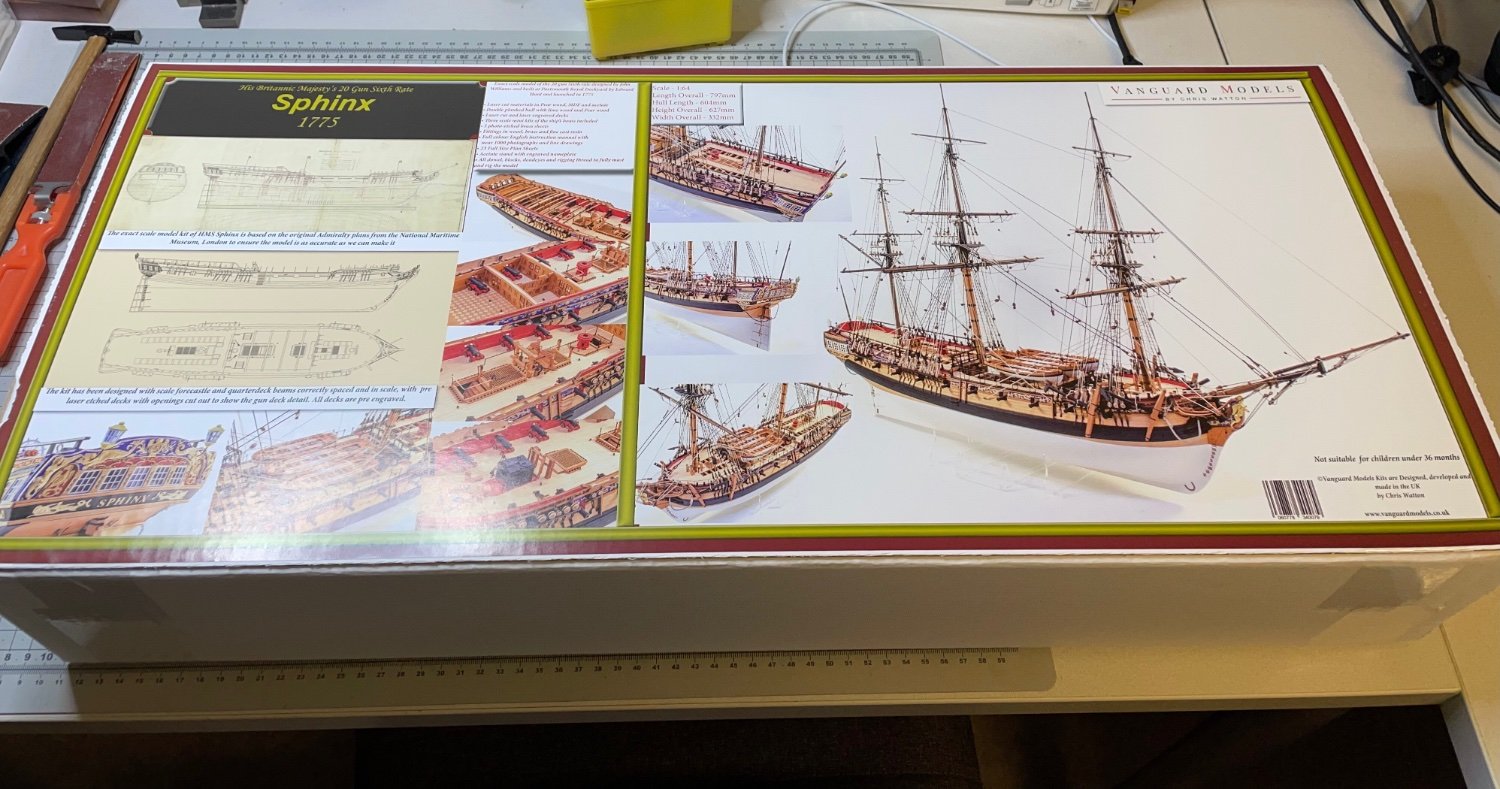


HMS Sphinx 1775 by aydingocer - Vanguard Models - 1:64 - Revision #2
in - Kit build logs for subjects built from 1751 - 1800
Posted · Edited by aydingocer
Photo 8: Very good looking thick and heavy instruction manual. It is printed on thick sheets, I guess on 120gr/m2 paper, instead of your regular printer paper of 80gr/m2. The instruction manual of my recent Amati Orient Express was by far the all time best, I can say this one ranks 2nd right after that.