Chuck
-
Posts
9,711 -
Joined
-
Last visited
Content Type
Profiles
Forums
Gallery
Events
Everything posted by Chuck
-
 Very nice....That will save you a ton of grief later on. Bollards look good too!!!!
 -
That looks really good. You could probably remove the lower molding and just place it higher. As long as the plank joint doesnt show. That would close up that space a bit. Chuck
- 221 replies
-
- 1
-

-
- queen anne barge
- Syren Ship Model Company
- (and 1 more)
-
Start a build log and with everyone's help I am sure it will turn out just fine. Chuck
-
I would read through this log.... But keep in mind that you bought what I labeled as an advanced kit. Primarily for the planking. I have said it many times....that kit is not a beginner project at all. But if you must, this is the best place to start. Although it is of my larger design but the same principles are used.
-
HMCSS Victoria 1855 by BANYAN - 1:72
Chuck replied to BANYAN's topic in - Build logs for subjects built 1851 - 1900
Pat she looks great. Its really coming together.- 1,013 replies
-
- 5
-
-
- gun dispatch vessel
- victoria
- (and 2 more)
-
Looks very good. I bet you are glad to have that all done.
-
That looks excellent. It is shaping up to be an excellent model. Also check out the few other logs that have started chapter 3. There are some really good discussions in those that will certainly help you out. Chuck
- 99 replies
-
- 3
-
-
- winchelsea
- Syren Ship Model Company
- (and 1 more)
-
Actually if you could lower the center window fillers a bit. They are both too high. This will cause you grief later on. They should be level with the ones next to it. Otherwise its looking great. Chuck
-
I have never seen red coamings before on any contemporary models. Thats interesting. Most often they are painted black or left natural. Chuck
- 1,784 replies
-
- 1
-
-
- winchelsea
- Syren Ship Model Company
- (and 1 more)
-
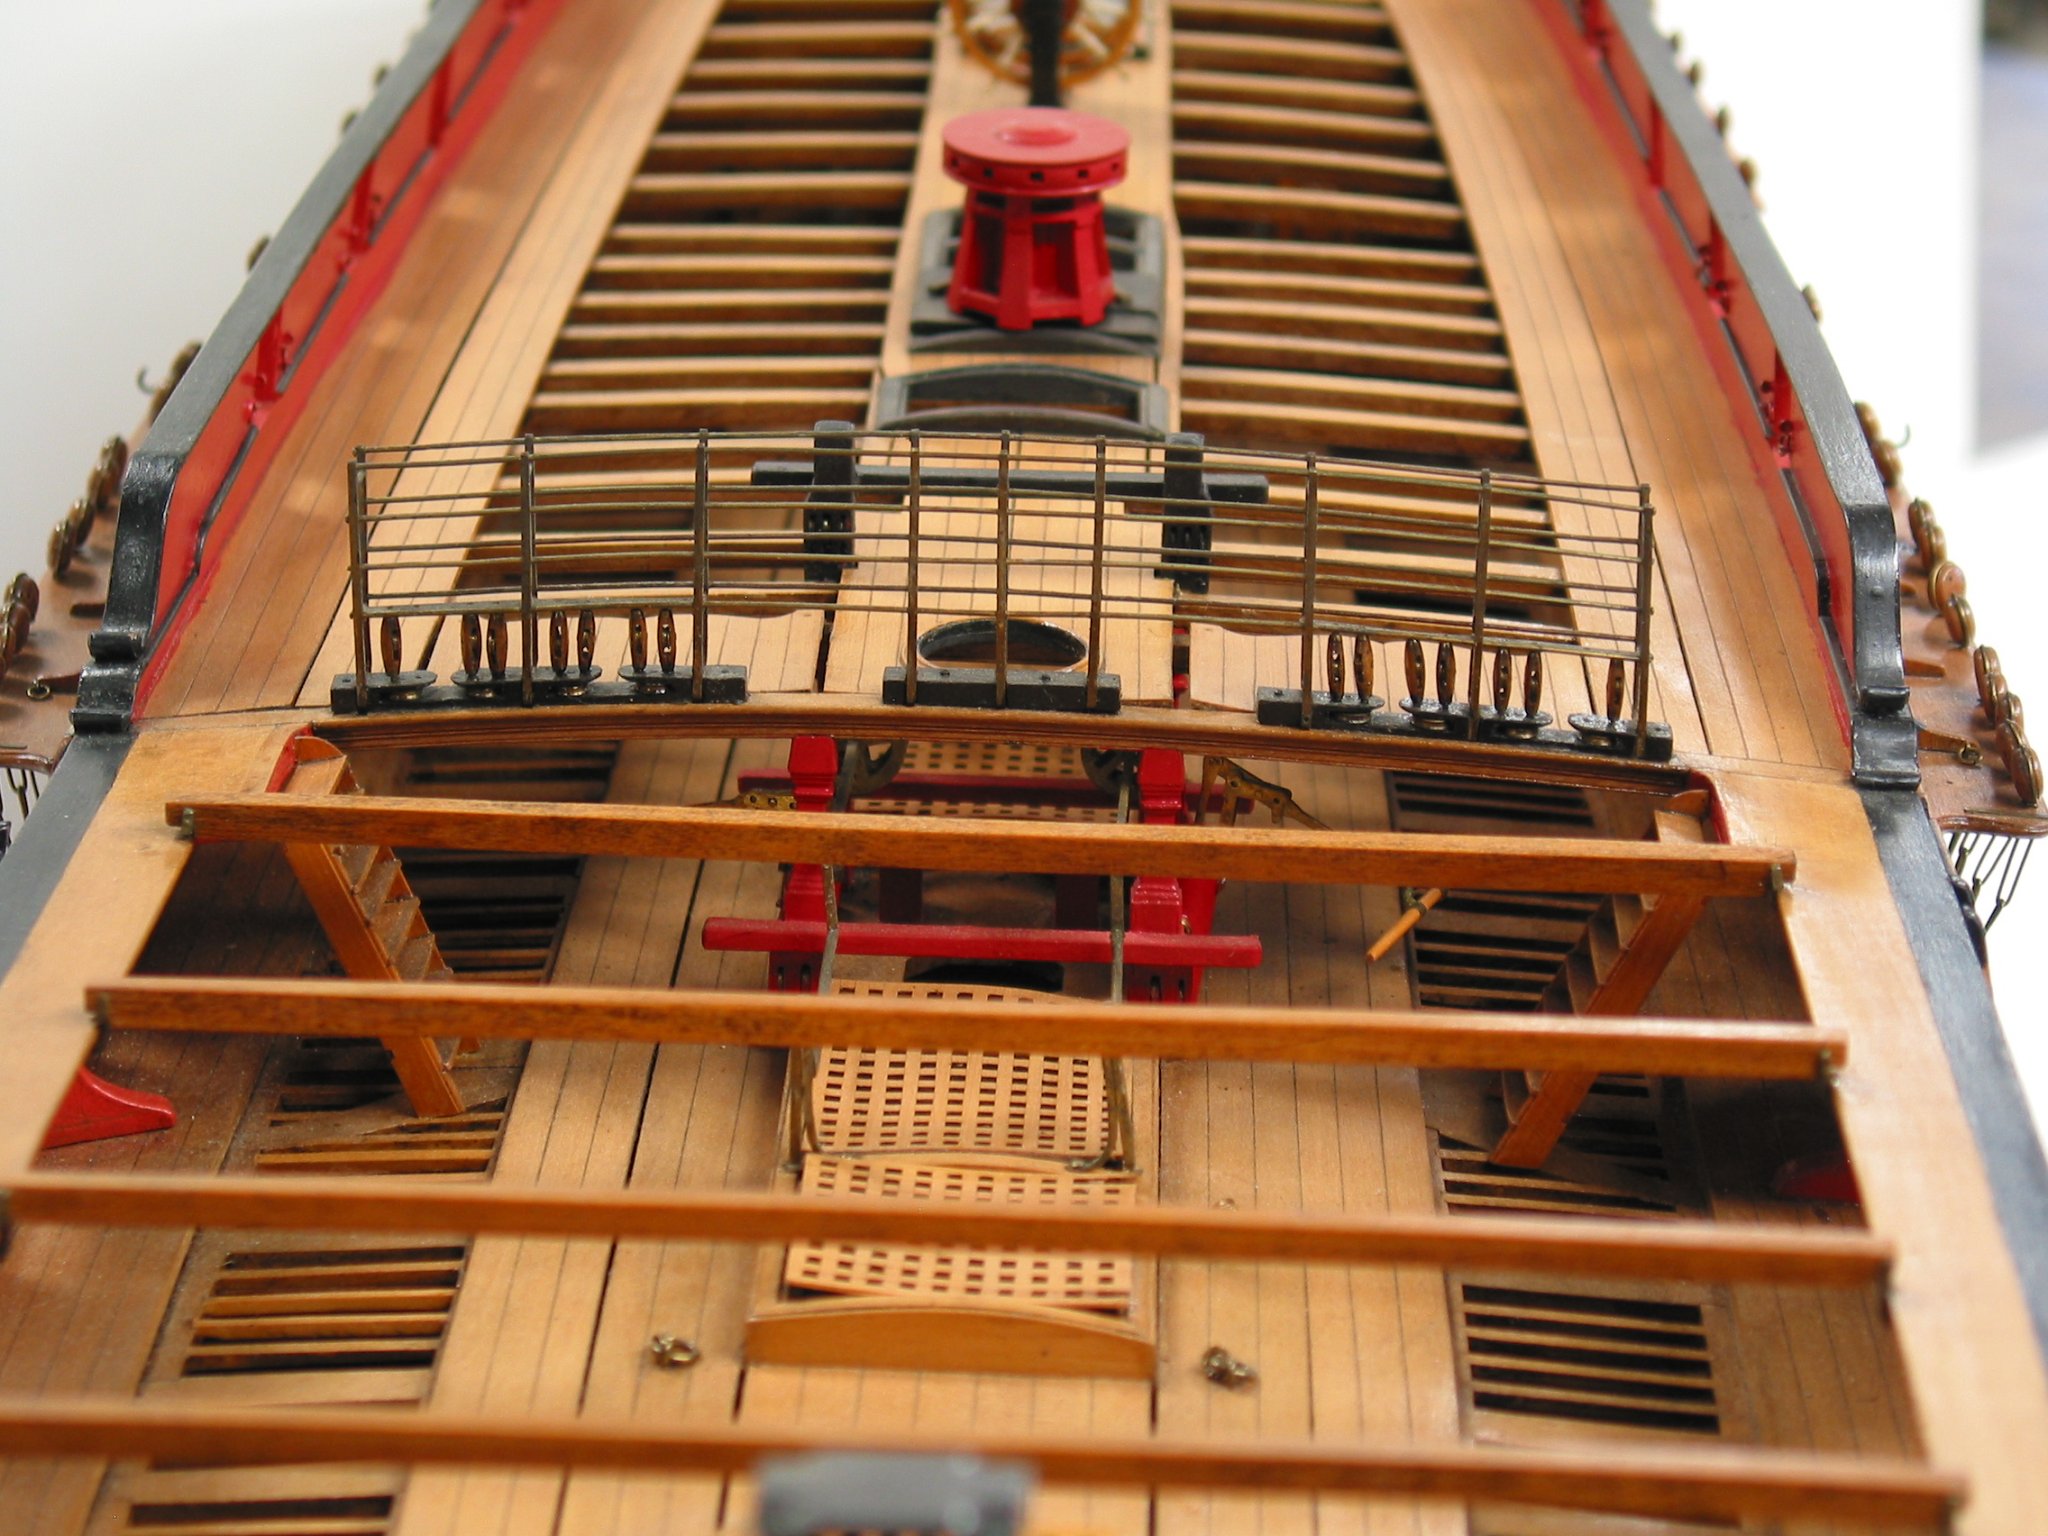
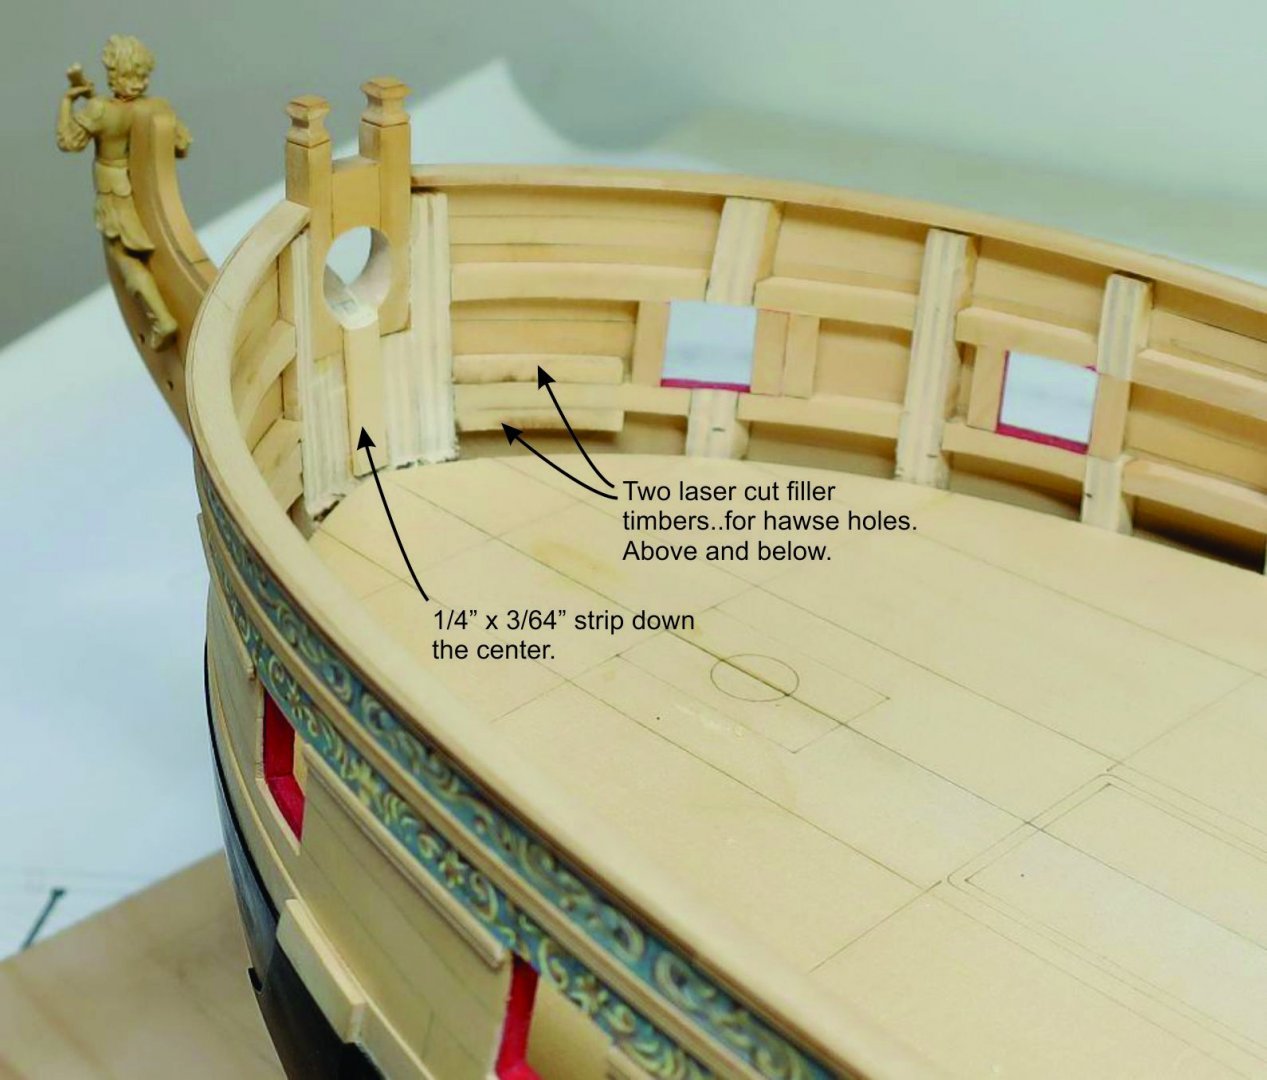
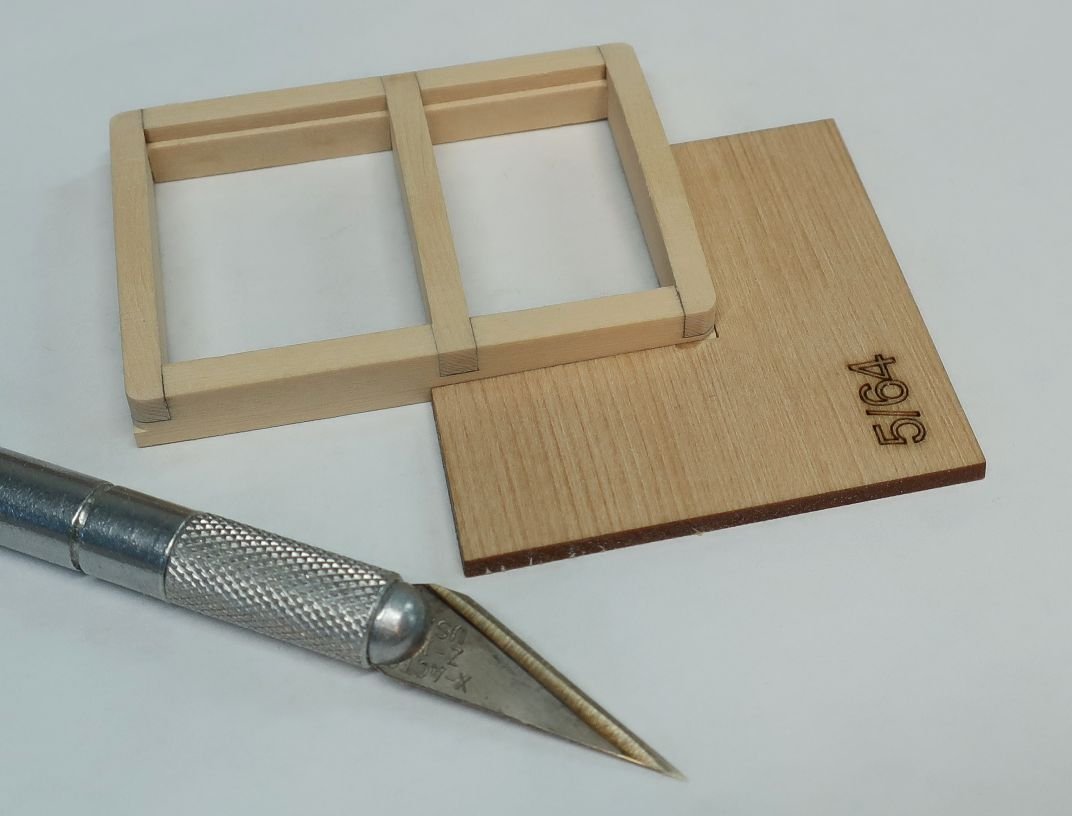
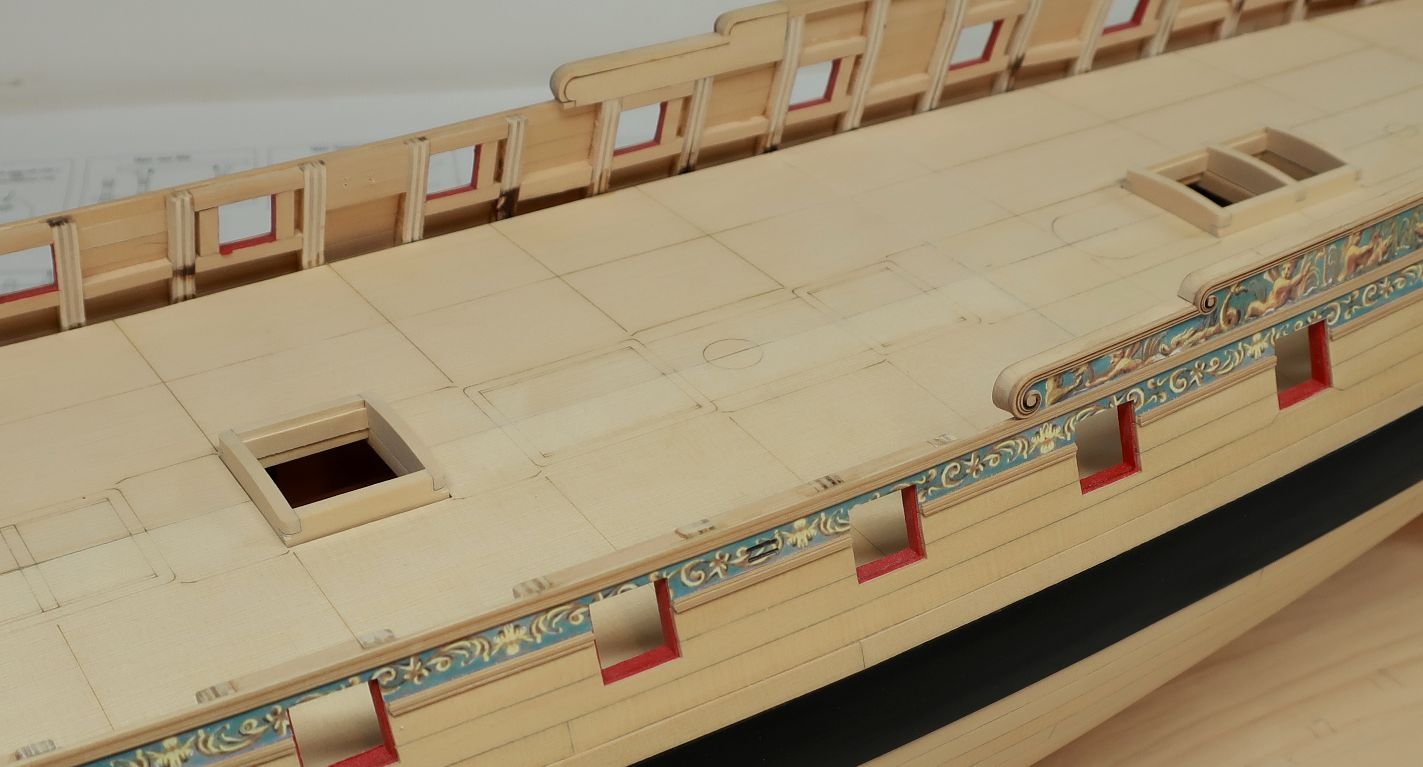
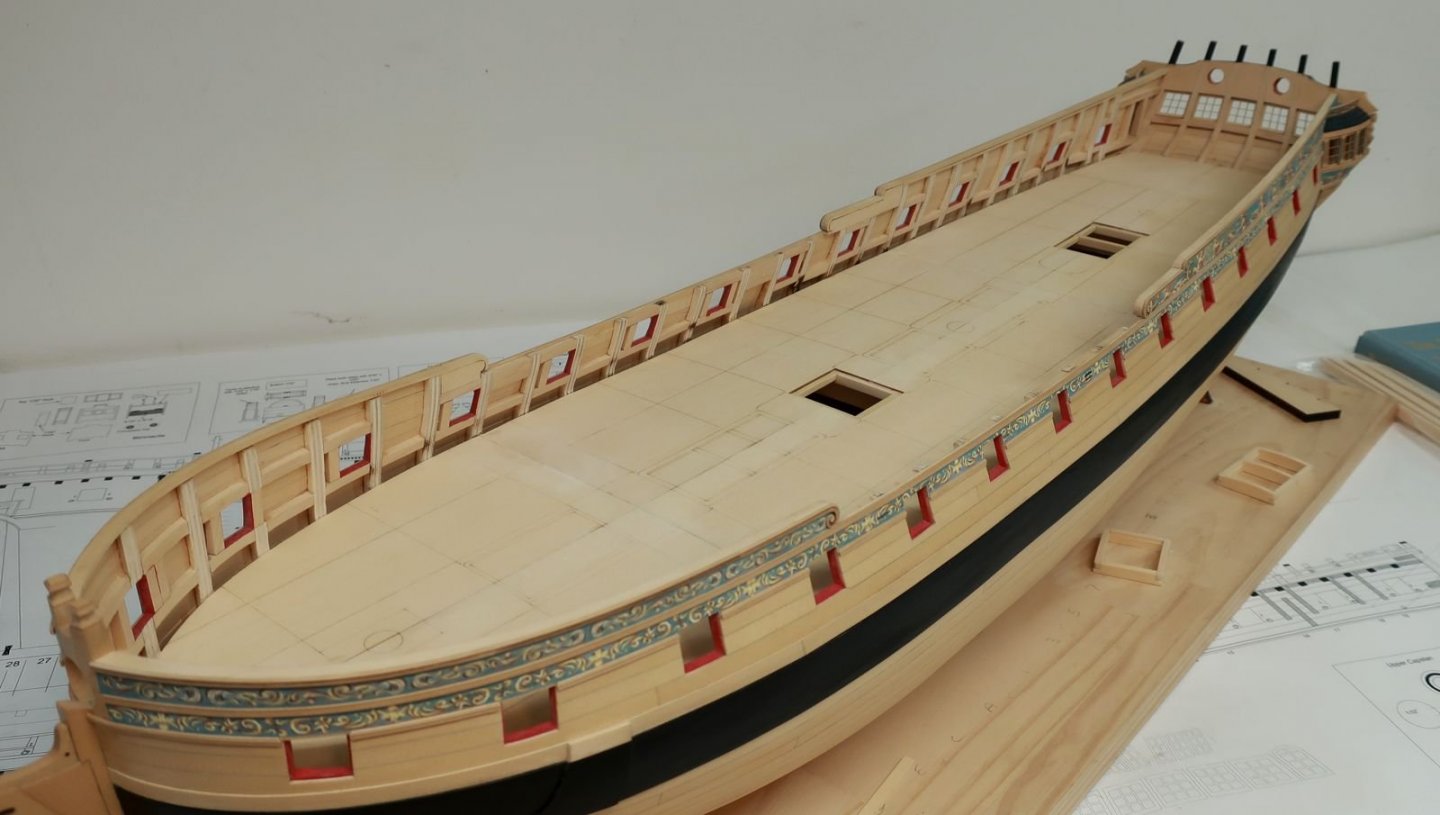
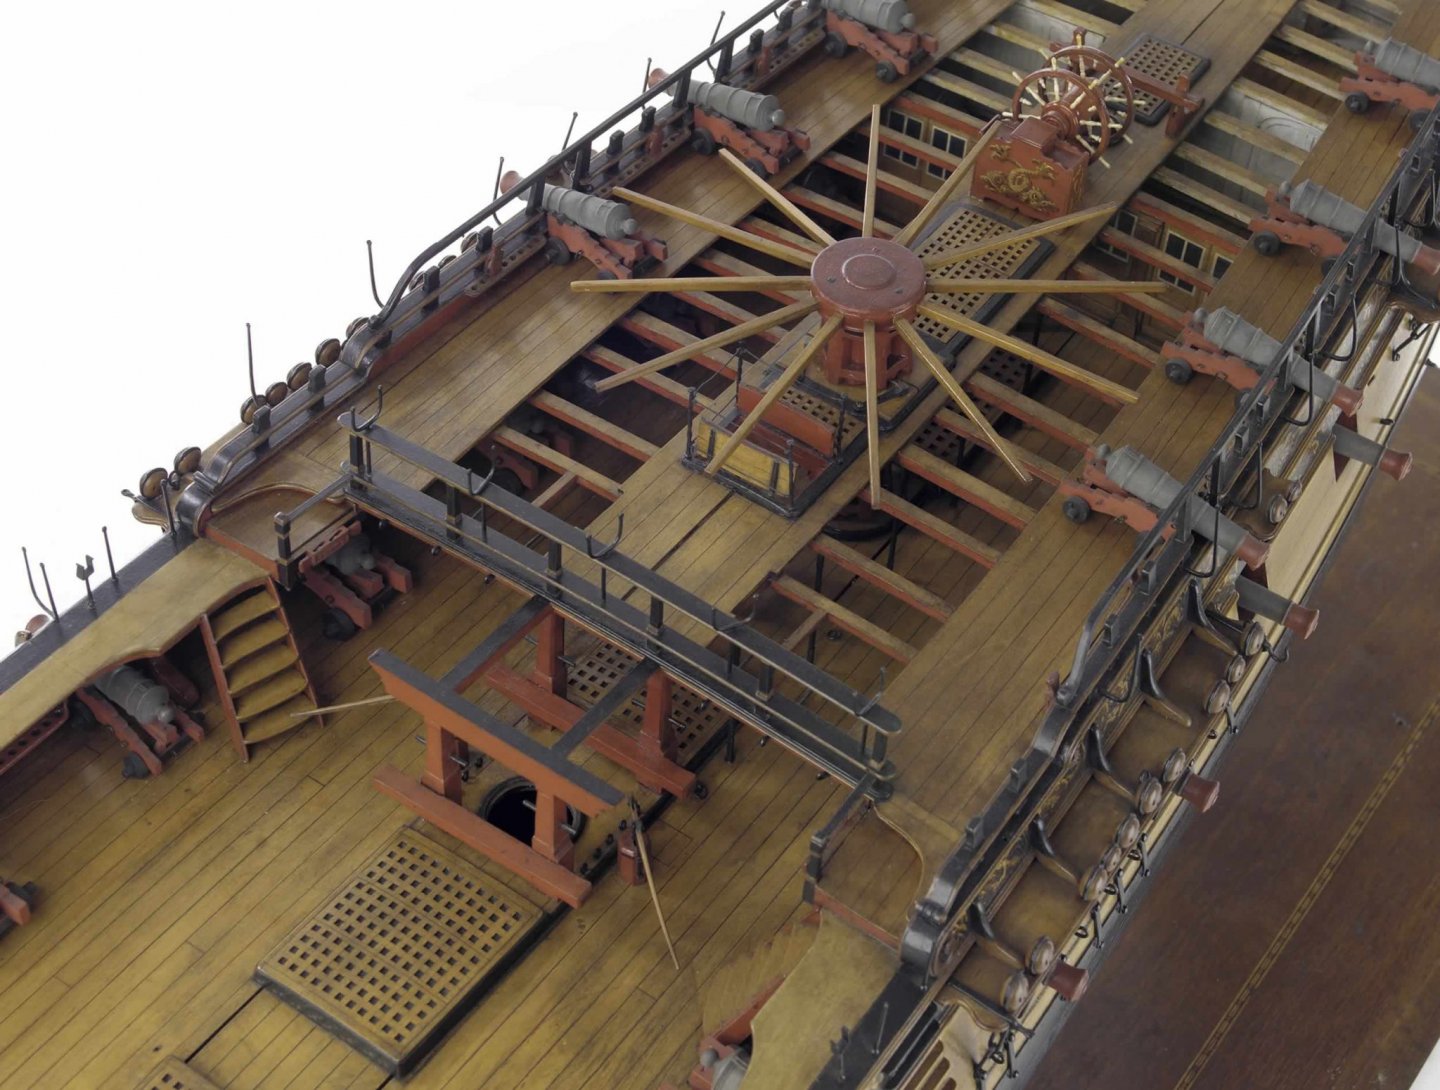
Here is a look at the coaming painted black with a grating in position. But these will be removed when I start planking the bulwarks. But first some pre-planking prep work. Before I can start planking the bulkwarks, I need to add some filler timbers (laser cut) where the hawse holes will be drilled. Then they were faired inboard. In addition, a 1/4" x 3/64" strip was glued down the stem so-to-speak. Shape the top round where the bowsprit hole is neatly. Keep this neat and round. The bulwark planking will abut the side of this vertical strip. And finally the bulwark planking can begin. The two lower strakes are the first layer of spirketting. The top of the spriketing should run even with the lower edge of the port openings. So you need to do some math. The distance from the false deck to the bottom edge of the ports can vary from model to model. It depends on so much....where you placed your sills....whether or not they are flat or angled inboard....etc. So you want to run two strakes for the spirketting 3/64" thick. On my model I used one 7/32" wide strake first and then the second upper strake was 1/4" wide. This combination was the perfect width in my case. Although you will inevitable find some ports that are slightly high or slightly low. You will need to adjust these should that arise....but most of mine lined up pretty good. You will be adding a second 1/32" thick layer to the spirketting later on. I did not simulate the seams with pencil because the bulwarks will be painted red. Except of course for in the captains cabin aft. There is a double line on the false deck showing where the captain cabin starts. So aft of this reference I did in fact simulate the tarred lines. So this photo shows the two strakes of the spirketting and how they run true with the bottom of the ports. I also added the inboard side of the fixed blocks. You can see one in the photo. I used some wire pushed through the sheave holes from outboard to help line them up. Let me know if you have any questions.

- 1,784 replies
-
- 33
-
-
- winchelsea
- Syren Ship Model Company
- (and 1 more)
-
As long as they are on the same side of each frame you will be ok. Best to pick a side.
- 217 replies
-
- 1
-
-
- medway longboat
- Syren Ship Model Company
- (and 1 more)
-
Relly coming along nicely Ben. I like the wood choices a lot. I didnt think I would. But after seeing them it looks lovely. Chuck
- 399 replies
-
- 3
-
-
- winchelsea
- Syren Ship Model Company
- (and 1 more)
-
Really great Start. Its good to see another join the group.
-
Honestly its really hard to tell what needs adjusting. Because you used different width planks, i cant tell if the run of your planking is wrong or if the transom fillers are too low. But the only way to tell for sure is to measure off the plans. Measure the distance from the top of the wales to the sheer on the plans and then compare to your model. Once you have the sheer correct then you can adjust to transom.
-
Beautiful job on the base....yes I like it a lot too. I may do a similar base for the Winnie although much much larger.
- 170 replies
-
- 1
-
-
- medway longboat
- Syren Ship Model Company
- (and 1 more)
-
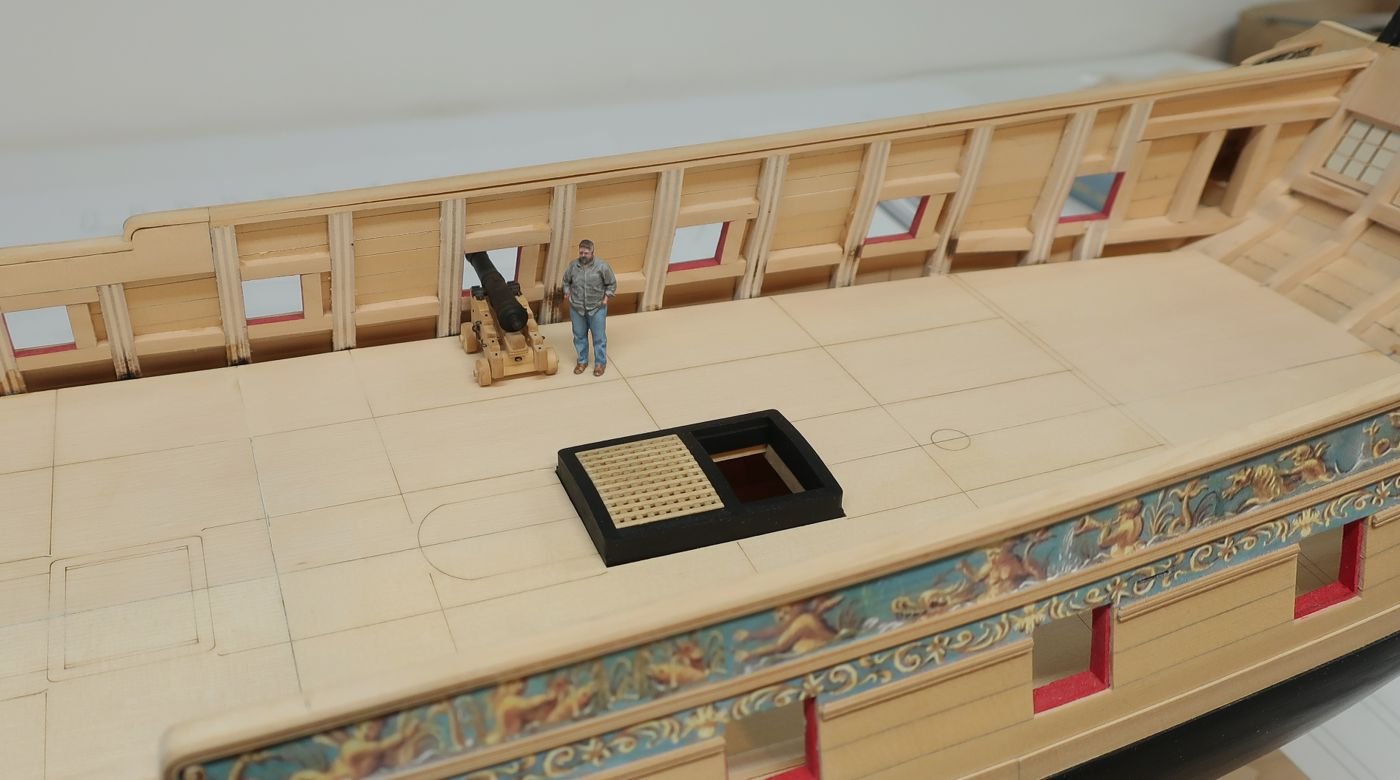
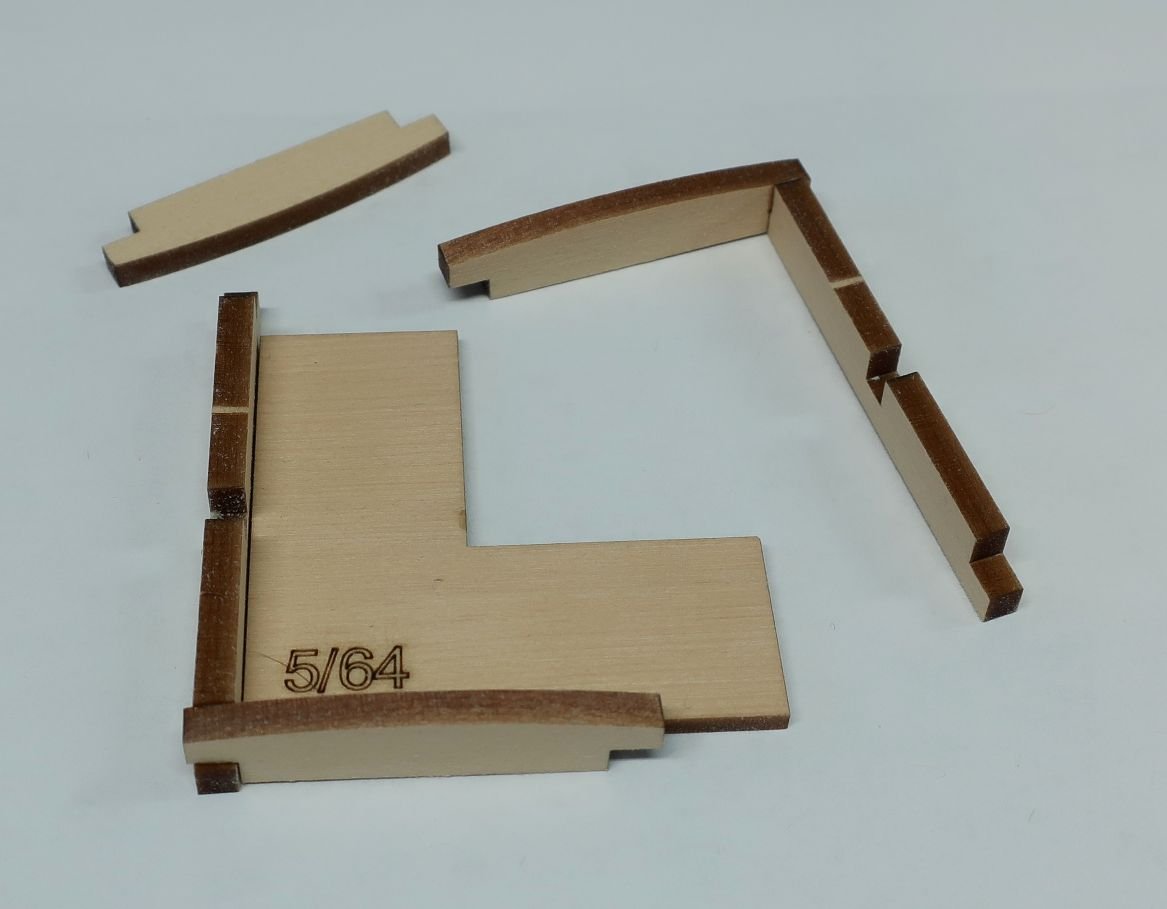
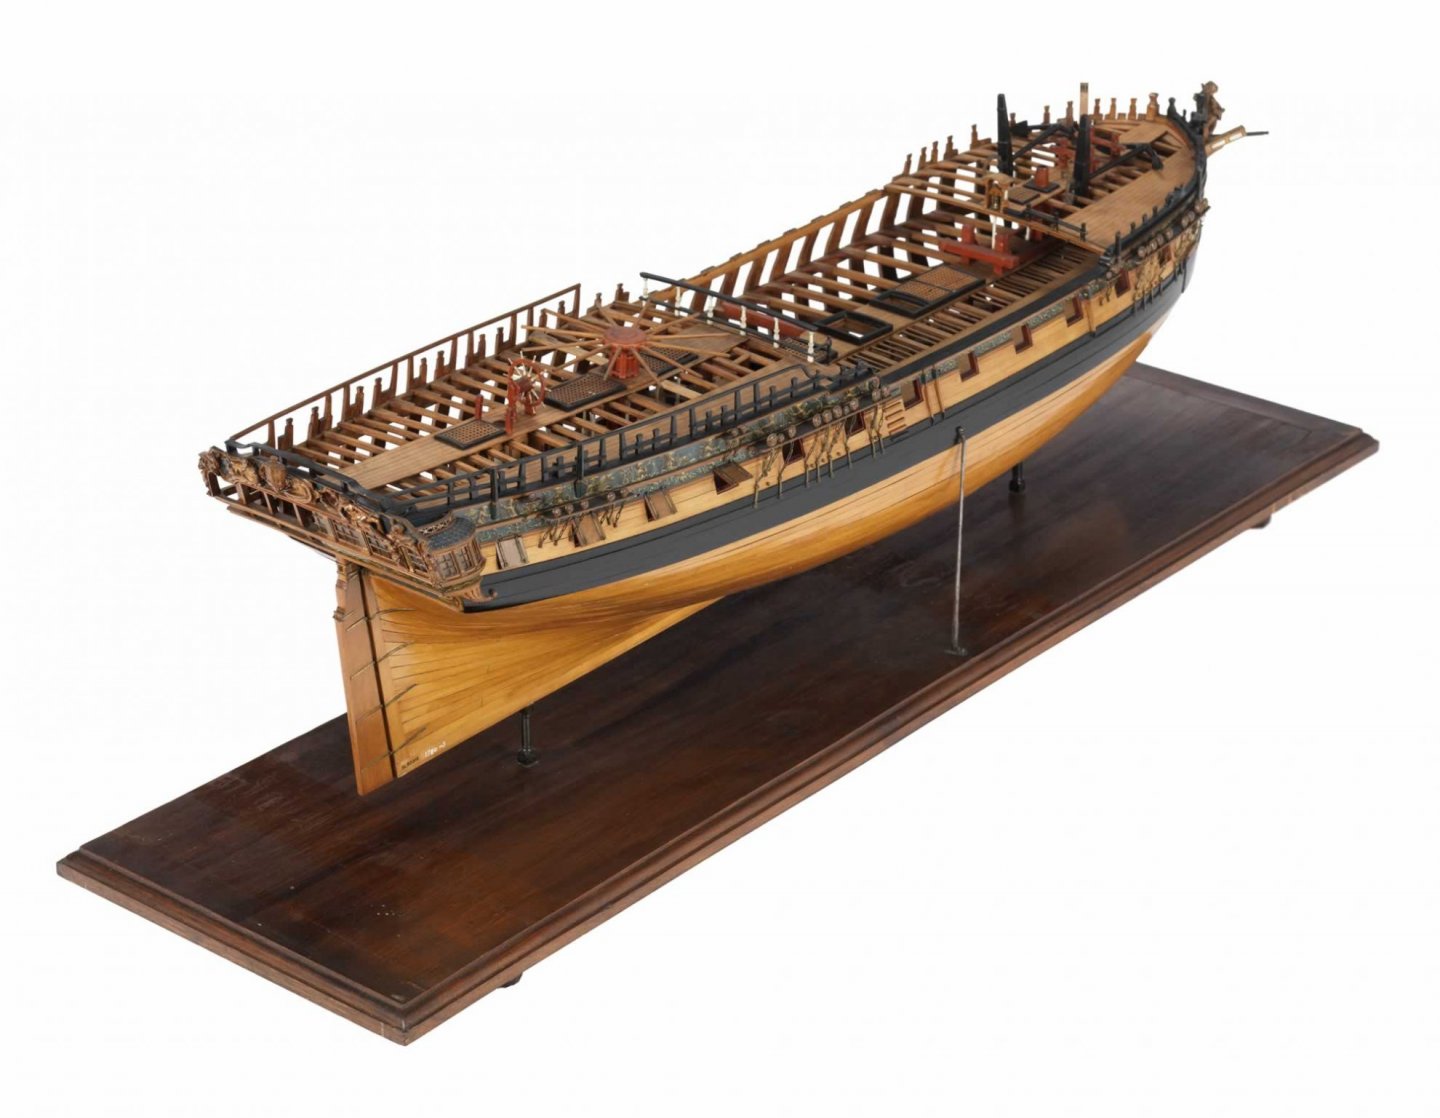
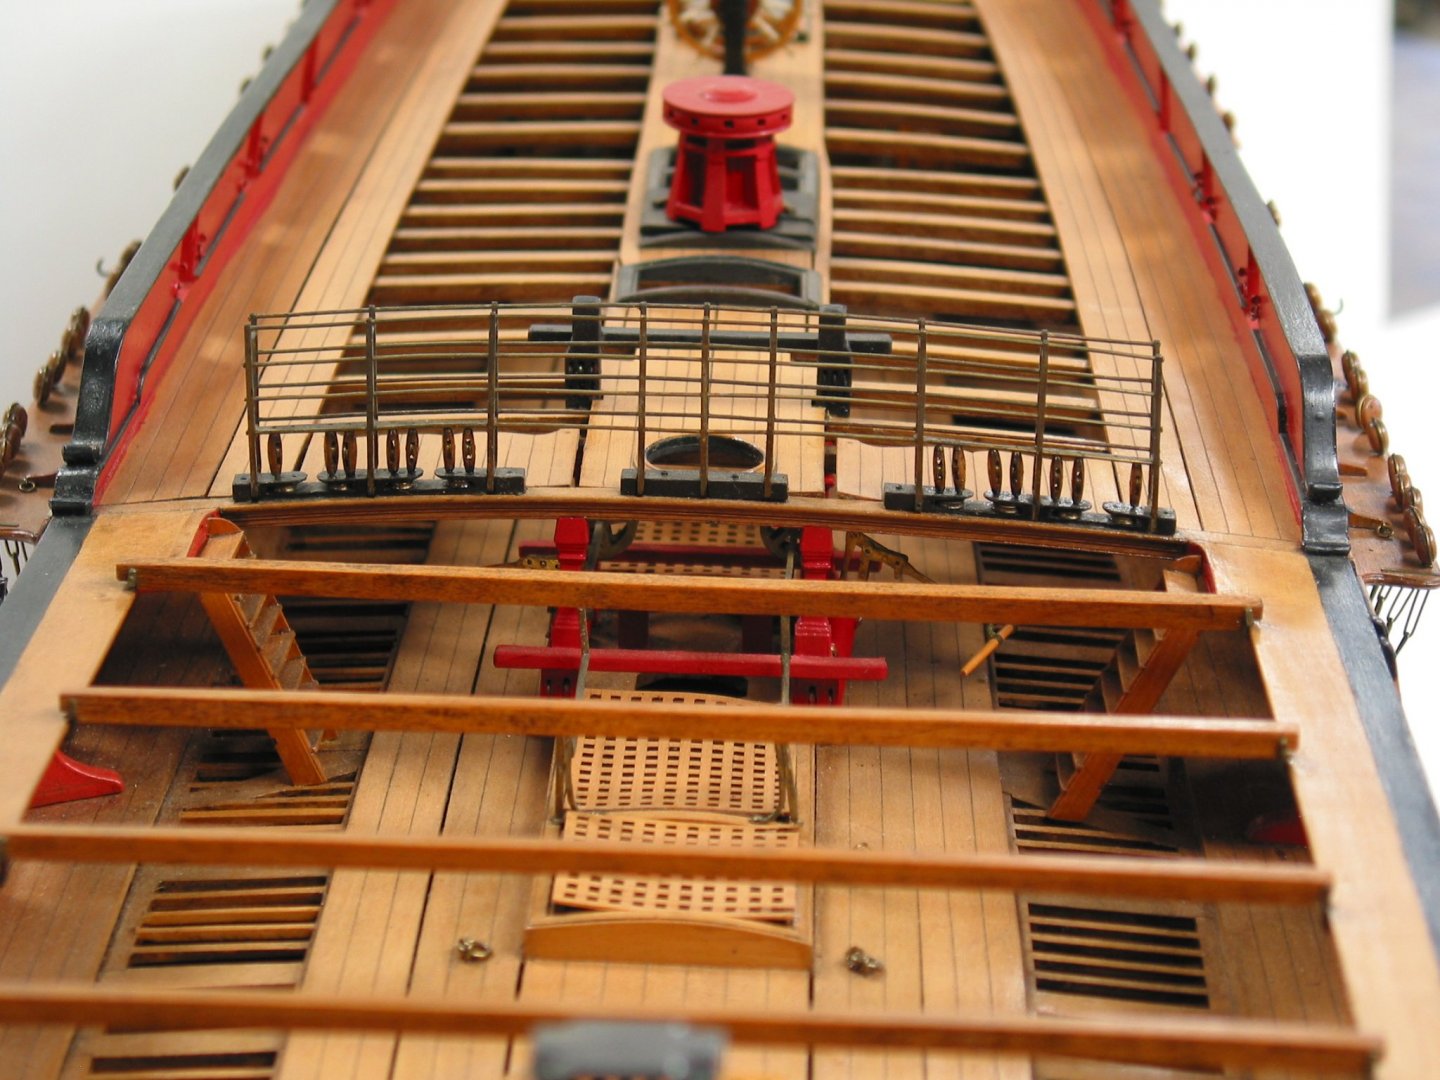
Thank you very much. No laser etched decking!!!!! I absolutely despise tthem with all the planks laser etched. It makes your entire model look kit-like when finished. A model this size makes it nearly impossible to do anyway. So yes we will be fully planking ours deck with wood strips. But you will lots of help and reference lines to help you out. The false decking.... The false deck is now glued in position. There are six large sheets. They are 1/32" thick. These false deck segments have many laser reference lines. So everyone must be super careful, make sure all of the reference lines match up when positioning these. Most important, make sure the center line between these is actually on the center line. This will ensure all of your fittings and coaming run down the center of the deck as they should. There is a trick that you may find helpful. But first, you should absolutely do a dry run with all six sheets in position. Because everyone will fair the inside of the hull differently, these may be loose or tight on your model. You may need to sand and trim the outside edges to get them to fit properly. Dont worry about having a small gap along the bulwarks. It is more important that you line up all of the reference lines and get the center running down the center..... A good trick is to dry fit all six in position. Then drill a few holes through the false deck sheets and into a few bulkheads. If you insert a few pins in these you can use them as registration pins when you glue each segment in position permanently. Drill all the registration pins for all six segments as you have them all in position. I hope that makes sense. You can see how there are two openings in that photo above for the two coamings which will be open companionways. I decided to go ahead and make these two coamings now. Although I didnt glue them in position. They may get damaged while I plank the bulwarks so I just skipped ahead a bit to procrastinate a bit before planking. You can see how they fit in those openings and on top of the framing you made for them. All of the coaming pieces are laser cut. They go together quickly. They have the camber build into them which is a good thing. You will also get a small right angle jig. You will actually get two of these. There use depends on which coamings you are building. These first two coamings use the 5/64" thick jig. All others will use a thinner jig. You can use the outside of the jig to get a right angle on the coamings. You dont want skewed coamings. I usually build two pieces as shown below and set them aside. Then I take the remining two sides and repeat the process. To finish the coaming I then glue these two pieces together to complete the coaming. This particular coaming is the aft one pictured on deck (J2). I show this one because it has an additional timber that separates it into two parts. There are notches for these and it was easy to just slip it right in and the coaming remains squared up. Then I finish it off by sanding all of the laser char off. I havent applied any finish yet. Once you have the initial coaming completed, you must add thin strips along the inside edges to form the rabbet. This is what the gratings will sit on. These are 1/32" x 3/16" strips. Everything is yellow cedar. Lastly....you must round off the four corners above the deck planking (which we have yet to do). That is why these two coamings (J1 and J2) use the thicker 5/64" jig. Simply use it to round off the corners down to the jig when the coaming is set against it. You can just use a #11 blade to make some straight cuts and then round it off with some sandpaper. You can see the finished corner on the left side. All four will end up looking like that. Only a small amount needs to be sliced off. Dont cut too much of the corner away!!! One last thing.....as with everything else. You can paint these coamings black like the contemporary model or leave them natural. Its up to you. I havent decided yet but am leaning towards painting them black. On such a big model like this I think it will break things up. Otherwise it will look all to similar down the middle of the deck. You guys have any preferences??? The HMS Amazon (contemp model) has a different painted look below....the qdeck is fully painted black while the gun deck only has the sides of the coamings painted black. Which is odd. Finally.....you have the Minerva contemp model....They are all natural on the gun deck and all painted black on the quarter deck. So many choices. You could also just leave them all natural. As you can see I like to really examine and study many contemporary models and that usually just leads to more difficulty in choosing which way to go!!!
- 1,784 replies
-
- 25
-
-
- winchelsea
- Syren Ship Model Company
- (and 1 more)
-
That looks pretty good to me. Its good to see a cherry version getting built.
-
You are correct...that was an error on my part. You will need more planking strips but I am out of stock with those at this time. Chuck
-
I used CA so it should be fine.
-
The survey is not per kit.....its a poll or survey on kit brands. See here. There are far too many kits and subjects to create a poll on a specific kit or subject.
-
Looks great Mike. You are getting close. The home stretch....hows that running rigging coming along?
- 150 replies
-
- 1
-
-
- agamemnon
- caldercraft
- (and 1 more)
-
Paper prints work just fine....they look great and its how the contemporary models were done. You can buy some self-adhesive paper which is very thin by the way, and print them on that. It would be very easy to paint right on top in a few areas only to fake that you actually painted it. But if the original design is done in a painterly style, it isnt needed. They are not easy to do however so they look good. Trust me. Chris has his work cut out for him. I have seen the decal friezes by other kit companies. The water/slide off kind. They look just awful in my opinion. But there will be trade-offs no matter what is selected. Chuck
-
That looks quite good. Its coming out great.
- 137 replies
-
- 2
-
-
- winchelsea
- Syren Ship Model Company
- (and 1 more)