Chuck
-
Posts
9,725 -
Joined
-
Last visited
Content Type
Profiles
Forums
Gallery
Events
Everything posted by Chuck
-
 Looking good so far. Just remember to keep you nails cut short and keep your hands clean while using the cedar. Once you get used to it, its a wonderful wood to use.. Chuck
- 778 replies
-
- 8
-

-
- cheerful
- Syren Ship Model Company
- (and 1 more)
-
Im going to leave the panels natural. Just some poly. But as I mentioned in the instructions...a shade very close to the contemporary model can be achieved by using Old masters fruitwood gel stain. No masts or rigging sorry. But those can be added on your own if you like. Its pretty standard stuff. My hull will end up this same color when done. Its what I prefer. But you can use whatever finish you prefer if you build her. I should have my store back open next week sometime. It depends on whether or not the post office has gotten their act together. I may send a few test orders out just to be sure before opening up.
- 1,784 replies
-
- 7
-
-
- winchelsea
- Syren Ship Model Company
- (and 1 more)
-
Yes the ports around the panels were touched up before the panelled sheets we glued in place. As far as the other planks....no I waited to trim back those planks and then apply wood filler if need. Then those gun ports were cleaned up and painted at the same time as the inboard bulwarks. Chuck
- 1,784 replies
-
- 3
-
-
- winchelsea
- Syren Ship Model Company
- (and 1 more)
-
That looks good. No i did t mess with those. Its the same as on my model.
-
ancre Coureur by cafmodel - 1/48
Chuck replied to cafmodel's topic in - Build logs for subjects built 1751 - 1800
Beautiful work Tom!!! You have been busy. -
Thanks Jeff Its the usual Grumbacher Crimson acrylic paint from a tube. I have a lot of clean up to do and many more coats before its all finished.
- 1,784 replies
-
- 5
-
-
- winchelsea
- Syren Ship Model Company
- (and 1 more)
-
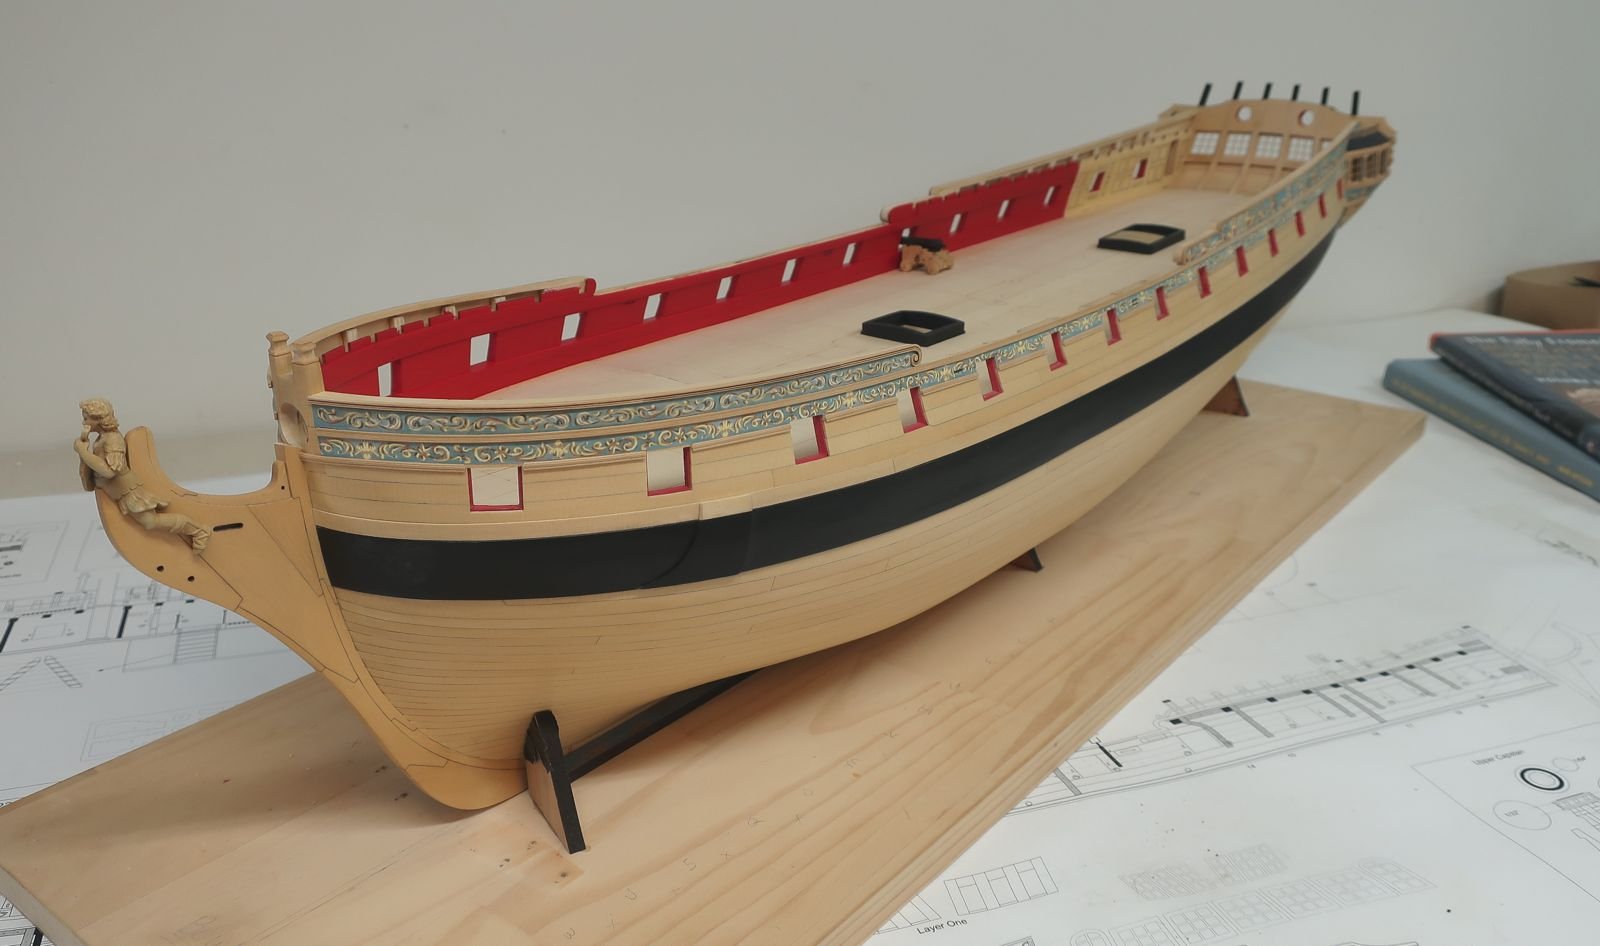
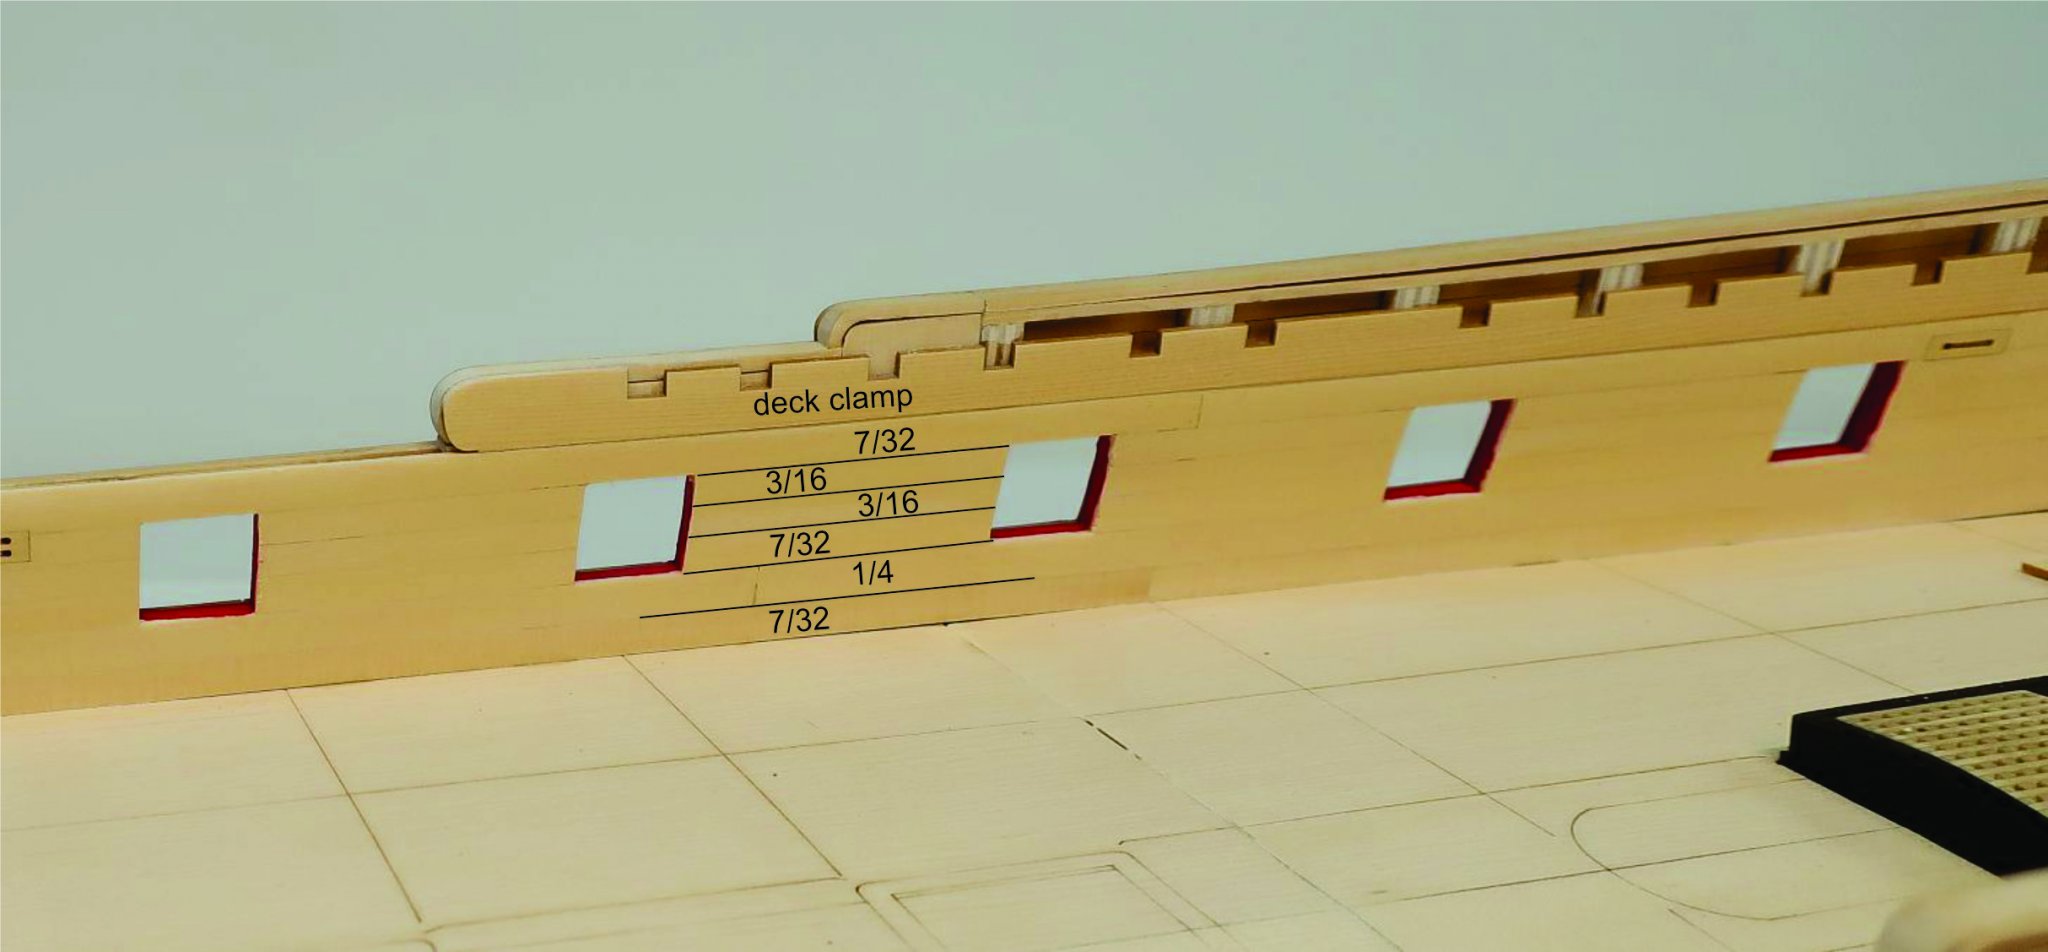
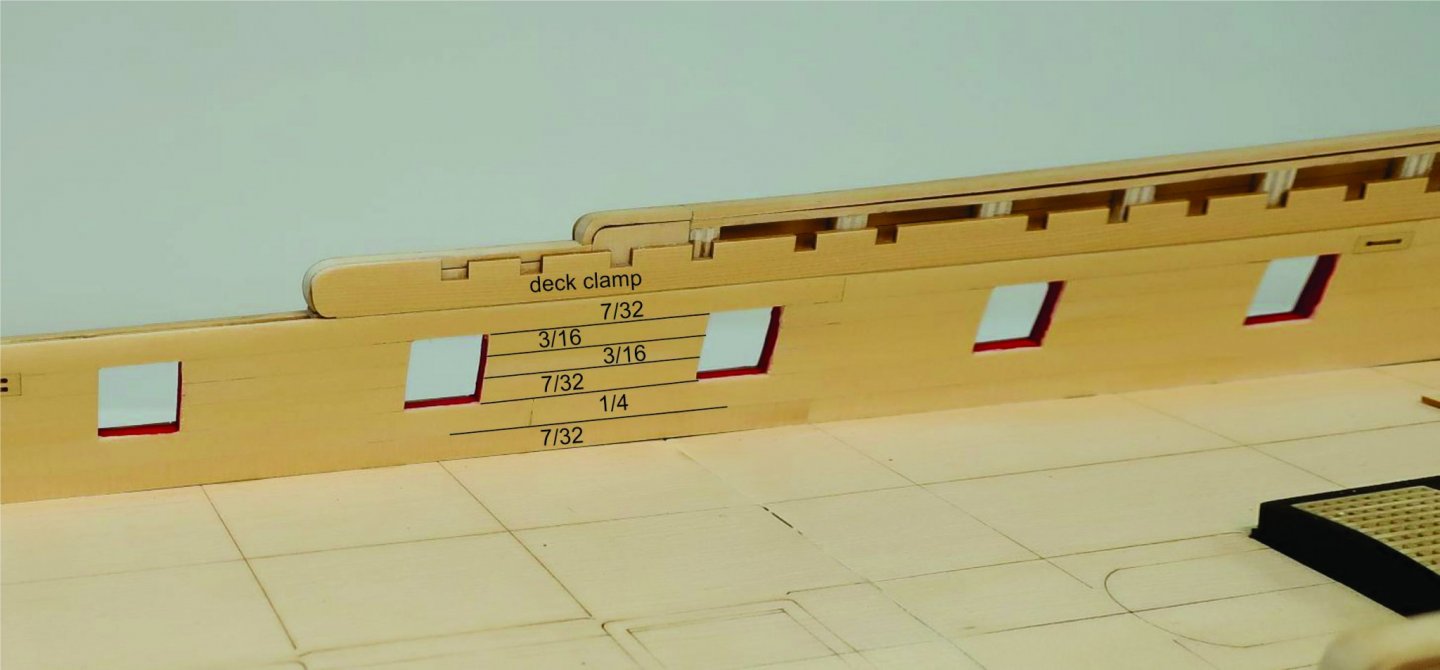
Next up it was time to add the second layer of spirketting (the lower two strakes) and the 7/32" wide plank above the ports. I used planks that were the same width but just 1/32" thick. You can even sand them thinner if you like. I also added the aft shell for fixed block. See it forward of the panelling? This should be added at this stage so you can plank the second layer around it. Note how I also added one more 1/32" second layer strake above that 7/32" wide strip. The top edge follows along the bottom of the notches in the deck clamp. I use various width strips because you will need to taper it. It is not a consistent width. Just make sure the top edge is flush with the bottom of the notches in the deck clamp. MOST important....look at the forward end of this additional trip. Notice where it starts in relationship to the first notch in the deck clamp. This is important because it will aid you later when we build the platforms for the gangways. Here is a view of the bow area. Same things apply. Notice where the aft end of the plank ends in this instance. Once again it is even with that first notch. Sand everything smooth and prep the bulwarks for painting. Then paint it red. But dont paint the fancy panels aft. Here is what my model looks like at this stage. I still have to complete the port side....havent started planking that yet.
- 1,784 replies
-
- 35
-
-
- winchelsea
- Syren Ship Model Company
- (and 1 more)
-
That is the science museum model of the 74 gun Warrior. Also note the deck beams painted red on each side. I may be doing this on our model. Its a very common feature although in some cases just the knees are painted red.
- 1,784 replies
-
- 1
-
-
- winchelsea
- Syren Ship Model Company
- (and 1 more)
-
Very nice. No i just sanded the heck out of it.
- 160 replies
-
- 2
-
-
- cheerful
- Syren Ship Model Company
- (and 1 more)
-
That is what the thicker layer of bulwark strakes that are between the gun ports and the deck. They are usually about an inch thicker so when you see a model they stand proud of the strakes above Them . In the contemporary example below they are painted red. But the strakes above them are not. Look at the planking in the waist. DSC01571
- 1,784 replies
-
- 4
-
-
- winchelsea
- Syren Ship Model Company
- (and 1 more)
-
Ahhh!!!! You were the only one to catch that!!!! Gold star for you. Yes I made a foolish mistake. I glued the first panel in upside down. And upside down it will remain. Once everything is all done it wont be too terrible. But yes, as soon as I finished it I realized my stupid error. So please be careful when you glue yours in!!! Its not a huge issue. Chuck
- 1,784 replies
-
- 4
-
-
- winchelsea
- Syren Ship Model Company
- (and 1 more)
-
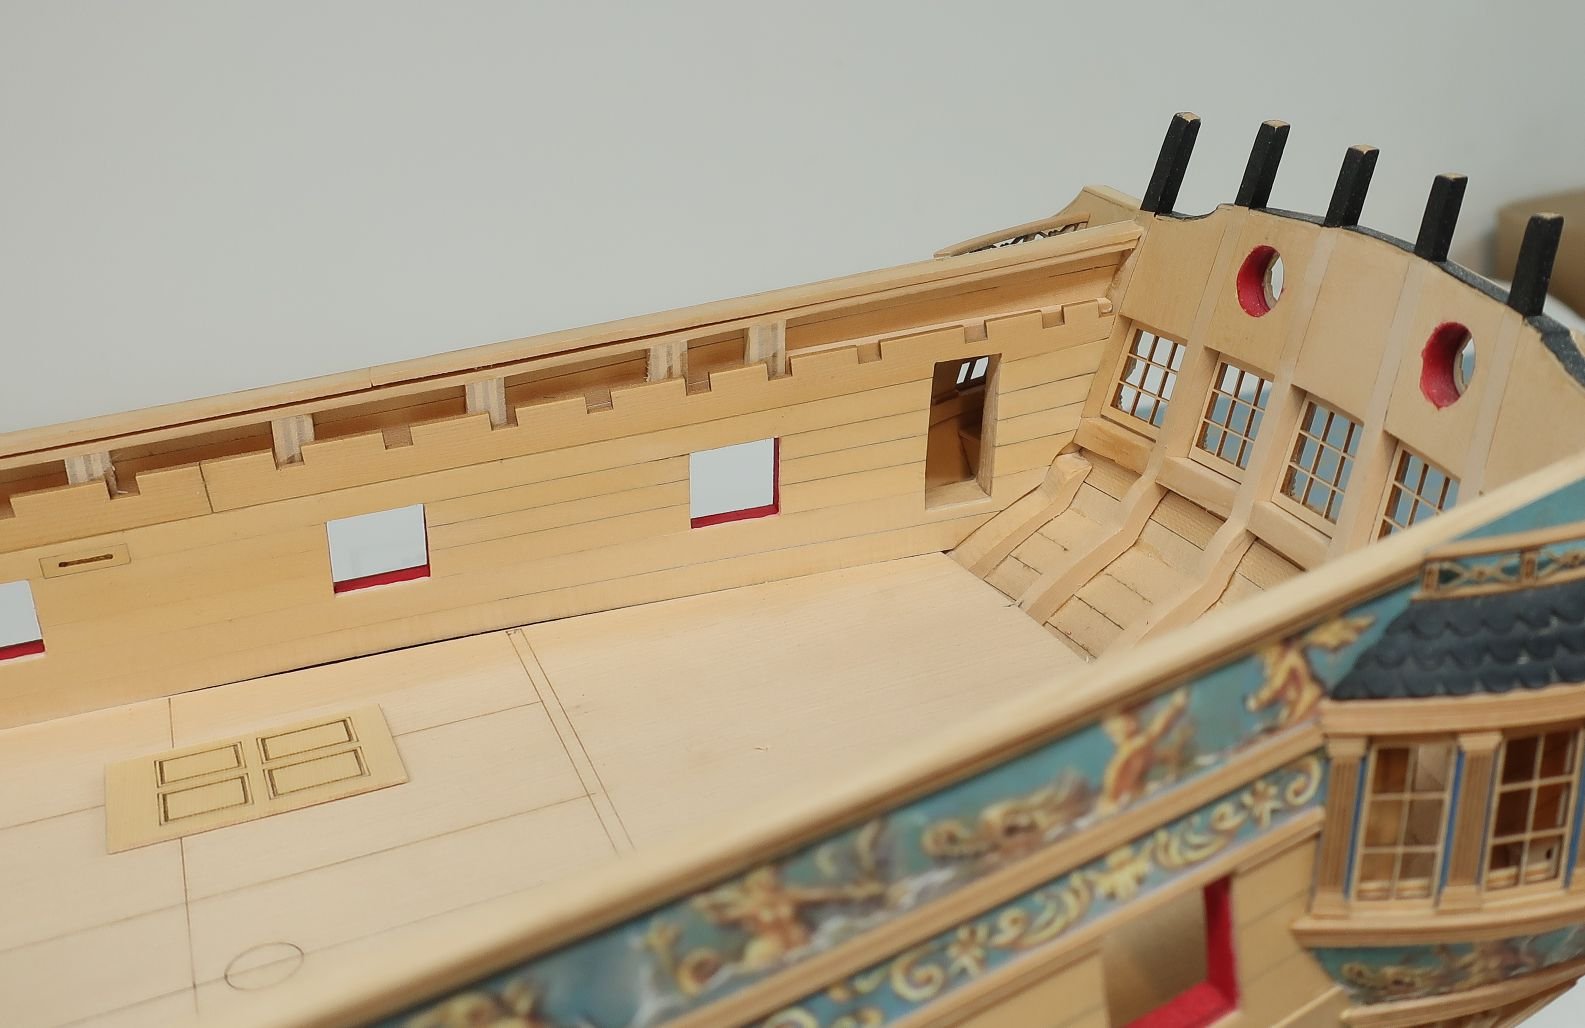
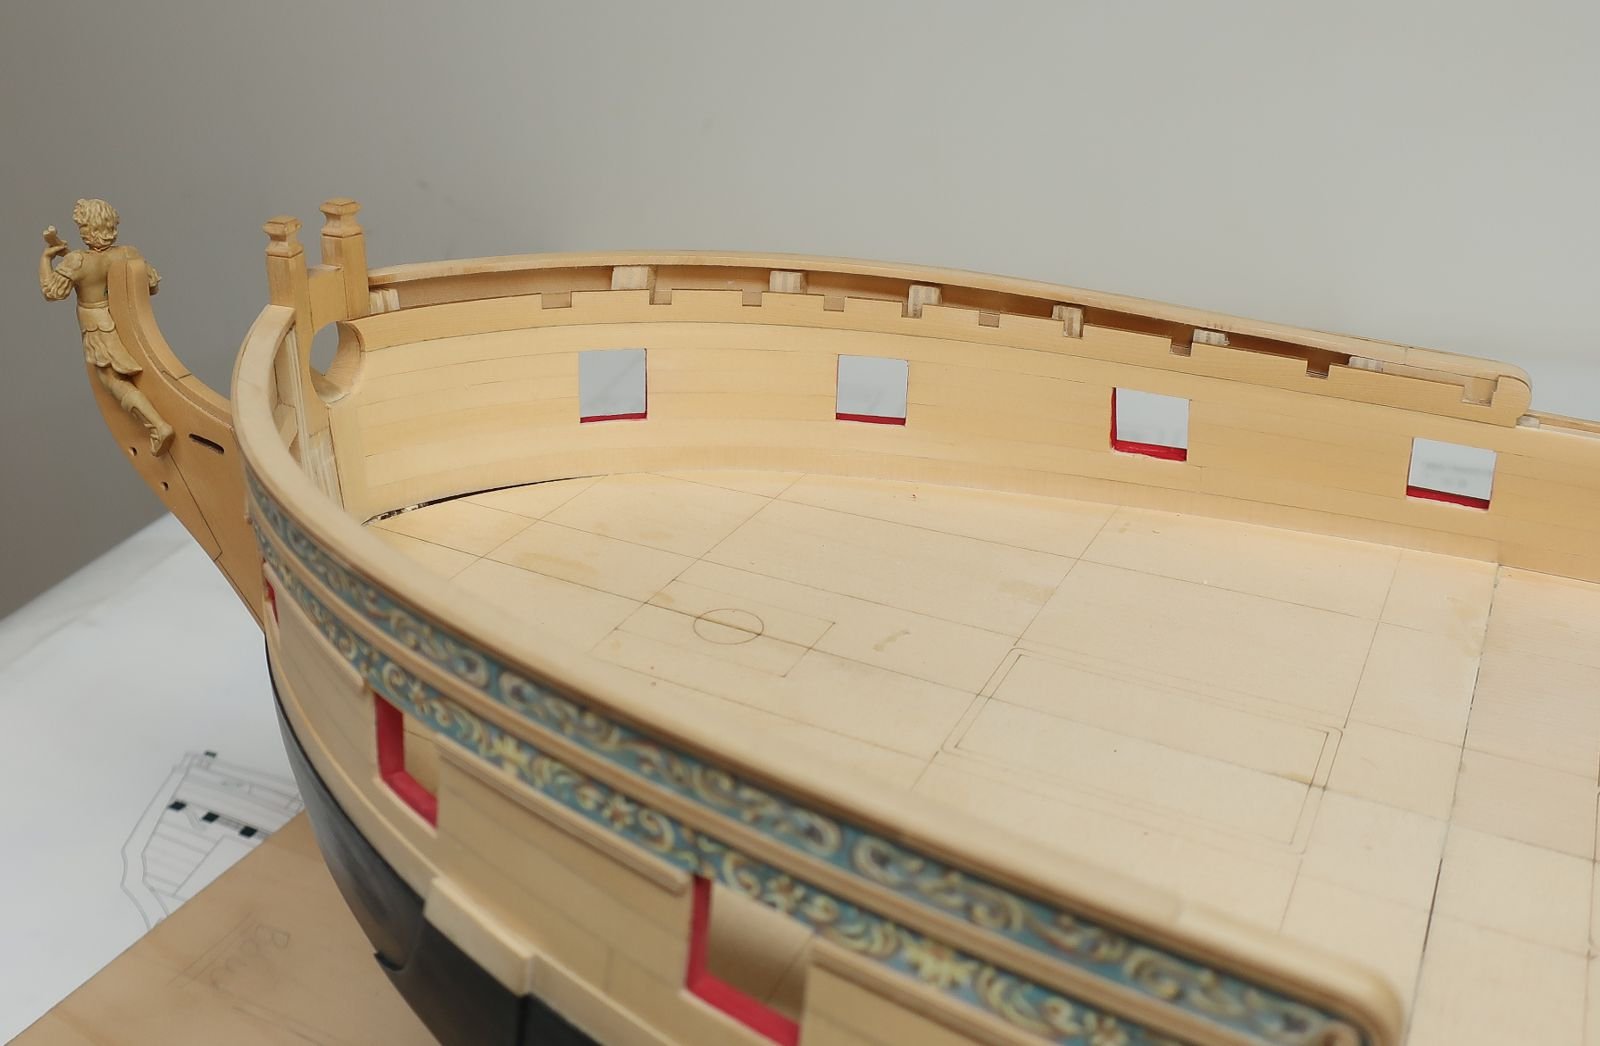
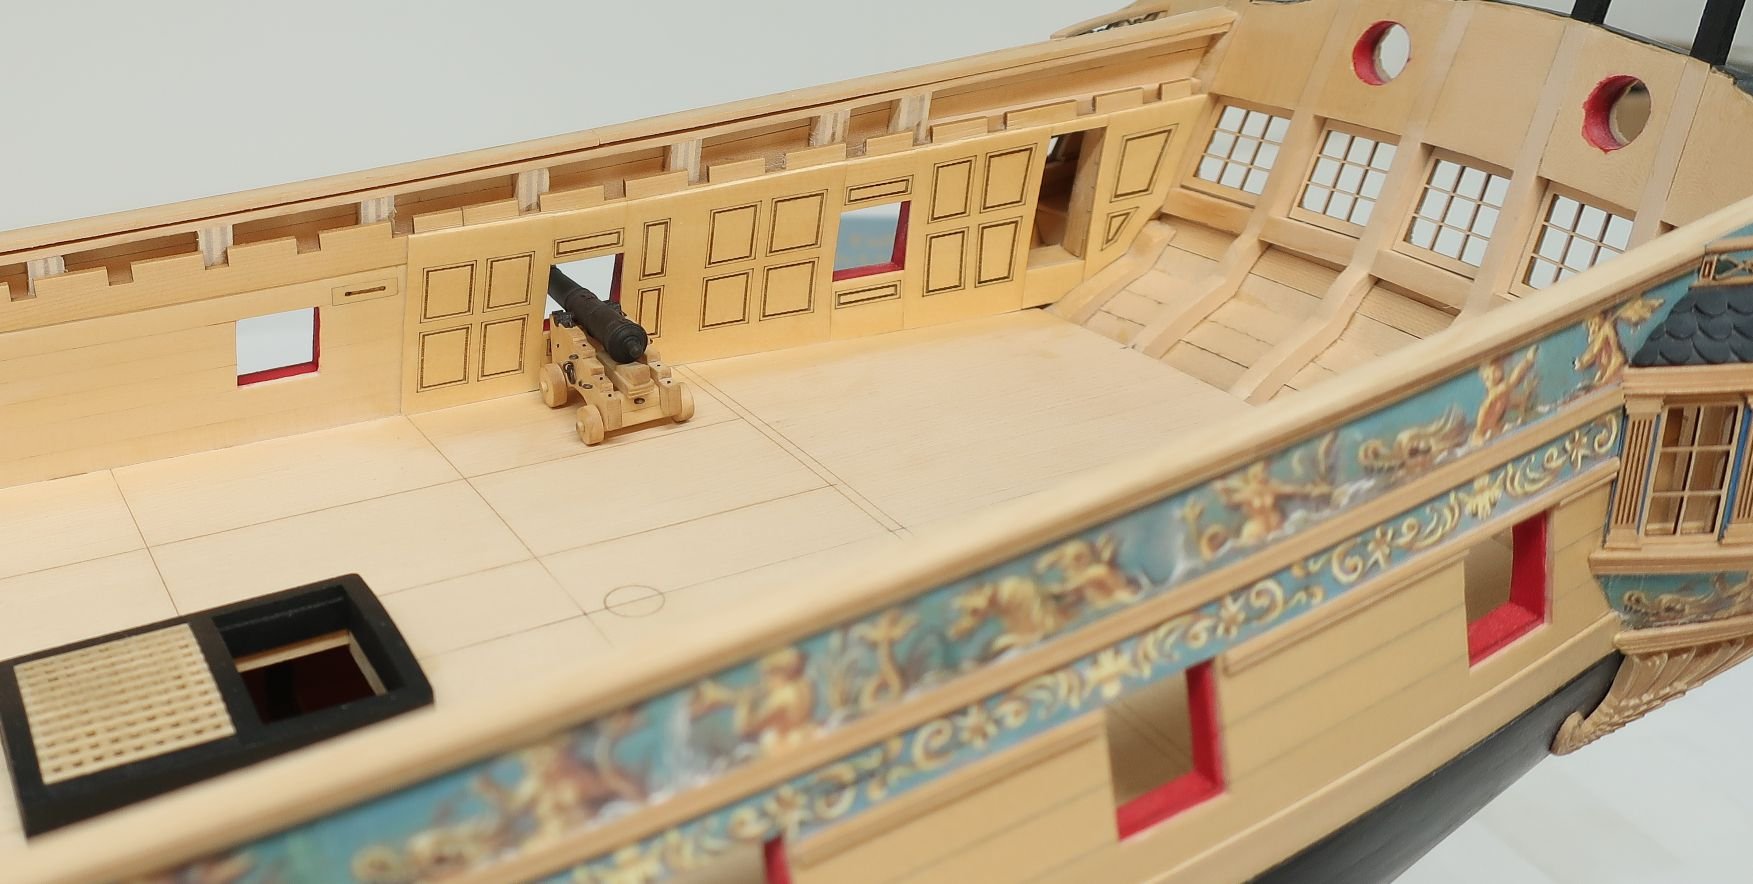
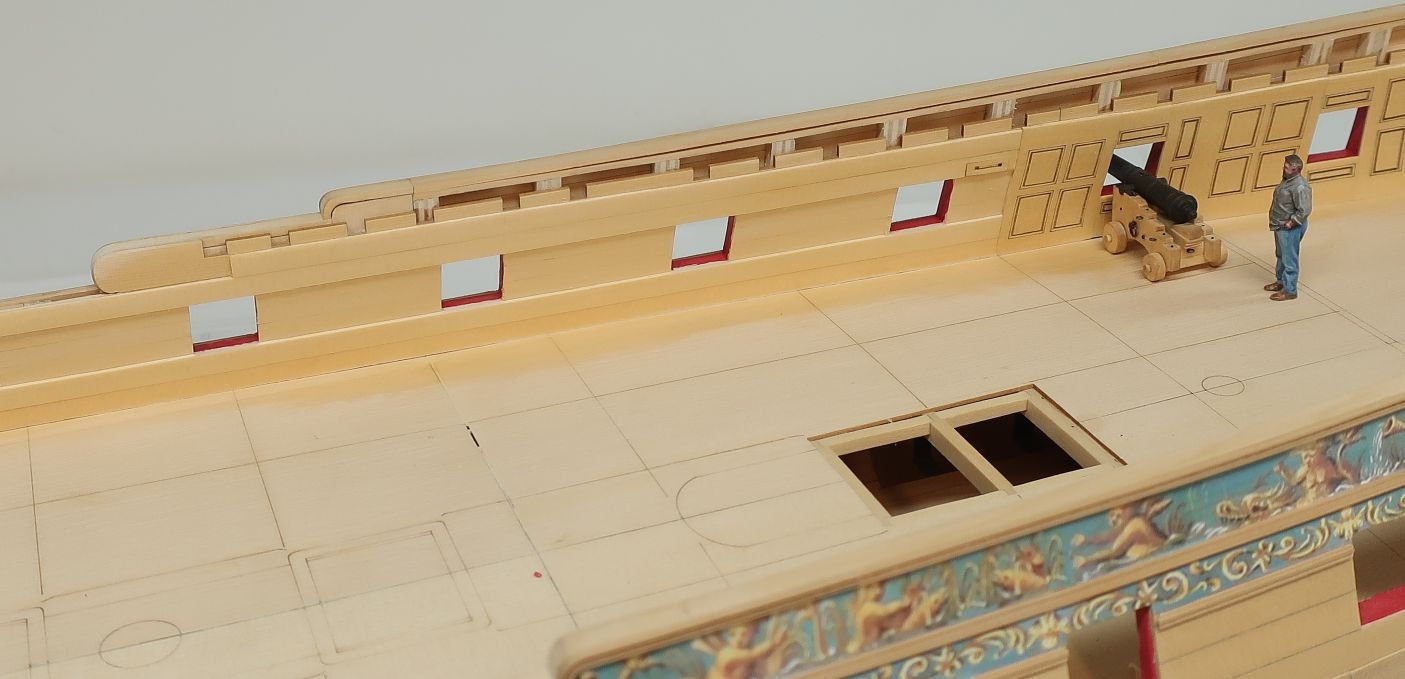
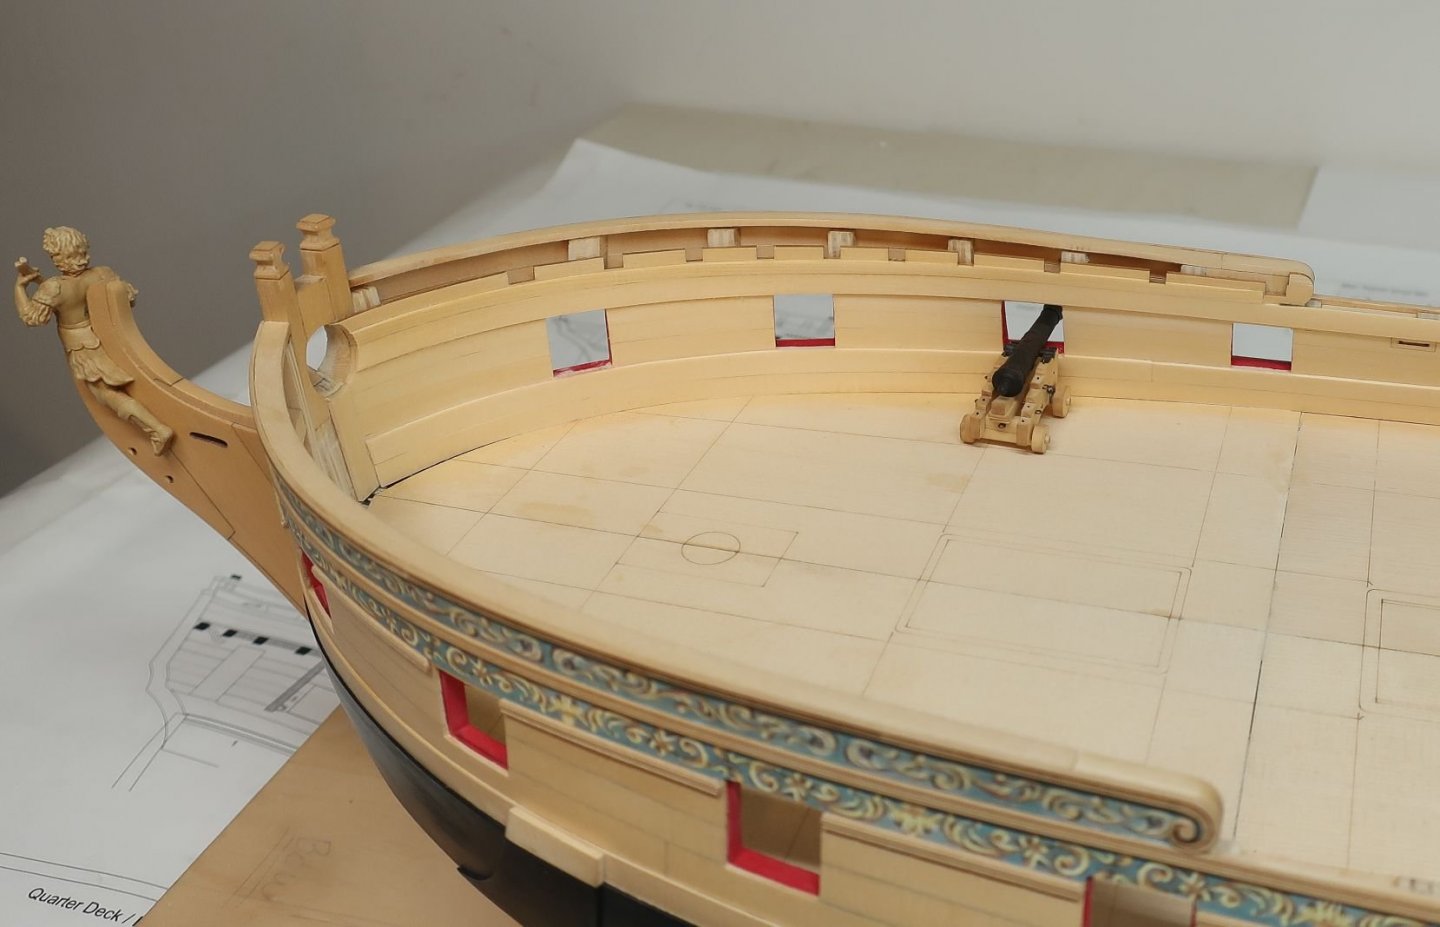
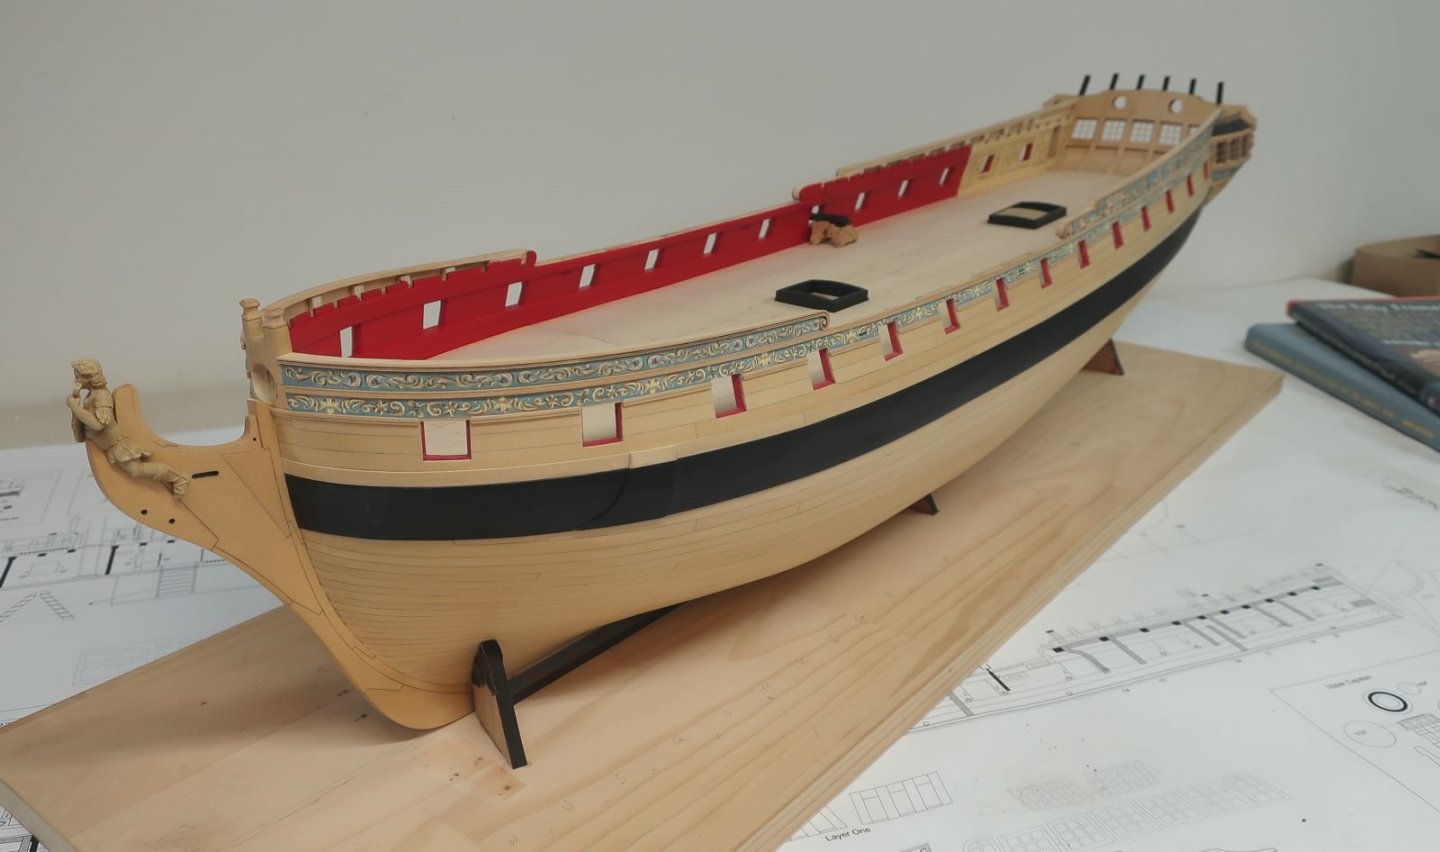
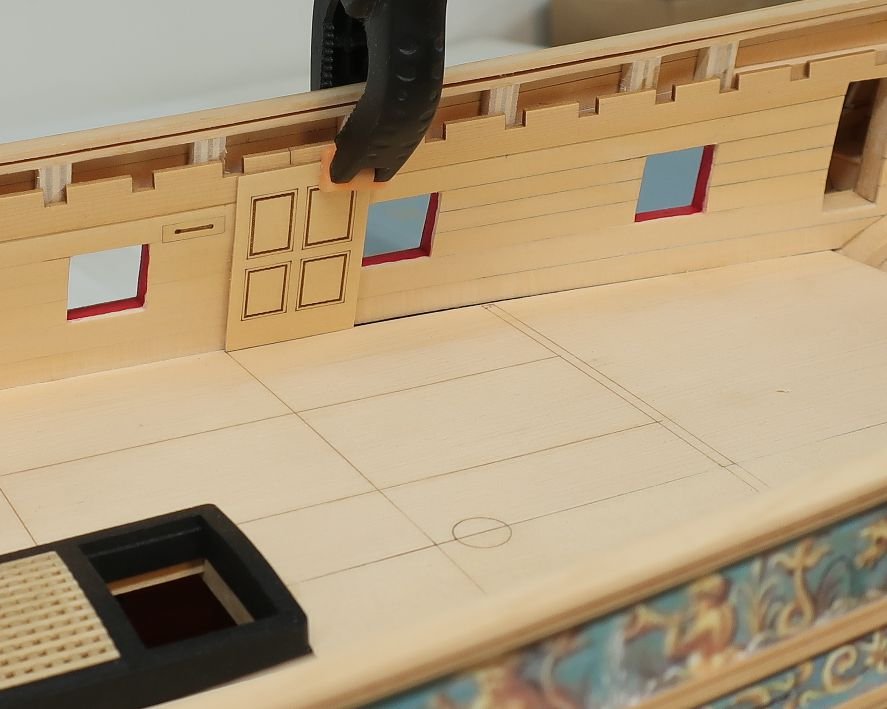
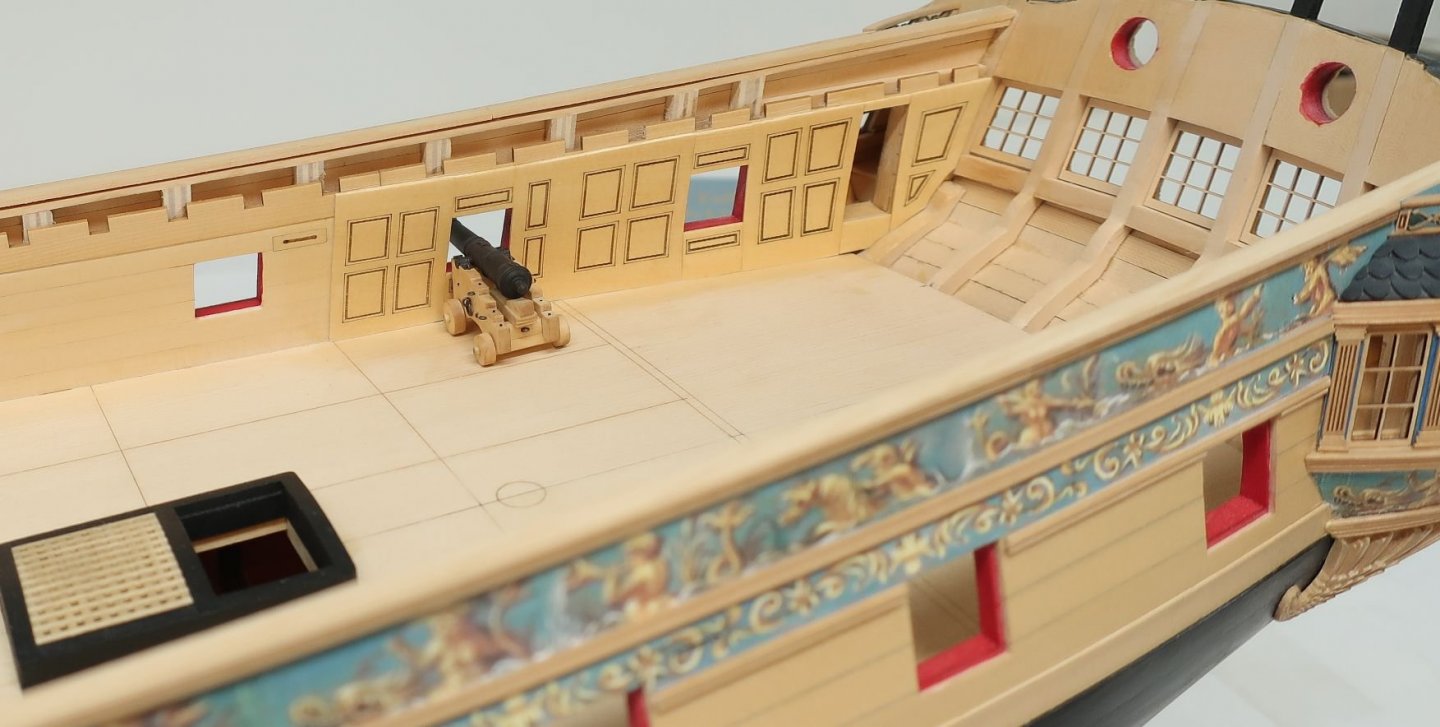
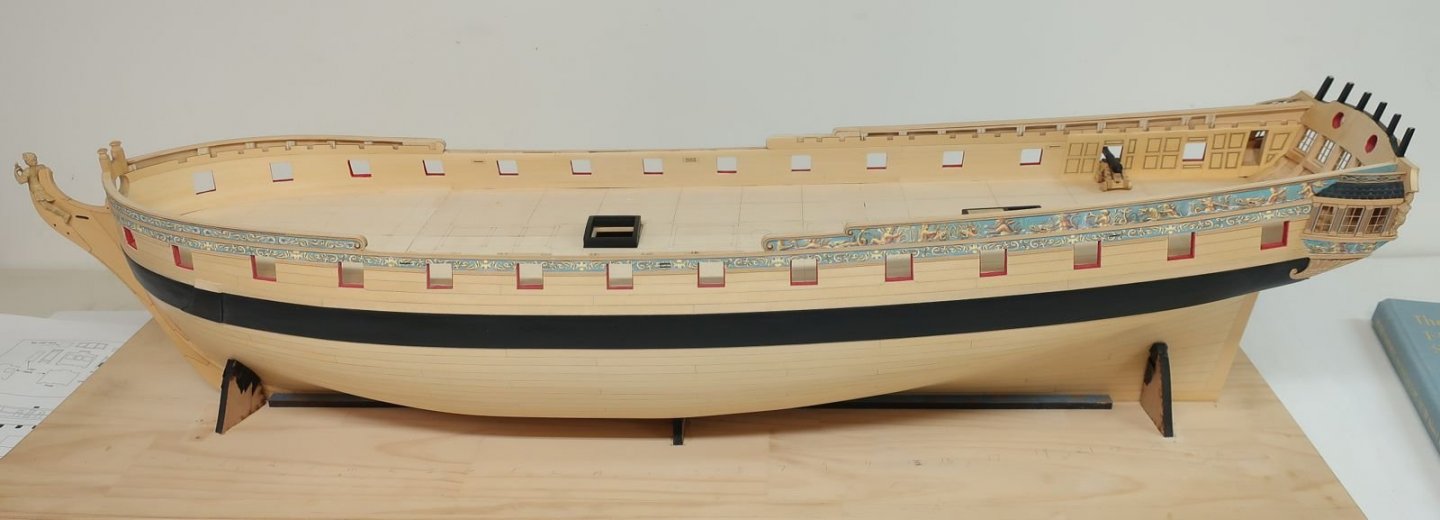
No not at all....we wont be building each paneled section. They are laser etched. But you could go that route if you are feeling ambitious. Let me show you what I have been up to. The bulwarks have been planked inboard with their first layer of planks. The first photo below shows the different widths I used. This might be slightly different on your model but you get the idea. The bottom two strakes will have the top edge flush with the bottom of the ports. The three strakes above that between each port were divided up so the top of those was flush with the top of the gun ports. On top of that goes a strip of 7/32" x 3/64" cedar. This takes you to the shear along the waist. I have NOT simulated the seams with pencil because they will all be painted red. The inboard layer of the fixed blocks were added too and the planking carefully cut around them. BUT....wait until after you plank the first layer of the inboard bulwarks to put the aft-most fixed block shell in position. It falls on the deck clamp which is thicker and this particular fixed block sheel should be glued on TOP of the first layer of Bulwark planking. The deck clamps are laser cut for you. The quarter deck clamp is in two lengths. You need to add the forward section first. Line up the front of it with the hance piece. This is important!!! The notches laser cut in the deck clamp are for the quarter deck beams. We want to make sure they are lined up properly on both sides. If done properly your deck beams wont be crooked!!! Dont sand the laser char off the seam between the two pieces. This will screw up the placement of the deck beams. Just butt them together. Once the forward section is glued in place....glue in the aft section. Below. This was left a bit longer on the aft side so you can tweak it to fit your model. Another really important note. You will notice that the bottom of the last notch in the deck clamp is even with the top of the stern windows. This is crucial. If your deck beams are too high it would be trouble. A little lower wouldnt hurt though to be safe. So please please make sure that this is correct. You will need to adjust it if needed back there. In fact you should probably clamp the deck planks in position before you glue them in as a test. Make any needed adjustments before you glue them in. And a reminder again to not sand the forward end of this deck clamp where the two sections butt together. Only sand the aft end to make it fit if need be. Here is a look at the forward deck clamp for the forecastle. Same is true with this one. Position the end along the hance piece in the waist. Then cut the other end at the stem to length which will need to be shaped round later for to make the bowsprit hole nice and neat. ALSO.....pre bend this deck clamp with heat. I used the hair dryer. Dont try and force bend it at the bow because it will certainly break along the notches for the deck beams. The next step is to install the paneled sheets on the planked bulwarks. These will appear in the cabins and captains quarters. They are very thin and laser etched with the panel design. The full panels between each gun port are added first. Then the panels above and below each port can be tweaked for a tight fit. You want to have tight seams here. Try not to have the seams to visible when your done. So clean the laser char from them. Notice the line on the false deck going port to starboard. This indicates where a bulkhead wall will be. Much later in the project of course. Keep this in mins as the forward edge of the first panel must end so you can push the walled bulkead against it later. So examine those notches in the deck clamps. This paneled bulkhead that stretches across the deck will be under the deck beam. Make sure the forward end of this first paneled section will end up under the beam. See how it lines up in the photos below. The double line on the false deck is another paneled bulkhead that separates the captains cabin. Note how it lines up with the notch for the deck beam above it. The cannon is just a prototype for the Winnie that I built. I use it to test how it fits on the model as I work on it. It looks like it will fit perfectly once the deck is planked. A quick note about these panels....I have seen some odd shaped ports on the some of the models being built. Their placements is also sketchy as we have mentioned in many logs. Especially that aft most port and the entrance to the quarter galleries. I mention this because these panels are pretty precise. Although some wiggle room has been designed in them...if you didnt measure your ports properly or if they are in the wrong position, your panels will likely not fit. This is why careful measuring early on is so important. So for that reason....these panels are OPTIONAL. You dont have to use them. Especially if the dont fit properly because of your port placement and gun port shapes. So test them first with a dry fit to see if they will all work. You might need to get a little creative.. And here is a final image of the model today. I am about to add the second layer of spirketting and deck clamps. Then I will paint the buwarks red. But the panels will be left natural. I havent done this yet on the port side so once I am done I will repeat all of this on the port side. Any questions.


- 1,784 replies
-
- 31
-
-

-
- winchelsea
- Syren Ship Model Company
- (and 1 more)
-
That looks very good. Well done.
-
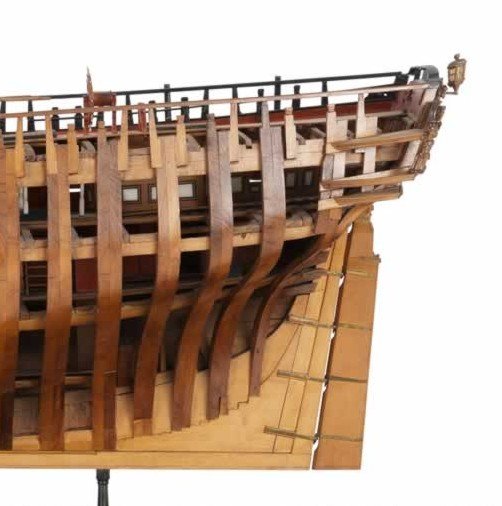
I am not sure how clearly you can see this....but if you look between those frames in the great cabin, you can spot the paneled bulkheads. I have finished planking the bulwarks and am now in the process of paneling the bulwarks on the starboard side. I am not crazy about the white panels on the contemporary model and will leave them natural. I will have an update soon but wanted to post this image for you guys to examine first. Chuck
- 1,784 replies
-
- 13
-
-
- winchelsea
- Syren Ship Model Company
- (and 1 more)
-
That is a relly tough joint to plank along the counter. Nor worries though. You might be able to cover most of that with the molding that goes there and of course the frieze. Its tough to get good cherry strips unless you cut them yourself. You would be able to pick and choose the better pieces that way. Byrnes is the best but many folks also use the Proxxon. It is looking good however.....I like what you are doing with the model.
-
That looks terrific. That planking is very neat and looks wonderful. 😃
-
that looks pretty darn good Ben. Extra time spent here will pay off many times over. The most worthwhile investment in time for the entire project. Chuck
- 399 replies
-
- 7
-
-
- winchelsea
- Syren Ship Model Company
- (and 1 more)
-
Quite nice. Take your time with the lowe planking.
-
Looks really good and it great start. Your photos are fantastic. 😃
- 109 replies
-
- 5
-
-
- Vanguard Models
- Flirt
- (and 1 more)
-
Very nice work Christian....must feel good to be making something from wood after all this time. It looks great.
-
Really looking great Rusty. The Pear is such a rich color. Really looks great for the Winnie.
- 642 replies
-
- 1
-
-
- winchelsea
- Syren Ship Model Company
- (and 1 more)
-
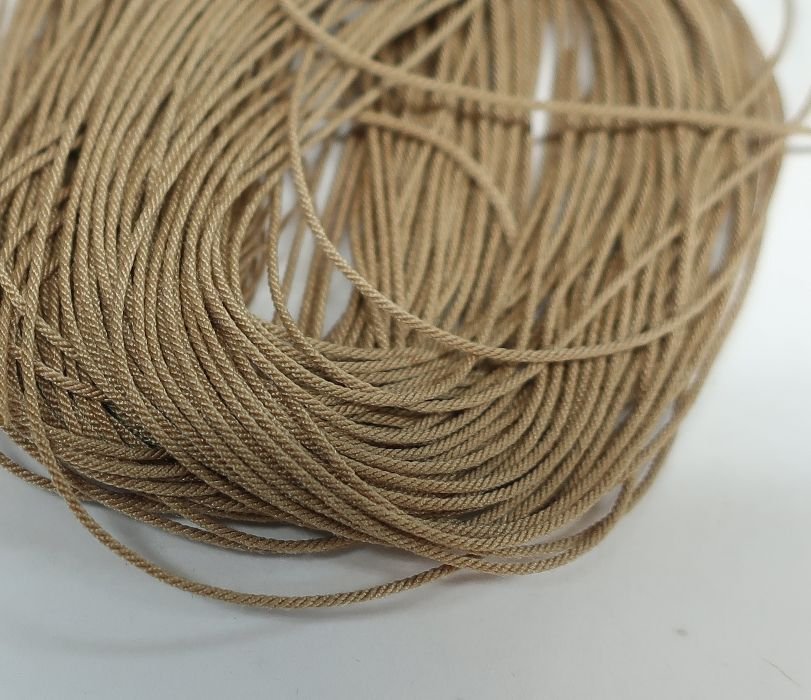
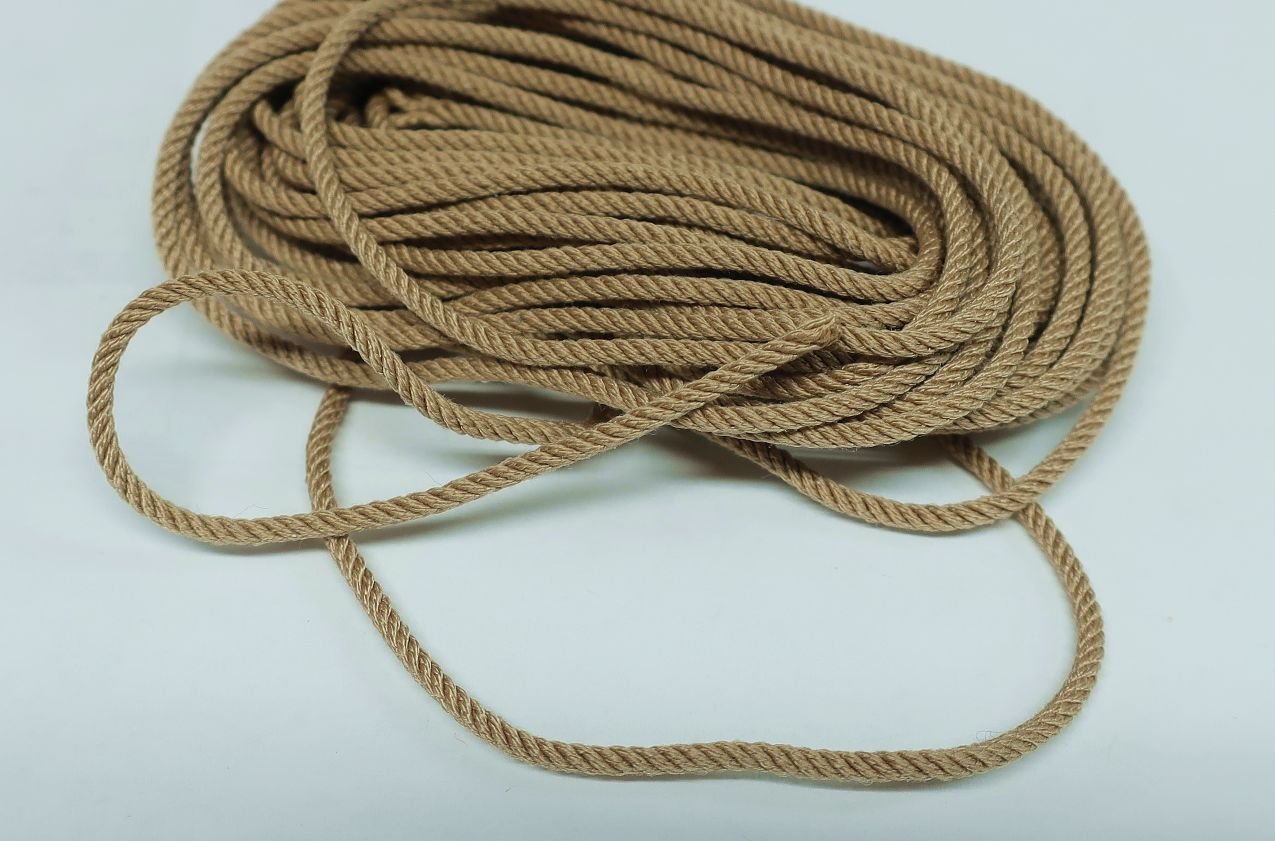
I just wanted to show you guys some rope I was making just yesterday. Its not packaged up yet. This is NOT Gutermann MARA. This is my poly/cotton blend stuff. Its supposed to be about 60/40 poly to cotton. But my guess is there is more poly. So yes I do still have to cook it. Same procedure as I mentioned for the Mara stuff above. I have started making it just in case I cant get my Linen thread anymore. But I digress. I just wanted to point out how tightly it is laid up.... Many more initial twists of the individual strands.....so after you twist all three strands together in the opposite direction, you can achieve a tighter rope. Doing this with poly is much much easier than doing it with cotton or linen. The natural stuff wants to kink up on you. But because the poly is a bit more stretchy, it wont. Its more forgiving. It is also not as important to tie the strands to your ropewalk with the exact same same tension initially. Because its a bit more stretchy....again it tends to equalize and make a really crisp and clean rope when laid up. This particular size rope is very small by the way. It is size .018 Also note the color difference between the mara stuff I posted. The mara stuff is a bit orange that the museum wanted so I chose this custom color for my new Syren ULTRA scale rope. Let me know if anyone has any questions. and this is a larger rope which would be a huge challenge to make on one of those planetary machines. ( ,080) Note the cut end which isnt unraveling......no glue at all. Again this is a poly blend ULTRA rope. It hangs and coils very naturally.
- 115 replies
-
- 16
-
-
Let me know if you have any questions at all. I believe that this a skill everyone should learn. In the long run it is so much cheaper to make your own. And when you get good at it, you could probably make all the rope you need for a given project in just one day. On any average day...today for me....I will be making about 65 to 70 packages of rope. Each between 20 and 22 feet long. just remember to lay it up tightly. 99% of folks dont and their results look more like String than scale miniature rope.
-
Try not to look at it, LOL Seriously wont be an issue at all