Chuck
-
Posts
9,637 -
Joined
-
Last visited
Content Type
Profiles
Forums
Gallery
Events
Everything posted by Chuck
-
 thanks guys. Its not too tough Bob. Its about the same difficulty as my other designs like the long boat. Just bigger with more parts. no more difficult to build in my opinion...but i am probably not the best person to ask since I designed it.
- 1,784 replies
-
- 5
-

-
- winchelsea
- Syren Ship Model Company
- (and 1 more)
-
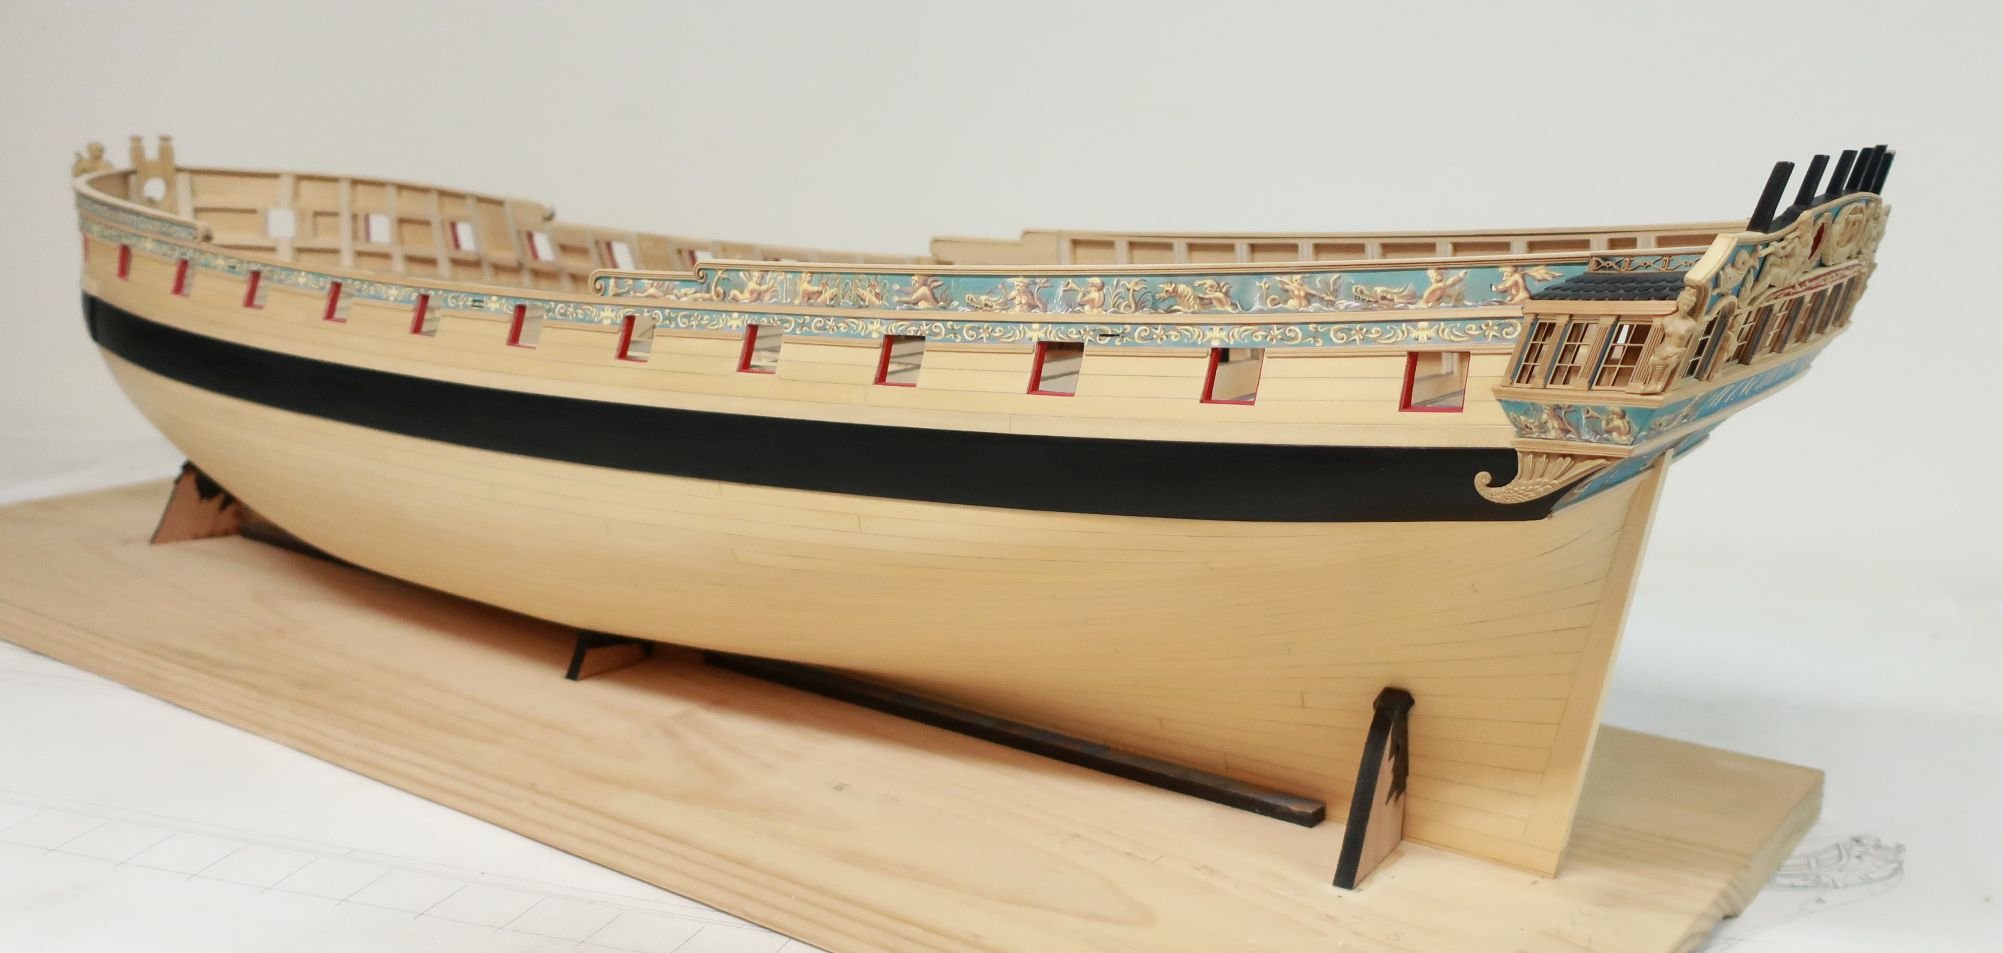
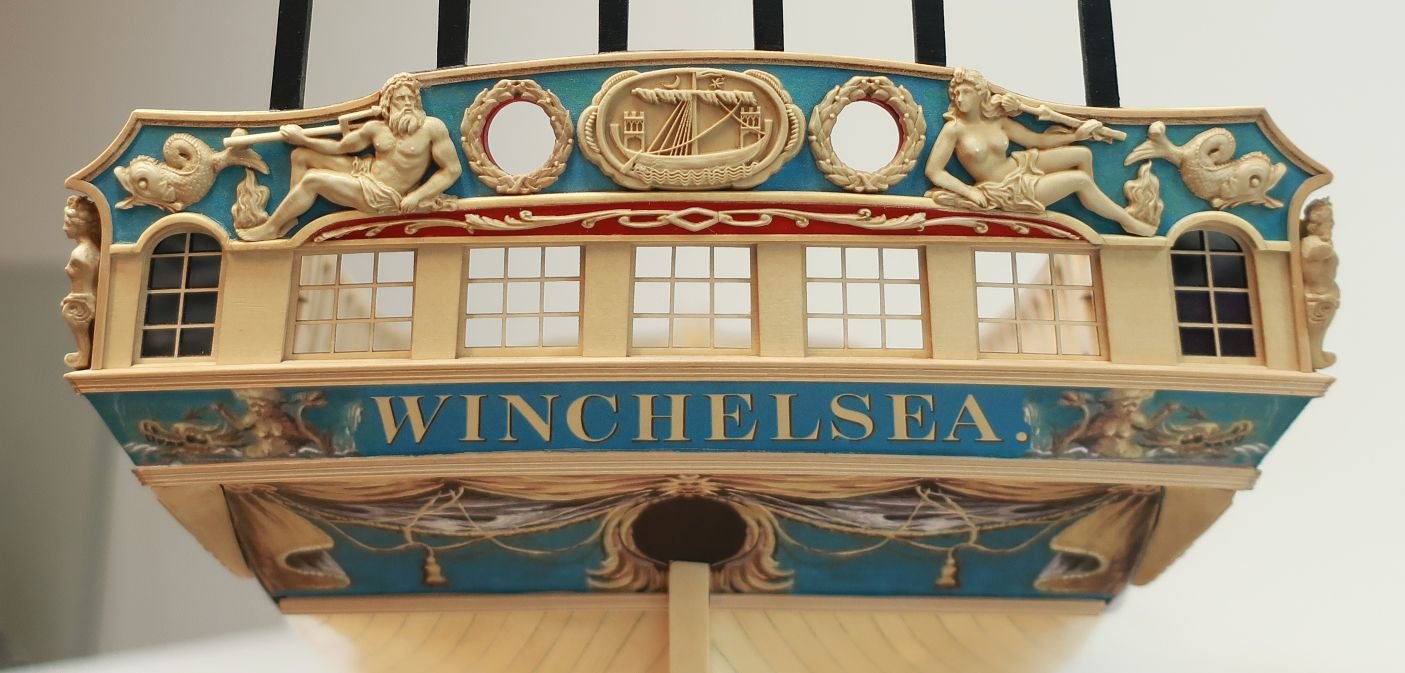
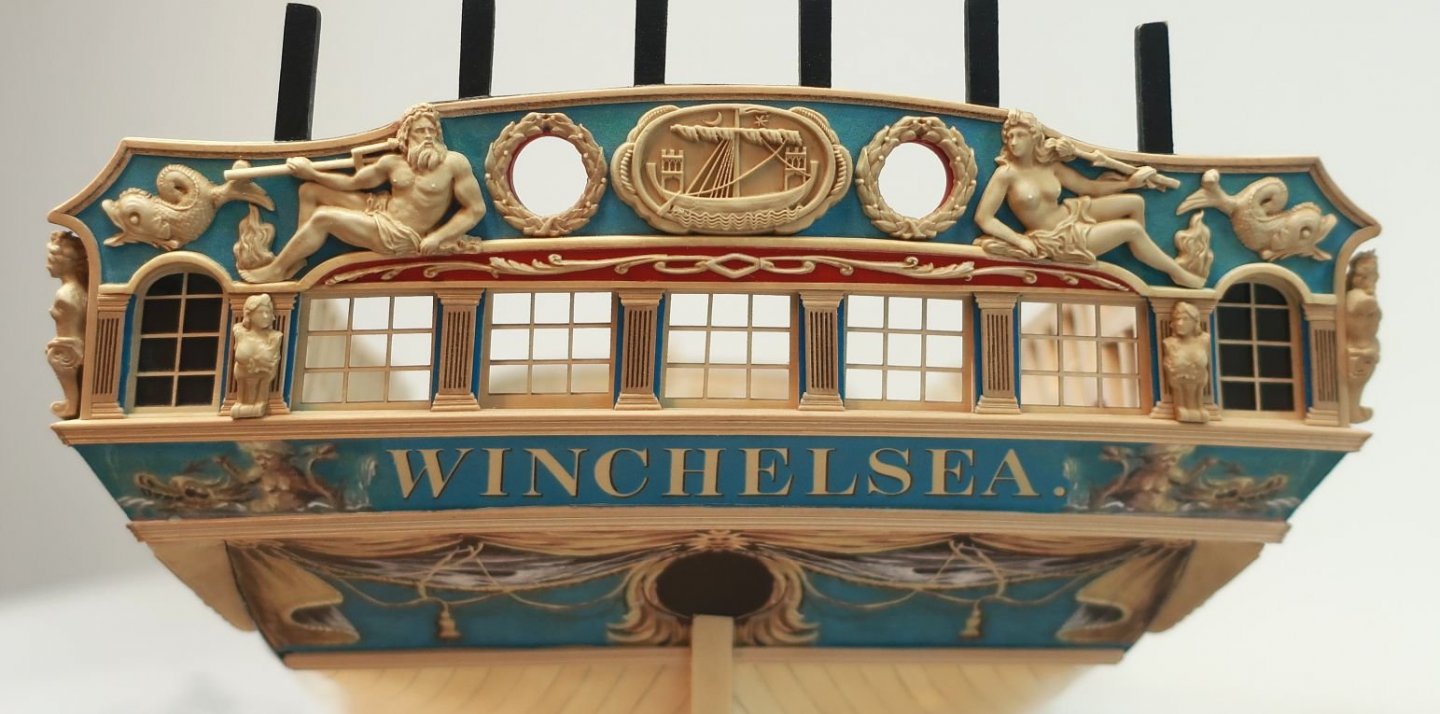
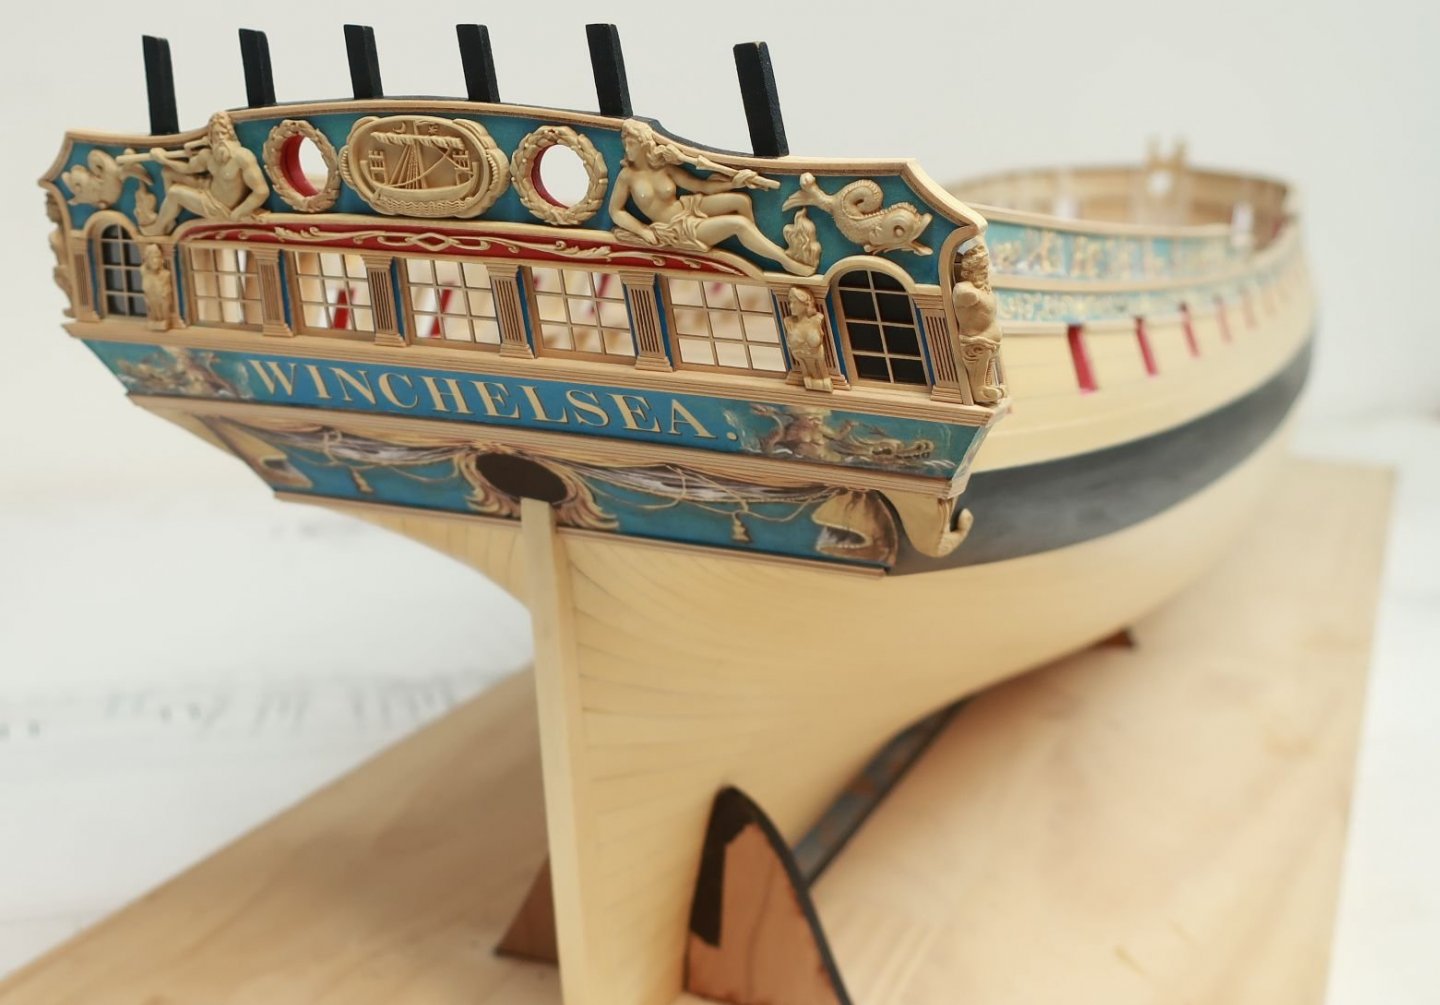
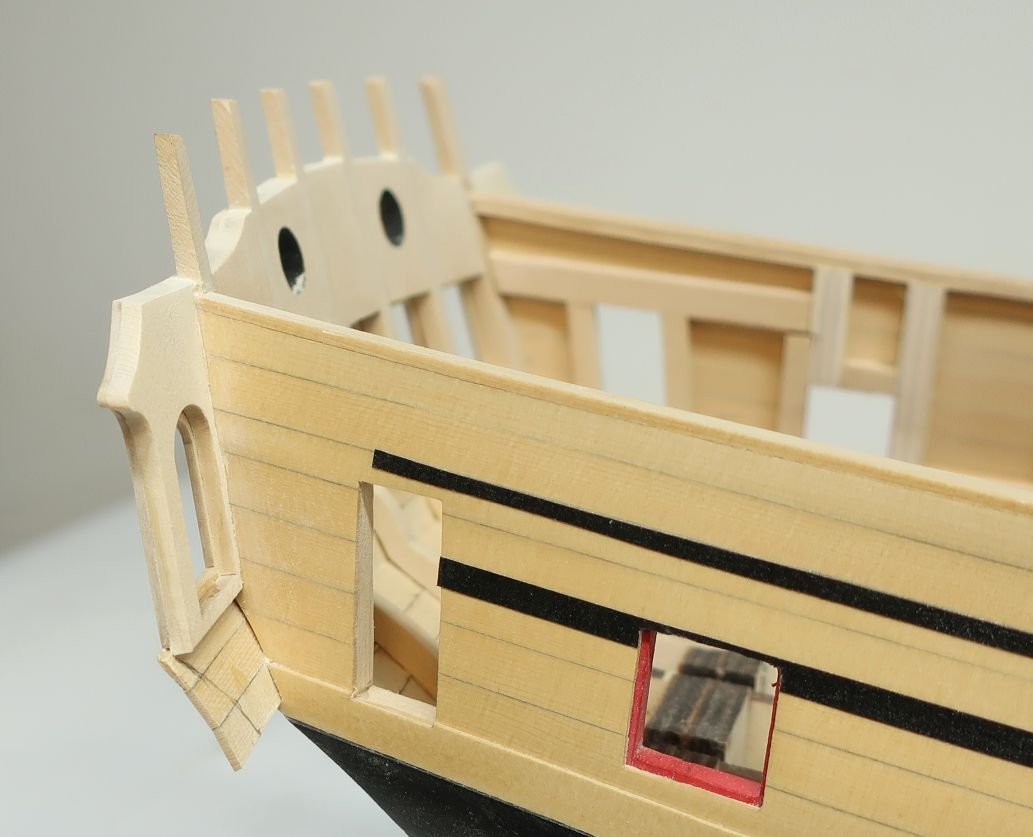
The stern transom details are now completed....along with chapter 3. I still have to finish writing it though. Then I will start getting the laser cut pieces together for you folks. The columns were added to finish it off. These were done exactly like those on the quarter galleries. The outside face of each upright between the windows were painted blue first. I was careful not to get the paint on the sides of the uprights. The top and bottom of each column was was cut to length from a strip of 3/32 x 1/32" boxwood. This strip was first scraped to create the profile needed (all those steps in each base and top). Once I cut and angled each piece I used a needle file to also shape the ends to match the profile. Then the center fluted column which is laser cut and etched was glued between them. I just removed the char and then tweaked the length for a tight fit. Lastly, the two small figures were glued to the front of those wider columns. That really finished the look of the stern. I am quite happy with the results so far. The color of the resin was tinted a bit as previously mentioned. Chuck

- 1,784 replies
-
- 50
-
-

-
- winchelsea
- Syren Ship Model Company
- (and 1 more)
-
For some folks yes but its not too bad.
- 1,784 replies
-
- 1
-
-
- winchelsea
- Syren Ship Model Company
- (and 1 more)
-
Its not really good at all. The grain is far too pronounced. I have tried.
-
Really nicely done.
-
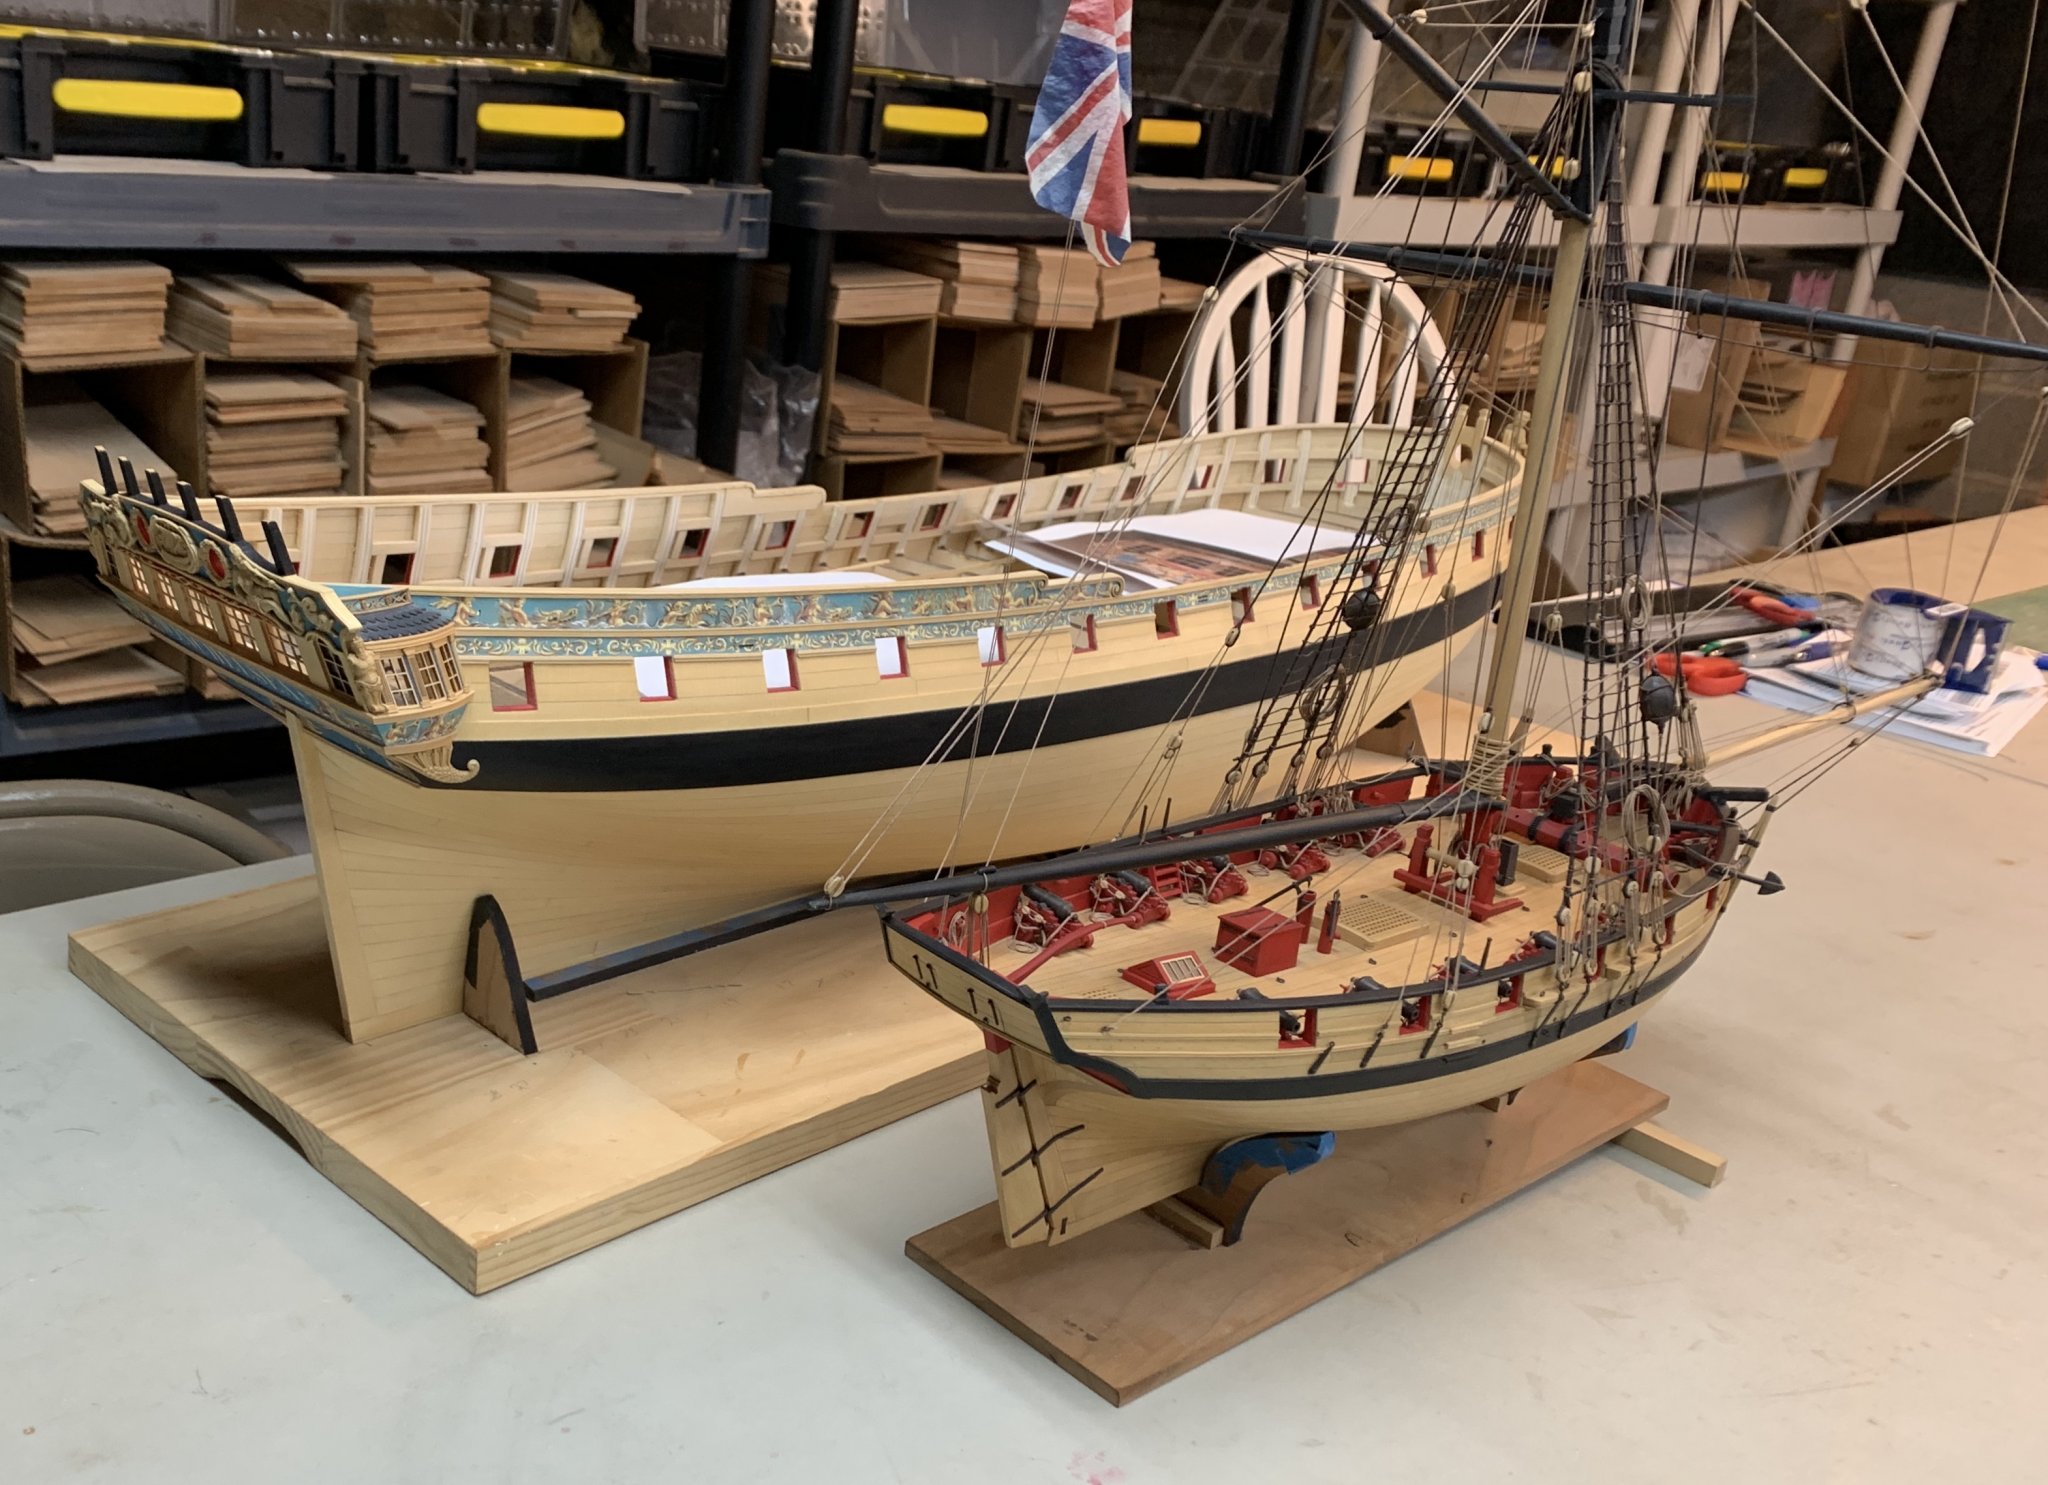
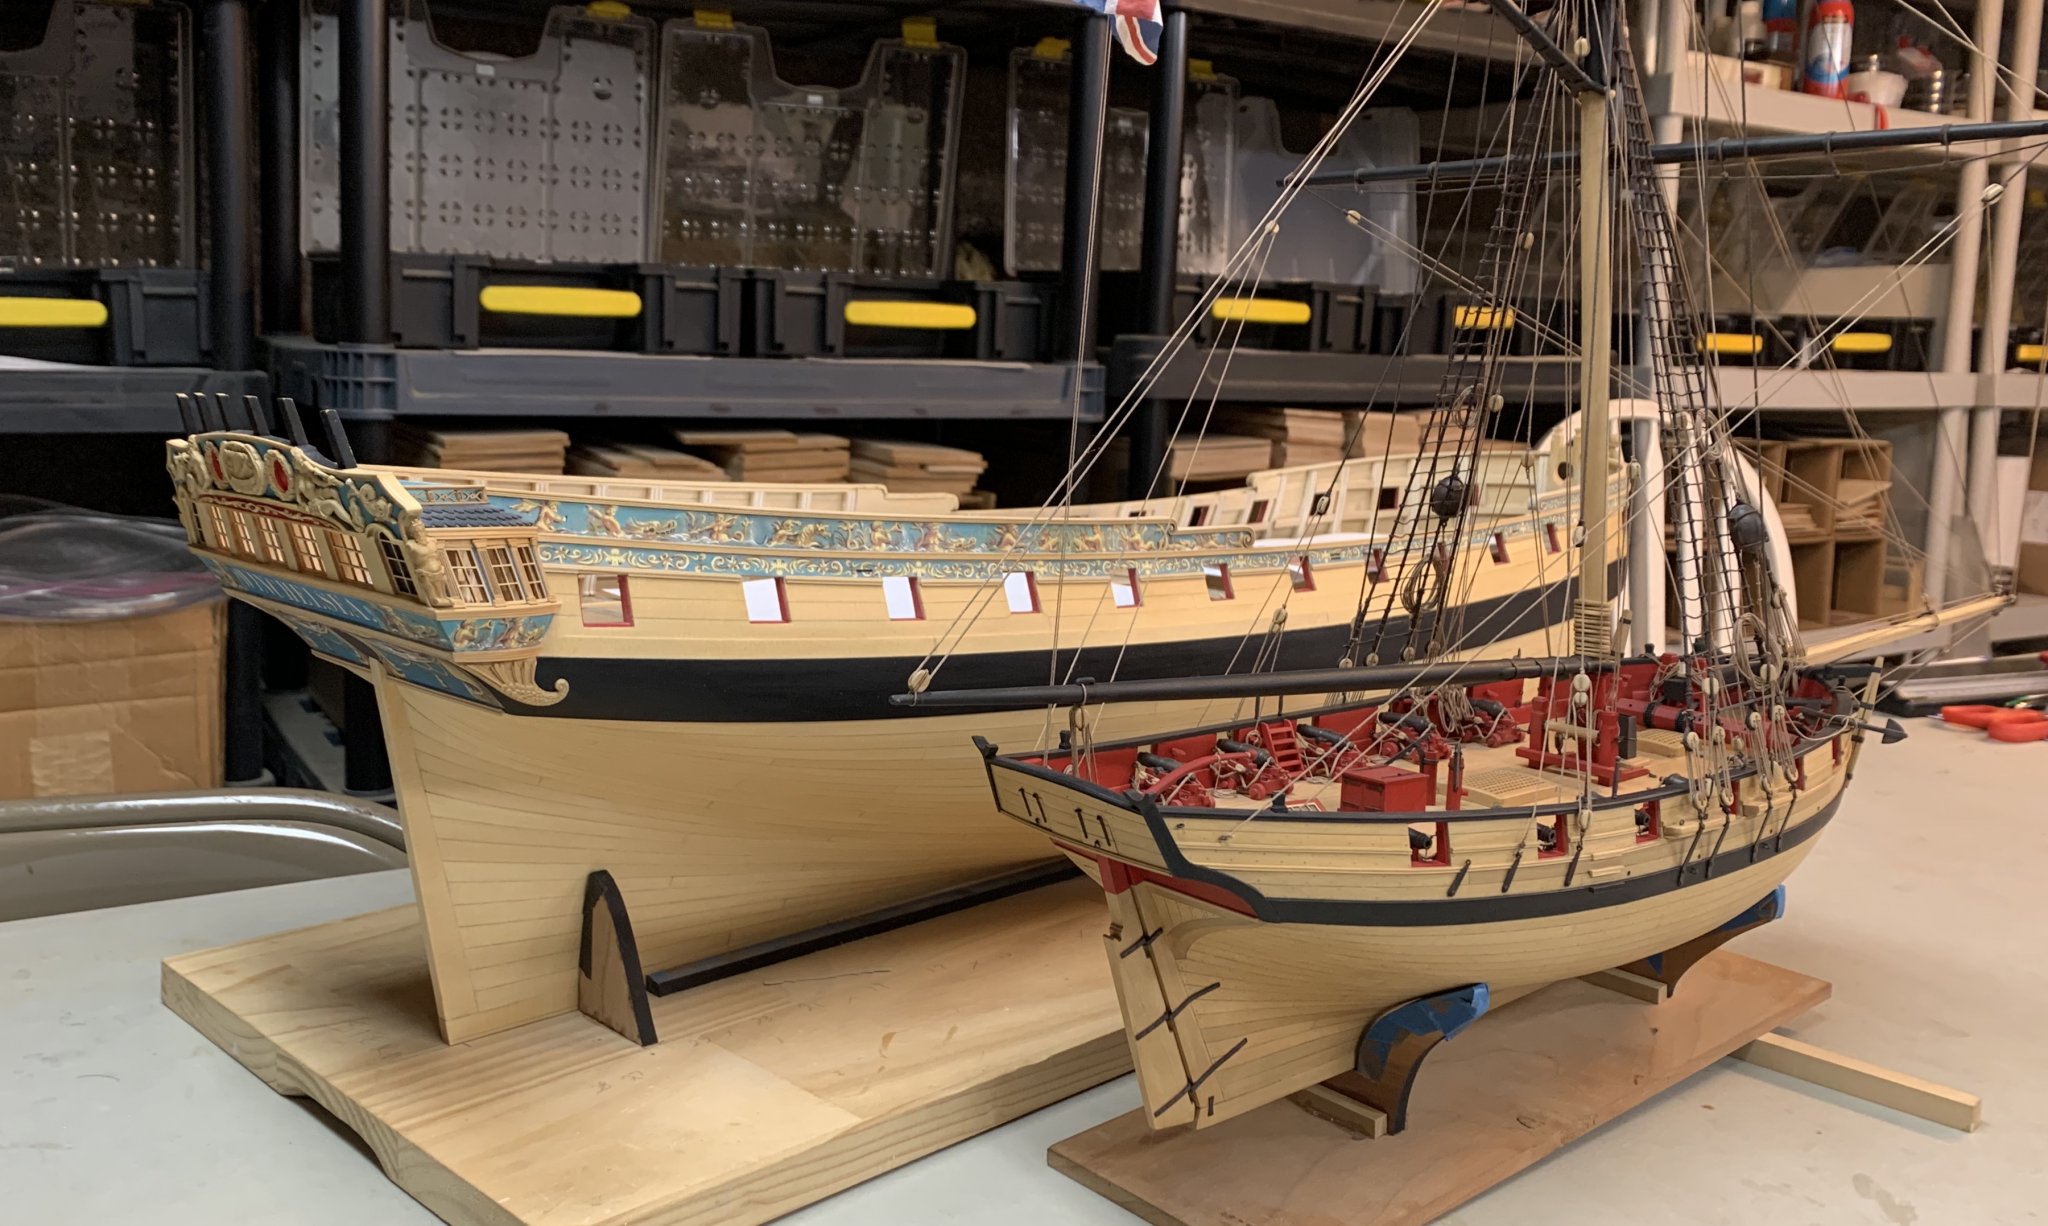
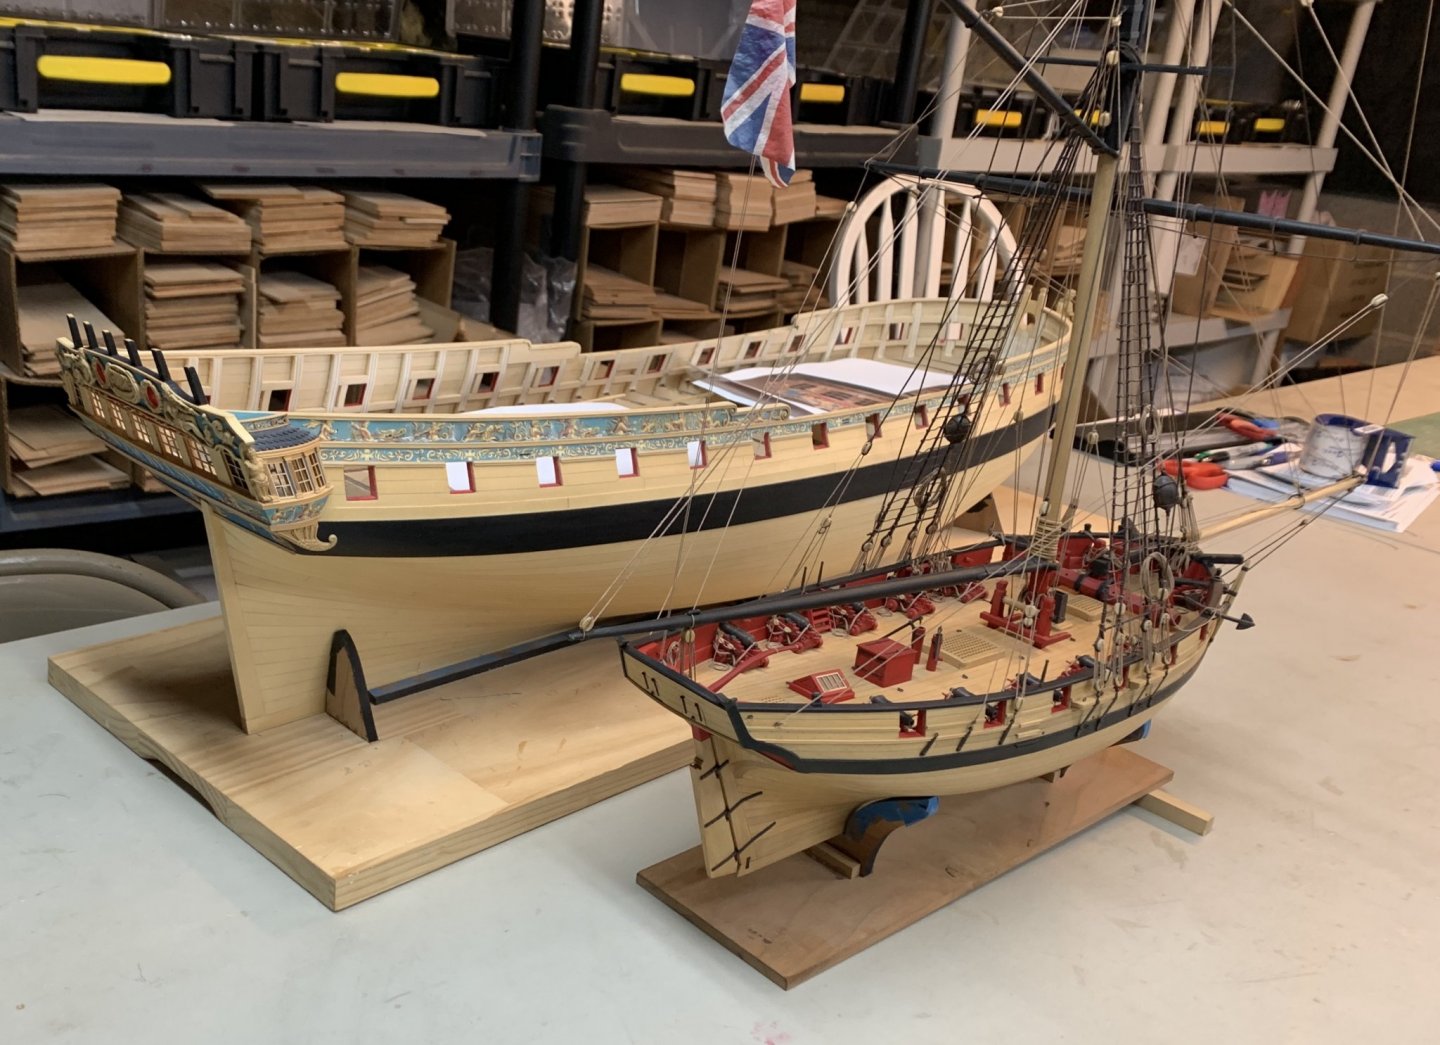
No progress on my Winnie but I finally found a day to fix my Cheerful. It got severely damaged when i brought it to the joint clubs show. The model got smashed on the ride back and the rigging pulled off the pin rails and the stern knees. It was a bear to position those pin rails against the bulwarks with so much tension on the lines. But i managed it without having to re rig anything except for the rope coils on the pin rails. The rigging on the bowsprit was also ripped away from the tip of the bowsprit. and that needing fixing. Bigger job than i would have liked. They are never the same after such a repair but I am glad its done. It was also filthy and covered with webs and dust. i will now put it away where it will be safe and protected. Interesting size comparison and note the color. The cheerful is all boxwood. The cedar Winnie really looks good in comparison and its 75% cheaper.

- 1,784 replies
-
- 40
-
-
-
- winchelsea
- Syren Ship Model Company
- (and 1 more)
-
Echo by davec - FINISHED - cross-section
Chuck replied to davec's topic in - Build logs for subjects built 1751 - 1800
It really looks fantastic. Sharp looking model. -
That is looking awesome. Well done. You got a nice run of those planks.
-
She is looking really good. Nicely done
-
Looking as it should Ben. Your careful attention to measurements will pay off immensely.
- 399 replies
-
- 2
-
-
- winchelsea
- Syren Ship Model Company
- (and 1 more)
-
Actually I cant answer those for your particular hull. Its your lining off of the hull that will best determine if you need a drop plank and how many. I would probably go ahead and use one. Most folks think they can bypass the lining off process but its best to do it....I use wide tape and trial and error to find the shape of the drop plank. Your lining off will determine the shape of the garboard. The french curve is only needed if you are going to cut and draw out your planks on a wider sheet. For example the drop plank. There is no real 100% scientific method for figuring the shape of the drop plank. You need shape it and then use a paper template to test its fit and its shape up against the wales. Chuck
-
Does anybody have some experience with CAF Models ?
Chuck replied to yvesvidal's topic in Wood ship model kits
They are in the middle of Chinese New Year so you wont get them. Keep in mind that they are a member here and you can PM them. I must also state that CAF no longer sells any kits based on the Ancre monographs. They have stopped production. At this present time, Tom at CAF is working with Ancre to come to an agreement so they can legally offer those kits again. This includes the Chebec Kit you mentioned. This means that the CAF kit of the Chebec can not be built or shown in a log on MSW currently as it is a pirated design. This has been acknowledged by Tom from CAF. Should CAF and Ancre reach an agreement, then those kits that they have worked out a agreement for, will be allowed to be built and logged on MSW. Until then, only those kits other than those based on Ancre monographs are now being offered by CAF for sale. See this topic for more details.. -
Hello and yet another Syren in progress
Chuck replied to Kevin53's topic in New member Introductions
Really nice work on that Syren. Welcome to the forum. -
Love the Idea Ben. Cant wait to see how it all turns out. I am sure it will look fantastic. Chuck
- 399 replies
-
- 5
-
-
- winchelsea
- Syren Ship Model Company
- (and 1 more)
-
That looking great. I usually set the fence once 3/64 from the blade and go to work. I use feather boards to keep the sheet down and against the fence.
-
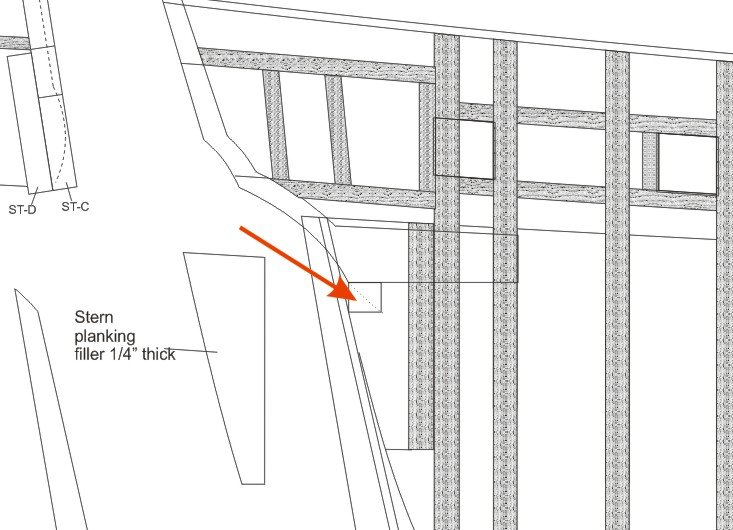
That looks very good Bob. You are certainly moving along. I might point out a possible issue however. The sheer at the the stern is a bit high in relation to the top of the transom. I am not sure if your planking run just slopes up too much for the last 5 or 6 inches of the run or if your transom fillers were placed too low. Probably a little bit of both. You might want to tweak both at some point. This will probably affect how your qgalleries will end up as well as the railings atop the quarter deck. Check out the relationship between the two in the photo below. Chuck
-
Hopefully tomorrow will be the last day of jury duty. The trial cant drag on much longer.
- 46 replies
-
- 1
-
-
- medway longboat
- Syren Ship Model Company
- (and 1 more)
-
That looks fantastic. You are almost done.

- 46 replies
-
- 2
-
-
- medway longboat
- Syren Ship Model Company
- (and 1 more)
-
That looks fine. They are left extra long just in case. Just sand it flush on both sides. use satin and never gloss wipe on poly. Also dont forget to add those filler strips below the counter. You forgot
-
Here is another tip..... I know this may waste some wood. BUT it is much easier to bend a strip not so close to the end of the strip. You can get a much nicer and smoother bend a bit farther back. Obviously then the excess after bending will need to be trimmed and discarded. But that is OK. It is very hard to bend a strip edge-wise so close to the end of a strip. So this is just another option you might want to try when a tighter bend is required.
- 43 replies
-
- 10
-
-

-
I only sometimes glue the edges. If edge gluing will possibly close a gap then yes I will do so. But if there isnt a gap then why bother. I found that if I edge glued every plank, should I not like that plank after positioning it, it will be very hard to remove without also damaging the planks it was edge glued to. I only use PVA for my models....except when planking. When planking I use CA. I place a small drop in the center of each bulkhead to glue each strake into position while making sure it is tight against the plank next to it. I only glue it on if it fits tightly and no gaps are seen after a test fit but sometimes I dont see the small ones and have to remove the plank after and try again. Finding where to place the "top" of the bend and how severe to make the bend is a learning "curve". No pun intended. Its something you will learn to find as you practice this technique. You will get much better with that after a dozen or so attempts. Most times you will likely underbend in the beginning. Then after that you may even over bend. But that is what allows you to learn what shapes are best. I would even go as far to say that you should sacrifice a few strips of wood and simply go nutty with some test bends. Try over bending and try under bending as well. Try moving the "top" of the curve forward or aft just as a test to see how it looks when test fitting. Try a tight bend and then try a more "longer" and subtly bend. Just examining the gaps after trying these different scenarios will help you learn a lot. Its what I do on every model when starting this exercise because once I have a good idea what curve is needed its pretty similar for all of the other strakes.....more or less for the hull shape you are working on. Hope that helps.
- 43 replies
-
- 15
-
-
Yes it is actually....but not of the Pegasus or Swan class. I will be doing one of the Winnie. I think that will be a nice compliment to the POB full hull. I have also since made some improvements in the framing process that will make it even easier to build. I will begin making it as soon as the Winnie full hull is completed. Chuck
- 130 replies
-
- 10
-