
DONATION DRIVE - SUPPORT MSW - DO YOUR PART TO KEEP THIS GREAT FORUM GOING!
×


Chuck
-
Posts
9,693 -
Joined
-
Last visited
Content Type
Profiles
Forums
Gallery
Events
Everything posted by Chuck
-
 Looks great. I am so glad you enjoyed the project. Chuck
- 39 replies
-
- 2
-

-
- cheerful
- Syren Ship Model Company
- (and 1 more)
-
Not yet.....I will put one together once I start production. But remember that the thread I am using is not the same. I am using a blended thread now which is made in the USA. The sizes are different. I never made a chart when I was making the stuff for the museum using the Guttemann stuff. I will check my notes though. Chuck
-
Dont forget......we have shirts and other merchandise available emblazoned with the MSW or NRG logo on it. Who wouldnt want to look as sharp as this guy.....buy one for yourself, or for you entire family. They make great Anniversary presents for the one you love dearly.... Click the link below. https://nauticalresearch.qbstores.com/all_products.html
-
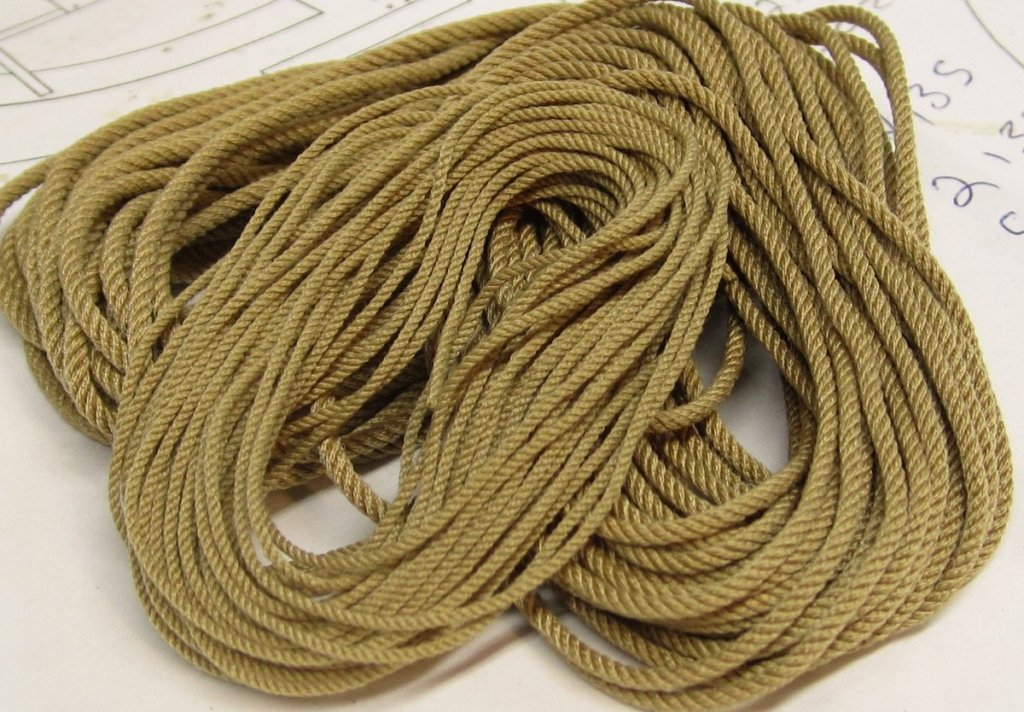
I will very shortly start making some Poly/cotton blend rope. I am going to call this Syren's "Ultra Scale Rope" . It will cost the same as my other Cotton/Linen rope which I will continue to sell as well. But if one is preferred a great deal over the other I will discontinue the least favorite. Only if sales really drop off on one of them. Otherwise I will try and offer both.
-
Kurt...I have a bunch. You can always use mine and come pick them up when you need them. Good ones are expensive. I have a lot of them and hardly use them because I prefer to do most work by hand. Next time you come to the shop you can check them out. Chuck
-
Nice photo set-up. I will have to rig something up like that.
- 31 replies
-
- 4
-
-
- master korabel
- avos
- (and 1 more)
-
Dont forget that your large planking fan for these wide planks are uploaded here......plus everything else. I just added the flags too in case you need to make more. The downloads section for this group is now complete with everything.
-
That really looks good. Its coming together. Just make sure when you start gluing those planks on that the planks are very secure to each and every frame. This prevents the frames from breaking once you go to remove the centers.
- 221 replies
-
- 3
-
-
- queen anne barge
- Syren Ship Model Company
- (and 1 more)
-
Getting there!!!! it looks really good.
-
Bob, One of these days you have to make the trek up to a meeting in Roseland. I know its a haul for you, but I would love to see you and the model in person. Chuck
- 87 replies
-
- 2
-
-
- medway longboat
- Syren Ship Model Company
- (and 1 more)
-
Really looking fantastic. ☺️
-
Those parts really should be redrawn to fix those issues using the plans and laser cut over again. I am pretty sure that the bulkheads would fair if cut from the plans directly, but I must say that it looks impossible after seeing your photos Bob. The outside edges of the bulkheads just look like they are the wrong shape in many instances. My guess is when they were originally traced for laser cutting they were badly done. I am watching your progress but also shaking my head because I cant see how that hull can ever be faired properly without adding at least another 3/32" of meat to many of those top=timbers. Its the only way I can see getting a smooth contour to the hull outboard. And its no guarantee that it will match the plans at that point. Sorry to see that. There needs to be a new corrected "starter package" for this project sold with full sized plans.
-
Its OK with me....They look pretty good. I used some 320 grit sandpaper folded up to smooth things a bit. I used the fold to get in those nooks and it made a big difference. I got a bit better with each new try as I gained confidence. I am so happy to see someone try and use the carved versions they make rather than the resin castings. It will mean so much more when the model is finished.
- 221 replies
-
- 2
-
-
- queen anne barge
- Syren Ship Model Company
- (and 1 more)
-
Exactly!!! I wish that were true of most kit MFG's.
-
I am about half way there with more kits. Getting another wood order late next week because I wasnt happy with the quality of the 1/32" sheets of cedar I have left. There were to many imperfections/graininess for my tastes. Maybe another week to 10 days. We dont churn these out in a sweatshop so they take more time to produce. Quality control and the best materials are super important to me. Chuck
-
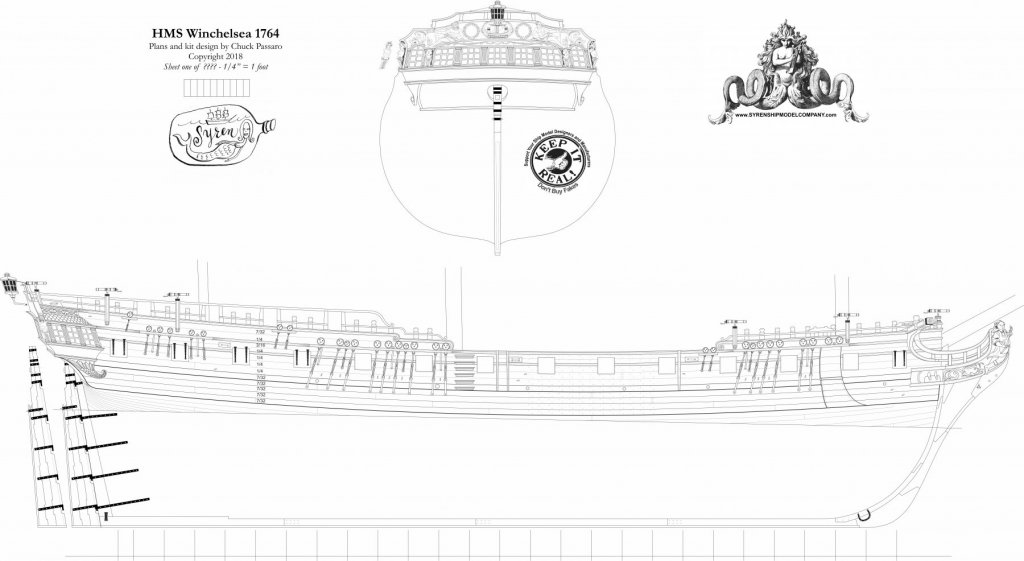
I am not sure if I posted this yet but I want to give everyone a detailed view of the model as it will ultimately appear....hopefully. Here is a link to download sheet one of the plans. I am going to shoot for launching this before it is completed so it is important that you guys see what the Frigate Winchelsea will ultimately look like. This shows the profile and stern view. Dont worry, like all of my plans, this first sheet wont contain any parts so no need to worry about pirating. Download and have a look!!! Because the image has very fine lines so a jpg like posted above is just too light. Click below for full size sheet. Winchelseaplanone.pdf
- 1,784 replies
-
- 37
-
-
- winchelsea
- Syren Ship Model Company
- (and 1 more)
-
Sorry to hear that....I hope for a speedy recovery!!!
-
How goes the progress....looking forward to seeing you build the model. Remember to ask me any questions. Chuck
-
Take it easy Nic....rest up. When you are back to work you will be able to work twice as hard now!!!!! You are all fixed up.
-
Enjoy the project!!! Dont hesitate to ask me any questions. The rigging isnt that bad on this one.
-
I was just checking everyones progress. I noticed there are a bunch of guys who started logs but havent started building yet. Hows it going with those? I checked to see if they were indeed shipped out and they were. I am just trying to keep the momentum going on this build. I look forward to seeing some of you guys start your models. If anyone has any questions please let me know. I am waiting on yet another batch of milled cedar but hope to have more kits available in a couple of weeks. Its never too late to join the group if you are interested. While you wait, check out the other logs and be sure to encourage those already building the model. Thanks Chuck
-
Nice start...Is it me or is the bulkhead former severely warped and bent? I would also caution on that forward bulkhead. The top timbers dont look like they have nearly enough thickness to fair them properly. Just an observation. I think fairing that hull is going to be a challenge. I see you already added a bunch of strips to fix what looks like mis-shaped bulkheads. Am I correct? We shall see. Chuck
-
I was just asked where the final chapter of this project was.....sorry guys. I have had this completed for months now and actually thought I posted it. I apologize. Anyway...I have now added it to the download area. Sorry for the delay. I cant believe I didnt upload it.

-
Added more companies.......remember you can still vote. You can also change your vote. You can pick 3 choices for each question in this poll. Please dont bash the poll. We realize it isnt perfect but the info is still very very valuable. If a brand has high negatives and no positives. I think it is something you might want to know before spending a few hundred dollars. This isnt a complicated poll....its just a snapshot of what you think based on actual experiences.


