HOLIDAY DONATION DRIVE - SUPPORT MSW - DO YOUR PART TO KEEP THIS GREAT FORUM GOING! (Only 75 donations so far out of 49,000 members - C'mon guys!)
×


Chuck
-
Posts
9,674 -
Joined
-
Last visited
Content Type
Profiles
Forums
Gallery
Events
Everything posted by Chuck
-
 Lovely progress....well done. A pleasure to follow your log on this kit. Chuck
- 60 replies
-
- 2
-

-
- Confederacy
- Model Shipways
- (and 1 more)
-
That is a great plan. I have often wanted to build another with the frames exposed so it will be so nice to see one finally built that way. A tribute to your care in planning that everything lines up as it should. Well done!!
- 131 replies
-
- 4
-
-

-
- Medway Longboat
- Syren Ship Model Company
- (and 1 more)
-
I think they look great. Glue them on.
-
Its all in the monograph chapters....just read through it....Carefully.
-
Thanks guys....Its crazy. Just made those 3/32" single blocks two days ago and they all but gone. So before I can make the next size I have to doubleback and make more. Im never going to get done at this rate.
-
It looks great so far. Keep going.
- 155 replies
-
- 1
-
-
- Medway Longboat
- Syren Ship Model Company
- (and 1 more)
-
You are using Cotton, linen line so watered down PVA or elmers glue is fine. I see those Winnie bulkheads on the shelf!!! Chuck
-
I am starting a new topic as the last one just got huge....over 2000 replies. Its fitting that I would do so today actually. Today marks ten years since I have started Syren. Its been a long and interesting journey. Ten years and miles and miles of rope made and thousands and thousands of blocks sold. Here's to the next ten years. Maybe not that long, LOL. For a bit of news....I have finally received the parts to maintain my CNC Mill. So blocks are on tap over the next few weeks. In fact I have already started. 3/32" singles and doubles are now in stock. More will follow. Although half of the 3/32" singles already sold out. UGH! Onward and upward as they say. Chuck
-
That looks great. It gets easier with practice. Just keep going.
- 155 replies
-
- 1
-
-
- Medway Longboat
- Syren Ship Model Company
- (and 1 more)
-
Excellent work. Yes its challenging but to get results like that it needs to be. No chunky primitive kit-like pumps on your model. That looks like it was scratch built by an extremely experienced builder who took their time. WELL DONE indeed.
-
Lovely work Jim That is a very nice model of the Winnie. I hope you enjoyed the project. Chuck
- 105 replies
-
- 1
-
-
- winchelsea
- Syren Ship Model Company
- (and 1 more)
-
I dont…as mentioned before I have others do that work for me. This is one thing I care not to learn. My brain just cant absorb any more. I have no idea what software package my guy uses.
-
No it is a 3d cad creation which was then 3d printed. I will do some final carving cleanup to add more detail and make them less “mechanical” and more carved looking. Like they were actually created/carved by the hand of man. More undercutting etc. I am making them less perfect, LOL. Hopefully. Then those masters will be sent for casting. I am working my way through all of the 3d prints as I write this.
-
Not for a while. Learned my lesson with the Winnie. I wont release any chapters until I am very very far ahead. Dont want folks catching up to me and waiting on me. I will however be setting Mike and Rusty up with parts very soon so they can help prove out my work before I release it. Look for their logs soon.
-
Can you post a picture?
-
Thanks Greg. I do like the look of the fillers but I dont think so. They are all different thicknesses so it would be a nightmare to laser cut them. I will leave that as a possible enhancement that folks can decide to do on their own if they want to.
-
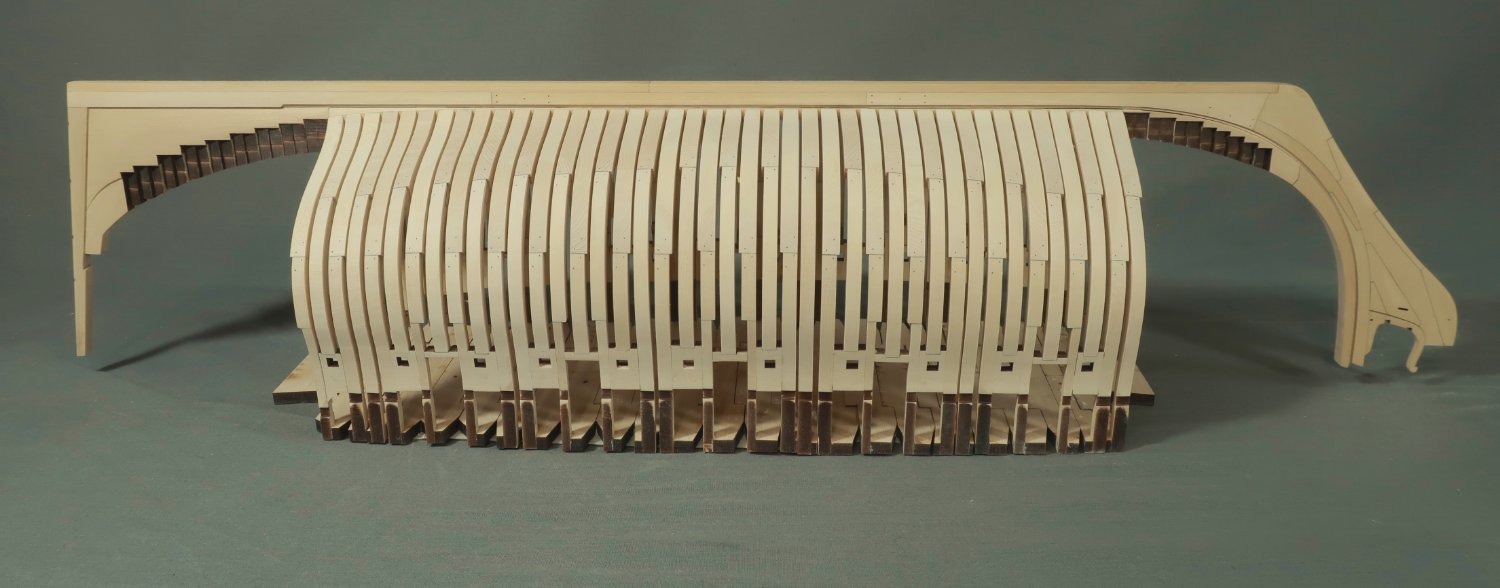
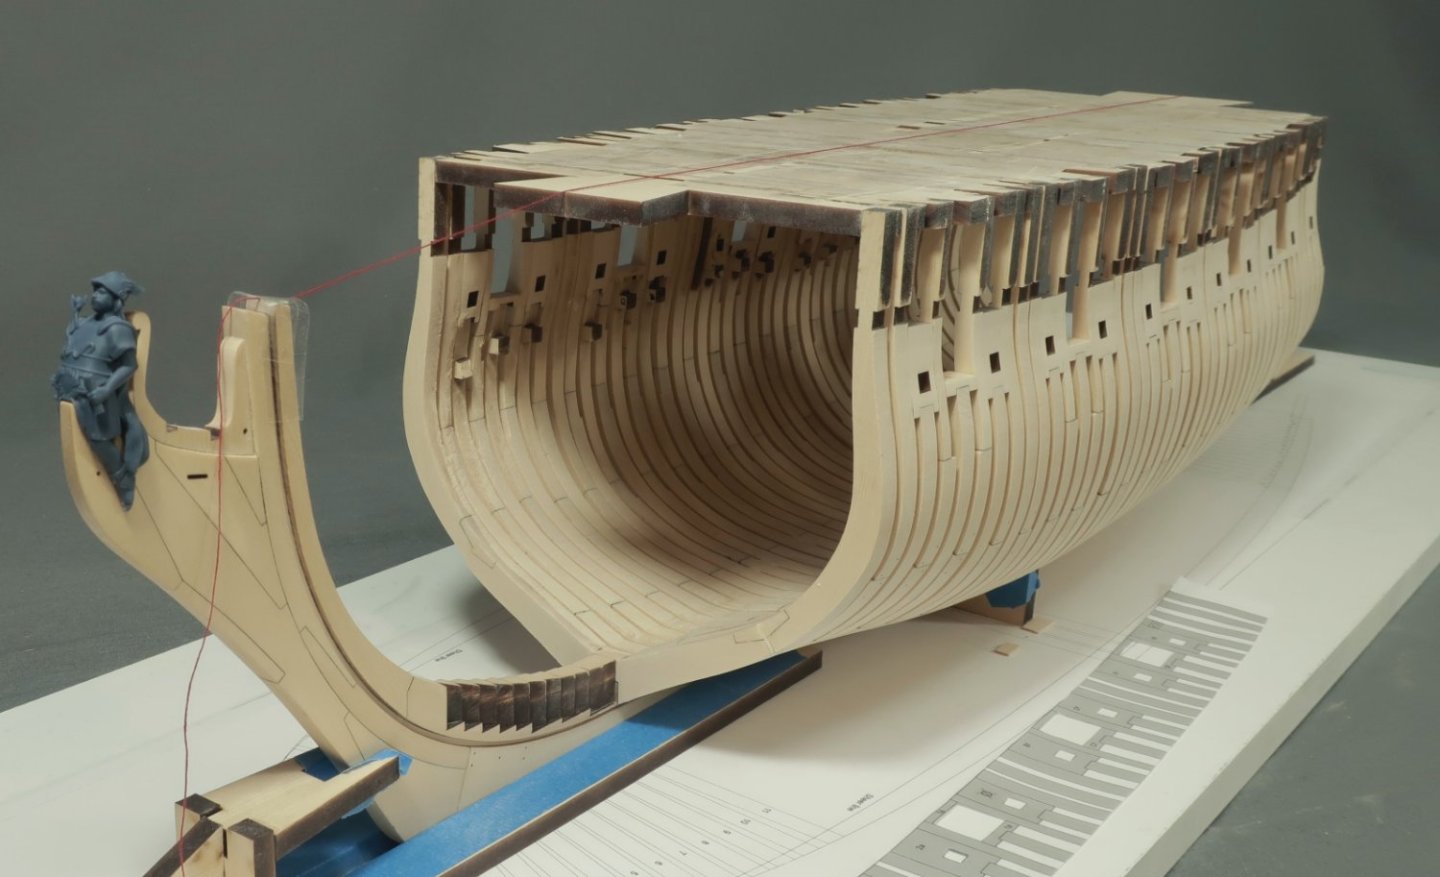
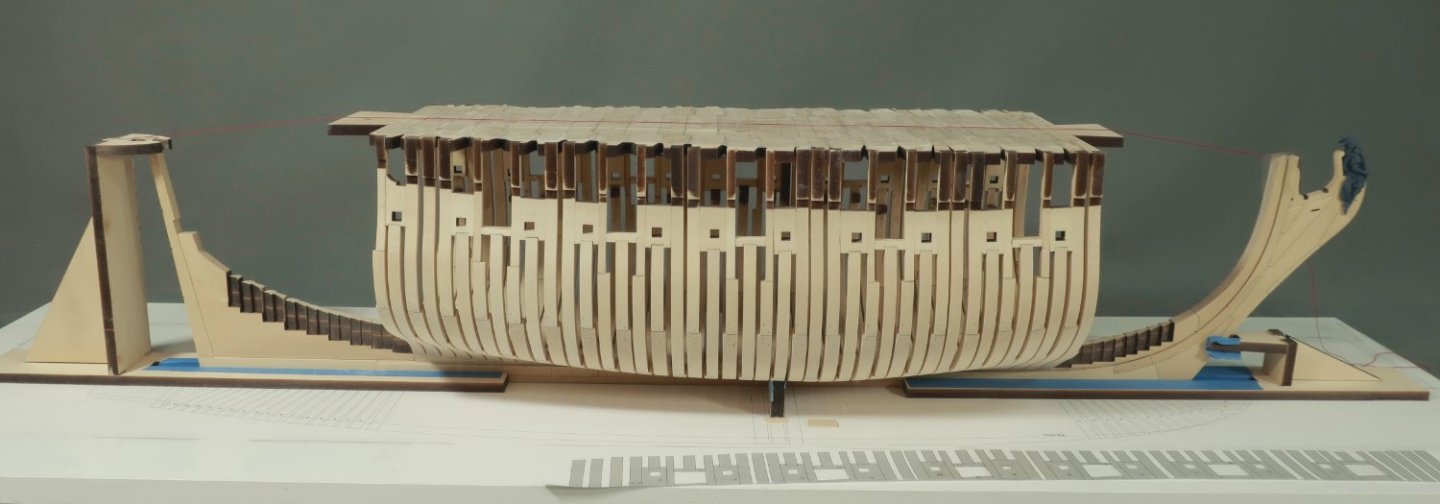
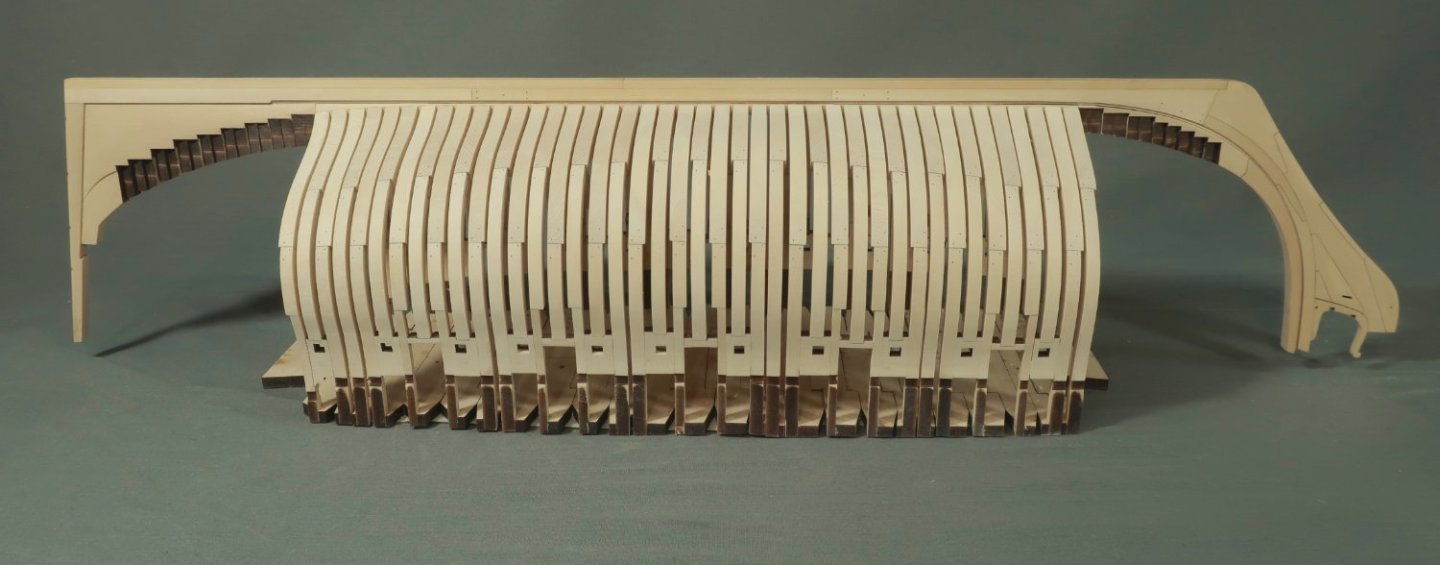
Finally finished all of the square frames. That was a good day and a milestone. I have faired the outside of the hull pretty good but stopped short of the outmost frames because I didnt want to over fair. Those will be done as I work on the cant frames next. The forwards cant frames are next. I also did some preliminary fairing inboard where I could reach. Just a little to make my life easier when the time comes to do that later. I basically just repeated the instructions I already mentioned until all the square frames were completed. It is really important to check the heights and positions of the sweep ports and gun ports as you progress. I have provided the laser cut parts to simplify that and yes you can measure up from the baseboard to check their heights. But I was also using a template I created. I just havent showed it before in my previous updates. This will be provided on the plans. This in combination with those other means of measurement will really help ensure that your ports all end up where they are supposed to. The top of the template aligns with the sheer. The bottom of the template actually aligns with the top edge of the wales. The heights are most important for the ports and dont go nuts if your openings are a 1/64" to the left or right. It will all work out in the end. You can always fix slight issues before you start planking if you have to do some shifting. But I highly recommend that you use this template from the start of your framing to check the port positions as you progress. If you do this before you glue the actual sweep port fillers into position permanently (and the gun port sills), you can adjust them at that time to ensure the opening are in the correct spots. Then after you get a match glue them in permanently. Using the template is really the key to successfully and easily taking the guess-work out of positioning the ports. With any POF project there is a lot going on and a lot of parts. It is inevitable that some frames may not end up where you want them exactly. Thats OK and certainly it happened to me. You may get a slight bend in your frame etc. Your wood thickness might be a little over or under with your frames. Maybe a frame isnt perfectly perpendicular to the keel after it settles once glued in. Creep can be an issue after 20 frames etc. But regardless of where you frames end up you can easily manipulate the sweep port fillers and sills using the template to get them exactly where you want them. As you can see the framing looks perfect to the naked eye but I can assure you they are not...the template is your salvation!!! The hull is really shaping up after doing some fairing. I hope you guys and start to see the shape in the photos I have taken. I will take a few days to a week to get organized before I start on the forward cant frames. I want to prepare the parts files for final laser cutting up to this point. What you see in these pictures should constitute the starter package or chapter one. It will cost more than a typical chapter because there is so much wood and so many parts. But it makes for a nice start. I will also prepare all of the carvings for casting before I start on the cant frames so it may be a while before my next update....A couple of weeks maybe. Any questions or comments are welcomed. Chapter 2 begins really soon!!!

-
Very nicely done. That is some fine looking planking. Remember to flip the hull over every few strakes to check the run. You will be able to tell more easily if your planking has started to form dips and you must adjust the run. Especially at the bow and stern.
-
Great catch and fix....yu are well underway now.
- 131 replies
-
- 3
-
-
-
- Medway Longboat
- Syren Ship Model Company
- (and 1 more)
-
You could just use wood. Just rip a very very thin piece of cedar or boxwood. Use that instead of the black bands which are laserboard. Or even just paint the laserboard to match.
-
That is looking so good. Werent those ladders fun to make? I dont know why I liked making those so much. But your model is looking excellent.
-
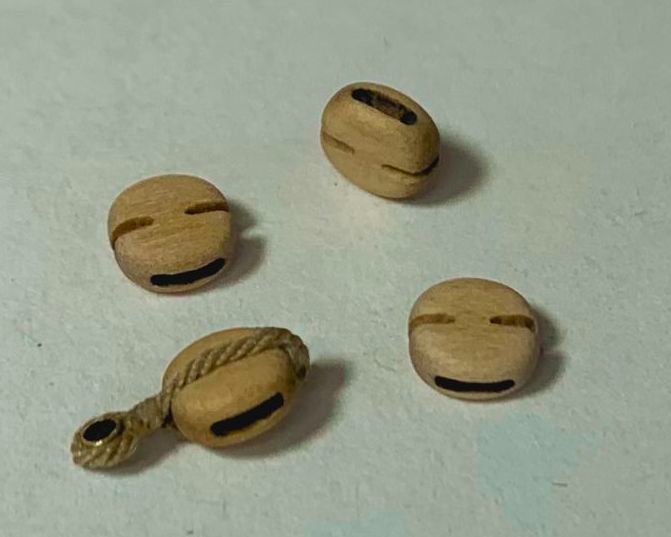
These Syren mini kit Barrels are 1" tall. ... and about the correct diameter you need. Hoops can be painted should you prefer a wood look...if you dont want to make them look like iron.'' They are made from Cedar. If this meets your criteria.