HOLIDAY DONATION DRIVE - SUPPORT MSW - DO YOUR PART TO KEEP THIS GREAT FORUM GOING! (Only 51 donations so far out of 49,000 members - C'mon guys!)
×


Chuck
-
Posts
9,663 -
Joined
-
Last visited
Content Type
Profiles
Forums
Gallery
Events
Everything posted by Chuck
-
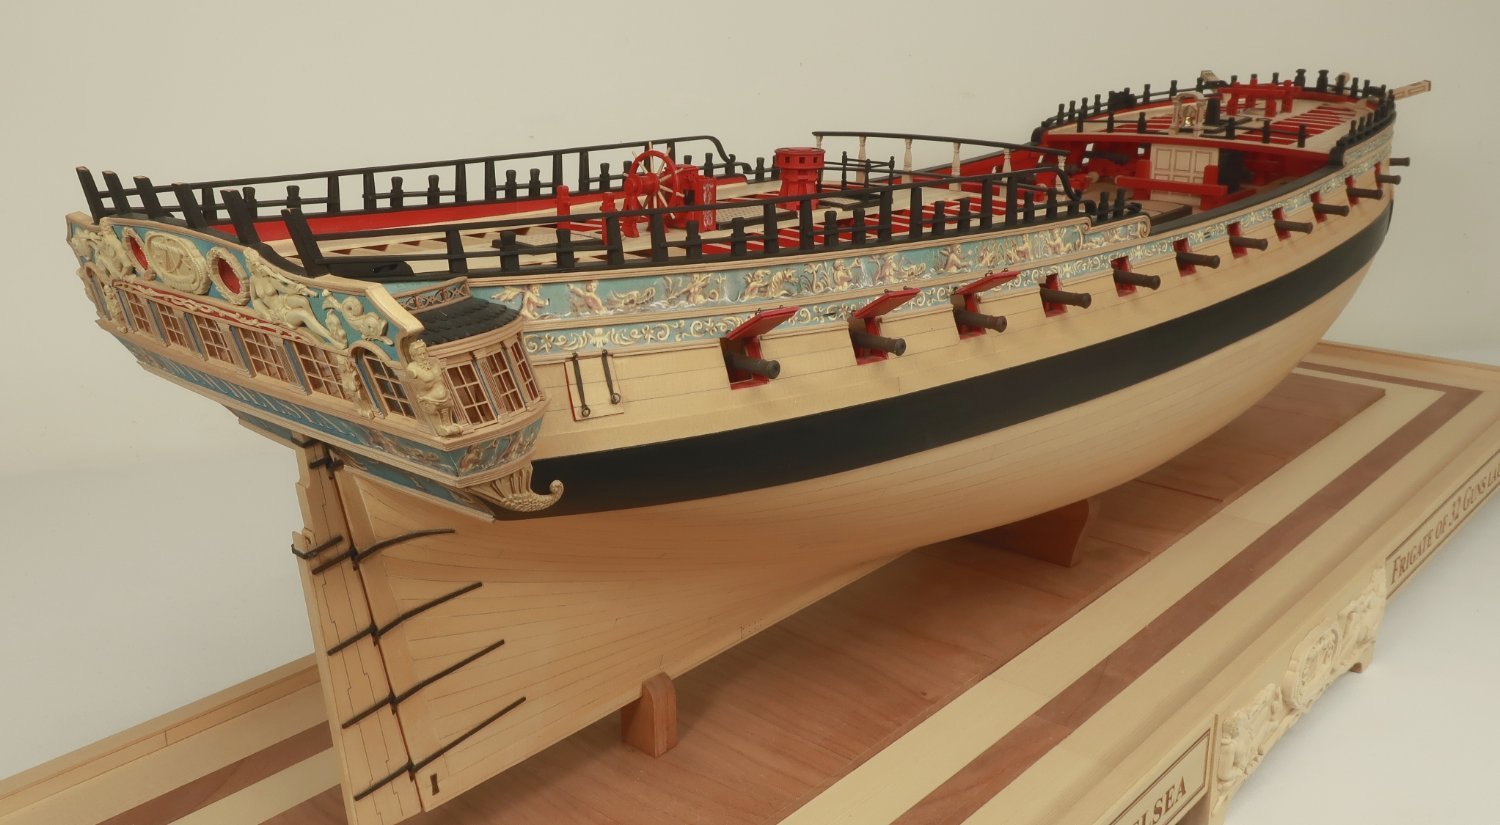
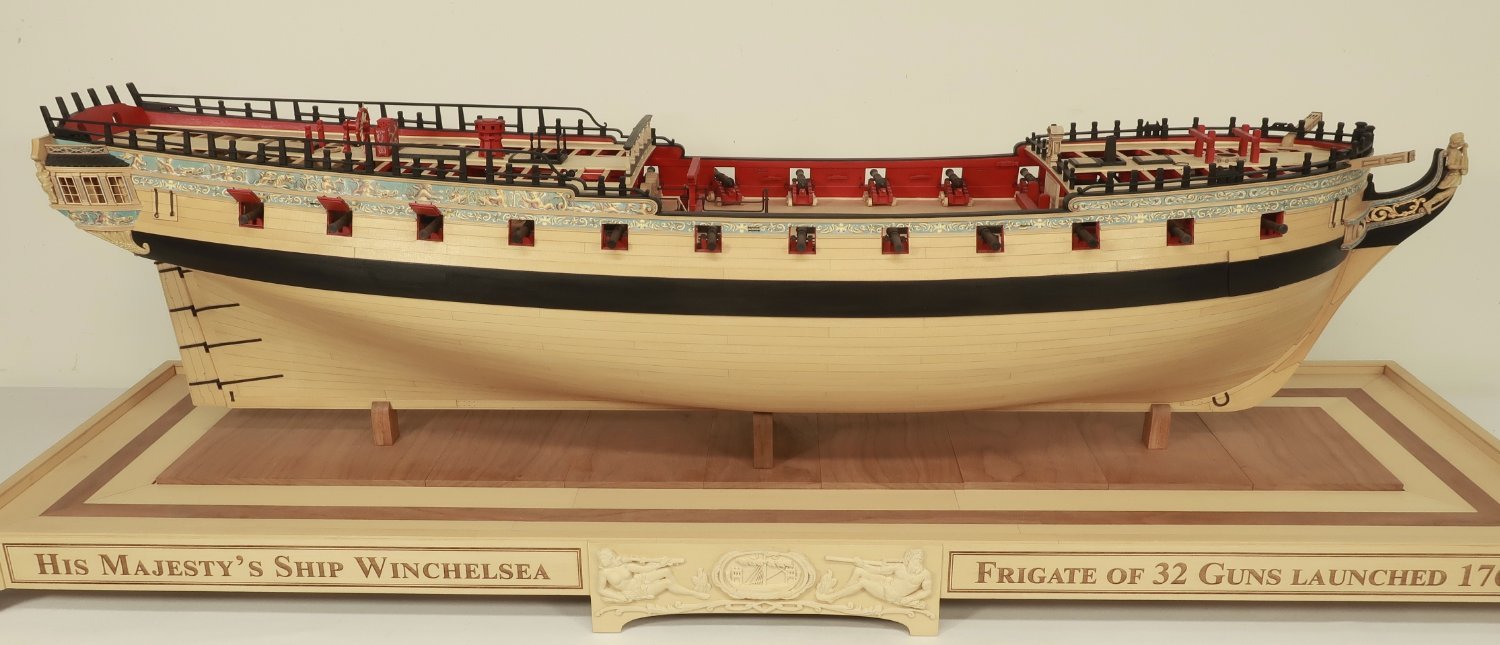
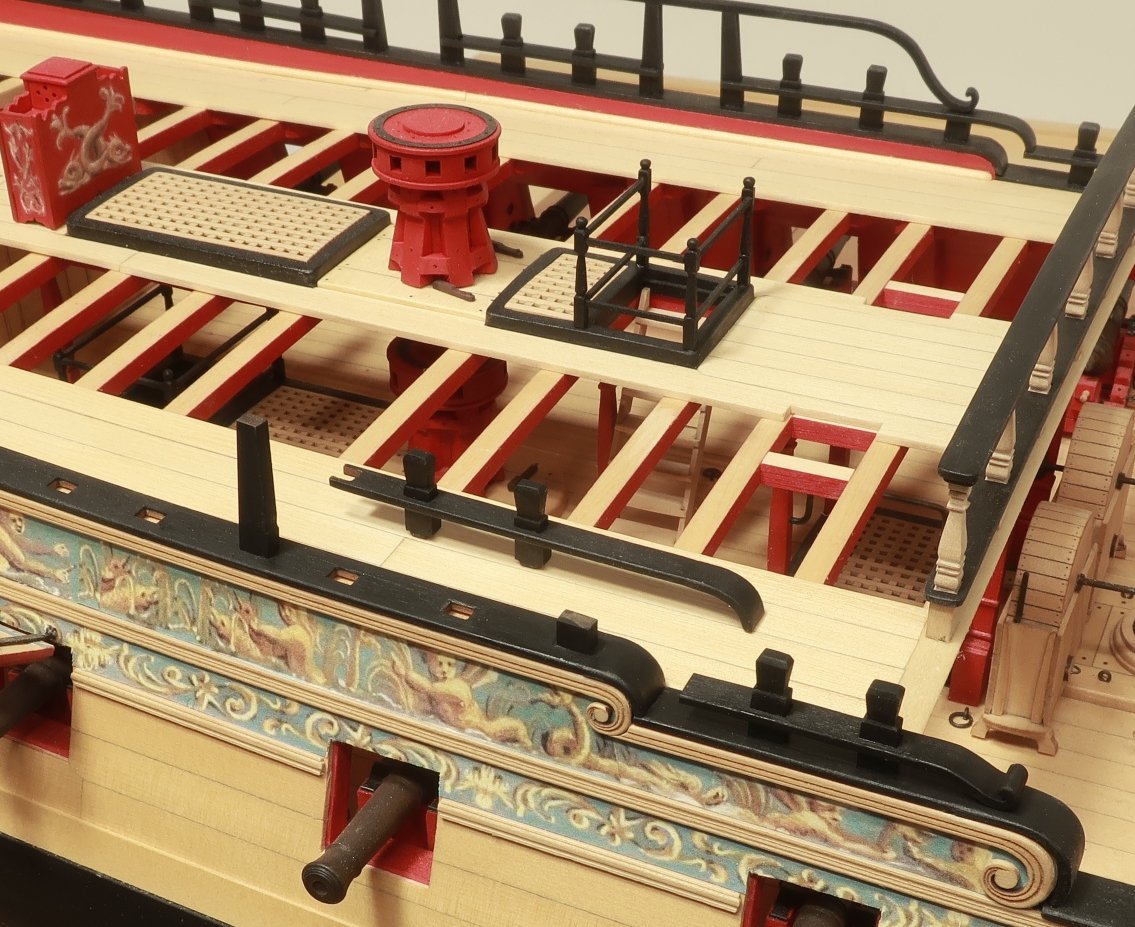
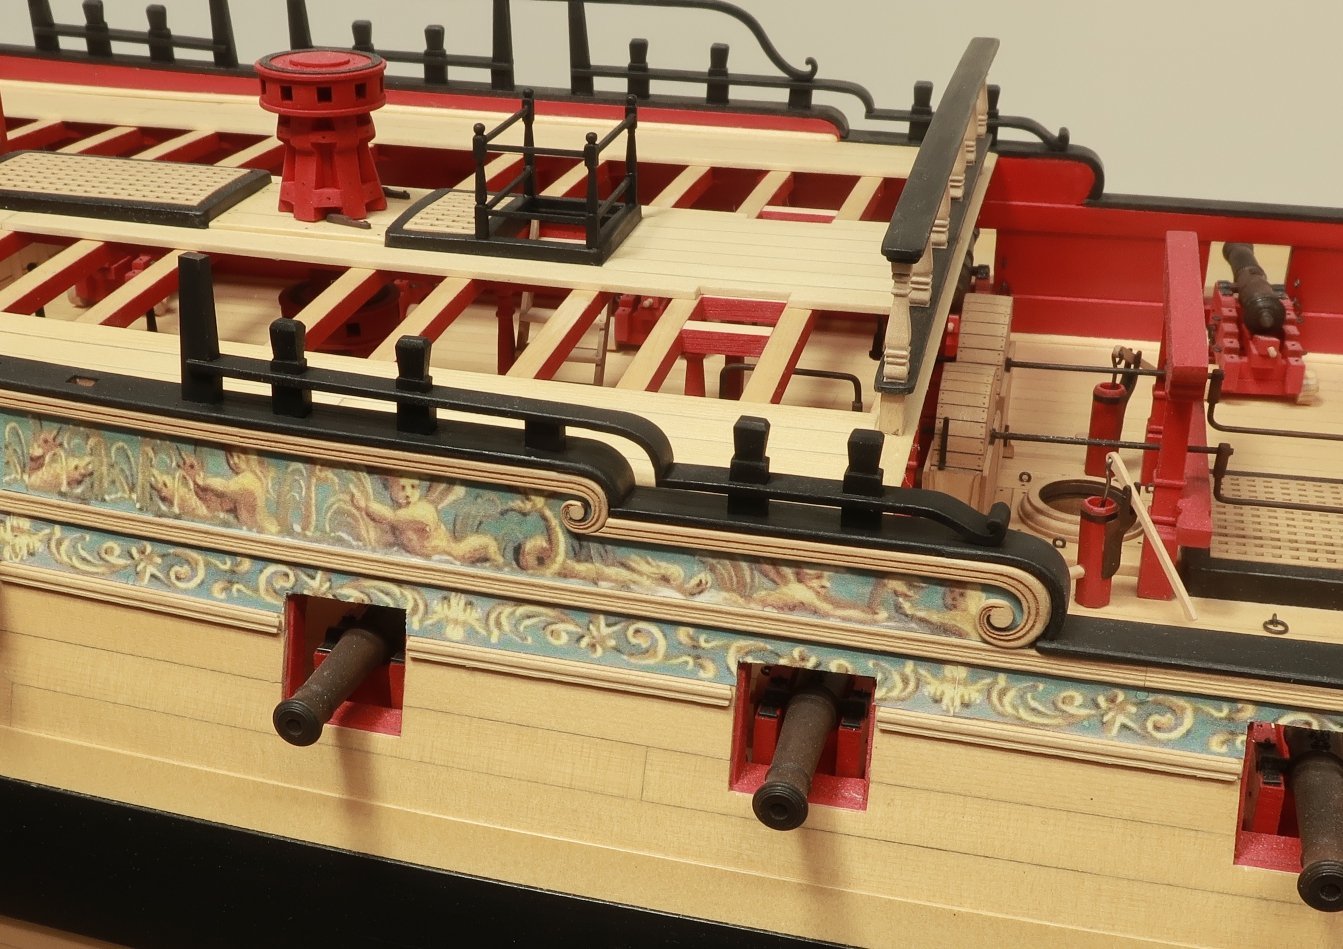
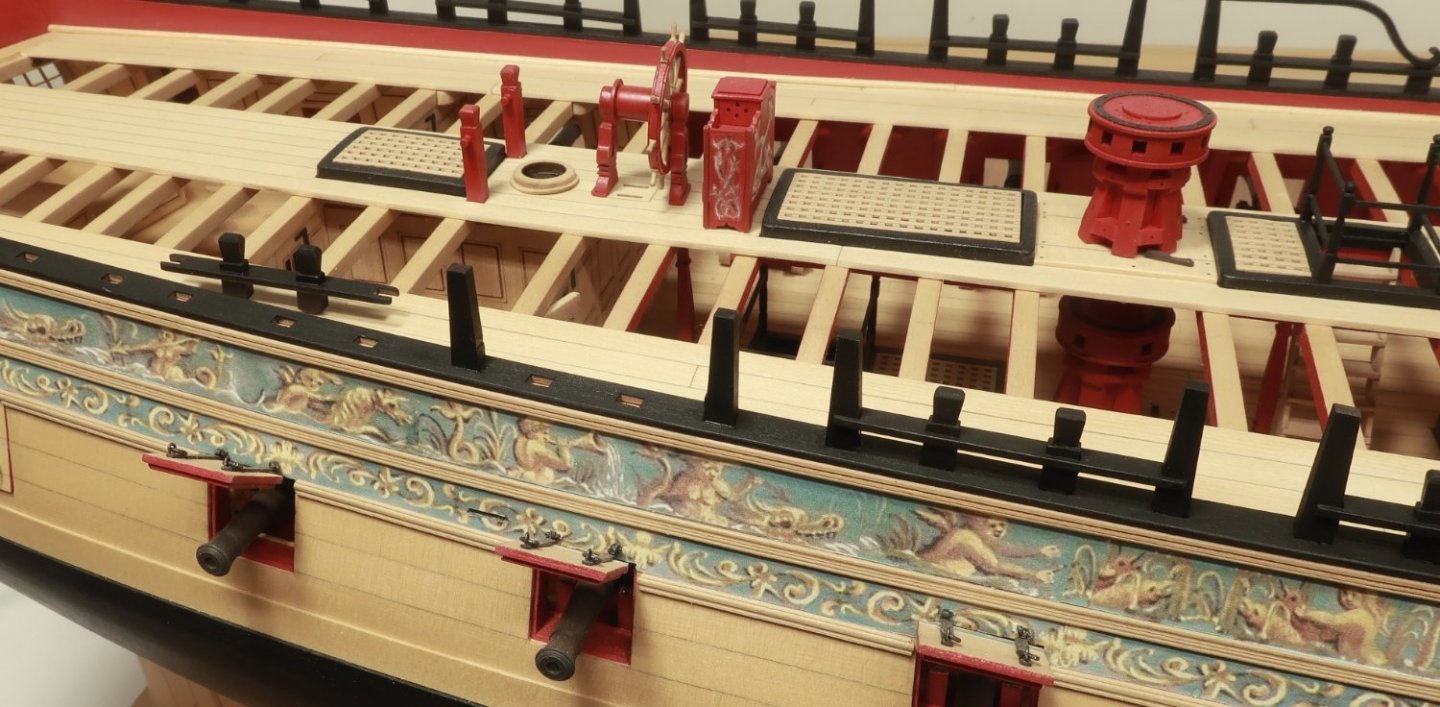
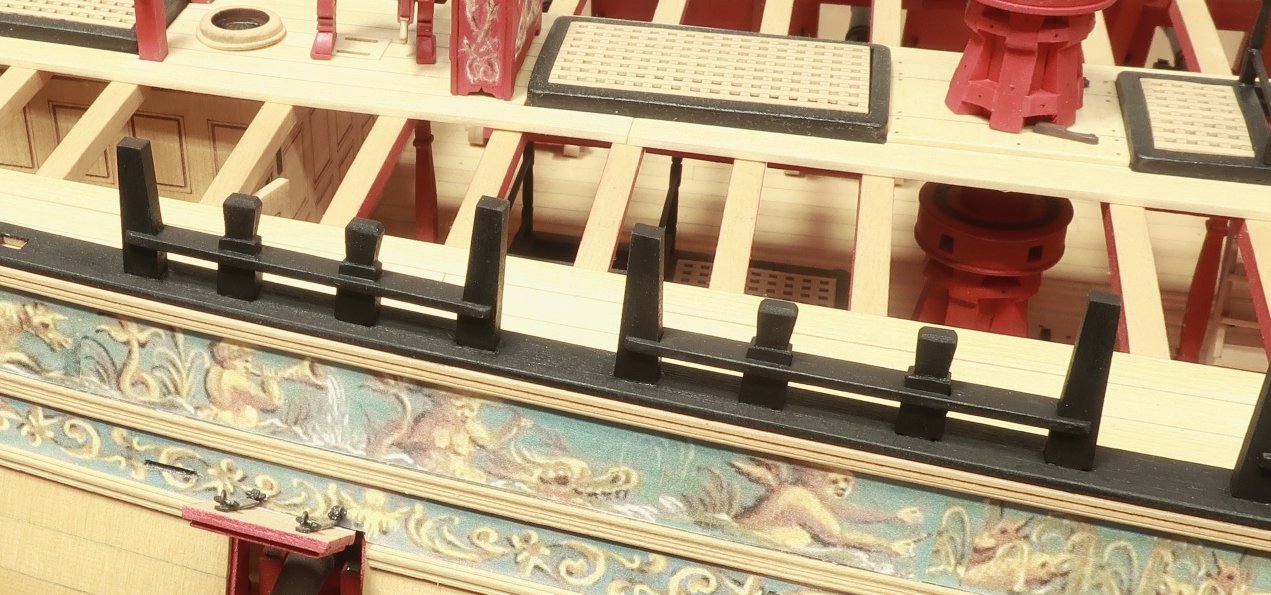
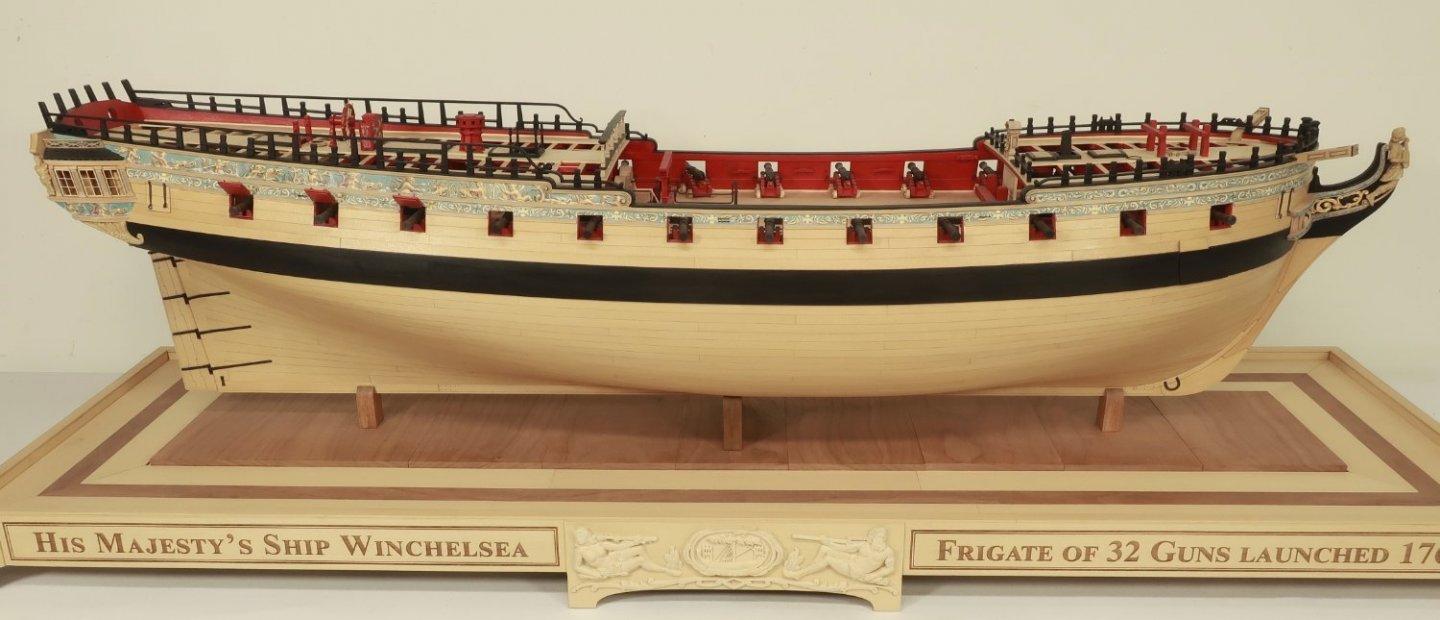
 Just a quick update....Today I completed the qdeck rail on the starboard side. Uneventful and all parts were laser cut. I will detail the step by step. All Parts are laser cut in groups. I thought it would be easiest to build if completed in sections. The laser cut parts for each group are labelled as such...M-1 and O-1 and L are the parts for the first section....then working your way aft you will use the parts M-2 and O-2 for the second section etc. The first section of rail is the most finicky but I will try and explain. The first section of rail (parts L, M-1 and O-1) First I glued the various parts together in the photo below. Just like the fcastle rail, finish the timberheads on all four sides. Then glue the fancy curved pieces to the notched rails so after painting them black you wont see the seams. Once painted black, the first lower section was dry fit on the drift in the waist. Dont glue it on yet. But you will also notice in that same photo, the longer post and short post on the qdeck sheer. These are actually painted ahead of time and glued in position. I found it easier to have these glued in place so the the assemble behind it can be slipped into position. This is the other assemble we made earlier. To complete this first section of the fancy rail, dry fit this section on the cap rail. Dont glue it on yet. See below. Note how the forward end connects with the lower rail on the drift. These should look like one continuous rail. I added some wiggle room so you can sand the aft end of the lower rail so it will be flush. That is why you shouldnt glue any of them in yet. Mark it with a pencil and sand the aft end until its flush and looks like one rail. This will be easier to understand as you guys are also doing it...I understand that it is difficult to write about but you will see what I mean once you get to this step. When you get everything to fit nicely, you can glue it all in position permanently. Then moving aft it gets easier. Each additional group just contains two longer uprights, the rail, and two timberheads. The photo below shows on of these sections already completed. This was section 2. Section 3 of the rail is in progress. In the same photo above you will see the two longer uprights painted and glued in position. Again, I found it easier to complete this way. Behind it you can see the center section with the timberheads waiting to be inserted between the two long uprights. One NOTE....the longer upright in each group (in this case section 3) are different lengths. The uprights get shorter as the work their way aft. Make sure you glue them into position in the correct order. Shorter ones are aft. Then add the center assembly which has been already painted. Also make sure its facing the correct direction. It will only fit one way. The timberheads should be vertical and as such have angled bottoms. Make sure each upright and timberhead are vertical and because of the angled bottoms facing the correct way. The photo below shows the center inserted... Continue in this fashion for all five sections of the rail. Then the top rail can be added. It comes in two sections. On fancy piece on the forward end and a long length of rail to the transom. I found it easier to attach both pieces together and sand them. Then pre aint it black. You will have to adjust the aft end to fit against the transom stern frame. Also note the fixed block that sits on the cap rail against the transom. Your rail in the fifth and final section sits on this block. A small laser disc is glued into the slot of the fixed block. This can be finicky but manageable if done a section at a time. Its not a plastic kit so you will have tweak the angles and shift some timberheads to get them to look just right. Remember the timberheads and uprights on this rail should be vertical. Make sure the longer uprights are all the proper height which they should be before you put that top rail on. You dont want a wavy top rail. So DONT sand their lengths at all. They are all precision laser cut to the proper lengths. Test the top rail before gluing it on. This is a task that requires that you go slow....there are a lot of things to watch out for which wouldnt make any sense at all to you if I wrote about them now. But once you start building this rail please dont hesitate to ask me a lot of questions. Any questions or comments??
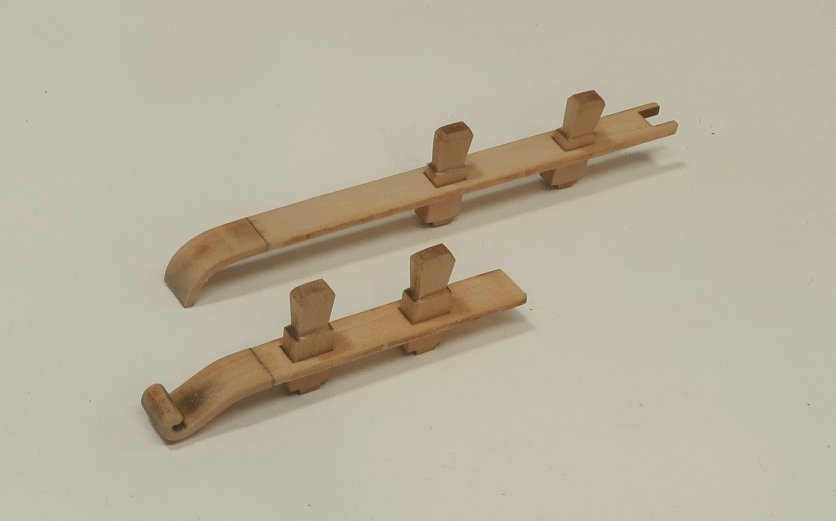

- 1,784 replies
-
- 35
-

-

-
- winchelsea
- Syren Ship Model Company
- (and 1 more)
-
Thats fine but that test piece does look too low. But its great to see you using the tools that you feel comfortable with.
-
That will do just fine Glenn Keep going!!! No need for a redo on those.
- 840 replies
-
- 4
-

-
-
- winchelsea
- Syren Ship Model Company
- (and 1 more)
-
Frank is correct. A locely job but the bowsprit hole should be angled. The bollard timbers are skewed slightly. Not a lot but on their forward and aft sides.
- 840 replies
-
- 4
-
-
- winchelsea
- Syren Ship Model Company
- (and 1 more)
-
Nicely done.
-
Dont worry about the aft end…you are good to go. the length is fine. That doesnt matter.
-
Perfect....but seriously check the bow shape before you plank over it.
-
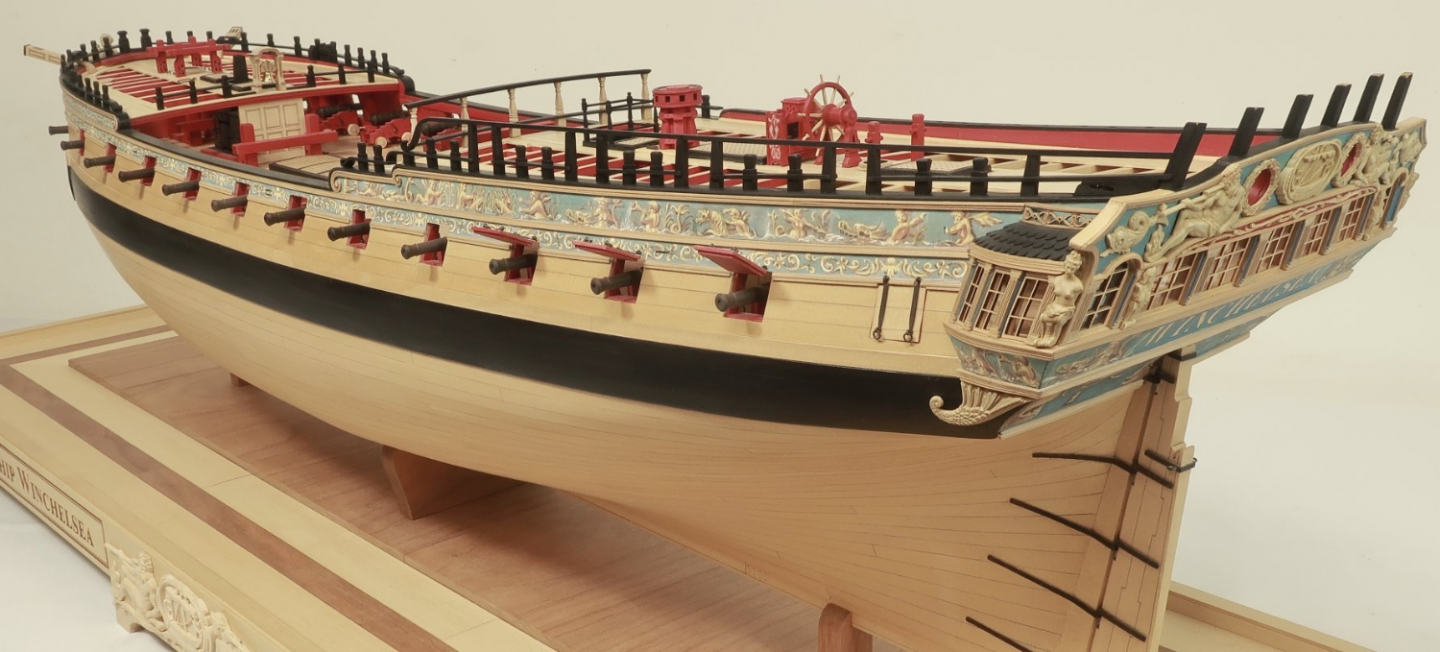
Now would be a great time to check the shape of your bow. This will ensure the caprail parts will fit and the fancy rail. See below.
-
Very nice!!! Just lovely.
-
Here you go Jim....CHAPTER NINE Chapternine.pdf Planking templates are at the end of the chapter. Be sure to print them out.
-
It looks great so far.
-
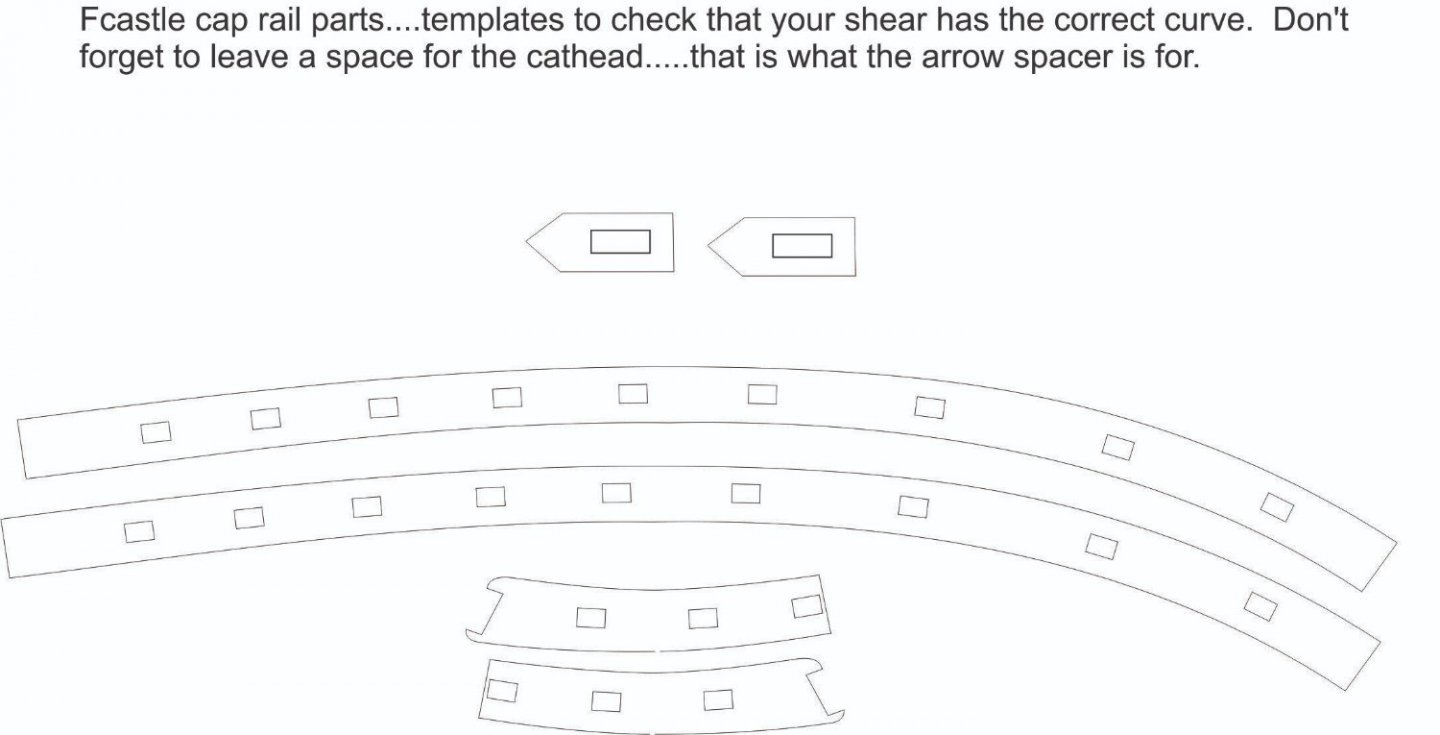
Attached is a PDF of the actual fcastle cap rail parts. This includes the small "arrow" spacer for the cathead. Read chapter 9. BUT...I thought this would be a great way for those who are just starting to fair the bulkheads inchapter one to check that the bow shape and curvature is correct. Lay these on top of the bulkheads were the cap rail will eventually go to check the shape. I know you guys get nervous about the correct shape at the bow. Many of you will NOT have that and the cap rail may not fit. Which will mean you guys will need to scratch build the cap rail and fancy rail parts. Make sure that your bow has the correct shape before you start planking... GBarlow..........Glen, this is the perfect timefor you to use these. fcastle caprail templates..pdf
-
Nope....i am going to wait a few months. See if you guys can figure it out. LOL....I just want to make it extra challenging and extra rewarding when you guys finish it all up.
-
Lovely work....those pumps look perfect. Well done! 😄
-
Looks great so far....just take your time. Welcome to the group and happy new year!!!
- 155 replies
-
- 1
-
-
- Medway Longboat
- Syren Ship Model Company
- (and 1 more)
-
Beautiful work…i bet you are glad the planking is done.
-
Beautiful start!!! Welcome aboard.
-
Its an honor system especially now because we know everyone who has access to the plans in this group. Even their address/phone info. You also agree to only use them for your own personal use when signing up. So yes....you can cut your own. Many have done just that on a scroll saw and I encourage it. But there are no vendors other than myself who offer the laser cut parts. I also frown on individuals going to a service to cut there own parts. You must ask for separate permission to have parts laser cut elsewhere. Plus not all laser templates are available....this is a semi scratch project although laser cut parts can be purchased only through me for 98% of the parts on the model. Chuck
- 1,784 replies
-
- 6
-
-
-
- winchelsea
- Syren Ship Model Company
- (and 1 more)
-
There is no separate plan for that. You have to take them off the large plan sheet. Mill the strips and then plank the counter. They are 1/4" wide and 3/64" thick. No templates for those like any other model project. Chuck
- 1,784 replies
-
- 3
-
-
- winchelsea
- Syren Ship Model Company
- (and 1 more)
-
There is no USA VAT…but yes paying VAT is a problem….but you could always scratch build the parts too expensive to ship for your situation. Thats the beauty of a project like this and being able to buy each chapter as you go. You only buy what you want when you want it. in addition….for the cost…you will never be able to buy another project like this… with this amount of detail and historical accuracy for the price offered. You certainly wont find any cheaper even close to this quality. You get what you pay for. This is the only project that will yield results like this straight out of the package. You wont find another like it. It doesnt exist.


- 1,784 replies
-
- 18
-
-
- winchelsea
- Syren Ship Model Company
- (and 1 more)
-
Nicely executed
-
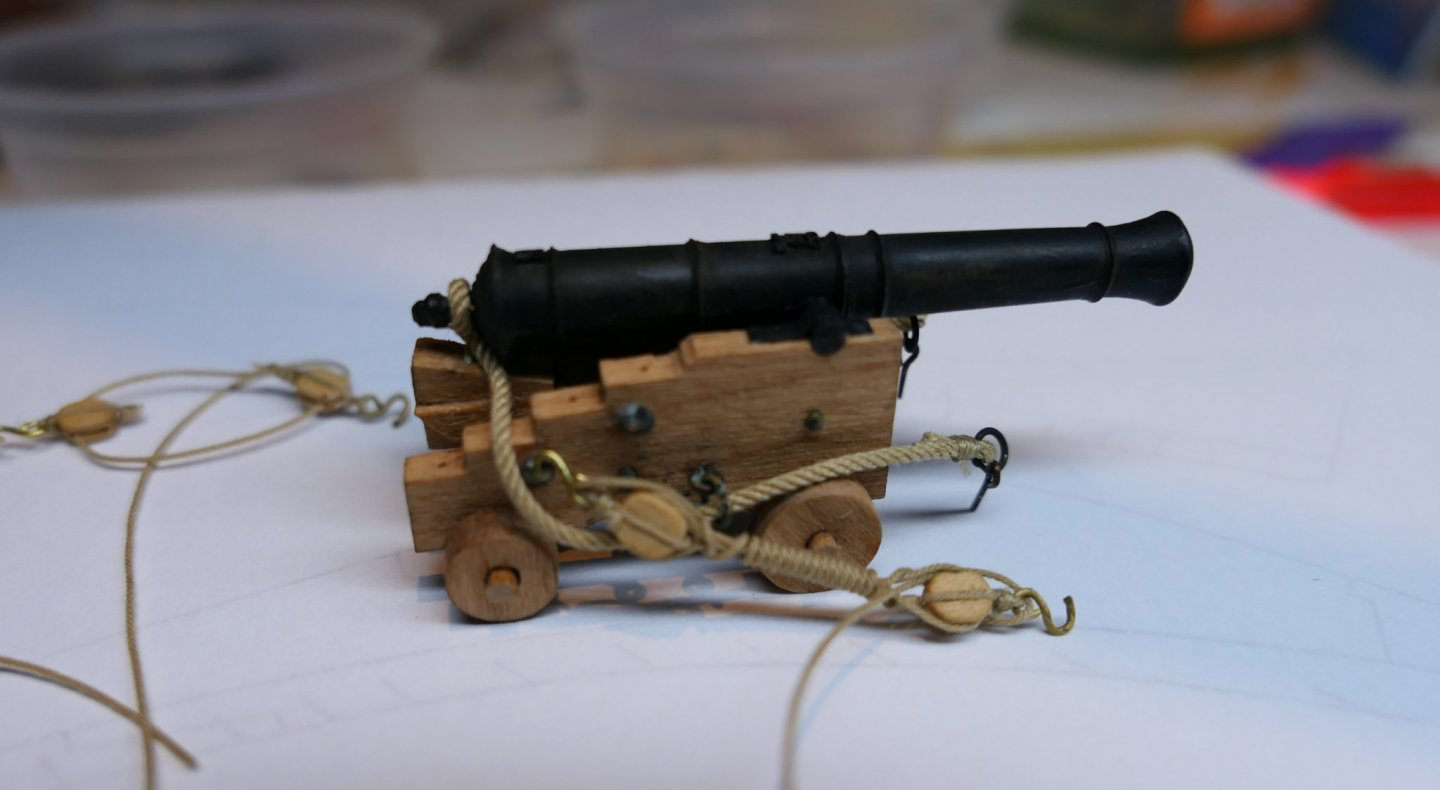
.045 if you prefer a slimmer look and .055 for a more Robust look. The store will open on Jan 1st. this is a carriage with .055 tan rope.
-
It looks very good. But the breech lines should absolutely be tan and not dark brown to simulate being tarred. Chuck
-
Looks good.