Chuck
-
Posts
9,719 -
Joined
-
Last visited
Content Type
Profiles
Forums
Gallery
Events
Everything posted by Chuck
-
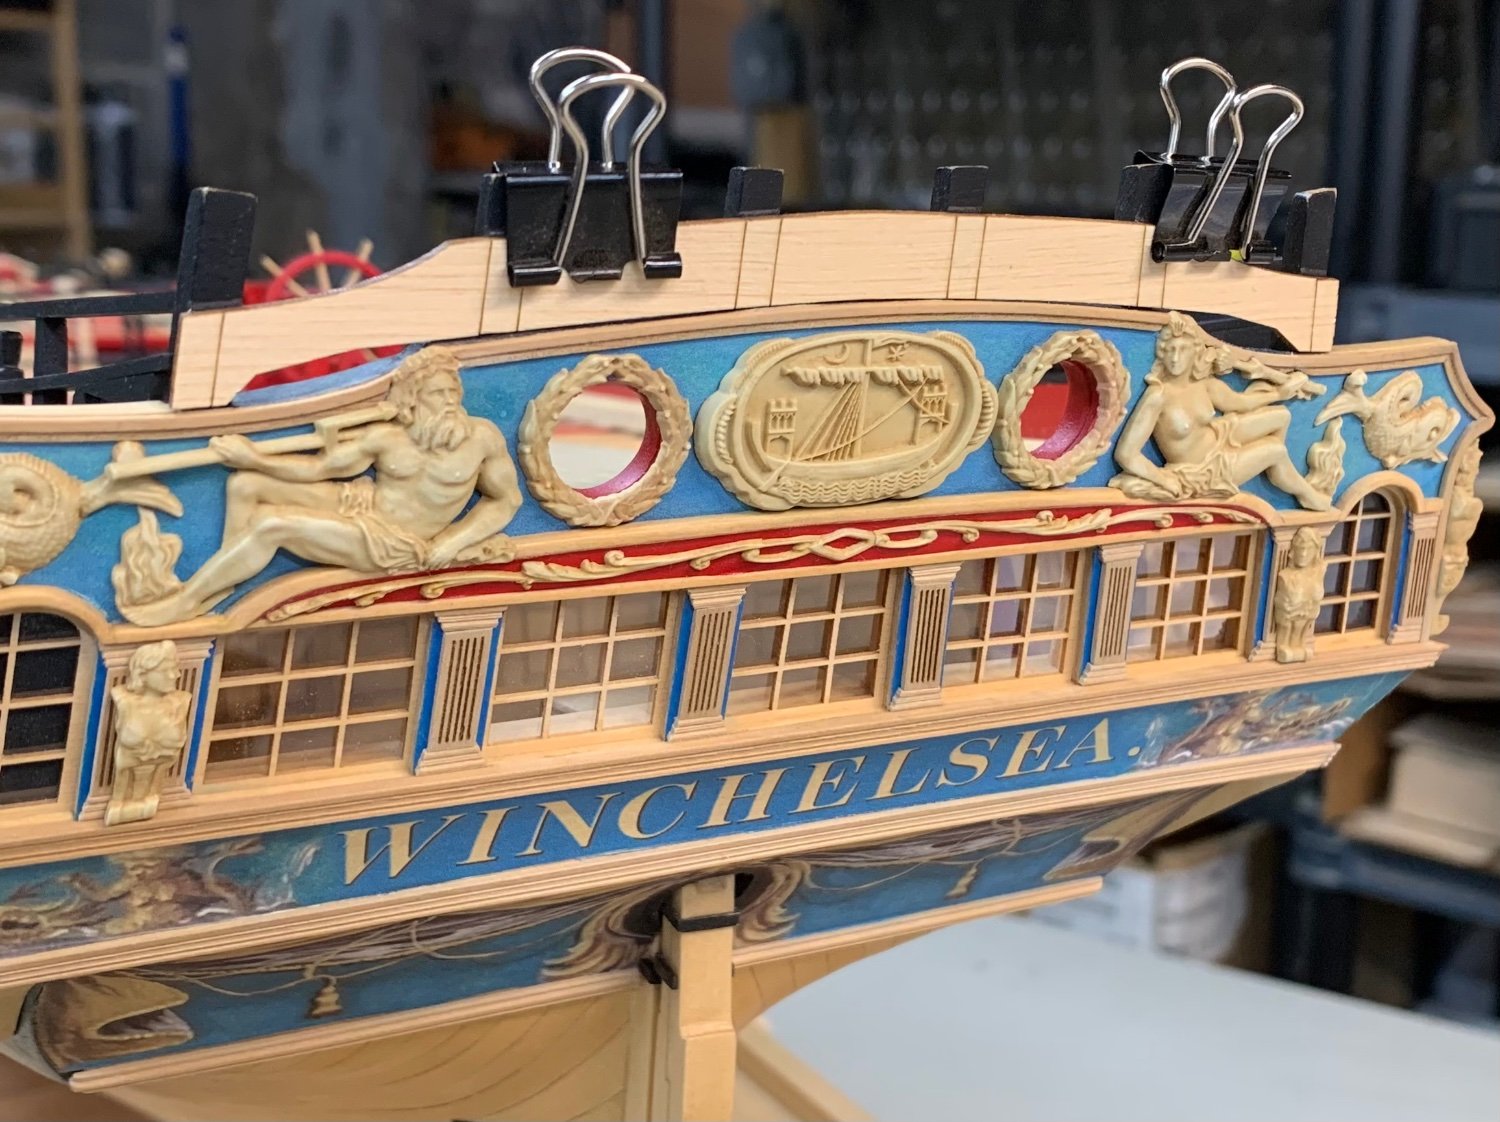
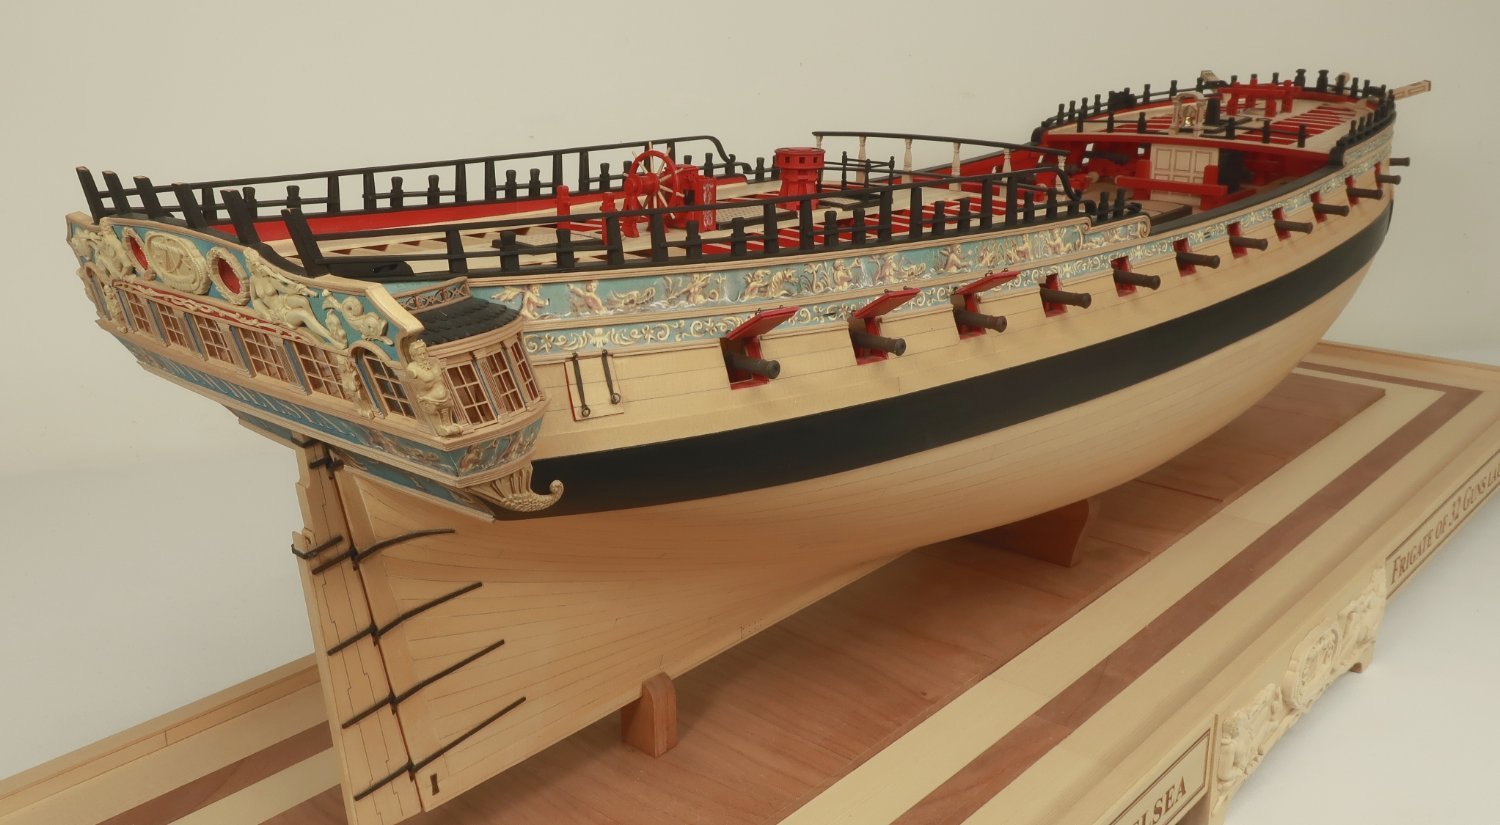
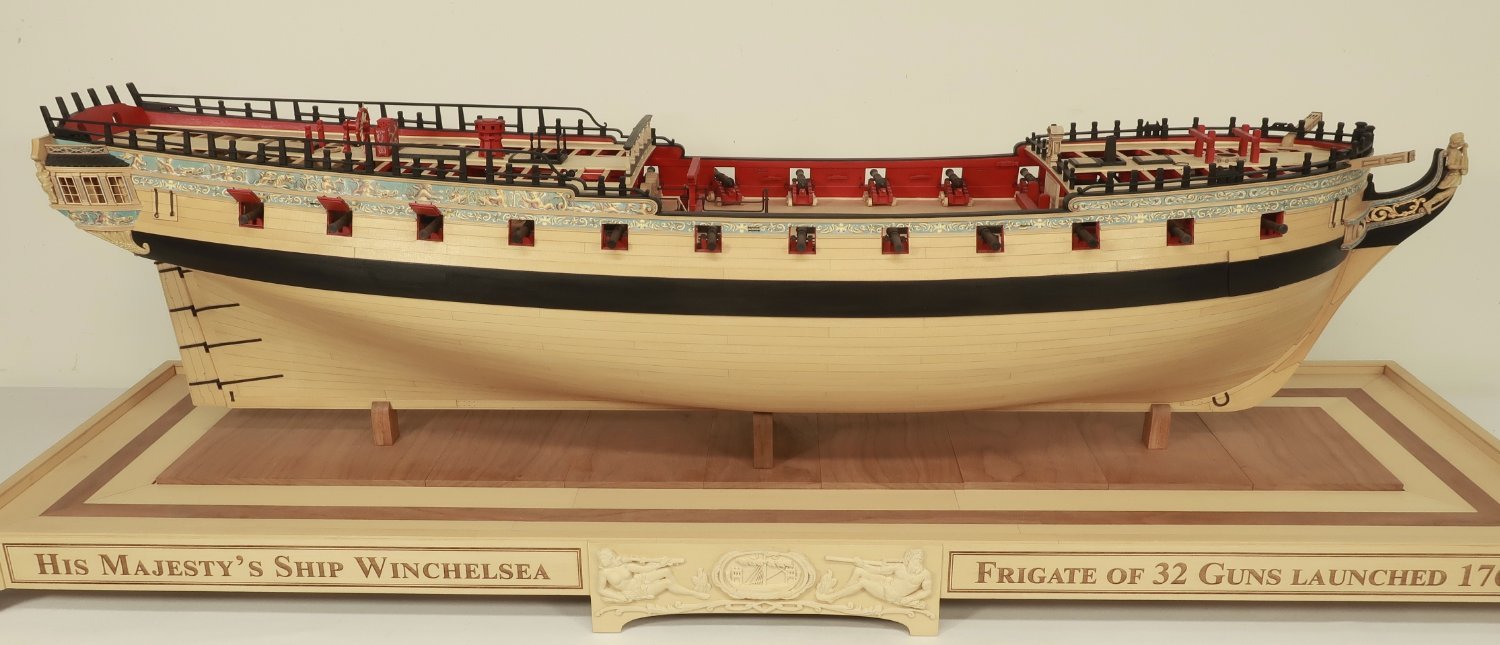
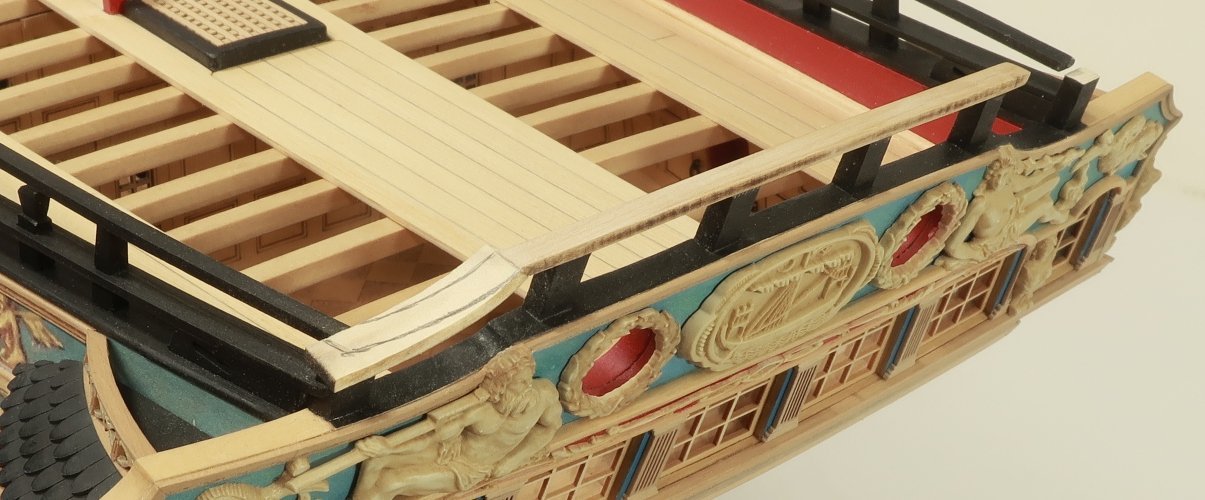
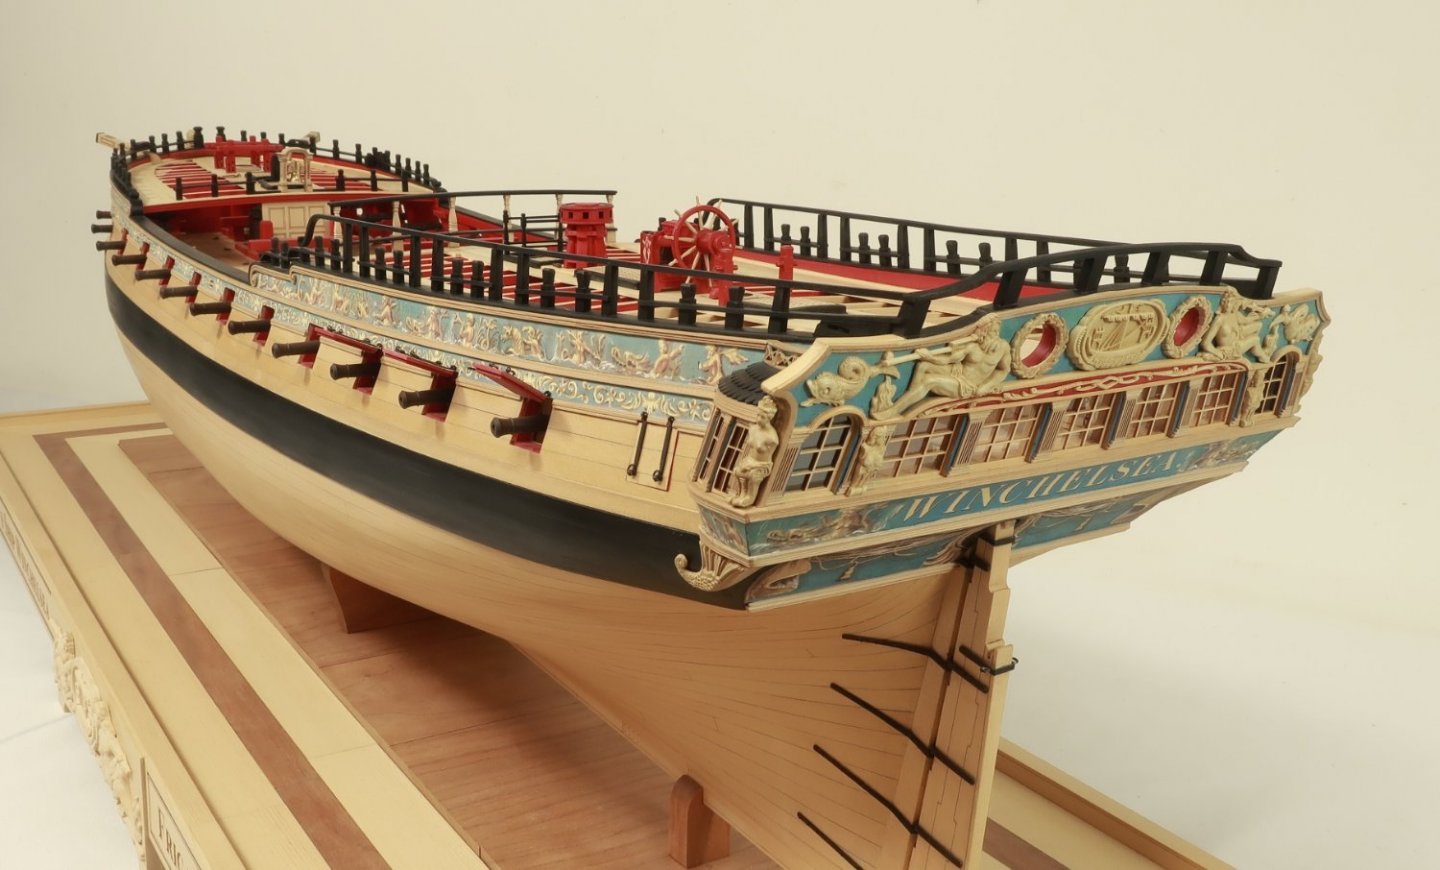
 If you remember, I used the provided laser cut template to mark the height of the stern frames. Then I cut them down most of the way with sharp chisels and a #11 blade. I followed that up with sanding them down to their final height. The first part of the cap added was the laser cut center section. It is 1/16" thick. This piece has a gentle curve to it when viewed from above to follow the curve of the transom. This piece was centered and glued in position. I also cleaned up both ends to make them neat and tidy to accept the pieces we will glue into position next. You can see the center section glued into place below. In addition the first outer section is glued on as well. Note how it is much wider than the center length. This will allow you to draw and MATCH the curve of the transom when viewed from above. I am not really stressing the sanding of char here because that will be taken care of once you reduce those outer pieces. You will be reducing them to the same width while maintaining the same graceful curve. Once you finish both sides, you can sand it all with a fine grit sandpaper to prep for painting. Then paint the whole thing black. Sanding made a lot of dust so remember to clean that all away before you start painting. You want the best quality painted surface as possible. Here are some pictures after the cap was completed and painted. This really ties everything together well.
- 1,784 replies
-
- 36
-

-

-
- winchelsea
- Syren Ship Model Company
- (and 1 more)
-
I am cutting more chapter 9 parts right now. Just wanted to let you guys know. I am cutting cherry version right now. I have also decided to use some yellow cedar sheets for the cherry chapter. Mainly for the rails and cap rail which will be painted black anyway. It doesnt matter with the color or wood type. If you absolutely want cherry for all parts then send me a PM but I think you will appreciate the flexibility of the cedar for the forecastle caprail and fancy rail. These are just the 3/64" thick parts.....All other parts will be cherry. I have already made about 36 chapter 9 sets in yellow cedar but they all sold out and once I make some cherry versions first, I will make more yellow cedar chapter sets right after. They should be ready next week at some point. Even though folks are months and maybe more than a year away from needing this chapter, it sells out right away anyway. So please watch the store this week if you are getting close to needing this chapter. Some folks just really want it sitting on the shelf in their shop rather than wait to buy it when they need it. So keep in eye out if you will be needing it soon.
-
- 2
-
-
Good work....no need to rush and proceeding carefully will pay off in multiples later on.
-
I think it looks fantastic. You should continue with it as is. Take what you have learned and move on to another subject to prevent yourself from losing interest. Possibly Spedwell? But your model really does look lovely. So little of the lower deck will be seen. Be sure to simulate a light seam on the fcastle and qdeck planking. It will look just fantastic.
-
I have no ide really but my guess would be 1:48 just like the model.
- 1,784 replies
-
- 3
-
-
- winchelsea
- Syren Ship Model Company
- (and 1 more)
-
Very nice. Those are so hard to make by hand like that.
-
Absolutely beautiful…you did such an excellent job on the Cheerful. I hope you enjoyed the project.
- 160 replies
-
- 1
-
-
- cheerful
- Syren Ship Model Company
- (and 1 more)
-
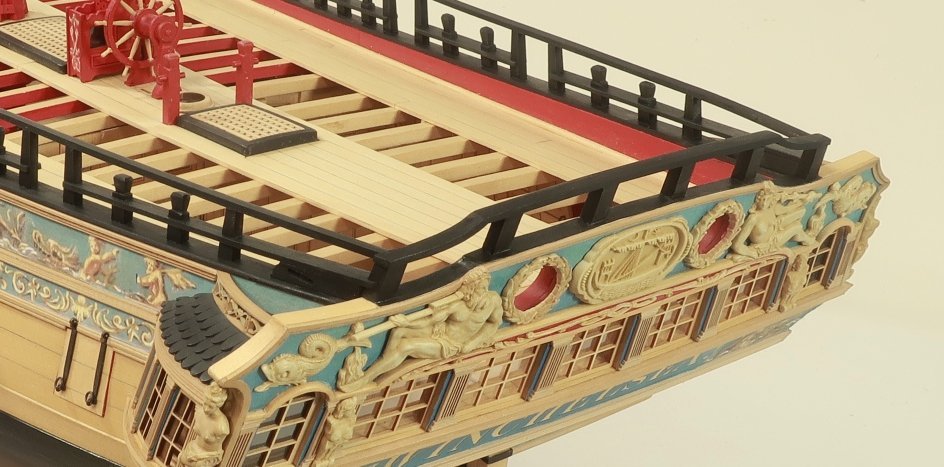
Just a another point here with the transom rail. On the contemporary model the qdeck top rail is oddly higher them the transom rail. You can always do this but the original drafts dont reflect this detail. Here is an oddly presented photo of that detail on the cont model. It just doesnt look right to my eye and so I will attempt to make the transom rail flush with the top rail of the qdeck. In addition.....this photo shows a beaded edge to the top rail of the transom. This will be added to our model as well. More photos to come.
- 1,784 replies
-
- 19
-
-
- winchelsea
- Syren Ship Model Company
- (and 1 more)
-
Laser cut template for marking the height of the stern frames. Now I must admit an error in judgement. Not that this will be terribly difficult for me do,but this would have probably been easier to do before the qdeck rails were added. So just a suggestion….and I will make the monograph chapter reflect this. The stern frames are best cut down before you start on the qdeck railings port and starboard. I have already cut down the stern frames using a sharp #11 blade. Slicing a little at a time. Then sanding down to my pencil lines made using this template. Note how the transom rail will be the same height as the qdeck fancy rail where the two meet. Hence the difficulty in surgically cutting away those outer stern frames. I am happy to report however, that it all came out splendidly. Photos of that shortly. so remember….This step first!!
- 1,784 replies
-
- 23
-
-
- winchelsea
- Syren Ship Model Company
- (and 1 more)
-
Beautiful work as usual. Love those small details. And it doesnt matter really how often you might see it on primary sources. I have seen many examples where fine unusual details are shown on a particular contemporary model and nowhere else which makes it absolutely worthy of inclusion. We may never the why? or how often? but its a wonderful detail. Well done.
-
I am glad the surgery went well. Welcome back.... Check here for all helpful downloads.
-
Absolutely beautiful progress.
-
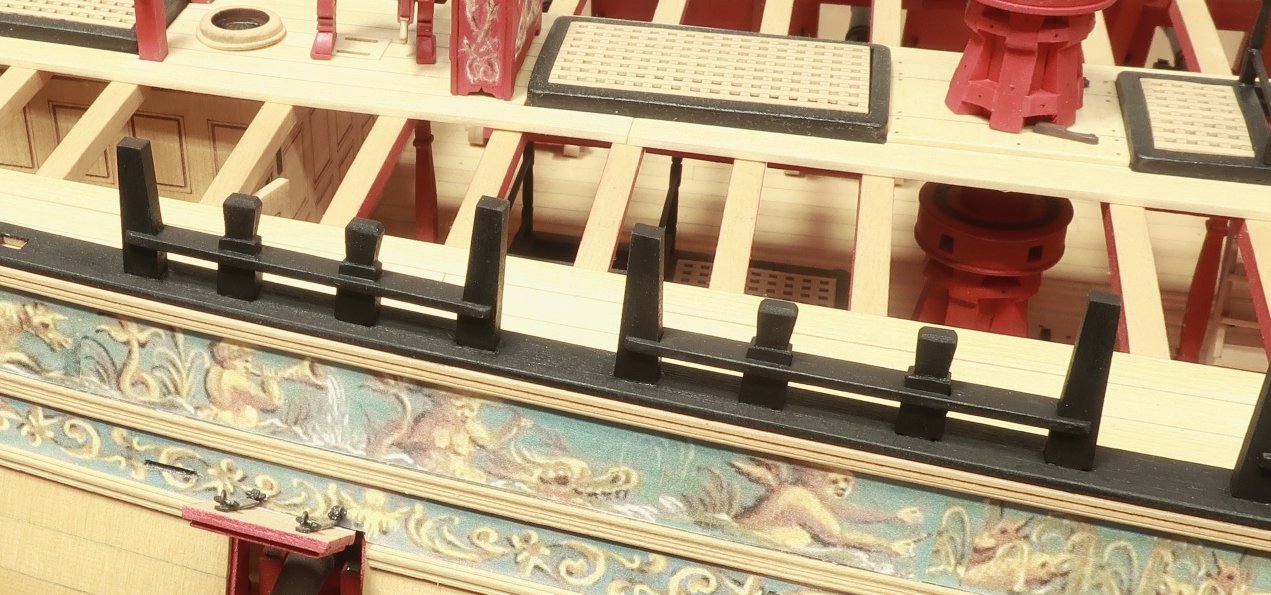
Yes they are not shown on the draft or the cont model but I think they would have been there. The standards are usually not shown on original drafts. At least most that I have seen. So this will be an optional detail but one I will be adding to my model for sure. Chuck
- 1,784 replies
-
- 8
-
-
- winchelsea
- Syren Ship Model Company
- (and 1 more)
-
If you have some brass tubing or even some styrene tubing that would work better for you. Those aren't that fragile at all. I have no idea how you are breaking them like that. But a replacement will be the same. I recommend you use any kind of tubing you can find close to that diameter instead.
- 1,784 replies
-
- 2
-
-
- winchelsea
- Syren Ship Model Company
- (and 1 more)
-
For what? The lids on the top of the stove. I am not sure what you mean by vents. There are no vents. They are just held in place by little tabs. To be cut with a sharp blade….not just punched out. Unless the laser didnt cut all the way through. Take a picture. Post it. if you need a new sheet i can send one no problem but I am not very sure which sheet or part you are referring. I etched the outline on the top of the stove for the lids but thats just for placement purposes. You shouldnt remove those …and on a sep sheet there are small matching circles for the lids that go in those spots. Its all spelled out step by step in the pdf.
- 1,784 replies
-
- 1
-
-
- winchelsea
- Syren Ship Model Company
- (and 1 more)
-
That will be designed and made after the hull is completely finished.
- 1,784 replies
-
- 4
-
-
- winchelsea
- Syren Ship Model Company
- (and 1 more)
-
Thats looking very good i deed.
-
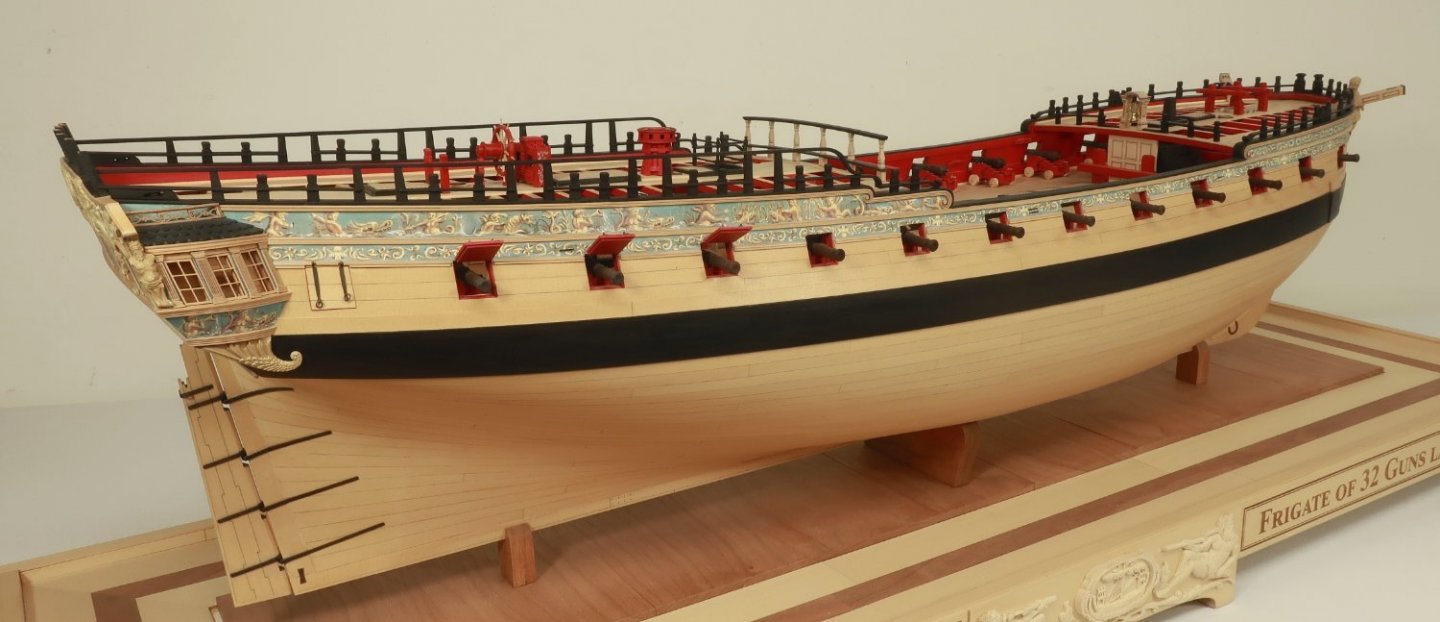
Thanks guys....next up will be the cap for the transom. That will be a gratifying part to complete as I am tired of looking at those stubby stern frames sticking up at the stern. Once that is completed I will wrap up chapter 10 with a few timberheads with sheaves along the inboard qdeck bulwarks. And the iron-work and guns. Chapter 11 was originally going to be for the headrails but I have decided I want complete the exterior with channels, deadeyes and fenders and swivel guns and such first. That will really make the model look finished off. I am looking forward to the next chapter a lot.
- 1,784 replies
-
- 20
-
-
- winchelsea
- Syren Ship Model Company
- (and 1 more)
-
US Brig Syren by Gahm - Model Shipways
Chuck replied to Gahm's topic in - Kit build logs for subjects built from 1801 - 1850
Wonderful work and nice progress on the rigging. Looking forward to see that rig develop. Chuck -
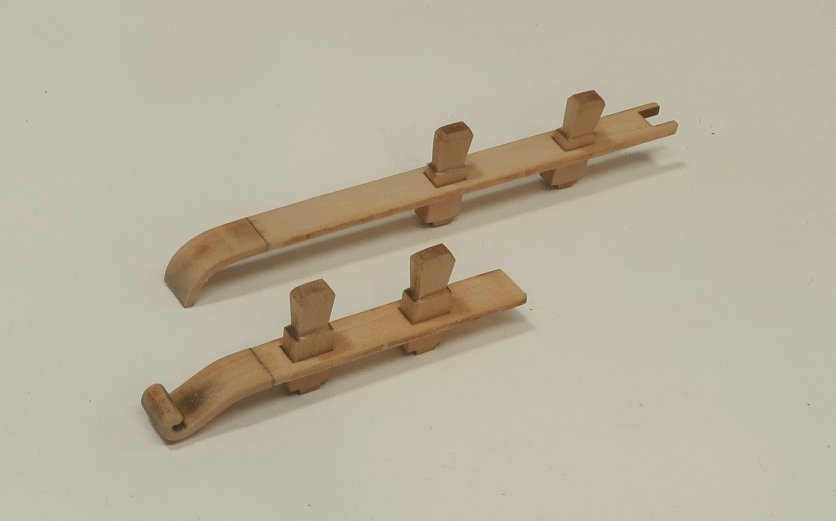
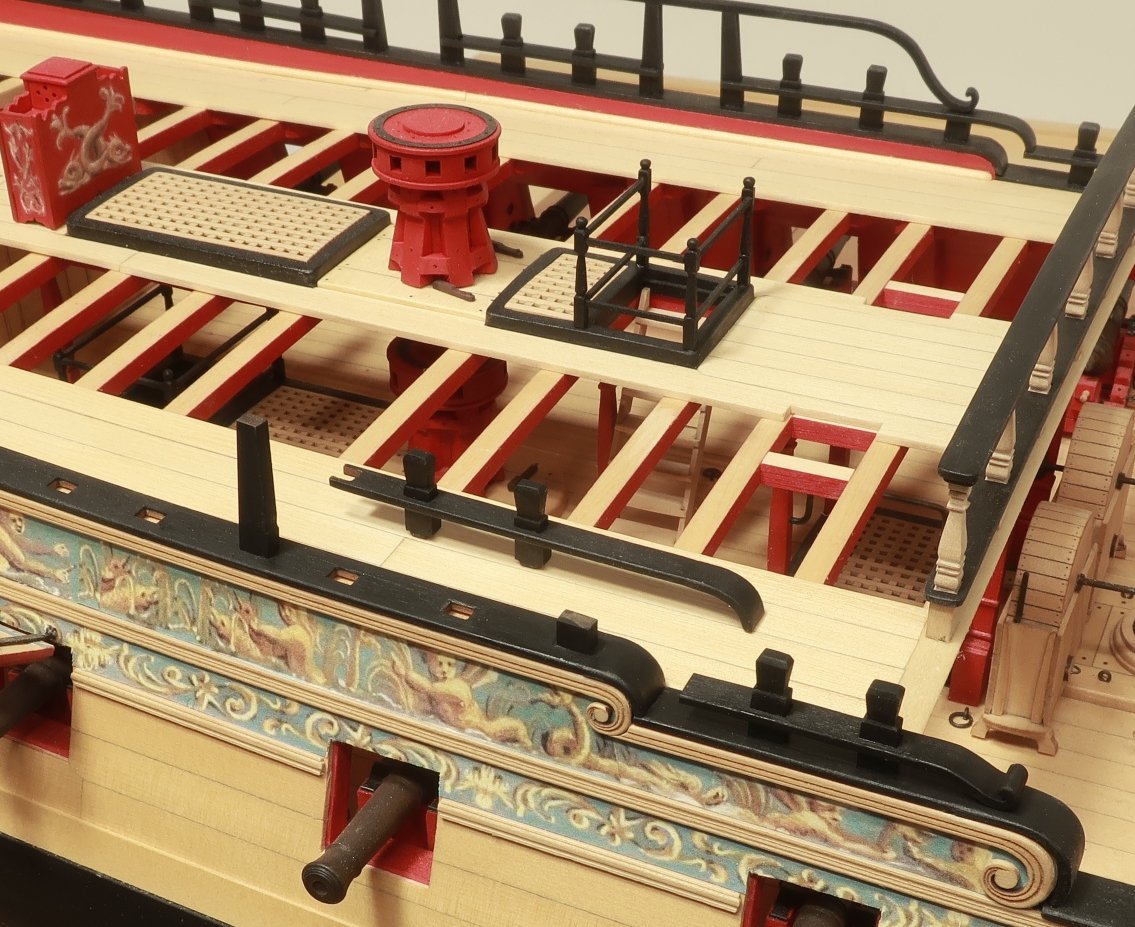
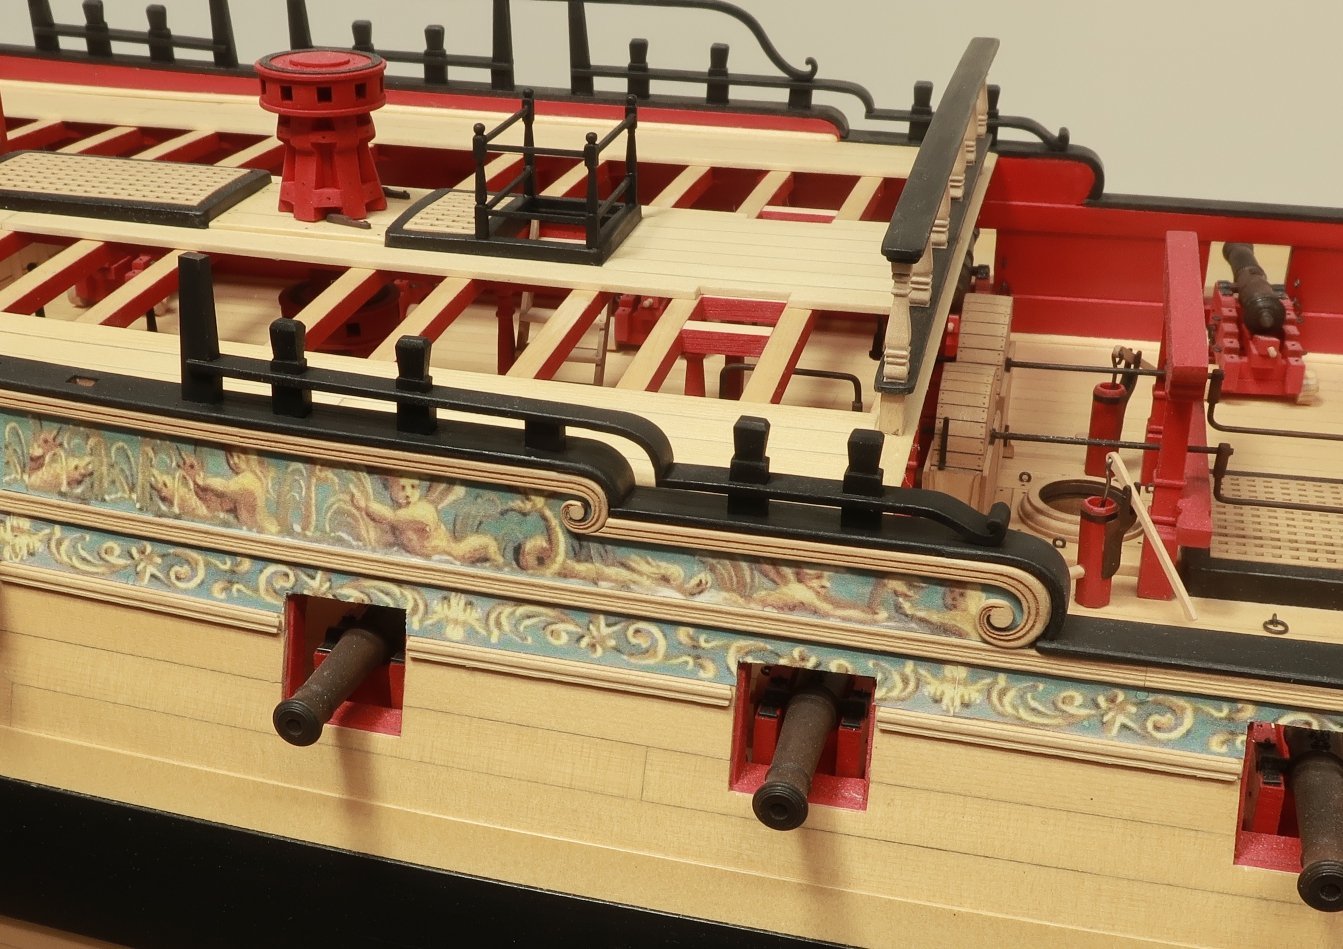
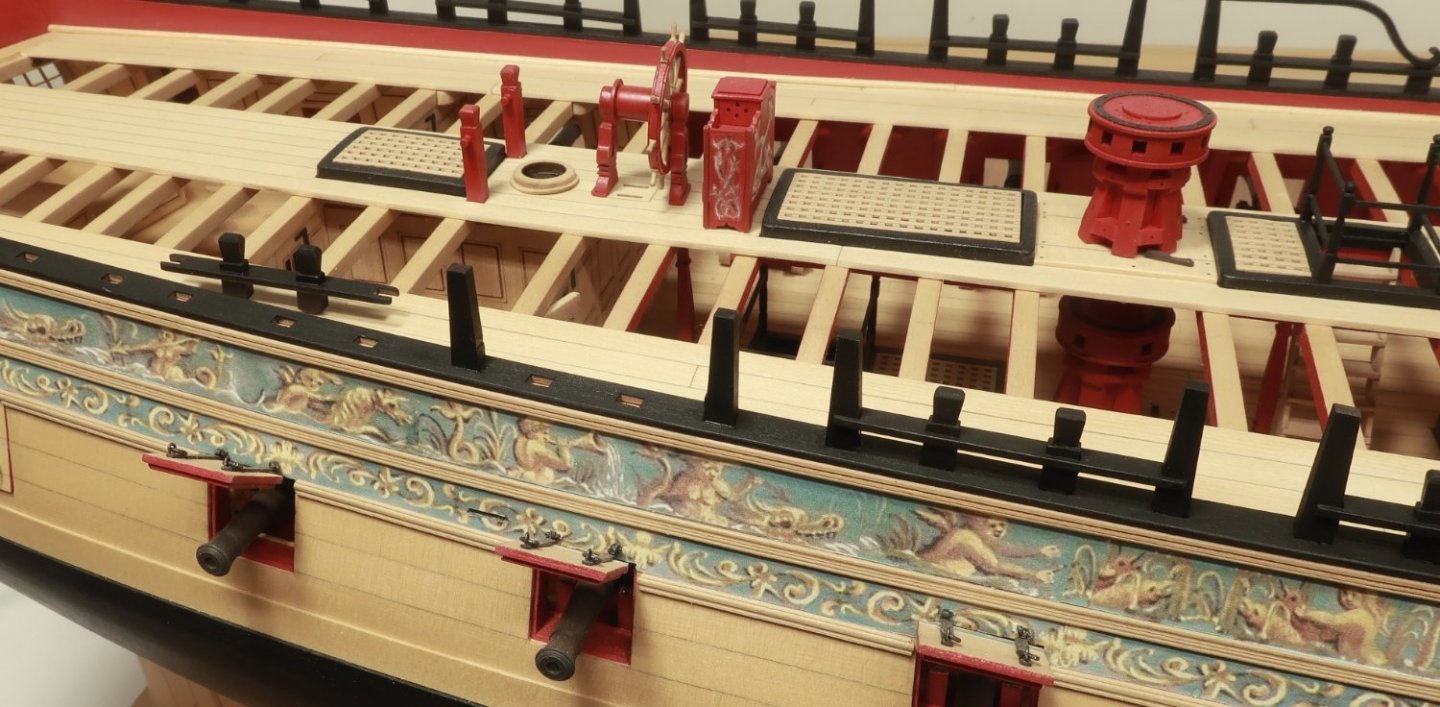
Just a quick update....Today I completed the qdeck rail on the starboard side. Uneventful and all parts were laser cut. I will detail the step by step. All Parts are laser cut in groups. I thought it would be easiest to build if completed in sections. The laser cut parts for each group are labelled as such...M-1 and O-1 and L are the parts for the first section....then working your way aft you will use the parts M-2 and O-2 for the second section etc. The first section of rail is the most finicky but I will try and explain. The first section of rail (parts L, M-1 and O-1) First I glued the various parts together in the photo below. Just like the fcastle rail, finish the timberheads on all four sides. Then glue the fancy curved pieces to the notched rails so after painting them black you wont see the seams. Once painted black, the first lower section was dry fit on the drift in the waist. Dont glue it on yet. But you will also notice in that same photo, the longer post and short post on the qdeck sheer. These are actually painted ahead of time and glued in position. I found it easier to have these glued in place so the the assemble behind it can be slipped into position. This is the other assemble we made earlier. To complete this first section of the fancy rail, dry fit this section on the cap rail. Dont glue it on yet. See below. Note how the forward end connects with the lower rail on the drift. These should look like one continuous rail. I added some wiggle room so you can sand the aft end of the lower rail so it will be flush. That is why you shouldnt glue any of them in yet. Mark it with a pencil and sand the aft end until its flush and looks like one rail. This will be easier to understand as you guys are also doing it...I understand that it is difficult to write about but you will see what I mean once you get to this step. When you get everything to fit nicely, you can glue it all in position permanently. Then moving aft it gets easier. Each additional group just contains two longer uprights, the rail, and two timberheads. The photo below shows on of these sections already completed. This was section 2. Section 3 of the rail is in progress. In the same photo above you will see the two longer uprights painted and glued in position. Again, I found it easier to complete this way. Behind it you can see the center section with the timberheads waiting to be inserted between the two long uprights. One NOTE....the longer upright in each group (in this case section 3) are different lengths. The uprights get shorter as the work their way aft. Make sure you glue them into position in the correct order. Shorter ones are aft. Then add the center assembly which has been already painted. Also make sure its facing the correct direction. It will only fit one way. The timberheads should be vertical and as such have angled bottoms. Make sure each upright and timberhead are vertical and because of the angled bottoms facing the correct way. The photo below shows the center inserted... Continue in this fashion for all five sections of the rail. Then the top rail can be added. It comes in two sections. On fancy piece on the forward end and a long length of rail to the transom. I found it easier to attach both pieces together and sand them. Then pre aint it black. You will have to adjust the aft end to fit against the transom stern frame. Also note the fixed block that sits on the cap rail against the transom. Your rail in the fifth and final section sits on this block. A small laser disc is glued into the slot of the fixed block. This can be finicky but manageable if done a section at a time. Its not a plastic kit so you will have tweak the angles and shift some timberheads to get them to look just right. Remember the timberheads and uprights on this rail should be vertical. Make sure the longer uprights are all the proper height which they should be before you put that top rail on. You dont want a wavy top rail. So DONT sand their lengths at all. They are all precision laser cut to the proper lengths. Test the top rail before gluing it on. This is a task that requires that you go slow....there are a lot of things to watch out for which wouldnt make any sense at all to you if I wrote about them now. But once you start building this rail please dont hesitate to ask me a lot of questions. Any questions or comments??

- 1,784 replies
-
- 35
-
-
-
- winchelsea
- Syren Ship Model Company
- (and 1 more)
-
Thats fine but that test piece does look too low. But its great to see you using the tools that you feel comfortable with.
-
That will do just fine Glenn Keep going!!! No need for a redo on those.
- 840 replies
-
- 4
-

-
-
- winchelsea
- Syren Ship Model Company
- (and 1 more)