HOLIDAY DONATION DRIVE - SUPPORT MSW - DO YOUR PART TO KEEP THIS GREAT FORUM GOING! (89 donations so far out of 49,000 members - C'mon guys!)
×


Remcohe
-
Posts
612 -
Joined
-
Last visited
Content Type
Profiles
Forums
Gallery
Events
Everything posted by Remcohe
-
 Congratulations Grant on completing such a fine model. I really enjoyed following your build. Remco
- 456 replies
-
- 4
-

-
- finished
- bomb ketch
- (and 2 more)
-
That is a nice set of anchors Piet, do you take a commission and build me a pair for the KF ;-) Remco
-
I think one of the issues is I didn't use pure black Fieblings, but mixed it with Mahogany (same brand) to get a very dark brown instead of black as I liked that better. I would expect that if the tung finish (I use it not pure but thinned down with turpentine) dissolved the stain the issue would have presented it right away. But it was ok for over 6 months before it started to fade. So it must be the UV causing the issue. Anyway I will make a few scrap pieces with and without finish with both my mixed colour and pure black to see what happens over time and use them to test if I can repair it or not. Next to that I will try an acrylic ink The results will follow in due time. Remco
- 1,215 replies
-
- 6
-
-
- sloop
- kingfisher
- (and 1 more)
-
Jan, it's the stain discolouring below the oil topcoat. The shininess is just coincidence how the light fell. I have no idea how far the stain and the oil penetrated the wood. I only know I added multiple layers of stain and in the beginning it was very dark brown with no lighter patches what so ever. Remco
- 1,215 replies
-
- 3
-
-
- sloop
- kingfisher
- (and 1 more)
-
Thanks all for your advise and especially Ed for your research. I added a pic showing the 'problem' a bit better. Under normal light conditions it's very obvious, it just doesn't show very clear on a picture unless I over expose it. I dare not use any solvents for the risk of letting the dye getting into places I really don't want it to be or dissolve glue. I could try to carefully scrape the topcoat of the tung oil and hope the Fieblings will penetrate the wood. But this also has the risk it might get into places where it shouldn't go. Let me sleep on it for a couple of nights Remco

- 1,215 replies
-
- 12
-
-
- sloop
- kingfisher
- (and 1 more)
-
HMS Naiad 1797 by albert - FINISHED - 1/48
Remcohe replied to albert's topic in - Build logs for subjects built 1751 - 1800
The knees look excellent and the joinery is textbook execution style. Remco -
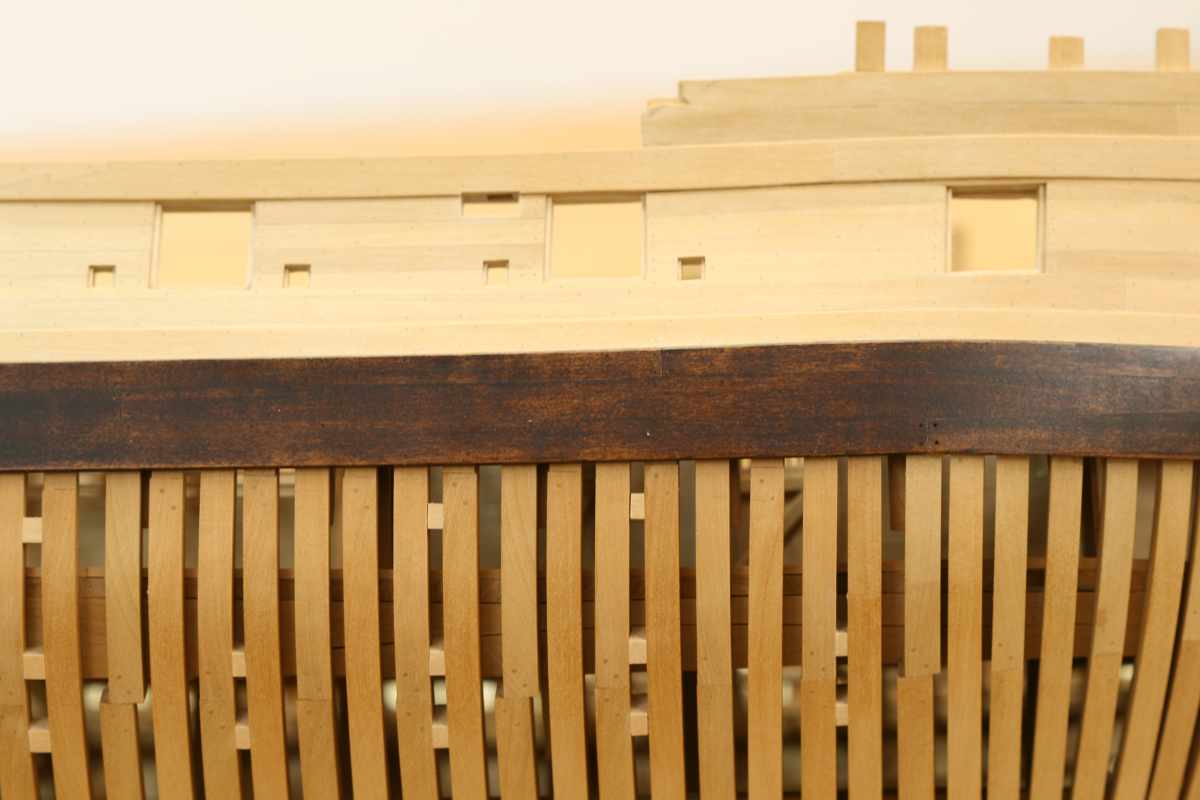
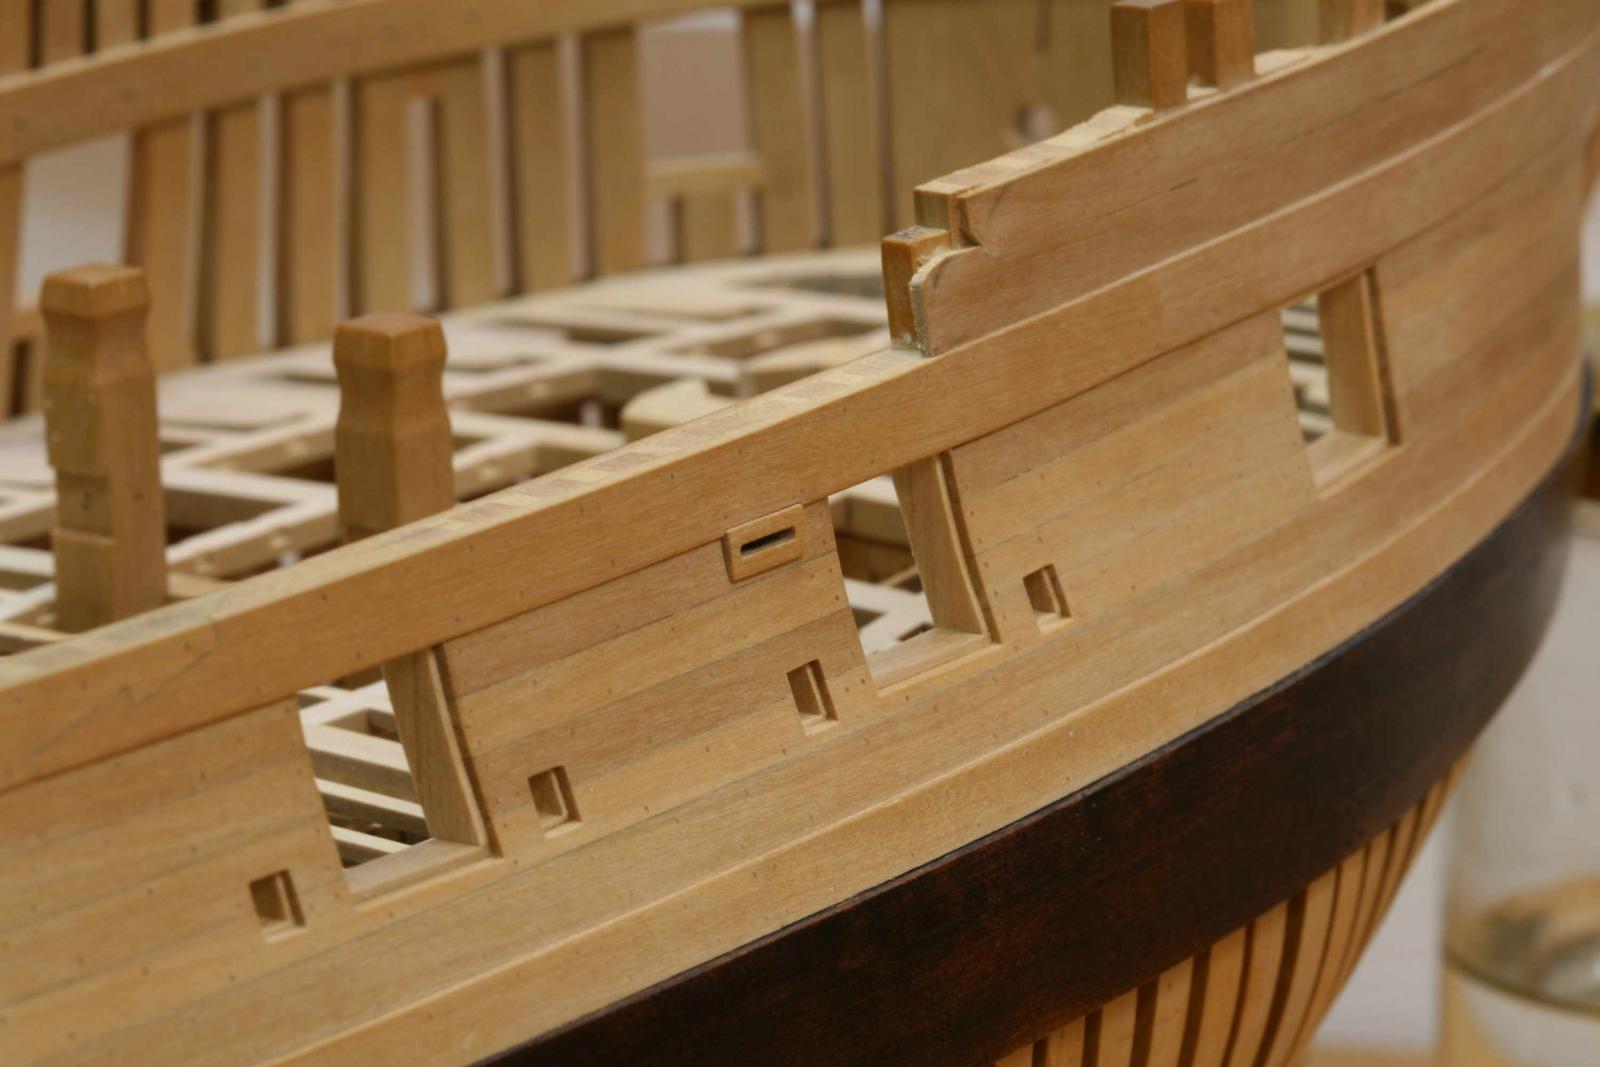
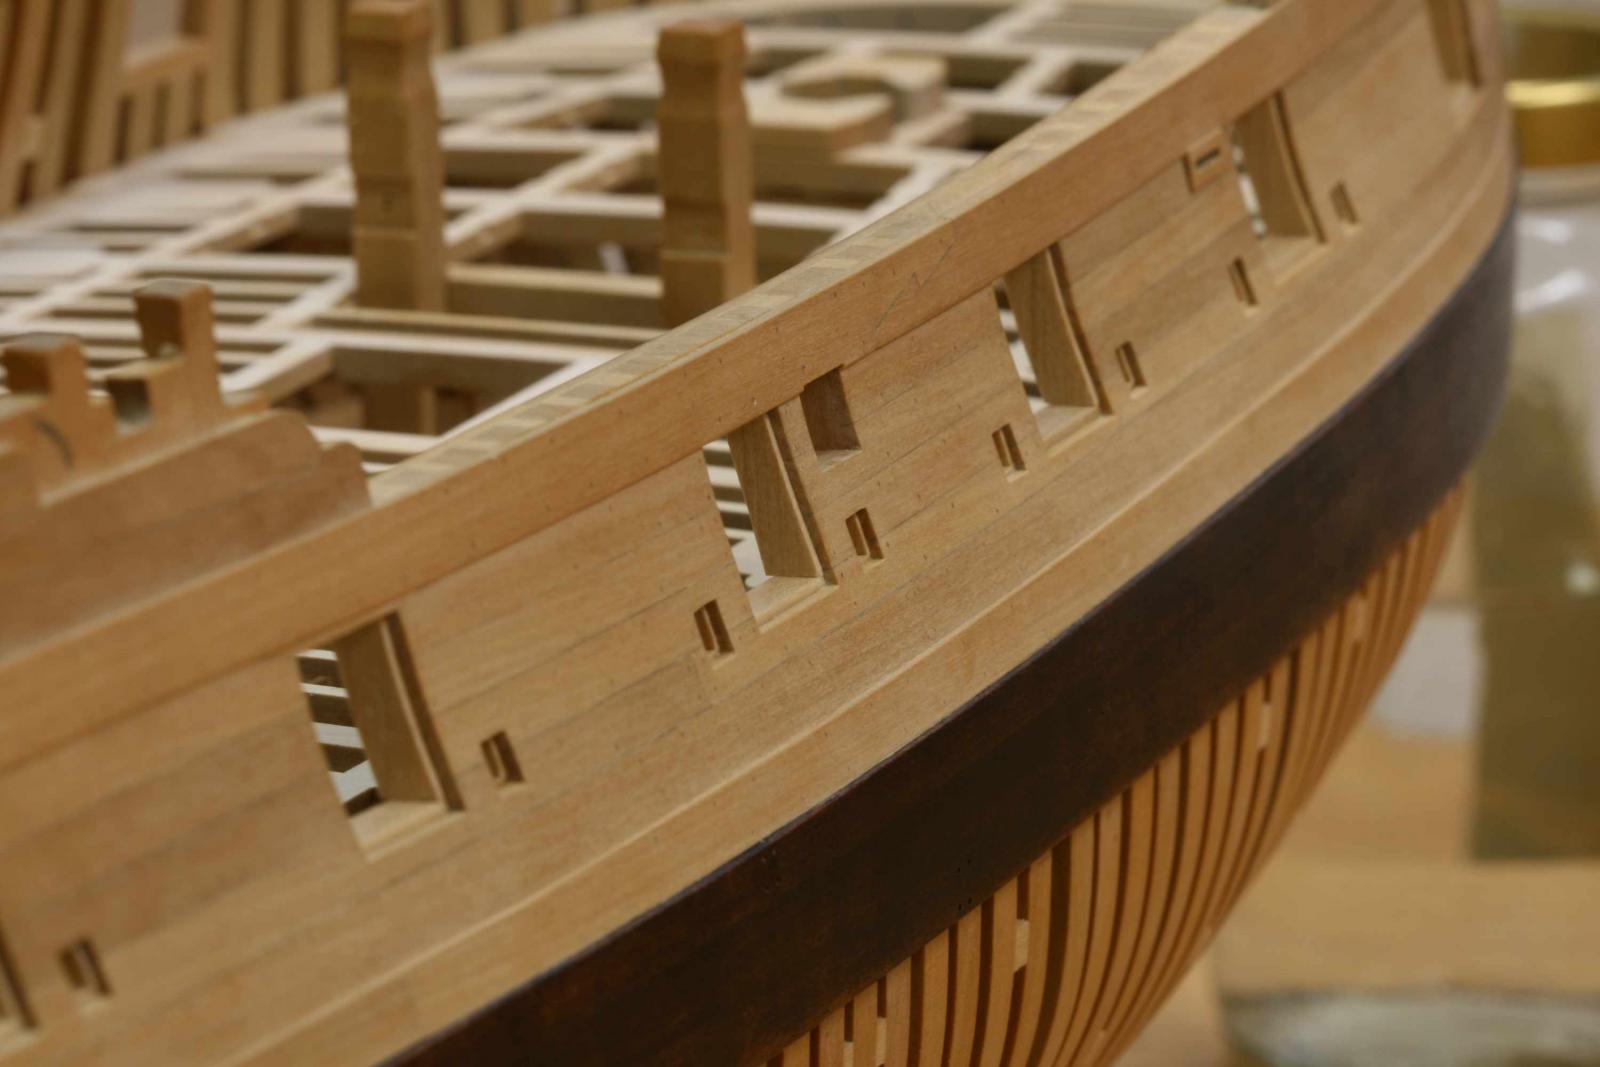
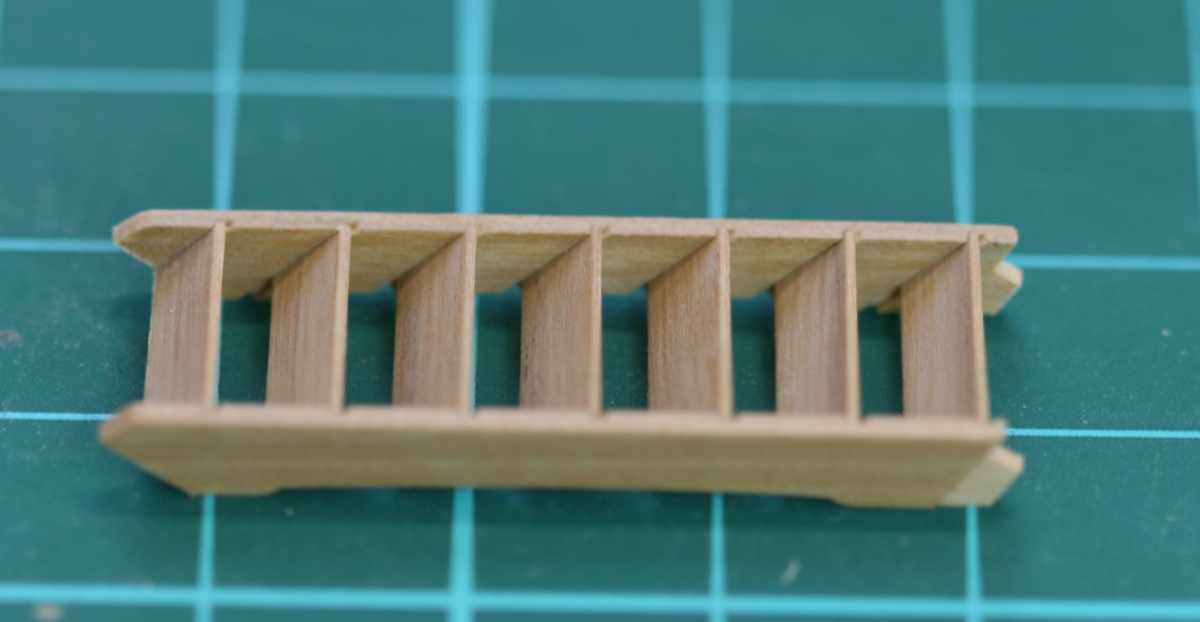
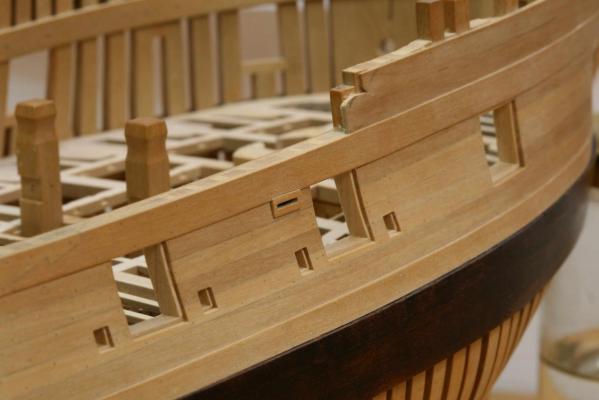
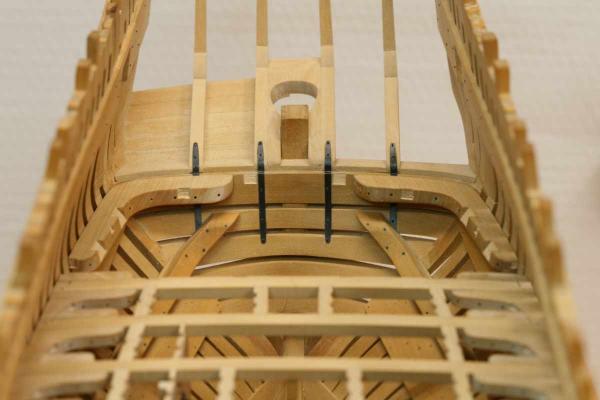
I'm going to redo the mast step, I try to avoid "I'll do that better on the next one" as much as possible. Before you know........ Ok but first the port stops for the gunport and sweep ports. A nice challenge to follow the contour of the hull. Well, I just used the hull to mark the contour and the rest was a matter of time and patience, fun to make. Here you can see something that concerns me, the black strikes getting lighter and lighter over time. And also quit blotched I used Fieblings to dye pear strips of wood. Unfortunately it already received a few coats of finish (tungoil) so there is not much I can do about it. Remco

- 1,215 replies
-
- 26
-
-
- sloop
- kingfisher
- (and 1 more)
-
Not easy to use full length planks on hulls like this, they twist and turn making them everything but a straight plank in any direction. My hat is off to you Sir, I took a short cut and broke my planking on my boot hulls in sections. Remco
-
Mike, my mistake. I only use turpentine. There is a big difference https://en.wikipedia.org/wiki/White_spirit https://en.wikipedia.org/wiki/Turpentine Turpentine smells a lot better. I store a batch of the mixed stuff in a small glass jar, it keeps a long time but is does polymerise to the lid. The rest of the oil I keep in an old bottle that is vacuumed with a wine saver. Remco
- 968 replies
-
- 3
-
-
- hahn
- oliver cromwell
- (and 1 more)
-
Diluting has two advantages. The oil dries quicker and there is less risk of a build up of a layer of oil on top of the wood leaving a shiny finish. I had no need to apply sanding sealer as the tung oil does not raise the grain. Remco
- 968 replies
-
- 2
-
-
- hahn
- oliver cromwell
- (and 1 more)
-
I also did some experimenting, Tung oil, WOP, beeswax, museum wax of different brands. I use Tung oil as a finish, 50% deleted with turpentine. Gives a nice nearly flat finish, not as flat a sanding sealer which I like better. But Tung Oil also takes care of any remaining sanding dust in joints and other very small recesses. Remco
- 968 replies
-
- 8
-
-
- hahn
- oliver cromwell
- (and 1 more)
-
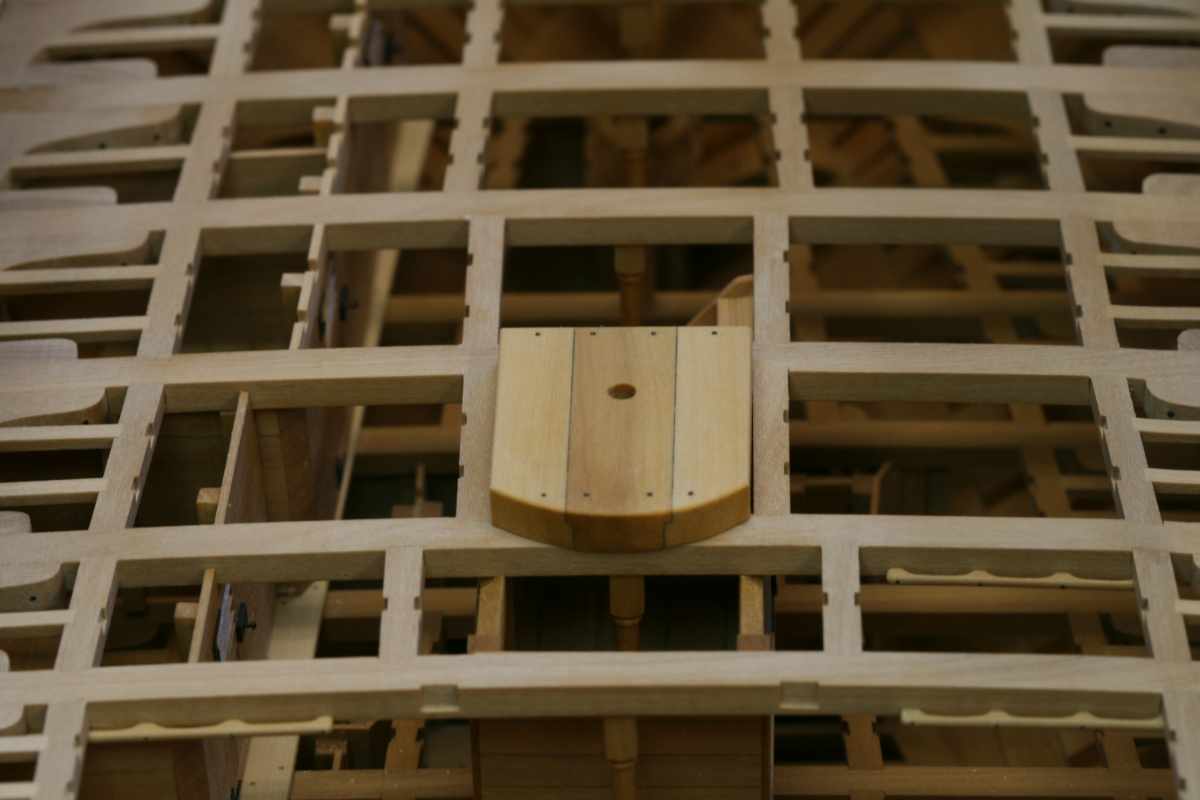
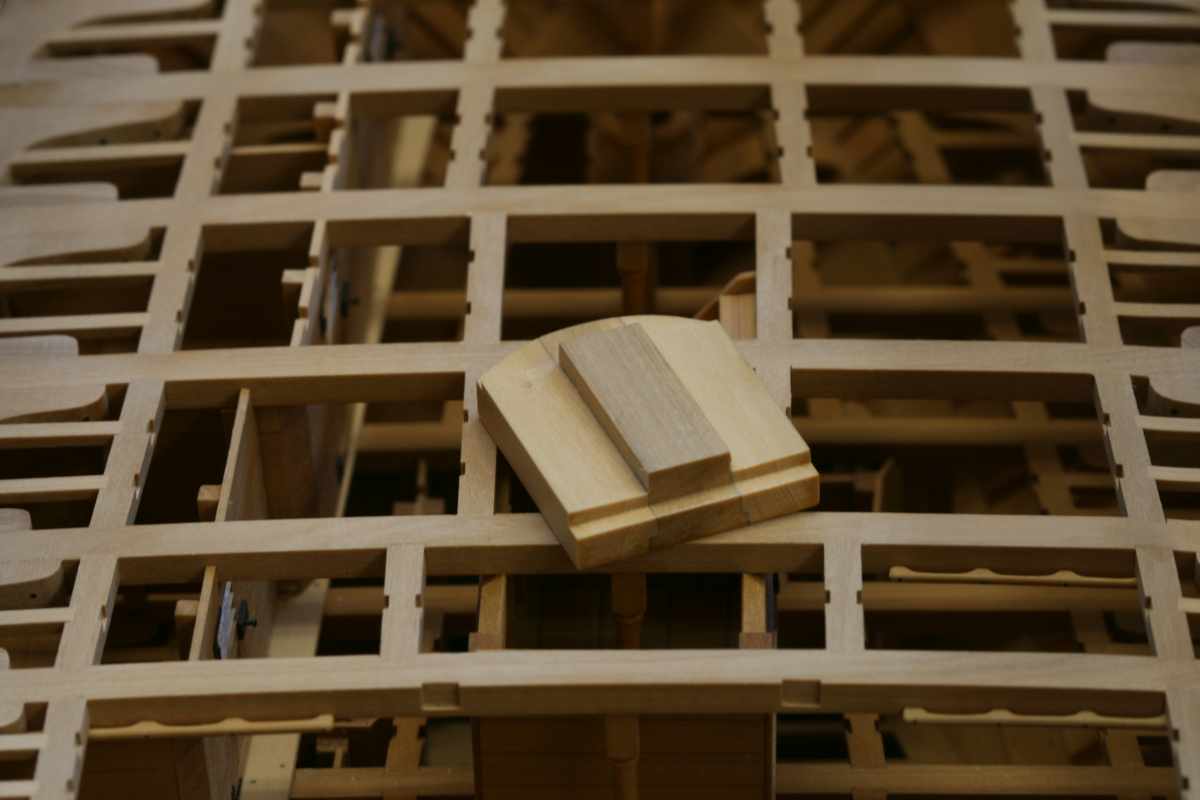
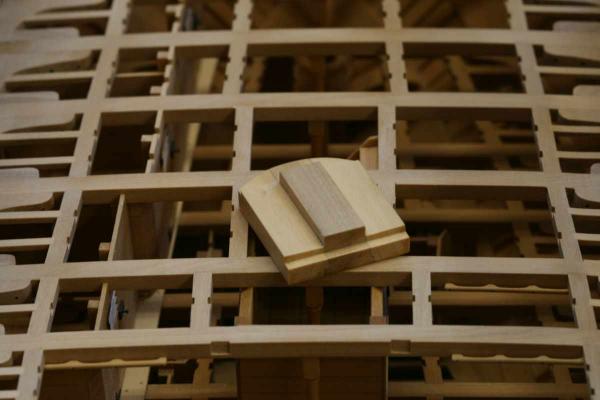
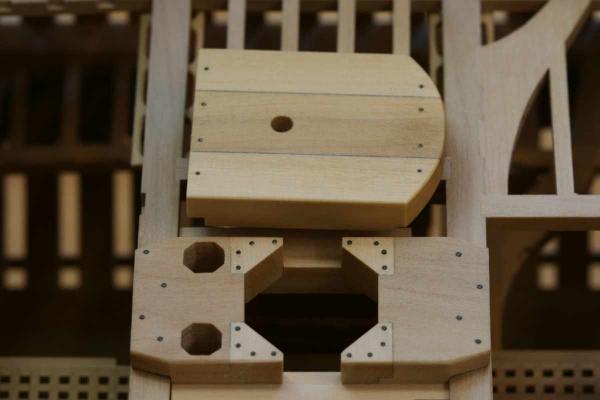
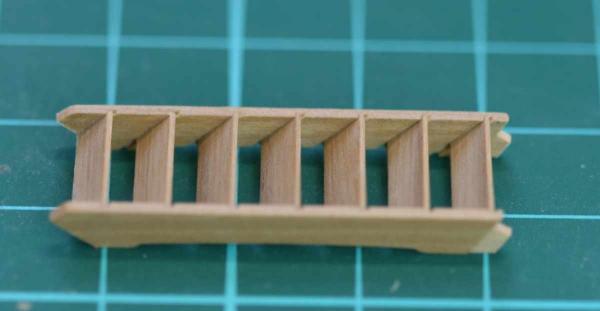
Thank you all for your very generous comments and likes. It's you folks that keep me building, without MSW I probably would have quit years ago to start an other model only to leave it unfinished later. I moved on to the capstan step. The first version had no rebated parts, I didn't like it and made a second and a third version. The second was scrapped as I chipped a bit of that was very visible the third one is below. I'm also considering redoing the cross blocks for the main mast step. I was not paying attention an accidentally added bolts that are way to big. Most bolts in the build are 1" but in this case I need 0,75" bolts like the ones on the capstan step. The difference is quite obvious....... Remco

- 1,215 replies
-
- 33
-
-
- sloop
- kingfisher
- (and 1 more)
-
HMS Naiad 1797 by albert - FINISHED - 1/48
Remcohe replied to albert's topic in - Build logs for subjects built 1751 - 1800
This looks absolutely stunning. What is the model we can see in the back of the first picture, this looks like a very fine model too. Remco -
Nice. I find it really enjoyable to build small boats. Lots of detail and relatively short building time. Remco
-
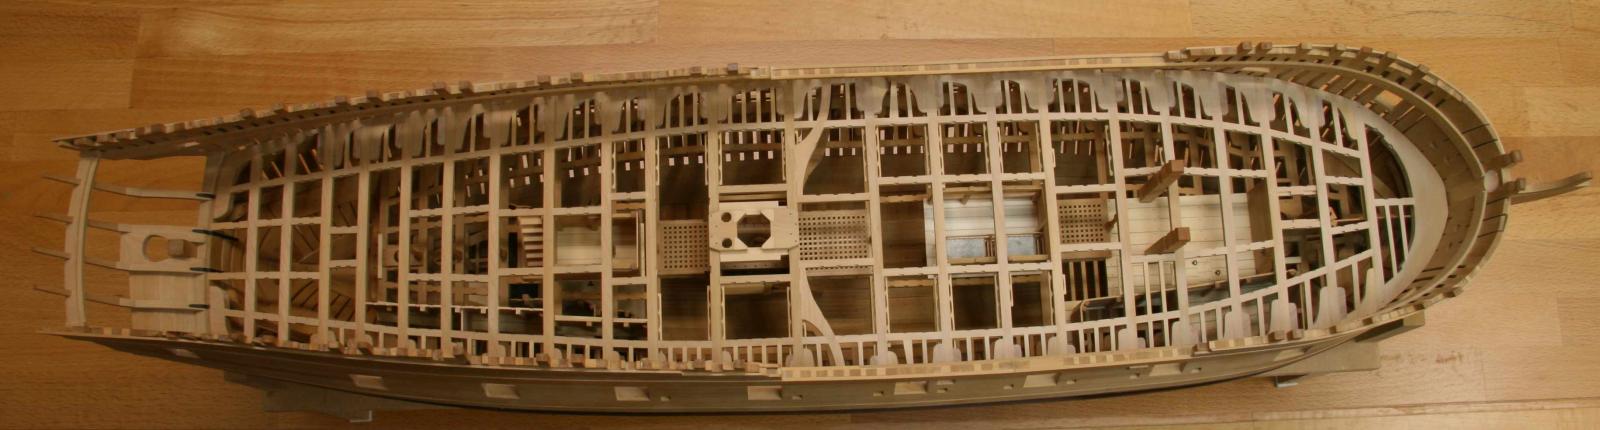
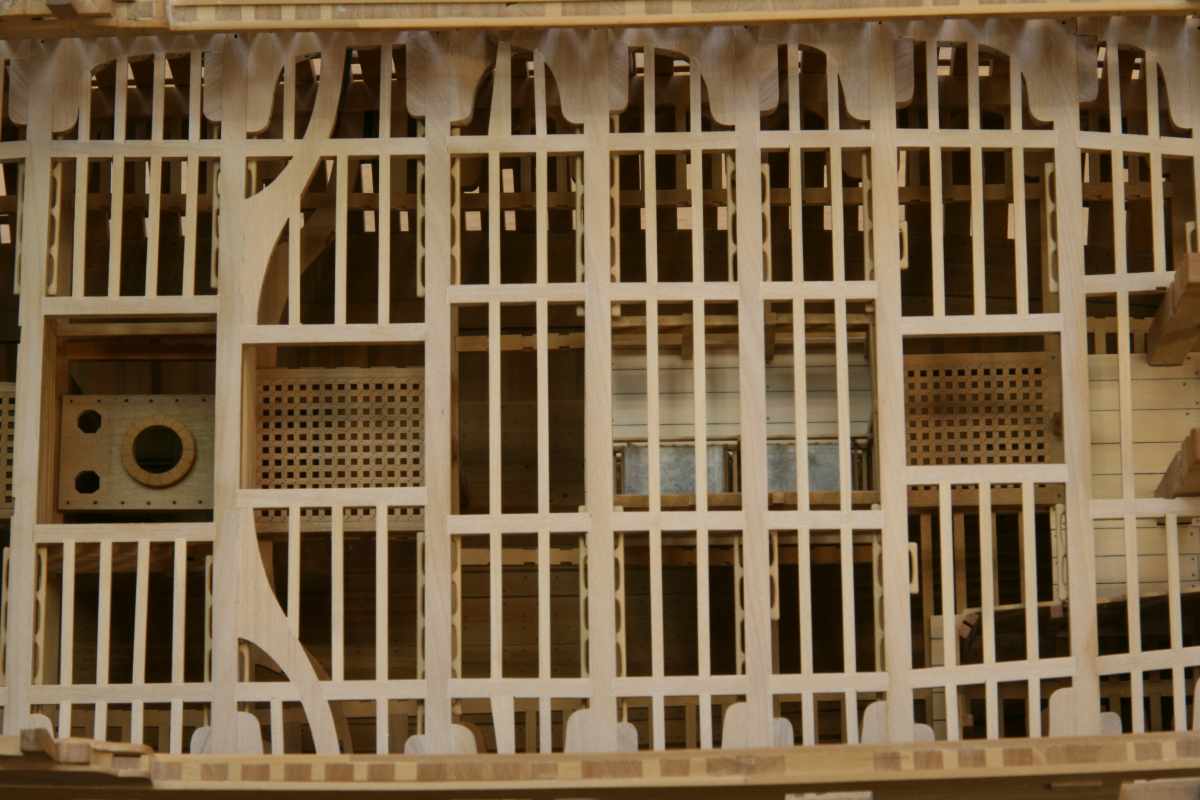
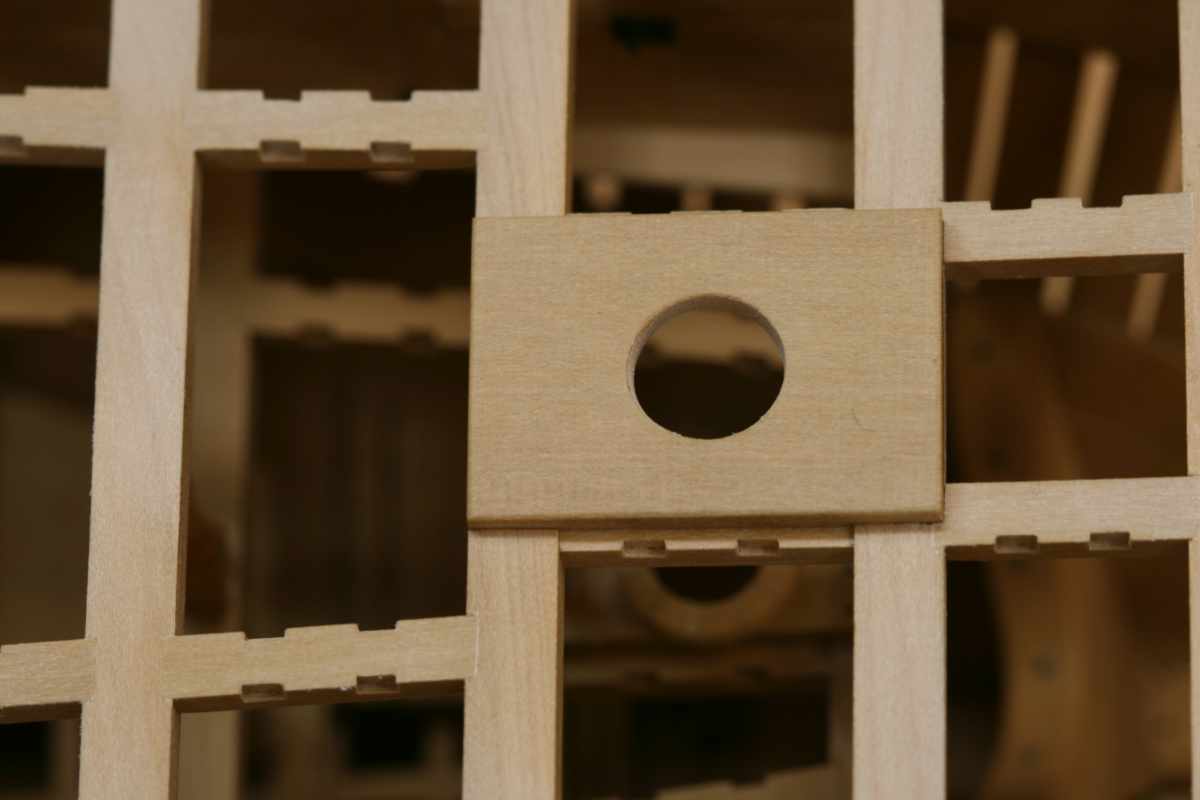
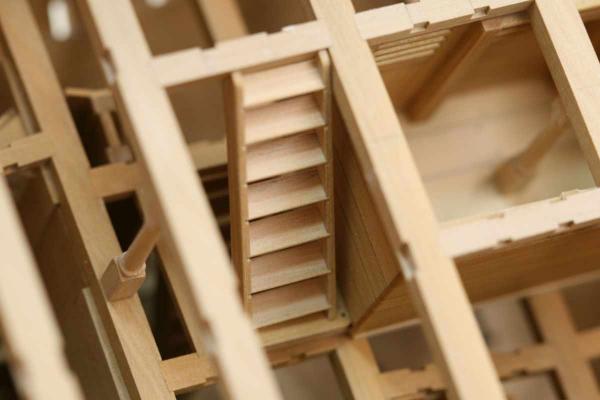
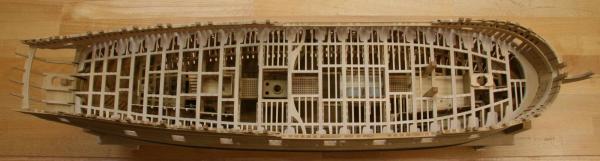
Finally after a one year, the basic structure of the upper deck is finished. I never realised I was that slow building my ship :-) I don't plan to add more ledges between the carlings so there is a better view at the lower decks. Cutting the mortice in the wing transom was a bit tricky, especially as they had to be right the first time. Time to add tome more bits to the deck. Remco


- 1,215 replies
-
- 48
-
-
- sloop
- kingfisher
- (and 1 more)
-
ancre Le Fleuron 1729 by rekon54 - 1:24
Remcohe replied to rekon54's topic in - Build logs for subjects built 1501 - 1750
The close-ups of the guns is like looking at the real deal. Remco -
Each time I look into your log she's getting better and better. Beautiful progress Piet, I really like the new color scheme. Remco
-
Thanks all for your birthday wishes. No one was too late as I still have 1:15 hours of birthday left today Remco
- 1,215 replies
-
- 6
-
-
- sloop
- kingfisher
- (and 1 more)
-
Really nice fit of the bowsprit into the deckplanking. And the rest of the deckplanking looks great too. Remco
-
Congratulations Mark, that's a serious milestone. Regarding the duplicator, take a good look at the commercial ones and you're probably able to make one of your own. I did once a long time ago, but never really tested it, so I can't tell mine works. If al fails you may opt to procure a set of guns. Remco
-
HMS Naiad 1797 by albert - FINISHED - 1/48
Remcohe replied to albert's topic in - Build logs for subjects built 1751 - 1800
Your work is unbelievable crisp and clean. Each update a pleasure to watch. Remco