HOLIDAY DONATION DRIVE - SUPPORT MSW - DO YOUR PART TO KEEP THIS GREAT FORUM GOING! (89 donations so far out of 49,000 members - C'mon guys!)
×


Remcohe
-
Posts
612 -
Joined
-
Last visited
Content Type
Profiles
Forums
Gallery
Events
Everything posted by Remcohe
-
 That is a lovely base for such a great model. Remco
- 641 replies
-
- 4
-

-
- greenwich hospital
- barge
- (and 1 more)
-
I can imagine your frustration getting the moulding right. Making cuts with a scraper on such small piece is hard or even almost impossible. Unfortunately the moulding itself is hardly visible on the pictures. It's a joy to follow your progress on this little gem. Remco
- 641 replies
-
- 6
-
-
- greenwich hospital
- barge
- (and 1 more)
-
I love all the details you're cramming into this little model. Makes me want to try something like this as well... Maybe I will allow myself a side project to get away from the planking I'm currently struggling with... But I shouldn't. Remco
- 641 replies
-
- 8
-
-
- greenwich hospital
- barge
- (and 1 more)
-
HMS Naiad 1797 by albert - FINISHED - 1/48
Remcohe replied to albert's topic in - Build logs for subjects built 1751 - 1800
Lovely progress Albert Remco -
I love the Knechten and the way you made the hats! Remco
-
Wonderfull display of craftsmanship, I can only imagine how challenging it is to get the shapes of the planks just right to get an excellent fit. Remco
- 641 replies
-
- 5
-
-
- greenwich hospital
- barge
- (and 1 more)
-
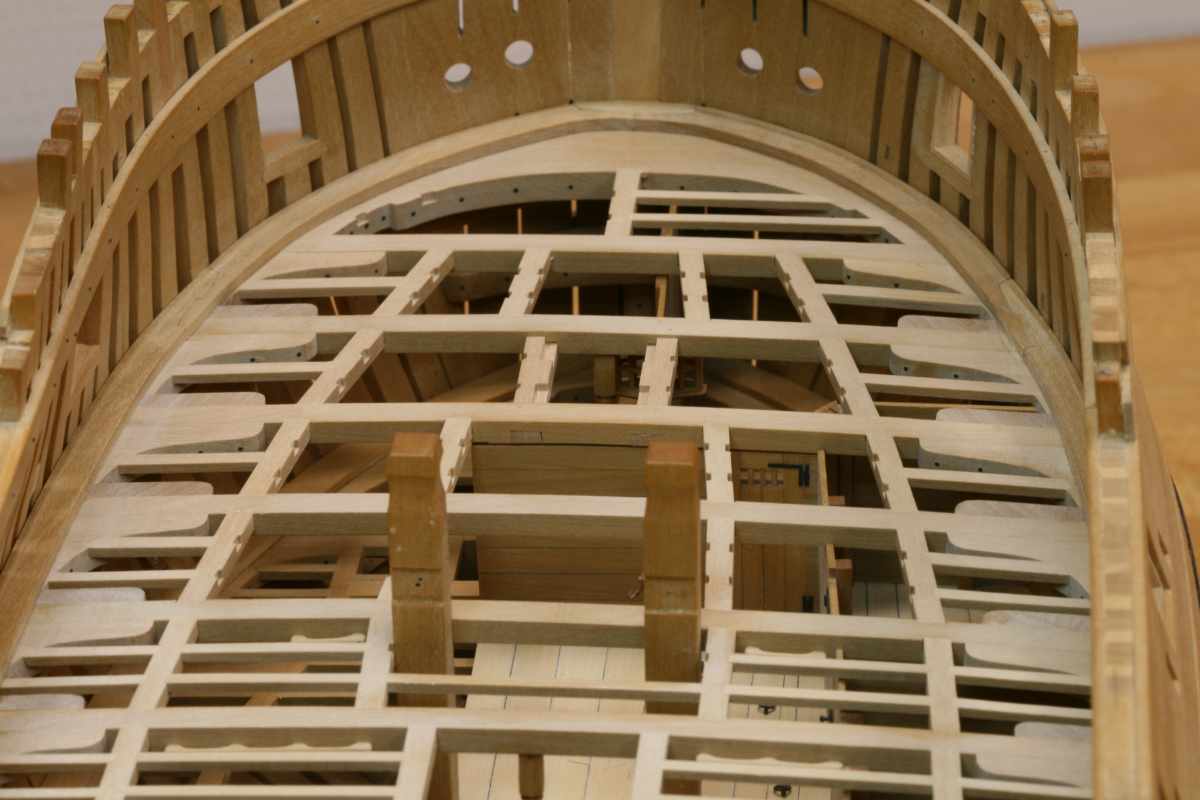
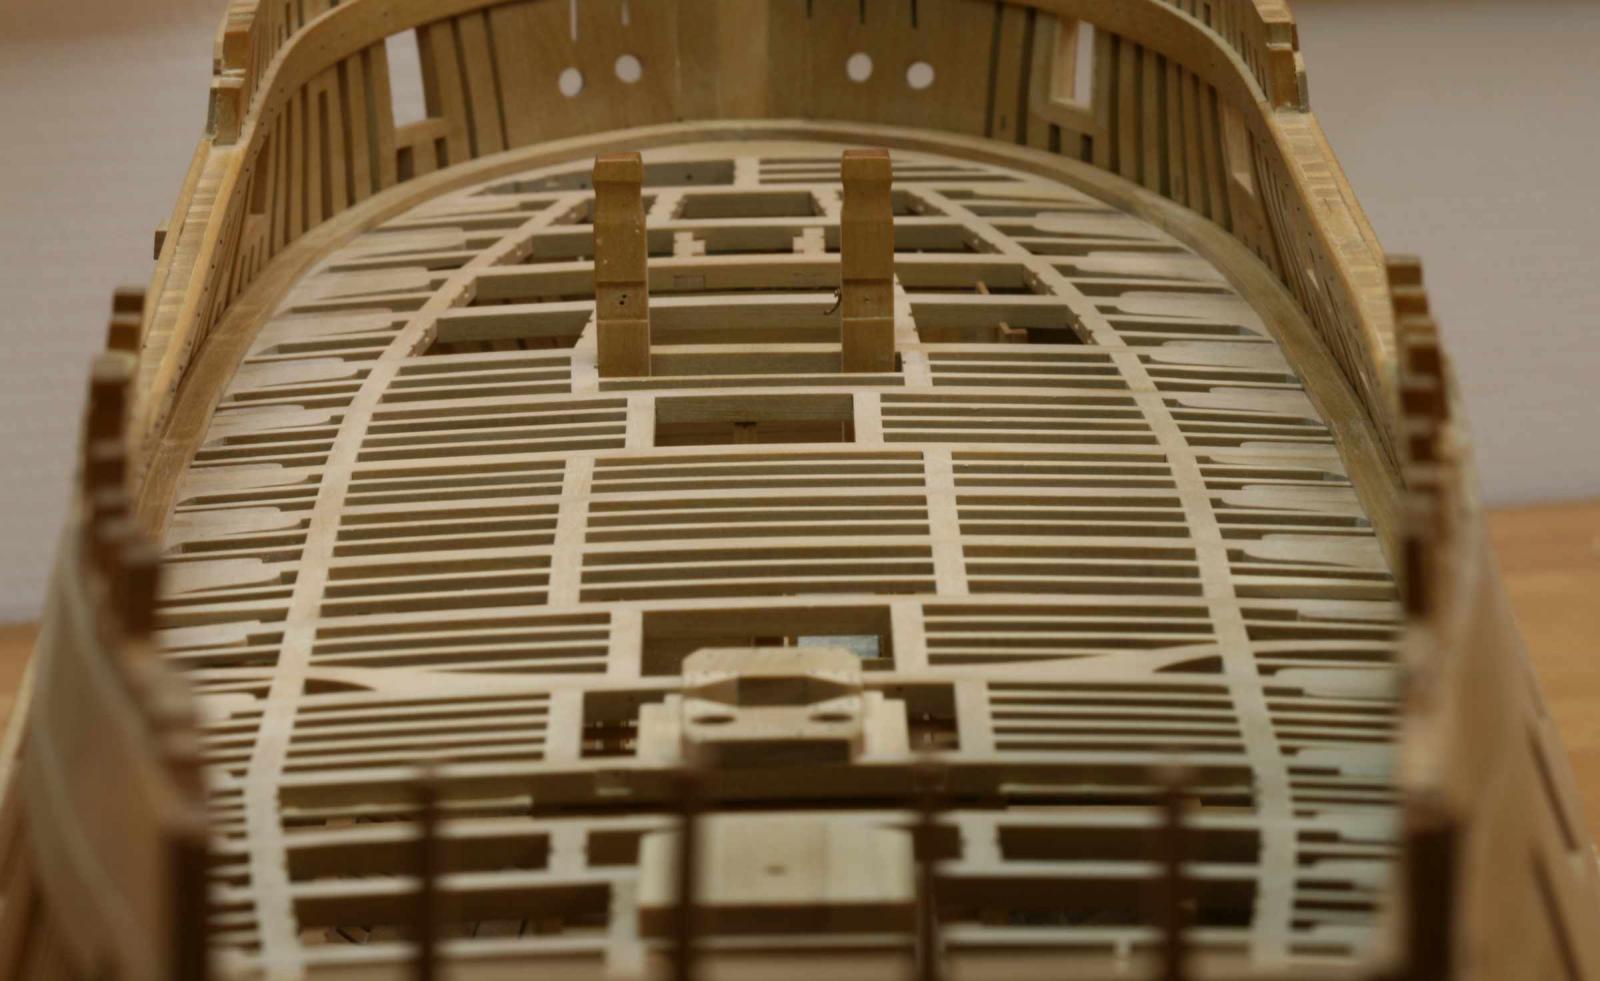
'Little progress' yet not an easy part to fit the grating next to the transom. Excellent fit of such a difficult part. Love the holdings on the floorboards. Remco
-
Your carving turned out really really really great! Remco
-
Sorry to hear about your humidity issues. But that will sort out with the 'right equipment' I love your workshop, lots of space and light. Remco
-
I totally missed the start of this beautiful build. On the upside I had a lot of catching up to do so Druxey you you made my day extra special Your choice of subject is great and your execution out of this world. I will stick to workboats as this barge is out of my league Remco
- 641 replies
-
- 9
-
-
- greenwich hospital
- barge
- (and 1 more)
-
Hi Gary, Wonderfull progress. I'm wondering, how do you align the templates if you paste them to both sides of one piece? Remco
-
HMS Naiad 1797 by albert - FINISHED - 1/48
Remcohe replied to albert's topic in - Build logs for subjects built 1751 - 1800
Absolutely beautiful Remco -
Hi Piet, the carvings are getting better and better. Jut a few remarks on the shark, should the dorsal fin not be a bit more to the rear(stern ) and did you leave the left front fin away on purpose. You could show the latter sticking out under the crocs foot. Picture Remco
-
Ok, 2.0 is even better! Remco
-
The mouldings are a lovely detail to the benches. Remco
-
Nope, stupid questions don't exist, stupid answers do exist... Jan, first the blade is annealed, I use a small blow torch to heat the metal till it's bright red and then let it cool slowly back to room temperature. Now the blade is soft enough to use files and saws to make the shape of the waterway. Then the blade is heated till its red/orange and immediately dropped in a jar with oil, this is quenching. I used peanut oil as this was the only one I had in at hand. Then The blade is heat treated in a regular oven at 400F/205C Remco
- 1,215 replies
-
- 8
-
-
- sloop
- kingfisher
- (and 1 more)
-
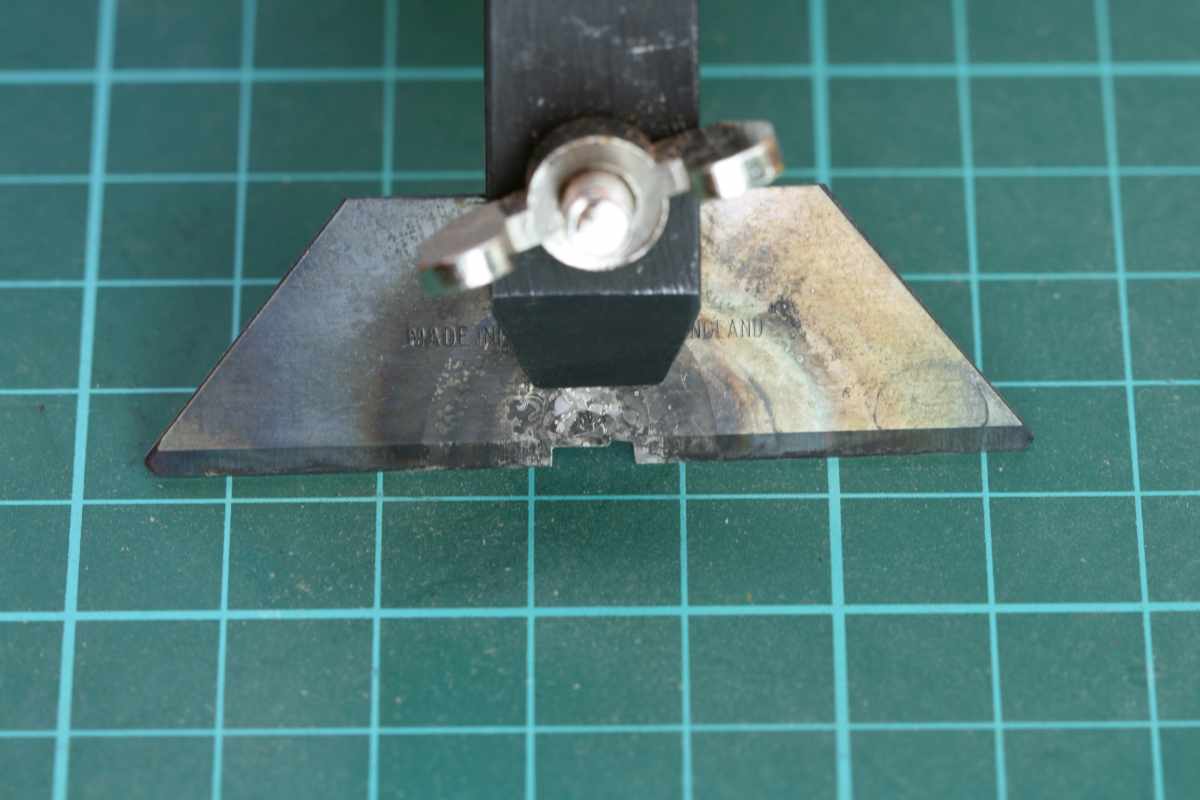
Thanks all! I lost count Piet Greg the scraper worked fine at the curved sections. I just had to go slow and take very thin shavings. The vertical edges1 of my scraper are smooth so they hardly take any wood off, the horizontal side is sharp and does all the cutting. The scraper was made from a blade of a Stanley knife. The steel was treated to soften it for shaping and then hardened again to keep the edge sharp. It's clamped in a small hand vice to make the scraping easier. Remco

- 1,215 replies
-
- 10
-
-
- sloop
- kingfisher
- (and 1 more)
-
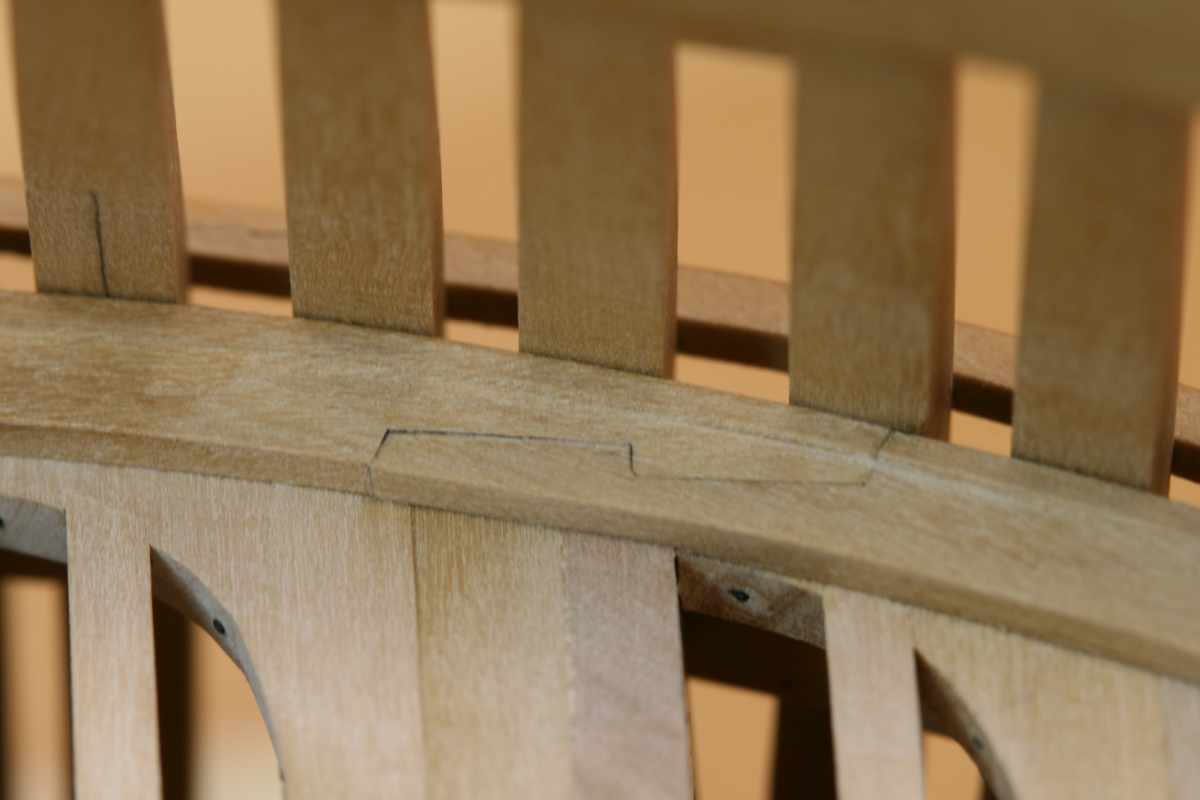
Between a side project to add more store capacity to my workshop (lots of extra drawers, can't have enough of them it seems) I installed the waterway. Using card templates to determine the shapes and home build scraper to get the typical profile of the plank (see last pic). The hook and scarf joints were extra tricky as the position of the waterway it self was fixed due to their shapes relative to the hull. So I had to get them right the first time. They all were ok, although sometimes I had to fill a minor gap with a small sliver of wood. The small piece at the bow connecting the port an starboard waterway was challenging. Remco

- 1,215 replies
-
- 45
-
-
- sloop
- kingfisher
- (and 1 more)
-
That is a clever trick to cut the flanges! The overall result of your metalwork is great (again...) Remco
- 3,618 replies
-
- 5
-
-
- young america
- clipper
- (and 1 more)
-
I'd say keep on going it looks very promising. I like it that the sharks tail is free from the transom and adds depth to the overall picture. If you can pull this off with the tip of the sharks nose that would increase the depth as well. Remco
-
Hi Grant, Great project. To defog the instrument panel 'glasses' you can dip them in Future Floor Polish or an equivalent. Aircraft modellers use(d) this to make the canopy's clear. Remco
- 339 replies
-
- 4
-
-
- dumas
- Chris-Craft
- (and 3 more)