HOLIDAY DONATION DRIVE - SUPPORT MSW - DO YOUR PART TO KEEP THIS GREAT FORUM GOING! (89 donations so far out of 49,000 members - C'mon guys!)
×


Remcohe
-
Posts
612 -
Joined
-
Last visited
Content Type
Profiles
Forums
Gallery
Events
Everything posted by Remcohe
-
 Nice port Mike. I don't think there is a silver bullet to do this, maybe the closest thing might be 'patience' Remco
- 968 replies
-
- 6
-

-
- hahn
- oliver cromwell
- (and 1 more)
-
Very nice progress Ed! Though I thought the same as Jan, quite a hazardous setup IMHO. I prefer to use a table saw to performs such cuts. Safer and faster if you take the time to set up a simple jig. Remco
- 3,618 replies
-
- 7
-
-
- young america
- clipper
- (and 1 more)
-
That's it Piet. Maybe Gwen has a sewing needle that has the correct size? What size are you looking for? Remco
-
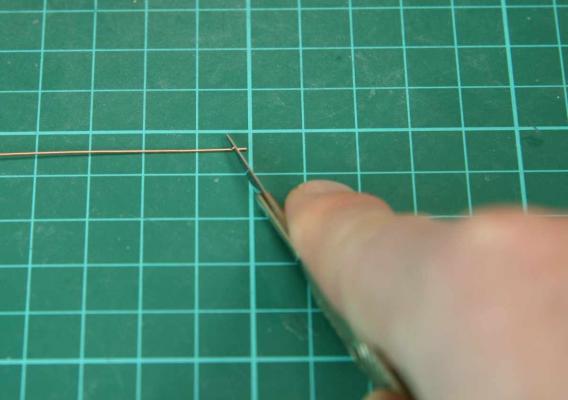
Piet, nice going. You can also twist the wire around a small drillbit the size of the eyelet you need in the end. You clamp the bit upright in a vise, much easier and the same eyelet each and every time :-) Remco
-
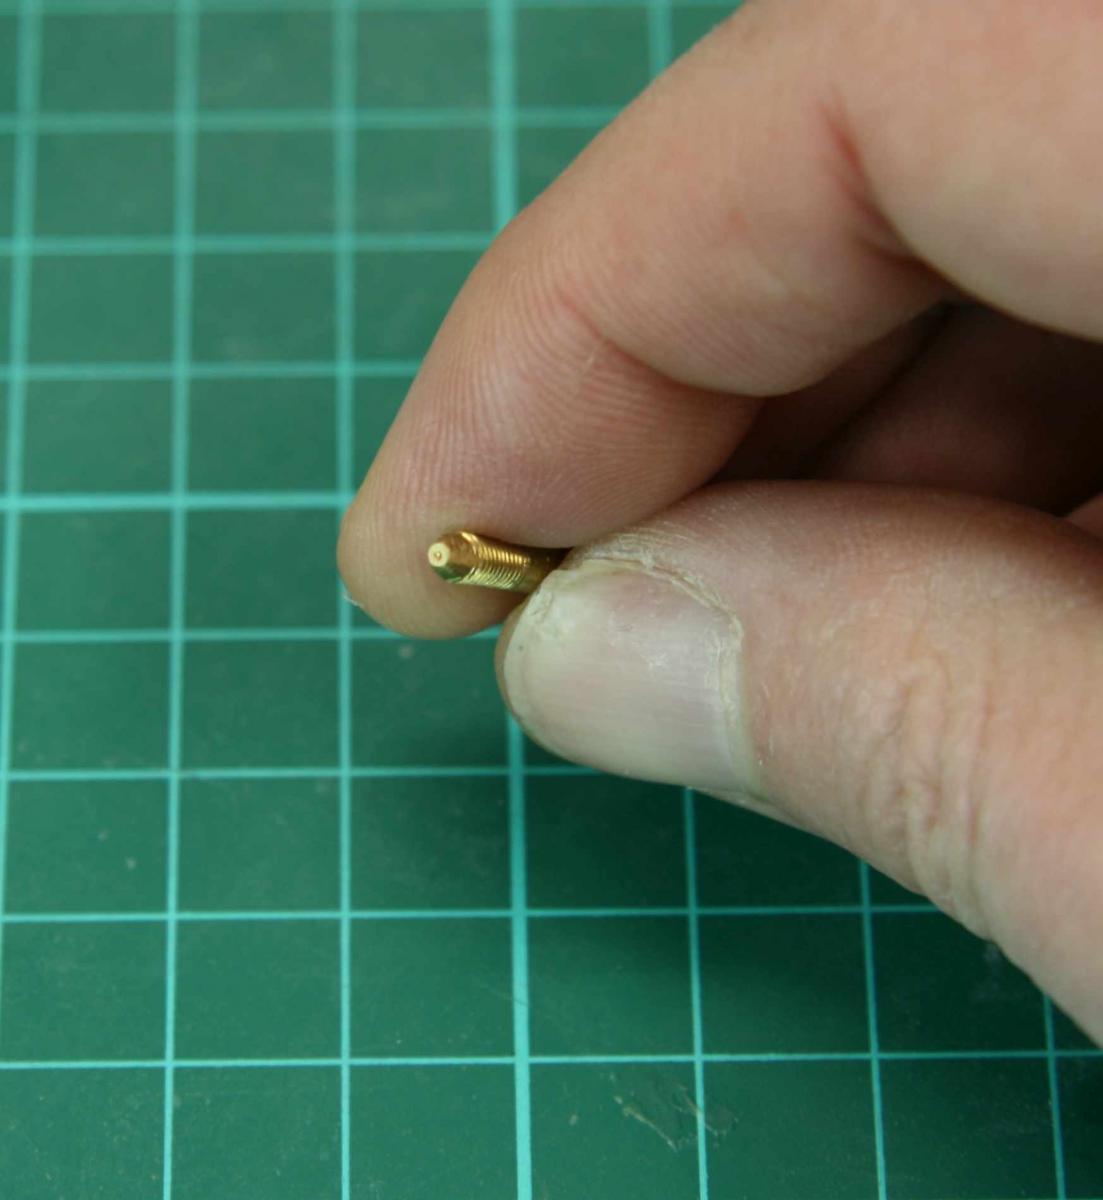
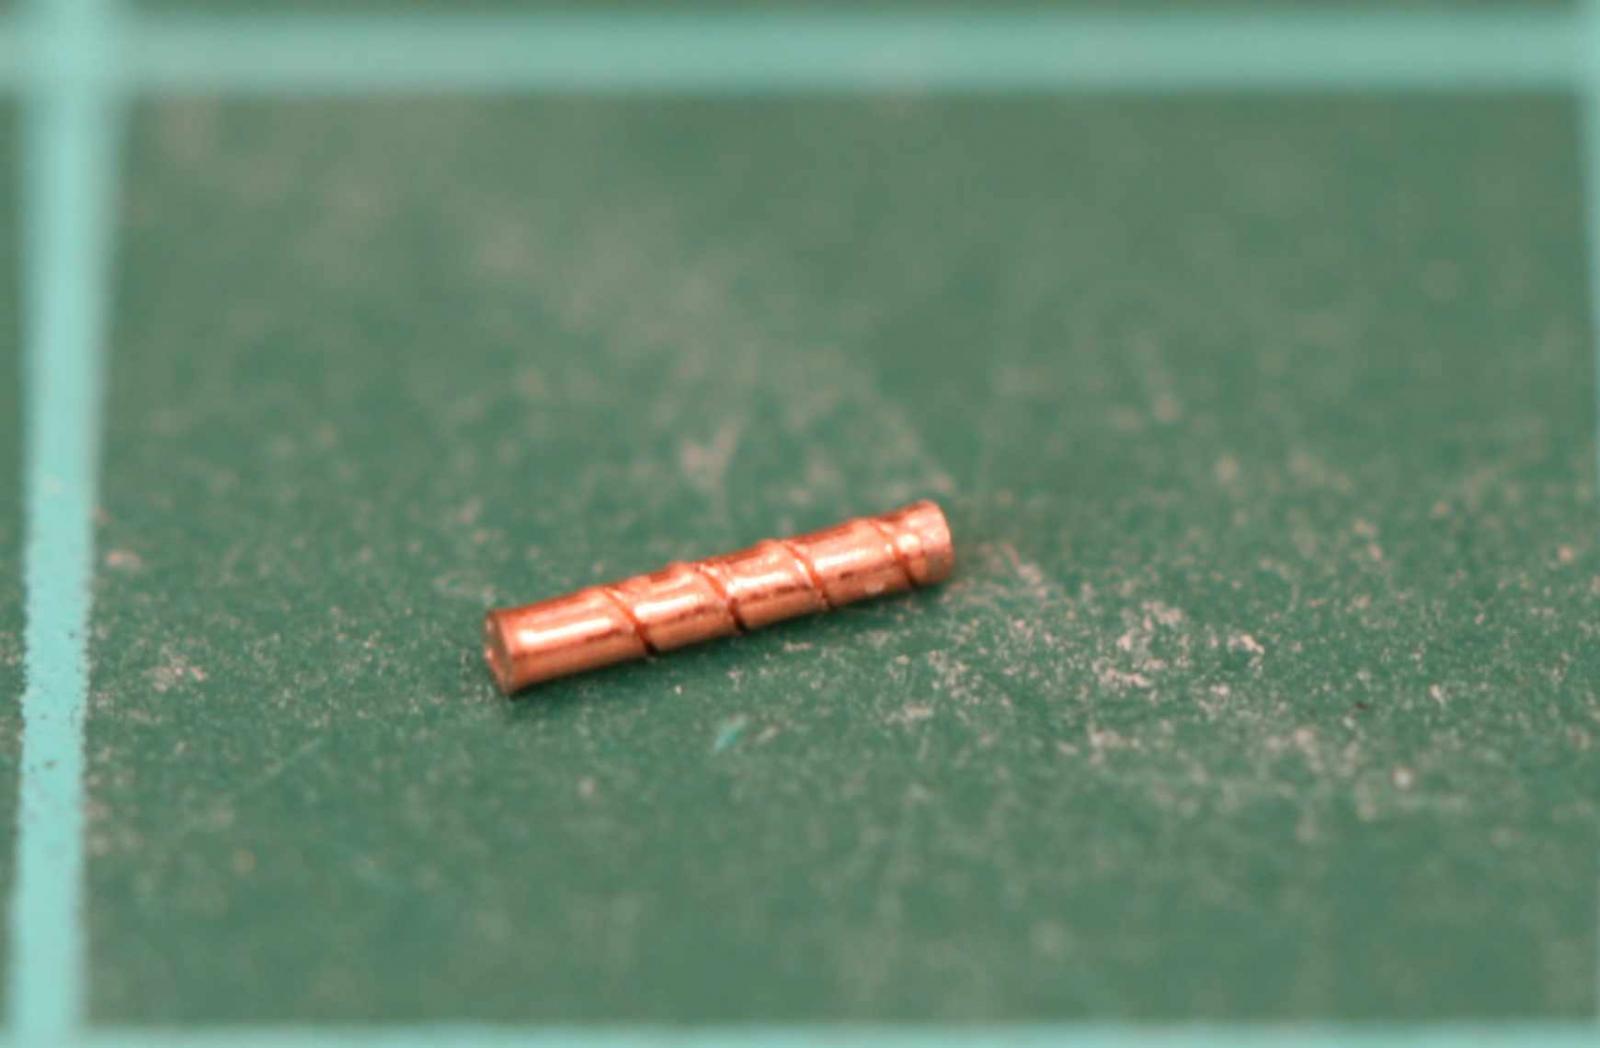
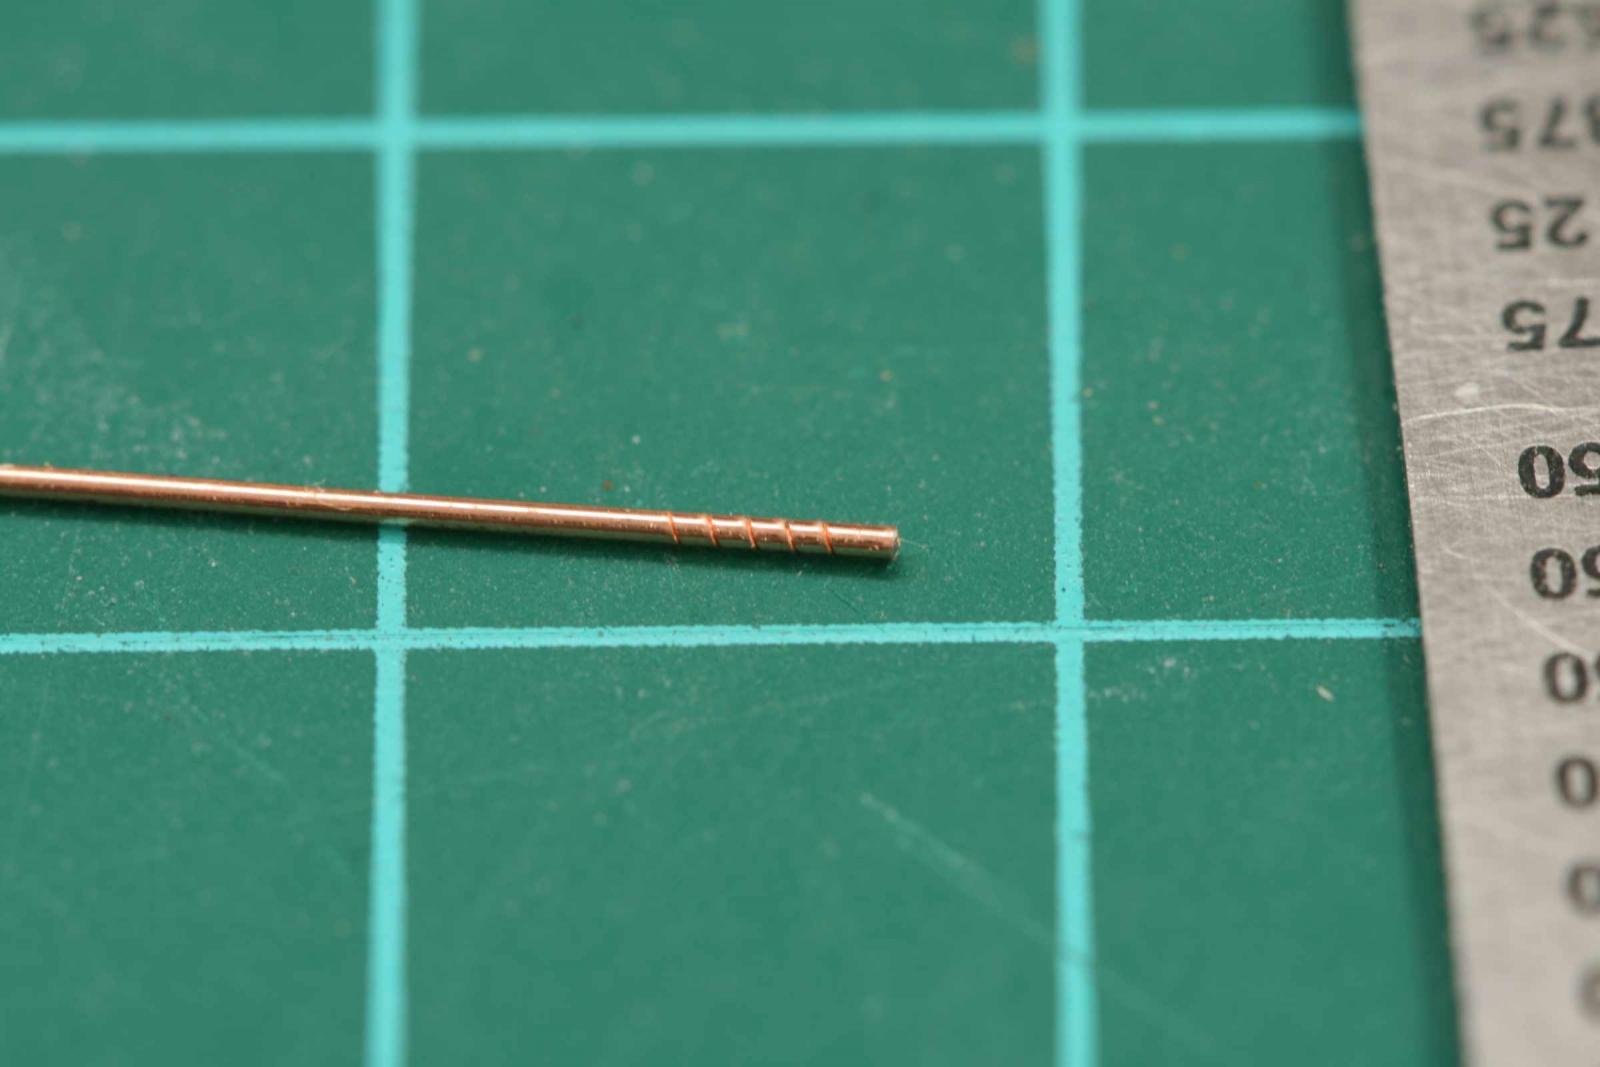
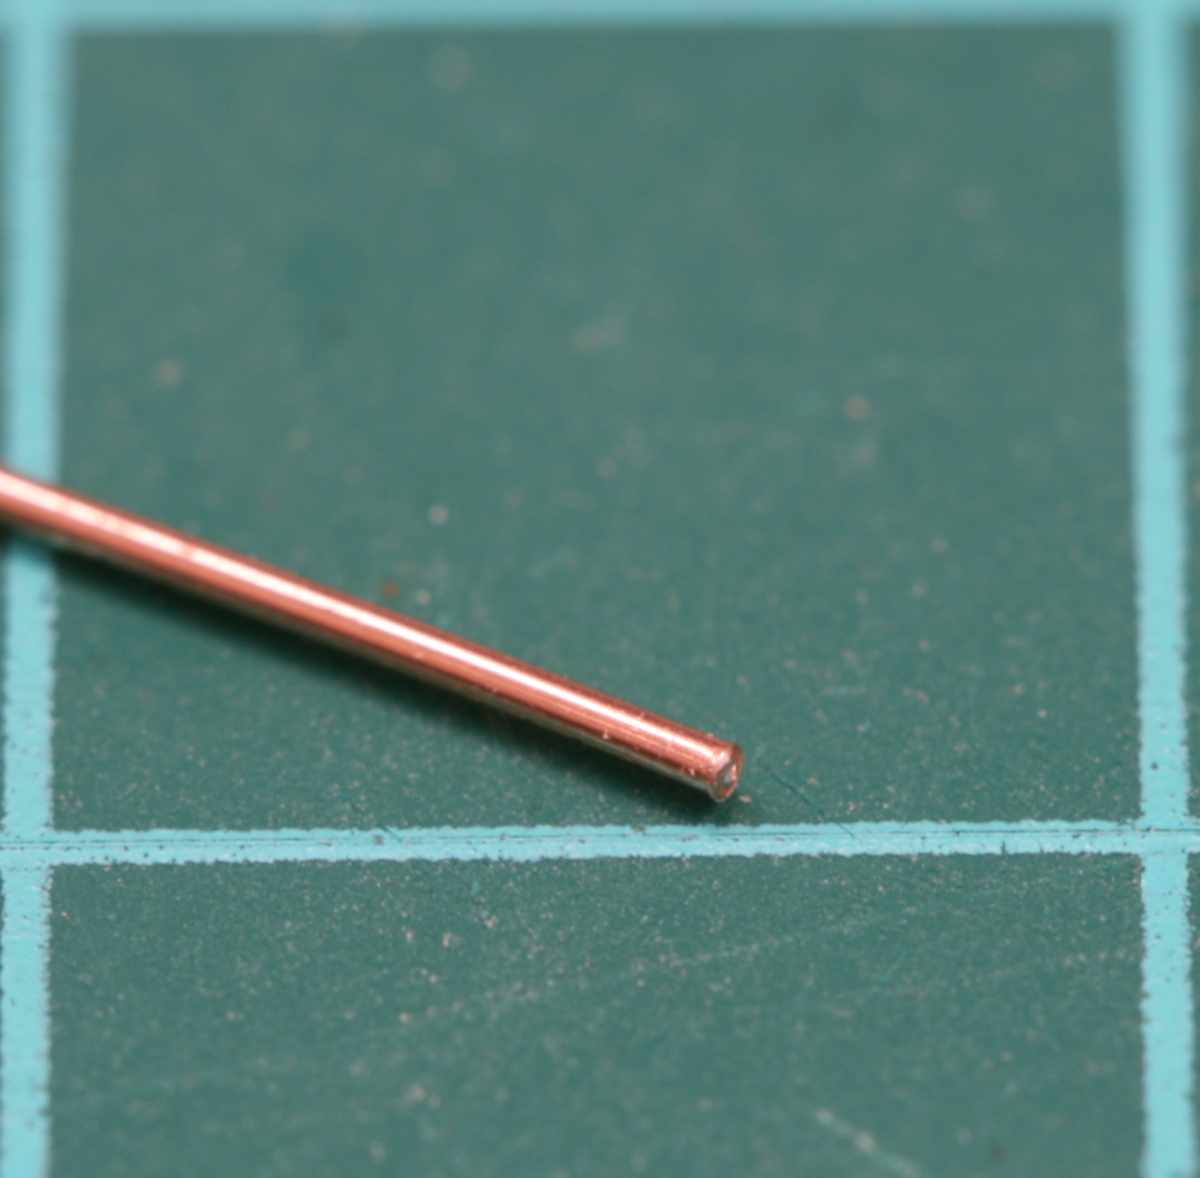
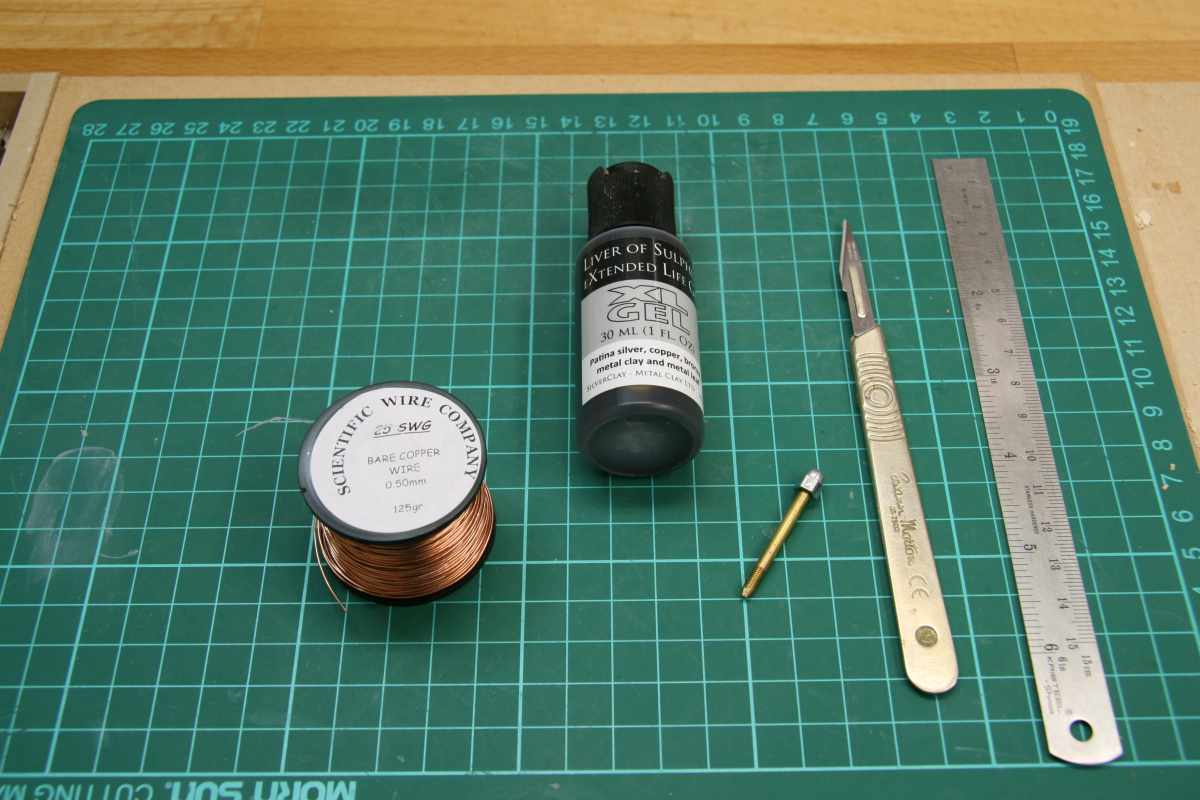
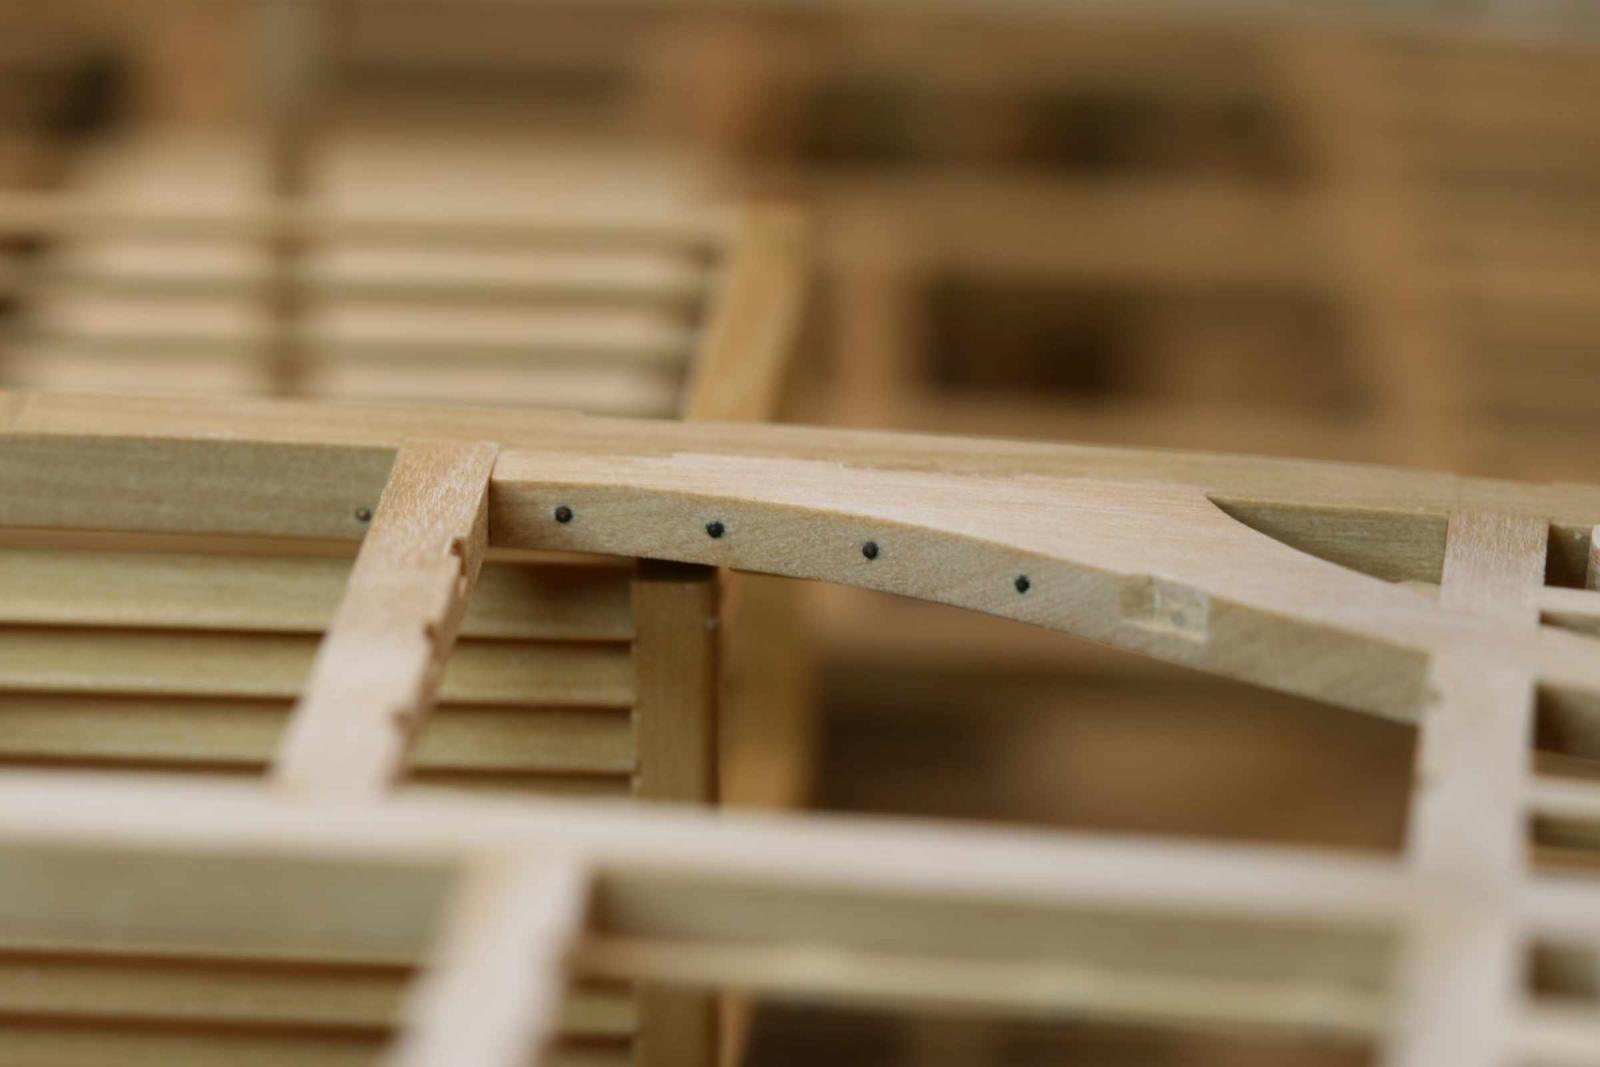
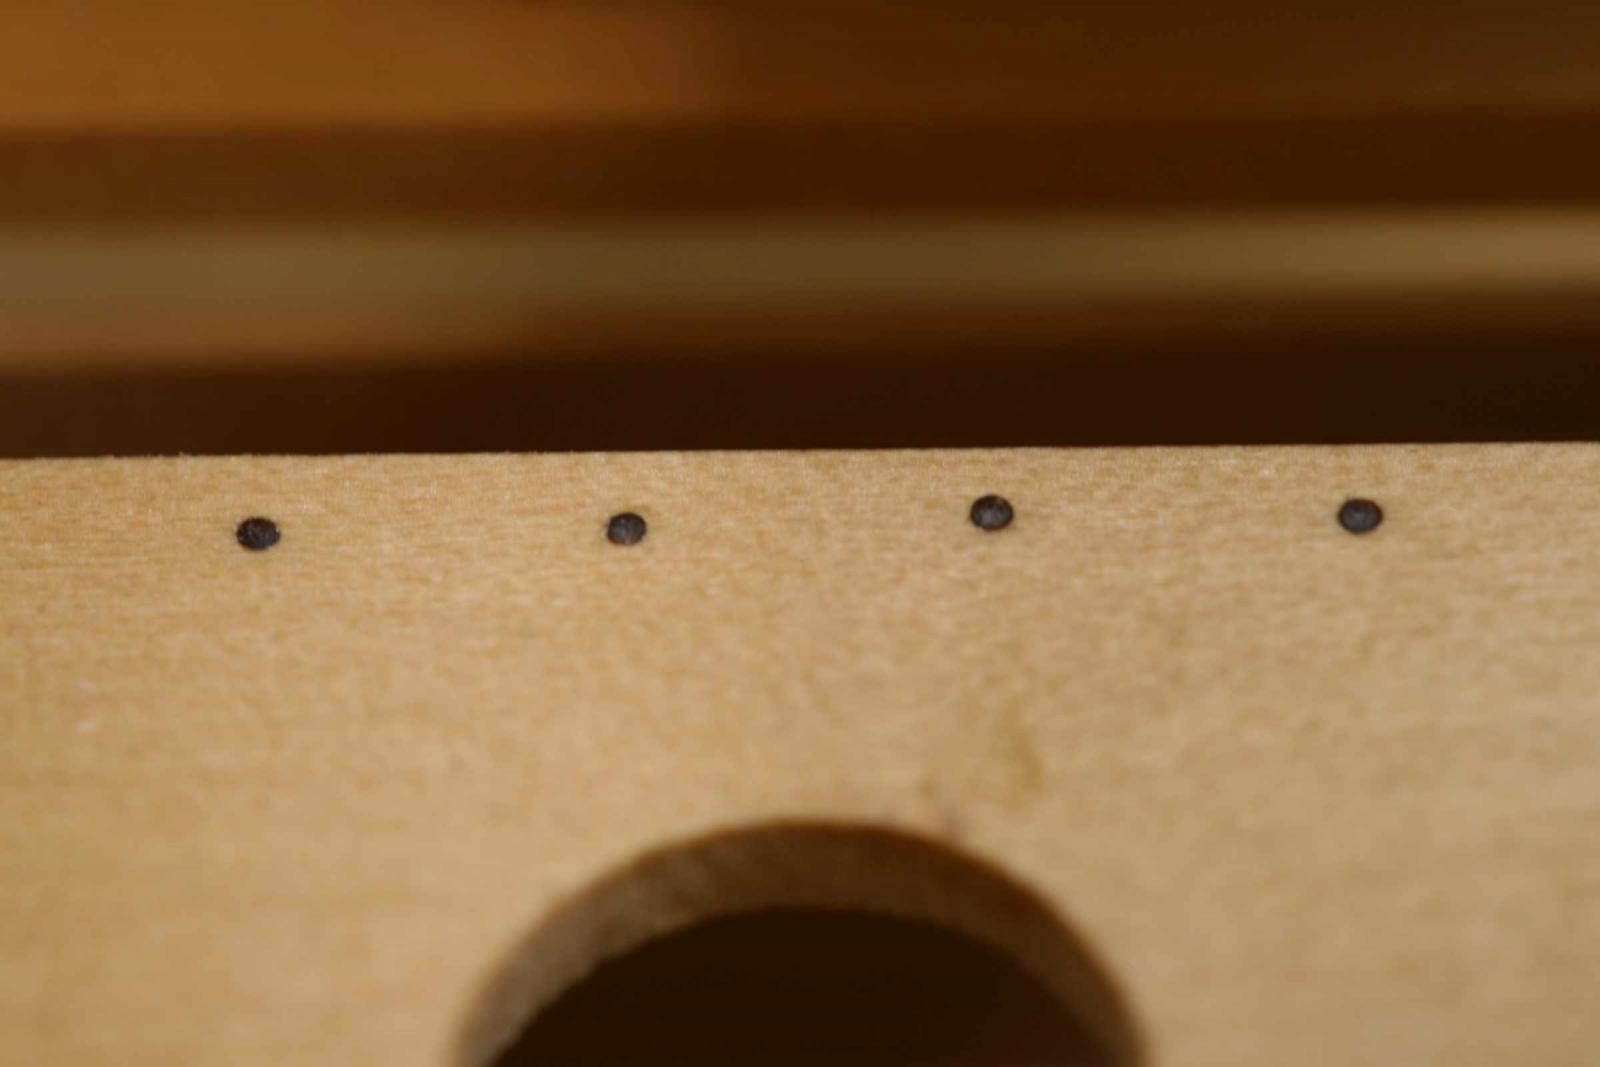
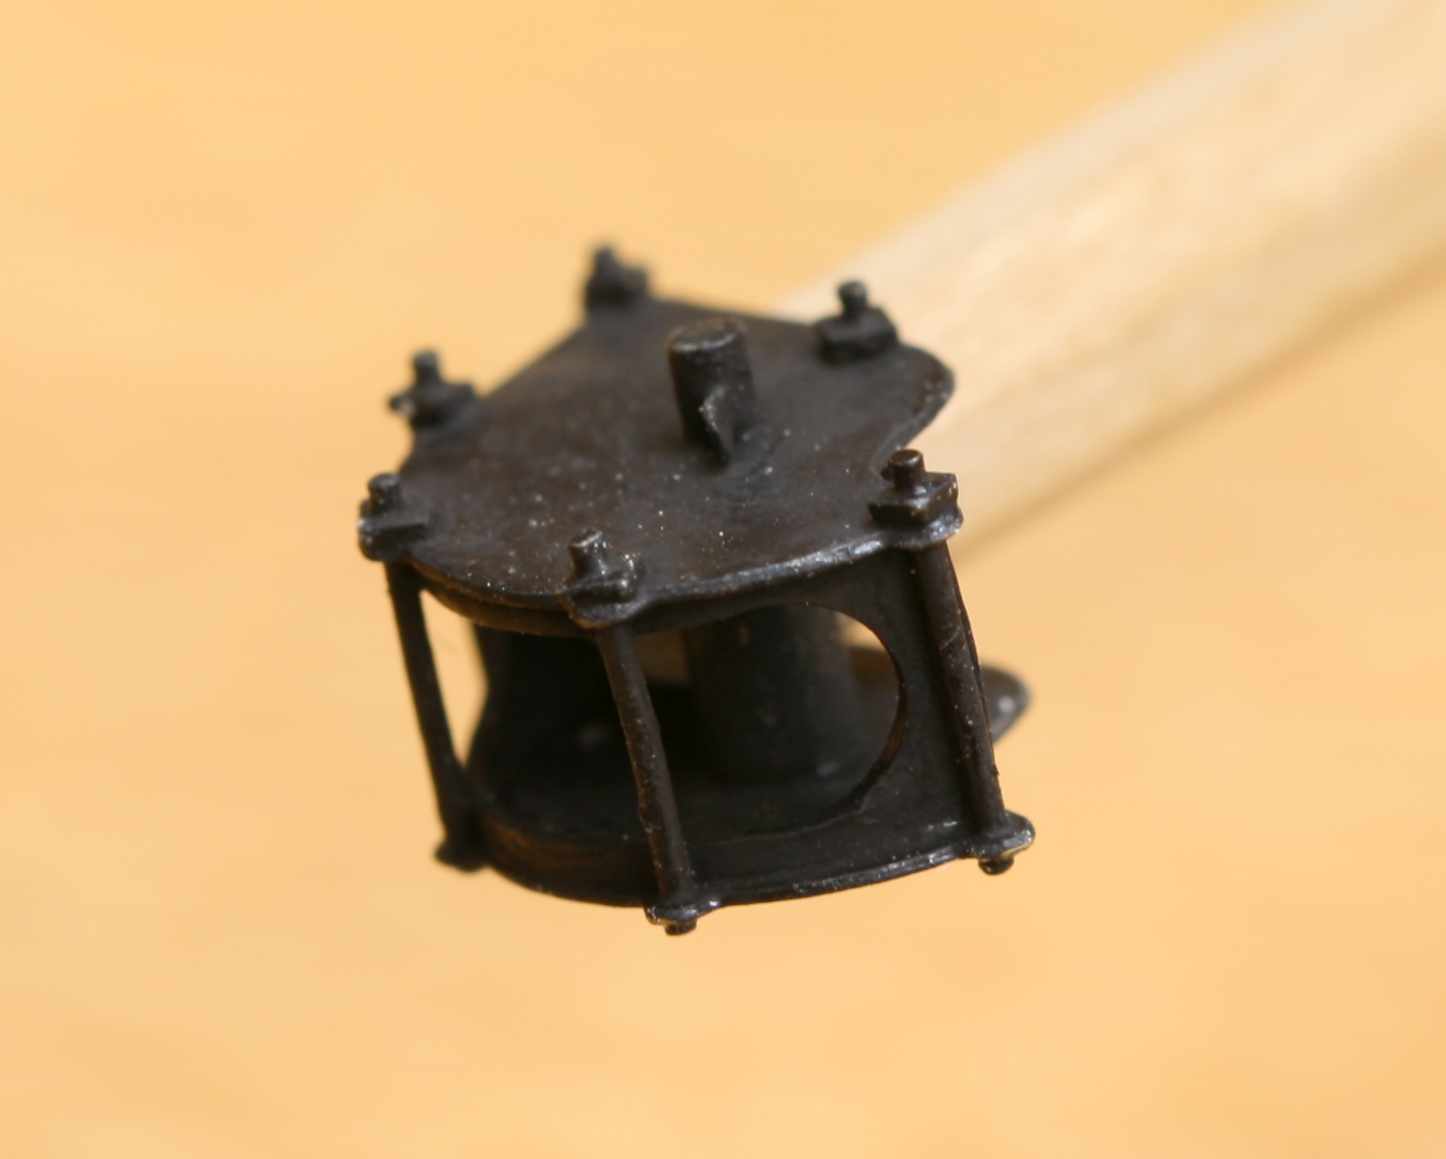
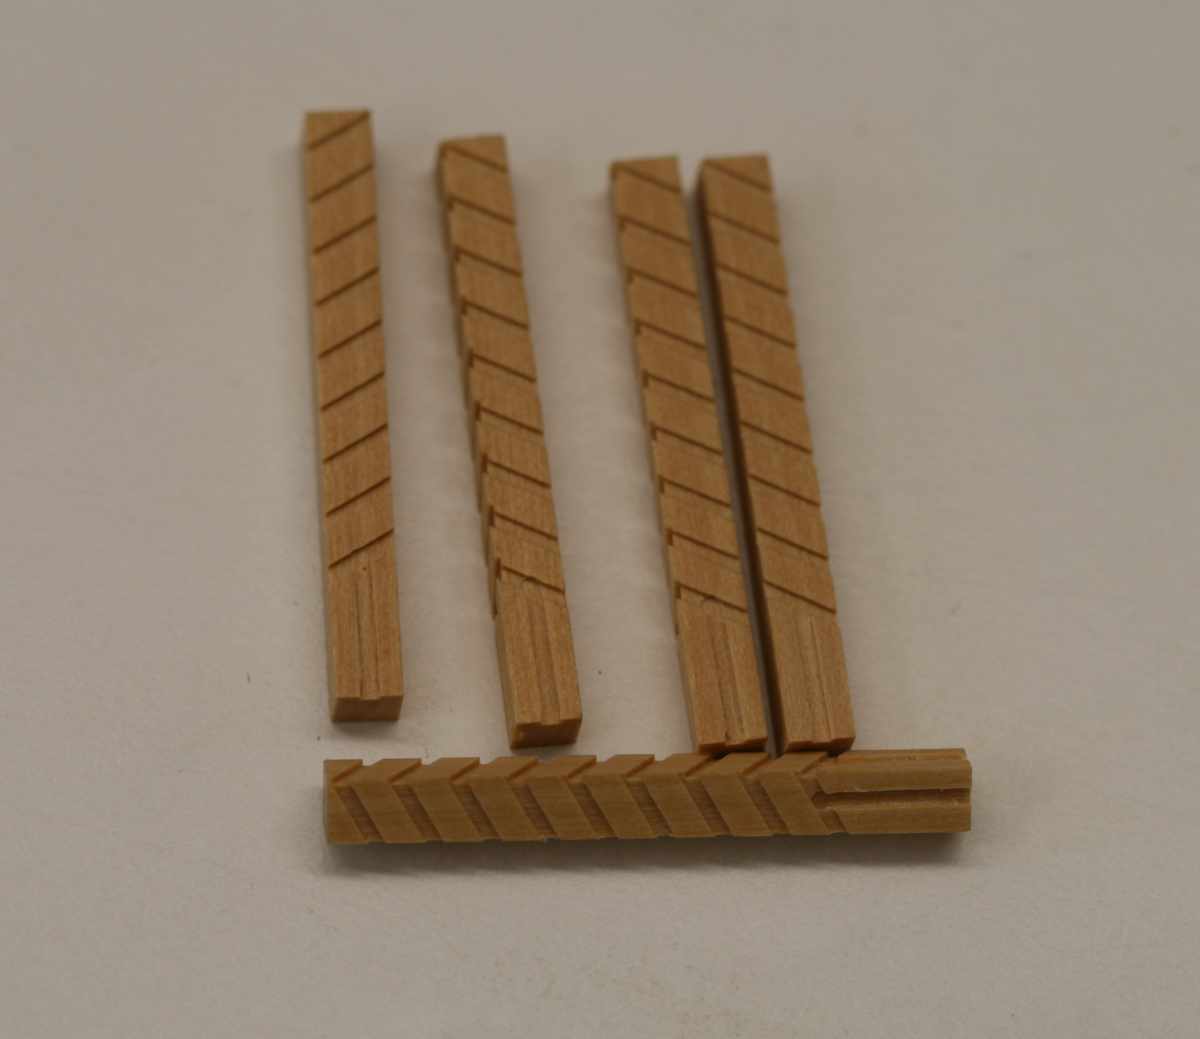
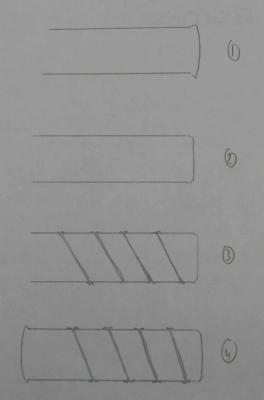
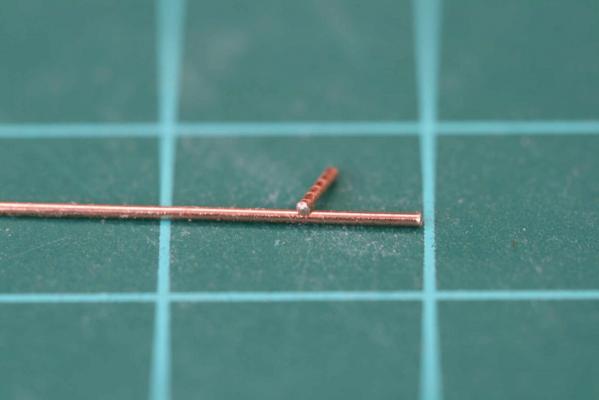
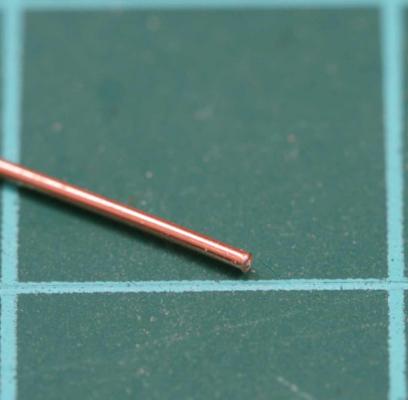
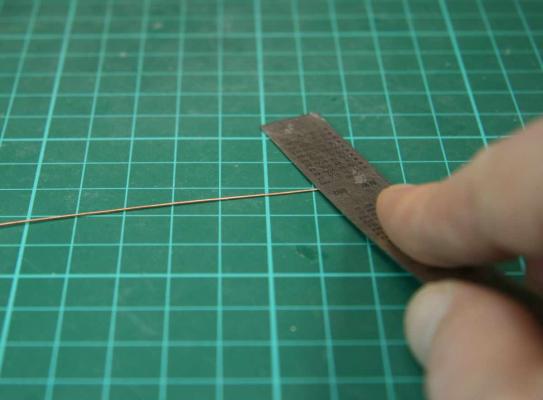
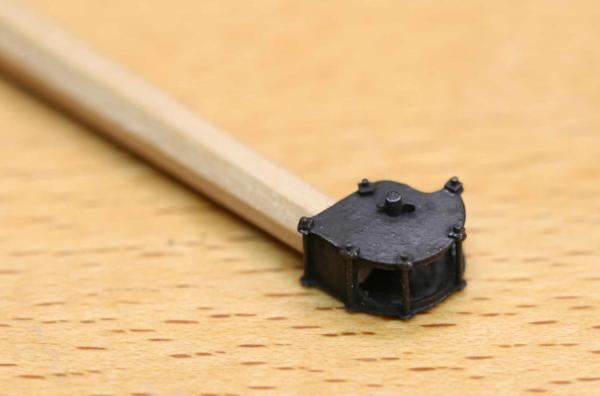
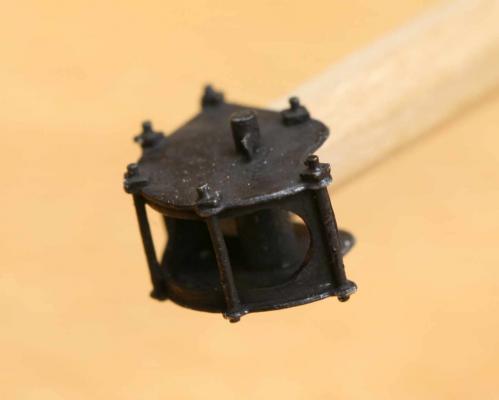
Ok here we go. When cutting a brass rod with a sharp knife a burr is created, I use this both to my advantage and at one point it needs to be removed (otherwise you'll have trouble inserting the bolt in the predrilled hole. Here are the steps involved: 1. This is the rod after the last bolt was cut 2. The burr is removed using a small steel ruler 3. A new diagonal burr is created to have the bolt firmly set in the predrilled hole ( I use bot 0,5 mm brass rod and a 0,5 mm steel drill to drill the holes, without the diagonal burr the fit is a bit loose) 4. Cutting off the bolt creates a burr this is the dome of the bolt Tools needed (I won't cover the use of Liver of Sulphur which I use to blacken the bolts after they are in place): Step 1 This is the rod after the last bolt was cut Step 2 The burr is removed using a small steel ruler Step 3 A new diagonal burr is created by rolling a sharp blade overt he rod to have the bolt firmly set in the predrilled hole Step 4 Cutting off the bolt creates a burr this is the dome of the bolt I use a brass rod with a small hole in the point to push the bolt into place leaving the dome of the bolt proud to the surface. When the are all done I treat them with liver of sulphur to blacken them. The end result (it's hard to capture but each bolt has a nice subtle dome): Remco


- 1,215 replies
-
- 39
-
-
- sloop
- kingfisher
- (and 1 more)
-
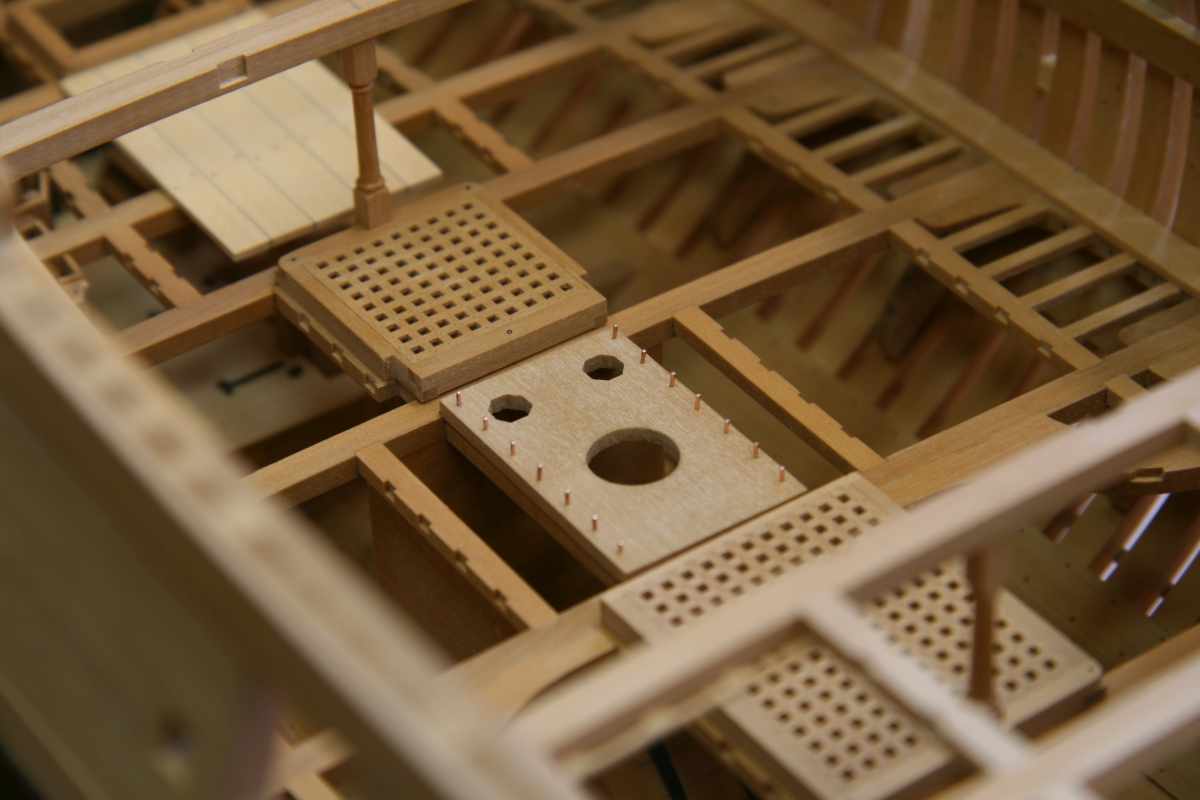
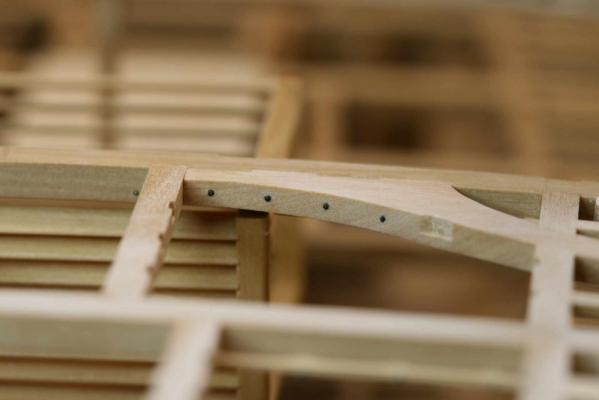
Thanks for all the kind comments and likes. I forgot to add the pictures I made before the pump well was installed. This is the pump intake that is now tucked away deep inside the hull, unfortunately 90% is invisible now. The last picture is the main mastpartner with the brass bolts positioned but not yet secured and blackened. As a side note, the fabrication of bolts was refined over time, I used to make the dome shape of the bolt head with a cup burr. Later I discovered that when I cut the brass rod with a sharp knife one end is dome shaped and one is flat. I use this to my advantage now. Still every bolt is scored to give it a little grip inside the predrilled hole. If there is intrest I can make little how-to for the thousands of bolts that are used in this build. Remco

- 1,215 replies
-
- 18
-
-
- sloop
- kingfisher
- (and 1 more)
-
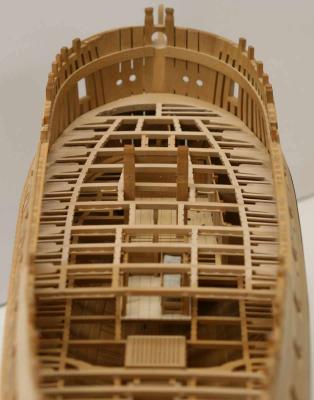
Sorry for the long wait, 'life' got in the way.... Dave, the wood will darken over time, I like the color of free boxwood too. Greg, the thought crossed my mind :-) The new pumpwell is installed and the next set of beams too. A bit tricky as they are curved in two ways. Remco

- 1,215 replies
-
- 39
-
-
- sloop
- kingfisher
- (and 1 more)
-
Everything has been said, still I would like to compliment you for an amazing capstan. Remco
- 346 replies
-
- 4
-
-
- terror
- polar exploration
- (and 2 more)
-
Just re-do it Piet Remco
-
Cutter Cheerful 1806 by rafine - FINISHED
Remcohe replied to rafine's topic in - Build logs for subjects built 1801 - 1850
Bob, the work is well worth the effort. I can almost feel your cramped hand :-) Remco- 525 replies
-
- 3
-
-
- cheerful
- Syren Ship Model Company
- (and 1 more)
-
I was literally shaking my head when I saw the brass pins. Your metalworking is out of this world. You must have a microscope attachment on your lathe ;-) Remco
-
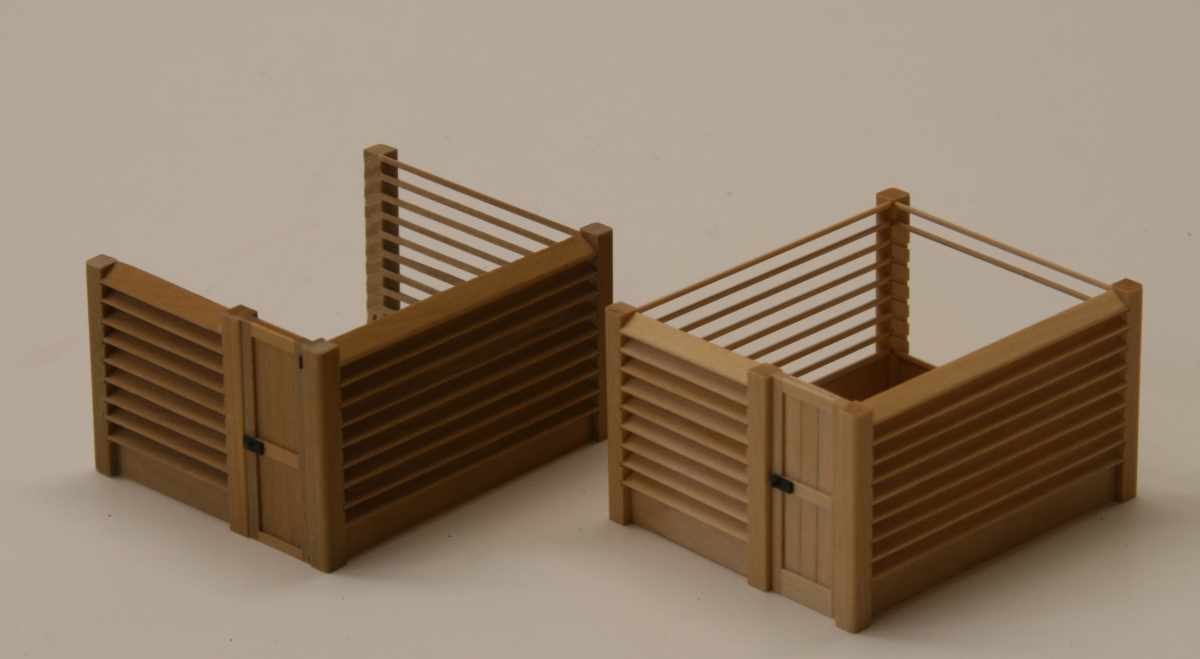
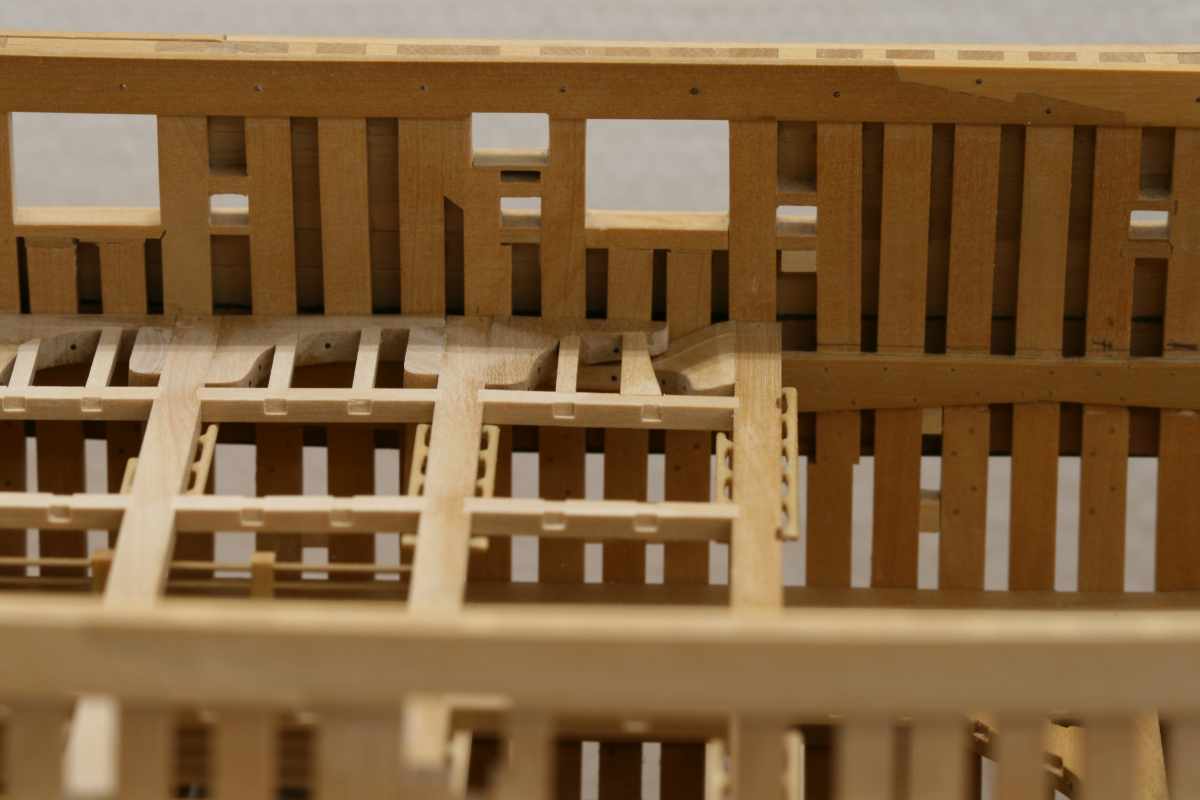
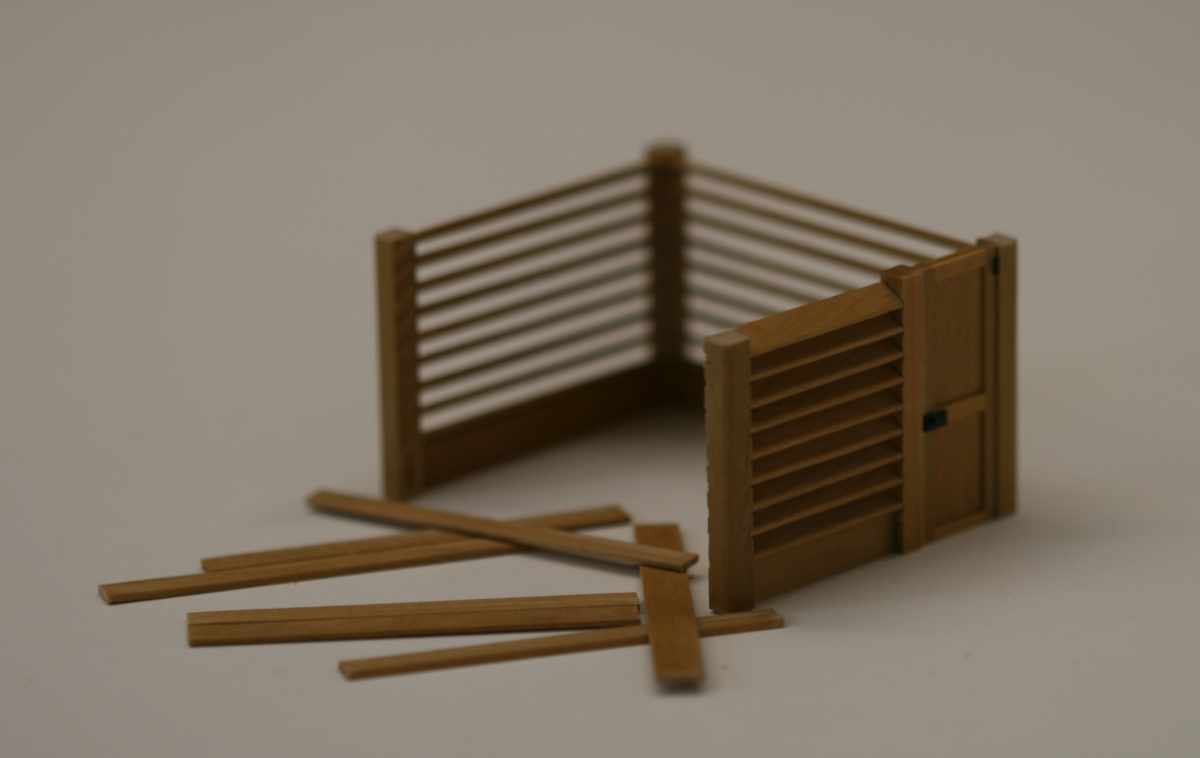
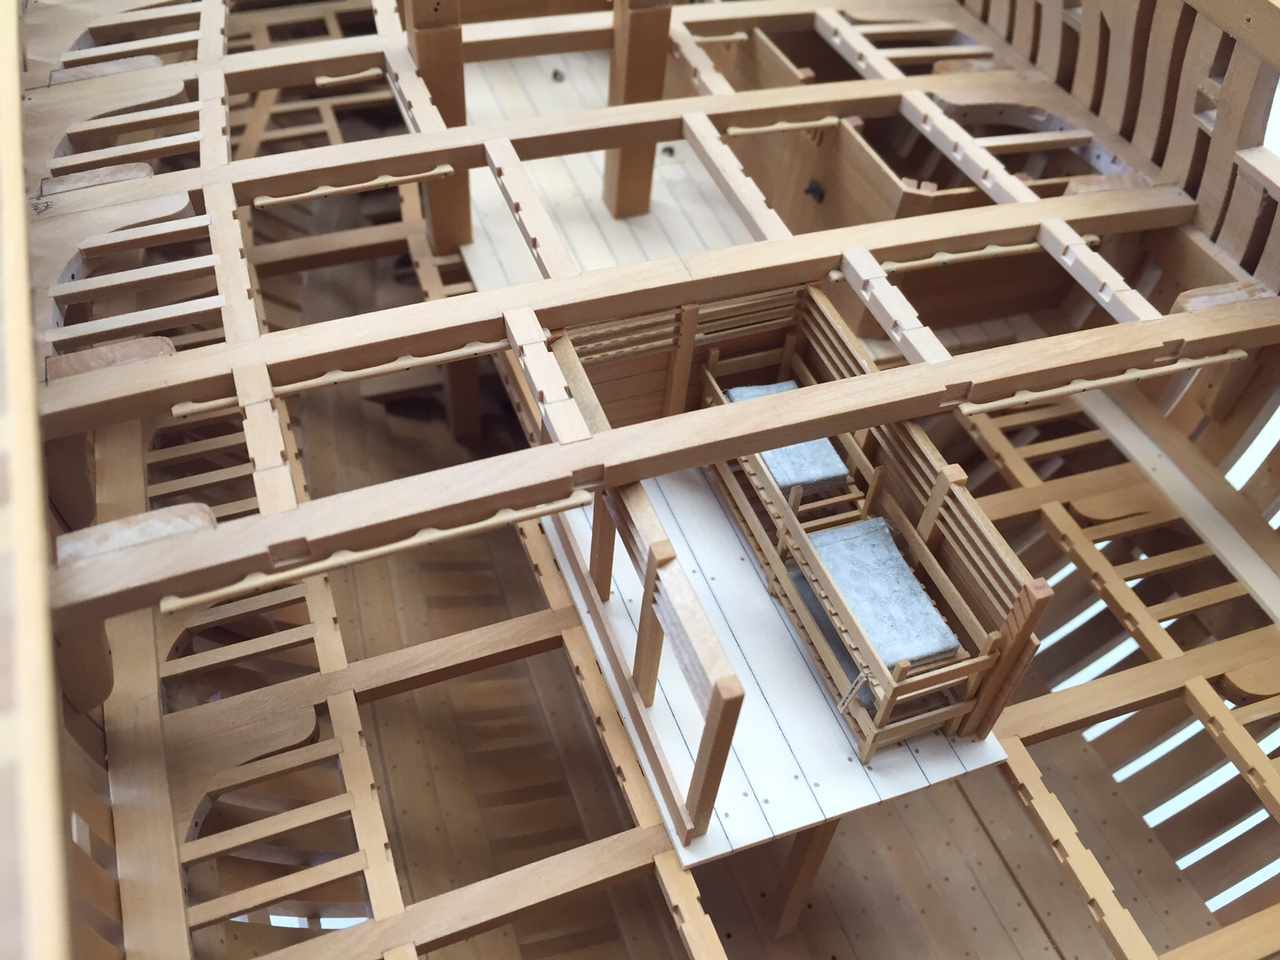
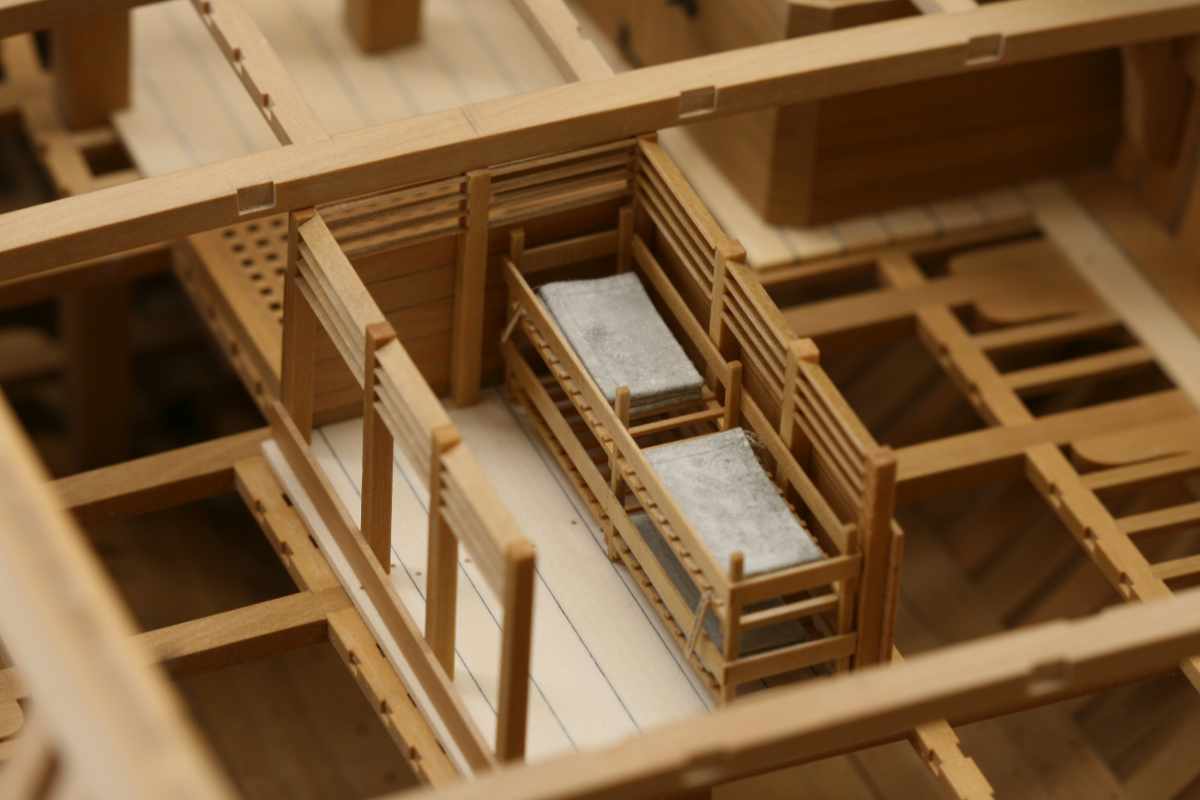
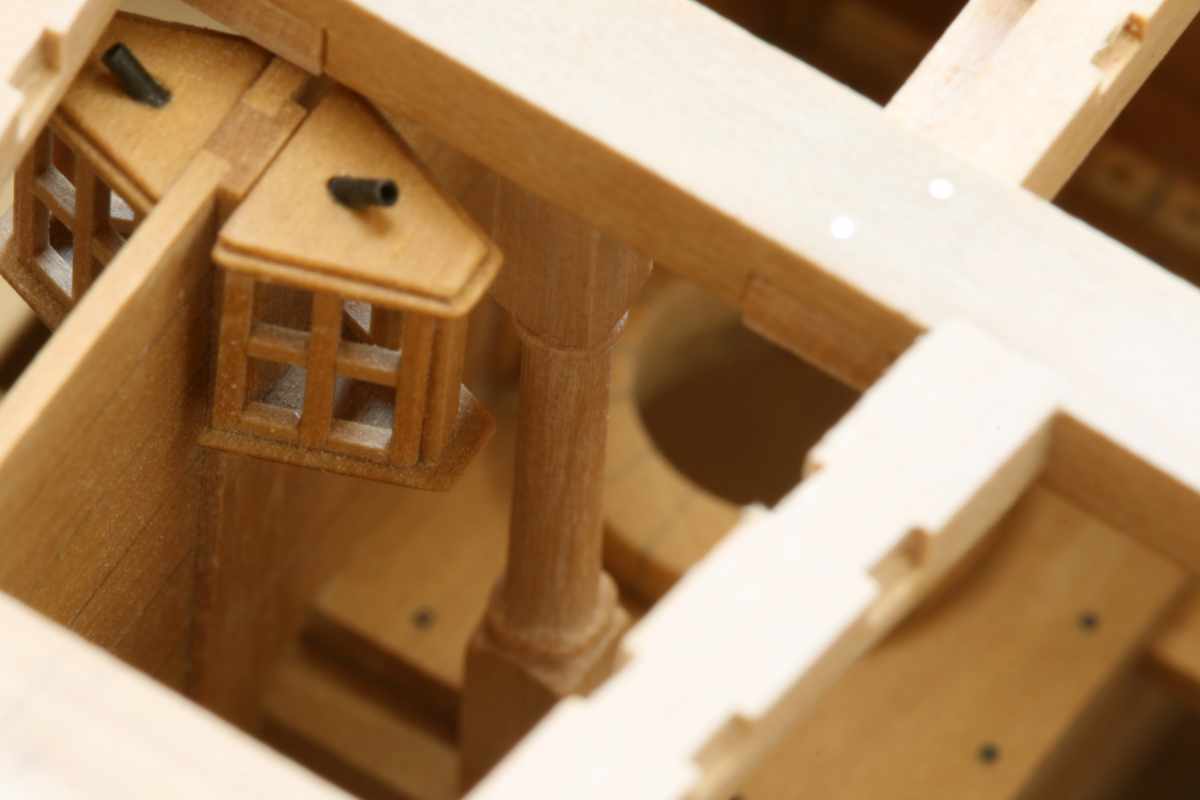
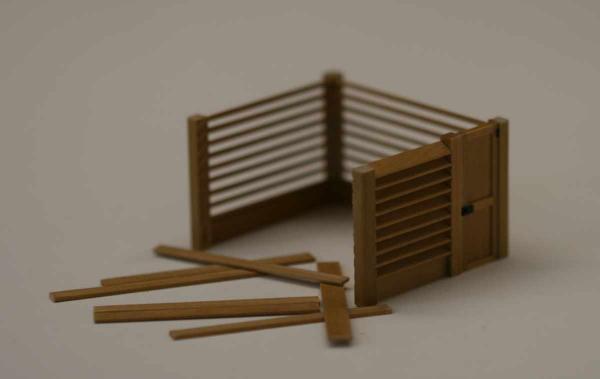
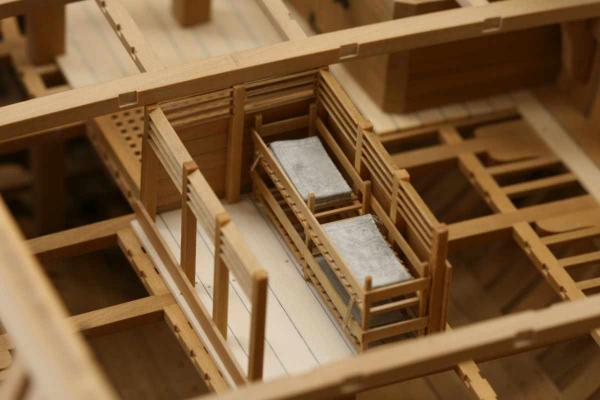
The new pump well. Not much different from the old one but the stanchions and the louvres are a little less wide than the old one. It looks more delicate. I also enhanced the joints on the door to show the individual planks. Remco

- 1,215 replies
-
- 31
-
-
- sloop
- kingfisher
- (and 1 more)
-
Very nice progress Piet, you are the "master of tiny pieces" Lets just say high quality anno 2015 isn't what it used to be :-D Remco
-
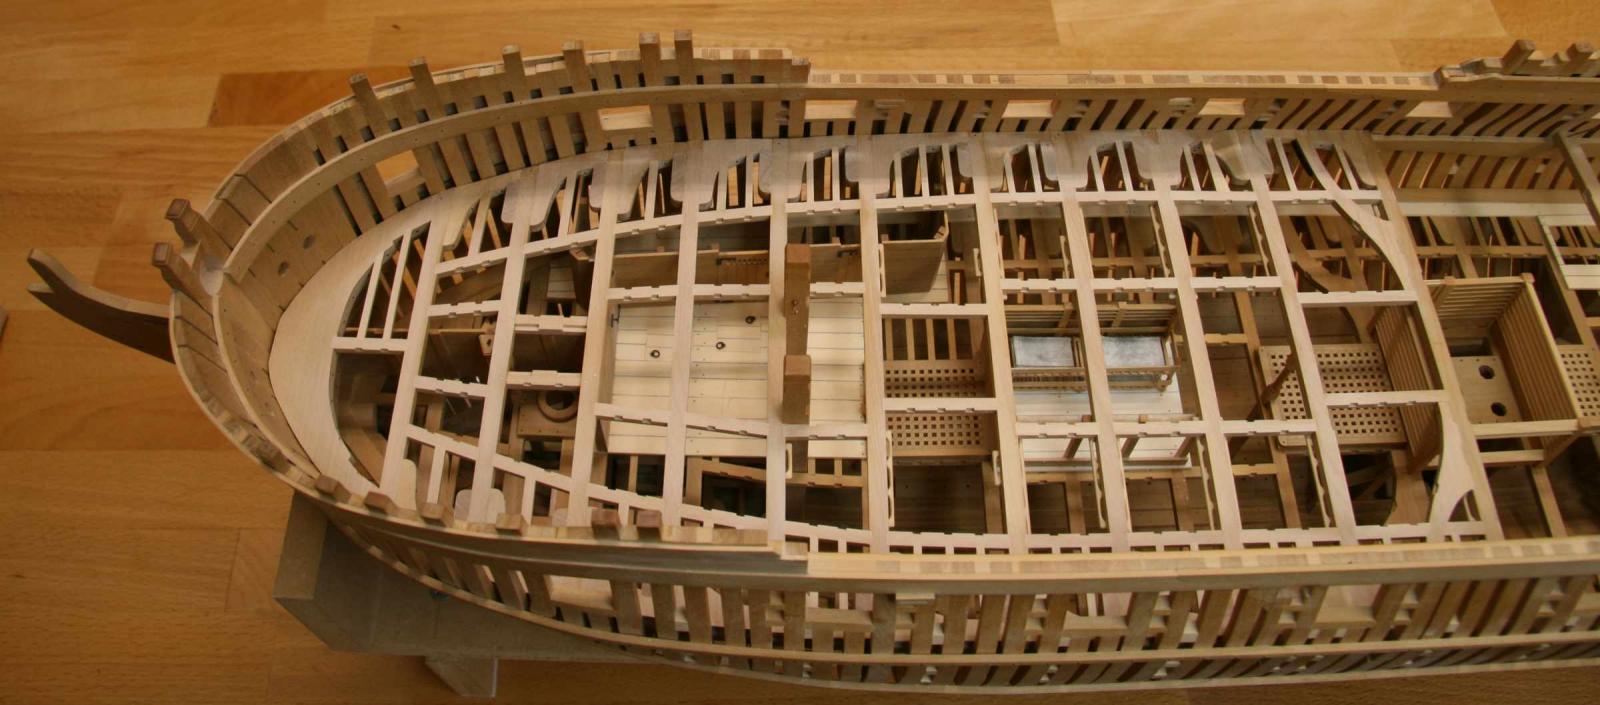
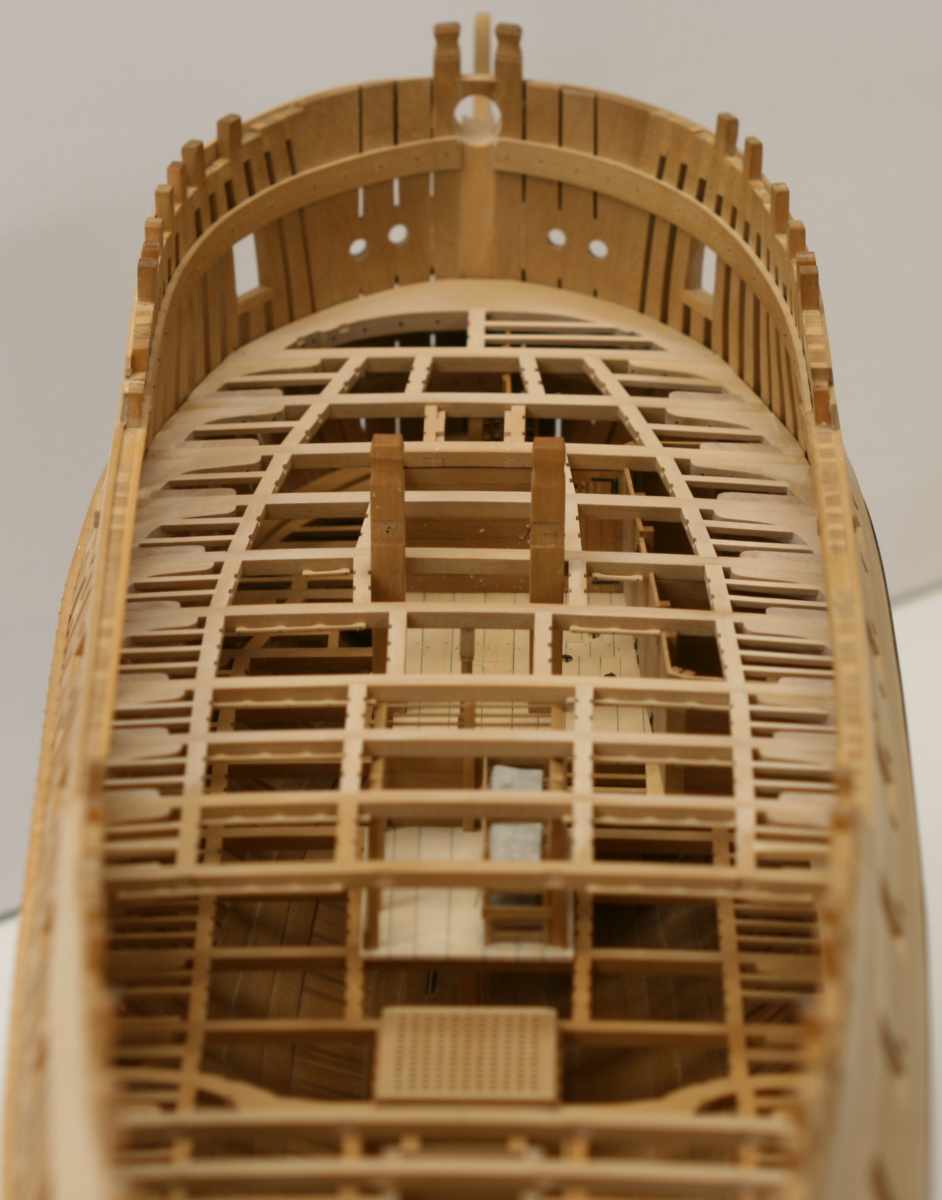
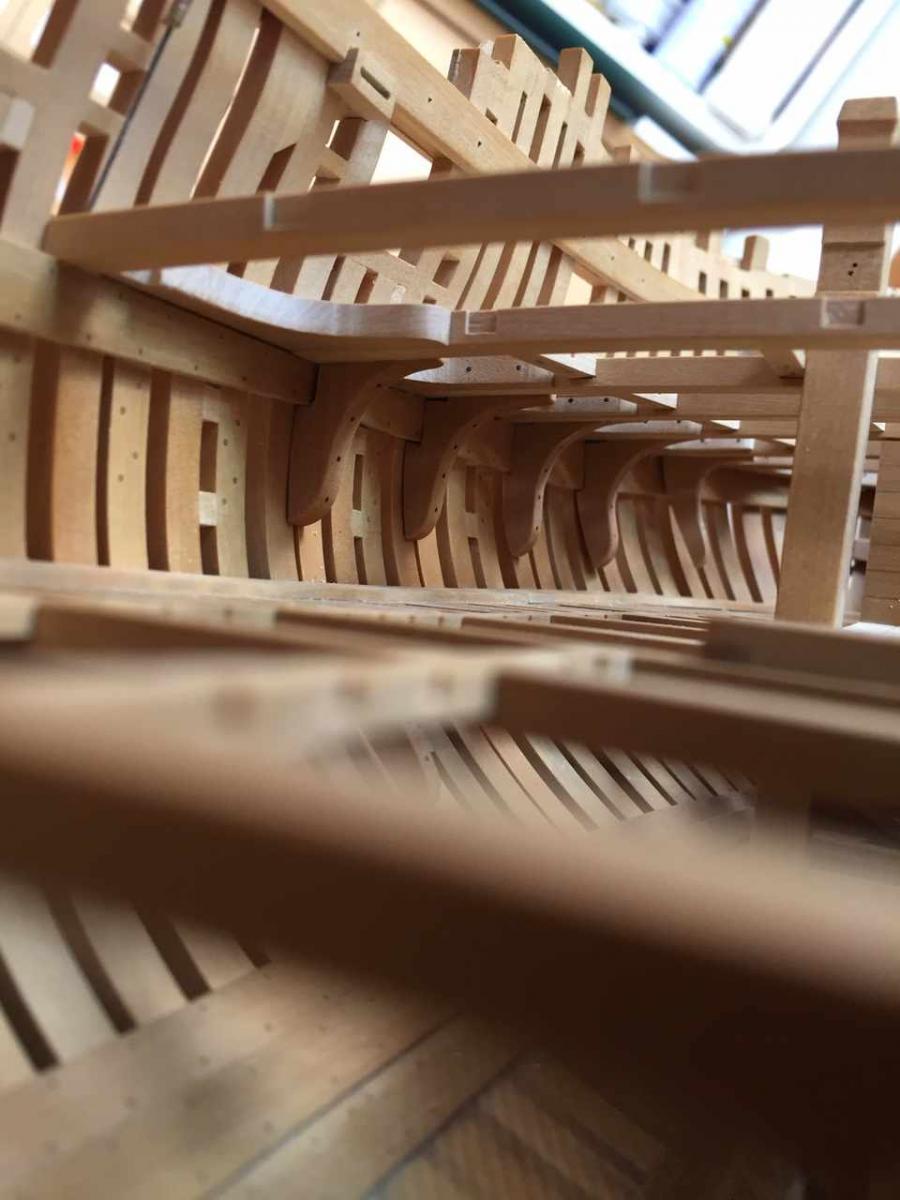
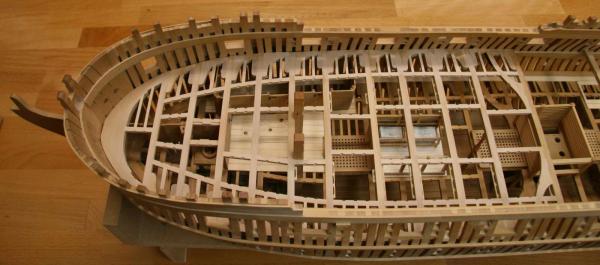
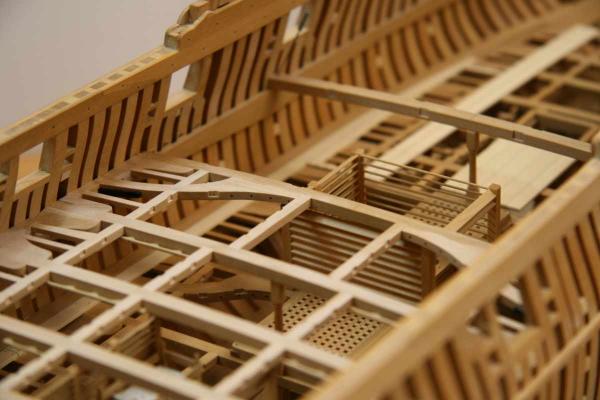
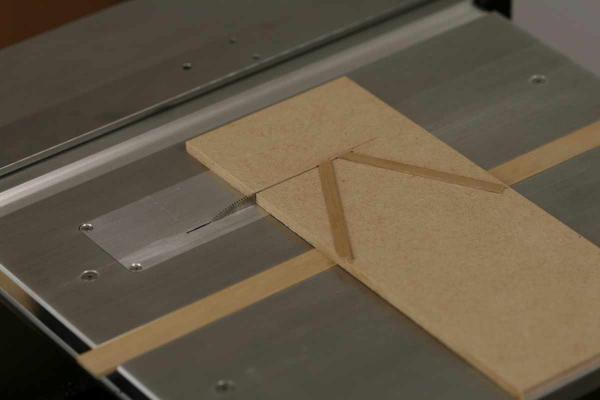
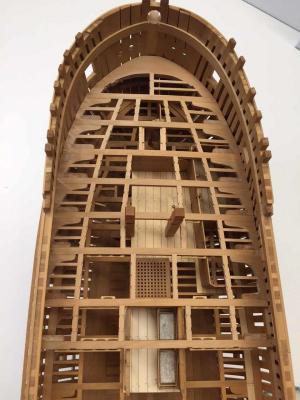
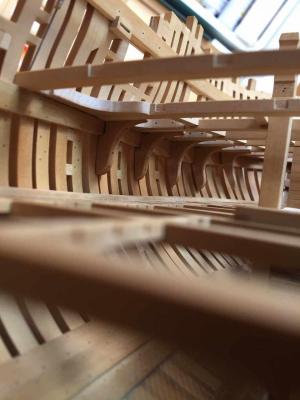
Slowly progressing. Some special knees half way down the hull And the progress to date The pump well I had made years ago got a bit beaten up in storage. As I also was not very happy with some of the dimension of the stock I used I decided to make a new one. I made a jig to make accurate cuts for the dado's on the stanchions, it's hard to see but at the far side where the blade cuts is a thin strip of wood the width of the blade to mak each cut at the same distance. The finished stanchions, the vertical dado's were milled. Remco


- 1,215 replies
-
- 34
-
-
- sloop
- kingfisher
- (and 1 more)
-
ancre Le Fleuron 1729 by rekon54 - 1:24
Remcohe replied to rekon54's topic in - Build logs for subjects built 1501 - 1750
Respect...... -
Great accomplishment Danny. It has been fun and educational. I will most certainly look back now and then to check how you managed to do all the tricky stuff I have yet to do. Remco
-
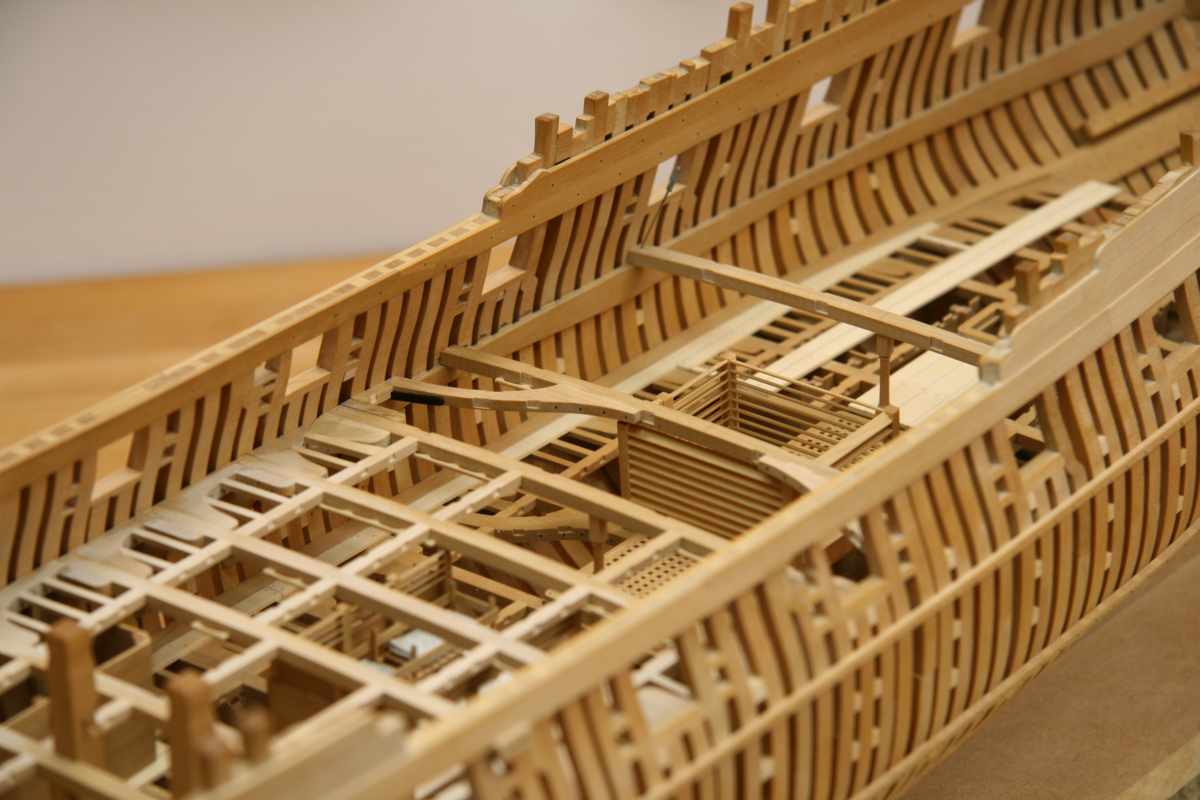
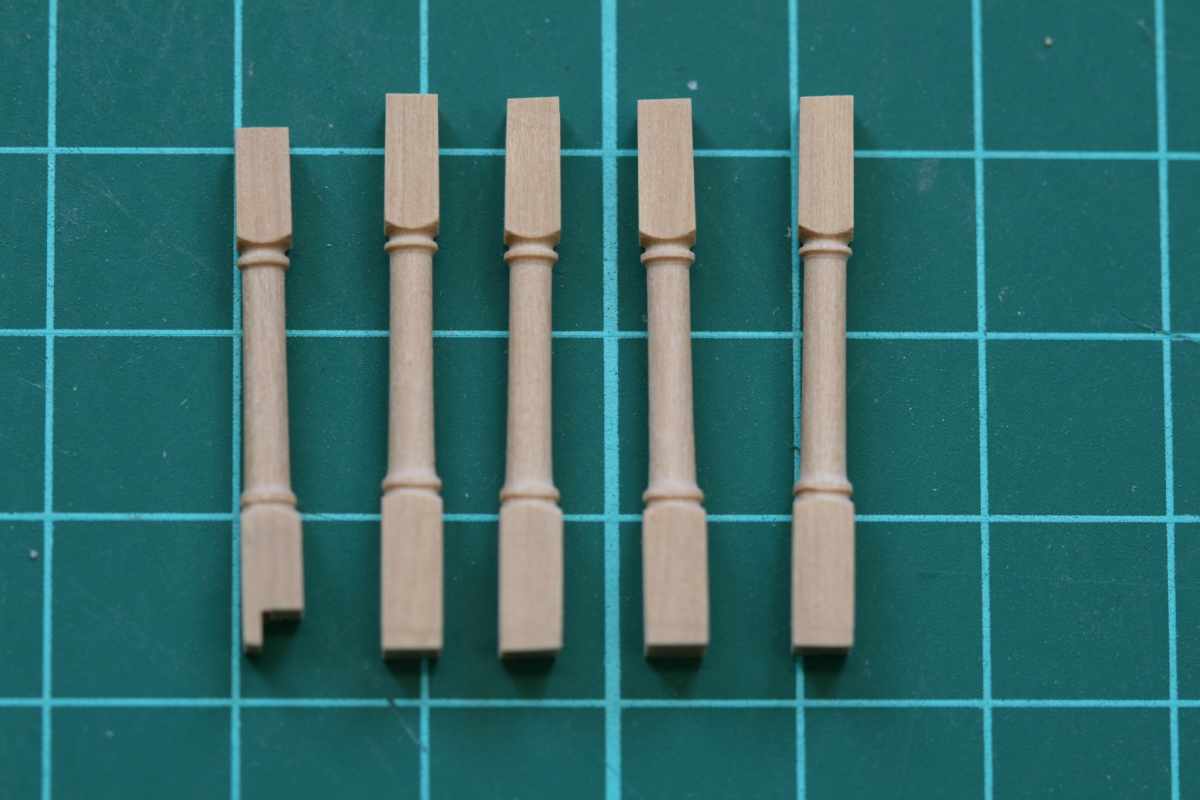
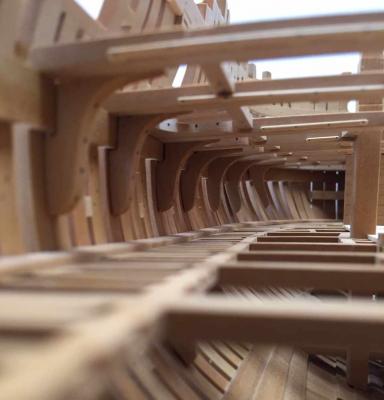
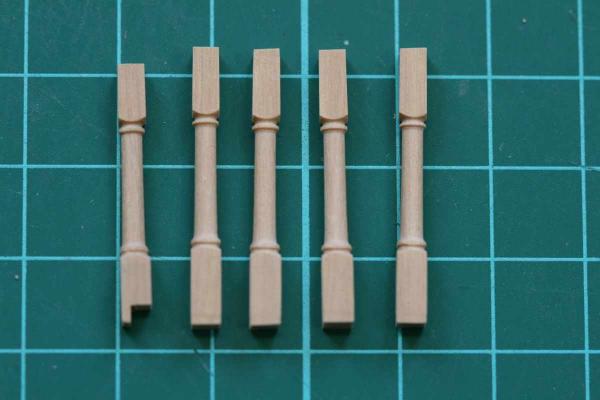
Thanks all for your kind comments. Greg the pillars were cut freehand and with the help of a piece of paper with the cross slide settings written down. More beams, knees and now its also time to add the hammock battens. They are fragile once glued in place and easily knocked off (yes I tried it...) Remco

- 1,215 replies
-
- 42
-
-
- sloop
- kingfisher
- (and 1 more)
-
This is so great to watch, beautifully executed. You could have fooled me if you said its was made out of one piece. Remco
- 1,051 replies
-
- 6
-
-
- cheerful
- Syren Ship Model Company
- (and 1 more)
-
Wonderfull Johan, you make it look so easy while it's not. Remco
-
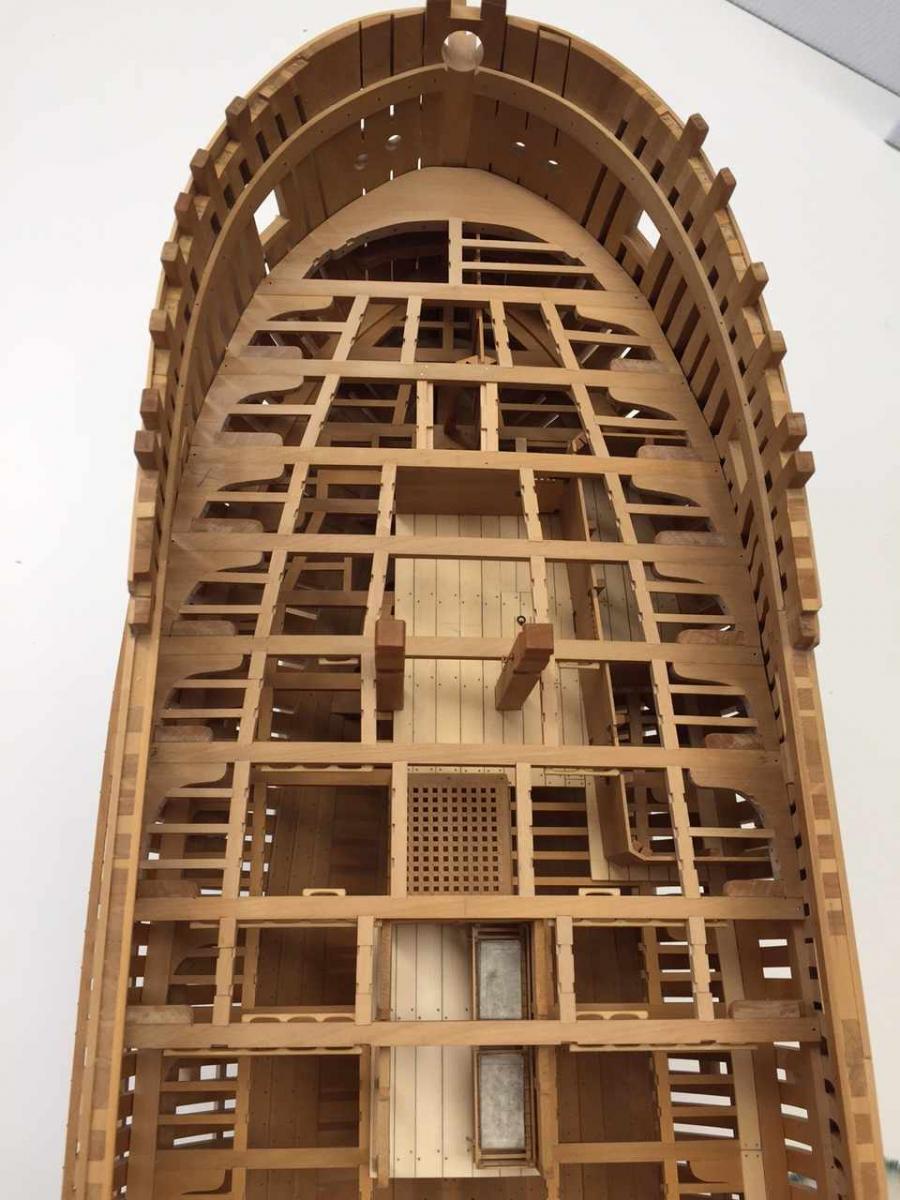
Thank you all for your kind words and likes. Work is progressing and more knees, hanging knees, carlings and ledges are added. I also forgot to install a pillar in front of the fore mast , but that was taken care of. The last opportunity to take a look at the sail room before its permanently installed in the hull Some of the knees with mortices cut The state of the upper deck to date The next weeks will be more of the same... with the addition of installing hammock battens as I work my way across the deck Remco


- 1,215 replies
-
- 33
-
-
- sloop
- kingfisher
- (and 1 more)
-
Seriously stunning! How long will the finished sloop be? Remco
-
A bold move Mark and certainly worth the effort. I always fear such redo's but I know if I don't it wil bother me for years to come. Remco
-
Absolutely stunning Alex. Remco