HOLIDAY DONATION DRIVE - SUPPORT MSW - DO YOUR PART TO KEEP THIS GREAT FORUM GOING! (89 donations so far out of 49,000 members - C'mon guys!)
×


Remcohe
-
Posts
612 -
Joined
-
Last visited
Content Type
Profiles
Forums
Gallery
Events
Everything posted by Remcohe
-
 Thank you Alex. It is the way you knotted the thread I was looking for and the picture shows it perfectly. Thank you again. Remco
 -
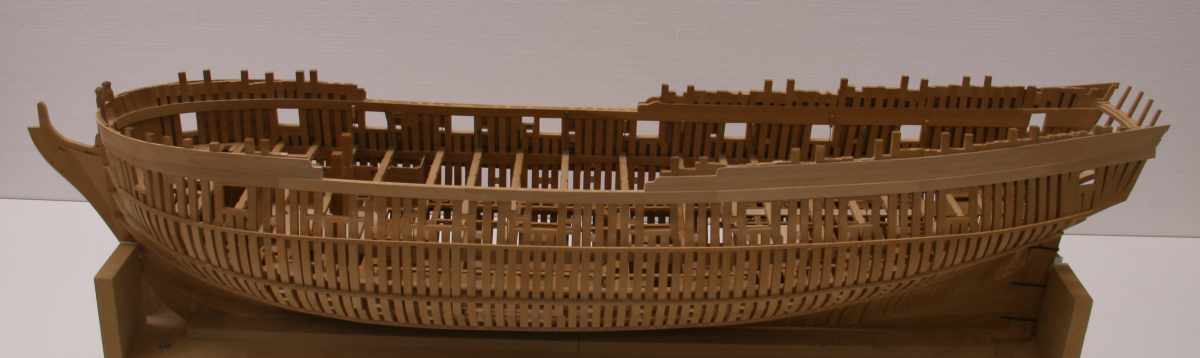
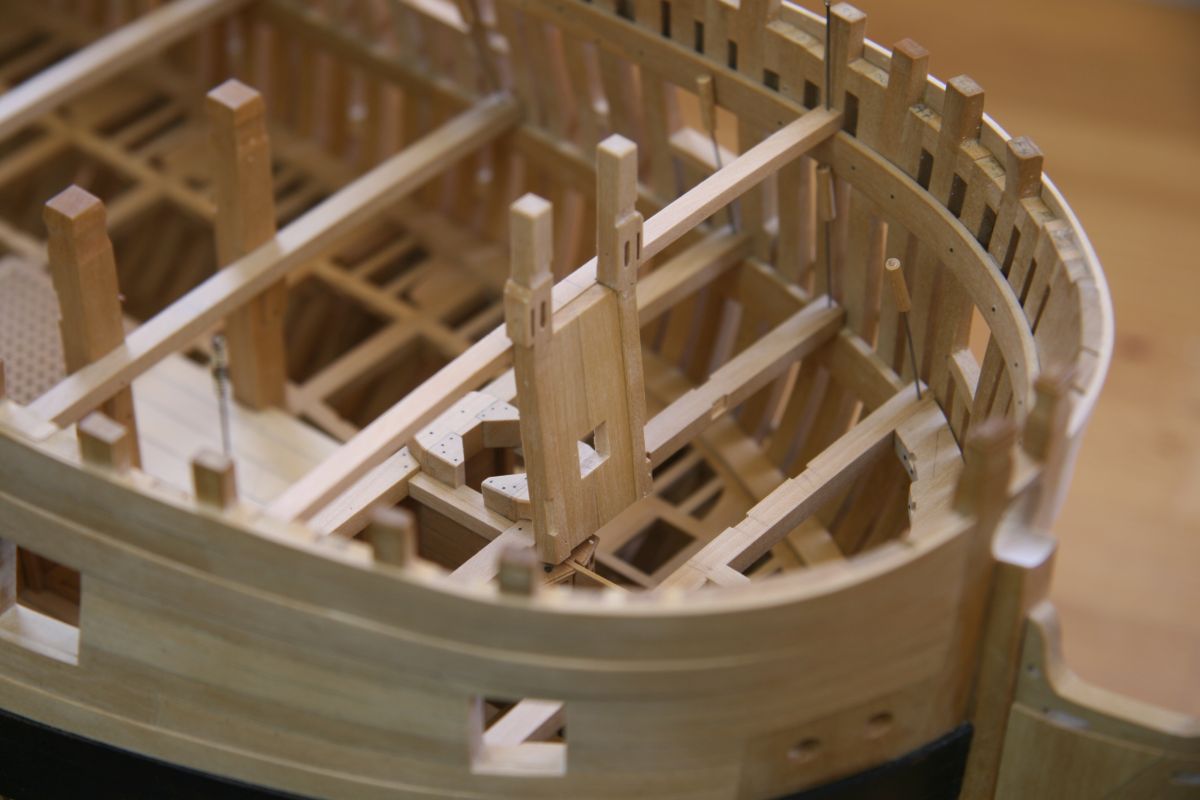
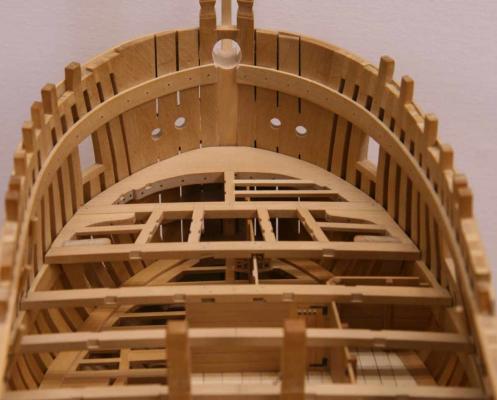
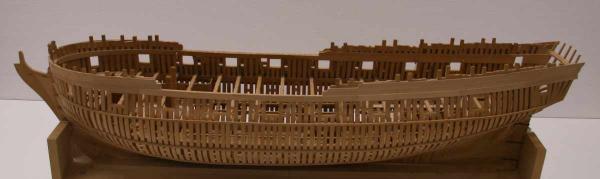
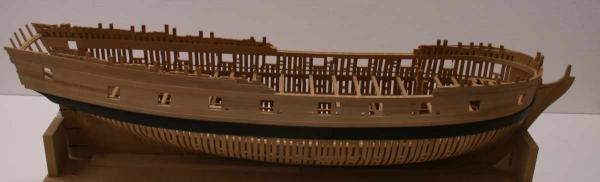
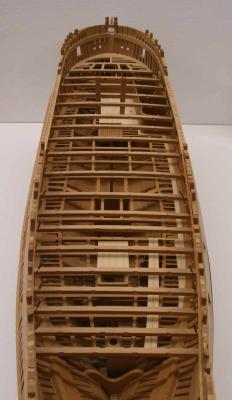
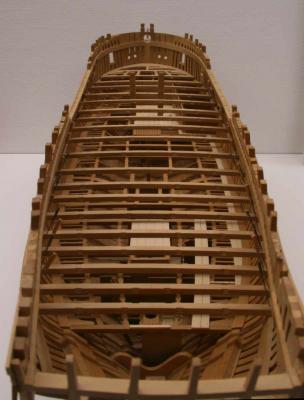
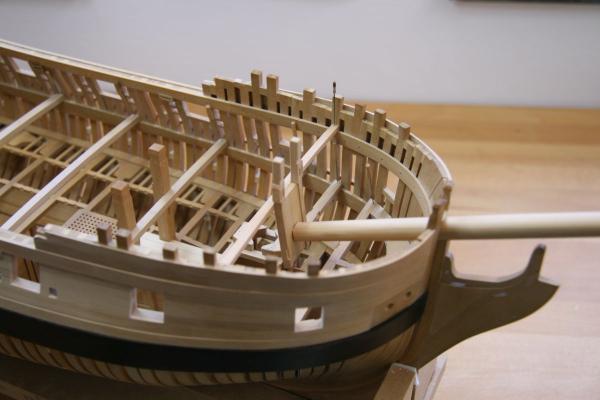
Finally a long overdue update. My KF got little attention lately as work and other (fun) projects got in the way. I cut all the mortices for the carlings in the upper deck beams and started to make the first of the knee's and hanging knees. These are not one of my favourite parts to make and unfortunately every beam has a hanging knee. This is due to the heavy load on the deck with all the canons. I'll stick to my mantra and go step by step or part by part in this case Remco
- 1,215 replies
-
- 50
-

-
- sloop
- kingfisher
- (and 1 more)
-
Cutter Cheerful 1806 by rafine - FINISHED
Remcohe replied to rafine's topic in - Build logs for subjects built 1801 - 1850
Already a speedy start Remco- 525 replies
-
- 3
-
-
- cheerful
- Syren Ship Model Company
- (and 1 more)
-
The chain looks great, can you show in a bit more detail how you made the knots? Remco
-
Very nice Alex! Remco
-
Congratulations Bob she turend out fantastic. Your display room must be getting very cramped with all those models. I really enjoyed following your build and look forward to the next one ;-) Remco
- 1,477 replies
-
- 1
-
-
- essex
- model shipways
- (and 1 more)
-
I had the honour and the pleasure to see Piet's model in real life. All the pictures on MSW don't do her justice, she is stunning. The hull looks very realistic from all angles and the texture matches the steel plates the original was made from. All the details actually work, Piet had me try them out all. From hoisting the anker, the torpedo deck launcher is out of this world, the AA guns that can lower into the bins, the pulley's, even the break on the pulley works, etc etc. The colours are vivid and really do the model just. Piet if you still wonder if your Dad is proud of the model you made of the ship he loved most? He should! My wife also had the pleasure of meeting the builder and his charming wife, we enjoyed every single minute of it. Remco
-
Piet, how wonderful she turned out, it was great to follow your build and read your stories accompanying it. Now O19 has a face of someone who sailed her and the stories that gives her a place in history. I'm pleased I'll see her first hand and her skilful builder too in two weeks . Remco
-
Wow lots of space compared to your appartement! Remco
-
Both the 18-pounder as the Baille à Drisse look spectacular! Remco
-
Oh my that display case is big, I can understand the Admirals objections now ;-) Remco
- 662 replies
-
- 1
-
-
- bonhomme richard
- frigate
- (and 1 more)
-
Again you have build a true master piece. Congratulations Karl. Remco
- 662 replies
-
- 2
-
-
- bonhomme richard
- frigate
- (and 1 more)
-
Johann, it's a joy to watch your work. Outstanding craftsmanship I'll try your method for the hooks, they look superb. Remco
-
The detail and shape of the hook is impressive (as everything else.....) Remco
-
Thanks all for your kind words. And yes Mark it's relaxing. David B, 99% is Castello Boxwood and deck planking is Holly Just a minor update, the mast step finished with lots of bolts and 4 shaves. Remco
- 1,215 replies
-
- 29
-
-
- sloop
- kingfisher
- (and 1 more)
-
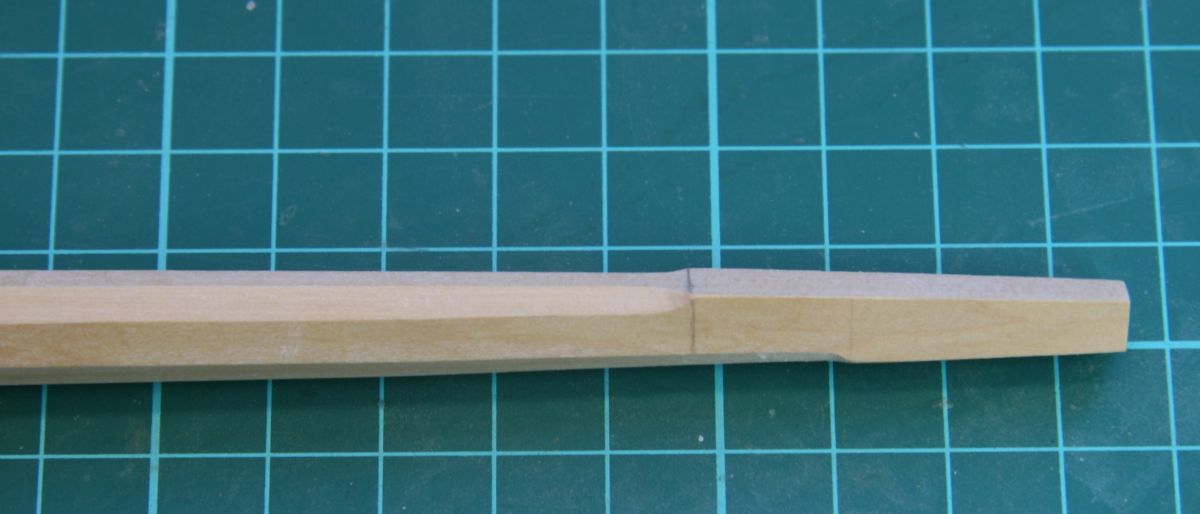
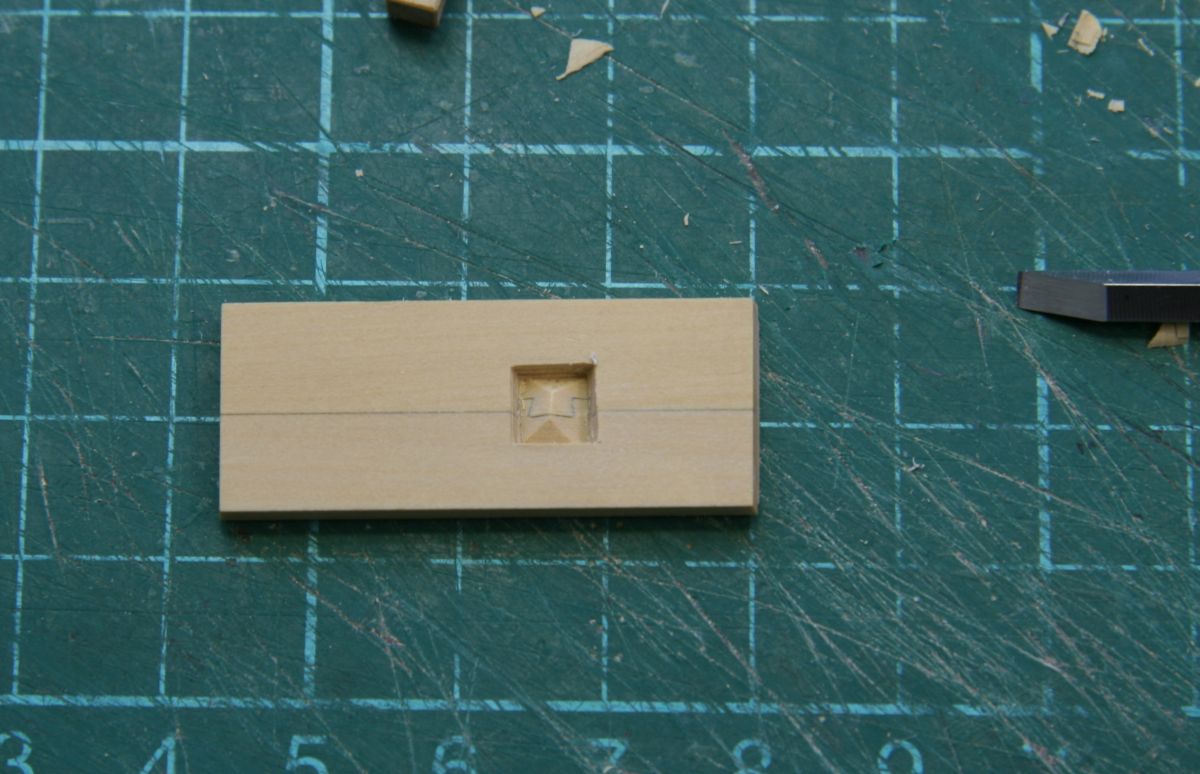
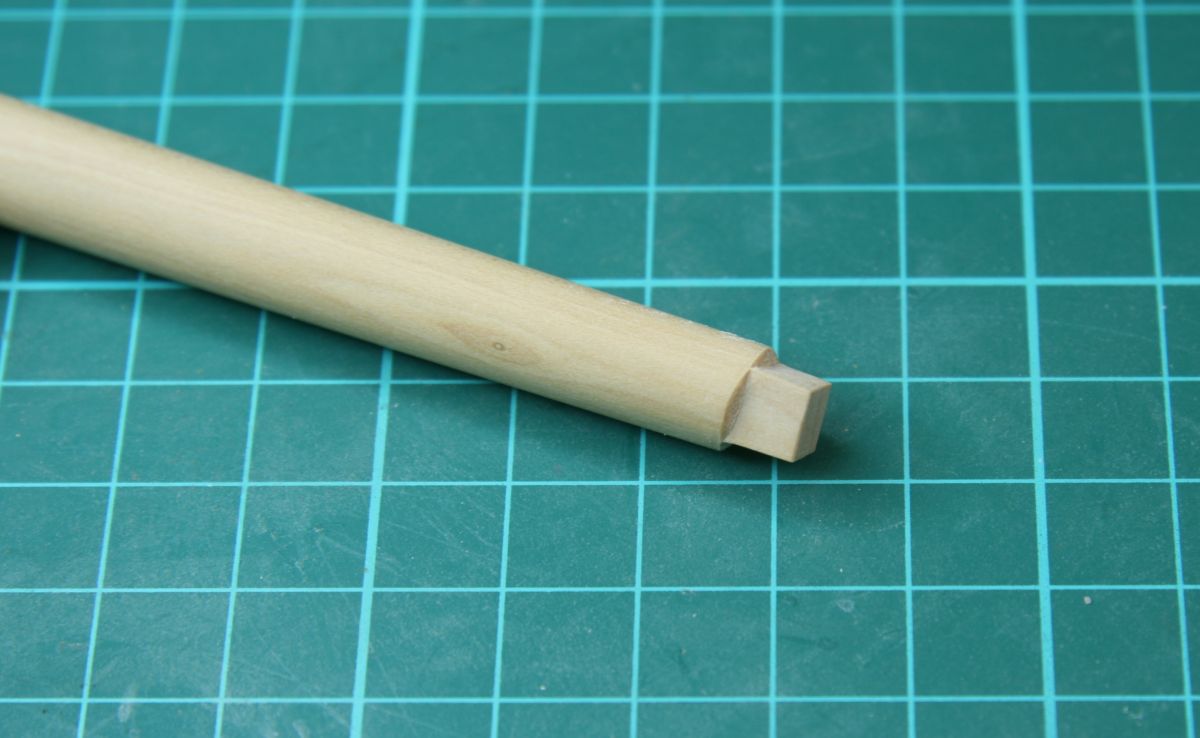
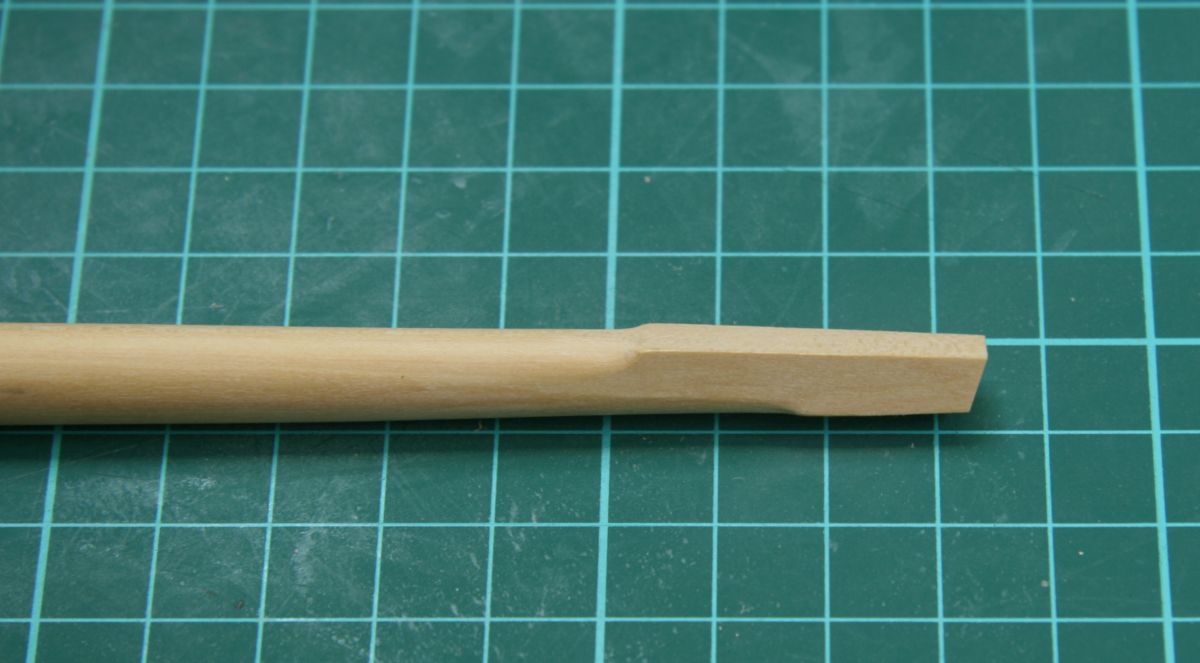
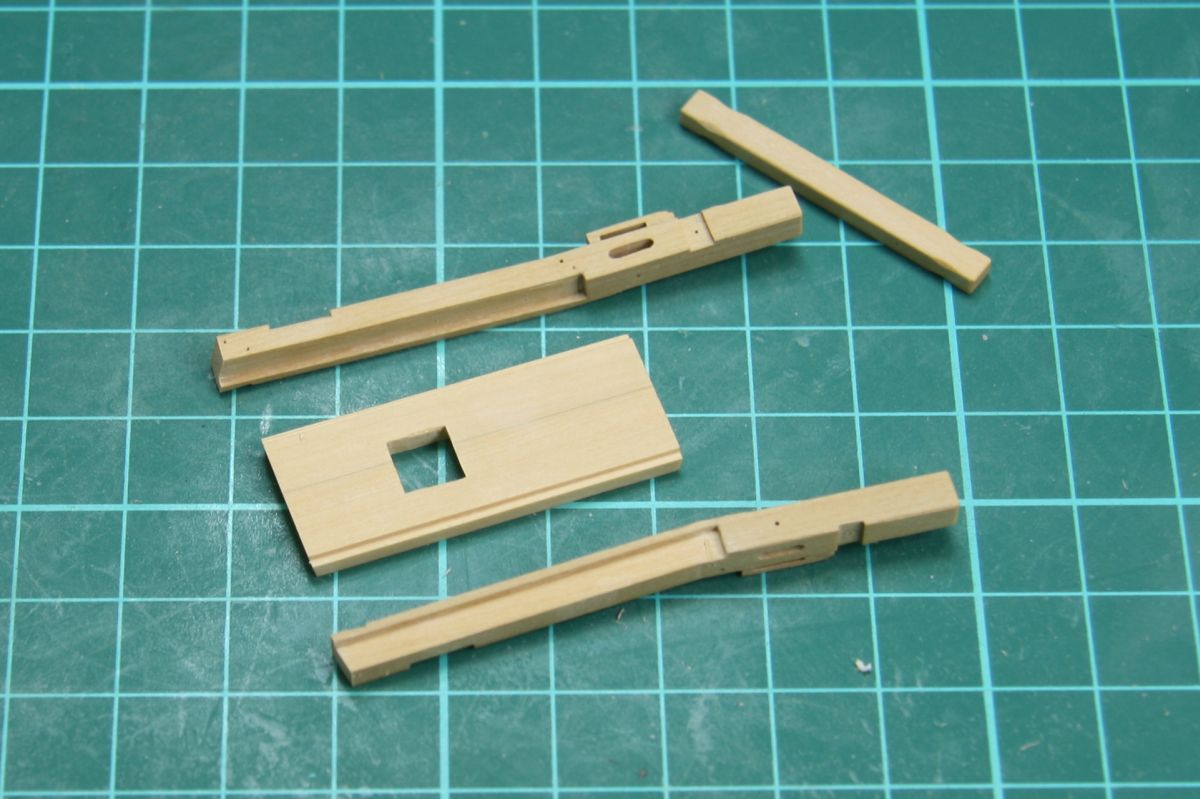
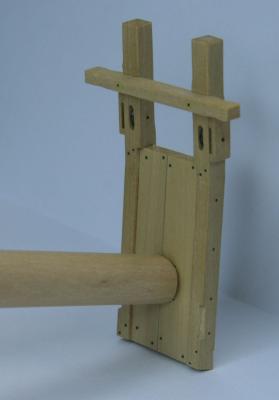
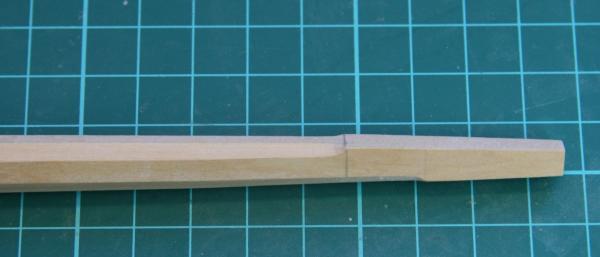
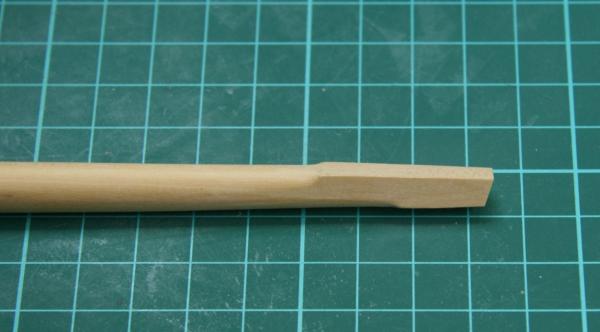
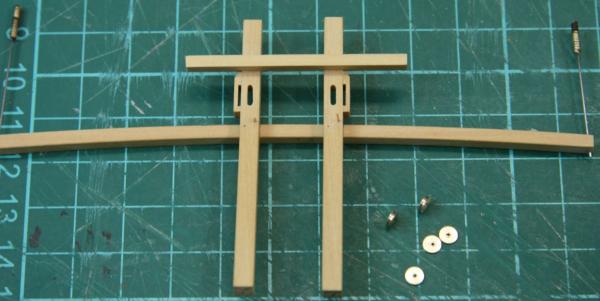
Thanks for the dimensions. I don't use a scale ruler but a conversion table to quickly get from feet/inch to mm Work continued on the bowsprit step. To accurately determine the step (square hole) in the chock (the vertical plank between the bitts) I had to make the bowsprit itself too. I find it very satisfying to make a mast just with hand tools, it takes time but the result is very accurate. While cutting the step the rabbet between the two planks very nicely The bowsprit was cut from square to octagonal to round using a hand plane, well honed chisels and sandpaper. The base going from round to square And the tip The step is also rebated into the upright bitts Remco


- 1,215 replies
-
- 36
-
-
- sloop
- kingfisher
- (and 1 more)
-
Mayflower by SawdustDave - Finished
Remcohe replied to SawdustDave's topic in - Build logs for subjects built 1751 - 1800
Congratulations Dave, she turned out really great Remco -
Nice tutorial Chuck. Bit of a 'shock' your cutter is smaller than I had thought it would be, but that's a compliment Remco
- 1,051 replies
-
- 2
-
-
- cheerful
- Syren Ship Model Company
- (and 1 more)
-
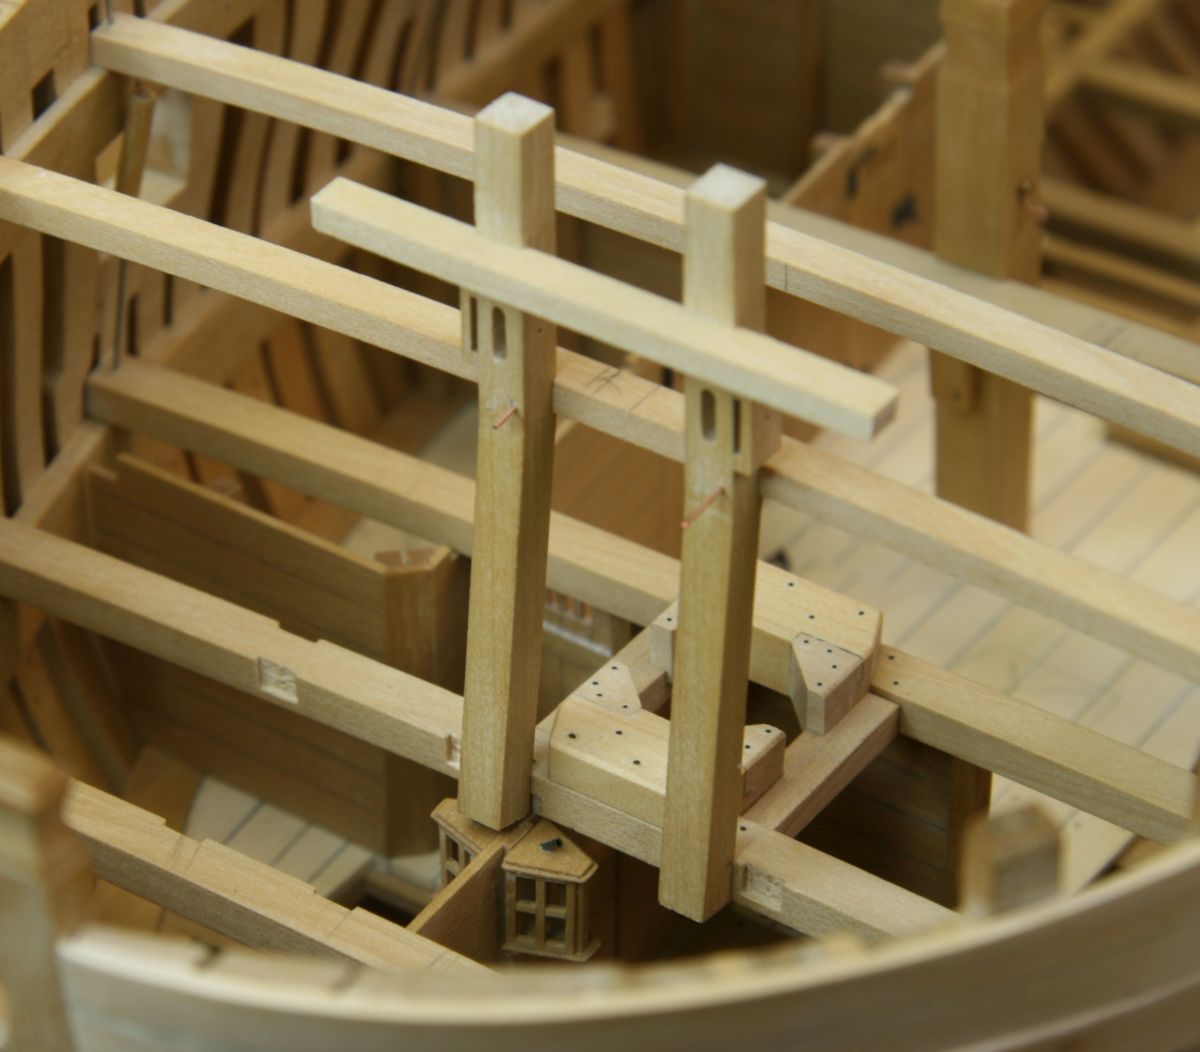
Thanks all for your kind comments. Next up is the bowsprit step. As I needed two of the forecastle deck beams to determine the size of this part. Not looking forward to this job I made an (warning off topic) 1/35 BMW R75 with side car, a nice little plastic kit from Lionroar. After that I found new energy to return to the KF and I went ahead and cut all forecastle and quarterdeck deck beams so they are ready for future use. Some parts still need to be made but I can not find the with of the crosspiece. Any ideas? I guess it's shorter than the main topsail sheet bitt crosspiece... Remco

- 1,215 replies
-
- 26
-
-
- sloop
- kingfisher
- (and 1 more)
-
Nice execution of the challenge I dropped on you. I agree enhancing the dummy hinges with black would have made them stand out too much, now they are just perfect. Let's see what I can come up with next Remco
-
Nice to see how you figured out how the hinges should work and they turned out great (just like I expected ) Now you should at least scribe the hinge location above all the other lids as well Remco
-
Renaissance wax for finish
Remcohe replied to vaddoc's topic in Painting, finishing and weathering products and techniques
I 'like' the odour of turpentine better than mineral spirit. I never buff the surface, I want a dead flat finish Remco -
Renaissance wax for finish
Remcohe replied to vaddoc's topic in Painting, finishing and weathering products and techniques
Vaddoc, it's better to use turpentine instead of mineral spirits. Is smells a lot better and if you warm it up a little (not too much be careful as it is flammable) the wax will solve better. I tried it and the finish is nice but will not harden completely, you can indeed forget glueing or painting parts afterwards so plan ahead when you are going to apply the finish. In the end I switched to heavily dissolved tungoil, thin coats dry within a few hours. Remco -
Ed, Even though the original had a glos finish, I would prefer a flat or in this case satin finish on a model to overcome the scaled effect. It's probably personal taste. Remco
- 3,618 replies
-
- 1
-
-
- young america
- clipper
- (and 1 more)