HOLIDAY DONATION DRIVE - SUPPORT MSW - DO YOUR PART TO KEEP THIS GREAT FORUM GOING! (Only 69 donations so far out of 49,000 members - Can we at least get 100? C'mon guys!)
×


michael mott
-
Posts
5,200 -
Joined
-
Last visited
Content Type
Profiles
Forums
Gallery
Events
Everything posted by michael mott
-
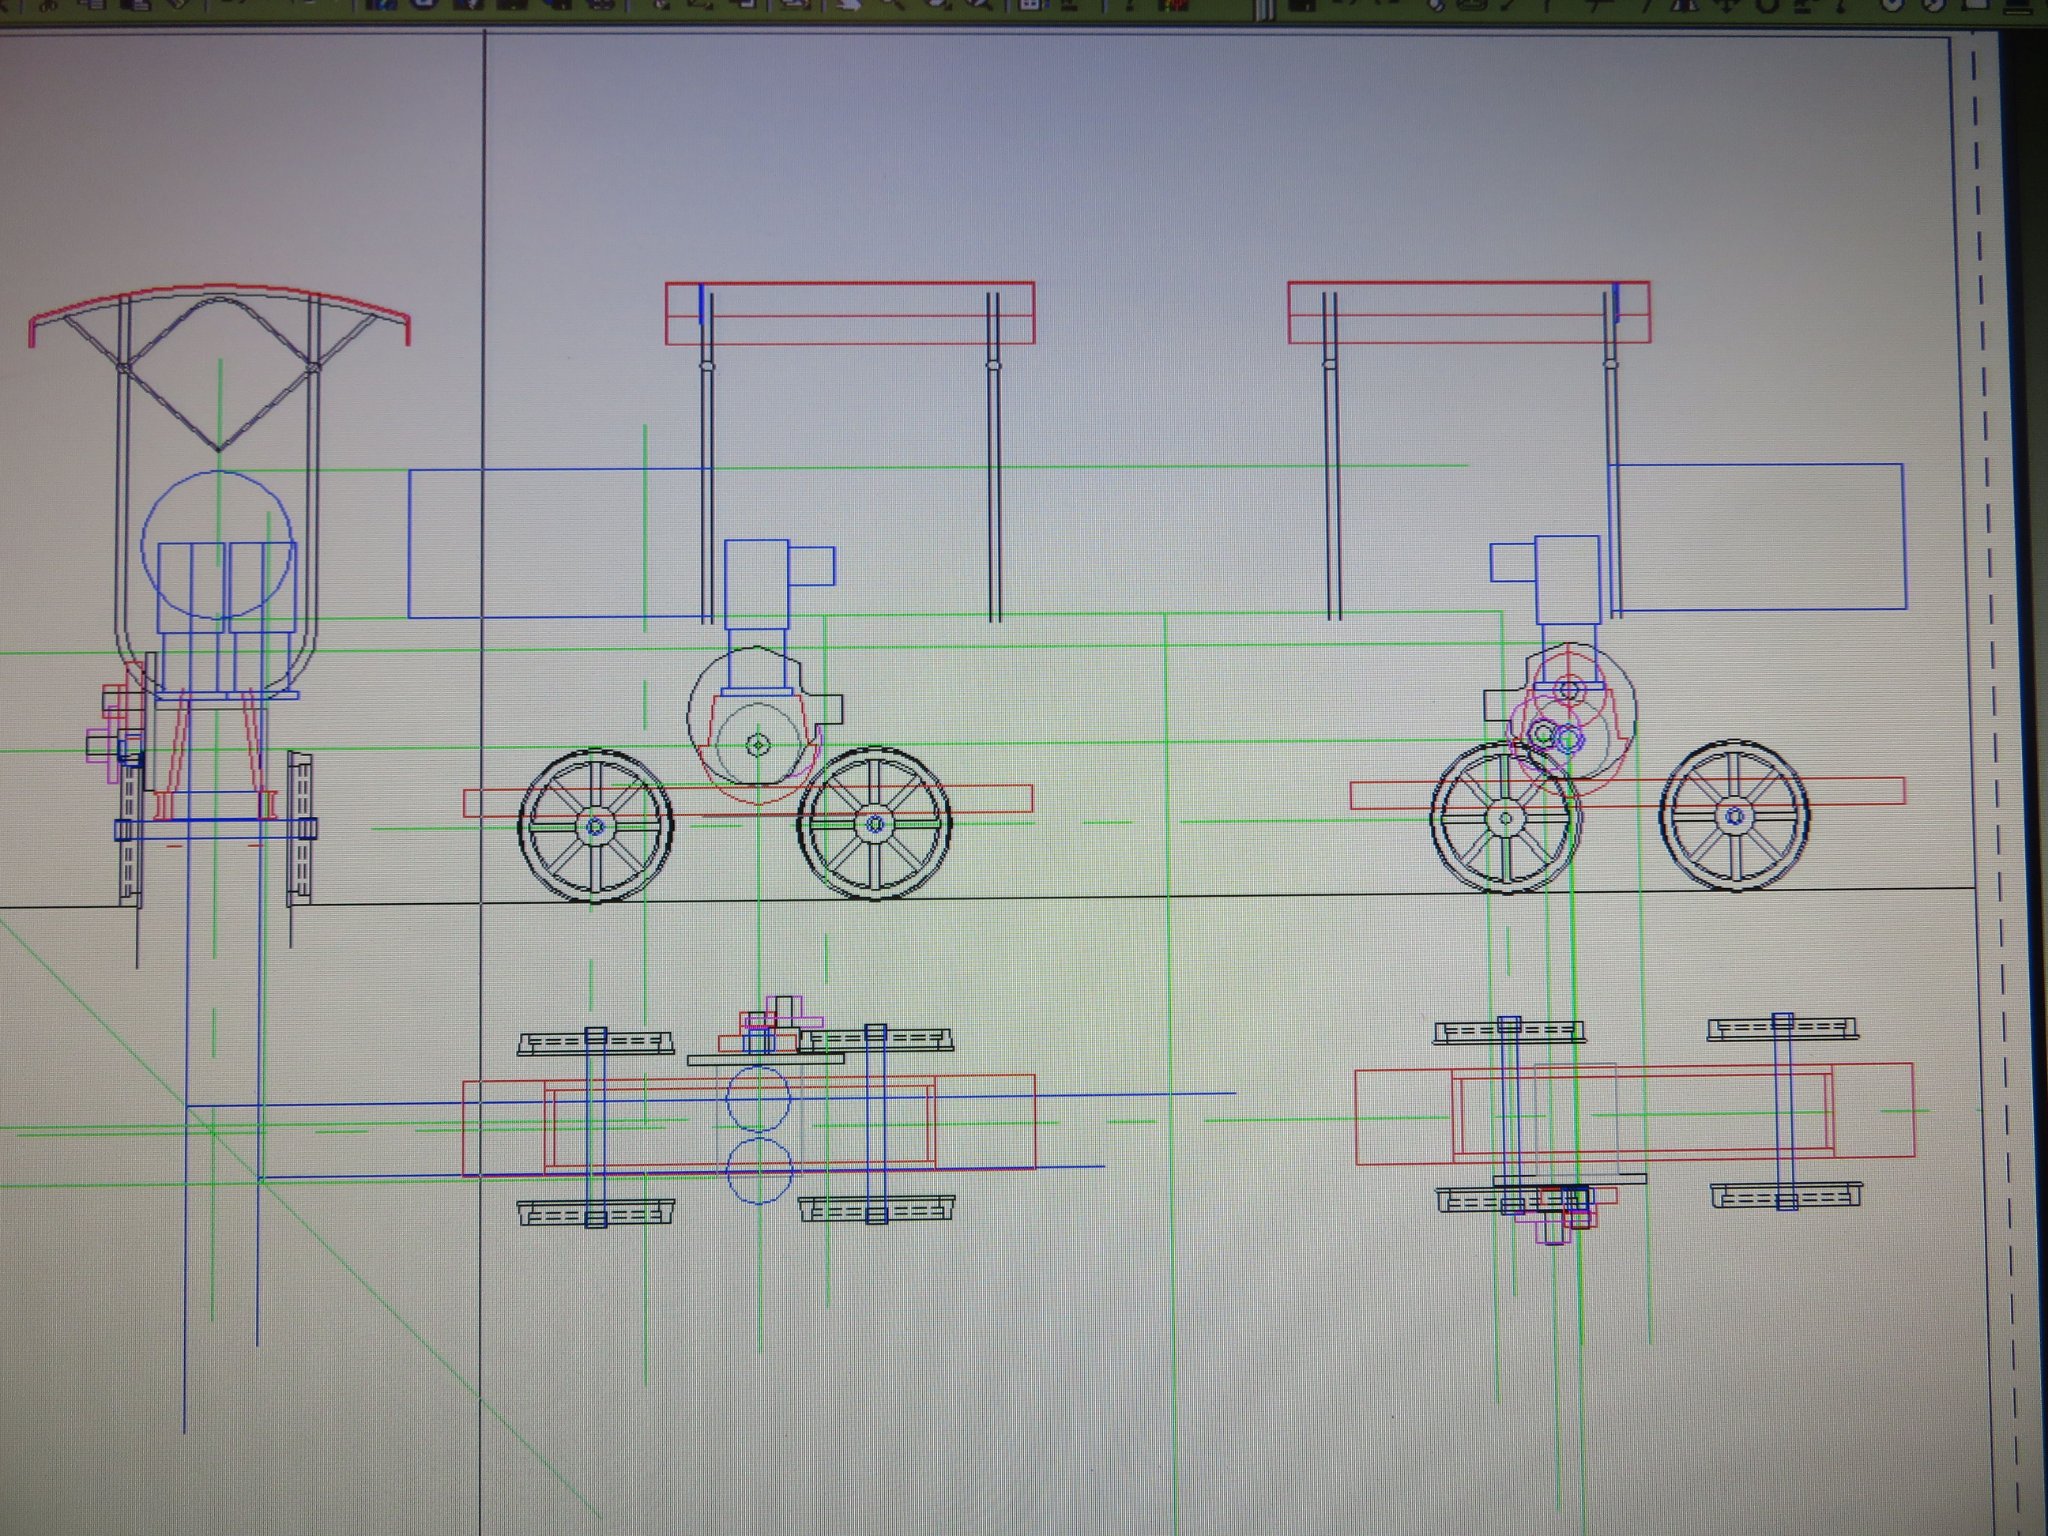
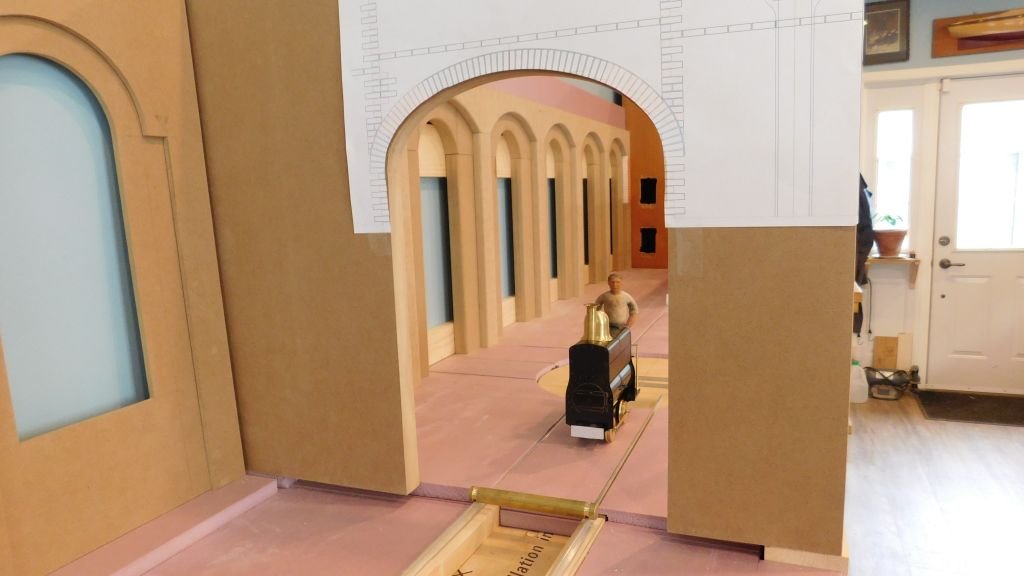
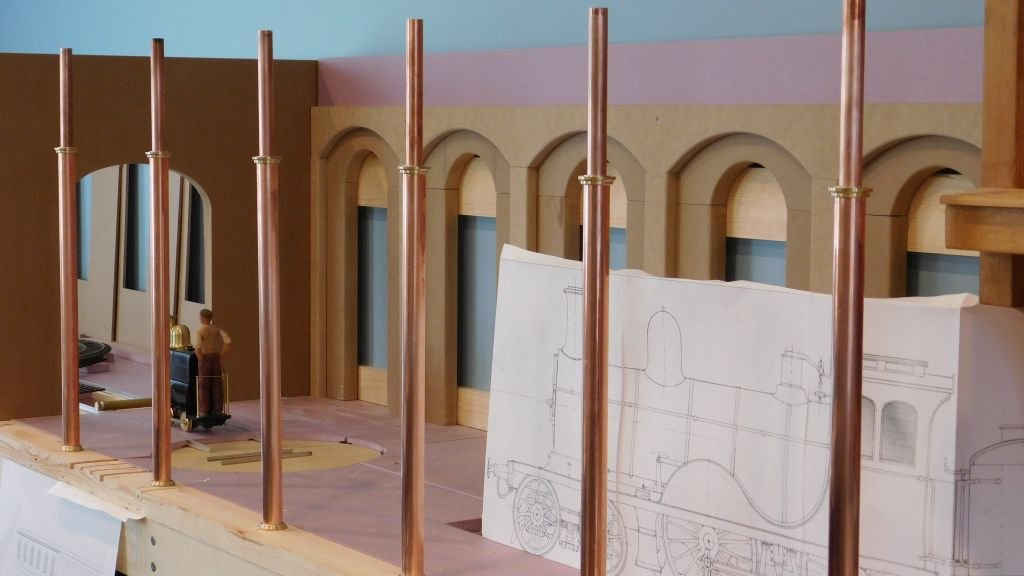
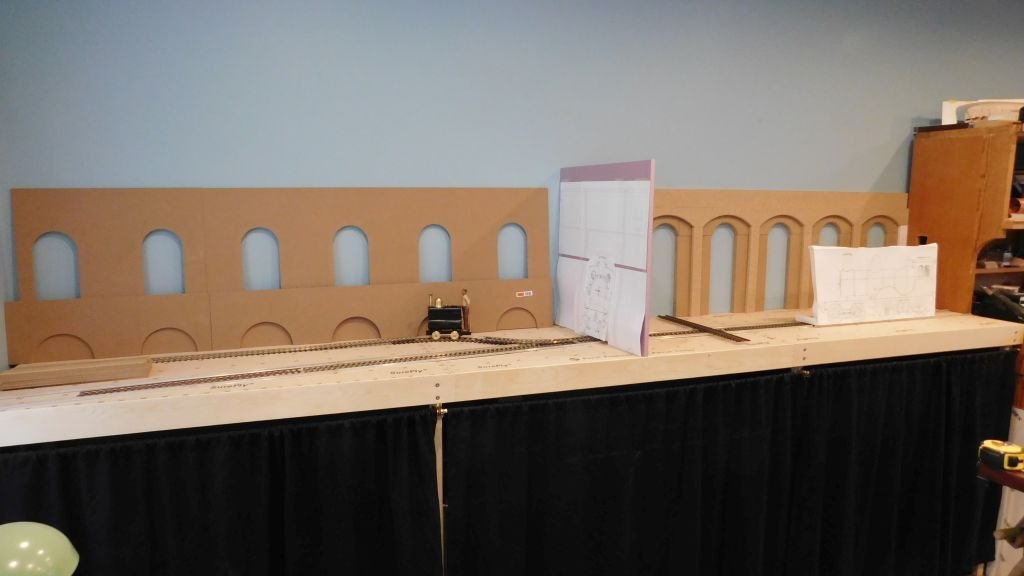
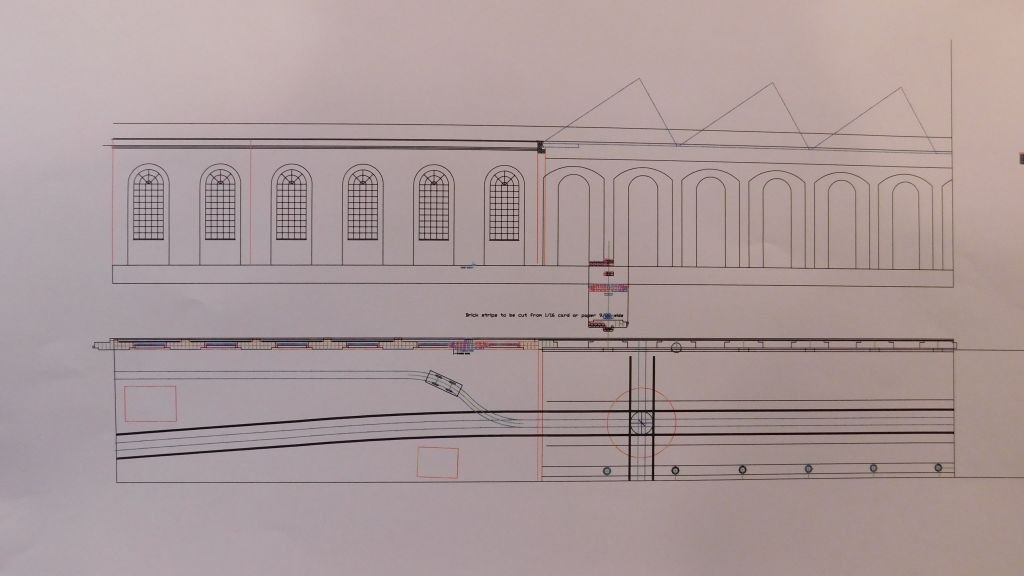
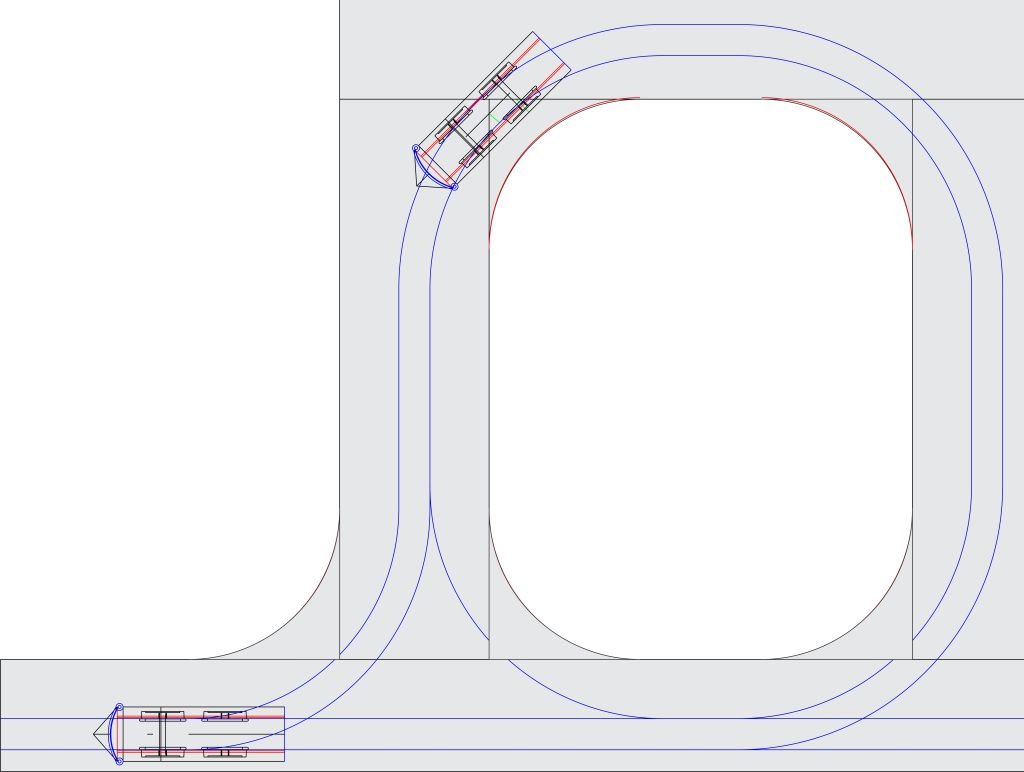
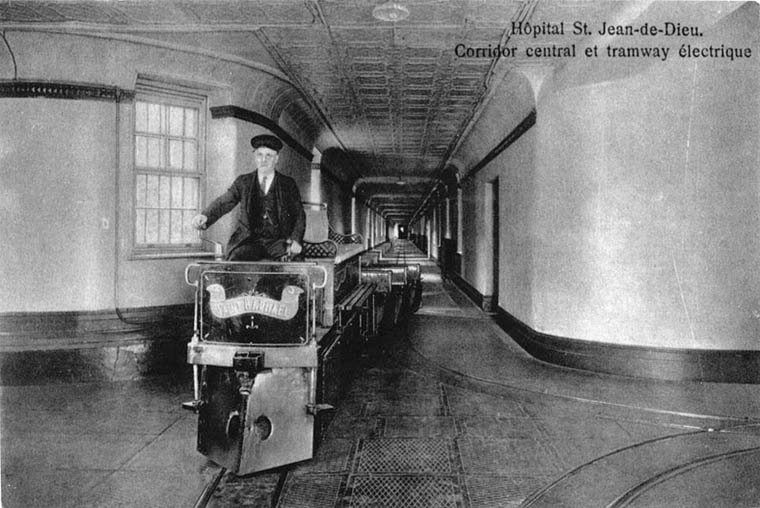
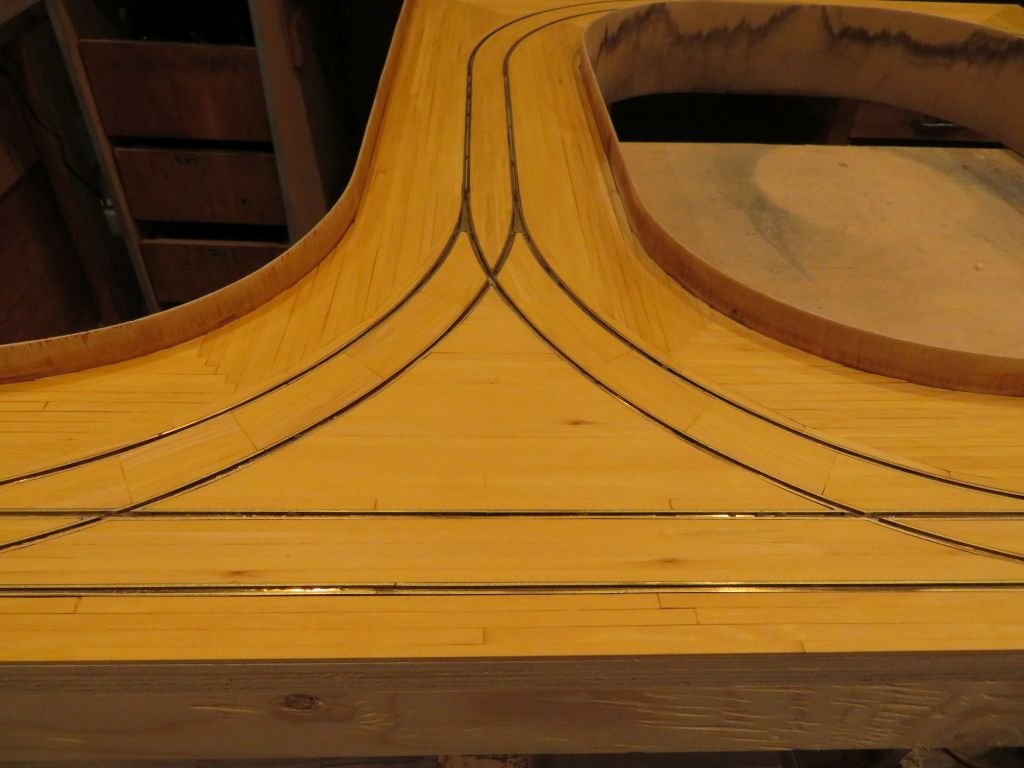
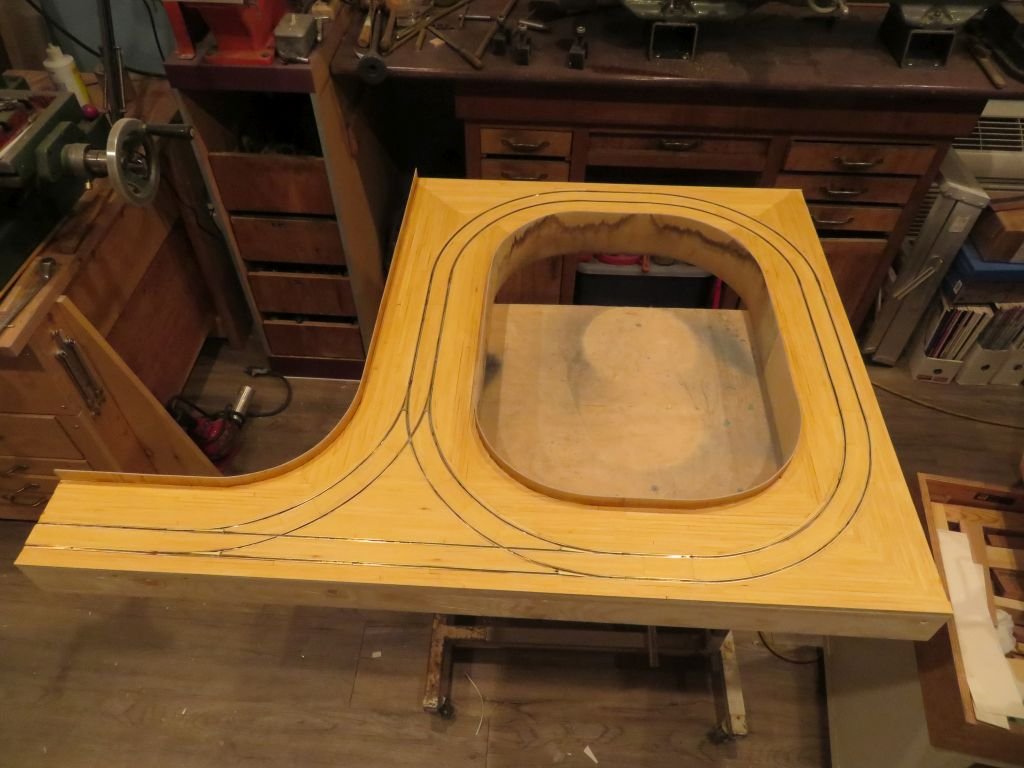
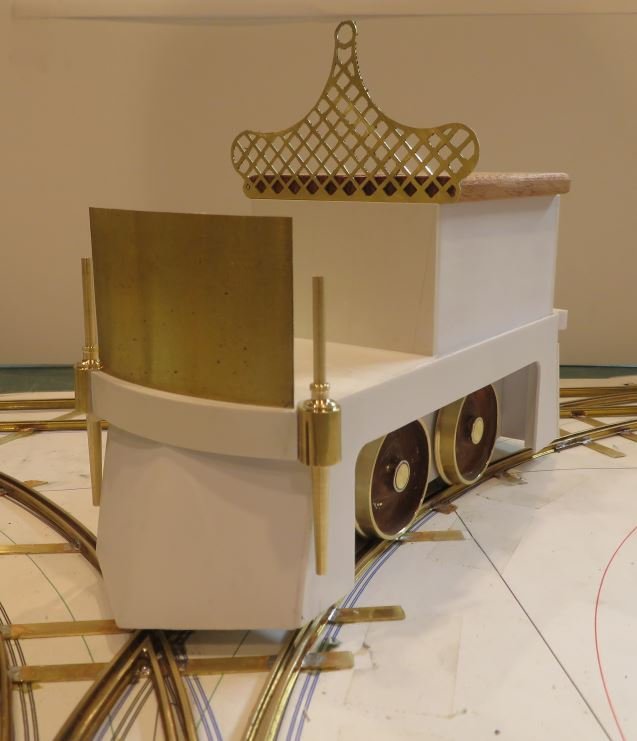
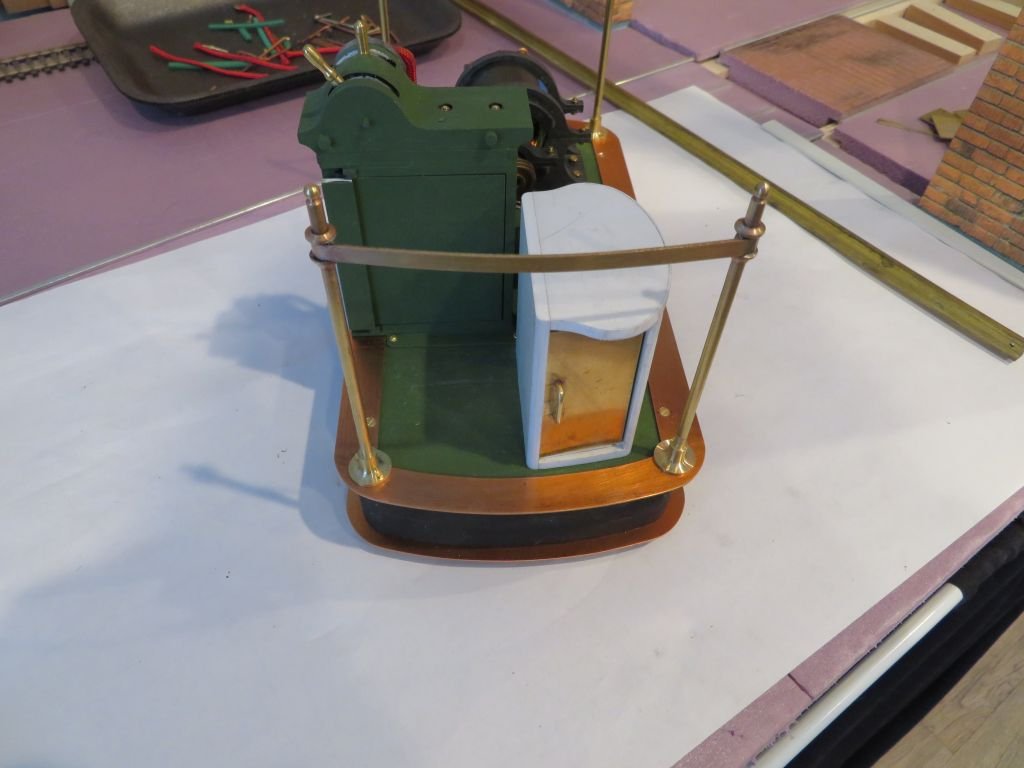
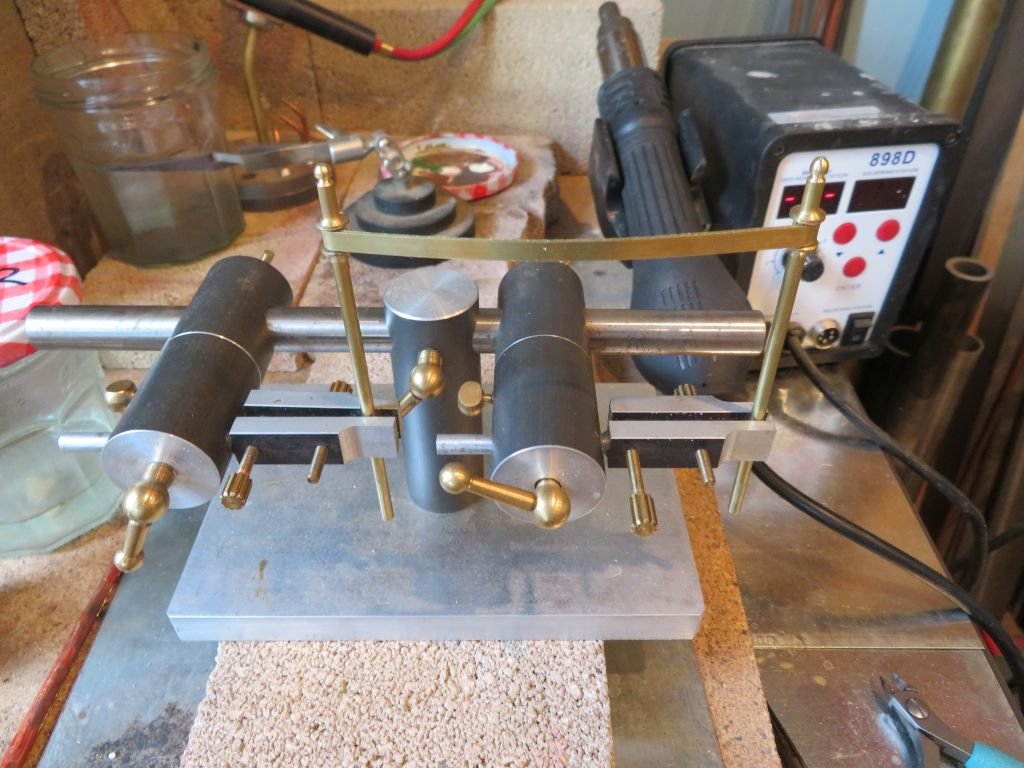
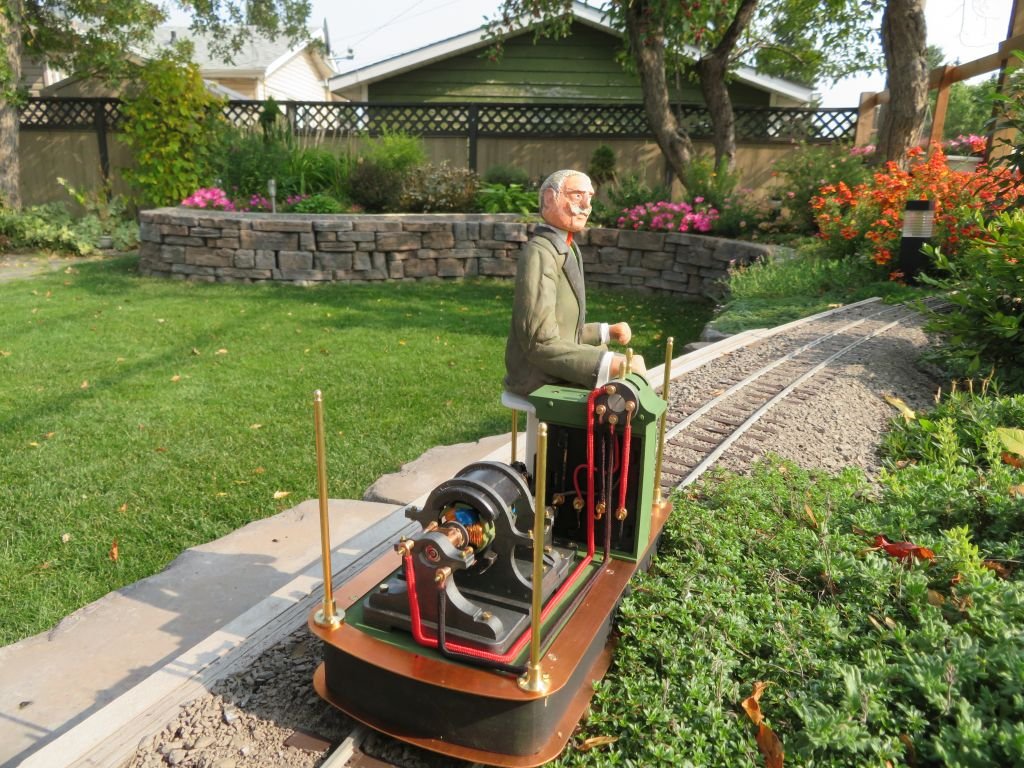
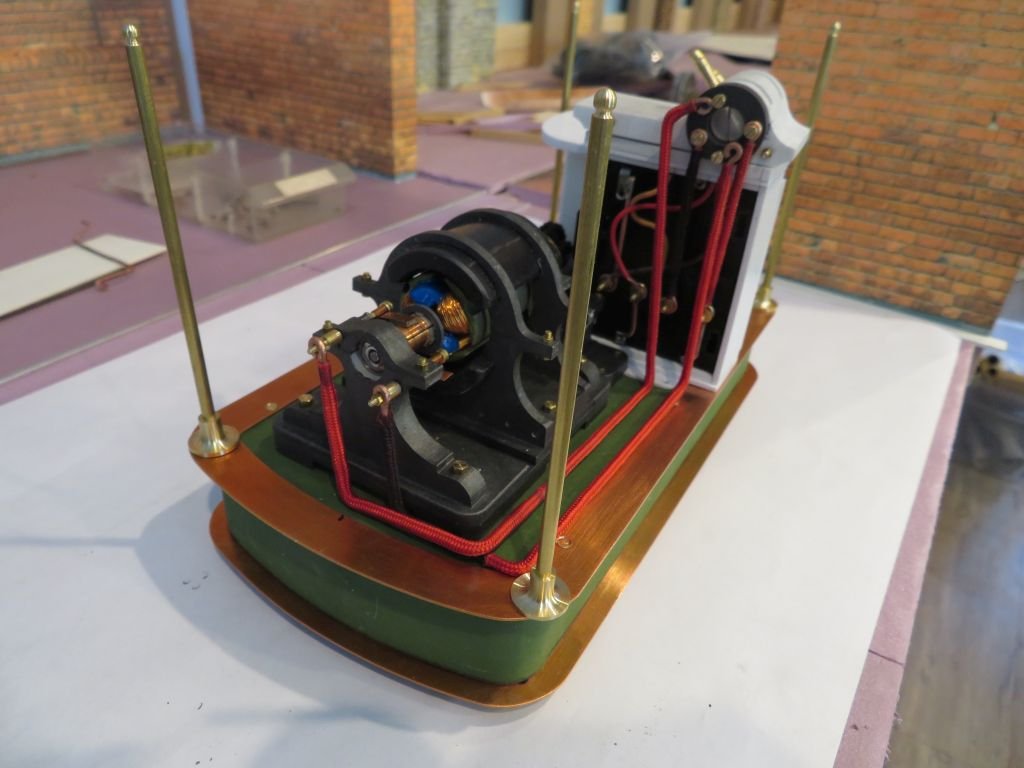
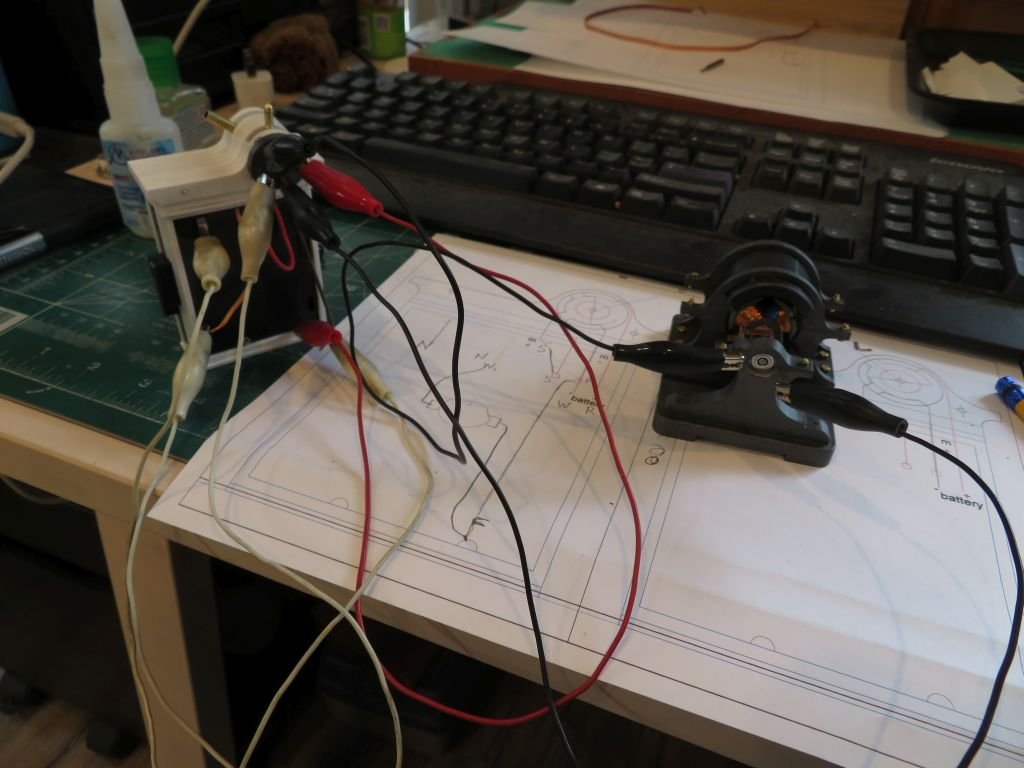
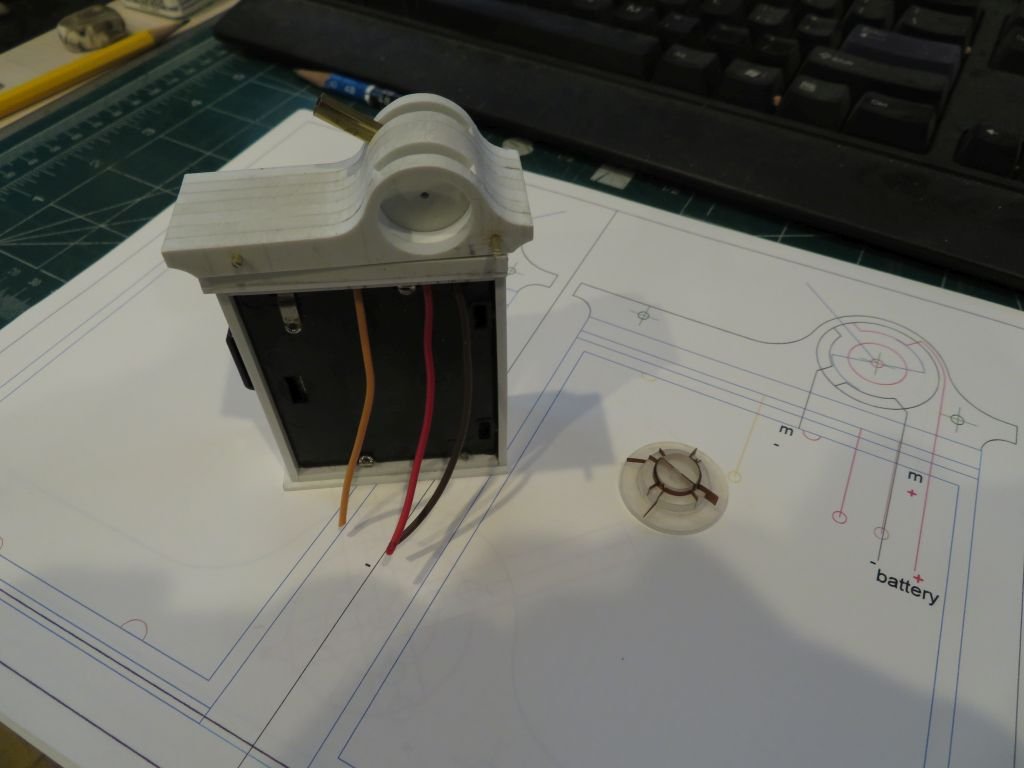
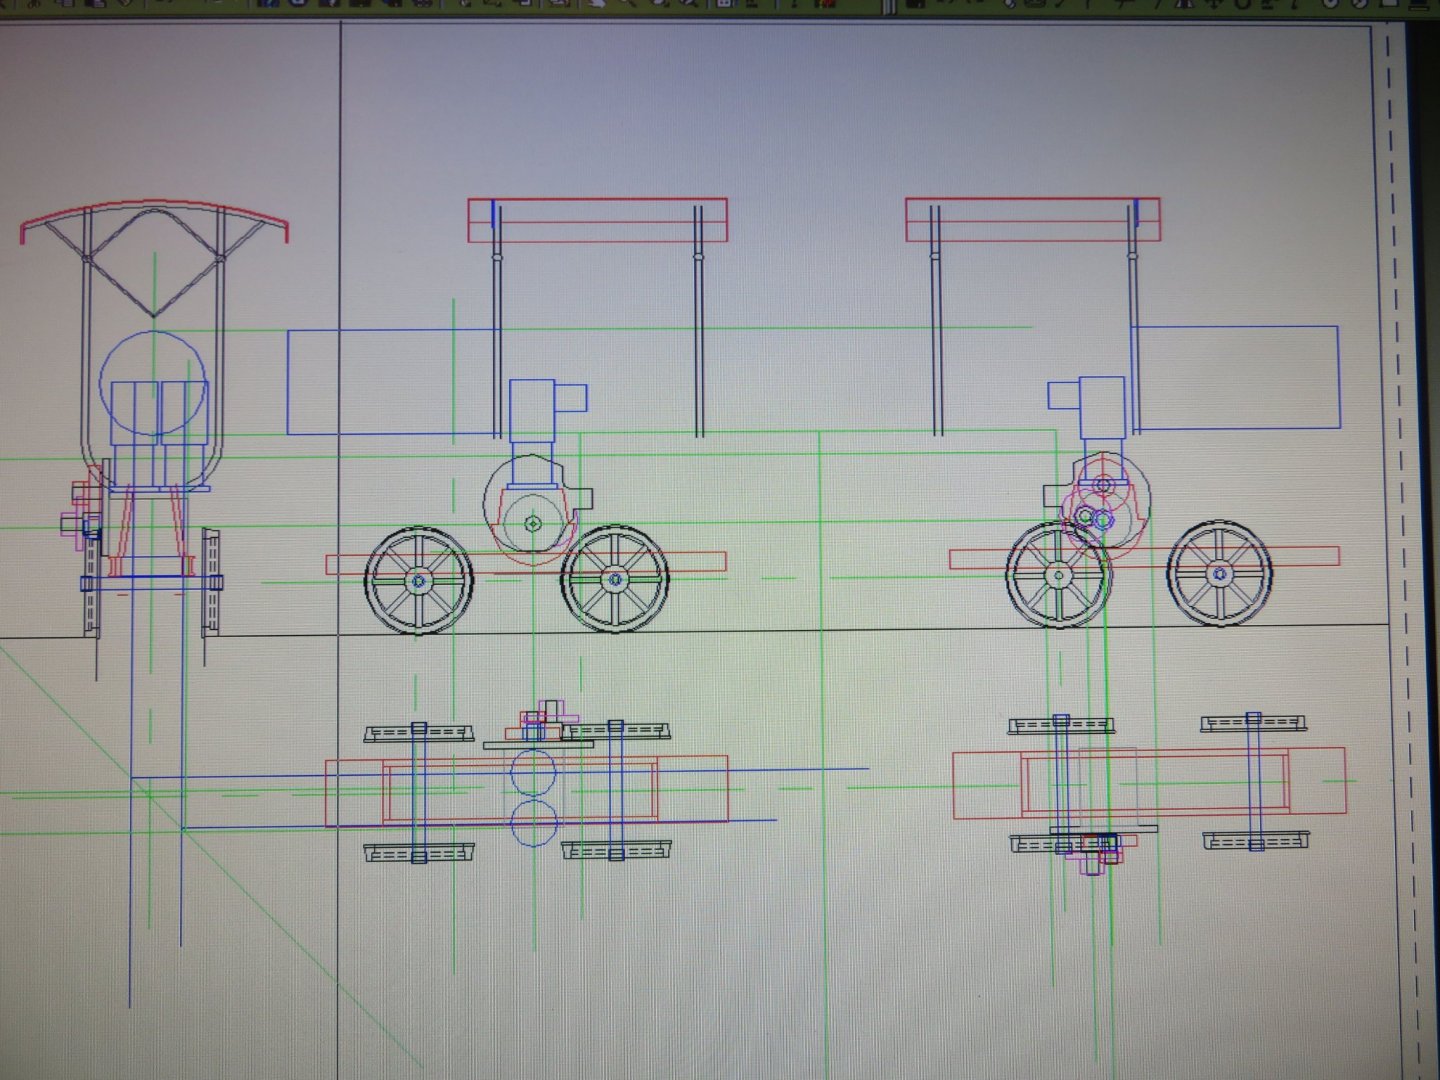
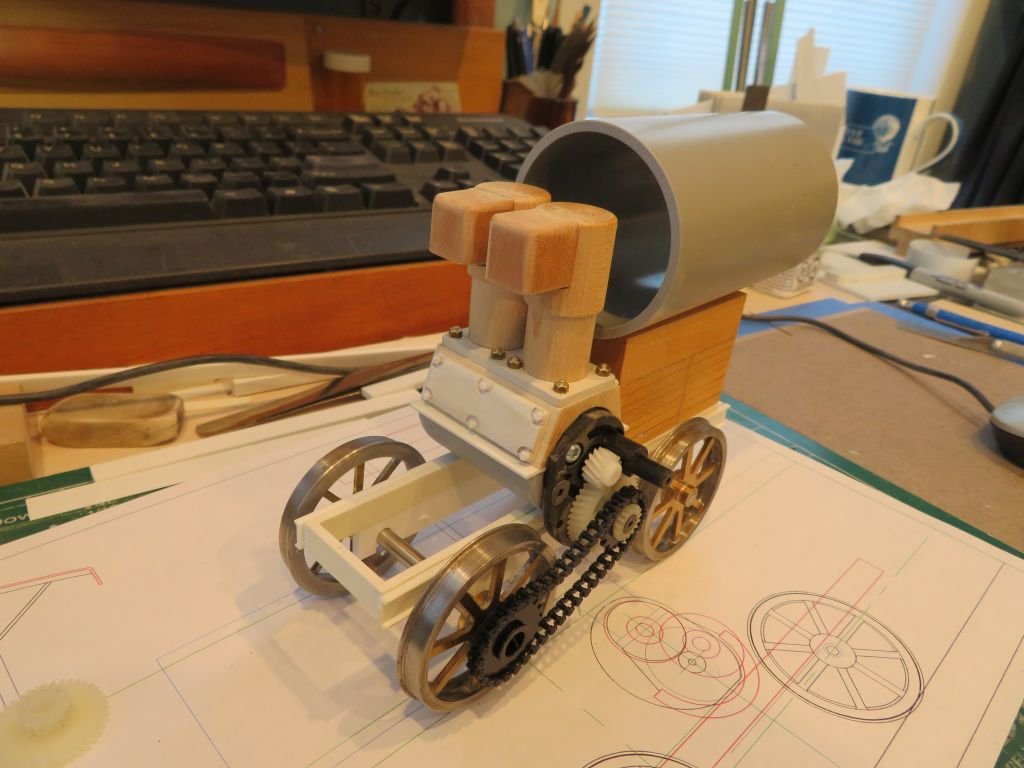
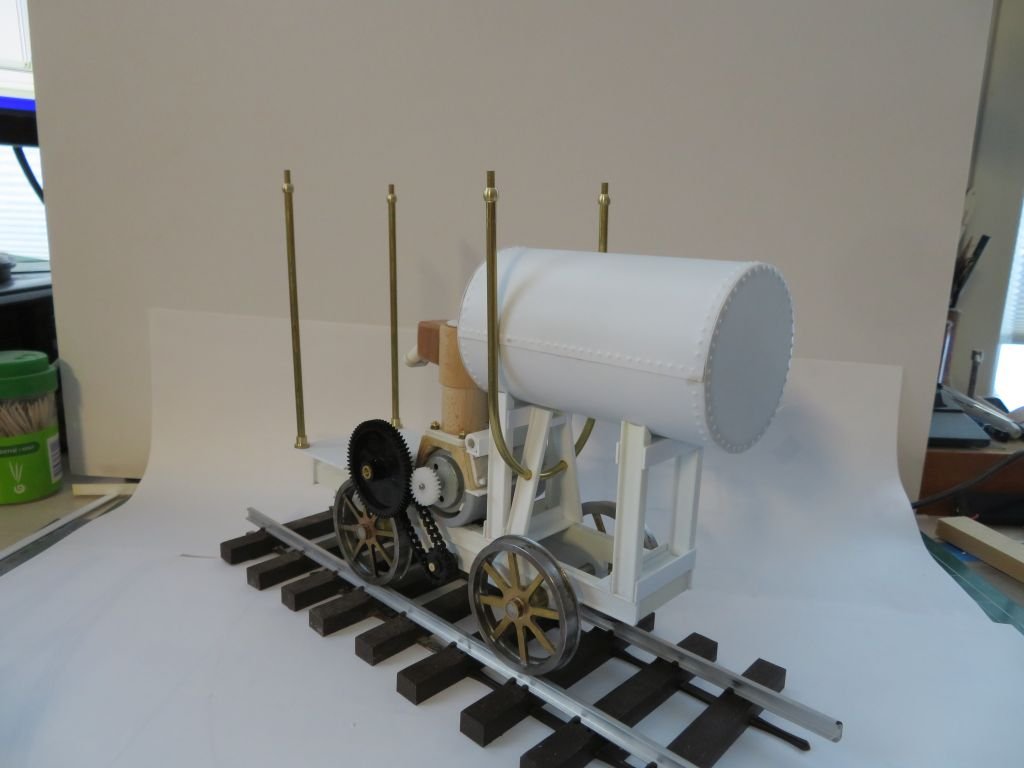
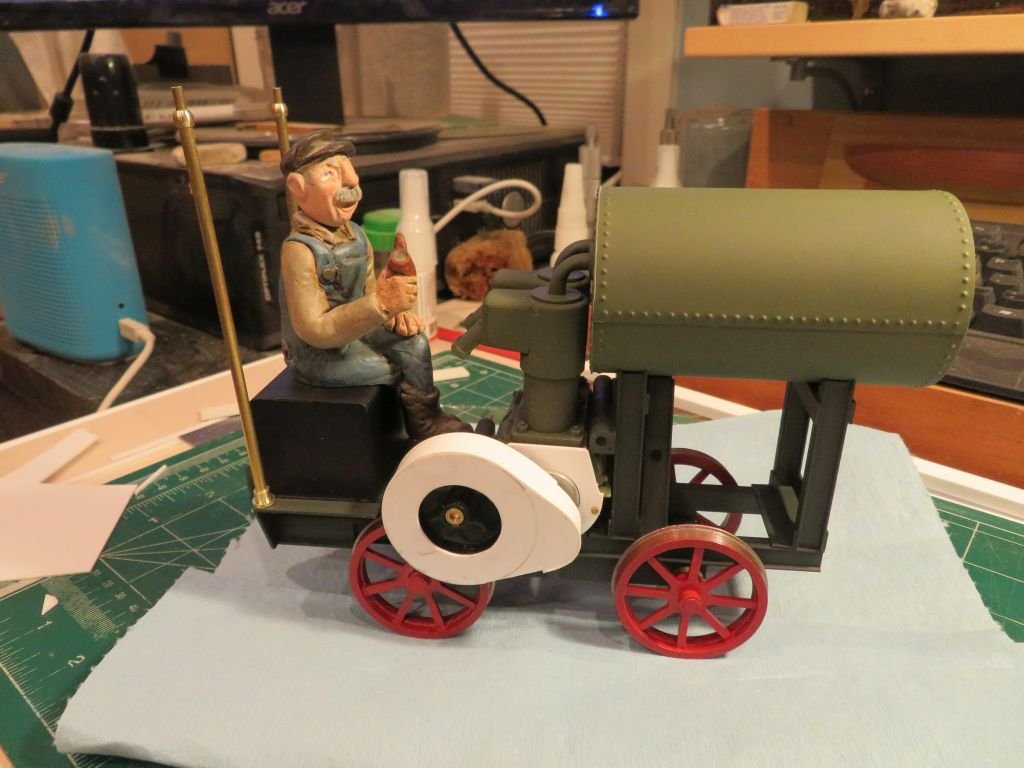
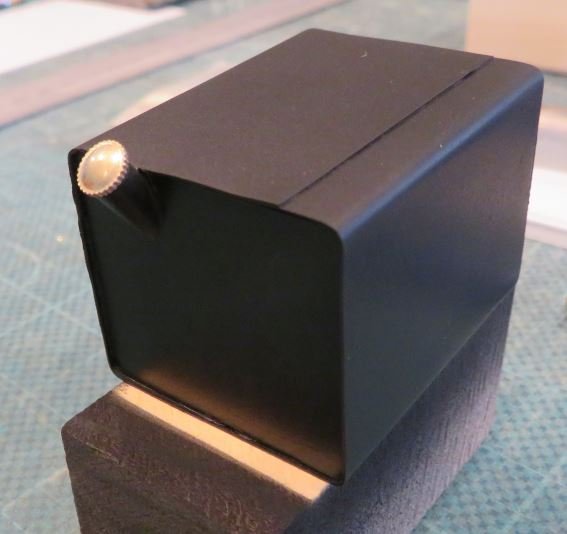
 Hi Keith, well again sorry for the long delay as you might have guessed I have been down a few more of my rabbit holes. The deck sounds like a great project. The ability to set up the track on a nice flat surface is a plus with live steam, and given the climate in our parts of the world the ability to take it up over the winter is not such a bad thing really. We are going back down temperature wise it is currently -20C and overnight are set to get down to -36C in the next couple of days. The RH Billy looks great, was the kit difficult or an easy job? I think they sell their cylinder sets as a separate item. I have considered buying a set to bypass all that side of the work. And regarding the other rabit holes I have been working on a 12 foot long by 2 foot wide layout in 7/8th scale of a section of a locomotive building building works with the Crewe works as inspiration. Then there is the Hospital tramway model layout that is also 7/8th scale and just 4 square feet of model surface . this first picture is in the public domain and shows the intersection of two corridors and one of the electric locomotives. This is my proposed floor plan. and the 3rd or fourth iteration of the loco. The wooden flooring is laid over some old salvaged rail from some HO gauge set track that was soldered to brass spacers the gauge is 1.25 inches The flooring is Yellow cedar. Then there are these two locos, One of Montagues new fangled electric experimental locos. this parts salvaged from an old battery drill. it is 1:10 scale and 45mm gauge My own design for a forward and reverse switch using a rotary set of wipers. testing the efficacy of the switch It worked well enough Using the old third hand to do a bit of soldering. And finally this odd loco using some salvaged printer motor and gears with some Servo link plastic chains for the drive, it has gone through many iterations as well it is based on the only known photograph of a 2 foot gauge loco built by the Saunderson Gifkins Tractor Company and is dated around 1912 The gas tank is some .005 thou styrene wrapped around a block of Poplar the gas cap is a watch winder from the stock of watchmaking bits that I acquired from an old friend. The battery will be located in the water tank that was also used as added weight for traction. it is 7/8th scale and set up for 45mm track gauge, the loco will be using a LocoRemote control system that uses my phone to control it. That pretty much sums up the last year and some of my rabbit holes. Michael
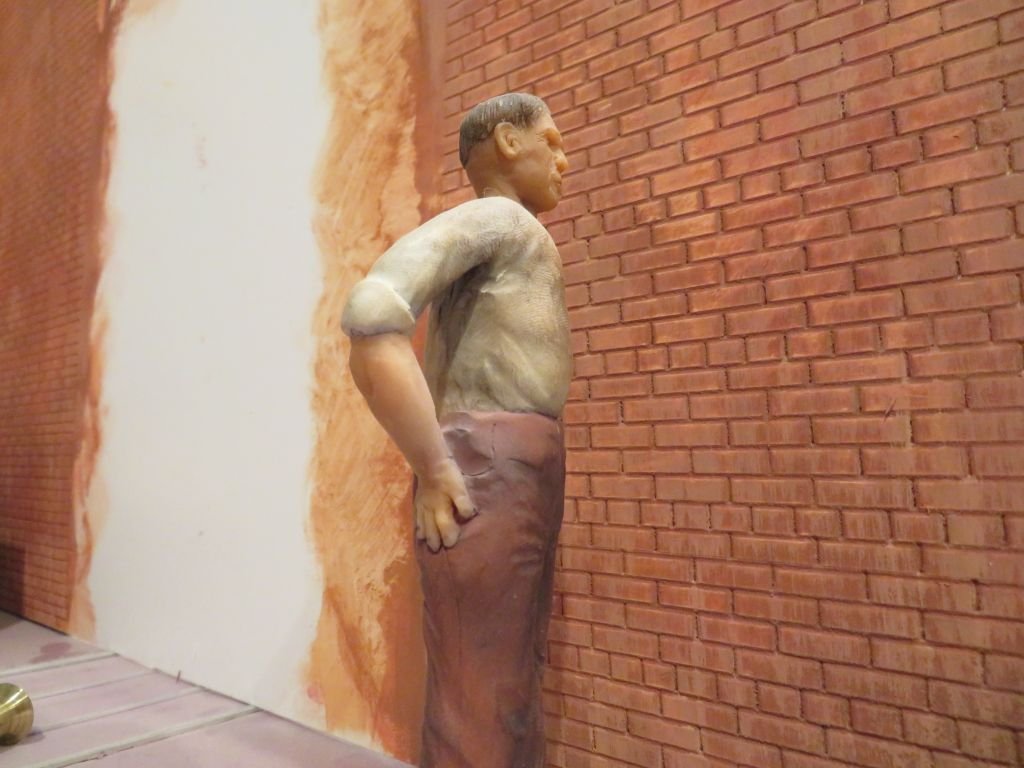


- 96 replies
-
- 16
-

-
You know Tom I find that I drop Candles all the time! What an interesting project, I am sure that you Uncle will be very happy with the model Cutter when you have finished. I like the yellow Cedar it has a nice mellow look and I love the smell of it. Nice work on the floor grate. Michael
-
Greg Thanks for the kind words, yes the maple is really pretty. Tom.... Oh dear you have asked about a couple of my rabbit holes... The structure behind the Plaid Box is the backdrop of a model railroad layout that is built to 7/8th to the foot scale, It is a section that ostensibly is inside a locomotive factory. That will have a gantry crane and a loco being built. Sort of 1896 time frame. Based on the Crewe works and the narrow gauge tramway serving the works. I will post some pics in the non ship area. The "Y" is a small narrow gauge hospital layout based on a hospital in Quebec that had electric trains in the corridors. I will add those as well. Michael
-
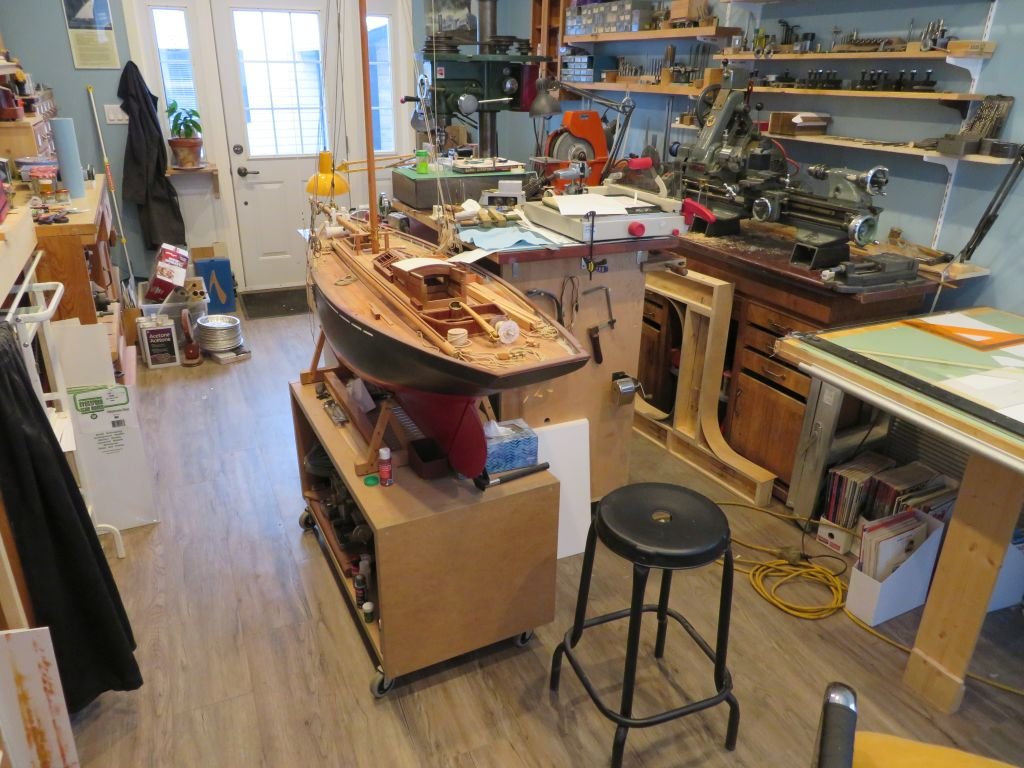
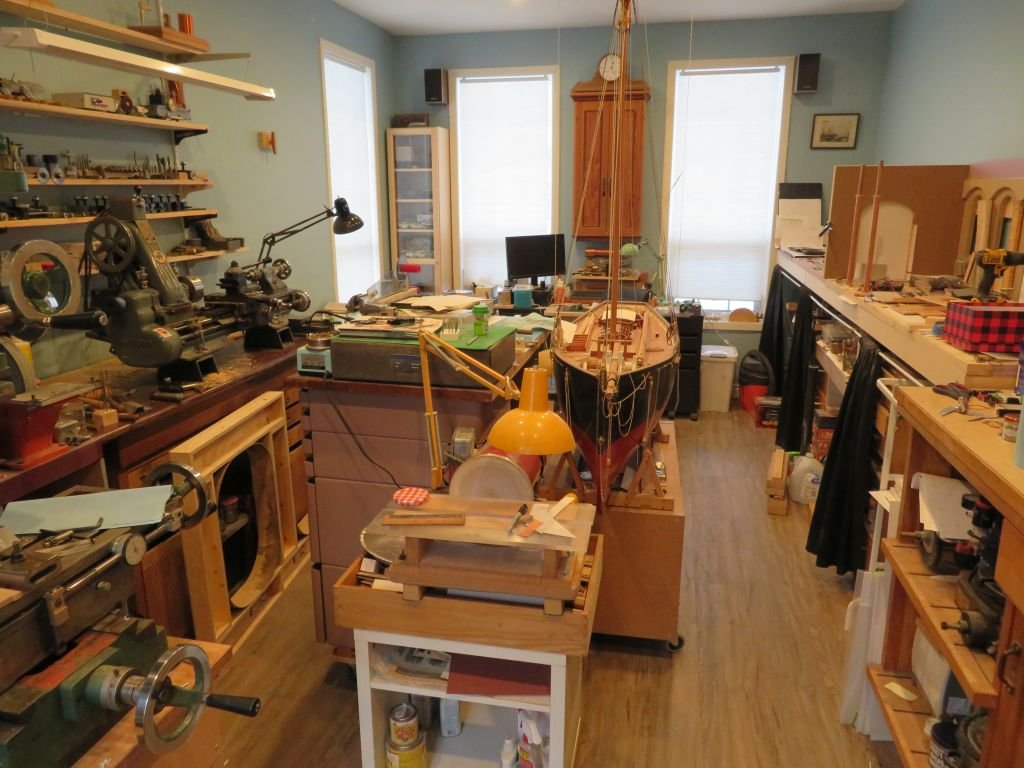
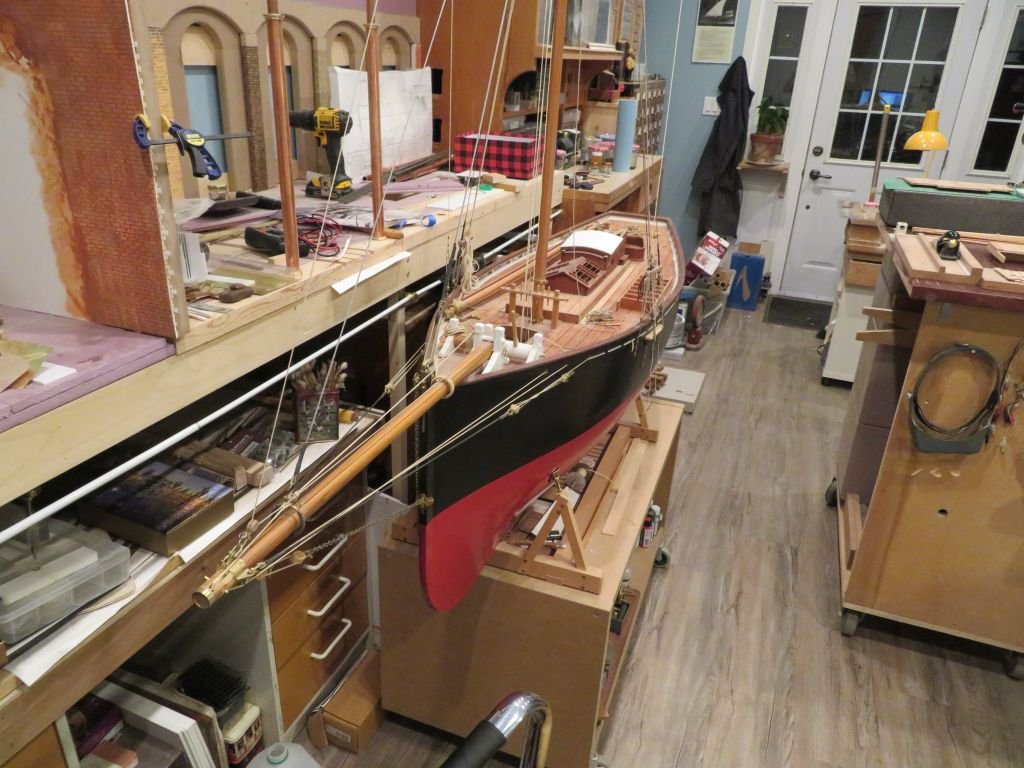
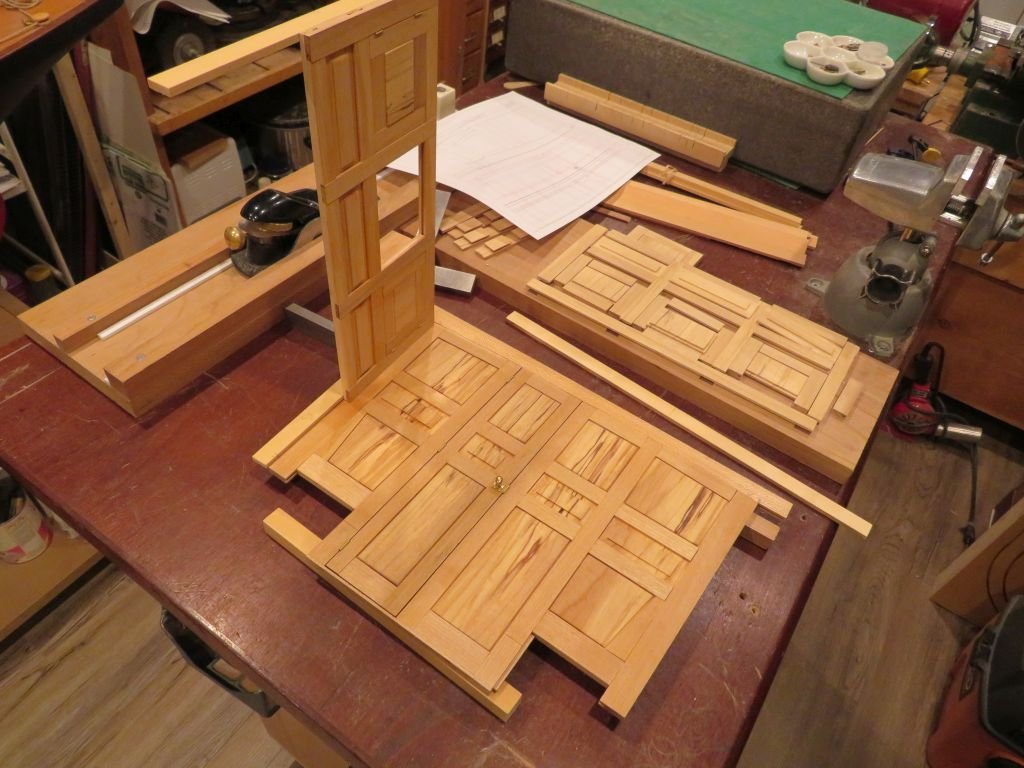
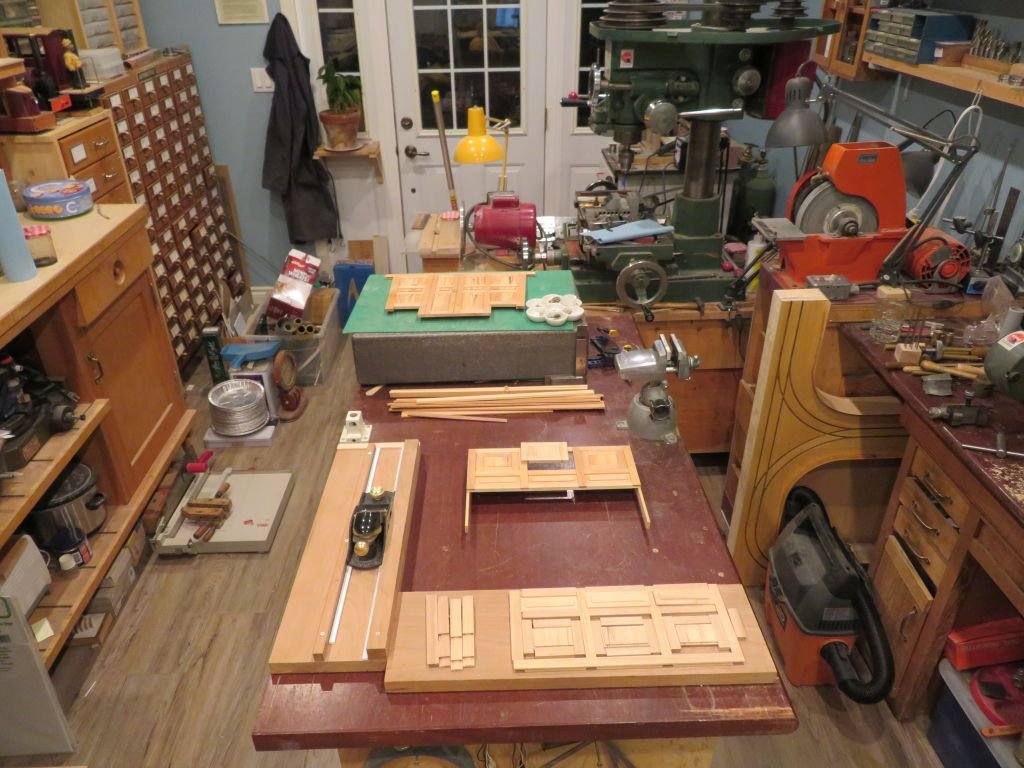
First a bit of sorting here are a couple of shots this morning, time to put away some of the rabbit holes. then rearrange the cabinets and work surfaces. Easy passage now around the benches with better access to the cutter also set the bowsprit back out. Picking up where I left off with the cabin interior will take a day or two to get back into the swing of things (doors, cupboards etc.) I need to sort out how to lock the parts together inside the hull, a bit like putting ships in bottles really. Big pieces that have to go through a narrow opening in the right sequence. Now for some fish and rice for supper. Michael
-
True I echo these sentiments. Michael
-
I just deleted the reference to the ship model, after I called the contact at the Edmonton public library. They were told that the model is only worth $800. I think it is worth more this one is the same as the one I restored. https://www.bonhams.com/auctions/19192/lot/2101/ Michael
- 749 replies
-
- 4
-

-
-
- albertic
- ocean liner
- (and 2 more)
-
Hi Keith, catching up again, Stunning work on the anchors! Always a pleasure to see the clever ways that you break down complex parts into smaller pieces for fabrication. I noticed the lighting under the rails Are you going to incorporate any.....I couldn't resist. Again it is a joy to follow along with your work. Michael
-
Tim Thank you for your kind words. I have been down a few rabbit holes the past year, I can see the sky is appearing again. I moved the cutter back out into the middle of the workshop that other day, in order to get to the drawing board which was folded up against the wall. There are still quite a few days left before I can get out to the garden, and I am feeling the urge to get back to work on the cutter. Regarding Underhill's quote...Yes I have never had a problem with starting over on an aspect of the work, after learning that it might be better to do it again to to improve it. I have a feeling that I am going to be rearranging things out in the shop again today. Happy New and Healthy year to everyone. One last thing I have been visiting the Model Ship Society of New Jersey on their Zoom meetings and have enjoyed the visits and seeing their work and presentations. So thanks to Bill Brown for the invites. Michael
-
Hi Rob just catching up. Looks like you have your work cut out for you now. What a great experience to have the time to meet and discuss your project with the author of books about your subject model. Michael
- 3,560 replies
-
- 3
-
-
- clipper
- hull model
- (and 2 more)
-
Apologies submitted I missed the email situation. Thanks for the reminder, It won't happen again. Michael
- 749 replies
-
- 2
-
-
- albertic
- ocean liner
- (and 2 more)
-
Sorry to everyone back east...
michael mott replied to Patrick Matthews's topic in Modeling tools and Workshop Equipment
Backyard has been like this for a couple of weeks now. Most likely stay this way till the end of march with a steady increase until after the equinox when it will begin to recede again. Michael
-
A Model Builder’s Cabin
michael mott replied to Tim Moore's topic in Modeling tools and Workshop Equipment
Tim, the new model shop looks fantastic, love the old wooden drafting table in the corner as well. Michael -
Catching up Keith, lovely work on the life rafts and cradles. as others have said lots of lessons in this build log. I'm guessing you could easily put a book together. I think there would be a fair number of folk who would purchase one......just sayin' Michael
-
Further to this discussion, I too cut my own planks and can because I have a large tablesaw and a large bandsaw. Cutting wood from the large sizes that Bill in Idaho mentions uses up as much of the wood cutting the sheets as the sheets themselves. Using thin blades on large saws gets a bit tricky and is limited by the diameters of the blade on tablesaws not so with bandsaws but with bandsaws you have to have one surface smooth so a jointer planer is needed to accomplish that, then after the wood has been sliced off on the bandsaw it needs to be finished on the cut side by running through a thickness sander. The wood would be too thin to run through any sort of thickness planer. With wood that is in rough plank form say nominally 2" (it is less than that even if rough) in order to get accurate planks the rough plank needs at least the face (wide side) and one edge planed flat and square before it can be processed on the larger saws. The 10 inch delta unisaw table saw that I use has 0 clearance inserts and the hollow ground thin kerf blades are only 8 inch diameter I cannot use these blades on the 2 inch planks I have to use a regular tin carbide blade which is thicker than the planks by double, but is gives a fairly fine finish right off the saw. So now I have a small sheet that is say 16th thick by 1 5/8" now in order to convert that to 1/16th x 1/32 planks I either need a micro saw with the fine slitting saw blades .010 to .025" type thicknesses for the blades, or I can use the table saw I have with my 8 inch hollow ground thin kerf blade and slice off the the 1/32 planks from it indexing the blade over as each plank comes off.and for each 1/32 plank I have used up at least 3/32nds worth of wood. All that said one can see why it is not profitable at even the bare minimum of wages to mass produce wood planks on a small scale for a limited market. without having some very sophisticated and expensive processing machinery. On top of all that exotic woods are becoming harder to get anyway, as it gets used up by ever more users for various industries. I hope that this rather long winded comment gives those who cannot process their own model supplies some of the challenges facing those who do supply these materials for us. Michael
-
What a kind offer bill. That is what I really enjoy about this community, the help and sharing that happens. Michael
-
Modelling locks or Latches
michael mott replied to jackieofalltrades's topic in Metal Work, Soldering and Metal Fittings
Here you go a simple little mortise lock that could be made from styrene and or brass overall dimensions are .378" wide .5" high .125" thick This lock has no springs and is showing the basic design principles I have made locks using this basic design for a small box I have the drawing in Autocad 2000 and corel draw 11 There is a slot for the handle which is the blue bar at the top. the key is the old cabinet type that slides over a pin so the end with the tube is hollow. the jpeg is full size Michael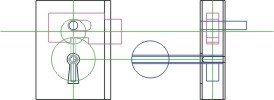
-
Well I thought I would add my two cents worth to this discussion. I have done a great deal of scribing over the years on many types of plastic the back side of an exacto blade work very well. I have even used a set of blades laminated together with AC glue on one Architectural model to represent a brick infill on a concrete spandrel at 1-200 scale, I think there were 12 blades and the material was plexiglass. The back of the blade can be dressed easily on a bit of 400 grit wet and dry. I agree with the earlier comments about visibility of wood grain etc at viewing distances. A hint of texture can work well if not overdone, but again it does depend on the scale. I remember taking a Heller Victory and sand off virtually all of the hull planking so that it was almost not there. Michael
-
I go away for a few weeks and come back to more incredible workmanship. The parting off of those porthole rings must have been a tad nerve wracking with a very slow feed in. the shots of the interior with the computer screens etc. are a joy to behold. Lovely work Sir! Michael
-
Hi Roger this one has peaked my interest as well, I shall follow along. Michael
-
Hi Keith good to know I am not the only one doing some of the household tasks. I shall have to give the Modelwork on my stuff that is nautical a one day a week try! sounds like it might get my Mojo back up and running on the cutter. Your own work is of course exemplary and a great build to follow. I do enjoy seeing how you solve construction challenges. Michael
-
Good morning Eberhard and MSW friends, Judy and I are safe and well, we are focusing on our home and garden, I gave away the big sailboat Maria to the chap I originally got it from. I am not inclined to spend 3 hours driving for 1/2 a days sailing, plus all the expenses involved with yacht club and mooring fees. The Cutter is right next to my model bench and in my face as they say so not far from my thoughts. My Mojo for working on it will rise again over the winter i am sure. I have been focusing on some old model train projects and trying to finish some of them up. Regards Michael
-
Very nice, watching the video was very informative and a great learning experience. A lovely piece of work. Michael
-
Congratulations on a fine model Kevin. Michael
- 72 replies
-
- 2
-
-
- fishing boat
- artisanal fishing boat
- (and 1 more)
-
Gary I had the same impression, I am amazed at the small size of the detail work that you have put into this model, superb work all round. Michael