-
Posts
5,200 -
Joined
-
Last visited
Content Type
Profiles
Forums
Gallery
Events
Everything posted by michael mott
-
Nicely redone Mike Michael
- 607 replies
-
- winchelsea
- Syren Ship Model Company
-
(and 1 more)
Tagged with:
-
Here is the picture I was referring to in the previous post I'm not sure if the link will work so here is the address of the site https://www.bonhams.com/auctions/19192/lot/2101/ at the site there are two pictures in the "Lot Details section" click on the right hand one which is the same as the thumbnail and you can see the pillar and the brass device on the much larger picture. Michael
- 749 replies
-
- albertic
- ocean liner
-
(and 2 more)
Tagged with:
-
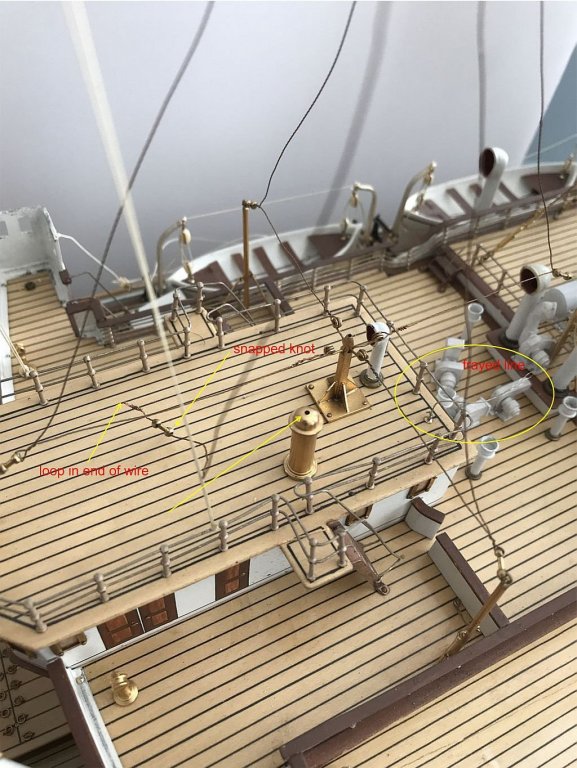
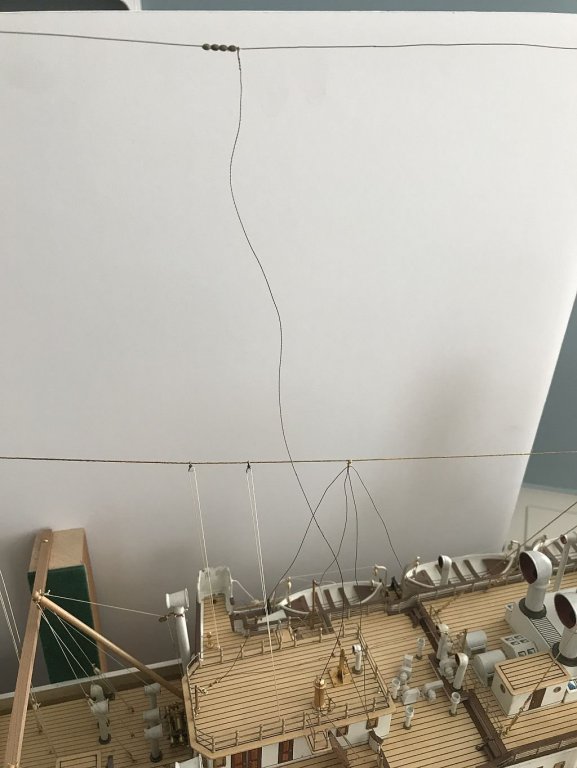
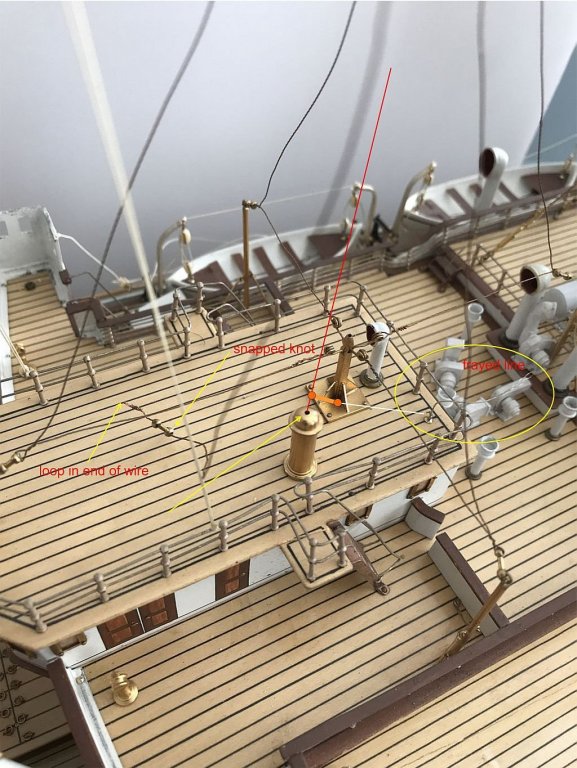
Looking for some guidance This first picture shows the antenna wire from the top cable between the masts dropping to the roof of the wheelhouse. This next picture shows the end of the antenna and the device with holes through the ball ends. one end has the antenna wire loose through it with a loop twisted in the end of the wire. The other end of the device has some white line knotted to it.There is also some frayed line attached to a hook in the decking, The logical notion is that the brass device was connected to the frayed line attached to the hook. but then where does the loop in the wire attach? The domed brass pillar appears to be used in some fashion with the antenna in one of the pictures on one of the other models of this ship but I cannot see it clearly enough to make a determination about this. the next picture shows my interpretation with the loop of the antenna hooking into the top of the dome somehow. But this is a wild guess Michael
- 749 replies
-
- albertic
- ocean liner
-
(and 2 more)
Tagged with:
-

HMCSS Victoria 1855 by BANYAN - 1:72
michael mott replied to BANYAN's topic in - Build logs for subjects built 1851 - 1900
I am impressed by the amount of time that you are all putting into this group model with regard to getting details that are basically the same size as a part in a tiny jeweled Swiss watch. Lovely work. I think that at the scale you are working with Eberhard's Idea of the pen and some dots would give the visual impression that you are looking for, with the human eye filling in the details. Michael- 1,021 replies
-
- gun dispatch vessel
- victoria
-
(and 2 more)
Tagged with:
-
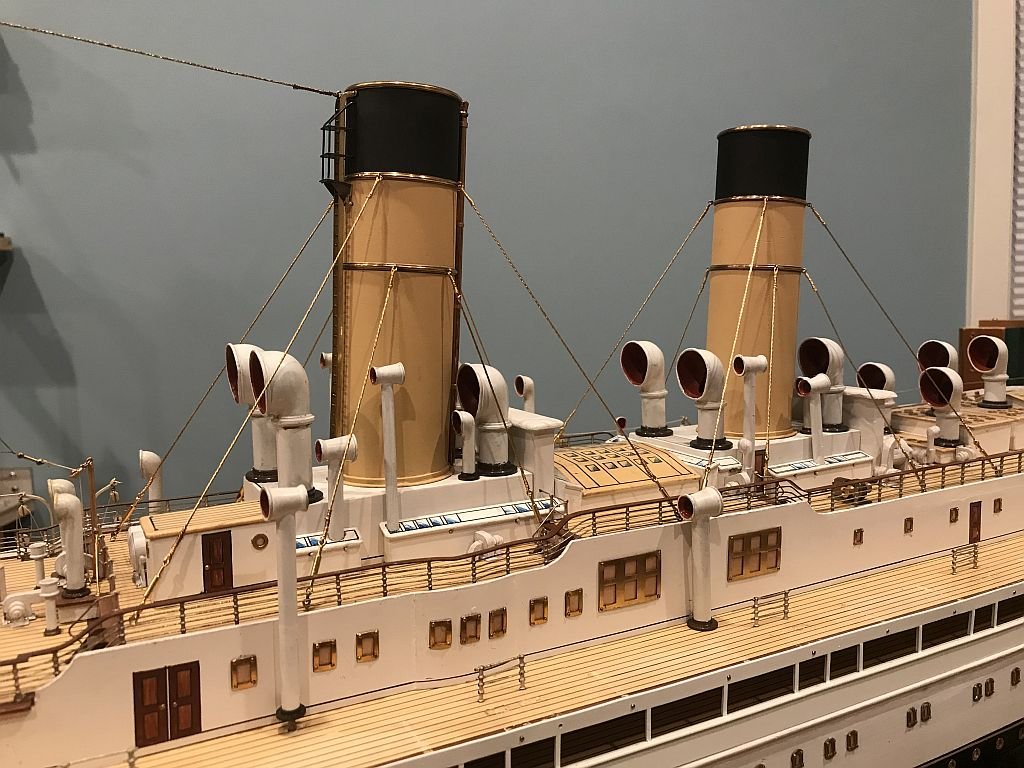
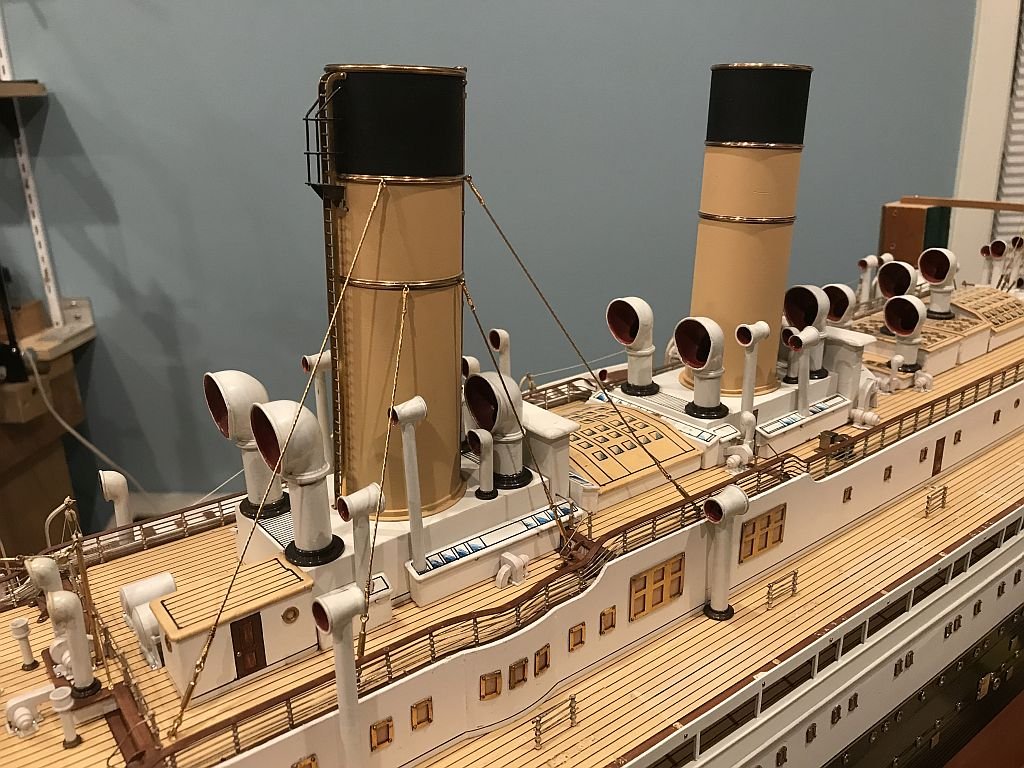
Druxey, wouldn't that be amazing Carl we will never know. Wefalck I have often wondered about this. Roger thanks for sharing this. it reminds me of an early childhood memory of visiting a place called Ruislip Lido, which was a small lake near London, and I remember two things a large ocean liner model floating there near the entrance and the ride on model railway with steam locomotives. "Kenneth More recalled the production of the film in his autobiography, published 20 years later in 1978. There was no tank big enough at Pinewood Studios to film the survivors struggling to climb into lifeboats, so it was done in the open-air swimming bath at Ruislip Lido, at 2:00am on an icy November morning. When the extras refused to jump in, More realised he would have to set an example. He called out: "Come on!" I leaped. Never have I experienced such cold in all my life. It was like jumping into a deep freeze. The shock forced the breath out of my body. My heart seemed to stop beating. I felt crushed, unable to think. I had rigor mortis, without the mortis. And then I surfaced, spat out the dirty water and, gasping for breath, found my voice. 'Stop!' I shouted. "Don't listen to me! It's bloody awful! Stay where you are! But it was too late ....[24]" The passage above is from Wikipedia the link is to the article about the film " A Night to Remember" The film was released in 1958 so it was likely a year or two earlier when I saw the model. A milestone today, I finished replacing the broken cable stays on the funnels. Also hook back up the antenna wire from the forward mast to the forward funnel. Michael
- 749 replies
-
- albertic
- ocean liner
-
(and 2 more)
Tagged with:
-
Thank you Javier for starting this new log I am interested in your building processes at such a small scale. An interesting model and a great start. Michael
- 11 replies
-
Thanks Ben, yes your comment about the windows is interesting. The models of various ships like these was to promote to the public to use their shipping line to travel, and were more often than not displayed in the storefront windows of the different shipping lines. I remember as a young boy looking into the windows of many different offices along regent street and others looking at these models and dreaming about one day being able to build one of my own. What a difference 60 years makes. Oh and yes hours in the upper floors of the Science Museum in South Kensington with my nose up to the glass studying the model ships that used to be on display there as well. Michael
- 749 replies
-
- albertic
- ocean liner
-
(and 2 more)
Tagged with:
-
Doris, Thank you for continuing to show us your model and the ways that you accomplish your detailed decorations I too like your method of individually making parts rather than casting them. Many of us in these modern times look for the fast solution to a building or manufacturing process. By taking the time to make each piece individually you have shown clearly that Practice makes perfect, or to put it another way "...perseverance is necessary to establish perfection" It is also evident that you love doing what you do, it is beautiful work! Michael
- 1,035 replies
-
- royal katherine
- ship of the line
-
(and 1 more)
Tagged with:
-

Hello from spain to everybody
michael mott replied to Javier Baron's topic in New member Introductions
Hello Javier, I visited your website today, what a fantastic collection of beautiful sailing craft. I also checked out the one build log on the two small craft. Please show us more in a new build log. Michael -
Steven thanks for those thoughts. Oh Dear Druxey I'm not sure if it was the 1mm smaller diameter on the top diameter or the 1/2 shade difference on the red interior or the thickness of the bead at the rim or the ..... Perhaps I should make a new one.... I think that you are selling yourself short Sir. Michael
- 749 replies
-
- albertic
- ocean liner
-
(and 2 more)
Tagged with:
-
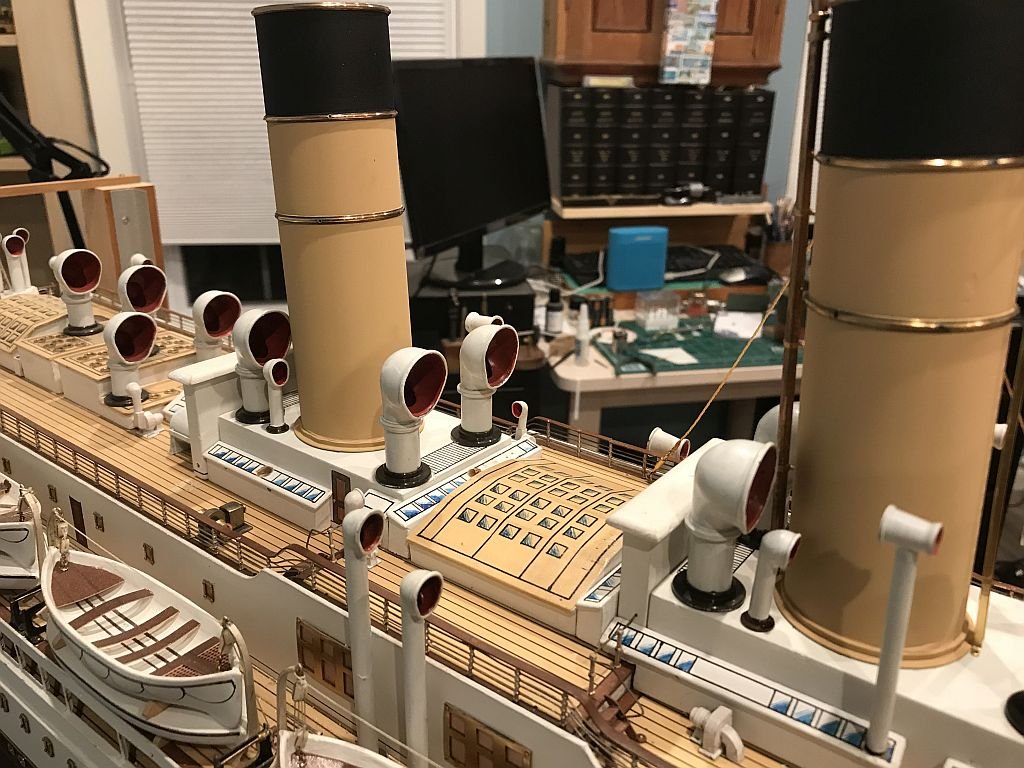
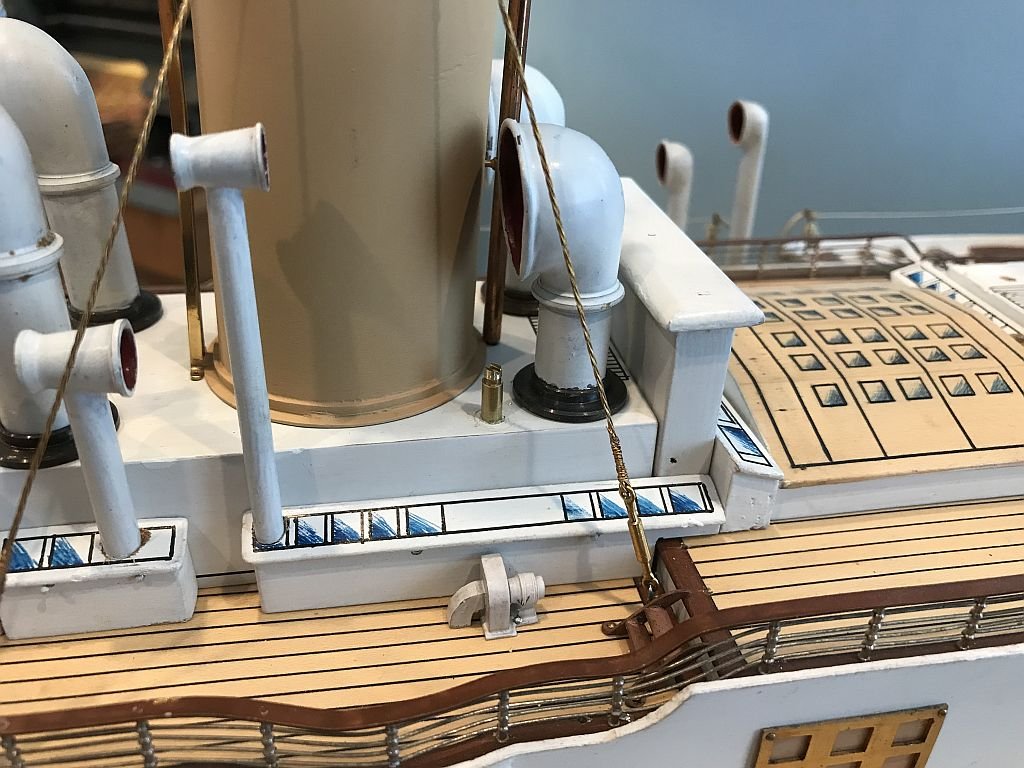
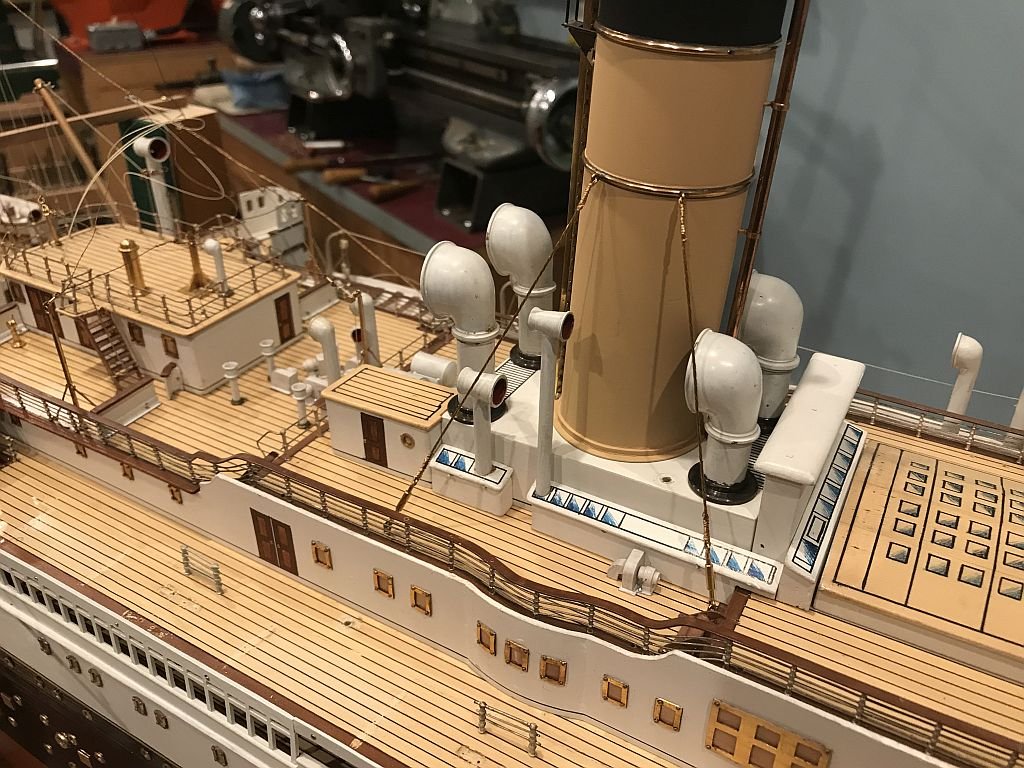
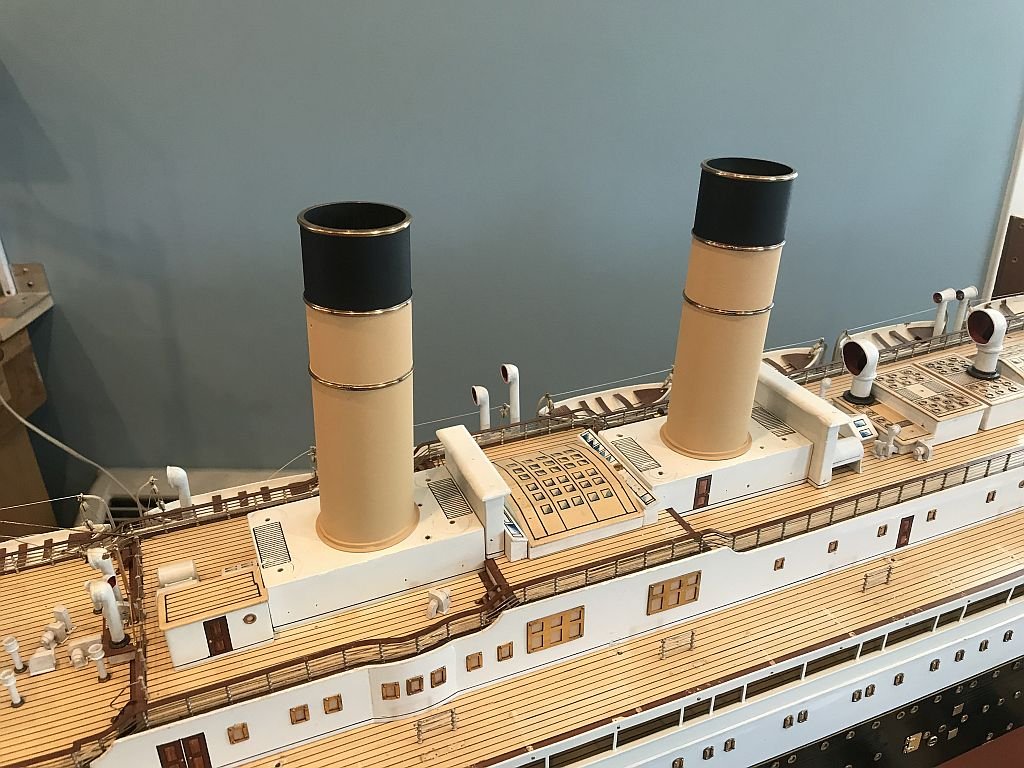
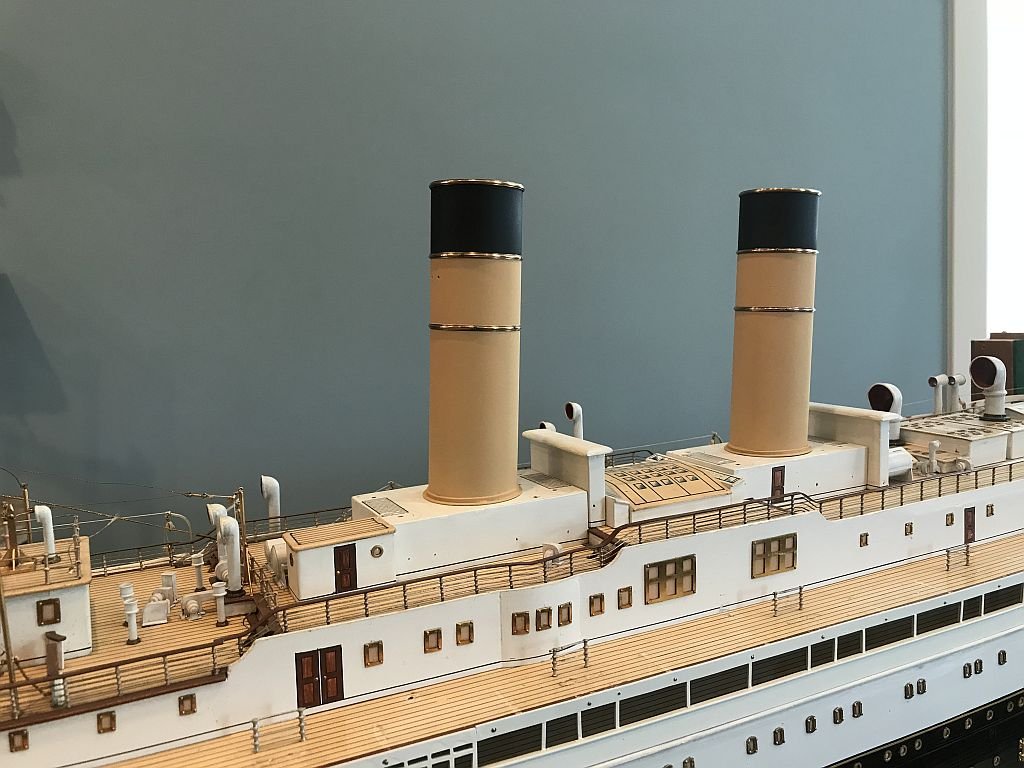
Pat, Druxey and Joe thanks for the compliments. And thanks for all those who hit the like button. A couple more cable stays on the port side of the forward funnel. Now we can play, Spot the new vent stack. If you guessed this one you were correct. It is beginning to look like a ship again. Michael
- 749 replies
-
- albertic
- ocean liner
-
(and 2 more)
Tagged with:
-
Good to see you back in the shipyard Rob. Michael
- 1,208 replies
-
- great republic
- clipper
-
(and 1 more)
Tagged with:
-
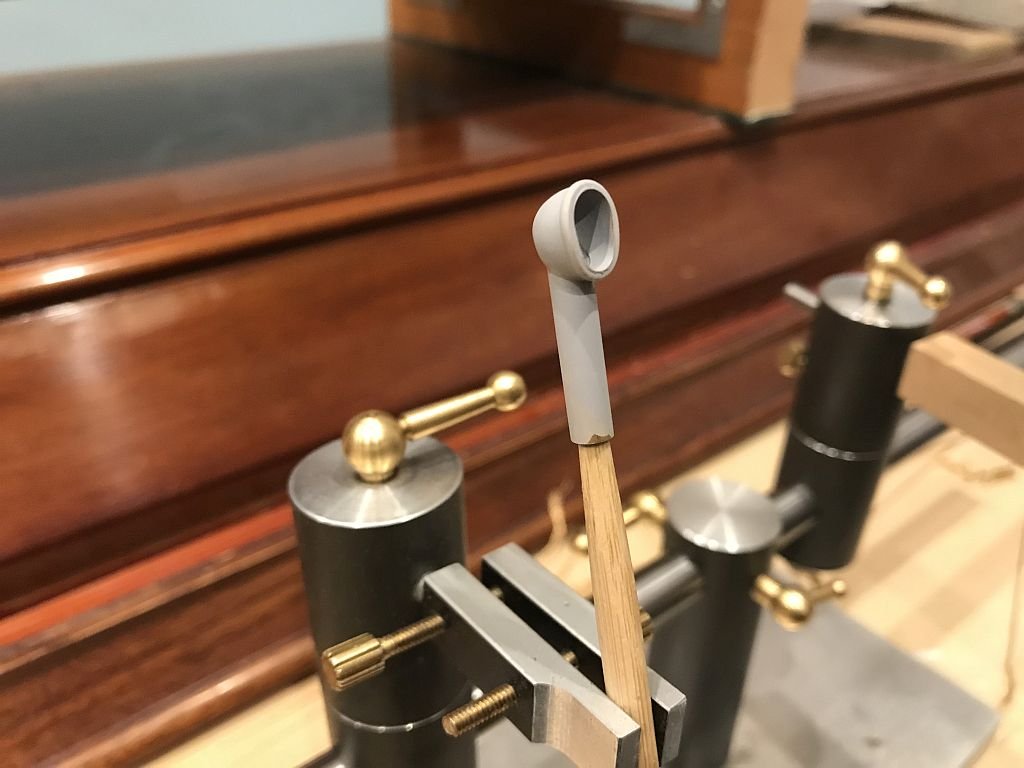
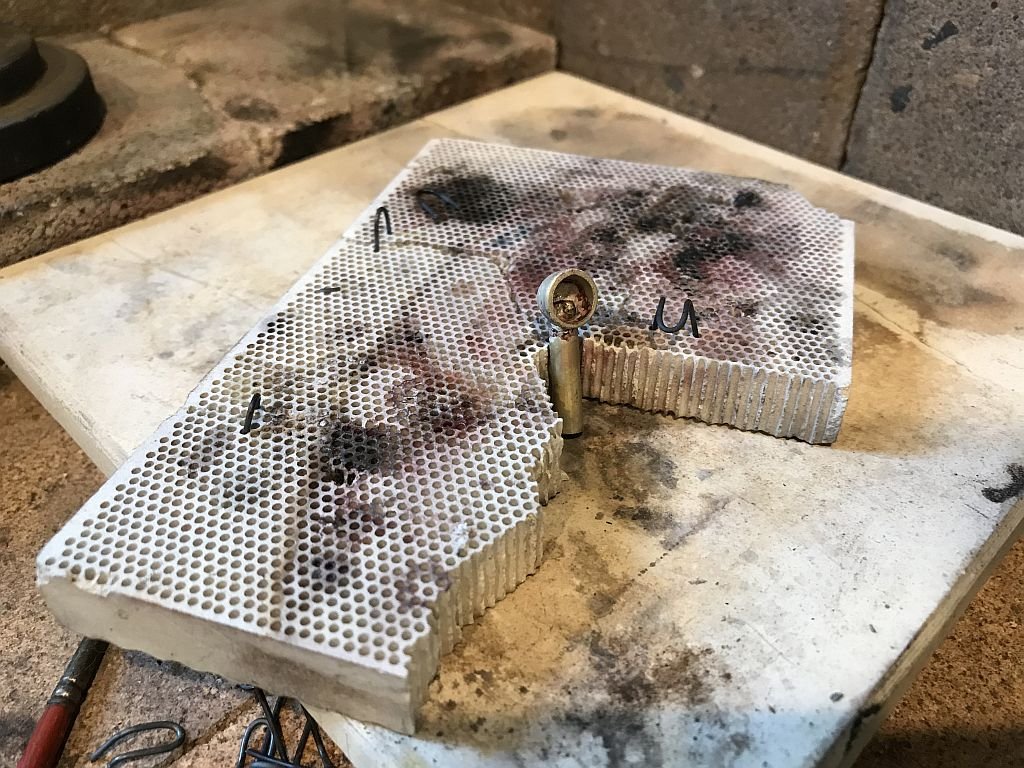
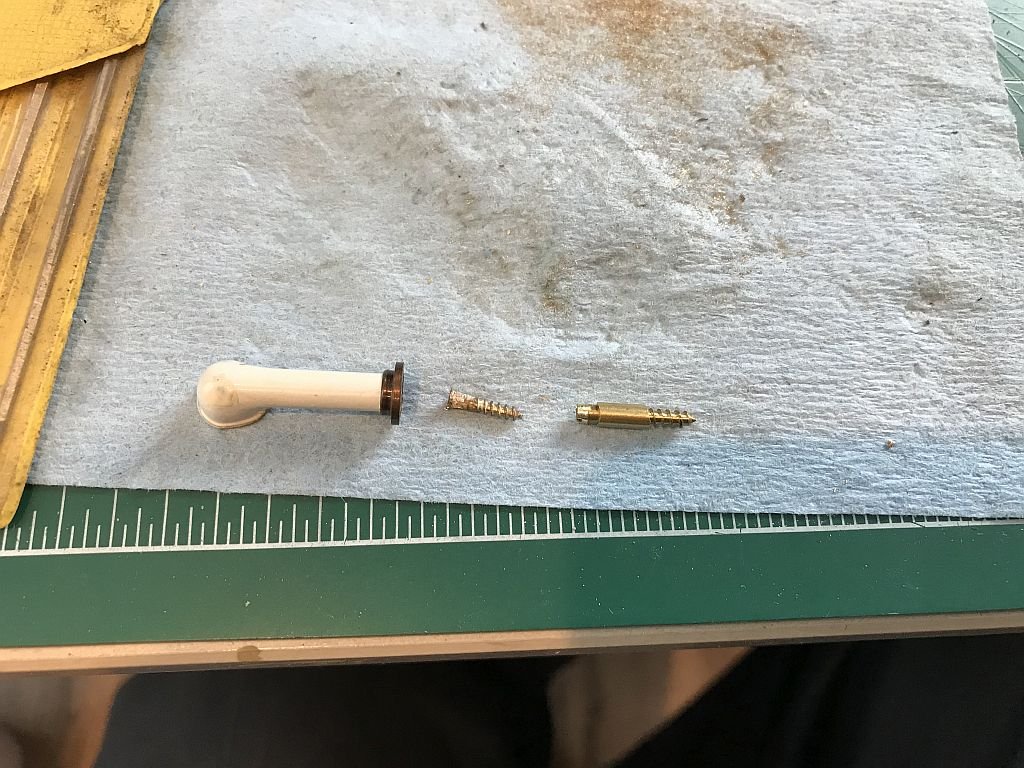
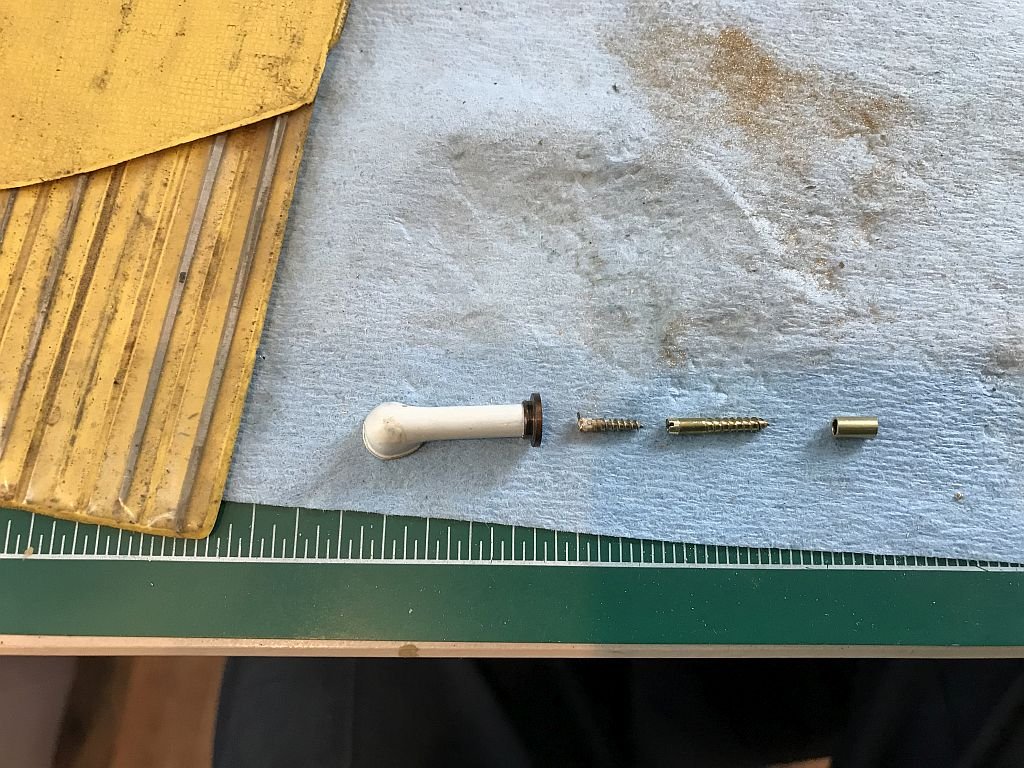
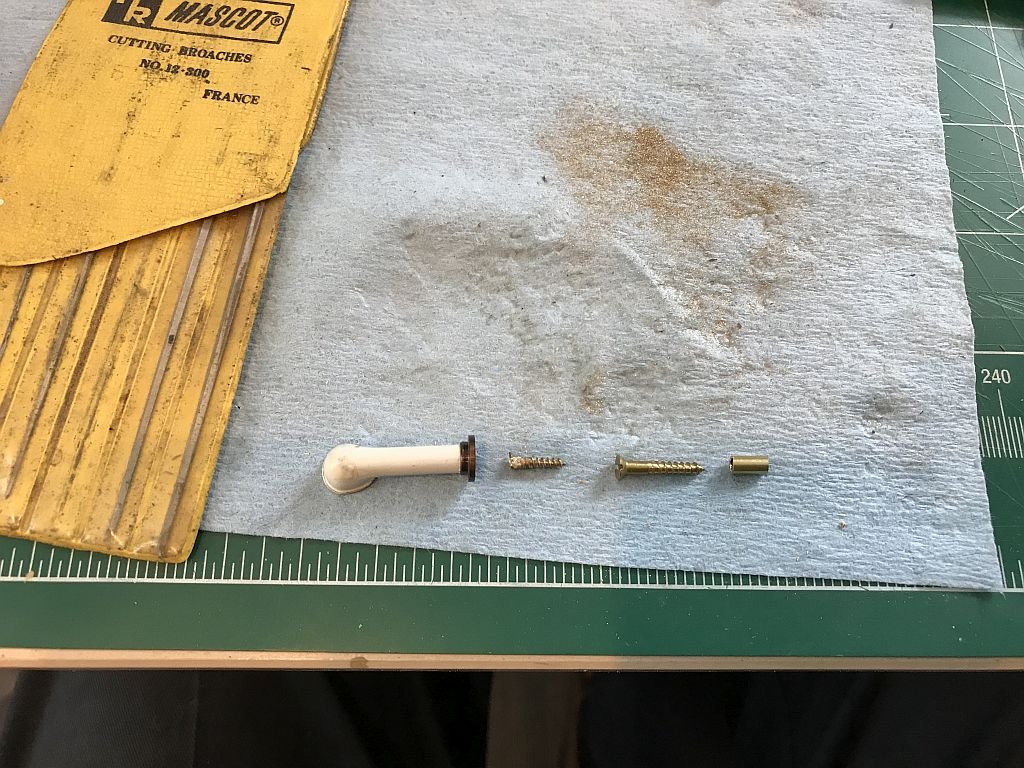
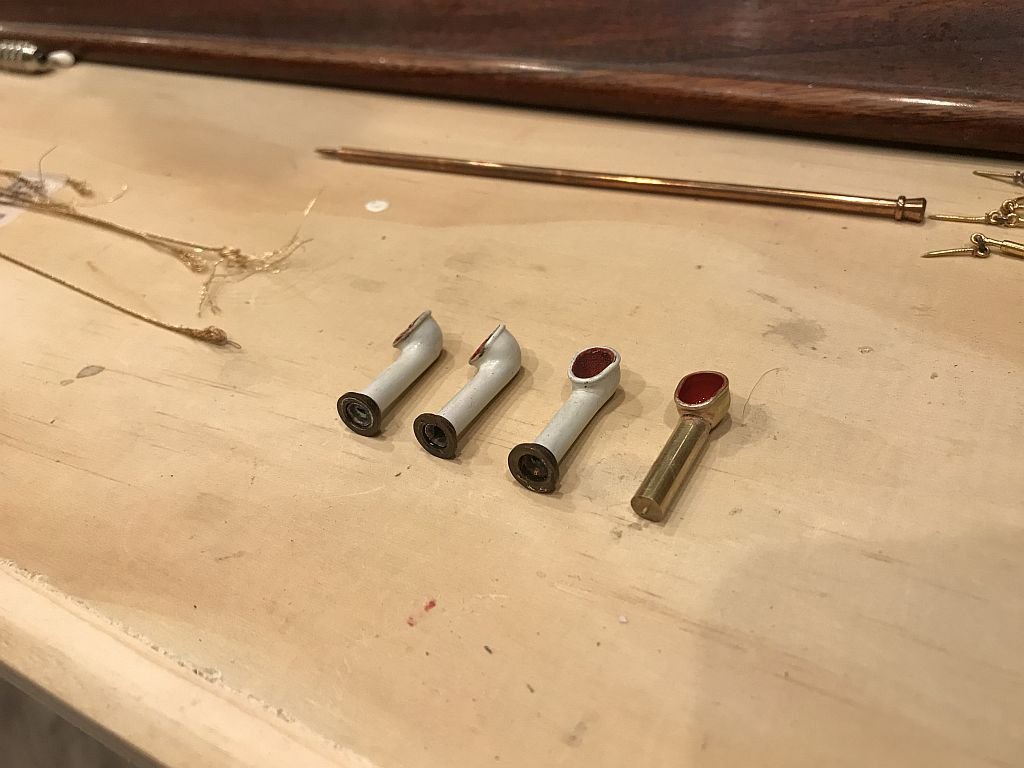
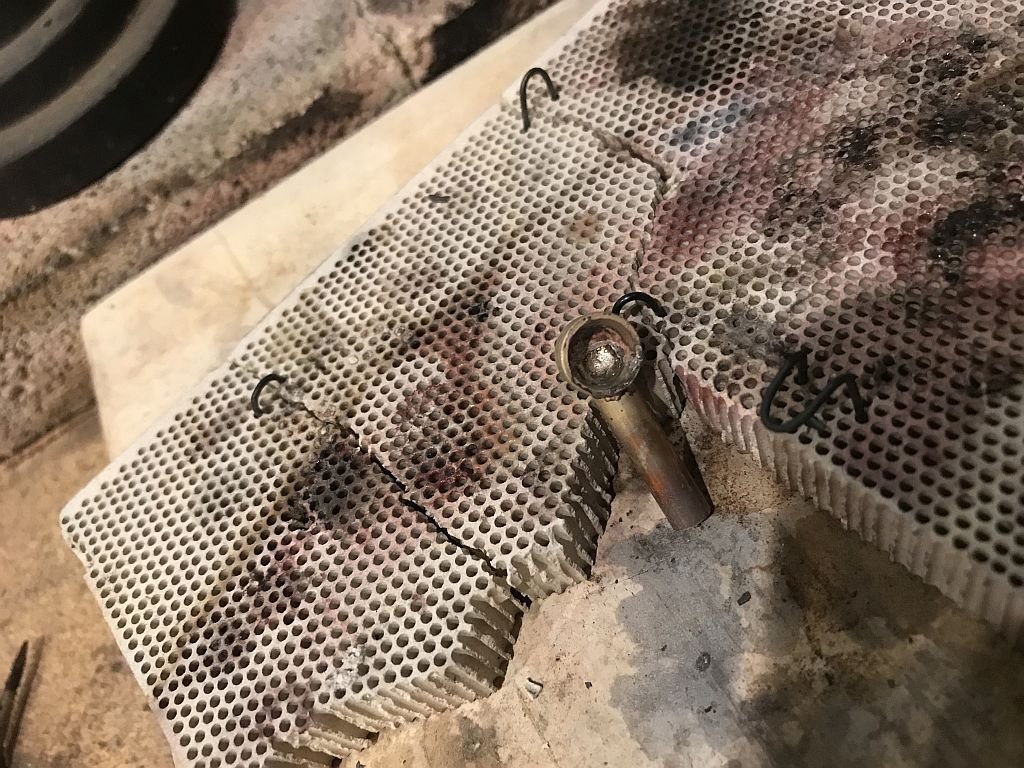
Thank you to everyone for the likes and visits. While I enthusiastically replicated the small vent in my haste I forgot to consider the mounting on the ship. Back to the workbench and a new one was machined up and again silver soldered together this time using a hollow vertical section. After cleaning up and shaping the opening by squeezing it, I dipped it into some Tremclad Primer after spraying it out of a rattle can into a glass jam-jar. As all of the vents were attached to the deck with screws soldered to the bottom of the stack I needed a way to re attach them without using heat which would destroy the paint. This picture shows the broken screw, and a new small brass screw of the same diameter and a small bit of tube to act as a sleeve. Next the head of the screw was made flush with the diameter making sure to keep the slot. The tube cauld slide up the threads but not over the head end which is important. Next the new screw was threaded into the funnel house with a small screwdriver . This will enable the new vent and the old ones to be re attached with a drop of white paint as the glue and slid on the new screw. Michael
- 749 replies
-
- albertic
- ocean liner
-
(and 2 more)
Tagged with:
-
Eric, even with the plank length consideration, I still think that B is the best option, given the skill needed to plank one of these boats in the first place a few angled cuts wouldn't be that much of an issue in my view. Michael
- 599 replies
-
- sidewheeler
- arabia
-
(and 4 more)
Tagged with:
-
Eric looking at all three options I would definitely choose option B as the lease complicated and the strongest, since the planks span the largest number of frames in a contiguous manner. Michael
- 599 replies
-
- sidewheeler
- arabia
-
(and 4 more)
Tagged with:
-
Eric A thought occurred to me that what if the planking in this area simply carried on straight like this If I were planking it, it would be what I would do in full size, I think that the strength and integrity of the deck up to the wheel would be stronger than turning it. Michael
- 599 replies
-
- sidewheeler
- arabia
-
(and 4 more)
Tagged with:
-
I am impressed that you stuck to it and was able to salvage the hull, so kudos to you for your tenacity and resolve. Looks good after all it has been through. Michael
- 22 replies
-
- notre dame
- hydroplane
-
(and 1 more)
Tagged with:
-
I can see how graceful the lines of this hull are going to be. Regarding the laser cutting, you have shown clearly what is possible and what should be the standard for other kit manufacturers. Perhaps the better ones will get the message and follow your lead. Thanks for the thoughts about my own work, and yes perhaps we could work out something down the road. Michael
- 421 replies
-
- medway longboat
- Syren Ship Model Company
-
(and 1 more)
Tagged with:
-
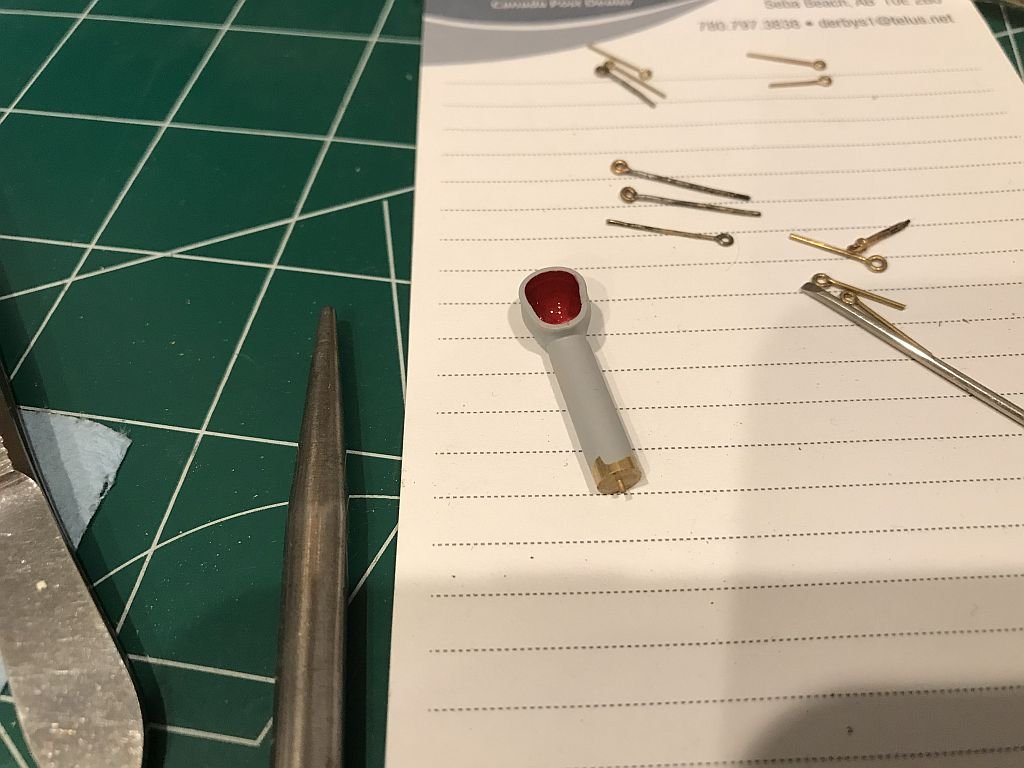
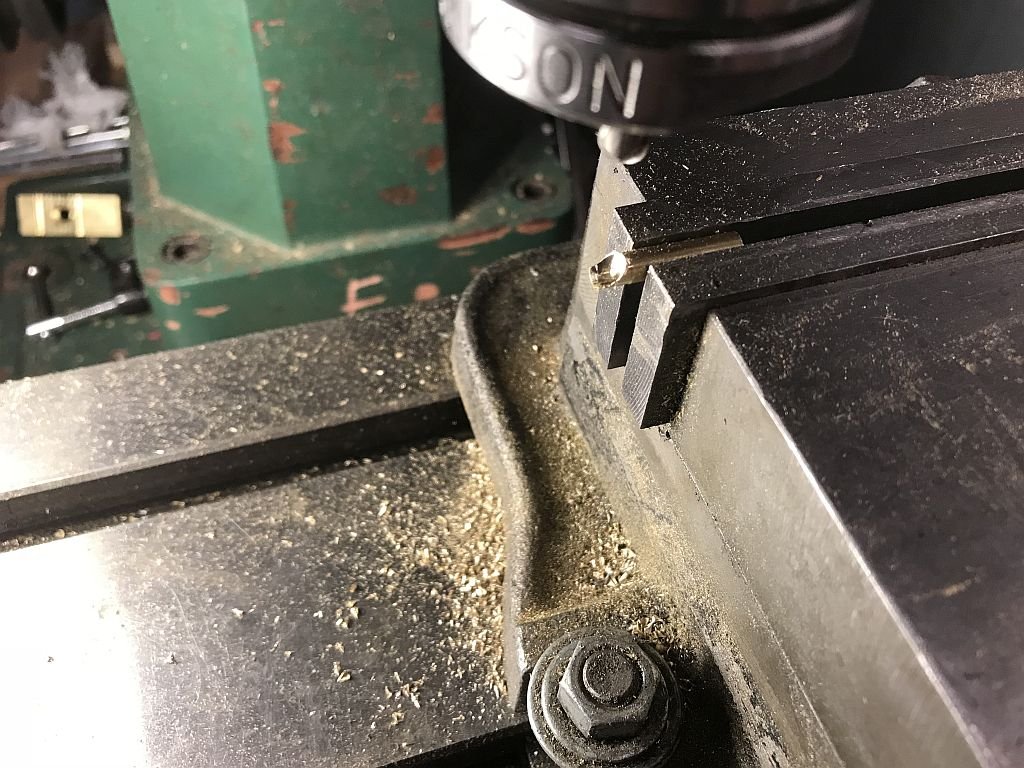
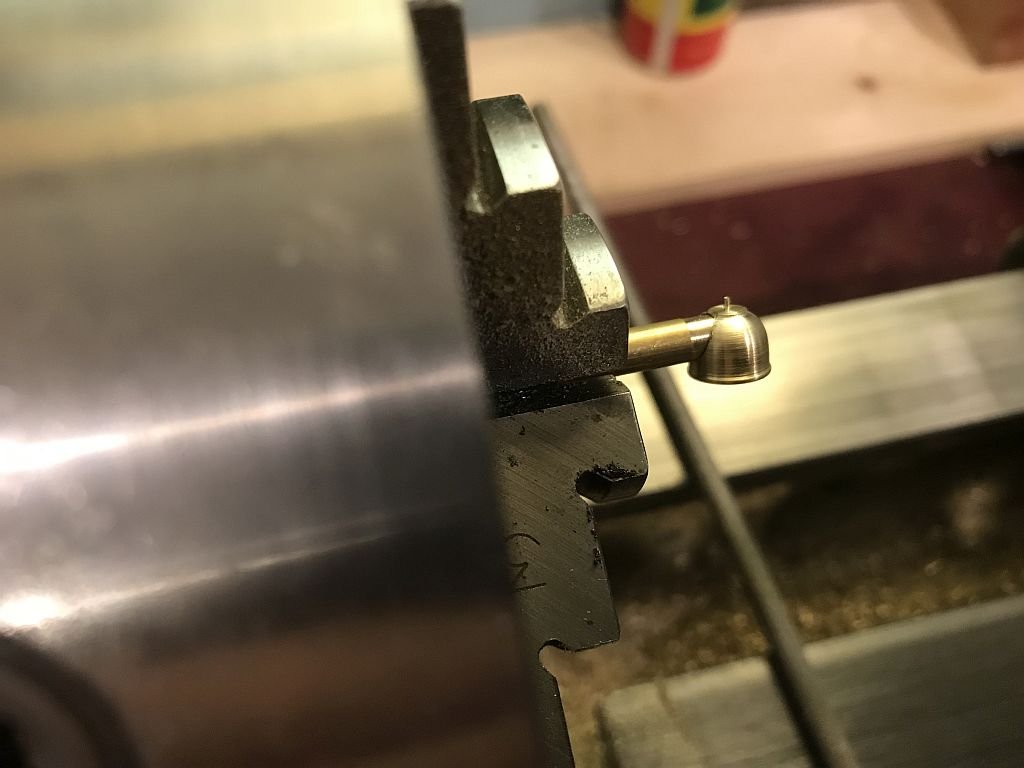
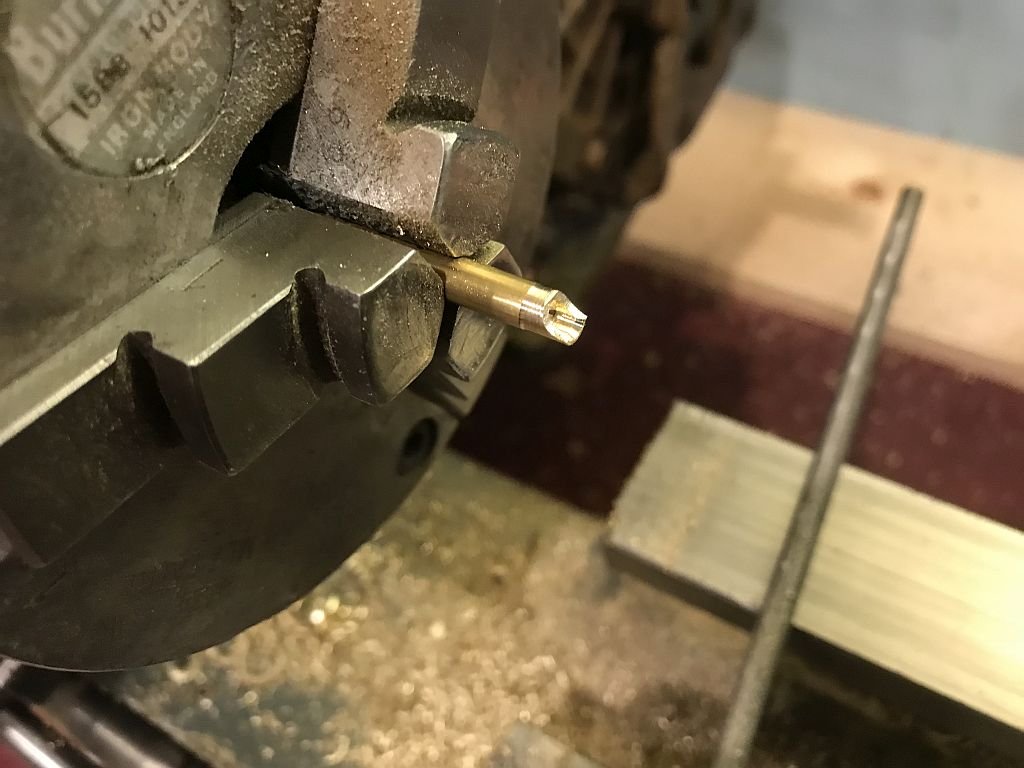
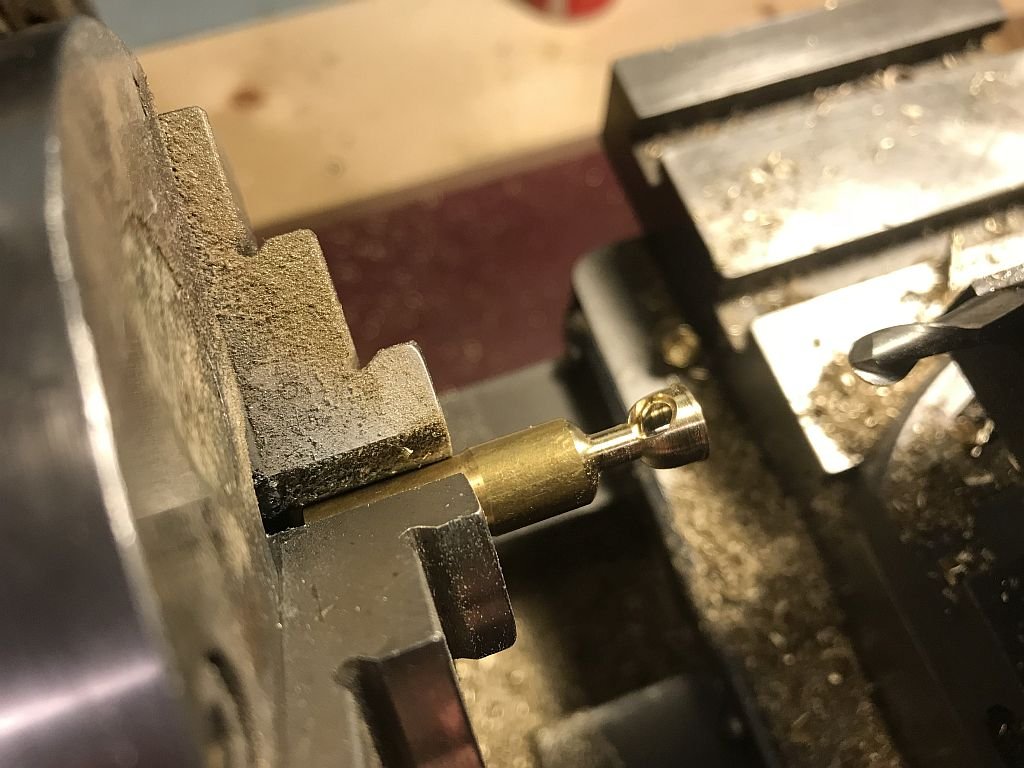
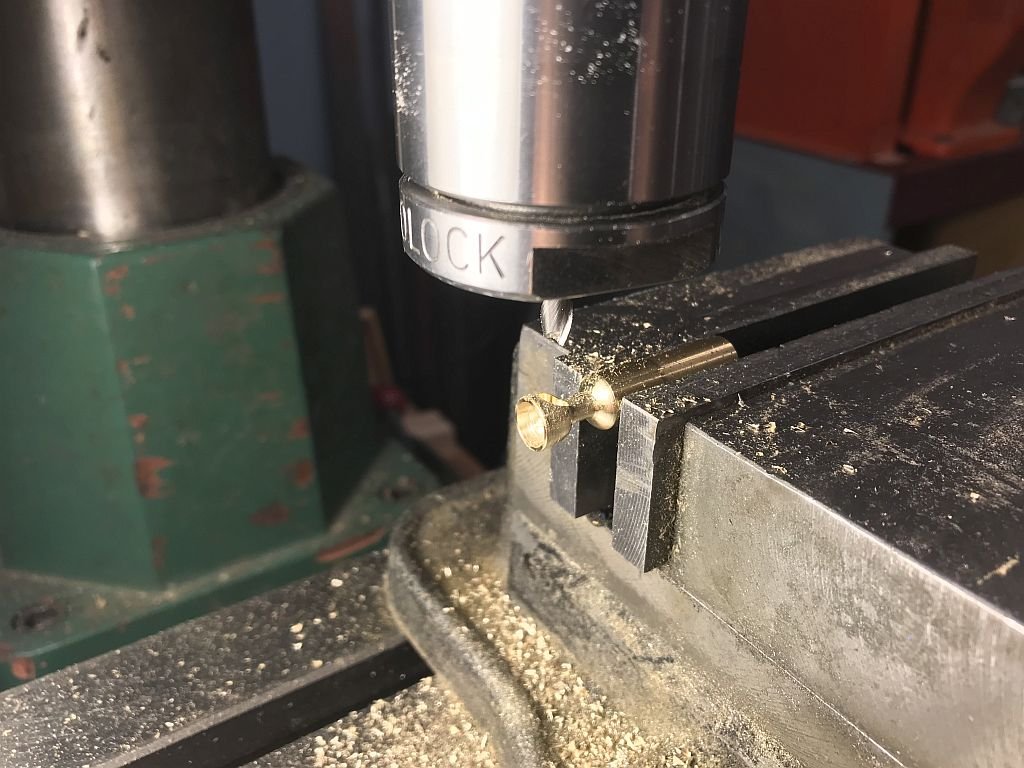
Carl, Colin, Druxey, Denis, Ed, and Ben, thanks for the comments and advice. I set one of the stays today and was pleased with the way it was able to be fixed regarding the length. This particular job was troubling me, in as much that i was unsure as to the winding up of the cable at the top end where it attaches to the funnel. I solved it by making the turnbuckle end next to the deck a slide fit into the hole by opening it up a little. Originally the deck eyes to which the turnbuckles are attached were basically nailed in place. By making it a slide fit (a touch of glue will fix it later) I was able to measure the length and fold the cable at the appropriate length so that I could then wind up the one longer strand the same way that Basset Lowke did it in the funnel eye off the ship. This certainly cave me a lot of confidence that I would be able to complete the rest in the same manner. And so it was. I did the second one the same way just to be sure that the first one wasn't a fluke. However while putting on the vent stacks discovered I was missing a small one! it must have been swept up in the debris at the beginning, before I was called in. I really had no option but to set about copying the size that was missing. I turned up a cup out of some 3/8 brass then drilled a hole for the 3/16 vertical section put it back in the lathe and finished off the inside by using the ball end cutter as a lathe tool before parting it off. The vertical rod was filed with a 5/16 round file to match the inside of the cup. Then scooped out with the ball mill After being satisfied with the basic shape I silver soldered them together before shaping the cup into the oblong like shape of the originals (which are all slightly different from each other) so I am not to worried about it being exact to one of them since they are all different slightly anyway. A shot of red paint in the inside after cleaning it all up. That's it for today. Michael
- 749 replies
-
- albertic
- ocean liner
-
(and 2 more)
Tagged with:
-
Ed it looks like you have got the hang of this rigging gig! Masterful workmanship of the highest order Ed. I continue to be amazed by your skill and execution of this work. Michael
- 3,618 replies
-
- young america
- clipper
-
(and 1 more)
Tagged with:
-
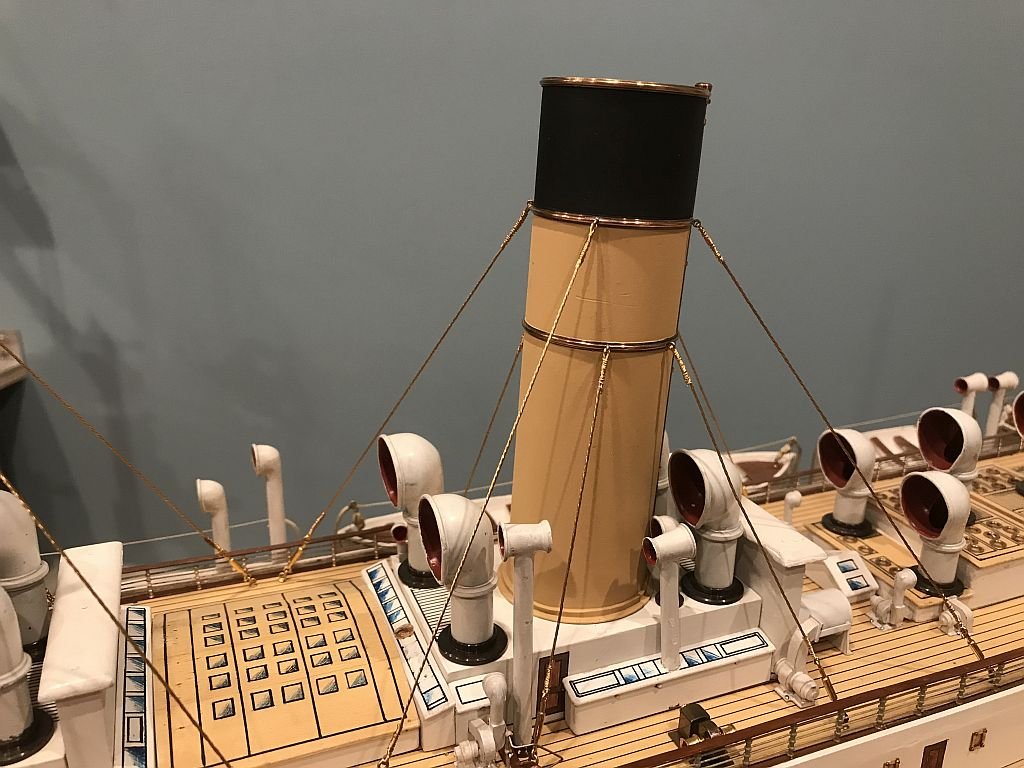
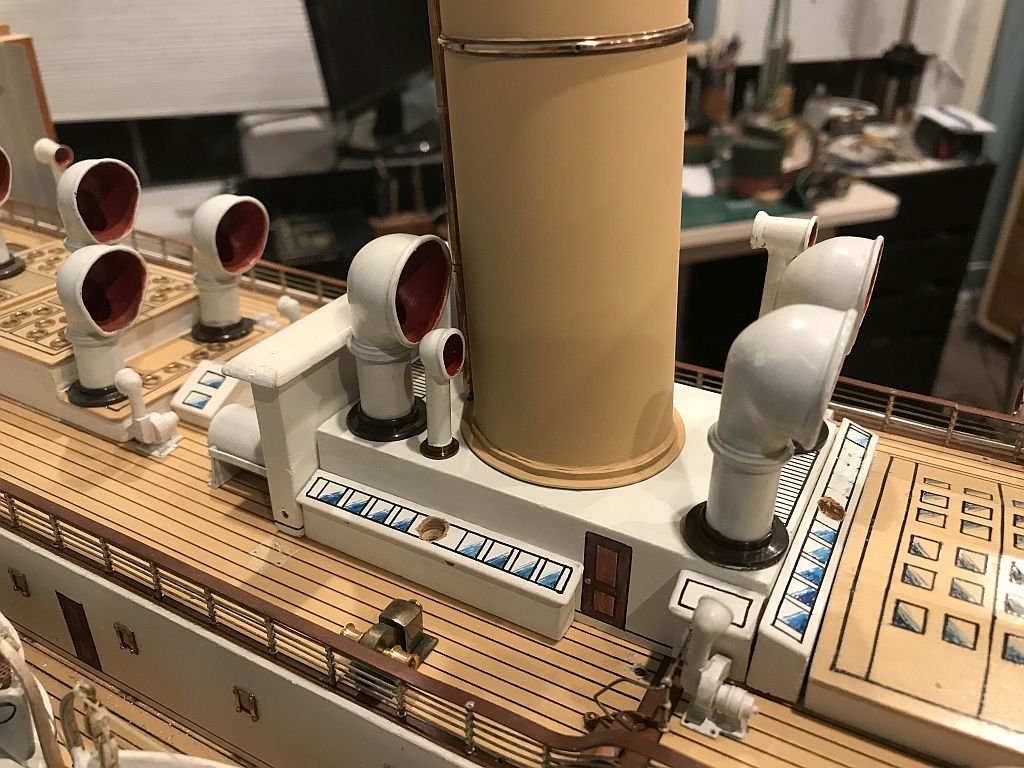
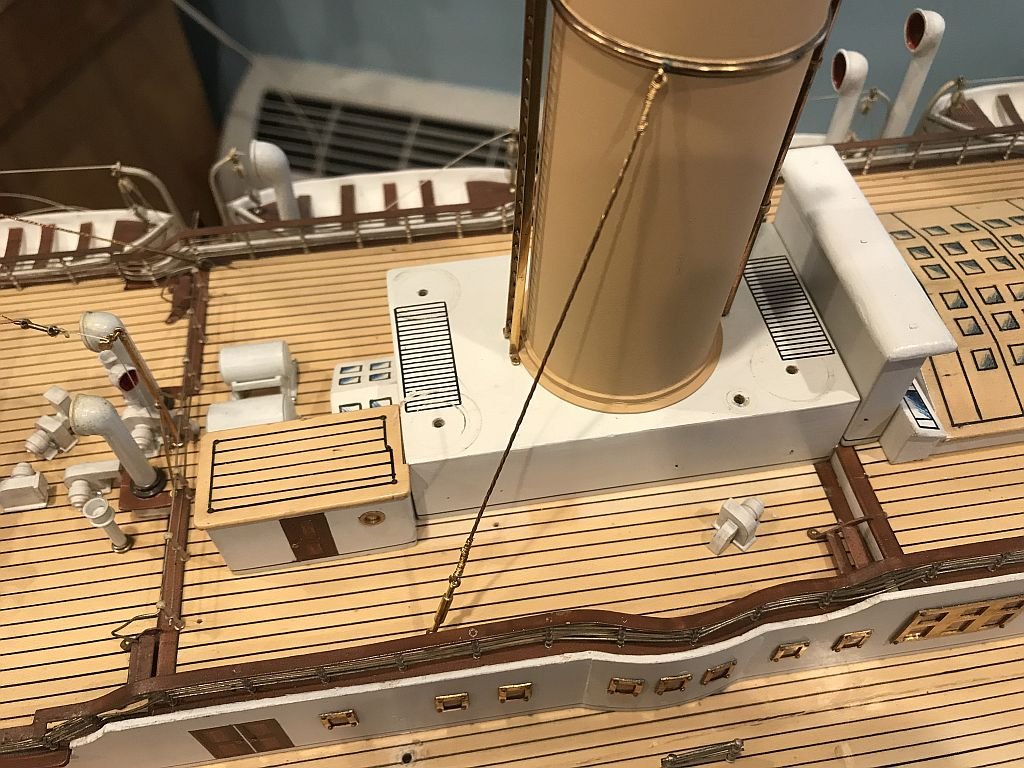
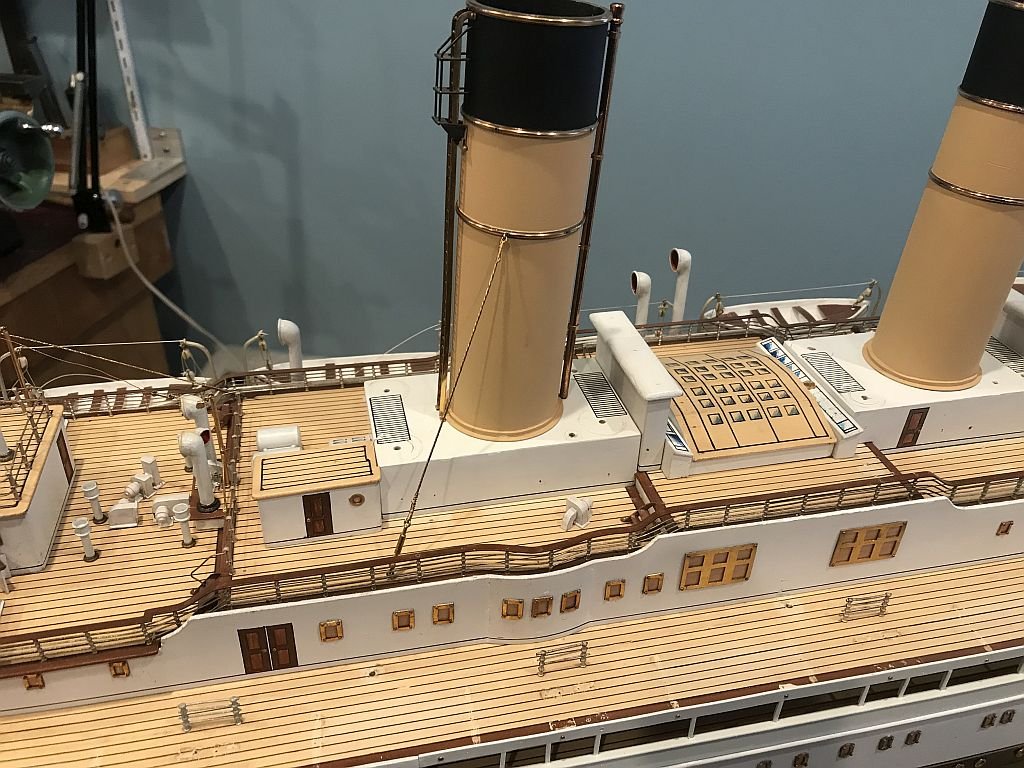
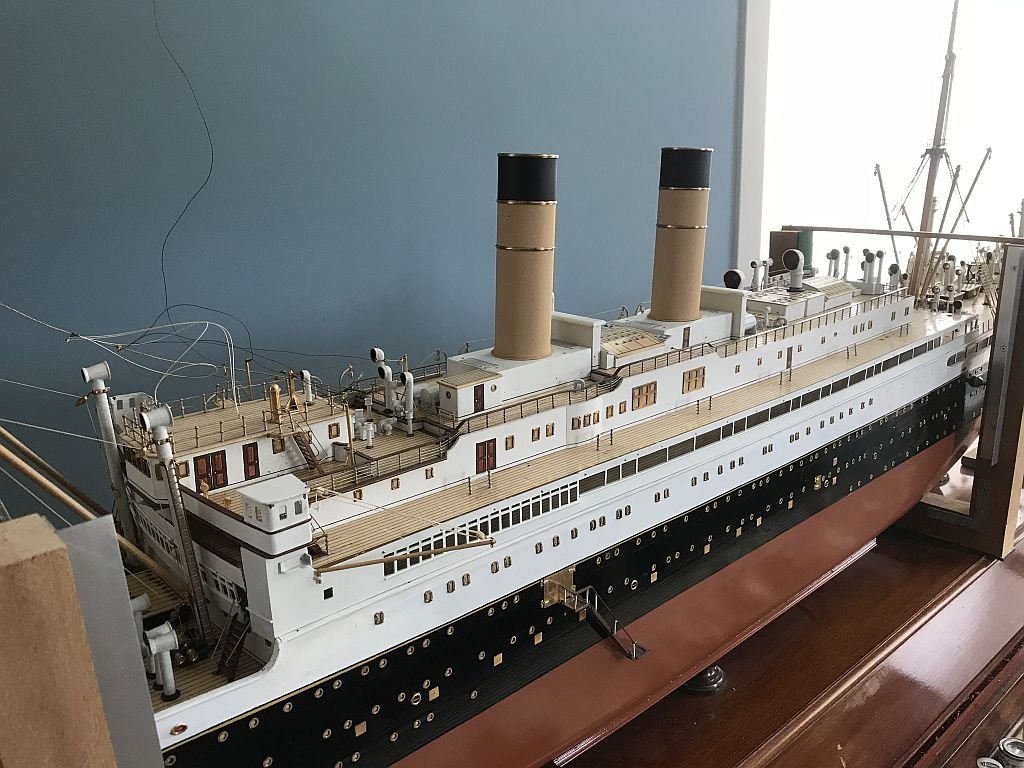
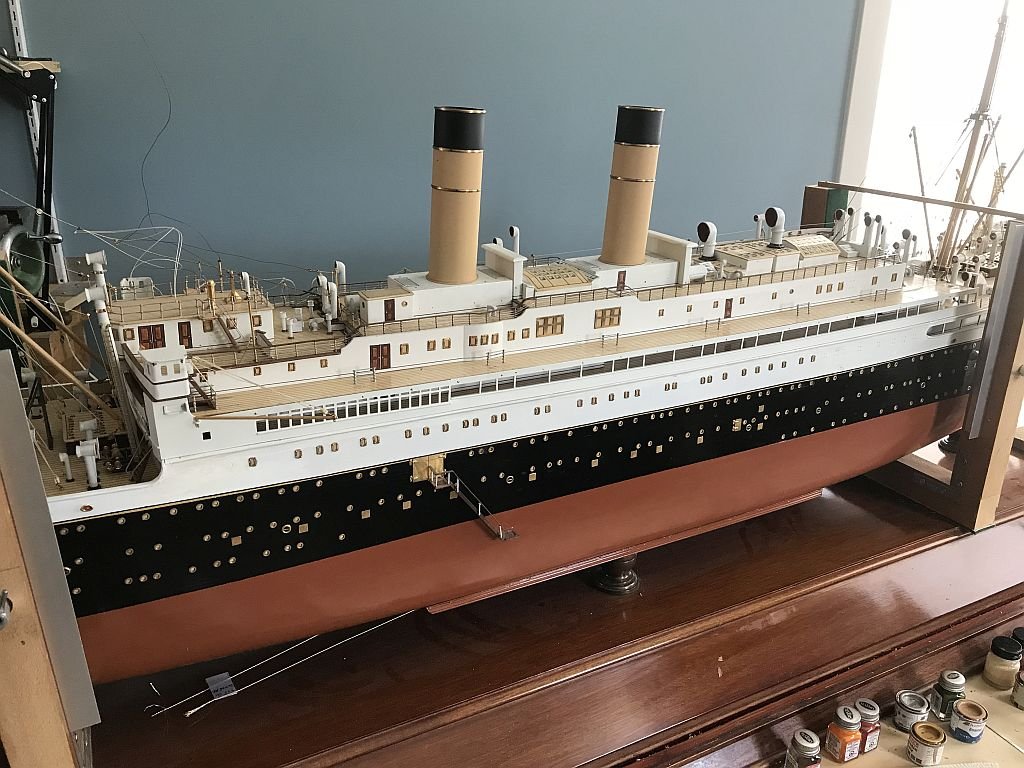
Carl, Pat, John, Joe, Druxey and Denis. Thanks for the supportive comments. today I finished painting the funnels. and the last one in natural daylight. Now the real work begins with the replacement of the funnel stays. But for now I'm off to the lake to do a little sailing and Rest & Relaxation. Michael
- 749 replies
-
- albertic
- ocean liner
-
(and 2 more)
Tagged with:
-
Chuck what a great project. this kit design is really tempting! I know that I would end up worrying too much about too many unfinished projects so I shall have to content myself by watching your group put them together. Perhaps in the future. Michael
- 421 replies
-
- medway longboat
- Syren Ship Model Company
-
(and 1 more)
Tagged with:
About us
Modelshipworld - Advancing Ship Modeling through Research
SSL Secured
Your security is important for us so this Website is SSL-Secured
NRG Mailing Address
Nautical Research Guild
237 South Lincoln Street
Westmont IL, 60559-1917
Model Ship World ® and the MSW logo are Registered Trademarks, and belong to the Nautical Research Guild (United States Patent and Trademark Office: No. 6,929,264 & No. 6,929,274, registered Dec. 20, 2022)
Helpful Links
About the NRG
If you enjoy building ship models that are historically accurate as well as beautiful, then The Nautical Research Guild (NRG) is just right for you.
The Guild is a non-profit educational organization whose mission is to “Advance Ship Modeling Through Research”. We provide support to our members in their efforts to raise the quality of their model ships.
The Nautical Research Guild has published our world-renowned quarterly magazine, The Nautical Research Journal, since 1955. The pages of the Journal are full of articles by accomplished ship modelers who show you how they create those exquisite details on their models, and by maritime historians who show you the correct details to build. The Journal is available in both print and digital editions. Go to the NRG web site (www.thenrg.org) to download a complimentary digital copy of the Journal. The NRG also publishes plan sets, books and compilations of back issues of the Journal and the former Ships in Scale and Model Ship Builder magazines.


