donrobinson
-
Posts
1,909 -
Joined
-
Last visited
Content Type
Profiles
Forums
Gallery
Events
Everything posted by donrobinson
-
Yah I agree, Real Cool!!
-
Ropewalk
donrobinson replied to Worldway's topic in Rope Making/Ropewalks's Rope Materials and parts resources
I don't mind at all Chuck, I actually really appreciate this bit of advice. I need all the help I can get, as you say it is an art and being the slow learner I am it is going to take me sometime and plenty of thread to get this right. I will try and get more twist to the rope, I think my machine may need some adjusting. I usually have some of your rope beside me when making mine but I was always just blaming the lighting for mine not looking as good as yours. Thanks Again -
I've been trying to keep silent so as people don't get us mixed up again , but I can't do it any longer. She looks great, nice work
- 104 replies
-
- 4
-

-
- king of the mississippi
- artesania latina
- (and 1 more)
-
You could glue two or more pieces together, cut them to shape and then soak them in the appropriate liquid for your glue to separate them. Should speed things up a little.
-
Ropewalk
donrobinson replied to Worldway's topic in Rope Making/Ropewalks's Rope Materials and parts resources
Gregory, what type of thread are you using? -
Ropewalk
donrobinson replied to Worldway's topic in Rope Making/Ropewalks's Rope Materials and parts resources
Hi David, I was trying out something for a friend a while back and here are some results. This is using Gutermann thread, all that I have used to date. "A" and :B" are made from three ropes of four strands of thread and are approx. .85 mm, "C" and "D" are made from four ropes of three strands and measure approx approx. 1 mm. So both are twelve strands of thread with two different results in diameter. "A" is made using 1 spool of yellow and two red, "B" is two spools of yellow and one spool of red. "C" is made with four spools one red, one yellow, one red and one yellow, "D" is made with two spools of red side by side on machine and two spools of yellow side by side. I use the Domanoff machine. Lots of fun to do, however, you not save time doing this it is just the satisfaction knowing you did do it. To date I have used only Gutermann thread and have made 8 different sizes so far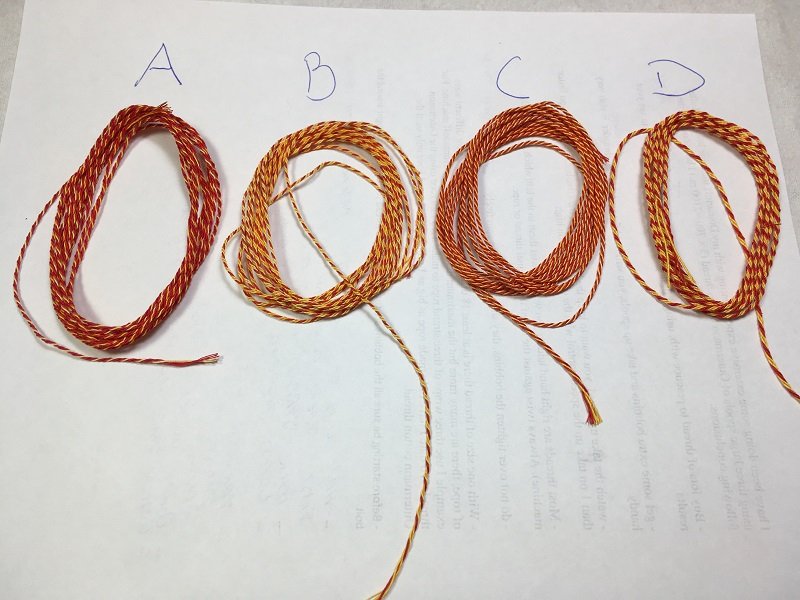
-
You are right Mike, the stuff I use is a "no wax formula". What I do is spray some in a lid off of a jar drag my brush lightly through it then wipe the brush on a clean rag. So the brush is just barely damp before I use it on my models, it is acting more as a dust magnet than as a polish. I've been doing this for over two years now and it seems to be doing the job well so far.
- 653 replies
-
- 4
-
-
- trabakul
- marisstella
- (and 1 more)
-
Hey Elijah, sorry for taking so long. I use a very soft brush and lightly brush everything, I also made an attachment for my vacuum to hook on a 1/4" hose. When I'm all done I use the same brush and put just a very small amount of pledge then give it a quick dusting again cleaning the brush as I go and re-applying the pledge(very small amounts) to the brush. I do this usually once or twice a year, whole process takes less than an hour. I also have an air compressor, but have not used it yet as the noise is so annoying, maybe next time.
- 653 replies
-
- 4
-
-
- trabakul
- marisstella
- (and 1 more)
-
What a great tutorial!! Thank You. Now to find some sewing lessons!
-
You should really stain your fabric first as the glued parts will probably not take any colouring or at least not as much as the other areas not glued. Look at the MarisStella sails, theses are double folded and will give you an idea how the corners should be cut, in a "V" shape. They will also give you an idea how to do the stitch lines. To prevent fraying on cut lines I painted all edges with watered down pva glue, I use Weldbond, I would also do this after colouring the fabric. It did not stain the fabric but your case, with colouring you may want to try a test area. I can also warn you now that when using wire be sure it is straight and in the proper position, the very outside edge of the hem, as it is a real pain to sew around. I only did a little sewing on my sails, by hand, and found the wire to be in the way all the time, with a machine you maybe going through lots of needles

-
You have really come along with this Doug, it all looks real good, and I see you have mastered the mill
- 99 replies
-
- 1
-
-
- essex
- cross-section
- (and 1 more)
-
Hello Jason and OC now that I have finished my Trabakul build it is my full intention to pay more time to this girl and make some progress. Thanks for the push to get things going!!
-
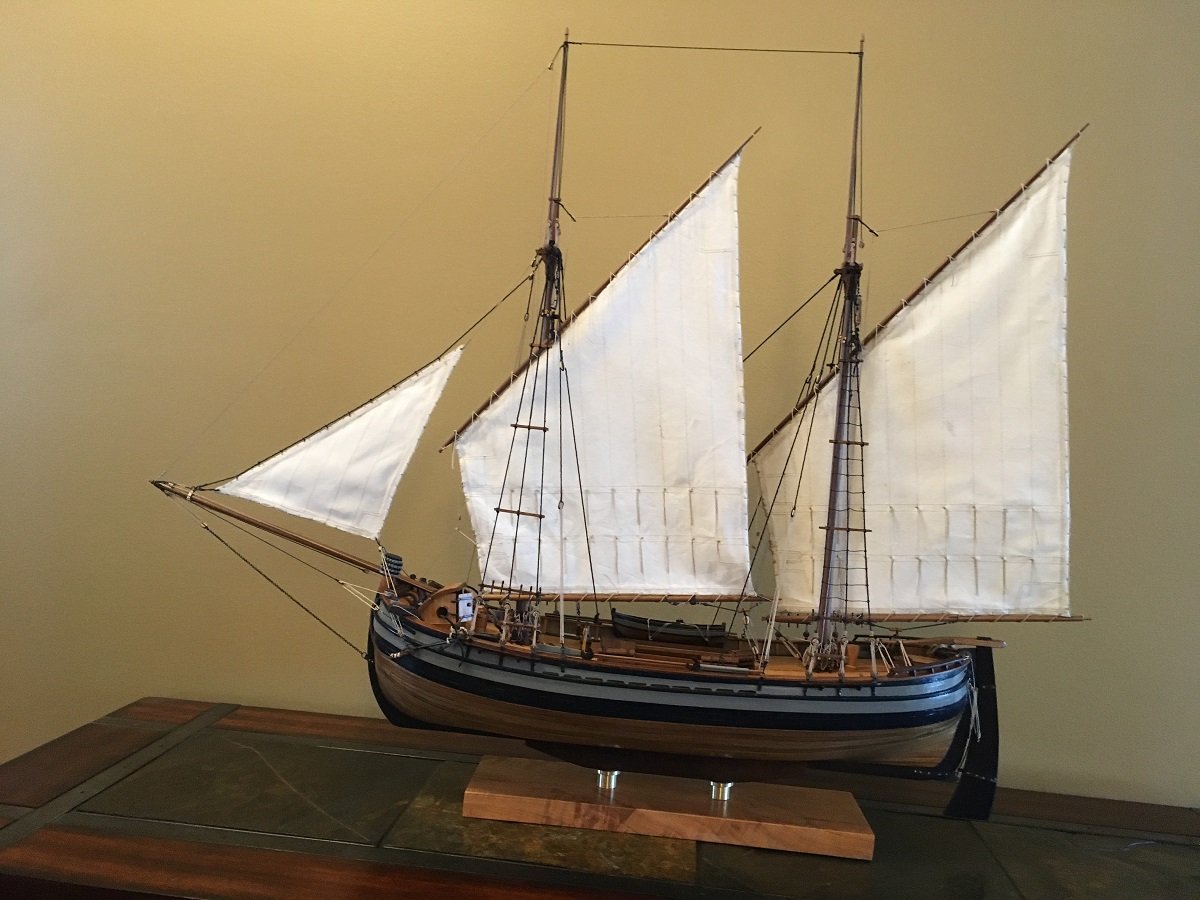
Thank You all so much, this is just overwhelming!! I apologise for taking so long to reply but I took Frank's(riverboat) advice and "hit the liqueur cabinet" in a little celebration. Elijah I don't really care for cases on my models, I know it is wrong but usually once or twice a year I'll take them and give them a good cleaning, It only takes 30 minutes and gives me more "bonding time" with the model. lol Hubac, the decking material I used is cherry Popeye the next main project is the Stefano and also the Pegasus in my spare time Graham, the colours are just something I thought up, it really should have a black hull with red and white trim. I just couldn't bear the thought of painting all that nice wood! Mike, you know the feeling of "completed" and yes it is great!! Again "Thanks" to all for the outstanding comments and for all the likes, this is exactly what makes this site the best
- 653 replies
-
- 7
-
-
- trabakul
- marisstella
- (and 1 more)
-
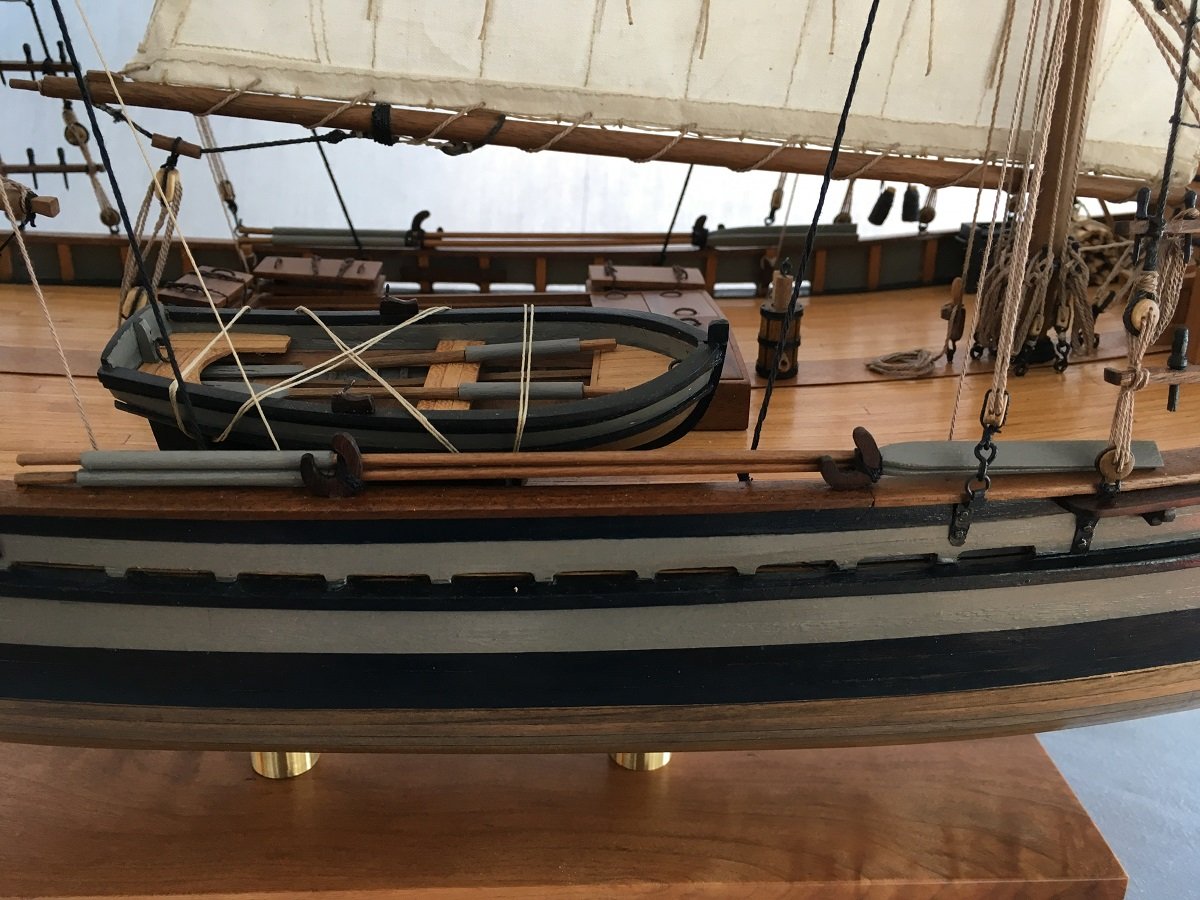
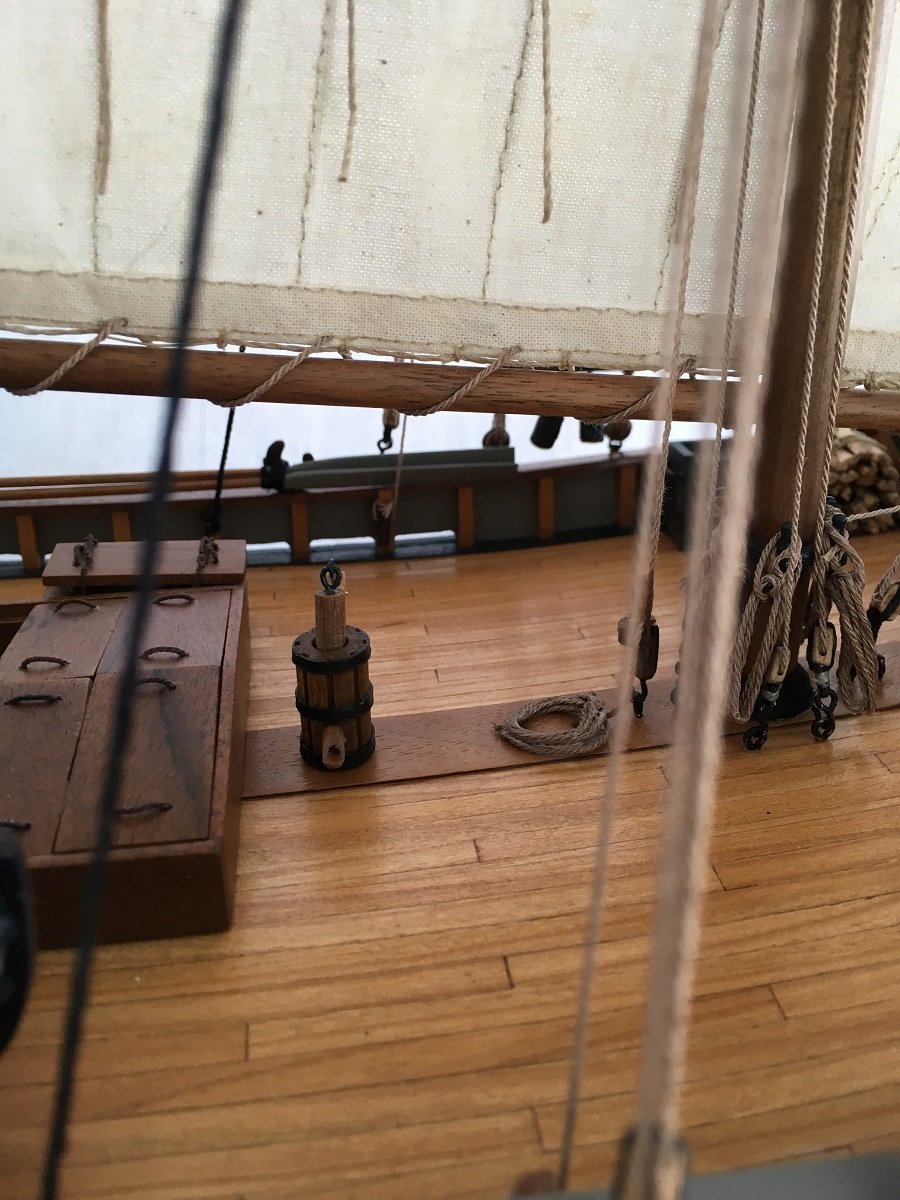
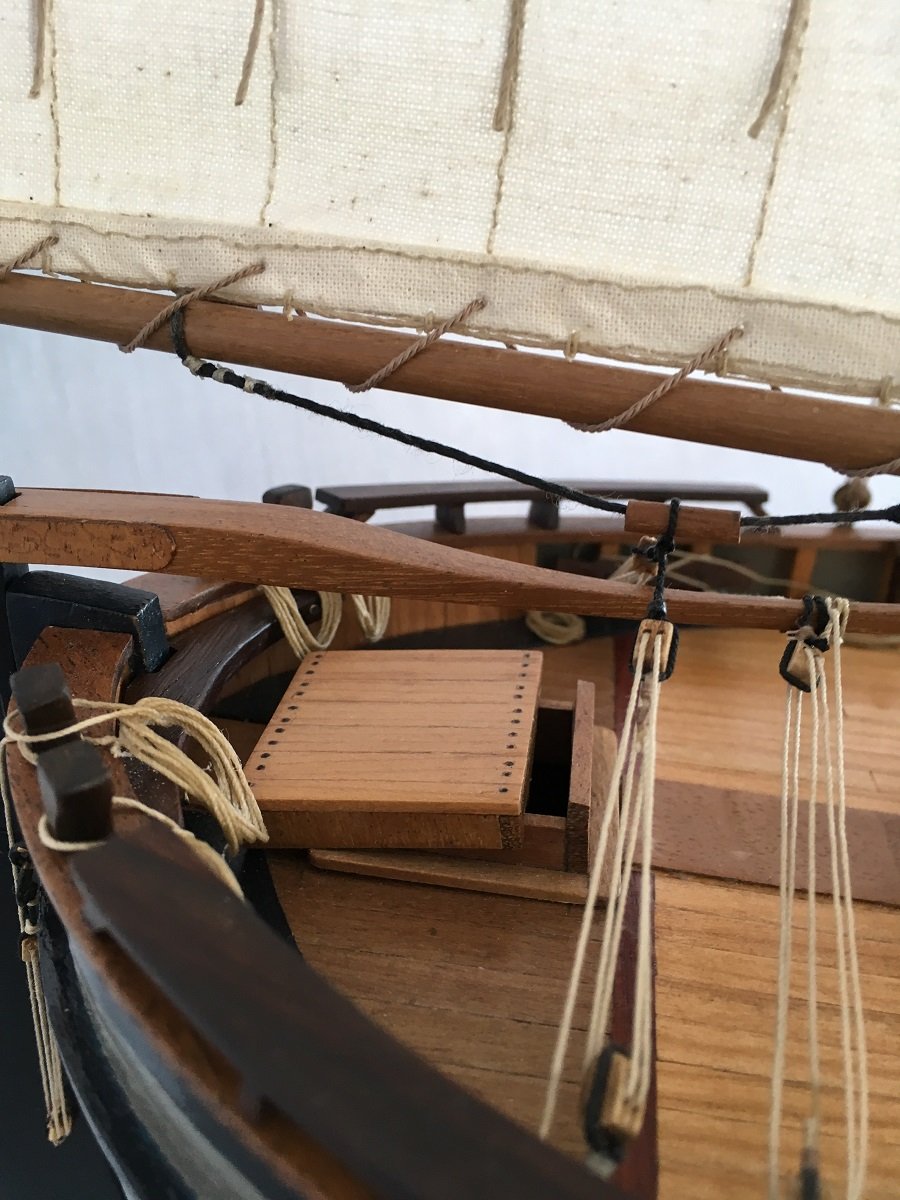
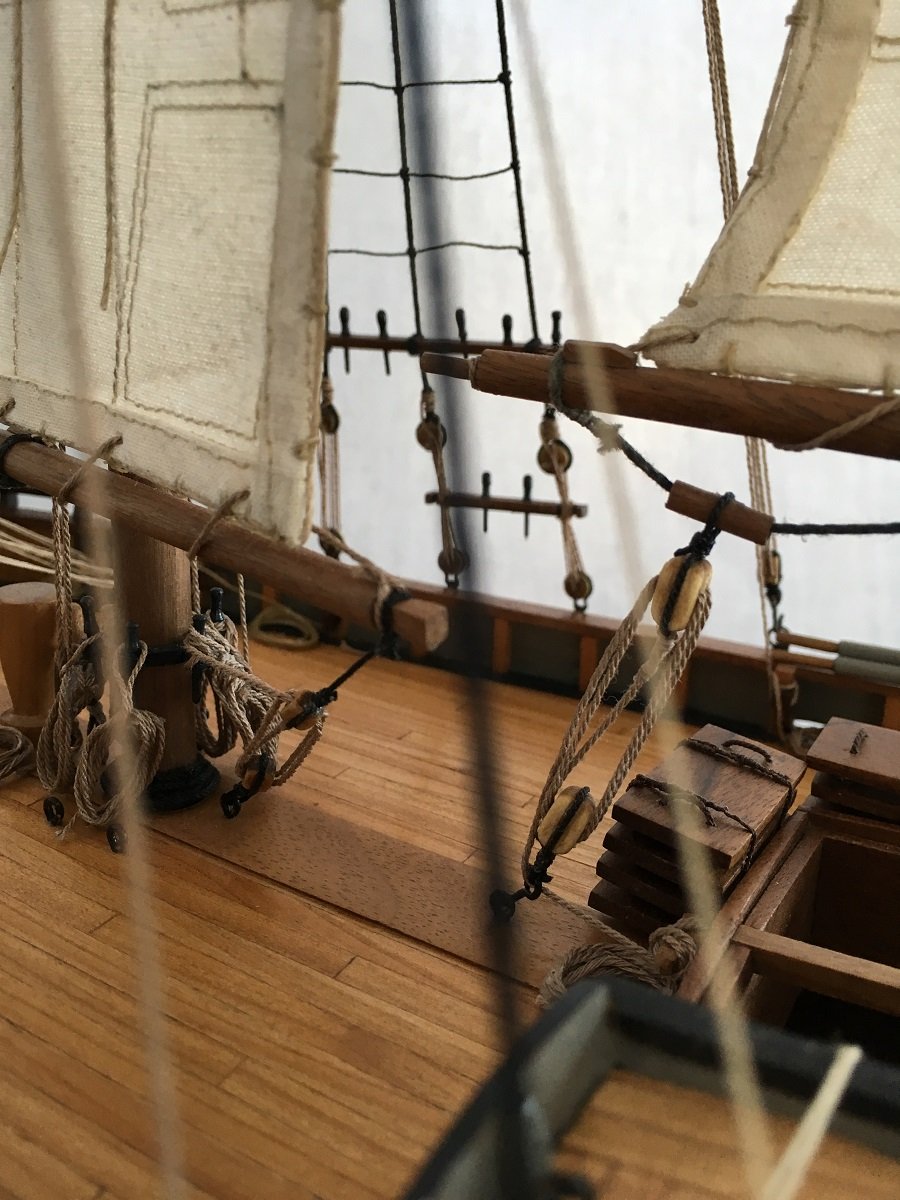
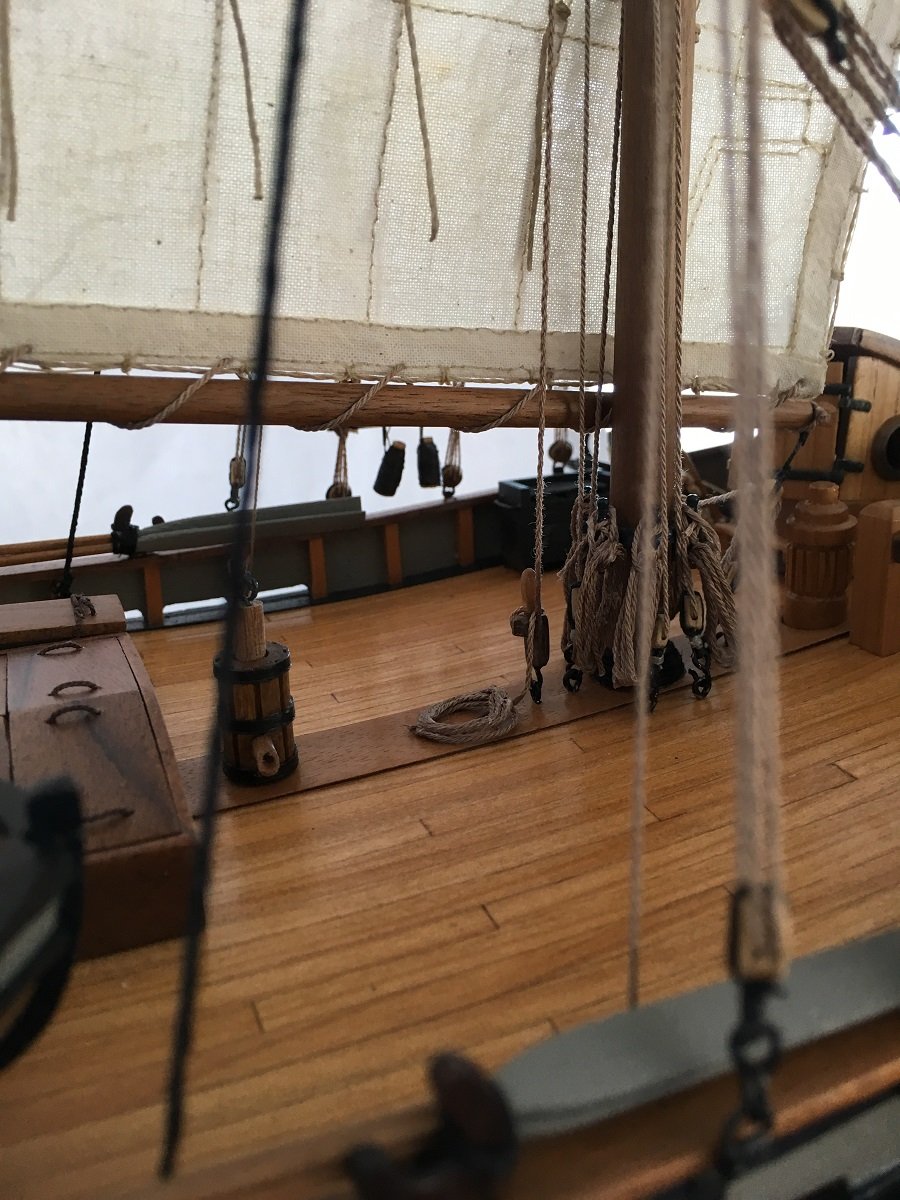
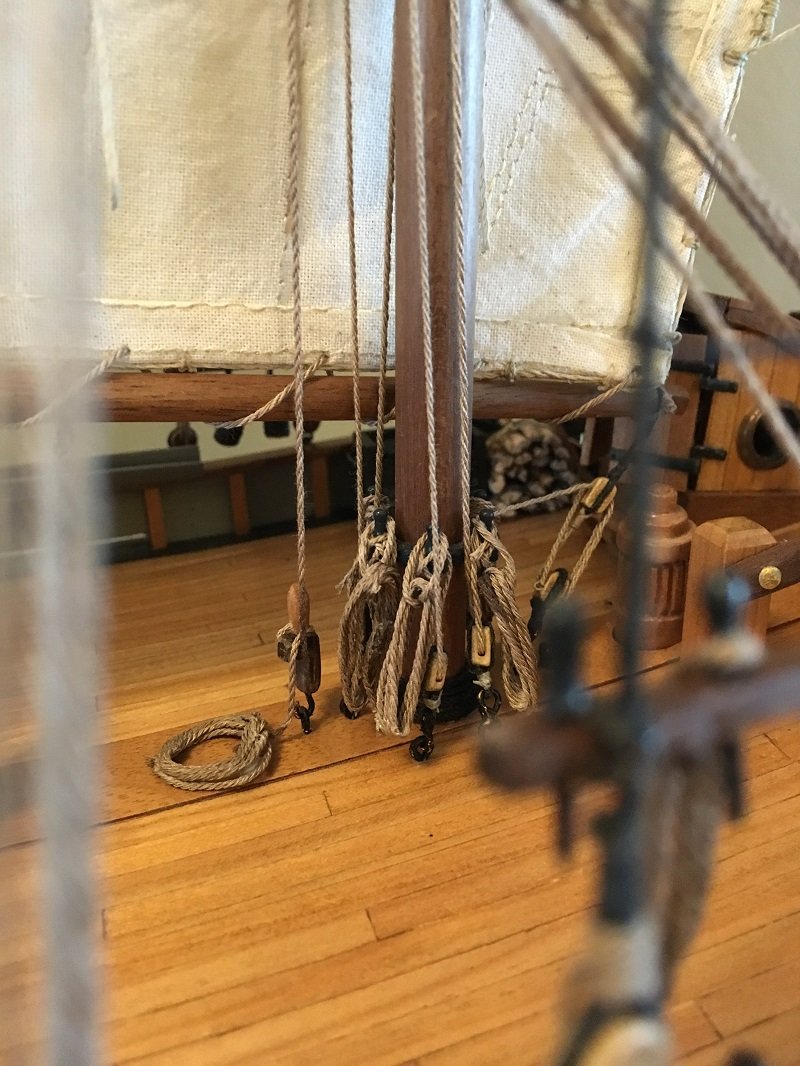
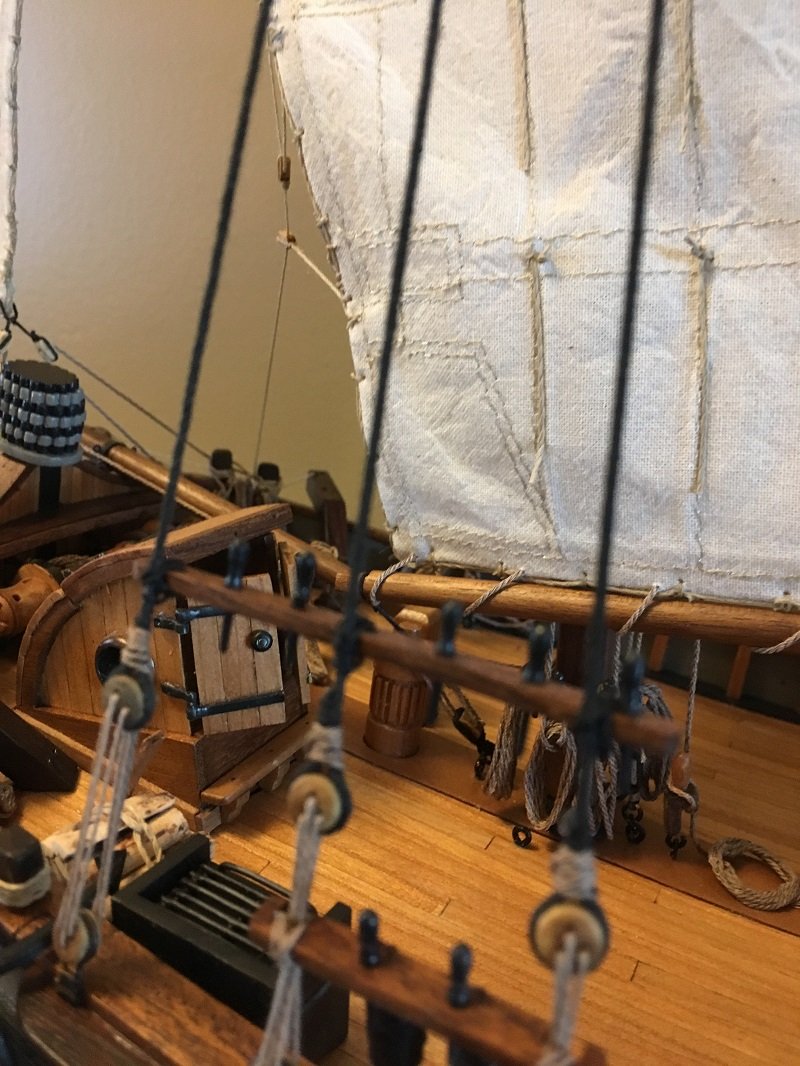
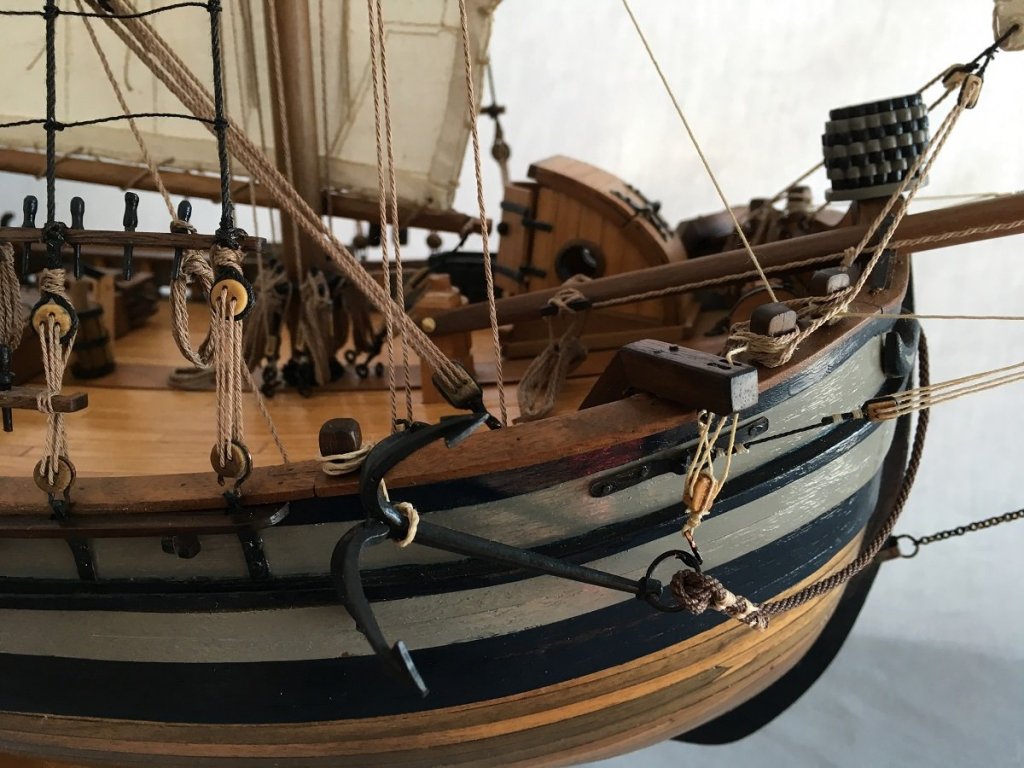
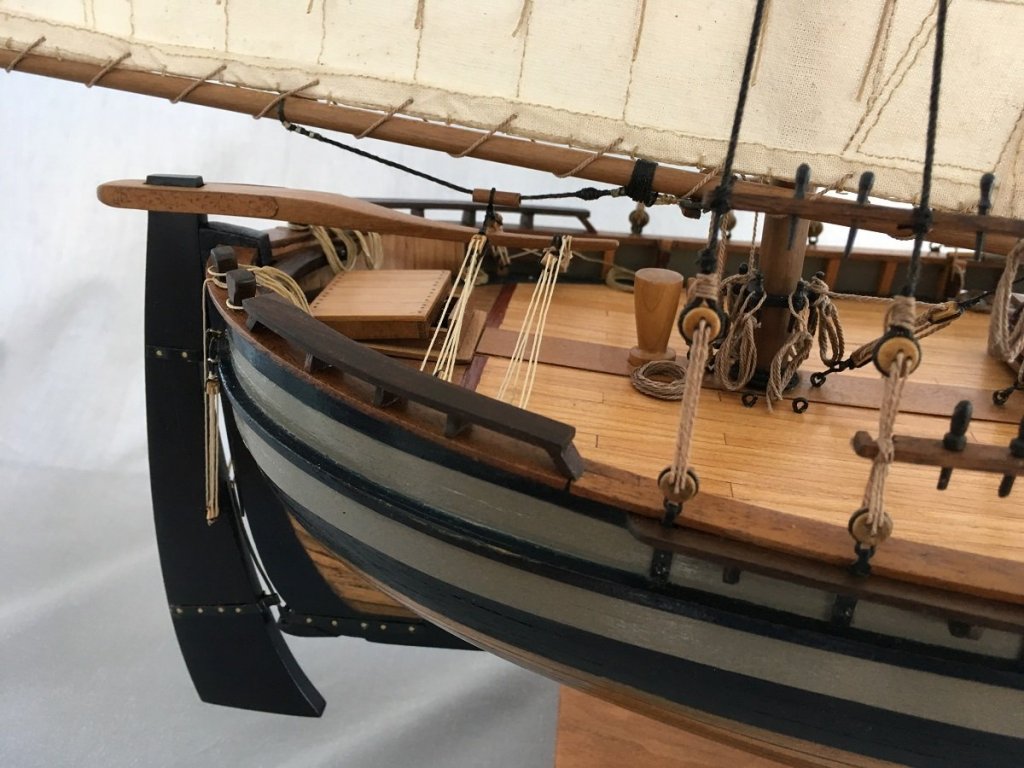
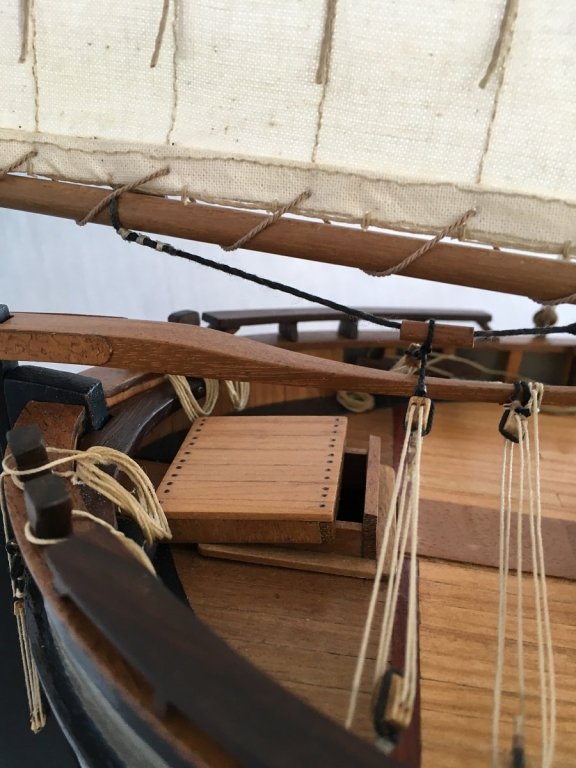
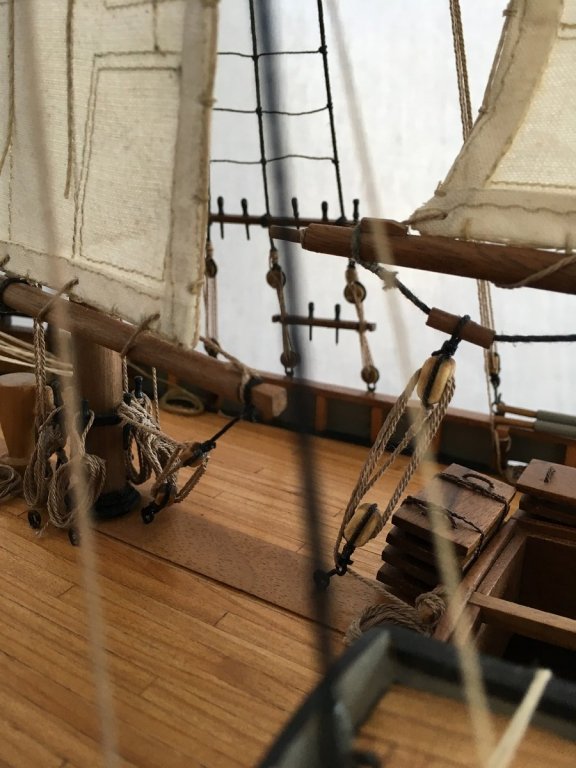
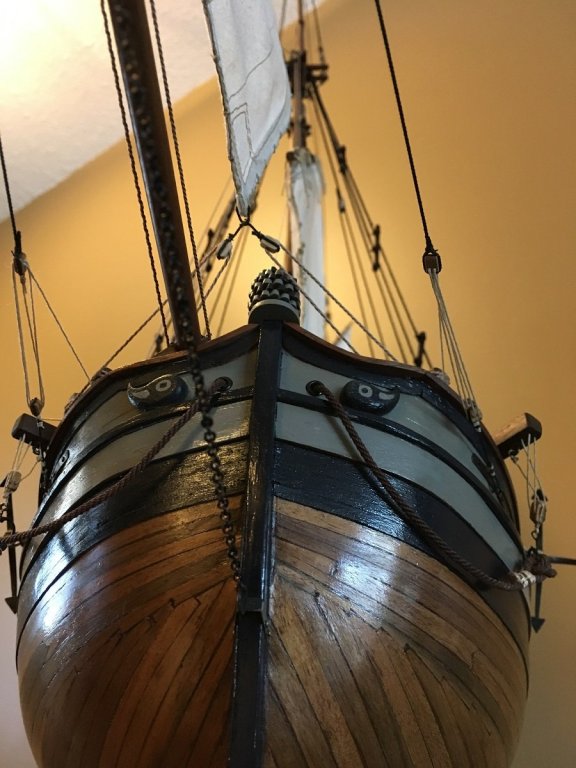
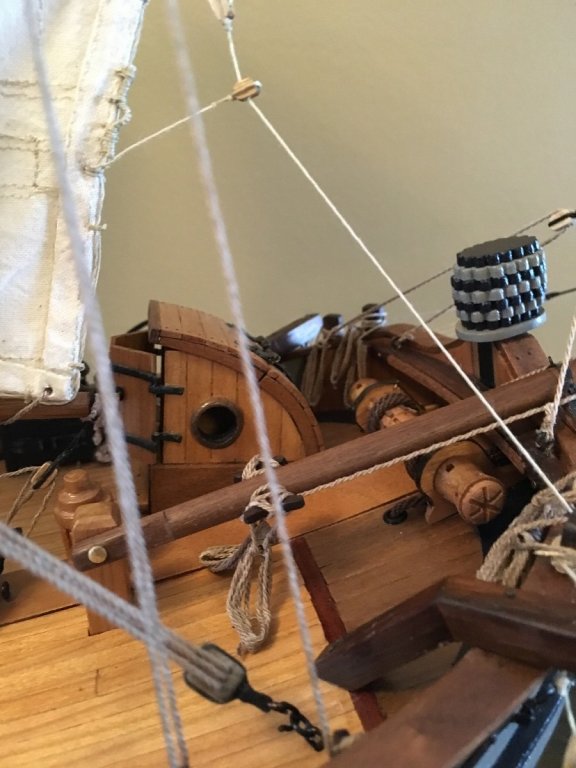
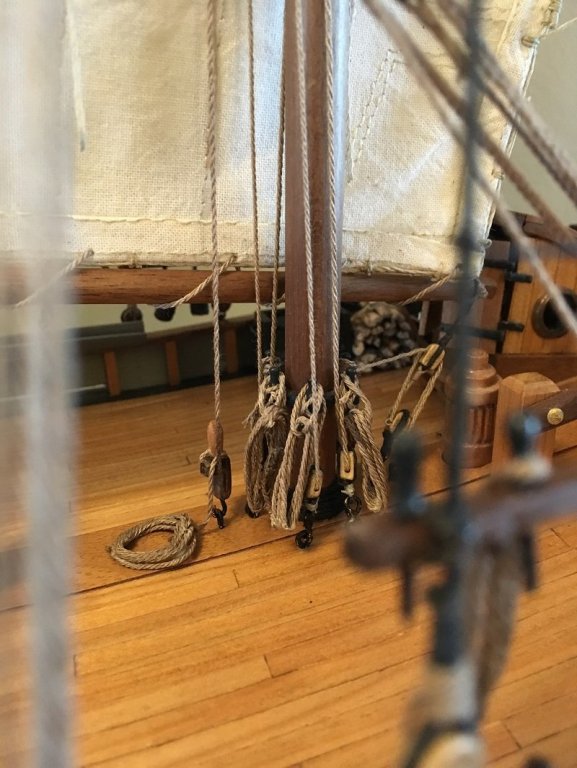
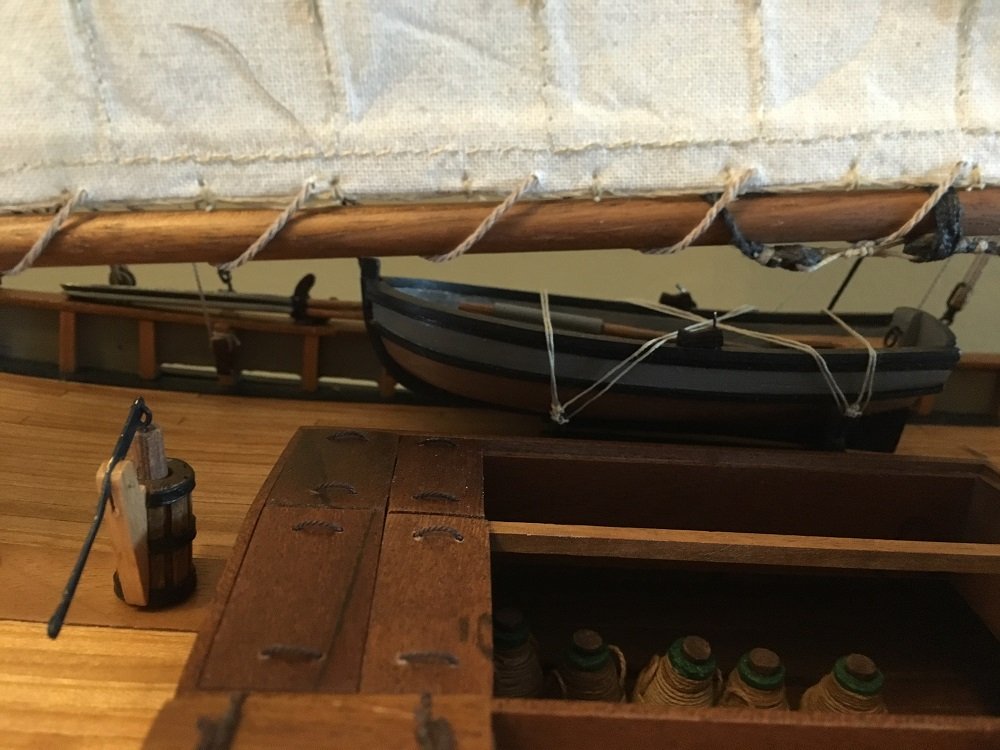
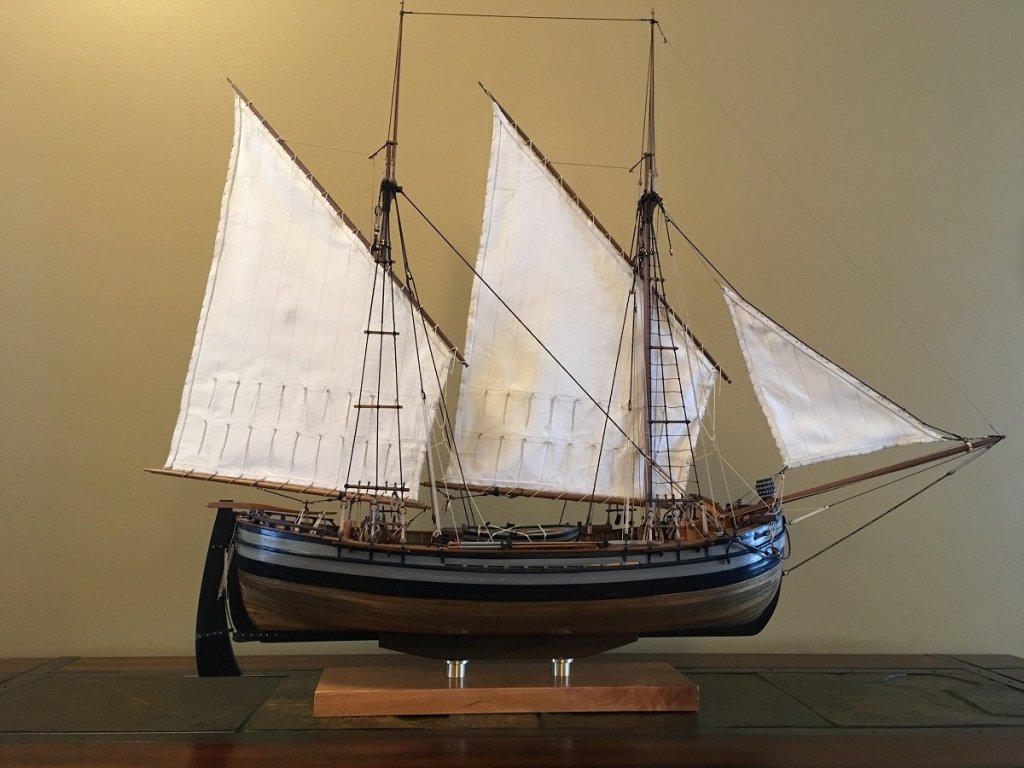
The day has finally arrived, my Trabakul is complete!! Thanks to all for following along, for all the likes and the great comments it was all very much appreciated. I would also like to thank Zoran at MarisStella for all his support and help and of course for producing this fantastic kit. Although, not an easy build, I would recommend this kit not only for the challenges you will face but also for the high quality of material and contents. So anyway here she is: That's it and I really hope everyone enjoyed and I hope to see you over at my Stefano build Have A Good Weekend and do think of those we have lost at war as tomorrow is "Remembrance Day" in Canada


- 653 replies
-
- 40
-
-
- trabakul
- marisstella
- (and 1 more)
-
Such a great build, I really like how you have painted the carvings they look fantastic. Super work on the fix, very annoying but happens to all of us
-
She all looks good, almost a shame to paint that furniture as it looks very nice the way it is. Great work
- 131 replies
-
- 3
-
-
- finished
- artesania latina
- (and 1 more)