


donrobinson
-
Posts
1,909 -
Joined
-
Last visited
Content Type
Profiles
Forums
Gallery
Events
Posts posted by donrobinson
-
-
Looks like an interesting build. Are the hull planks pre-cut?- mtaylor, jack.aubrey and mrshanks
-
 3
3
-
Hi Soren, this is a great kit and I wish you luck. As you say there are lots of good logs to follow here and also lots of fantastic help. I have also started the Pegasus , no log yet, it is on hold for now as I complete some Christmas projects after that I will start a log. I will be watching for yours and will follow along, I am not too far into mine yet(bulkheads mounted) so we should be close together.
-
incredible work, the rigging is beautiful
-
Hi Zoran, Somehow I missed this last posting of yours. Those are nice looking boats you have shown , and a great deal on the shipping costs. The Ragusian Carrack is a very interesting looking boat. That looks like something I would like to have on my shelf someday
- Canute and MarisStella.hr
-
2
-
- That looks really good Dimitris, I've never seen that before
-
-
-
Hi Dave,
I was just wondering how the Rattlesnake is coming, or are you just working on the AVS. This is such a good looking build I was hoping to see more of it. Your AVS is coming along great by the way
-
Hi Ian, you will find that a lot of this "walnut" in kits are just walnut look a likes. There are lots of species of wood called walnut but are just that(name only), if you have a Windsor Plywood close by check and see if they have Mansonia aka African Walnut, I found some here and it looks real close to lots of the kit walnuts. I got mine for $4.99/bf, not too bad of a price for "Walnut"
- Seventynet, Canute and Dimitris71
-
3
-
Your planking is looking real nice, as is the rest of the boat. Great work!
-
Thanks to all of you:
Dimitris: Thanks, it took along time(for me) and I think I was a little too fussy at times but I think it was worth the effort
Dave: I was a little worried when I first opened the hull, but now I am happy with it. I'm wishing now I would have opened one more hold, for the captains candy storage

Zoran: Thanks for stopping in, I hope you are right. I'm a little worried that I am having more fun building it than he is going to have looking at it
Brian: It is more of a entry level kit so maybe that's why it is not seen very often. It is a lot of fun changing things on it and a little bit of stress relief from the more complicated kits
- Dimitris71 and Canute
-
2
-
Hi Dimitris; it is called a seizing, personally I like the contrasting colour, it makes it stand out more. If it is historically correct or not I could not say for sure, what I can say, is that it is your boat so do what pleases you.
- Dimitris71 and Omega1234
-
2
-
Great rigging Frank, you are really getting close to the end. Is that liquitex available in hobby stores? Or where does one find it.
I like your idea of a turntable for the rigging, I was thinking of this also but also thought it would be good to have it mounted on a table or pedestal that could be raised or lowered, if you could design something like that I would really appreciate it.

-
Hi Martin, I'm not sure if you have seen the 3D tour of the Revenge on Amati's site, I just thought I would let you know in case you have not seen it. It is really good and could be of some help, for me anyway, check it out. I have been trying to put the link here for you but apparently this is above my capabilities it can be found at "amatimodel.com". You will have to get to the Revenge page then click on the 3D Tour. Just a warning it may take up a lot of your time as it is real good.
-
-
Hi Dimitris,
This is one of my favourite parts of a boat, how so many lines converge to the bowsprit. You are doing good.
300 hundred olive trees, that would be a lot of olives!!!
-
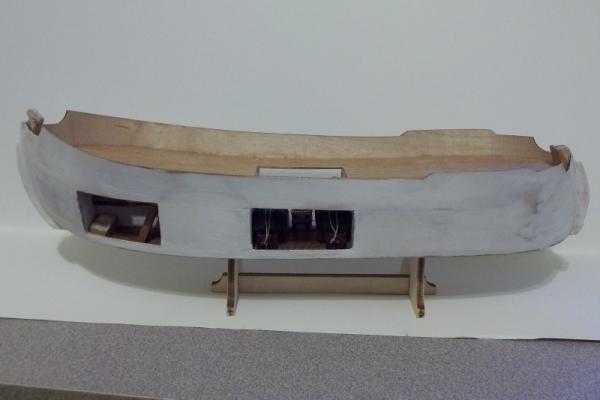


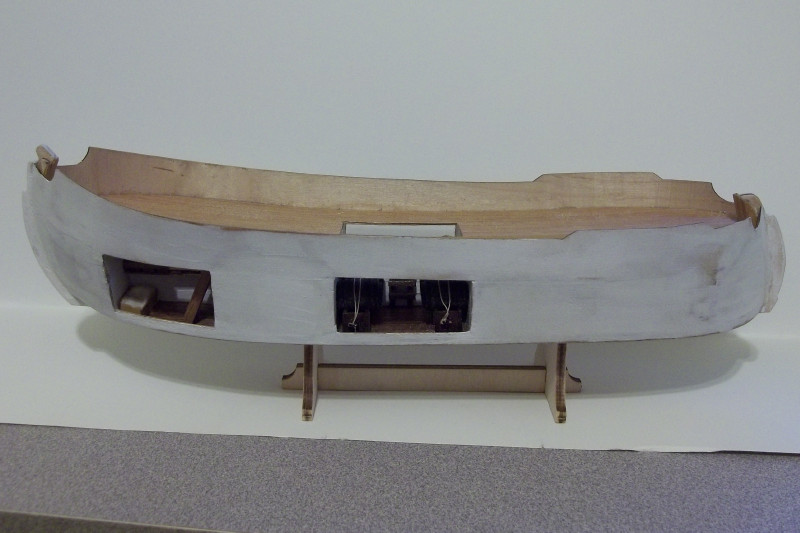
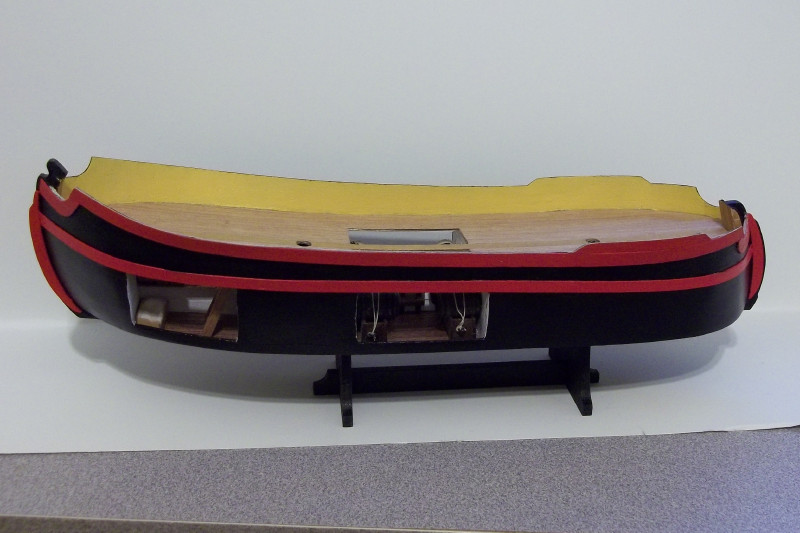
I've made some progress since last time. As you can see I have opened the hull so that my little captain can get a better view inside. I thought that this will be easier than trying to open the hatches and catching some rigging, causing grandpa some repair work.
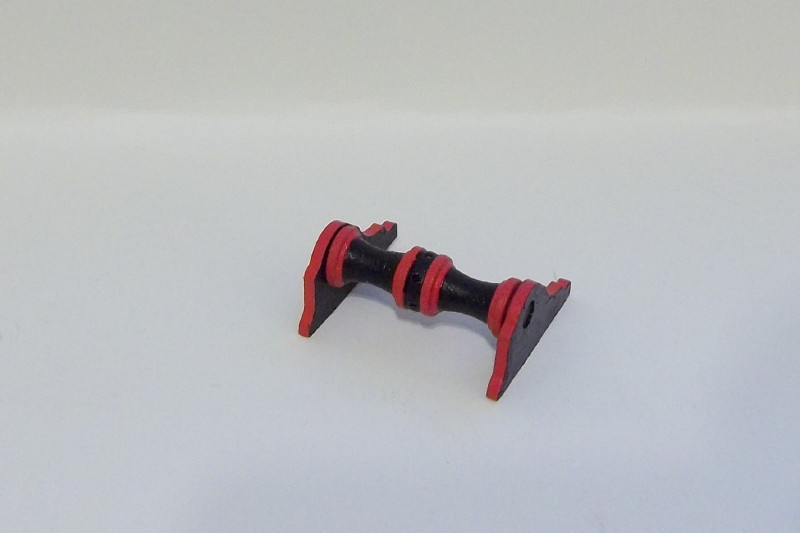
The capstan is the kit supplied one, it appears to be a little large for this size of boat but I decided not to try and rebuild, at this size my four year old grandson should have no problem seeing it.
I replaced the wales with different stock as the kit supplied wood which was much thicker would have been very difficult to make the lateral bend required.
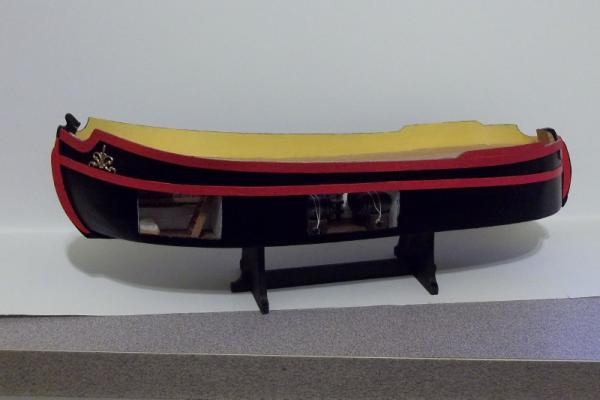
The hull, on the port side, is now complete other than a couple of touch-ups that will wait until the end. This was my first attempt at painting a hull, on my other two builds I planked rather than painted. I never realized how much extra work it is to paint a hull and get that "perfect" finish, I now have a great amount of respect to those who choose to paint. There still is some flaws but can only be seen when held up to the light at a certain angle. I am sure if it ever gets held up in that fashion it will be dropped, thus taking any attention off of the painting flaws.

That's it for now,
Have a Good One
- Mirabell61, Seventynet, riverboat and 5 others
-
8
-
Fantastic Brian, congratulations! I have learned so much following this build, looking forward to your next one
- Dimitris71, Canute, zoly99sask and 3 others
-
6
-
-
Hi Vivian, I just finished reading your log and would like to say your work is wonderful, and I am looking forward to seeing more of it.
Have a Good day
- Vivian Galad, mtaylor, ScottRC and 1 other
-
4
-
I wouldn't recommend using one of these, they are handy to have but not for models. Aiming them accurately is almost impossible, when the pins hit material of different density(knot) they tend to veer off to the side(partially exiting or splintering wood), the striking pin leaves an indent in the wood( can be seen on the above matchstick pictures) and the size would limit use to almost only the exterior hull.
I have also thought of using one of these in the past but quickly ruled it out due to these reasons, the biggest one being is that I don't have a model I want to experiment on.
-
that is a real nice detail, great work
-
Thanks Frank it's been a fun build so far
Rick I forgot to answer your question concerning the milling machine. Sherline tools has a rotary table($283.50) and combine it with a tilting angle table(115.50) and you will be able to drill holes at any angle. Now if you want the ultimate they have a cnc one also($761.25) you would just have to enter the number of holes into the machine and it will move the table for you, no more counting revolutions or trying to figure out degrees. Tim "the tool man Taylor" would love this one
- riverboat, Dimitris71, Canute and 1 other
-
4
-
You are really moving along, very nice work

Trabaccolo by donrobinson - FINISHED - Amati - with a little Santa bashing
in - Kit subjects built Up to and including 1500 AD
Posted
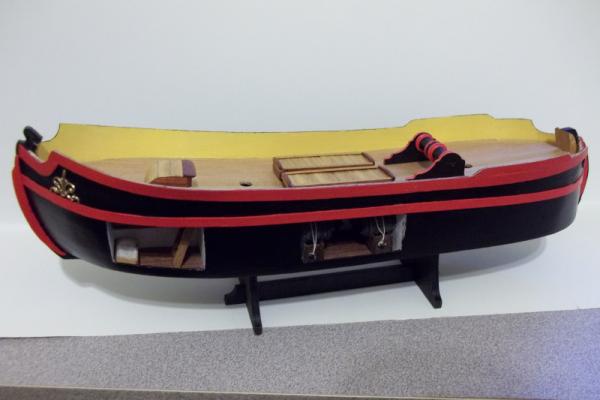
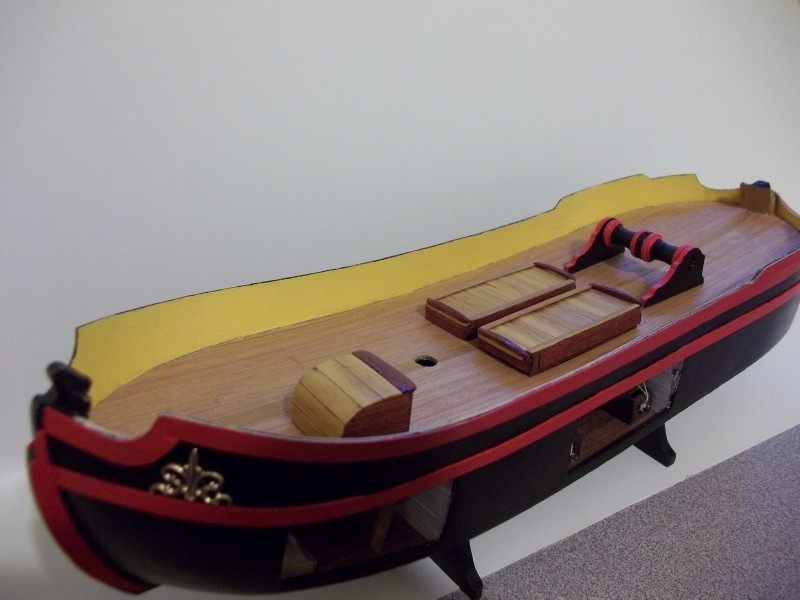
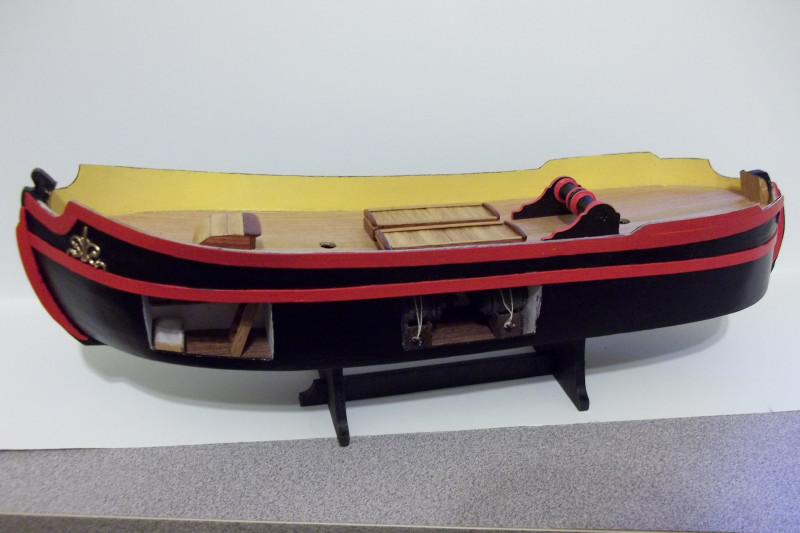
Here is a little look as to what has happened since last post. I apologize for quality of pictures, this point and shoot camera is really not that good. Pictures explain what has happened so I won't bother to explain too much.
Next will be installing belaying pins, then install all deck furniture permanently then masts and rigging.
Have a Good One