HOLIDAY DONATION DRIVE - SUPPORT MSW - DO YOUR PART TO KEEP THIS GREAT FORUM GOING! (Only 13 donations so far - C'mon guys!)
×

CDW
-
Posts
7,743 -
Joined
-
Last visited
Content Type
Profiles
Forums
Gallery
Events
Everything posted by CDW
-
 She looks very very long in that picture. Big model, for sure. The paint looks great, Greg.
 -
Thanks, and of course you may come along, OC! Glad to have you aboard.
- 44 replies
-
- 3
-

-
- schnellboot s-100
- revell
- (and 2 more)
-
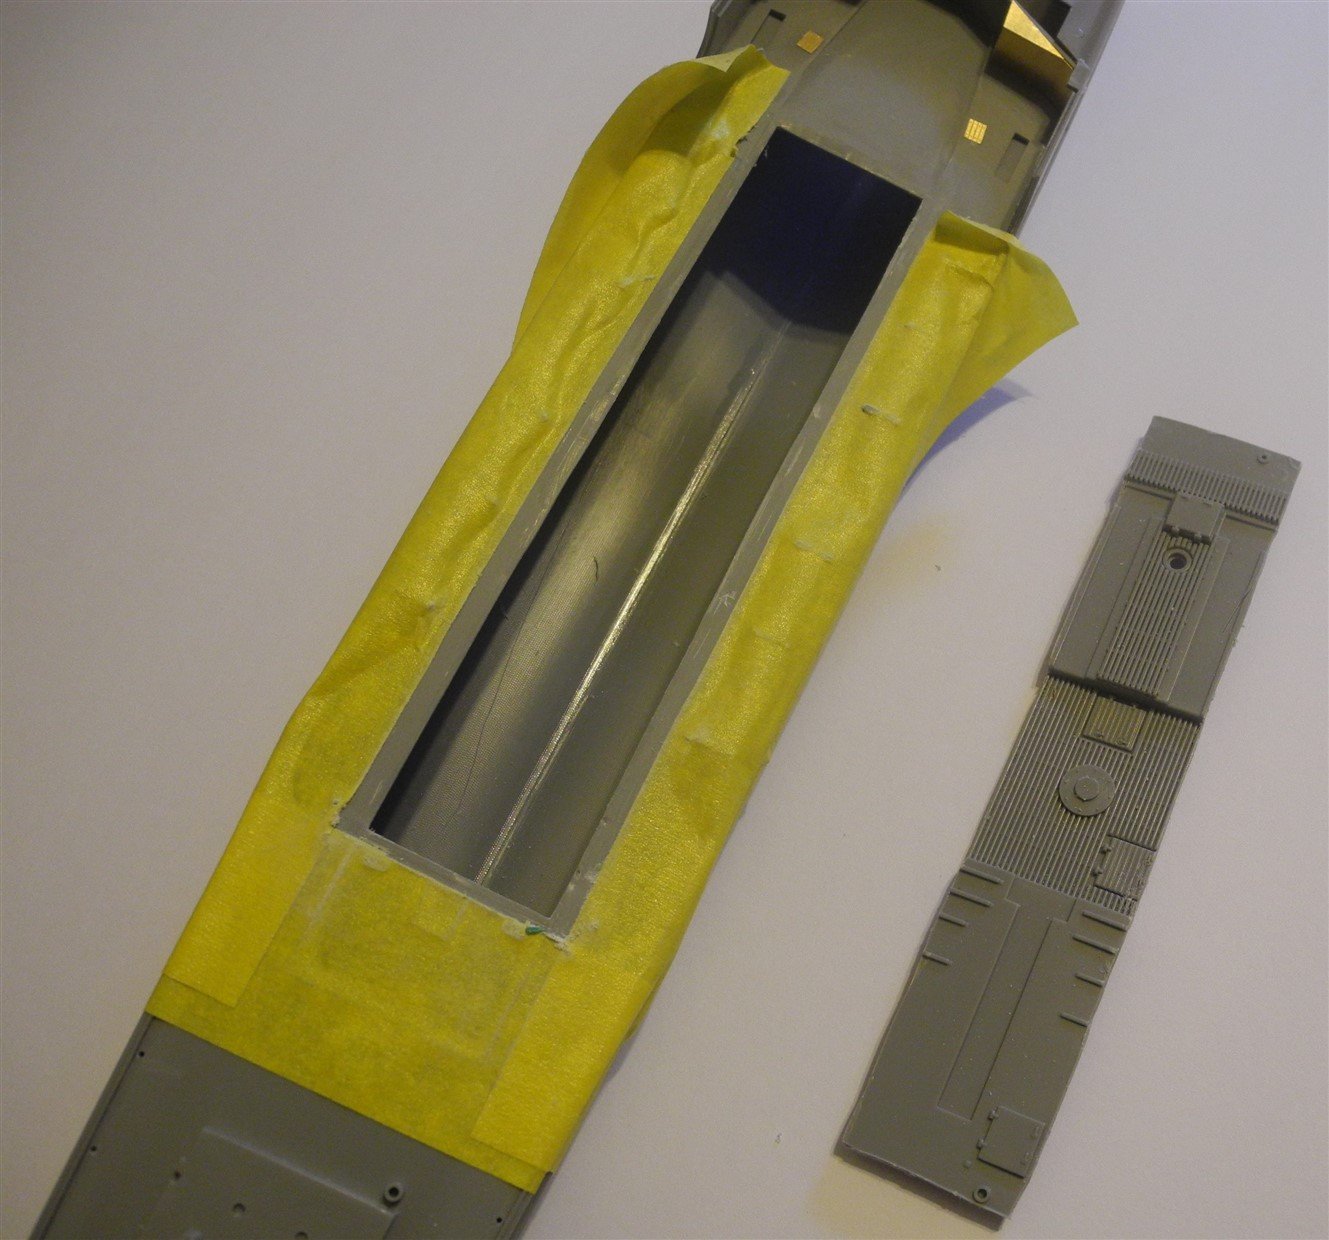
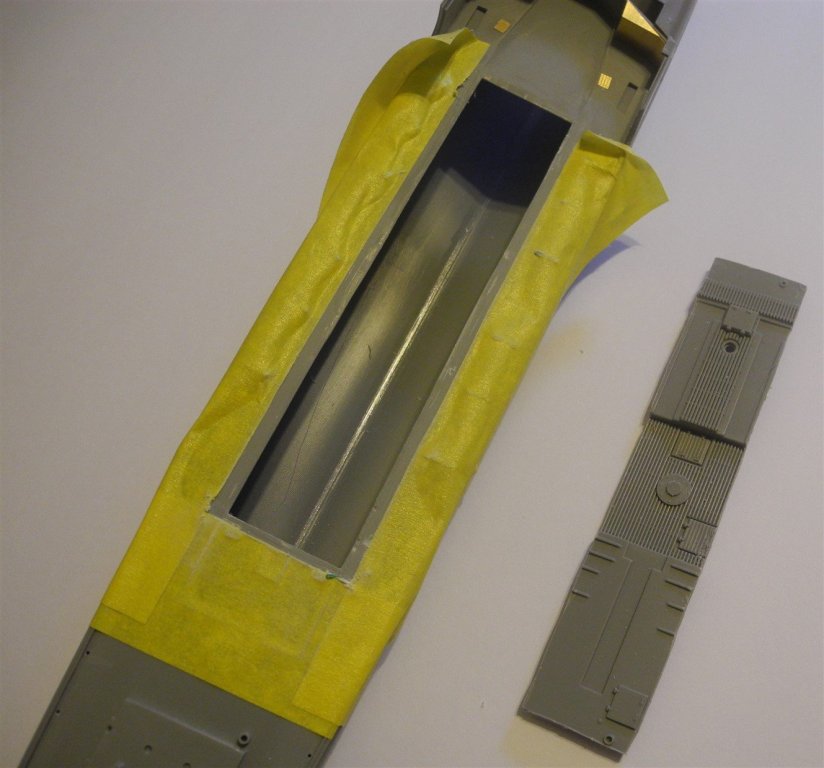
Here, almost all the surface detail on the forward deck has been surgically removed to prepare for the updated parts. Just to the left of the deck piece, on the instruction sheet, you can see the raised details that had to be removed and what will be added in its place.
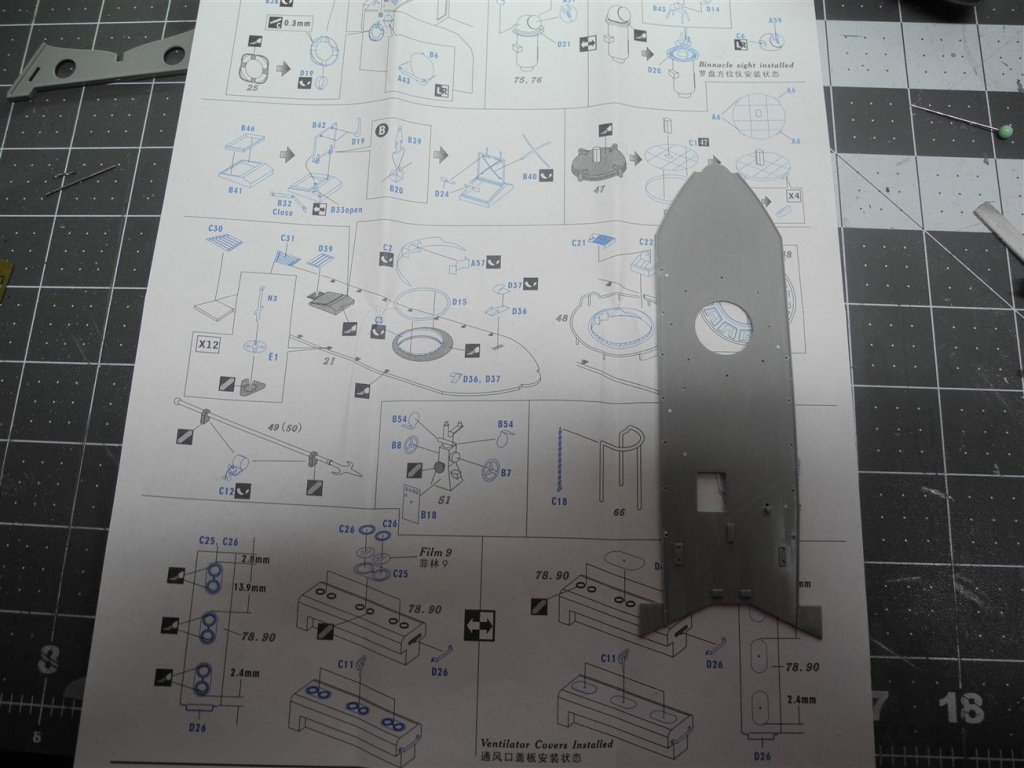
- 44 replies
-
- 5
-
-
- schnellboot s-100
- revell
- (and 2 more)
-
Langoustier by mhmtyrl - FINISHED - 1:35
CDW replied to mhmtyrl's topic in - Build logs for subjects built 1851 - 1900
Outstanding. I love your work on the planking.- 27 replies
-
- 3
-
-
- langoustier
- lobster boat
- (and 1 more)
-
Hey Mike Great start, buddy. In the "good old days", we called those parts "die crunched". Sterling models were world famous for die crunched parts. Do you ever sand the side of the die cut sheet that's not completely cut through? Sometimes, sanding to reduce a small amount of thickness is enough to make the parts fall right out. At the least, it gives a lot less to cut when you're doing the knife work.
- 146 replies
-
- 3
-
-
- dumas
- Chris-Craft Commander Express
- (and 2 more)
-
Just dry fitting some of the photo etch superstructure I've been building. So far, so good. Fit seems okay. Still, lots to be done including more surgery to other deck parts.
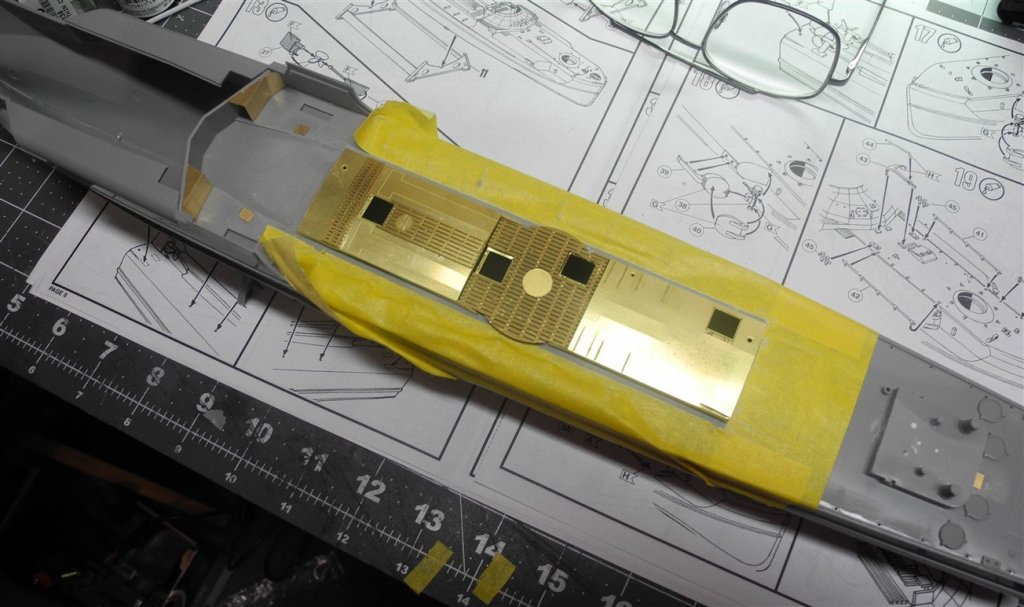

- 44 replies
-
- 8
-
-
- schnellboot s-100
- revell
- (and 2 more)
-
Glad to have found your build thread. The boat has beautiful lines. Will enjoy following your progress on this project.
-
A big difference in the hull, now compared to when you started. Great job! PS: How does the photo etch that came with you kit look? Does it appear sufficient to get a good finished result or would more be better? The reason I asked is because I've been seeing some 1:250 Yamato photo etch sets on Ebay recently and am wondering if I should get a set. I don't think my kit part installments have included the kit photo etch yet for me to compare.
-
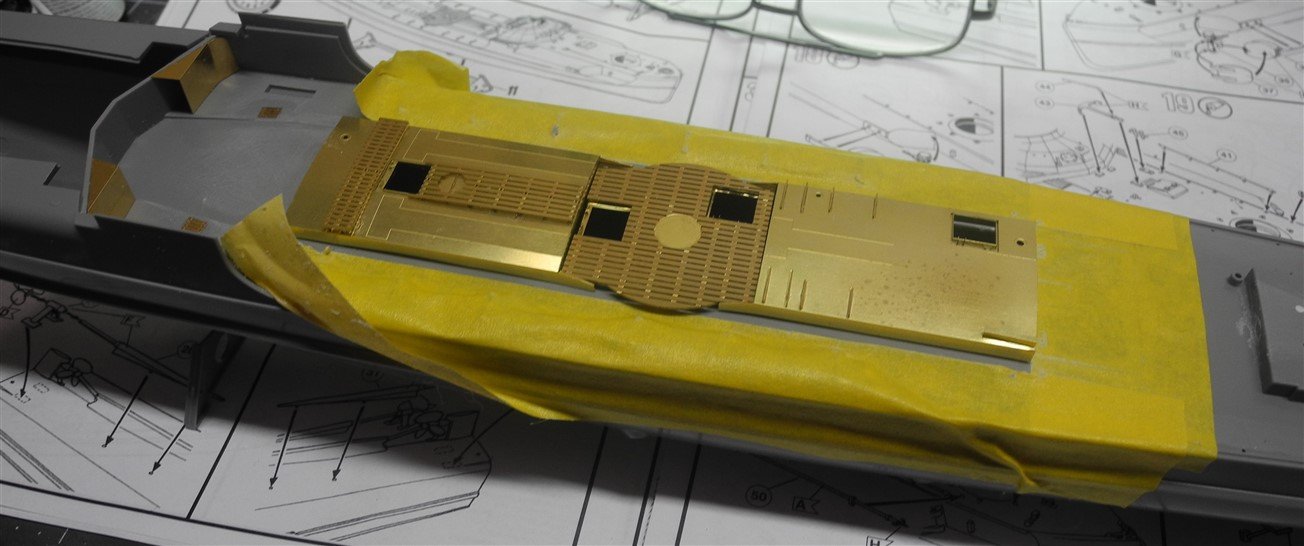
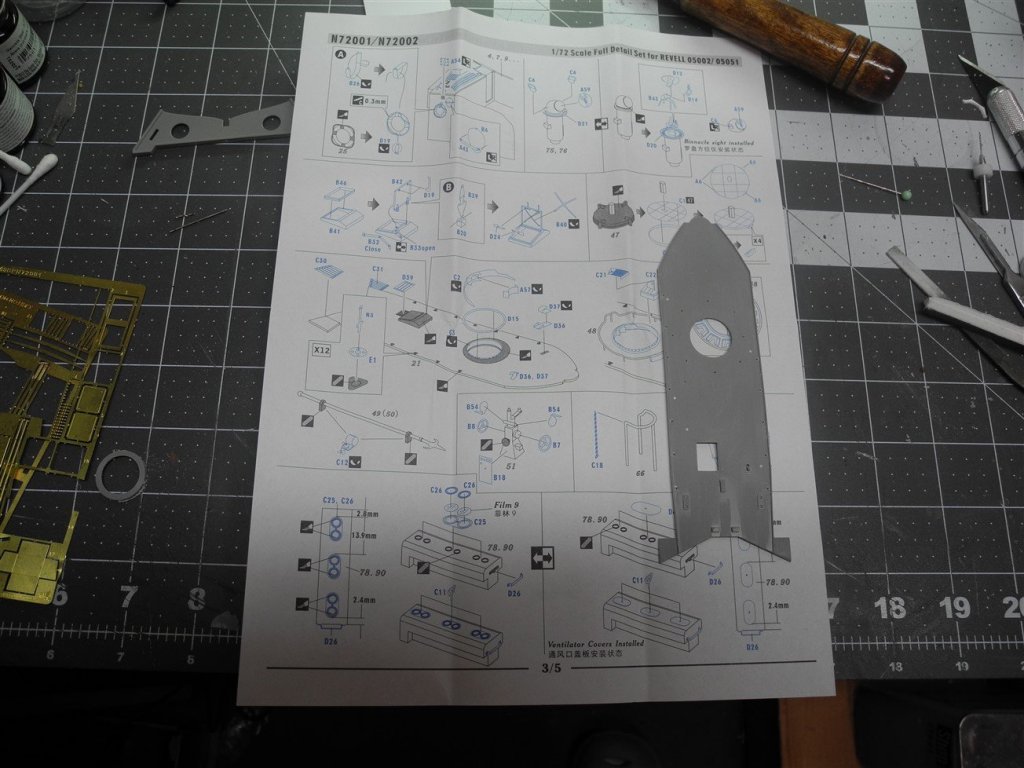
There's quite a bit of surgery that needs to be done to build the detail set and incorporate it to the model. Here the entire center of the deck is removed to prepare it for a new, photo etch superstructure.

- 44 replies
-
- 7
-
-
- schnellboot s-100
- revell
- (and 2 more)
-
All looks great so far. Following your build for inspiration.
-
Airbrush
CDW replied to Mike Dowling's topic in Painting, finishing and weathering products and techniques
edit: I was up too late and and had a senior moment stating lanolin. I actually use glycerin. -
Airbrush
CDW replied to Mike Dowling's topic in Painting, finishing and weathering products and techniques
For the airbrush cleaning fluid "recipe" above, I forgot to add that I give it a squirt of lanolin glycerin as well. The lanolin glycerin acts as a lubricant. If your local drug store is like mine, a chain store, you'll probably have to search for a small mom and pop drug store for the lanolin. Big drug store chains don't carry items like that anymore. I guess there's not much call for it. edit: I was up too late and and had a senior moment stating lanolin. I actually use glycerin. -
Airbrush
CDW replied to Mike Dowling's topic in Painting, finishing and weathering products and techniques
I mix up a gallon of distilled water, cheap windshield washer fluid, alcohol, and a dash of dish washing detergent, then dispense small portions in a small squirt bottle to everyday use. Been using this concoction for years to clean my airbrushes. It's cheap and very effective for acrylics cleanup. My mix ratio is approx: 2 3/4 quarts : 1 quart : 10 oz : 1 tablespoon -
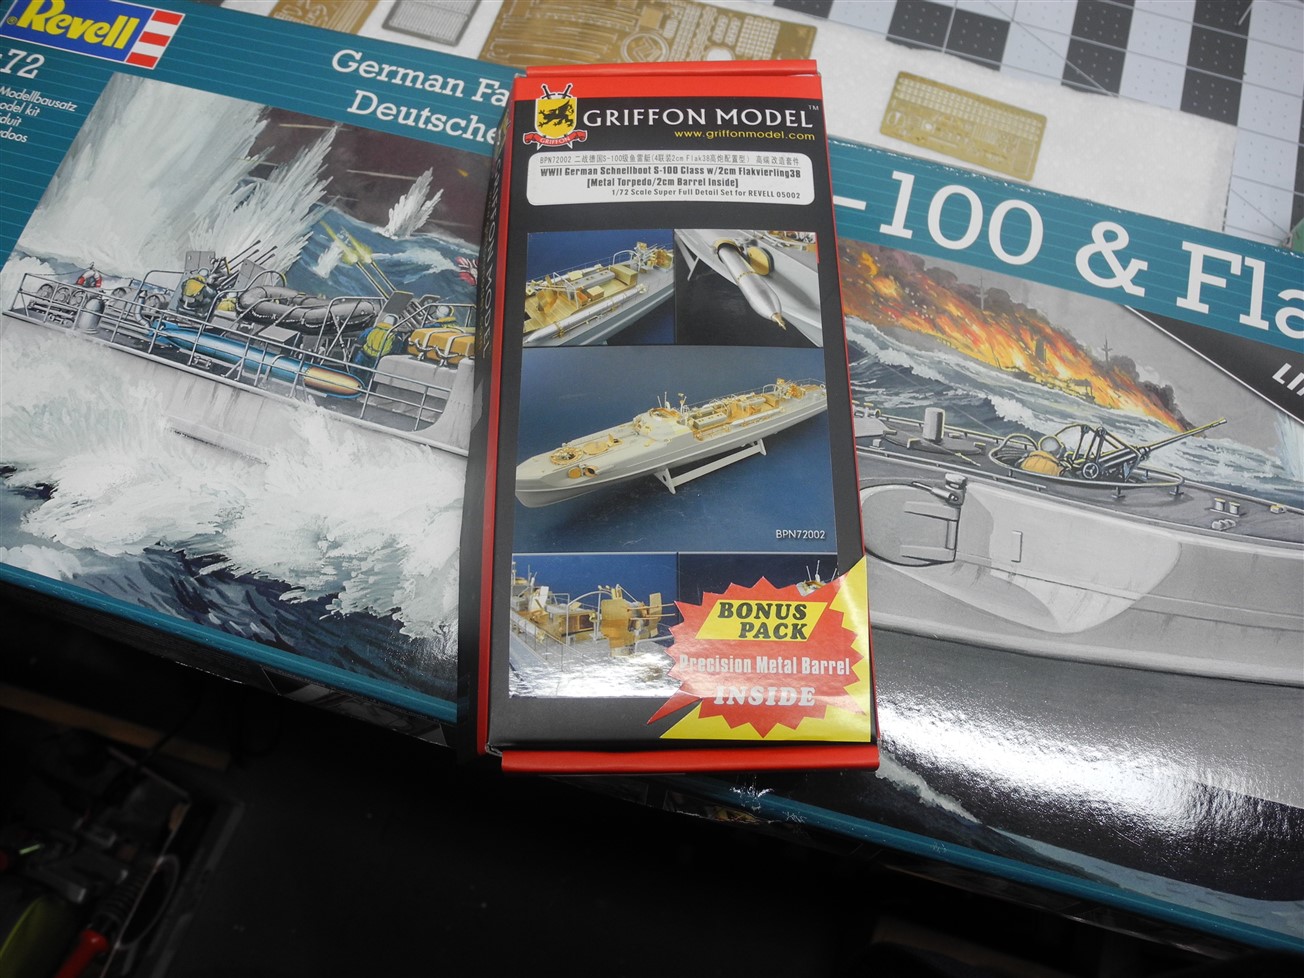
Good news...my Griffon Models detail set came with a BEAUTIFUL set of turned aluminum torpedoes, complete with detailed little bitty props and all that good stuff.
- 44 replies
-
- 6
-
-
- schnellboot s-100
- revell
- (and 2 more)
-
Like you, I am also having some trouble figuring this out. Maybe there are features that have not yet been loaded into the new program (I hope) because the new format is not quite as user friendly as far as posting pictures is concerned. Have you found a way to post pictures from Imgur or other such sources? I could not find the way to do that.
-
Yes, I have to admire that tripod work as well. Been there and done that, and know how difficult it is to get it all lined up. Your entire work so far is coming along beautifully.
-
If it were the 1:35 Italeri Schnellboot, it would be a more suitable model for RC. But the 1:72 version I'm building is a little small.
- 44 replies
-
- 5
-
-
- schnellboot s-100
- revell
- (and 2 more)
-
Thanks Captain Slog. Glad to have you aboard. I'm looking forward to your 1:200 Mikasa build when you get to it.
- 44 replies
-
- 4
-
-
- schnellboot s-100
- revell
- (and 2 more)
-
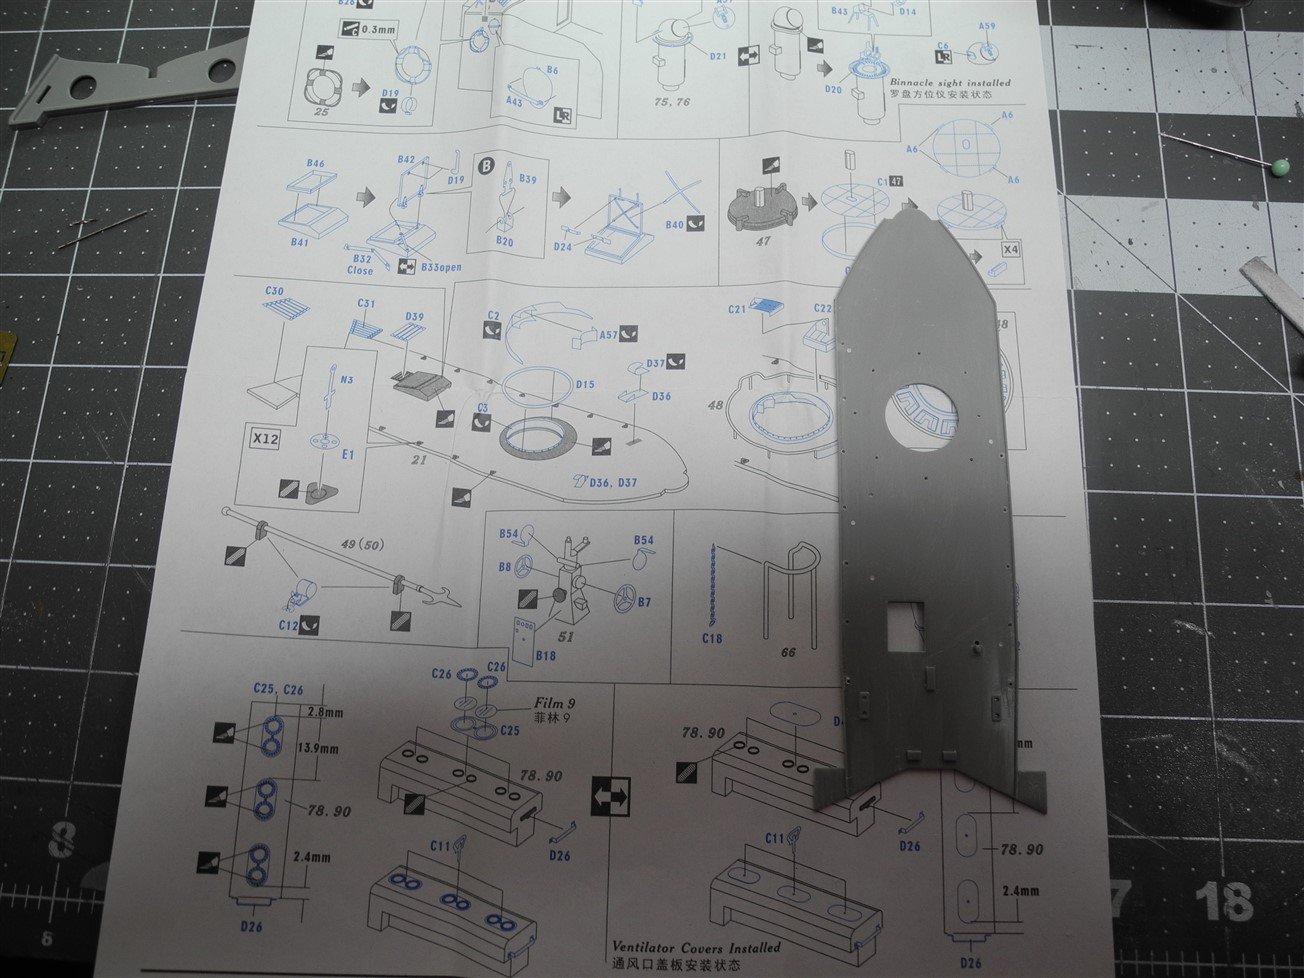
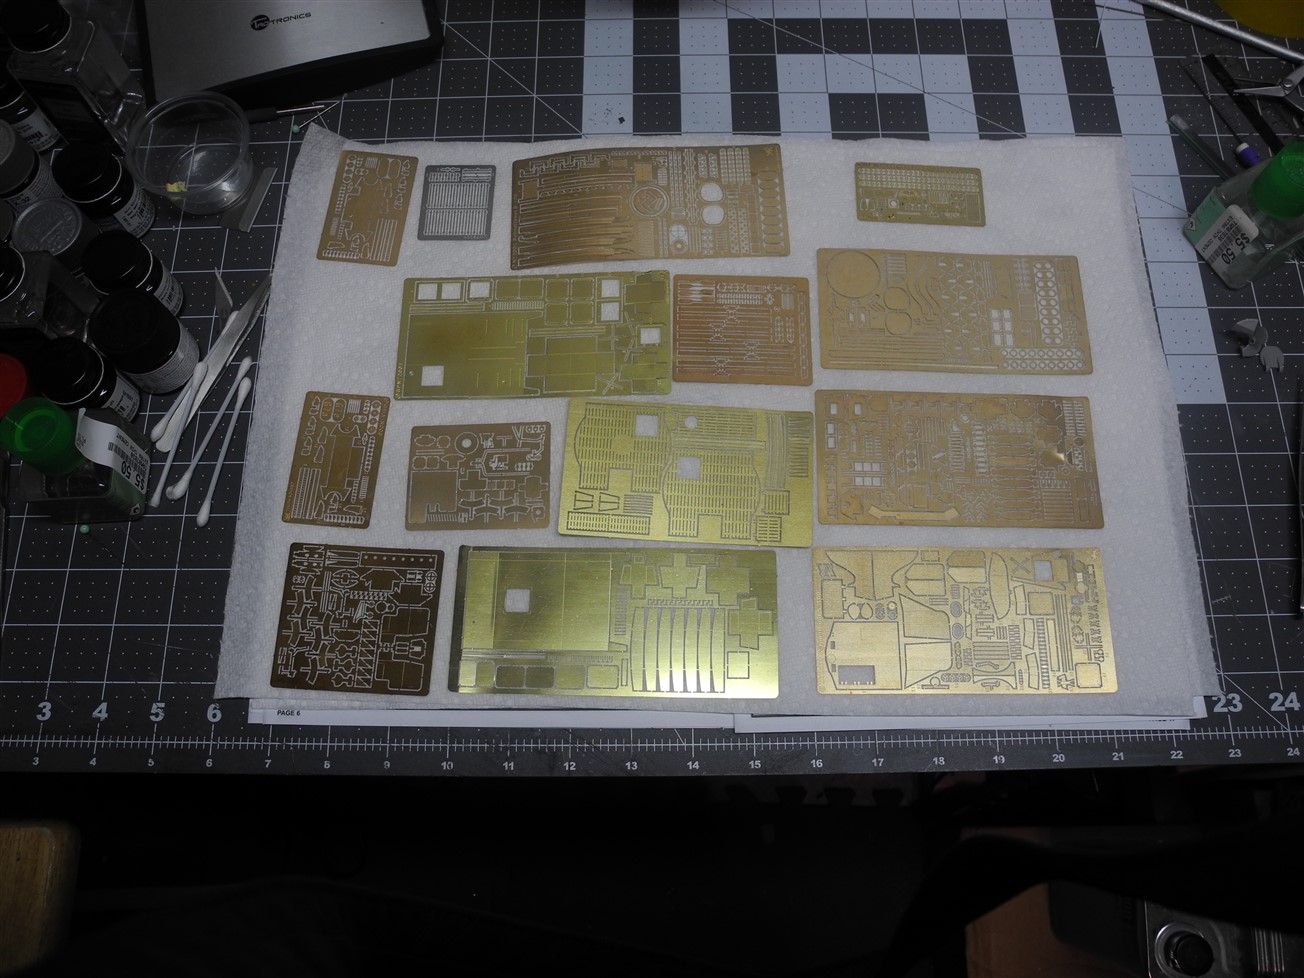
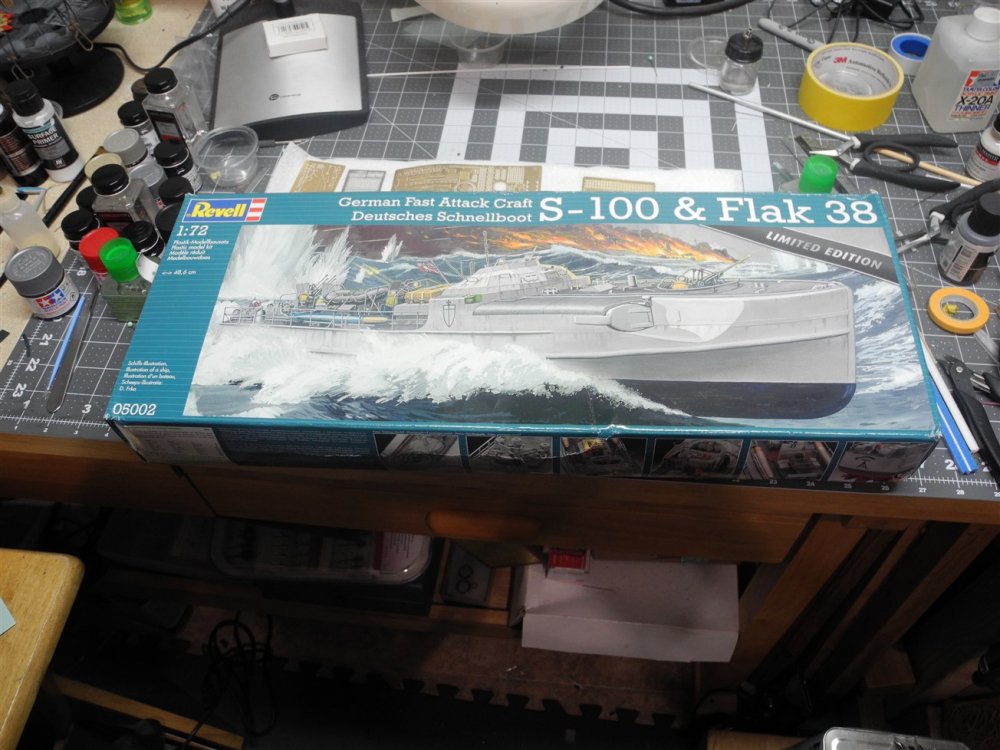
My next project. I should have bought this model a few years ago when they were plentiful because now, they are hard to find. I shopped around until I found one on Ebay from Russia. This particular set included the Griffon Model comprehensive detail set. I cleaned up the photo etch sheets in my sonic cleaner and am ready to begin assembling the boat.


- 44 replies
-
- 9
-
-
- schnellboot s-100
- revell
- (and 2 more)
-
Airbrush
CDW replied to Mike Dowling's topic in Painting, finishing and weathering products and techniques
For light cleaning between colors, I just flush mine with airbrush cleaning fluid meant for acrylics. Flush it by filling your cup with cleaning fluid and spray it through the airbrush until it comes through clear. For heavy cleaning, you'll have to disassemble the airbrush and clean it using the same cleaning fluid. It helps a lot if you have a set of cleaning brushes meant for cleaning airbrush. -
Ever hear that old country music song, where the artist (Johnny Cash) says in the lyrics, you can call him Bill, George, or anything but Sue. I always got a chuckle from the song.