


Karinmutter
-
Posts
103 -
Joined
-
Last visited
Content Type
Profiles
Forums
Gallery
Events
Posts posted by Karinmutter
-
-
4 hours ago, Sailor1234567890 said:
What is the purpose of the moused up stays? I see that it keeps the eye formed from closing tight on the mast as slack is taken up but is there another purpose? I'm more knowledgeable about later ships.
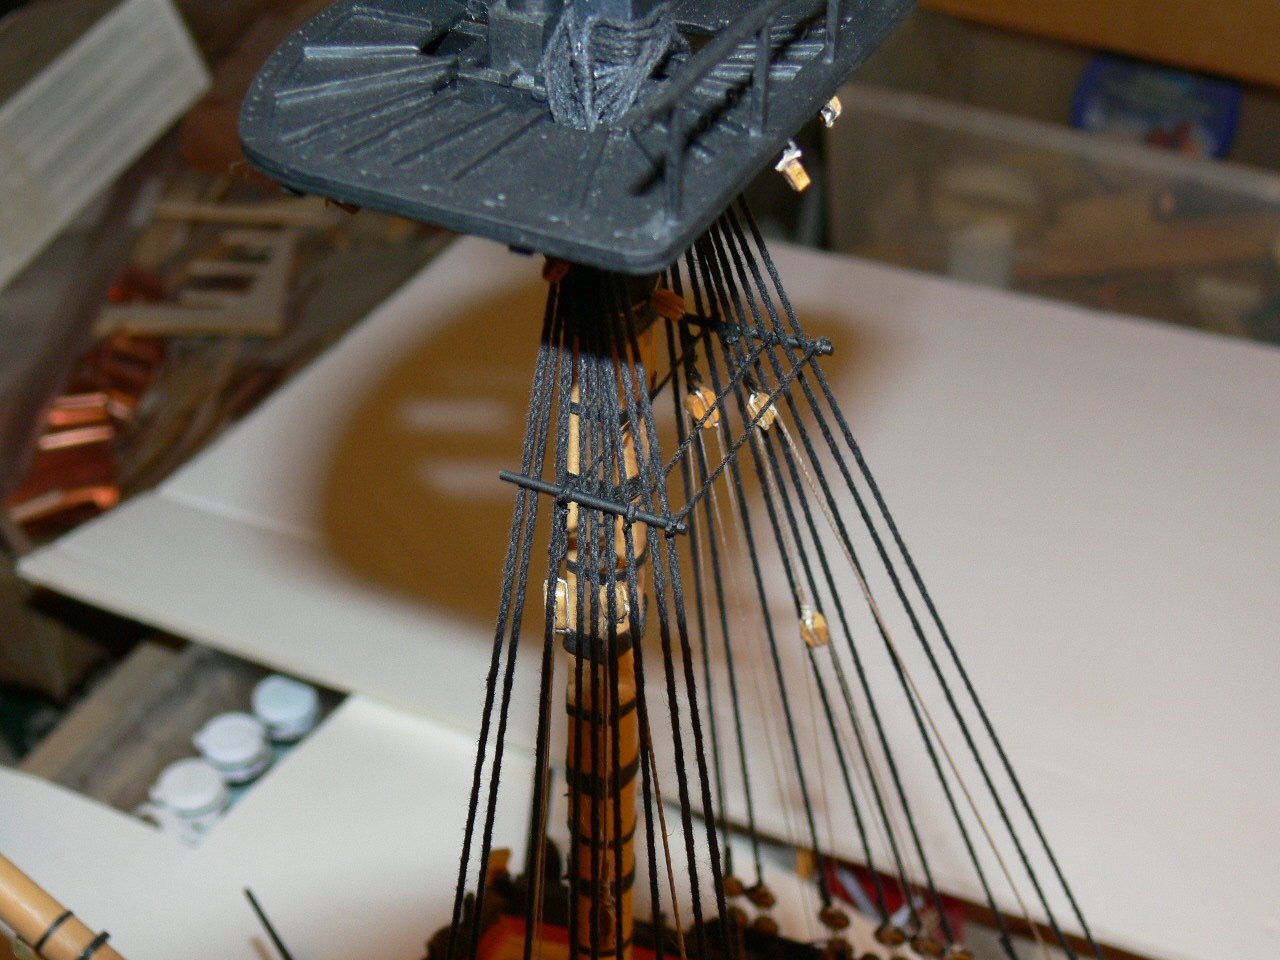
Hello Sailor! You are right, the purpose of the mouse is to keep the loop from closing tight on the mast. I guess it distributes the forces more evenly and allows better control by changing the distance between the closed heart blocks.
Greetings, Martin
-
7 hours ago, mort stoll said:
very nice .very very nice.
mort
Thank you Mort , I am not perfect, but I try my best...
-
7 hours ago, Vane said:
Increadible build! I which to do Agamemnon some day as well!
Just a technical issue I dont understand why. But I have seen several people "ink" the ratlines rather than using black thread. Why?Hello Vane, thank you for your appreciation!
As for your question: Threads, who are already black are not as easy to handle, because the coloring makes them stiffer. Also the desired "sag" is harder to accomplish. Inked threads are not as evenly coated, because of glue etc. This resembles the original ropes more, who were tarred and weathered.
On the other hand it requires some extra work and you have to be careful not to get spots on the model. I covered the whole model with paper towels.
In my previous models I had used thin black twine for the ratlines . They also give good results.
Greetings,
Martin
-
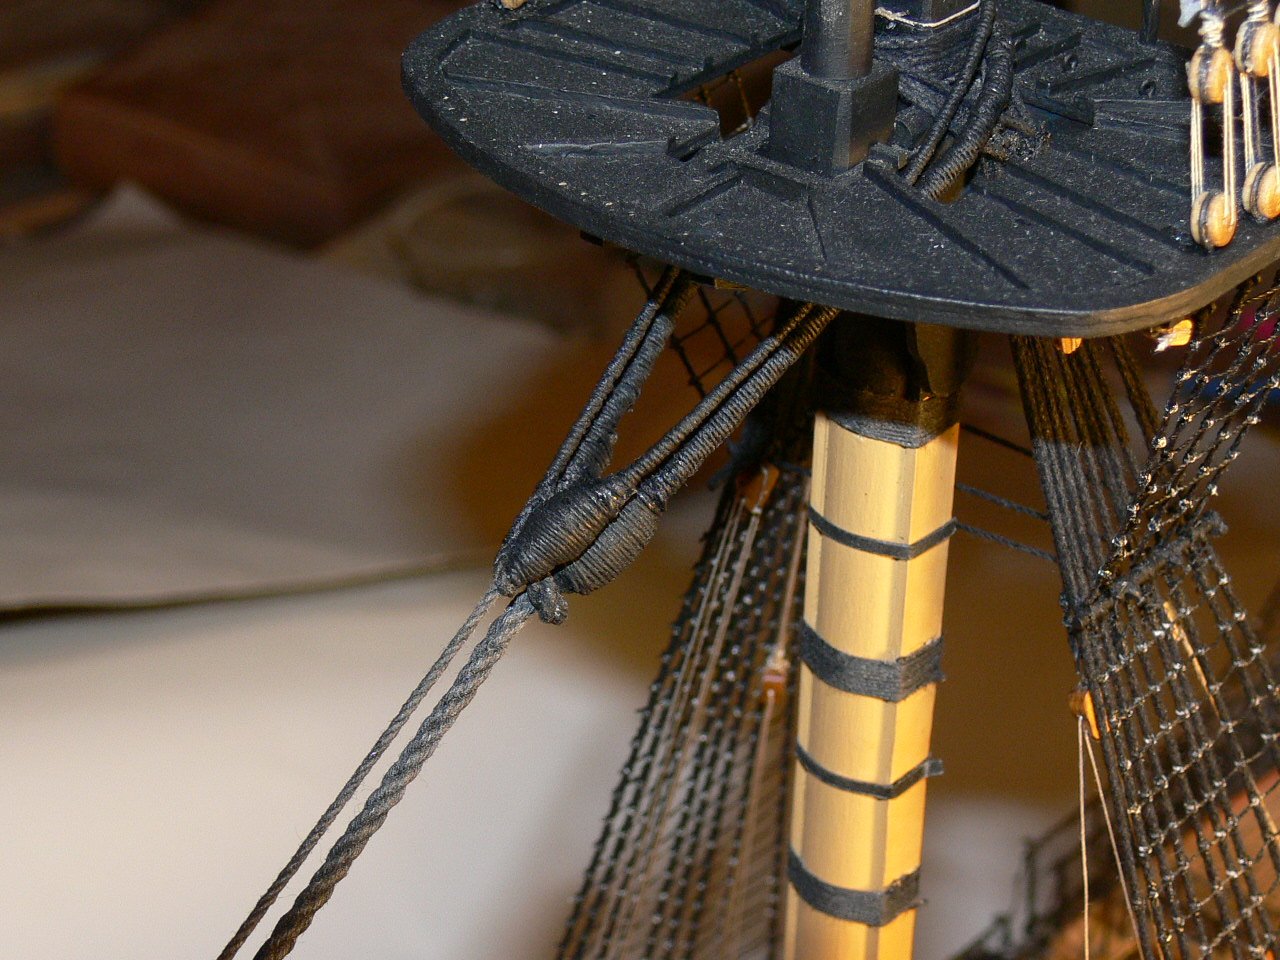
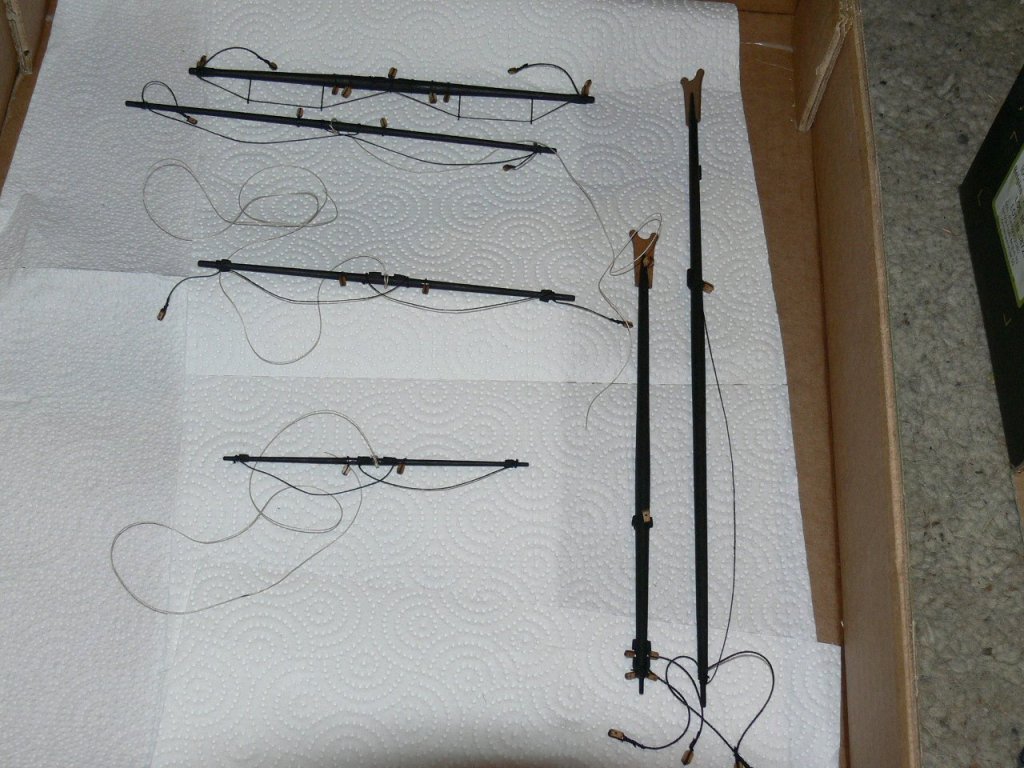
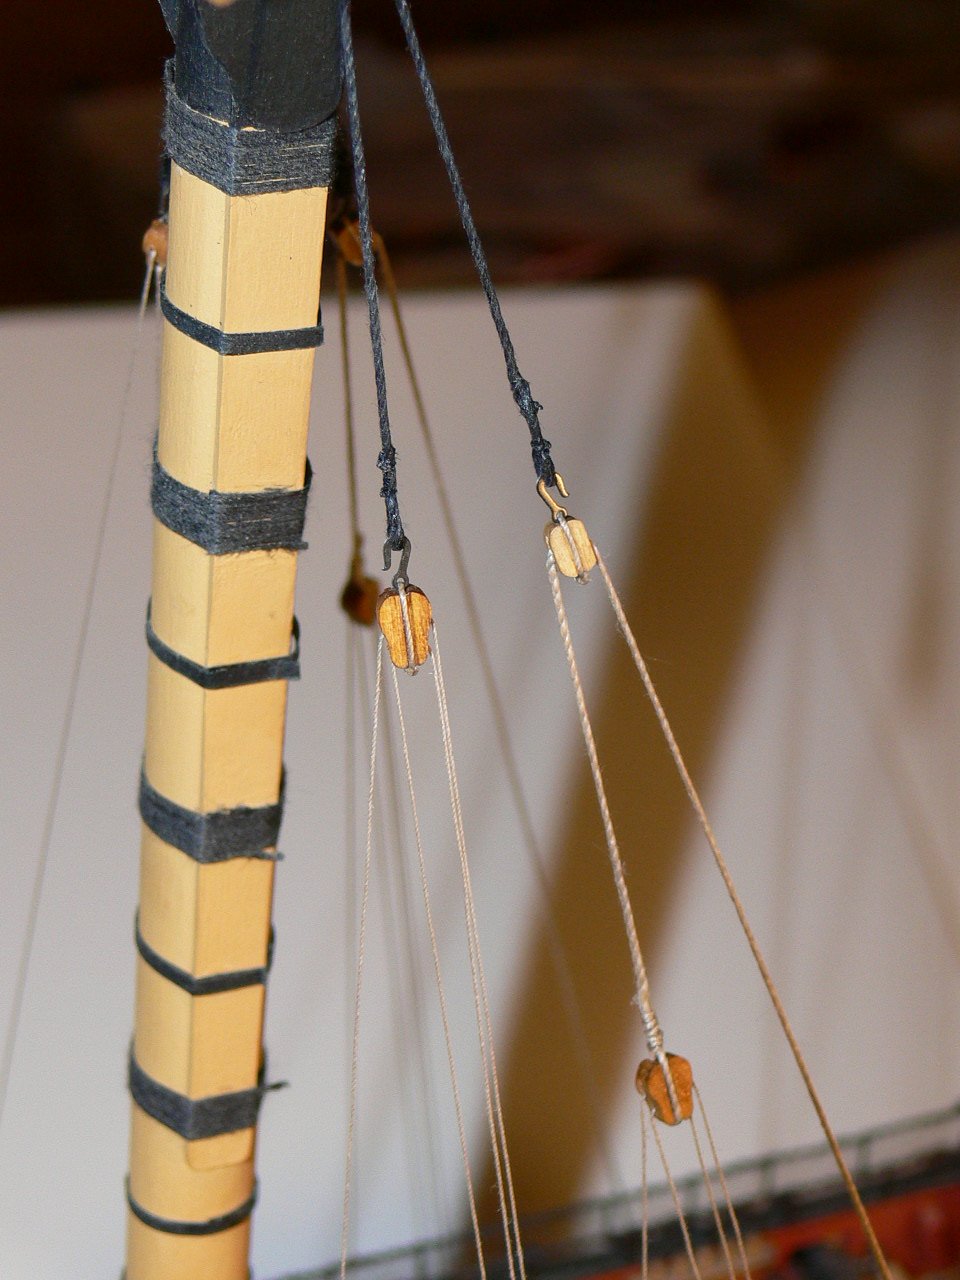
Meanwhile I made the preventer stay. I found out that some ropes in the kit were missing, especially the 2.5 mms and the 1.3 mms. I ordered them online.
.JPG.b5d5fa84010e7efb5540fdfe22840602.JPG)
.JPG.0f715f01bef4b8677619b935f3d3d114.JPG)
.JPG.1d39717467523664dfbb000576669db8.JPG)

.JPG.a36db9ab4ef75907137ee3518b38ea38.JPG)

.JPG.a86b2f1f32d422e1ab6c64eea9abb8f0.JPG)
-
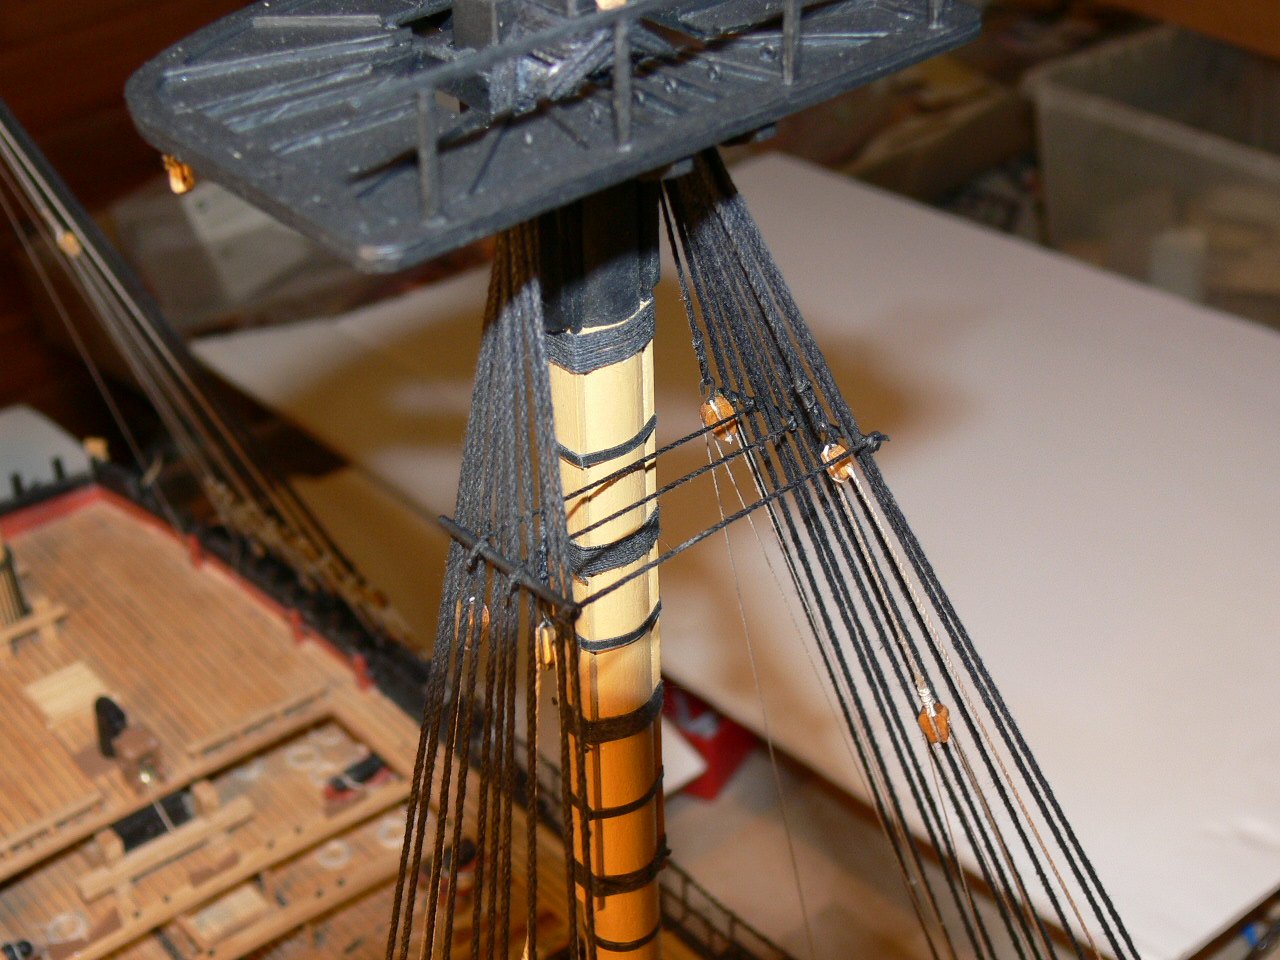
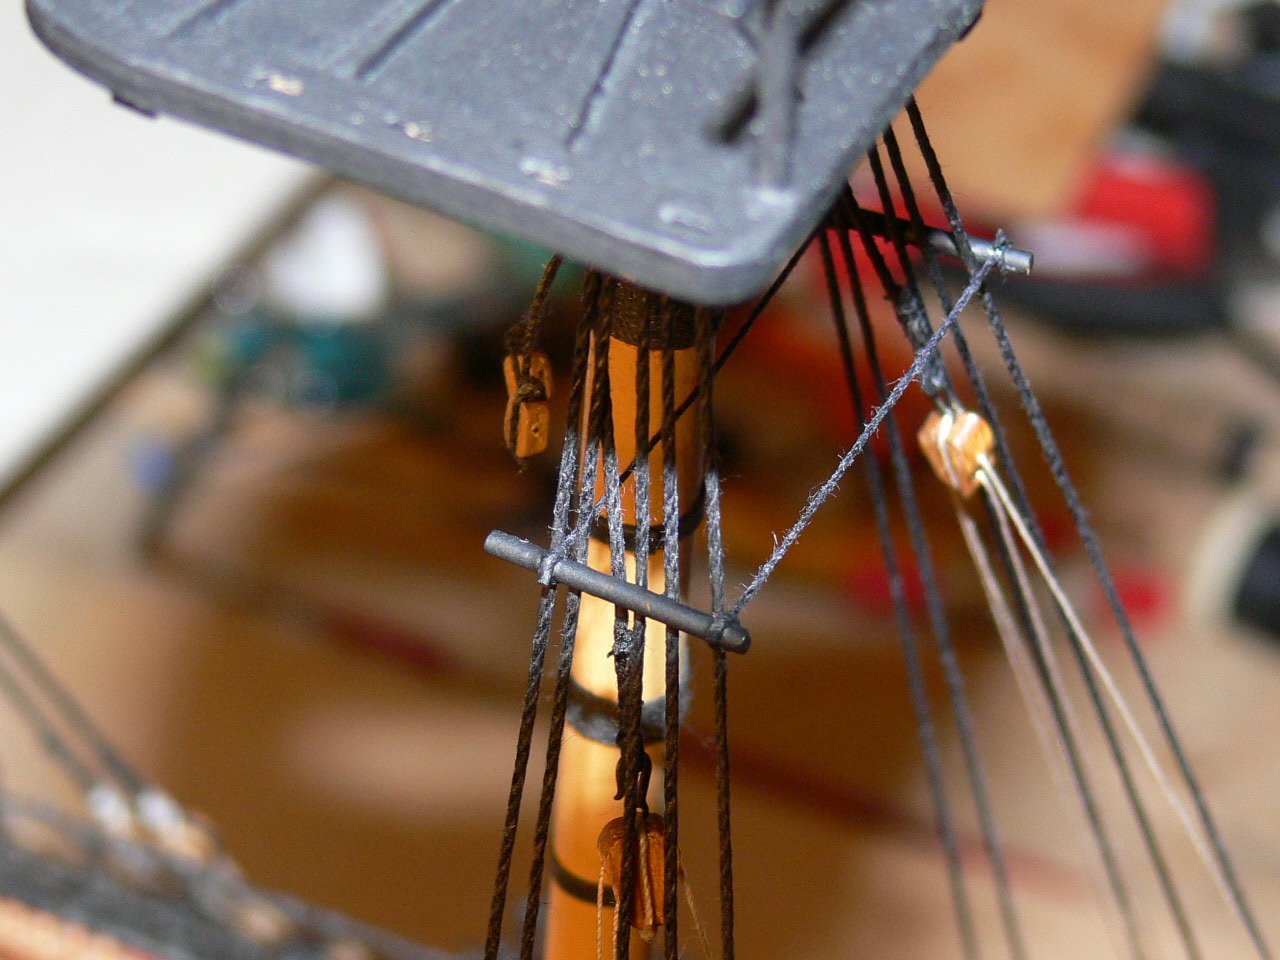
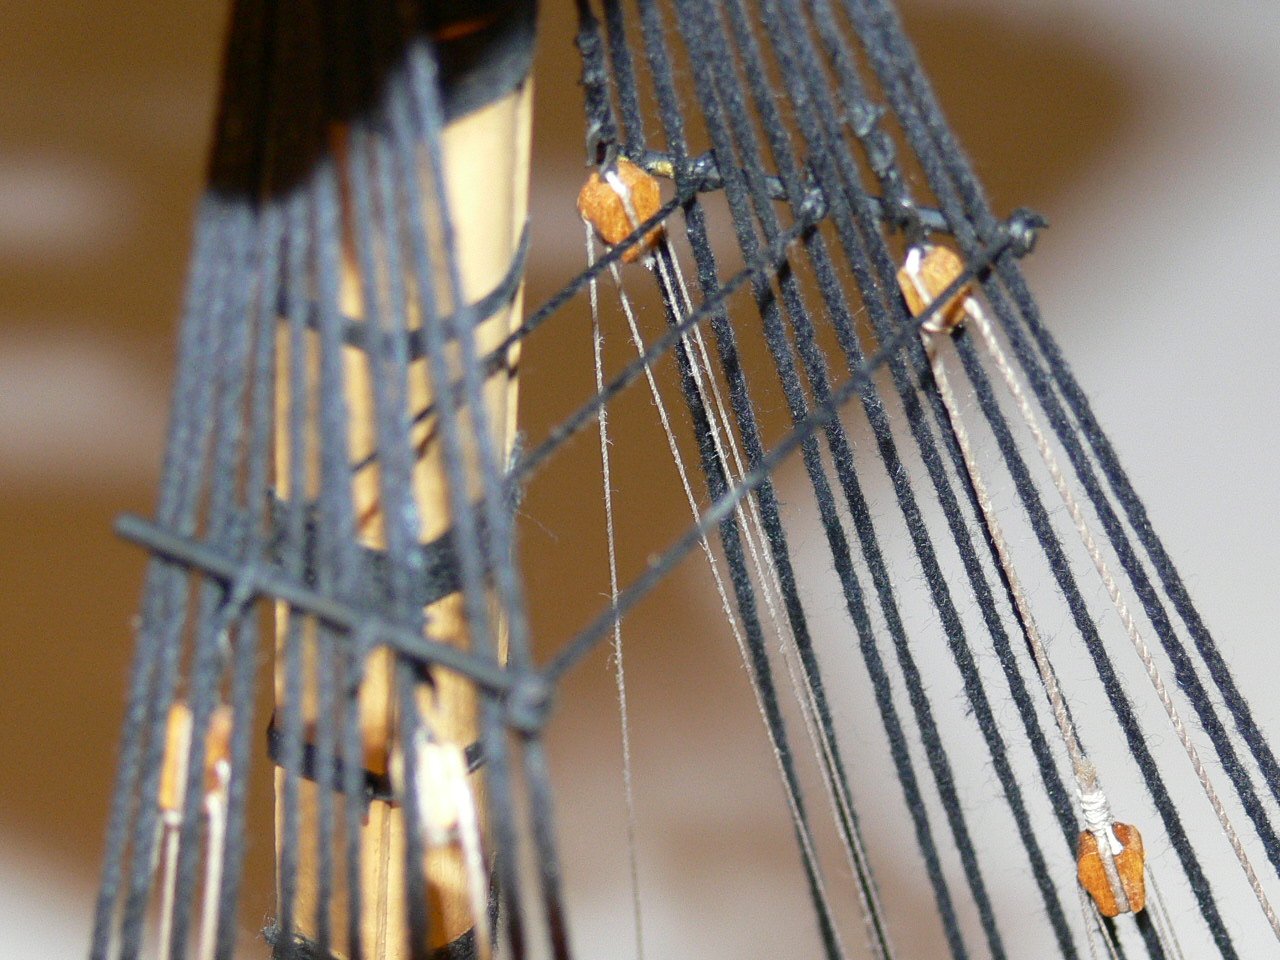
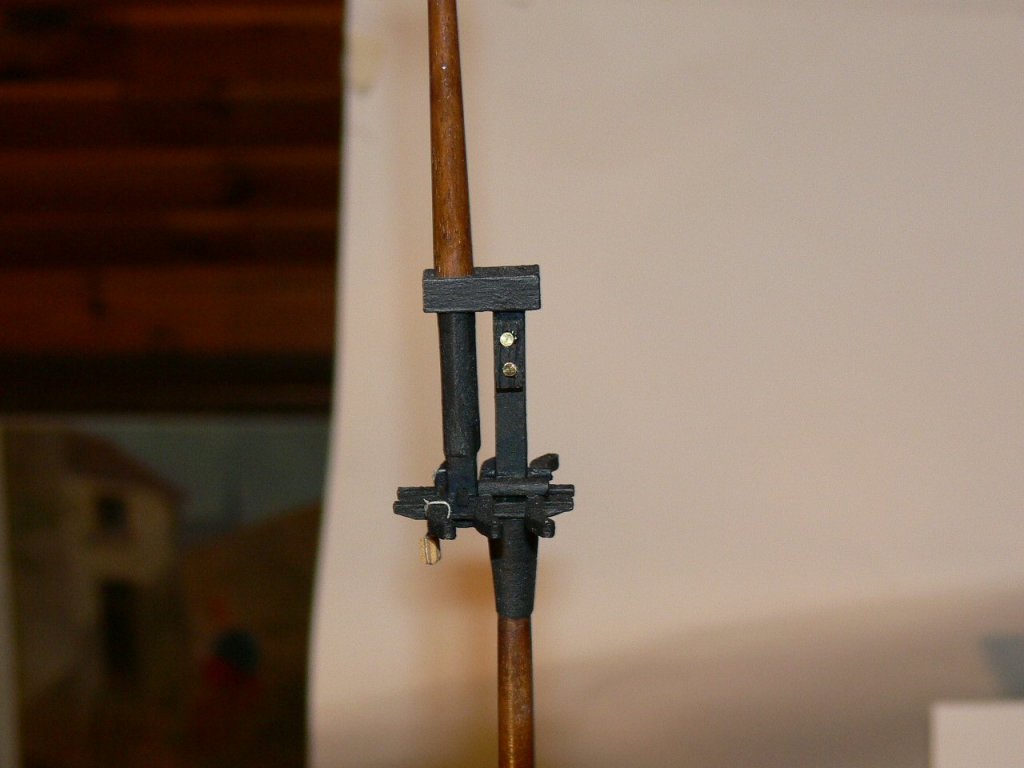
I finally inked the ratlines and worked on the gaff and on the stays. The mouse was made out of an 8 mm dowel, I gave it a pear form on my turning wood lathe and drilled a 3 mm hole in the middle for the stay. I put 0.5 mm of masking rope where the stay goes around the mast. This was done by hand. The rope for the stay was initially white and I stained it. I also bought prestained rope, but it did not look very good and was thinner, so I did not use it.
.JPG.ac66a5248667b2dc59789ca9147c5563.JPG)
.JPG.dedcb6ba8951192a363d69f5b75fba69.JPG)
.JPG.0494e9bc904888731d9e7c0476753a41.JPG)
.thumb.JPG.a73157ef4df6048b27b97d4d197335fb.JPG)

.JPG.06319f211eaf5e898c6b204d6e7cc444.JPG)
.JPG.2325e677cc5d1188270f3ce39ad4d31c.JPG)

- Henke, GrandpaPhil, Old Collingwood and 3 others
-
 6
6
-
18 hours ago, vulcanbomber said:
Lovely looking model of the Agamemnon.
I am one of the few people who actually enjoy tying ratlines and yours look very neat and tidy. Good work!
Thank you!
For me tying the ratlines was fun, too. But I did stop whenever I felt tired or my arms were getting "heavy", fortunately there is no time pressure!
-
-
I have finished the ratlines-almost. I still have to paint them black with China ink. I could not find a black thread that was as flexible as the unpainted ones. So I decided to paint them after putting them on, as recommended by the manual.
.JPG.cdc5fdd378eaccbfc1b81f4f9d5ba82a.JPG)
.JPG.76deaf6c6de277c9bf5dc0eb4542f359.JPG)
.JPG.bada2bec4870e1364e690e3095010056.JPG)
.JPG.2e09b354b15eb0542fb41db54f7d35b4.JPG)
.thumb.JPG.263cdb1a8e4cbec426f5435b1b22ecb2.JPG)
.JPG.5b720ef8936854b74c80abcfa155487f.JPG)
.JPG.132691378db3a365aa17c9239bb1c557.JPG)
.thumb.JPG.d60f839aca41856ab53b75510b94dcfc.JPG)
.JPG.62e01f735a469b825a13d33dec651335.JPG)
.JPG.e10840188aff96cf7530ff1cc3672185.JPG)
-
4 hours ago, mort stoll said:
keep up the great work
mort
Thanks, I try...
-
13 hours ago, mtdoramike said:
Oooooo, the Agie, not many models get my blood pumping like the Agamemnon and what a beauty she is too.
I agree,that ship has something appealing to her, this is why I picked her in the first place.
-
3 hours ago, Mirabell61 said:
Tolles Modell Martin !
a very good looking model Martin, I like it
")
Nils
Hello Nils,
thank you for your kind encouraging comment.
Happy modelling and moin-moin 😉
Martin
- mtdoramike and Mirabell61
-
2
-
3 hours ago, Henke said:
Fantastic work Martin. I like the cathar pins. How did you fix them to the shrouds?
Regards
Henrik
Hello Henke, thank you for the nice words. As for your question: I marked the position of the cathar pins with a tiny spot of paint on the shrouds. Then I put a little bit of superglue gel on the pin and pressed it gently against the shrouds,to keep their natural direction.
Greetings, Martin
-
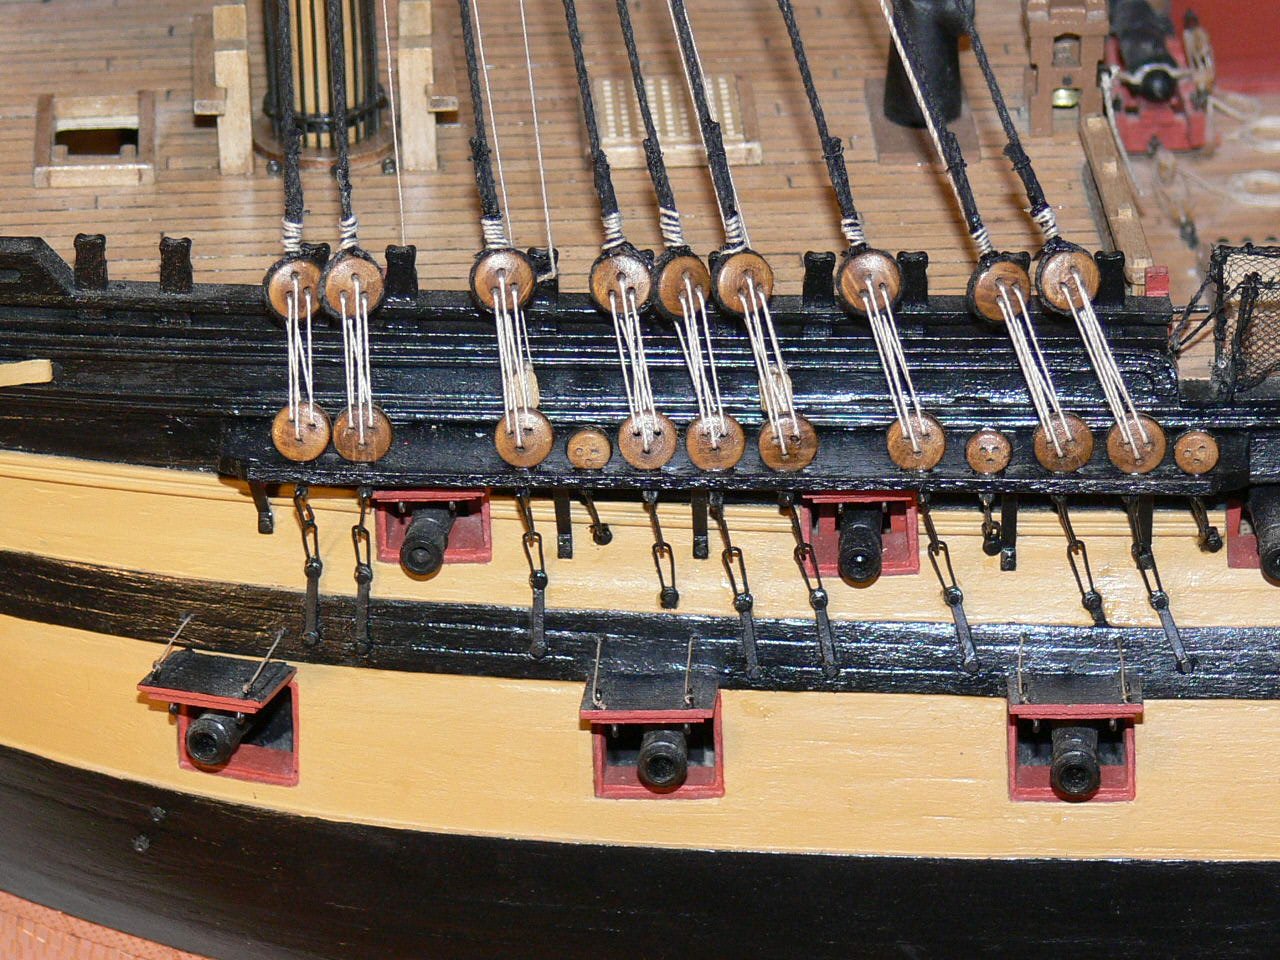
Some new pictures. Finally I have managed to put on some shrouds. As a tool for the spacer, I used bent needles, a bit wider than recommended. One for one pair of deadeyes, and two for the second pair. The second needle made it more stable and the deadeye was fixed in a permanent position.


-
15 minutes ago, James H said:
This is coming along so well. Not too far from the finishing line now, relatively 😁
Thank you Jim! It took me a lot longer than I had envisioned to make the yards. Plus we had a heat-wave here in Germany : working under the roof can be a real torture.
But now I am running out of excuses, and I think the shrouds will not be such a big challenge. In my dreams I already see the finishing line 😉
Hope you are doing fine!
Martin
-
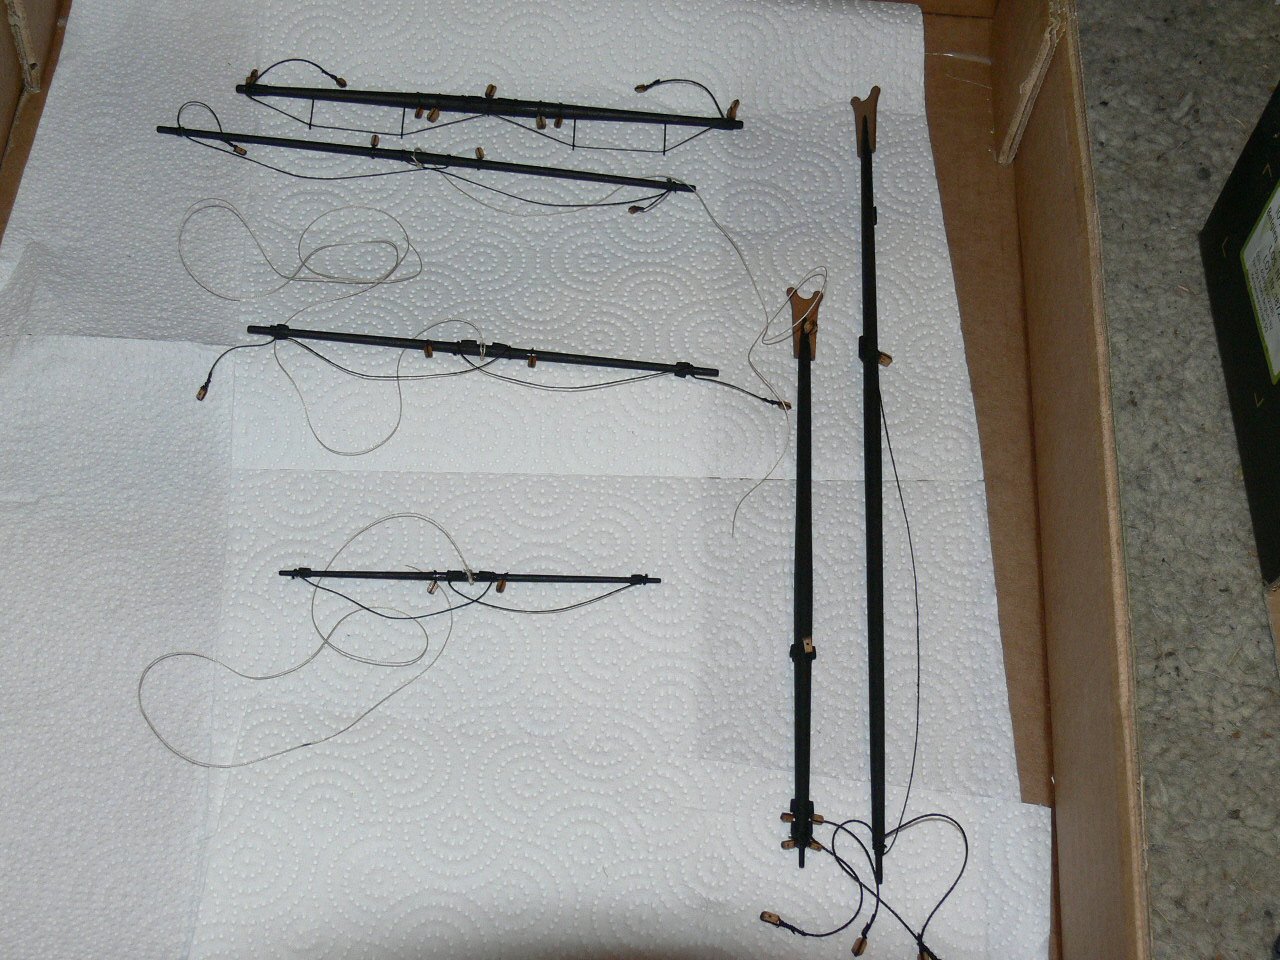
Hello community,
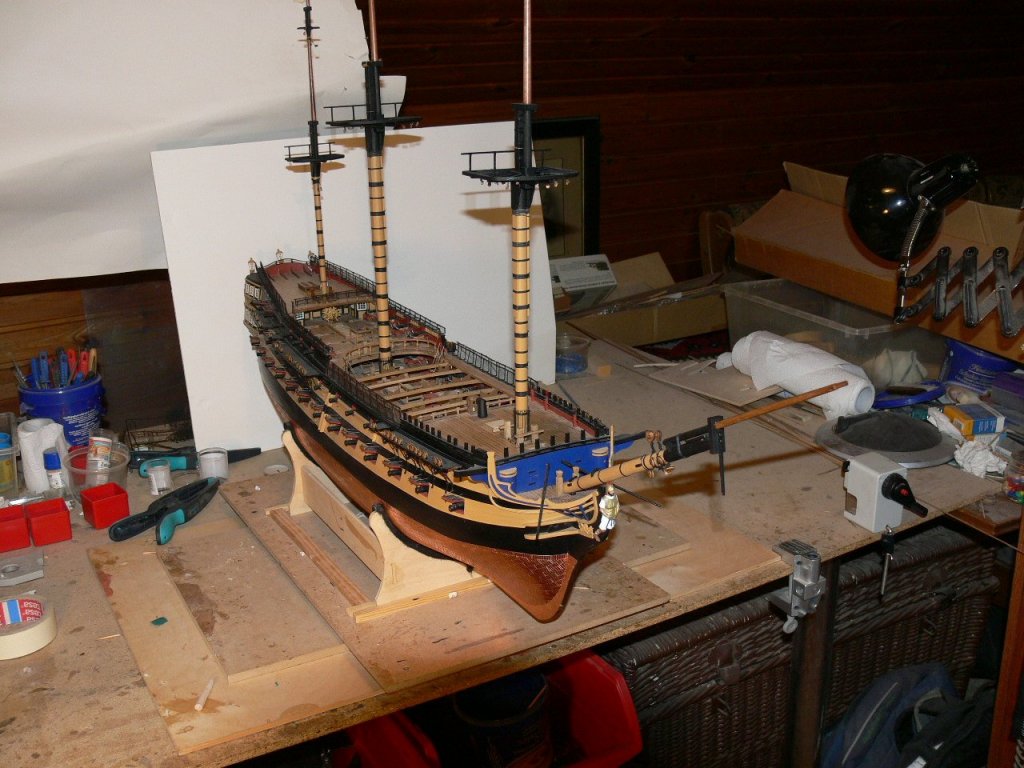
I have finally finished the yards. I started the rigging with the side tackles. I will continue with the shrouds.
.thumb.JPG.9543543b16f1367aef494bb696ffce28.JPG)
.thumb.JPG.fa552b00be678e6bfe4e4e583ef54e17.JPG)
.thumb.JPG.997767cd67a4f305b0604daa64a16c5a.JPG)
.thumb.JPG.db253f80fa5ab081dc3a7a20759c0bd6.JPG)

.thumb.JPG.a4503331af2d8852e00f4faeee580b5b.JPG)
- Retired guy, KARAVOKIRIS, JpR62 and 3 others
-
6
-
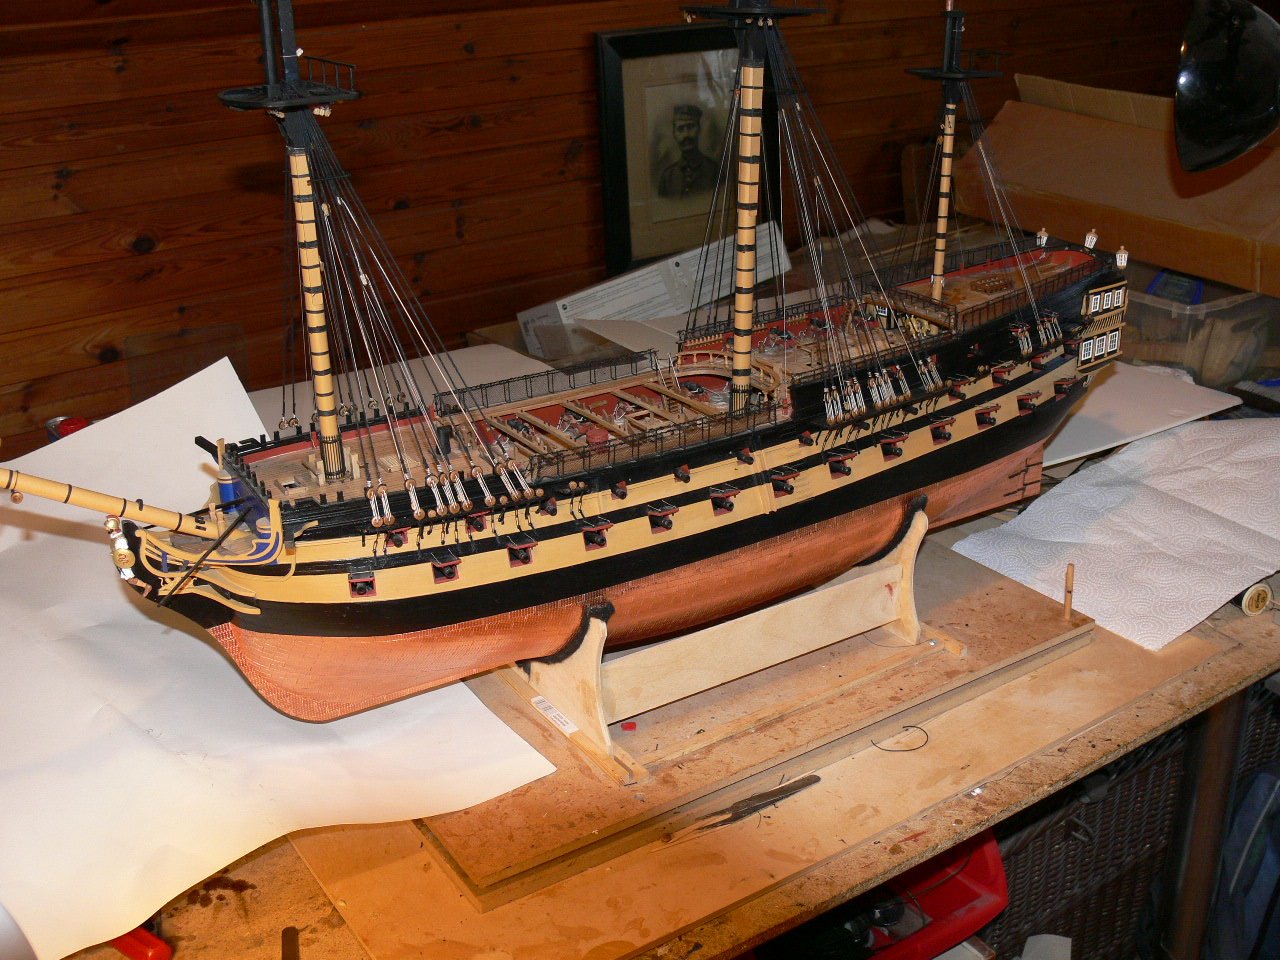
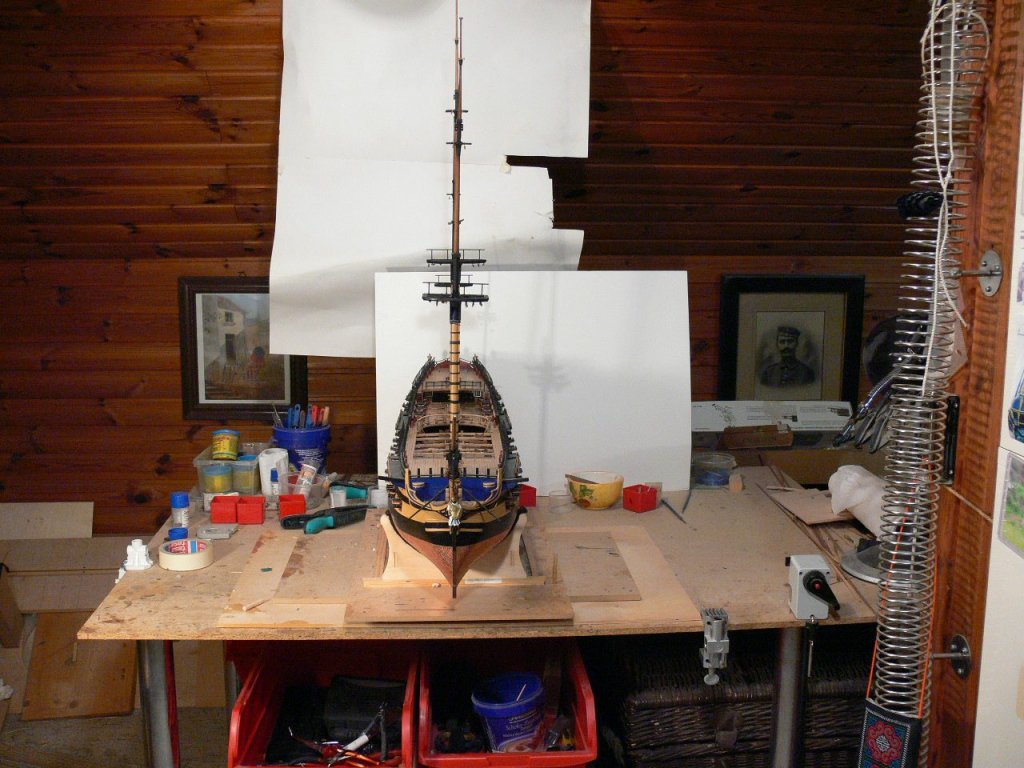
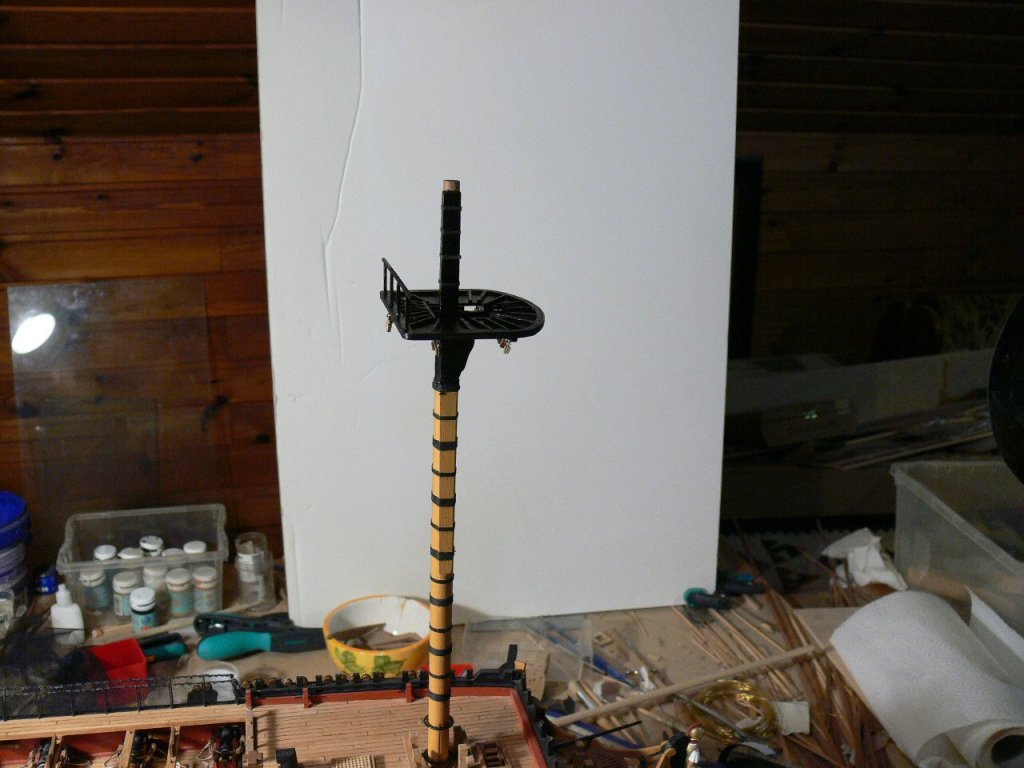
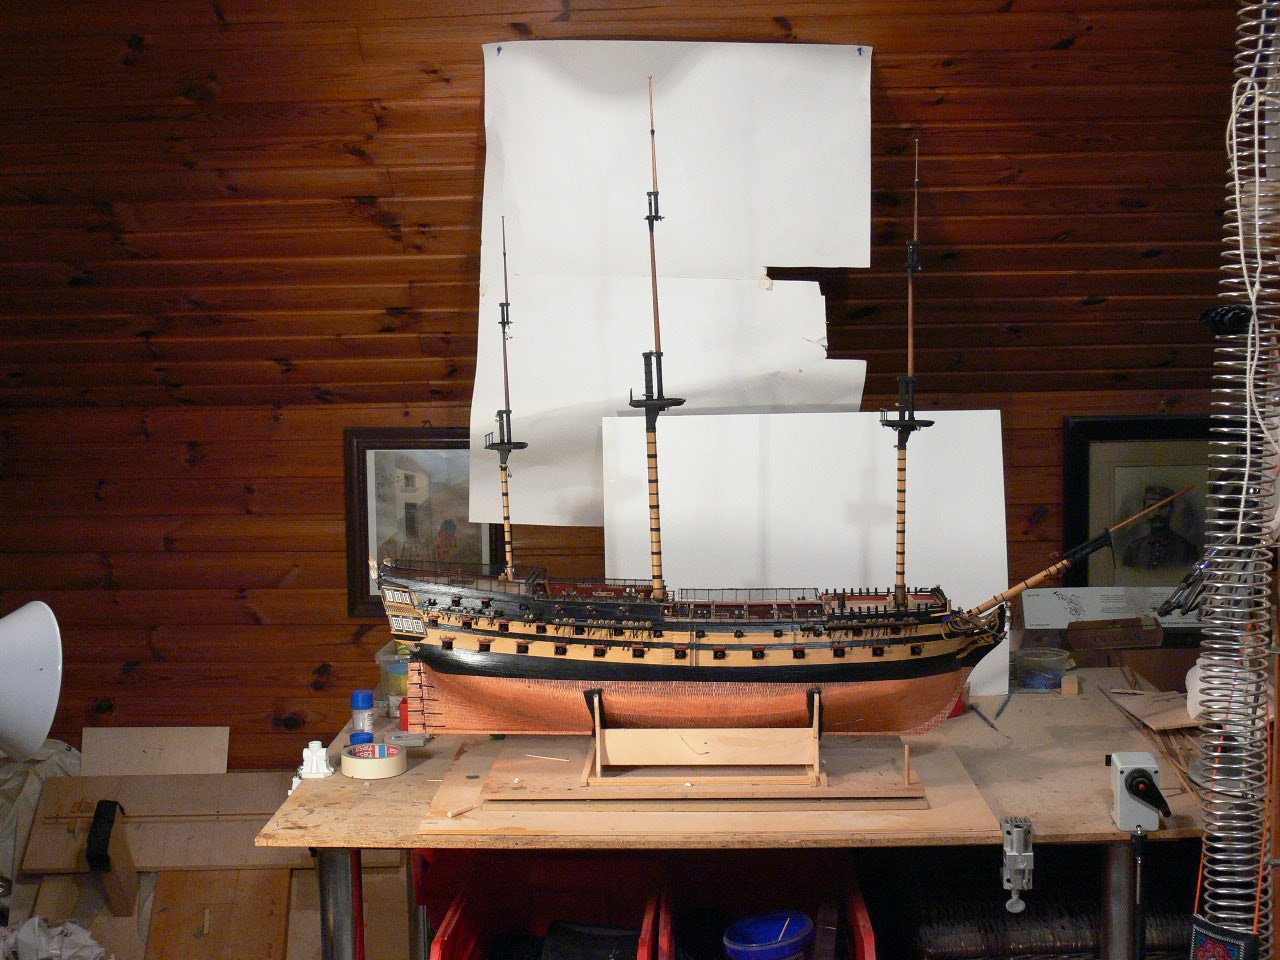
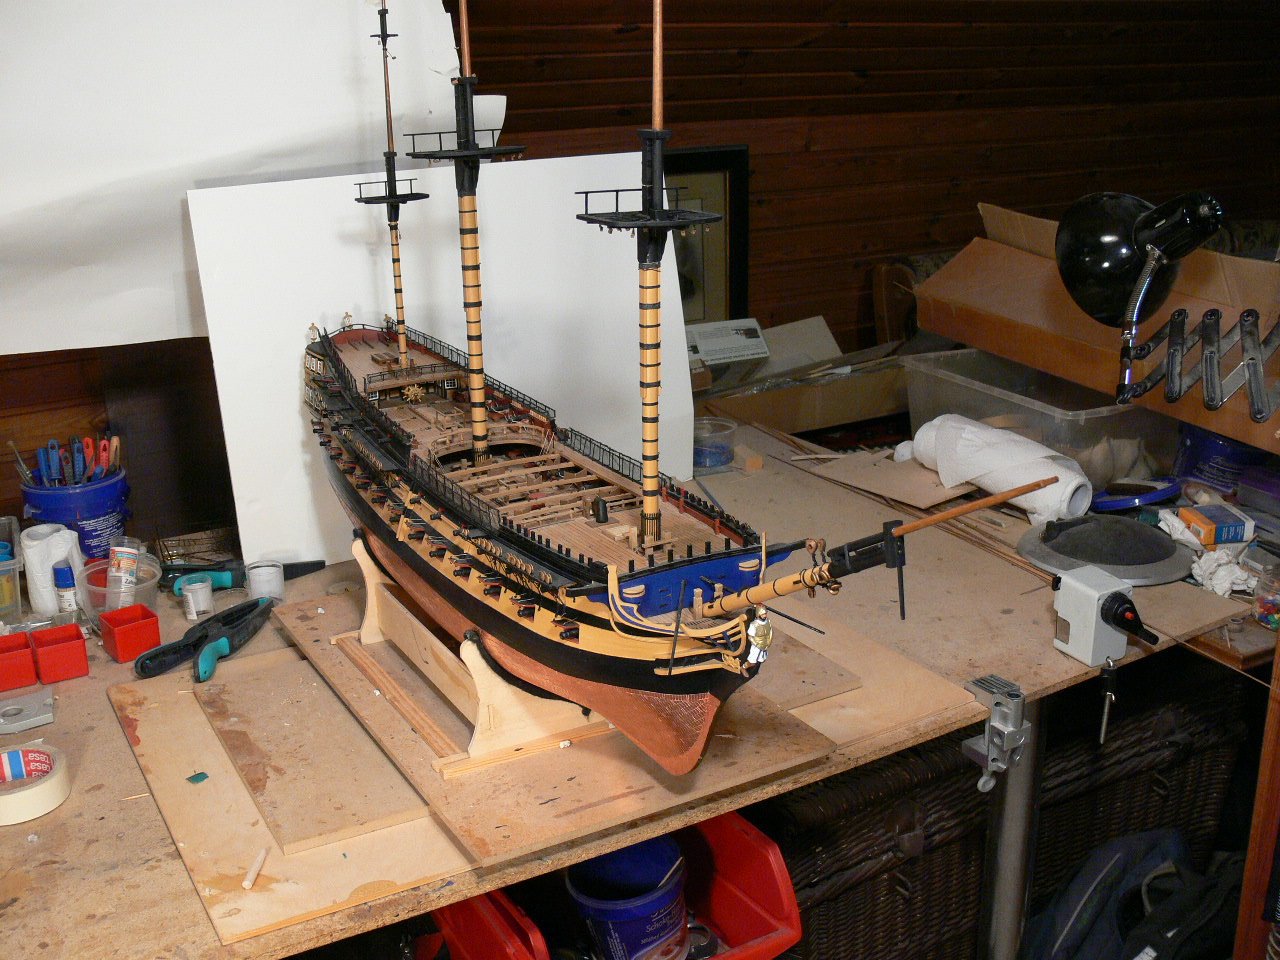
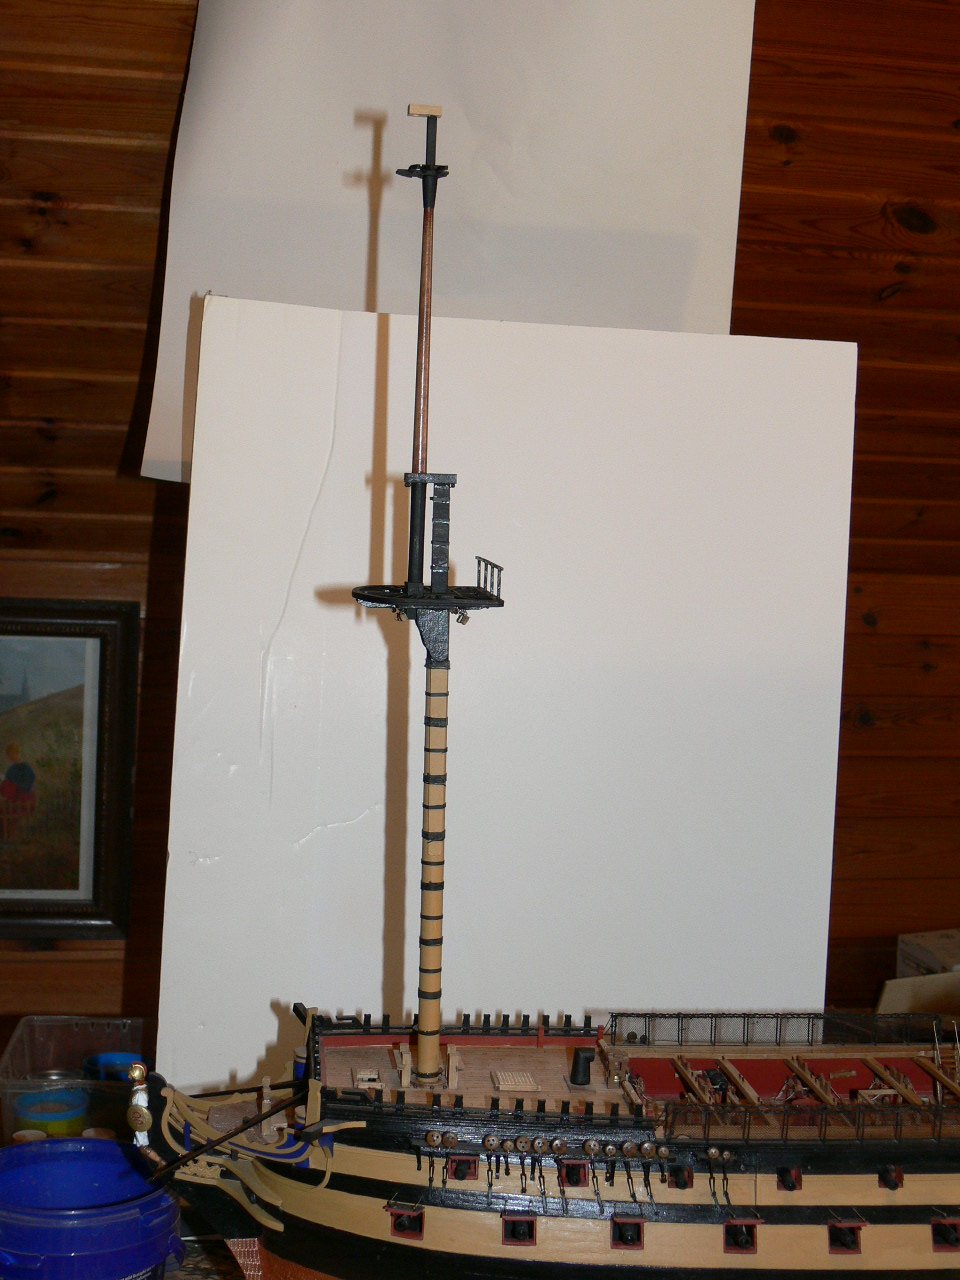
Finally I have finished the masts and bowsprit. They are glued in and I can go to the next step: Probably standing rigging or preparing the yards. I did not put the yards on right now -as recommended in the instructions. In all my previous ships I made it that way,I feel that it is a lot easier that way.


- oneslim, JpR62, GrandpaPhil and 1 other
-
4
-
On 4/9/2019 at 5:45 PM, vulcanbomber said:
Lovely work.
I'm reaching the masting stage of my build and I'm finding it a little daunting, they are far more complicated than the masts on my San Francisco!
Hello vulcanbomber, I feel the same. There are a lot of little extras and sometimes the plans are not correct, so you have to find own solutions. Your project looks fine by the way!
- vulcanbomber and J11
-
2
-
On 4/7/2019 at 12:30 PM, Jonathan11 said:
Your attention to detail and excellent craftsmanship is perfection with this build. As I was going over this gem of a ship I felt as if I was looking at a real ship in dry dock being built. Really like the over-all color contrast you have used. Your other two competed ships are true master pieces.
Thank you for the nice reply! Right now I have overpainted the black part of the foremast. Although "dull black"( admirality paints) is the recommended black by Caldercraft, I think it looks better in a more matt tone (without too much shining ). I stained the dowel (color : walnut) and put two layers of clear varnish on top. I put the dowels in a drilling machine (Bosch), layed it on my thighs, operated the speed with my right hand and the sandpaper with the left.
One final remark : At the bottom of the fore topmast the instructions suggest to file the 8 mm dowel square. But it is impossible to have the required thickness that way. So I cut off the square bottom, took a piece of a 12 mm dowel, filed it square and glued it back on the fore topmast (with a brass nail connecting the two parts,because glue alone might be too weak. That fit in perfectly!


- J11, JpR62, Retired guy and 2 others
-
5
-
On 4/6/2019 at 9:49 PM, ETNZ said:
Great small boats. My best news is that someone cancelled their surgery and I was given an early call. So, neck surgery done about ten days ago and it is so good to get the feeling back in my hands. I am not able to carry on with the main build but am making the incidentals like the anchors etc whilst convalescing. I hope that your polymyalgia stays at bay. Good luck as you press on.
I wish that you will get well soon. The "Agamemnon" is hard enough to do without a handicap.
Good luck to you, too!
-
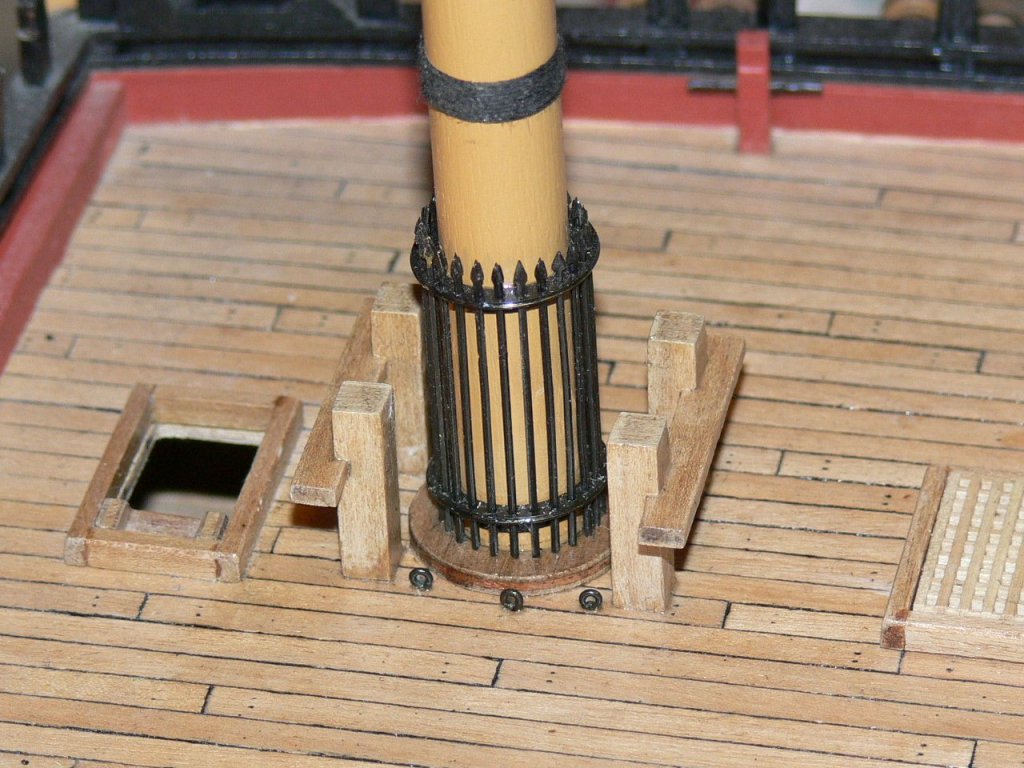
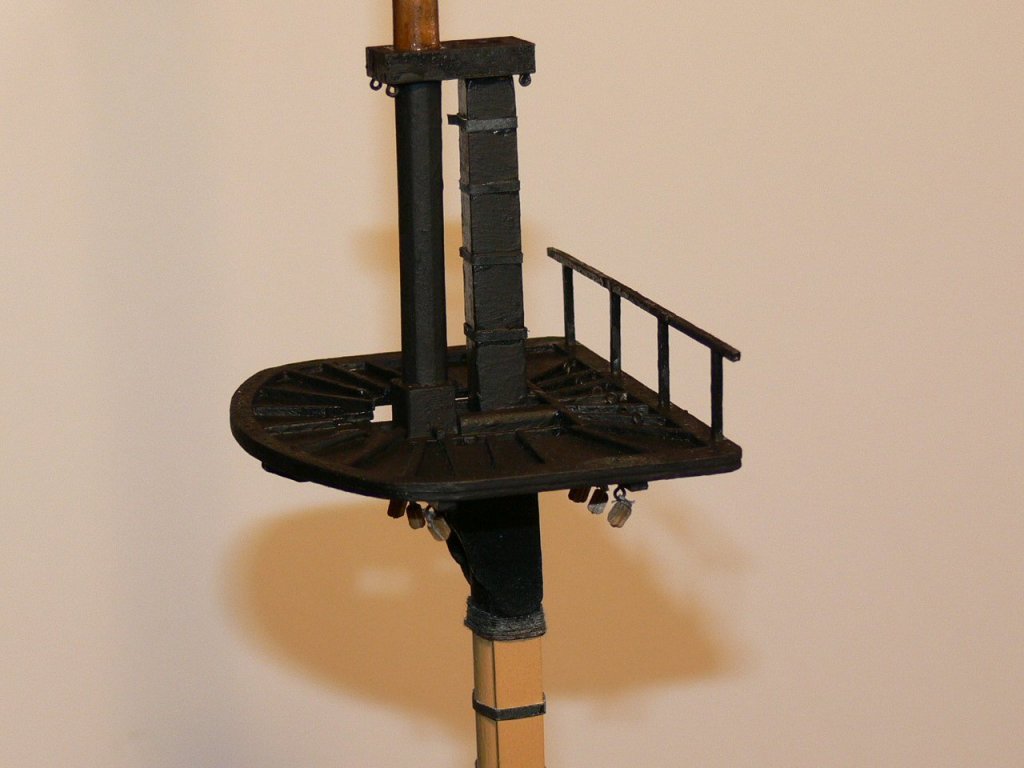
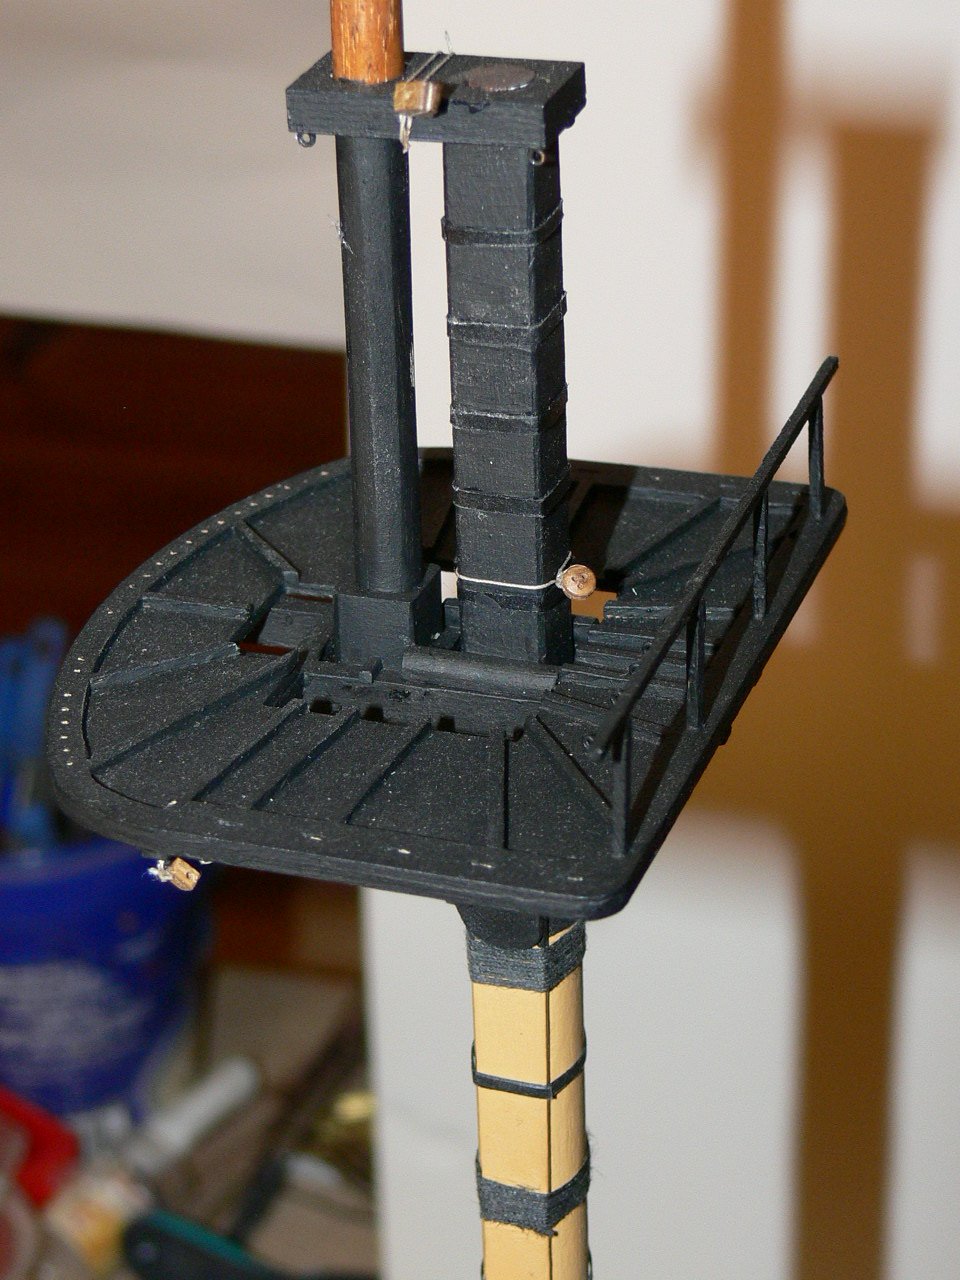
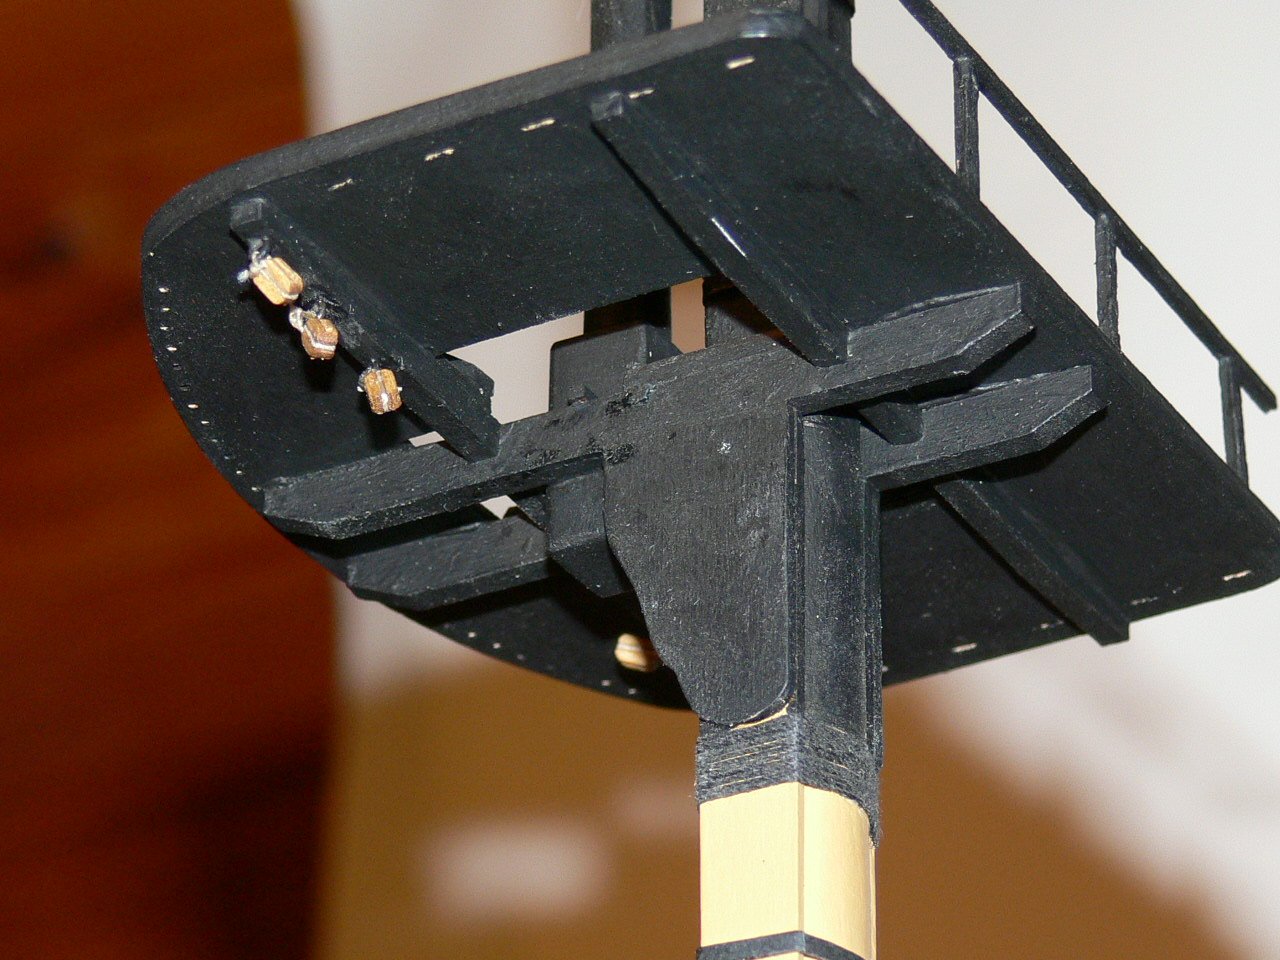
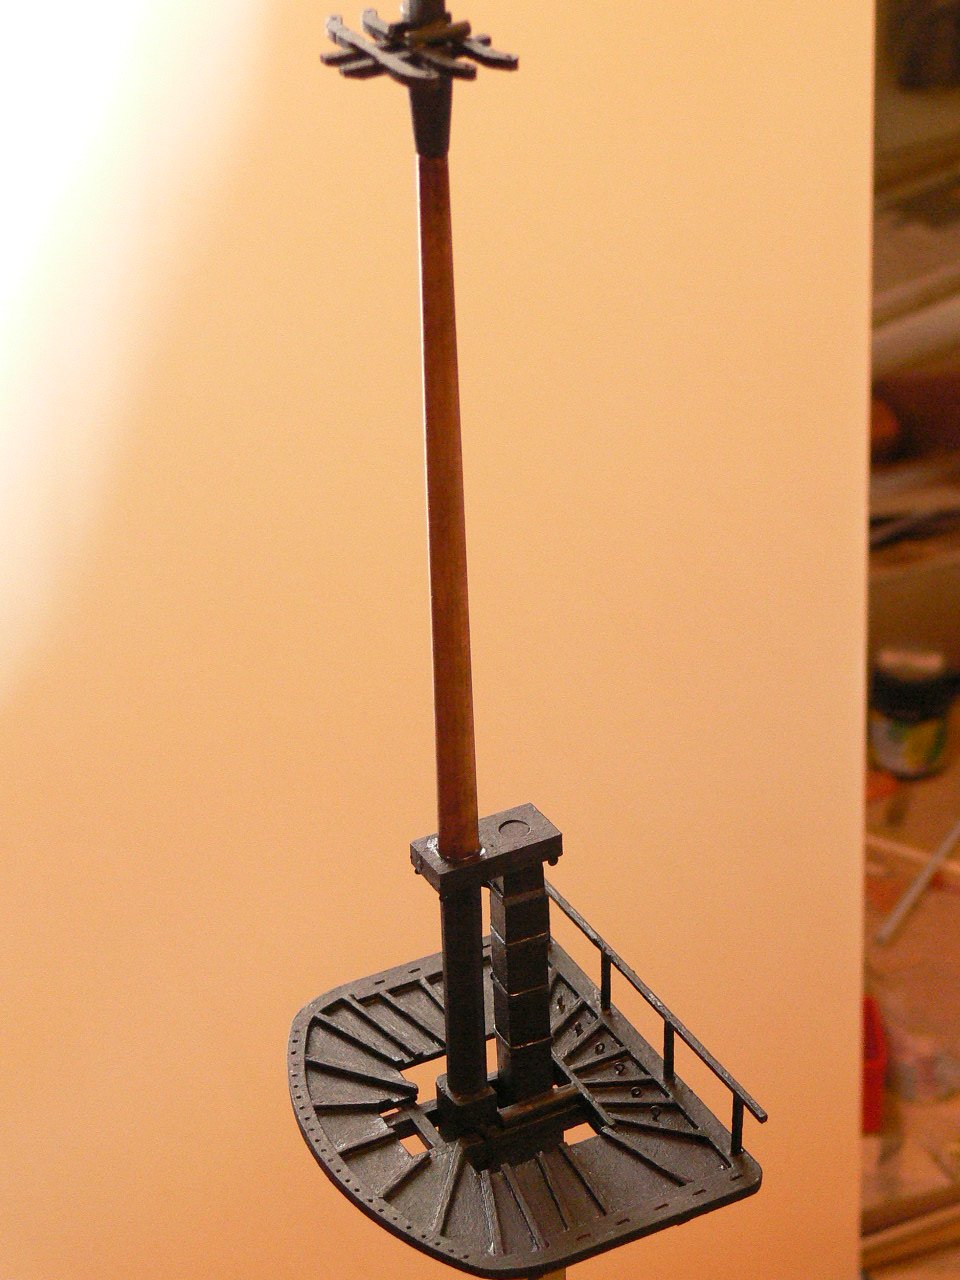
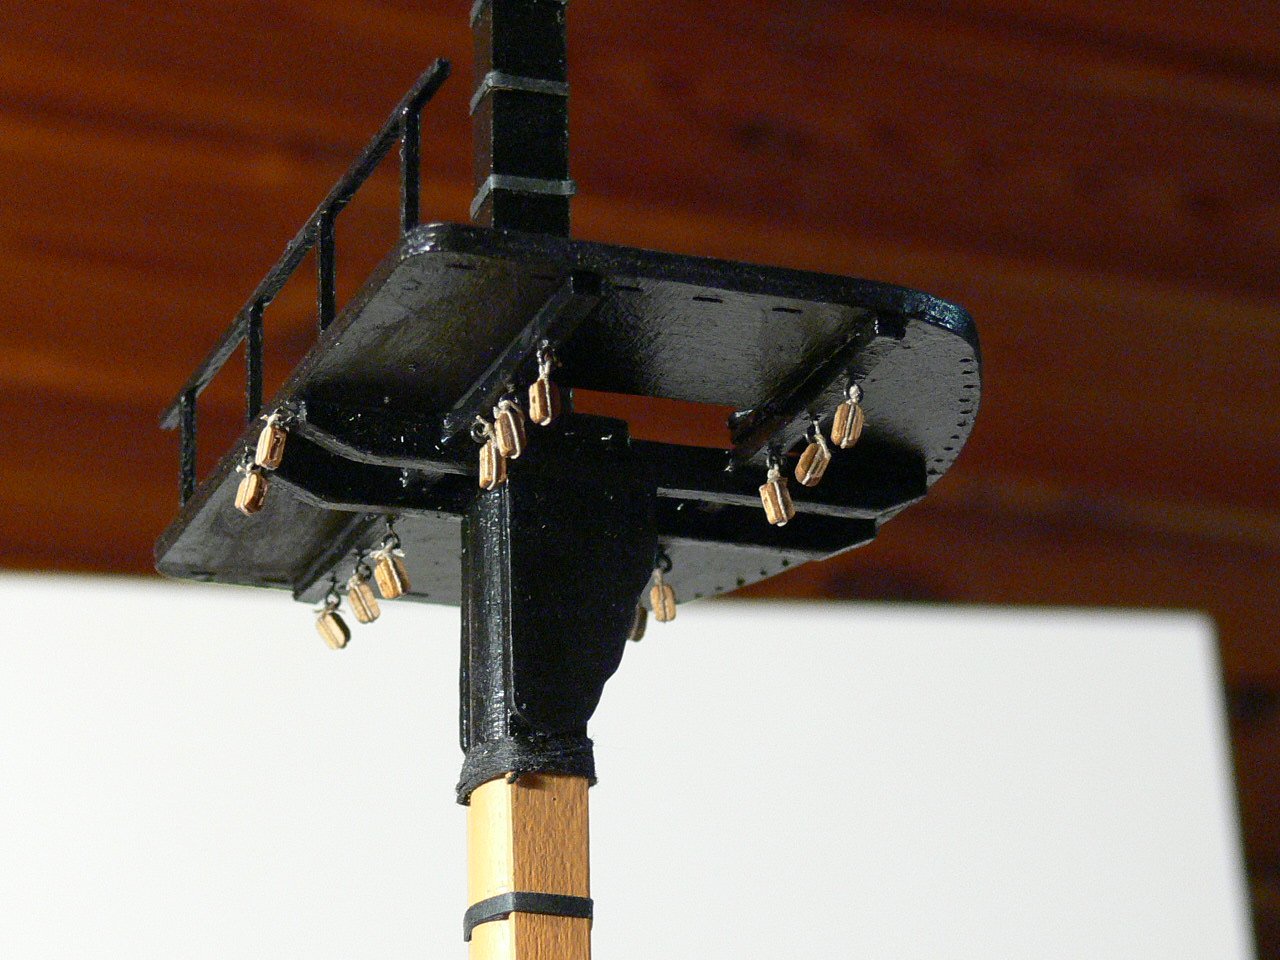
Meanwhile I have started to make the masts. I had to replace the dowel of the main mast (14 mms) because it was not straight.
The platfotm turned out to be warped after I had glued the two parts together. I had to press it overnight and make the wood wet. That solved the problem.
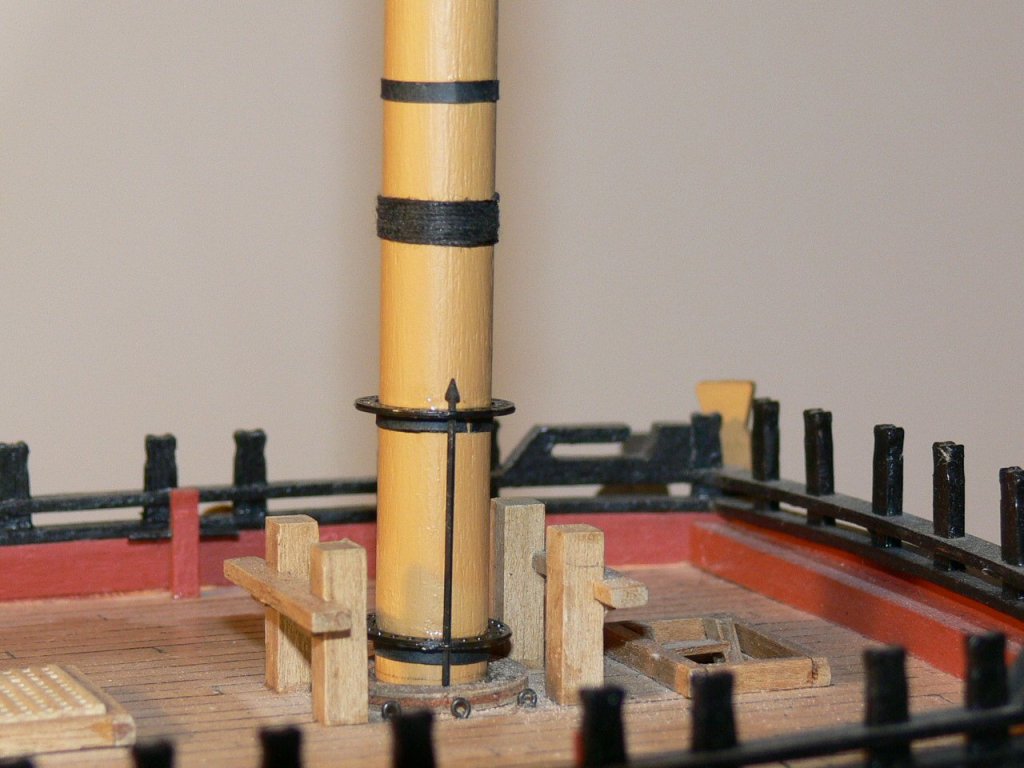
The rings at the bottom that hold the spears were a bit too wide. I put an "iron ring (thick black paper) under each ring and glued it together.


-
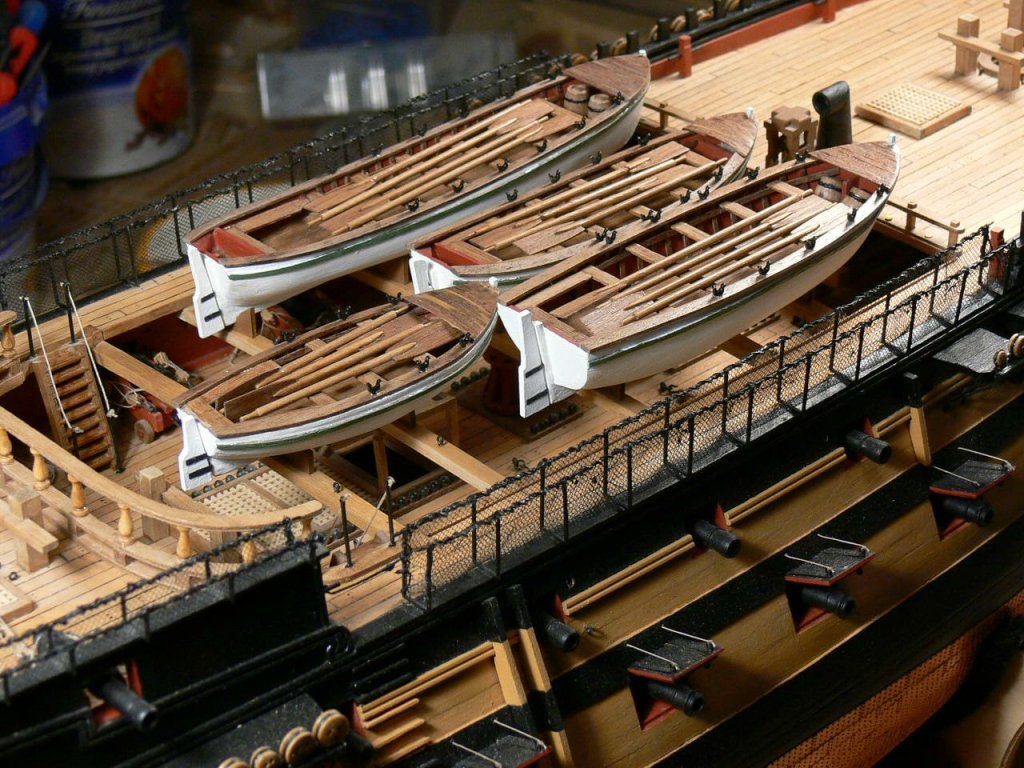
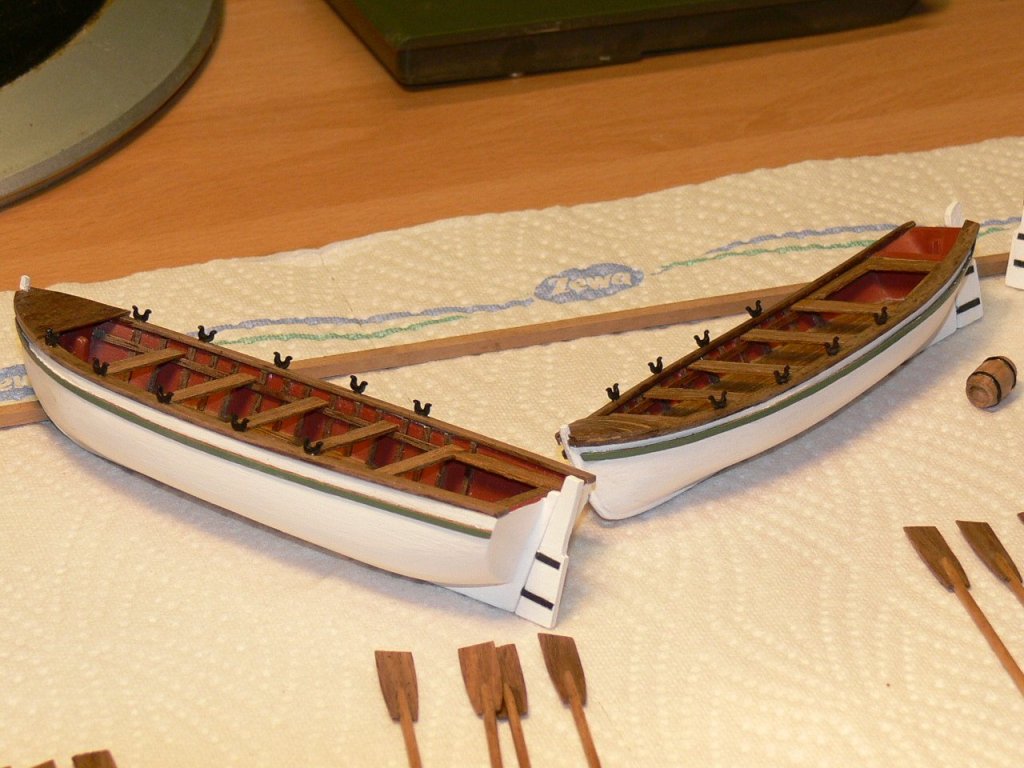
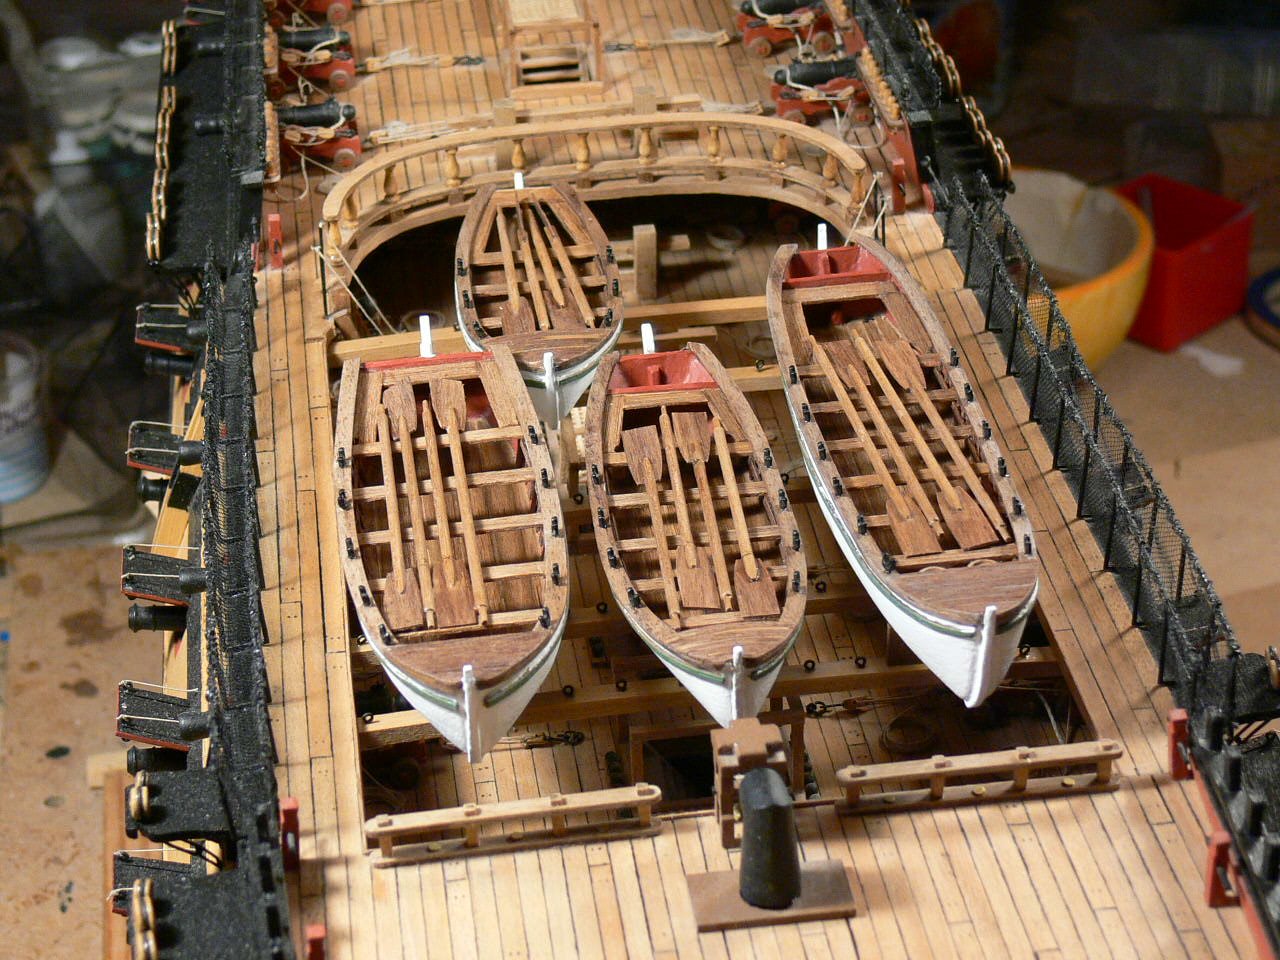
Finally some pictures of the boats where they will finally be. I will however put them aside for the moment to have access while I am doin the rigging.

- glennreader, mort stoll, Dubz and 5 others
-
8
-
On 3/16/2019 at 8:11 PM, vulcanbomber said:
Very nice work.
Thank you!
-
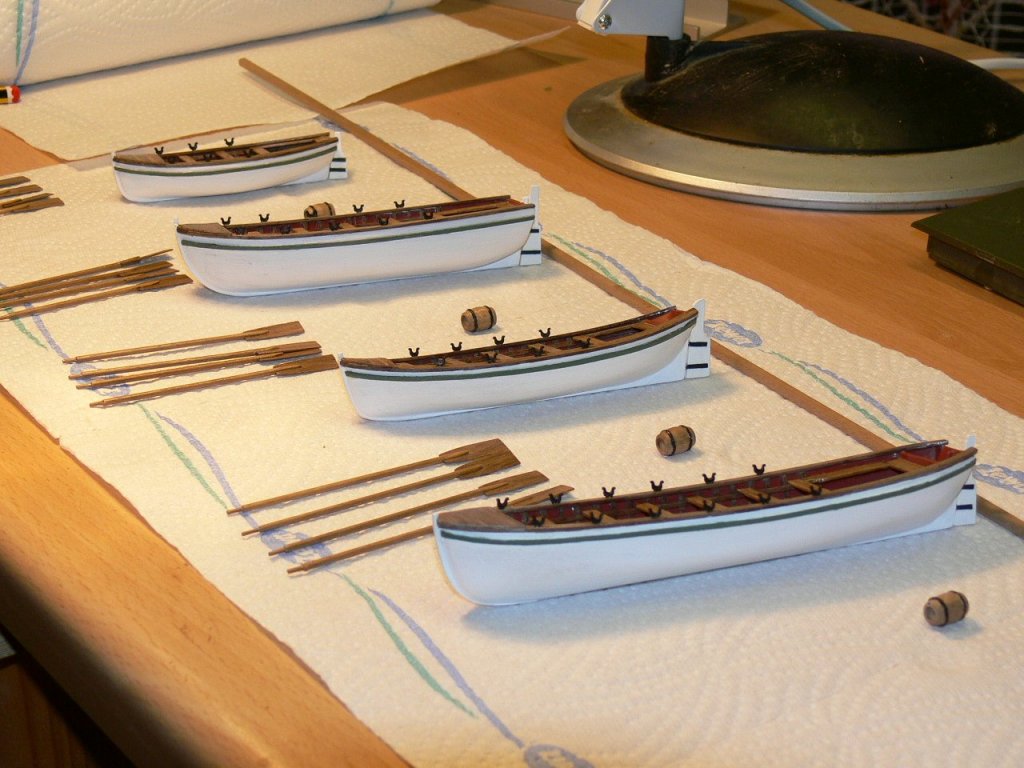
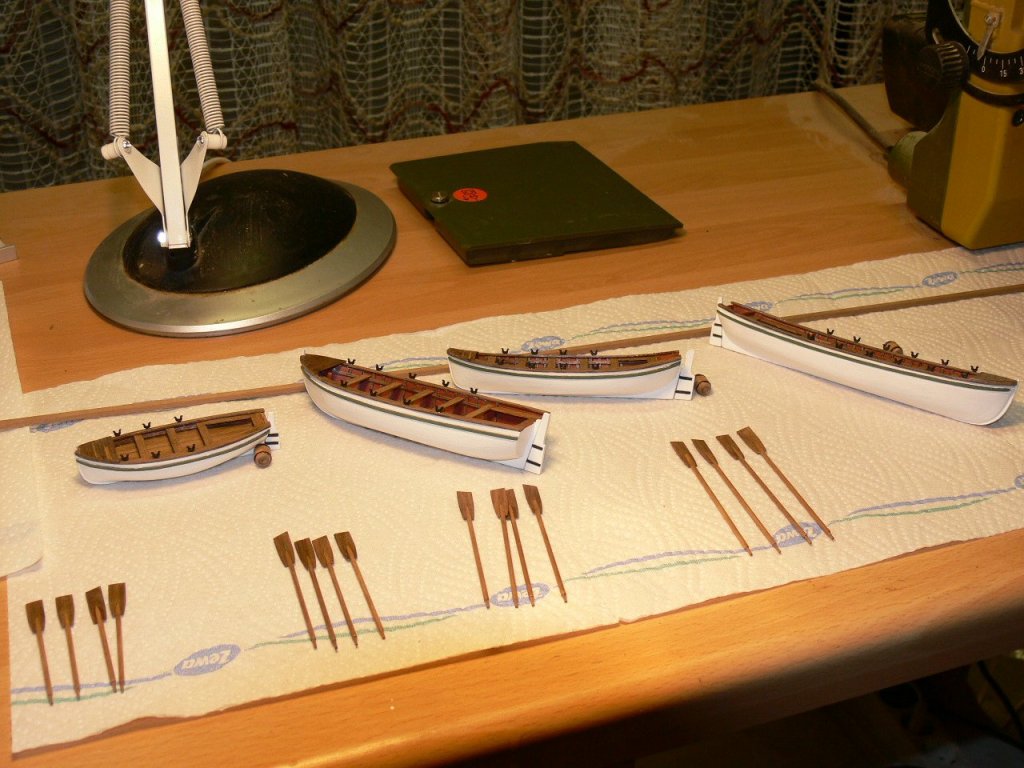
I have finished the small boats now. It took more time than I expected. The oars were also relatively time consuming.
Now I am looking forward to thenext step: The construction of the masts , yards and spars!
-
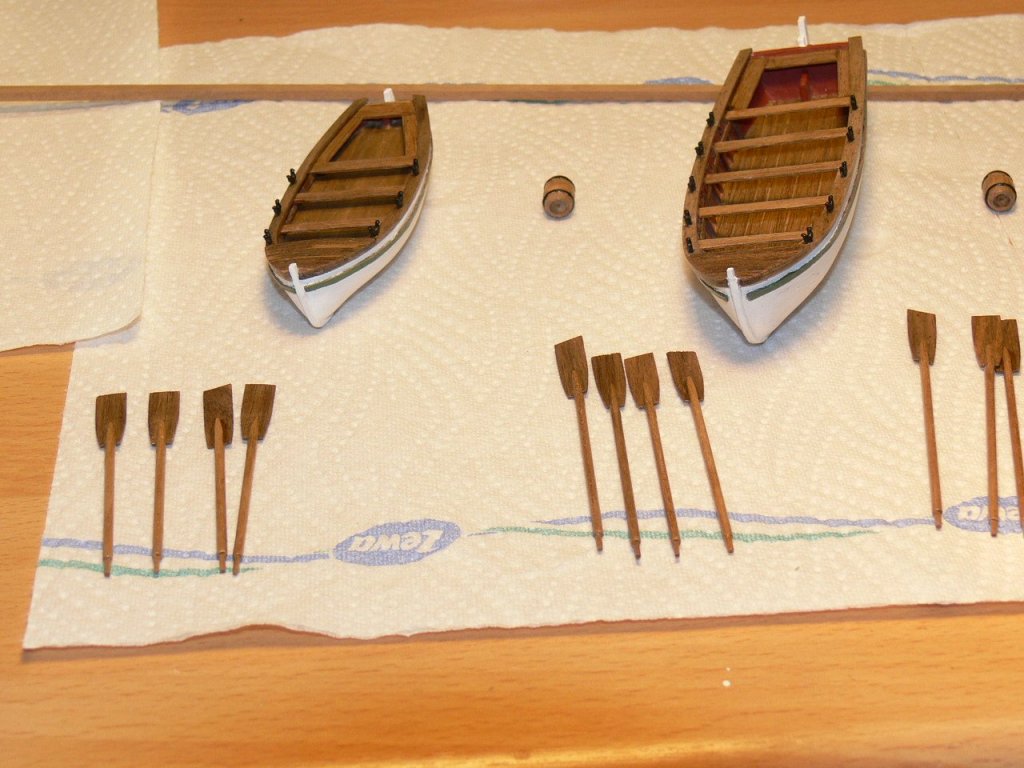
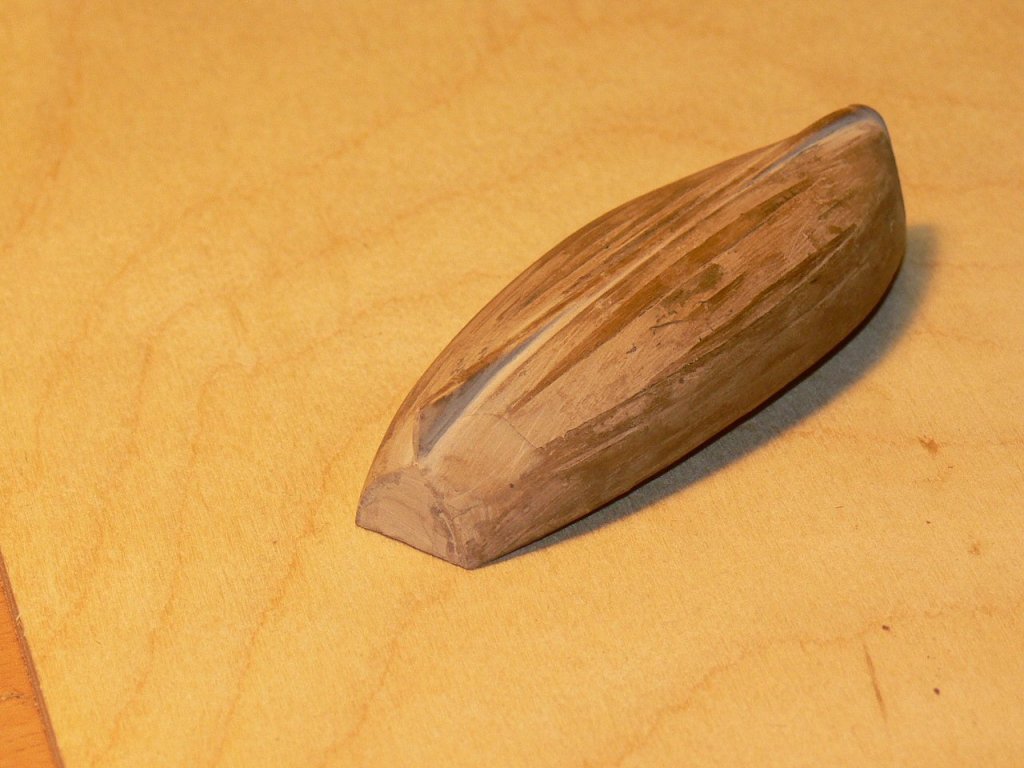
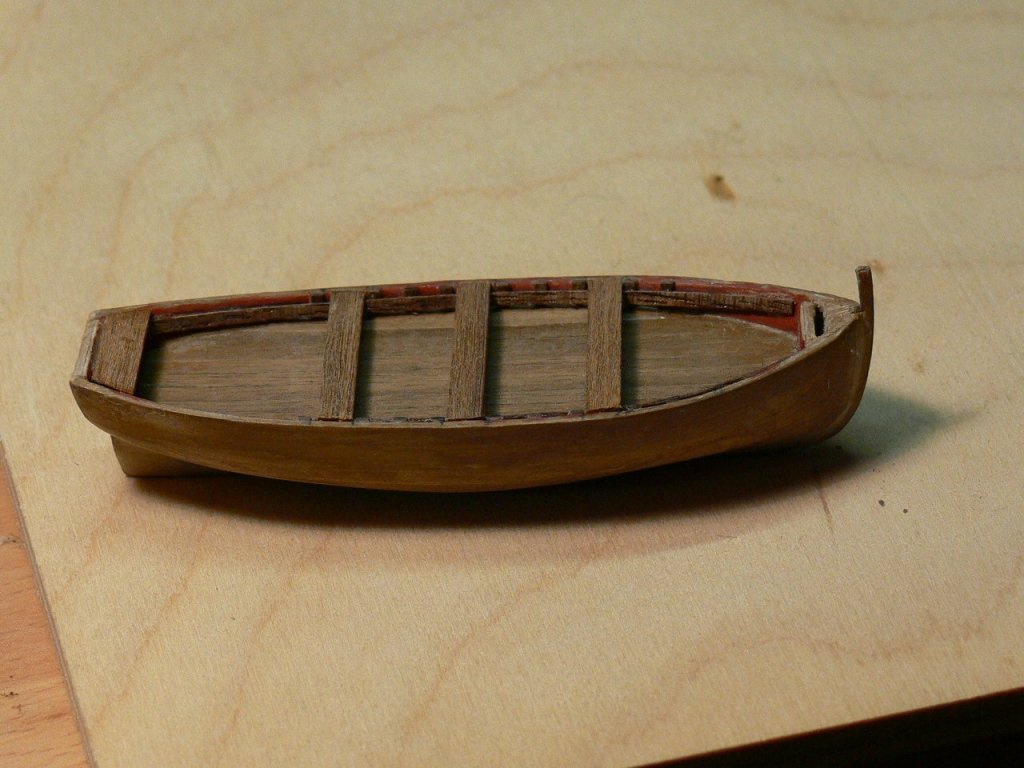
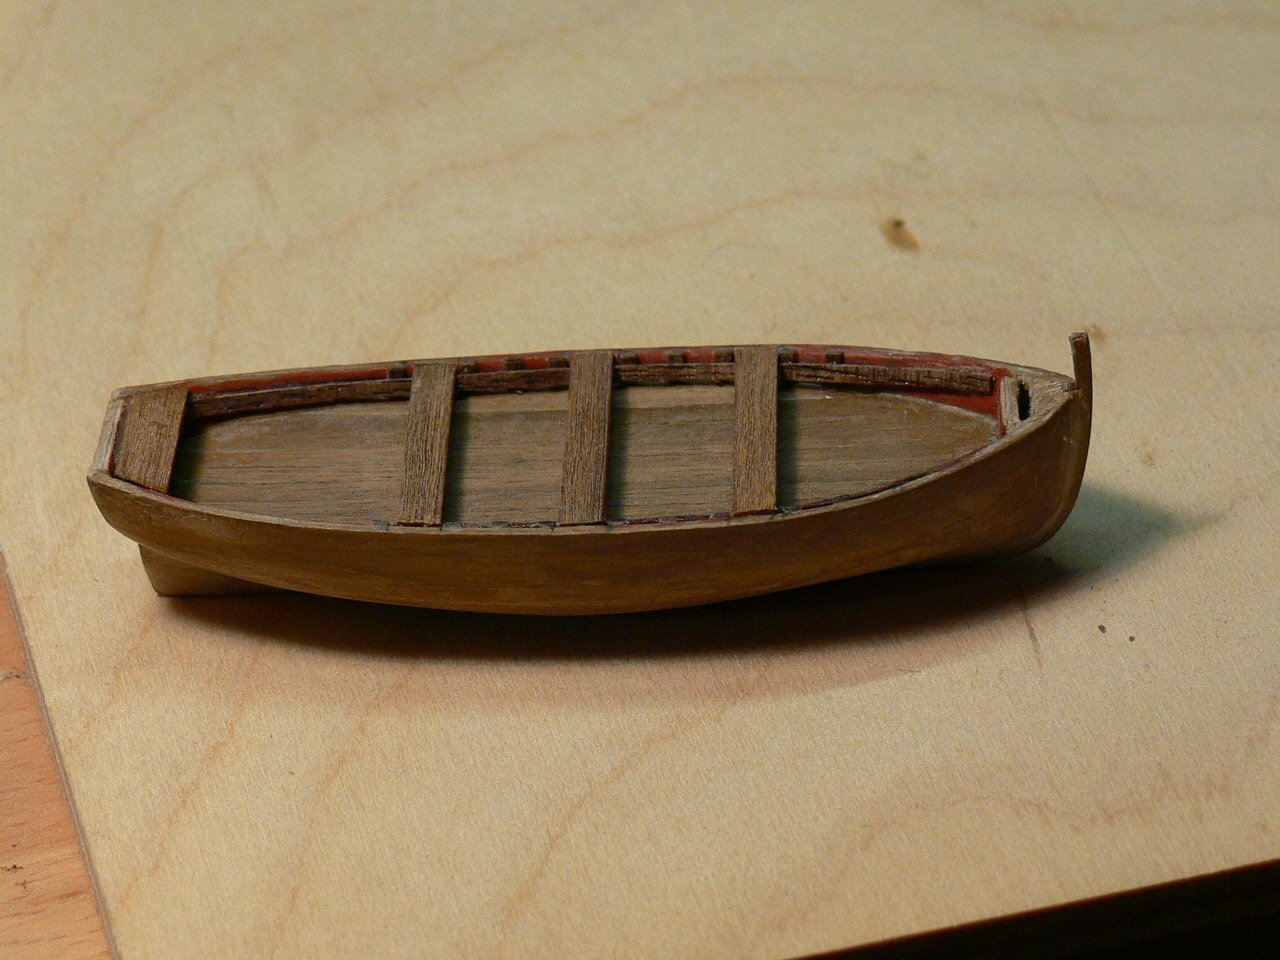
I have finished the first three small boats. Currently I am working on the last and smallest boat. It is not easy to fit in the benches, because there is only a very small distance from the floor to the railing. Again , I glued a second keel on top of the first one .

.thumb.JPG.fdae356729c0b8f492e191e0bda58dc5.JPG)
- Retired guy, JpR62 and Ondras71
-
3
.JPG.bd3973c07fb452db0977369118712987.JPG)

.JPG.1f077c78c8ad8195707b425c38a41333.JPG)
.JPG.42267c75d06f4dc9a38501c8539b152f.JPG)
.JPG.d19ef20e04f73db177b3f192c89a39a8.JPG)
.JPG.ed1dd41dec6004d1f88a29383af6023e.JPG)
.JPG.d52ffe517f5c64bc1e52290ac21da5a4.JPG)
.JPG.4568f45c71d3186fd30ad42d80fa0c4c.JPG)
.JPG.4320fc42f4b022d6f31ffd71eb933f4e.JPG)


.JPG.f52b4bc1424b86628924c8613a0a31d6.JPG)
HMS AGAMEMNON by Karinmutter - FINISHED - Caldercraft - 1:64
in - Kit build logs for subjects built from 1751 - 1800
Posted
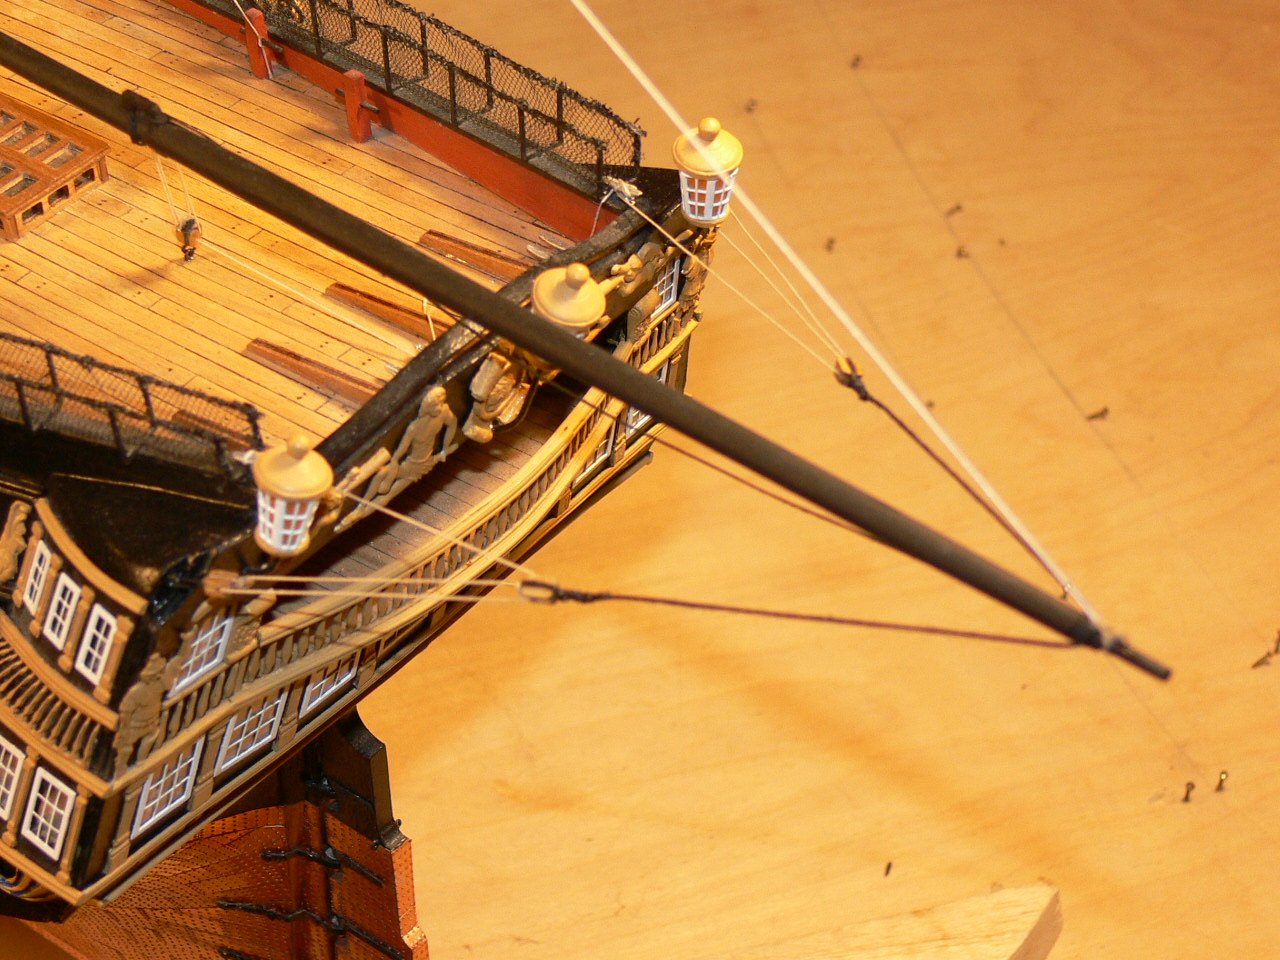
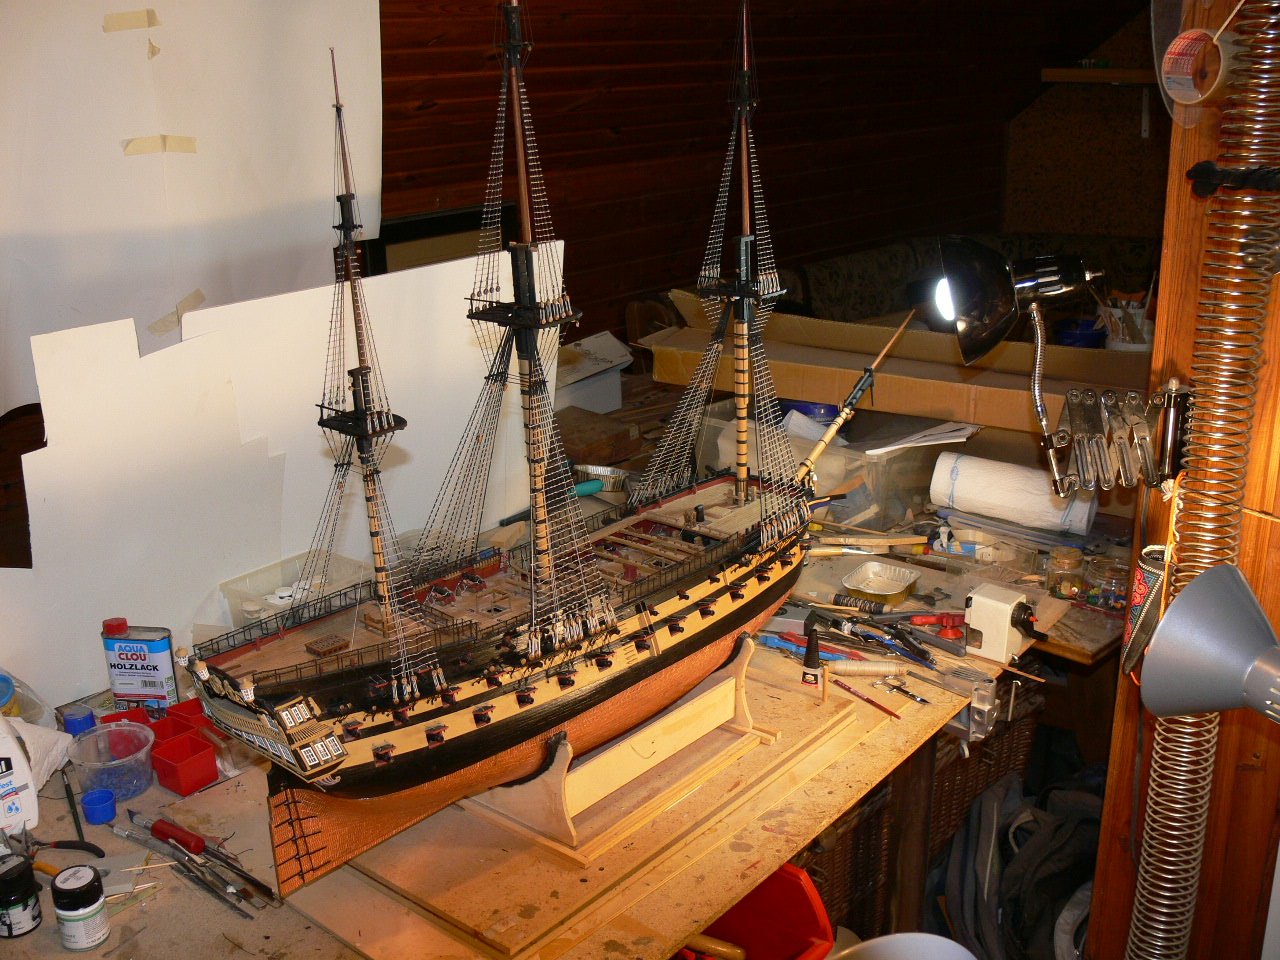
Hello fellow shipbuilders,
I made a few adjustments and I have added two "toilets", the bowsprit lashings (forgotten to mention in the manual) and the snaking. I have added a few pictures, which show the making of the "mouse". I used a wooden dowel, shaped it with my woodturning lathe and carefulle drilled a hole going through it to make room for the stay.