HOLIDAY DONATION DRIVE - SUPPORT MSW - DO YOUR PART TO KEEP THIS GREAT FORUM GOING! (Only 20 donations so far - C'mon guys!)
×

dgbot
-
Posts
3,993 -
Joined
-
Last visited
Content Type
Profiles
Forums
Gallery
Events
Everything posted by dgbot
-
 Toni, your joinery and attention to detail always amazes me. This is one of the times when I wish I could record your work up close. David B
 -
Darrel your Blue nose is coming along great, DavidB
-
I have both vols it is worth every penny. David B
-
Nothing wrong with white. But I have always had trouble getting a decent coat. David B
-
These were models designed by Magnus Mork. I have found them interesting and fun. They are a free download. http://modelsnmoore.com/mmork.php David B
- 39 replies
-
- 1
-

-
- lehigh
- papercraft square
- (and 3 more)
-
I wish that model was at the last WSMC I think it is fantactic. When you are done please make a trip to WI and brign it to Manitowoc. Bravo! David B
-
Looks like you are going to be doing a lot of fishing David B
-
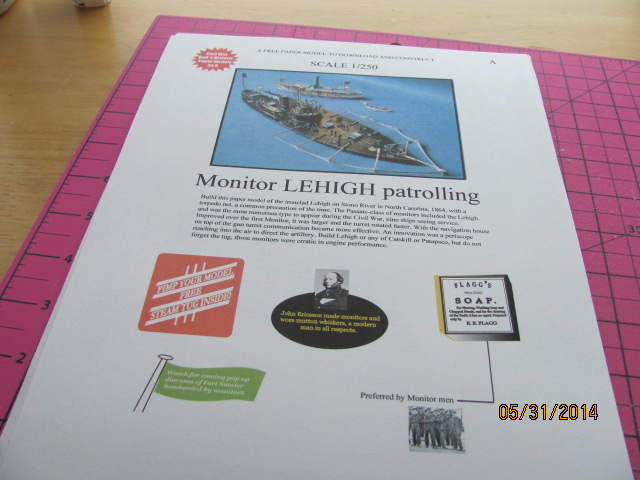
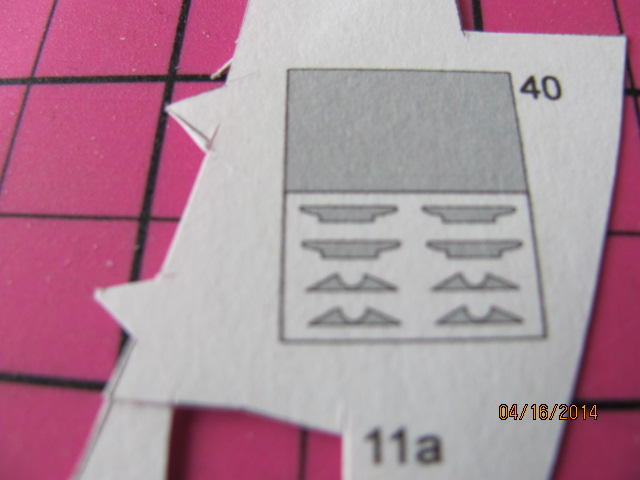
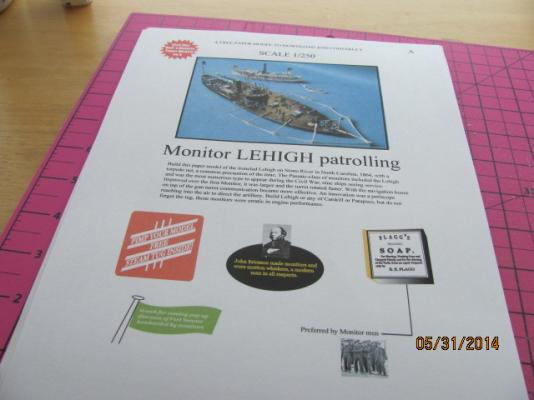
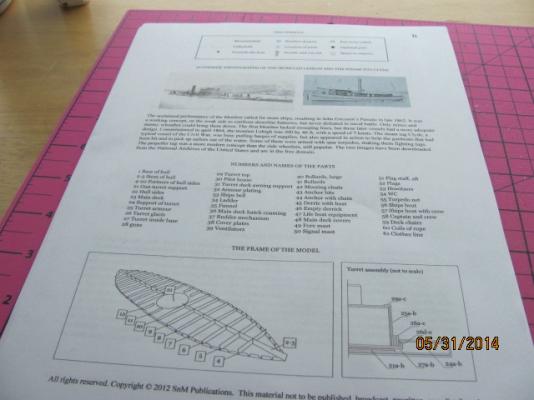
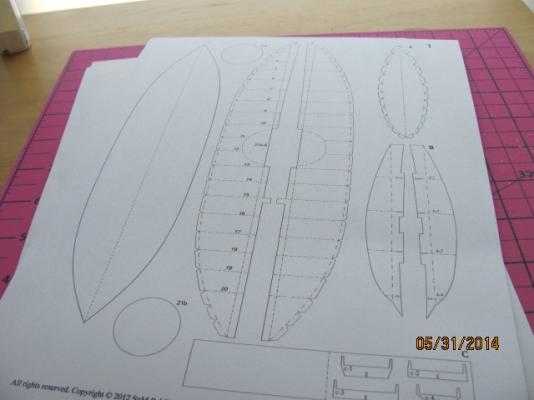
I have decided to work on another civil war model. The main reason for this is of course cost of the plans and I like the way they look. The one I have in mind is the Lehigh. The Lehigh was a Passaic Class monitor that was commissioned in 1863. The Lehigh served in the navy off and on until 1898 untill it was decommissioned and sold in 1904. This model seems it might be fun. David B
- 39 replies
-
- 5
-
-
- lehigh
- papercraft square
- (and 3 more)
-
You are getting there. Keep it up. David B
-
If I were you I would choose another option. One less messy and easier to do David B
-
Nice job. David B
-
There are modelers in my club who have made several life boats out of tissue paper. The first thing is to make a plug the shape that you need. Once finished you give it several coats of either wax or poly for a coating. Wrap the plug in plastic or cling wrap. Make up a slurry of white glue and water and start layering with tissue paper and slurry. After after it dries take some wet and dry sandpaper and smooth out the hull. Once it is popped off the plug and the wrap removed you then detail the insides. This takes practice but after a while you would be surprised at what you can get. I like using PVA. It is easier to use and less messy. As for the paper after awhile you begin to get a feel for what will bend or fold and how to smooth out the wrinkles. As for clamping I have been using tweezers and my fingers along with some weights. I am not in any hurry. One of the thing I am not sure I will get used to is that there is so little weight. David B
- 27 replies
-
- 1
-
-
- teazer
- blockade runner
- (and 2 more)
-
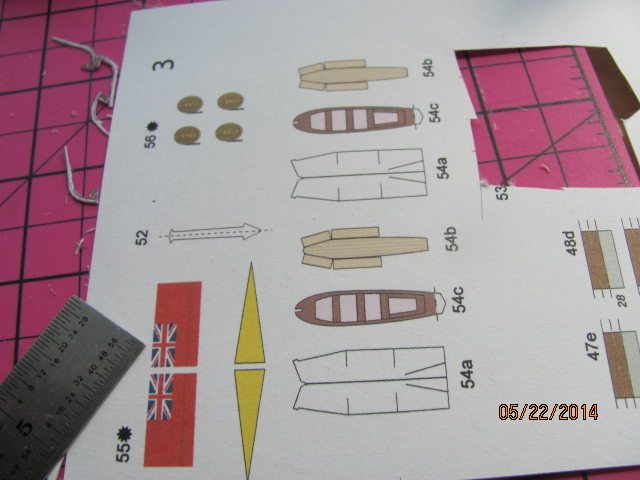
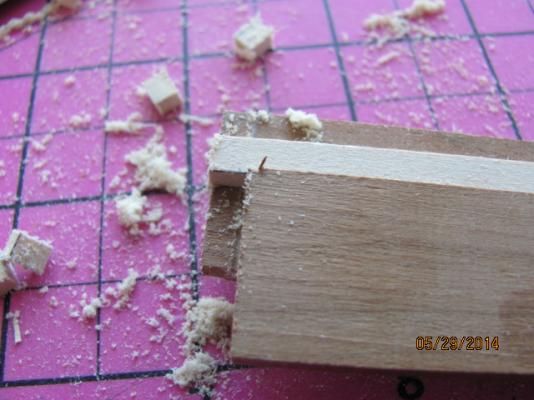
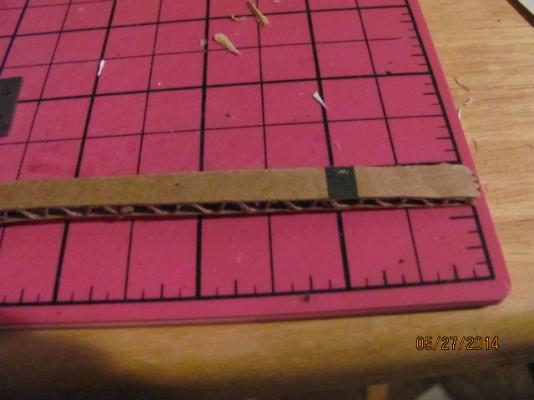
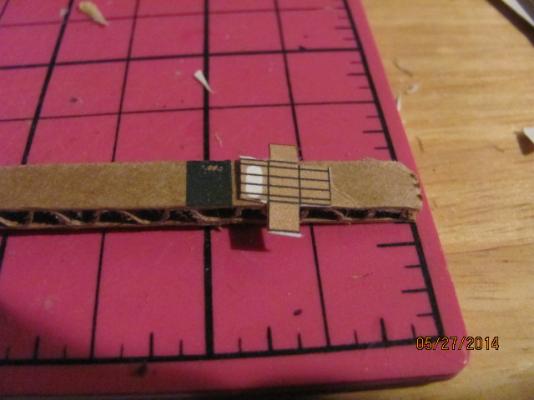
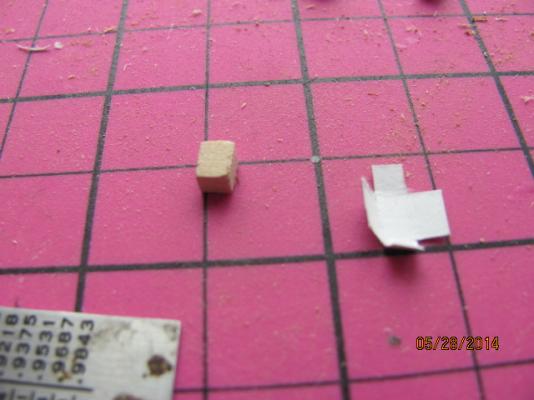
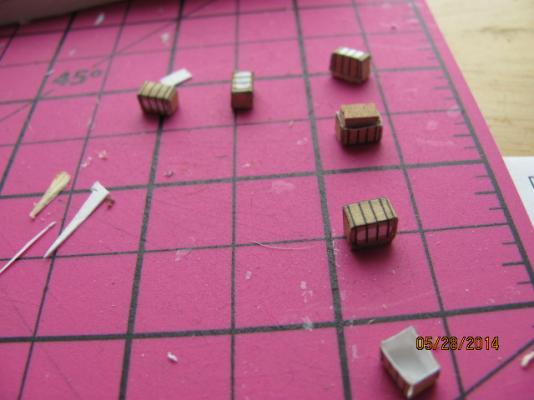
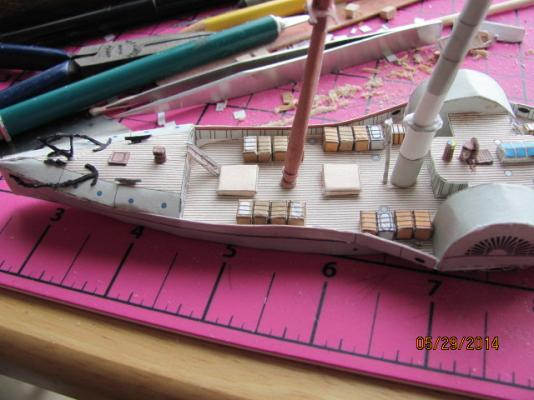
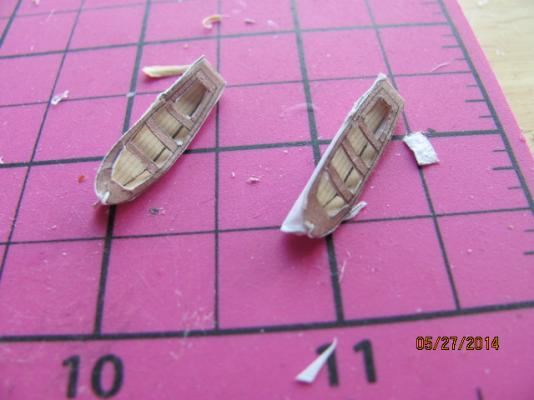
Next came the bundles of cotton. After a few attempts I kept coming up with garbage. So I cut out a piece of cardboard strip to make a block but this did not work out This did not work out so I took a piece of basswood and stripped it to the length I needed and mad up a jig to cut out blocks. The bundles were then cut out and glued up around the blocks and this did the trick. Once they were assembled they were then glued to the deck. This was a good way to hide a few mistakes that I made. Once this was done I put the life boats on. There could be an improvement in there placement but next time I plan on using some wire to make for a better look. The finished model. Once more I have learned much. It is not perfect but an improvement. I have the plans and the next time I build this model I plan on making several improvements. As stated I am learning and having fun at the same time. Eventually I will gain the confidence to tackle the Schachtschiff2. Klasse USS MAINE that a friend sent me. This will be the true test. David B


- 27 replies
-
- 7
-
-
- teazer
- blockade runner
- (and 2 more)
-
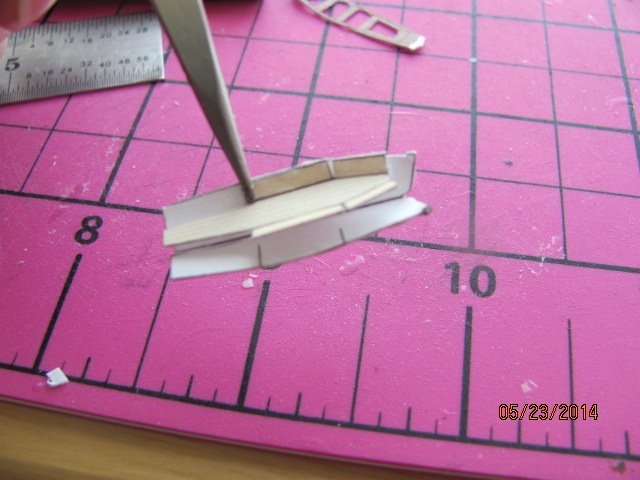
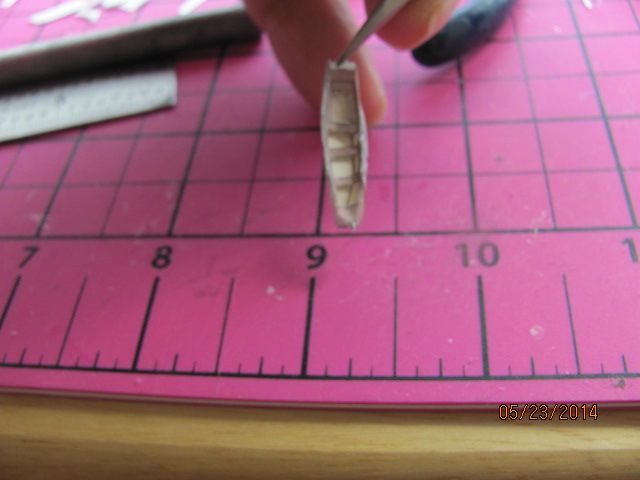
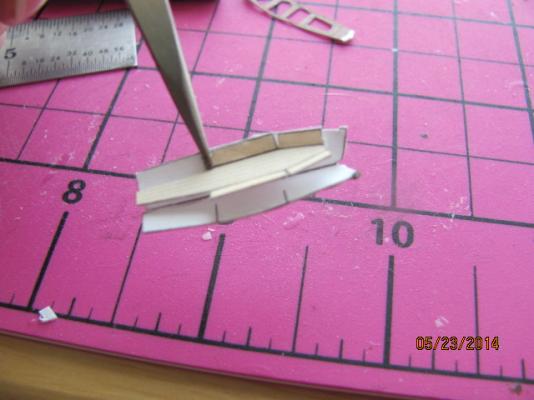
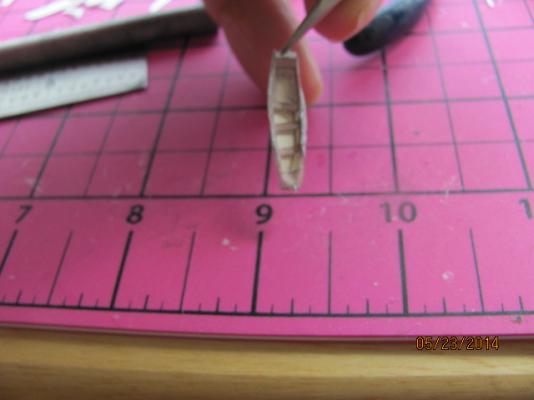
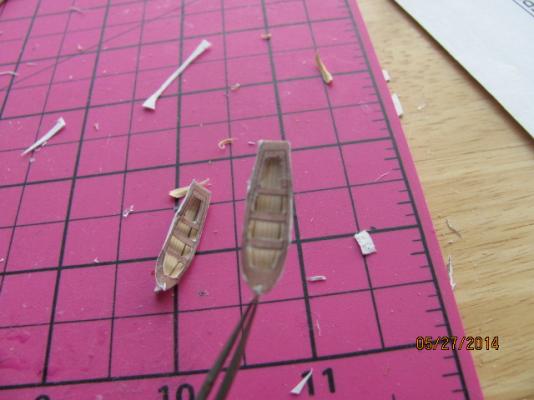
Then cut out the life boats and assembled them. After a few attempts I was able to make a couple that were decent. The next time I do one of these I will make a small mold and make the hull out of tissue paper and white glue. It will be a little more work but better looking. David B

- 27 replies
-
- 2
-
-
- teazer
- blockade runner
- (and 2 more)
-
Manufacturers put just enough to get a shape. This helps to keep the cost down. However over the years I have found that filling in between the bulkeads makes for a better gluing surface. You can also now easily visualize how the finished hull will look and make symmetrical. David B
-
Another thing is to add several inches to the bowsprit and just drill a through hole in the deck. Just rememember to start out small and widen it for a snug fit. David B
- 1,756 replies
-
- 1
-
-
- constitution
- constructo
- (and 1 more)
-
Wouldn't you just like to have the real thing? The only problem is it would be a money pit. David B
- 296 replies
-
- 1
-
-
- herreshoff
- buzzards bay
- (and 1 more)
-
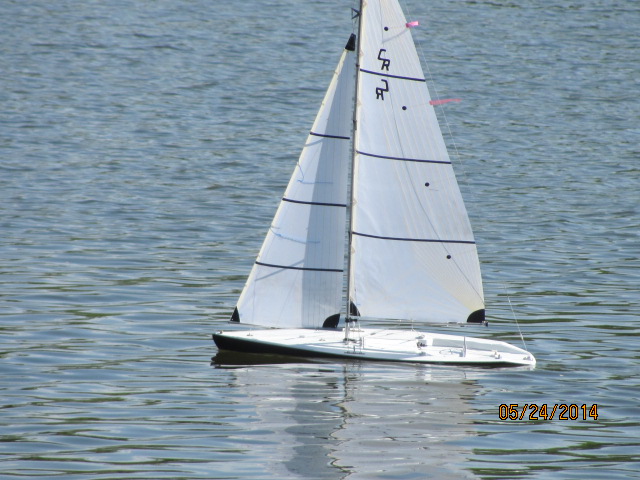
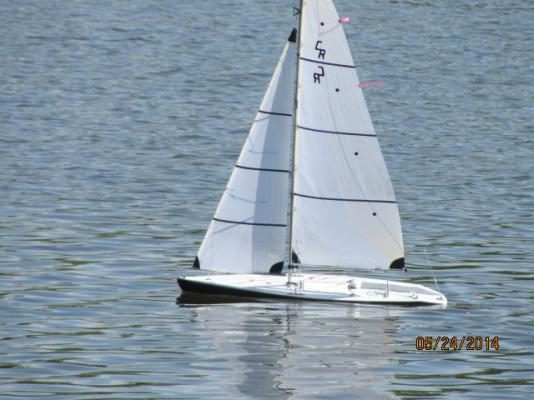
Thanks for the comment Keith. I go back to Iowa City Monday for a full day of PET scans. Then Friday to see the Doctor. They are already trying to schedule a bed in the isolation ward for my first tranplant. If available I will be there for a full month. I needed the weeks after my cell extractions in order for my. However it took me several days to recover from that small trip but it was worth it. I operated the sail boat and really enjoyed myself. It is nice to have friends who care. David B

- 27 replies
-
- 3
-
-
- teazer
- blockade runner
- (and 2 more)
-
Nenad many years ago a fellow modeler made a made a model of the Charles W. Morgan. He spent 20 years on it because he kept taking things apart and adding in new items as he found them through research. The end result was a gold medal at Manitowoc. However he said that there is a time when enough is enough. As far as I am concerned you have done wonders with what you have. If you are truly satisified with what you have accomplished and are happy, then do not bother redoing anything. Once your Cutty is done it will be a great work of modeling and skill. Remember through out this build you have been learning and expanding your knowledge and skills and are having a lot of fun. To me this is the great reward not medals and trophys. David B
- 4,152 replies
-
- 5
-
-
- cutty sark
- tehnodidakta
- (and 1 more)
-
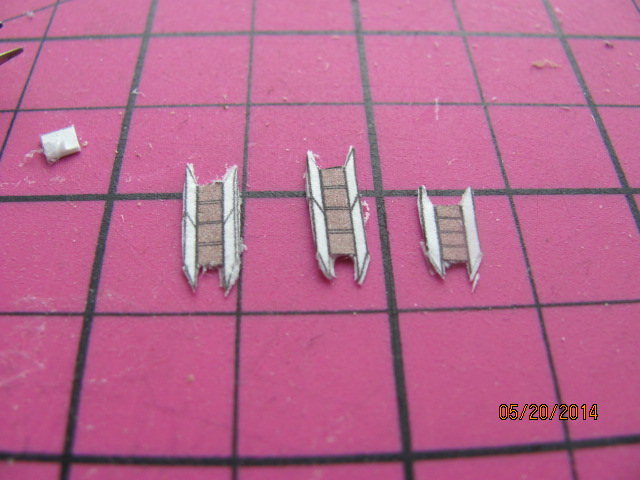
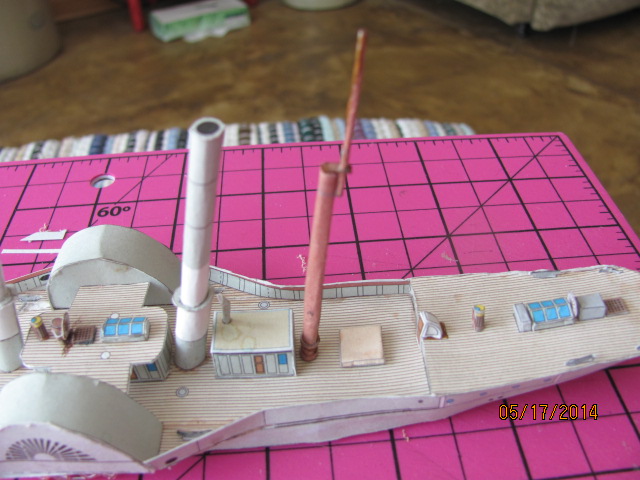
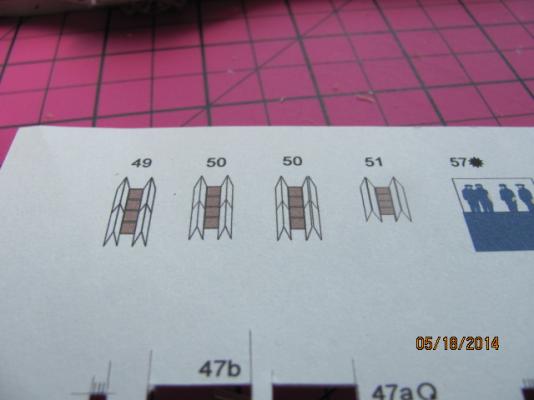
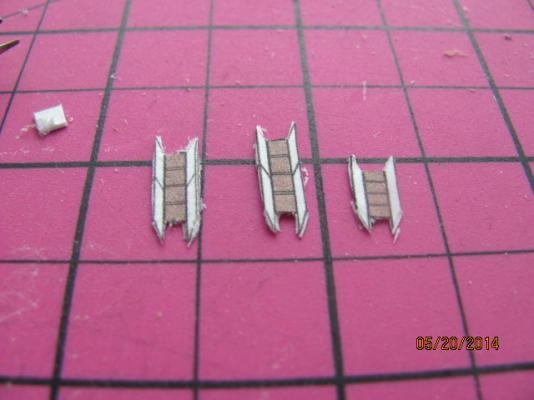
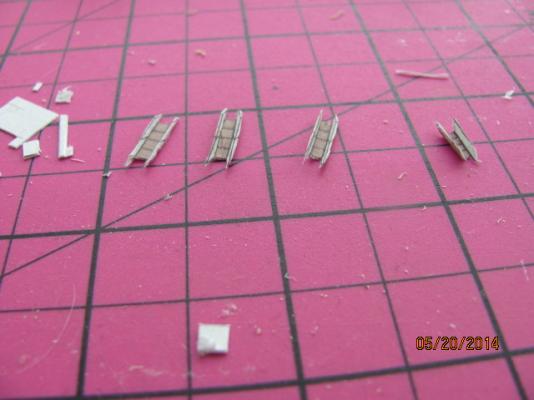
Next came the ladders. Once more a good straight edge along the folds makes it easy to get a nice tight crease. After touching up they were glued into place. One of the things I found out on these delicate pieces is that a drop of CA helps to keep the parts stiff and prevent accidental breakage. I only use as needed though. David B
- 27 replies
-
- 4
-
-
- teazer
- blockade runner
- (and 2 more)
-
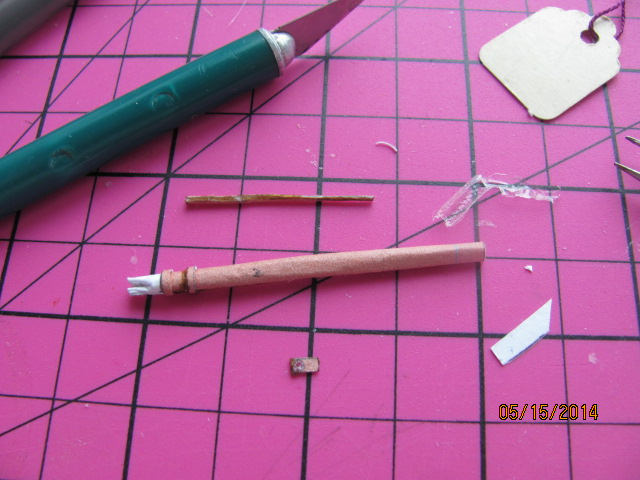
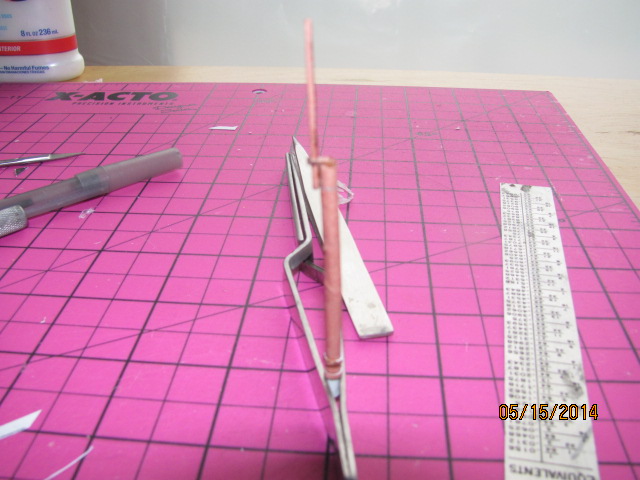
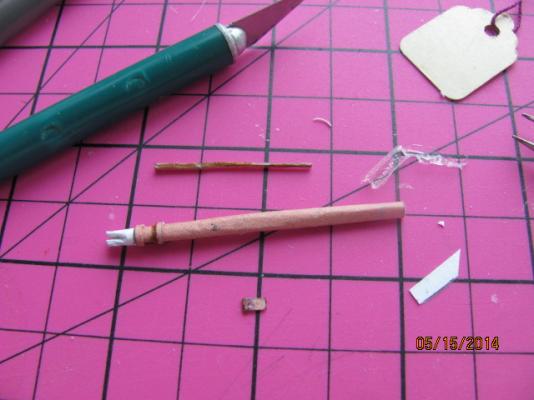
The masts were then cut out and formed. I left a little extra paper on the ends to help with the glue up and used a thin rod to help shape them. Next time I will use a couple of dowels when I can get them. David B


- 27 replies
-
- 4
-
-
- teazer
- blockade runner
- (and 2 more)
-
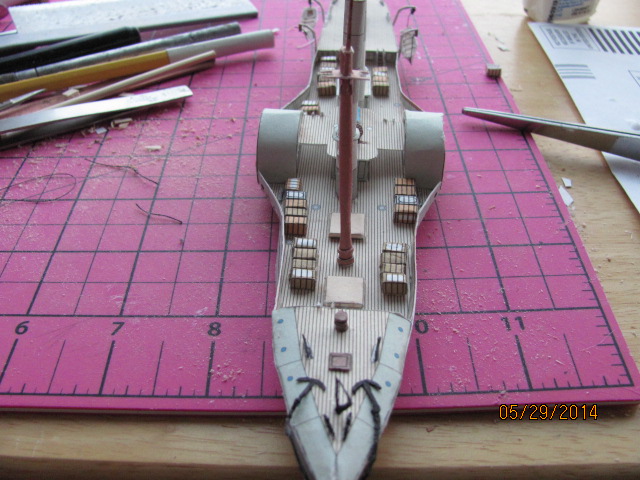
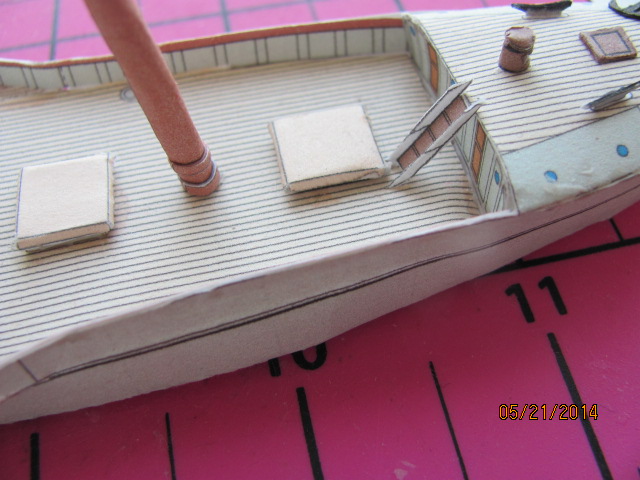
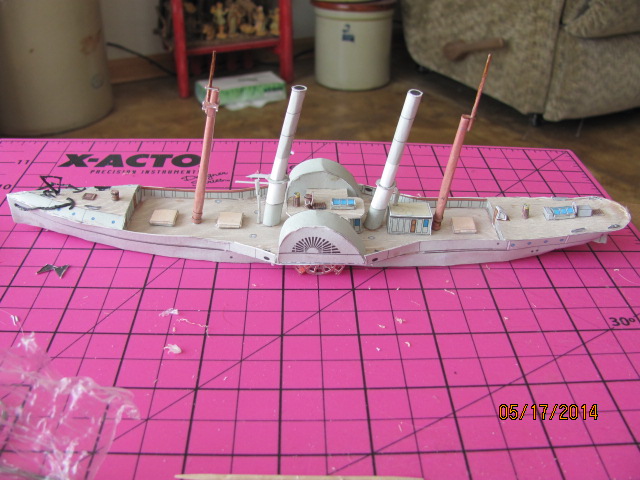
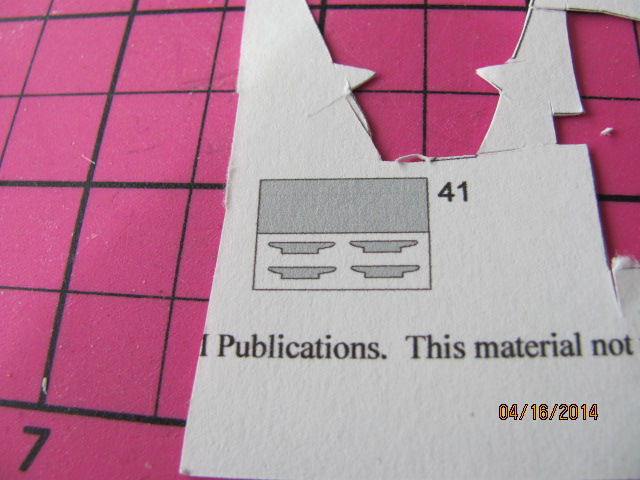
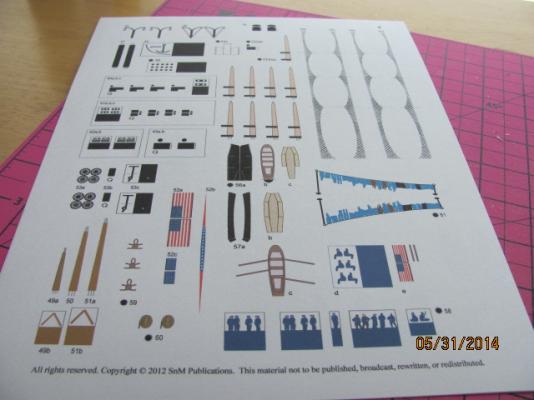
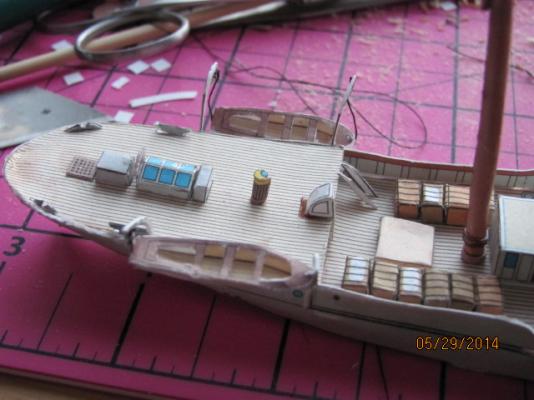
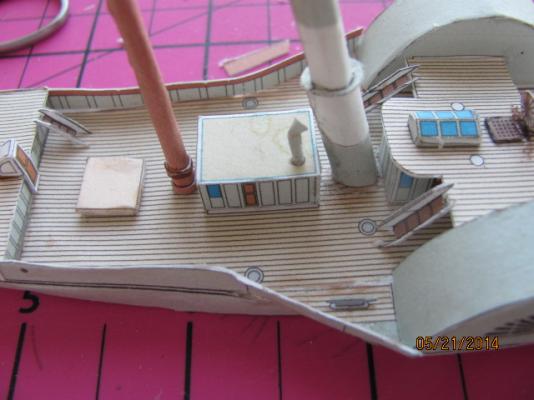
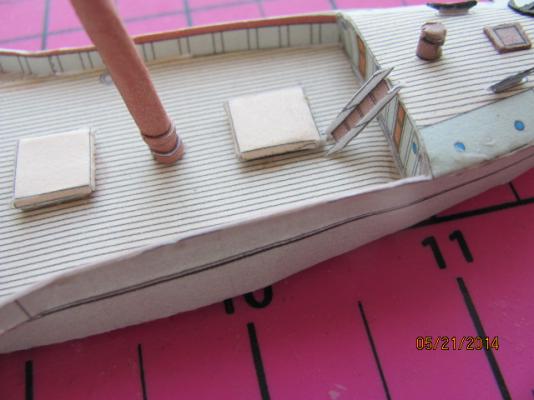
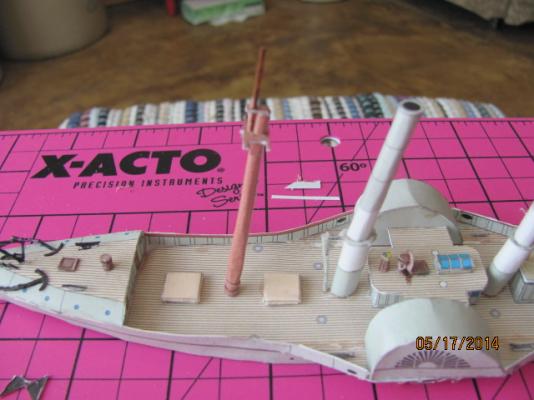
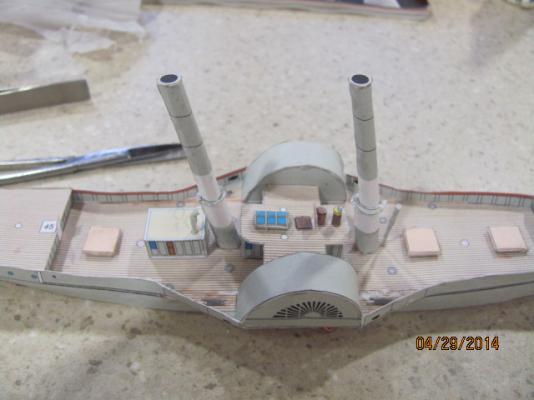
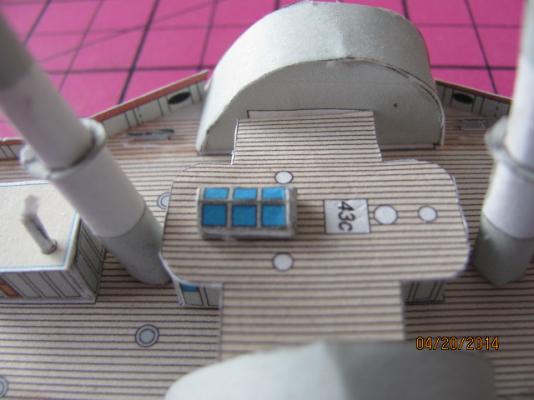
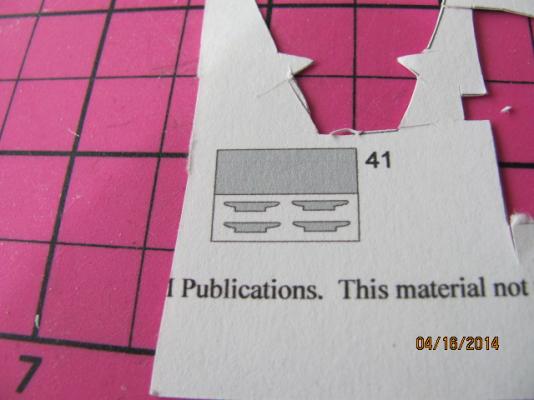
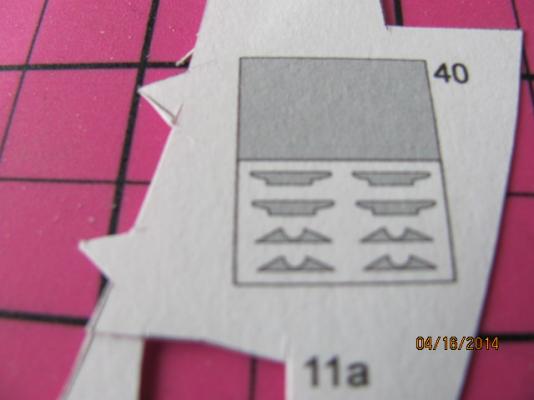
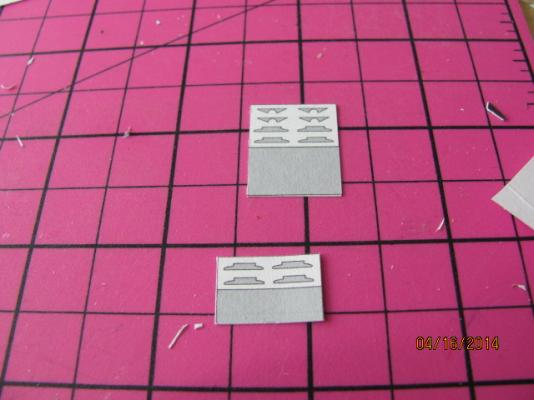
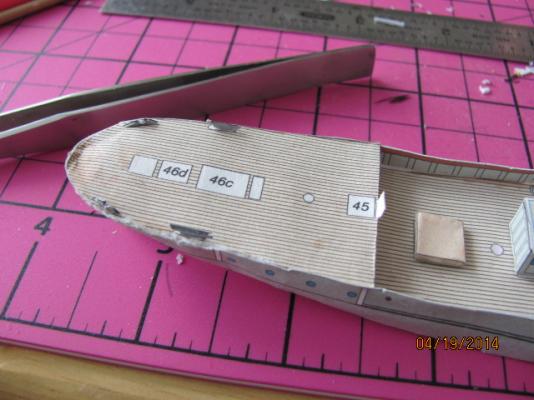
Next up was the rest of the super structure. The navigation deck was finished off. The aft deck was then completed with the wheels, compass and ventilators. This is about as good as I am going to get it. Once more I am learning about shaping and folding. Another item is a leather strop block I use on my xacto blade every now and then. This helps to keep the tip super sharp so that there are no tears.


- 27 replies
-
- 5
-
-
- teazer
- blockade runner
- (and 2 more)
-
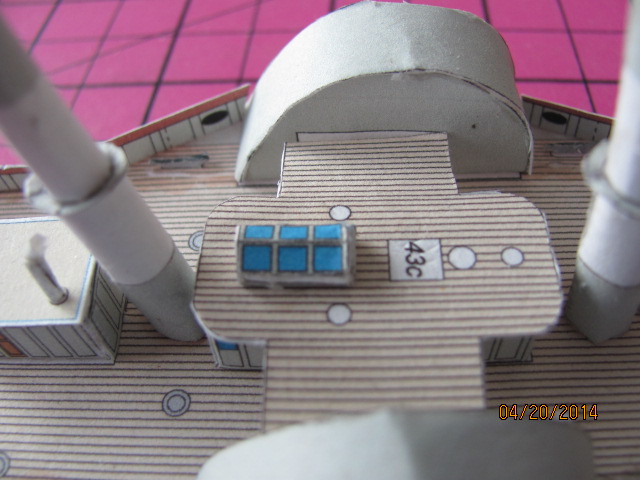
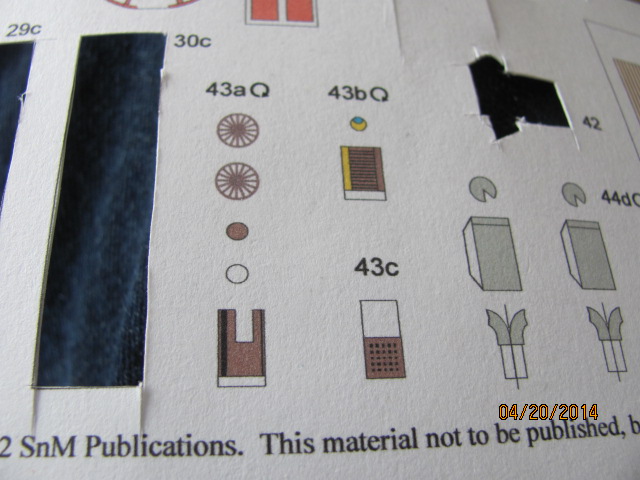
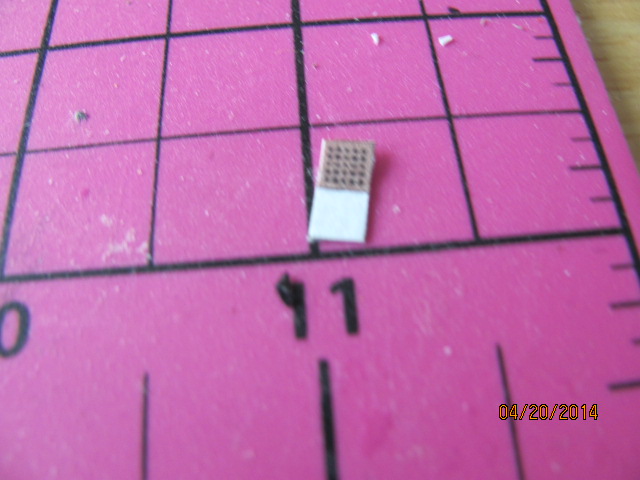
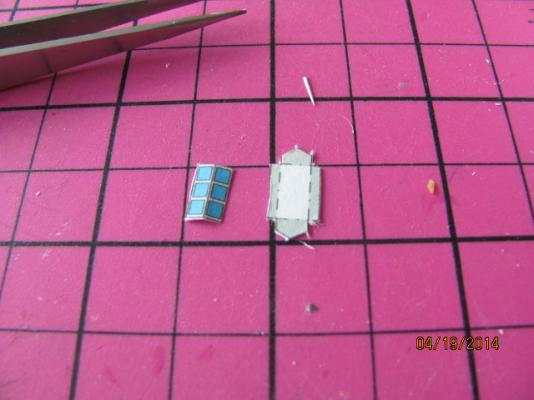
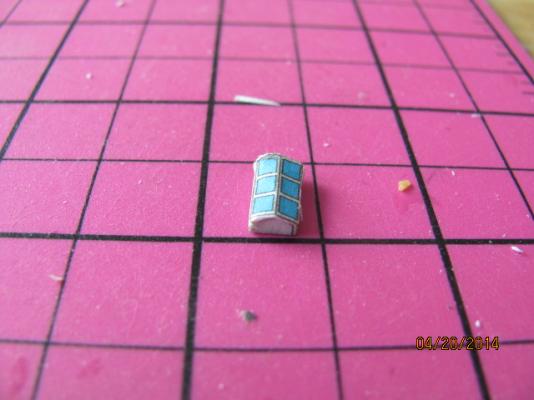
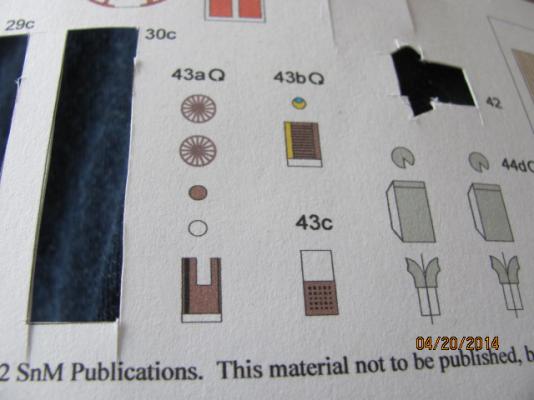
Thennext parts were the cleats. This was pretty straight forward. Just fold over and glue together. I applied a little CA to stiffen up the pieces a little bit and with a marker to touch they were placed on the model. So far so good.
- 27 replies
-
- 3
-
-
- teazer
- blockade runner
- (and 2 more)
-
I would stick with movable. David B
-
You have been a busy boy indeed. Well Done. David B