EJ_L
-
Posts
2,246 -
Joined
-
Last visited
Content Type
Profiles
Forums
Gallery
Events
Everything posted by EJ_L
-
Welcome to MSW!
-
 Ulises, thank you! From what I have seen you do on your own build, that is high praise indeed! Marcus, thank you so much for the compliments. Believe me, the planking is far from flawless but as the saying goes, we are our own worst critics. I also try to keep the really bad parts out of the picture frame. Yes, I added extra frames on either side of the gun port frames as well as other places where additional supports are needed. On a real ship, the framing is nearly solid with spaces in between frames in some places as little as 3-5 inches or sometimes none at all depending upon the type of ship and the era of its construction. I just last night finished up adding the frames to the opposite side as well as modifying the false bulkhead posts to turn them into knees for the deck above. I will try to remember to upload some picture tonight when I get home. Next up I will complete the deck planking and install the waterway. Once that is done, I will frame up the gun ports with their jambs, sills and headers. These I oversize so that I can trim them down to match the curvature of the hull. Lastly, interior and exterior planking will go on.
 -
There is no truly right or wrong answer as ultimately the models final appearance is what you are most satisfied with and what you feel you can build. Time, money, materials, tools and modeling skills all come into play. Personally, I stopped using any of the cast fixture a long time ago and have lately even begun to phase out the cast decorative carvings in favor of making my own. I won't sugar coat it, it is very difficult, frustrating and exhausting, not to mention it adds hundreds of hours to a build. While my own skills leave a lot to be desired when I compare myself to other people, at the end of the build, I am much more satisfied with my model, and that, like I said is the most important part of the hobby. As Mark put it, I have crossed over to the "dark side" and am now lost. Like everyone, I did not start my first build that way, (in fact my first wooden ship is very rough in many ways) and am always learning and growing. On a first build and especially one of this size, using the cast pieces may be to your advantage. Just look at what it will take to adjust the frames or build new ones that will allow the lids to recess into the hull for a flush fit. If you are planning on having the lids in the open position, no one will know if they close flush or not. Sometimes the simplest solution is the best.
-
Beautiful paint work. It looks like you have spent what time you had available for the build well. Great job!
- 91 replies
-
- 3
-

-
- deagostini
- vasa
- (and 1 more)
-
Indeed, great details. That chain for the pins is something rarely seen and really makes this a unique build. As always, Michael, well done!
-
Thank you all! The hull thickness at the upper gun deck sides are 7.5mm which at the 1:90 scale I am working comes out approx. 26.5 inches at full size. I am not certain if this is fully accurate hull thickness for this ship but I do not think it is far off and for my purposes, it looks good. Essentially I have my frames set at 4mm, the inner planking is one piece of 1.5mm and the outer planking is made of two layers of 1mm planking each.
-
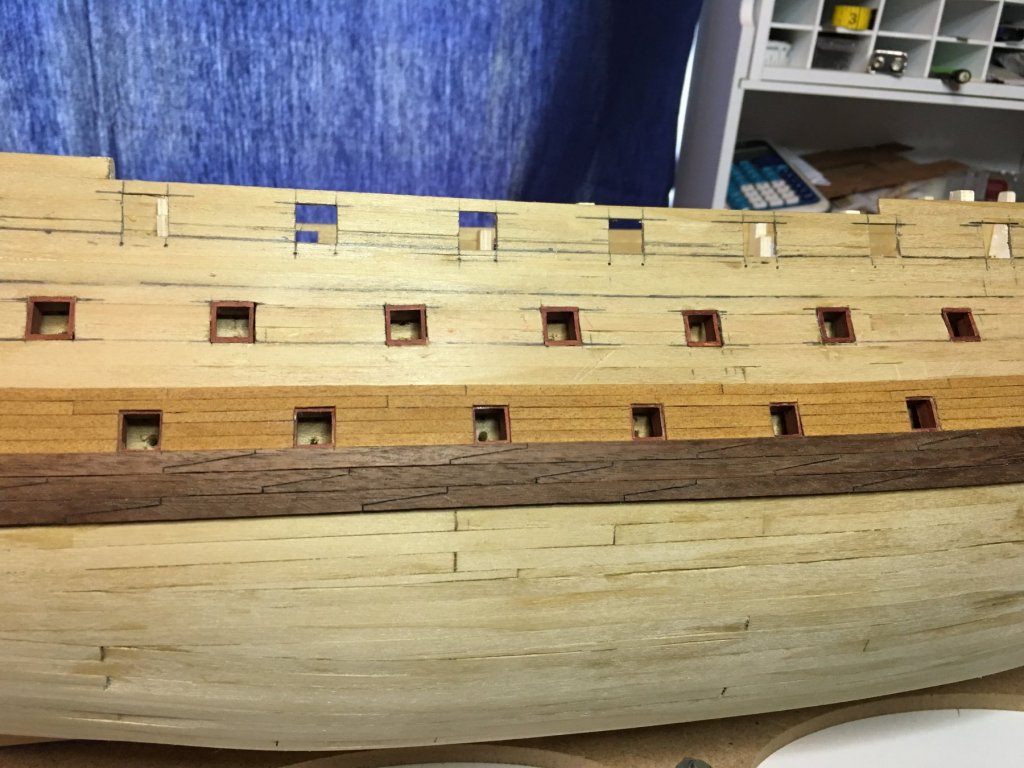
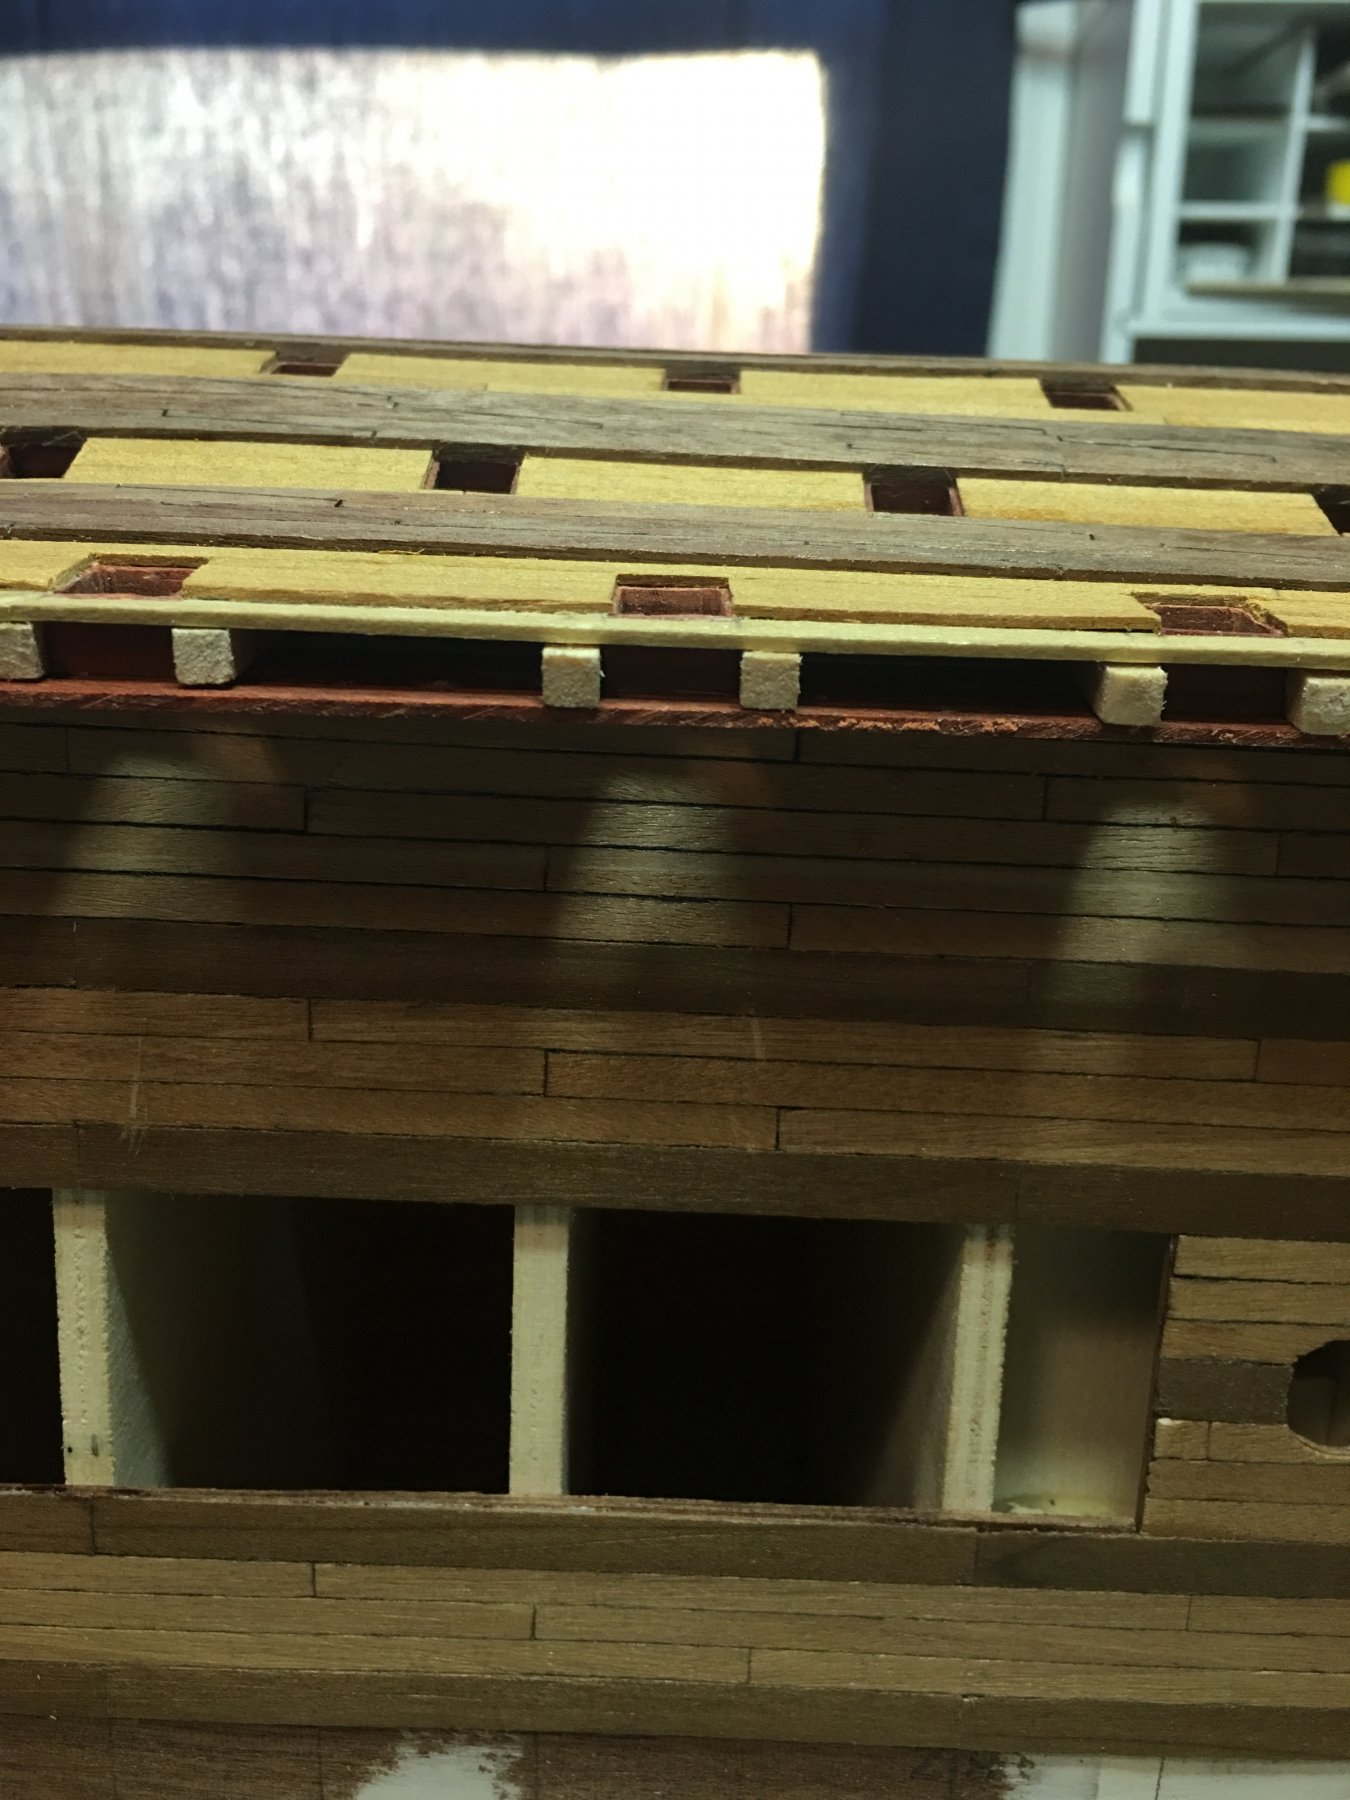
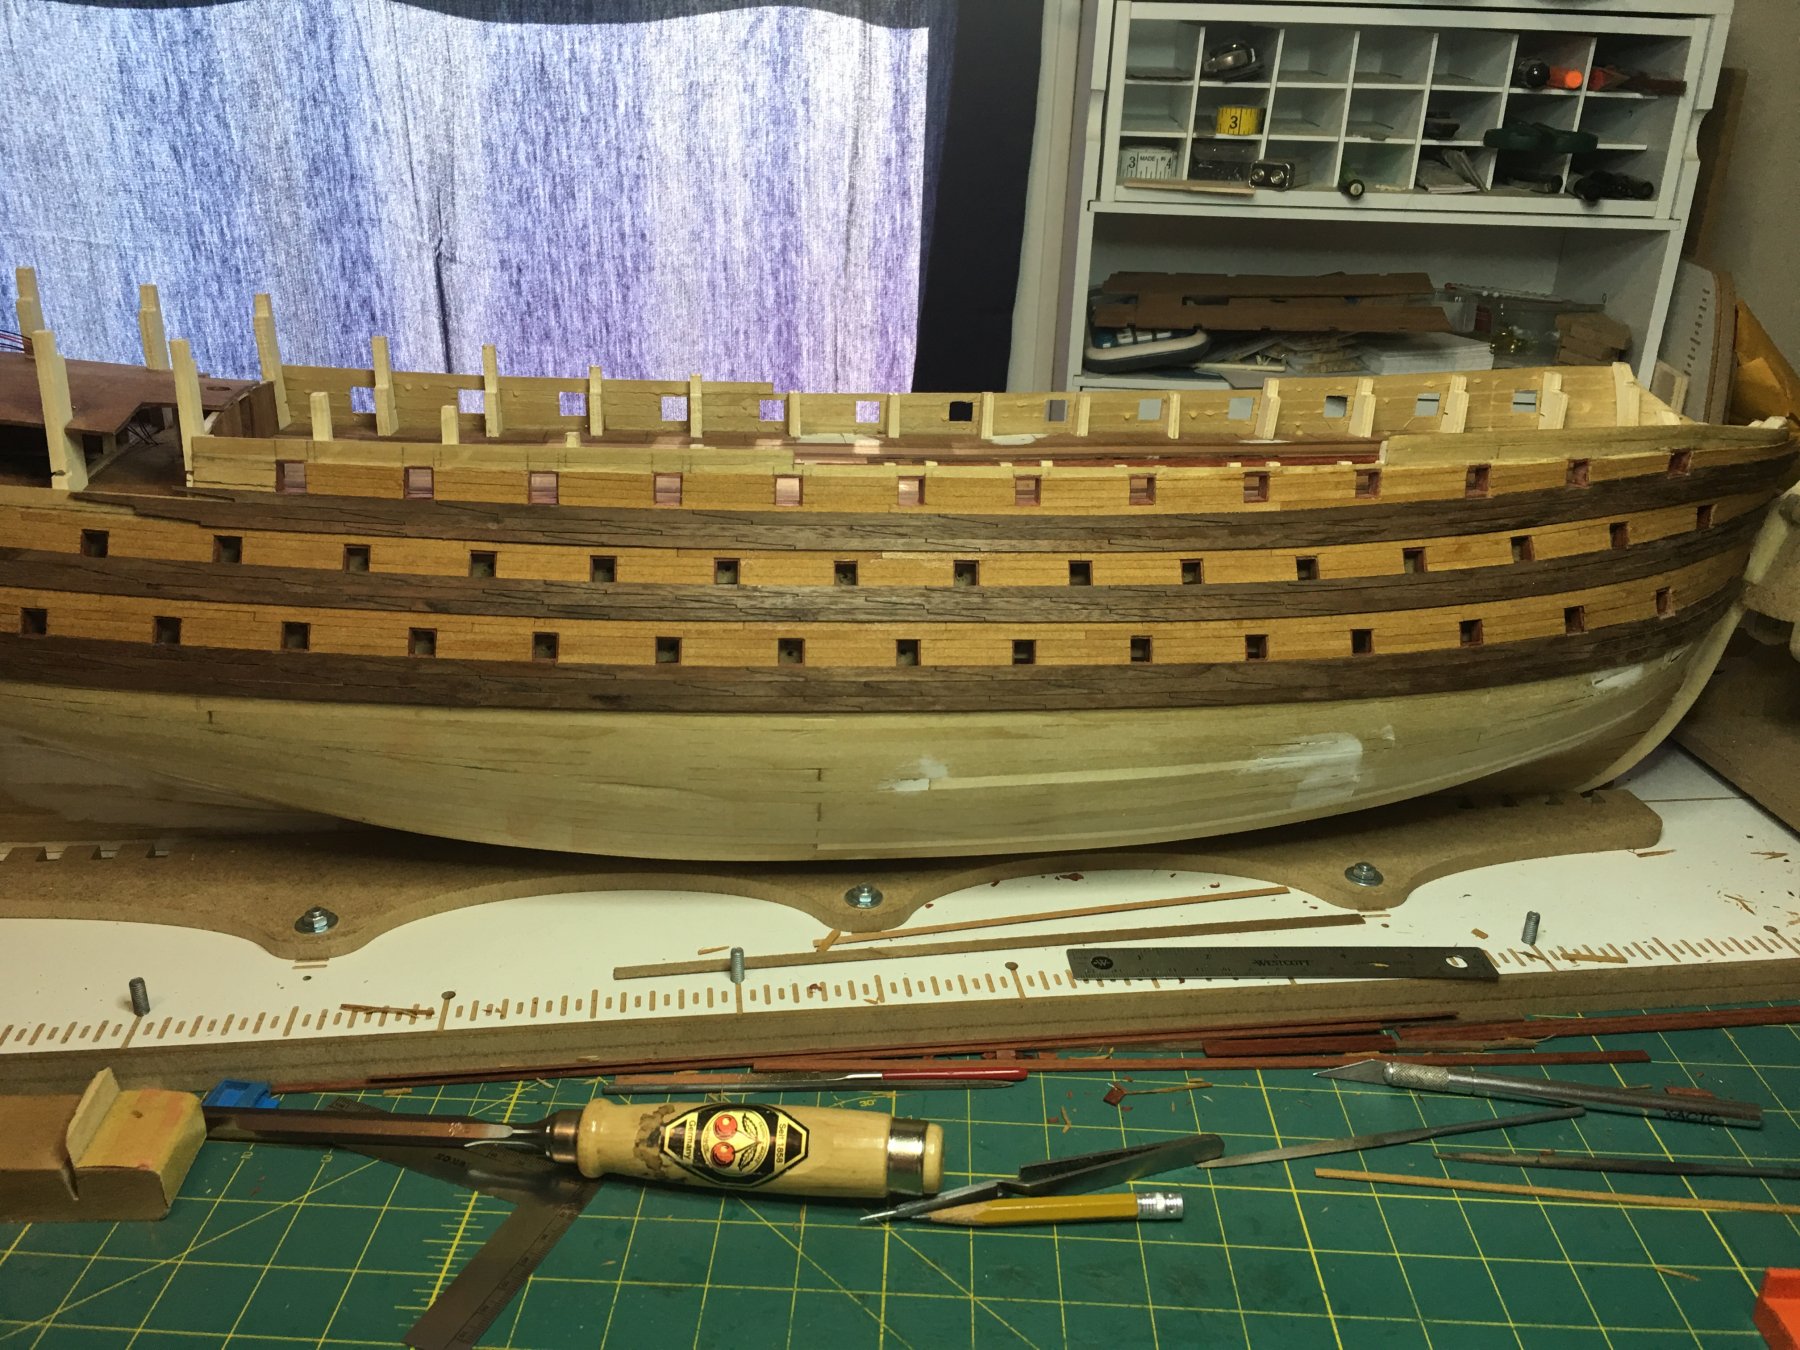
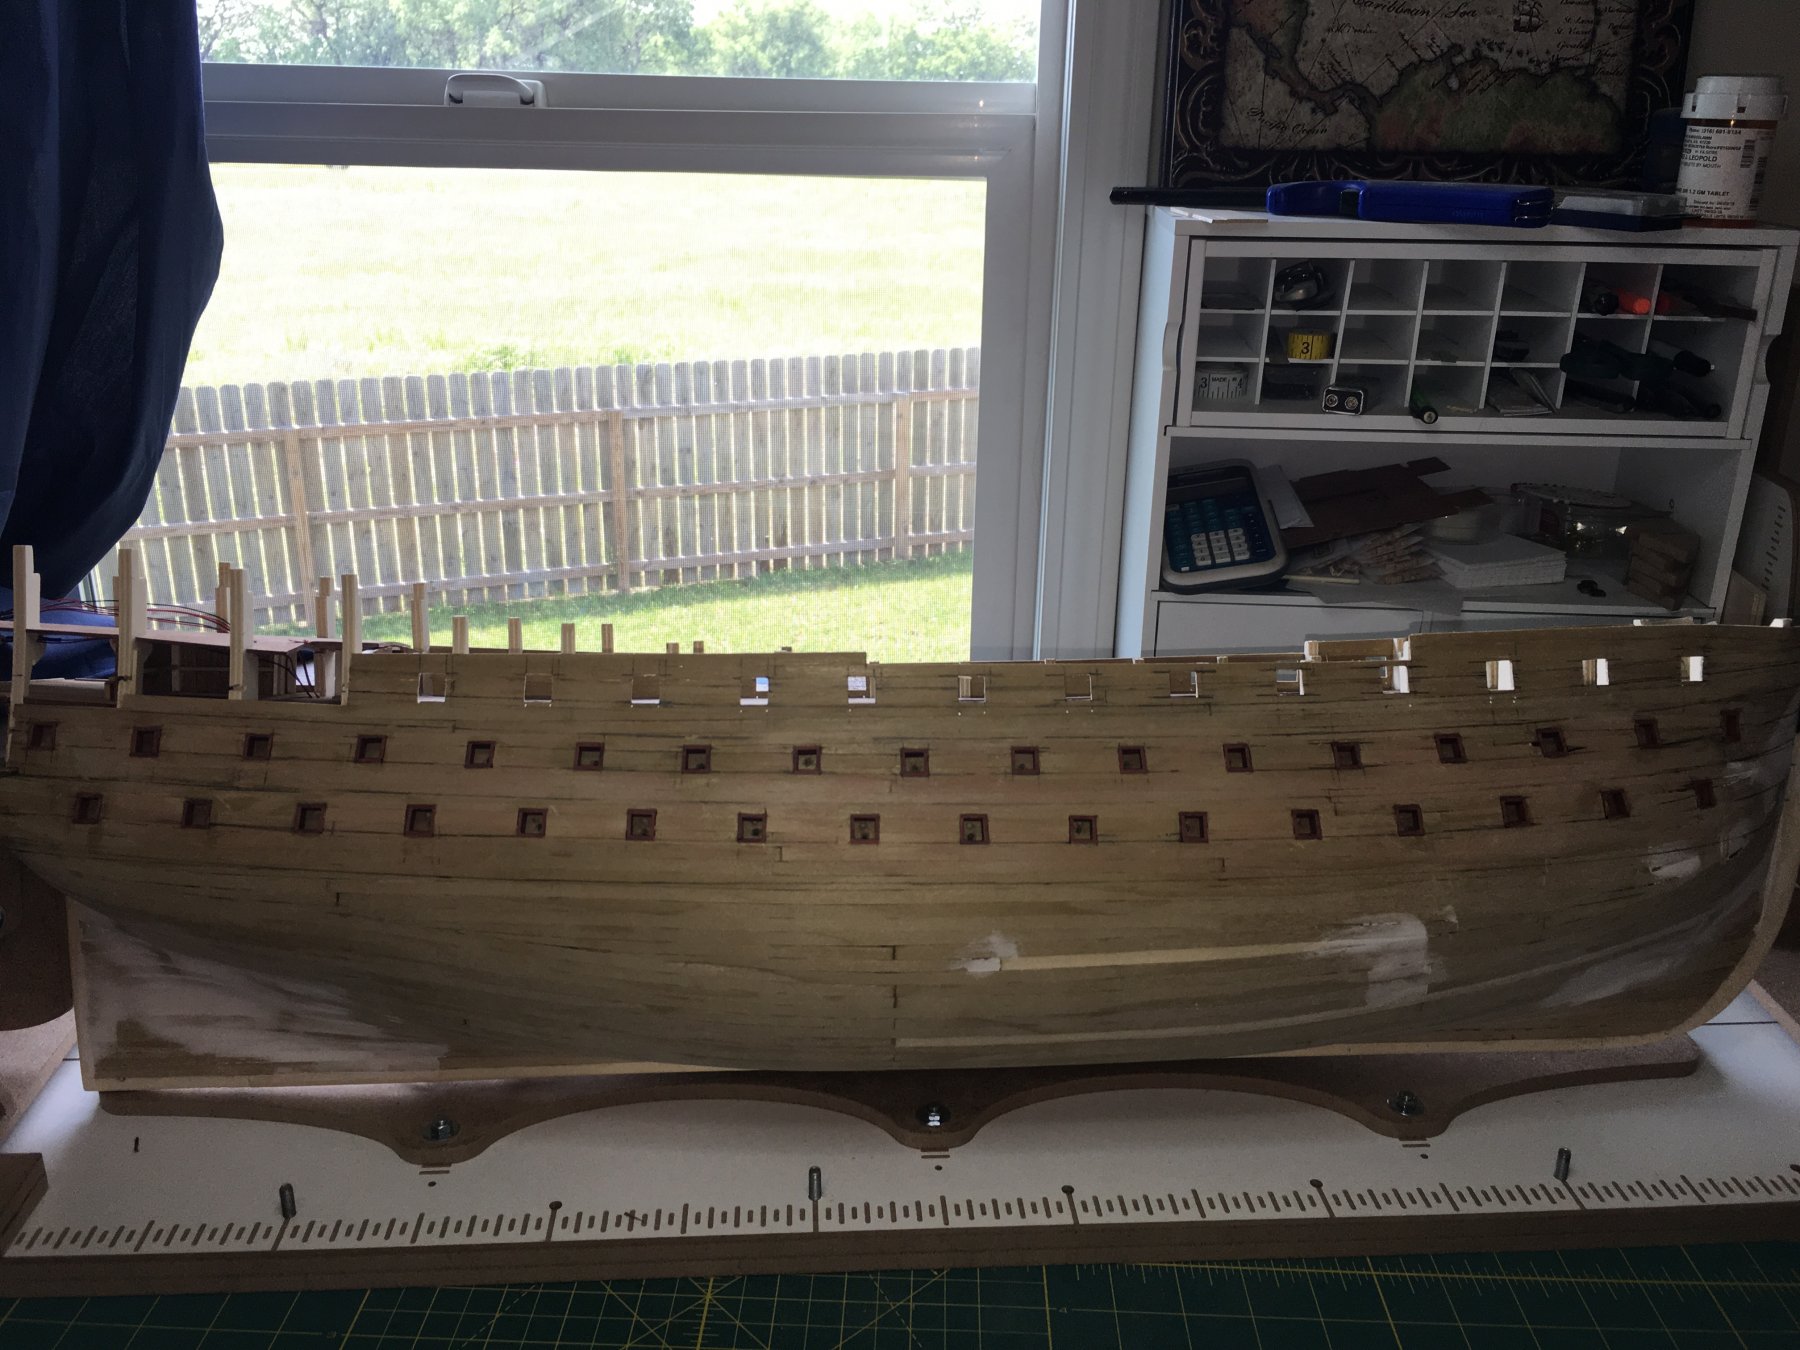
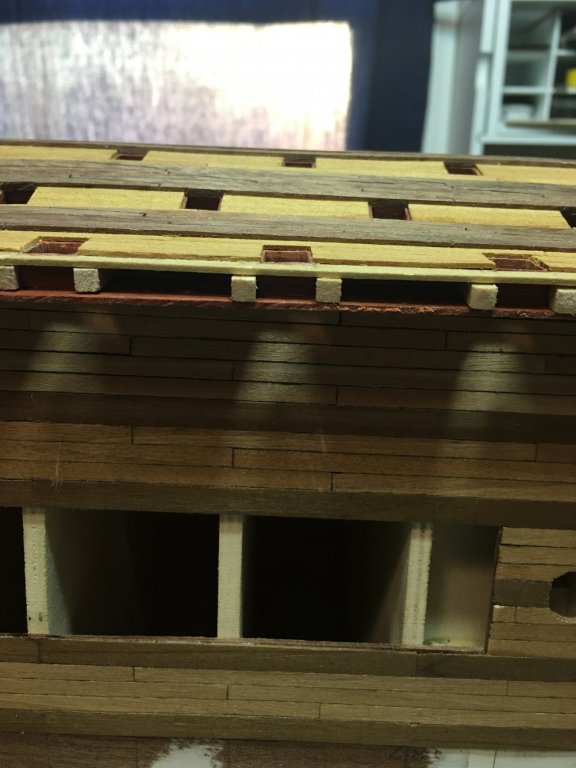
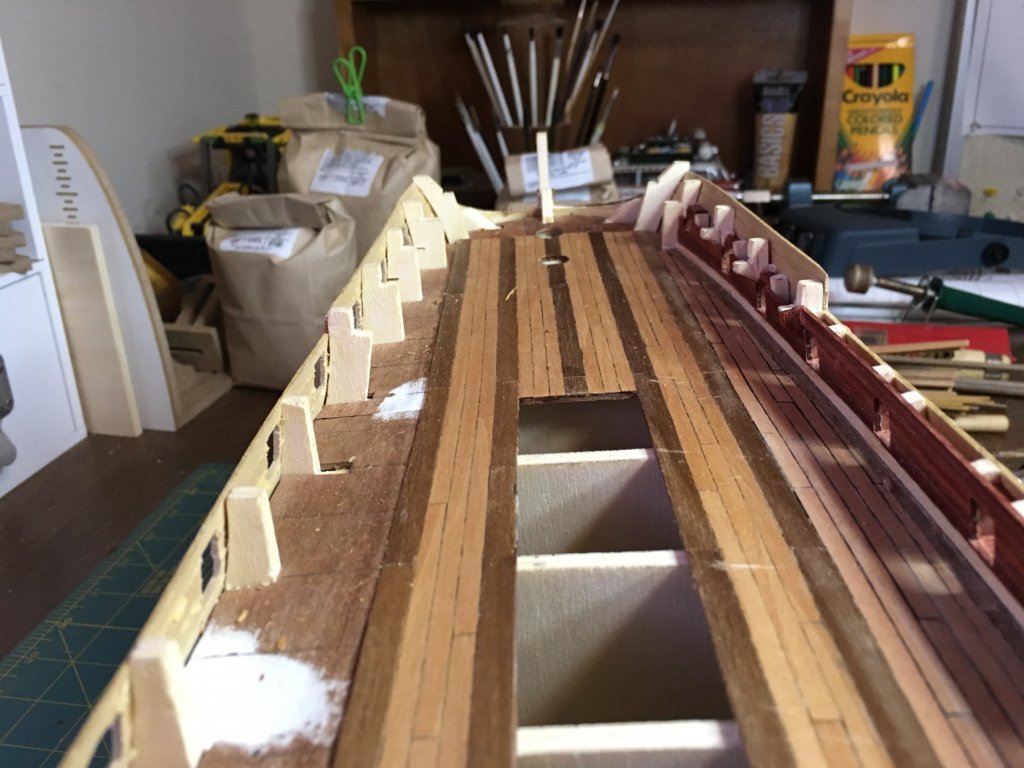
Thank you all for the nice words and likes. Quick update as I managed to get some more planking both inside and out the hull done on the starboard side. Marcus, I tried to show a little better the detail I was talking about on your log concerning the false bulkhead posts that go through the deck. In the picture below, the left side shows the posts as the come stock and on the right is after I have cut them away. As you can see, I left the deck planking back away from the slots for these posts until I was able to remove the posts after the exterior hull planking was in place. This allowed them to act as the supports for the hull to ensure proper shape till the glue set up. After the glue dried, I was able to cut free the top portions of the posts that were no longer needed and replace them with scrap wood to act as frames to provide the bulkhead support and proper thickness. In the areas where either the quarter deck or forecastle deck will go, I carved out the arched shapes to simulate the knees that will support the beams for those deck. I then installed the water boards and interior planking to close up the frames and create the finished look. As always, thanks again for following along. Much more to come!


-
One thing I would caution on when planking the decks before installation is that the upper posts of the false bulkheads are often far thicker than the bulkhead thicknesses would be on a ship. This leads to them needing to be cut down to fit withing the inner planking. When they are cut down, they leave bare spots int eh deck planking that will need to be covered. I would recommend only planking to within one or two rows of planks before the notches in the decks for those posts. Then, after the decks are installed, and the bulkheads set, you can plank to the edges to create a seamless pattern. If you are unsure what I mean, look at my Royal Louis build as I am doing that very thing right now. I will also recommend collecting the sawdust created from sanding. You can use it to mix with diluted white glue as a filler for some of the smaller gaps. Sawdust and glue can be a lifesaver in closing up small defects.
-
Thank you all for the nice words! This is actually my third ship this size. La Couronne was a 1:100 scale and a third rate which placed it only a few inches smaller than S.R. and R.L. My wife keeps joking that I need a garage to store all of these ships when they are done. I don't disagree as I have more planed for the future. May need 2 garages.
-
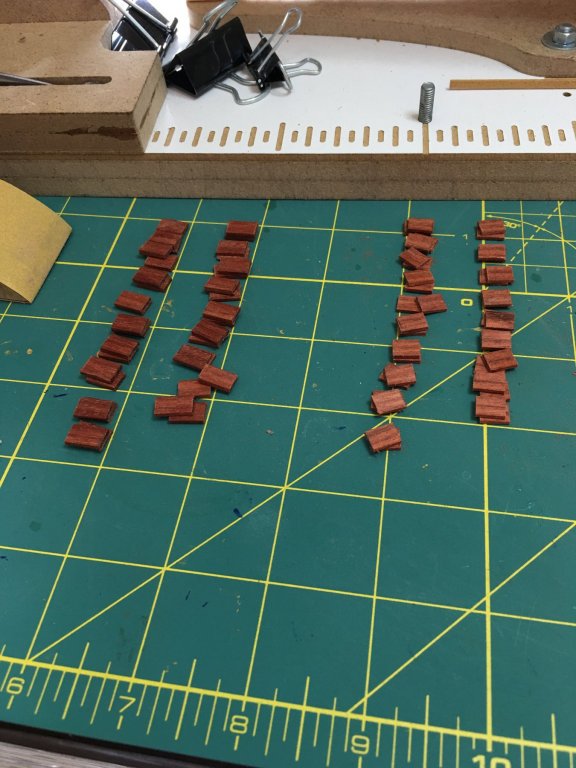
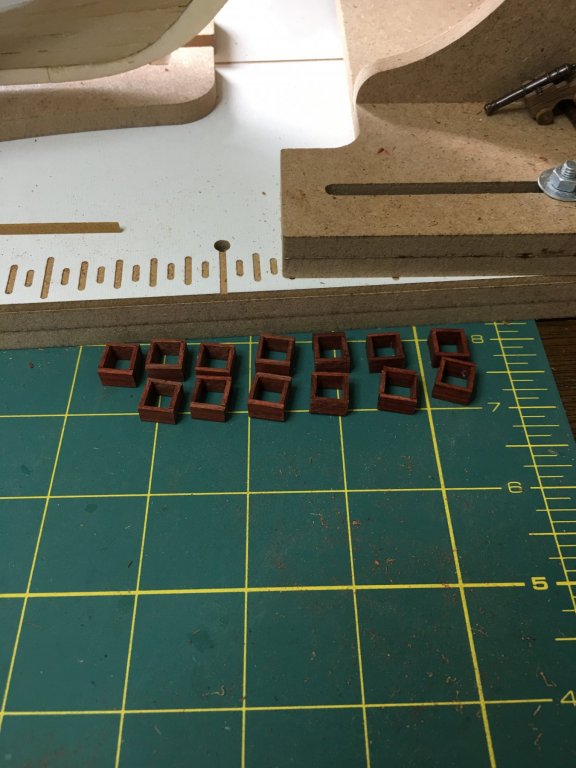
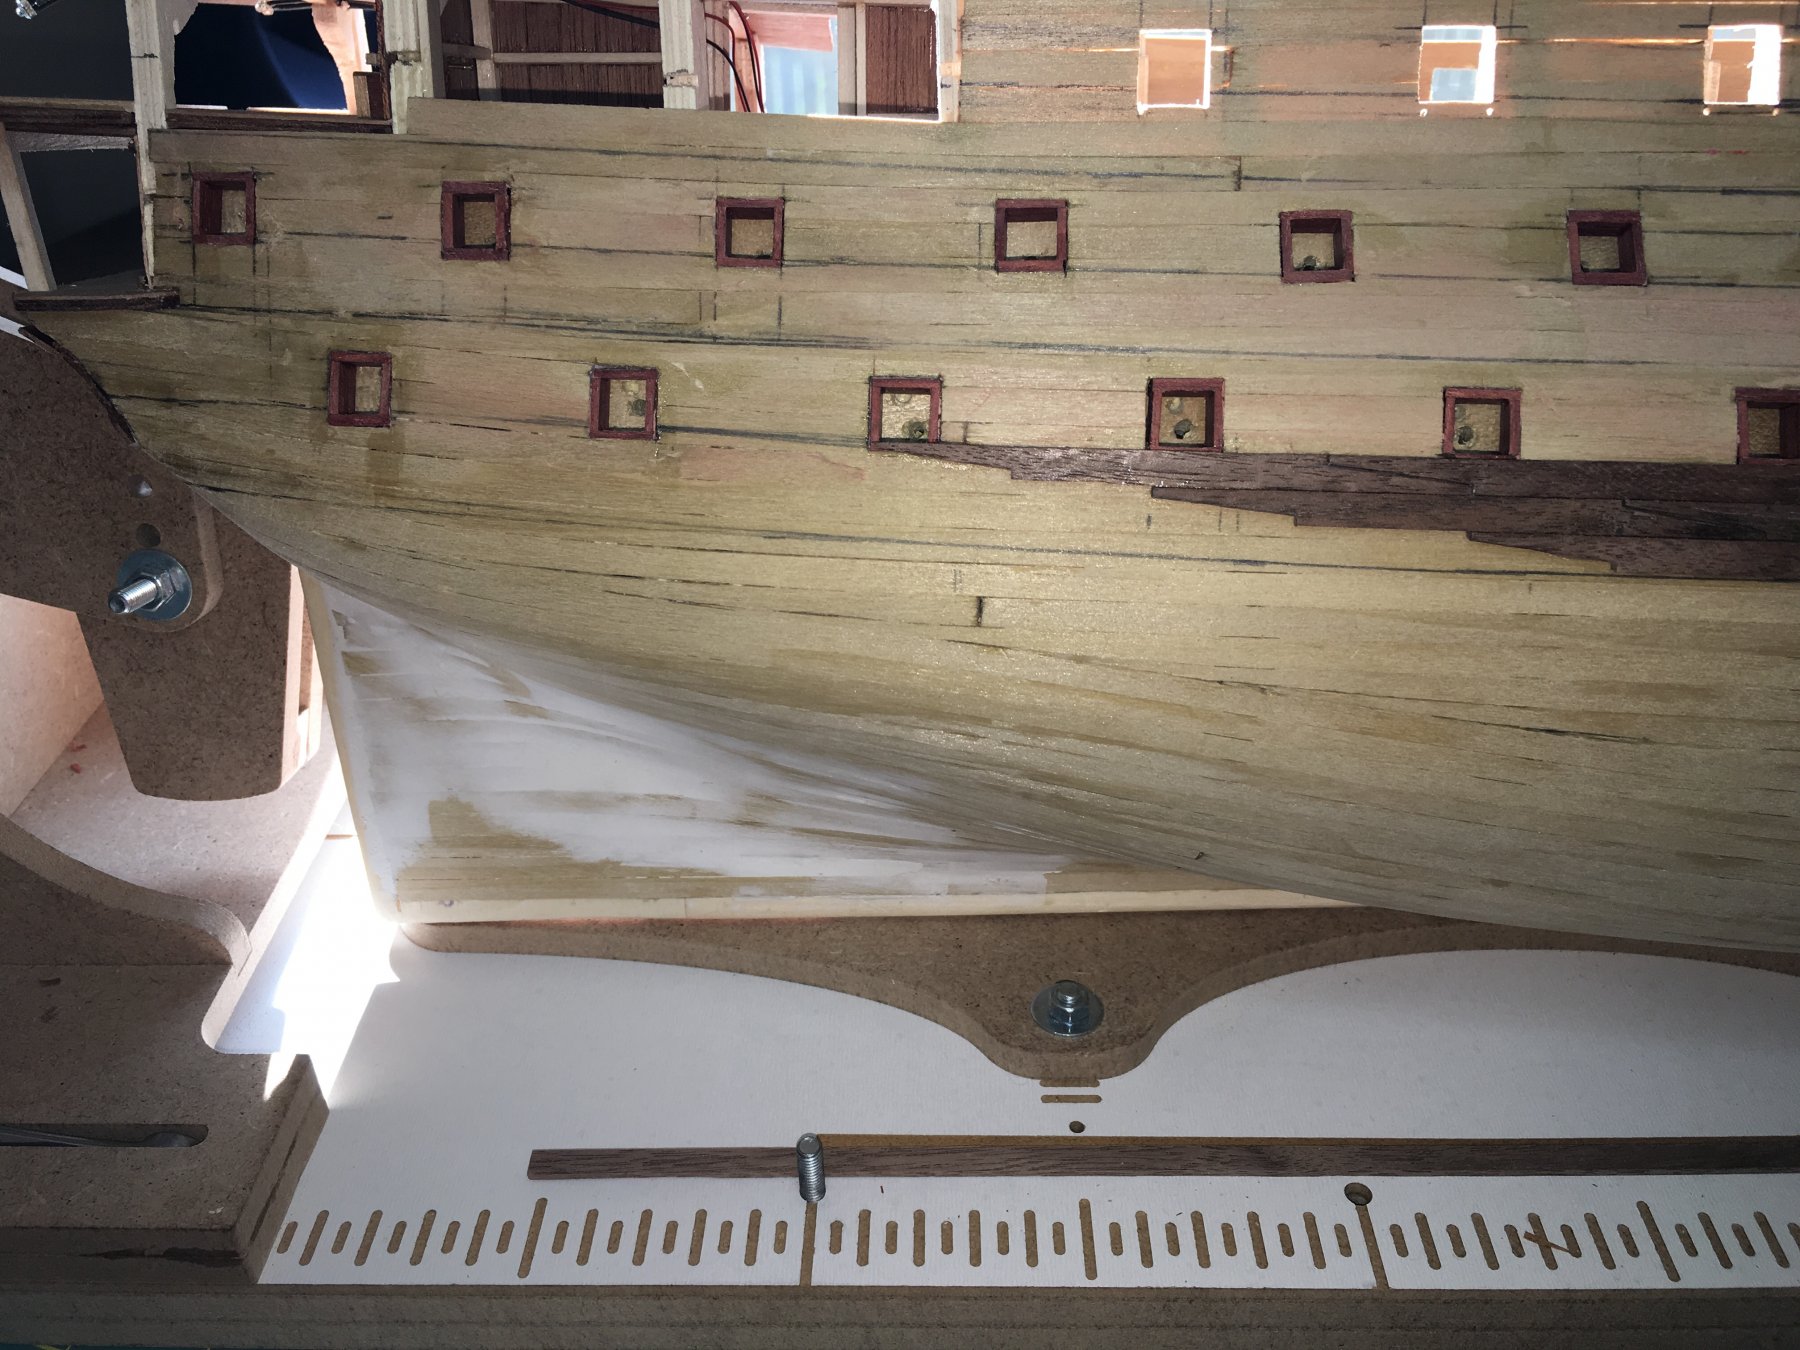
Small update. Been working on the upper deck gun ports. These I start taking a different approach as they are visible from both sides of the bulkhead. So I added additional framing and then made the liners out of blood wood as I have the others. Now that they have been set on one side, I am planking the interior with blood wood as well. Usually I will plank the interiors with a white wood but for this build I decided to add some color and went with the red. I will update when I have completed the planking and obviously, the deck needs some touch up sanding and a new coat of finish.


-
I've not built the one by Corel. I built a plastic kit of her by Heller years ago. A wooden Victory is on my wish list just a ways down it for now as I am focusing mostly on French ships. I have built La Couronne by Corel so I am familiar with the quirks of that manufacturer. Corel, like many of the long standing model ship manufacturers, makes great kits, however they are not always as accurate to the real ship as we would like. If you stick to what they have given you, you will end up with a beautiful looking model, if not historically accurate. I would highly recommend though, (and I would say this to any model from any manufacturer) find additional resources to use as well. A book on rigging practices will aid you immensely. James Lees' The Masting and Rigging of English Ships of War, 1625-1860 and George Biddlecombe's The Art of Rigging Jump to mind. Rigging is where almost all of the kits fail in their instructions. These resources help to fill that gap and are useful on many projects not just one specific build.
-
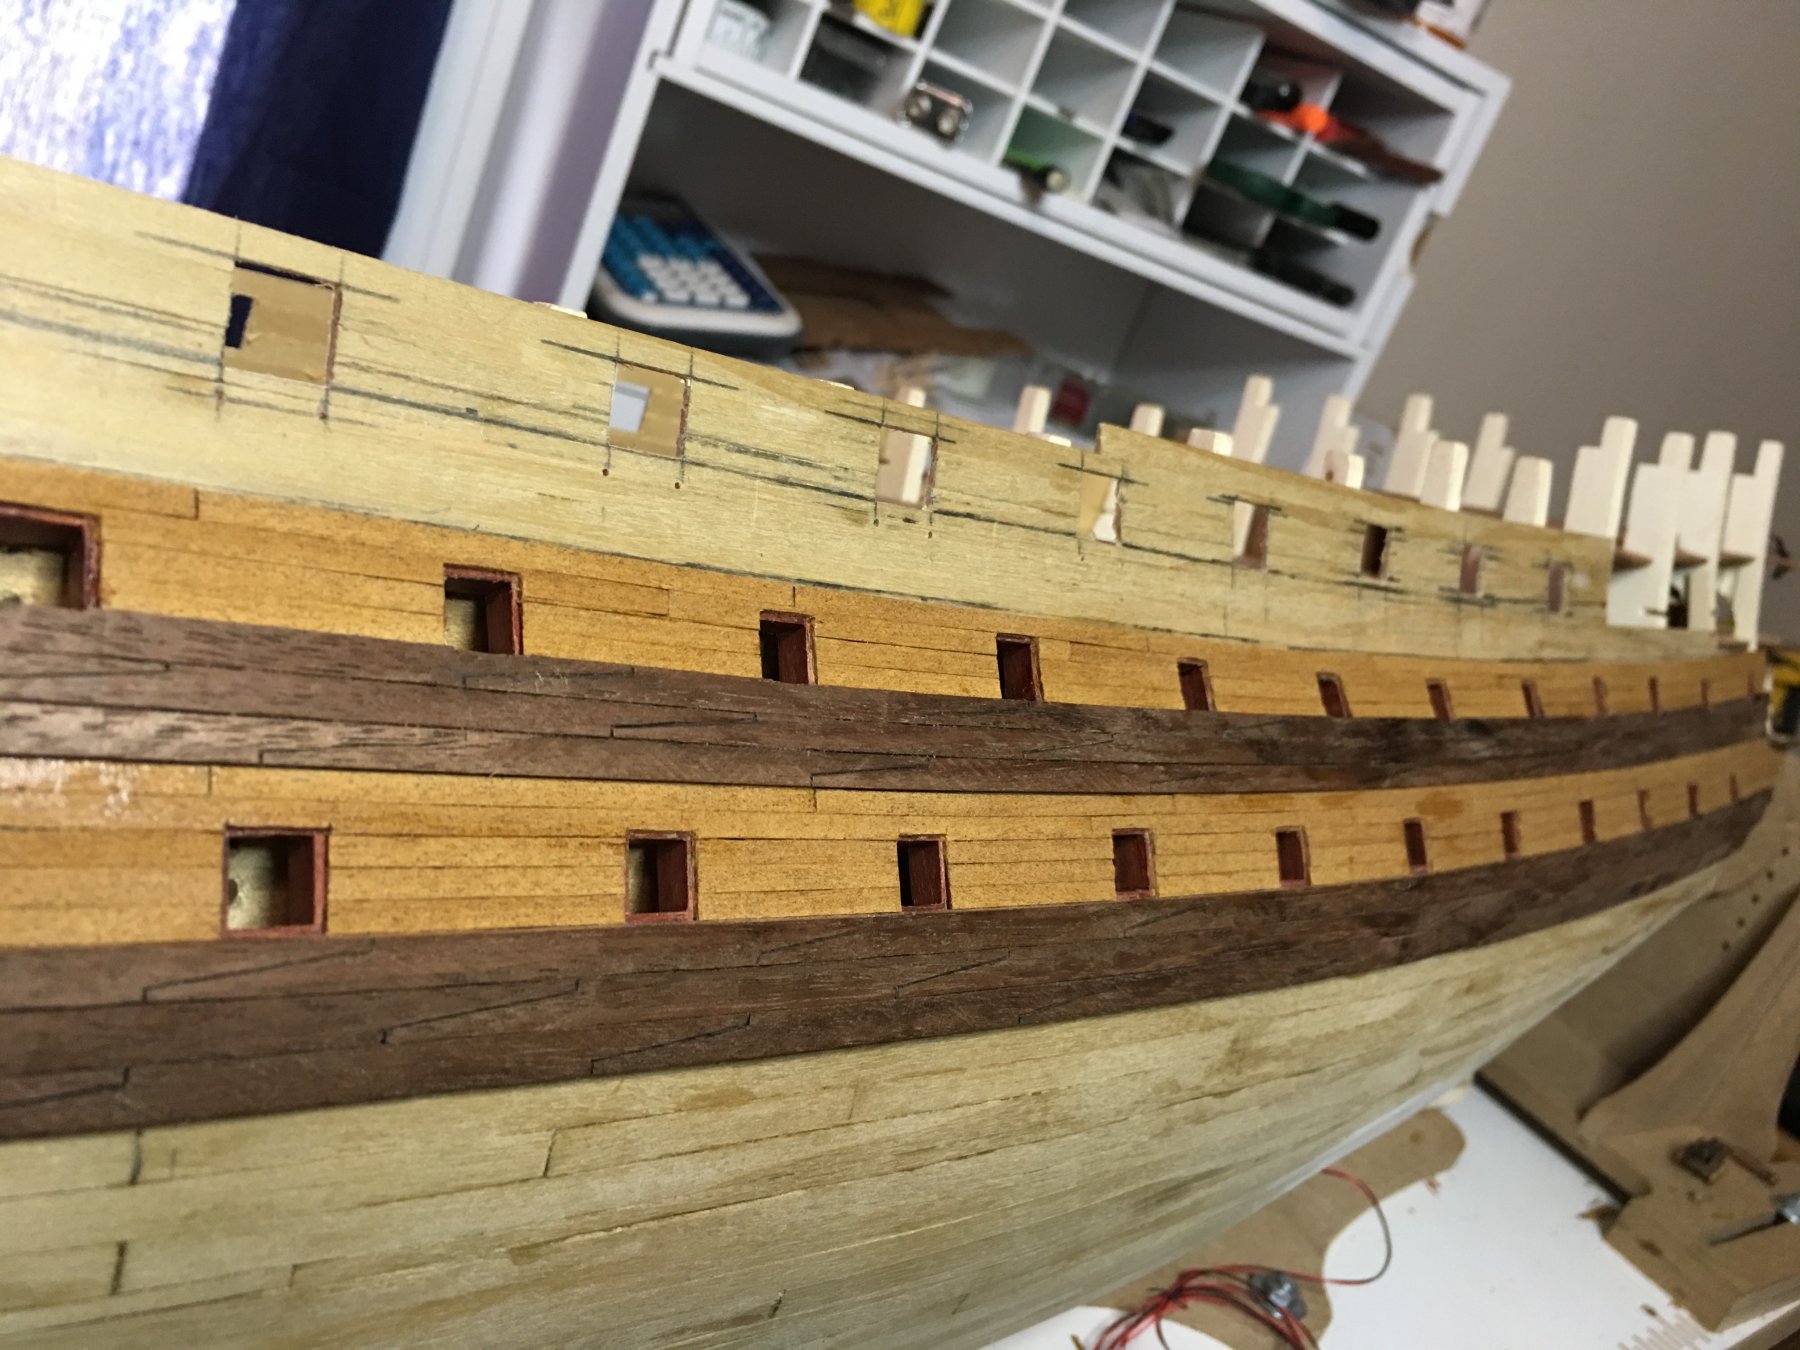
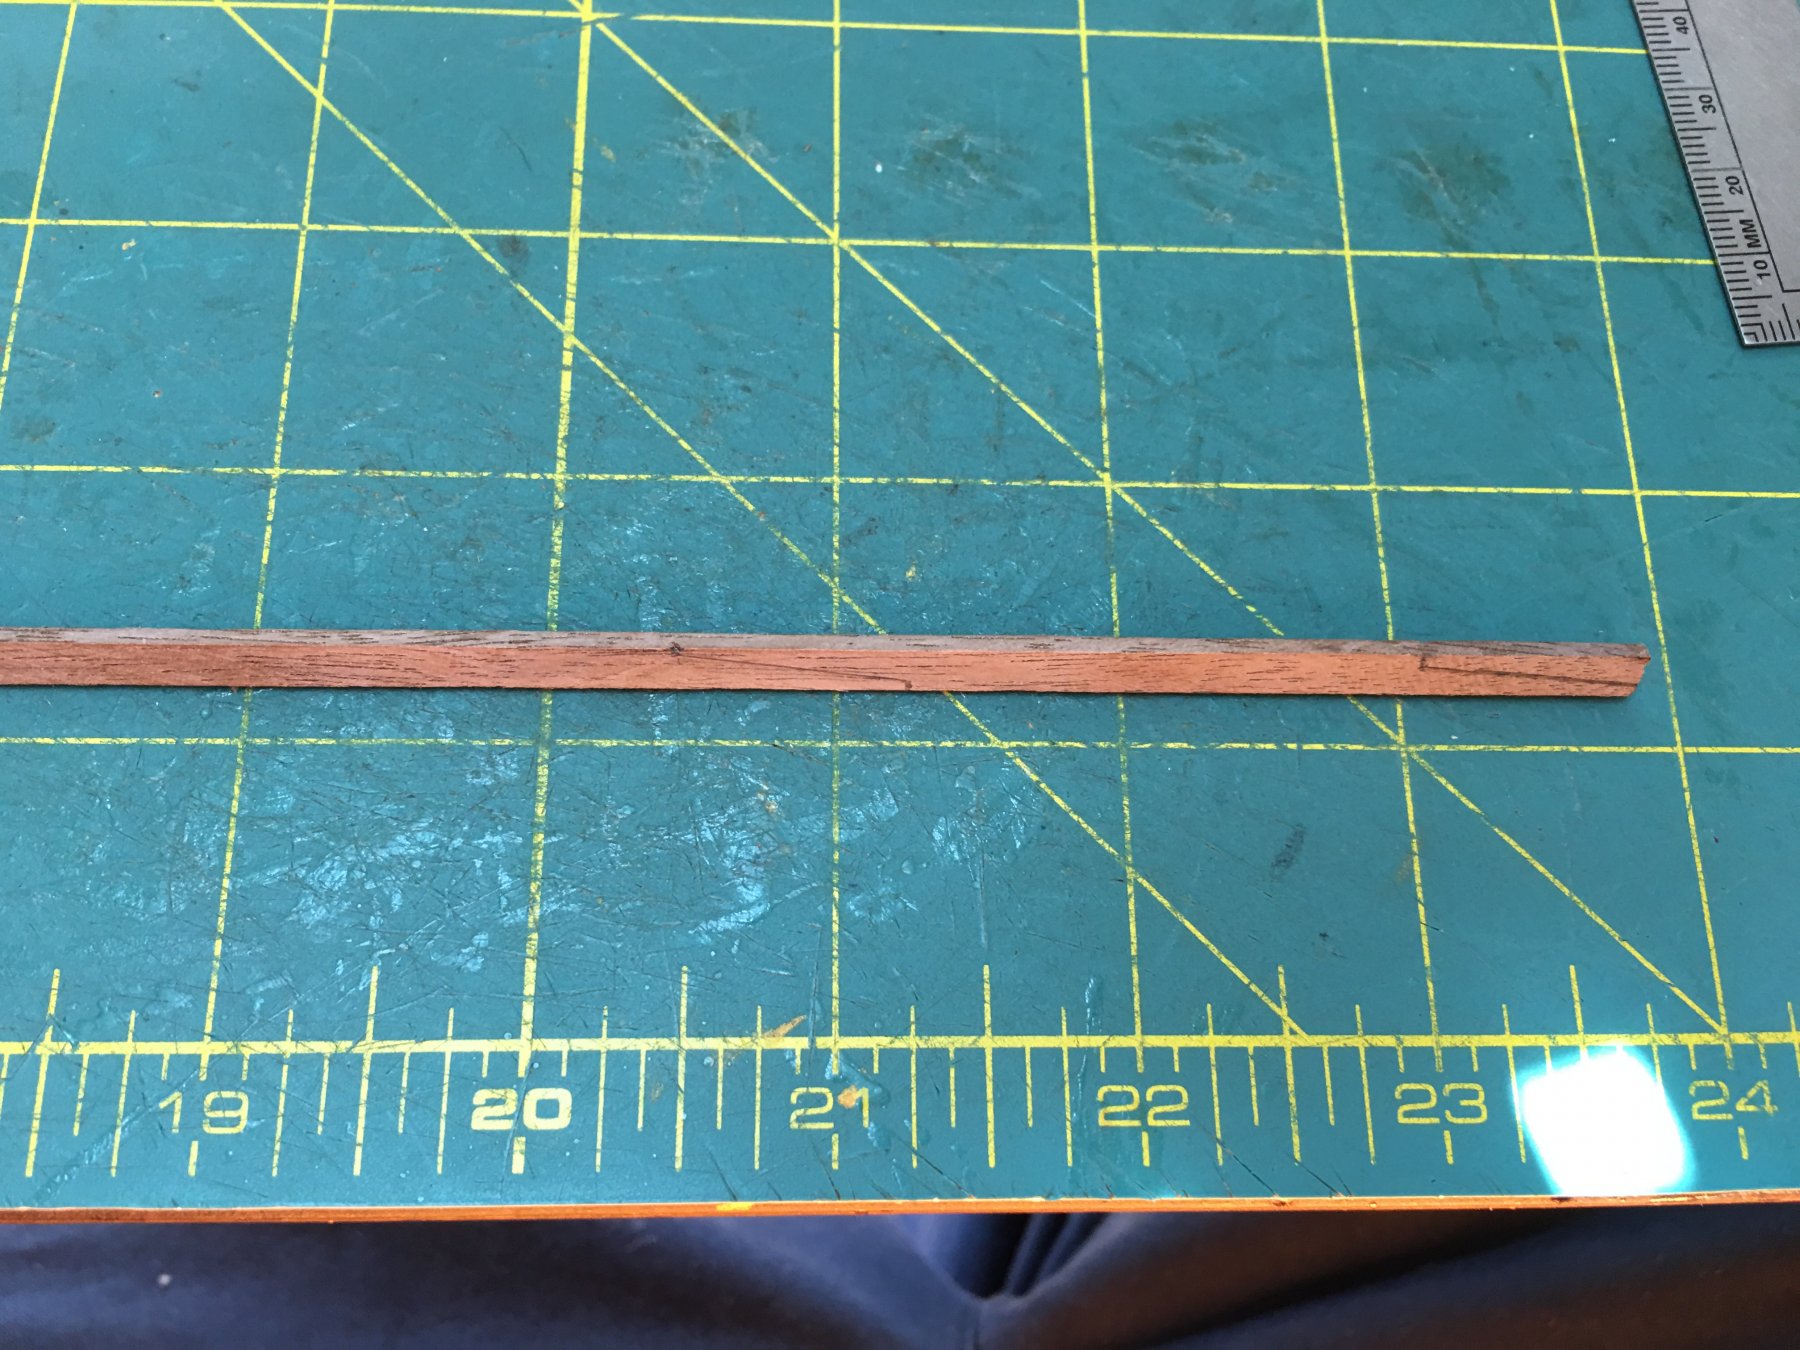
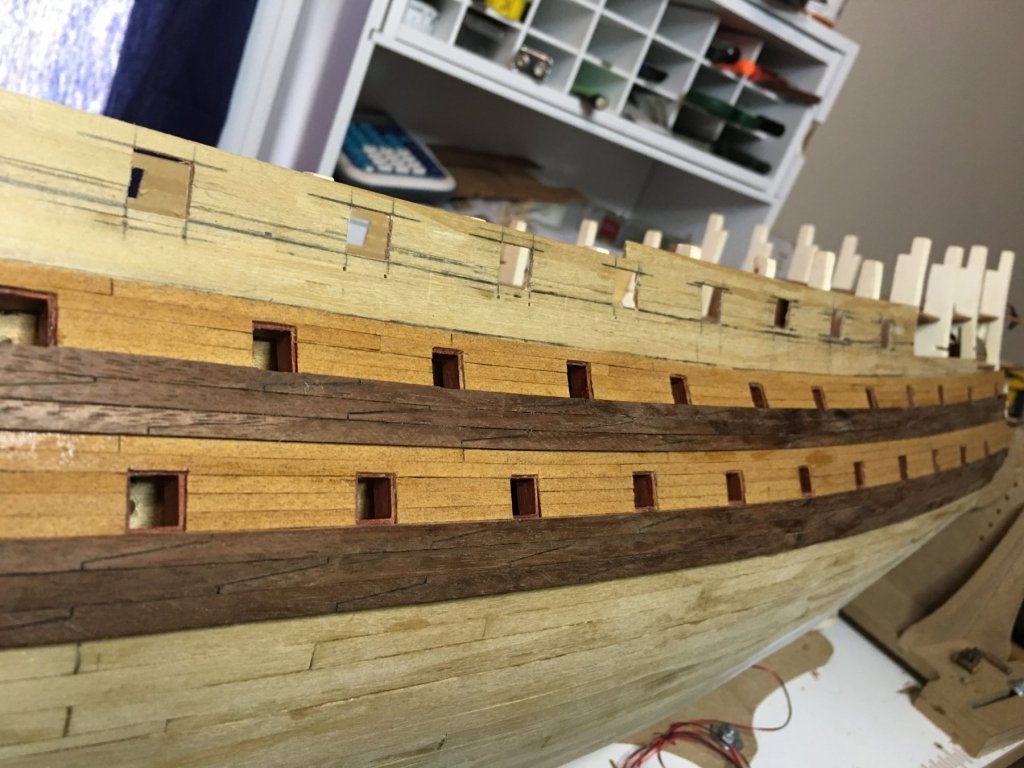
Y.T., I do not know if a simple and exacting answer exists for your questions, but I will say what I know. All wood dimensions were largely determined by the availability of wood. Region, trade, war all affected the timber availability and quality. The larger and more crucial parts such as keel and frames would get first selection of the longer timber with wales and planking taking second picks. I have seen dimensions ranging from 20 feet (6.1m) in length to 60 feet (18.3m) in length. While I have no doubts that some of these extremely long dimensions were used, I do not think they would have been widely used in planking as the availability of that much lumber in those lengths would be both rare and difficult to transport. Think in modern terms that a semi-trailer averages 50 feet in length and how difficult they are to maneuver on roads designed for them. Now, try to imagine moving a tree trunk that long or longer in an era where horse power and wagons were employed and there were no roads, just winding paths through often difficult terrain. Even with rivers to float them down or make use of barges, they still needed to be transported to that river. That all being said, I typically stick to lengths of wood for planking around 20-25 feet (6.1-7.6m) and wales 25-30 feet (7.6-9.1m). What determines the actual number is the framing. Any joint in the planking must start and stop on a frame and split the width of that frame in half in order to share the space with the plank that butts into it. With a P.O.B. build, there are no true frames to measure to. This information must be created by the builder but is fairly easy to do. The simplest way is to measure spaces between the gun port lids as the jambs are made from the ships frames. No this is not an exact science, but for our purposes it works. For this build my planks are running 20.5 feet or 70mm in scale. My wales are 25 feet or 85mm in scale. Unless you are planning on submitting the model for study as a historically accurate representation and have it judged as such by the experts, exact measurements are not crucial. The more important aspect will be keeping the shift pattern uniform and aligned. Typically 3 or 4 butt shift patterns are common. I usually use a 4 butt pattern. I am not certain on the historical accuracy specific to this ship, but for my purpose it is fine. Making sure that this pattern is carried evenly across the hull or deck is crucial. As for the scarfs themselves, there were many types used between the different countries, eras and functions. Often the wales would use a hook style scarf which is far to intricate at this scale, but was the standard nibbed scarf (what I have modeled) but with ledges carved into the sloping portion that formed hooks to aid in locking the timbers together. From what I have read, these would average between 4-7 feet (1.2-2.1m) in length. While there is an exact formula for calculating the dimensions of the scarf joint, (I do not remember where I read it) at the scale I'm working on, I use 1mm recess, then a 20mm angle slope down to another 1mm recess. My wales are 6mm wide on the lower to 4mm wide on the upper and I think this creates a pleasing ratio. I do not know if that helped to answer your question or if it just confused things more.
-
By all means, feel free to use the idea. I learned from others myself and am glad to pass it on. I would recommend if you are cutting your own wales to make them in one piece the full length and eliminate the splice all together. I was trying to use up some shorter scrap that I had laying about before tearing into a new board and my scraps were a bit short. Scribing the scarfs is far easier than actually cutting them. I've done that in the past on both S.R. and Couronne and while I am proud of my effort, there are better ways to spend that effort.
-
I am partial to a color pencil for the caulking lines myself. It takes a little more effort, but I like the more subtle caulk lines it produces and can be easily removed with a little sanding if you get it where you don't want it. The curvature of the deck, or camber, as Mark said is primarily for water drainage. I do not think I would worry too much about it at your scale. Chances are that the cut bulkheads will already have a slight curve to them to simulate it but if they do not, I wouldn't worry too much over it. I have not built this particular kit of Victory but I believe that you should have false decks which are the wood substrate that you install over the bulkheads and then plank over. If this is the case, and you want the camber, you can easily take a piece of scrap wood, approx. 1mm thick, the same width as the bulkheads and sand down the ends to form a curve then install on the bulkhead. When you lay your false deck, it will conform to the shape and you have your camber. It should be rather subtle so if it looks like your sailors need mountain climbing gear, the curve is too steep. By the way, if you do not have any, I suggest buying some scrap wood, bass or similar species, that can be used for a multitude of fillers and supports that will be needed. Much of that can typically be found in common hobby stores or online. Kits never seem to have enough of that type of material. The first area you will want to have it for is at the bow. Depending upon what the kit plans, you will need to install filler blocks to round out the bow. The first space is always a must and a lot of people will infill the second and even third spaces as well. This will go a long way to helping make those planking bends around the bow smoother and easier.
-
My advice is read ahead. Look through the instructions and drawings, parts and learn how they all go together. There are many details that do not always install in the order you think they might or are best left off till later for safety and access. This especially applies to rigging components. Reading through similar builds is a great way to spot many of these and I am glad to see you are doing so. Most importantly, have fun! You are in for a long build with this ship. Just remember that it is all for fun and for yourself. We will be here with encouragement, ideas and motivation to help guide and keep you moving. I'm gonna pull up my chair, grab some popcorn and settle in. Looking forward to sharing in your journey! 🍿
-
Welcome to MSW Marcus! Best of luck to you on your Victory build. I will keep my eye out for your log and look forward to following along.
-
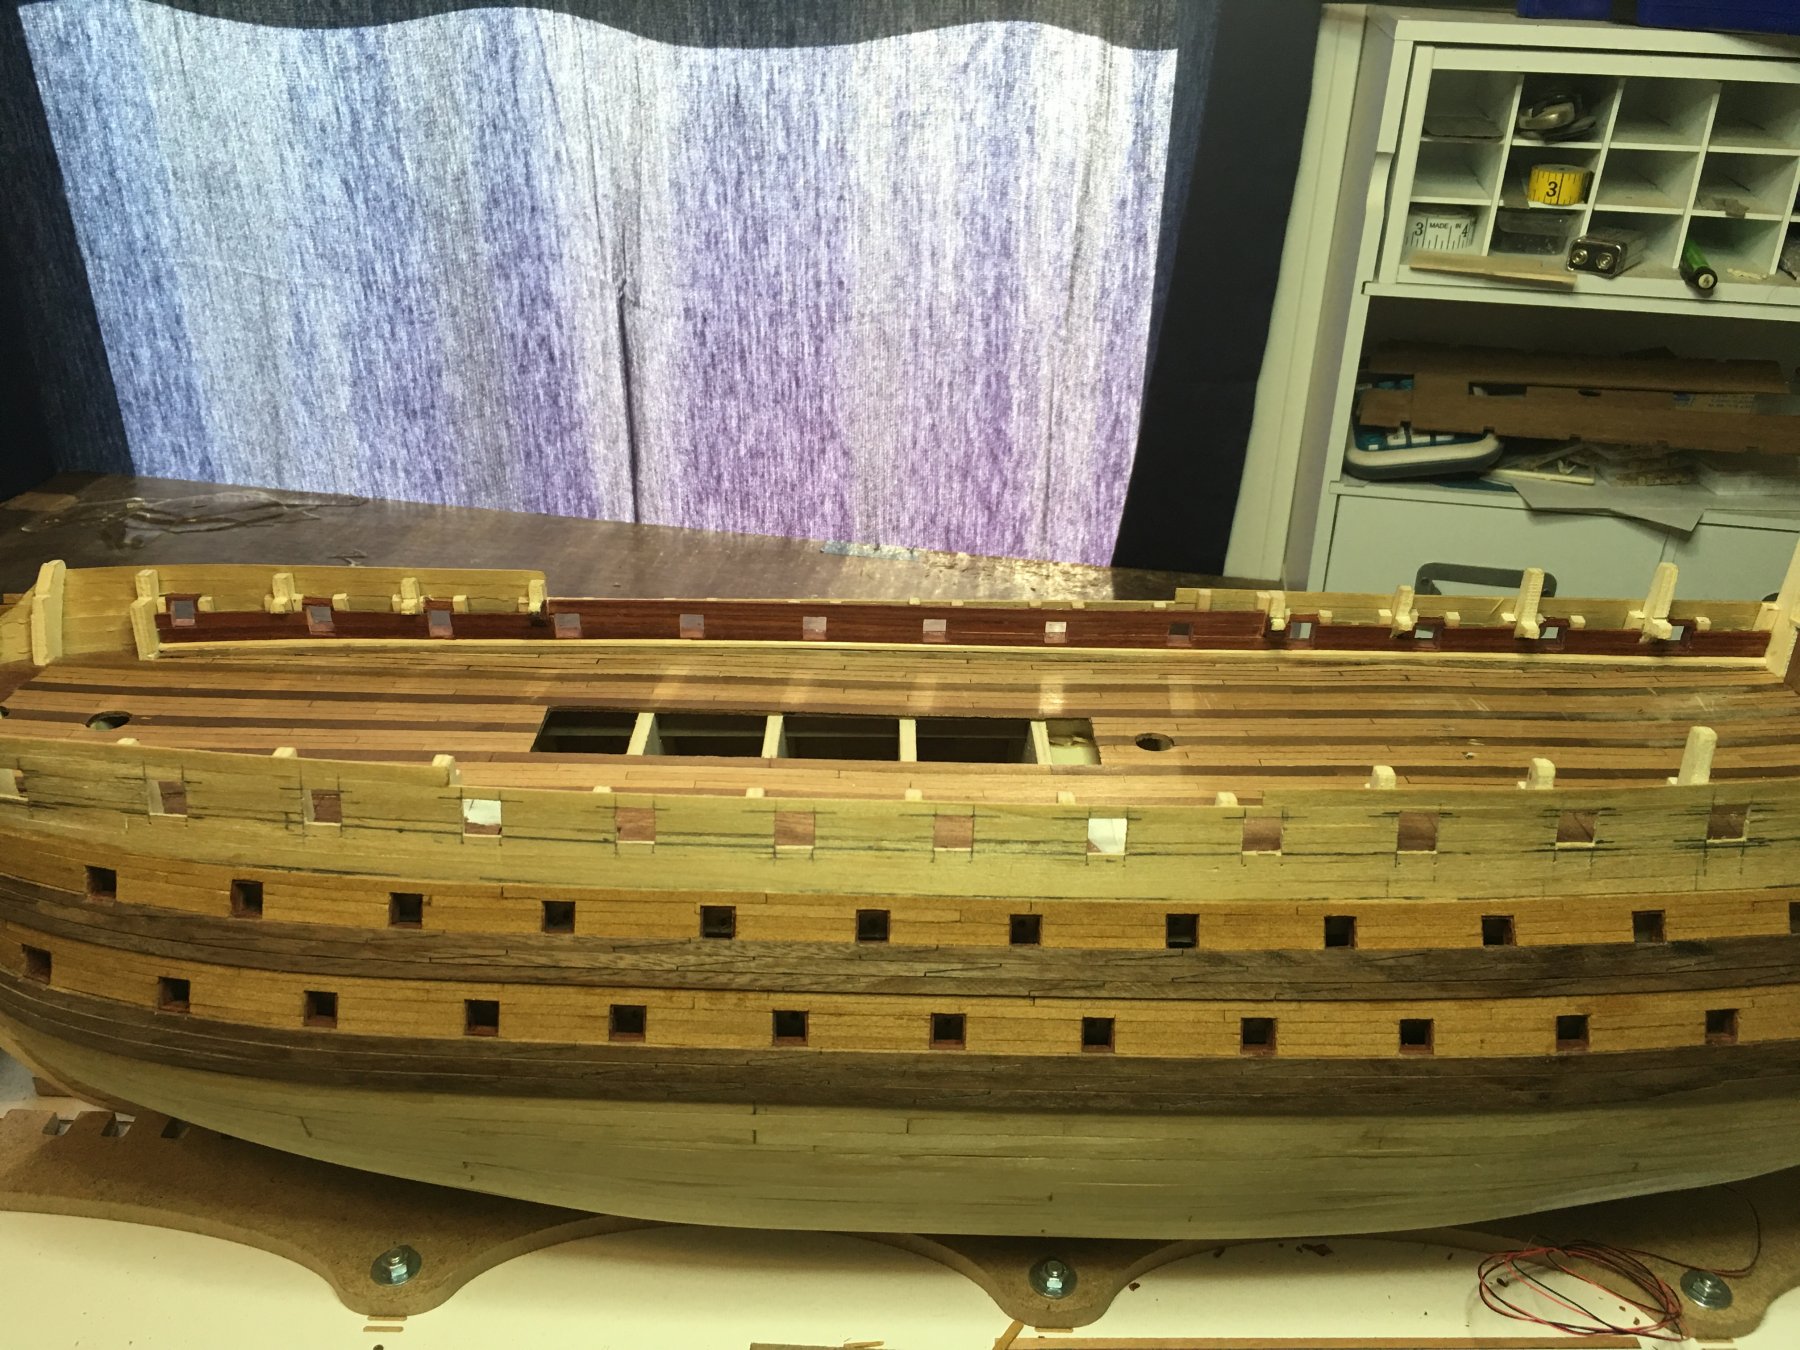
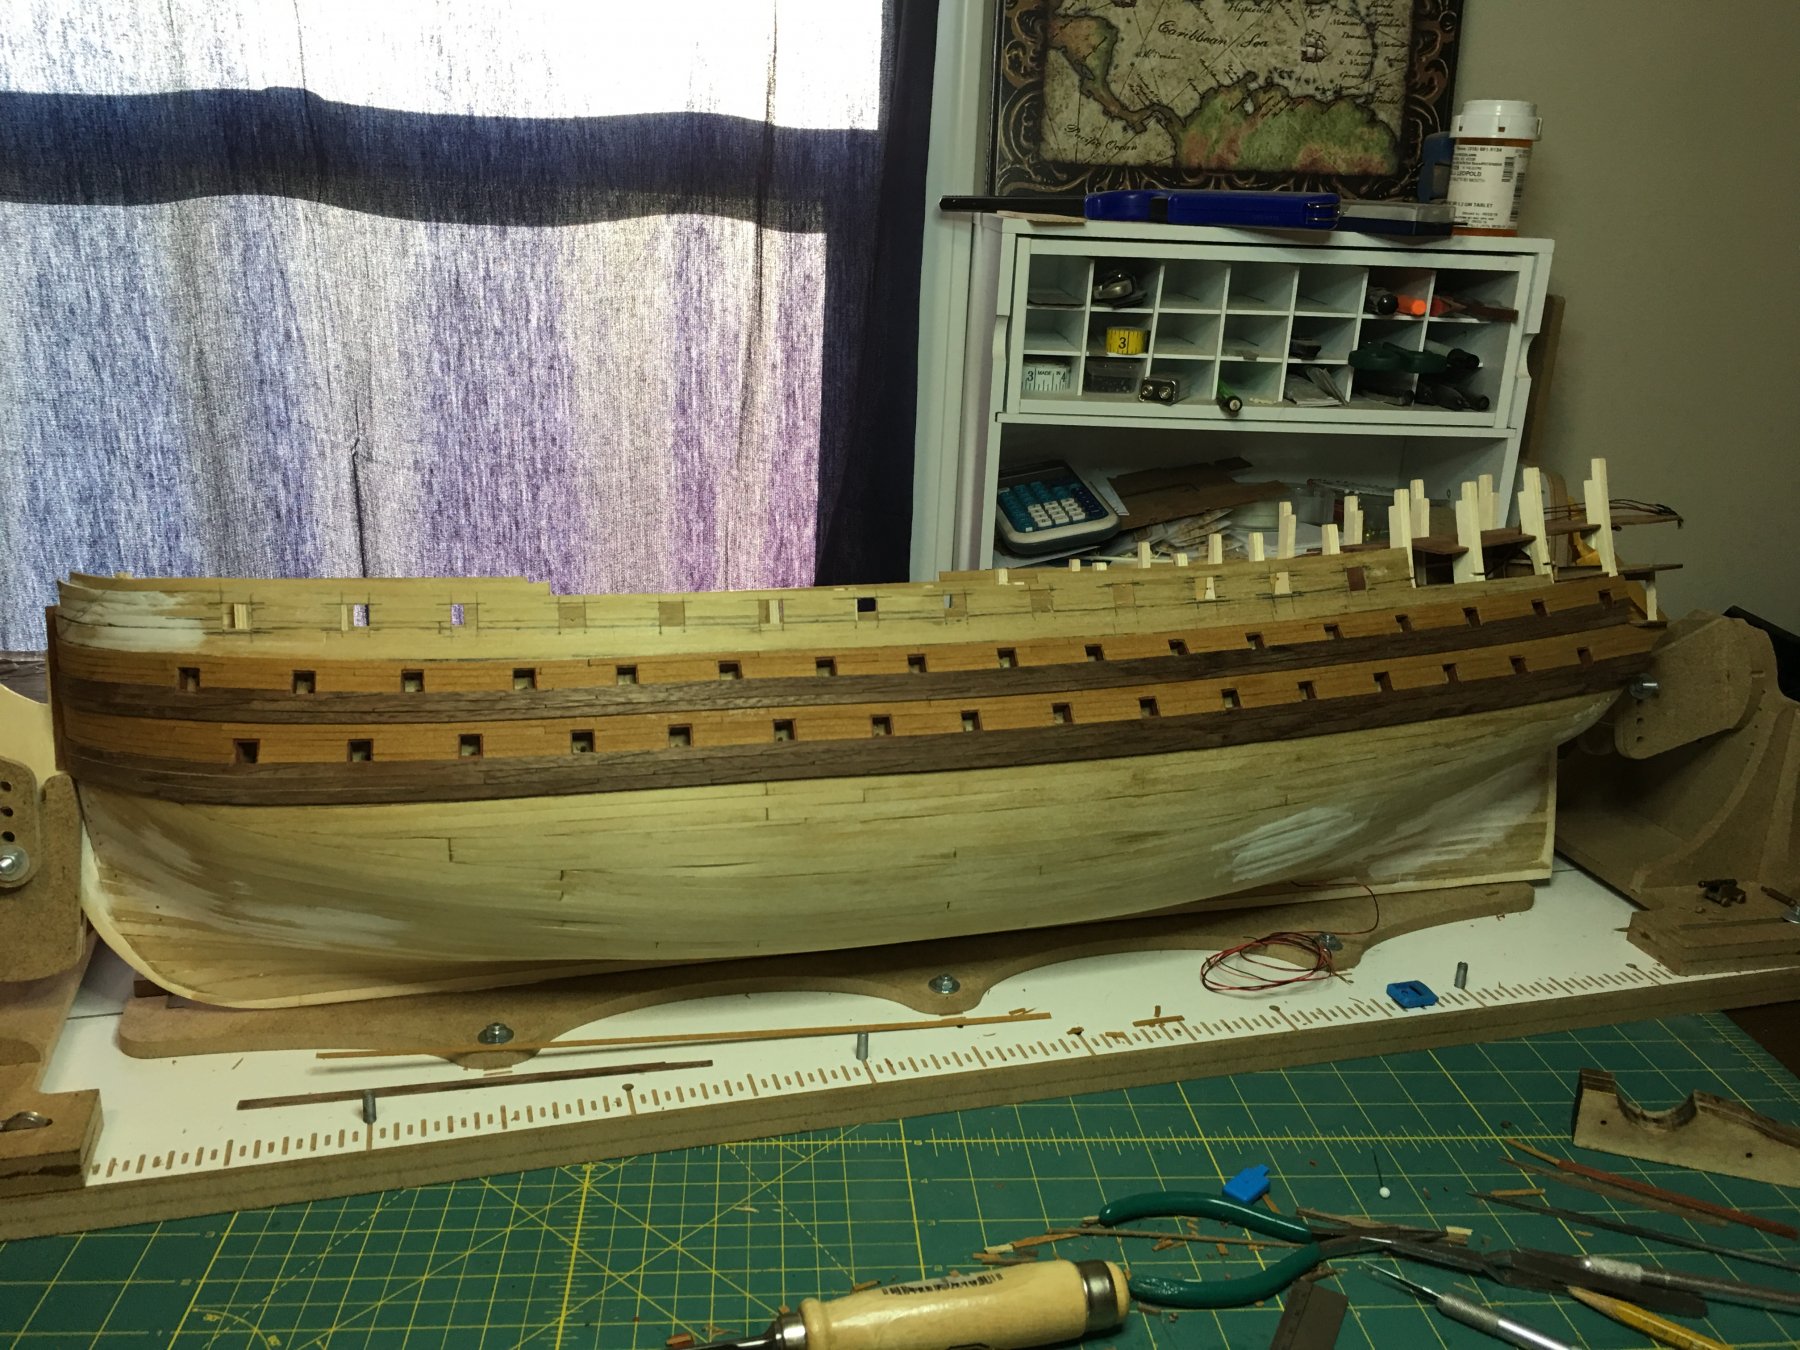
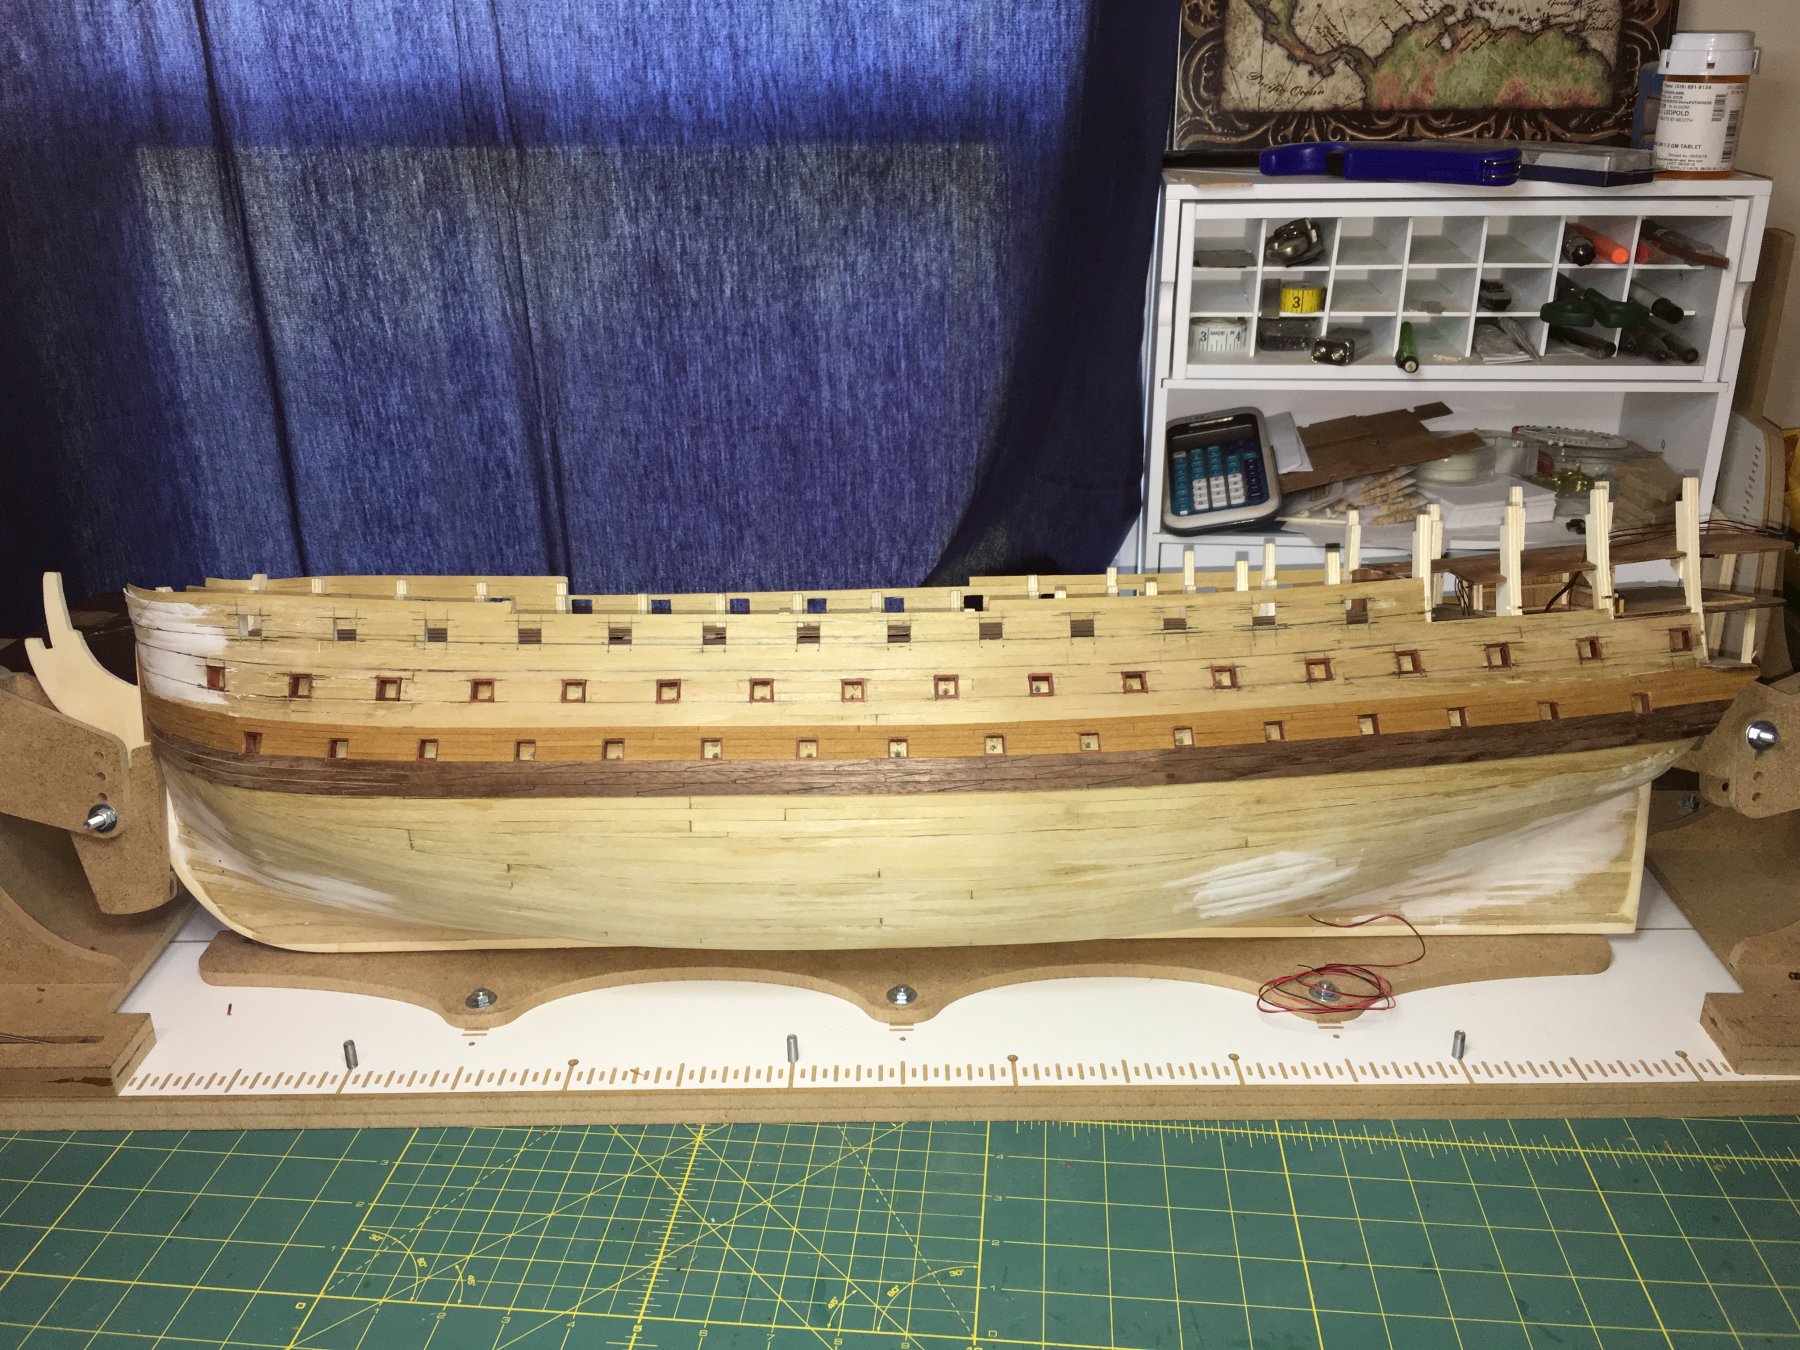
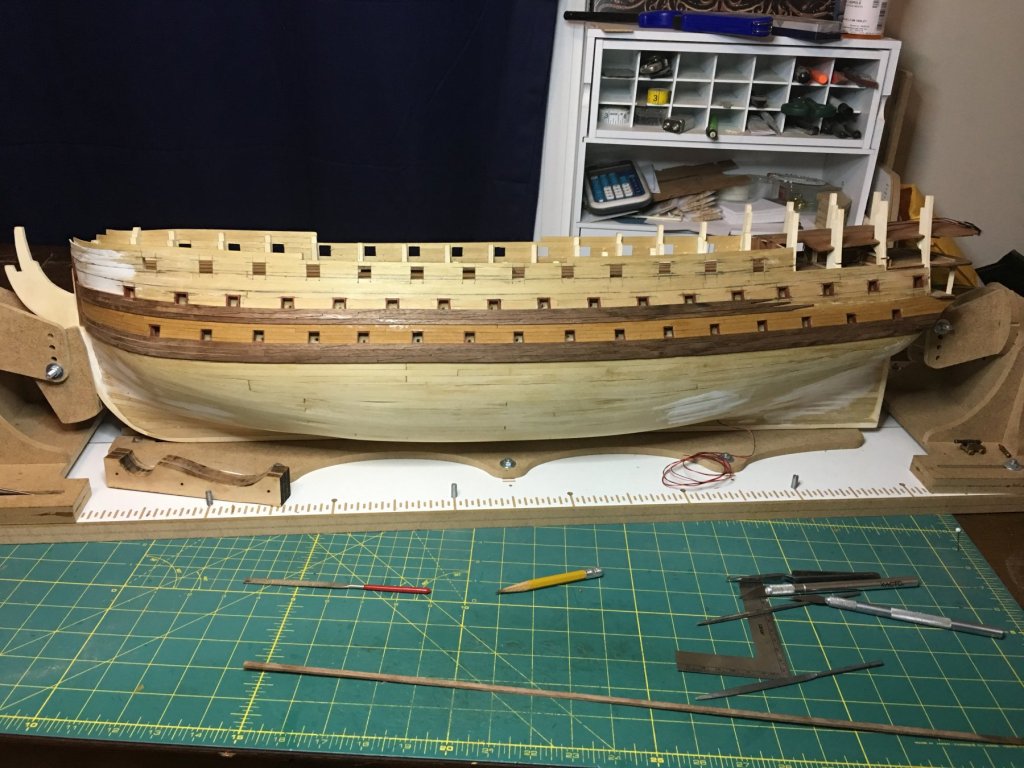
Thank you all for the comments and likes. Progress update on the planking, I now have the second row of wales and middle gun deck planking in place. Next I will work on the beakhead, installing the bulkhead and deck planking as well as cutting out the curved hull where it slopes from the forecastle down to the beakhead. This will also include more work on the stem post. Moving aft, I will complete the planking up to the cut outs for the cabins. I will frame out the gun ports in the forward two cabins on each side. I still need to finish the build out of the Admiral’s cabin which I am still working on the designs.

-
Sorry to hear of your bad health. I wish you the best for a speedy and complete recovery.
- 244 replies
-
- 3
-
-
- heller
- soleil royal
- (and 1 more)
-
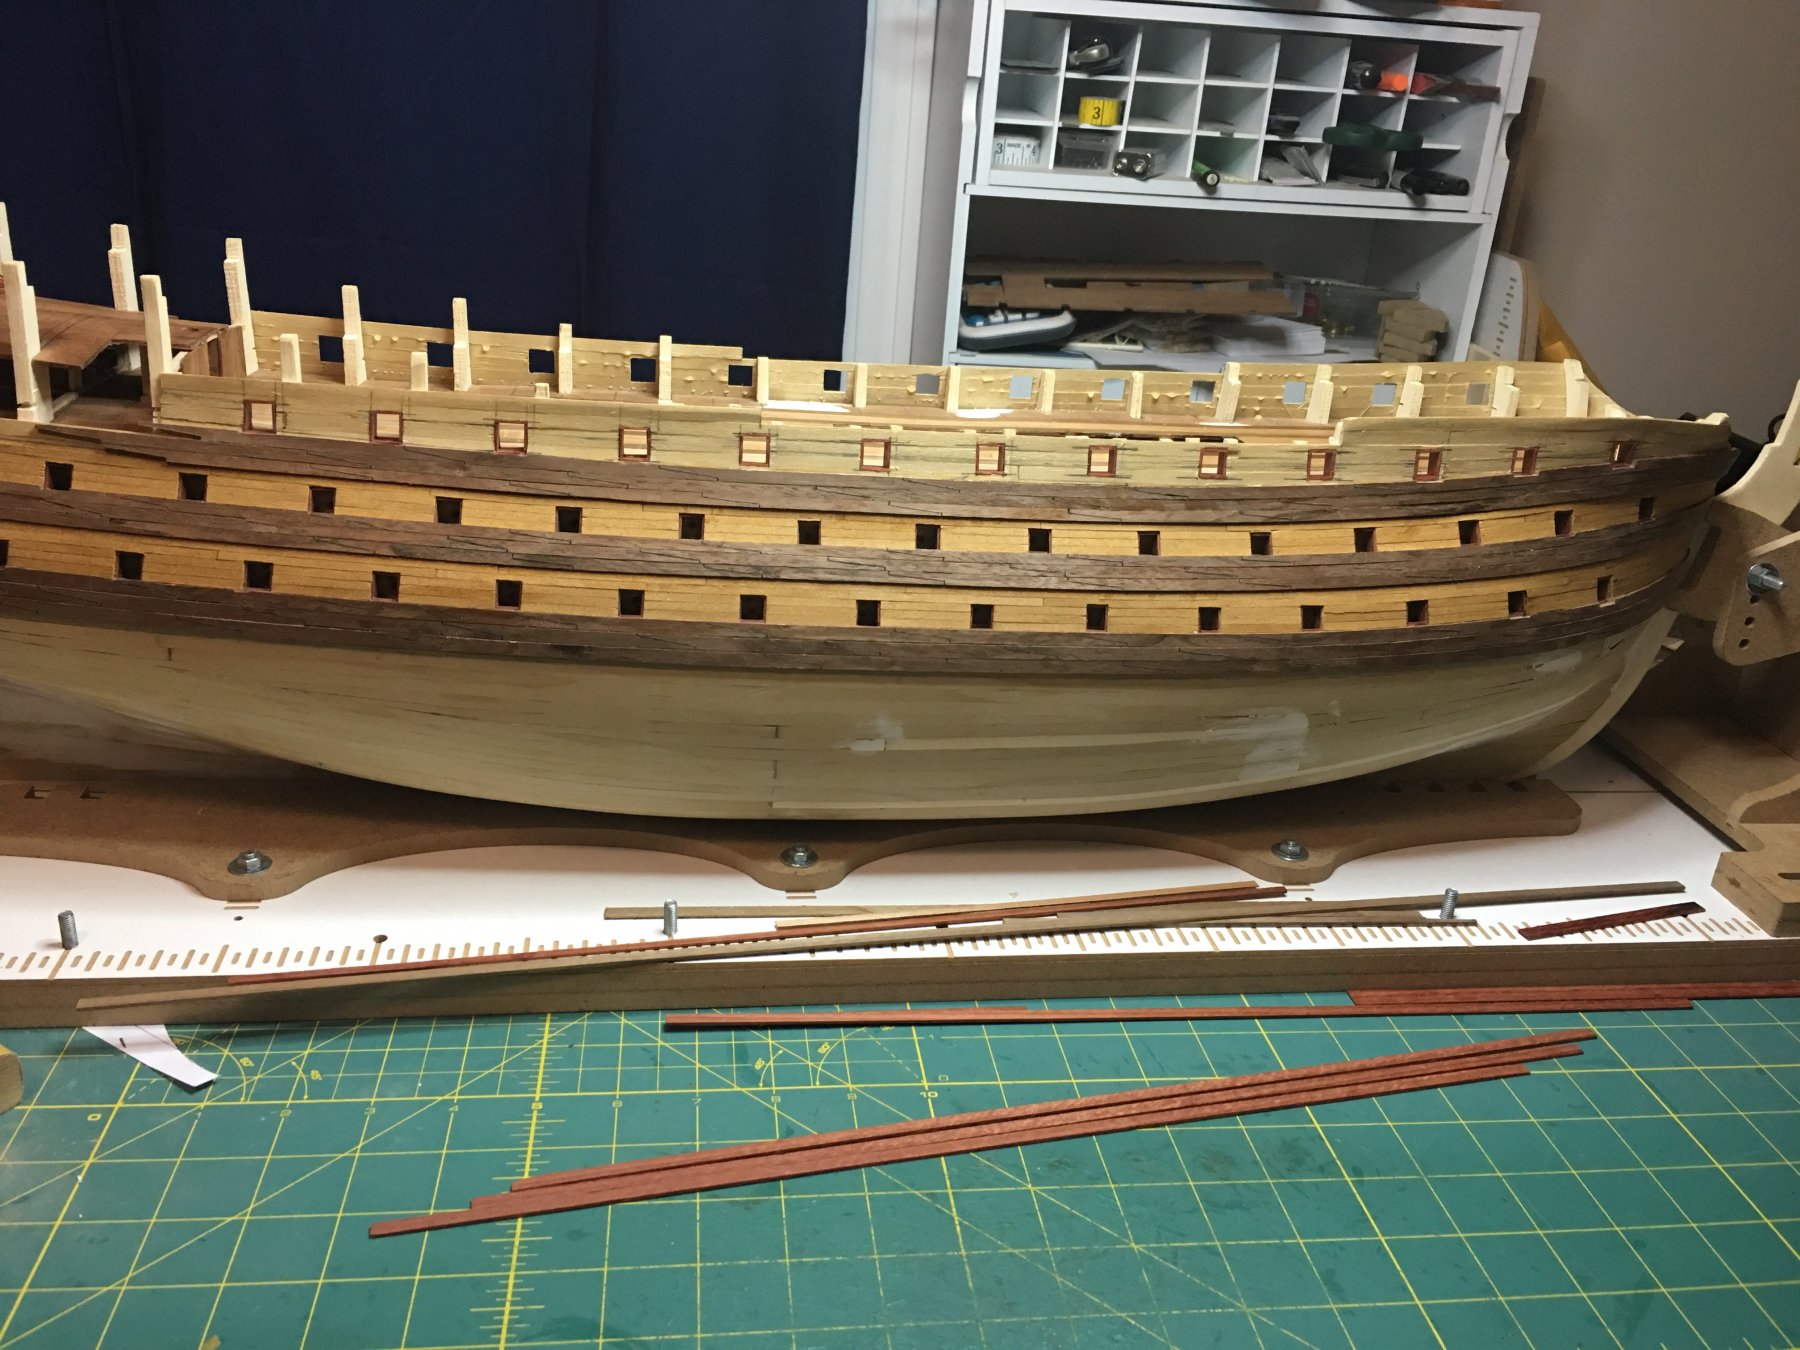
Just a quick update, ran the lower wales and first band of planks for the lower gun deck on the starboard side. Now I’ve moved up the he middle gun deck wales.
-
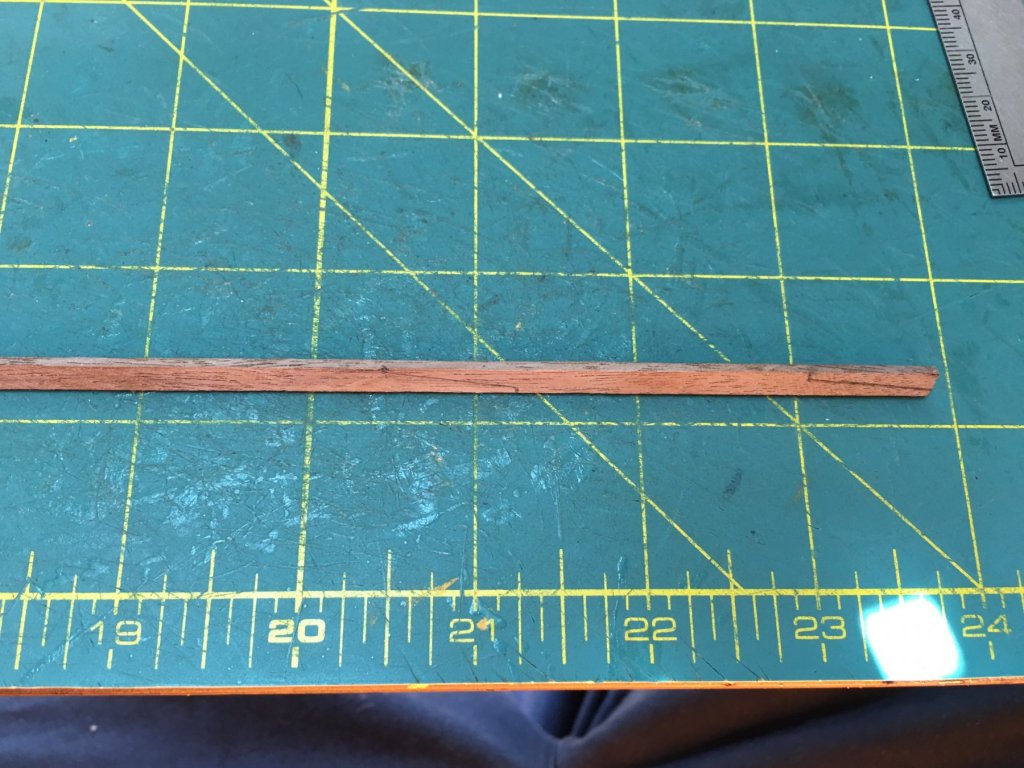
Thanks Marc. The scarfs are hand made. I ran long strips of wood from the stem as far back as they would go, laid out the pattern and scribed the scarf joints in with a #11 blade. I went over the lines several times to give the joints depth. Where the strips stopped, I will splice on an additional piece to complete the wales to the stern. That joint will be the only actual scarf joint. The process is really quite simple and easy enough to repeat. I will likely have to go back and run the blade through the joints after I sand on the wales prior to finishing the wood to deepen and clean out sawdust.

-
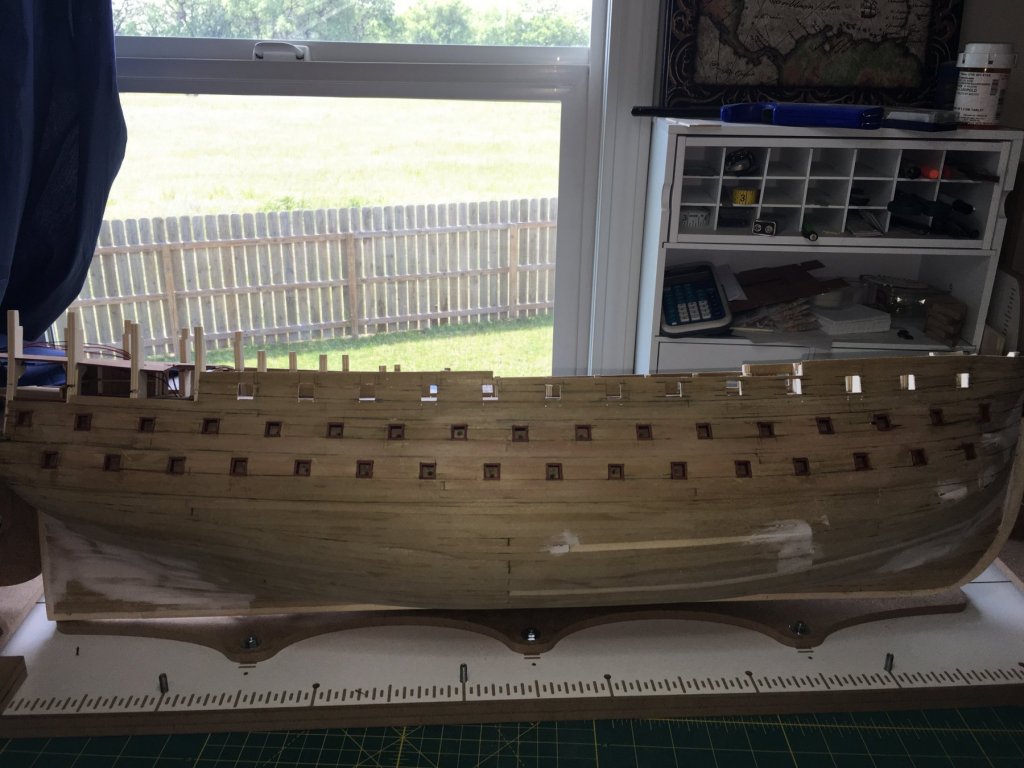
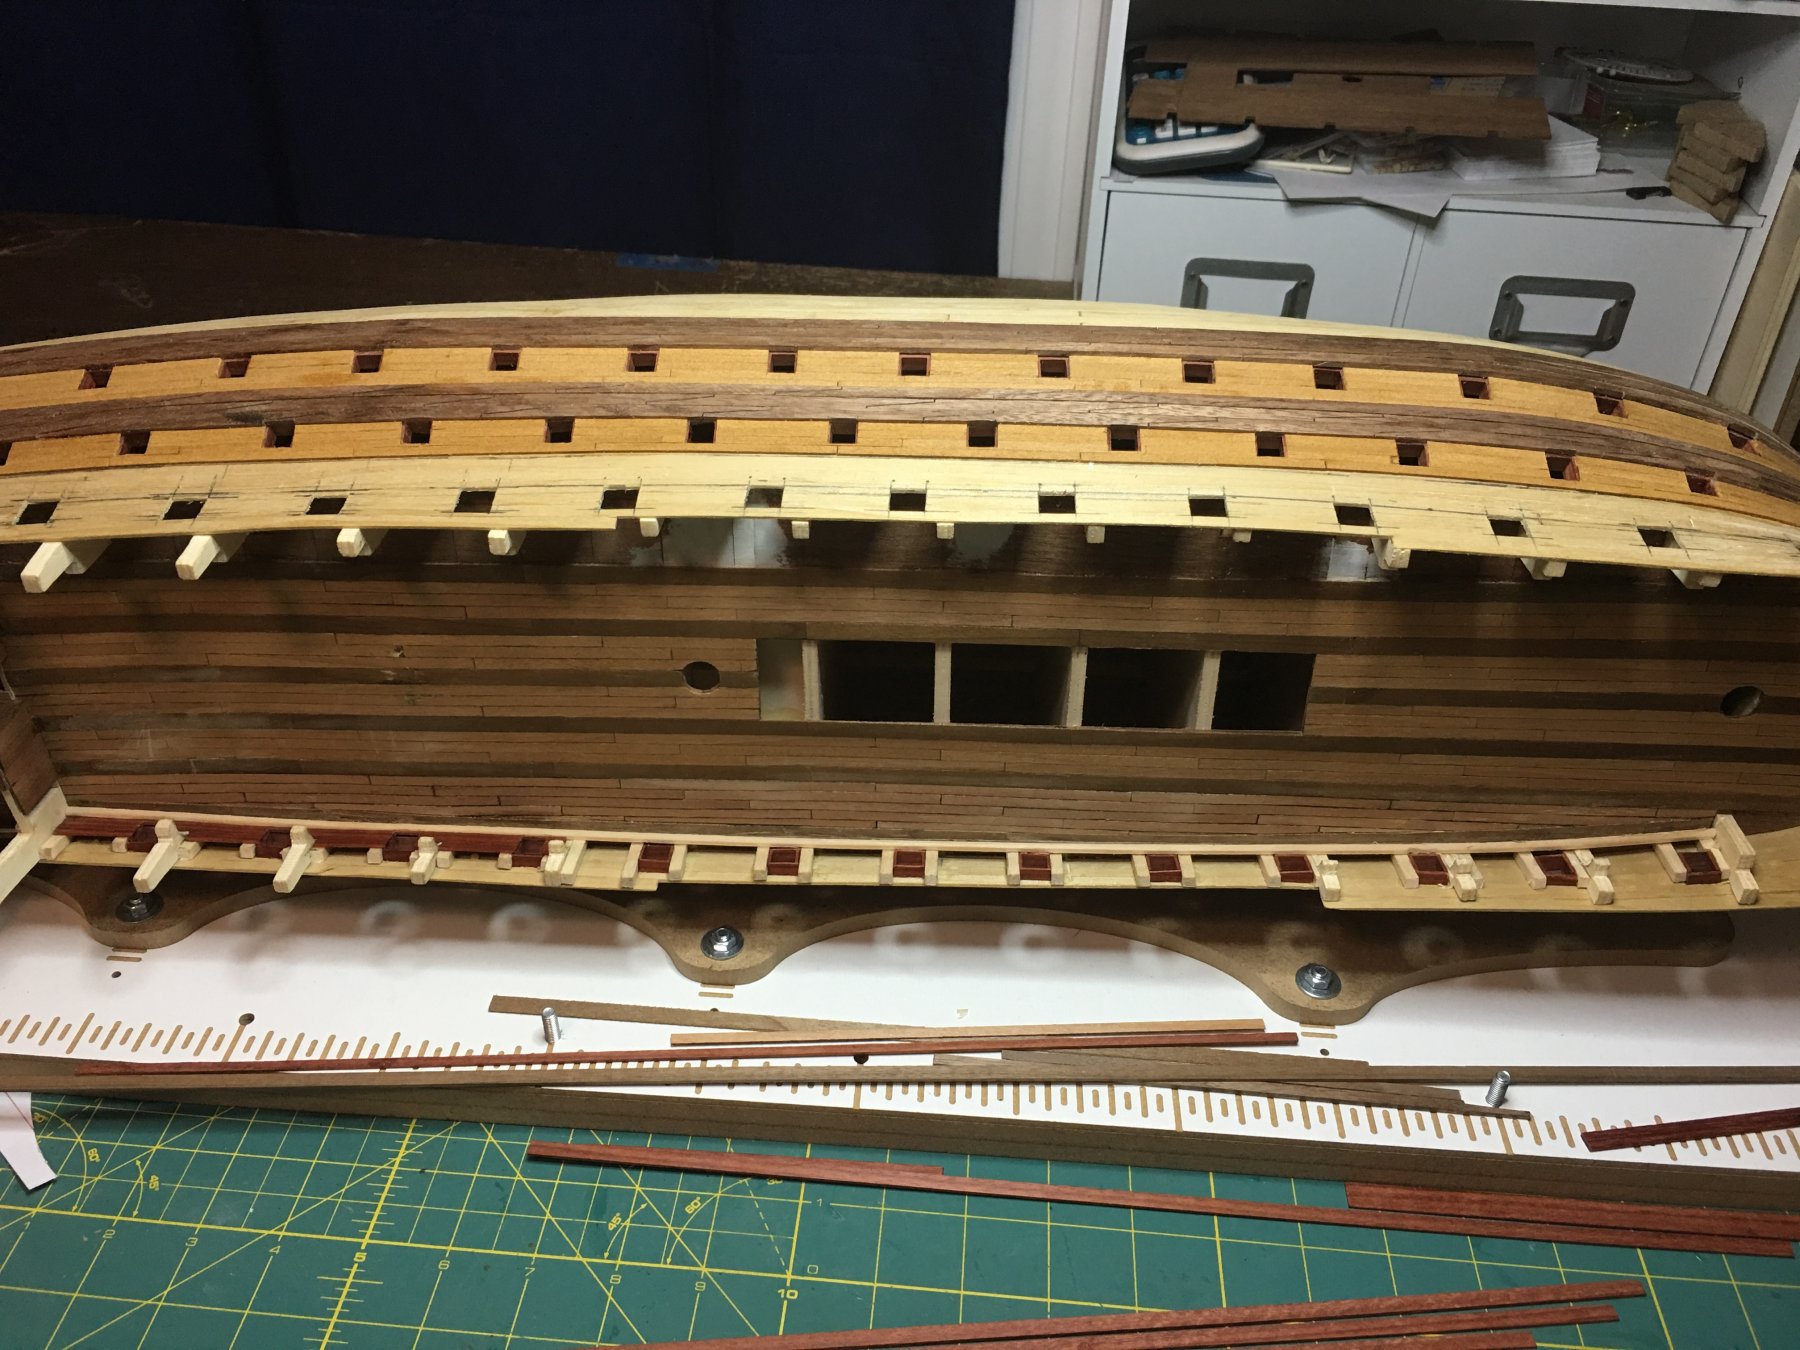
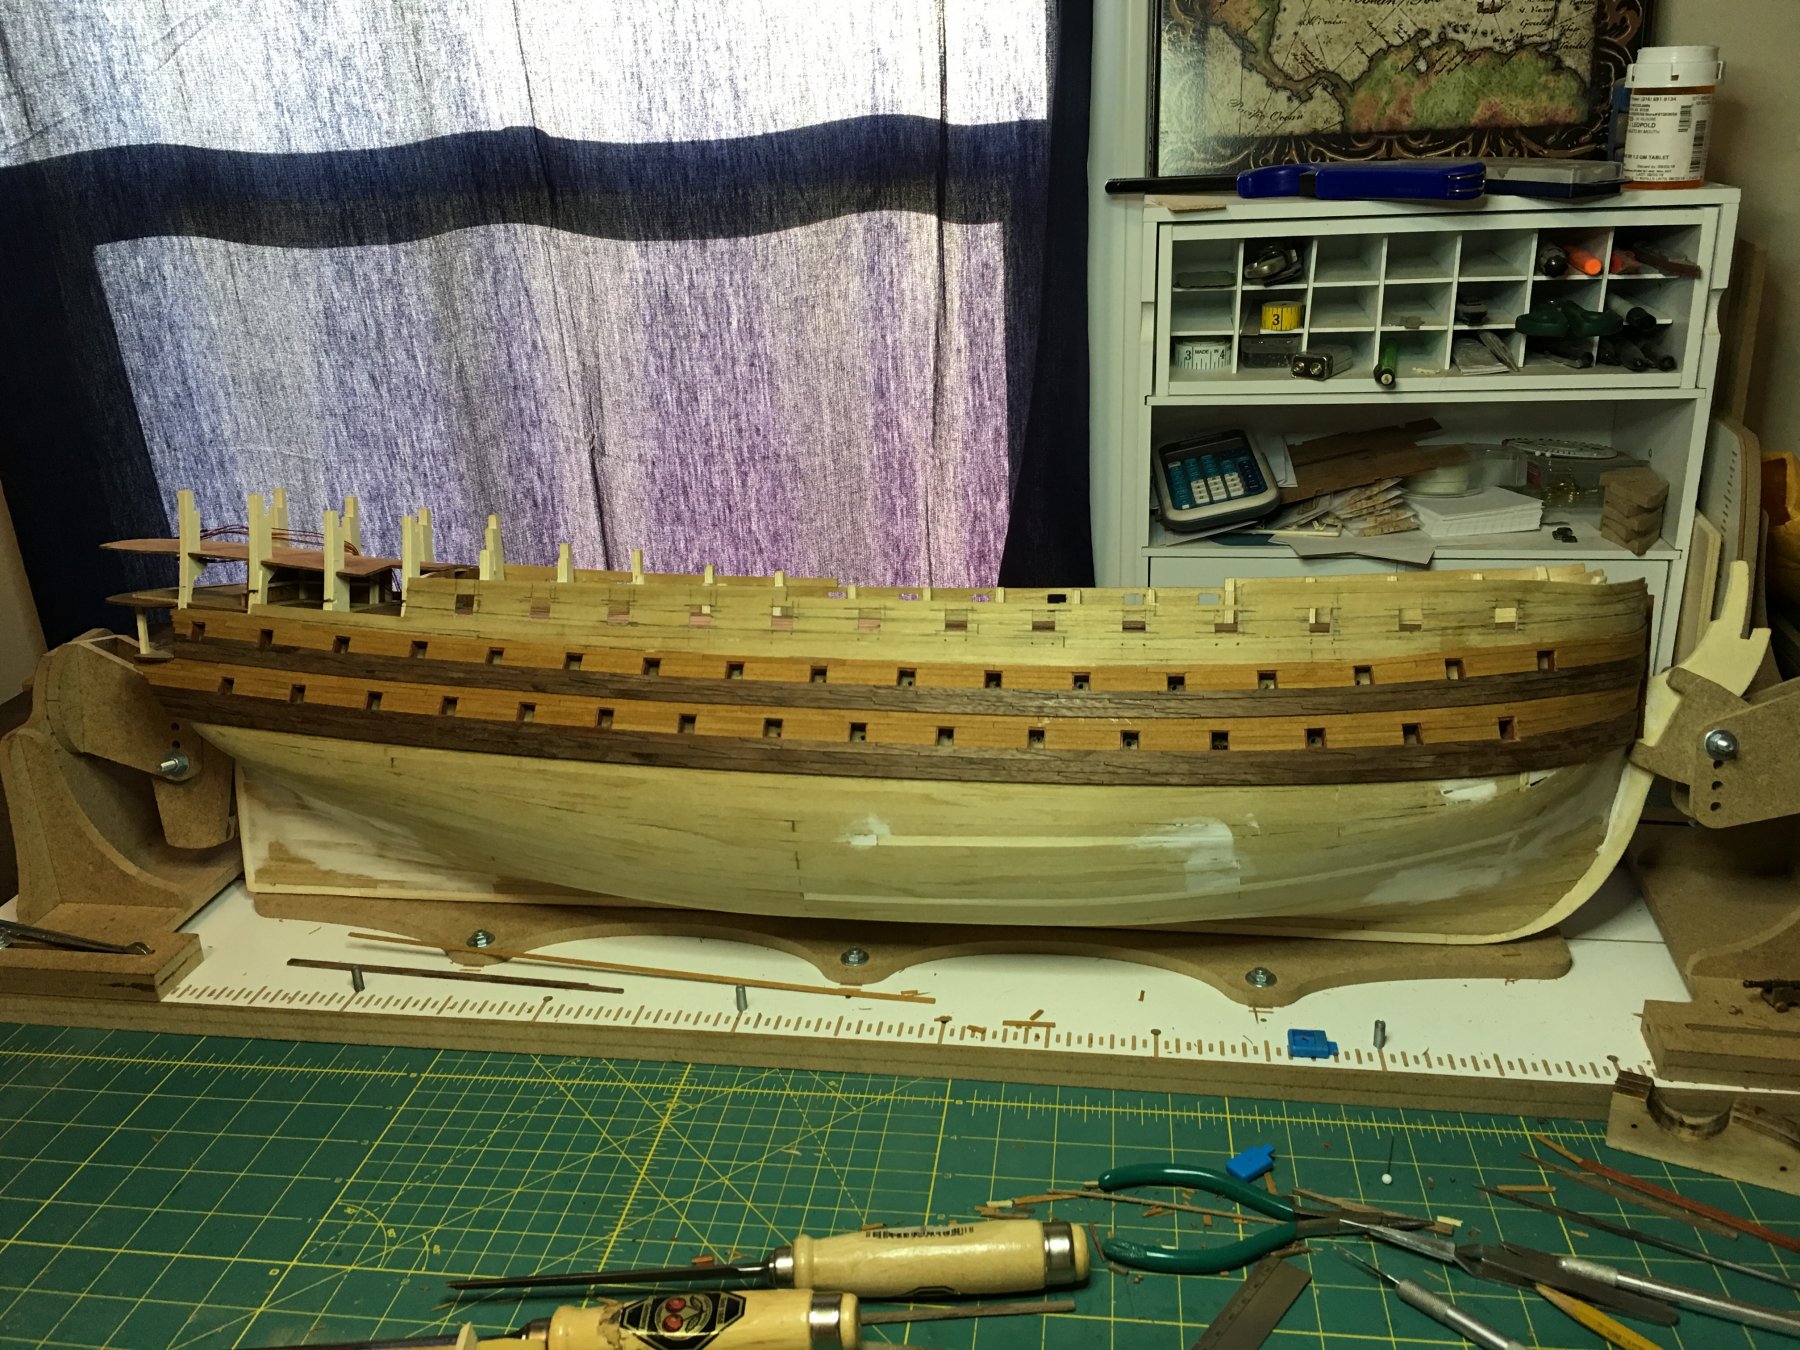
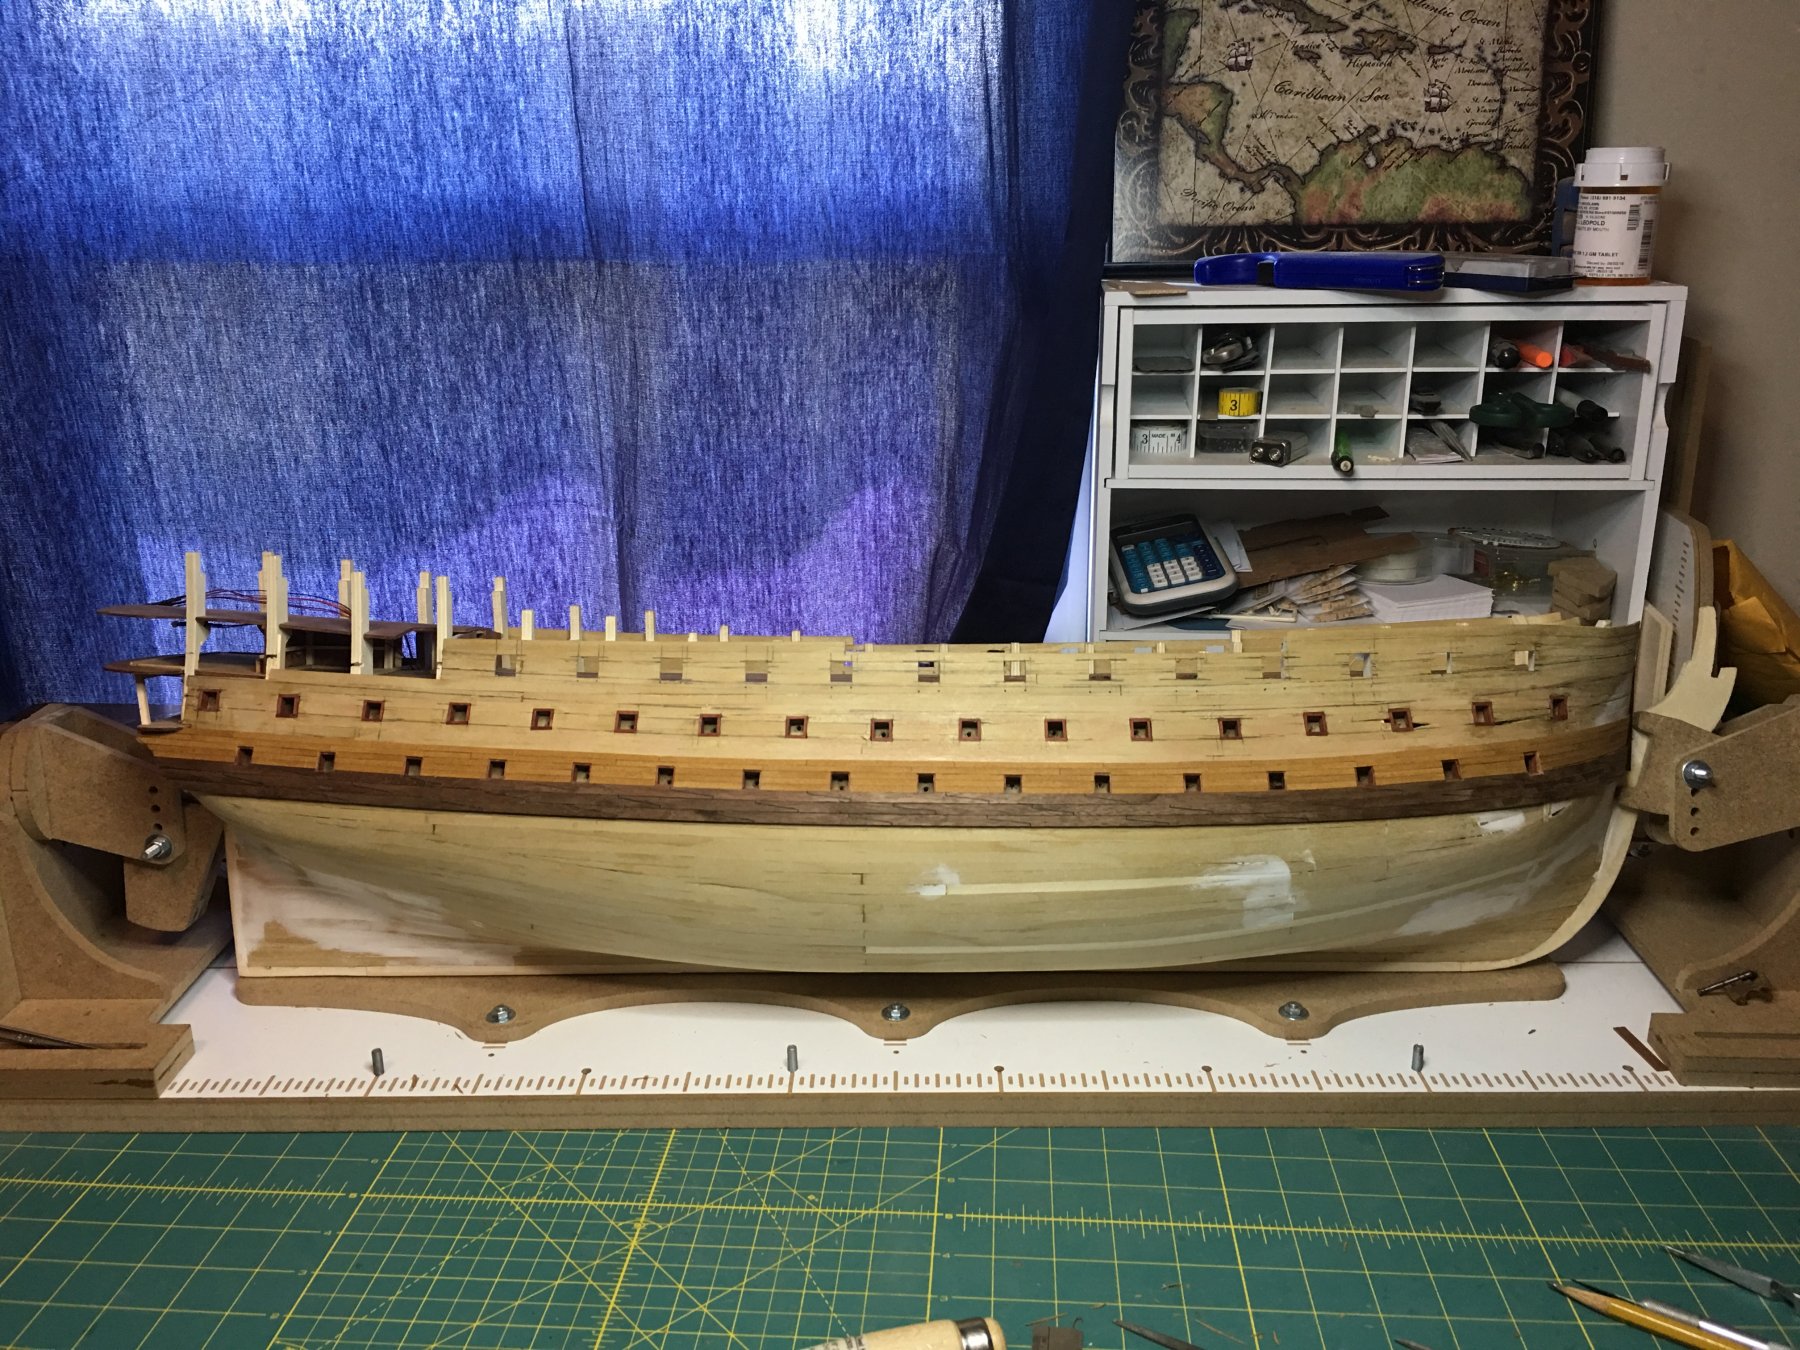
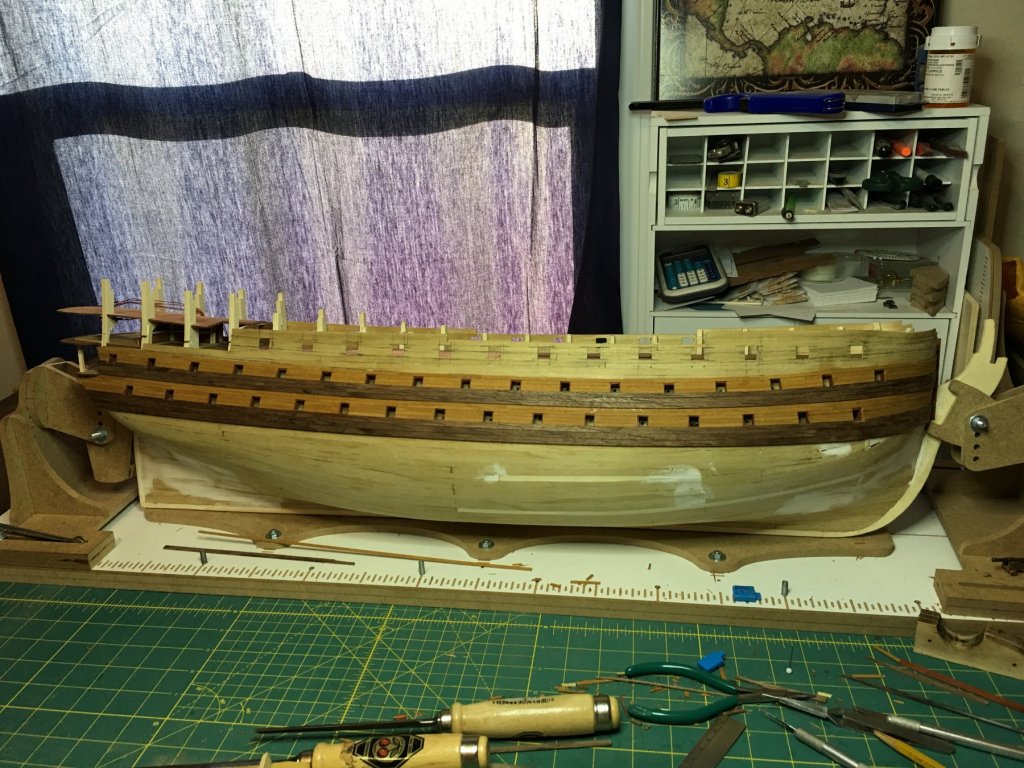
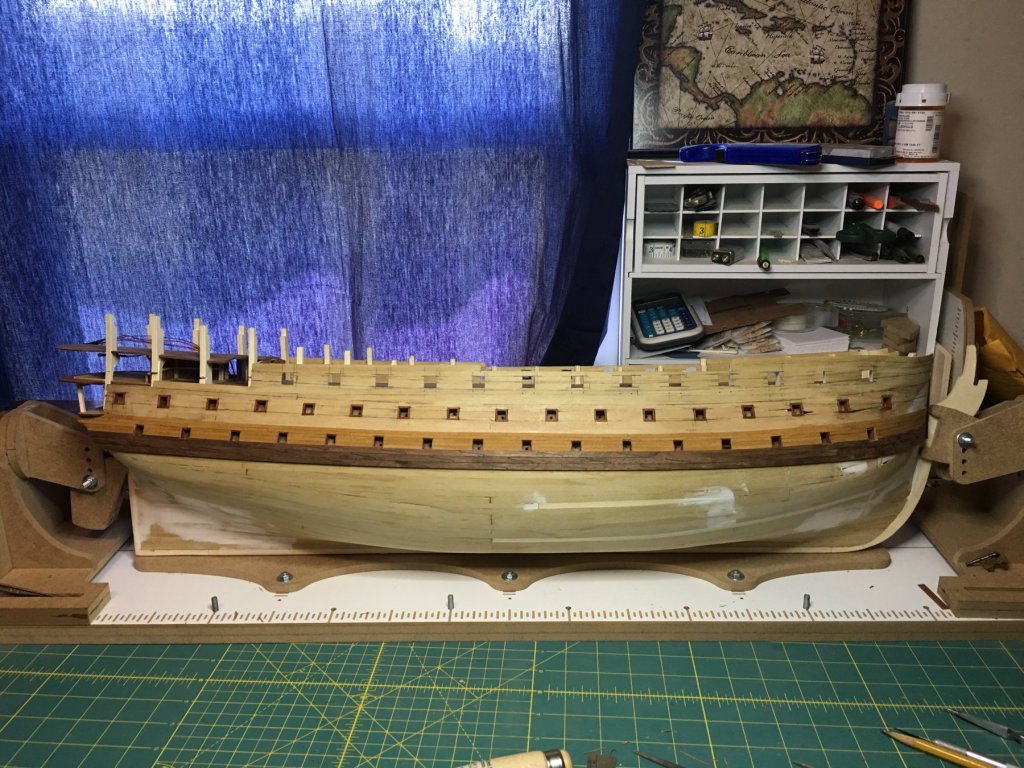
If there has been one good thing to all of the rain we have been getting here, I’ve had a lot of time to work on the ship. This was taken a few days ago as I was pulling into work. Fortunately, it hadn’t submerged the road in though a lot of places around us were underwater. We are on a slight hill which helped. I finished he’s installing the rest of the gun port frames on the lower and middle decks. Both sides are now complete. With the frames installed and sanded to fit the contours of the hull, I was able to start the outer planking. First the three rows of lower wales. Once those were in place, I laid the first band of planks at the lower gun deck. I’m now repeating that process on the opposite side. Then it will be a matter of repeating the pattern of Wales and planks till I reach the upper deck. Lots of work still to go so thank you all for settling in and sticking around on these long builds! 😀