Supplies of the Ship Modeler's Handbook are running out. Get your copy NOW before they are gone! Click on photo to order.
×


EJ_L
-
Posts
2,227 -
Joined
-
Last visited
Content Type
Profiles
Forums
Gallery
Events
Everything posted by EJ_L
-
 I am going to agree with Marc in that, just allow fr some structural compromise in the hull and continue onward. Make the changes that can be made "easily" and you will end up with a reasonable approximation of the ship. When you are done, if it truly annoys you, use it as a guideline for a complete scratch build. In any case, I think you are well on your way to having a well built model that will be enjoyed by and educate many.
- 244 replies
-
- 5
-

-
- heller
- soleil royal
- (and 1 more)
-
"something looks right, but other parts have to be added changed or rebuild"... I find myself saying this all the time.... 🙄 I don't think you are too far off on the profile. Maybe shallow the curve of the counter and soften the point at the top where the wale meets and stern and I think you will be set.
- 244 replies
-
- 5
-
-
- heller
- soleil royal
- (and 1 more)
-
Your sails look awesome! Very inspirational. Your sailors however, need to put down the rum and do a better job of squaring those yards. This is a 1st rate man of war, not some merchant tub.
- 786 replies
-
- 3
-
-
- Royal Louis
- Finished
- (and 1 more)
-
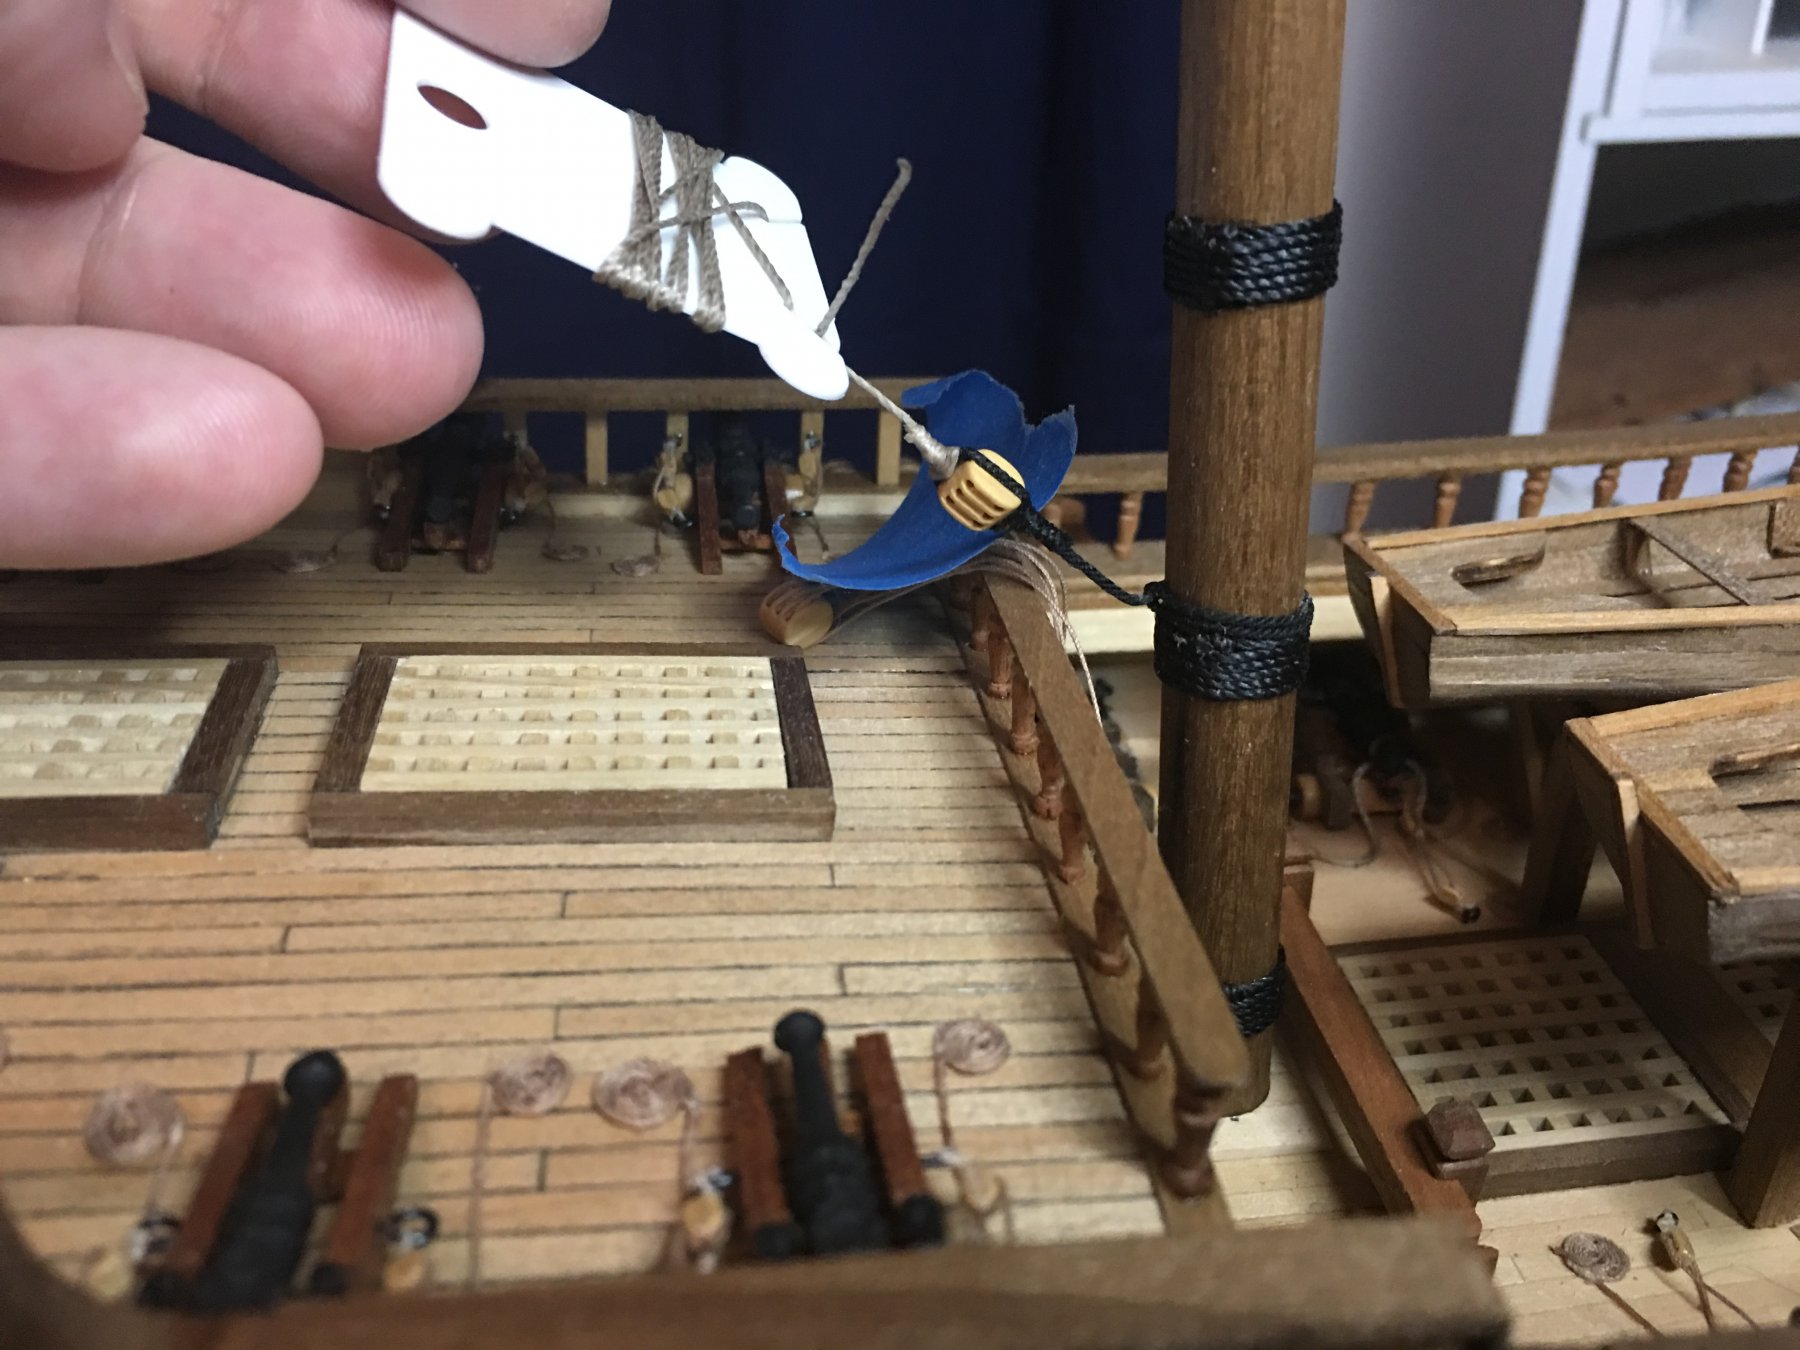
Thanks O.C.. I use a mix bag when it comes to rigging. It largely depends upon what I receive in the kits. In this particular case, the ropes I got are actually decent, but they are only of one color and two sizes (not counting the rope for the anchor). I will be able to use them extensively for the running rigging, but I had nothing that I could use for the standing rigging. The hardest part is measuring for quantities and figuring out what sizes are needed. Not really a difficult task, just takes some time. Spent an evening with flexible tape measures, note cards and calculators plus my scale conversion app. I think I got all that I will need. If not, well I know where to get more!
-
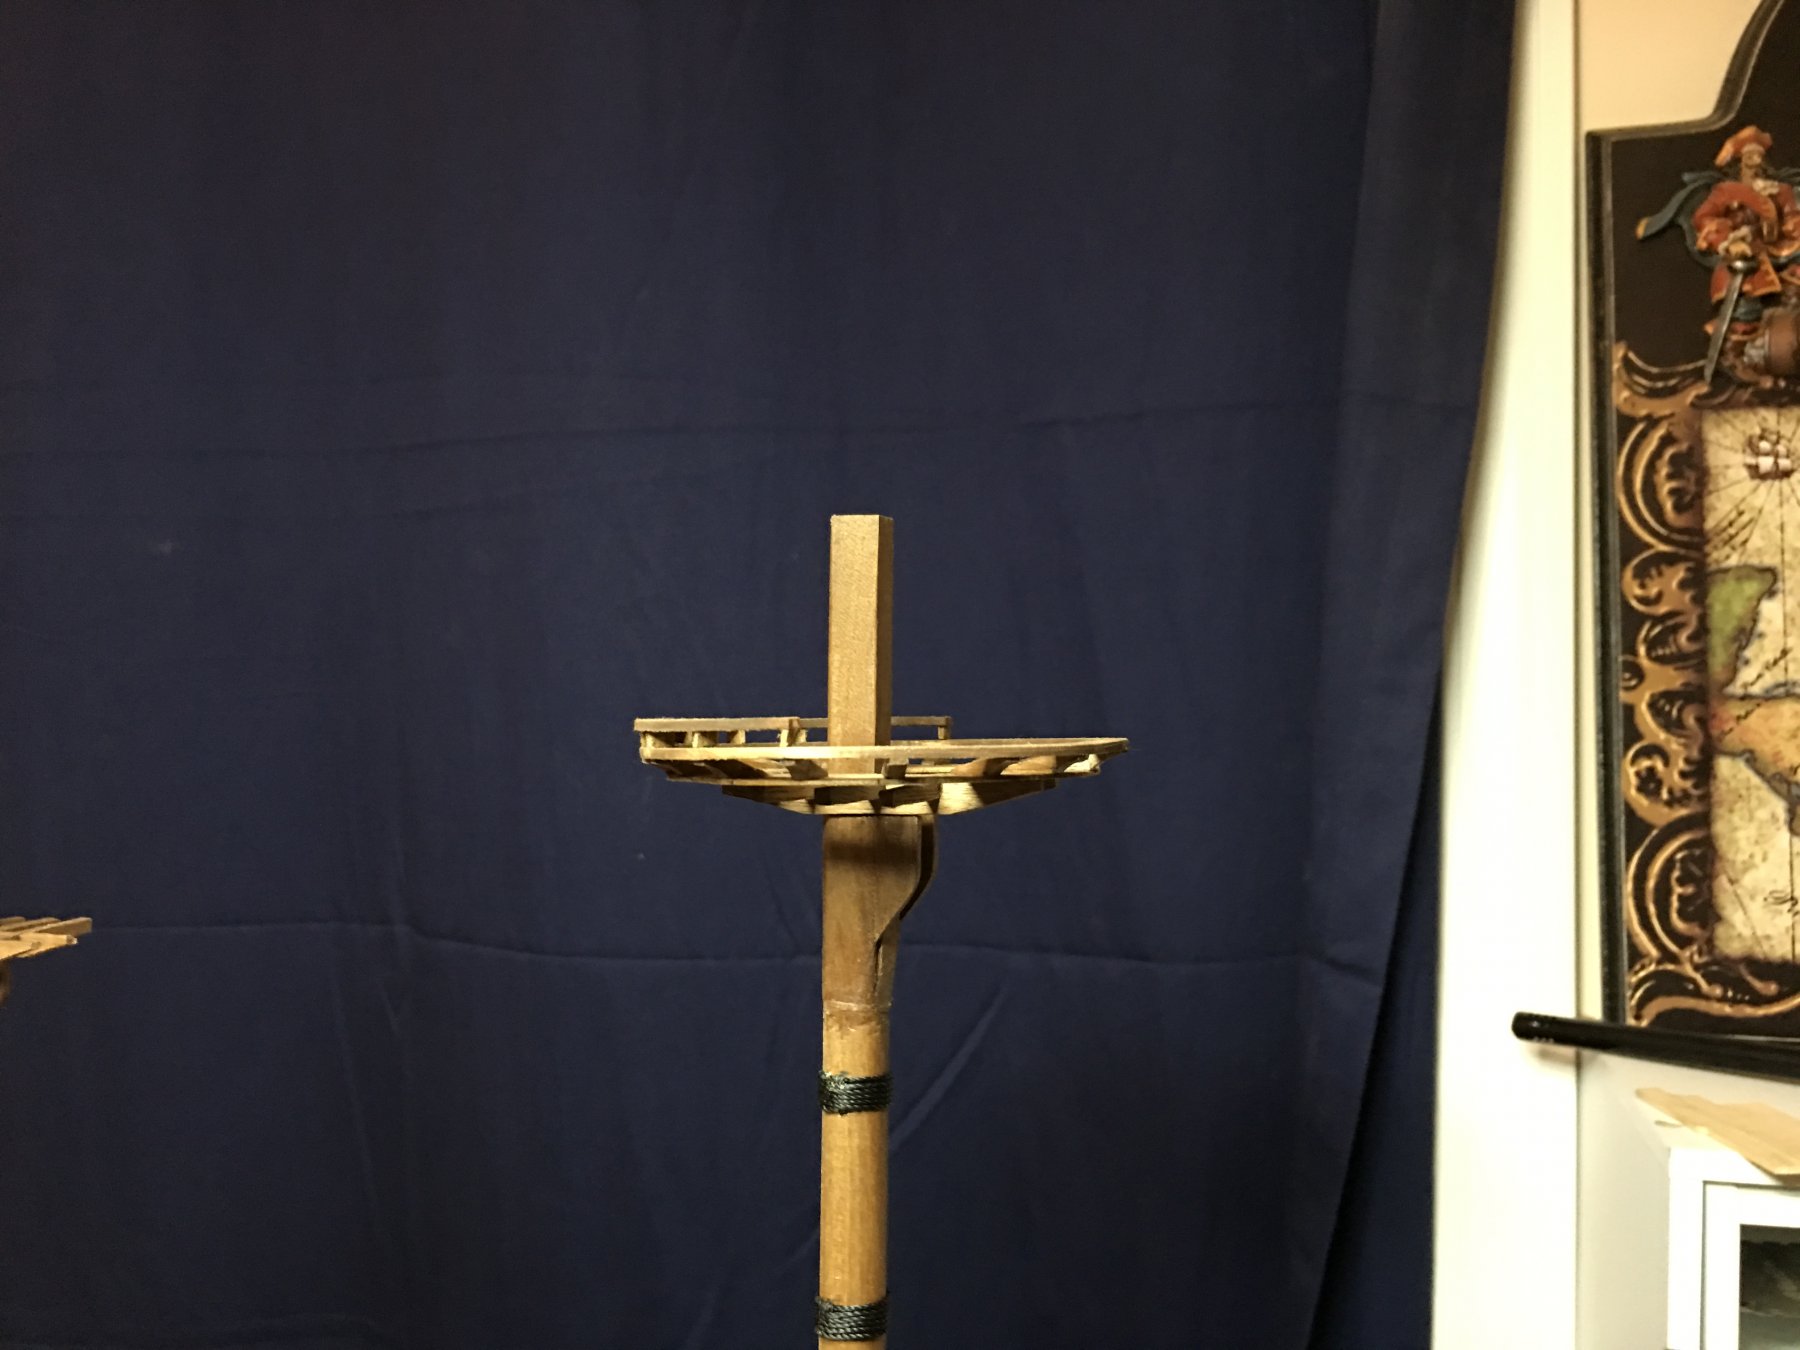
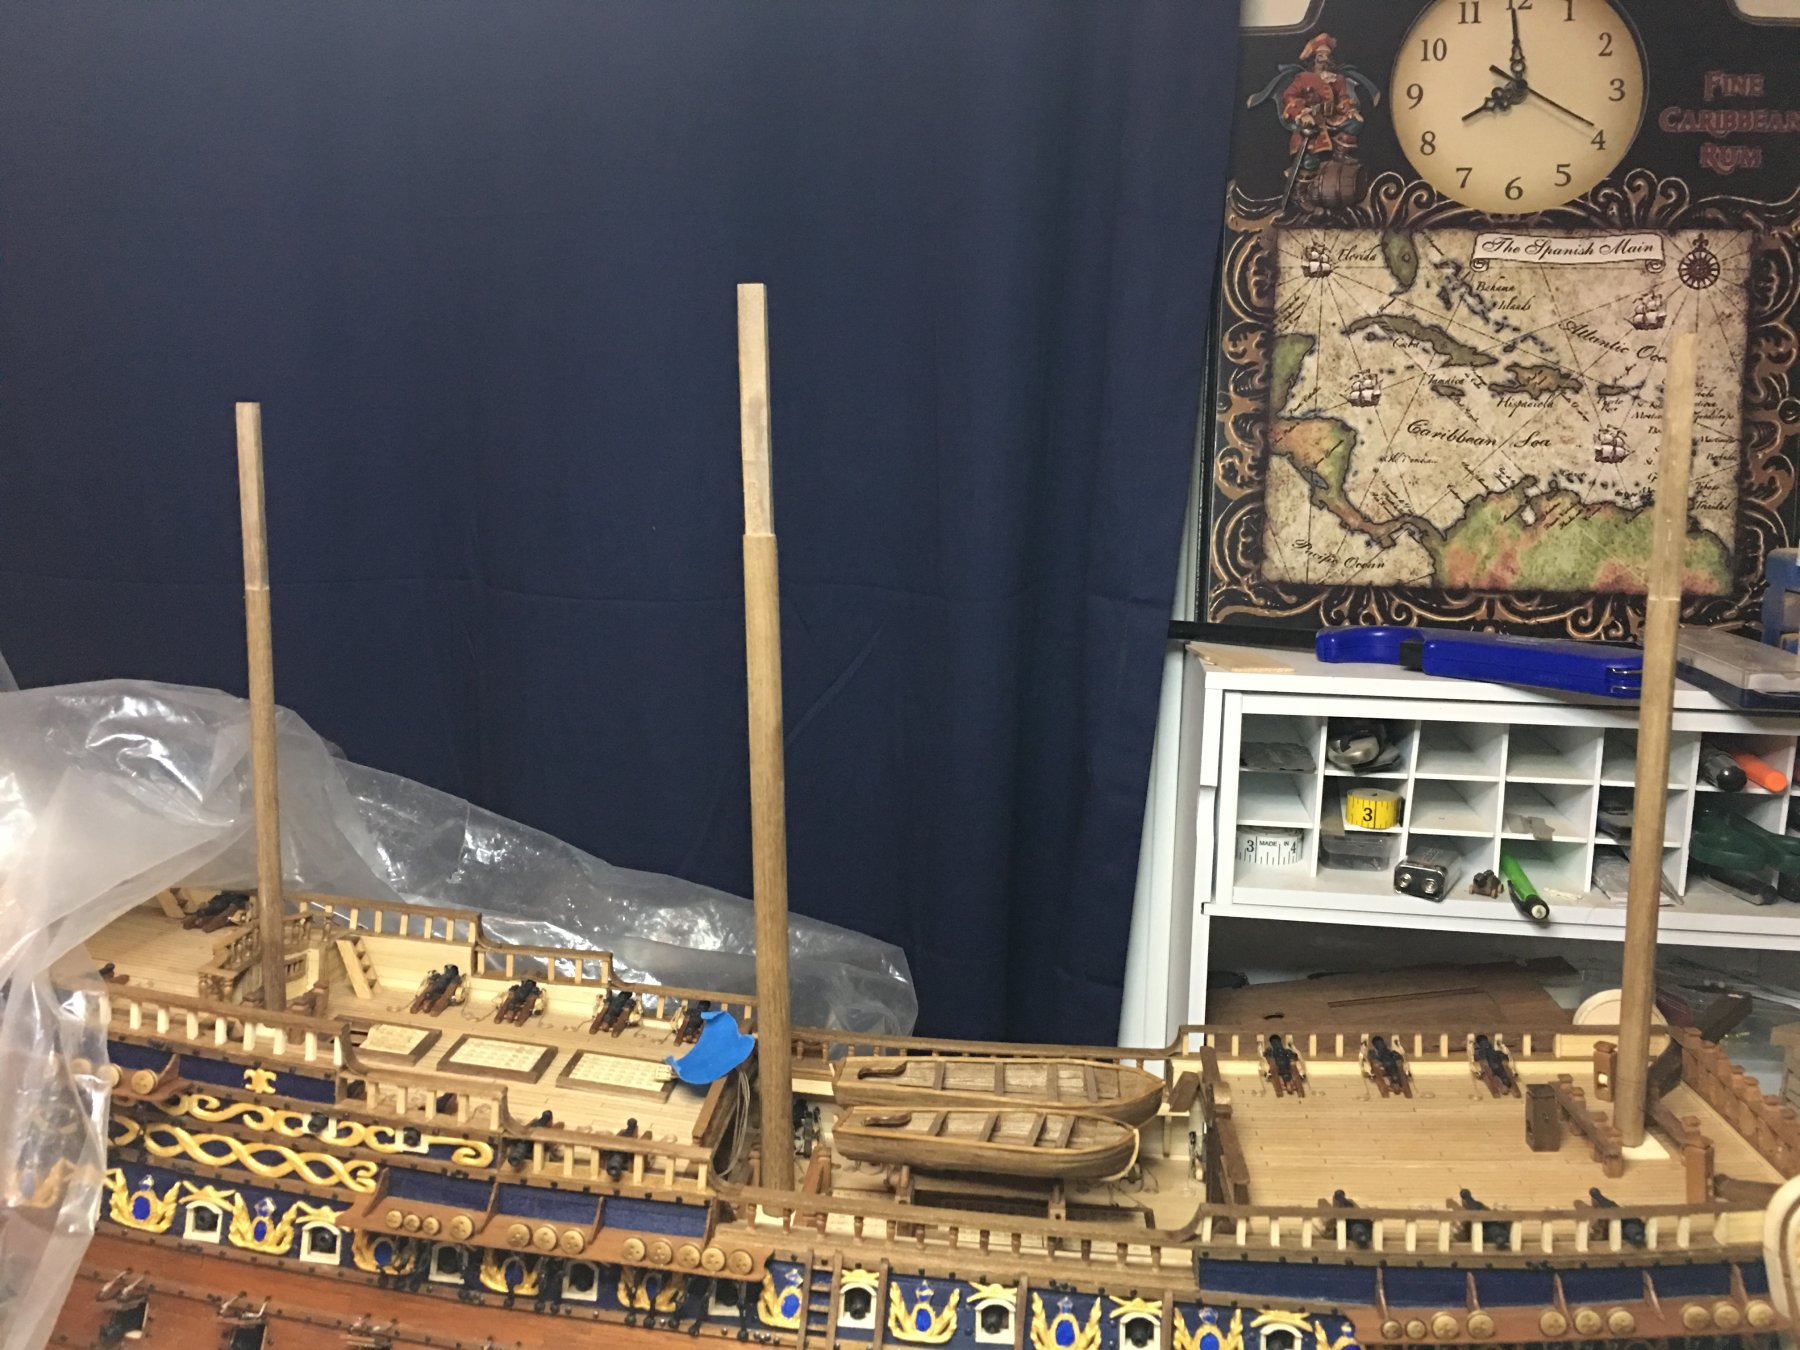
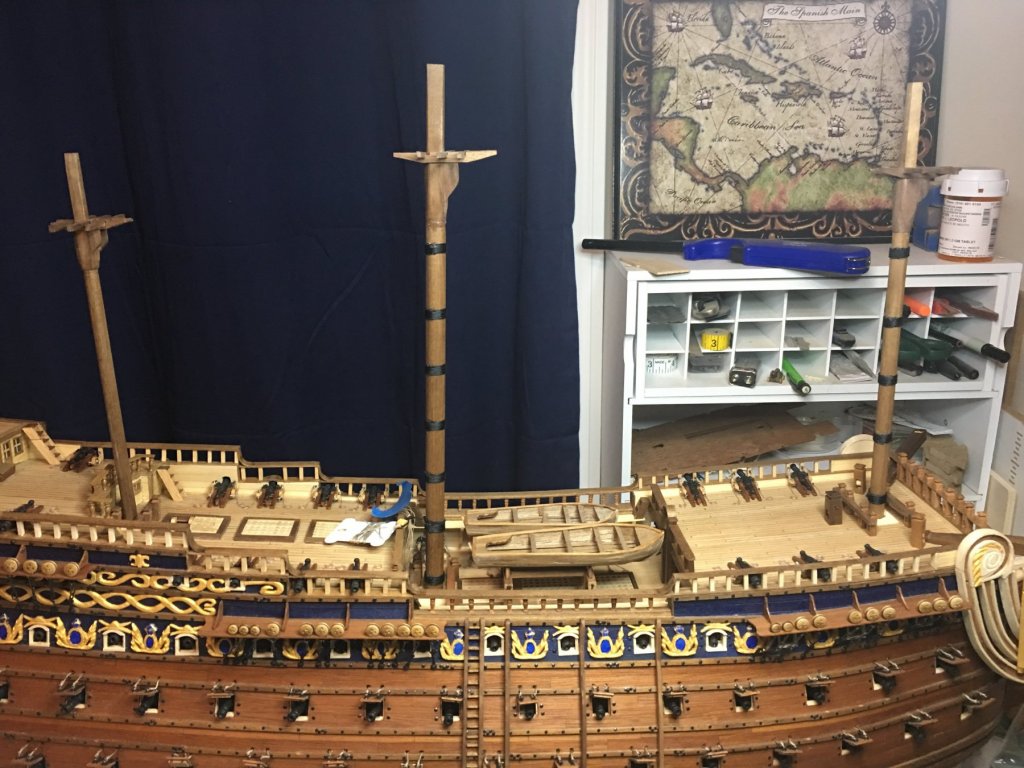
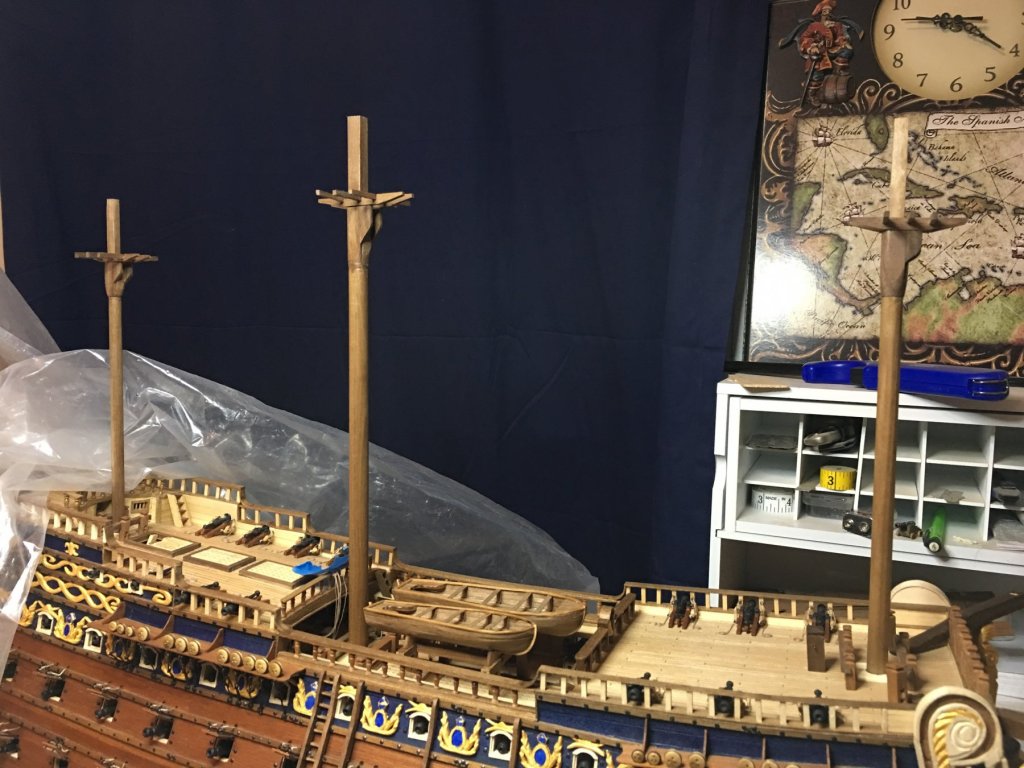
Received the rope and blocks from Syren this week. Great service from Chuck as always and incredibly fast delivery. Ordered Wednesday morning and they were in my mailbox waiting for me when I came home from work on Friday. Work has has been progressing nicely on the tops. Fore and main tops are built and in place though not yet glued. Mizzen top is underway, then the bowsprit. Once the masts and wood works are complete, the rigging of the stays will commence.


-
Well done! She turned out very beautiful. You have a nice model to display proudly.
- 55 replies
-
- 1
-
-
- scottish maid
- artesania latina
- (and 1 more)
-
I've always been impressed with that model. Like most of S.R. (myself included) there are well known errors and some for debate, but the workmanship is undeniable. The size is also incredible at 1:48. My own is 1:77 and takes up a large space. I would love to build one of these at 1:48 scale, but the admiral would probably banish both me and the ship to the shop.
- 2,634 replies
-
- 3
-
-
- heller
- soleil royal
- (and 9 more)
-
Thank you all very much for the comments and likes. As always, they are great sources of knowledge and encouragement. Work is continuing on the masts and no, hey are not glued in yet nor will they be for some time yet. Much easier to work on them off the ship. Woldings are in place and I’ve begun to fit some of the blocks. I’ve ordered the ropes and blocks from Chuck that will be replacing all of he kit blocks and all of the standing rigging. While I await those, I have started to build the tops. Pictures of that work to follow probably this weekend.

-
I would think the stunsail booms could go. The foot ropes I could see either way. I gues that would depend upon how the sail is rigged to that yard. If the ends just run through blocks and down to the deck, I would see no reason for the foot ropes. If however, the sailors need to go out on that yard to operate, or secure/let go the sail then I would think they would need to be there. My gut feeling is they are not needed.
- 786 replies
-
- 5
-
-
- Royal Louis
- Finished
- (and 1 more)
-
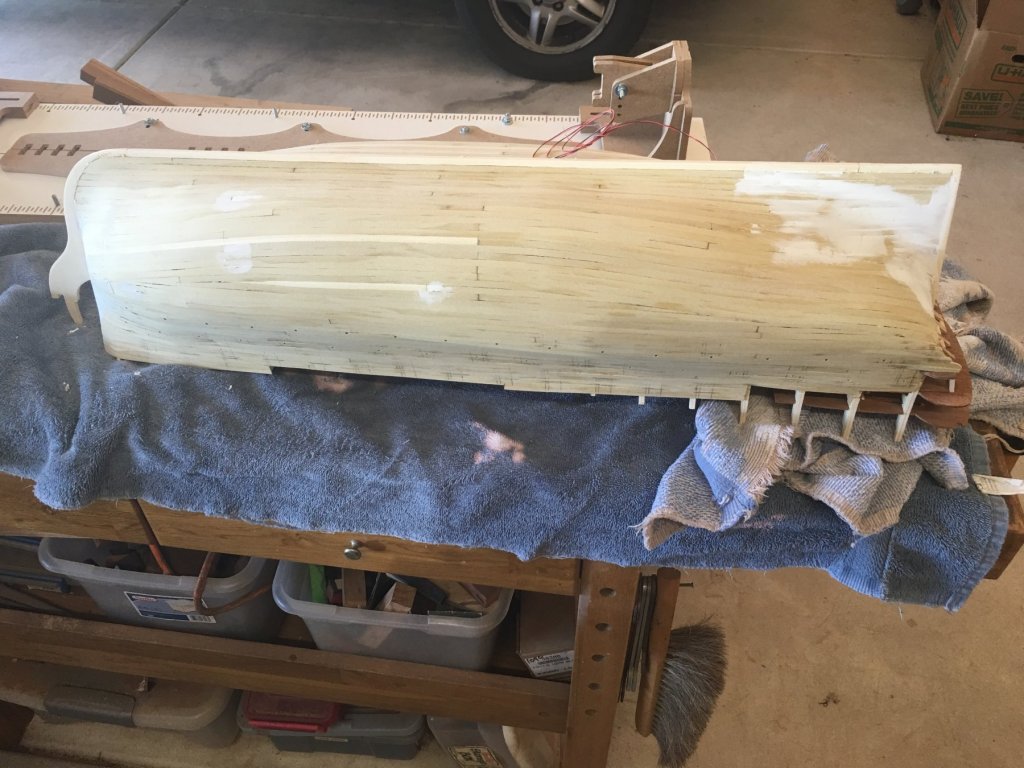
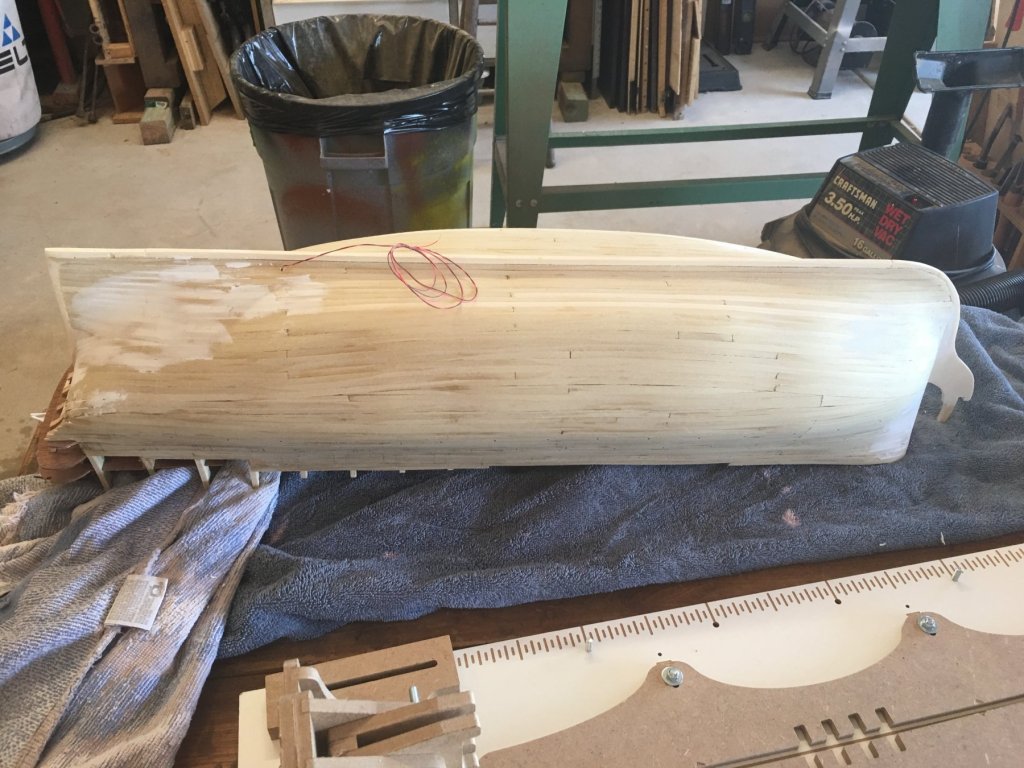
Well, your not wrong! The picture does make it look a lot worse than it actually is, but it also highlights the areas better than what my eye was catching earlier. I flipped the hull back over and ran a straight edge over the hull and while most of the areas are okay, there are a few that will get more filler. No worries about mentioning it Marc, I take critique well even if I don't always change the error, I file it away for future advise. Its hard to grow and learn if you don't listen to others and their advice! I was far more focused on the bow and stern today that I am not completely surprised that I missed them. Pictures do a great job of highlighting bad spots and another set of eyes is even more helpful. I will take her back out to shop and do some more work. I have the time and its better to make it right now than be stuck with a bad hull later.
-
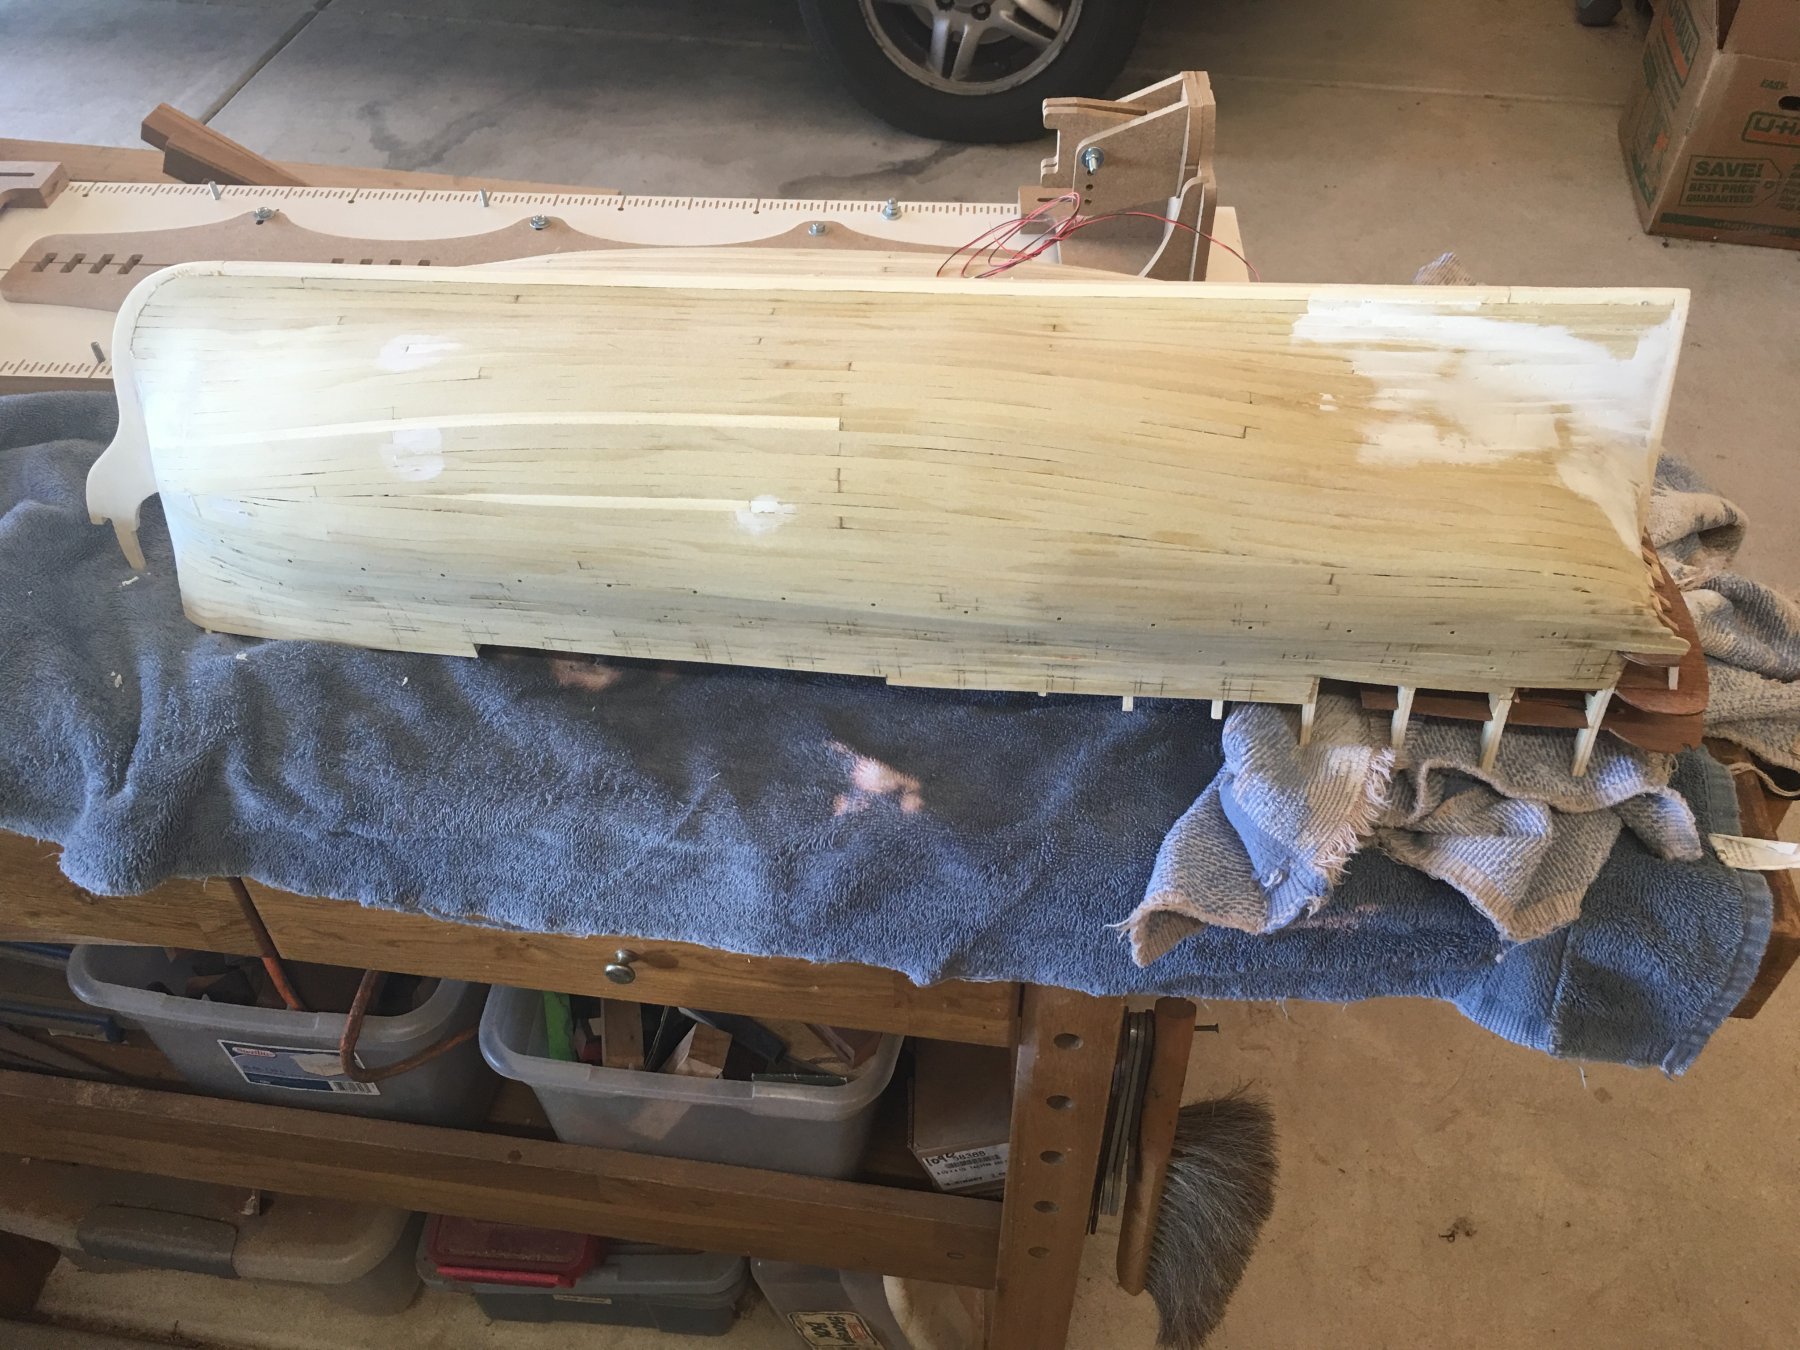
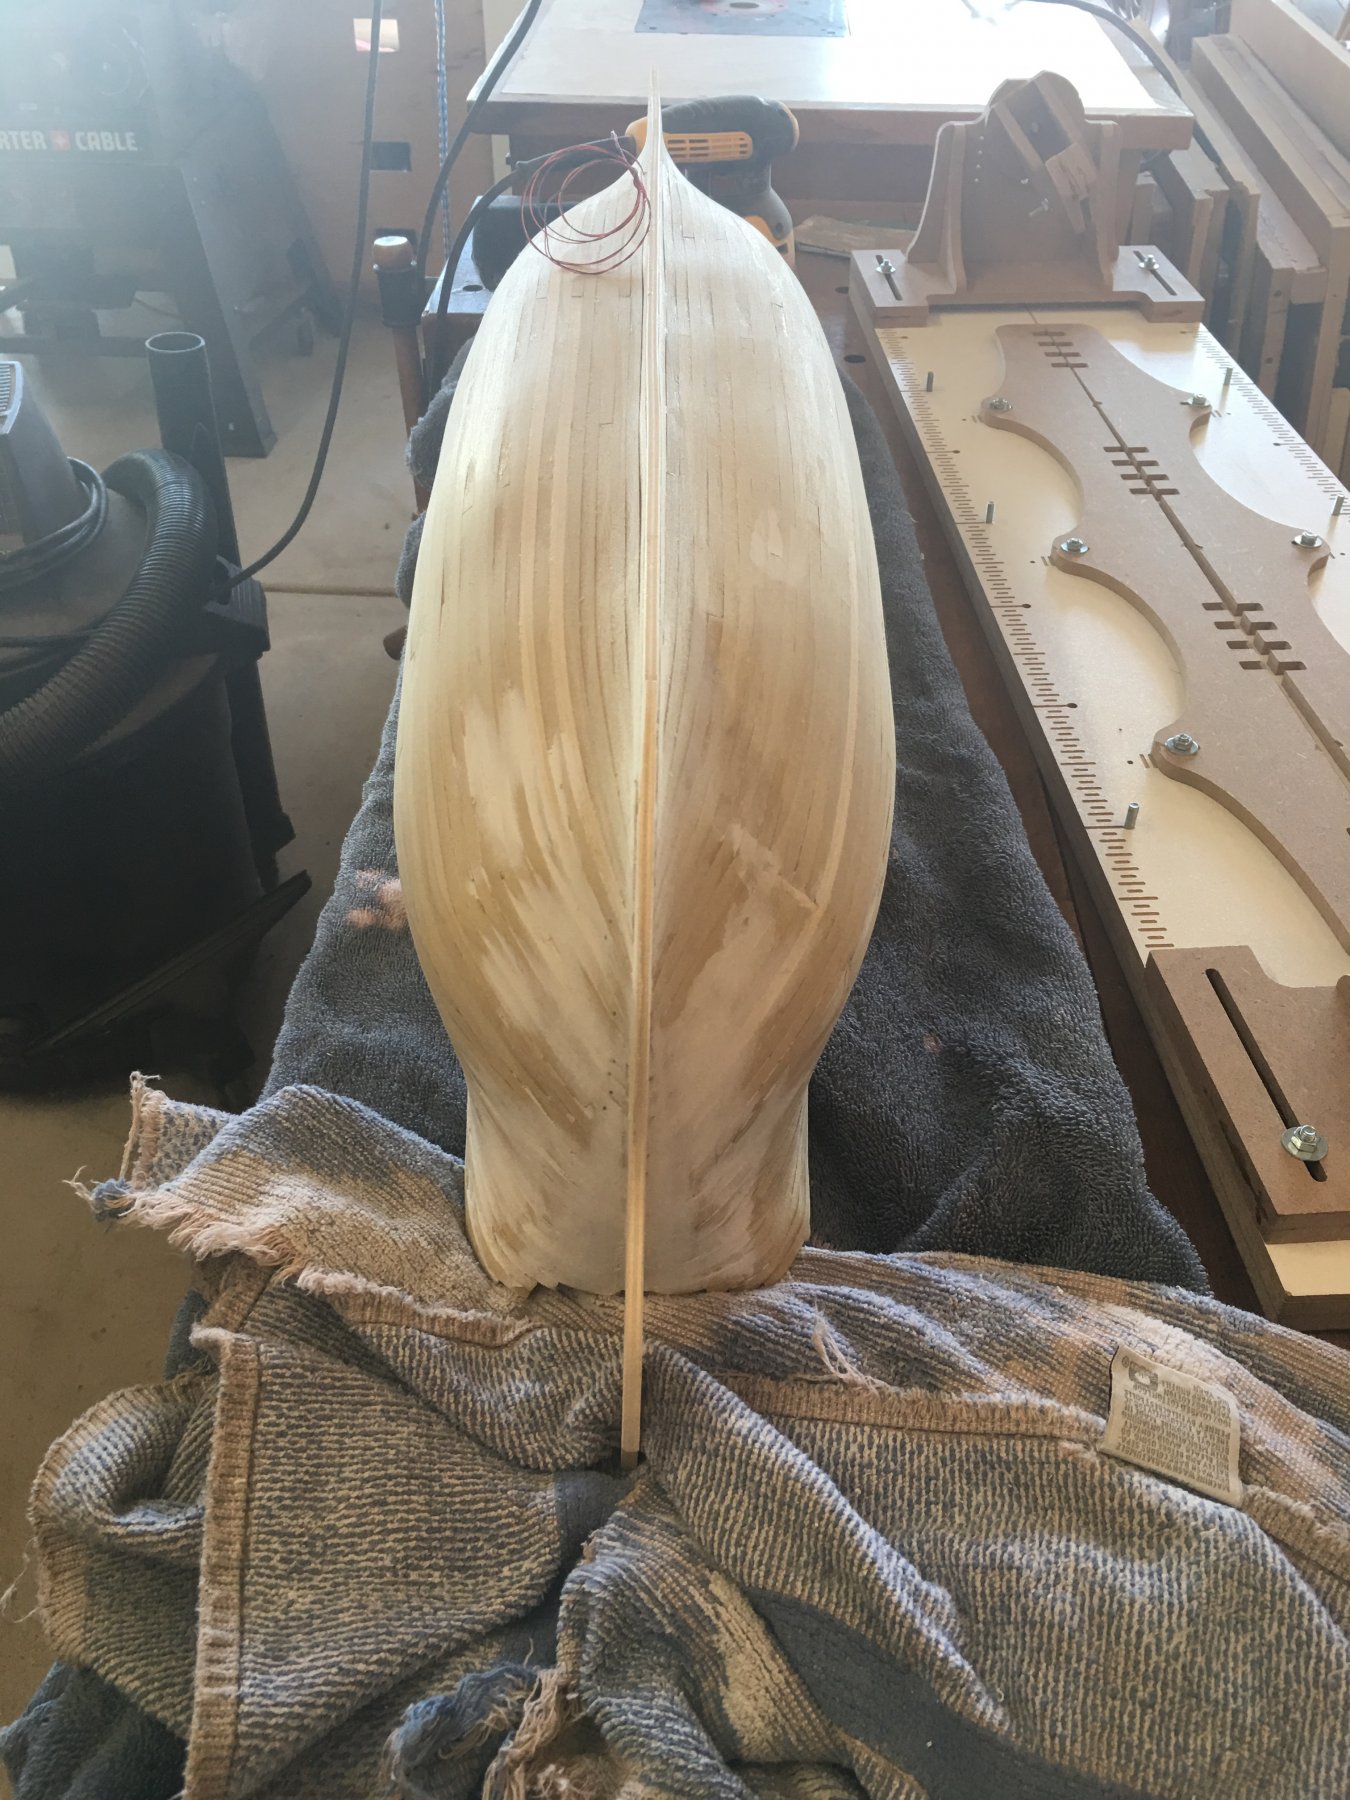
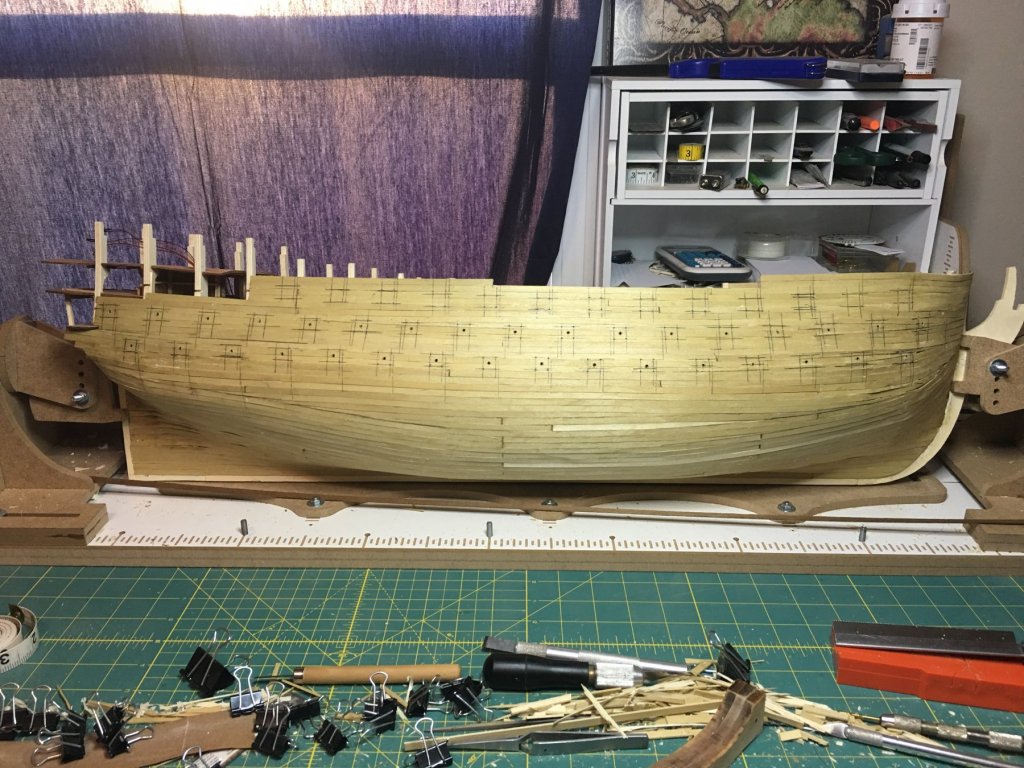
Beautiful weather this weekend allowed for some quality time in the wood shop. In addition to some much needed spring cleaning and work on a couple of other unfinished projects, I did get in some time with Royal Louis. Fairing work on the hull. Lots of sanding filling and sanding and now I have the hull smoothed out to where I can begin laying out the planking pattern. Once the pattern is laid on the hull, I can then see how much more wood I will need to order. I plan on using mahogany again for the lower hull. That is what I’ve used on the other two French builds and I think I want to keep them all the same for continuity. With that in mind, the wales will again be in walnut along with much of the trim pieces. For the upper works, I’m thinking about using yellow heart. I’m gonna rip some down and see how it finishes out alongside the other woods. We shall see. For now, here are a few pics. Hope everyone is having a great day and for those celebrating, happy Easter!


-
I think that the wider spread position in the last picture looks the best both for visual and for stability, which is more important.
- 244 replies
-
- 3
-
-
- heller
- soleil royal
- (and 1 more)
-
I agree that unless you are planning on leaving planking off to reveal the lower decks or installing lighting, it is very difficult to see down through the gratings or in gun ports at that scale. As Marc said, spray them all flat black, and you will be good to go.
- 244 replies
-
- 1
-
-
- heller
- soleil royal
- (and 1 more)
-
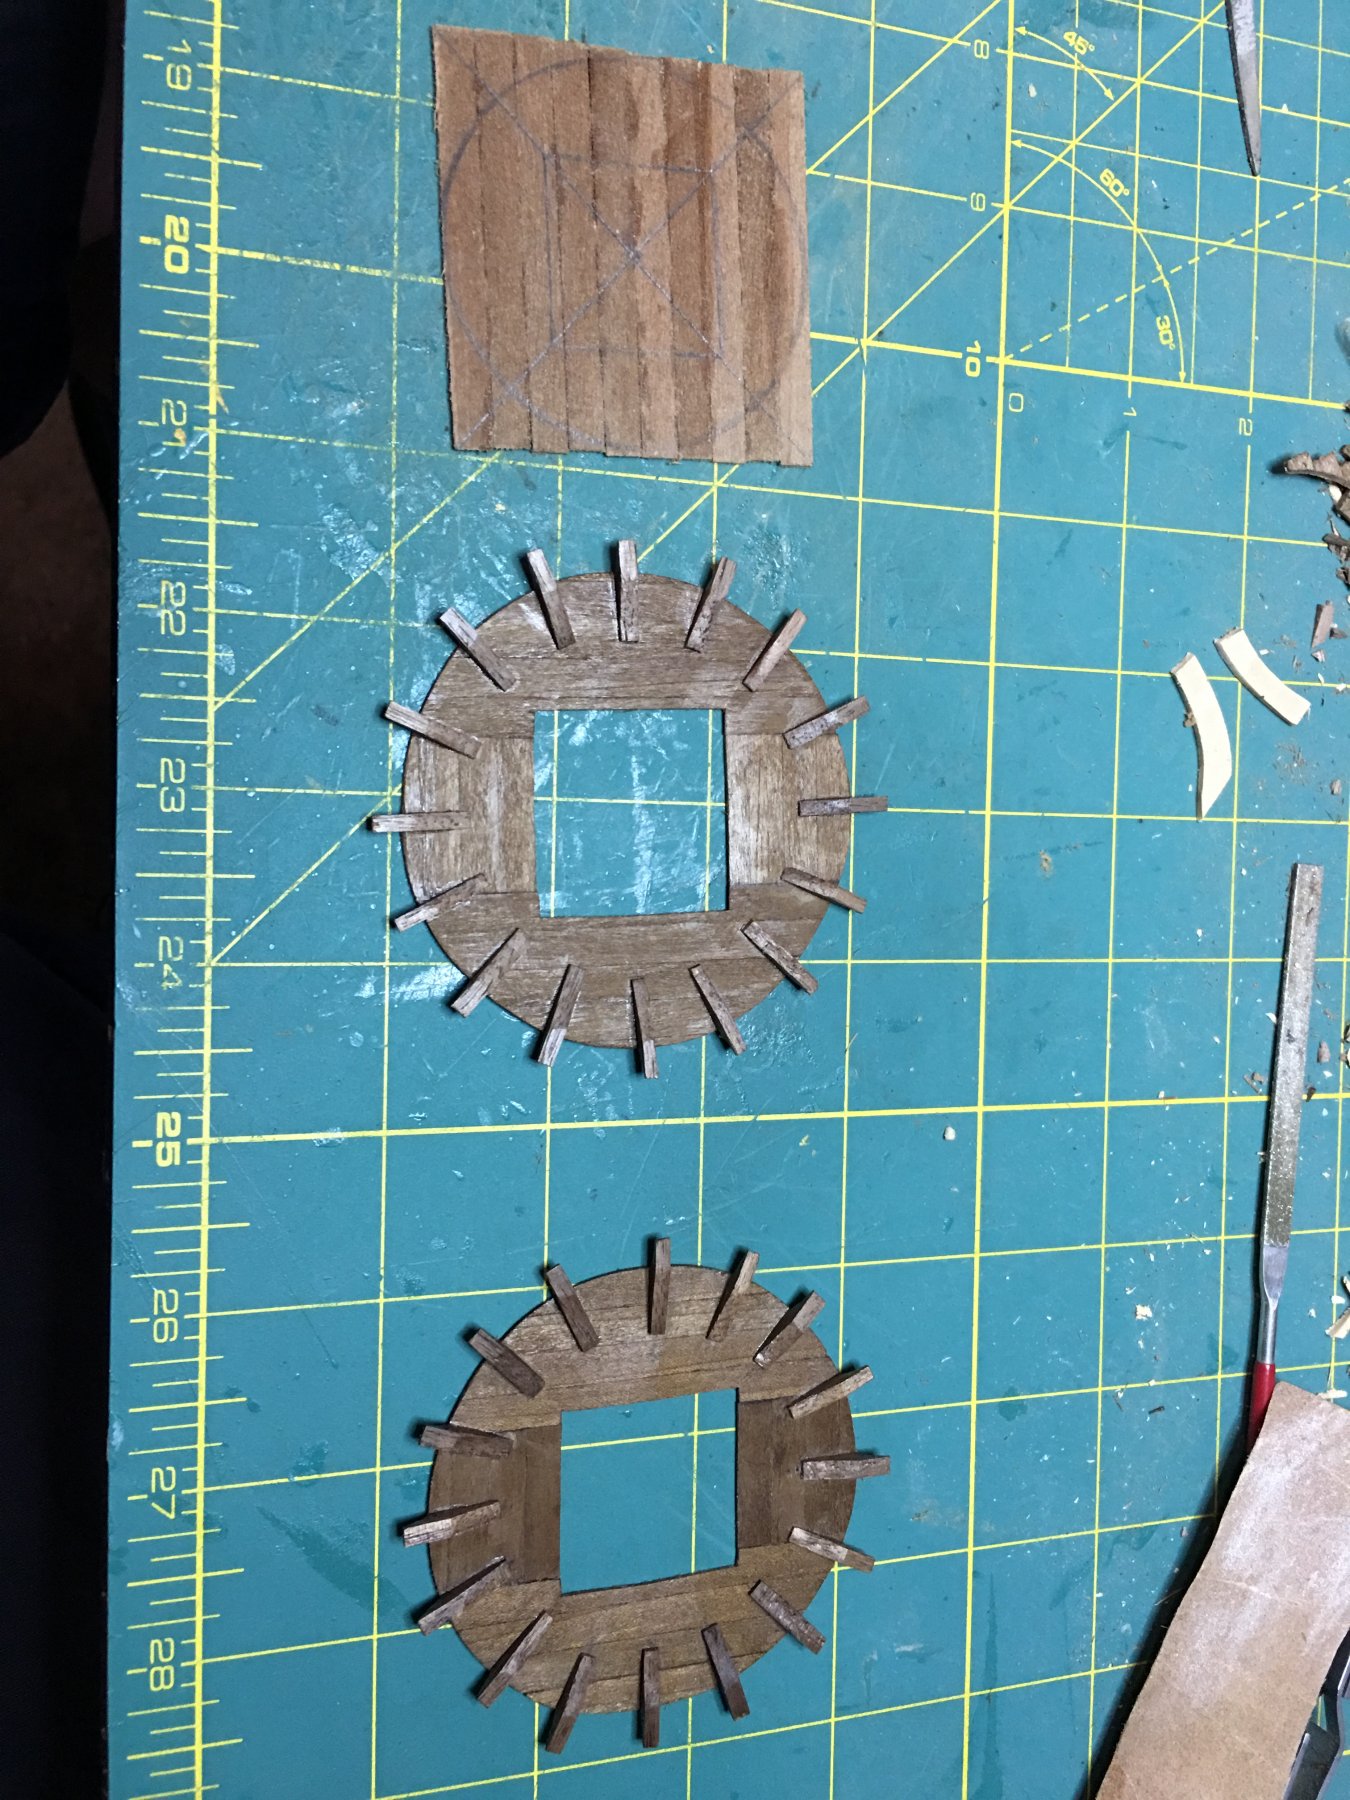
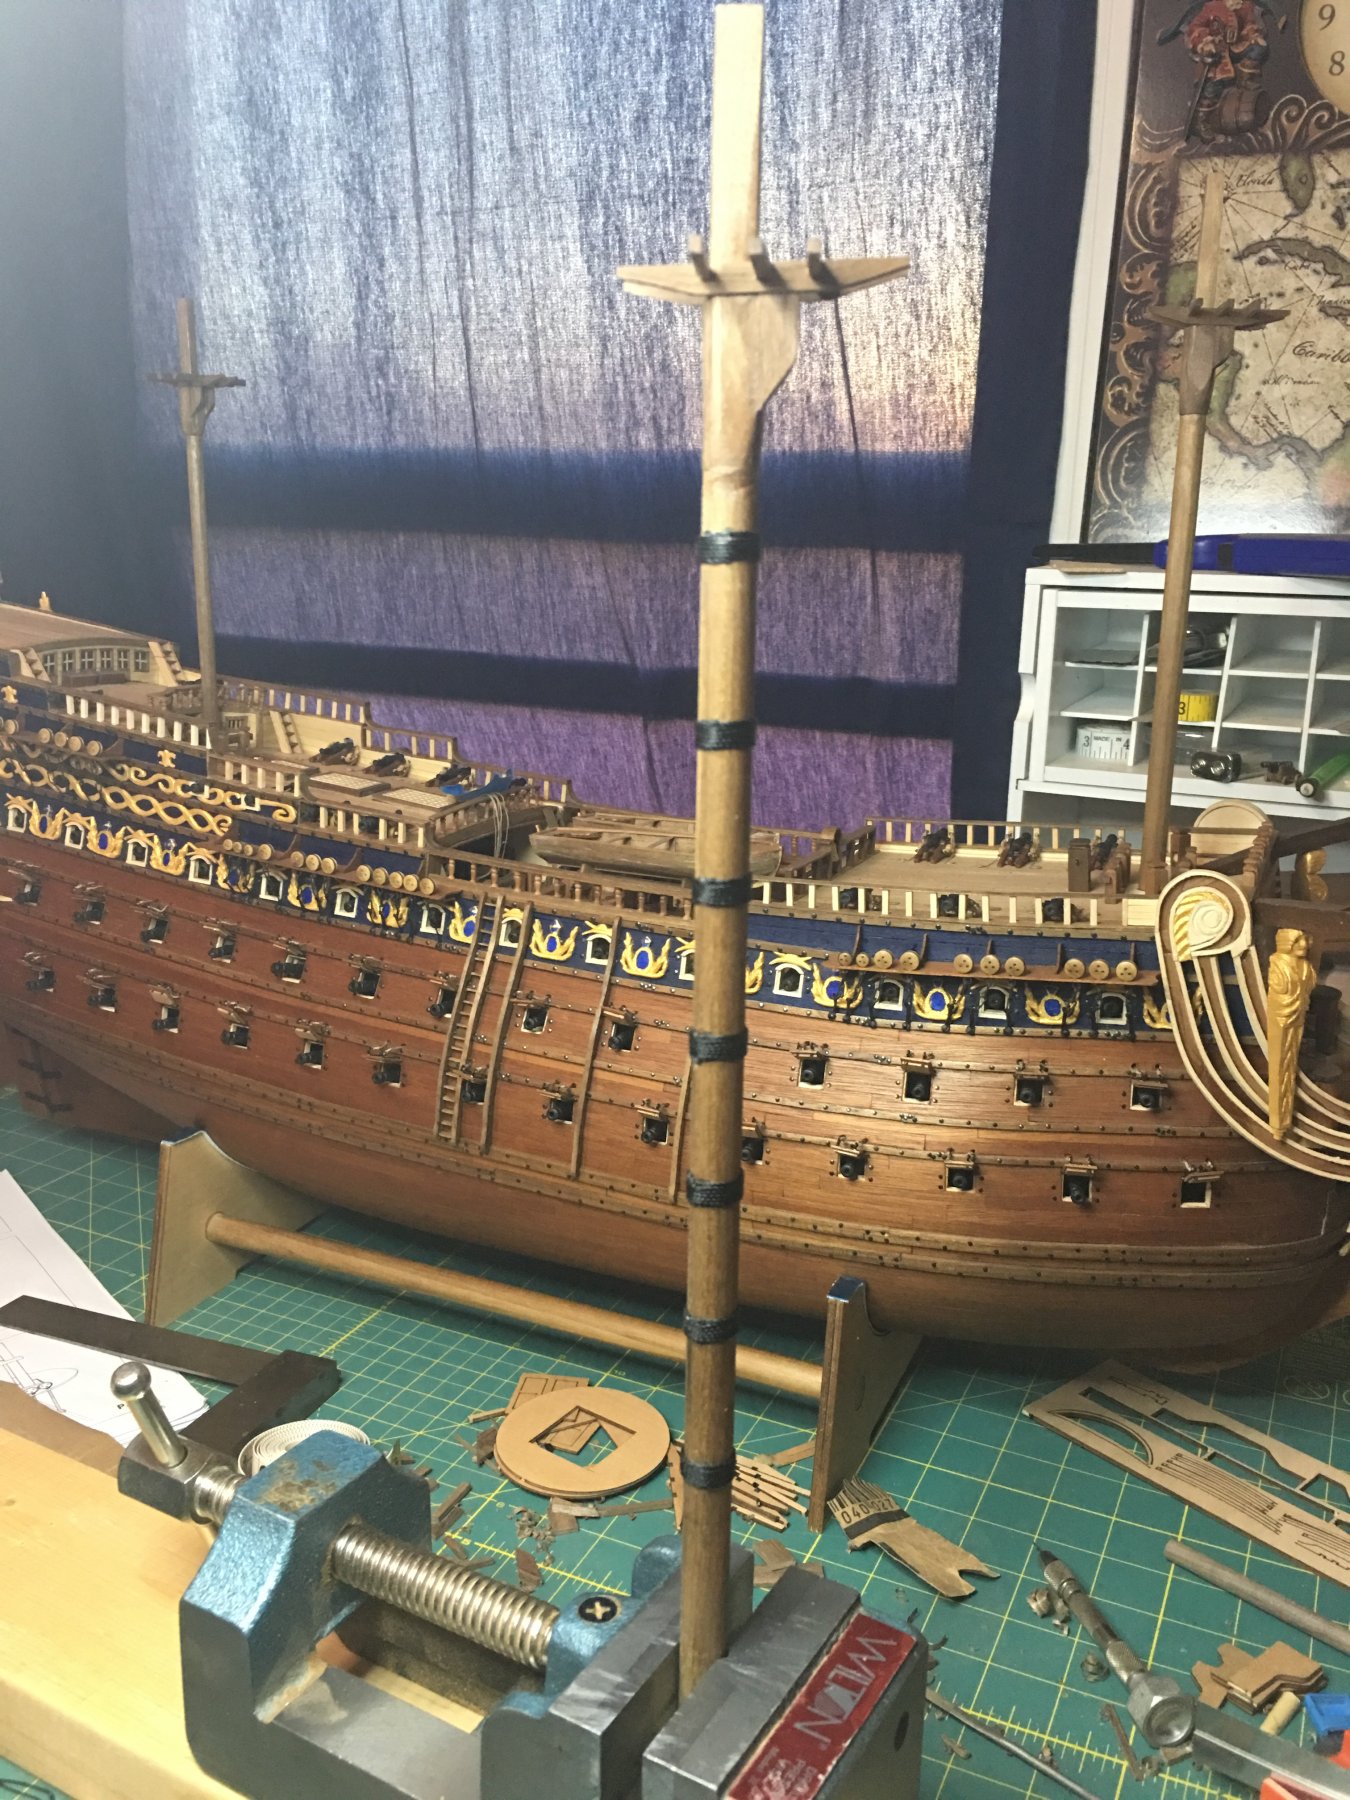
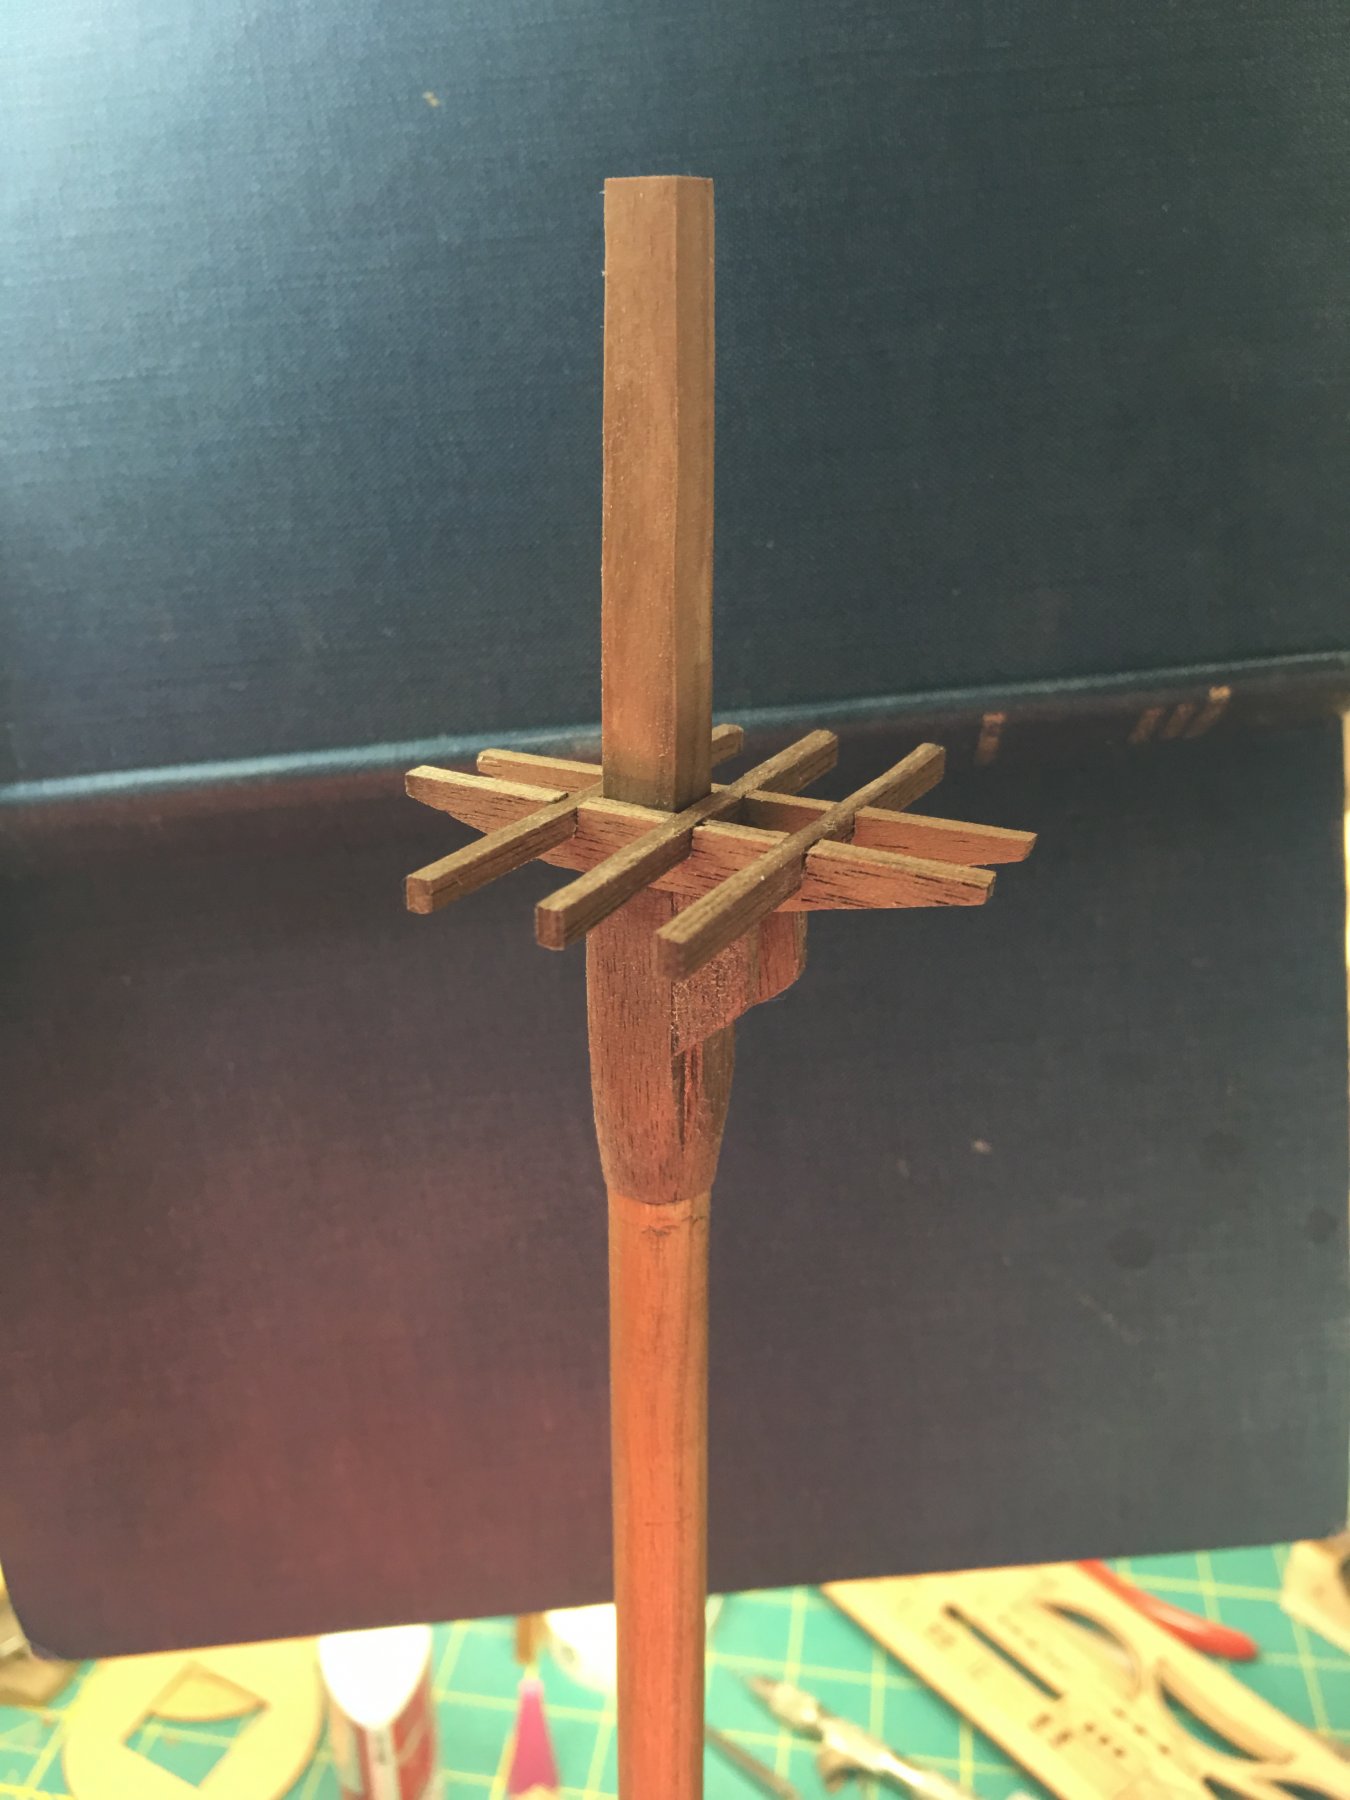
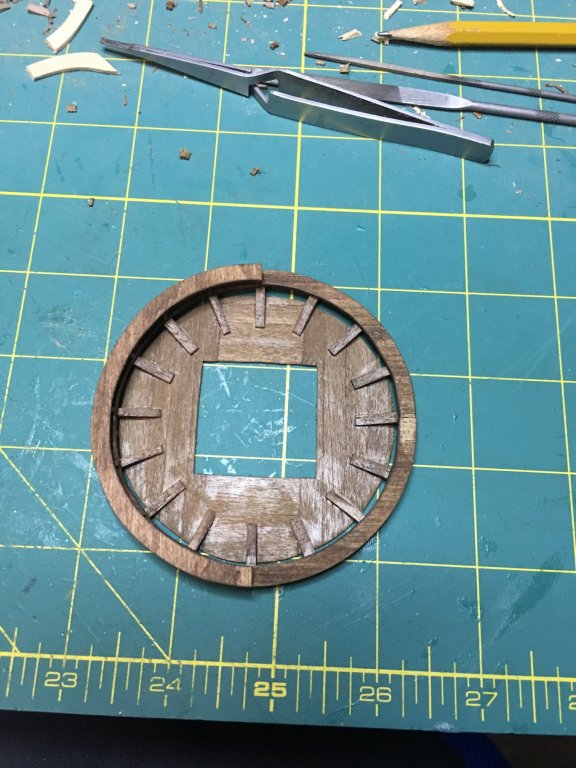
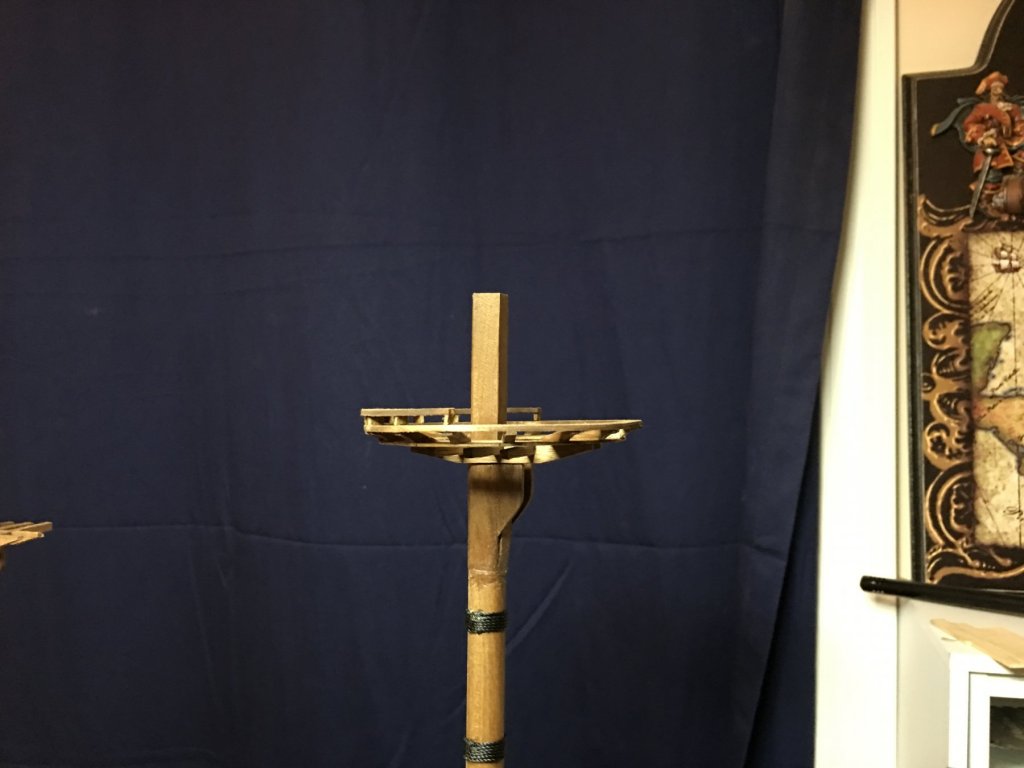
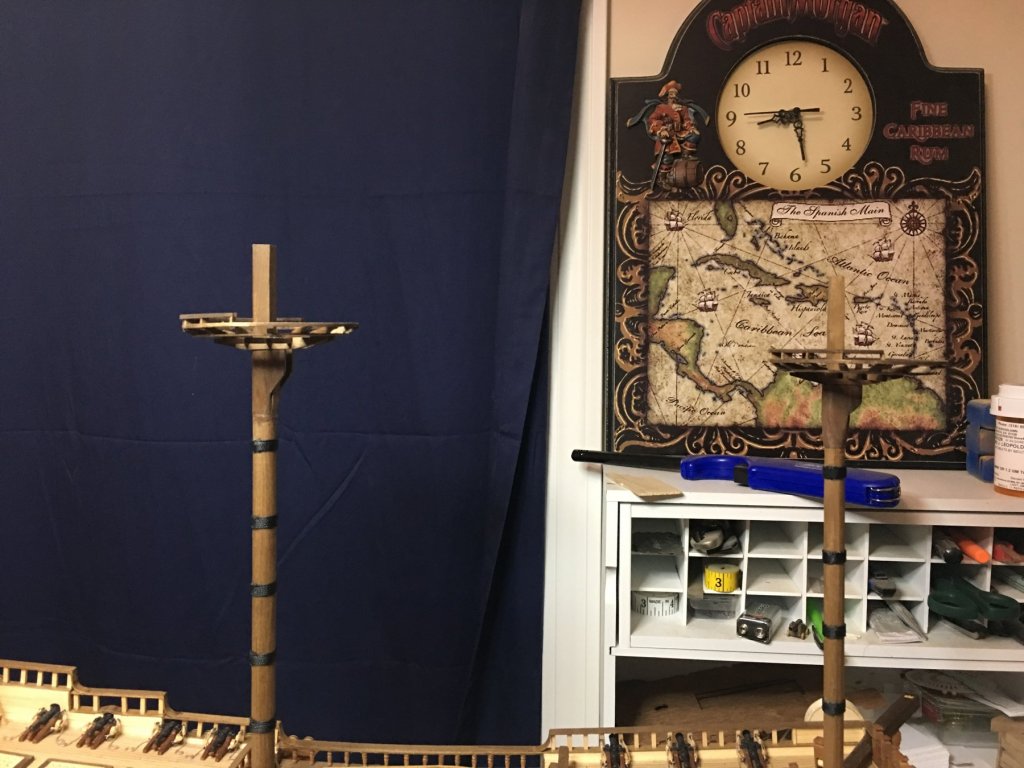
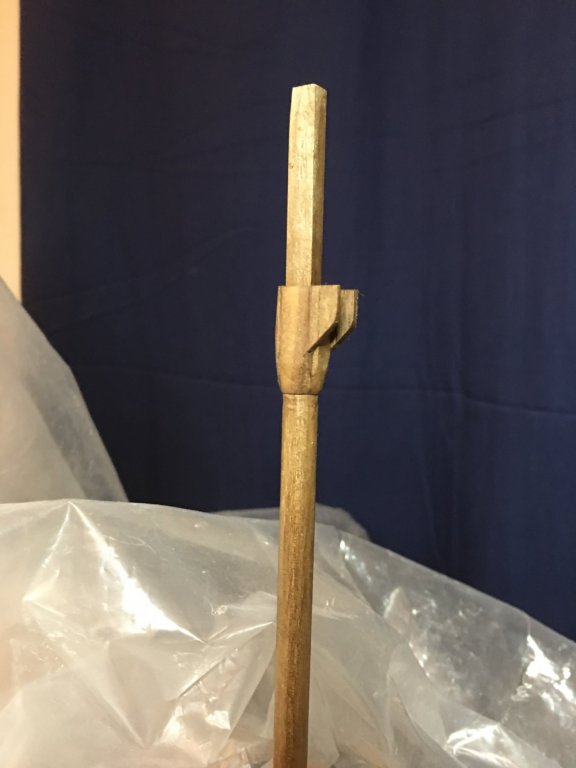
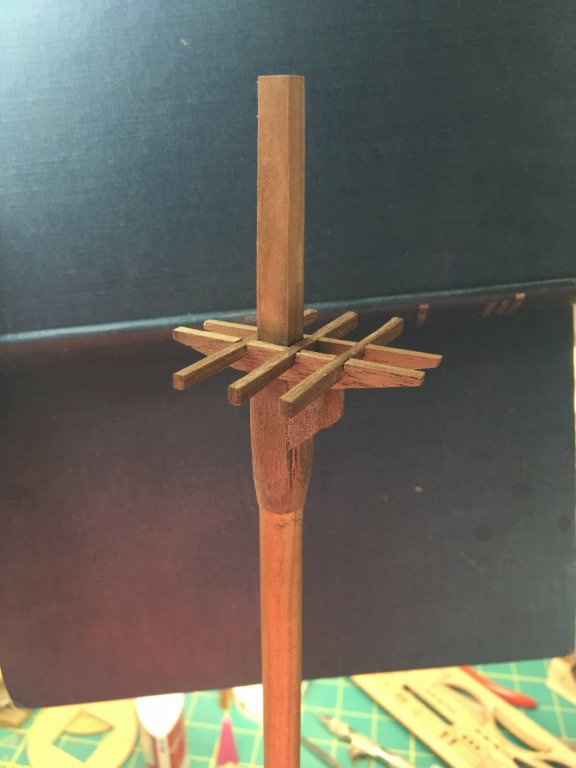
Cheeks, trestle-trees and cross-trees in place. I will place the woldings and any blocks that secure to he lower masts next and then work on the tops will start.
- 961 replies
-
- 13
-
-
Small update. I got the masts cut to length and squared off the heads. Now I am working on the cheeks for the tops. Would have have done more but my dogs have demanded my attention to make up some play time now the the weather is nice after the cold and wet winter.


-
Great book find, and what a stroke of luck on the picture! Hopefully it will lead you to a clearer image or even the actual painting itself. Nice work on the cannons. Those do look sharp indeed.
- 2,634 replies
-
- 3
-
-
- heller
- soleil royal
- (and 9 more)
-
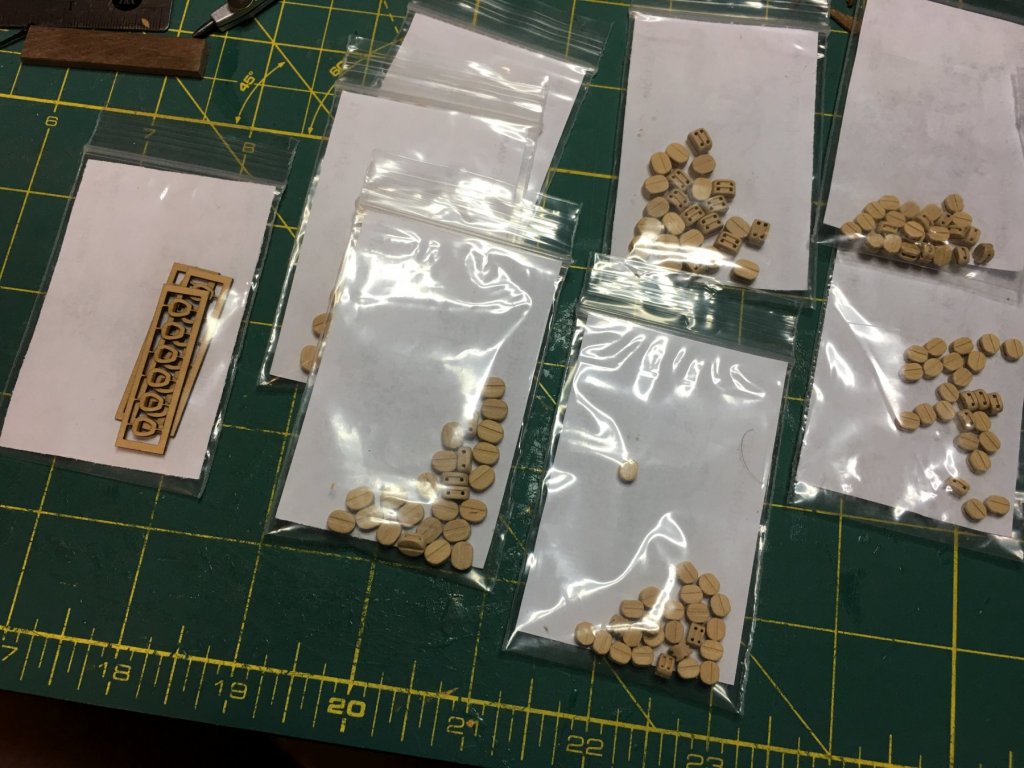
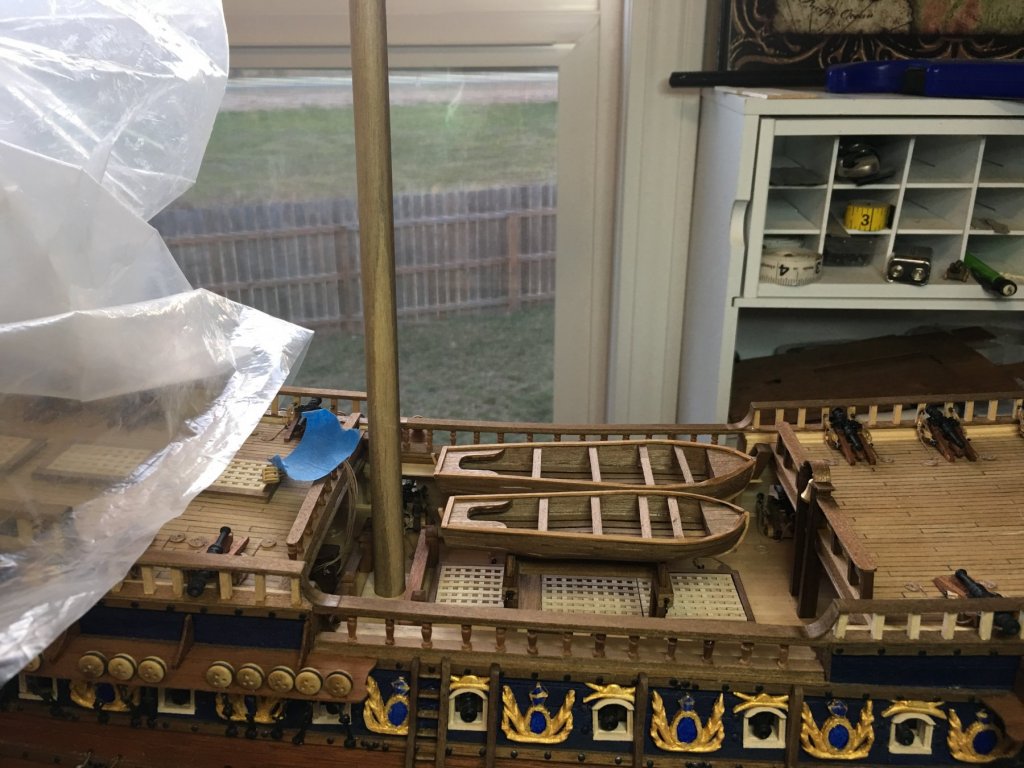
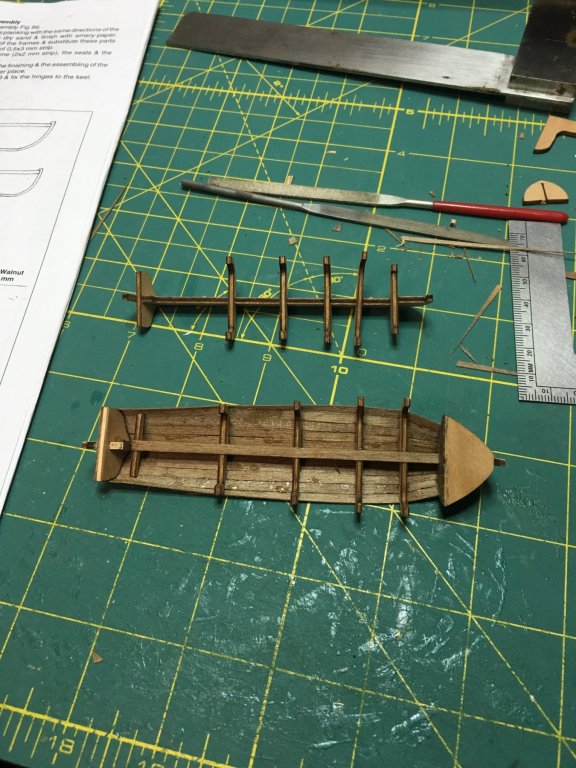
Thank you all for he nice words, well wishes and of course the likes and visits. I am feeling better and I think this round is finally ending. I have a follow up with my doctor soon to find out more. I did use the kit supplied materials to build the boats. Not overwhelmingly happy about the end results. The frames were not cut very well and with the wide spacing and extremely thin provided planks, the overall condition leaves more to be desired. Fortunately, I mostly just need them as a placeholder for now. I will not secure the cradles nor the boats till the rigging is further along and nothing else needs to go down to the bits below. With that time available to me, I am going to look into seeing if here is a way to improve the current boats and if not, then I will probably just fabricate new ones. So up next will be he start of mast building. I will start the lower masts up to the tops.
-
While Royal Louis is waiting for my health to improve so I can begin the sanding/filling and more sanding work to smooth out the hull, I have decided to start construction on the ship’s boats for Soleil Royal. Figured these would be a “simple” enough project to attempt right now.
- 961 replies
-
- 12
-
-
Looking at pictures of the Vasa and her lids, it appears that the lids were made up of two layers of multiple boards that lay perpendicular to each other. The outer layer was a thicker set of boards while the inner was a thin layer. This thin layer appears to act as connecting plates to hold the outer boards together. The large quantity of nails would be used to prevent and sliding or twisting of the lids due to water, heat, cold etc., to maintain the tight seal required of those lids. Any decorative figures would be an addition to this. How those decorations are attached, I do not know. My guess is that there were probably some sort of nail, peg etc., that was used to secure the carving in place and then caulked and painted over to blend in with the carving itself.
- 2,634 replies
-
- 2
-
-
- heller
- soleil royal
- (and 9 more)
-
After a nice vacation with the admiral followed by the past few days of being sick, I have managed to get in some more build time and now have the starboard side planked as well. Next, sanding and smoothing of the hull. A lot of work to do in that regard.
-
It looks like you have an invasion fleet forming! They are looking great!
- 73 replies
-
- 1
-
-
- mediterranean
- galley
- (and 1 more)
-
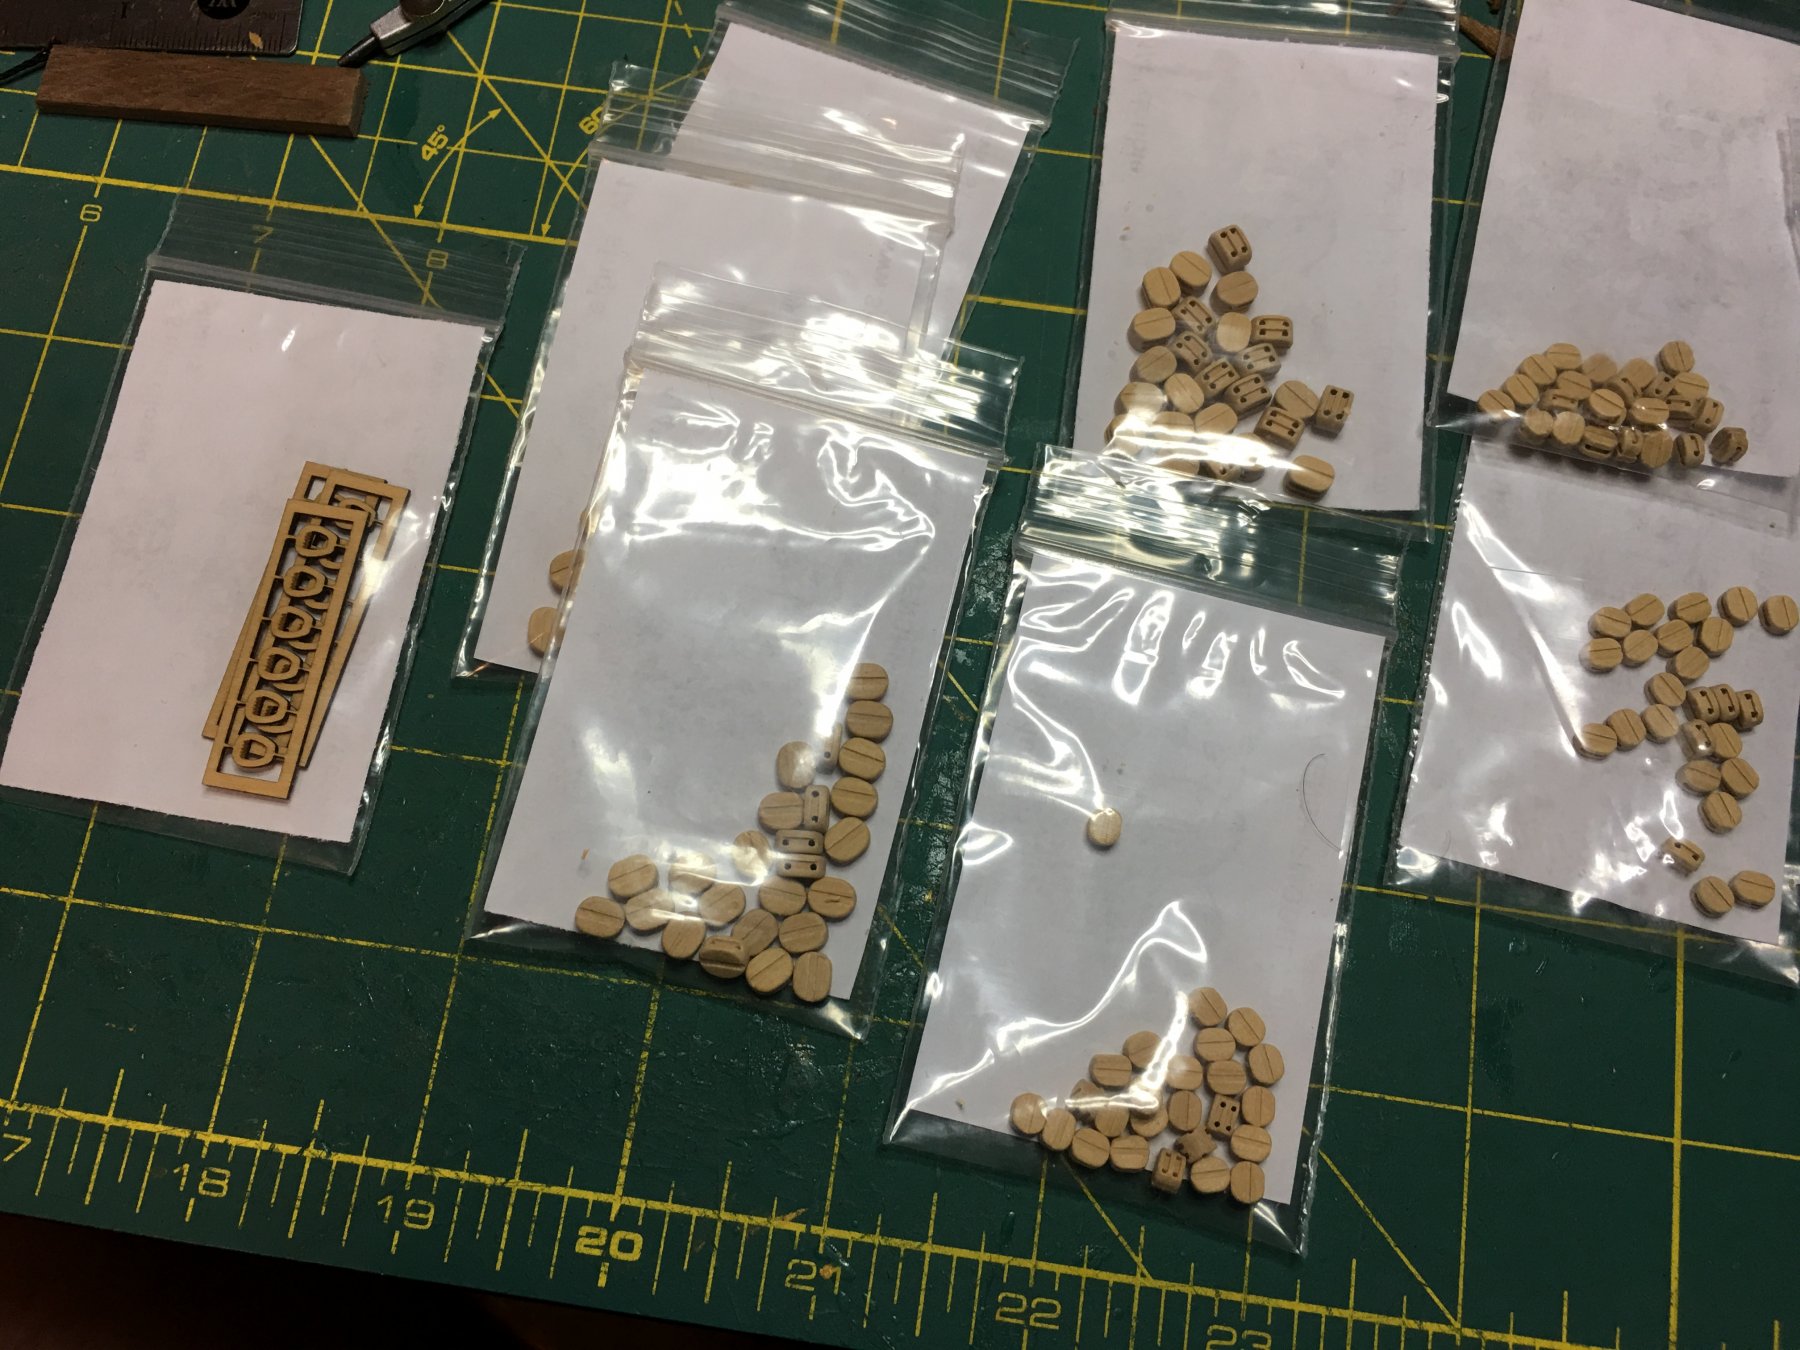
Glad to hear your move went well. Always good when that is over with, though unpacking can also feel like a never ending chore. I would agree that from what I have seen on the 17th century ships, especially the first rates, the inner lid decorations appear to be carved. One thing to keep in mind when looking at the spacing is that on an actual 1:1 scale, these carvings may only be 1-2 inches thick and therefore not a concern for the space of the gun barrel which was often stored with the barrel secured in the upmost elevation and lashed to the bulkhead to prevent movement. On a model however, we are looking at scales of 1:77, 1:87: 1:90, 1:100 etc., 1-2 inches can be a .5mm or less. Therefore, the carvings are often made oversized in order to have them show any level of detail. Sometimes scale accuracy gets sacrificed for artistic expression. (Treenails are a prime example of this)
- 2,634 replies
-
- 5
-
-
- heller
- soleil royal
- (and 9 more)