MORE HANDBOOKS ARE ON THEIR WAY! We will let you know when they get here.
×


EJ_L
-
Posts
2,244 -
Joined
-
Last visited
Content Type
Profiles
Forums
Gallery
Events
Everything posted by EJ_L
-
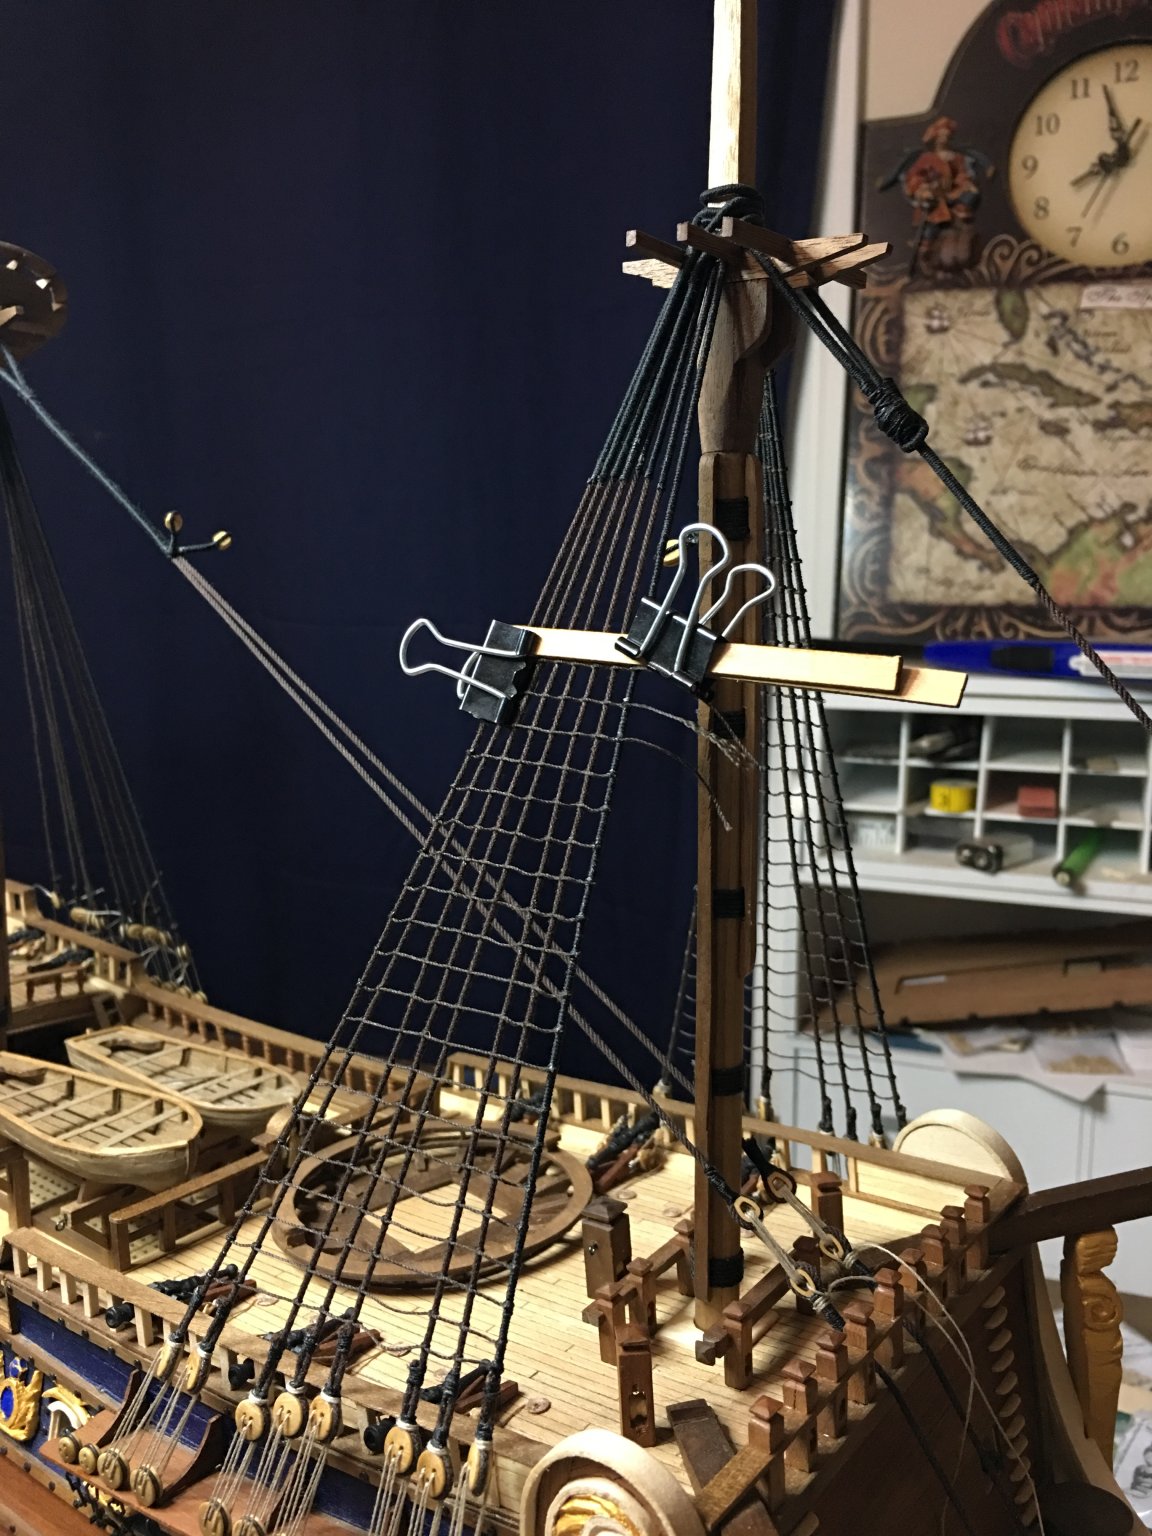
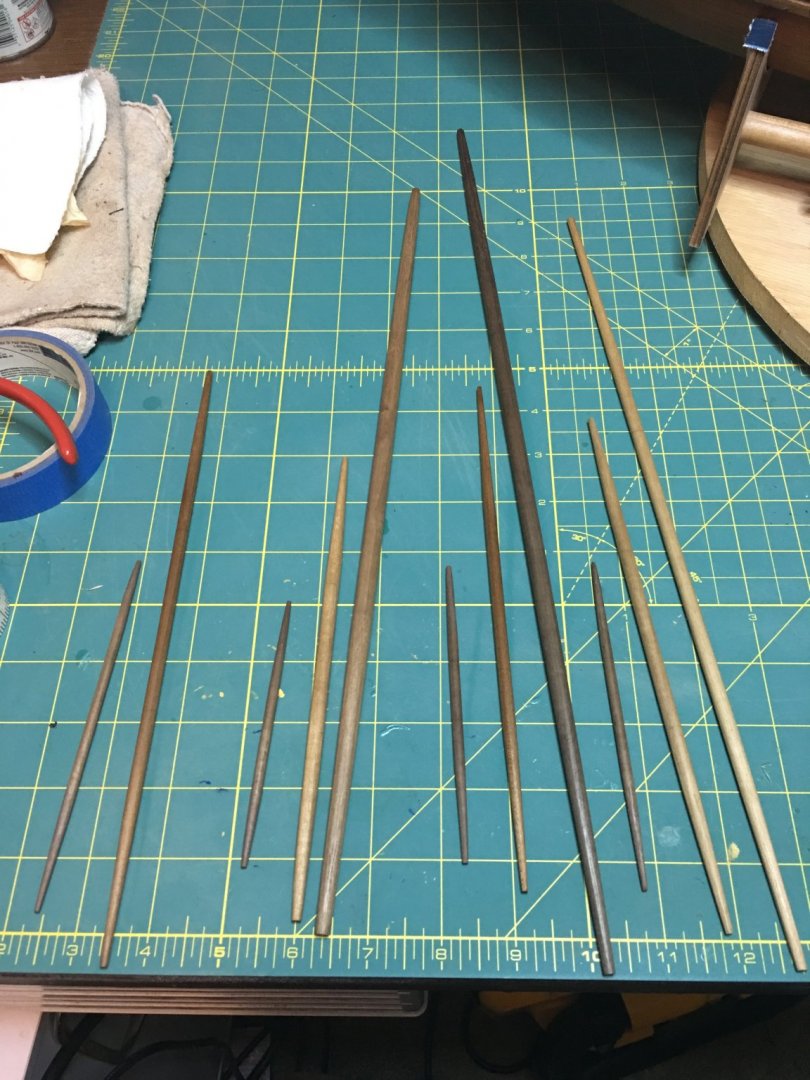
 Thank you all for the kind words and likes. O.C., shaping the yards usually is a nice break from detail work into something simpler however, this time I ran into an annoying snag. My chuck on my mini lathe had one of the jaws get jammed up with some small bits of metal shavings. After several attempts to clean it out, I was forced to take the chuck apart and give it a thorough cleaning. Good in the long run but, not what I wanted to do at the time. I would have simply switched to the big lathe however, I had both chucks in use on it as well for a project that I did not want to dismount as alignment was critical. So I fell back on hand shaping. Broke out the trusty Lie-Nielsen hand plane to taper the ends and then sanded them smooth. Took longer but, got it done. Will add the various details to them as I get closer to needing them. As for the ratlines, I actually don't mind tying them as it is really a very simple action. It's the several thousands of times you have to repeat tying a clove hitch that wears you down. Clamping the shrouds helps to keep the spacing and alignment and a good set of magnifying glasses combined with a couple pair of needle nose tweezers make the job go smooth. The only thing left is lots of patience....
 -
Congratulations on a huge milestone being achieved! She sure looks good standing proud.
- 2,669 replies
-
- 2
-

-
- heller
- soleil royal
- (and 9 more)
-
Very nice. Padlocks are very cool indeed and something rarely seen modeled. Well done!
- 131 replies
-
- 3
-
-
- santa lucia
- panart
- (and 1 more)
-
Just a small update. Yard construction has started. Needed to get them shaped and cut to length in order to measure for sails. Trying to finish the “dirty” work and get all the wood parts created and ready for rigging.
-
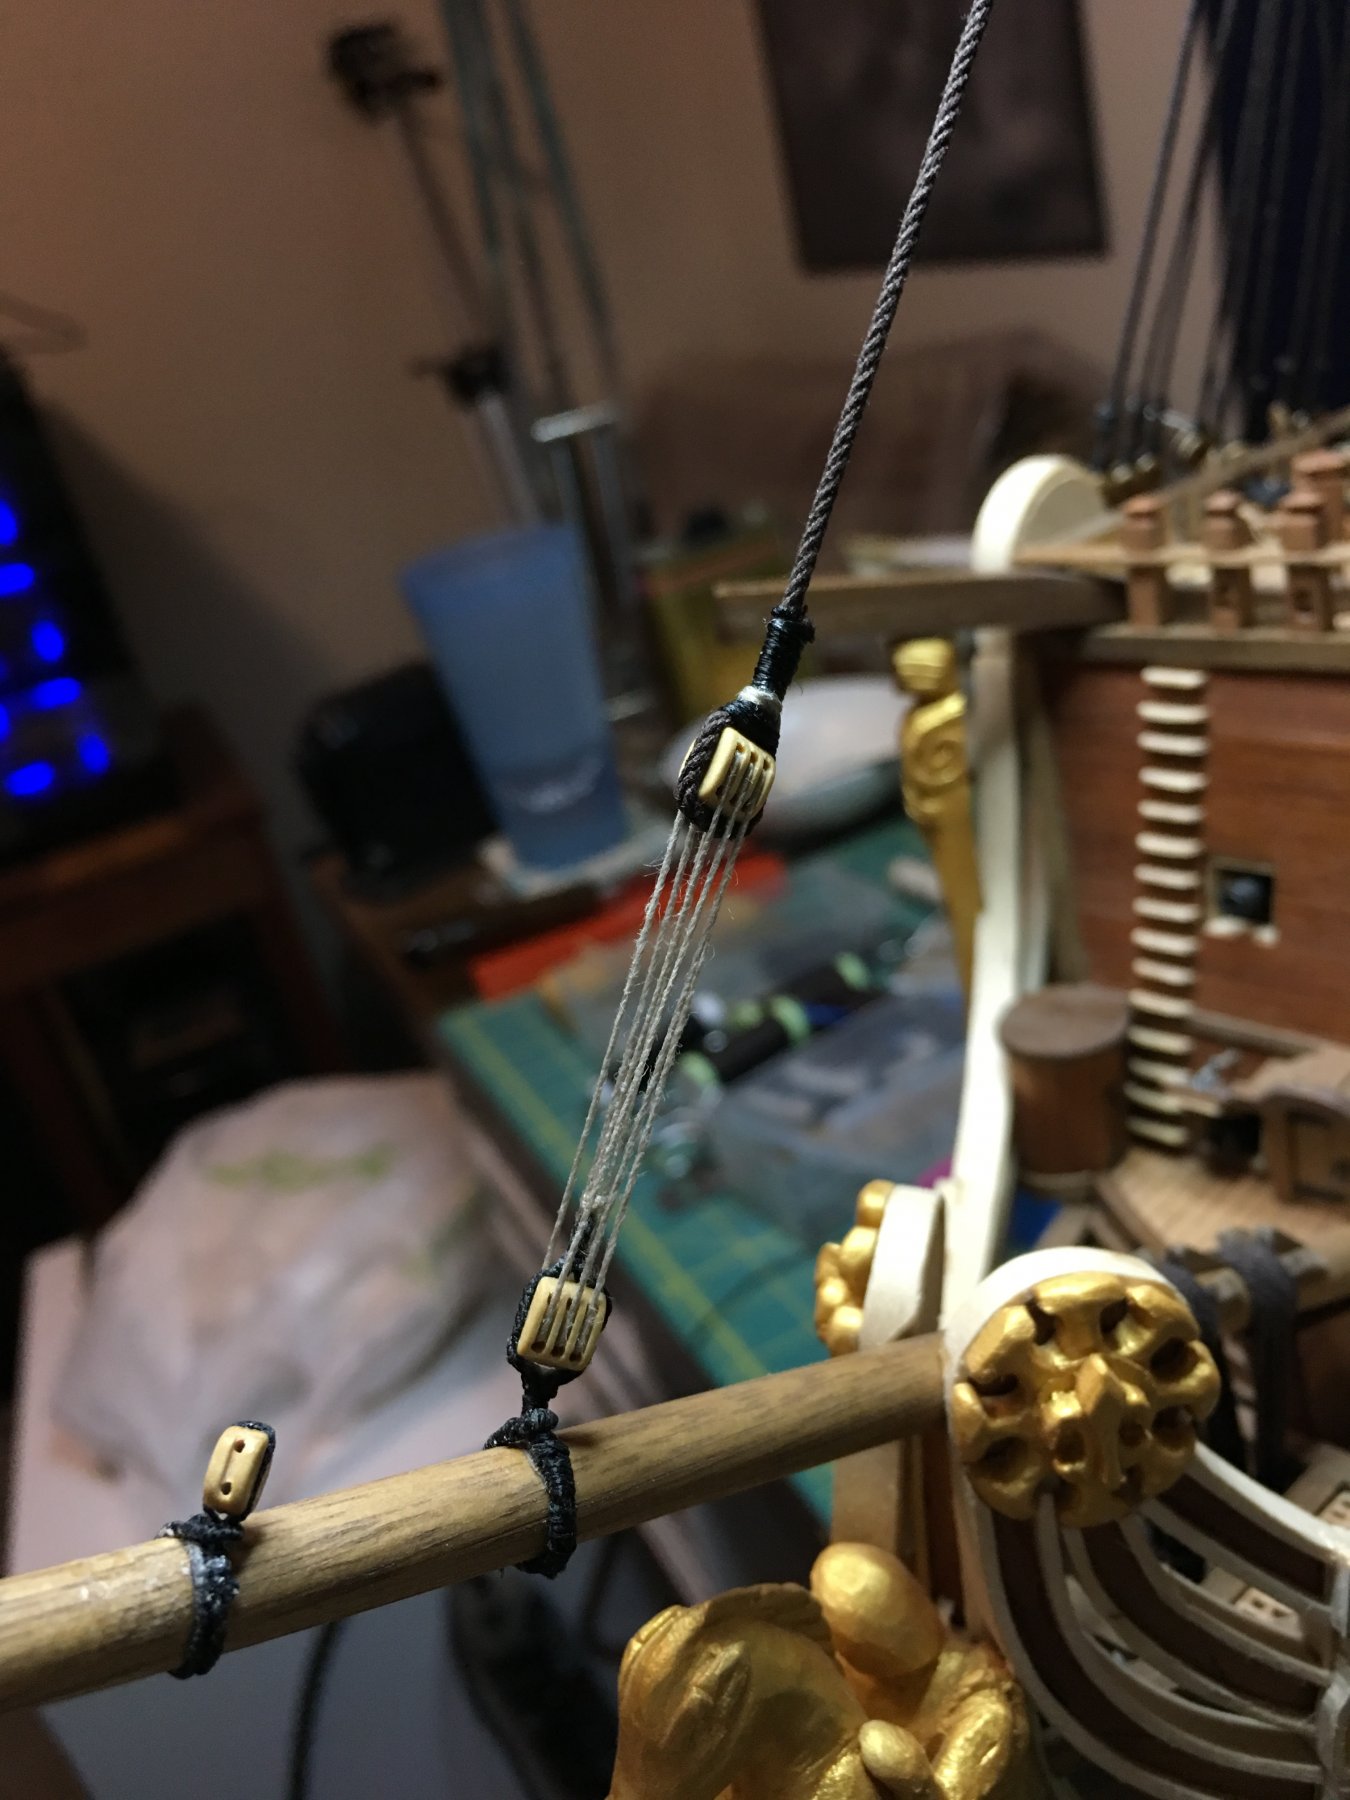
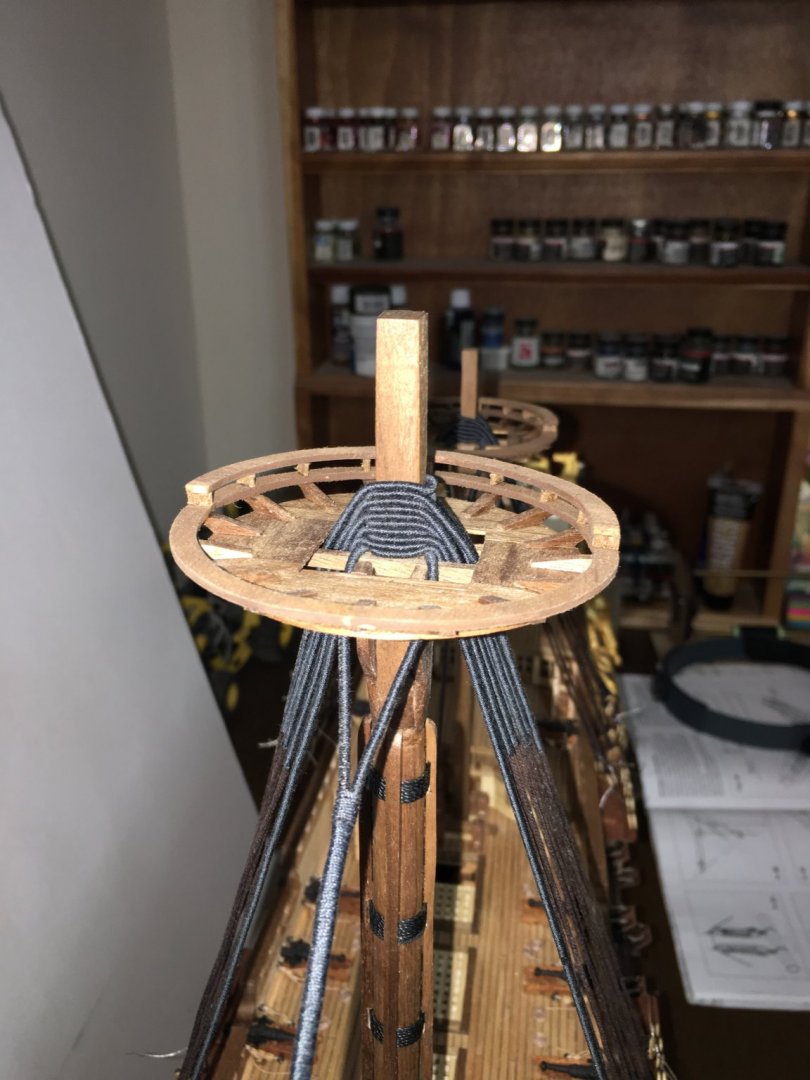
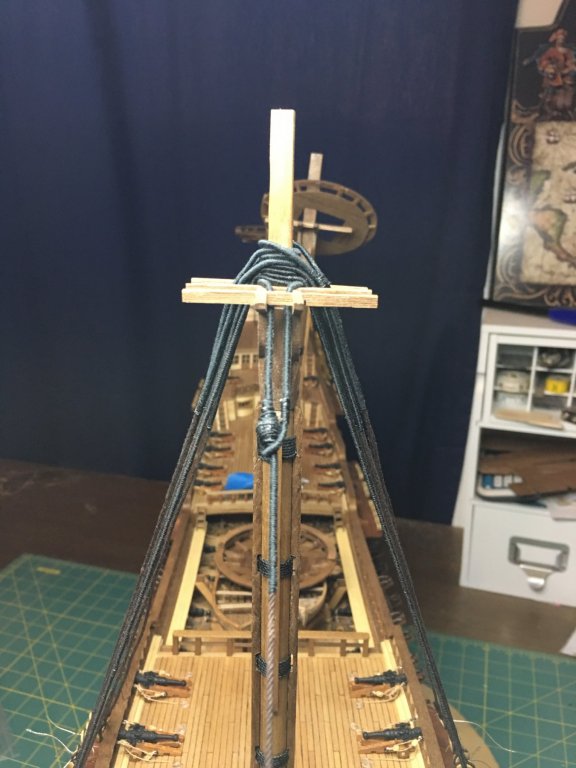
Thank you Michael. It is indeed time consuming though I have to admit that Chuck's serving machine has made it faster and far easier than trying to do it by hand. On that note, I know that the serving line would normally be the same color as the shrouds but, I wanted to accent this detail for better viewing of my friends and family who would not know to look for it otherwise.
-
Hi Peter! Looks like you are off to a good start on you Vasa. I love building and watching others build these large models so I think I will pull up a chair and join you on you journey. Good luck and I look forward to seeing how she turns out.
- 61 replies
-
- 1
-
-
- billing boats
- vasa
- (and 1 more)
-
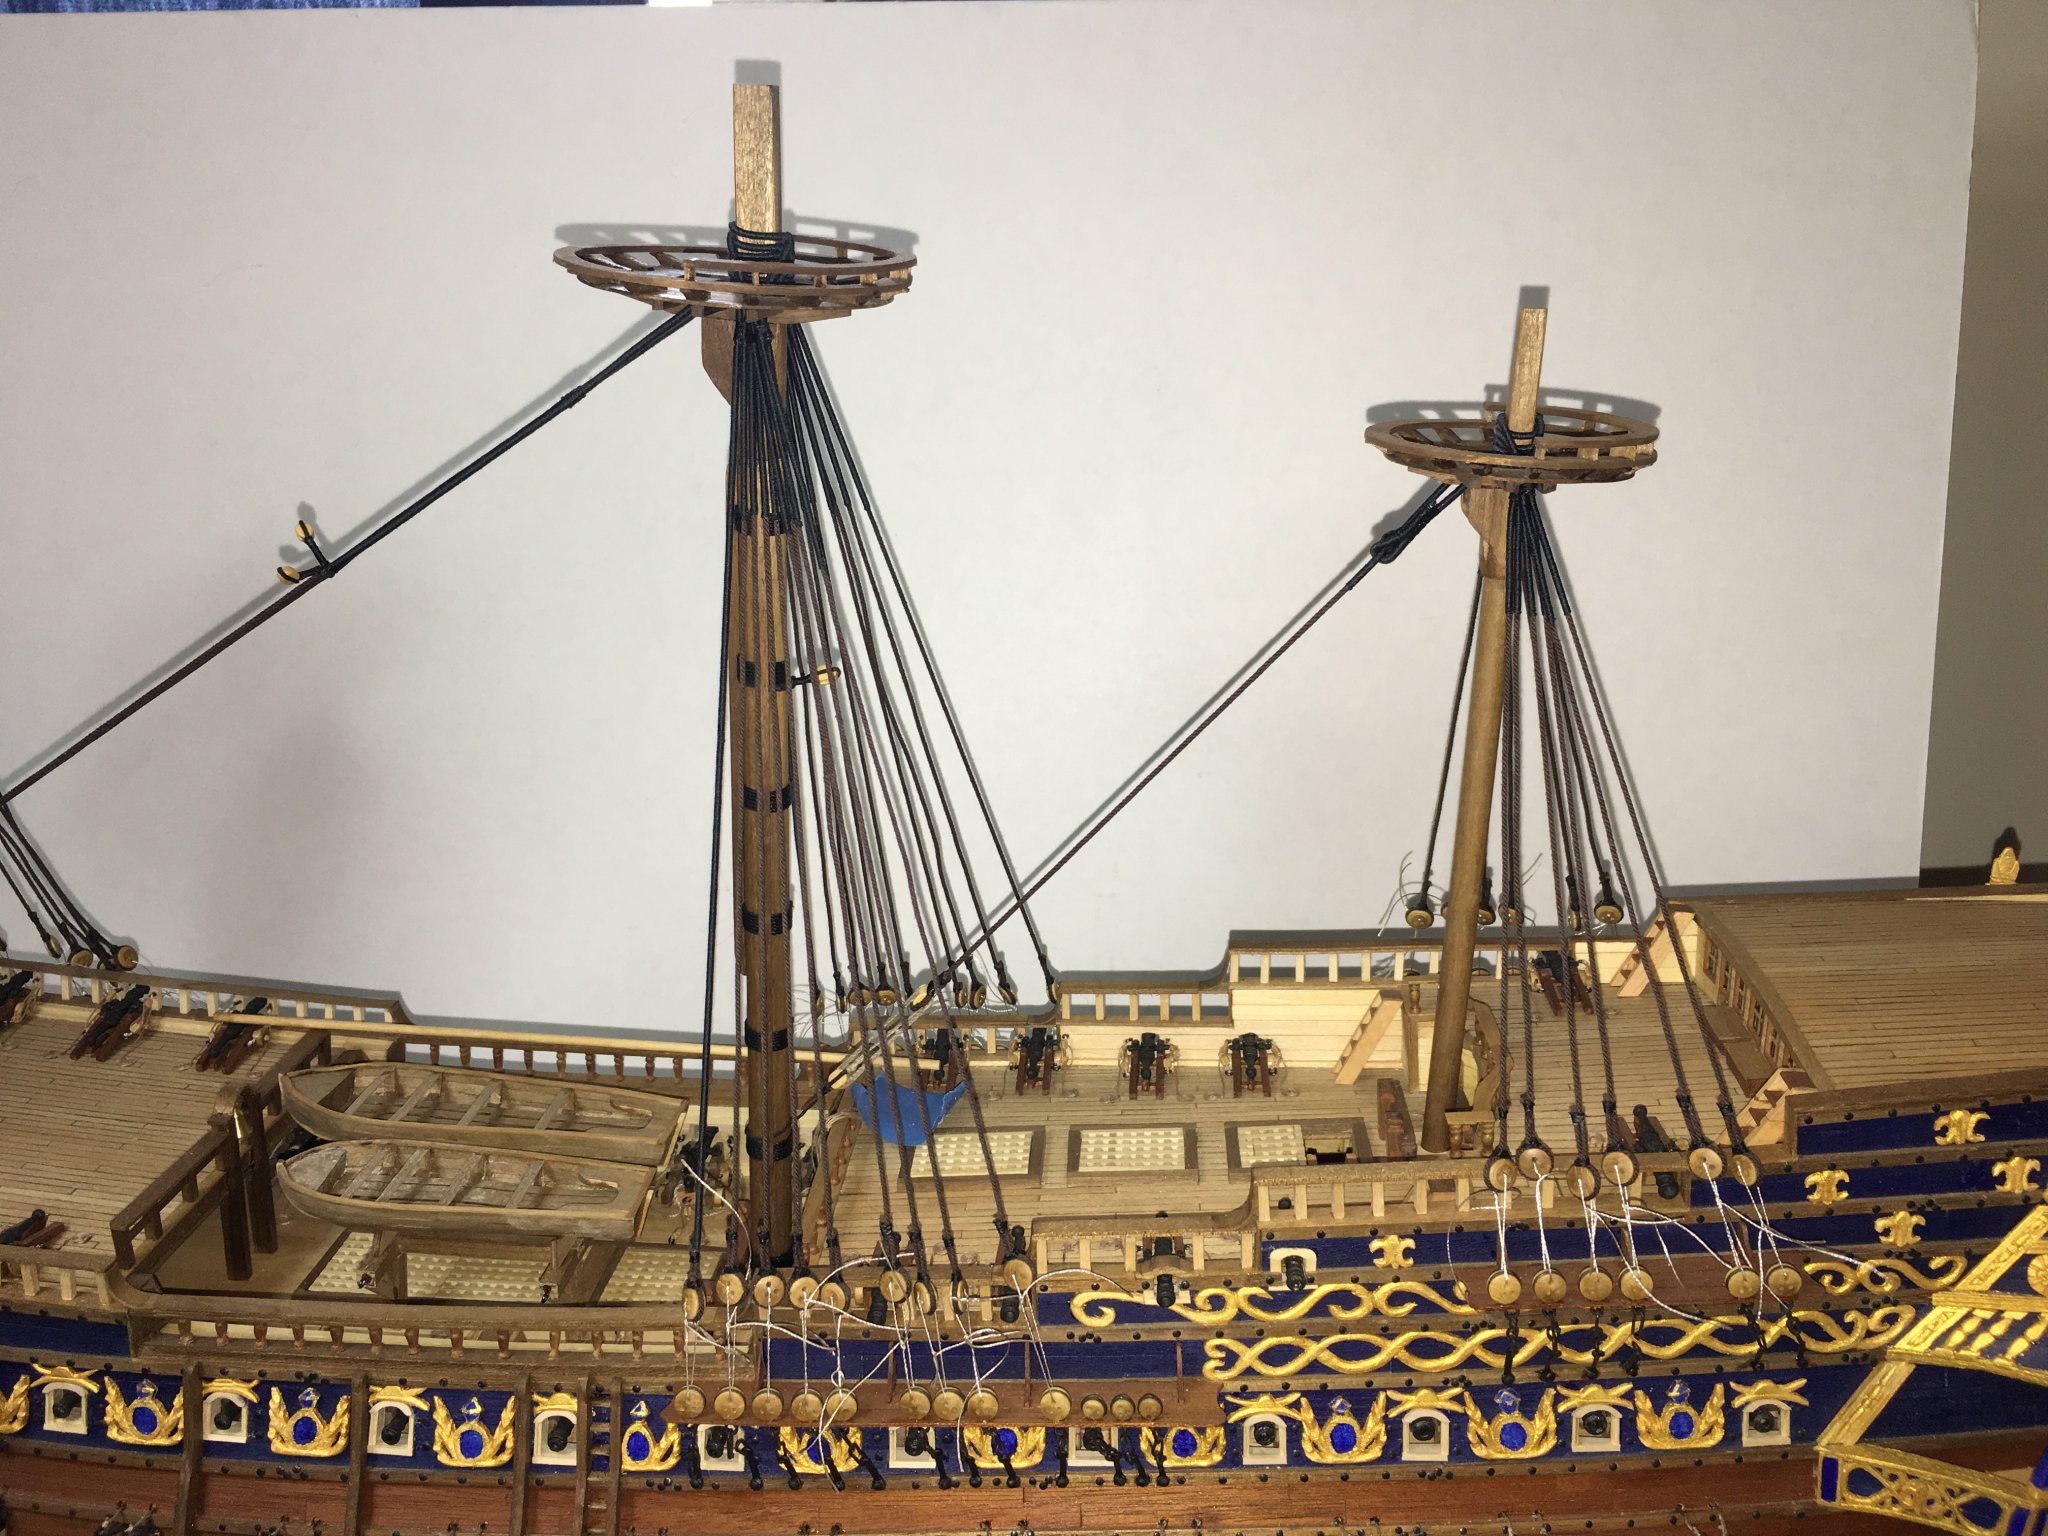
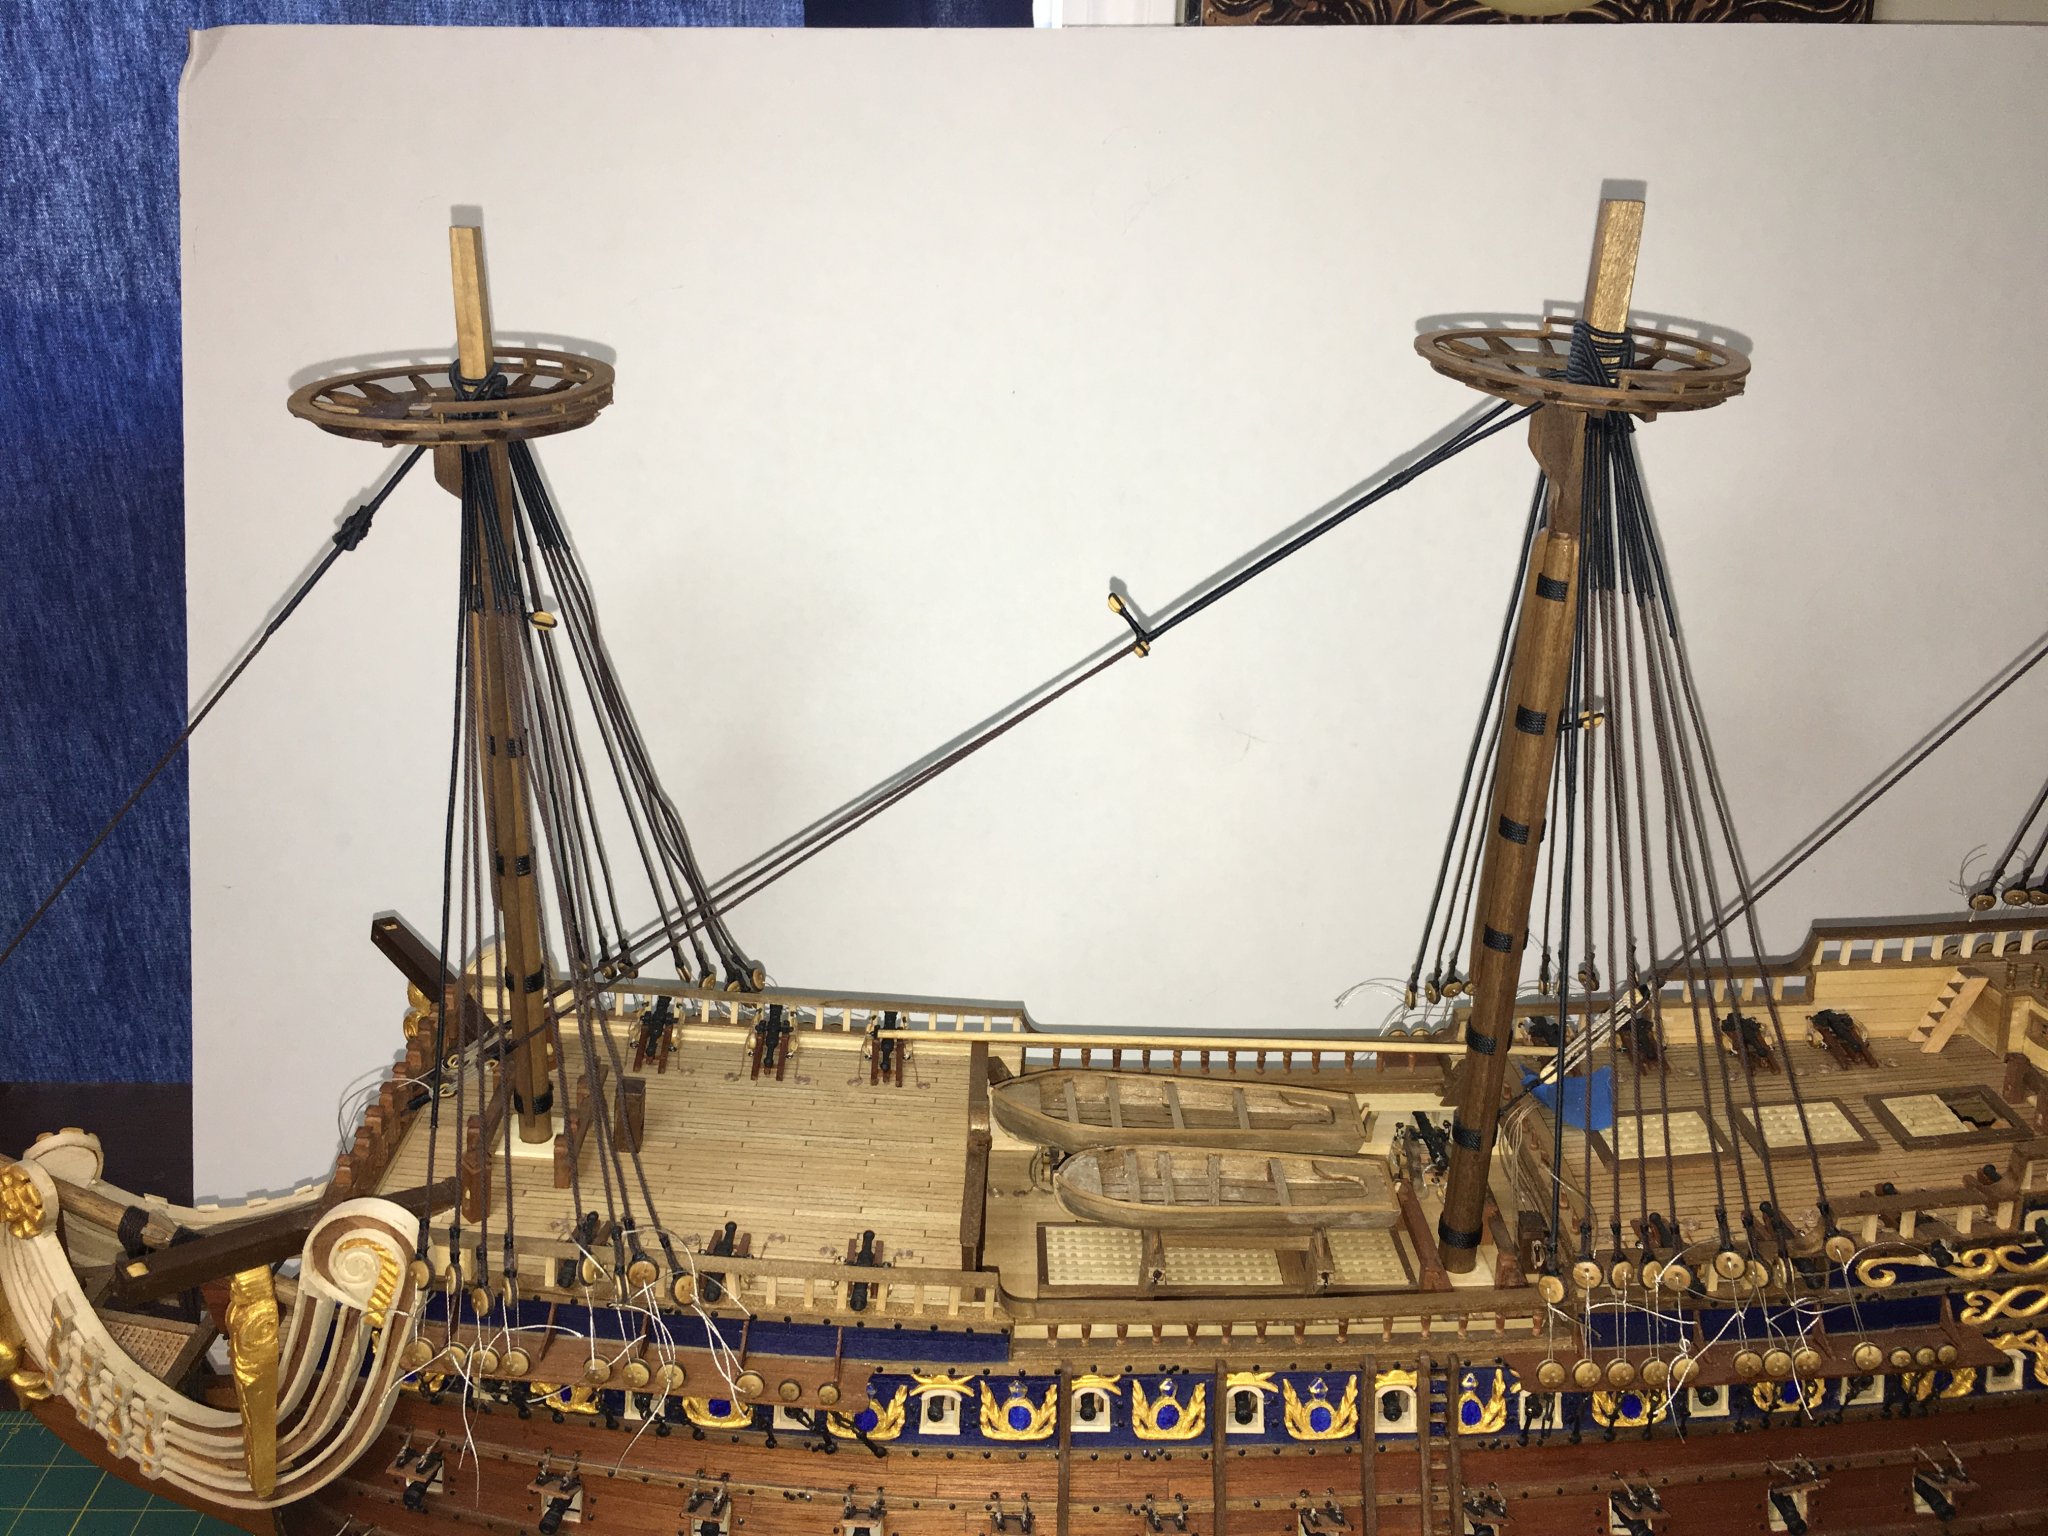
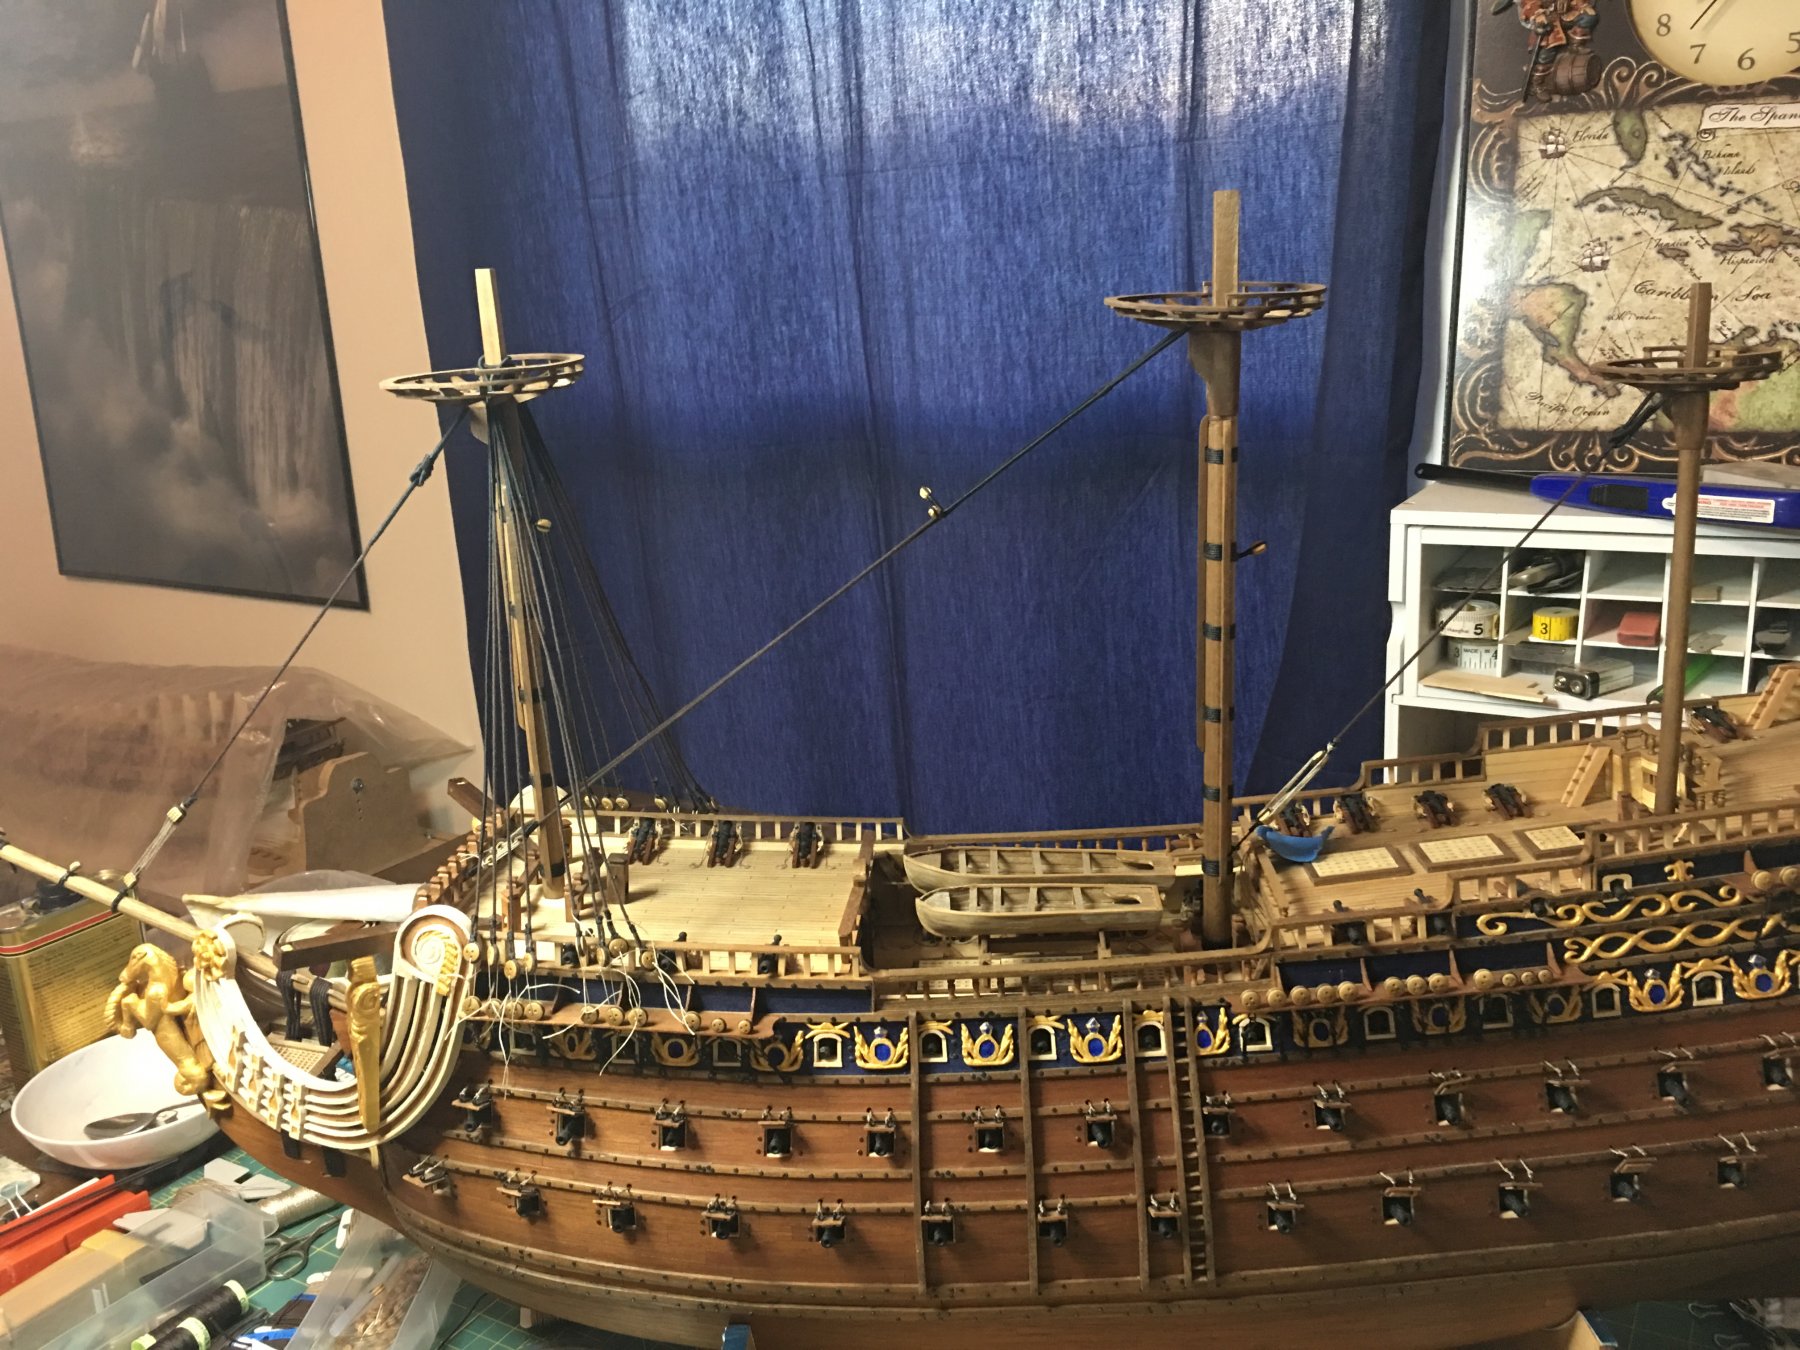
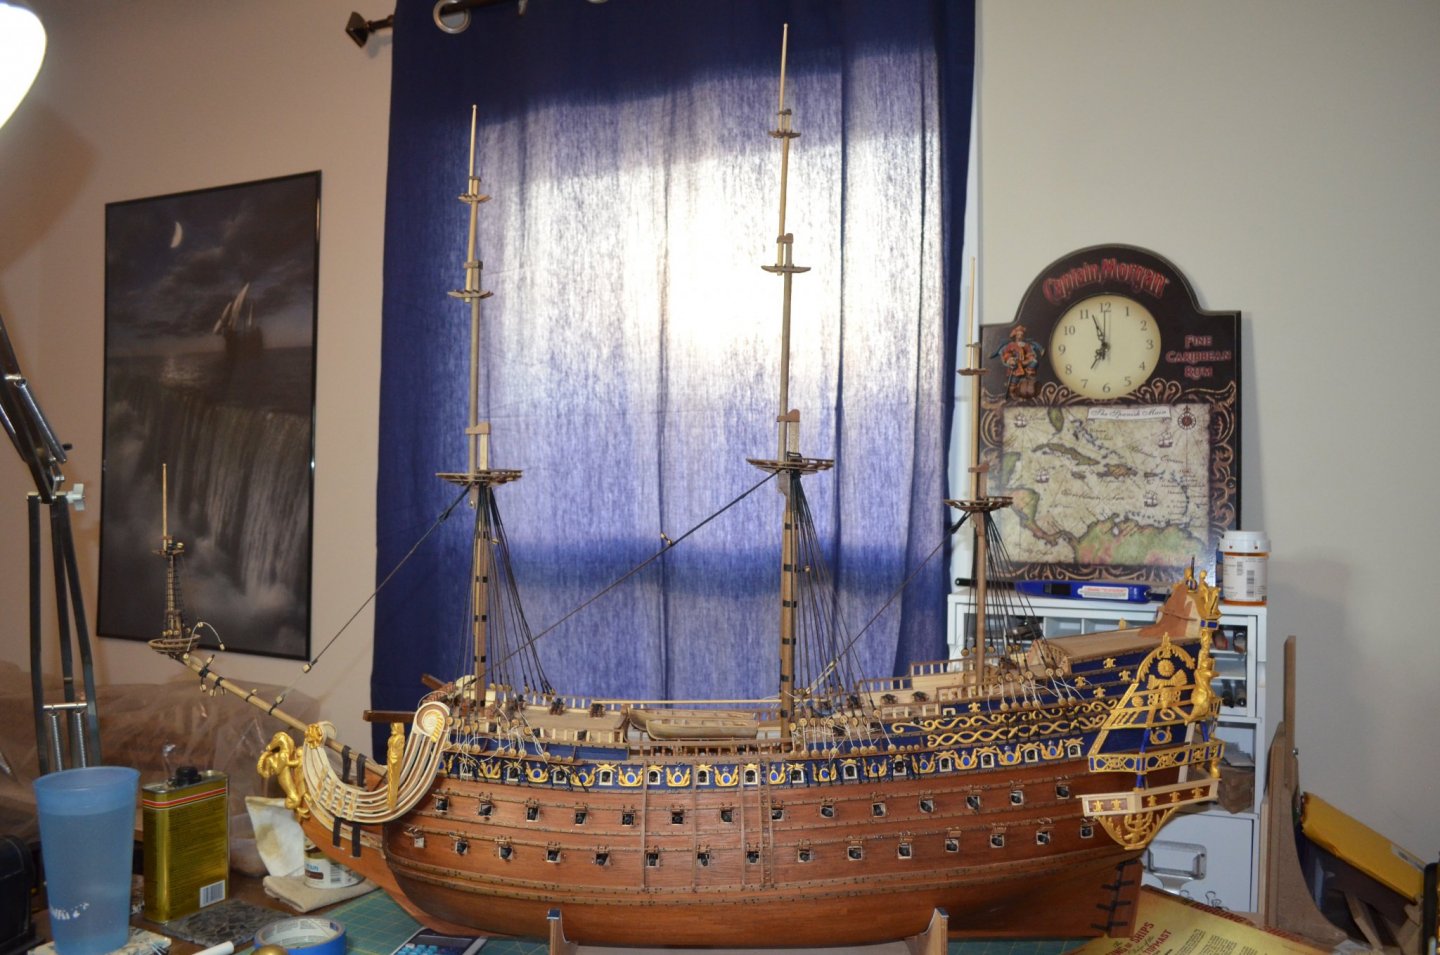
Thank you all for the nice words and likes. This is always one of my favorite milestones on a build. To see her full height, even if it is temporary, really drives home the awesome size of these ships. Running the numbers on her, from keel to tip of the main mast she would be around the equivalent of a 19-20 story building. Next up, I will disassemble the masts and apply the wood finish to the individual parts. While that work is underway, I will start to cut and shape the yards. I bought some muslin cloth a few weeks ago to attempt to make sails, most of which will be furled but, depending on how they turn out, I may go ahead and set the top sails. While I've been kicking this idea around since the beginning, I have reached the point in the build where I have to make a decision so I make sure to rig her accordingly.
-
Great tip on the fishing line indeed! It does appear to make great scale nails. As always, your work is fantastic!
-
Been building masts and have now topped out S.R.'s final height. None of them are glued in place yet, just dry fit and will be coming back down soon to allow for the rigging to continue. She is no doubt a very large model.
-
Breathtakingly beautiful! All of those long hours of tedious detail work and testing of paints have really paid off. I raise my glass in salute to you my friend!
- 2,669 replies
-
- 5
-
-
- heller
- soleil royal
- (and 9 more)
-
It is a large model indeed. My own is similar in size and now that the masts are going up and I have to work above my head, the full size is really becoming impressive.
-
Informative as always! I wonder too if some of the discrepancies could be contributed to concept vs. actual? Were either the drawing or the model an artistic concept for presentation and the other an actual representation of the ship after construction? The subtle changes in decoration, window patterns, number of windows, alignments etc., could easily be accounted for in this case. There could also be the human error of remembering details wrong. While these people were indeed masters of their art, as we all know, models and even drawings/paintings take time to build. It would not be too far off base to suppose that one was started while the ship was in port or close enough for the artist to view however, it may have left before the project was complete leaving the artist to reference notes, memories or other similar vessels for the details. Any one of these could easily result in the inconsistencies we are currently faced with. Marc, as you have said repeatedly, all we can do is make educated guesses into what these vessels looked like. I think that with what resources are available to us, those educated guesses can be supported with reasonable facts and that as long as we stay withing period appropriate methods, an accurate representation of the ship will be created. I am still thinking that I will attempt to build a model of the Monarque as one of my next builds. In doing so, I know that I will have to have a lot of guess work into her details but, much as you have been doing on S.R., I think that I will be able to recreate a reasonable representation of her, with some liberties.
- 2,669 replies
-
- 2
-
-
- heller
- soleil royal
- (and 9 more)
-
Beautiful indeed! I understand fully the frustration of rigging lines that won't hold tight. I'm getting into that battle more and more on S.R.. Hopefully, like you said they will tighten back up when the humidity decreases. Even if they don't, she still looks very nice.
- 122 replies
-
- 1
-
-
- independence
- privateer
- (and 1 more)
-
Your build is looking very nice and knowing first hand the size and difficulty of these 1st rate ships, and that this is your first build, I would tell you that you should indeed be very proud of how she is turning out. Do not get too hung up on flaws, either the kits or your own. I've seen master modelers complain about flaws in their own work. Use them as learning points for the next build. How would you do it differently and such. The varnish you have used is beautiful. I'm looking forward to seeing how it all comes together with the paint.
-
I will echo the "that is terrible news" statements. I hope something works out positively for you. Best wishes and prayers to you.
-
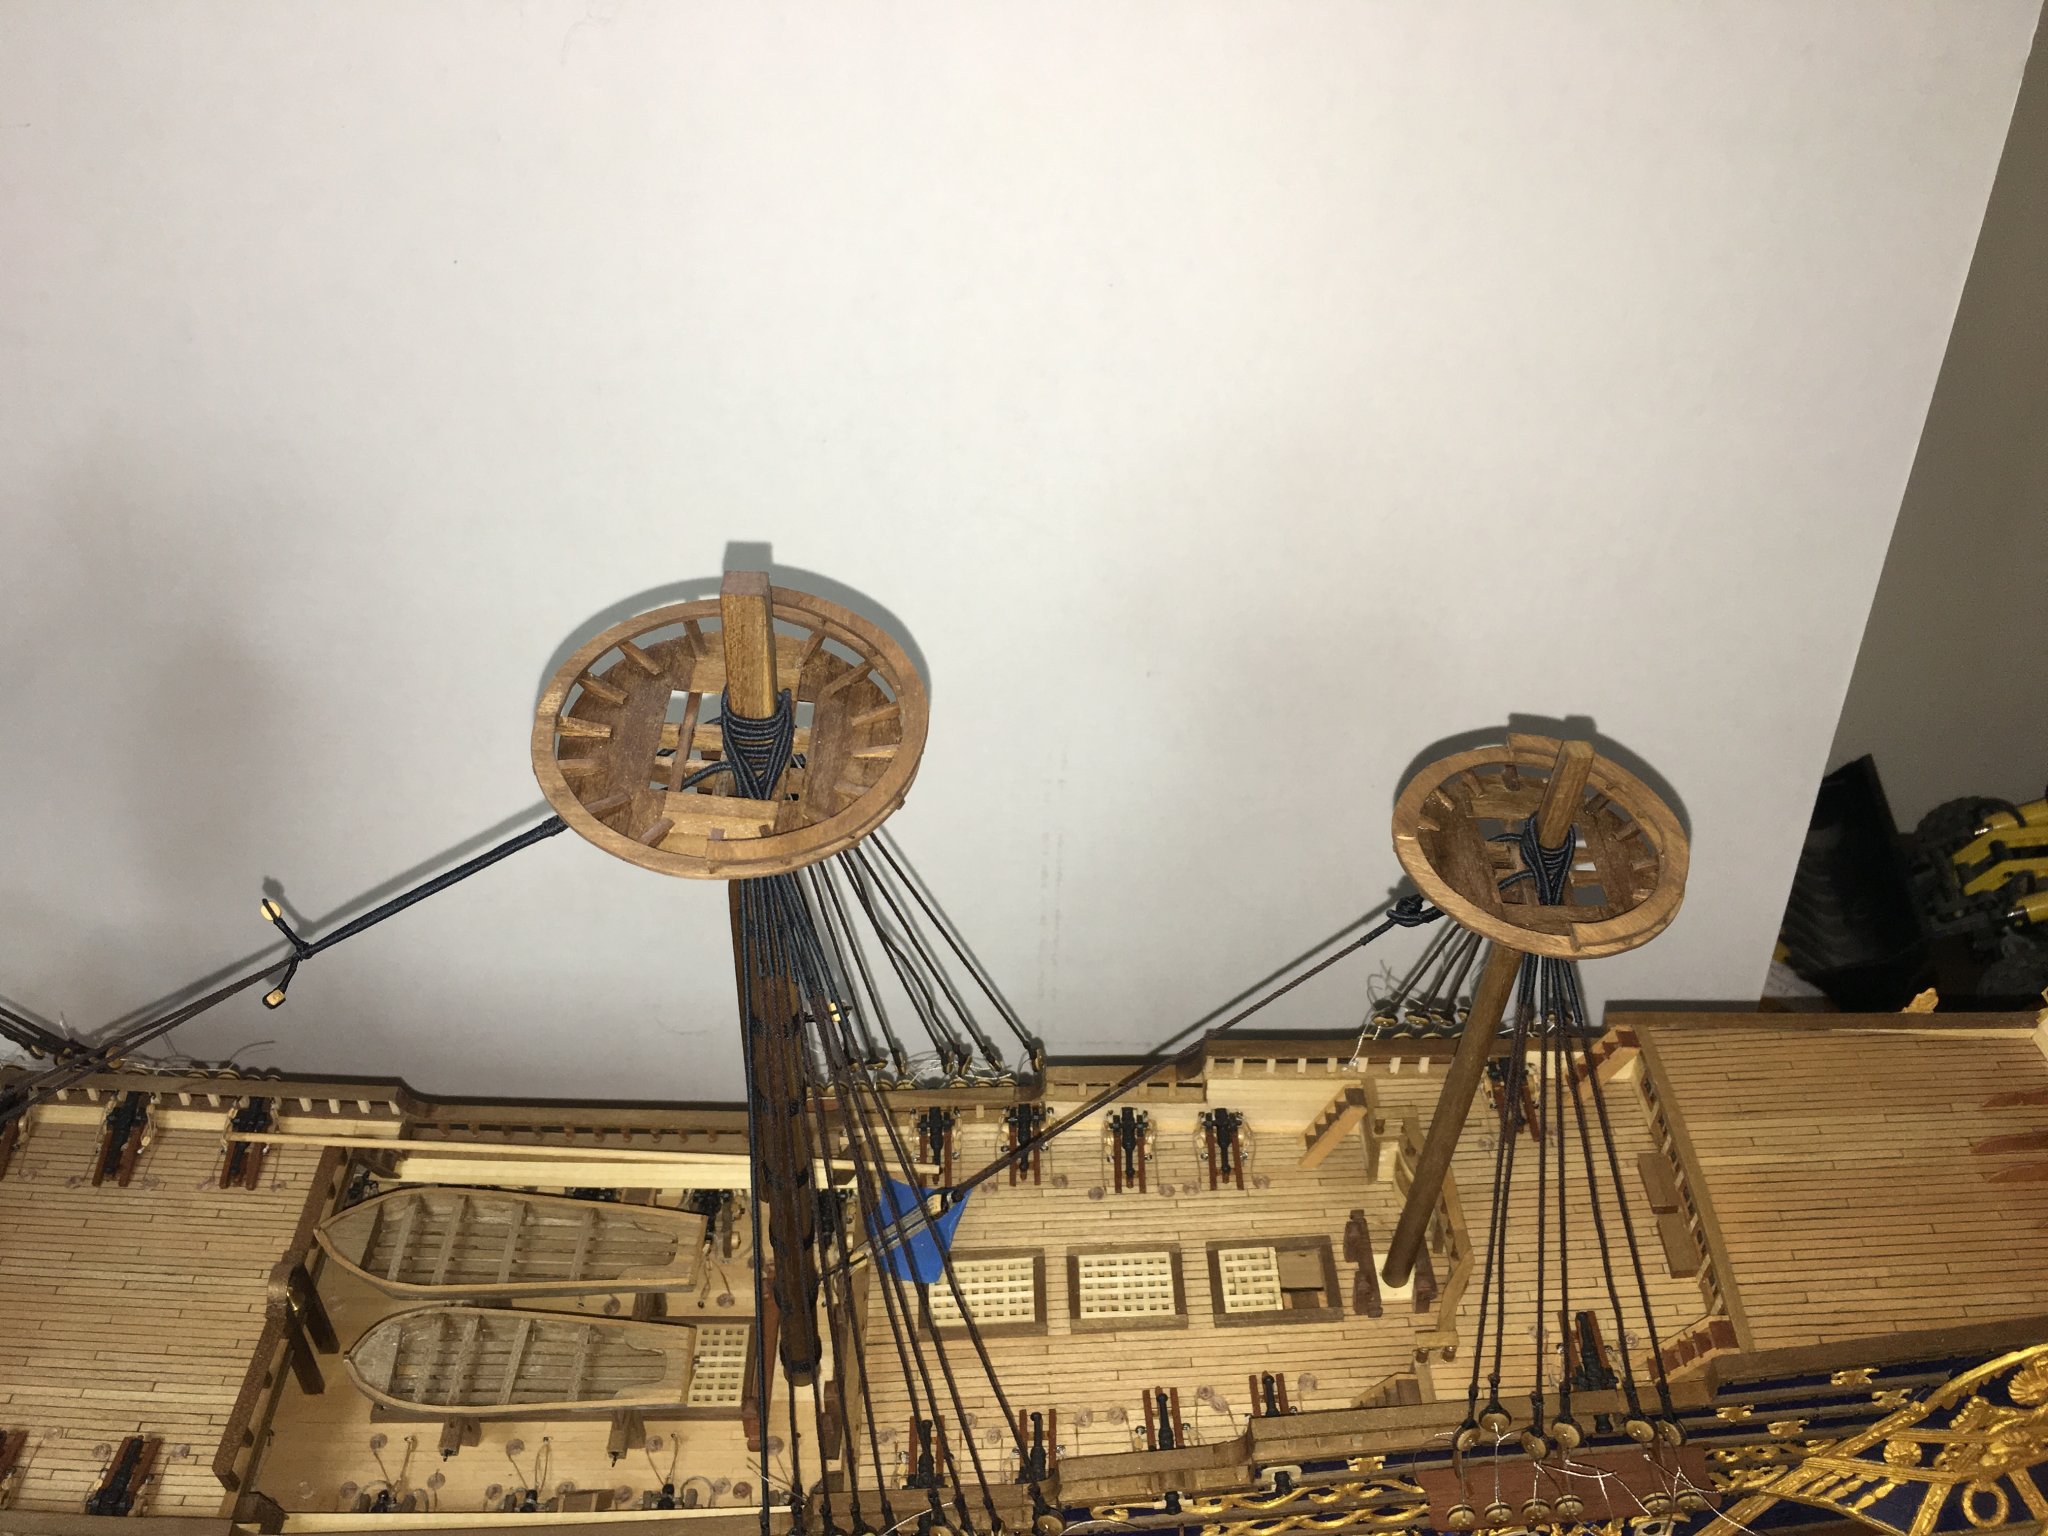
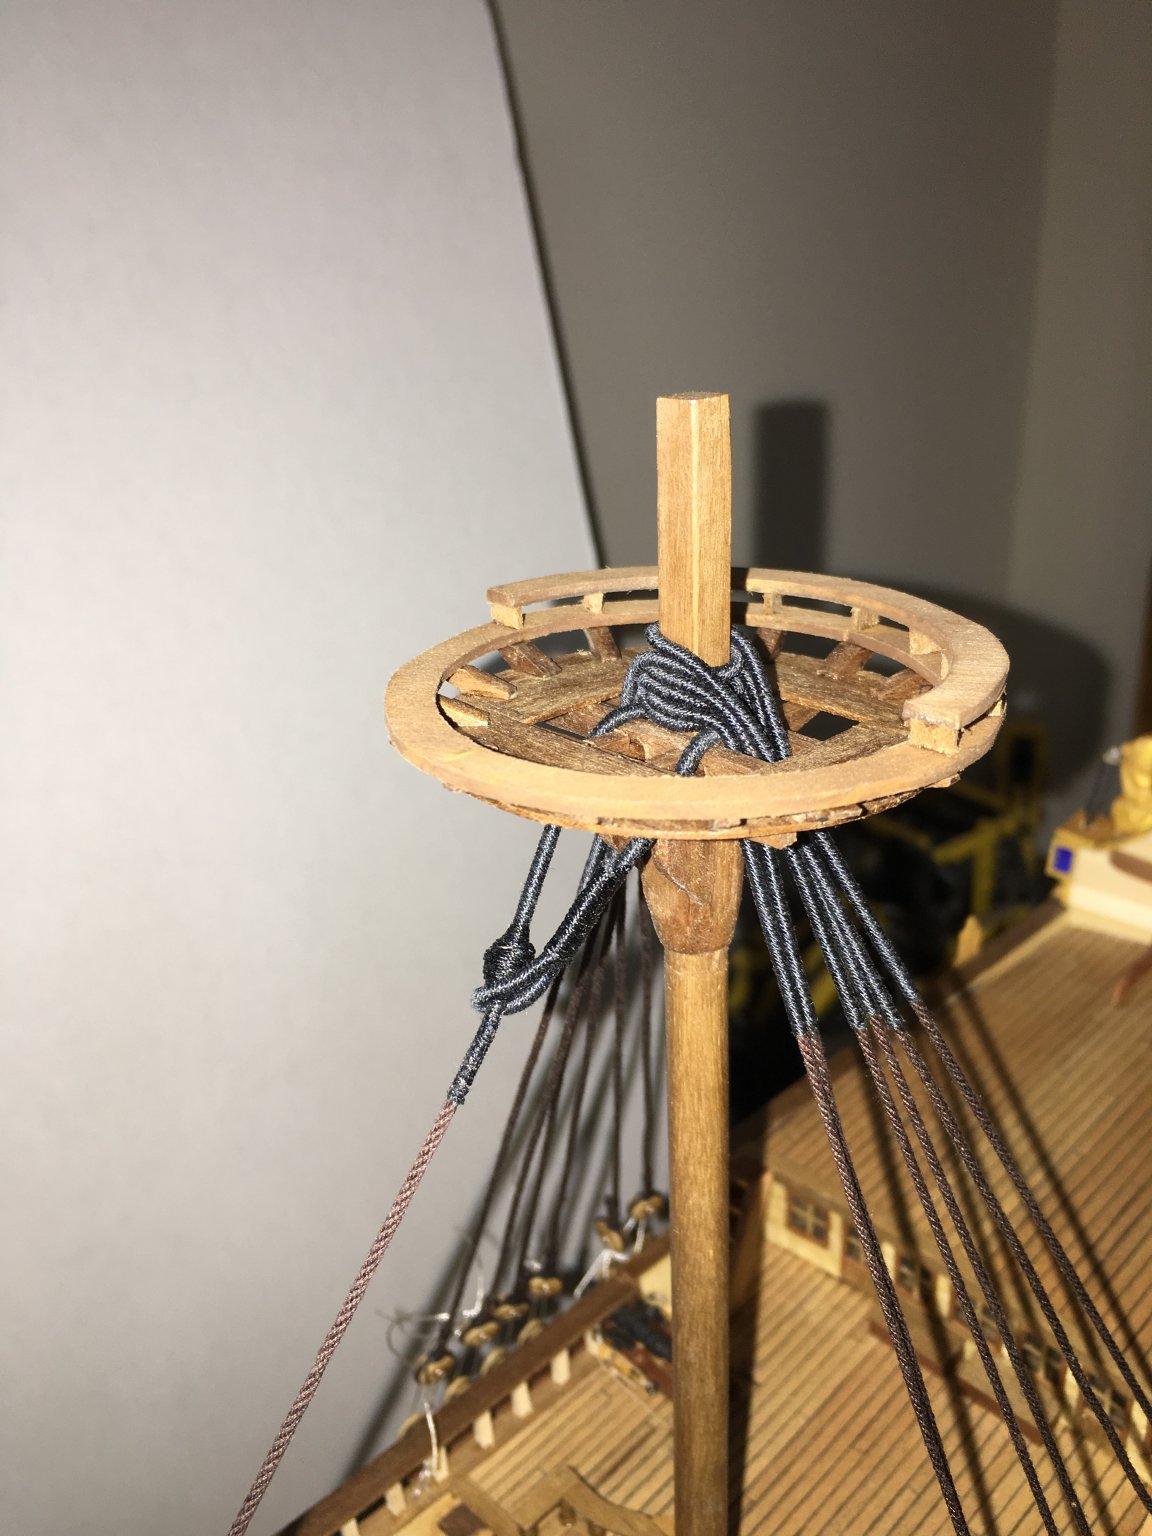
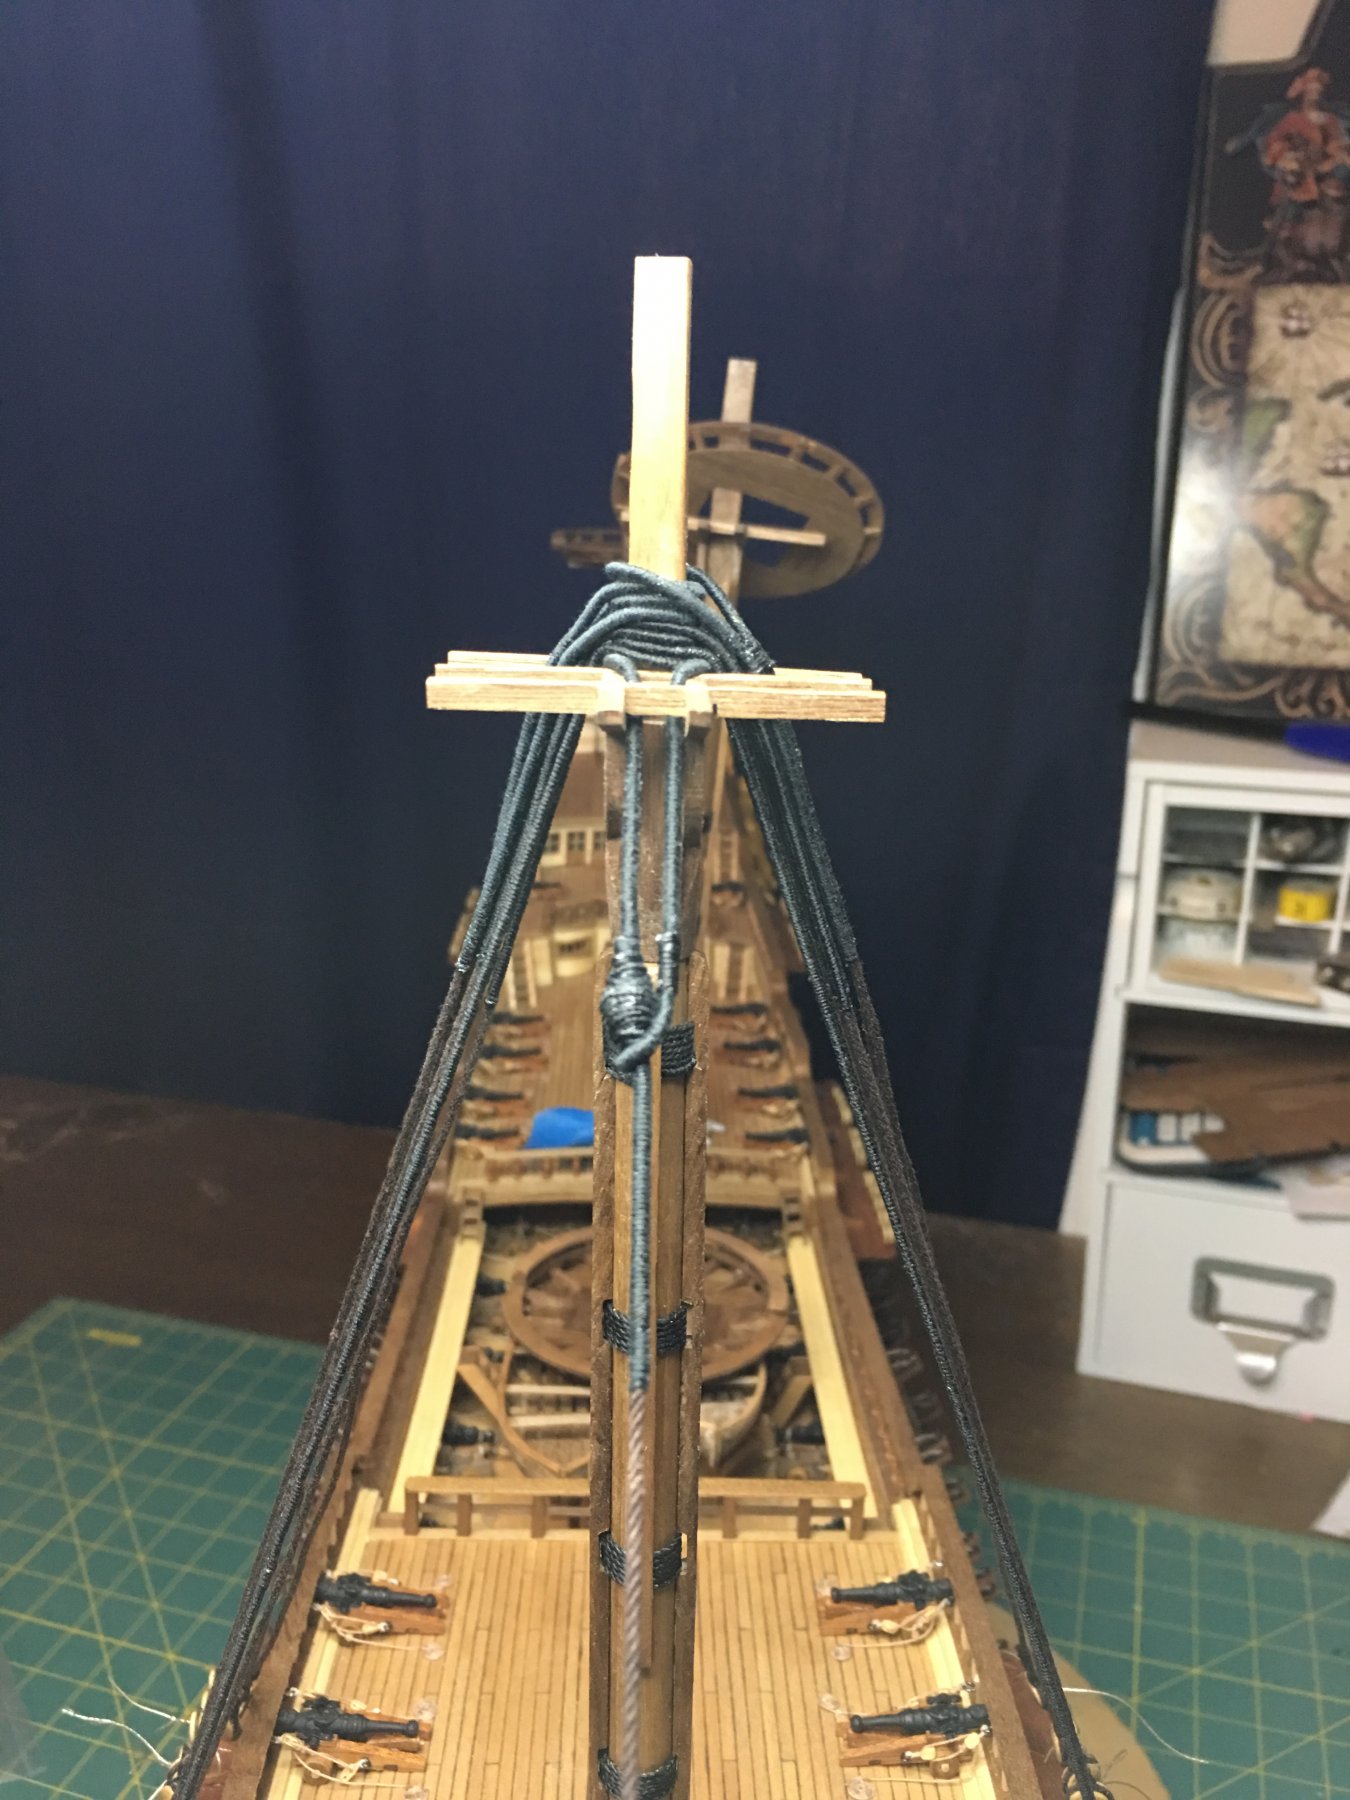
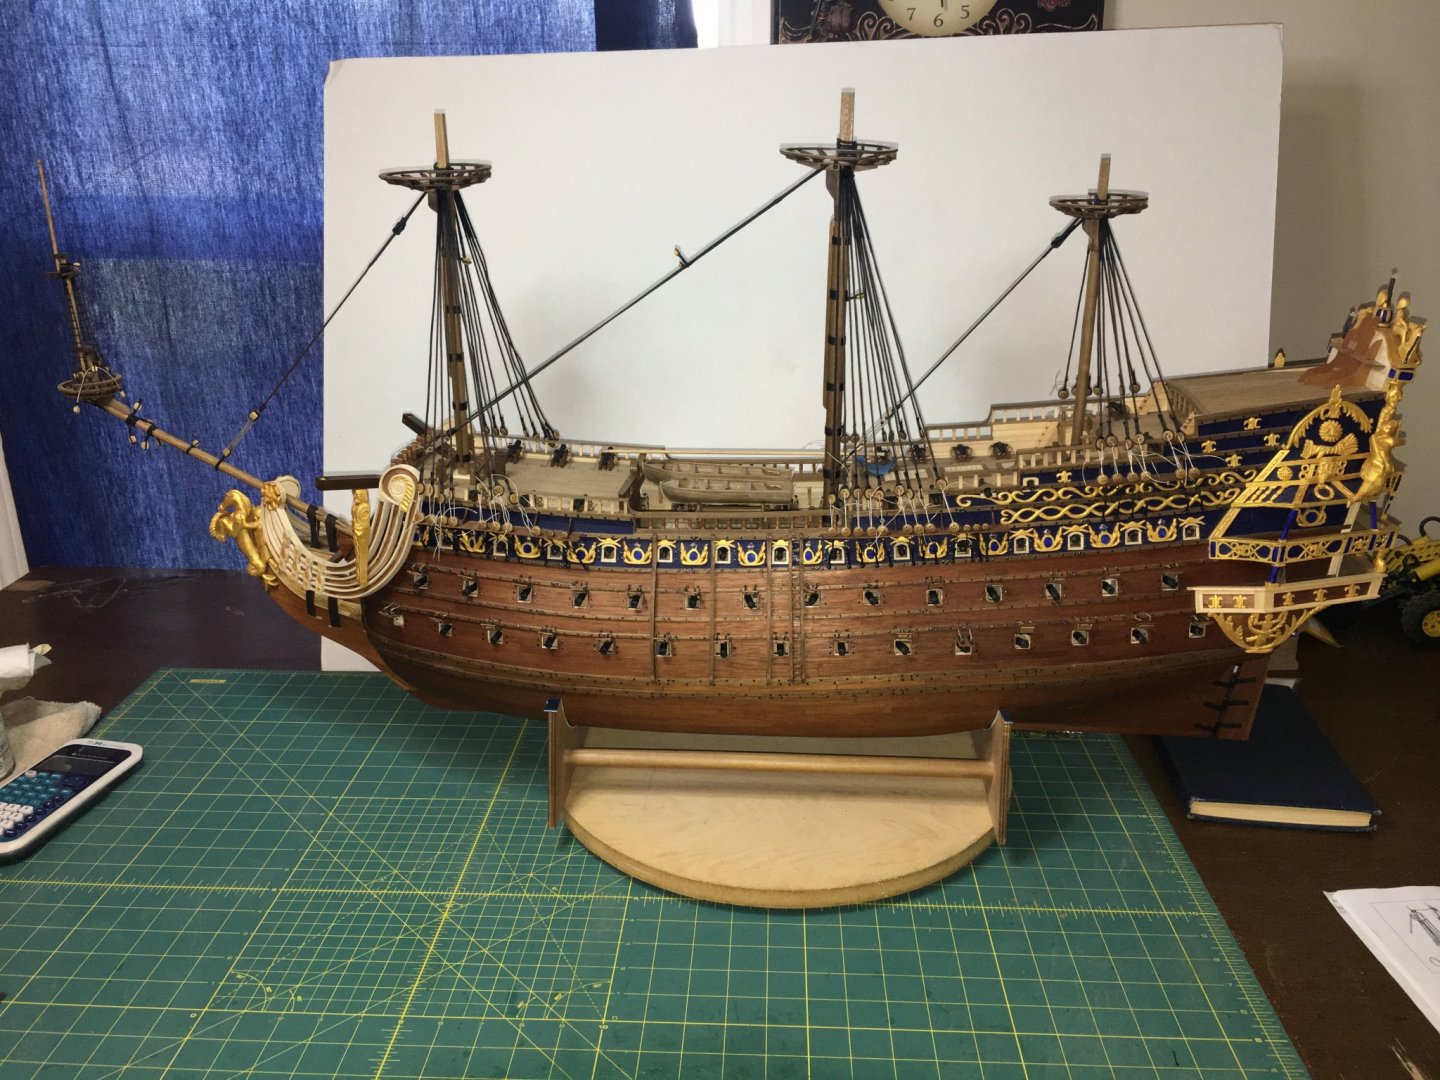
Another progress update on rigging. All of the lower shrouds have been created and places though not fully secured. Moving upward to the topmasts next. Once the topmasts are built and secured, the tops can be fully installed which will allow for the crowsfoot rigging on the forestays at the fore and main masts. As always, thanks for following along!


-
If you are not needing the hatches to be functional, card stock can be easily cut to resemble hinges. Use small wire for the barrels at the hinge and paint all black. Bolts can be simulated by dimpling the card stock. I've done this on many a door and hatch and they turn out good.
-
Thank you everyone for the kind words and likes. To try to answer the rigging questions, for a plastic model I've done what O.C. has said and inserted metal rods for strength and/or used wood instead. On wood models, I'm still figuring it out... 🙄 What I've learned that does make a difference is that you will often have to readjust the tension of the lines as rigging progresses upward. Either leaving lines loose or under temporary tension is recommended so that the lines can be undone and tightened as needed. Also, work in balance. For every forward stay placed, install an aft stay and the same port and starboard. For example, do not tighten all the starboard shrouds before the port shrouds or the will pull to the side and straitening it back out once it is tight can be difficult. Instead, work it from both sides one pair at a time. Do this for the top and topgallant masts as well. Once all the masts are in place with their stays and shrouds, then all the lines can be tensioned to balance out. Where I still struggle is with the running rigging, particularly where it has blocks that attached to the forestays. On a real vessel, the stays would be heavy and under enough tension that the pull force from the running rigging would not pull them out of line. On a model however, those lines are nowhere near heavy enough to resist the pull of the lines as they pass through blocks or the more complicated crows feet. To get the rigging to look correct, remain tensioned and not pull out place is a balancing act that I have not yet mastered. In short work in balance and be prepared to rework the lines as you progress. And if anyone else has suggestions, please share!
-
A word of advice with planking, it is usually advisable to work both sides at the same time. Reason being that when installing the planks, they can pull the bulkheads out of alignment fore and aft. If the sides are worked together, any misalignment can be caught earlier and more easily corrected if the opposite side is not fully planked which locks all the parts into place. Some people recommend going plank by planking opposite each other, I usually go in bands. With where you are in the build, I would recommend evening out the opposite side around your gun ports before proceeding further. Then you can do another band and swap back and forth between the two sides keeping progress even. This method is also helpful on the second planking for keeping the number of strakes even and the same size on both sides. This becomes very noticeable where the sides come close to each other at stem and stern.
-
Nice planking work. Good to see you still at her. We understand about life taking priority over modeling. No worries on update delays, we will be here waiting.
- 50 replies
-
- 3
-
-
- soleil royal
- first build
- (and 1 more)
-
Looking fantastic! The end result is an excellent simulated wood. Truly impressive.
- 244 replies
-
- 3
-
-
- heller
- soleil royal
- (and 1 more)
-
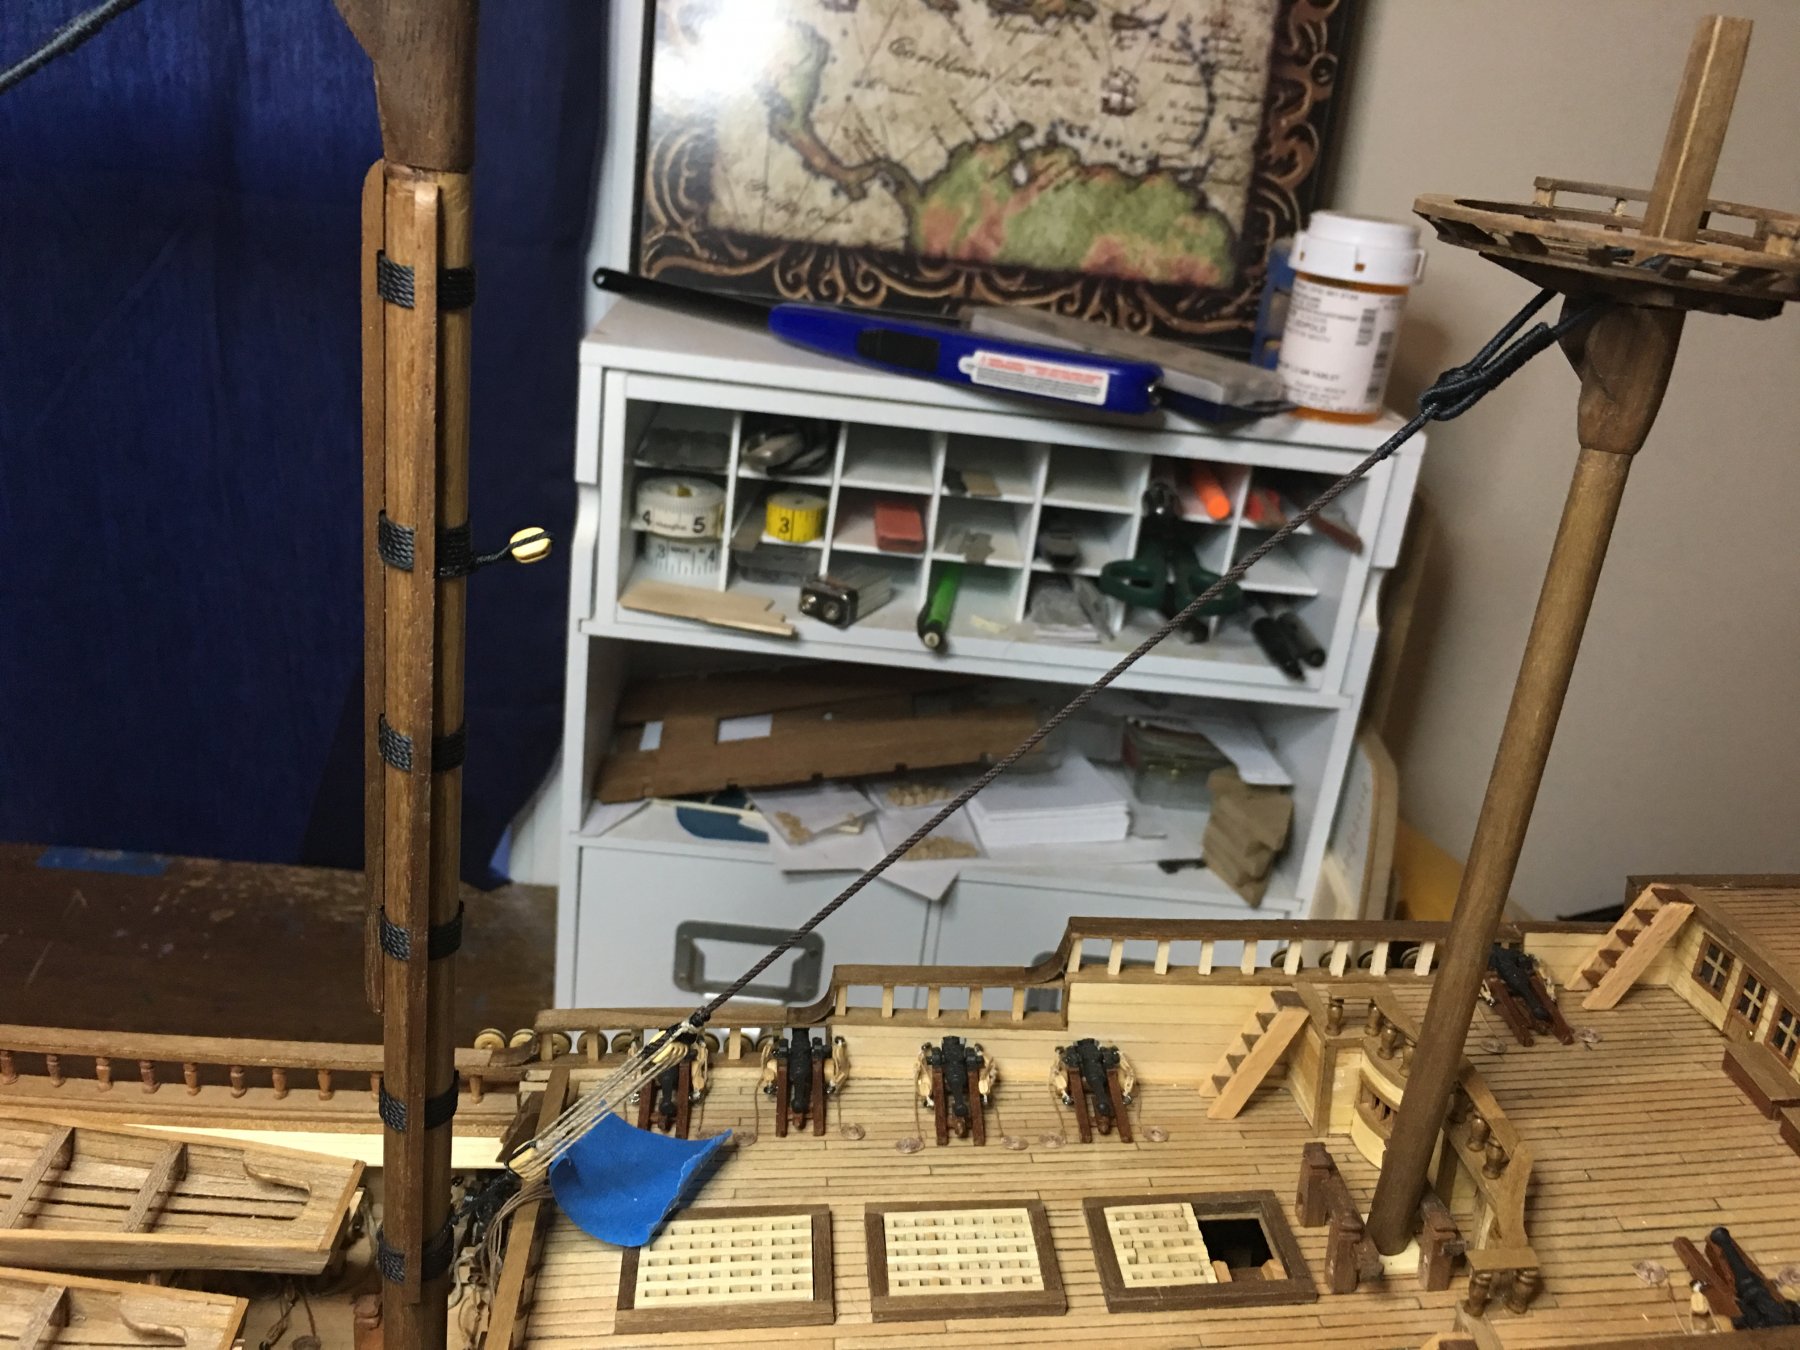
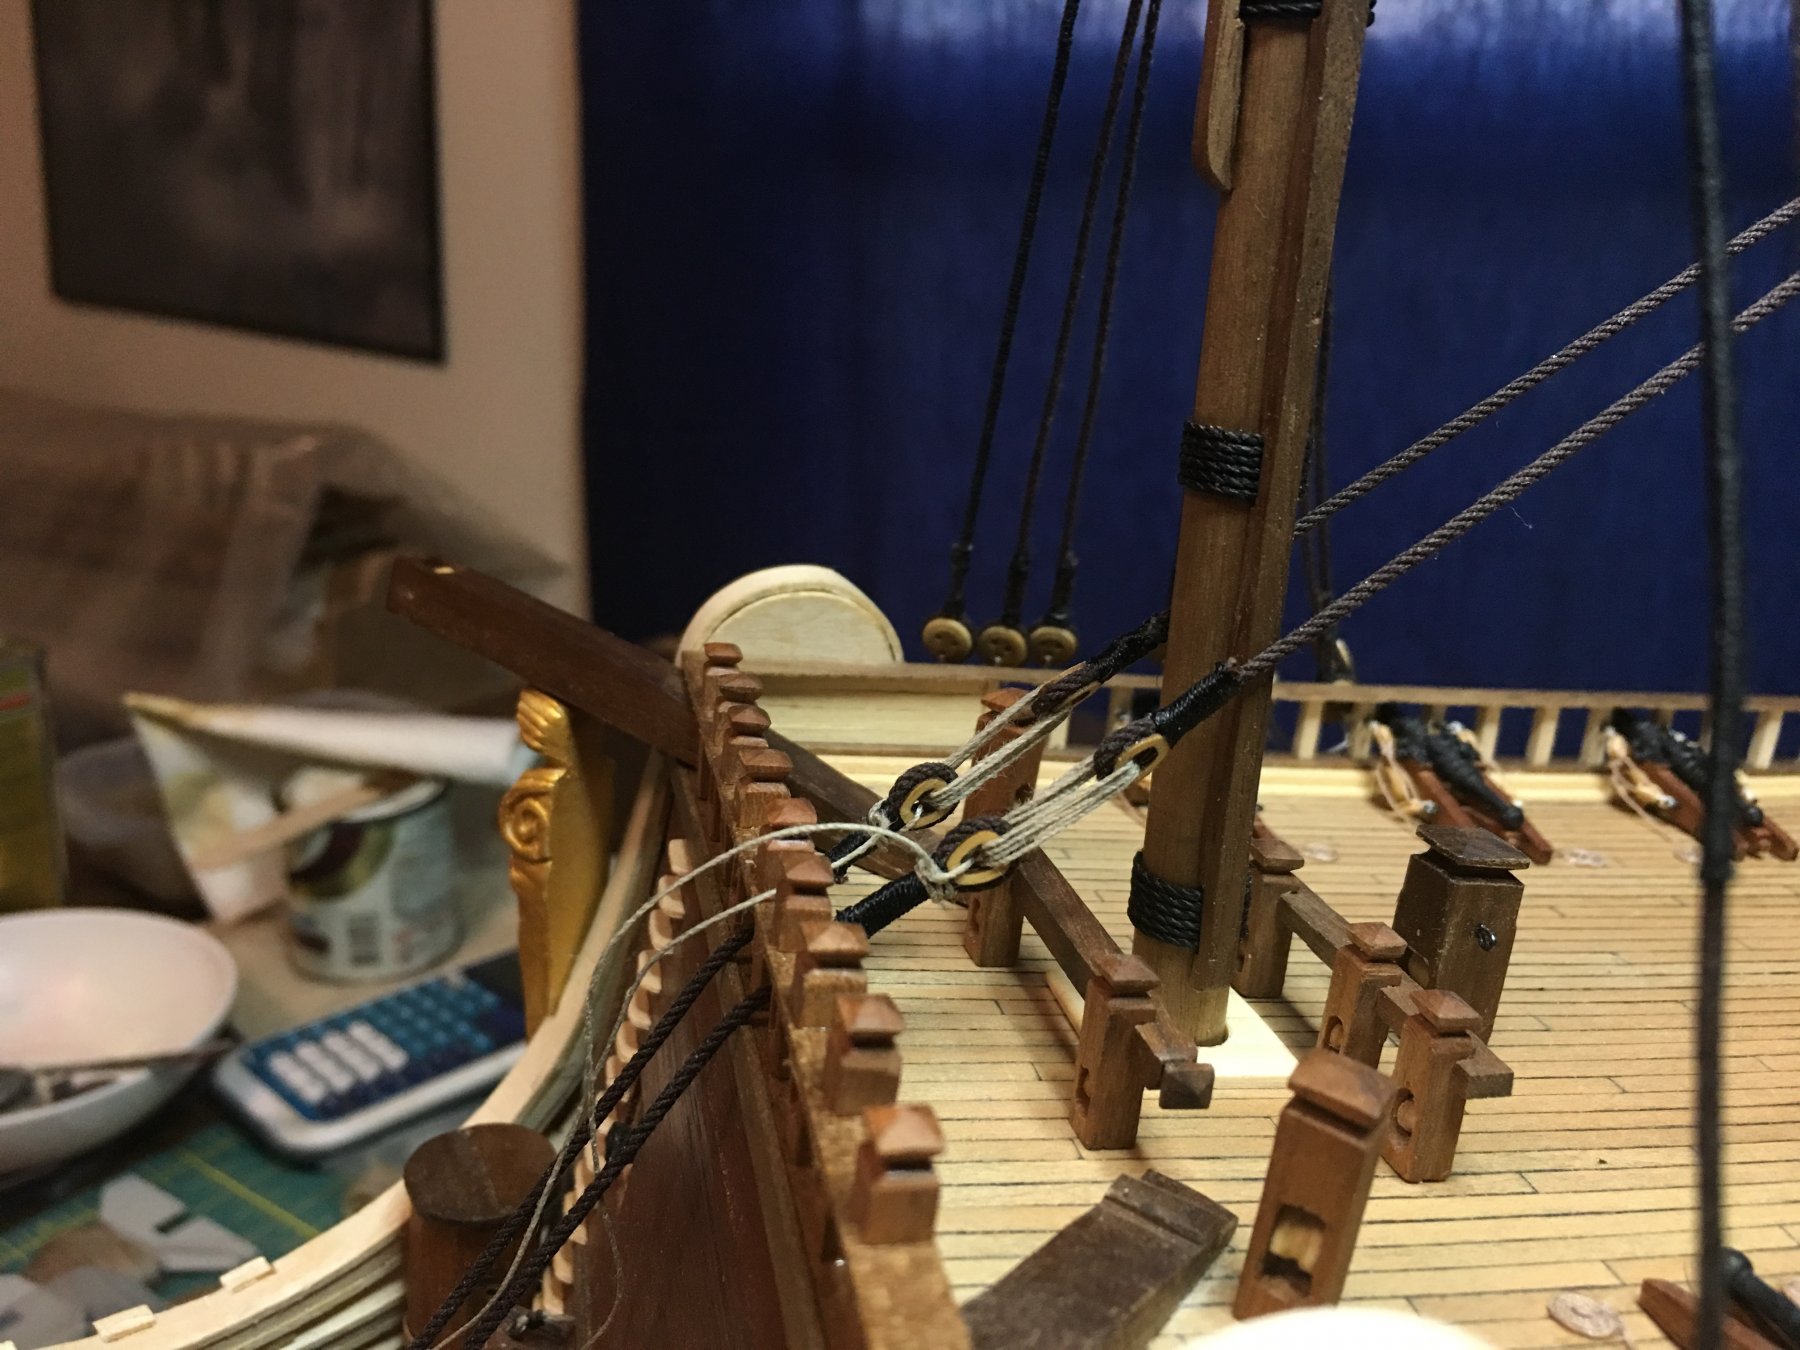
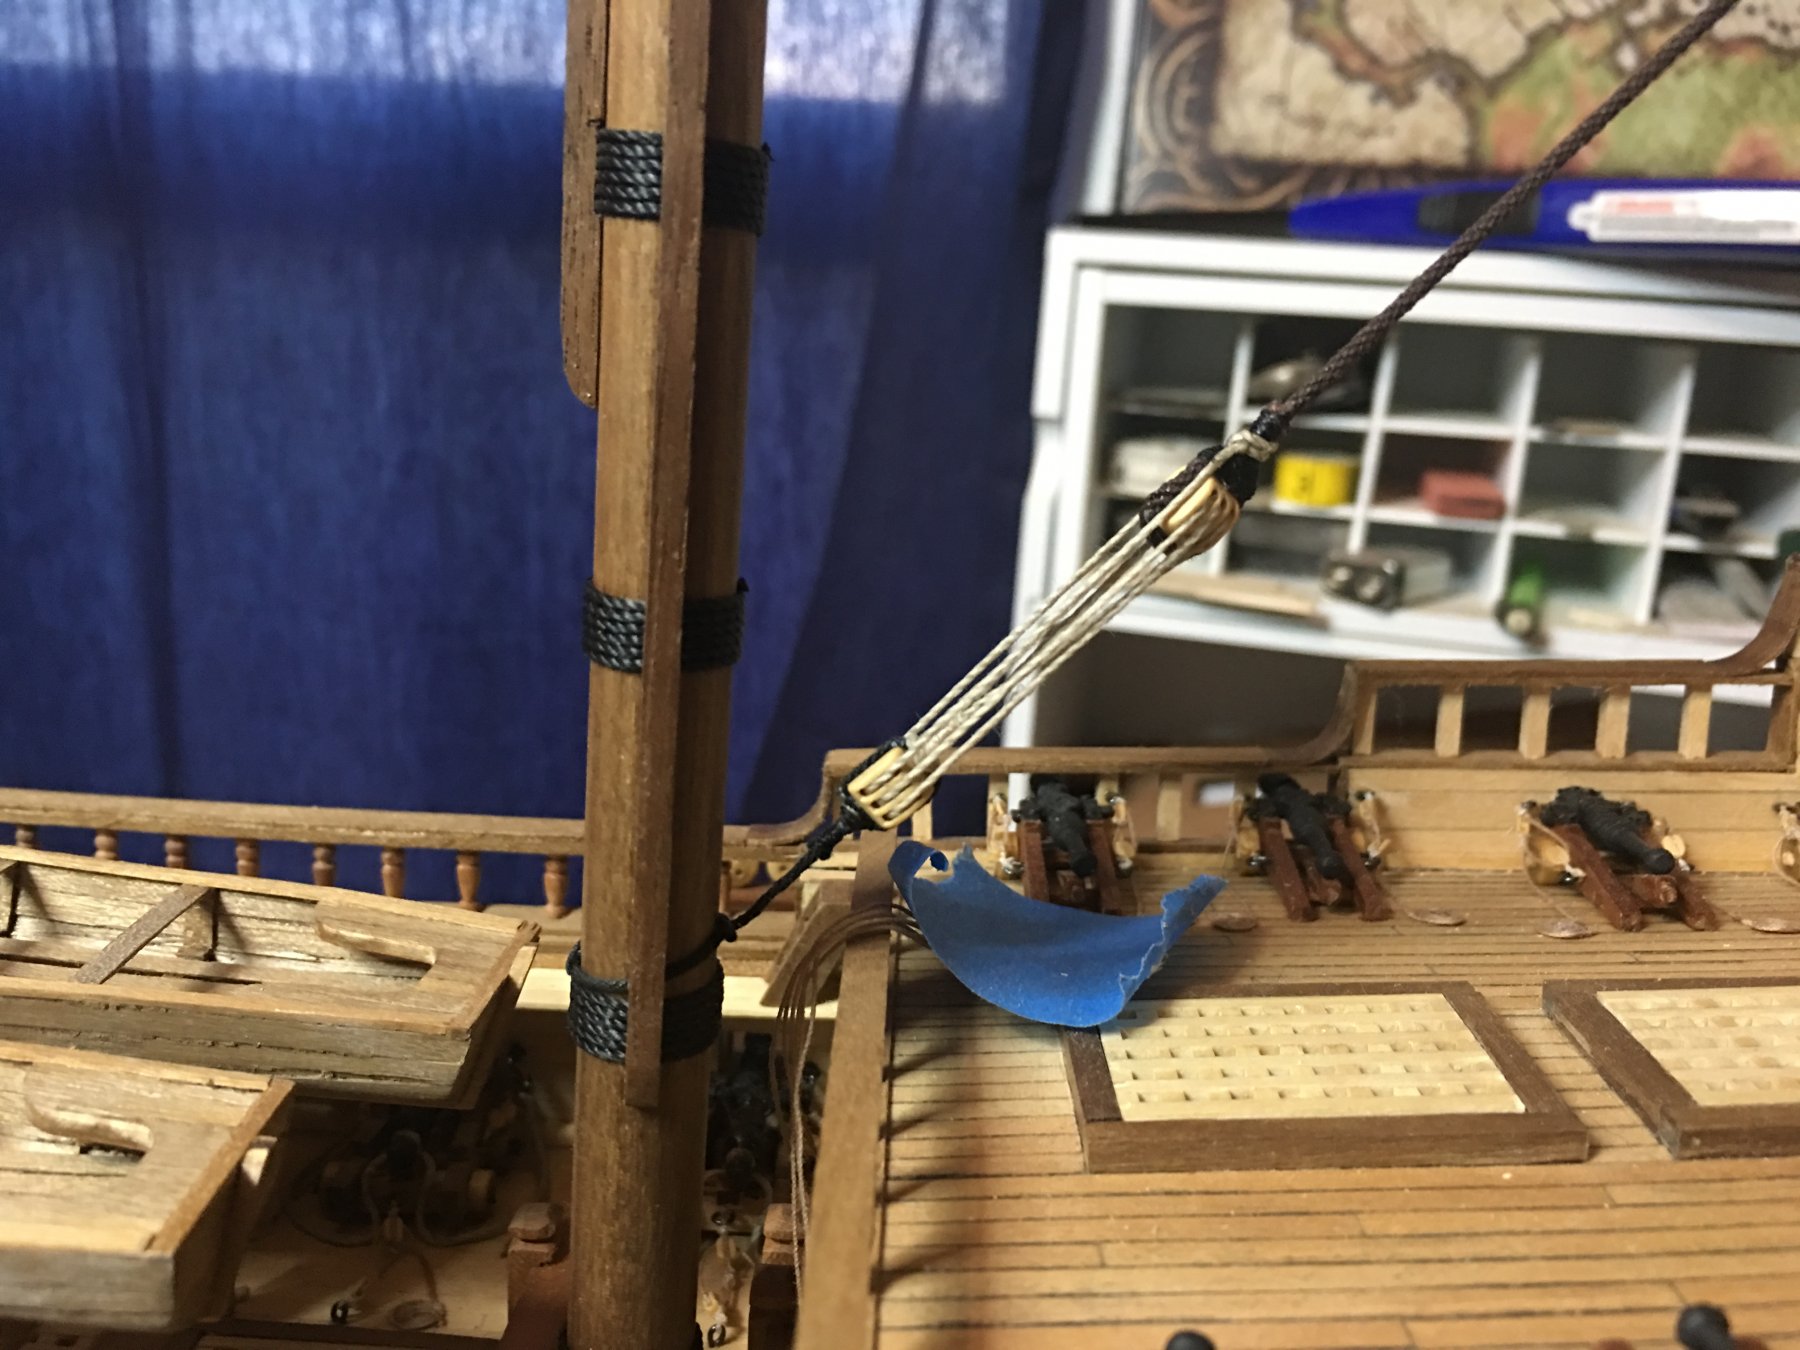
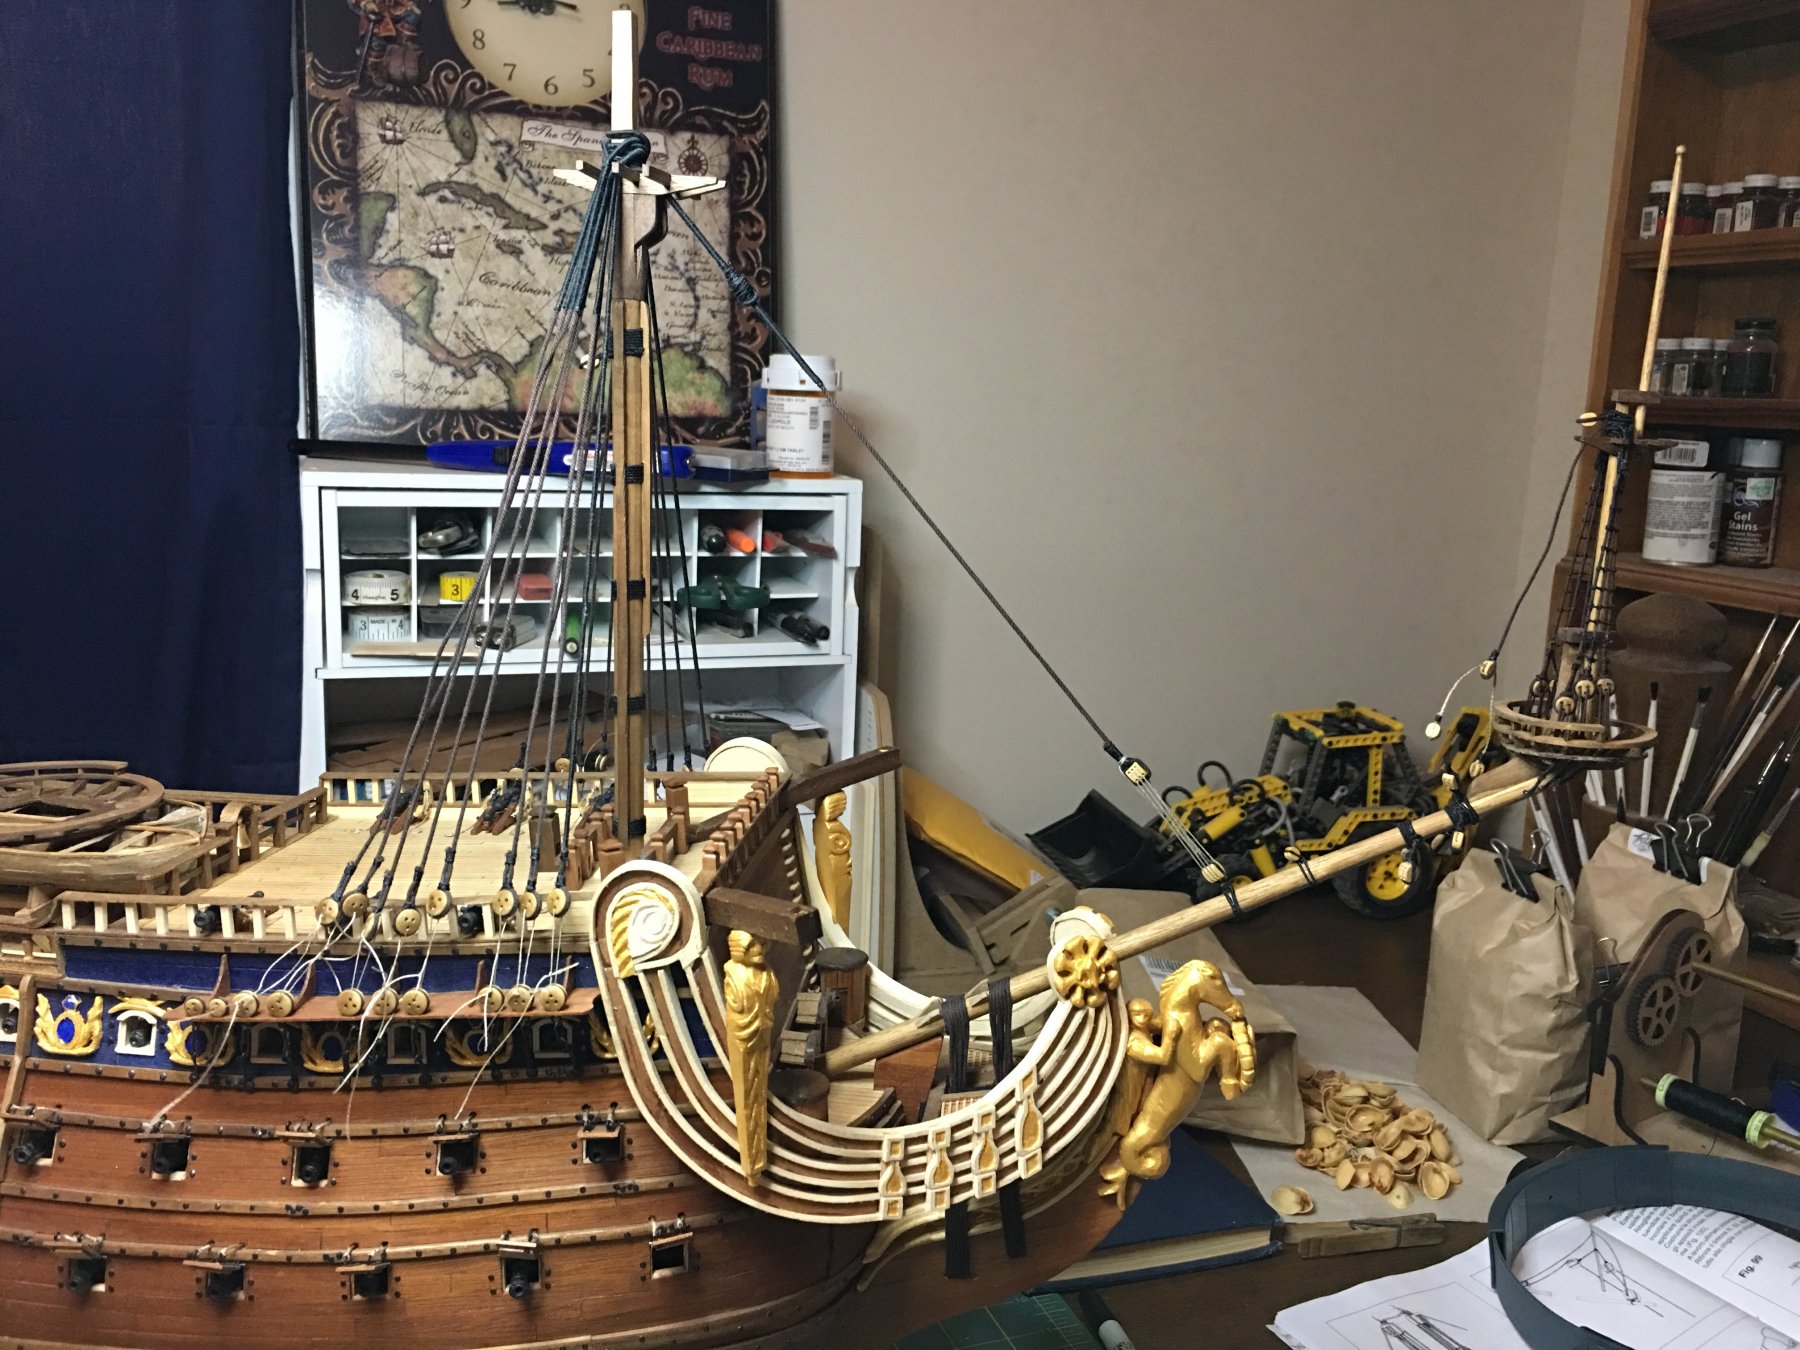
More rigging going up. The bowsprit has been set and gammoning in place. Set the forestay which will likely be the last piece of rigging on the foremast for the time being. Next up I will fall back to set the stays and shrouds on the main and mizzen masts.


-
Greetings from North Yorkshire, England
EJ_L replied to Niallmhor's topic in New member Introductions
Welcome to MSW!