EJ_L
-
Posts
2,246 -
Joined
-
Last visited
Content Type
Profiles
Forums
Gallery
Events
Everything posted by EJ_L
-
 This is excellent Robert! Great job on the weathering and details. A fun build, glad I caught it.
 -
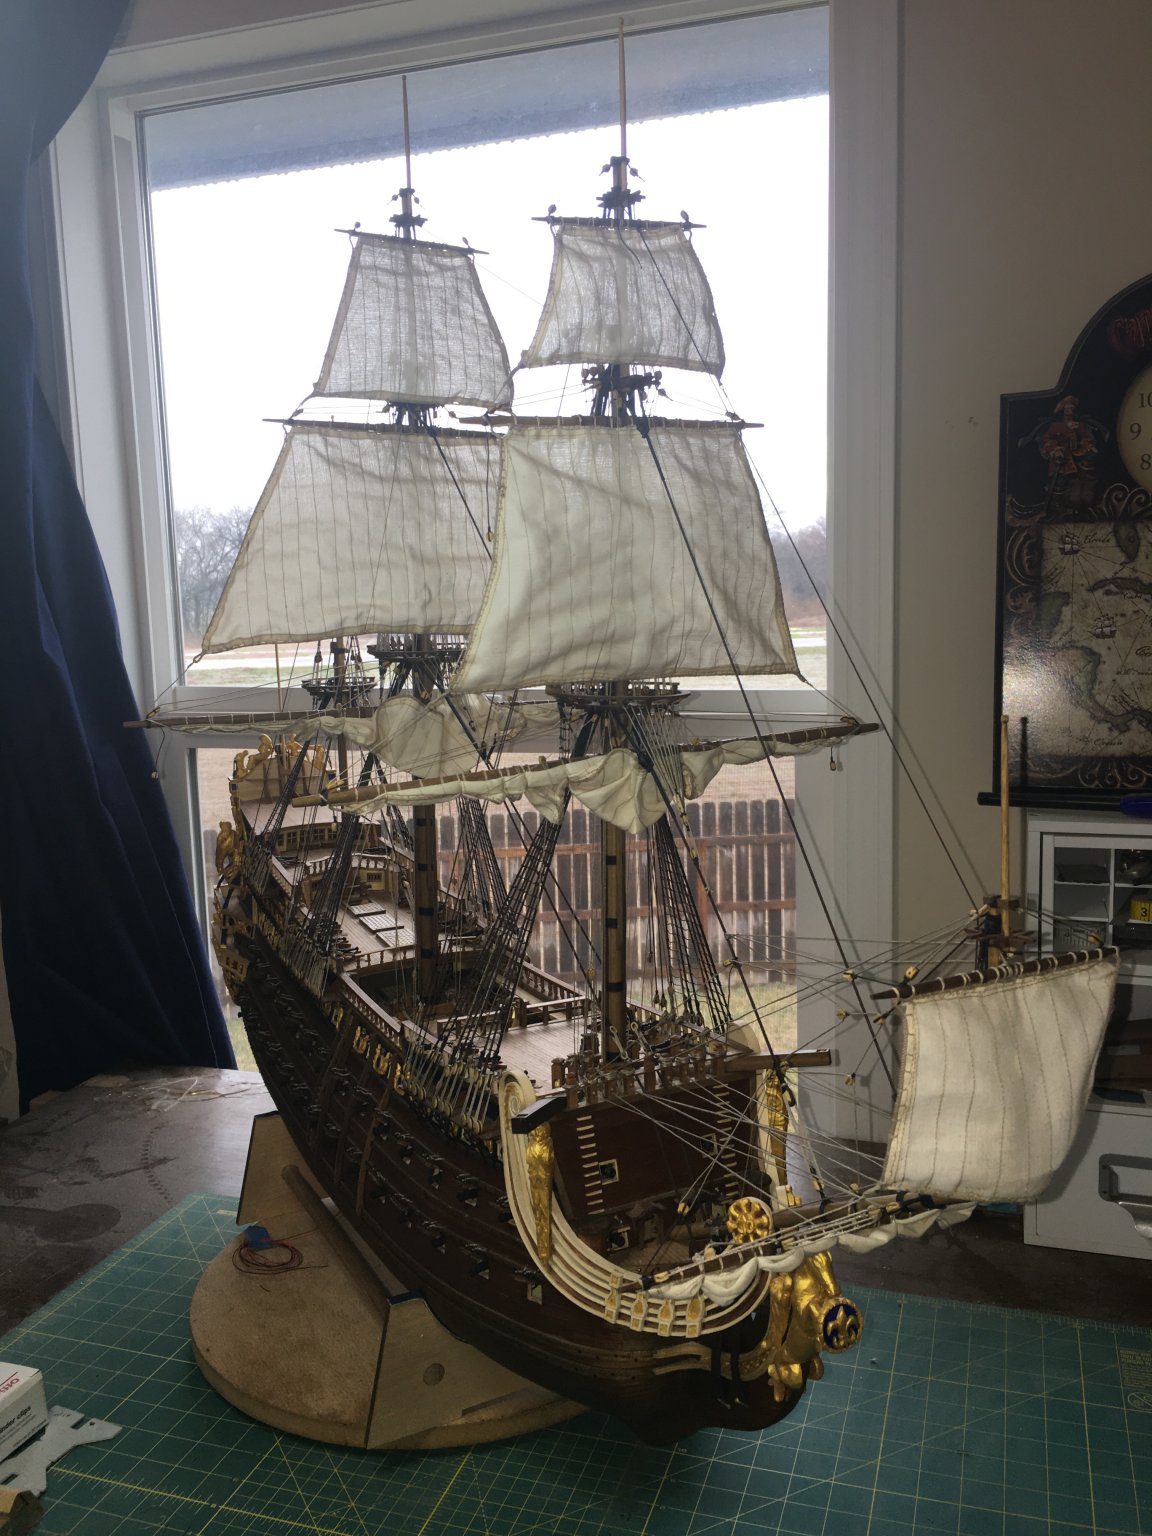
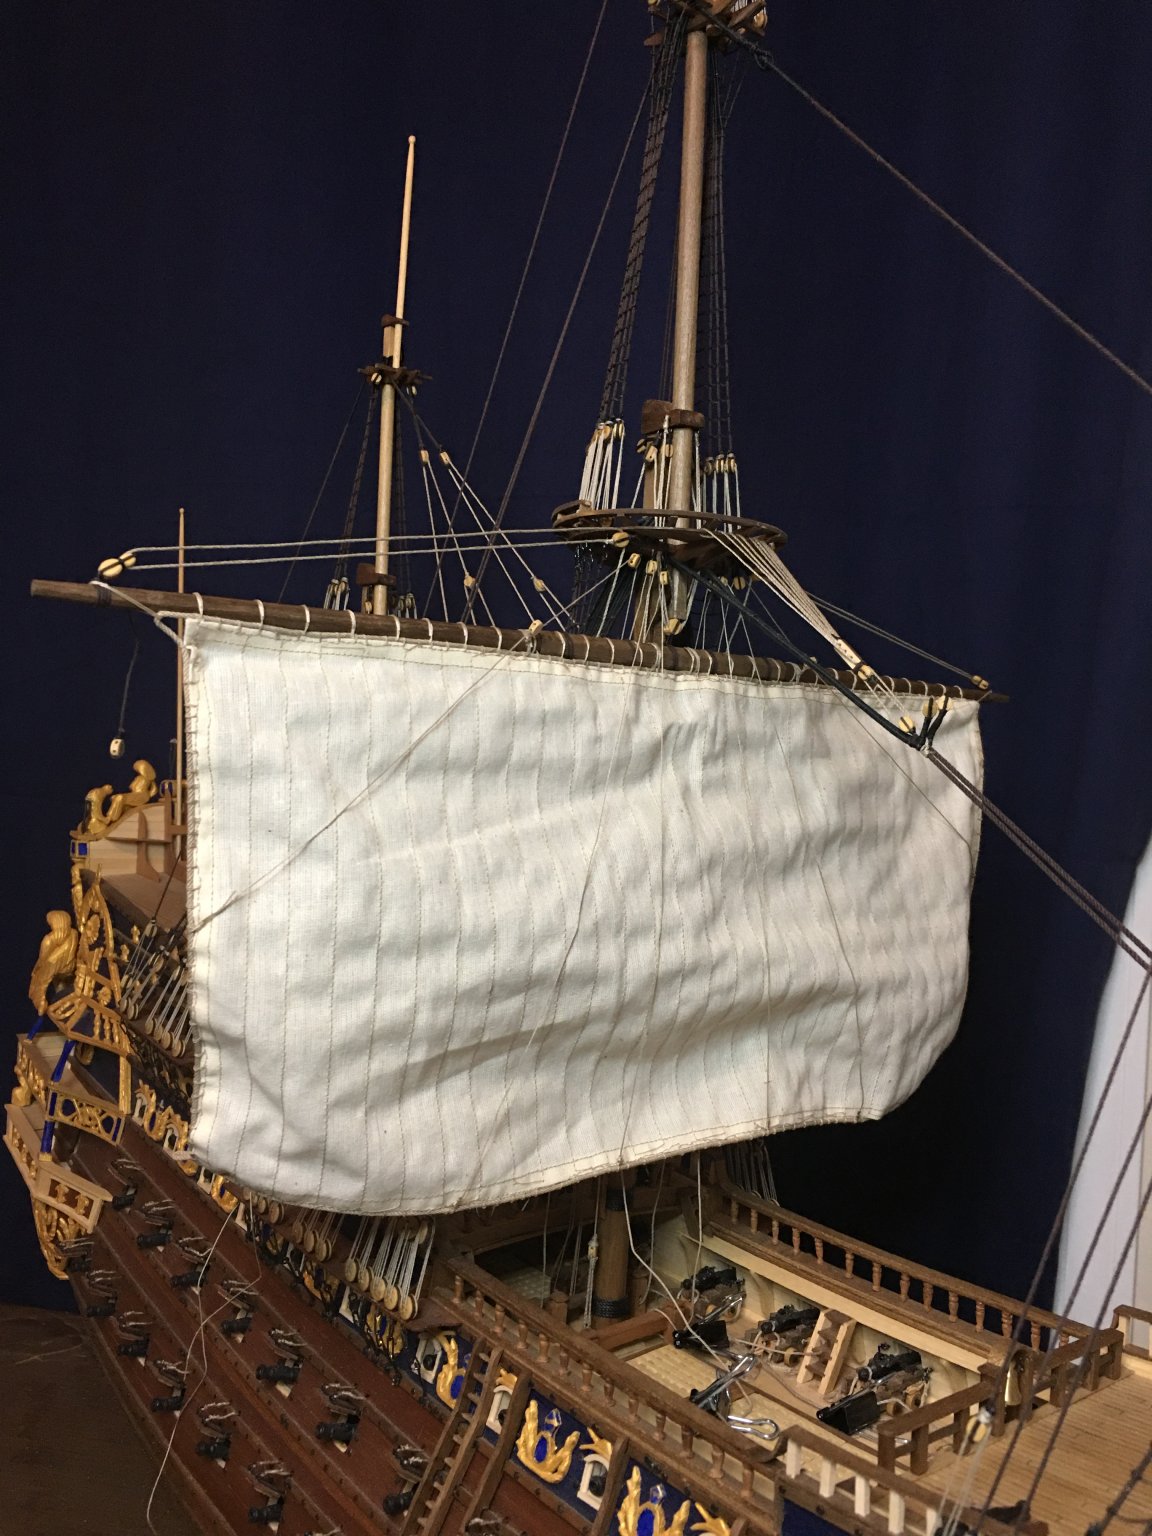
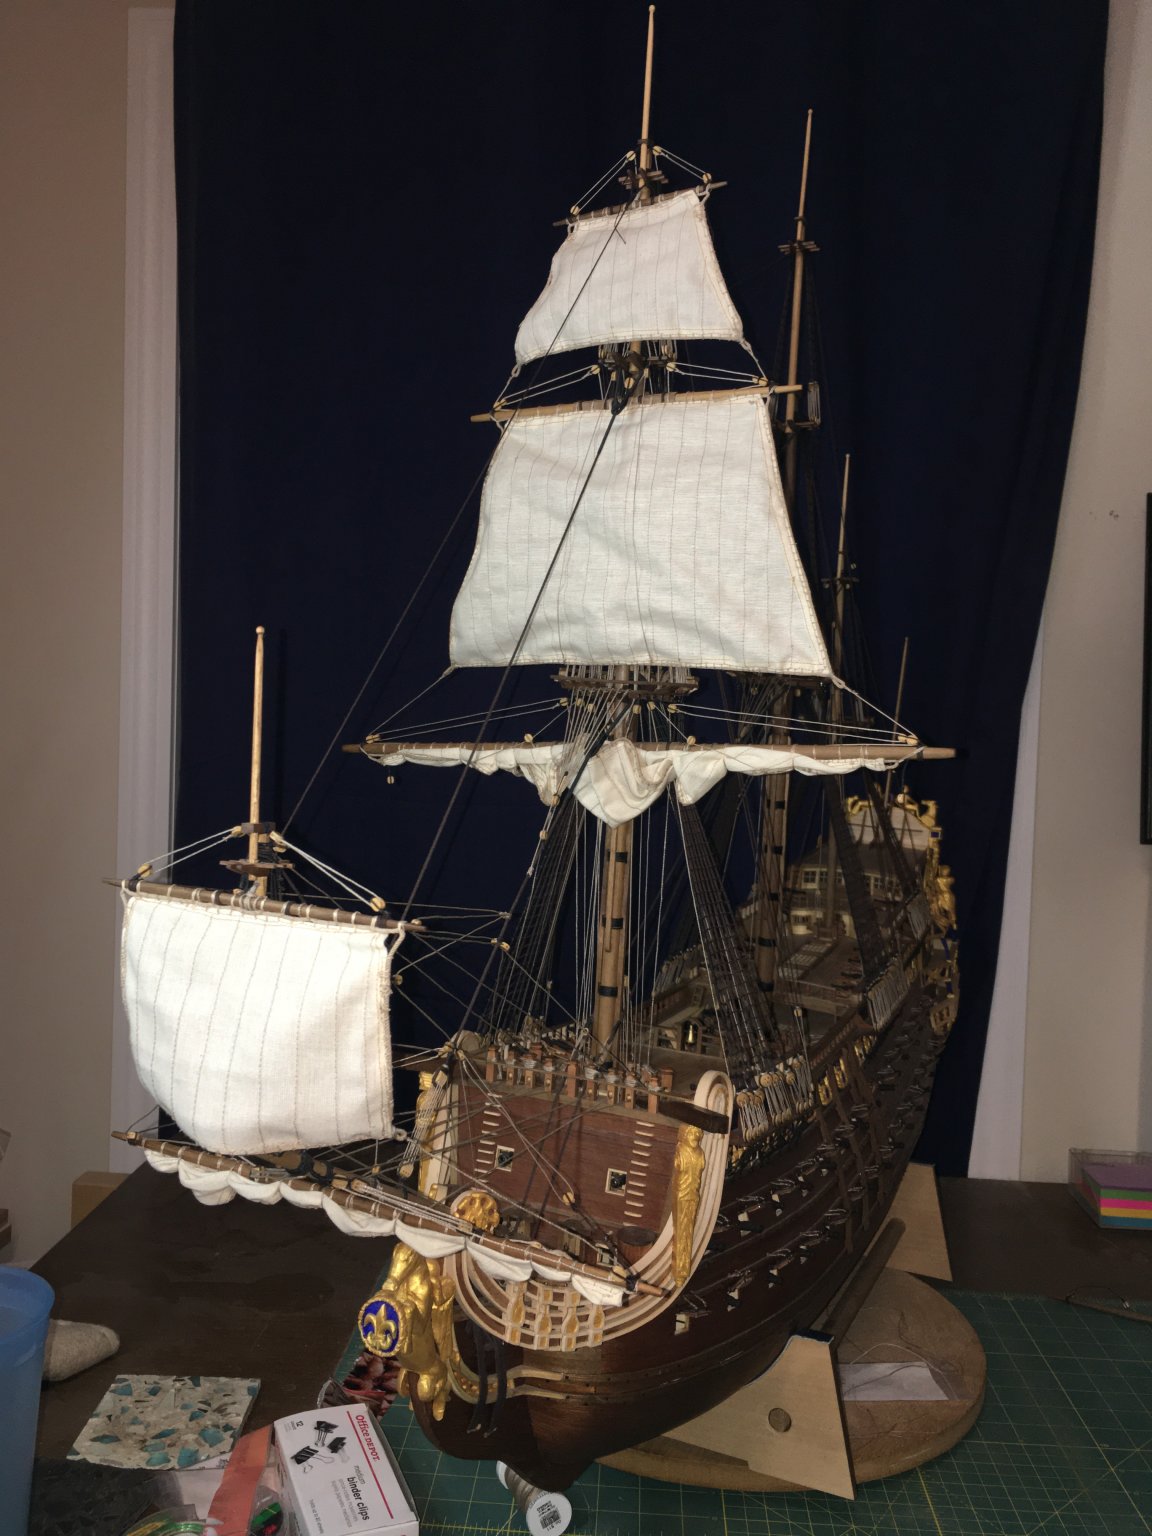
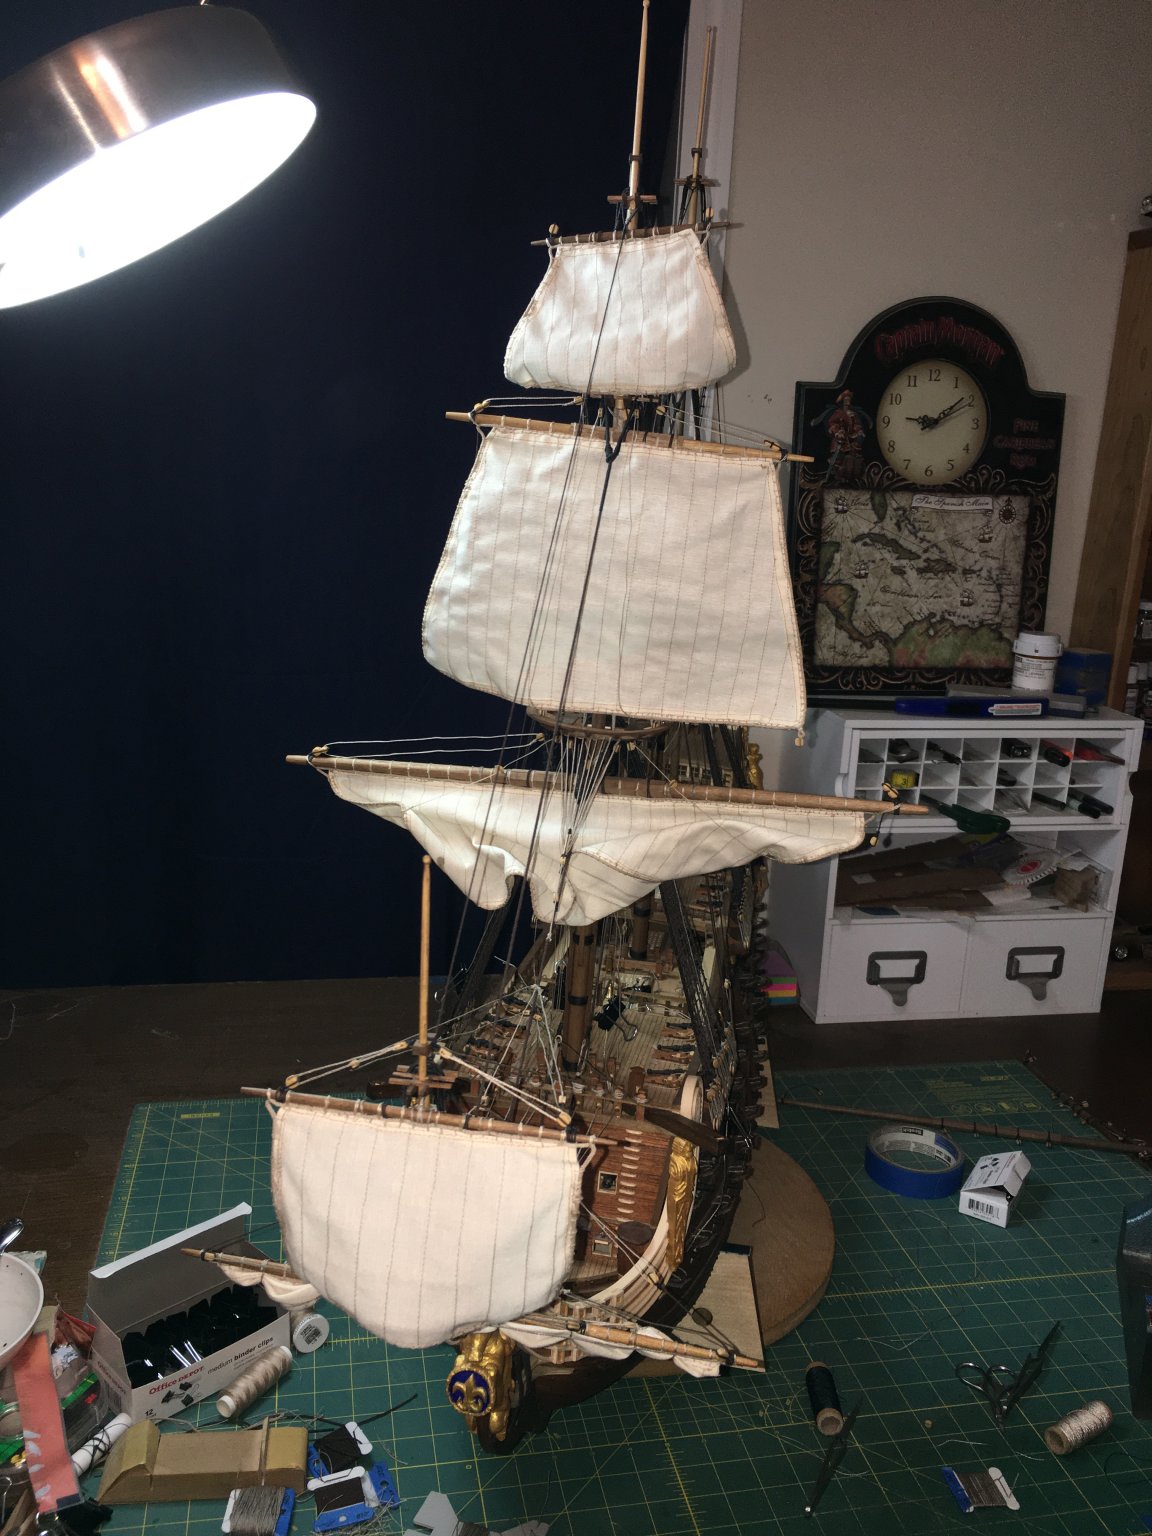
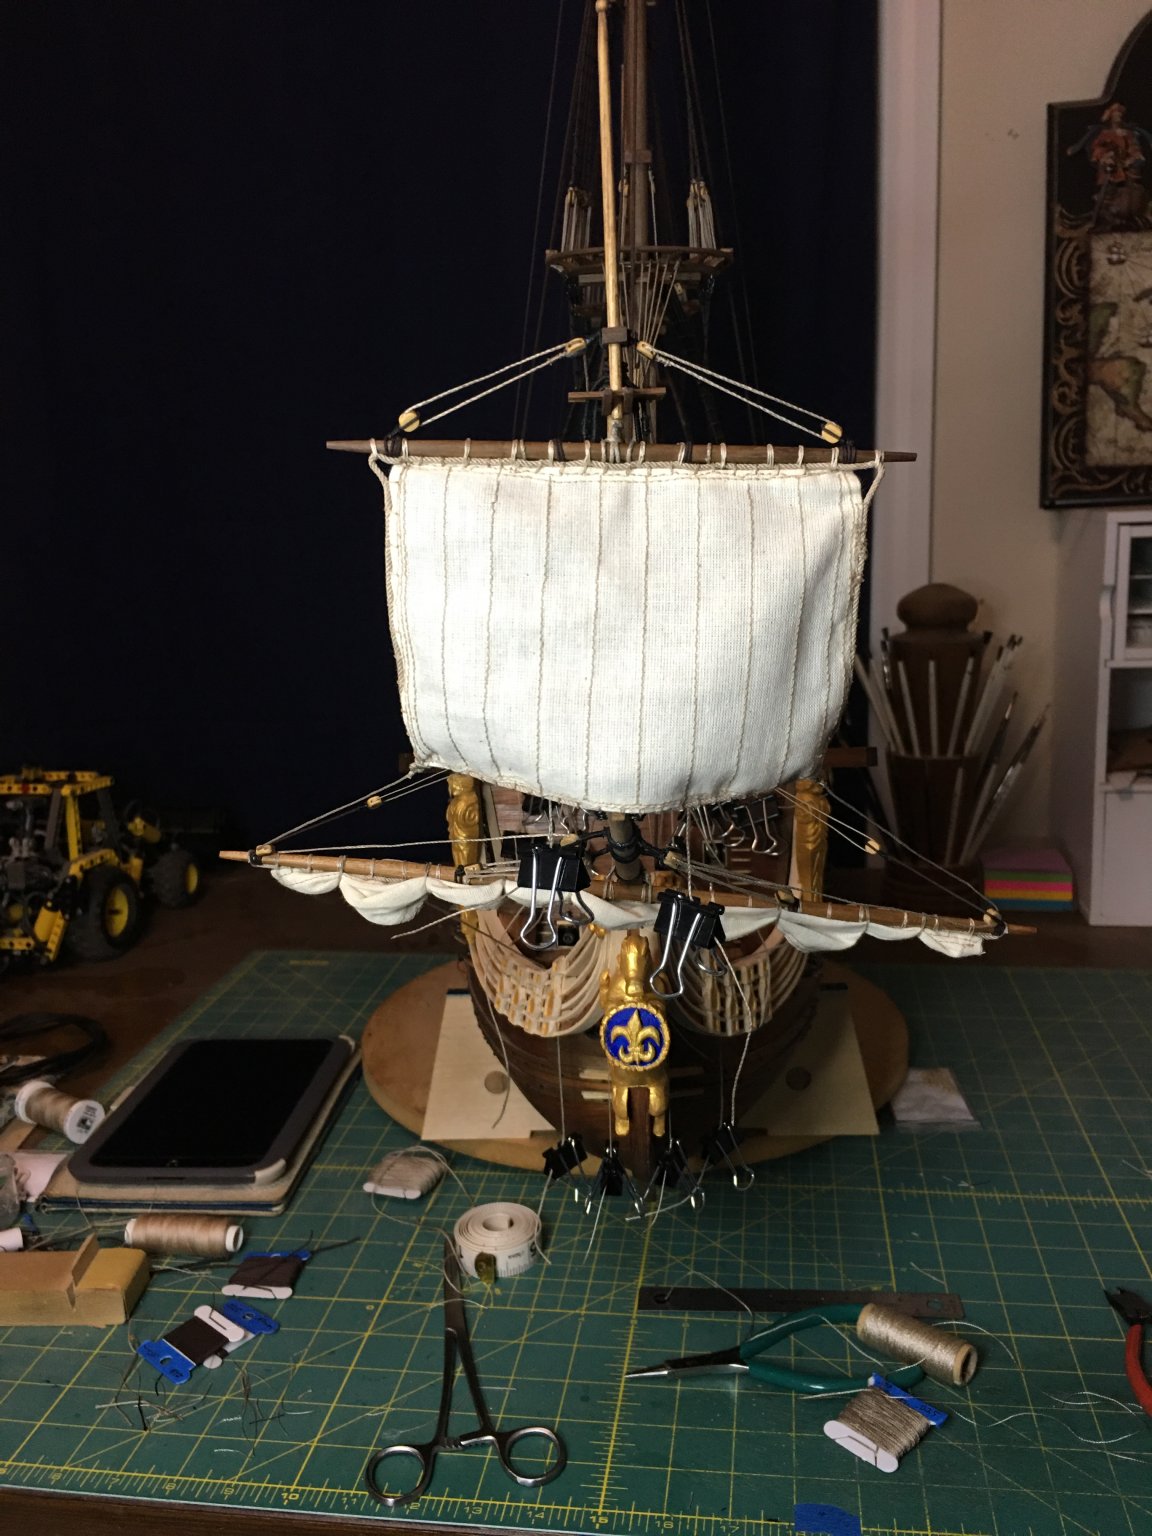
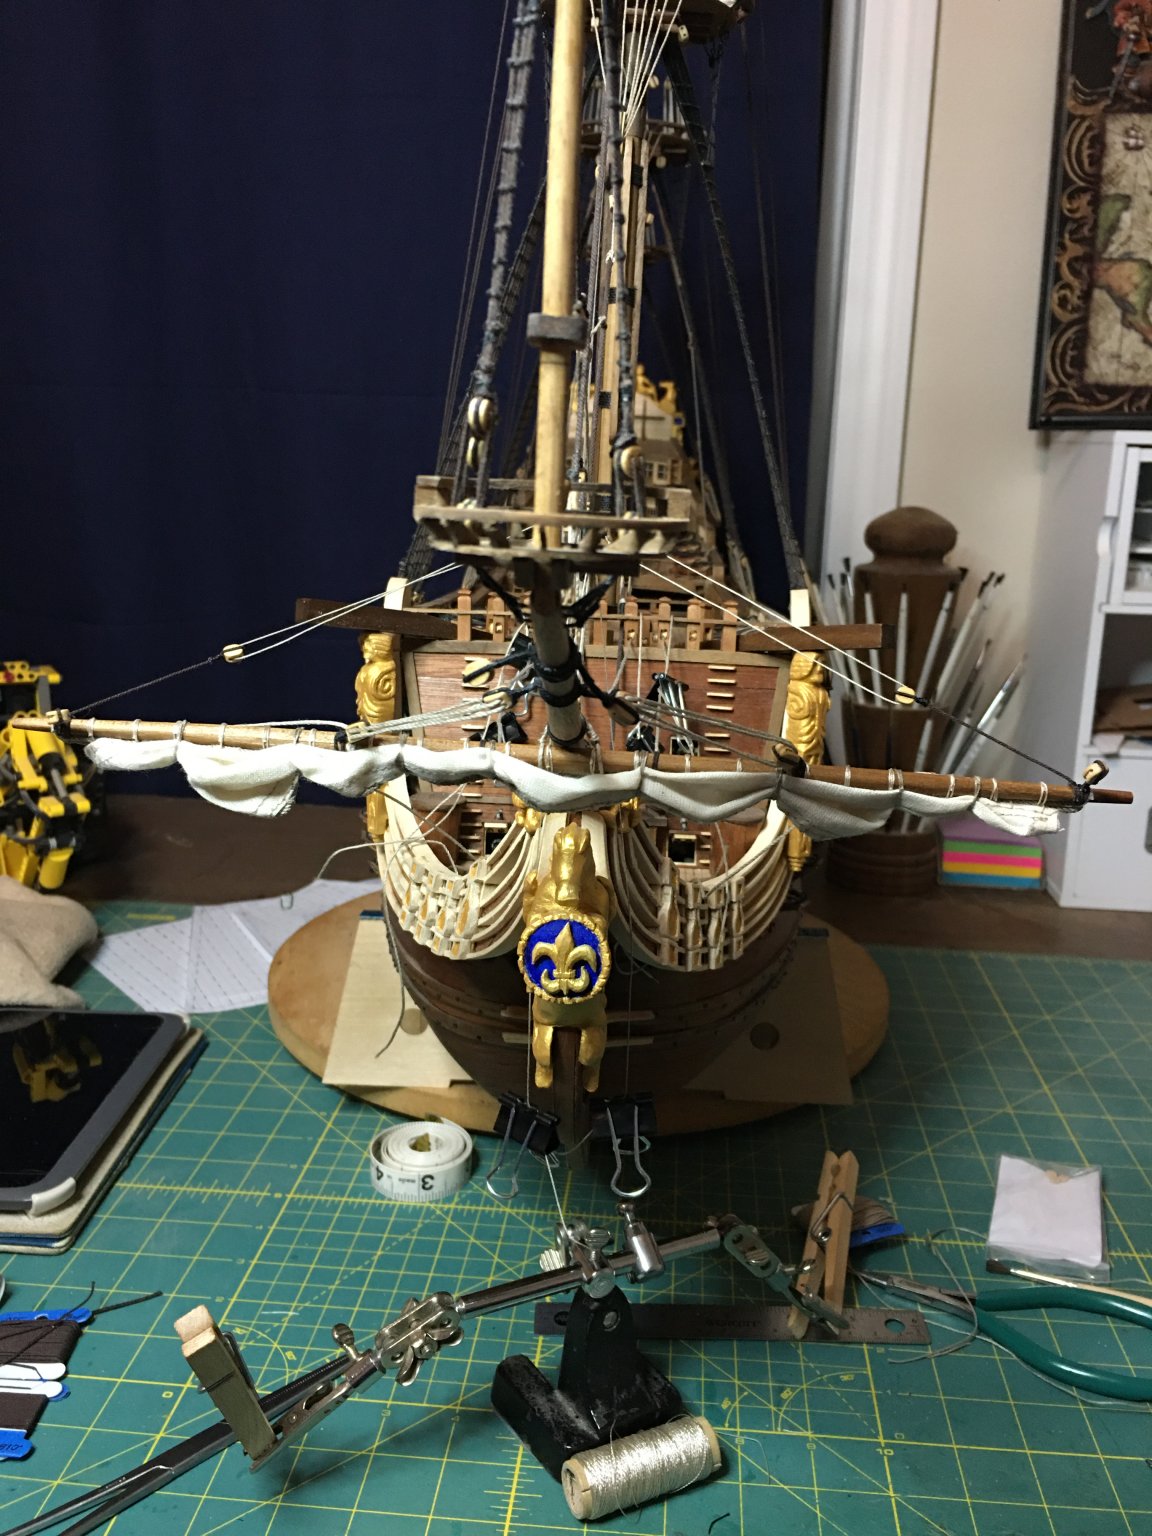
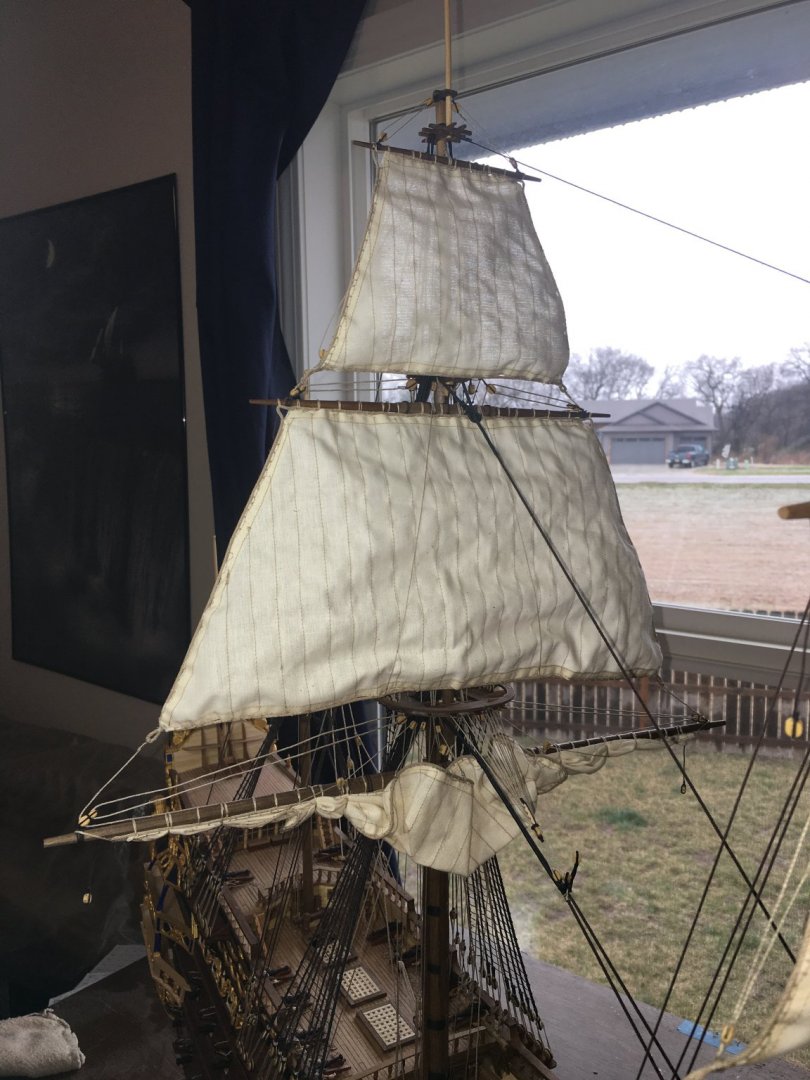
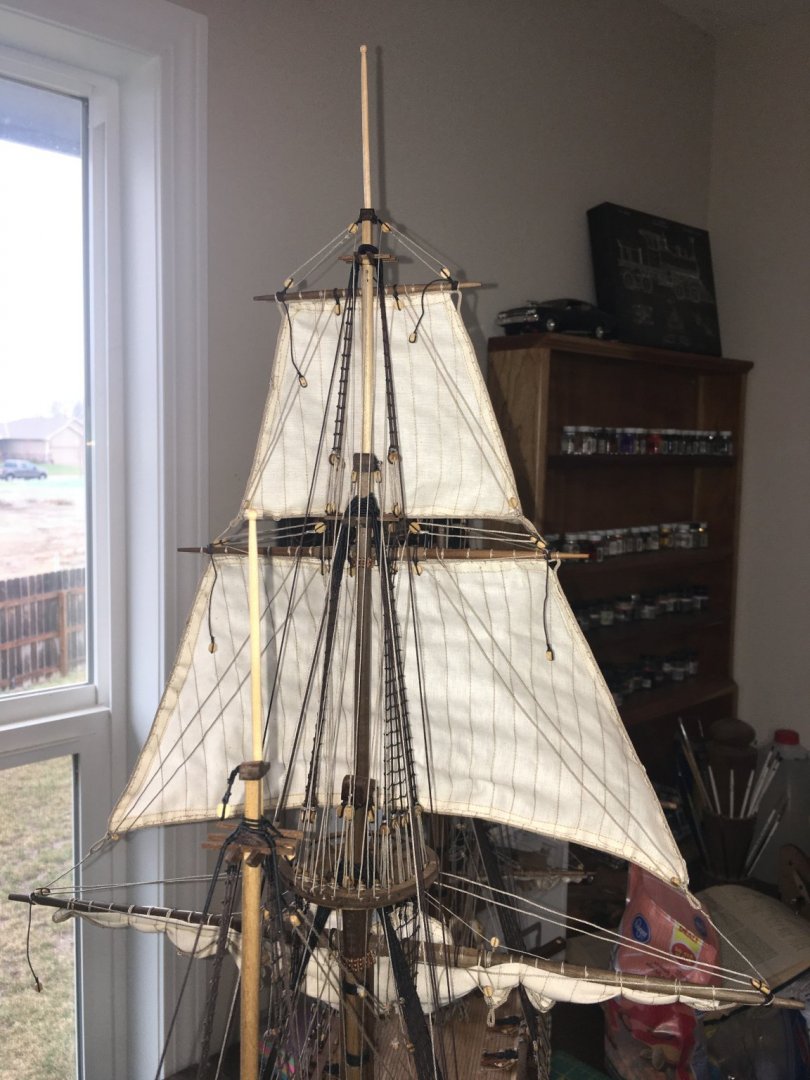
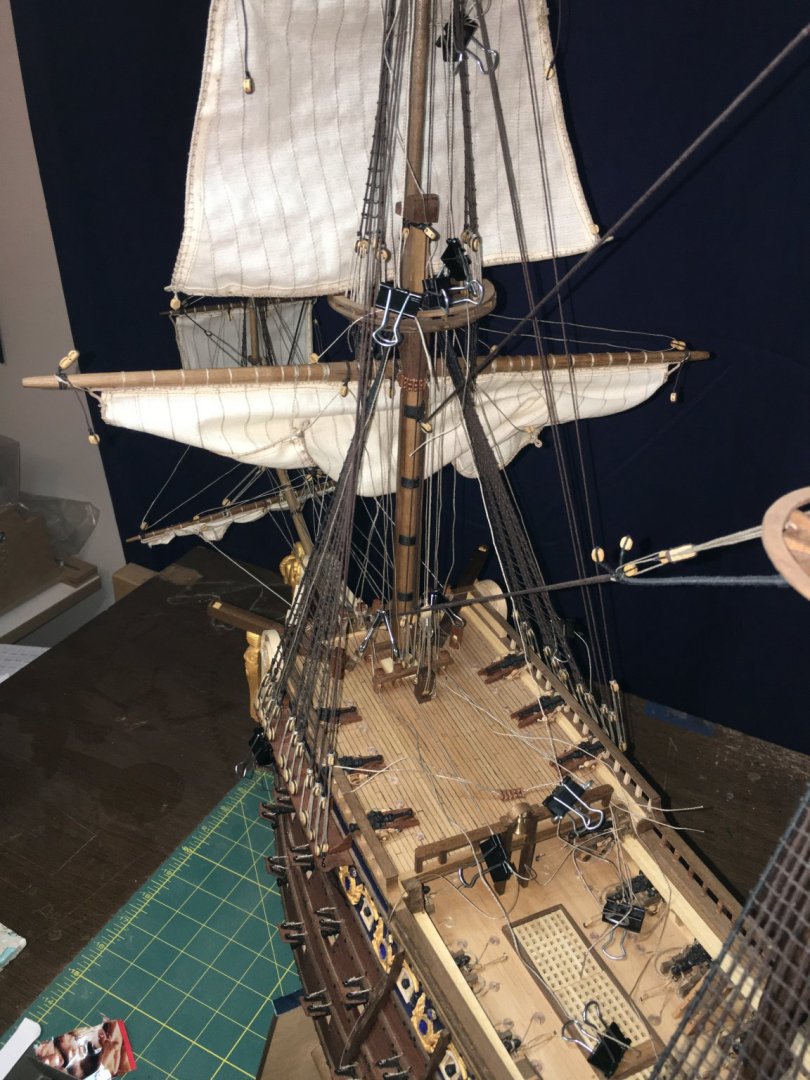
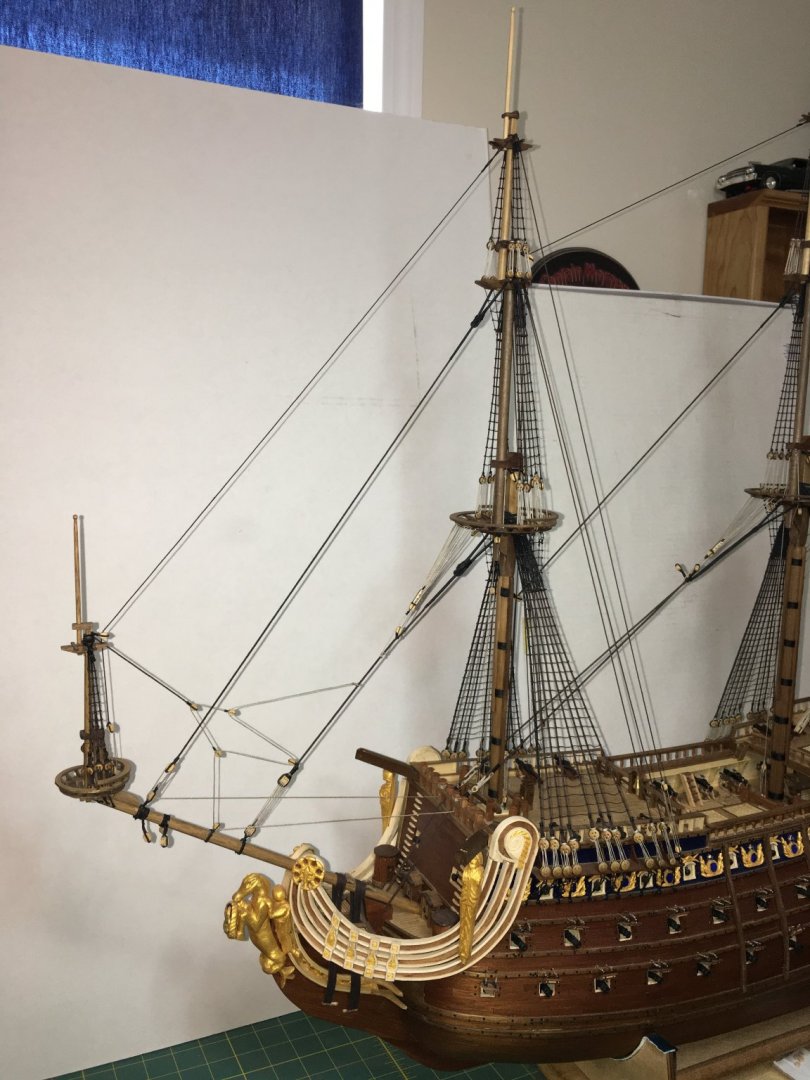
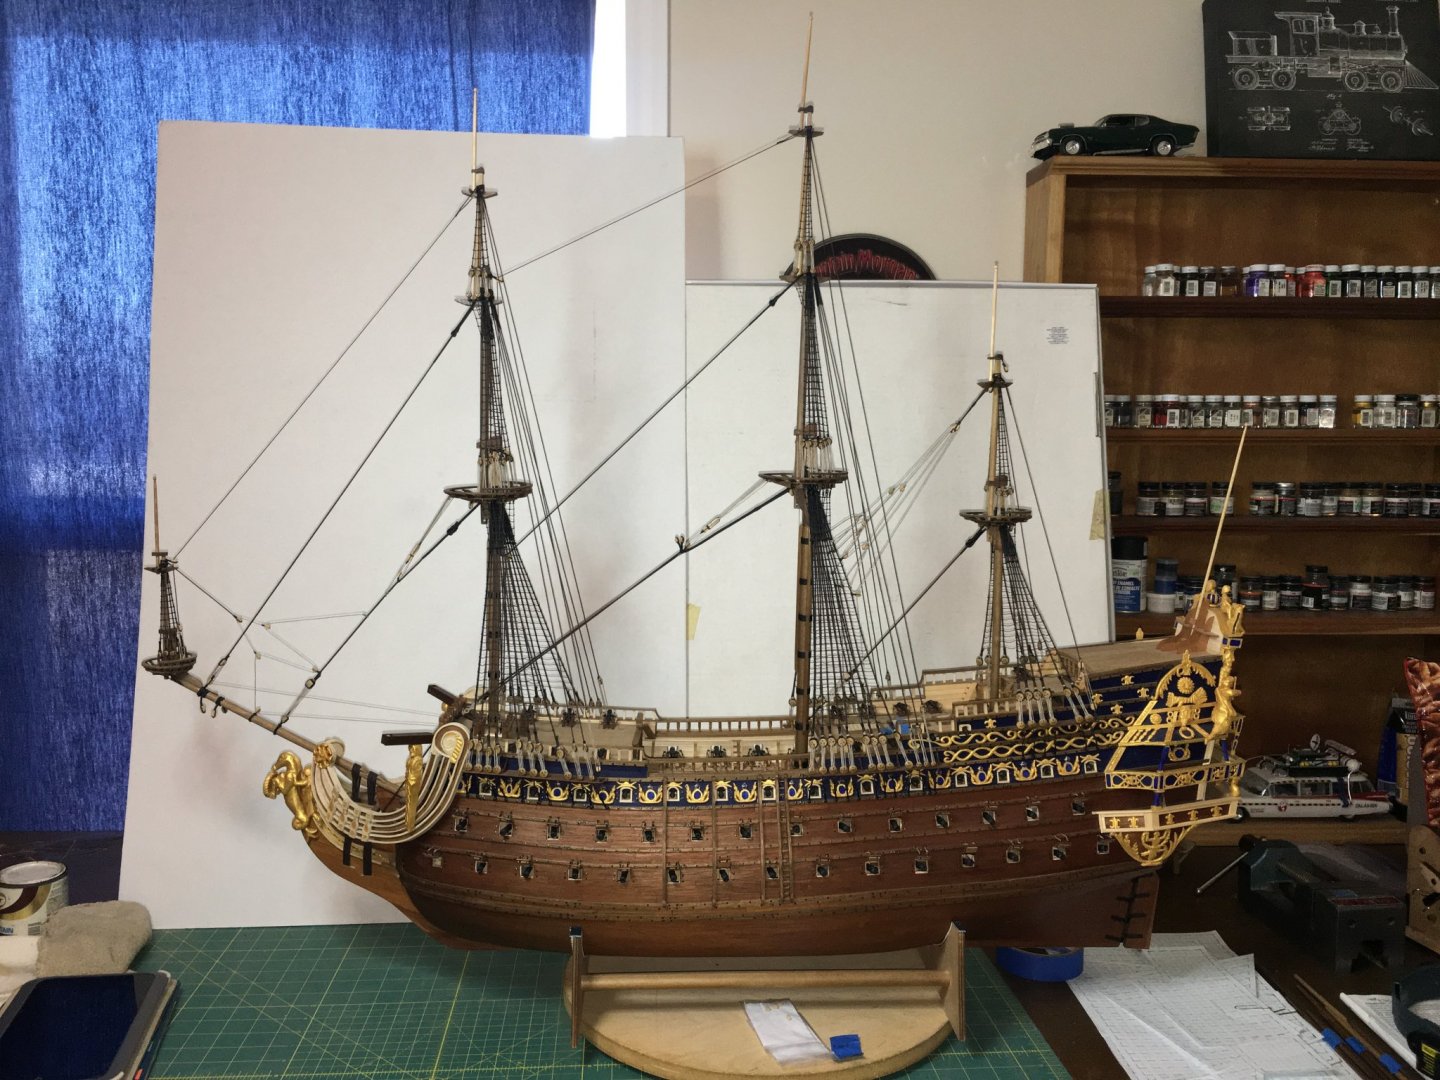
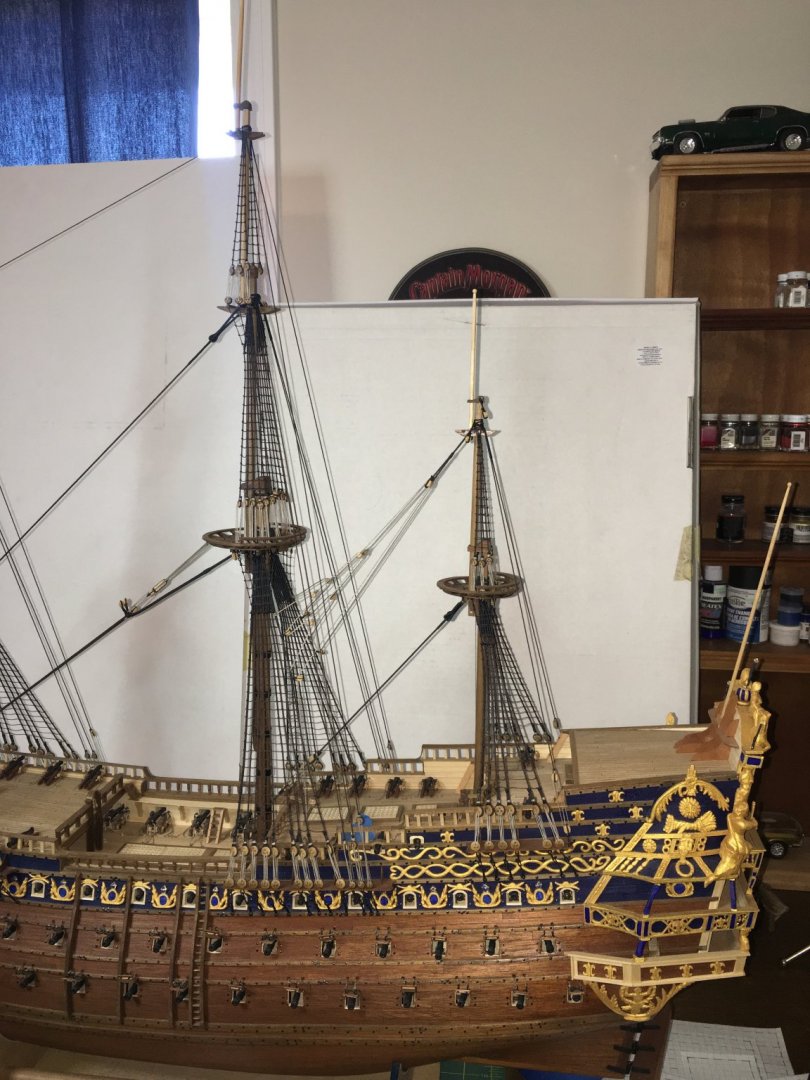
Thank you all for the kind words and likes. They always mean a lot and help keep the motivation going. I had decided to keep the courses furled mainly for viewing purposes. I had made them large enough that I could have displayed them either way, but after viewing the ship with them set, I did not like how they blocked the view of a lot of other details. It was not so bad right now as I can spin the ship and get in close to see things, but I thought about it when she will be in a case and viewing will be restricted. Having the courses furled and a ship under topsails was not unheard of in reality and that would eliminate blockage of the deck details. I'm still debating on the lanteen sail. It is a unique sail that could prove interesting to have set, but I wonder if it will block too much as well. Will look at it both ways also but I have a feeling it too will become furled.
-
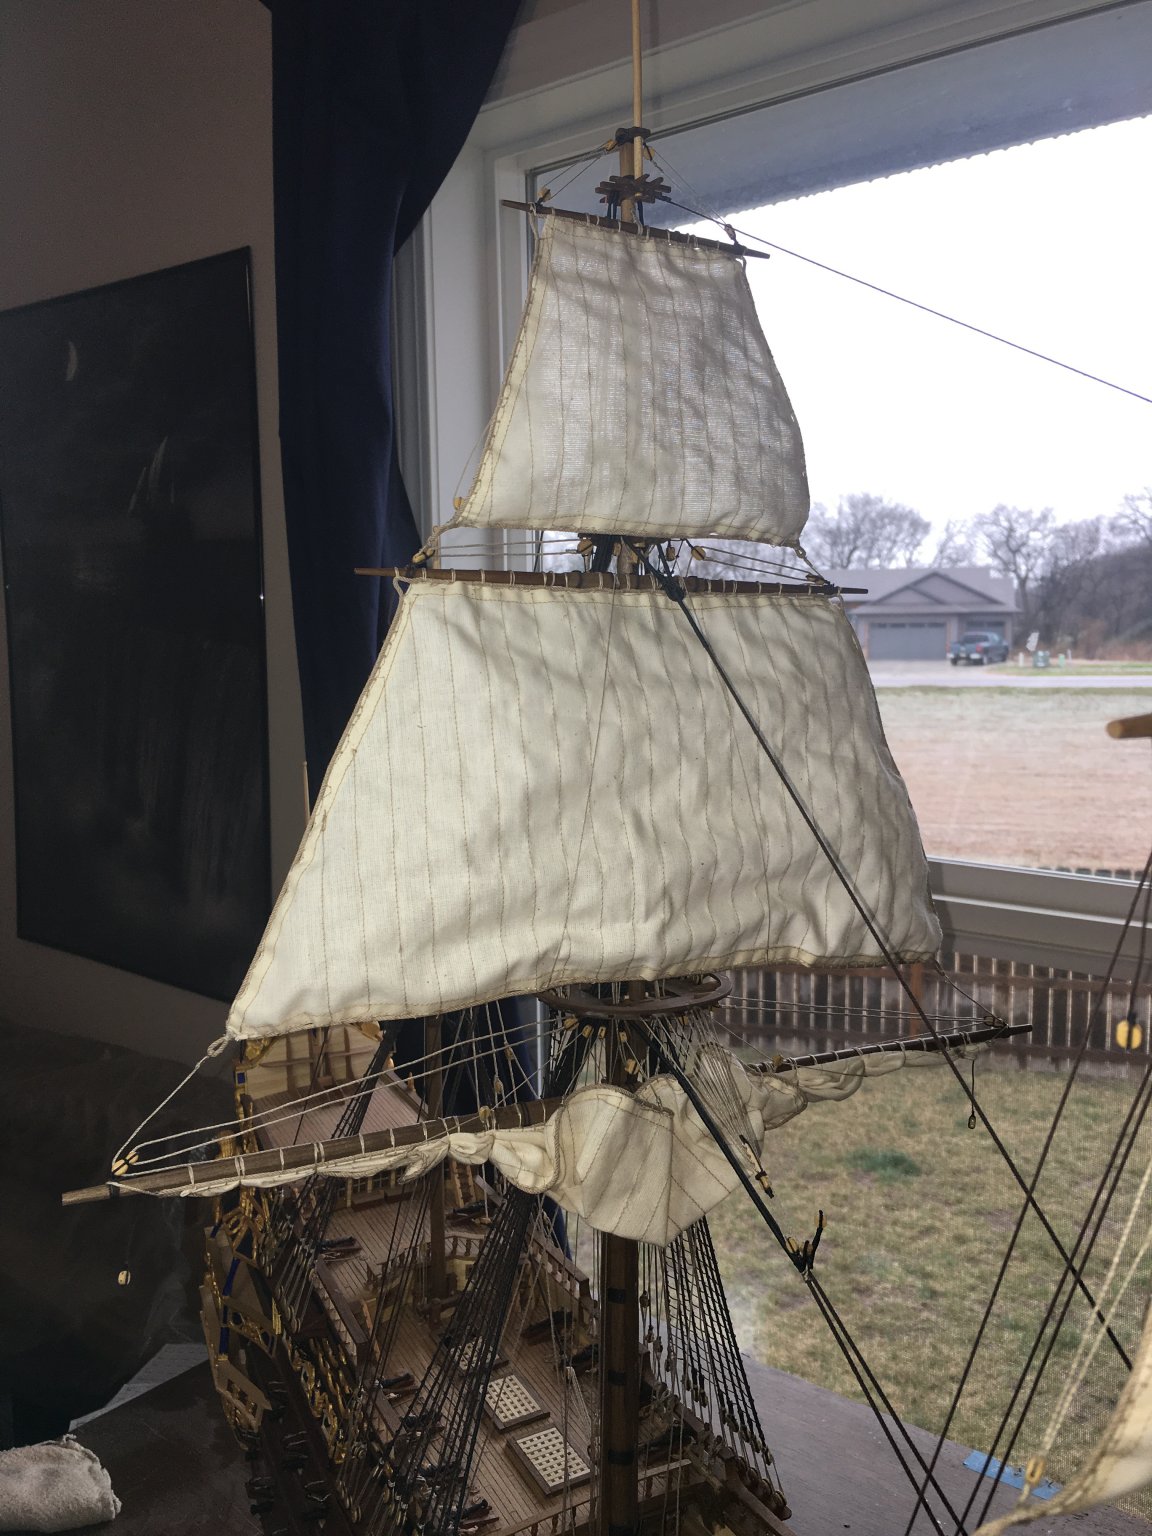
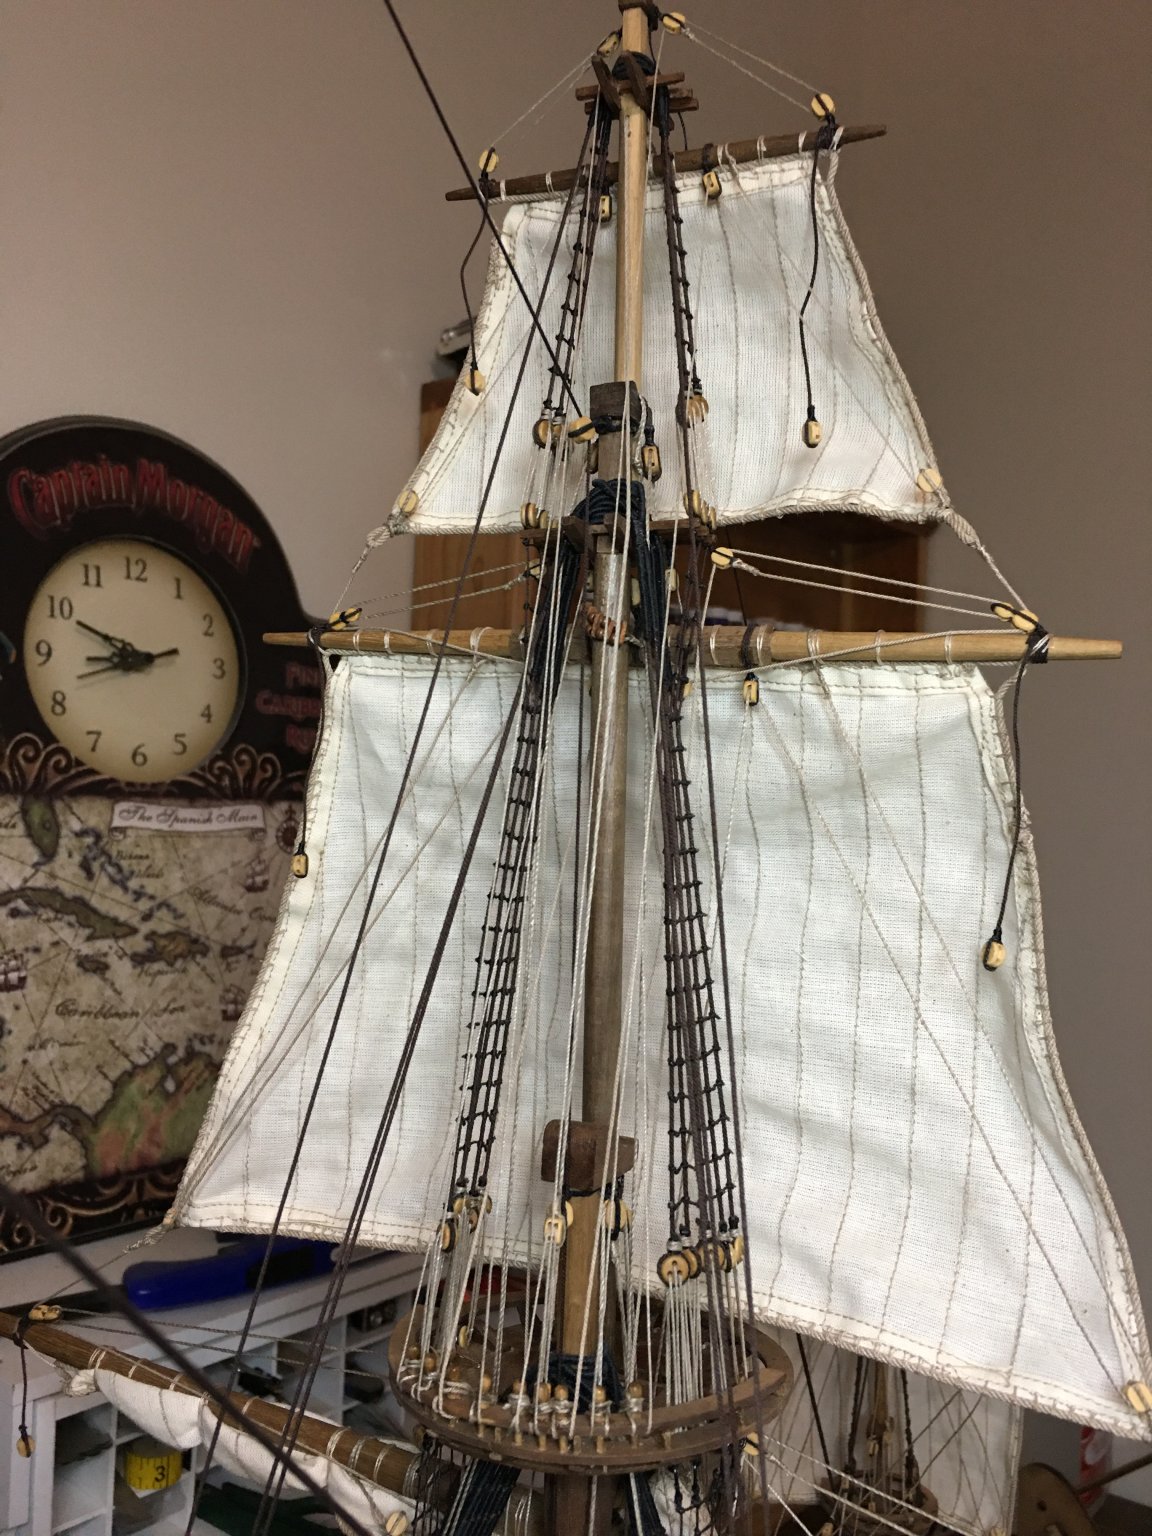
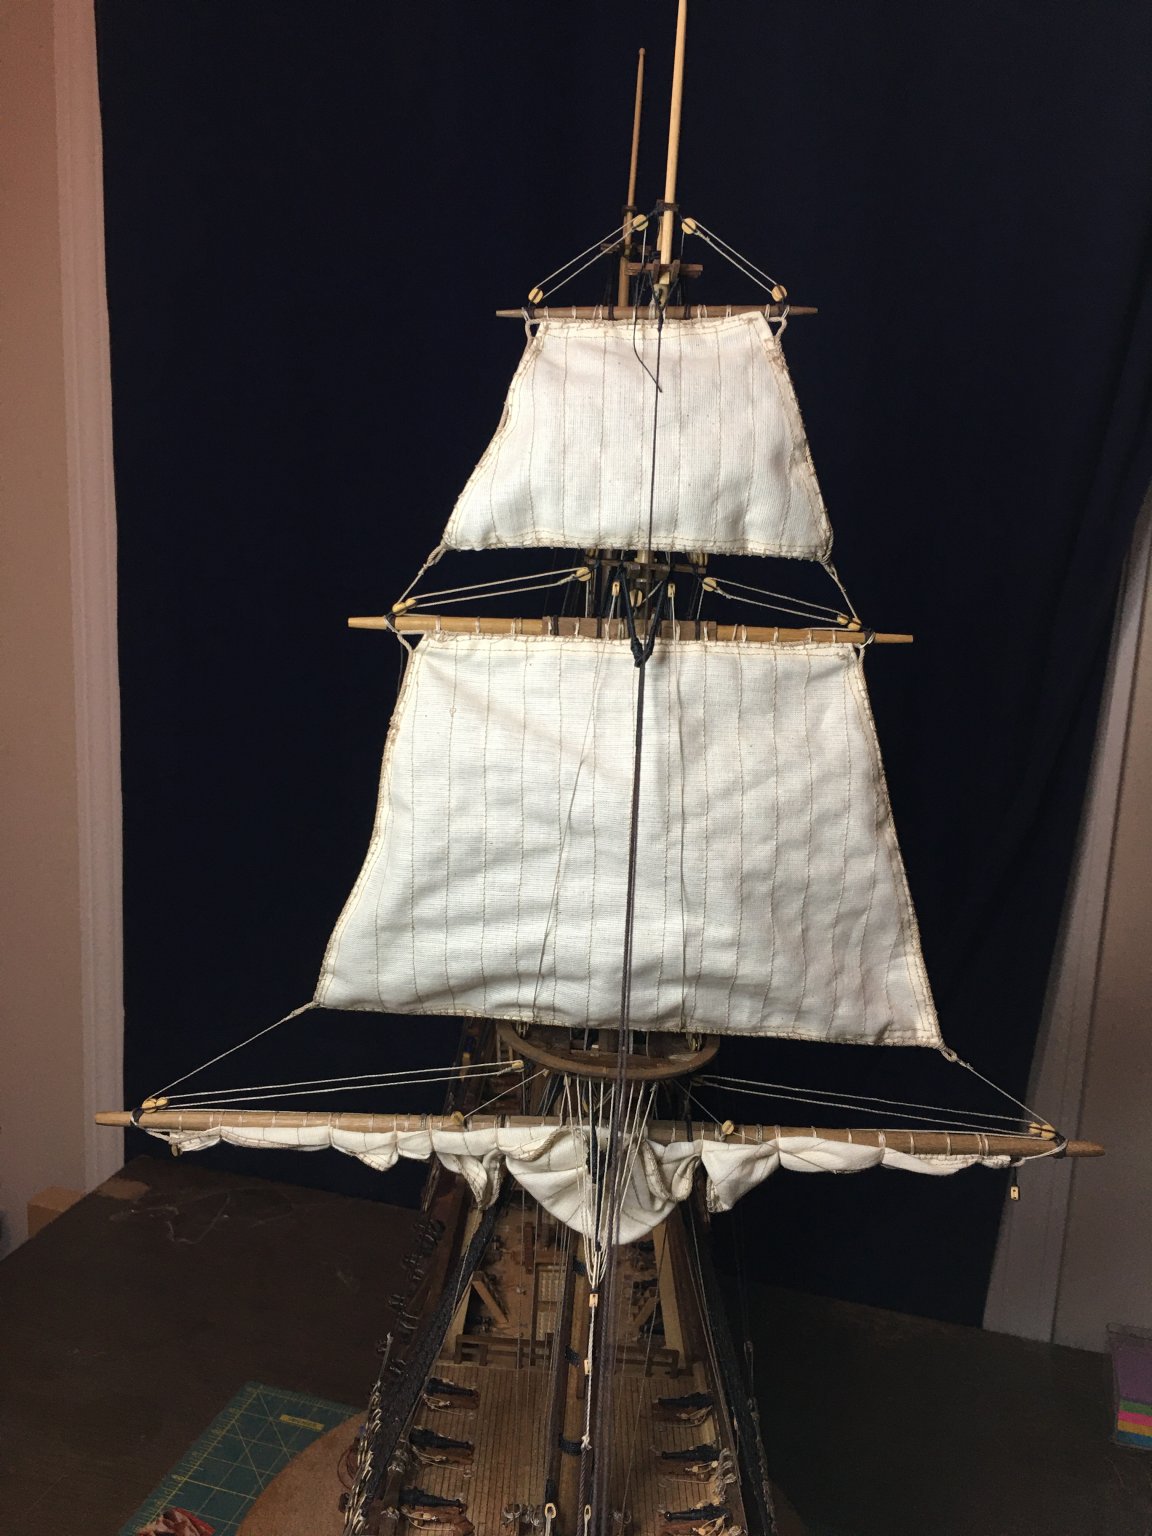
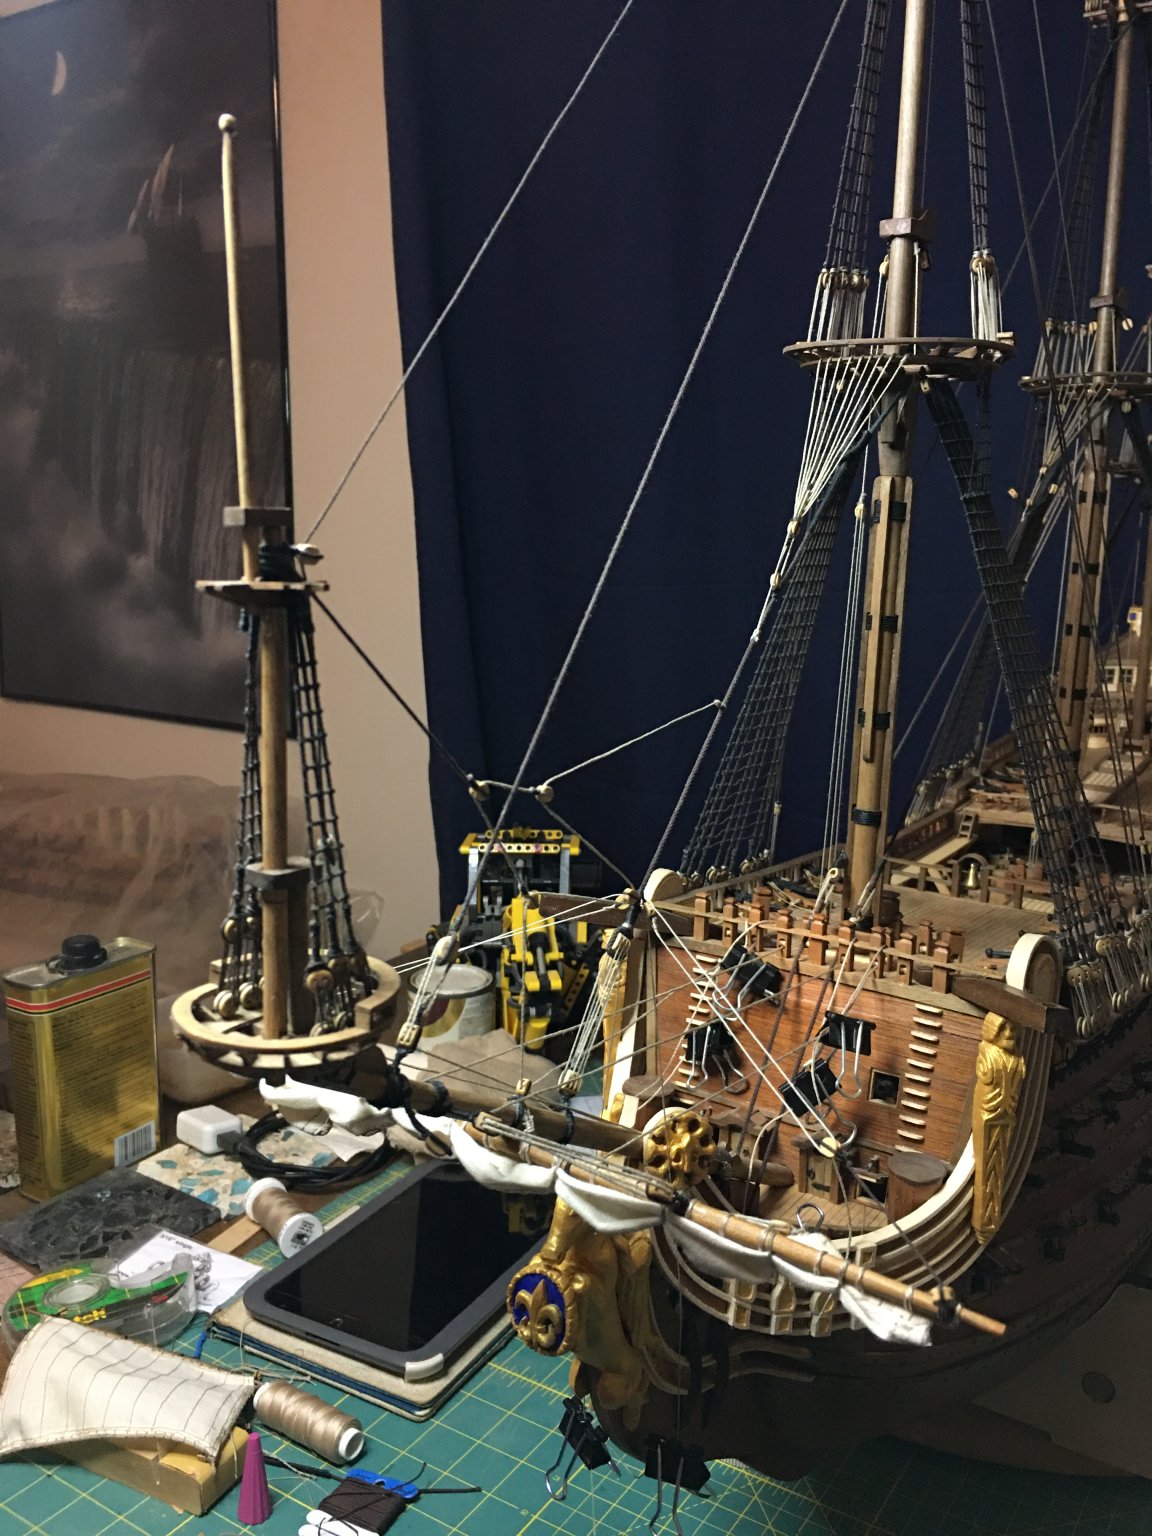
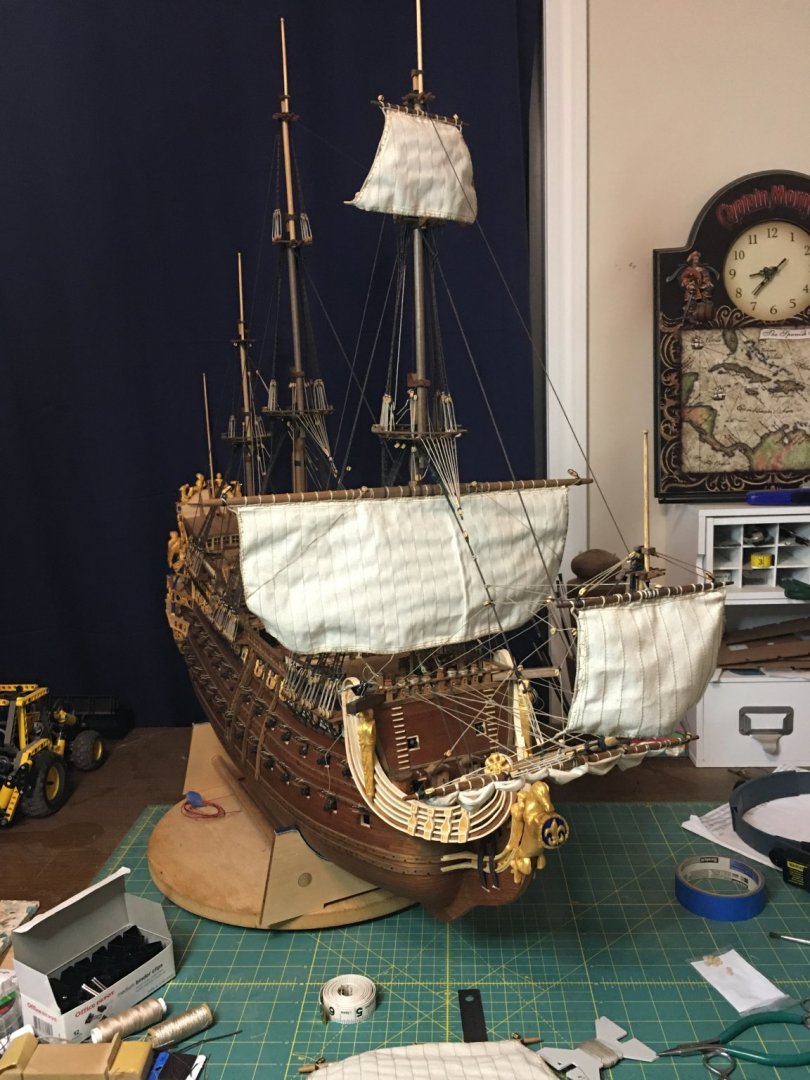
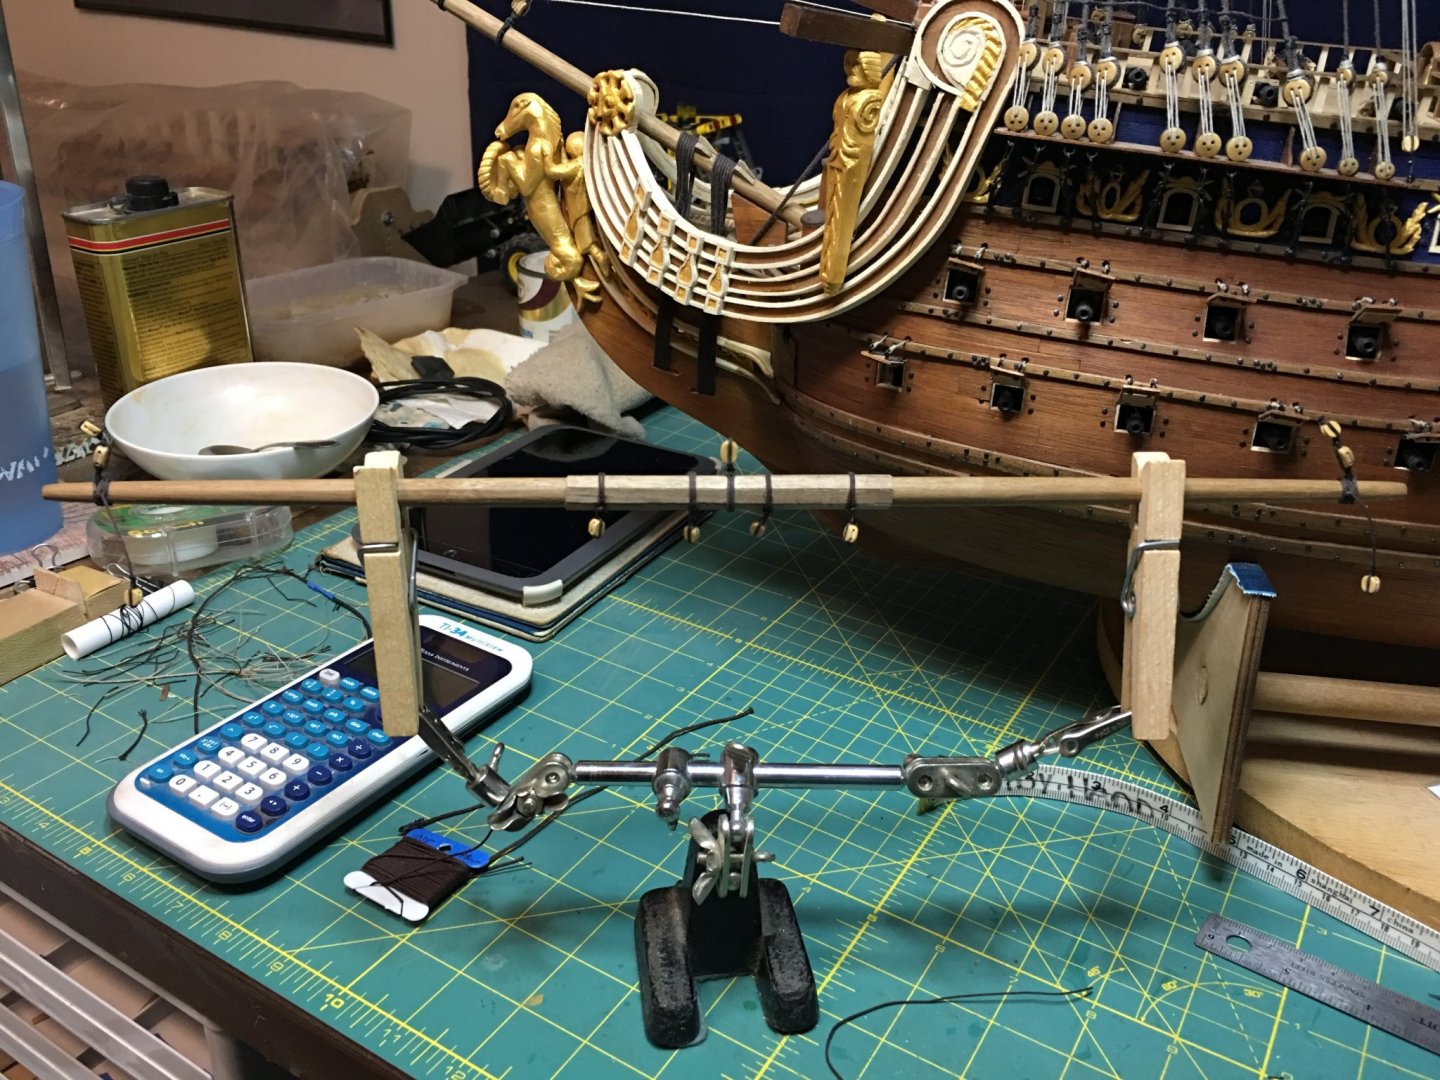
Main sails are in place and rigged. As with the fore sails, the braces will wait till other work is completed before I rig them as they just get in the way of any work on the interior. Now to work on the mizzen sails. The mizzen top will be similar to what has already been done but the lanteen will take some study. Once the sails are complete, there is not much left to build. Anchors and lanterns then she will be ready for a case.


- 961 replies
-
- 16
-

-
I'm a bit late to the build but it did give me a nice way to spend my lunch break reading through what you have done so far. Looking forward to another great build, and of a kit I have not seen before is always an informative adventure.
-
Bravo! Well done indeed, a fine model to display proudly.
- 120 replies
-
- 1
-
-
- crabbing skiff
- Chesapeake Bay crabbing skiff
- (and 3 more)
-
Tonight I finished the foresail running rigging except for the braces which will be installed after all the sails are rigged for easier access. I’ve learned a lot on this set of sails which I am hoping will allow for the main sails to go smoother and quicker as I will be basically reproducing what I just did.


-
Progress update on the sails, slow but gaining. There are some evenings when I spend an hour or two and may only have one rigged line to show for it. Lots of fitting, and refitting, adjusting and making sure the lines don’t foul each other. I am gaining ground and the nice part is that the main sails should go smoother as I will have the fore sails to reference.


-
Beautiful work indeed! I'm loving seeing this all come together. As you are modeling this to closely resemble Berain's drawing, where the four seasons will rest, in particularly the two inside figures, would you need those decorative mullions between windows 1&2 and 5&6? I'm having a difficult time determining if there is open space behind those figure as the shadowing kind of makes me think this, or if they are flat against the bulkhead as the outer two figures more closely present. This is one of those aspects of this drawing that has made determining the extent of the stern balconies difficult.
- 2,699 replies
-
- 3
-
-
- heller
- soleil royal
- (and 9 more)
-
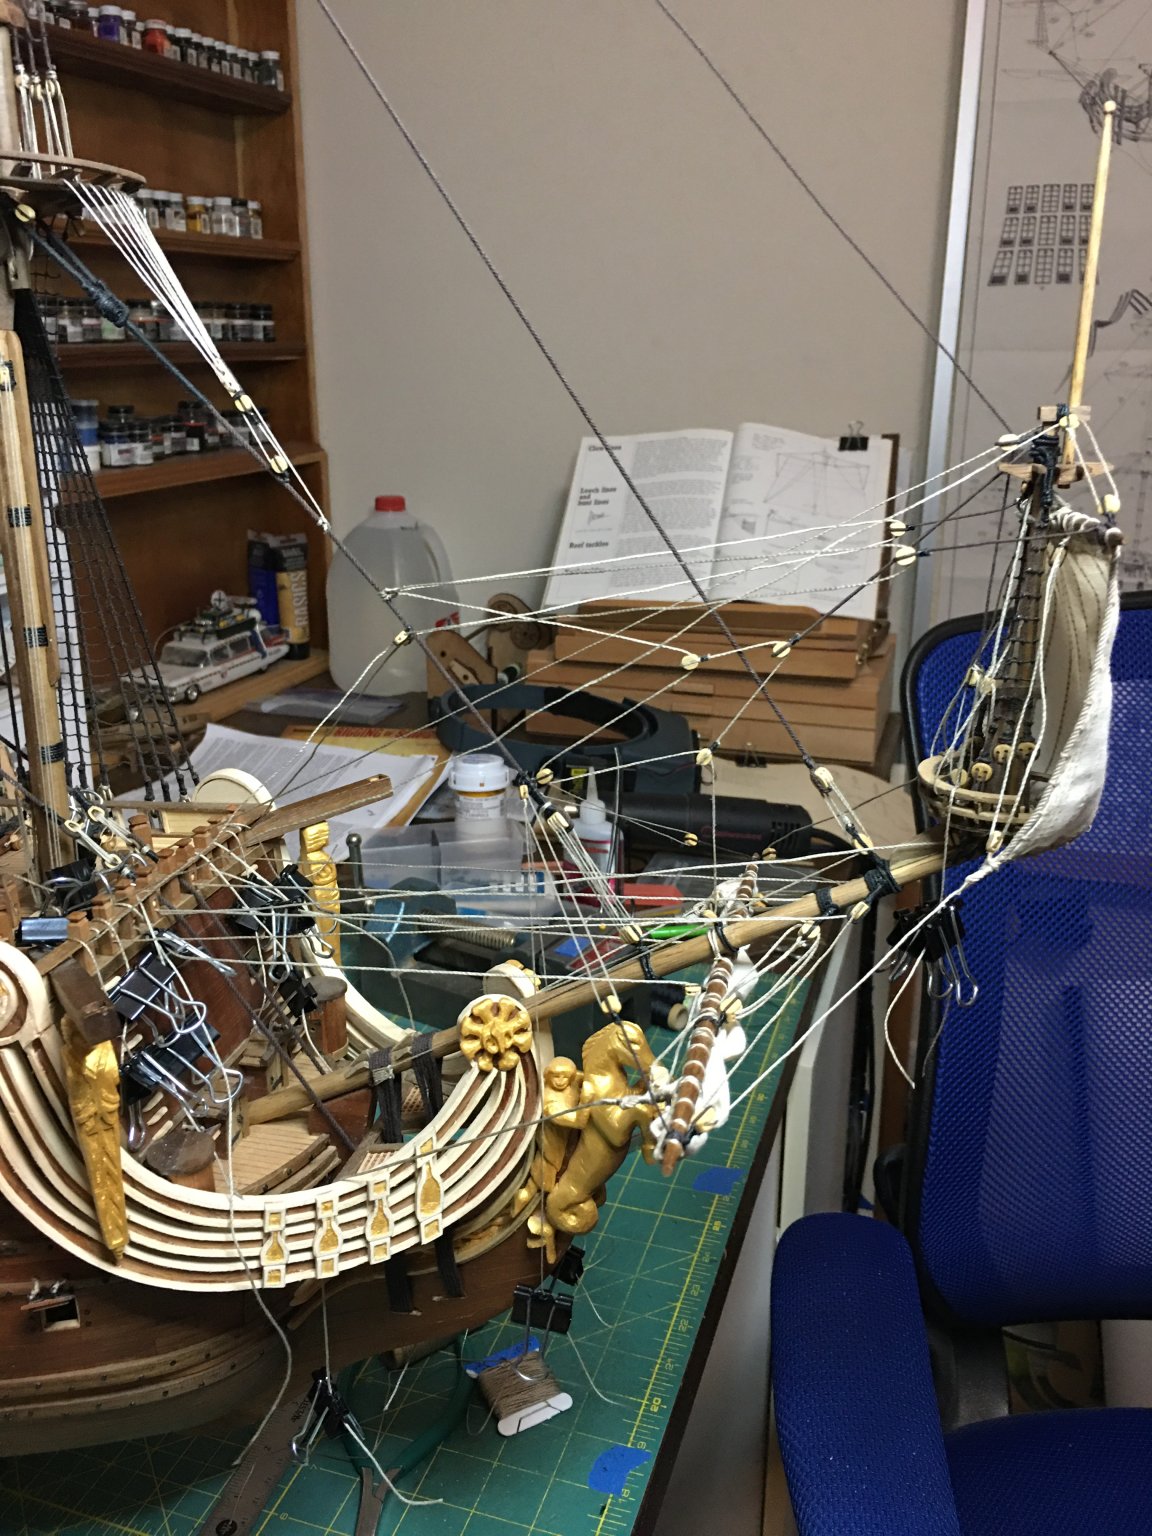
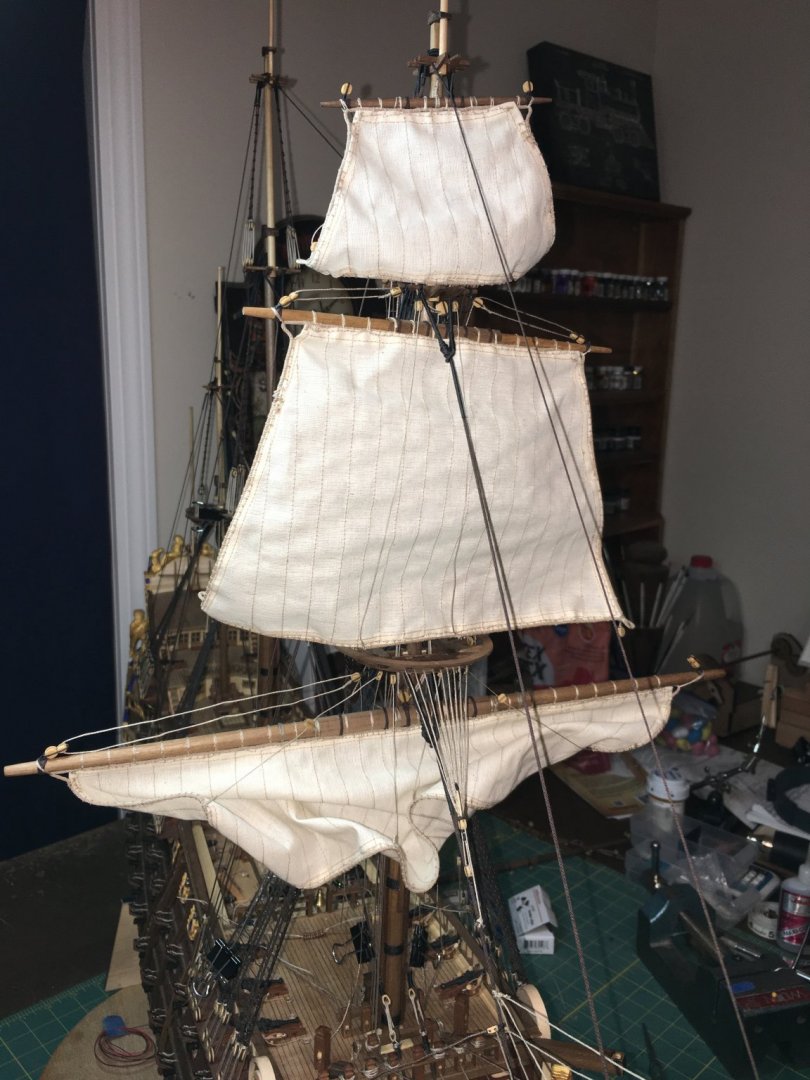
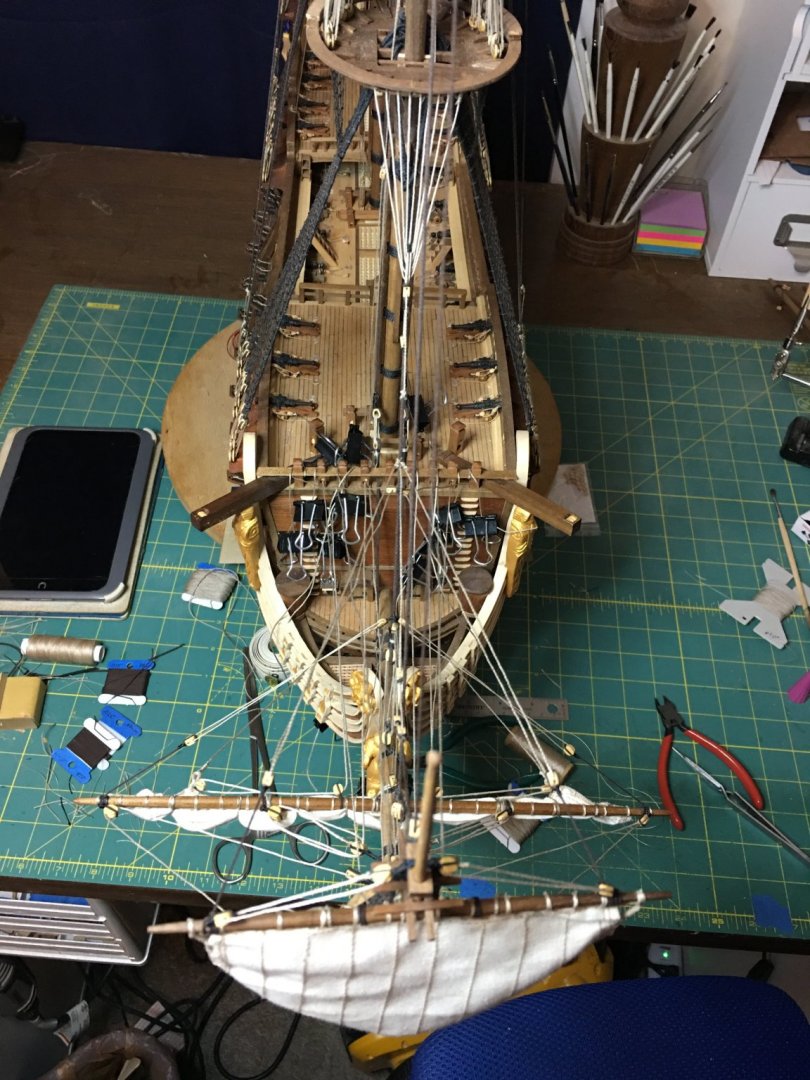
Just a quick update, both spritsail are secured in place and I am now fitting the fore sails. I bent all three to their masts this weekend and have finished adding all the clew, bunt and leech lines to the course along with their corresponding blocks. Now to start threading the lines and locating them to their belaying points.
-
The spritsail topsail is on the ship, all lines are in place and free of fouling. Now to secure them and then onward to the fore sails. Im very happy with how the sails are progressing so far. If not for this site, I doubt I would of attempted to do this. All of the great build logs have helped me immensely. A specific thank you to Michael (md1400cs) whose Vasa build gave me a lot of guidance.


-
Thank you all for the nice compliments as well as the likes. Sail work continues and today the first sail is set on the ship. The spritsail is in place with her lines run though not secured yet. I did not want the sail to obscure the figurehead so I am leaving this one furled. Tomorrow I will work on the spritsail topsail.


- 961 replies
-
- 10
-
-
That is indeed a tangle of wires, a situation I fully understand as the aft cabins of my S.R. build hide a jumble of them as well. Well done routing them in such a small space. I'm still trying to figure out how I am going to run the wires through the display case to the switch also. I am thinking about creating a tube through the cradle itself to get it below the case's base. Once there, I can turn them and run to the switch with relative ease....
-
She turned out awesome O.C.! As others have said, the figures, the details, the overall appearance of the ship all contribute wonderfully in bringing her to life in a unique way. This has been a fun build to watch come together, glad I was able to take the journey with you. Hope to catch you for the next one!
-
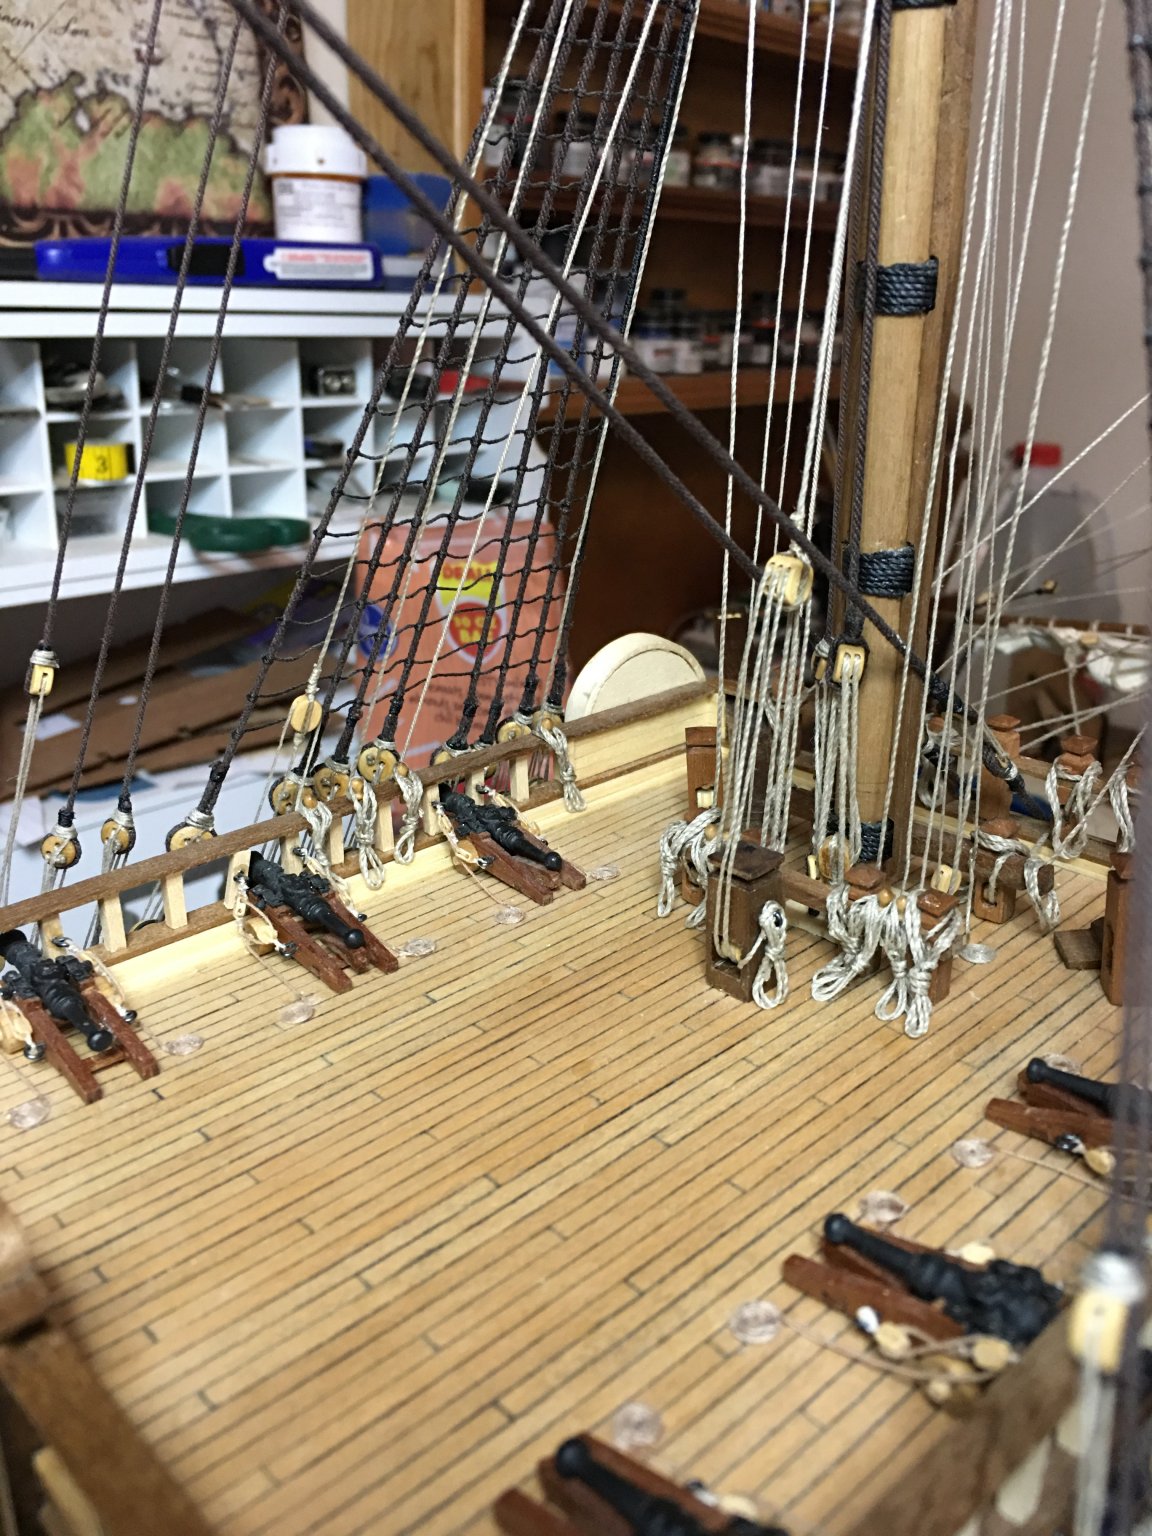
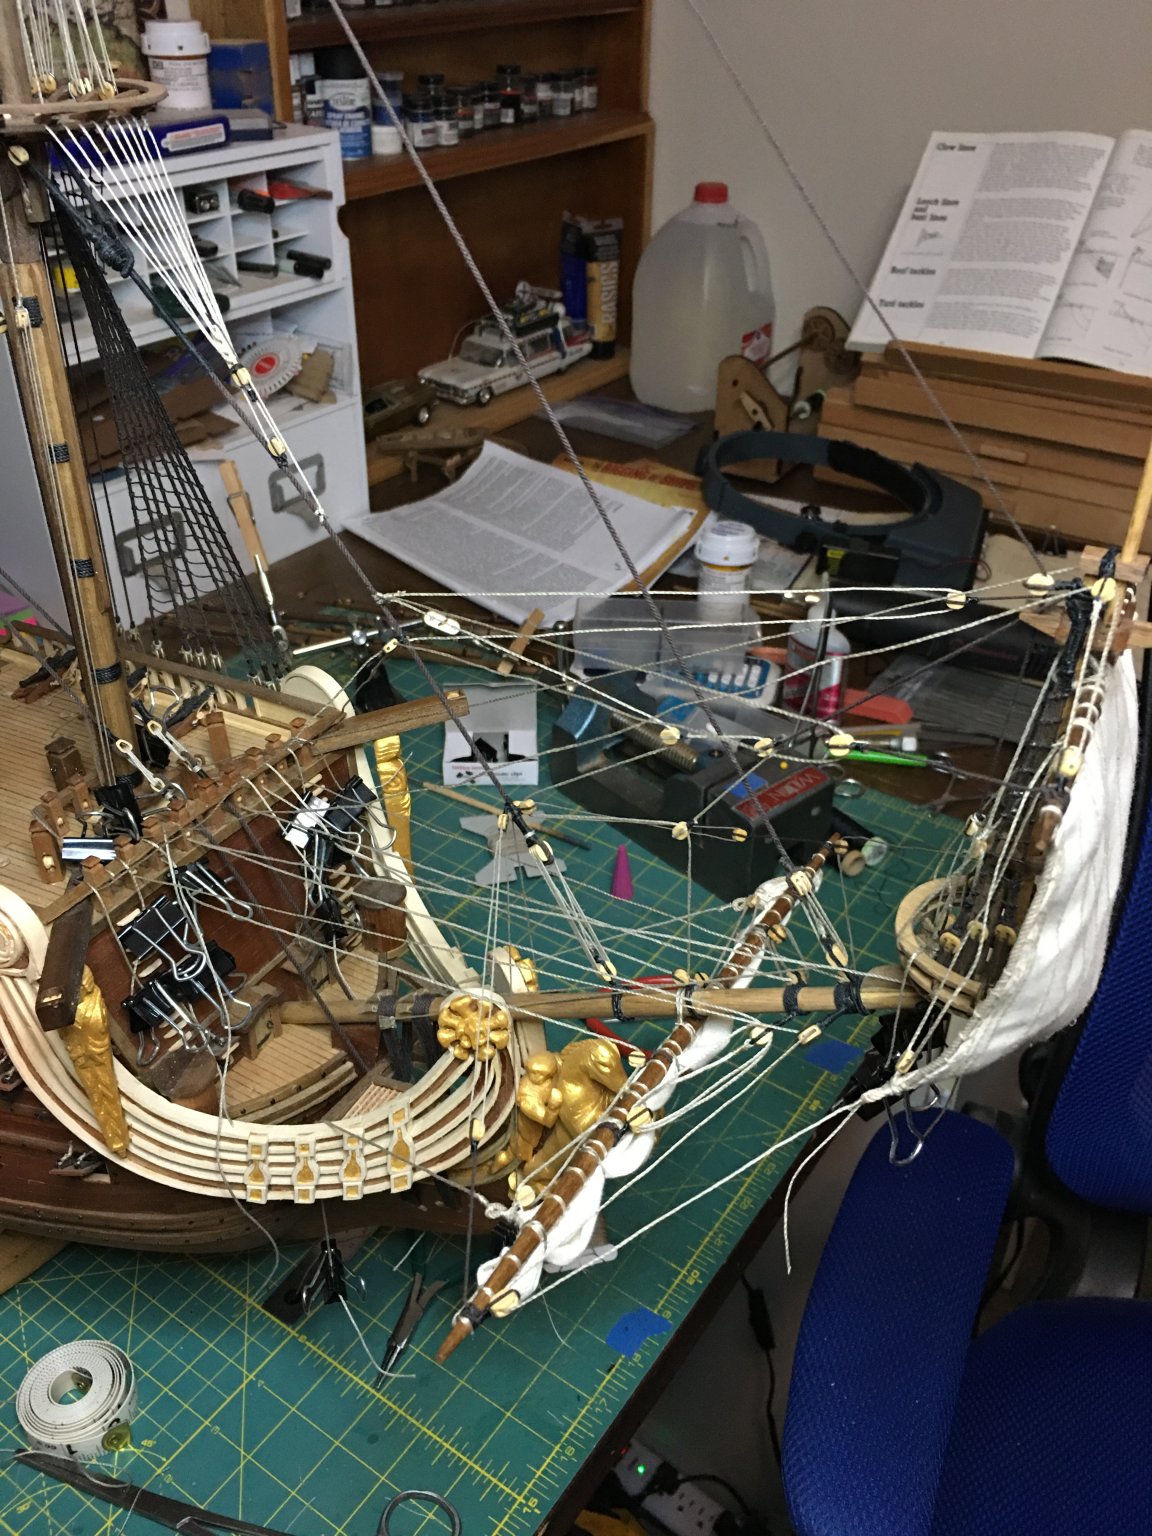
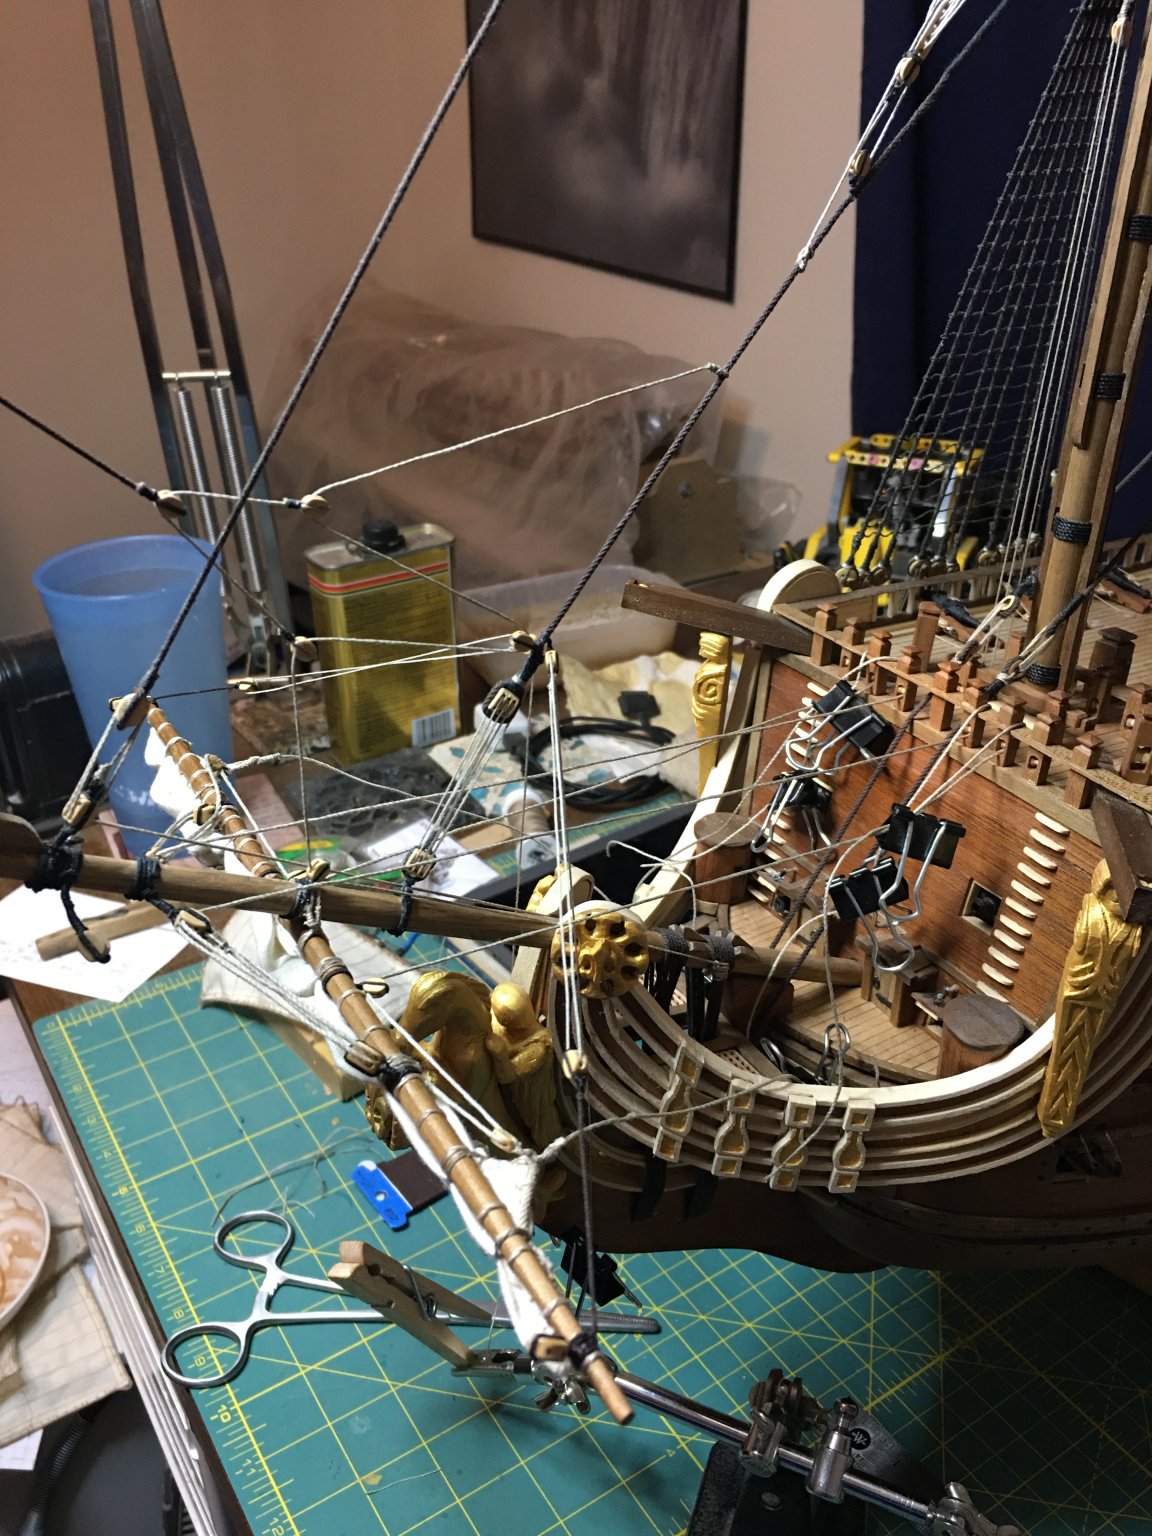
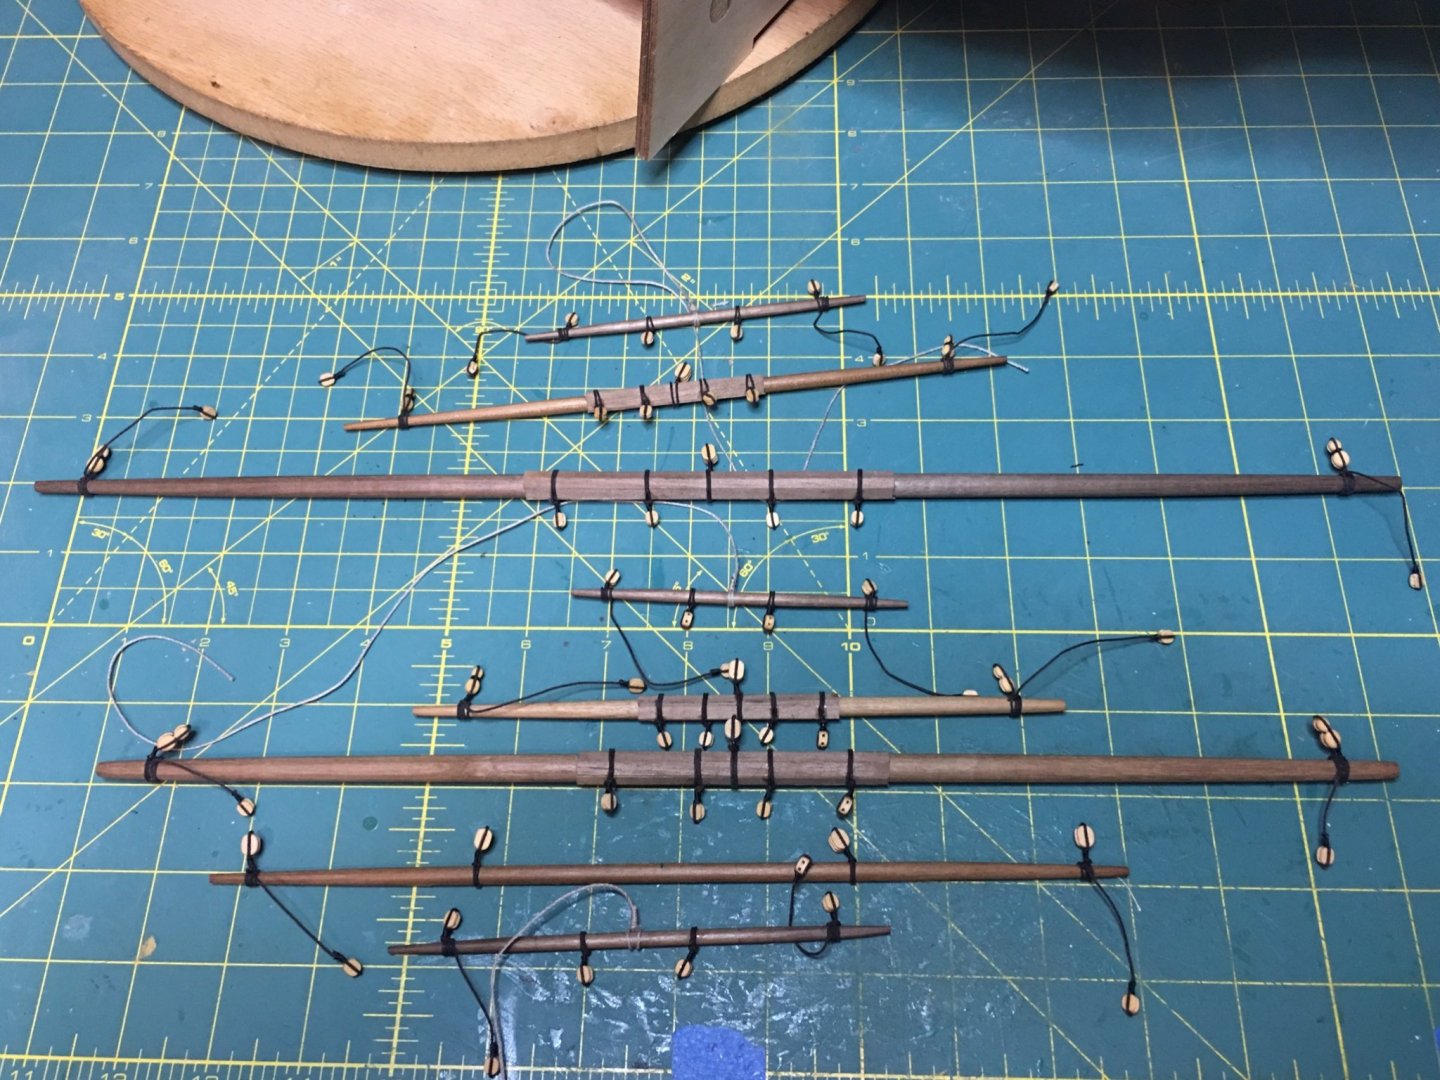
Another very productive week. Attached bolt ropes to the sails, leaving some slack to tie up the clews for rigging attachments. I also have set blocks on the spritsail, fore and main yards for the lifts, clews and braces. I will add the leech and bunt lines as needed as not all of the sails had these in this period, mainly the courses and topsails. Bending the sails to the yards will be up next starting with the spritsail and spritsail topsail.
-
The Pearl is looking great indeed! I'm enjoying this build as it is being presented in a unique way not typical to what is normally posted here in that instead of a nice, pretty new looking ship, we have a dark, weathered spooky vessel. Granted I know that is the whole point as that is what this ship is supposed to look like, but still it is refreshing to see it and you are doing a fantastic job. Now, some skeleton pirates would be a really cool element to add, though I have no idea where you could find any in this scale. Maybe if you know of someone who does 3D printing they could attempt to make you some? If not, regular pirates would be fitting as well since like O.C. said, they went back and forth between skeleton and normal forms. I believe the skeletons were only shown under the moonlight.
-
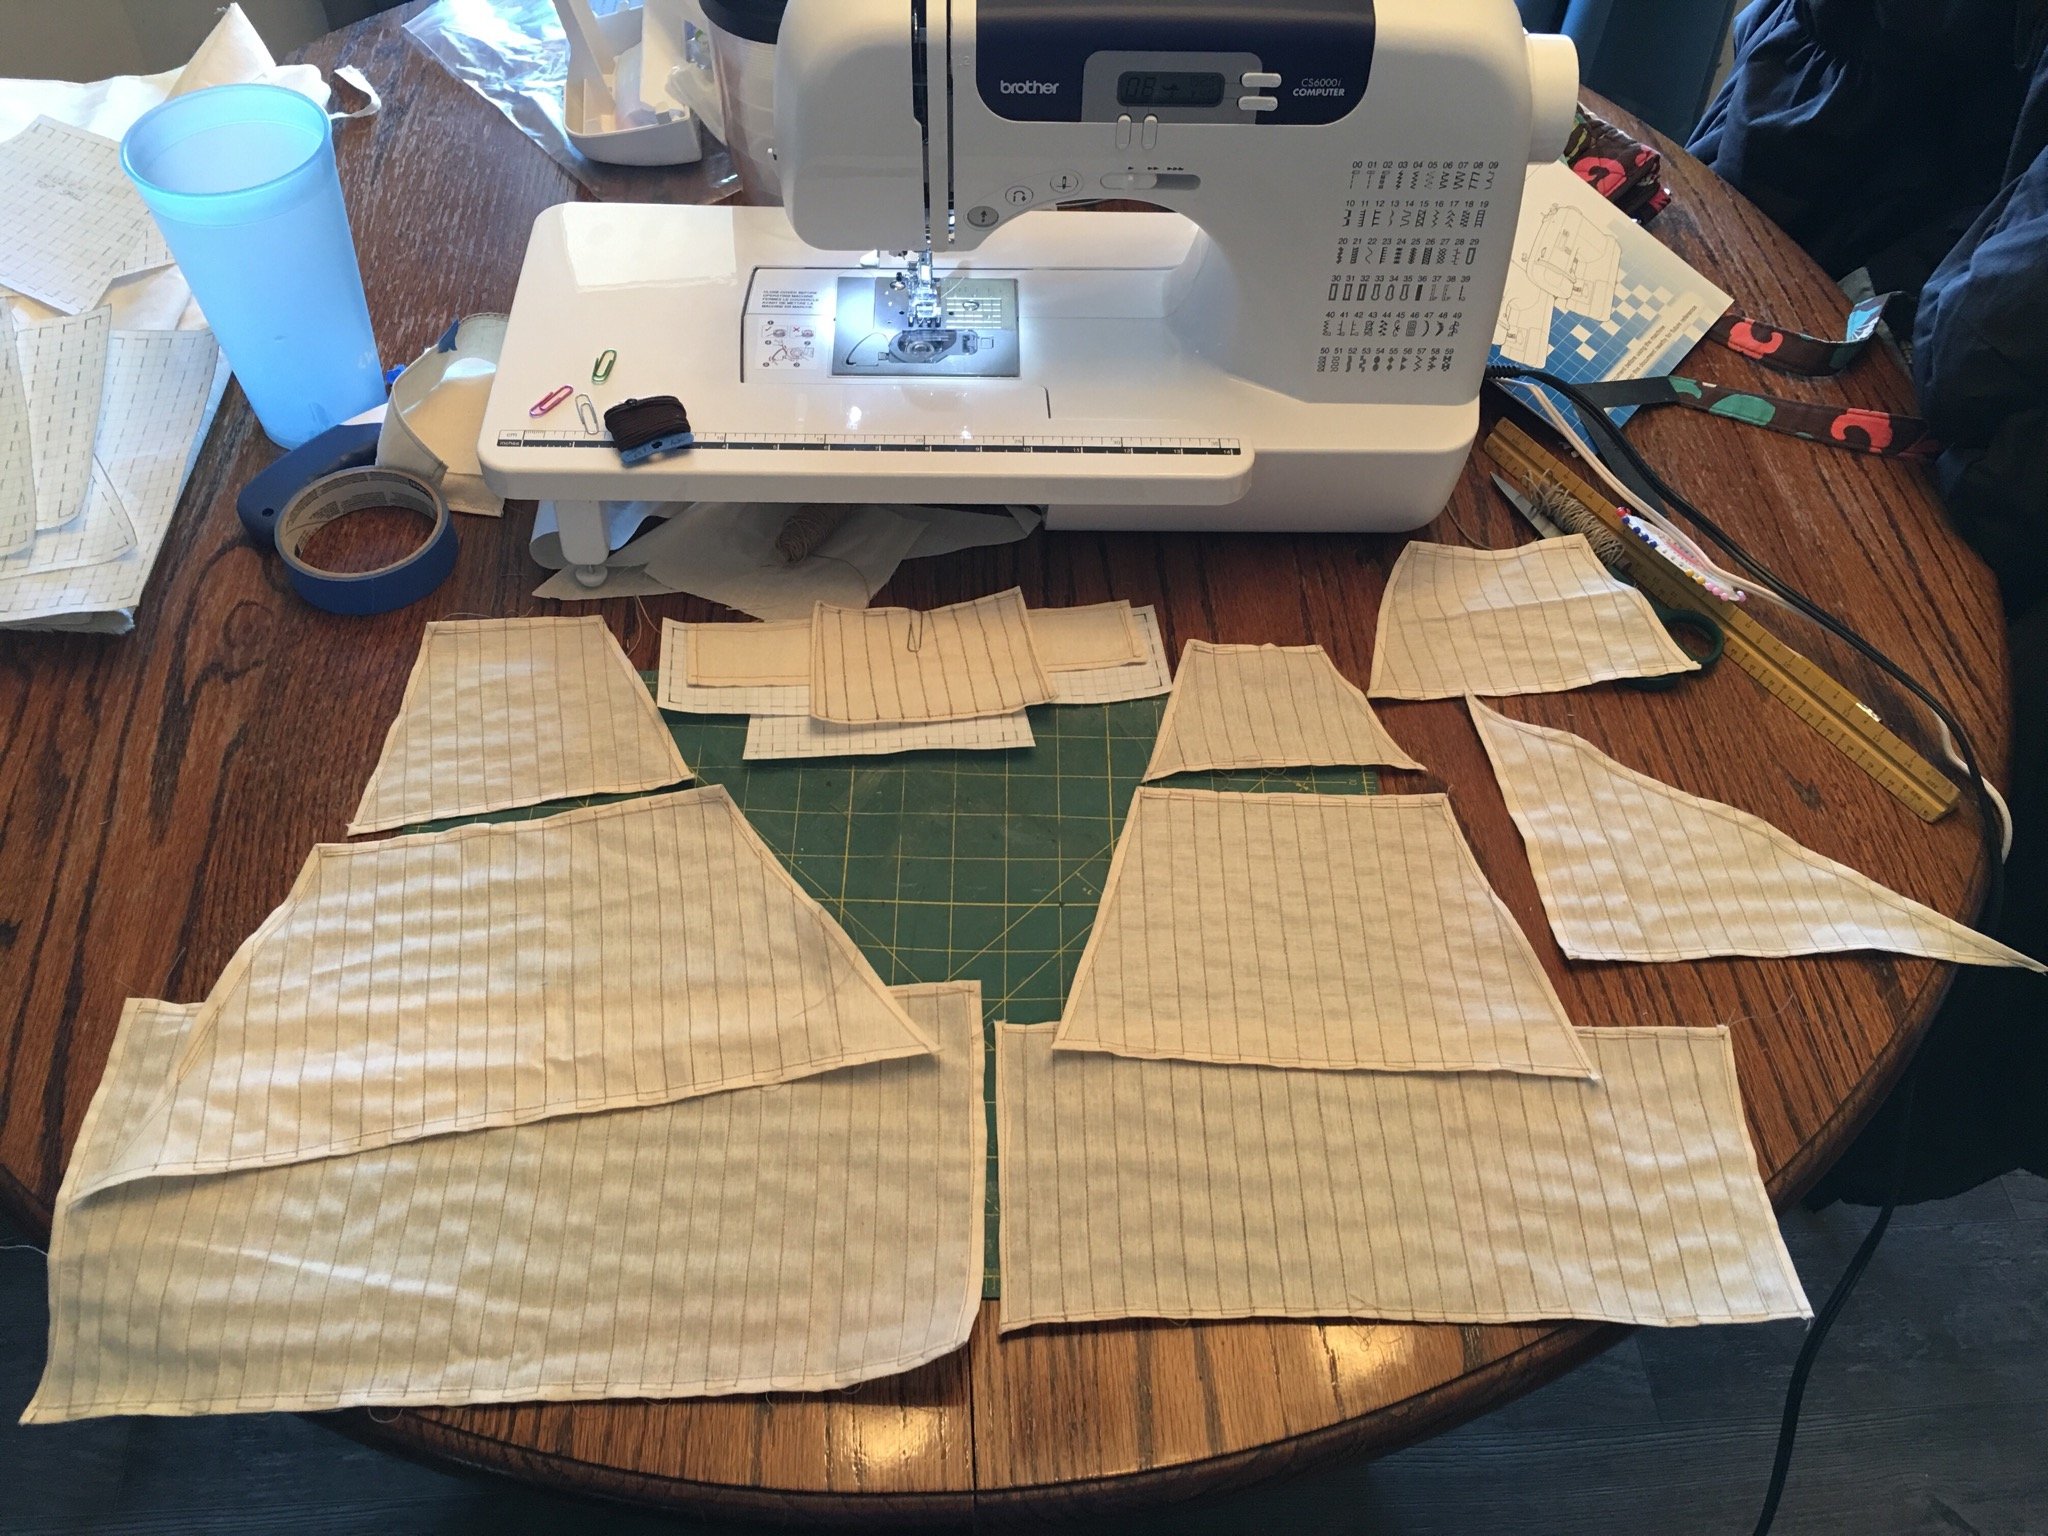
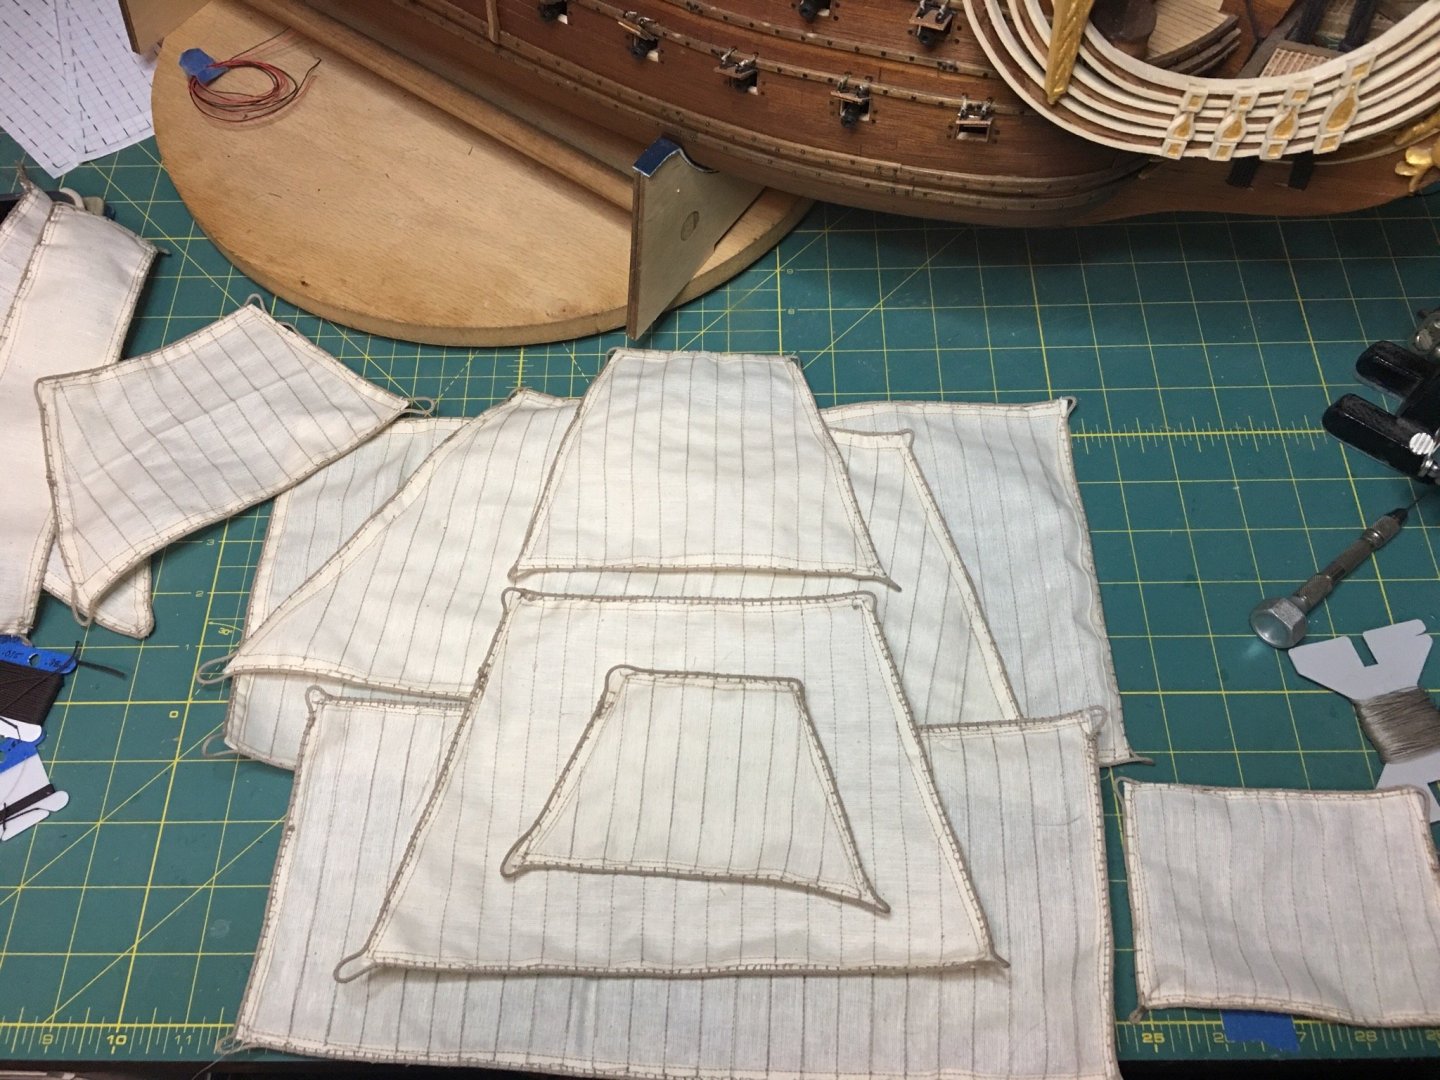
Sails are indeed a major undertaking especially with no rigging plan or supplied materials, but I think the effort will be worth while. This is my first ship with cloth sails. I’ve done the former plastic ones on my Constitution build but cloth does add extra challenges. Success! After learning how to use a sewing machine, some trial and error, I have a set of sails. I still need to clean them up and add details etc., but I have sails. More to follow.

- 961 replies
-
- 10
-
-
The stern is really coming together. You are making a strong argument for plastic modeling! The details you are achieving are incredible. I have never really thought about using plastic as a base for carvings, but I may need to look into it and experiment some for my Royal Louis build.
- 2,699 replies
-
- 3
-
-
- heller
- soleil royal
- (and 9 more)
-
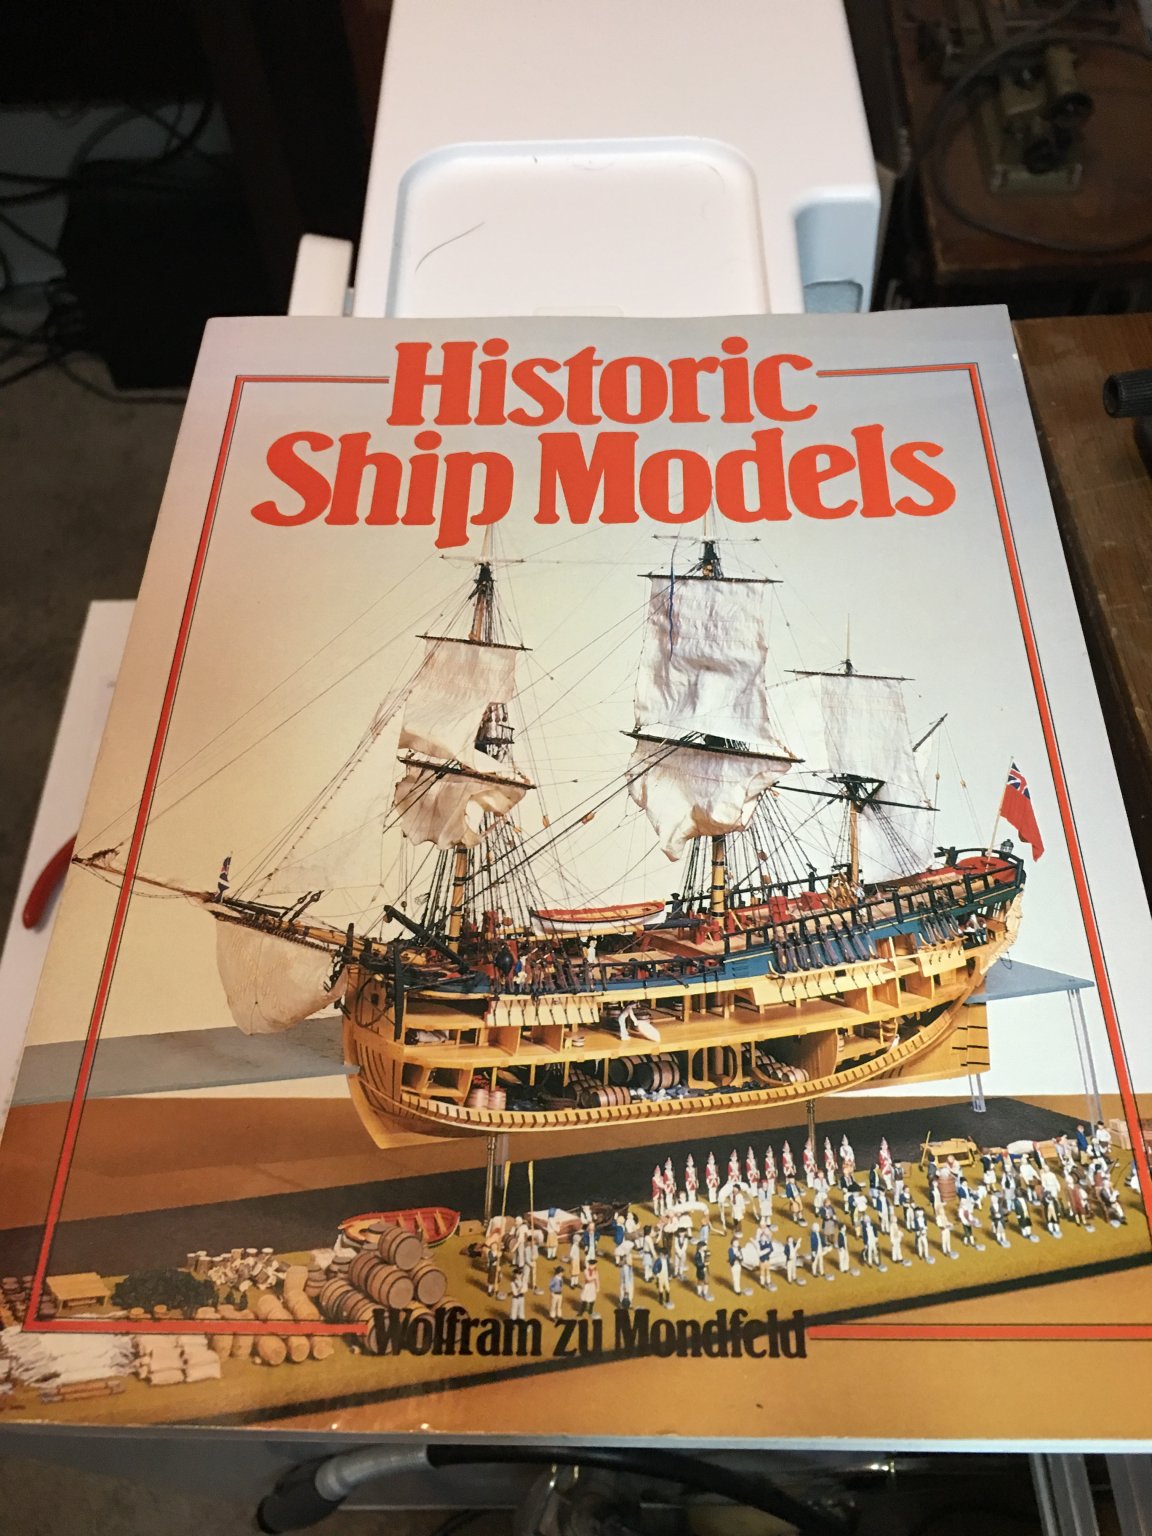
Picked up a book that has been on my wish list for some time now and I feel like a fog has been lifted and can see much clearer now. I will echo what many others have told me and that is this is a must have for any historic model sailing ship builder. A wealth of information and very clear drawings with excellent details. I really wish I would have had this book years ago.

-
Attaching blocks to yards. I plan on trying my hand at sewing sails this weekend. We shall see how that goes.
-
A very beautiful build indeed! A ship to display with pride.
- 91 replies
-
- 4
-
-
- deagostini
- vasa
- (and 1 more)
-
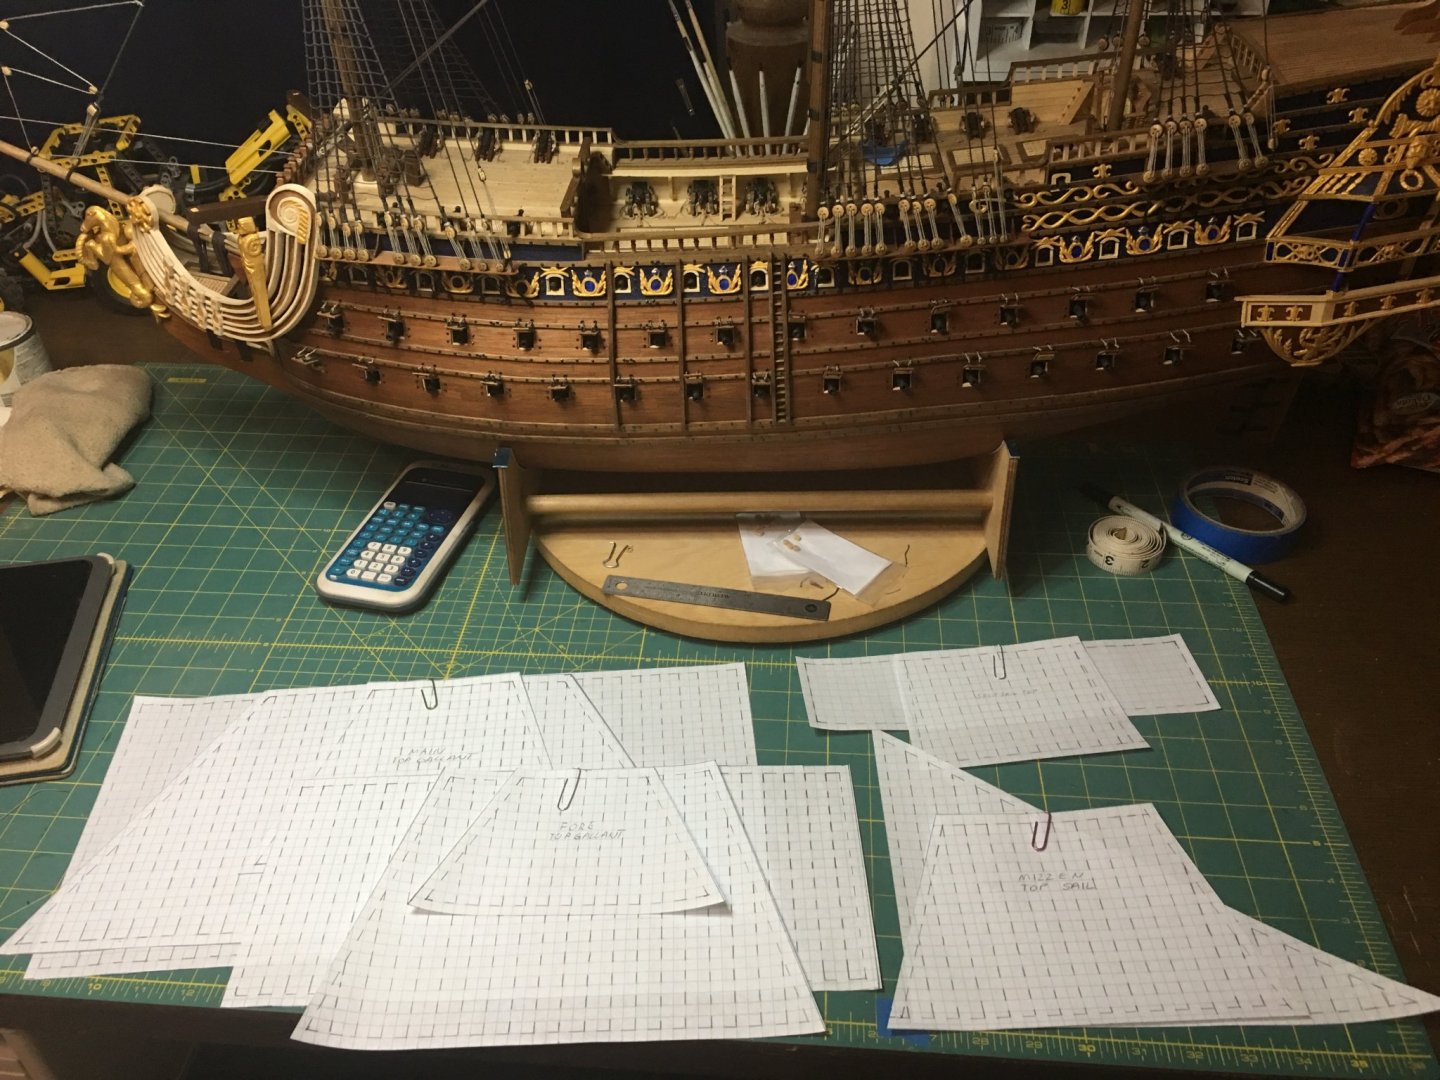
Completed the standing rigging this past week and the masts are now topped out at full height. With that work complete I have moved on to working the yards and sails. Made templates for all of the sails on graph paper to test for size and fit. Now I will transfer them to cloth and begin sewing. I am also going to add the details to the yards themselves as well as blocks and such to prepare them for the sails. I am leaning towards a combination of set and furled sails but we will see.
- 961 replies
-
- 11
-
-
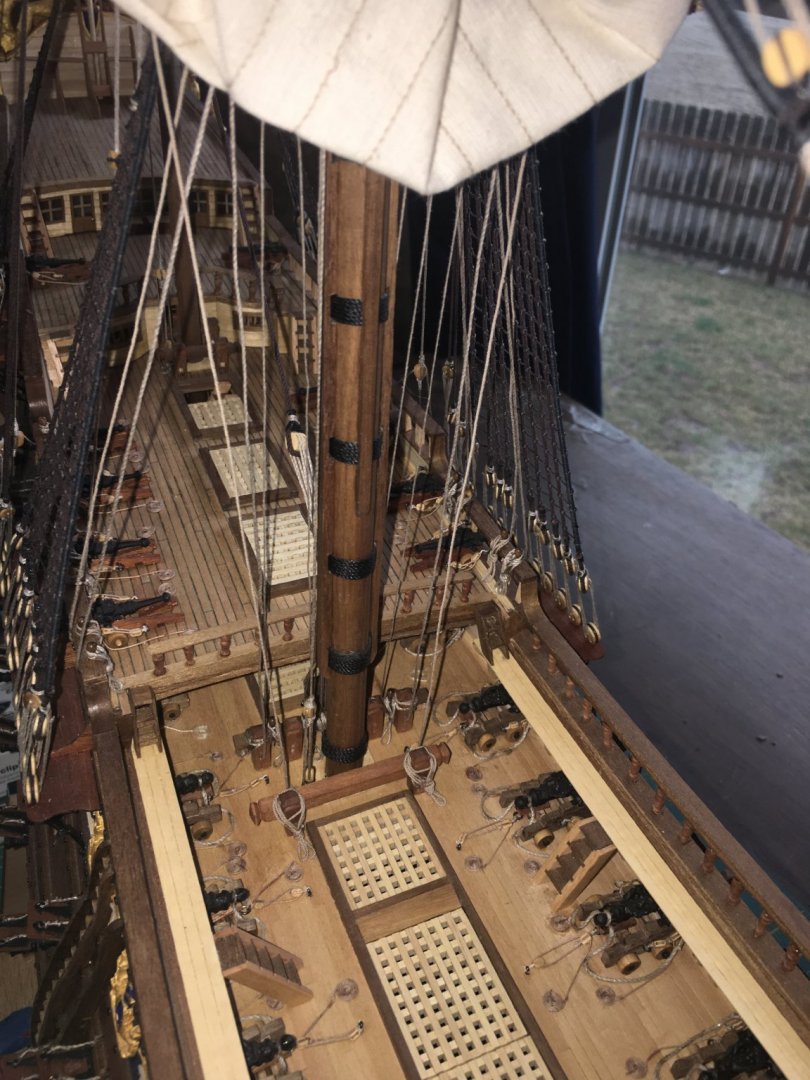
Thanks Tom and thank you to all those who have hit the like button. Honestly, I do a lot of eye balling alignment on the masts. Any side-to-side lean can be easily seen by viewing the masts in line from forward to aft and vice versa, for more exacting, I will use a straight edge and make sure that it touches all three masts as it passes them. A simple square will usually take care of ensuring plumb as well. In looking at alignment of the masts fore and aft (viewed from the side) this gets trickier. Most ships have a rake to their mast of 1-5 degrees (the masts leaned aft so that when the sails were full, they would not pull the masts past 90 degrees vertical). This adds a challenge as a simple square is no longer usable. I will typically fashion a miter gauge out of card stock that is cut to the degree I want my masts set at. I make them for each ship and each mast so that they will fit the build. With deck furniture, gratings etc. it can be hard to get a normal tool in place or to get a true reading off the deck. I will cut the card to fit around and over any deck items and once I have a flush fit, I can draw the angle I want the mast to slope at and cut the card to alignment. After using this to set the lower mast, the upper masts can be aligned using a straight edge. I recommend doing as much of this as possible early on before too much of the deck furniture is in place. Use alignment marks on the deck and masts to help make repositioning easier. To me, the harder part comes in when adding the rigging lines as they can pull masts out of alignment as tension is applied. Work them as evenly as possible, forward and aft, port and starboard and always monitor the opposite side of the one you are working on. I've had to redo plenty of shrouds when I spin the model around and see a mast pulled far to one side.
-
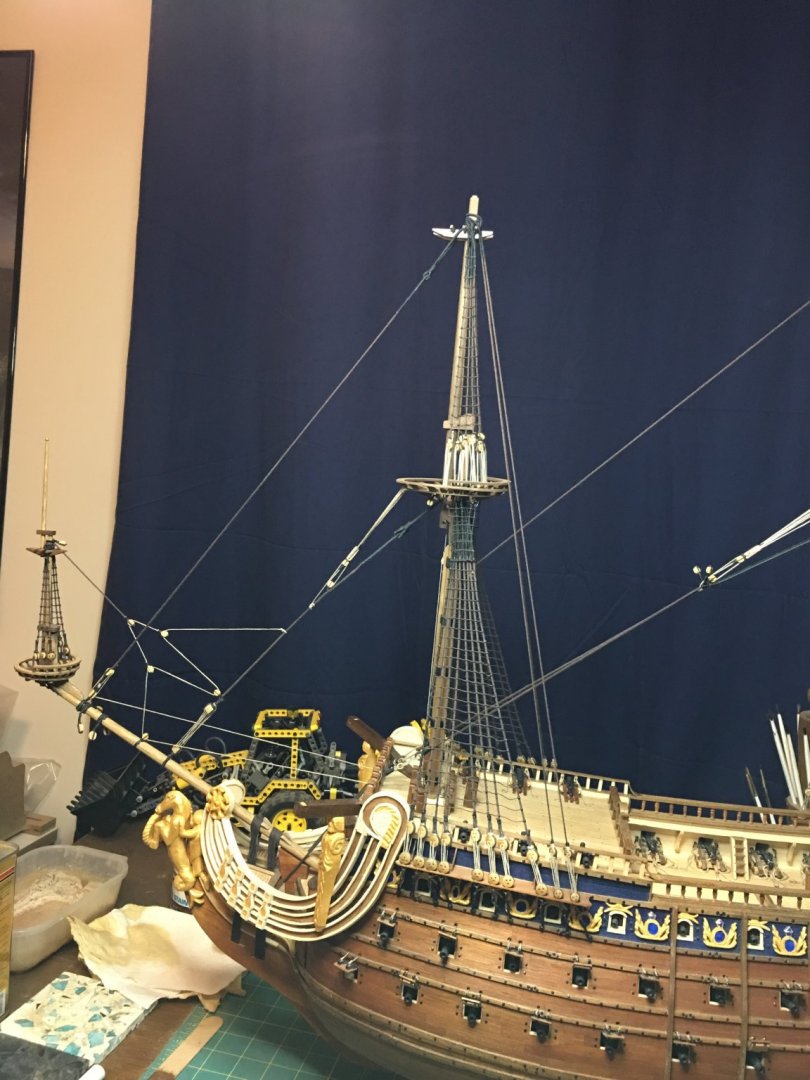
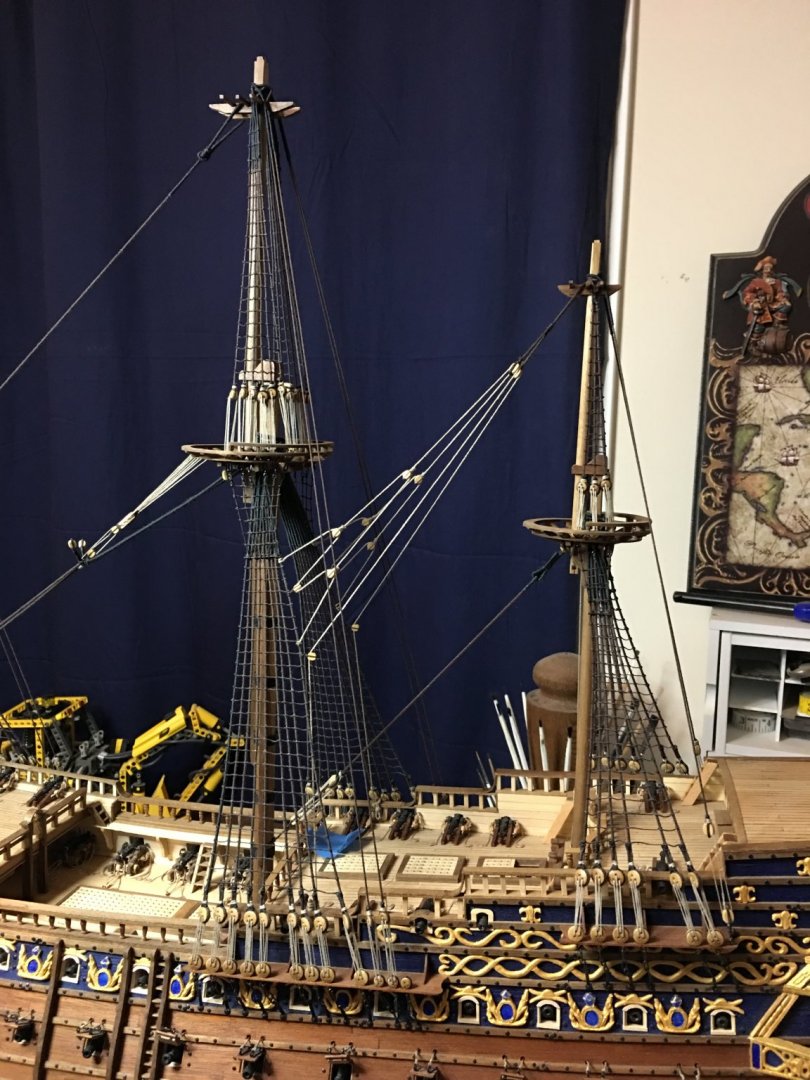
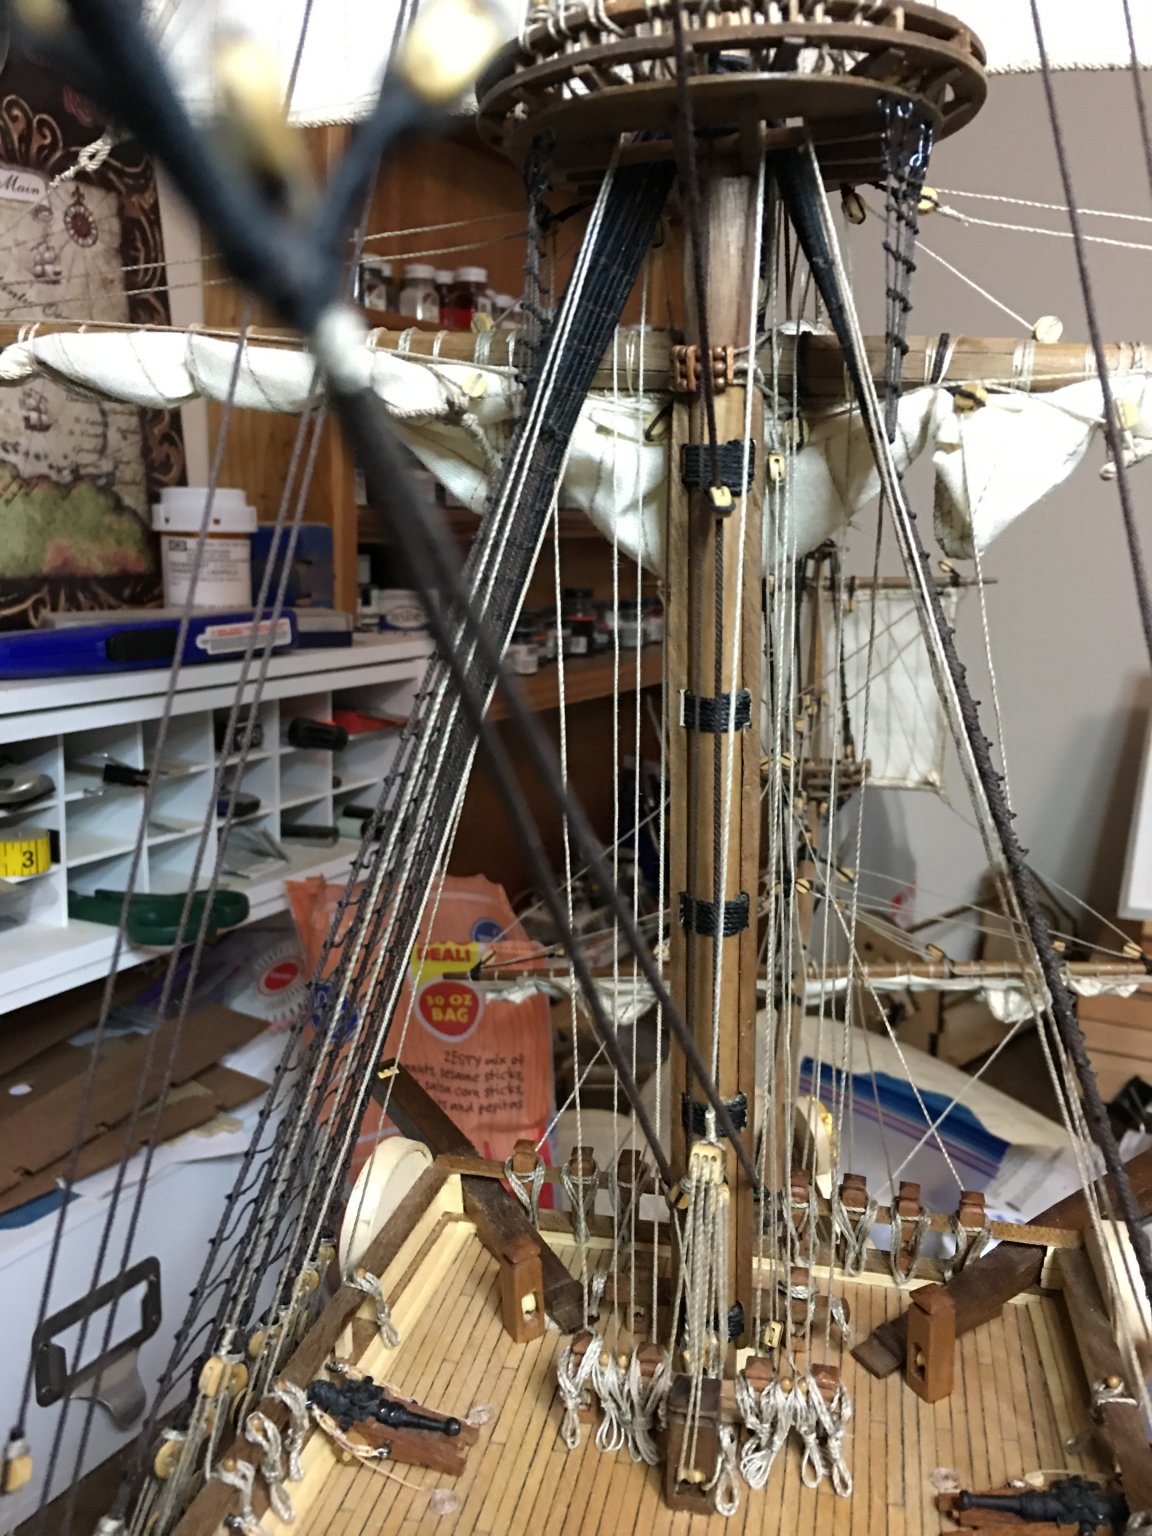
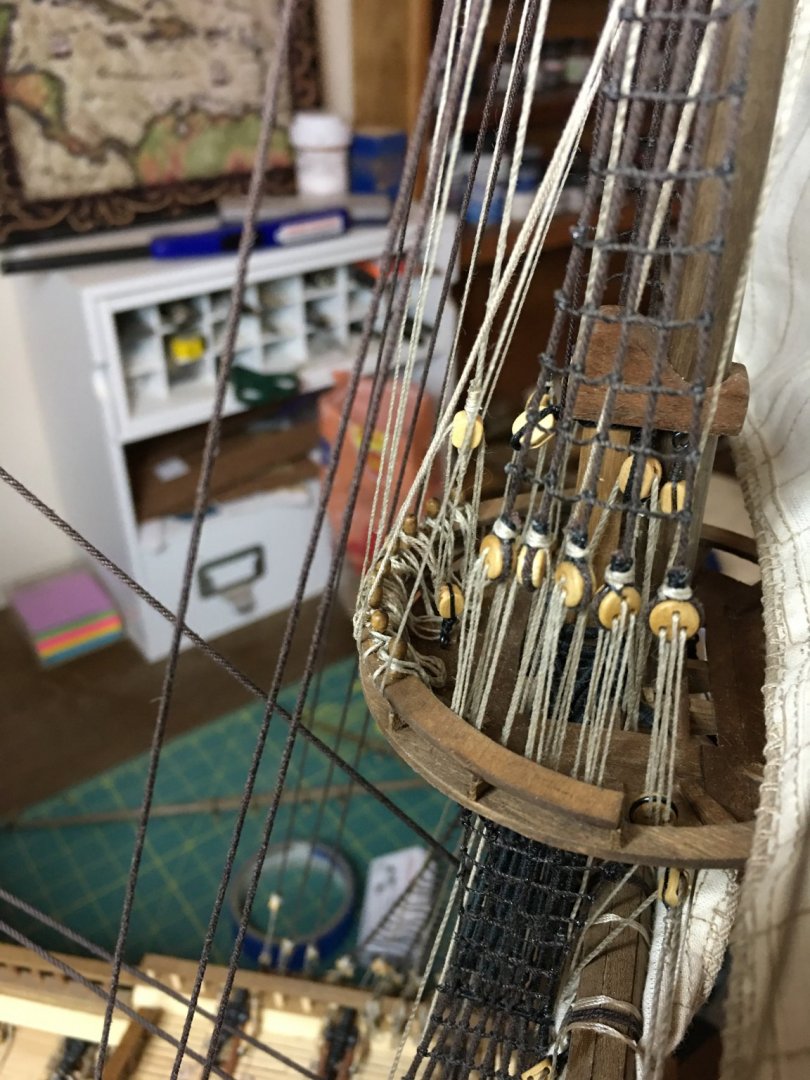
A lot of work for this update. All of the topmast shrouds are complete with ratlines strung and backstays set. Next up up will be work on the topmast caps and then setting the topgallant masts as well as topping out the mizzen with its flagstaff.