Supplies of the Ship Modeler's Handbook are running out. Get your copy NOW before they are gone! Click on photo to order.
×


EJ_L
-
Posts
2,227 -
Joined
-
Last visited
Content Type
Profiles
Forums
Gallery
Events
Everything posted by EJ_L
-
 Looking forward to reading what you compile. This era and especially the French vessels from the era, has fully captured my attention and I expect that I will be spending many future years building models that will benefit greatly from your research. Thank you for all you have shared to date and thanks in advance for the knowledge yet to share.
- 2,634 replies
-
- 2
-

-
- heller
- soleil royal
- (and 9 more)
-
The ball end of the links should be strong enough when glued. The plastic ships I have built used this same method and have held strong during rigging and in the many years since. That is an interesting configuration for the deadeyes. I think what you have drawn is probably the best way to attach them. It will be a pain drilling all the holes but I think the results will be worth it.
-
Slight distraction was waiting for me when I got home from work tonight. May not get a lot of building done today.
-
Sounds like a good plan. I typically work from bow to stern with rigging and that seems to be the standard. With the fore stays of the masts leading down to the mast in front, it almost has to go in that order. Bowsprit, foremast fore stay to bowsprit, mainmast fore stay to foremast, mizzen forestay to mainmast. Once I have those in place, I usually install my shrouds before working much on the topmast. The back stays of the top mast lead down to points aft of the shrouds so it is best to have them in place first. Also, the shrouds will lend more stability to the mast for tension. On that note, leave the stays loose until the end. Clamp or tape the leads in place so they do not slip or even use a knot that can be easily undone. Just don't glue them permanently until all of the stays and shrouds are complete. Reason is, as you install more rigging, the masts tend to flex and what was formerly a tight line now has slack or has been pulled off center. By leaving the rigging loose, the final tensions can be adjusted much easier. If you ever get hung up or need help just ask!
-
I am fortunate in that I did think about this problem back when I was building the bulkheads. I set my cabin doors inboard by one window space in order to leave room for a possible ladder. I had questioned the lack of access back then and had just not come to a resolution in the months since. With the heavy changes that I did to the ship to allow me to build out the interiors, I had to largely scrap what I was given on the plans as a design for these bulkheads. While creating a lot more work, it also gave me the freedom to modify them to better fit some details. It has also made fitting other things a pain as the unchanged kit no longer works right with the modified areas. All in what makes modeling fun!
-
O.C., Marc, thank you both for the images. I will most likely add in the ladders as I would think I would rather err on the side of them existing. without just raises too many questions. Another item has been added to the build list....
-
Tom, good question and one I have wondered about myself often. On past builds I have usually built and placed a ladder to the poop deck (poop royal on this ship?) as those seem to be the only practical way of gaining access to this deck. Much the same as you, I have been looking through plans and other models of Soleil Royal and have not seen any ladders placed. This has been one of those unsure things for me as to what would be correct. Common sense is telling me that there should be one, but common sense has been overridden several times on these ships. I'm hoping that additional digging will reveal the solution or that one of the experts may know and share. The plus side is that they are easy to access so if I need to add them or just decide to add them regardless, it can be done almost whenever. On an update note, I do not have pictures yet, but I have been working on additional decorations. Fleur-de-lis are indeed being used as well as some scroll work. I should have some pictures ready this week.
-
Indeed, strange they may be, but they do look great! Nice start to the boat as well. The weathering looks good and will look even better once the hull is weathered up a bit also.
-
Welcome back! Life sometimes does get in the way of model building, as do other hobbies. With a finite number of hours in a day, often there is just not enough room for all we wish to do. Good plan with prepping as much as you can to stain at once. That does help to cut down on the down time waiting for the stains to cure and dry. Mast work looks good from what I can see. If anyone questions any rough spots just say it was an emergency repair and the mast had to be hand hewn in a hurry. As for your spars, while I certainly am no expert, I would bet that the lower spar would be smaller than the upper. if your main spar is 5/16" then I think a lower spar at 3/16 would look appropriate. To know for certain, I would say you would need to know what the diameter of that spar in real life is. Then you could scale it down to fit your model. Hopefully someone can either back up my thoughts or say with more authority on the subject.
- 228 replies
-
- 3
-
-
- gunboat
- model shipways
- (and 1 more)
-
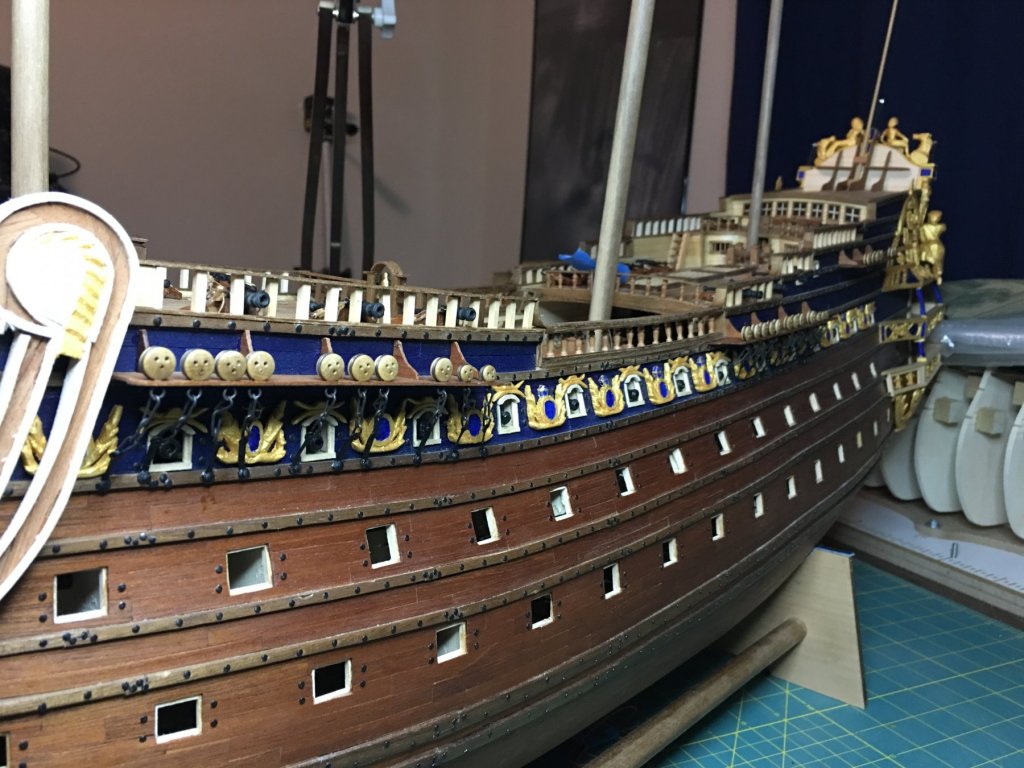
I don't know yet. Honestly, that has been a bare spot that has long bothered me. With an enclosed QG, they would not have decoration as it would not be seen. With them open, I do not know. I'm sketching some different designs for the other bare places for fill ins. I'm taking a lot of creative free will in these designs as none of the more "traditional" decorative designs fit the spaces this kit left me with. With some luck, I might just make something that looks okay...
-
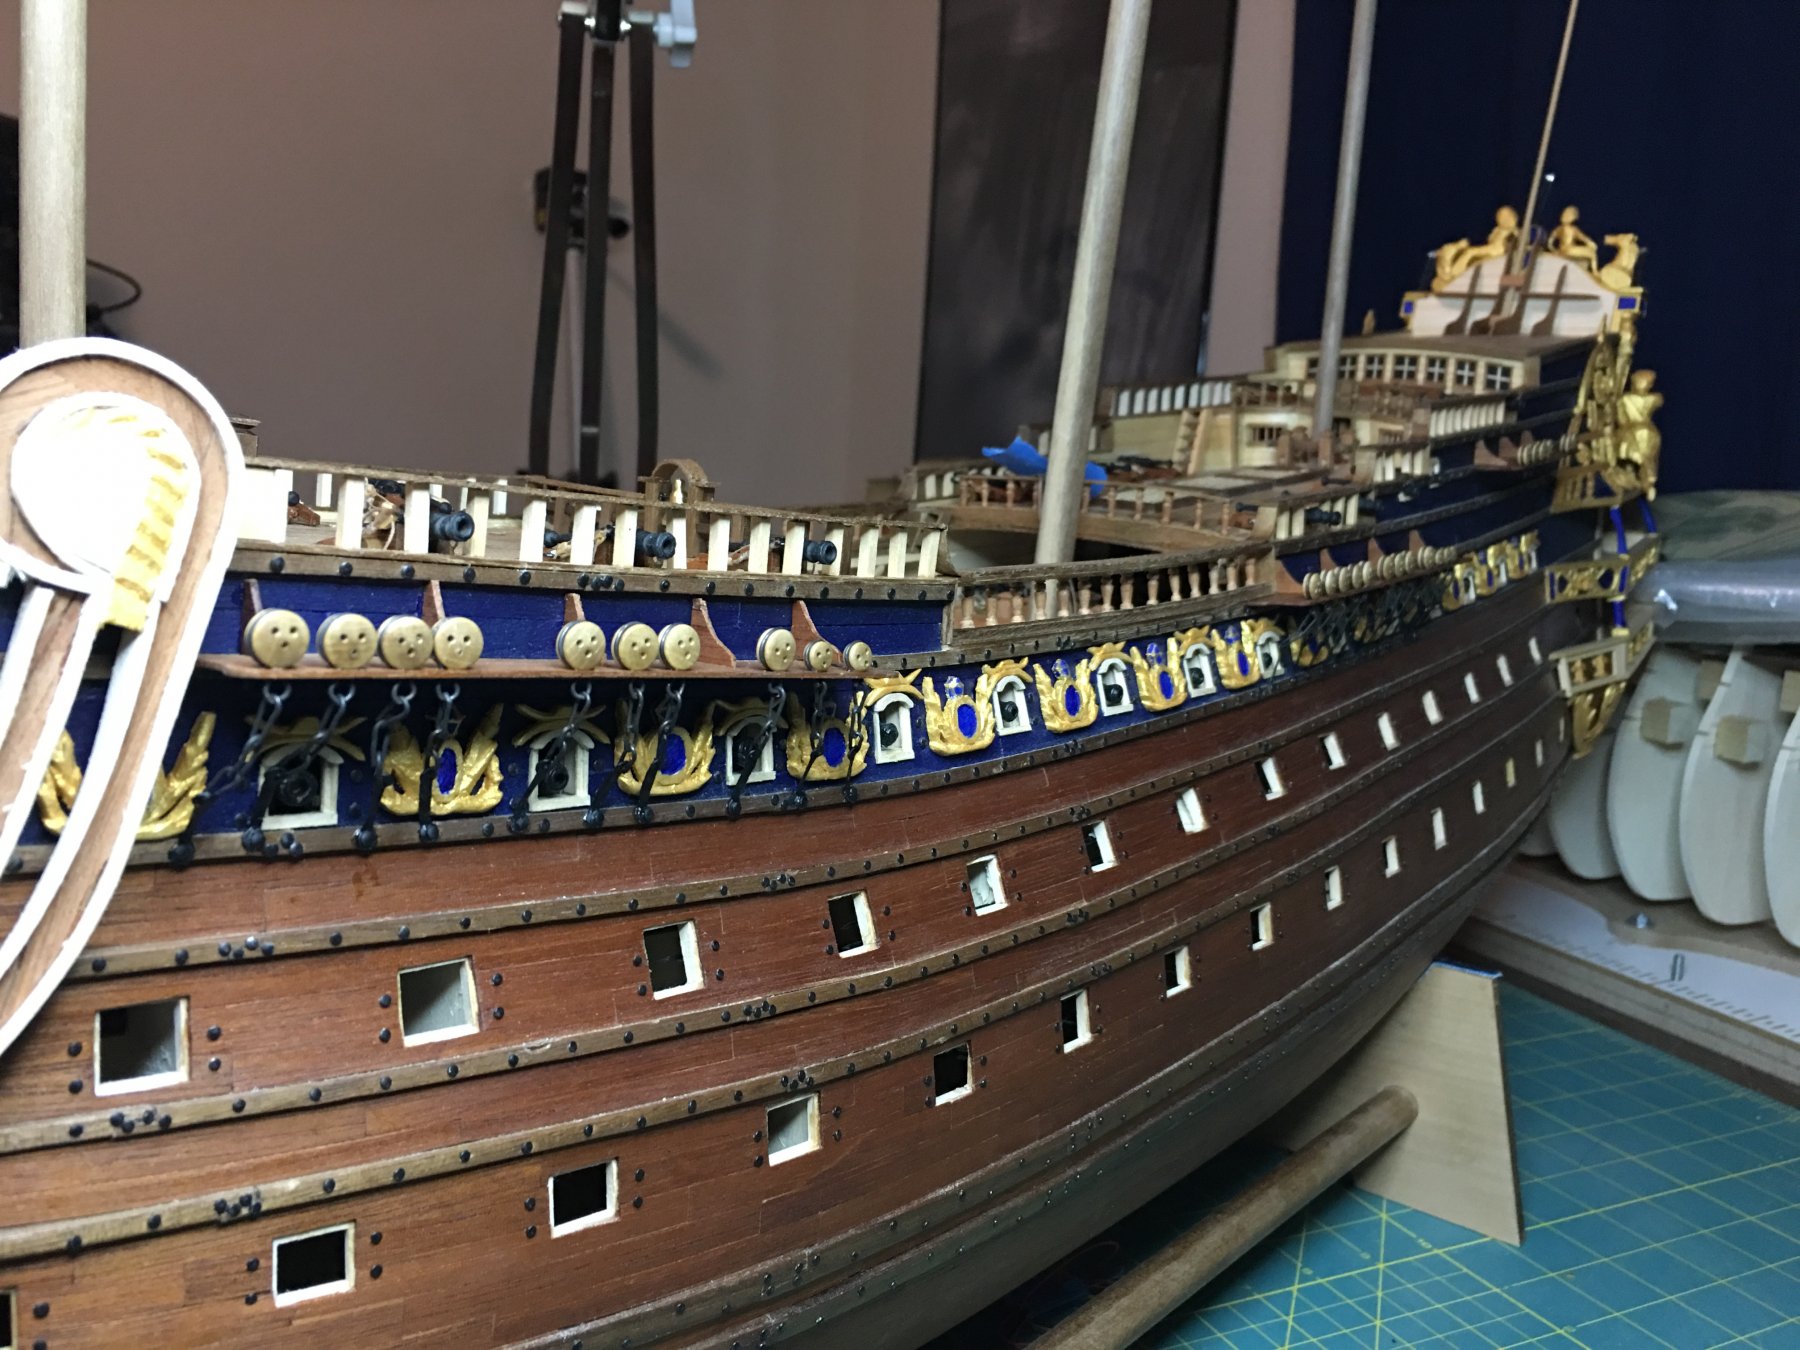
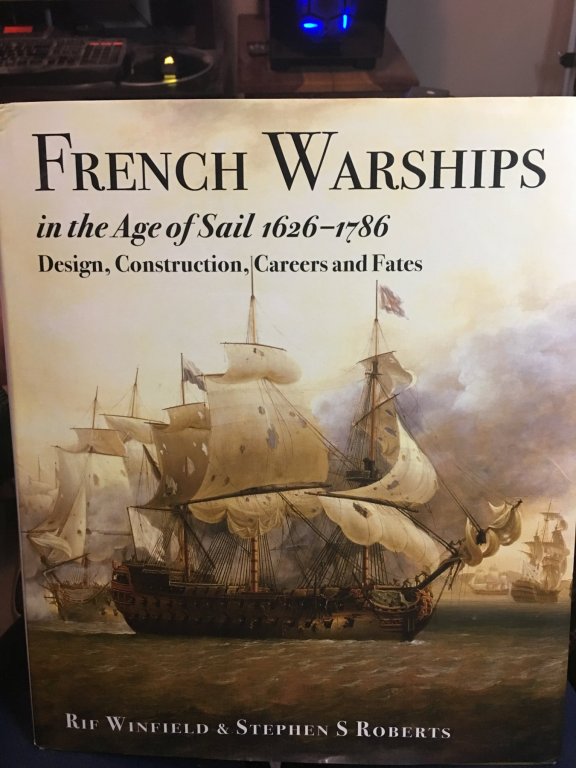
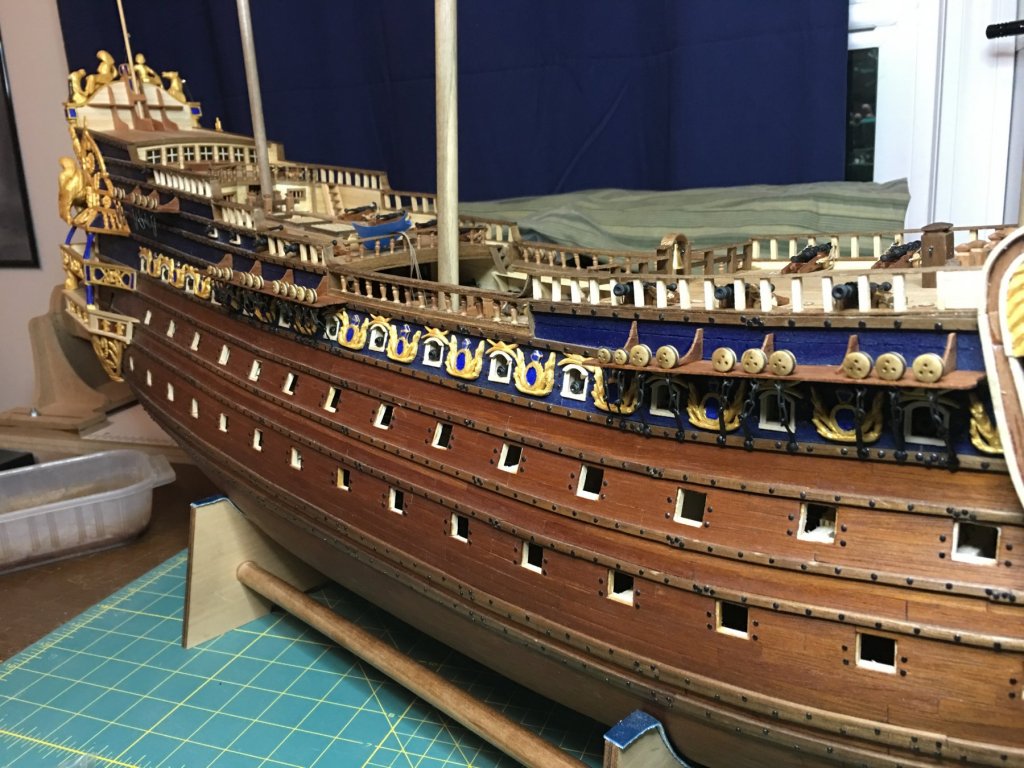
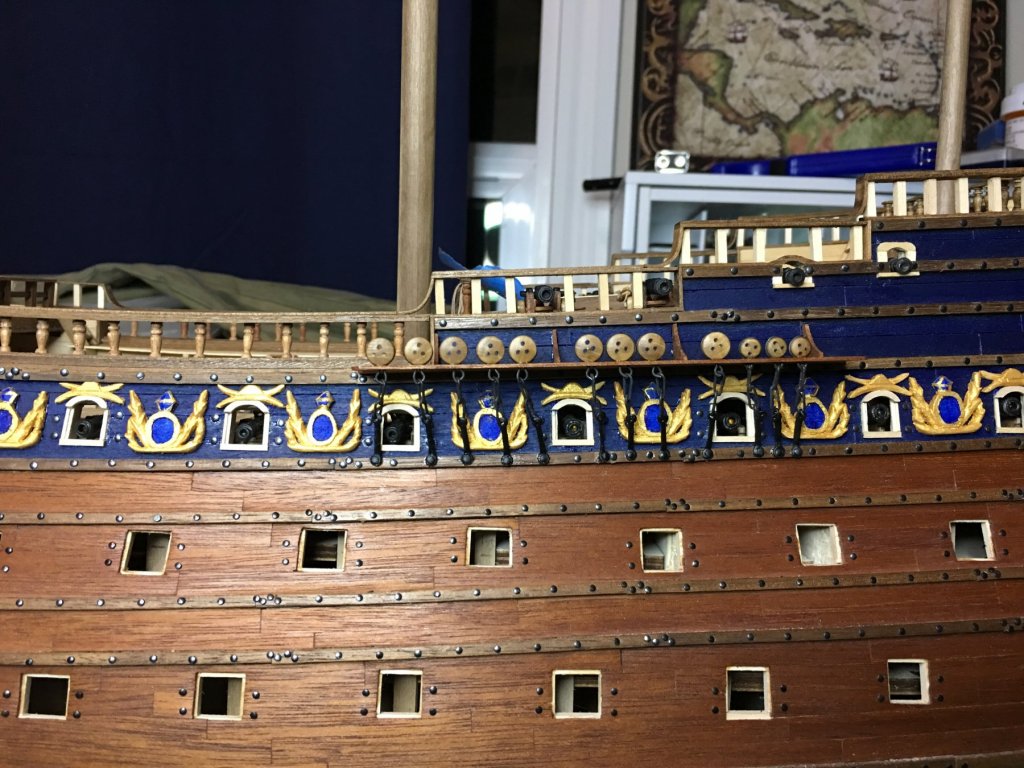
Channels are going up. I’m holding off on installing the chains on the mizzenmast channel. I’m working on creating some additional scroll work to fit in these spaces and need access below this channel. I’m not sure yet to the how and what these decorations will look like or even if this is a good idea but, I’m gonna try anyway!
- 961 replies
-
- 17
-
-
HMS ROYAL KATHERINE 1664 by Doris - 1/55 - CARD
EJ_L replied to DORIS's topic in - Build logs for subjects built 1501 - 1750
Excellent addition to the model. Those stands compliment her very well.- 1,035 replies
-
- 5
-
-
- royal katherine
- ship of the line
- (and 1 more)
-
Haha!! I can't believe I typed that! When I posted this I had been talking to my wife about different flags as she had come into the office while I was looking at historical flags from different countries. Union jack must have just been on my mind! I will edit that to simply say ensign. Thanks for the heads up! 🙄 🤣
-
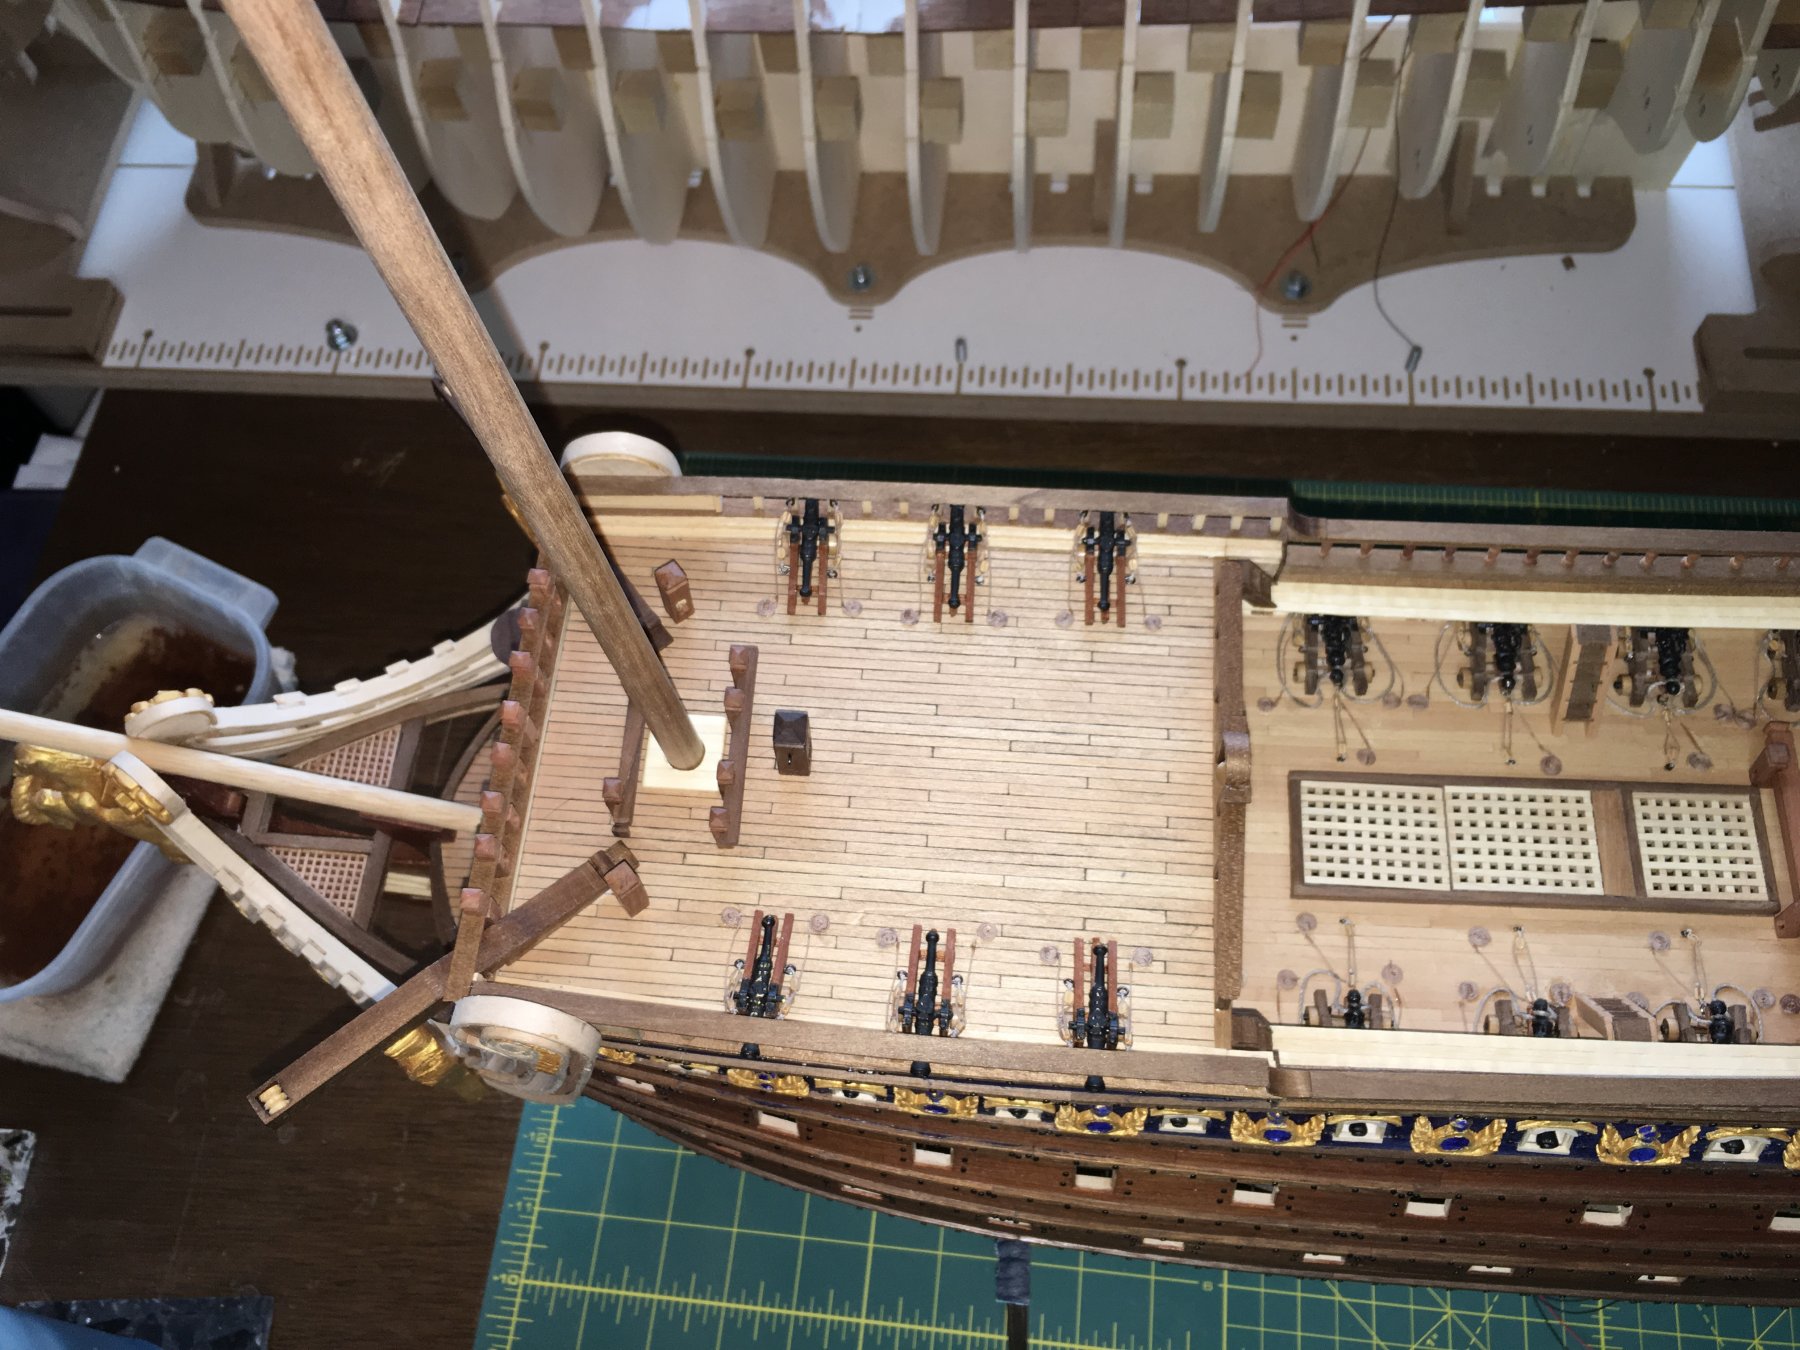
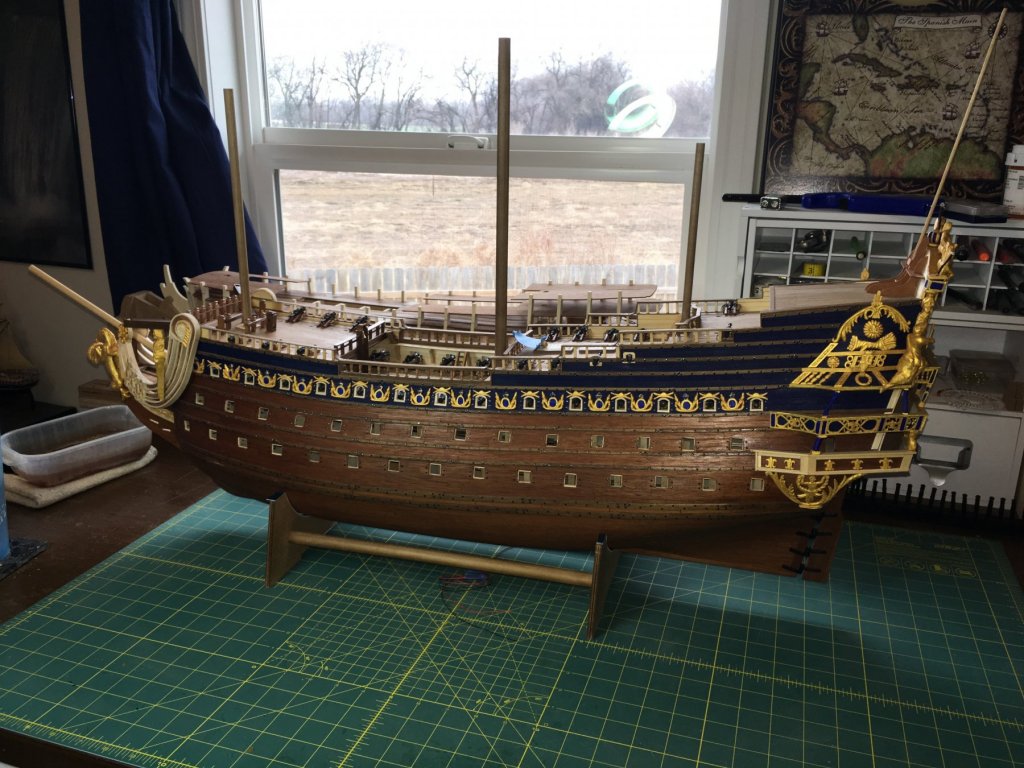
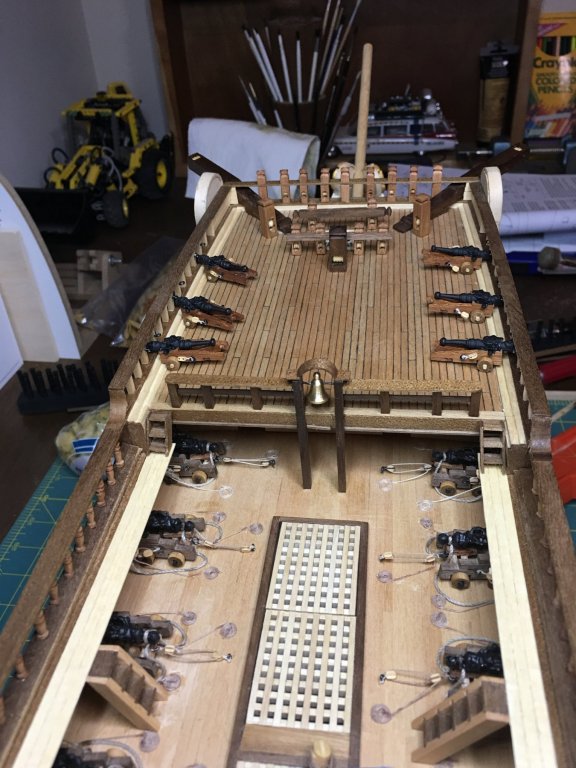
Another weekend has come and gone and with it some more work is completed. Finished rigging the guns and I also built the bracing for the taffrail and ensign. I’ve started the work on the channels and should have some pictures of that work later in the week.

- 961 replies
-
- 12
-
-
Michael, the clever thinking was not my own but, learned from you back on the Vasa. I have learned a lot from you on your builds as well as from others on here and need to be more conscience of making sure the credit goes where it is deserved.
-
The bulkhead under the forecastle was much like those towards the stern for the officers quarters. They provided compartmentalized space for private rooms or storage or to get out of the weather. I cannot say for certain if this feature was on SR but, I have seen it on many similar ships and figured it may well have been there. With any bulkhead on a gun deck, they could easily be removed by the carpenter and his mates when the decks were cleared for action. As you said, the sailors would need to have clear space for easy movement during a fight so the cabin bulkheads were designed to be held in place with pins that could be removed when needed.
-
Thank you all! This has truly been a great learning experience in not only the construction of these ships but, also in the history, design and practices of the French ship building compared to other countries. And then there is learning how to represent that in model form. This truly is a great hobby! Yes, I use an extra thick CA glue that I love. It beads up nicely out of the bottle which makes it easy to apply directly from the bottle or on a pin head. It does not bleed though as much as the thin stuff will nor does it run everywhere. Although, I still manage to glue pieces to my fingers far more often than I would like. I do keep the thin CA on hand as well as it work great when I need to cover something in adhesive. I used it a lot when carving if the wood is brittle. I could cover the piece in the thin CA which soaks into the wood and then carve and sand through it while it helps to hold the wood together.
-
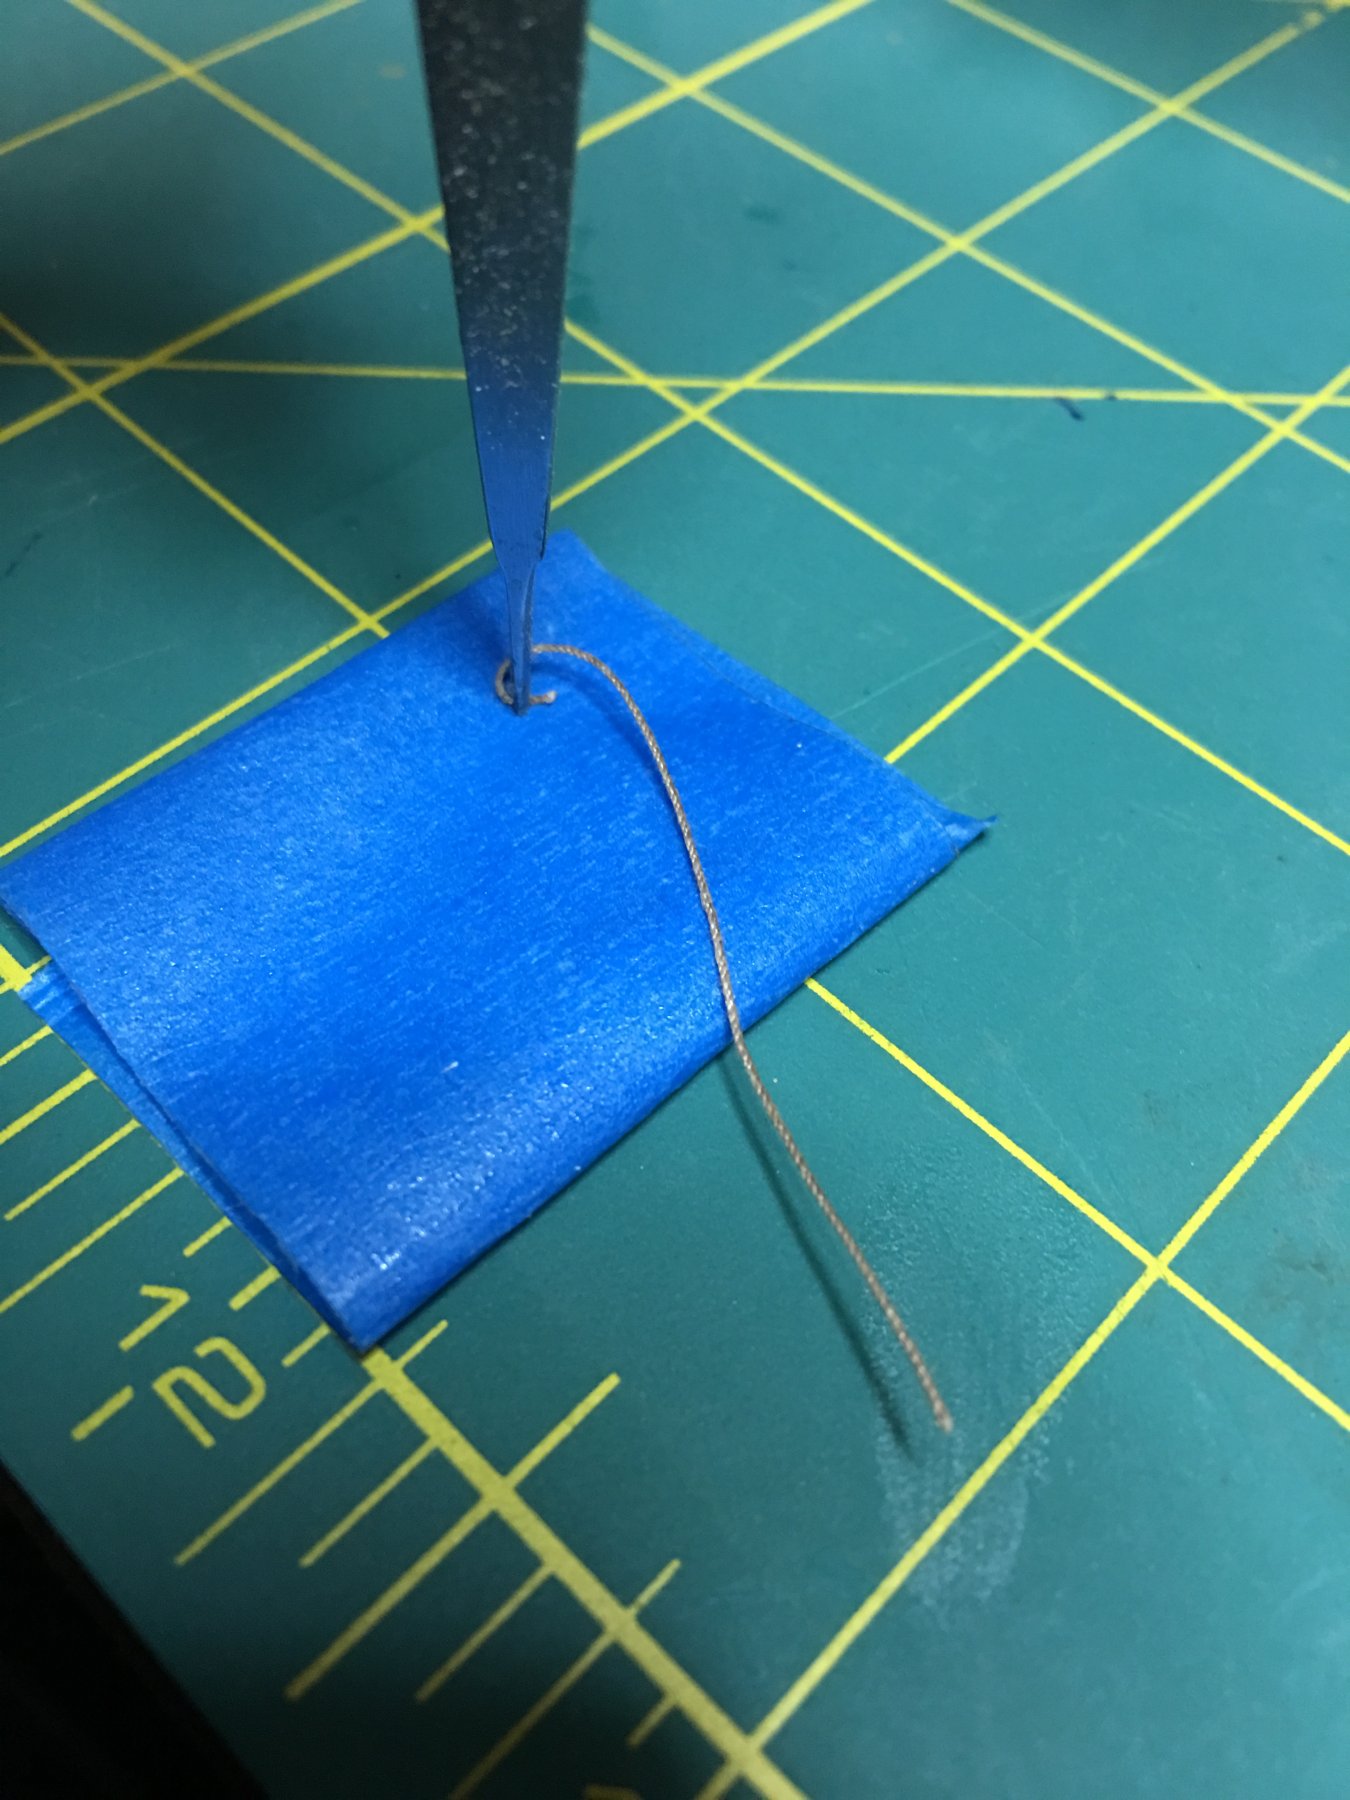
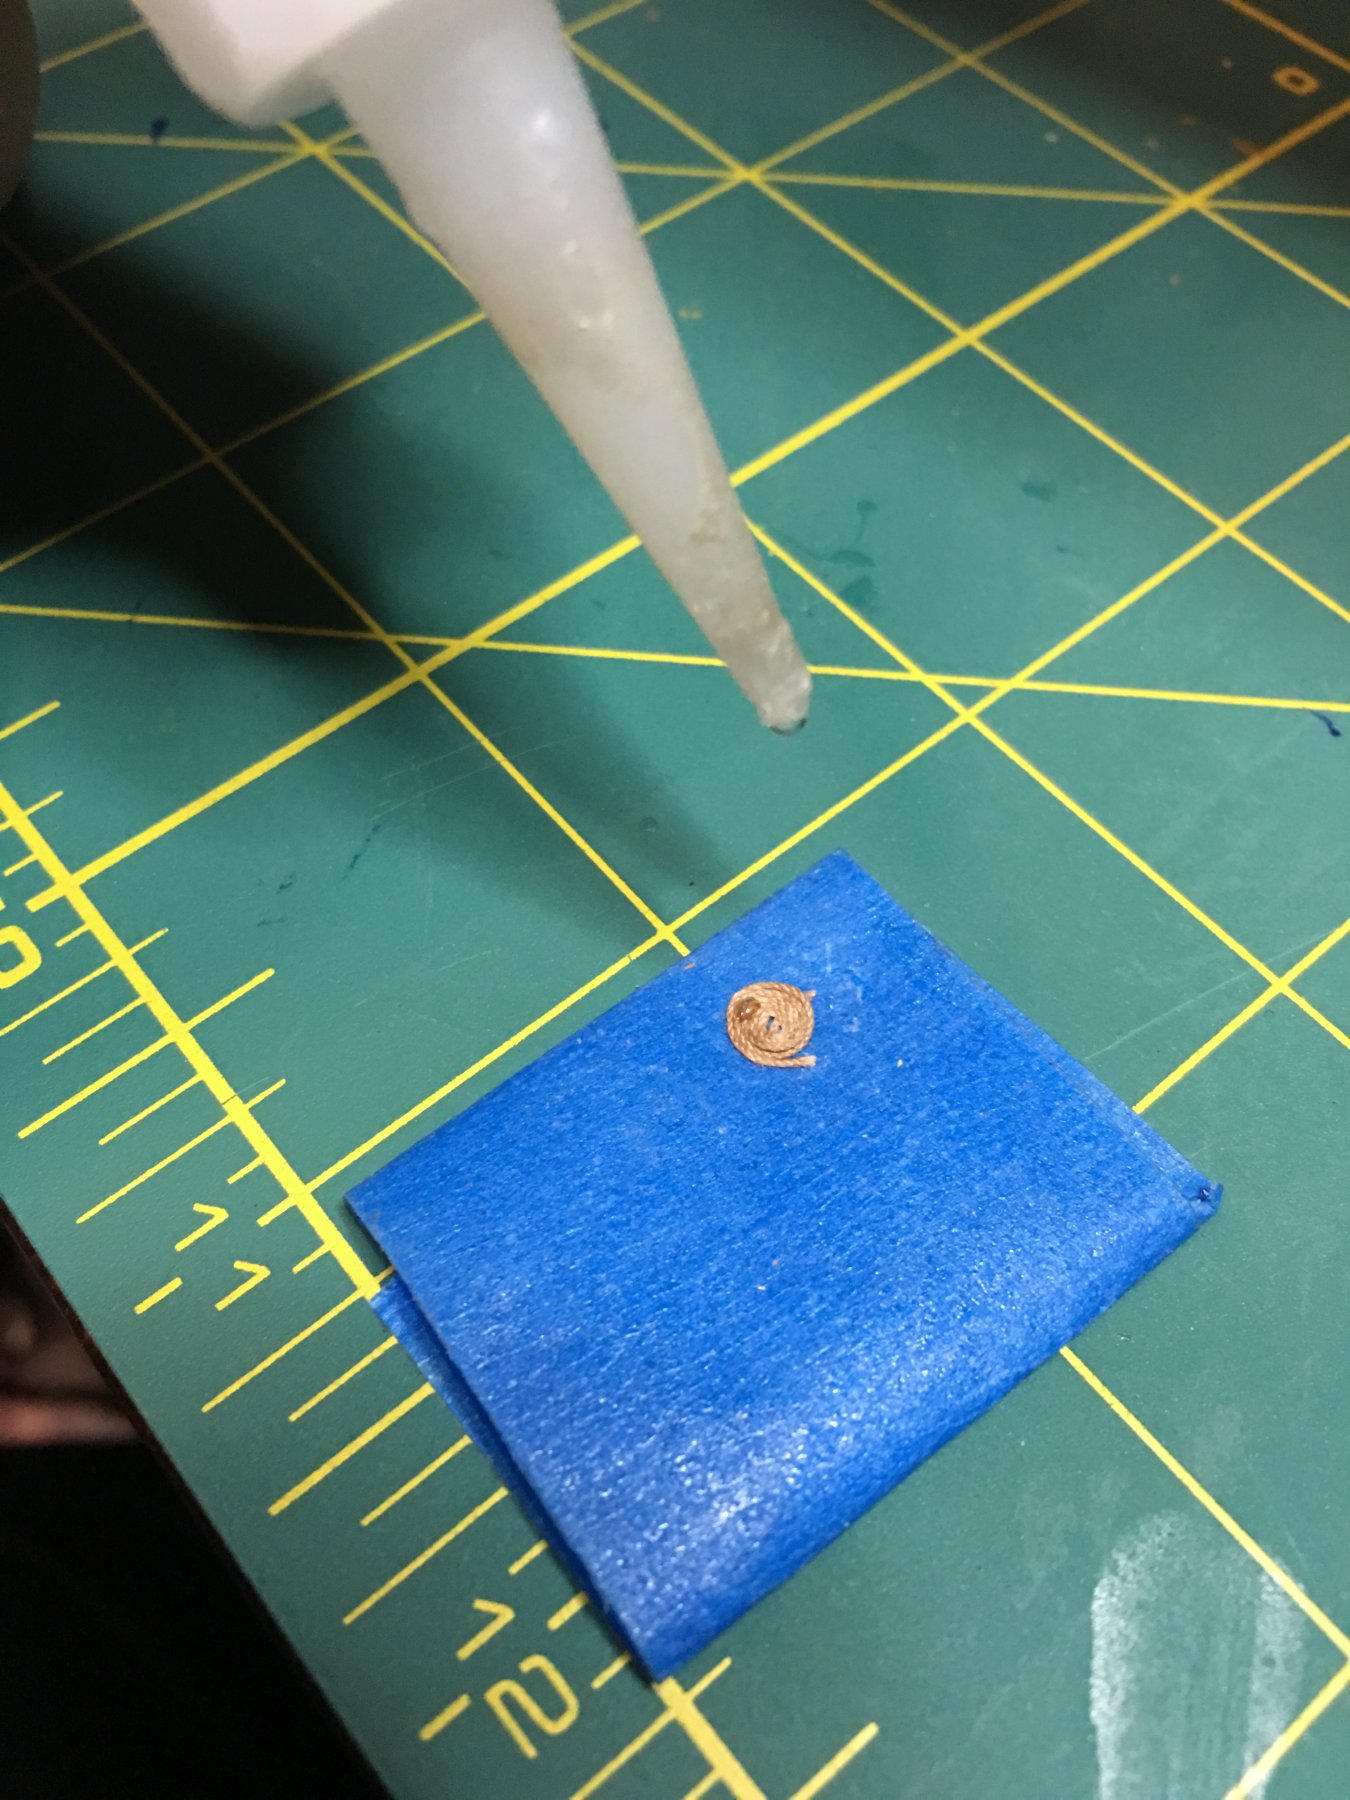
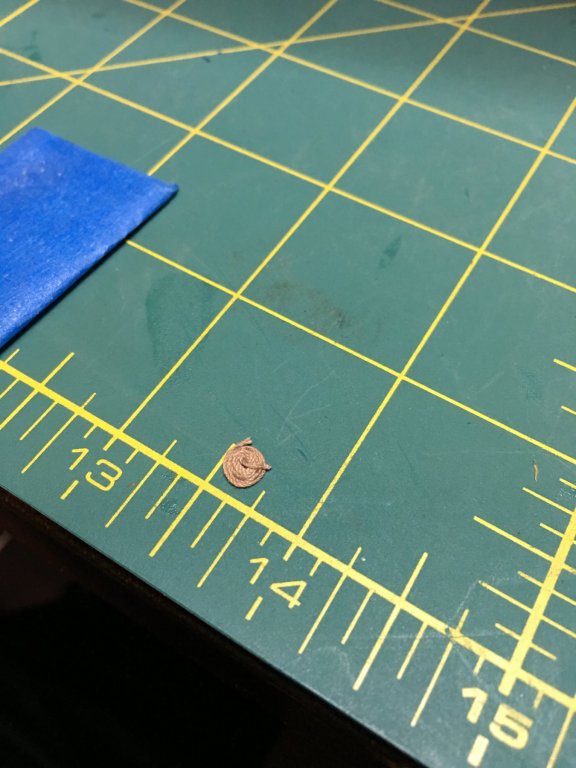
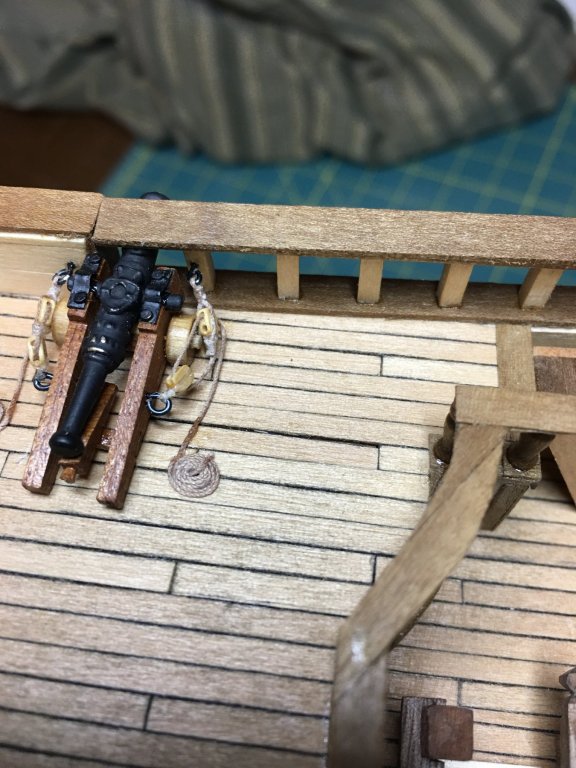
Thank you all for the nice comments and likes as well as following along. So I meant to post these pictures earlier but, it slipped my mind till now. Here are a few pics of how I make the rope coils. Place a a piece of tape sticky side up. Hold the rope down to the tape and begin to wind the rope around the tweezer. While coiling, press the rope down onto the tape so that the tape holds it in place. Sometimes the rope will keep coming off the tape. If this happens, use some glue to secure what has been cooled before moving on. Once the coil is complete, place a tiny amount of CA glue on the face to hold the rope together. Remove from the tape and flip over. There should be two exposed rope ends. One will be at the end of the coil and the other should be at the center with a short length over the top of the coil. If everything looks okay, set it in place, lining up the end of the coil with the cut off end of the rigging line. Thats it! Follow up tip: Pictured is a counter clockwise coil. Simply reverse the direction you wrap the rope to make a clockwise coil for the opposite side.


-
The rigging is shaping up nicely. Smart to simply tape the line ends in place till later. Being able to make those adjustments will help greatly in keeping tensions set correctly. I would not worry too much about the dead eyes not being even. I know a lot of fuss gets made over this but, in practice they would not always be perfectly even. There would always be some differences as adjustments were made to keep tensions on the shrouds. Aesthetically an even run looks more pleasing to the eye but, reality would more often than not, prove this to be unrealistic. In my opinion, yours do not look bad at all.
-
I've had a similar experience with a "missing" plan sheet. After searching everywhere I could conceivably image it could be it turned out that it was on the reverse side of the plan sheet tacked to my board. 🙄 The yards on her are indeed huge! My RL will be the third model that will be of that size. The admiral keeps joking that soon I will have enough of these ships in cases that they could be stacked up to make one of the missing walls in the basement. She may be joking but, I have sketched out a few ways to incorporate the cases into the wall design so they would be visible from both sides. She may end up regretting making that joke.
- 786 replies
-
- 3
-
-
- Royal Louis
- Finished
- (and 1 more)
-
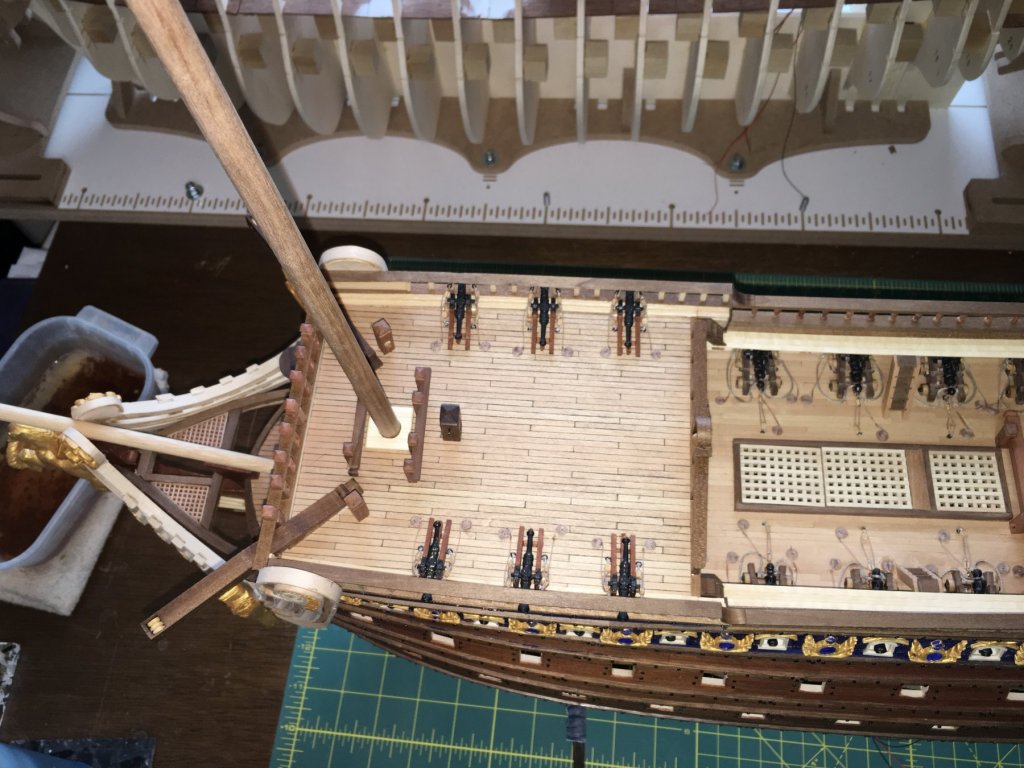
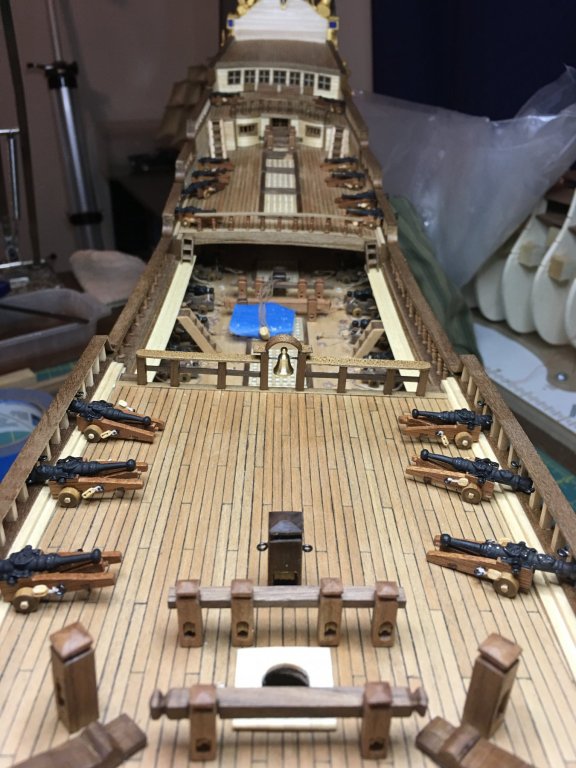
Last of the forecastle rails are in place along with the ship’s bell. Time to rig the remaining cannons.
-
This is a new one for me. Looking forward to learning something new!
- 131 replies
-
- 1
-
-
- santa lucia
- panart
- (and 1 more)
-
It may be a simple design but, it looks like a maintenance nightmare. Storms and gunfire probably made replacing these a constant chore. Still, they will make for a cool detail that is not often seen on models.
-
Welcome to MSW!