EJ_L
-
Posts
2,246 -
Joined
-
Last visited
Content Type
Profiles
Forums
Gallery
Events
Everything posted by EJ_L
-
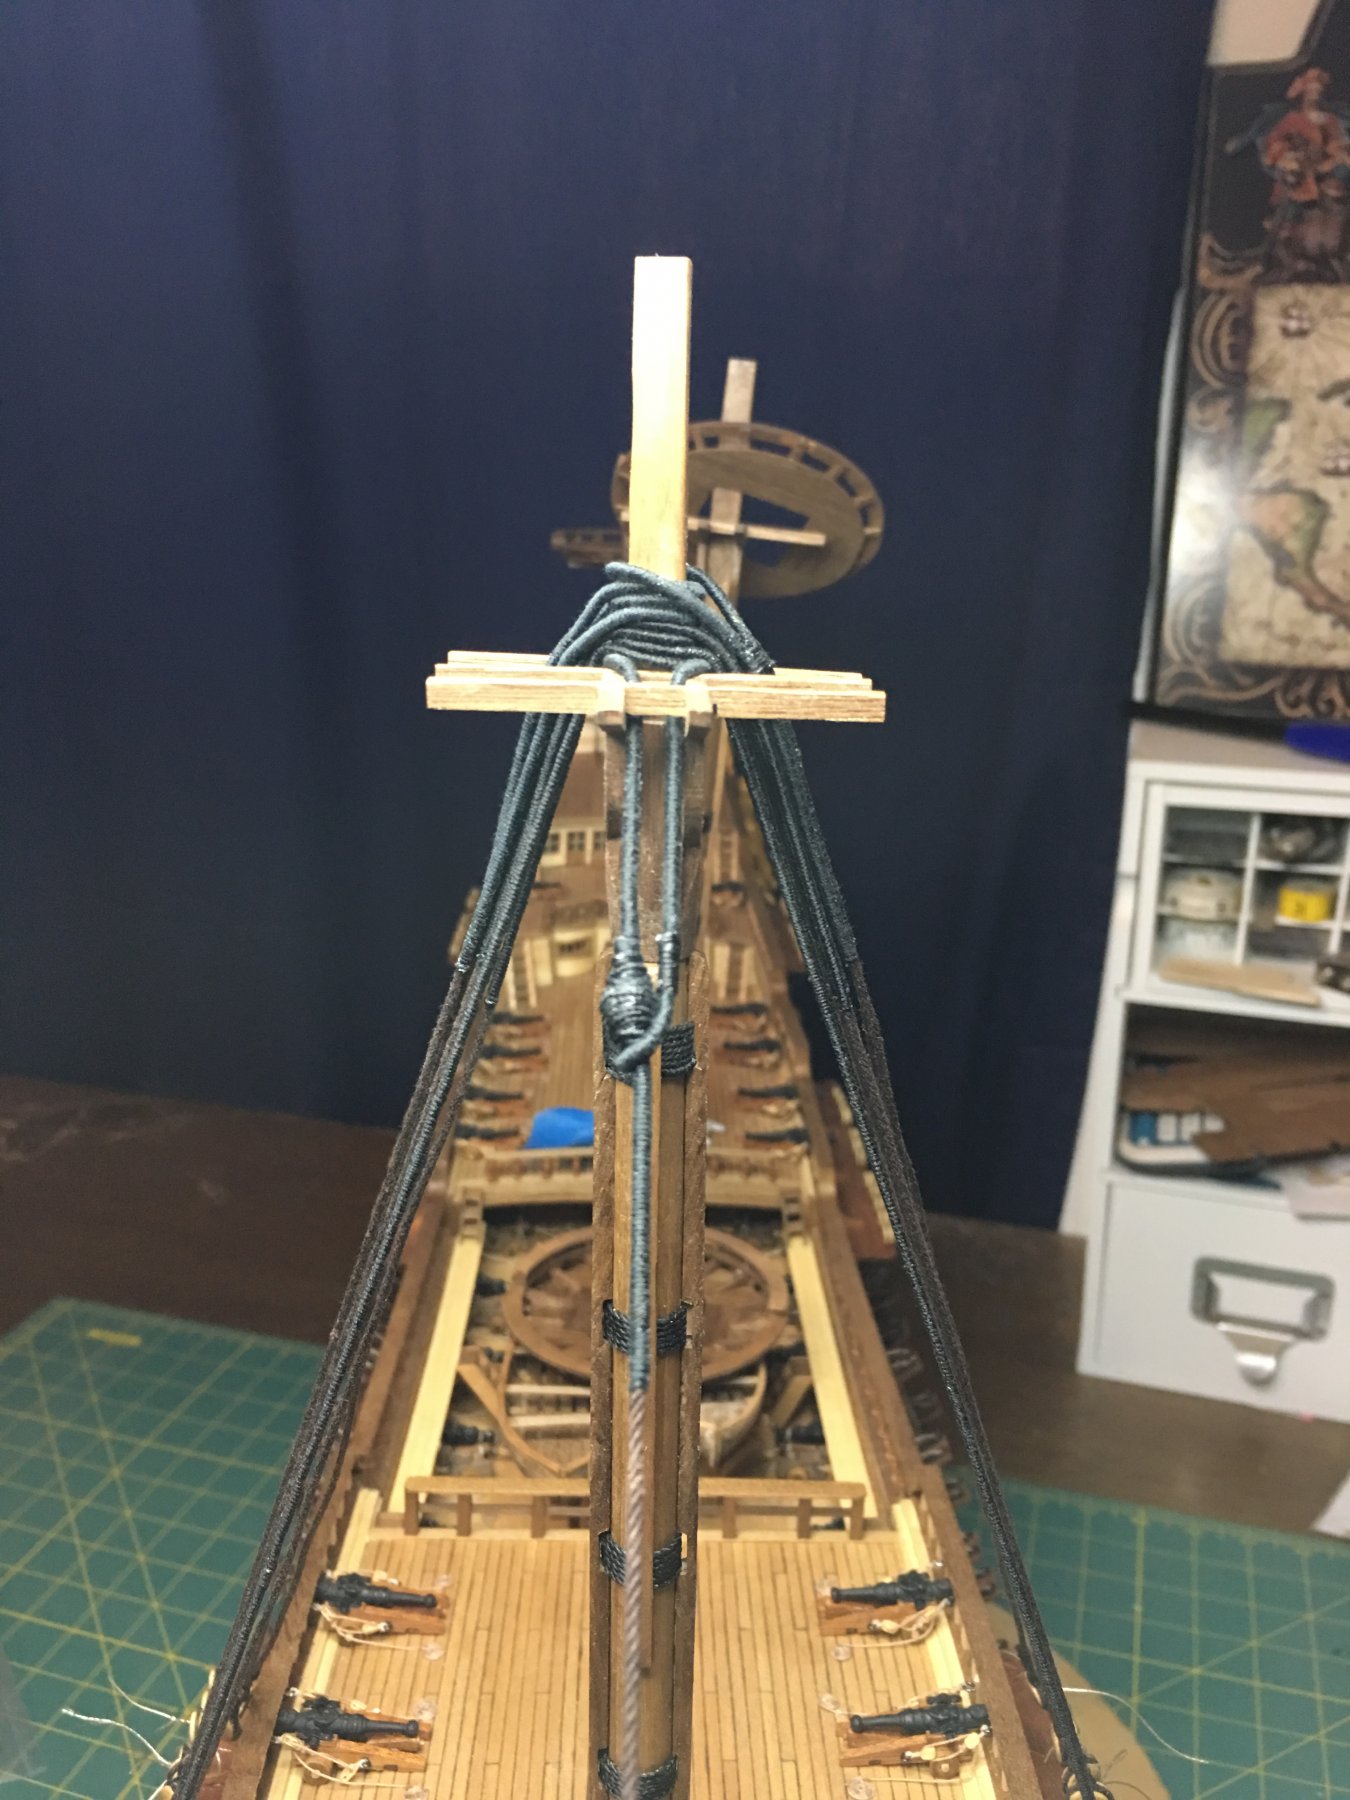
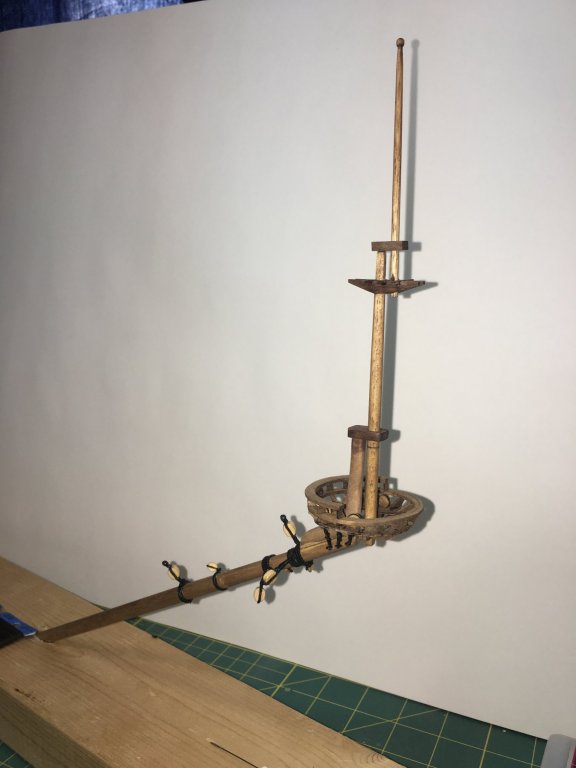
 More rigging going up. The bowsprit has been set and gammoning in place. Set the forestay which will likely be the last piece of rigging on the foremast for the time being. Next up I will fall back to set the stays and shrouds on the main and mizzen masts.
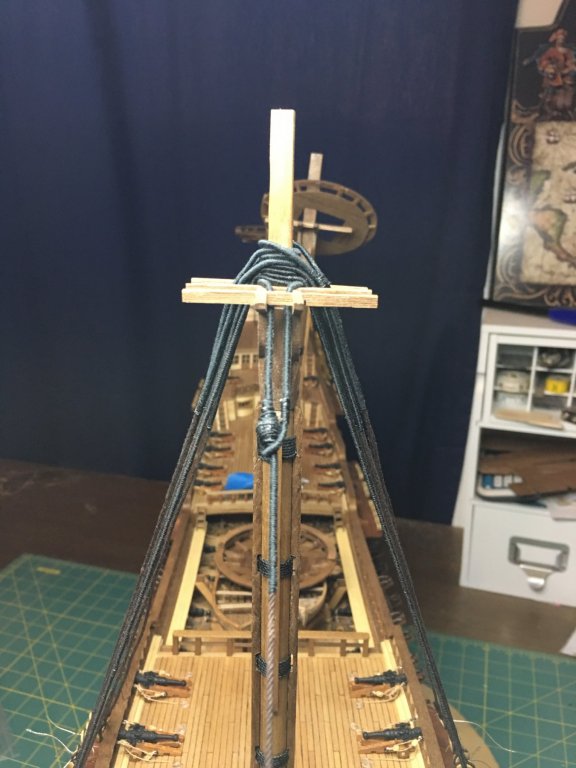


-
Greetings from North Yorkshire, England
EJ_L replied to Niallmhor's topic in New member Introductions
Welcome to MSW! -
Welcome to MSW! Beautiful carving work!
-
Requesting feedback for future MSW Group Projects
EJ_L replied to Chuck's topic in Group Projects on Model Ship World
I'm definitely interested in a POF cross section. As Mark said above, I think it would be a great stepping stone to scratch building POF models and allows for a lot of custom details and a wide range of useful skills. -
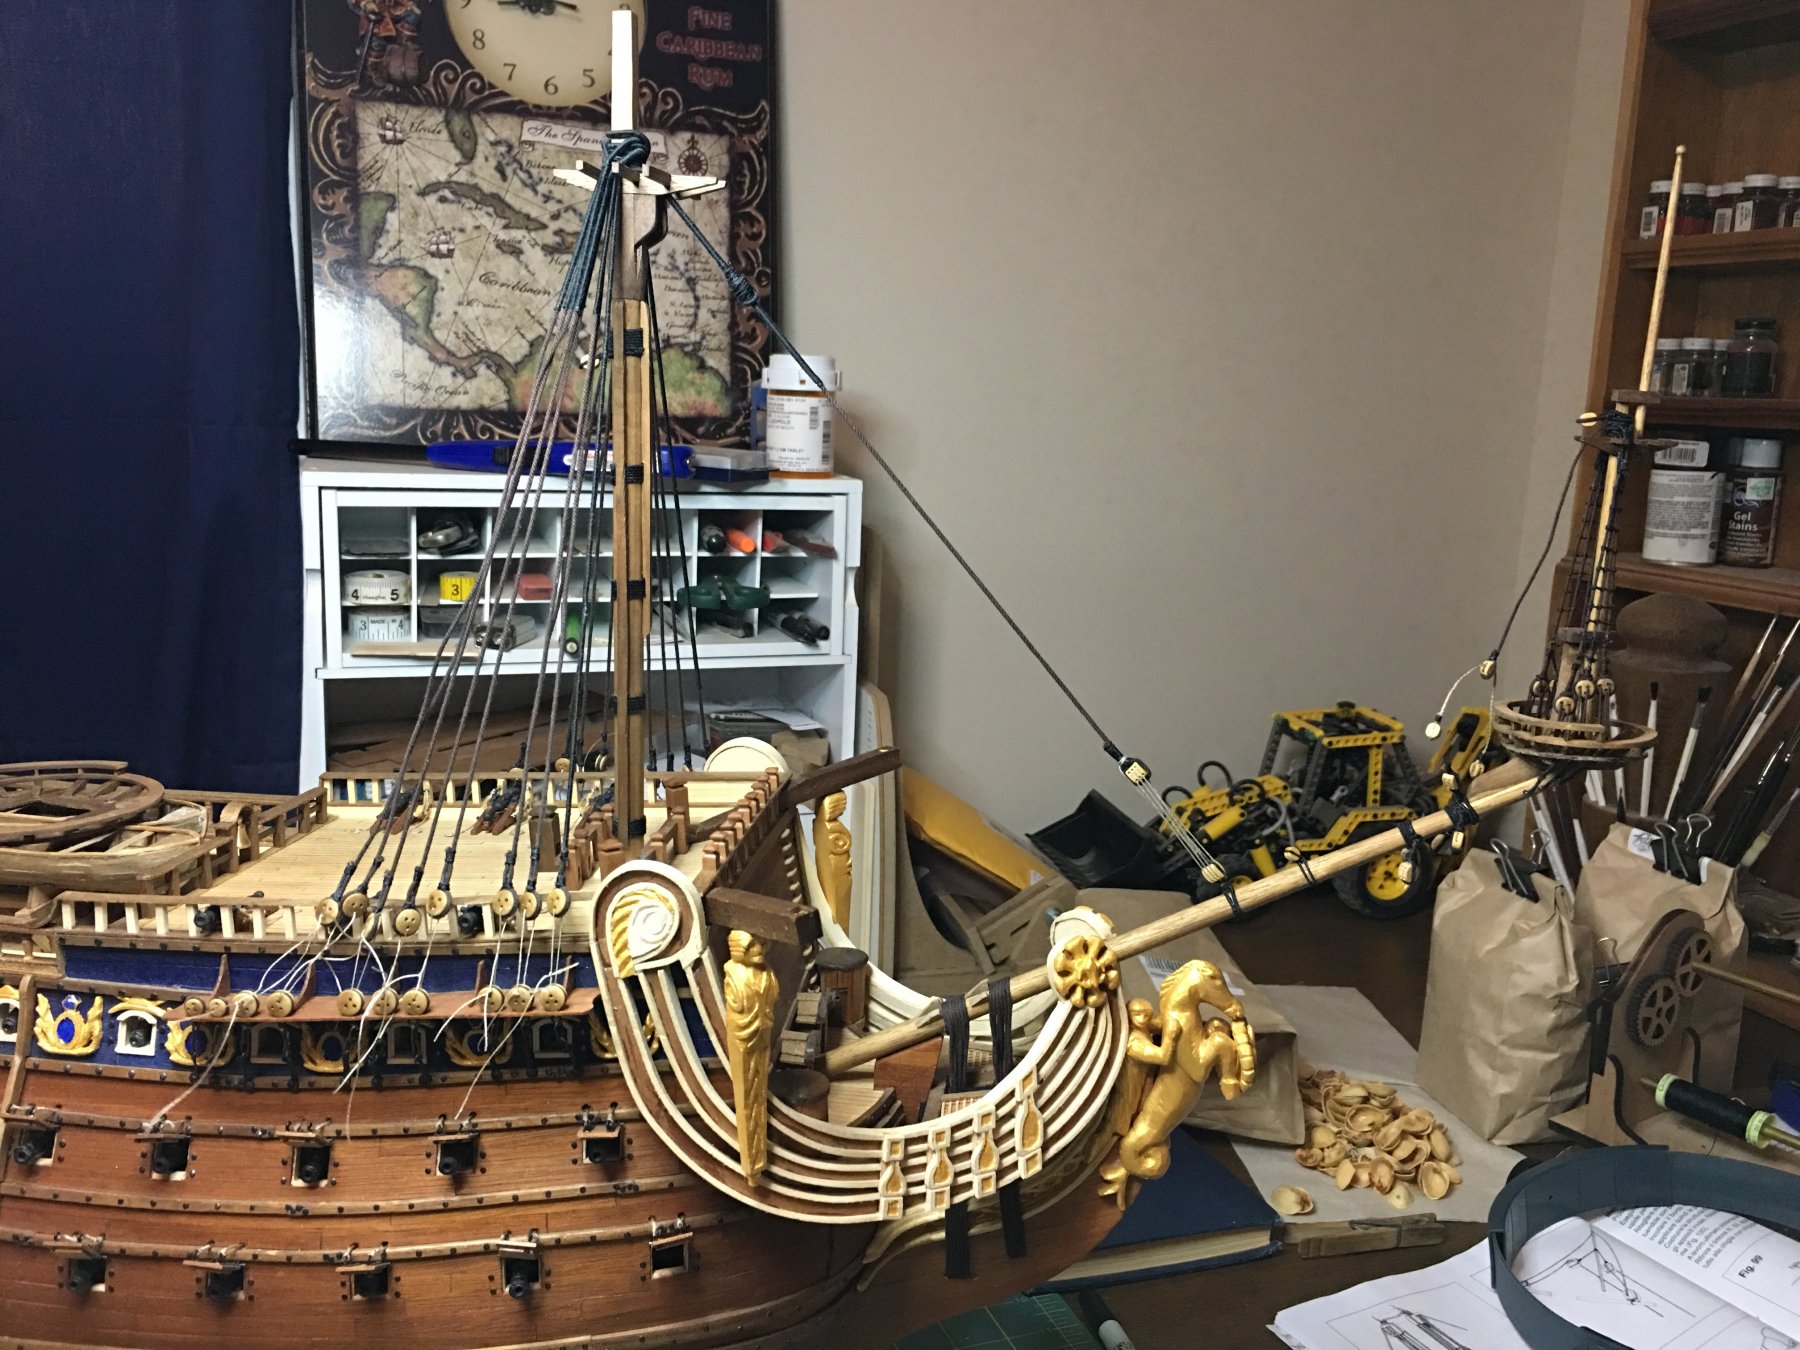
Foremast shrouds have been fitted and temporarily tensioned. None of this has been secured permanently yet but I need to have them in place for spacings and the fitting of other items. Working on ratting down down the spritsail topmast shrouds. Once they are done, I will fix the bowsprit to the hull with gammons and will be able to start fitting the fore and main stays.

-
Your obsession is amazing! haha! Seriously, if you can pull off those QGs as you have drawn them, that will truly be an incredible work of art! I've been loving watching you pull it all together and am looking forward to seeing how the physical modeling happens.
- 2,699 replies
-
- 2
-

-
- heller
- soleil royal
- (and 9 more)
-
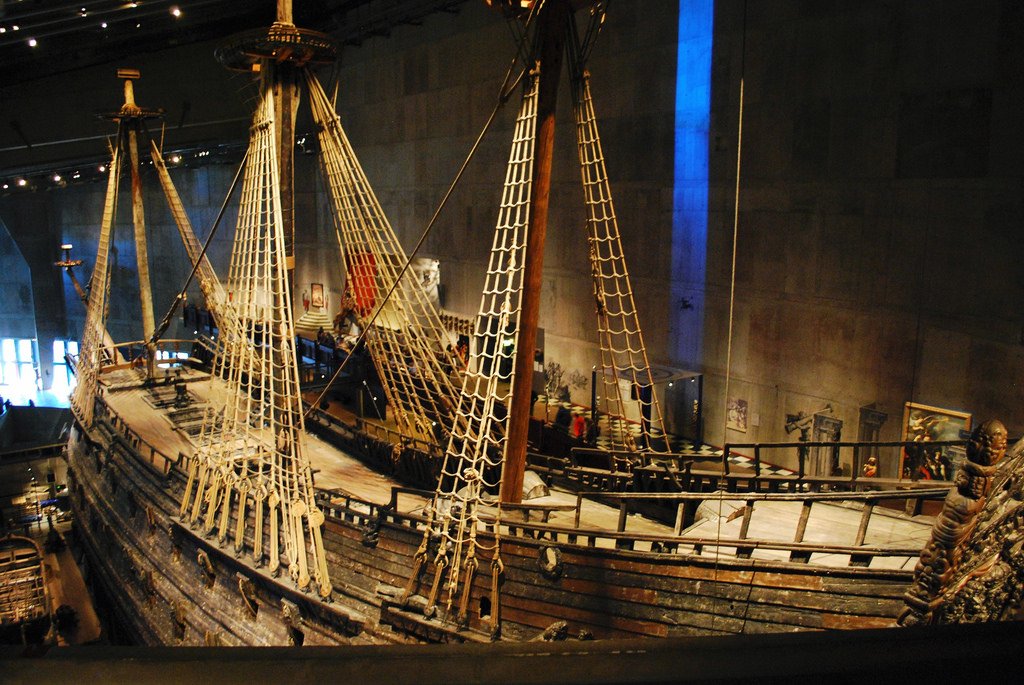
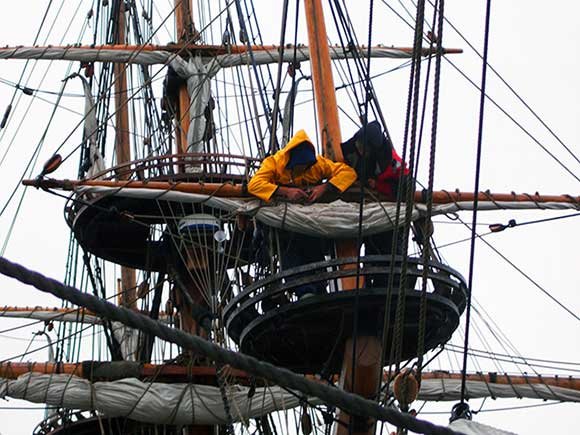
Tom, the round top with railings were common practice until the around the start of the 18th century. That is when they slowly began to change over to the more commonly seen squarish tops with the rounded front corners and no rails or only the one aft for rigging. When exactly the changes started is hard to say as with most nautical changes, they were slow and happened over decades. The reasoning for the changes had to do with sail clearances and operation. Here are a couple of pictures I pulled off google search real fast this morning showing the round tops on the Vasa and the Kalmar Nyckel.
-
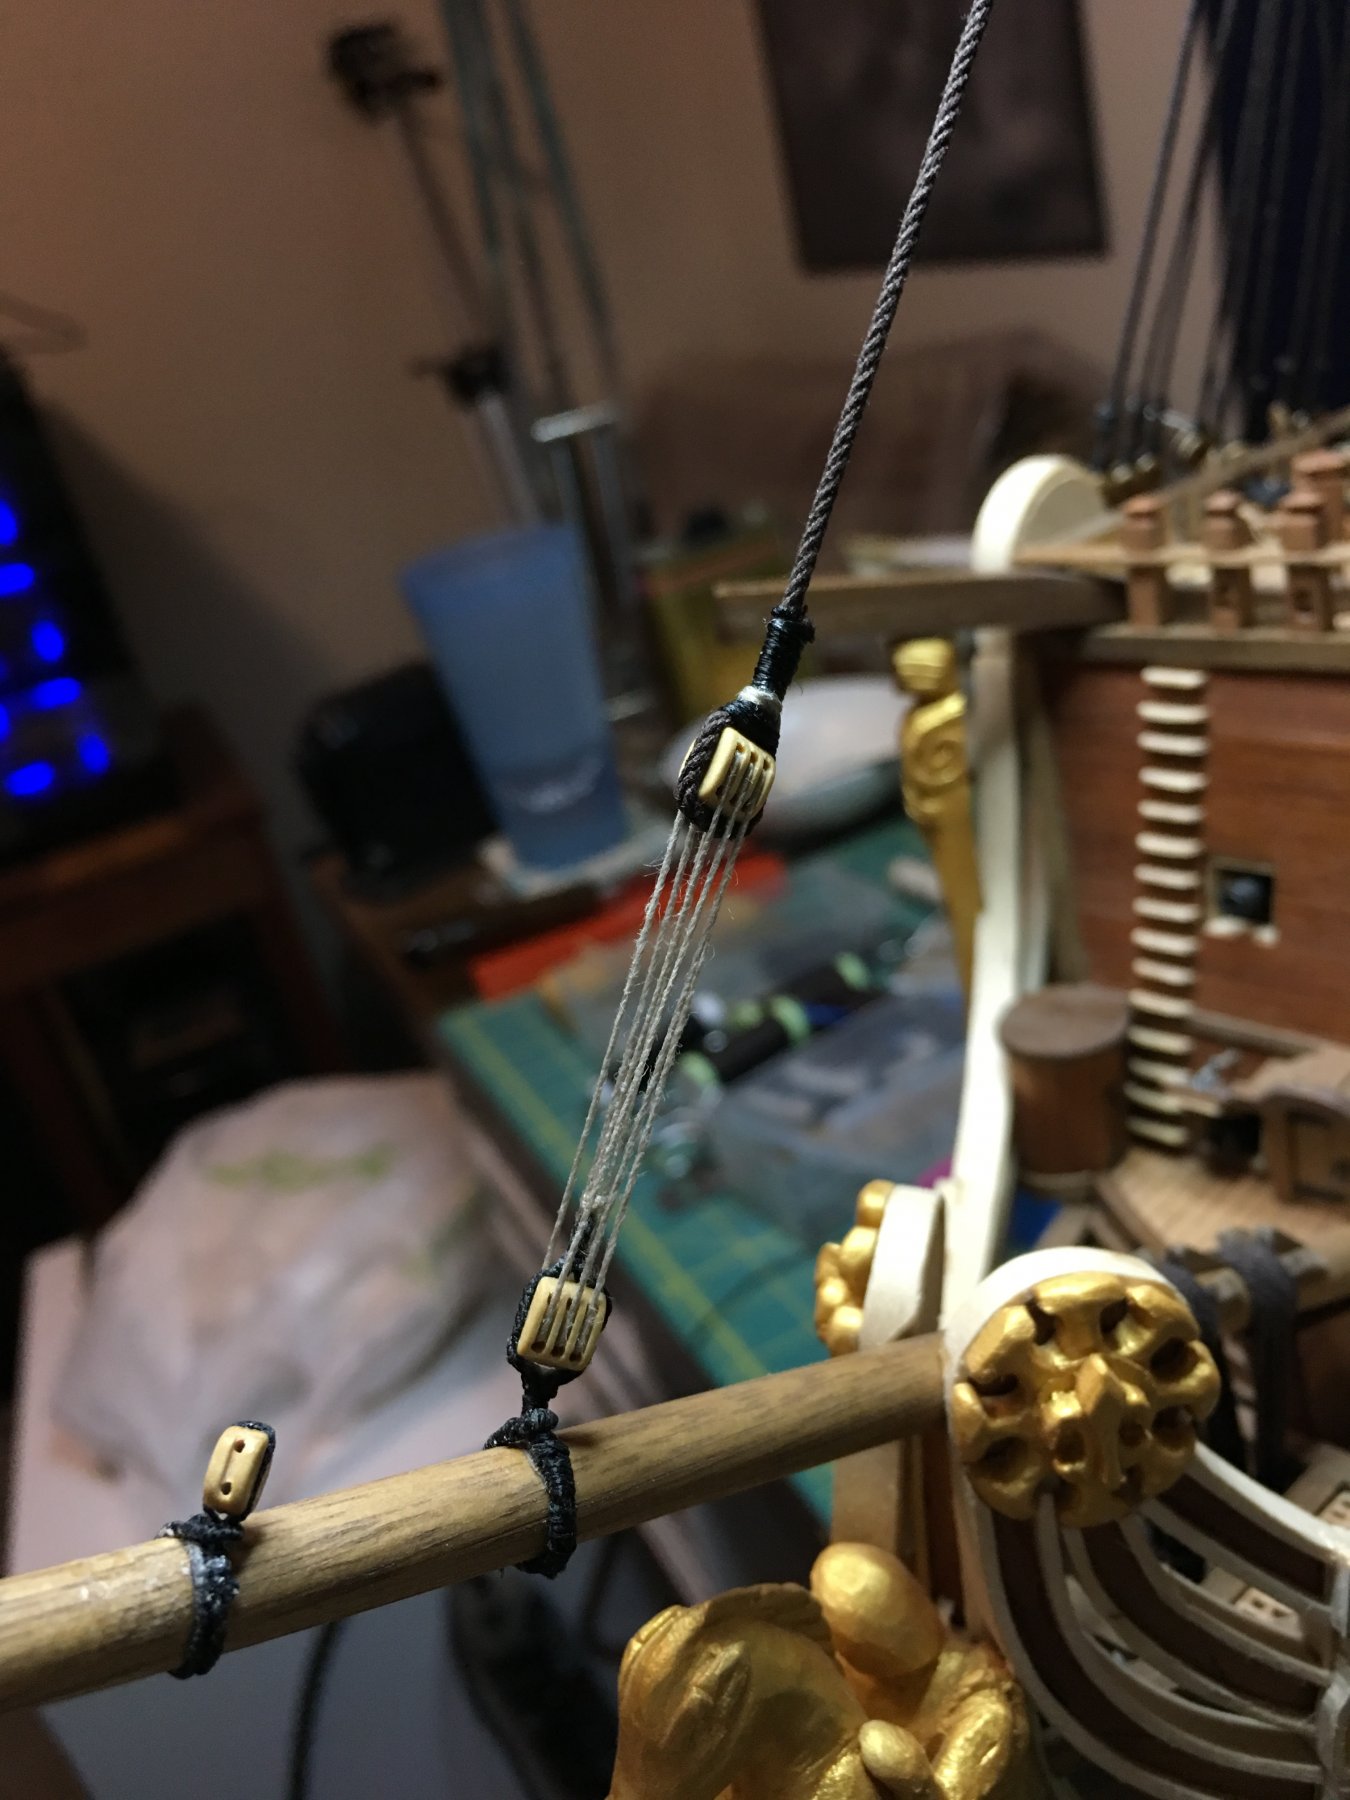
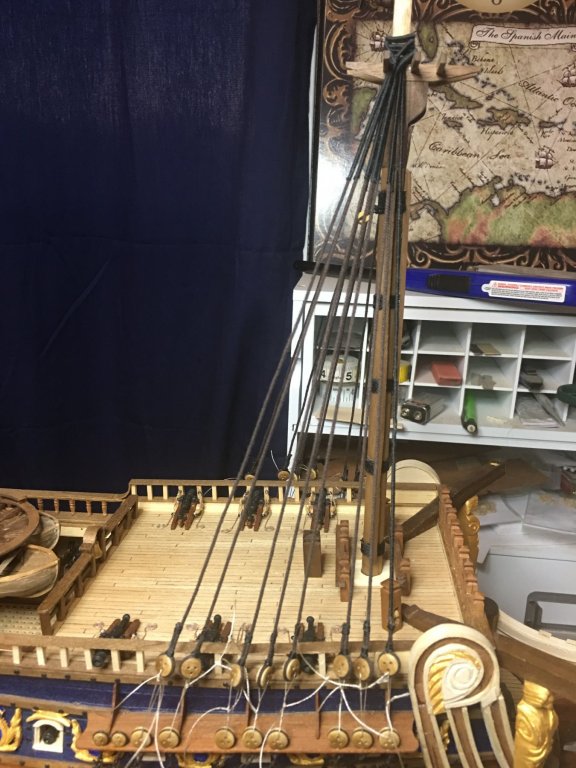
Shroud work on the bowsprit topmast and the foremast as well as adding blocks and pendants for the running rigging. Slow process but it’s coming along.


-
Beautiful models, a display to be proud of and enjoy. Wonderful piano music as well. Sad to see you go but I wish you all the best and enjoyment your next adventures take you!
- 73 replies
-
- 2
-
-
- mediterranean
- galley
- (and 1 more)
-
Very nice work indeed and slow is often a good thing I have found. To me rigging has always been one of those tasks that since each individual piece takes a lot of time and detail work, every piece that gets completed feels like a major milestone done.
- 786 replies
-
- 2
-
-
- Royal Louis
- Finished
- (and 1 more)
-
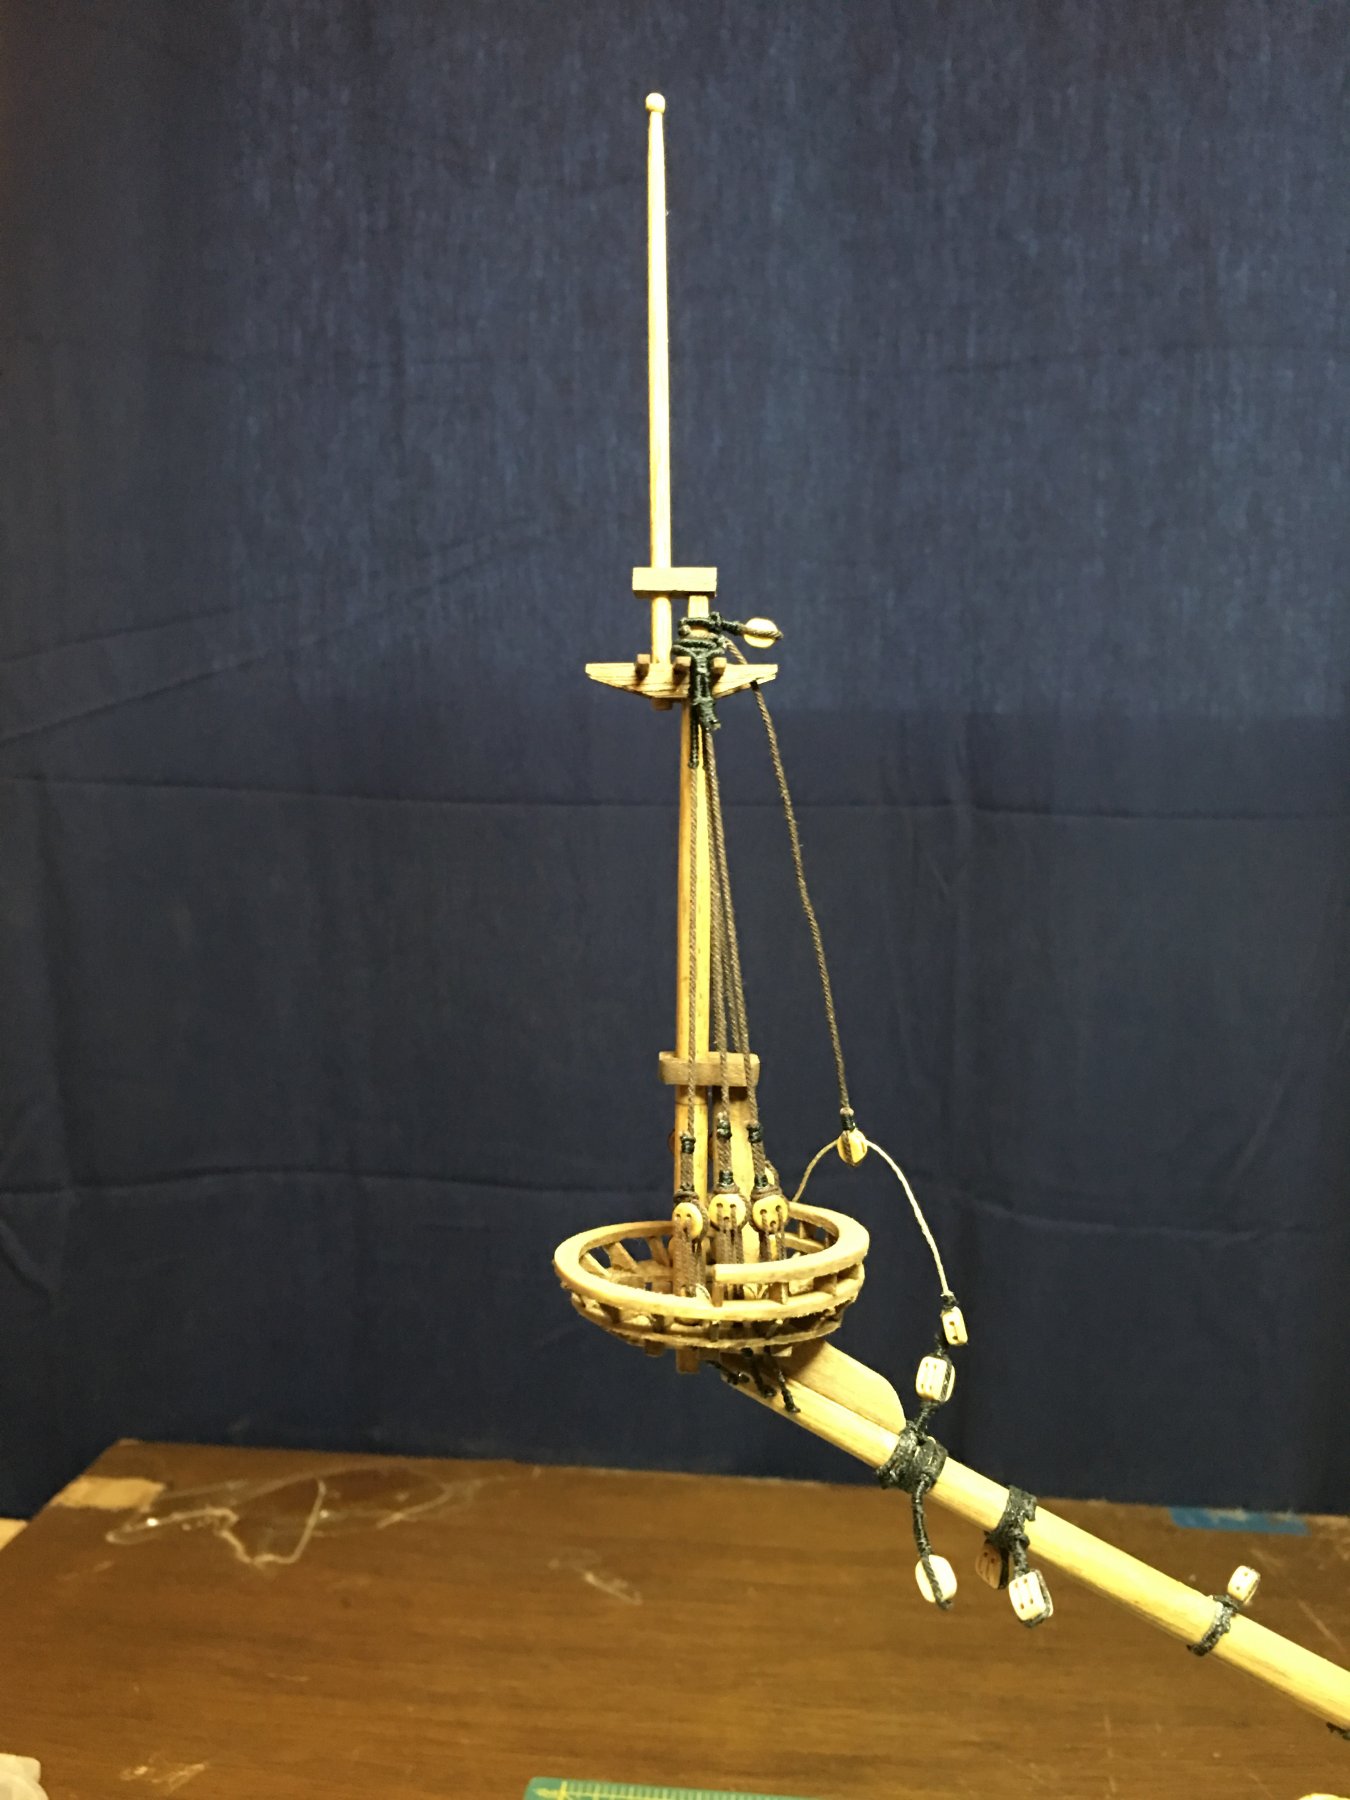
Back on the build! Resumes working on the spritsail topmast and now have all the wood components built and fitted but not yet glued. I am preparing the ropes to make the shrouds now and will be adding them as well as the ratlines as the week goes on. Still trying to decide if/how I want to add sails. I am going to try to get out to the fabric store soon and see what I can find. I don’t want to install the yards till they are added if that is the route I am going to take. More to follow soon!
-
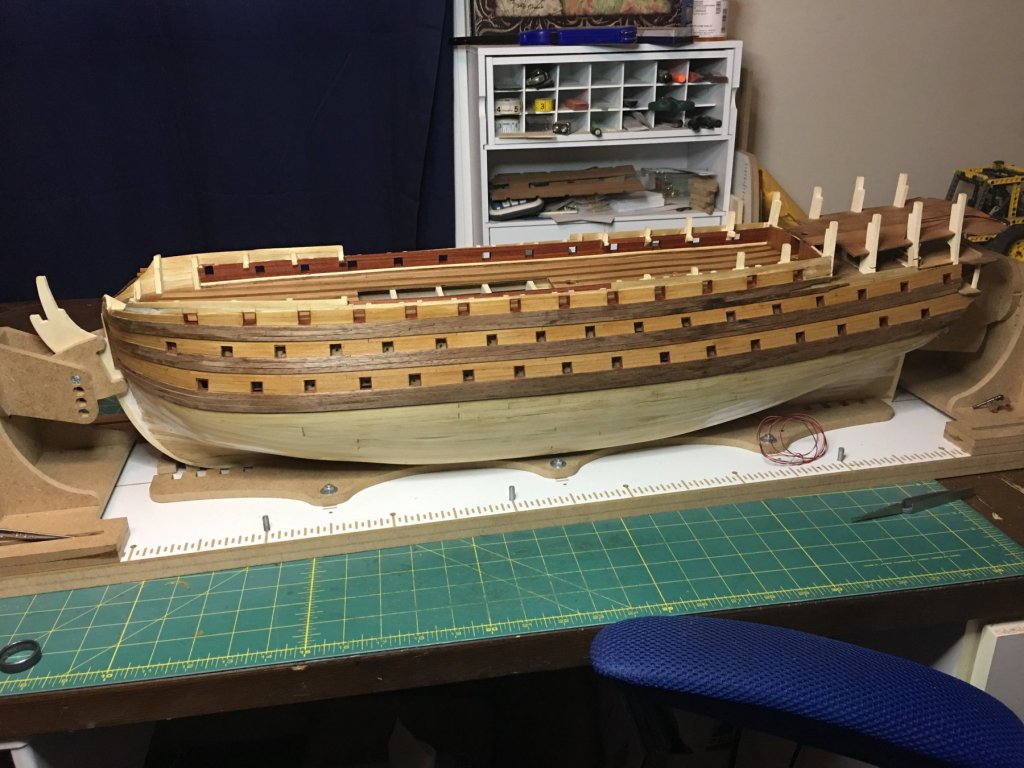
More progress on the hull planking. Both sides are even again to the top of the upper gun deck ports. Inner hull is planked and a coat of finish applied. I’m going to to take a break from RL for a little while. I need to save up a few dollars for materials to plank the lower hull and finish building out the cabins so the upper hull can be closed out. In the meantime I plan on working on Soleil Royal and continuing her rigging. If you are not already, feel free to join me there and I promise to return to RL soon!

-
I've made cradles for the masts to sit in to prevent them from sliding. Nothing fancy just a box sized to the diameter of the mast that the mast can slip into and stay in place. As long as it is below the deck where it can't be seen it is no problem. As for the glue, any wood glue will work. I typically use titebond 2 and it holds great. I will add a couple dabs of CA glue when I install the hull planks to aid in holding them quickly and securely in place till the wood glue has time to cure.
-
Not a lot of progress this week but I did finish the port frames and now I am working on planking the interior. For the port frames, I cut the liners long so that they extend past the frames on the inside and the first layer of planking on outside. I do this so that I can cut them down to the same thickness and curvature of the hull. Once they are all in, I trim them to fit and sand them smooth. Now I can install the planks over the frames and liners for a finished look.


-
One thing I would caution on in using these older models on details is that they were often built to show the lines of the ship, her potential sailing qualities and to some extent, the decorative figures on them. Common, everyday or "expected" details were commonly left off the model as anyone viewing them would be expected to know they would be there. Lack of ladders for example, would be a detail they may have left off as the admiralty board would expect them to be on the ship so there would be no need to place them on the model. Obviously, if this was a commissioned piece or a gift to someone important, the model would be complete in all details, but most of these were for presentation to the board for approval of ships to be built. Also, most of the models have suffered damage and loss of parts over the years leading to rebuilds. That can easily alter details as the knowledge of if they ever existed is also lost or blurred as in the discussions we are having now. I think to better clarify what would have been on a particular ship, one needs to look at the service records more than the artwork. In this case, if the ship in the year it is being modeled, was to serve as an admiral's ship or house the king, then an admiral's door would be expected. If it was just another ship in the fleet, than perhaps not. Ladders would have been on the ship no matter the use as they had to be there for function. A detail easily overlooked in artistic renderings, but not left off in practice. Even smaller vessels had ladders, larger ones had to have them. One more thing to consider is that ships of the day carried experienced carpenters and mates that could erect or tear dome almost any part of the ship quickly and efficiently with great skill. A feature such as an admiral's door and the associated platform could have been one of those features that was set up only when it was to be used. Due to the delicate position of that landing over the side of the ship, it is not a far stretch to think that it was only set up if the ship were to receive an admiral or king and taken down and stored below decks when not in use. That could be a factor when looking at the different paintings with some including the door and others not.
-
A possible solution to any missing gratings could be to place the battens in place closing them off. Those would be far easier to make than additional gratings and would be correct in use.
- 2,699 replies
-
- 2
-
-
- heller
- soleil royal
- (and 9 more)
-
I will agree with Wallace & Kevin in that the weathered look looks great, as long as that same level of weathering is carried throughout the model.
-
Congratulations on the baby! Good to have you back with us. Your planking looks beautiful. Well done!
-
For those support beams, either modification is acceptable. What matters is that the bulkheads remain square to the false keel. I will usually glue the beams to the bulkheads so that I know that the remain square. As noted above, the bulkheads themselves have some wiggle room and/or flex to them especially at extremities. Ensuring that those edges remain true during planking can help in keeping the planking even on both sides of the hull.
-
The larger 1st & 2nd rates would not have needed the swivel guns as much as the smaller sloops and frigates would have. This was mainly due to the uses they were typically used in, blockade and the line of battle. The large ships, were more often found used as an intimidation factor than in actual combat. When combat did take place however, it was far more likely to be at range rather than up close. There were always exceptions to this of course, but the close in fighting that would give swivel guns their most effective range, (think of them as shotguns in their use - powerful at close range, not as good long range) was left to the smaller and easier to maneuver ships.
- 2,699 replies
-
- 5
-
-
- heller
- soleil royal
- (and 9 more)
-
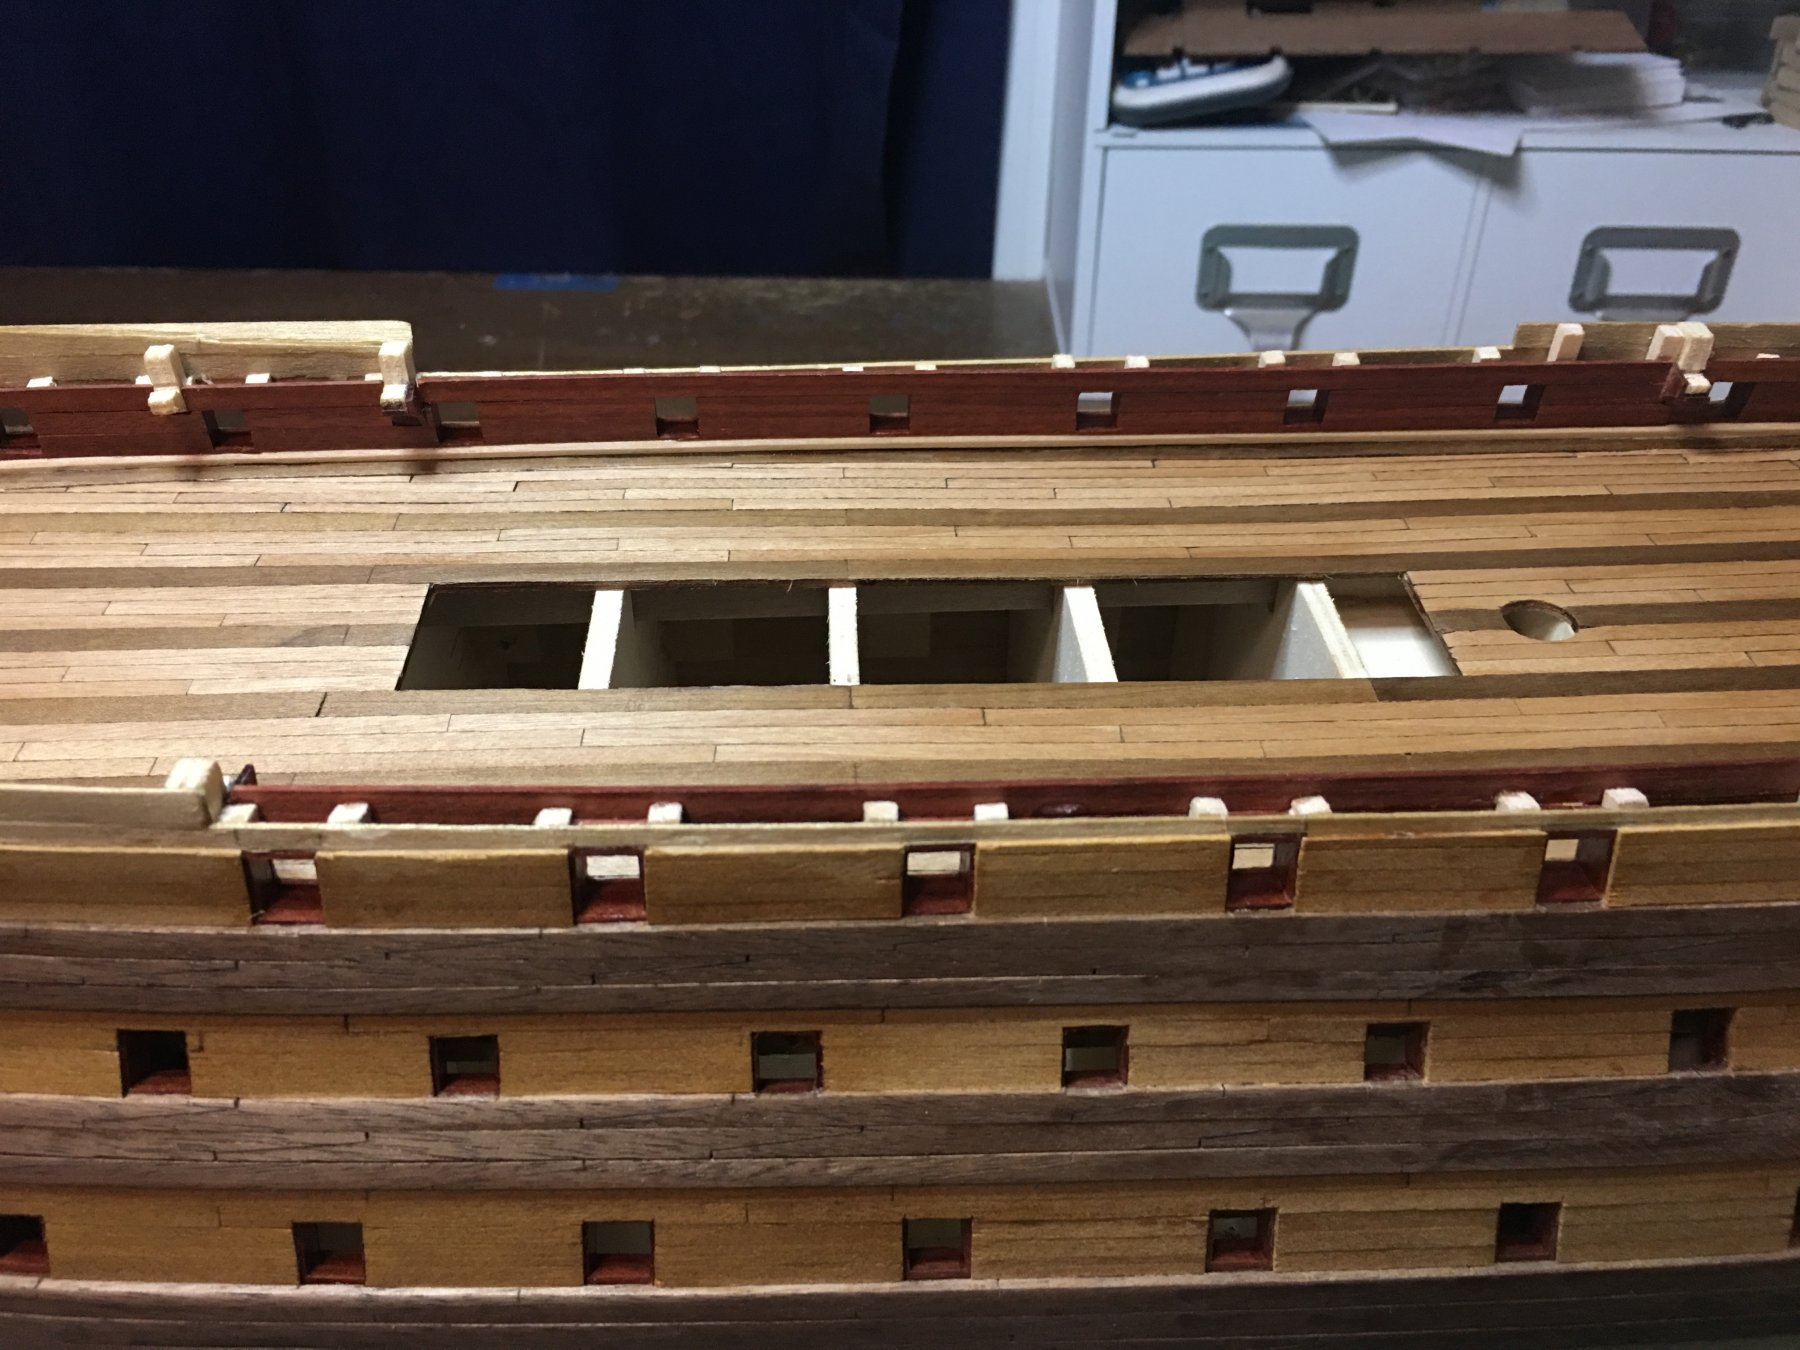
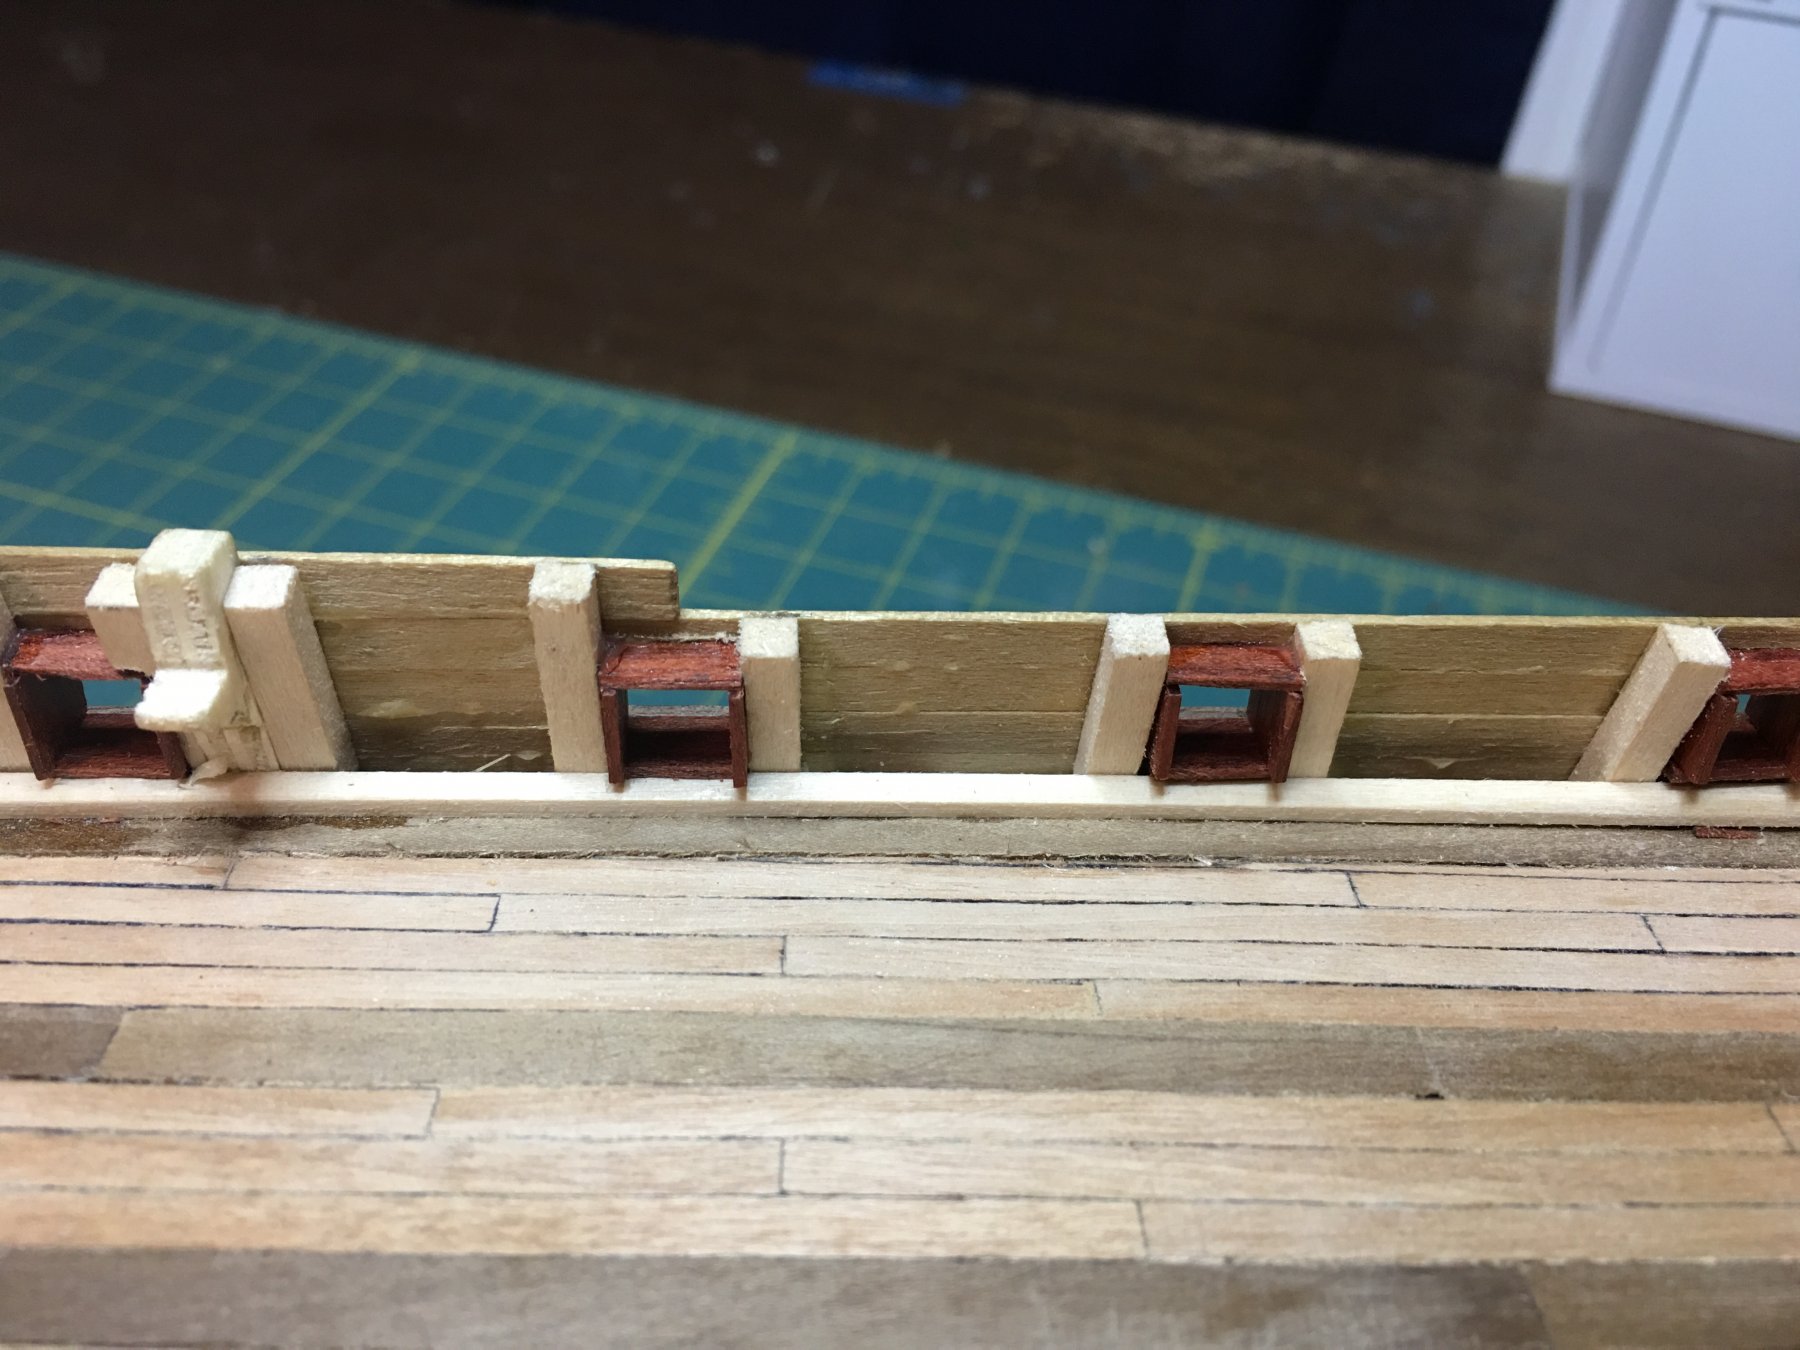
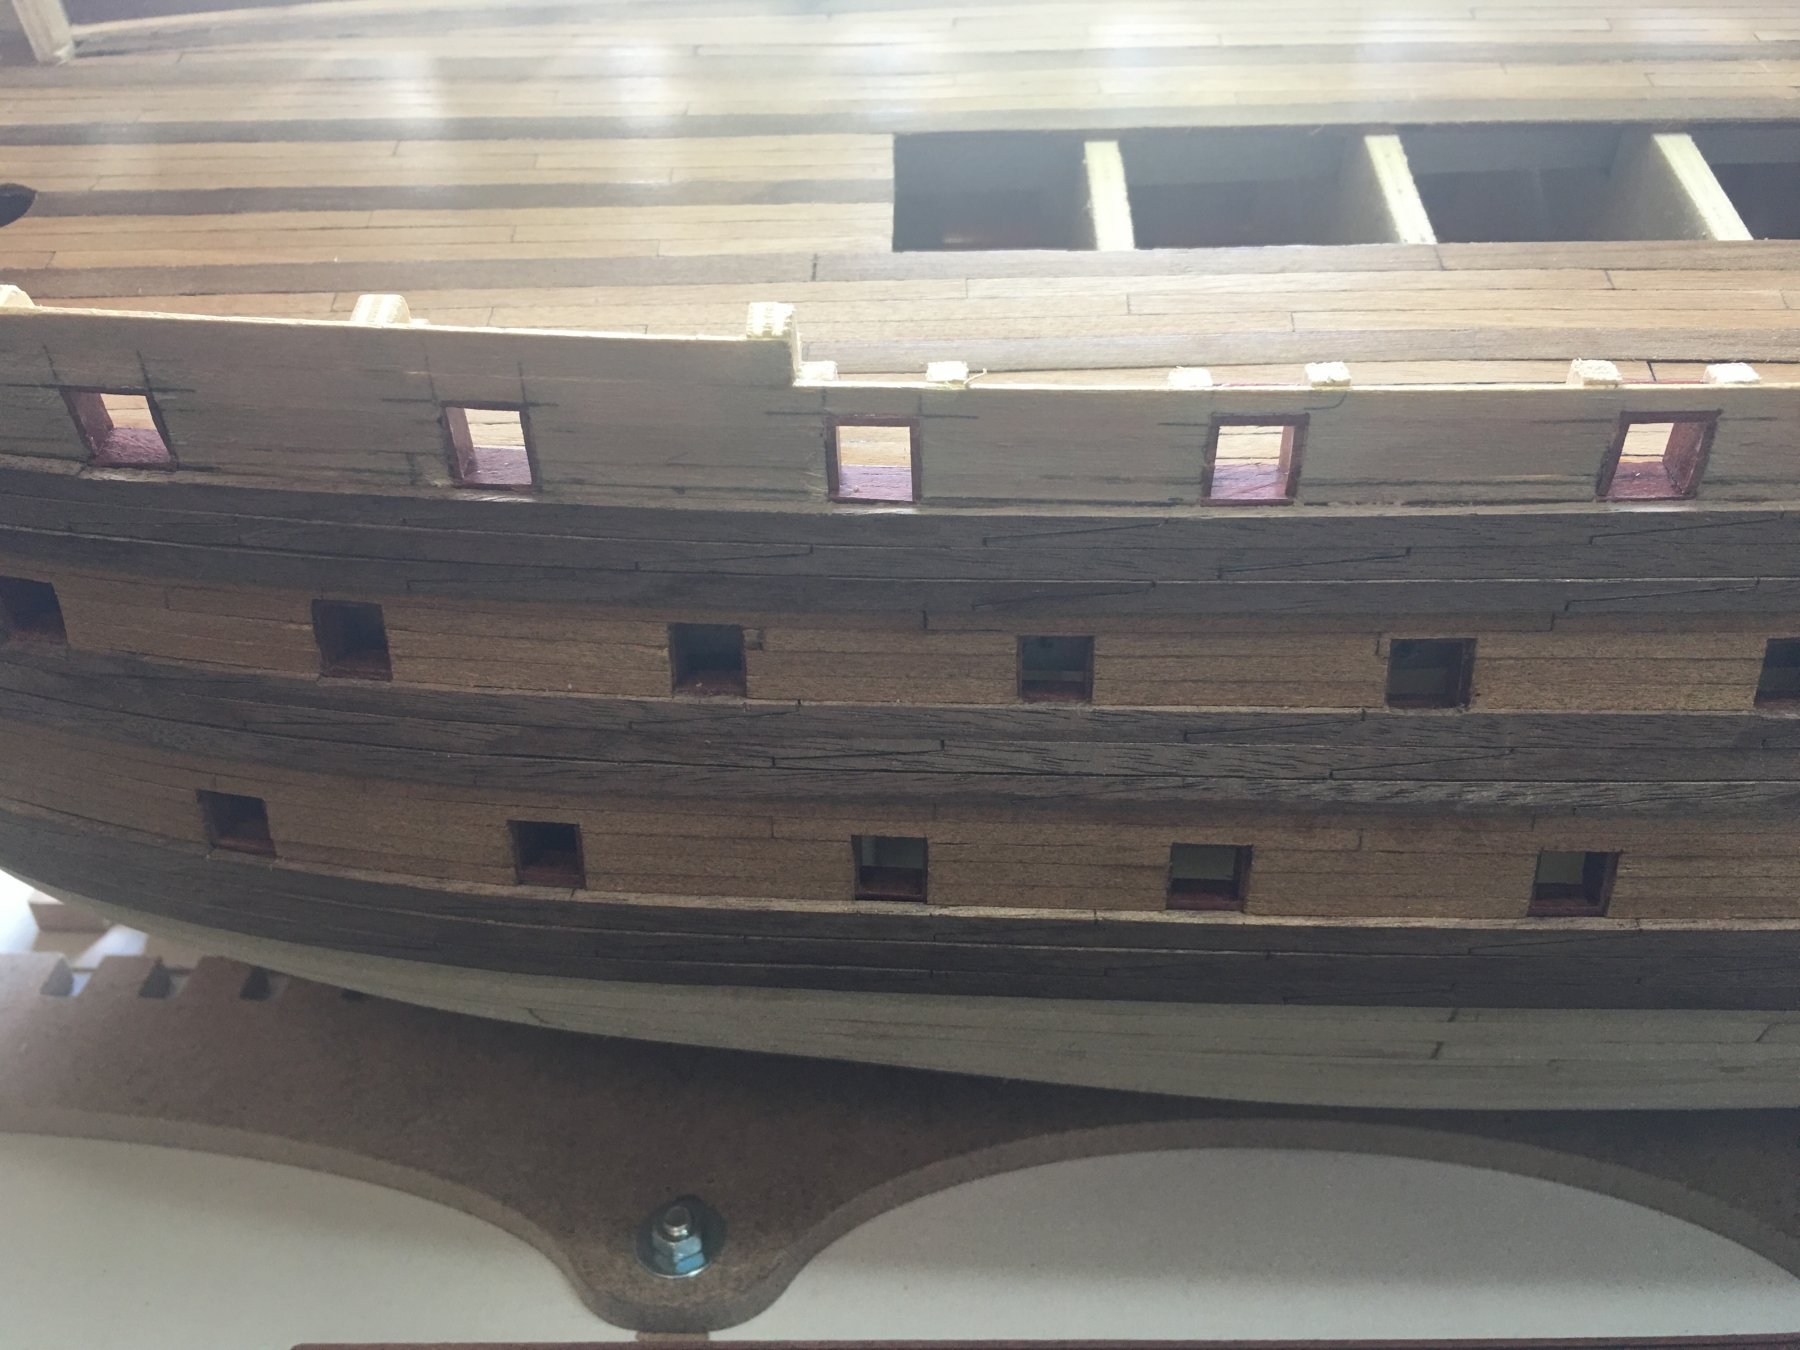
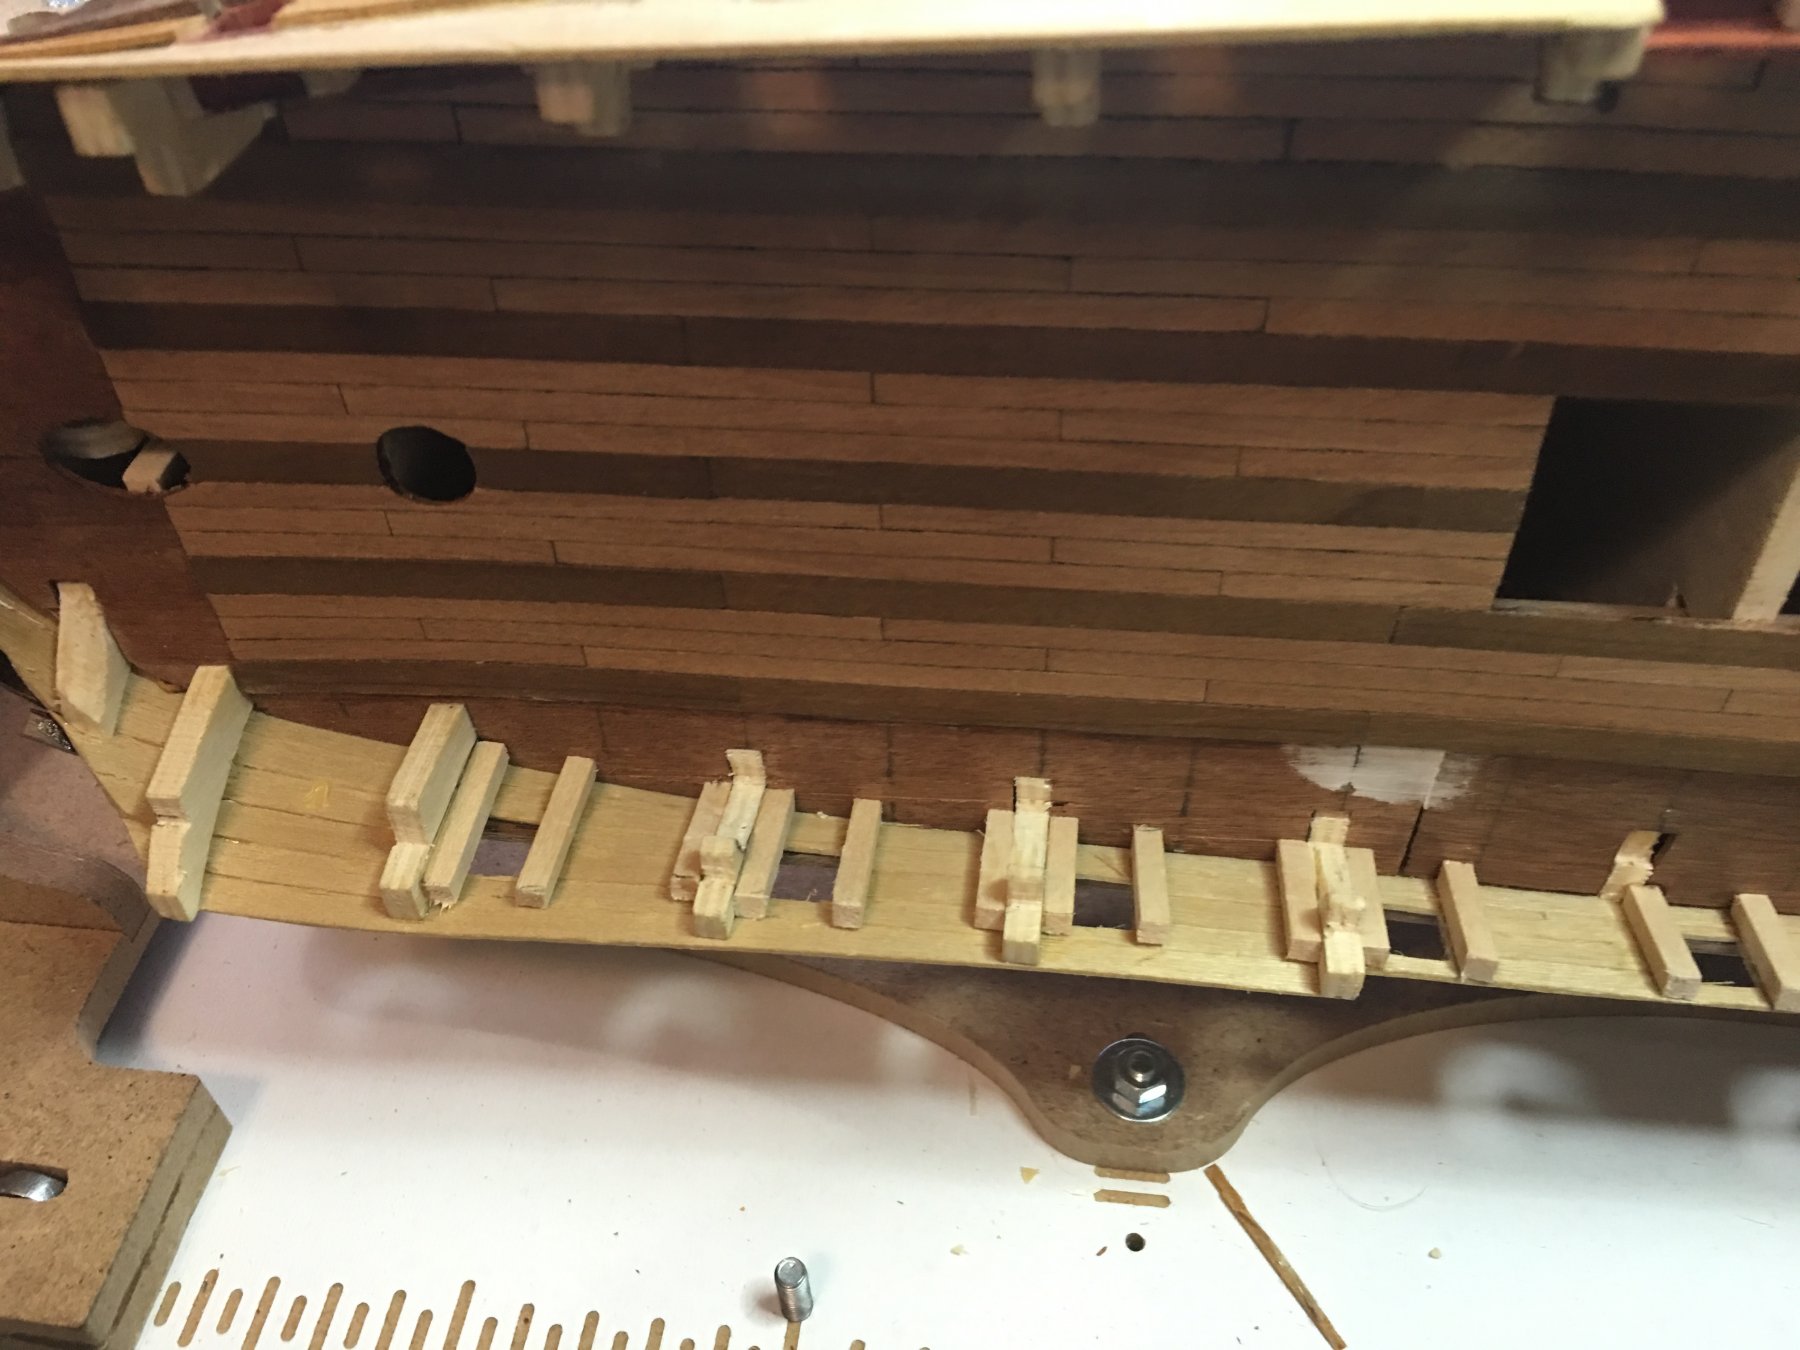
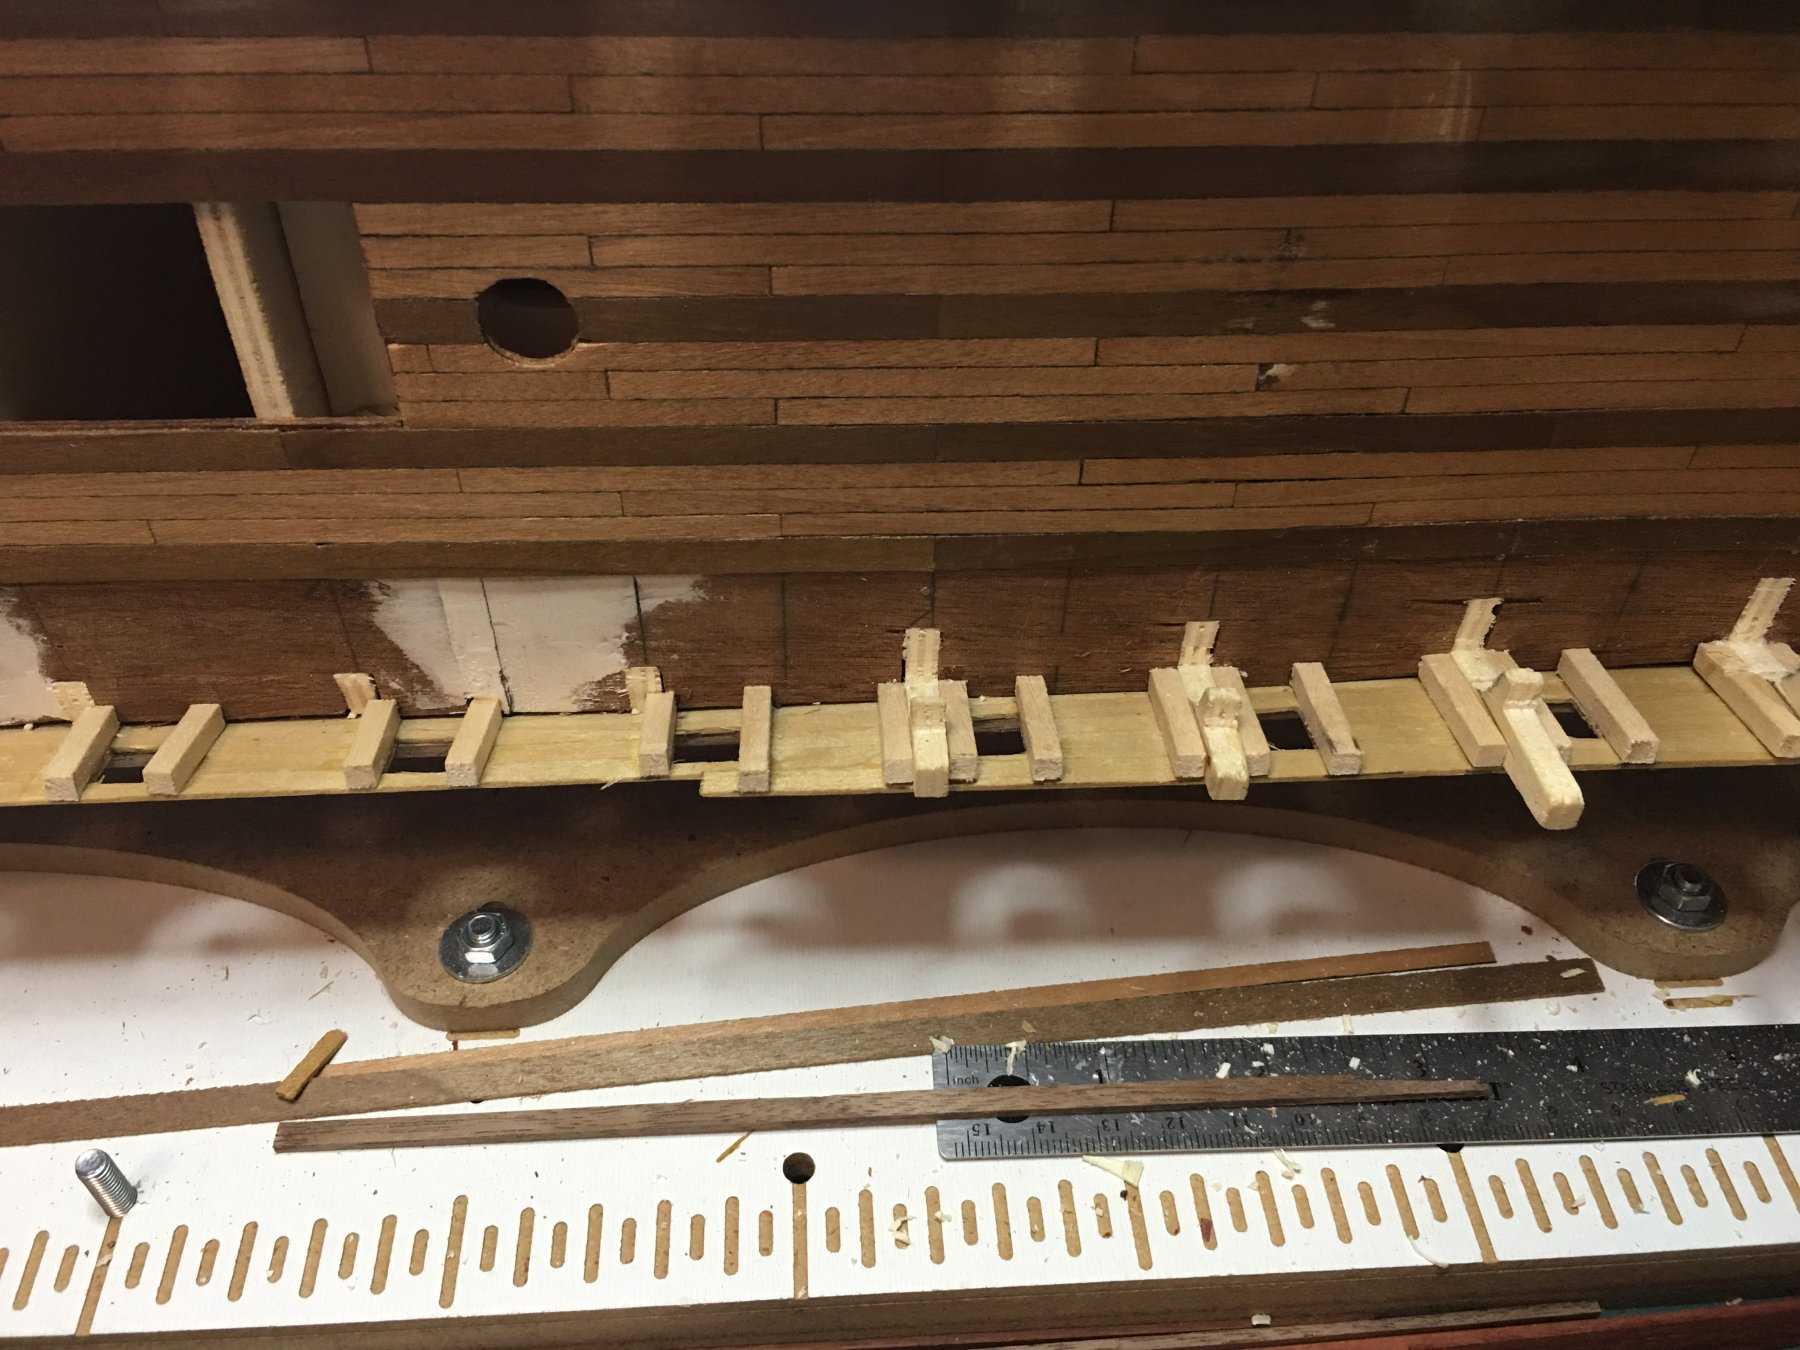
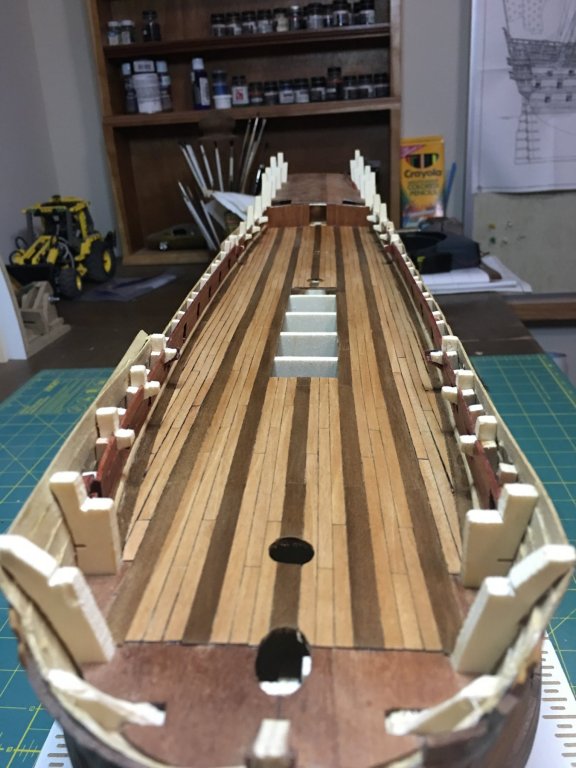
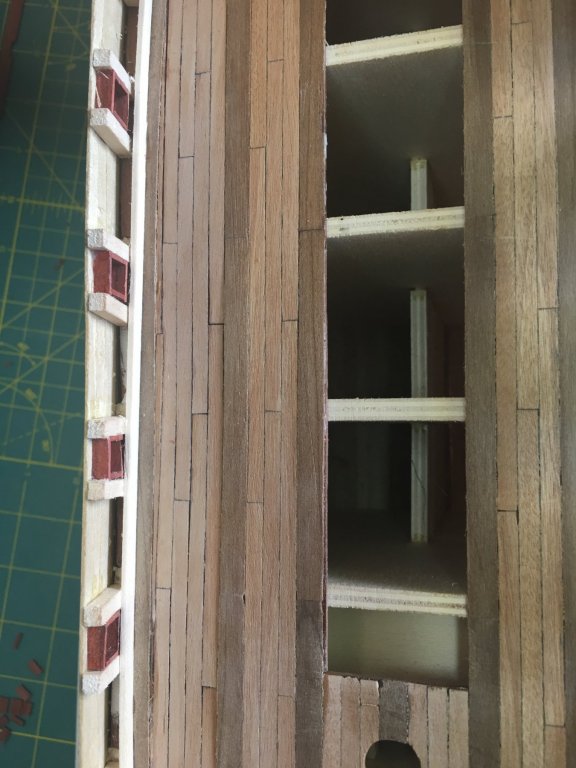
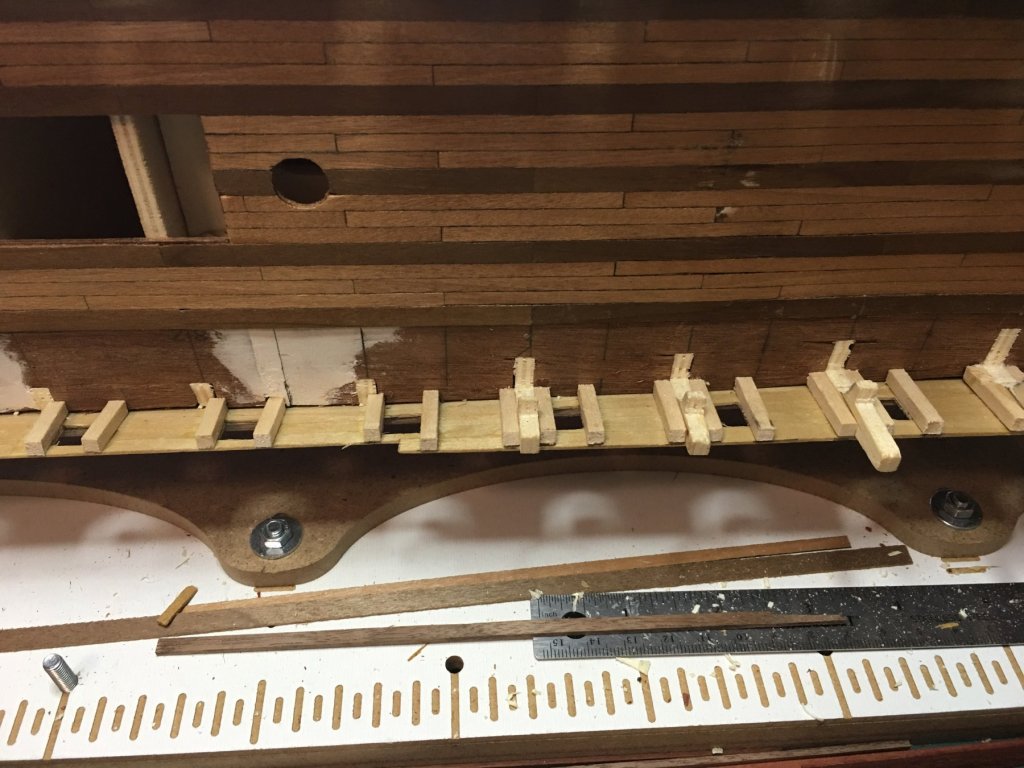
Here are a couple of pictures of the modified framing. I completely removed the posts in the waist area between the quarter deck and forecastle. They are far to wide and easier to just remove and replace than to try to use them. Also, by removing them I can properly align the frames around the gun ports as the jambs for the ports used the frames for this purpose. Beneath the quarter and forecastle decks, I cut away the material to form a knee to support the horizontal beams that will hold up the deck. I then added additional frames to build the gun ports and provide planking support where needed. With the frames modified, I can now finish planking the deck to the outside bulkheads unimpeded.
-
Here are a couple of pictures of the modified framing. I completely removed the posts in the waist area between the quarter deck and forecastle. They are far to wide and easier to just remove and replace than to try to use them. Also, by removing them I can properly align the frames around the gun ports as the jambs for the ports used the frames for this purpose. Beneath the quarter and forecastle decks, I cut away the material to form a knee to support the horizontal beams that will hold up the deck. I then added additional frames to build the gun ports and provide planking support where needed. With the frames modified, I can now finish planking the deck to the outside bulkheads unimpeded.

-
Welcome to MSW! All the best to you on that Victory build.
-
New Ship Builder Old retired concrete buider
EJ_L replied to jimbobuild's topic in New member Introductions
Welcome to MSW! I wish you the best on your first build.