Supplies of the Ship Modeler's Handbook are running out. Get your copy NOW before they are gone! Click on photo to order.
×


EJ_L
-
Posts
2,227 -
Joined
-
Last visited
Content Type
Profiles
Forums
Gallery
Events
Everything posted by EJ_L
-
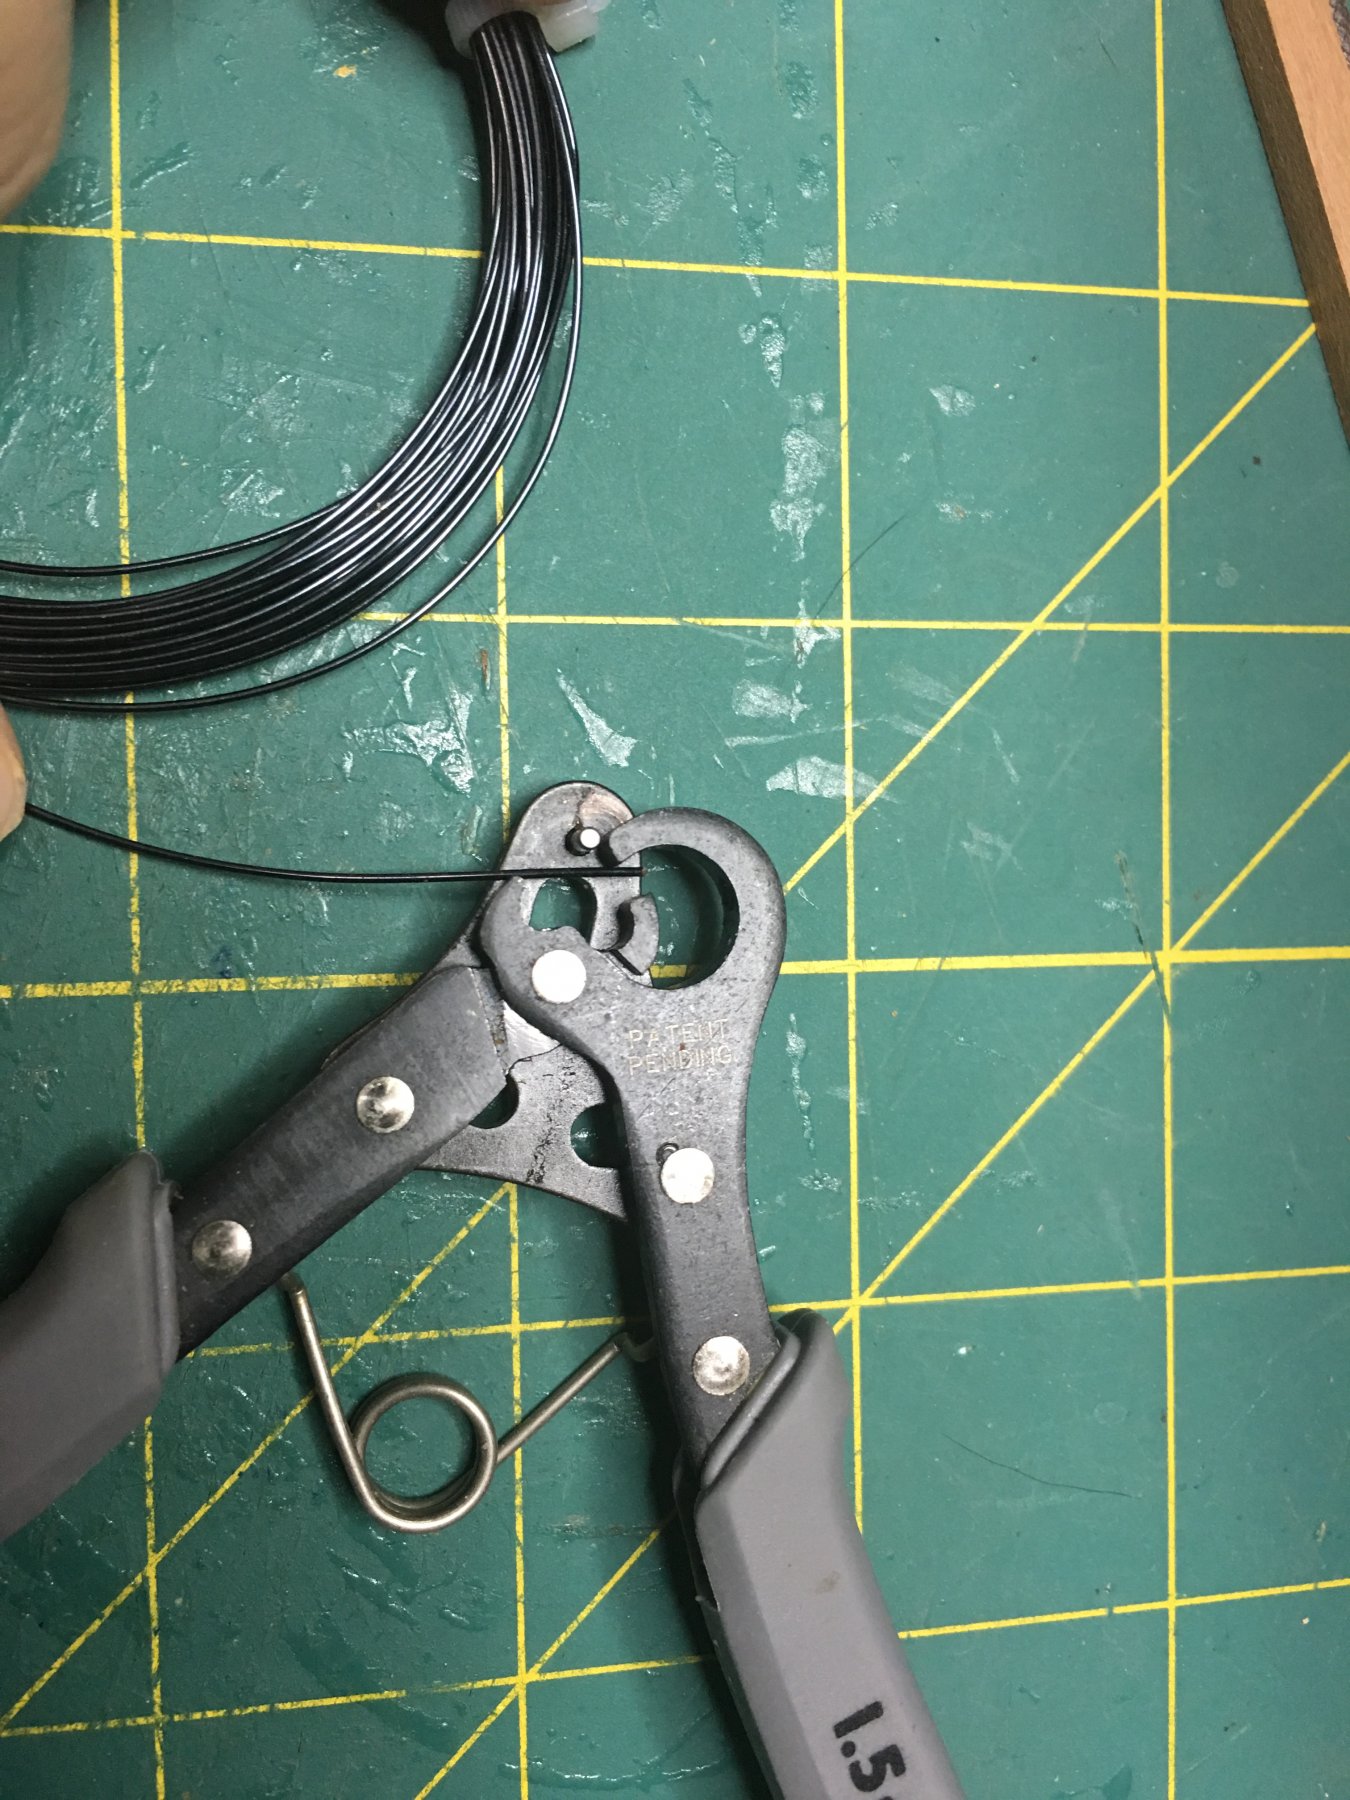
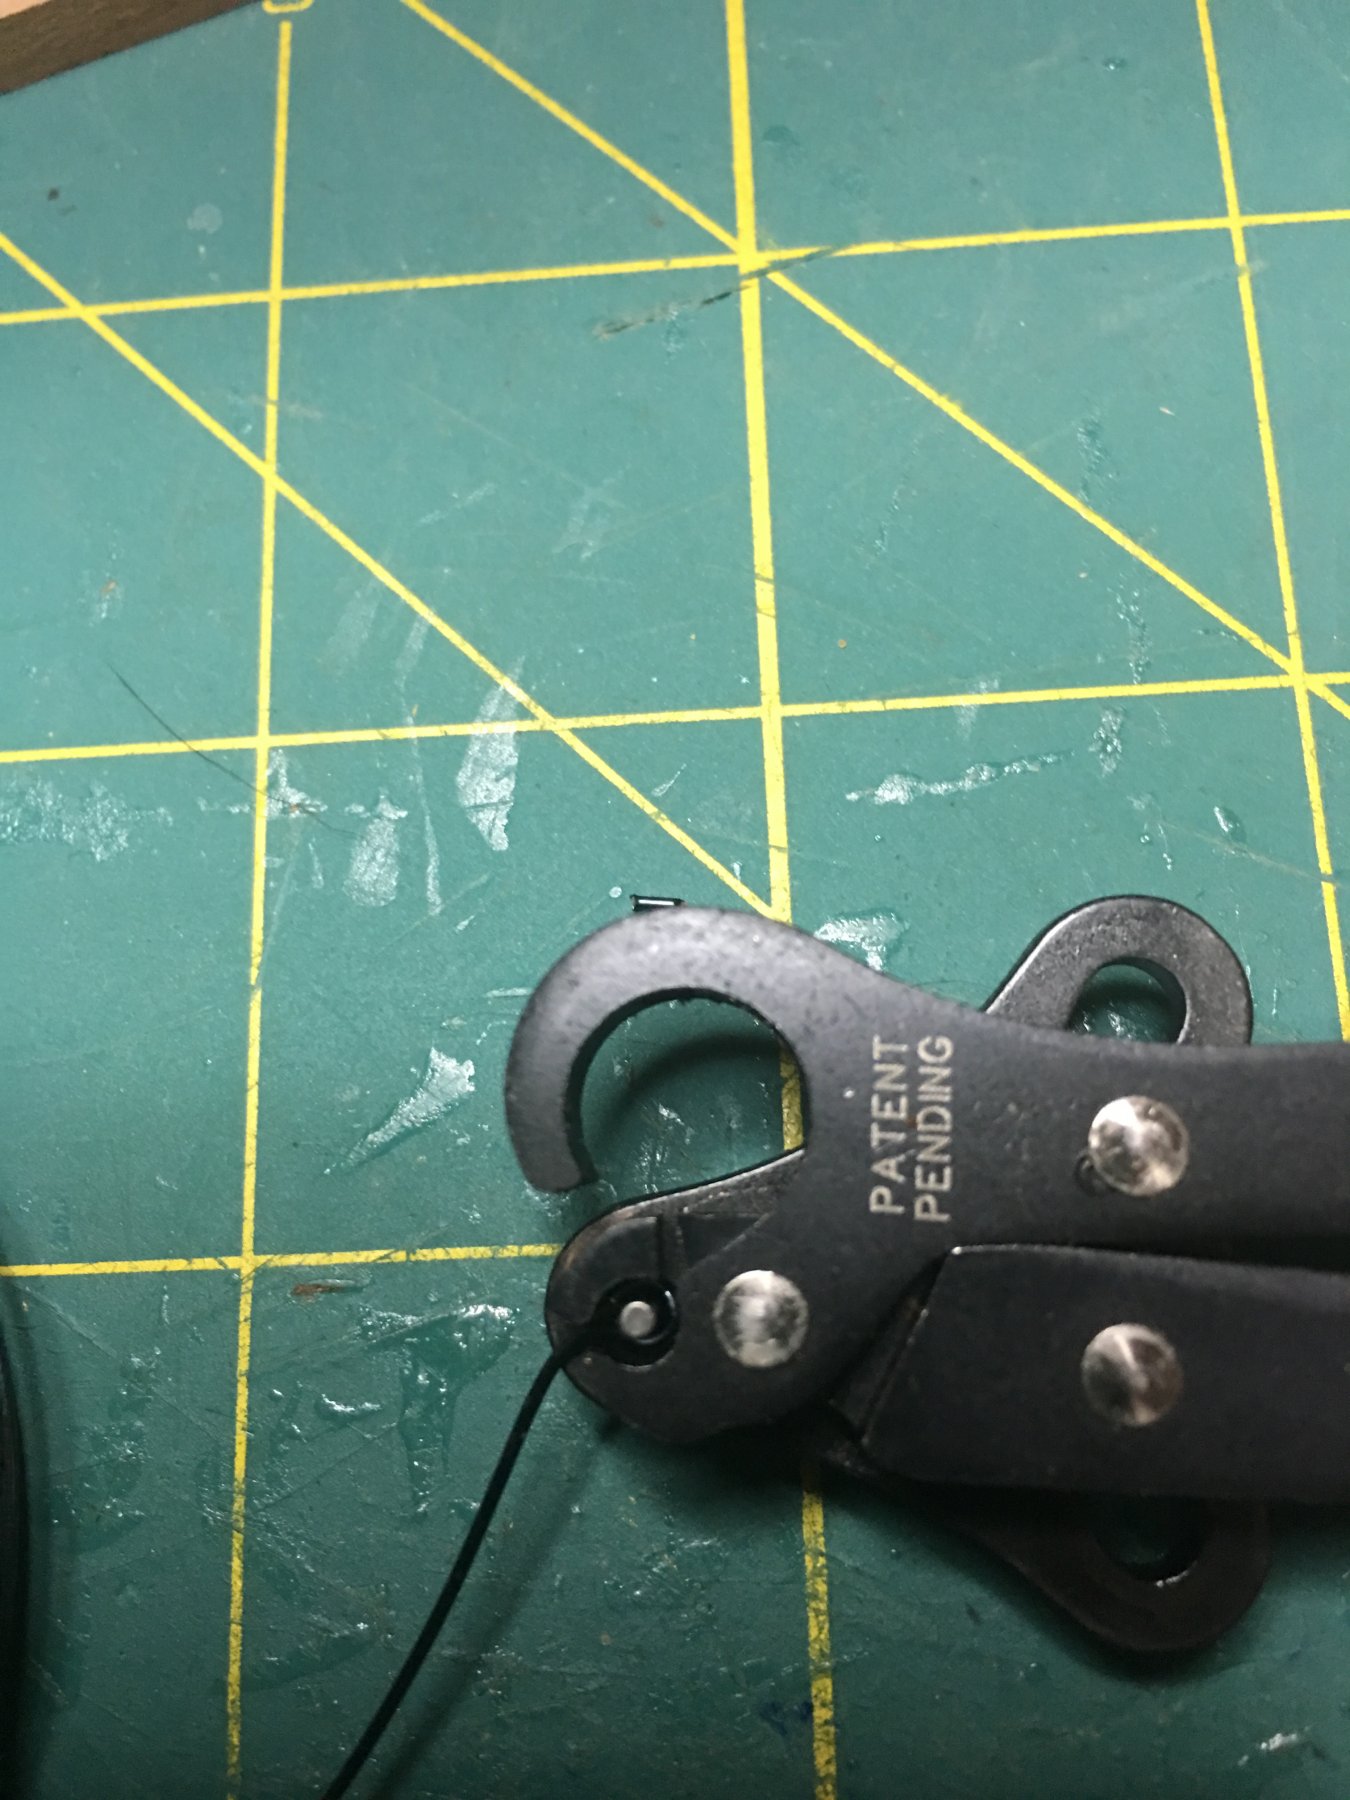
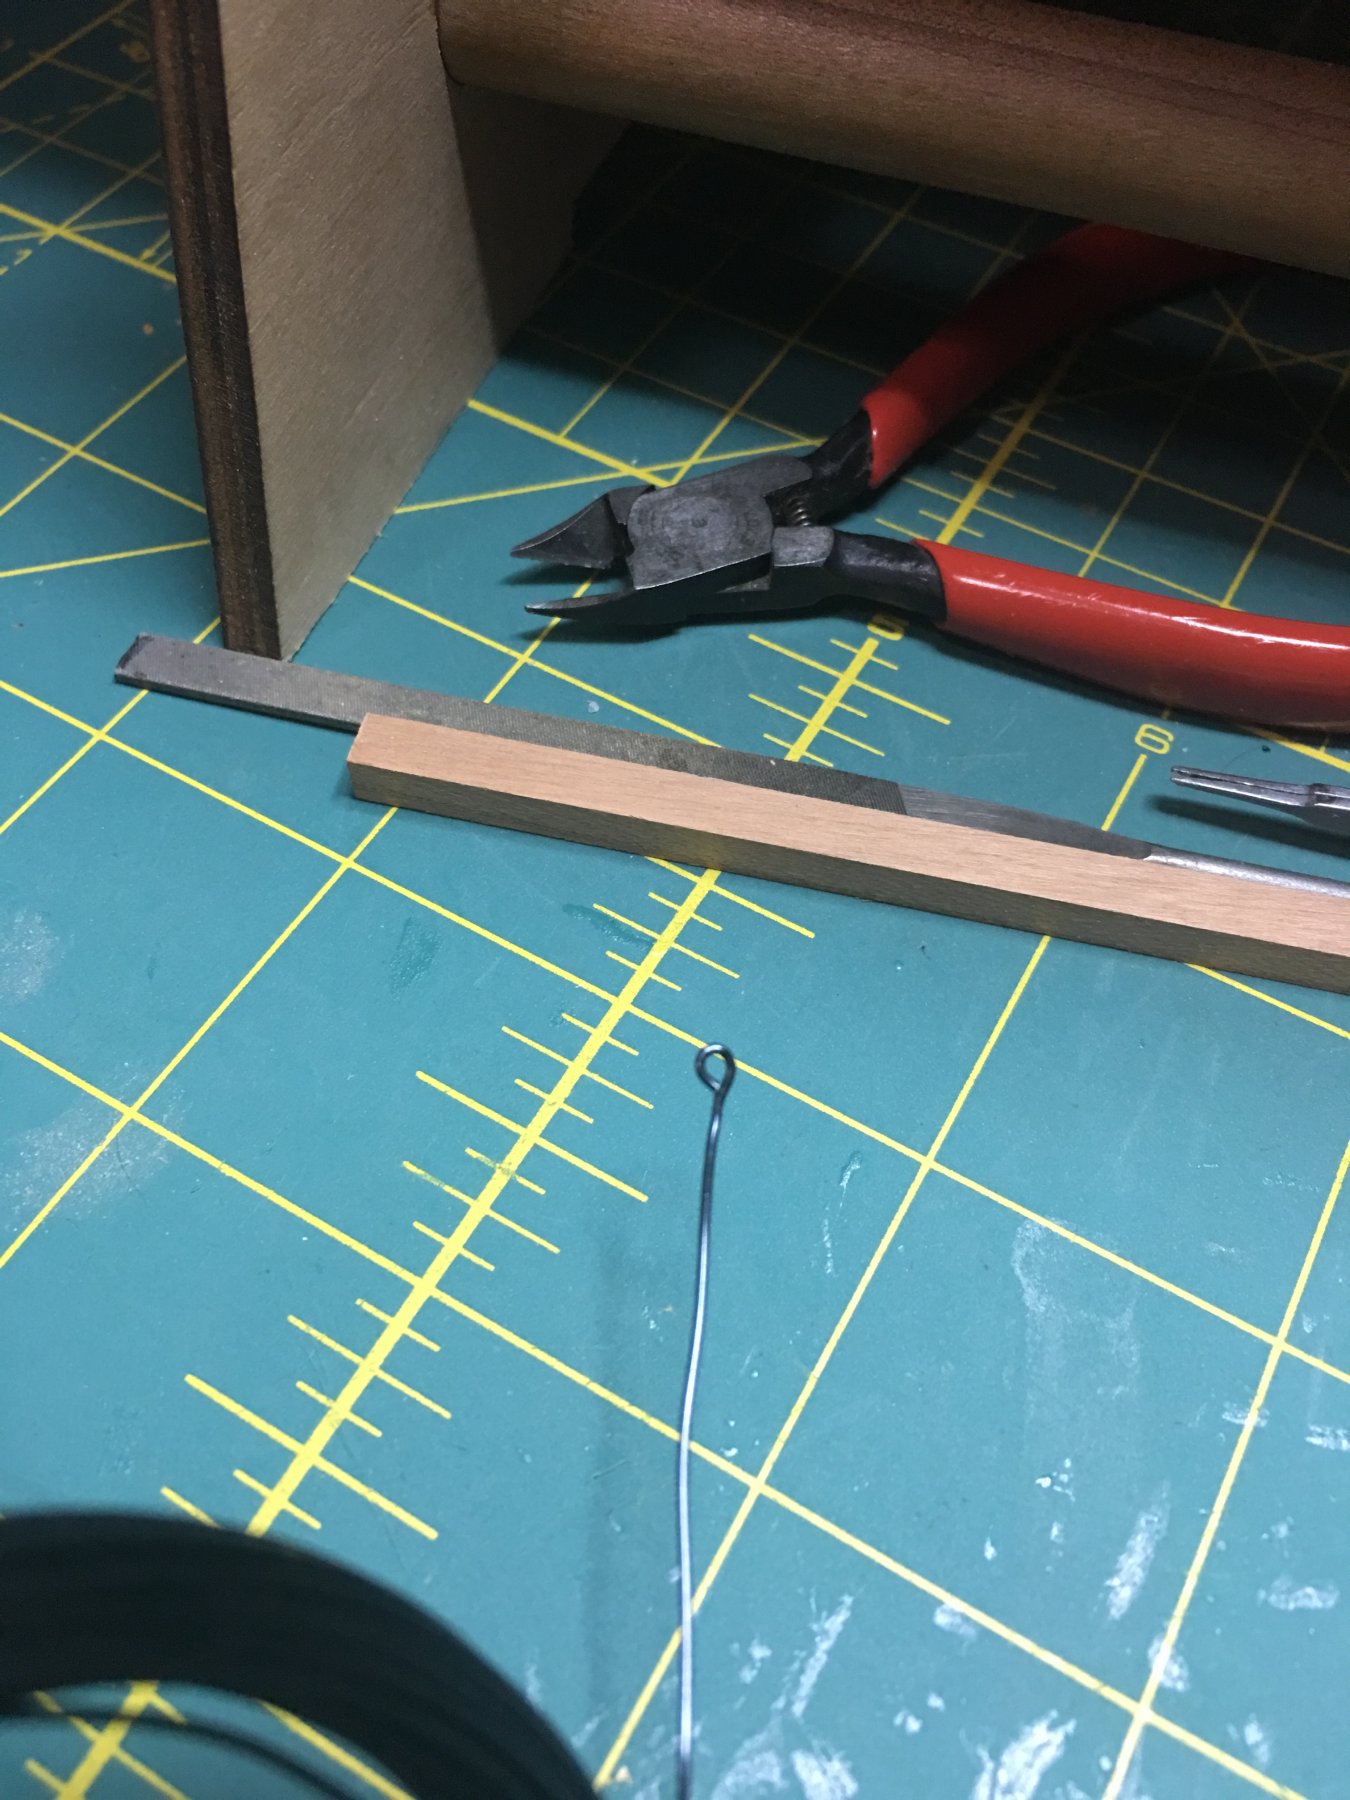
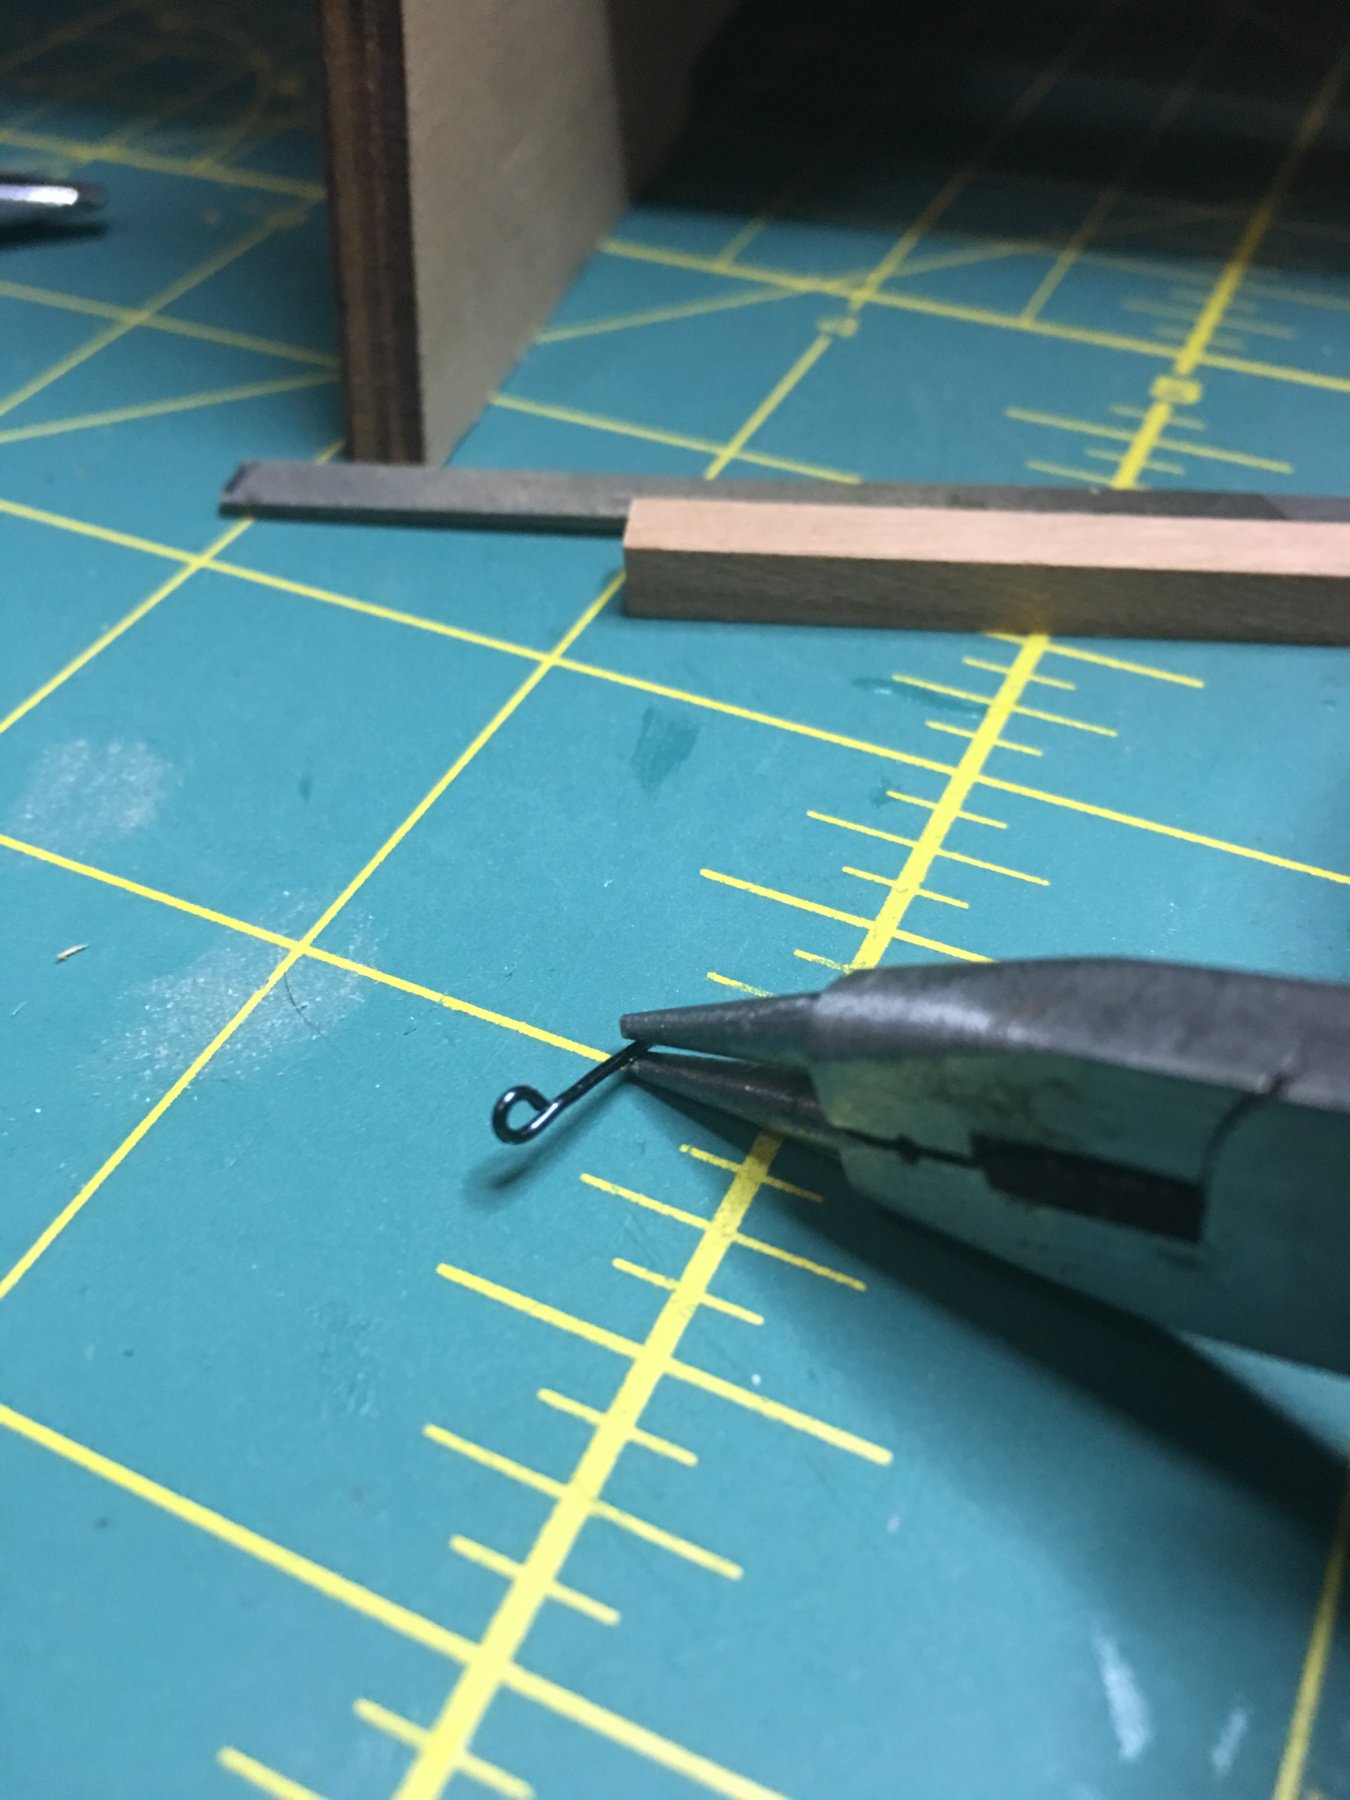
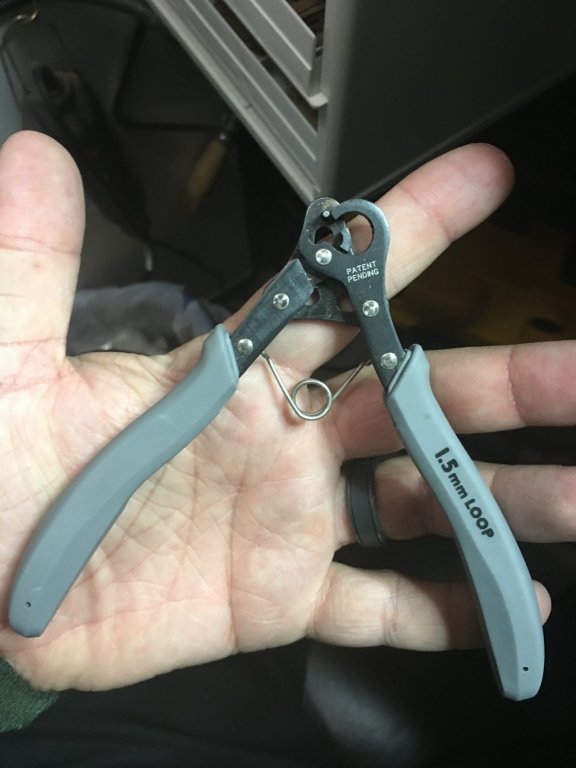
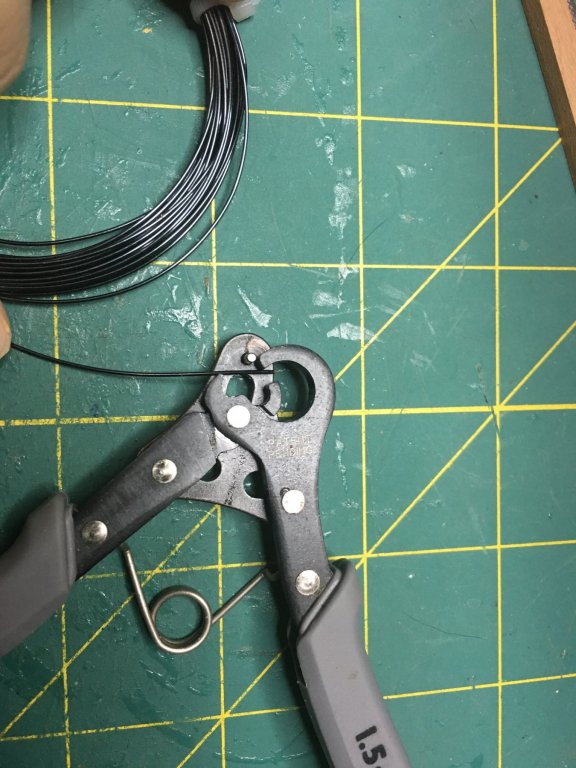
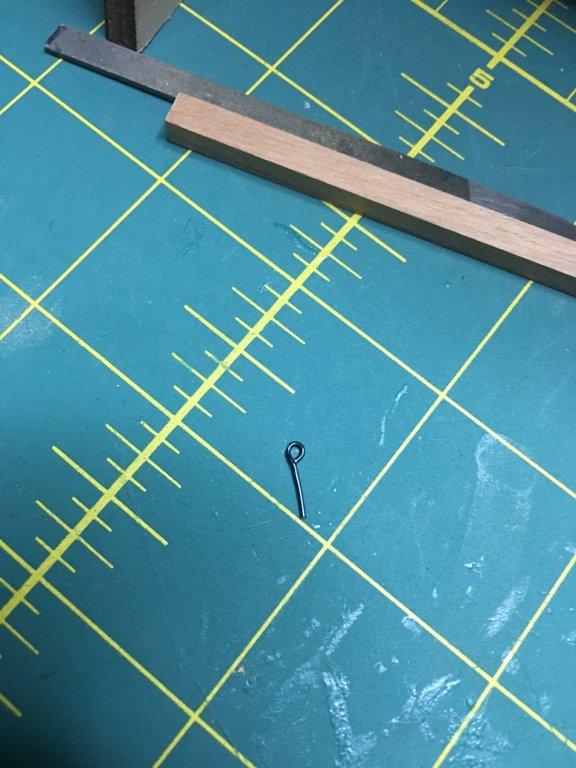
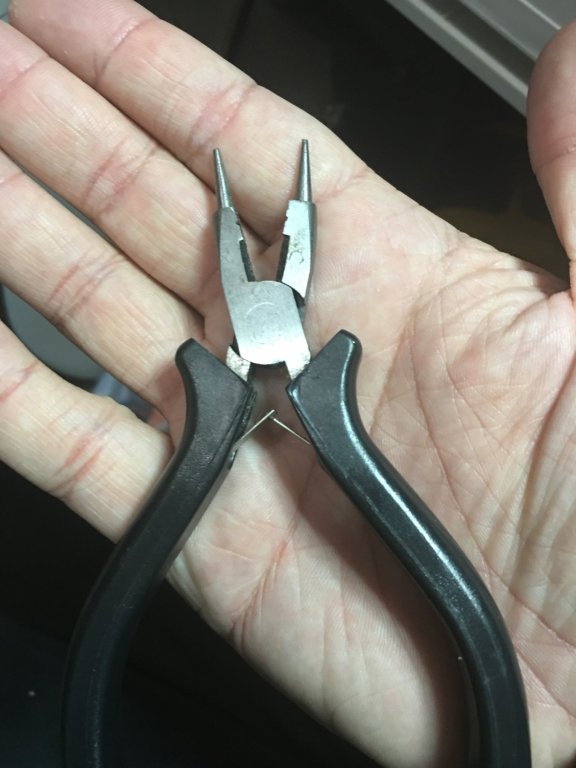
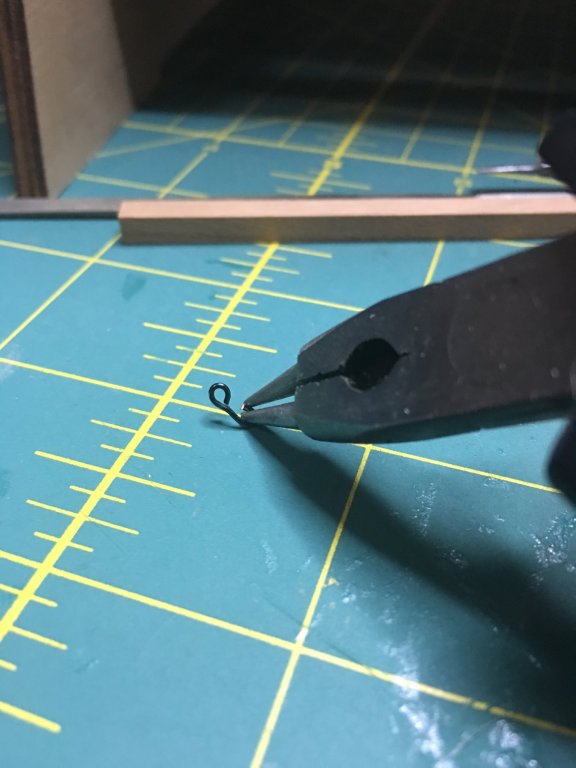
 Thanks to everyone for the kind words and likes! As for the hooks, yes, they are scratch made. I found some 20gauge wire in the jewelry department at Hobby Lobby that has been working great for hooks and eyebolts. Also found this loop tool there as well that makes this process very easy. Simply insert the wire, squeeze and release and then cut to length and you have an eyebolt. To make the hook, I use a pair of needle nose pliers that have rounded prongs instead of flat. Grip the stem of the eyebolt and roll it around the prongs of the pliers in the same direction as the eye loop and you now have a hook. Sometimes you have to do a little trimming or straightening and the black coating is also prone to come off. I don't worry too much about that until after they are installed. A tiny paint brush with some flat black paint cleans those marks up. Usually I will spend an hour making eyebolts and hooks. I have a small drawer that I store them in and in an hour I can have a couple hundred made so I don't have to do it often. It is an easy way of stocking up on much needed pieces while taking a break from the actual build. Also, the looper tool, even the smallest one can make the eyes a bit large for some scales. Simply trim the end of the looped wire where it returns back to the stem and crimp it back tight to the stem with a pair of needle nose pliers and you have a smaller eye. If you do that in tiny bites, you can easily adjust the eyebolt sizes as needed. I make all of mine the "stock" size when mass producing and then resize as needed.
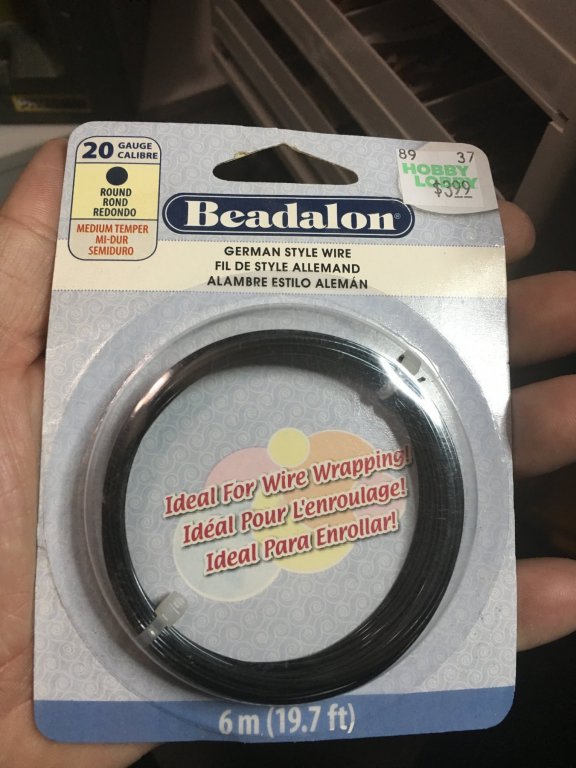


-
She is indeed massive. 36 inches long, 15inches tall and 8 inches wide without any masts. Will grow significantly in all directions once masted. I have no idea yet where she will make berth once completed!
-
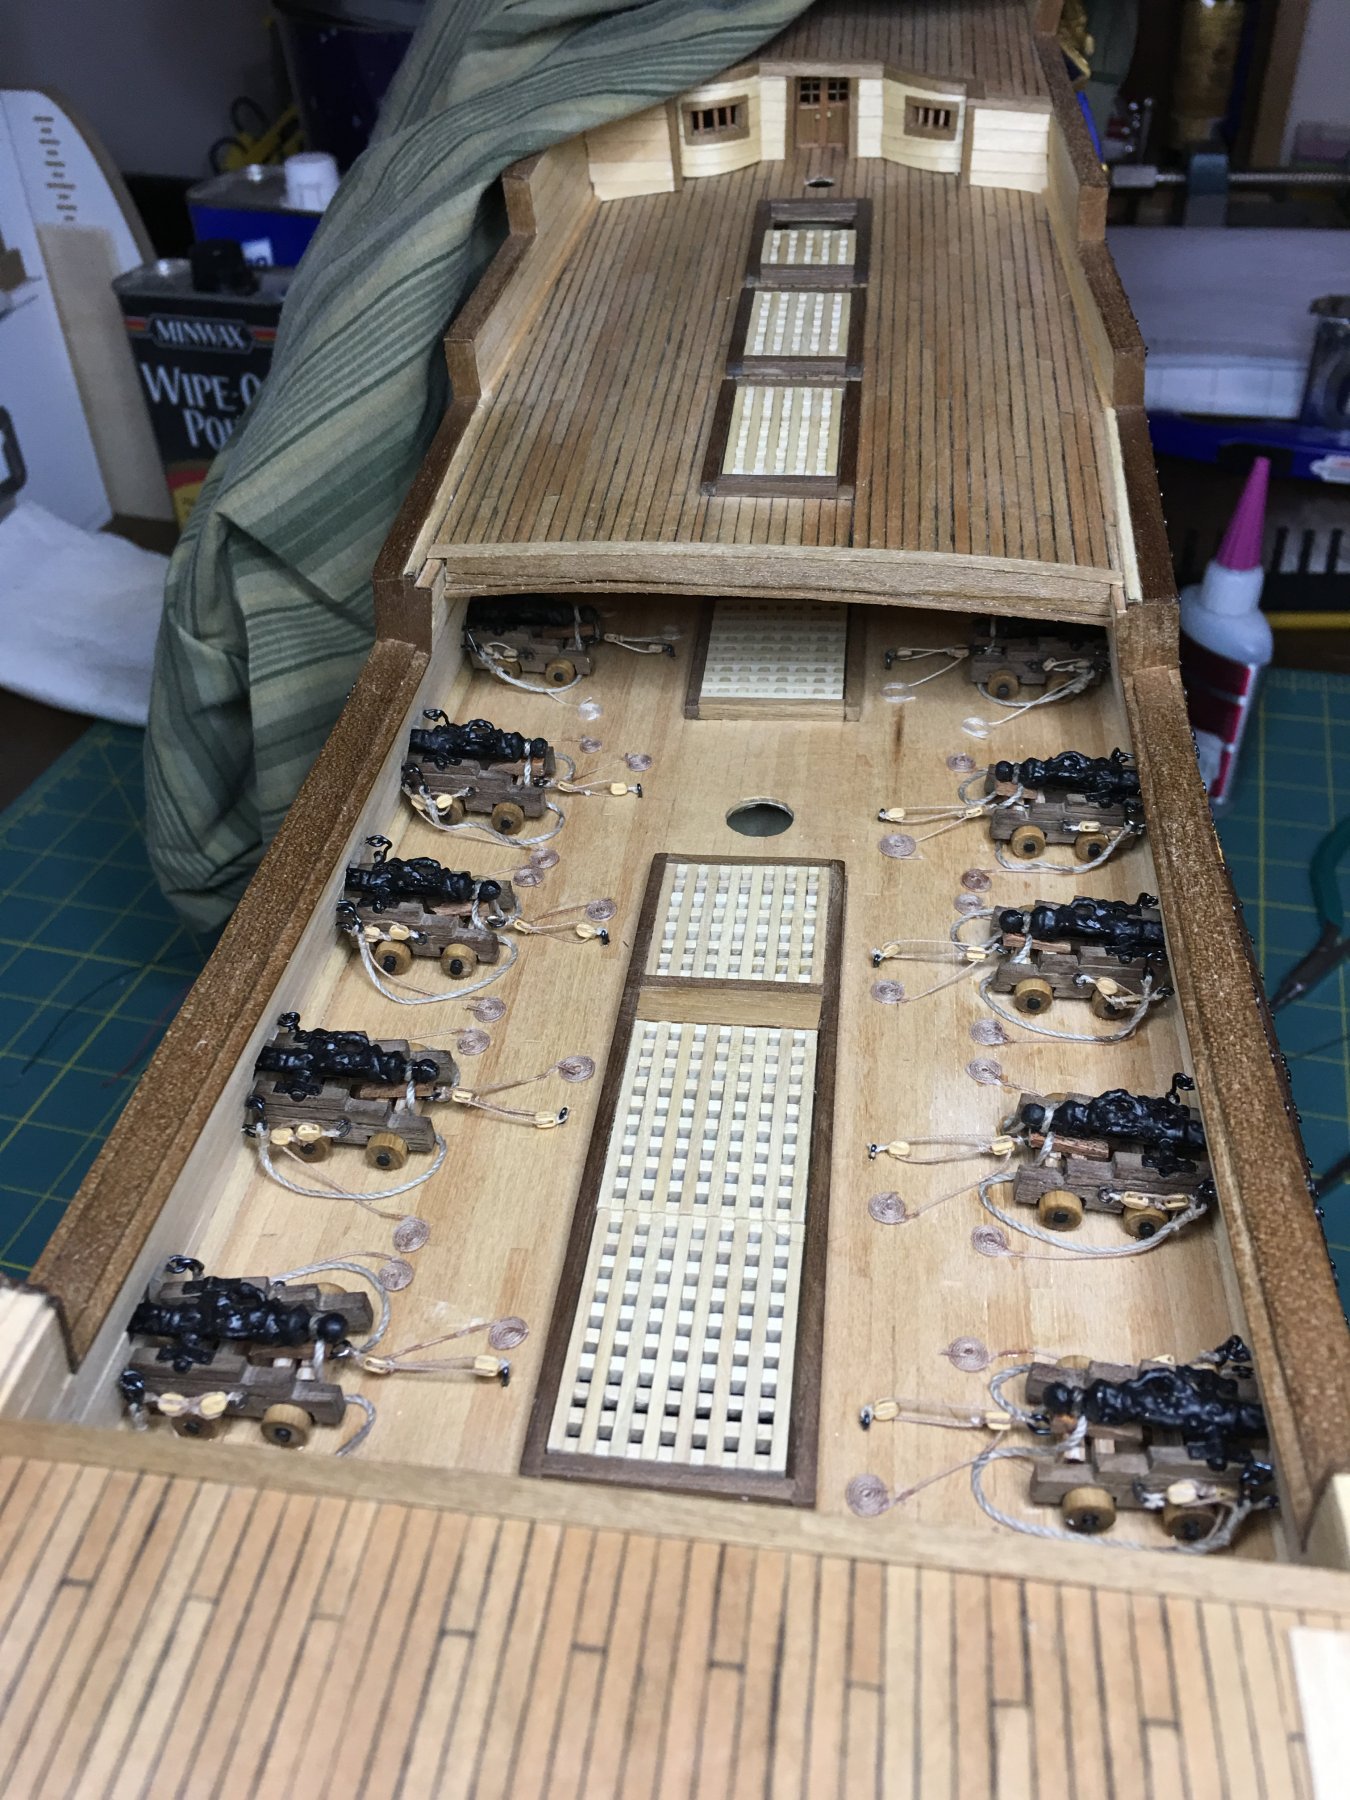
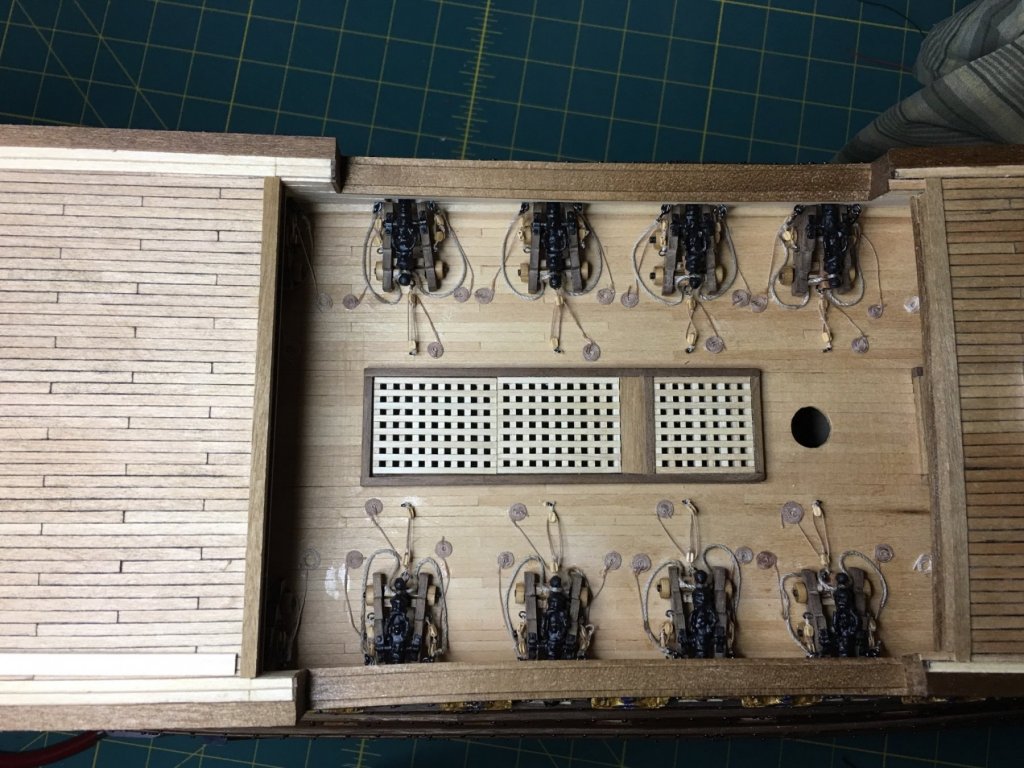
Finished rigging the guns on the upper gun deck. With those installed I can install the bitts and the cradles for the ship’s boats. Also with the work on the gun decks wrapping up I can start building the railings for the forecastle, quarter and poop decks without as much fear of them being damaged.

- 961 replies
-
- 10
-

-
Welcome to MSW!! You definitely picked a challenge but, you are in the right place to get those questions answered and keep the motivation flowing. Best of luck to you!
-
One thing compounds another.... Keeping up the good thoughts and best wishes that the doctors and drugs get her sorted out and back on the healing path.
-
HMS ROYAL KATHERINE 1664 by Doris - 1/55 - CARD
EJ_L replied to DORIS's topic in - Build logs for subjects built 1501 - 1750
I would think that there would need to be some type of support other than the gammoning and the fore stay mostly due to the fact that if the fore stay broke the entire spritsail mast would collapse. I ran into this issue with La Couronne as well. I chose to simply keep it inline with the center line of the ship though, many models I looked at had it offset. What I have wondered since is could there have been a supporting ledge to the side of the stem to carry the offset mast? This seems like a logical option as it would give the mast a place to rest that would allow the stem to still support the weight of the mast but allow for the offset. The gammoning and fore stays would still do their job of holding the mast steady but in the event that the fore stays are broken, the mast would not collapse.- 1,035 replies
-
- 5
-
-
- royal katherine
- ship of the line
- (and 1 more)
-
Indeed! That would be a fascinating read and I think a must have for anyone interested in the ships of this era. I would love to have a copy of that as well if/when it ever gets published. I will ear mark the money now! Unless by some miracle of chance that the original designs of these ships have survived (if they really ever fully existed) or are uncovered, I think all models of this era are fictitious to some degree. Educated, researched and based on proven knowledge but, still having to rely on some guess work. The only real exception to this rule is when a physical ship still exists such as the Vasa. Even then, as anyone who has even briefly studied it can attest to, there is still much to be learned. I don't think I would get to caught up and concerned about what purists think. Even if they do not agree with what has been done, the creation of dialog on the subject, (as long as it is constructive) can contribute greatly to our better understanding of the ships in the 17th century. Is that not what is really important.
- 2,634 replies
-
- 3
-
-
- heller
- soleil royal
- (and 9 more)
-
Well, I just added a couple more books to the wish list. With some luck, next year I will be able to purchase quite a bit of that list and greatly expand my library.
- 2,634 replies
-
- 2
-
-
- heller
- soleil royal
- (and 9 more)
-
I'm thinking that SR1 should make it to the top of your list for a future project. With most modern models and historical images being primarily focused on SR2, I think that an in depth research/build project (similar to how you are doing this one) would be a truly awesome thing to see here. Even if most of it is guess work, I think there would be great educational value in it both in the appearance of the ship herself but, also in build practices of that era.
- 2,634 replies
-
- 3
-
-
- heller
- soleil royal
- (and 9 more)
-
O.C., sorry to hear about the wife. Best wishes for a speedy recovery into good health. Take care of both her and yourself and we will be here when you are able to get back to it.
-
I will second what Carl said. No matter what the medium, wood, metal and now rope, you set high standards and the results are worth the effort!
-
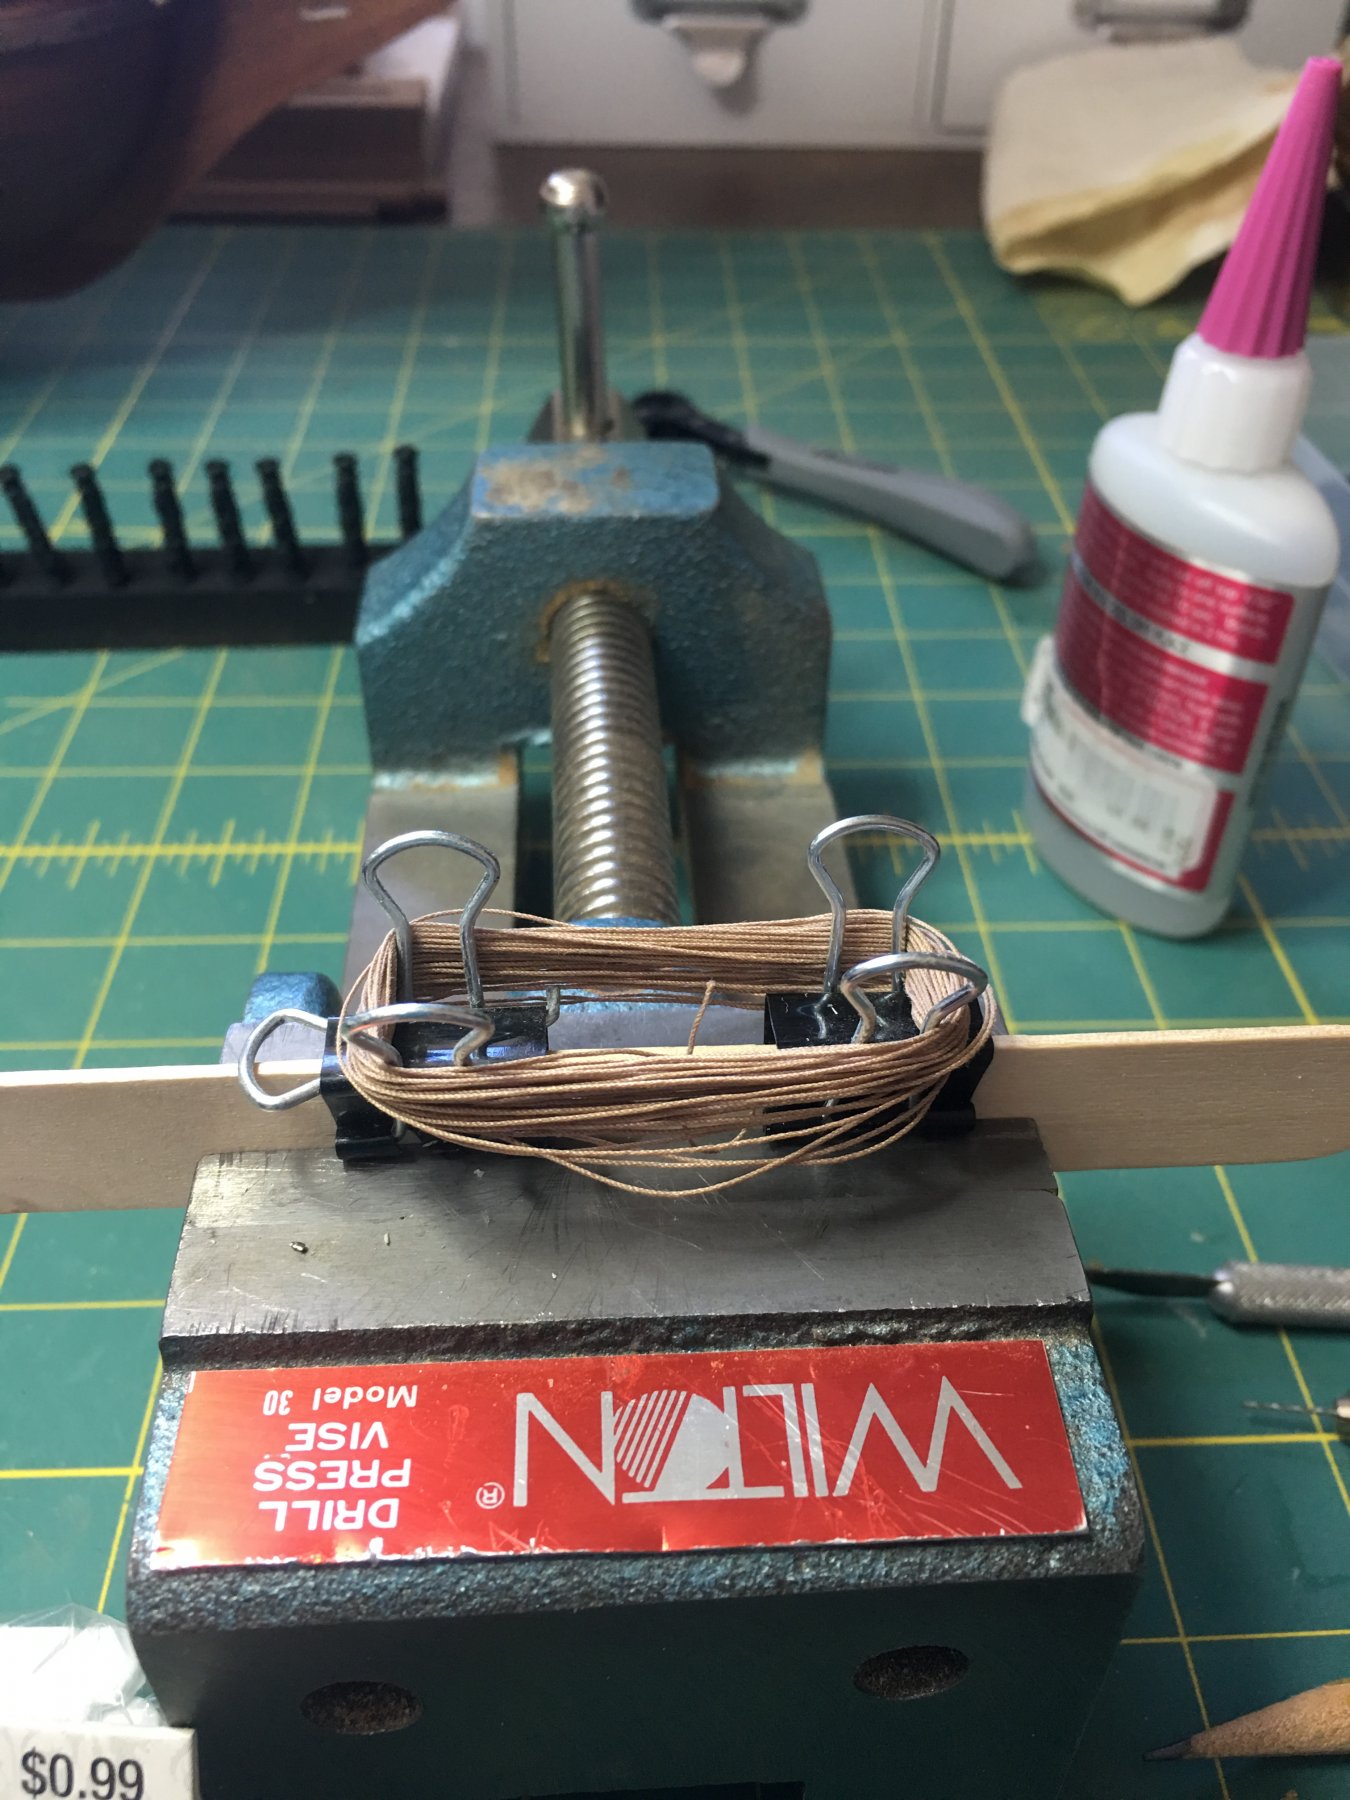
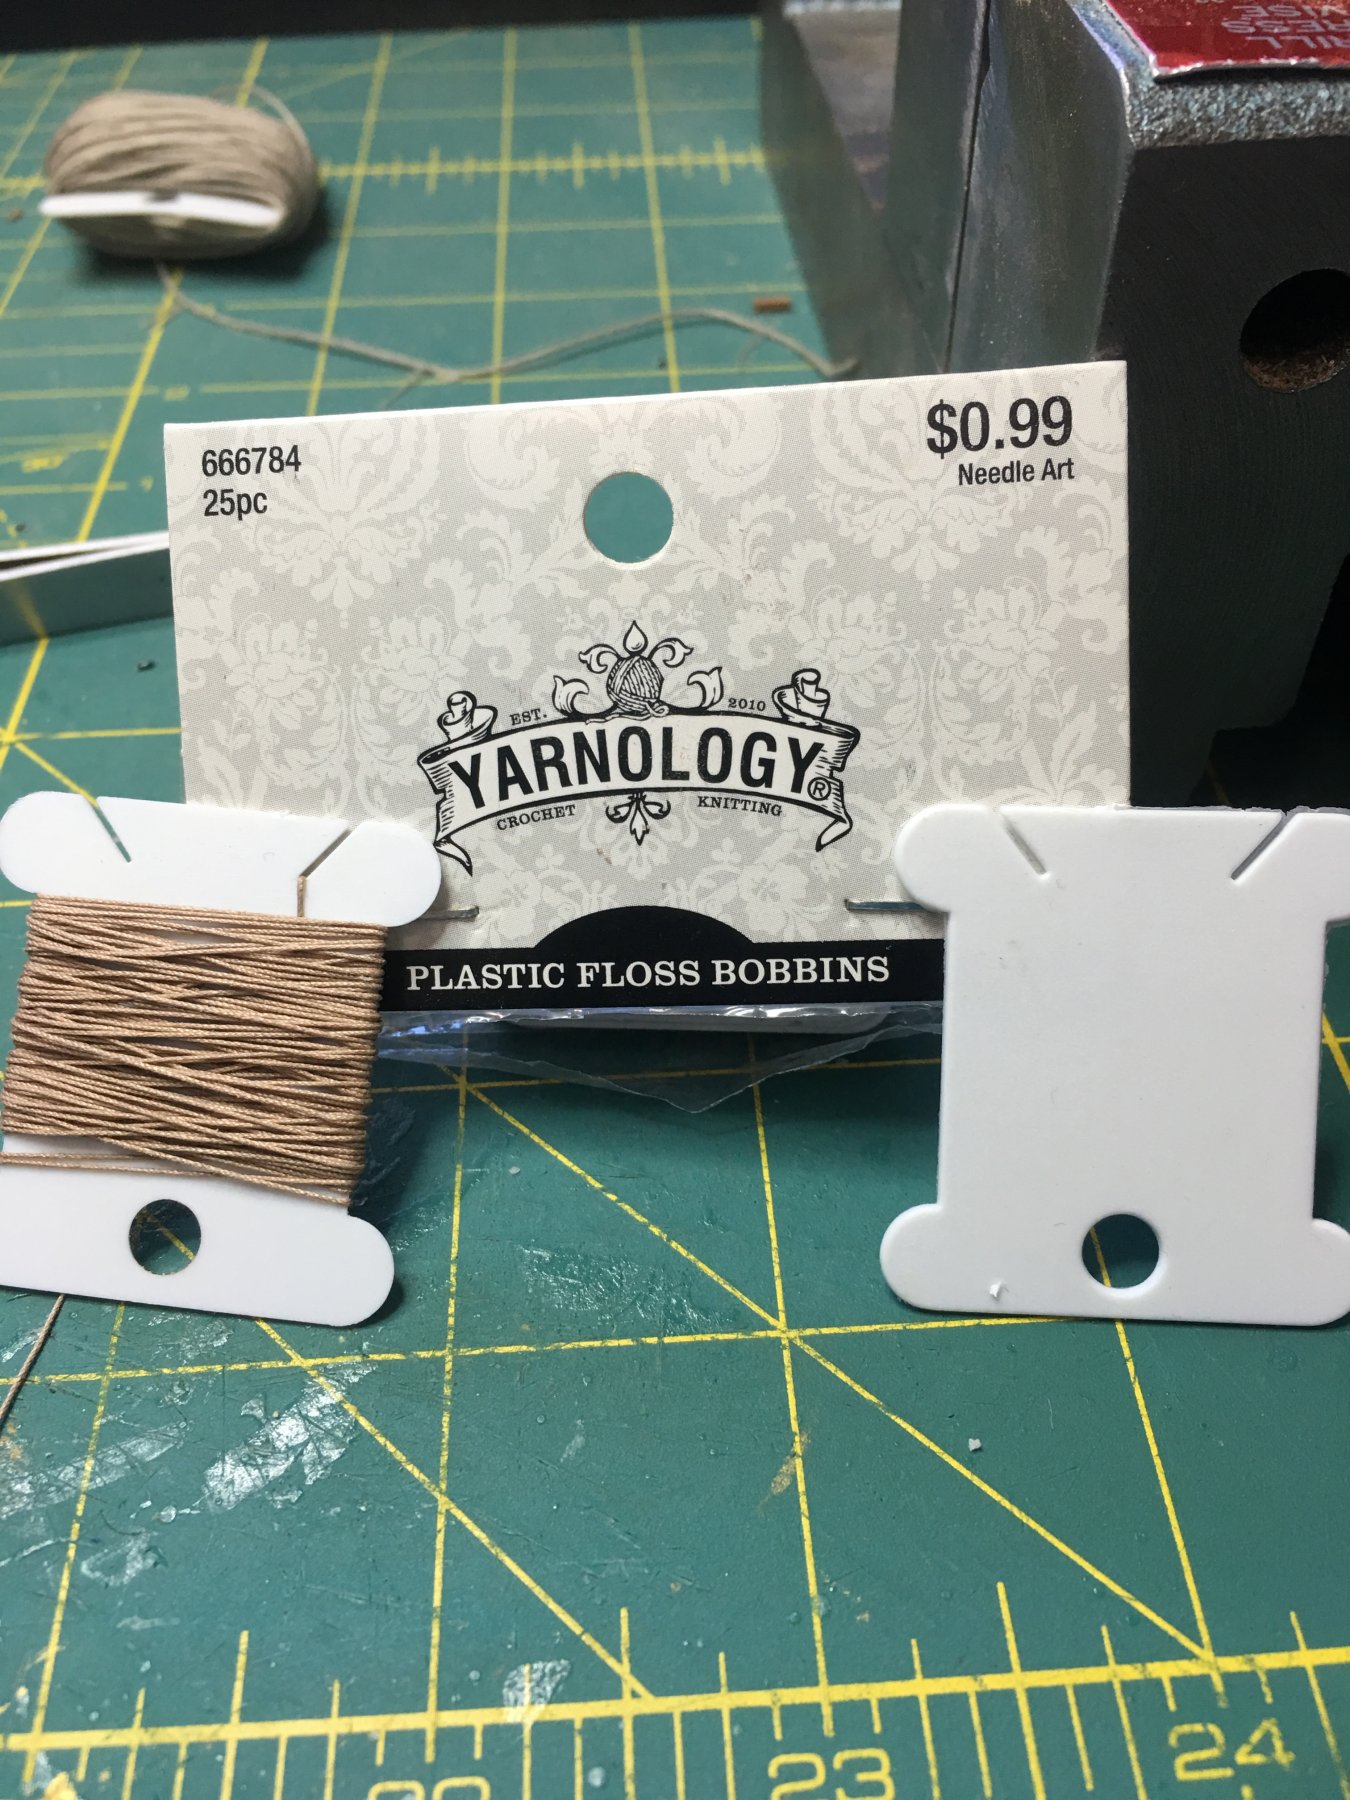
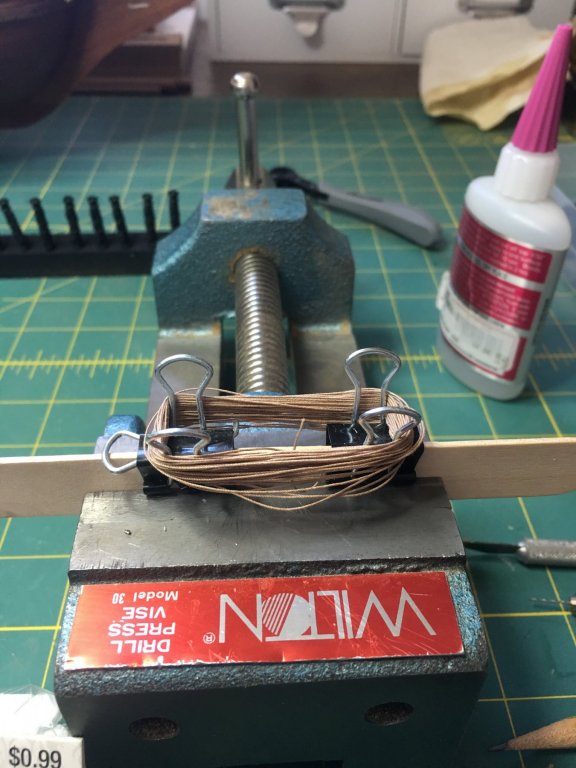
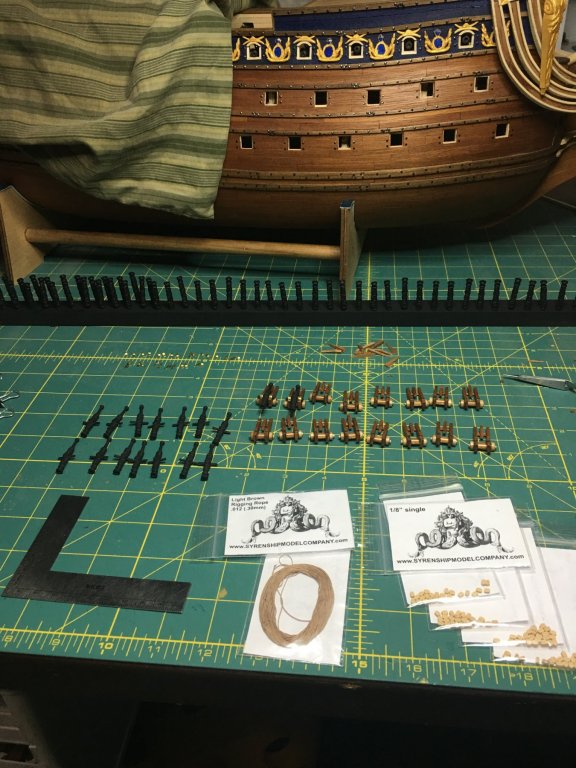
I love their ropes. I replaced most of the rigging on la Couronne with it and was very glad I did. They are clean with tight and uniform twists. Plenty of sizes to choose from so they fit nearly any scale and three different colors. You will need to recoil them when you get them. They are packaged in a nice coil but, in order to avoid tangles, you should rewind them around a bobbin or tube. The ropes work well. They are not overly stiff with coils that want to defy gravity and act like rope should. Not overly slick so they tie and hold knots well. All of those factors add up to create a rope that allows for beautiful and realistic details in very small scale rigging. I dont think they are unreasonably priced. For the larger builds like these first rates, you will need a lot of line but, to set up a rope walk, buy the materials and take the time to make all of that rigging yourself, in my opinion, the price is well worth it. I have enough tedious micro builds that I don’t want to worry about making rope. Plus he has very fast delivery as long as the materials are in stock. Even when not, they are good at getting the orders filled and out in a timely manner. I will recommend the serving machine though as it is a great tool for serving the lines that need it. You can also use some of the junk line from the kits to serve over. Here is is how I recoil my ropes. I take the cool from the shipping package and carefully spread it out between two binder clips. Then I unwind it from the clips to a blank plastic bobbin. I bought a 25 pack of them at JoAnn’s (any store that sells sewing/knitting products will have them) years ago for $1 and have yet to go through them all as I can reuse them when they run empty. The rope in these pictures is the .012 (.30mm) rope which is one of the smaller sizes. I will be using it initially for the tackle on the guns.

-
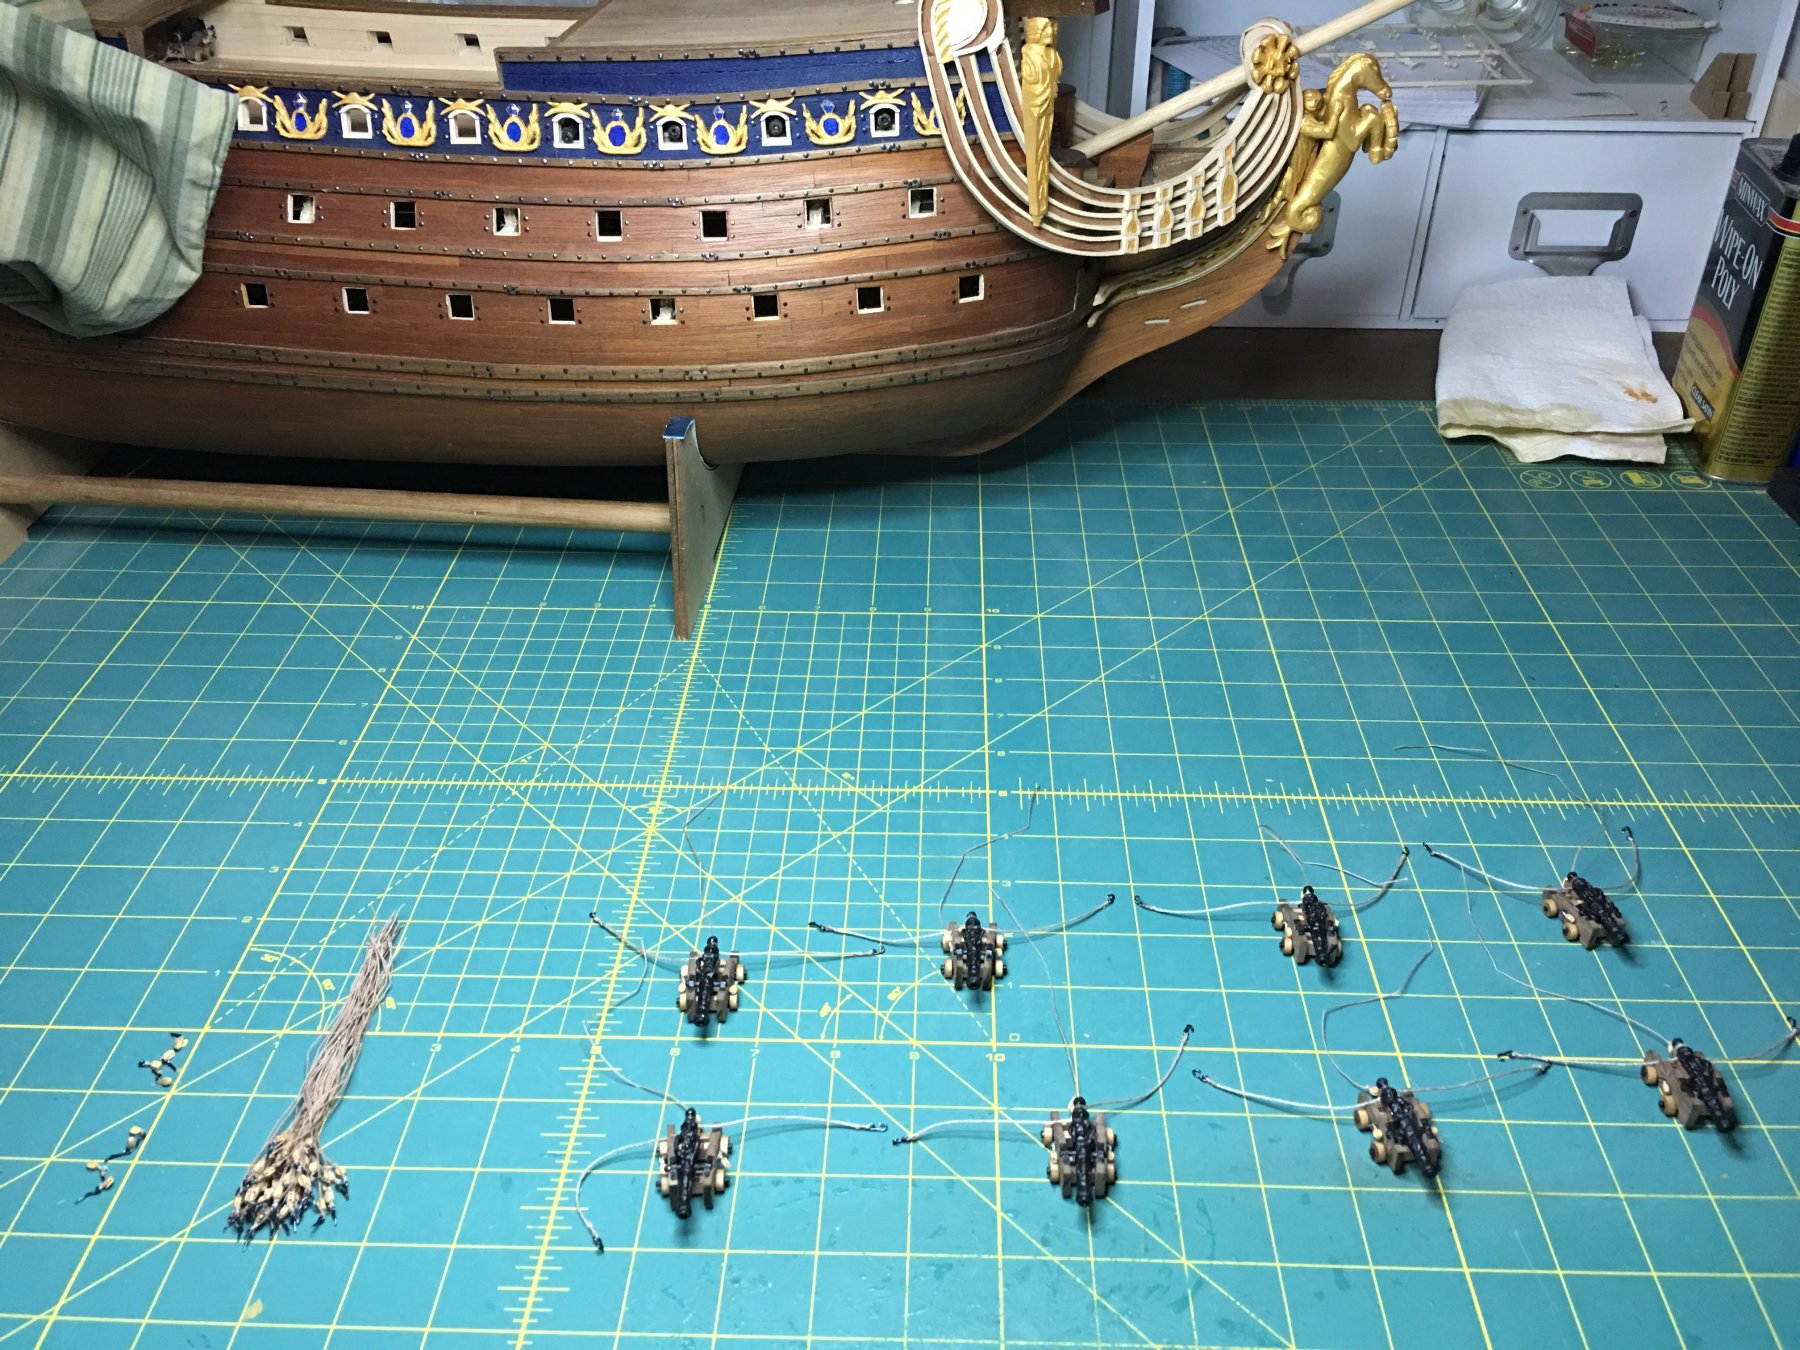
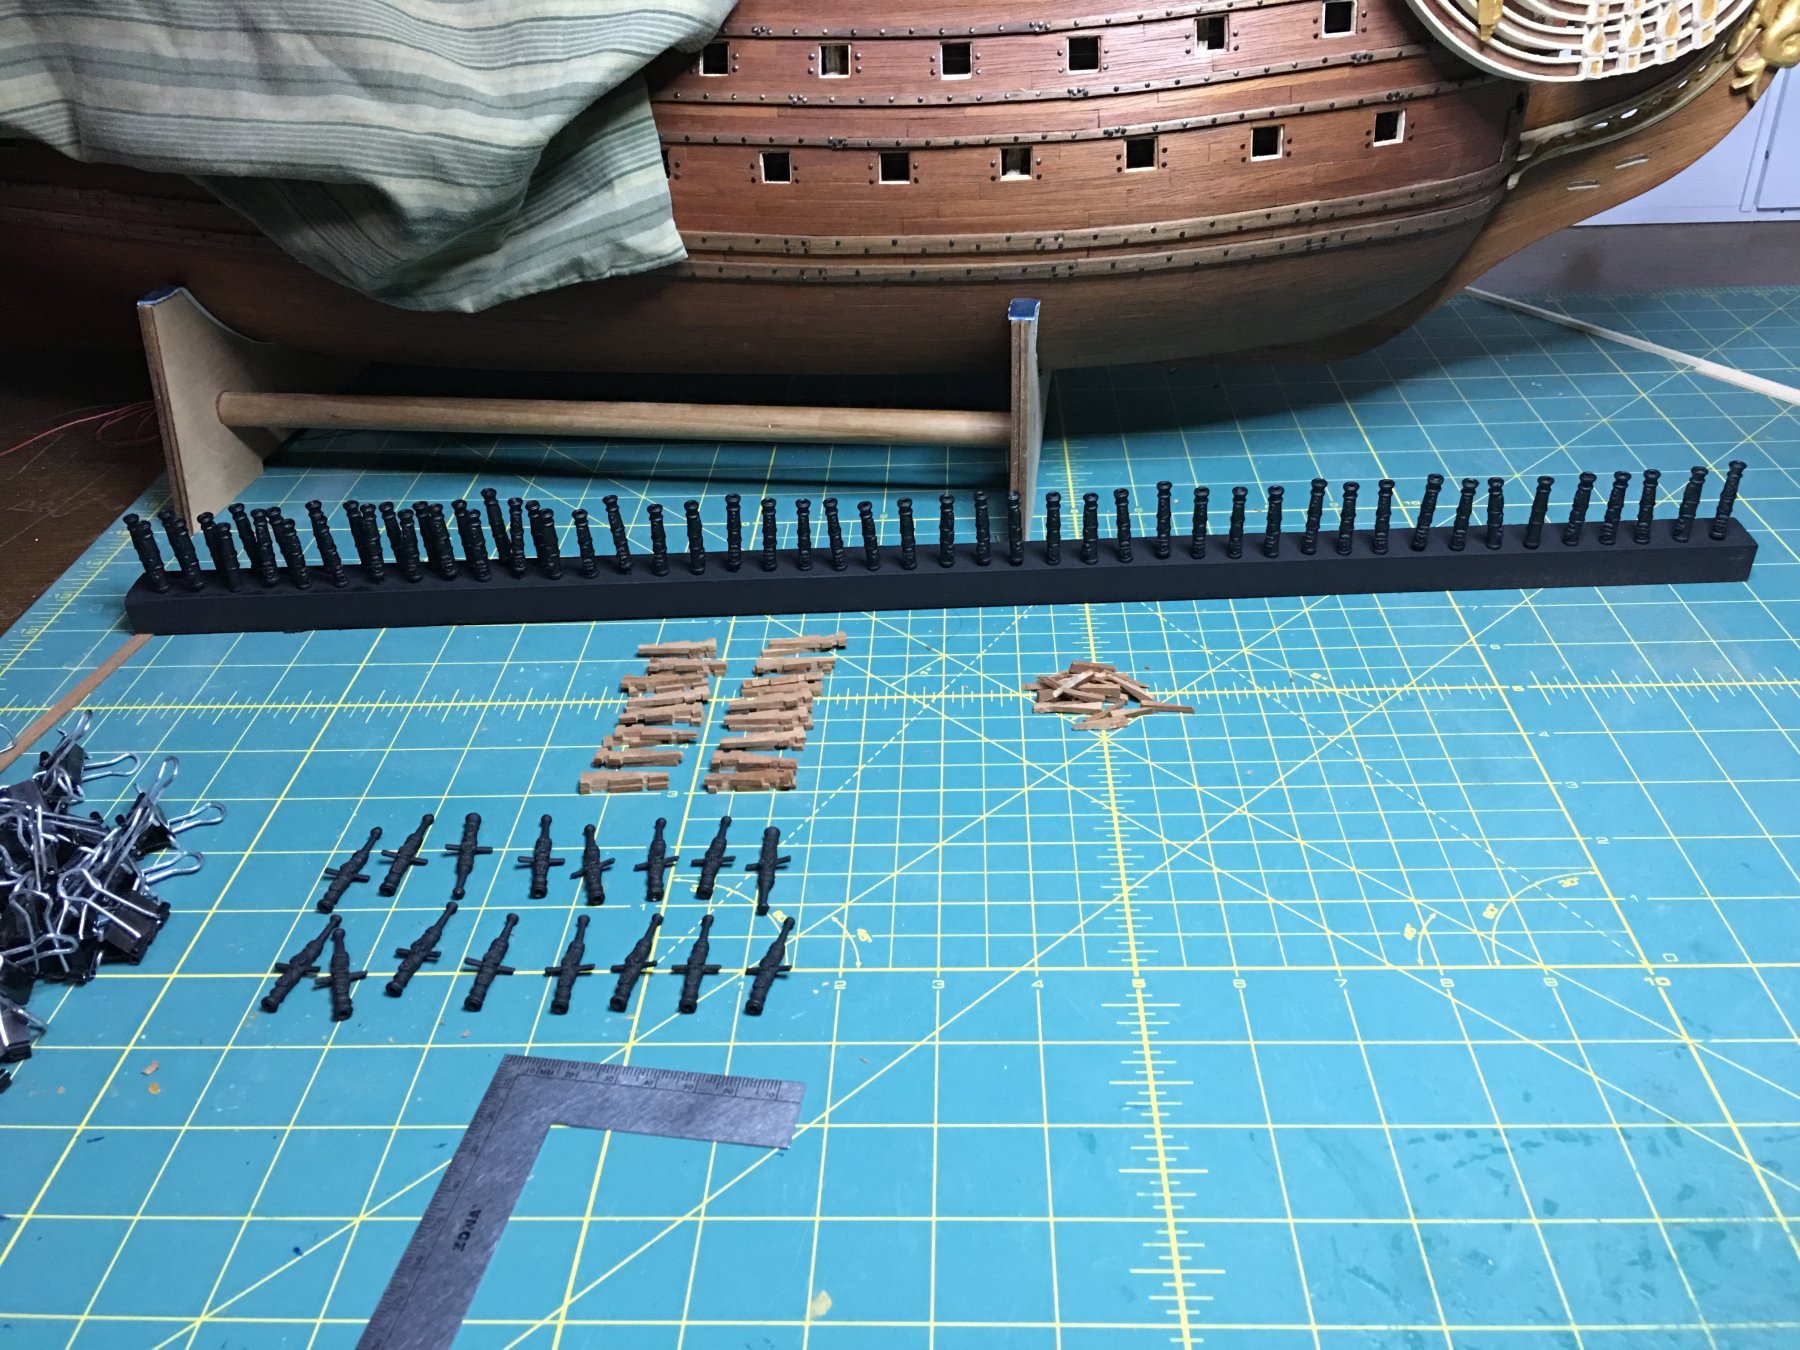
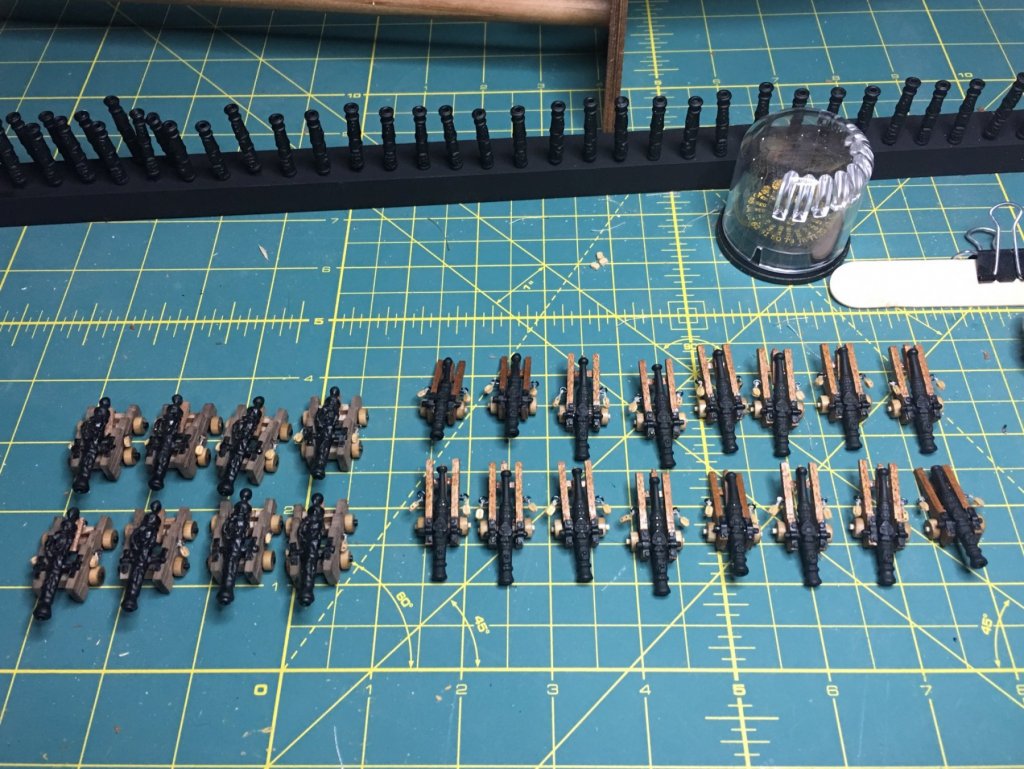
The eight remaining guns for the waist and the sixteen for the forecastle and quarter decks are ready with their blocks attached. Now to make the breech ropes and the other half of the tackle and they will be ready to install.
- 961 replies
-
- 11
-
-
Well done! All of those details are really adding to the realism and giving her life beyond a standard kit build.
- 786 replies
-
- 1
-
-
- Royal Louis
- Finished
- (and 1 more)
-
HMS ROYAL KATHERINE 1664 by Doris - 1/55 - CARD
EJ_L replied to DORIS's topic in - Build logs for subjects built 1501 - 1750
Beautiful work Doris! I wish I would have learned your technique with clay prior to carving my decorations from wood on Soleil Royal as I think I would have been more successful using that medium instead of wood. I think I will attempt your way on Royal Louis when it is time as you have been a great source of inspiration and the results speak for themselves.- 1,035 replies
-
- 10
-
-
- royal katherine
- ship of the line
- (and 1 more)
-
I've noticed that those side windows are often not well placed for realistic alignment with the interior cabin layouts, especially on kit models. Many times I have noted that they would appear to be in the deck framing or even splitting the decks themselves. Since most kit builds do not worry about interior build-outs, this is rarely an issue worth worrying over. For me though, it has been troubling as I like to build out those cabins and continuously run into that alignment issue. This is the primary reason they have not yet been installed on my own build. I do like how you have built your frames. They turned out nice and fit in well with the surrounding frieze. Looking forward to seeing what you decide to do with your stern and QG decorations! I'm sure they will be just as amazing if not more so than what you have done on the sides so far.
- 2,634 replies
-
- 1
-
-
- heller
- soleil royal
- (and 9 more)
-
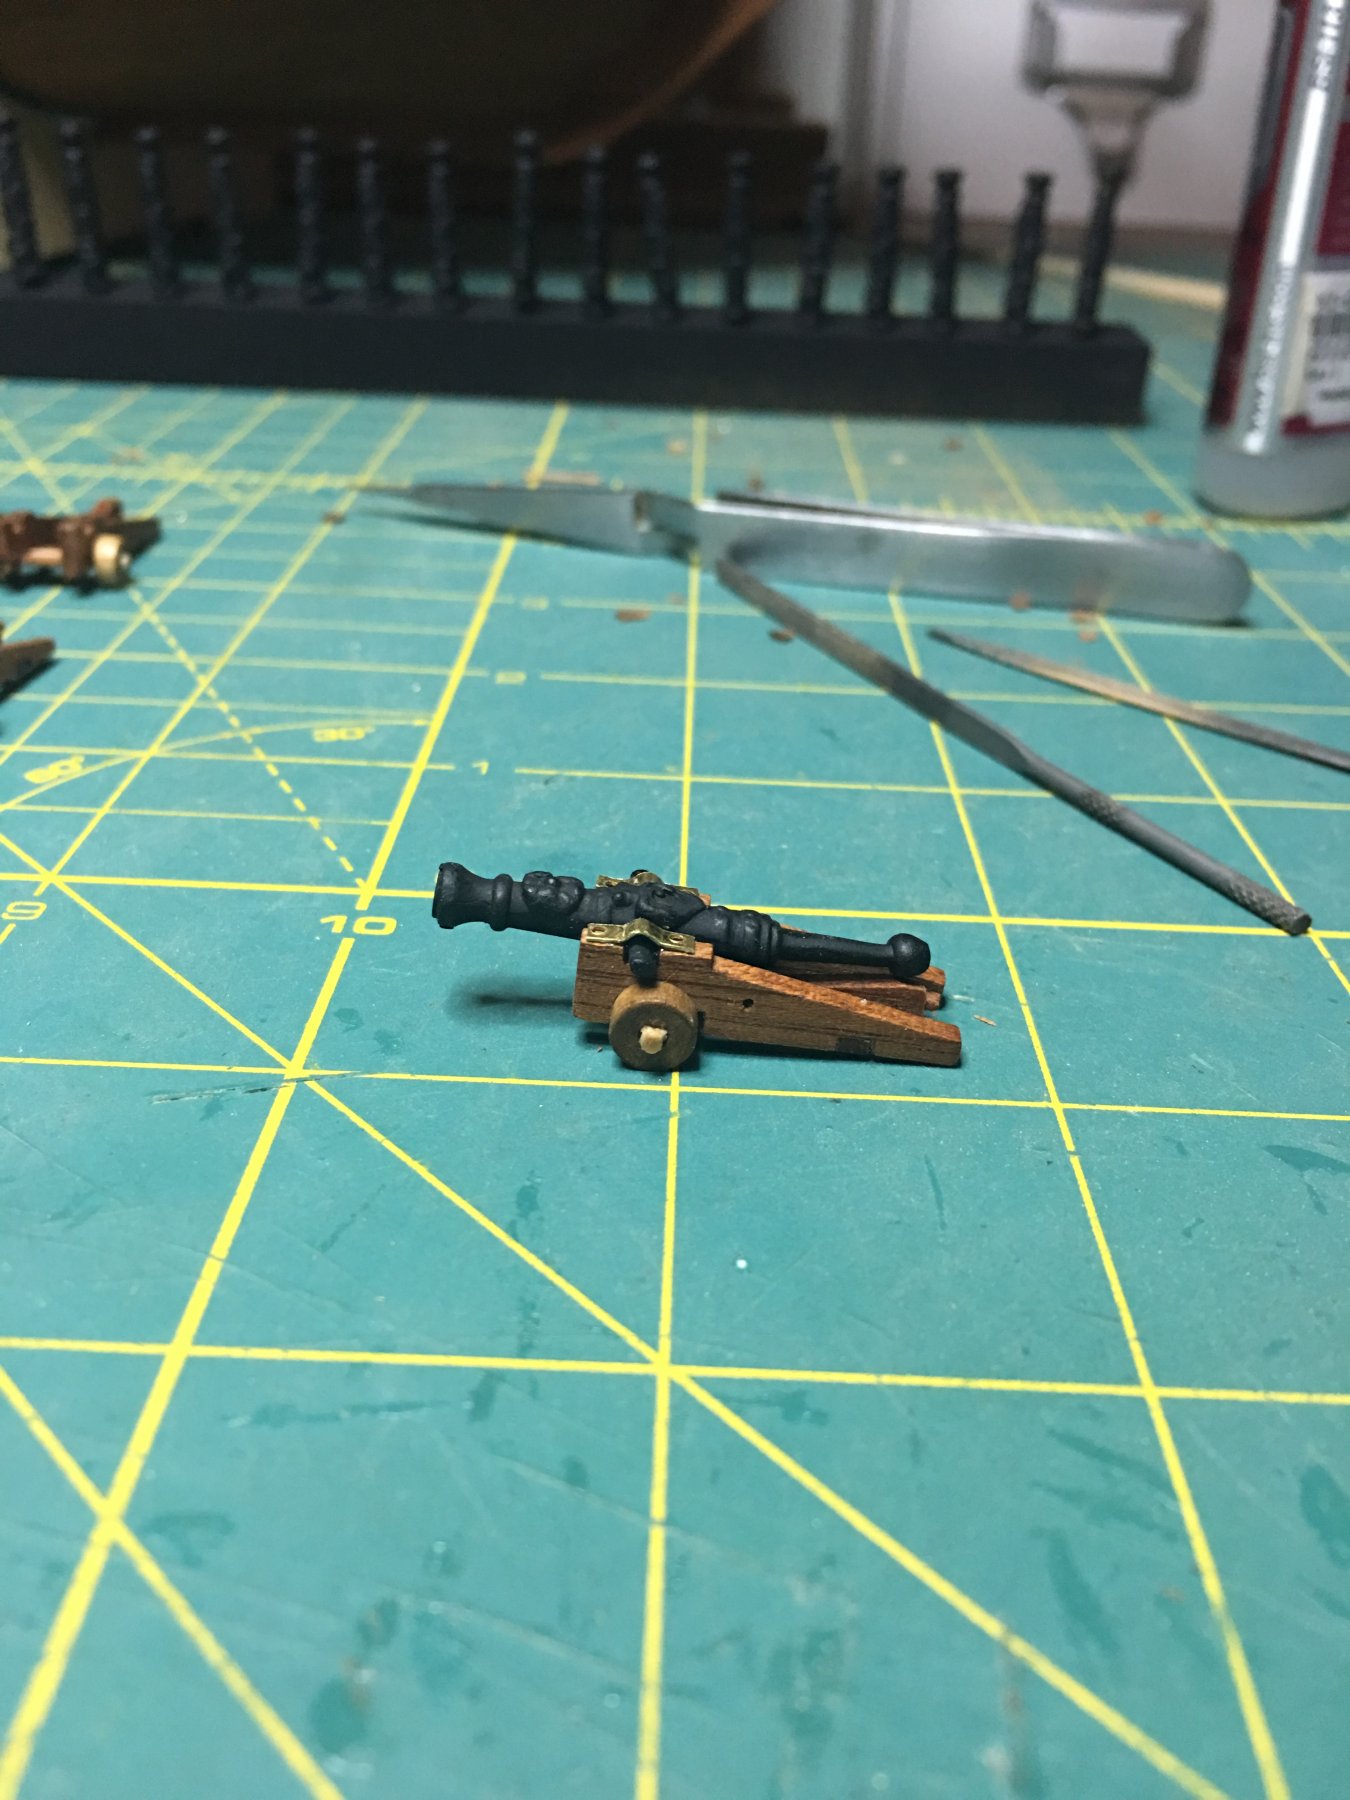
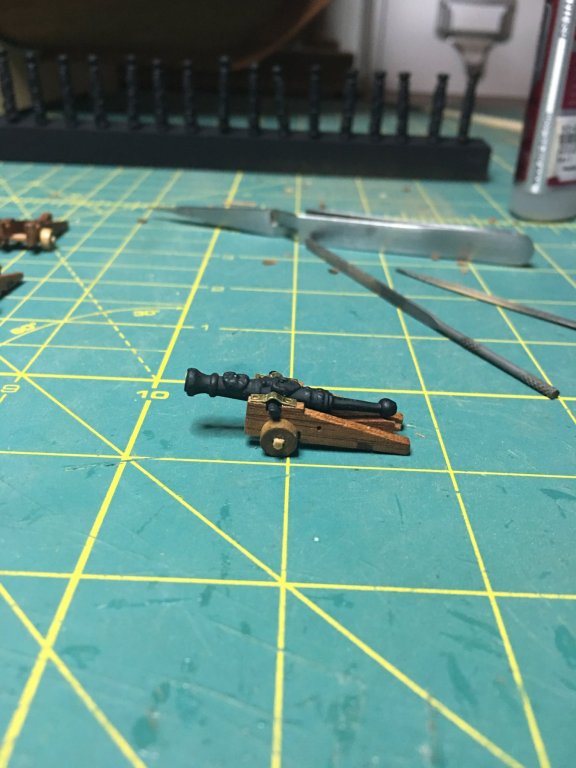
Cannon building continues. I did get some new blocks and rope from Syren to help out. Step by step they are coming together!

- 961 replies
-
- 11
-
-
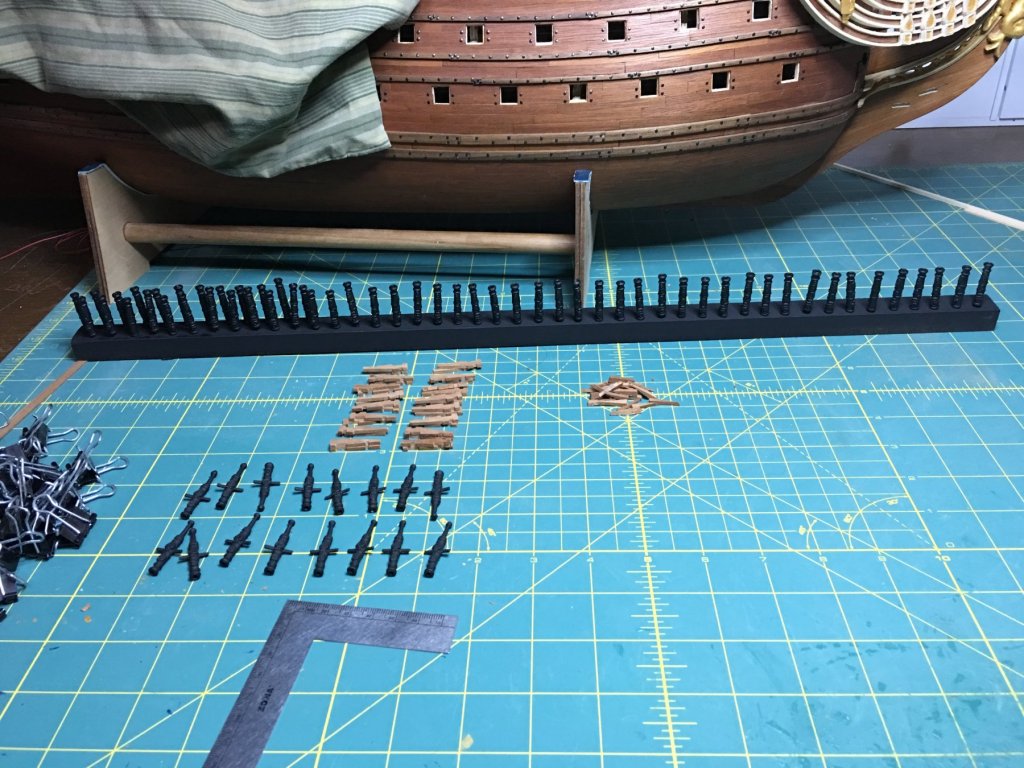
Quick update, cannon building this weekend. Ordered some blocks and rope to rig them which I should have by next weekend. Getting the remaining carriages built and will start installing the dummy guns soon.
-
Regardless of what you decide for the final selection, this has been a fun exercise to see the varying results. I've done a bunch of this in the past on my model railroad for weathering of rocks and buildings. I've not done much weathering on ship models yet but, after seeing some of these results, I admit that I am tempted to give it a try on a future build. Maybe some on Royal Louis.
- 2,634 replies
-
- 3
-
-
- heller
- soleil royal
- (and 9 more)
-
HMS ROYAL KATHERINE 1664 by Doris - 1/55 - CARD
EJ_L replied to DORIS's topic in - Build logs for subjects built 1501 - 1750
Truly incredible!! An inspiration to us all!- 1,035 replies
-
- 6
-
-
- royal katherine
- ship of the line
- (and 1 more)
-
Hans, I just spent my lunch break reading through your build log and wow!! A very educational build indeed. Sorry to hear about your surgery and setbacks on recovery. Hopefully, that will turn around for you and your hand will heal up correctly. I look forward to watching you continue your work once you are healed and the weather is nicer.
-
Marc, Popeye, thank you for the compliments! That other hull in the background is the Royal Louis, my other insanely large build. There is a link in my signature below to it. Come on over and pull up a chair, though make sure it is a comfortable one as that will be another very long build. Speaking of long builds, just this past weekend Soleil Royal completed her 2nd trip around the sun in the shipyard and last night I marked 1,330 man hours of work to date. I'm hopeful that she might get completed in 2019 but, with Royal Louis going on as well.... only time will tell. I'm in no rush and I keep getting tempted by some of the really awesome looking smaller projects that have been popping up lately. NRG's Oyster Sharpie and Syren's Medway Longboat and Queen Anne Barge have all been calling my name loudly for a different type of build as well as practice with full frame construction. I've also started to plan out some cross section builds of La Couronne and Soleil Royal to go with the completed full ship. So many ideas, only so many hours.
-
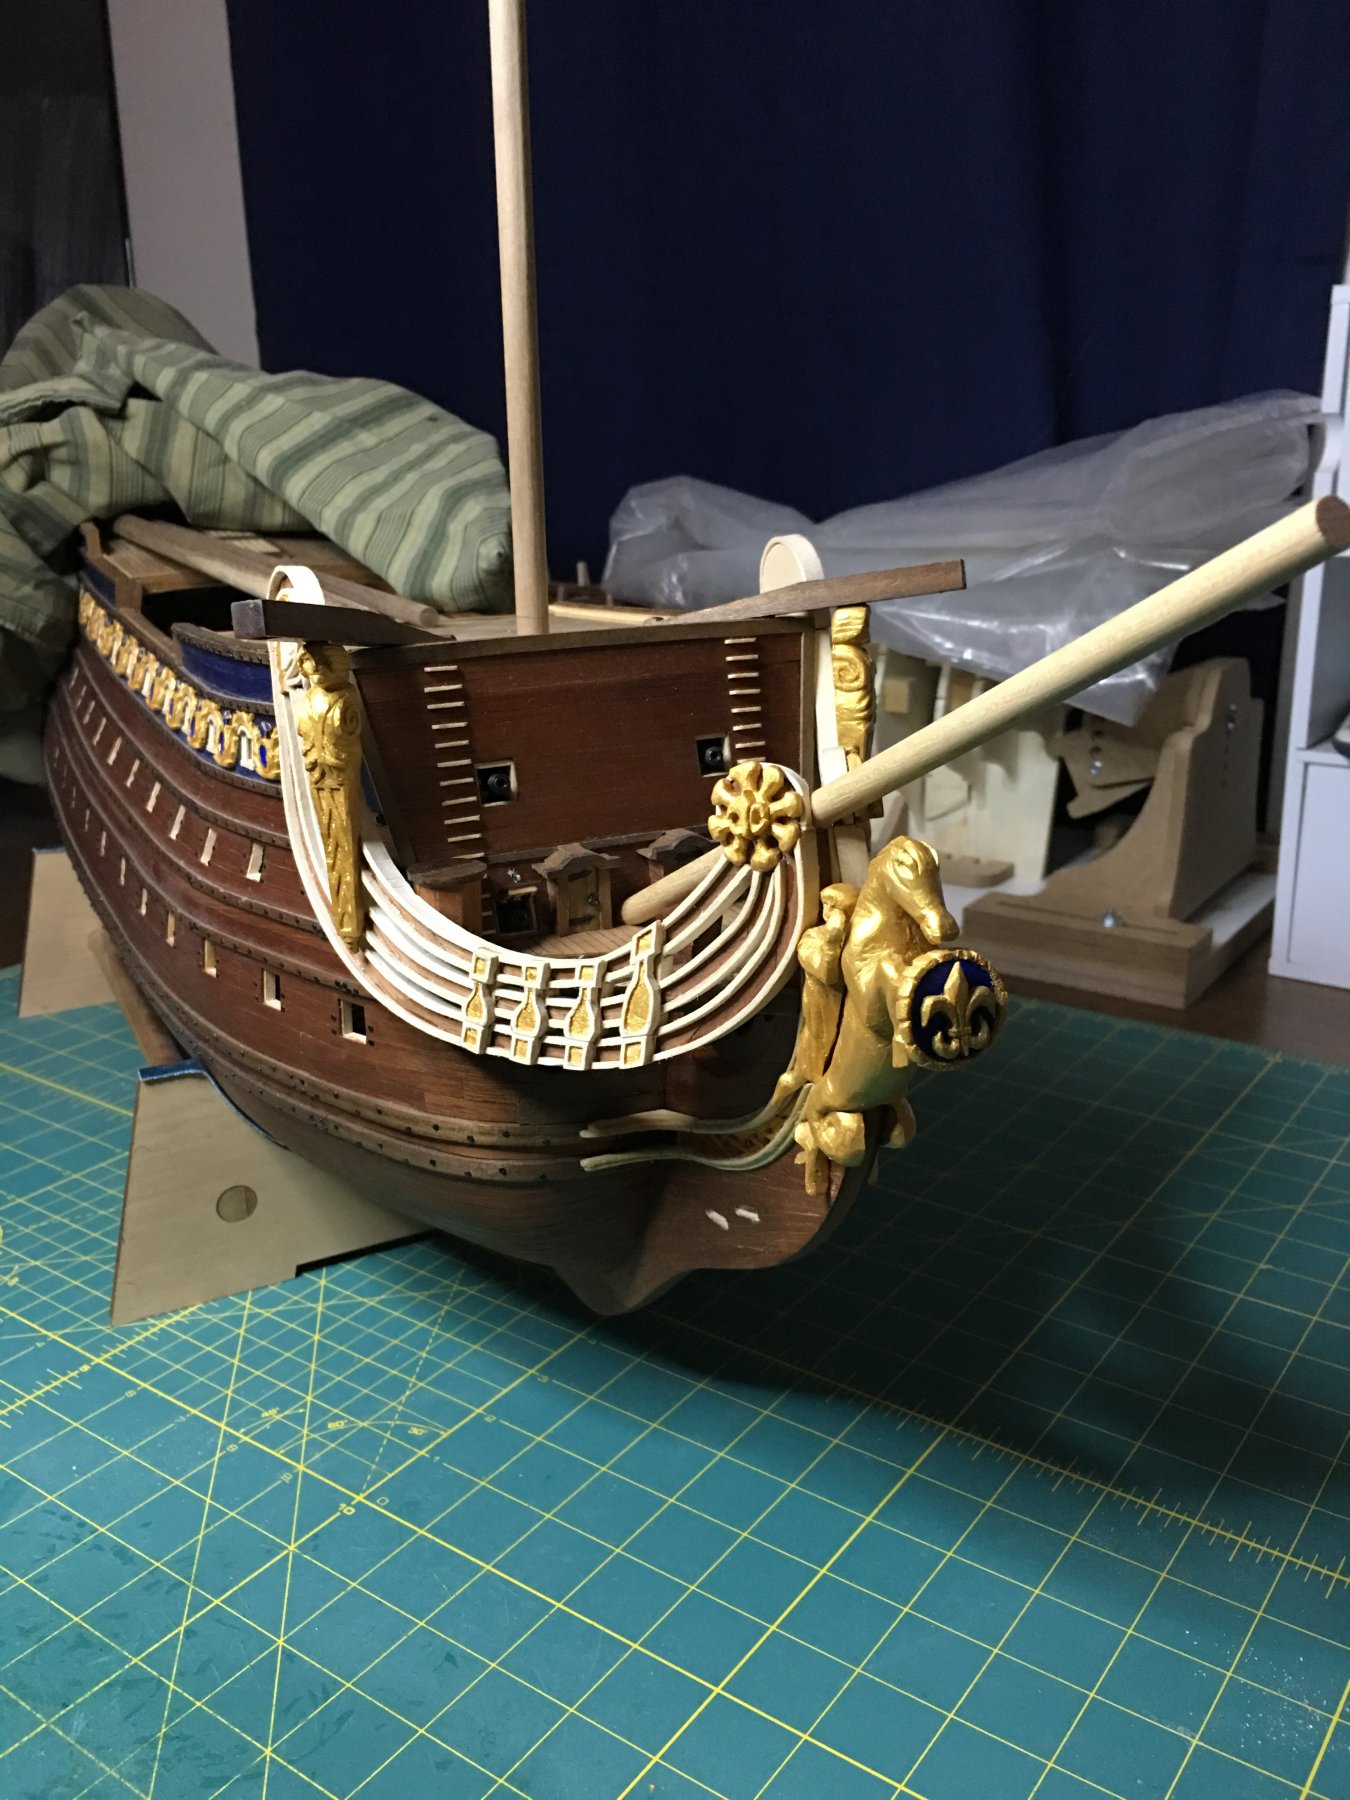
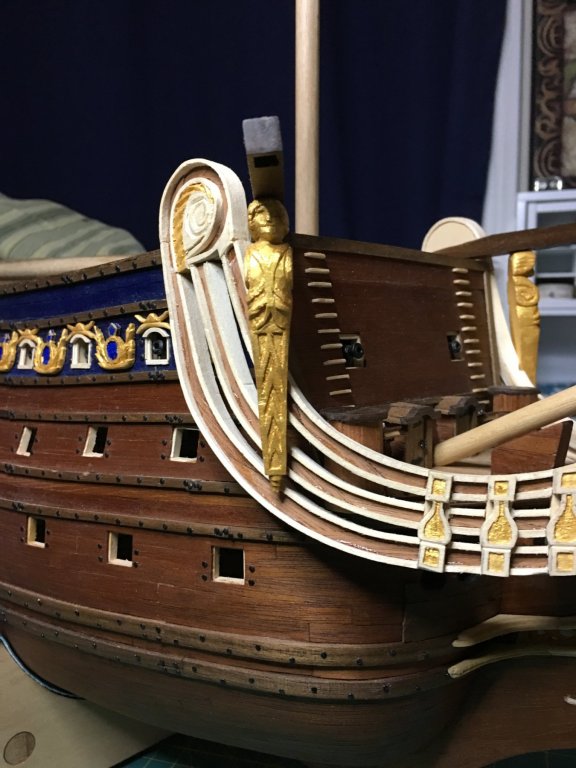
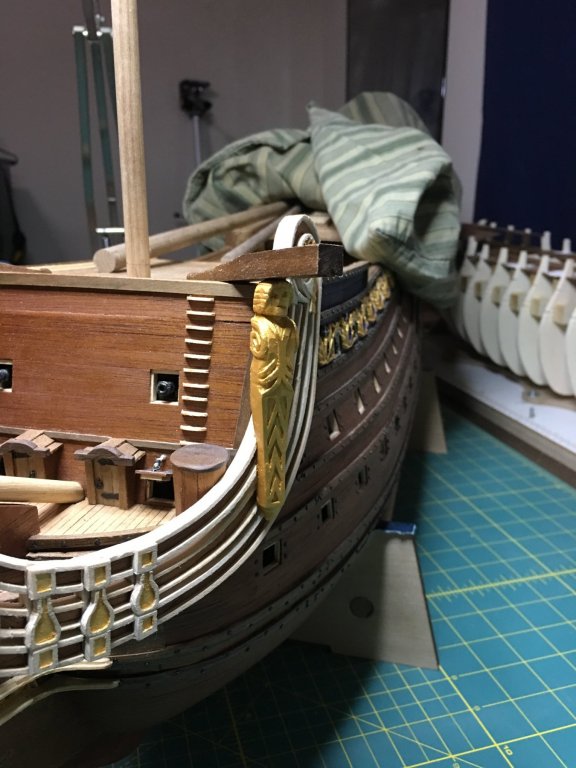
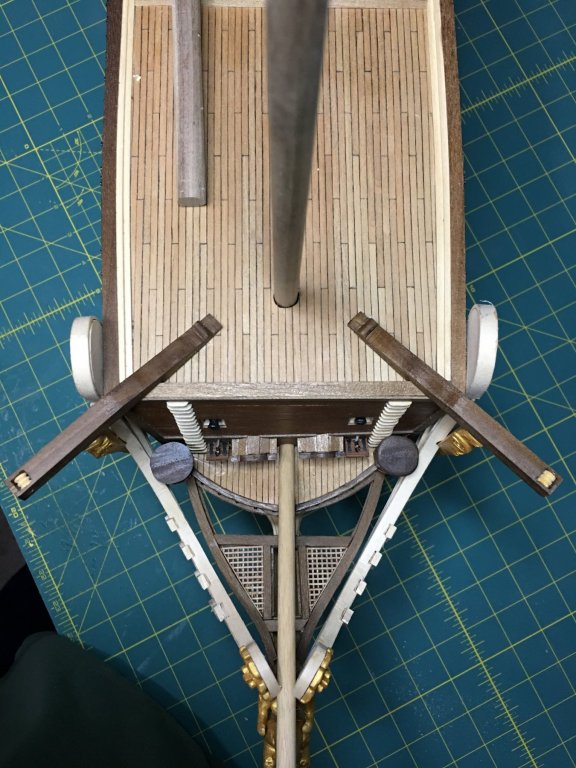
Far too kind! Doris is definitely someone to aspire to as her work is beautiful pieces of art. The catheads and their supporting posts posts are in place. I also fitted, though not secured, the bow sprit. Next up are a bunch of small assemblies. Bitts, railings, knight heads, ladders and more canons. The decks will be coming alive over the next weeks. Thanks you all for the very kind words, likes and following along on this long journey.

- 961 replies
-
- 11
-
-
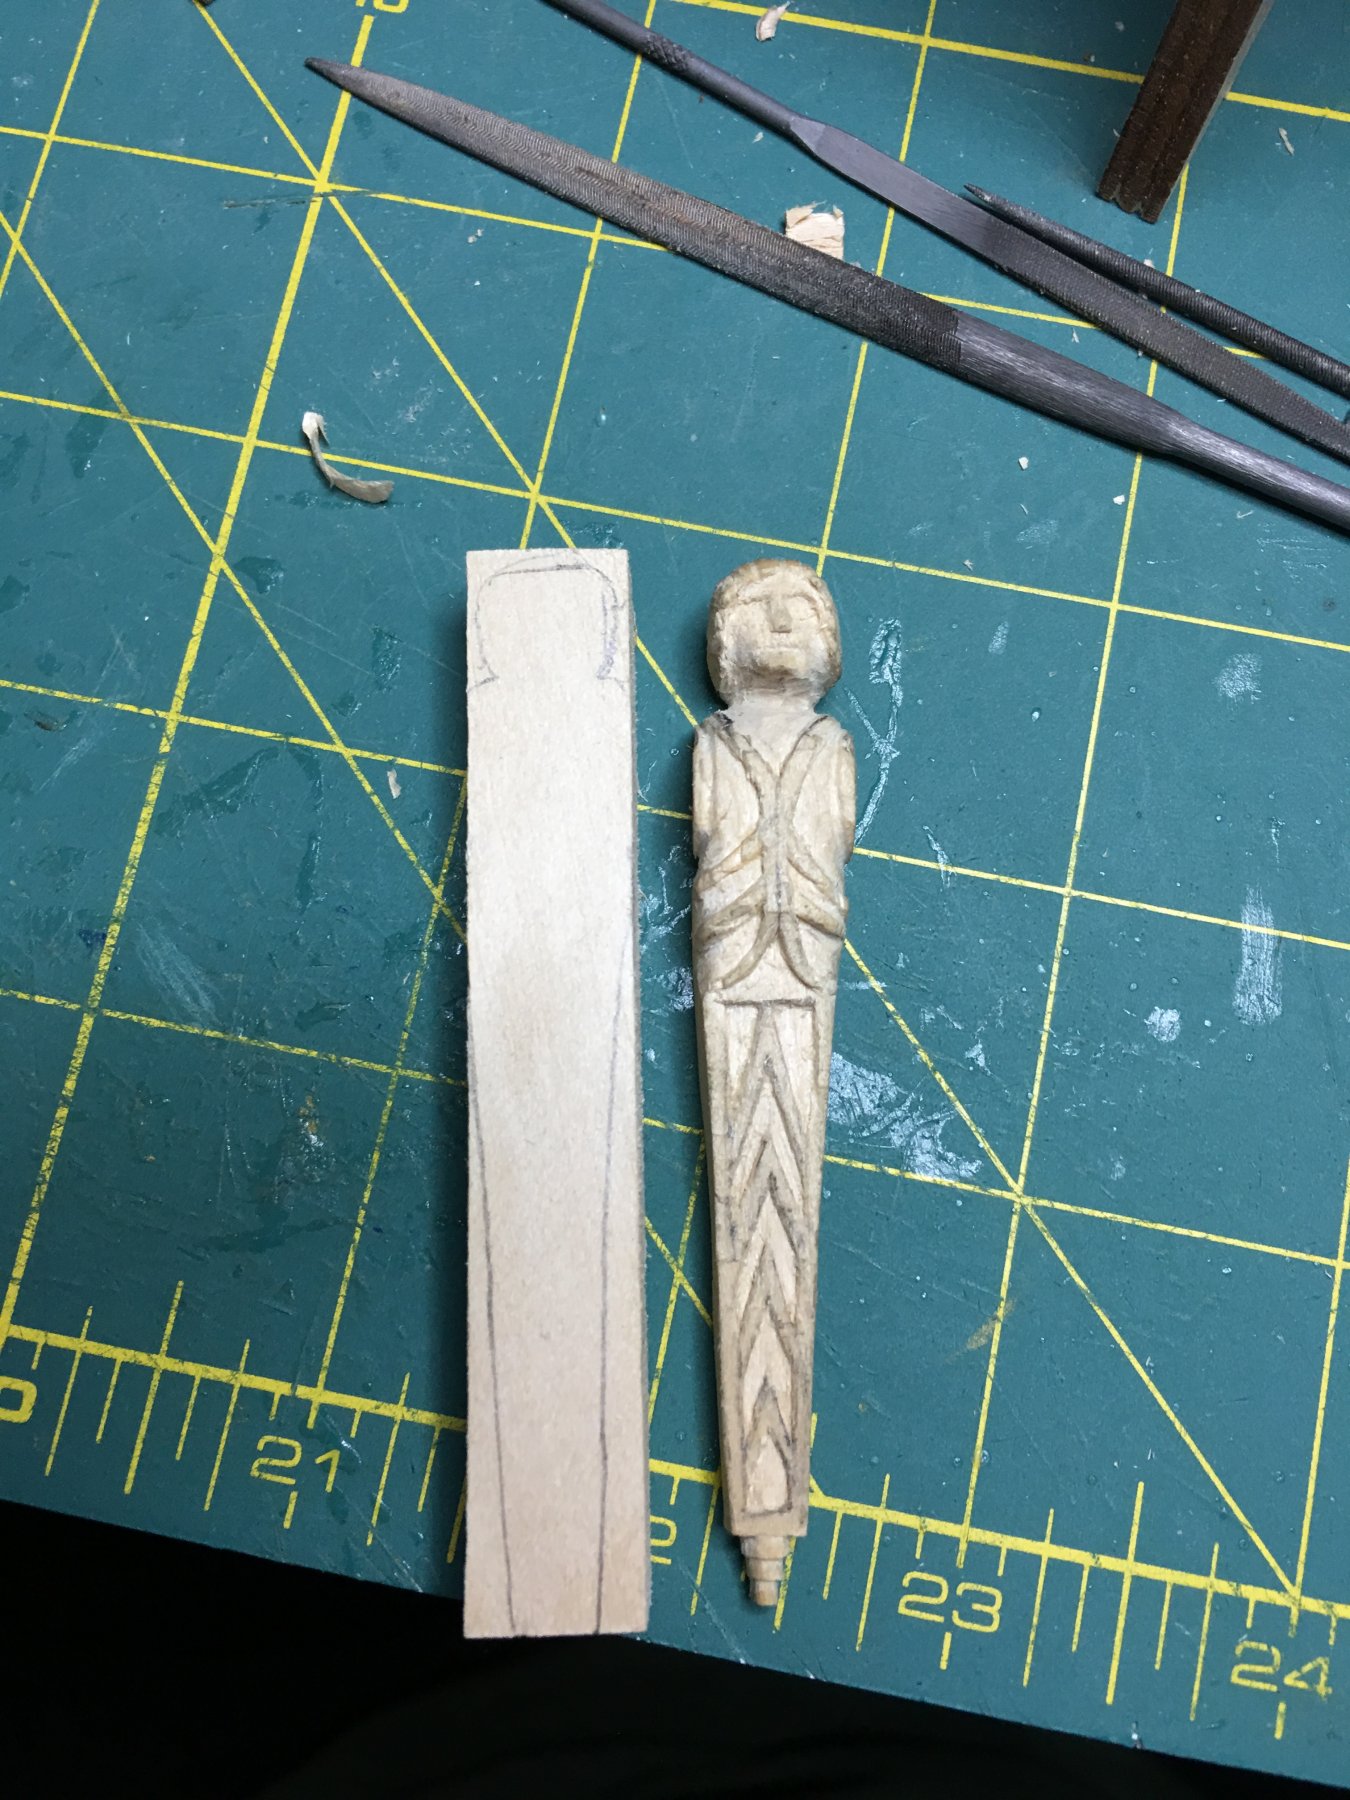
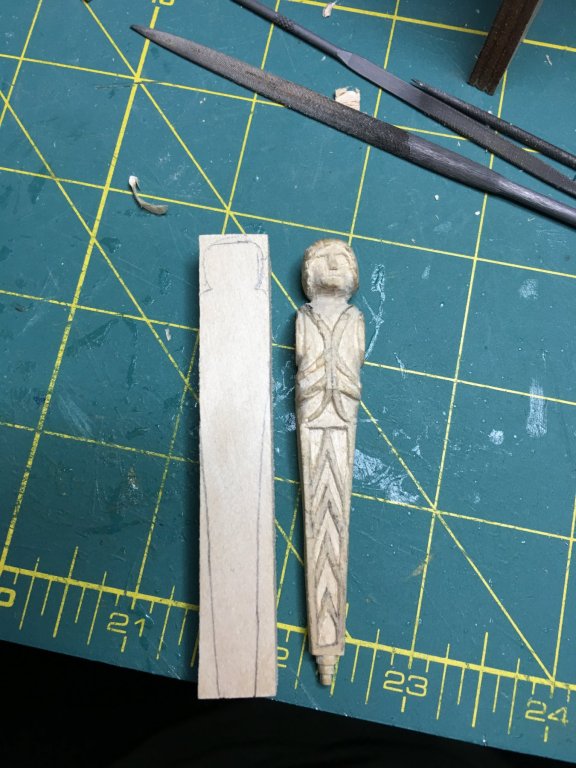
Back in the S.R. ship yard for a while. Planning on installing some furniture, canons and railings. First up are the catheads. Here are the start of the supports for them that extend down to the headrails. The catheads themselves have already been built so once these are carved and painted, I can assemble them and start on the forecastle railings. Good to be be back here for a while! Much more to follow! 😀
- 961 replies
-
- 11
-