


EJ_L
-
Posts
2,227 -
Joined
-
Last visited
Content Type
Profiles
Forums
Gallery
Events
Posts posted by EJ_L
-
-
Ah, the temptations of new models... I'm not very good at resisting that call as is evident by the multiple builds I maintain. Still, you never want to anger the admiral. She can cast you ashore and leave you stranded with no ship or hope for one. I've learned that if I keep mine happy, she lets me use the good ship Visa to buy more ship stuff which in turn keeps me happy.
Okay, I've said the correct things. Now I can say that I am looking forward to seeing you start that build! All that PE will really make it a spectacular model! I will be watching for that log as the Pearl finishes up.
")
- DaveRow, Canute, popeye the sailor and 2 others
-
 5
5
-
I will echo Chris in saying that yes, you have chosen the right path. Most "instructions" for model ships are as you said, more guide than traditional instruction. There are many parts that the instructions may say to install early but, can easily wait till much further. THe guns and port lids are a prime example. Yes, the fully rigged guns need to go in place before the ships masting and rig is assembled but, many builders will leave "dummy" cannon and the lids off till right before the rigging or even till after that stage and close to the end.
Along those lines of thought, separate sub assemblies are a great help especially when you get to the masts and rig. The more complete any item is, mast, yards, etc. with blocks and leads already installed before it is on the ship, the easier that stage will become. Similar to what you are already doing with the guns and anchors. It also helps to keep things moving while you wait on the mail.
-
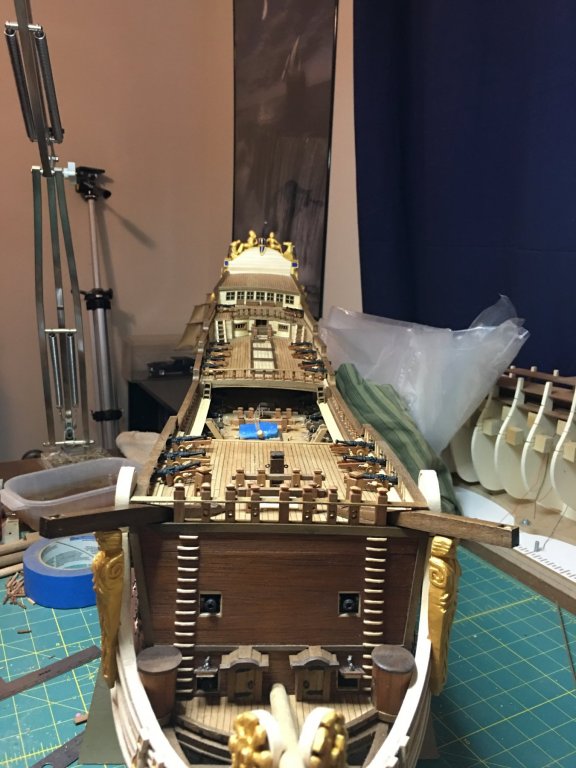
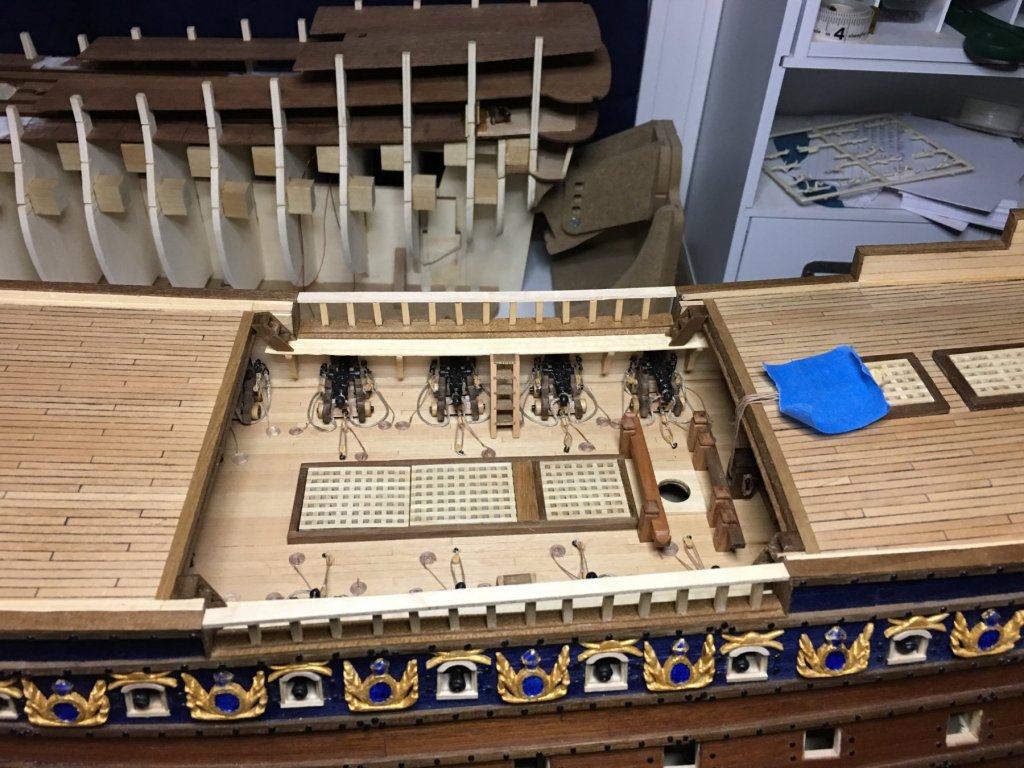
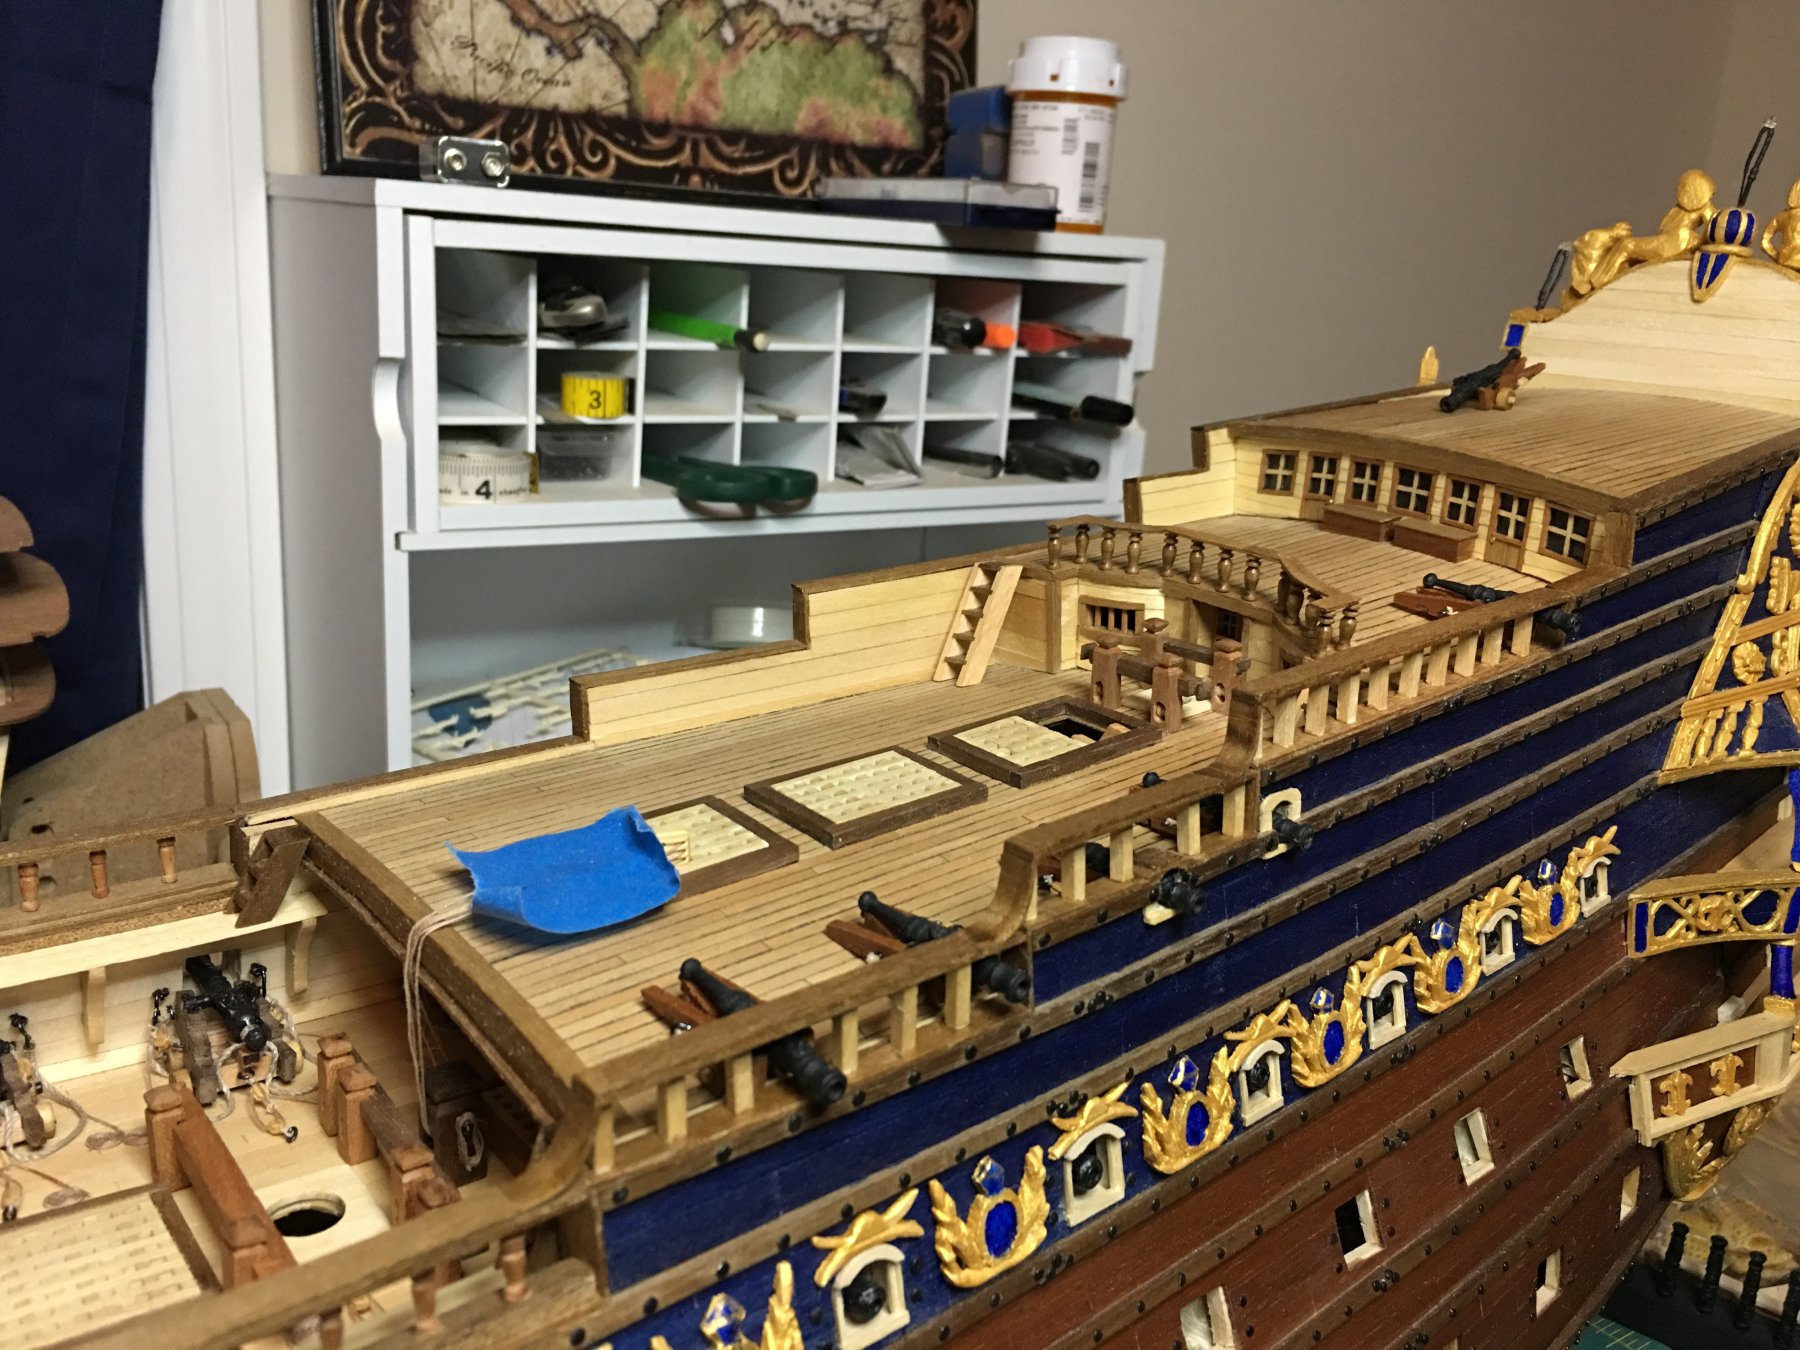
More railings in place. One more to go on the forecastle then time to rig the last of the cannons.
- Fright, Old Collingwood, zappto and 10 others
-
13
-
Heinrich, thank you for that information. I knew that my gratings were not correct after looking at some other builds from people with far more knowledge than I. I do not know though if I will change the design on these or not. It will be a lot of work and some expense I was not planning on as I will need to buy some better wood than what I currently have on hand. Fortunately, I am at a point in the build where nothing major is impacted by the changes so now would be the time to make them. I will give it some thought.
Many of these little problems are reasons why I am moving more and more towards scratch building. While there is nothing wrong with kits, I find myself frustrated when I see things that I know are wrong and want to change either too late in the build or the kit structure becomes vastly prohibiting on making those changes. With the kits, I rely too much on the given information and not enough on my own research until often times it is too late. With scratch building, one has to plan out the entire build to ensure everything is correct and are not misled or restricted by the limits of the kit.
This is one of the reasons I have been working so much on SR lately and not as much time on Royal Louis. There are changes to that kit I ma wanting make, as well as correcting many errors I have made in this one. That has greatly slowed down forward progress as I continue to plan and change plans as issues arise.
Ah the joys and challenges of model ship building!
- Hubac's Historian, CDW, Elijah and 3 others
-
6
-
This looks very interesting and I am looking forward to seeing how it turns out. My experience with using expandable foam at work is that it may not fully expand to fill all the space evenly. Many times there can be holes and gaps. They can always be filled in easily enough though if any appear.
Hopefully the oil base you applied will act as a good bond breaker but if not, most foams clean up with some effort and solvent.
-
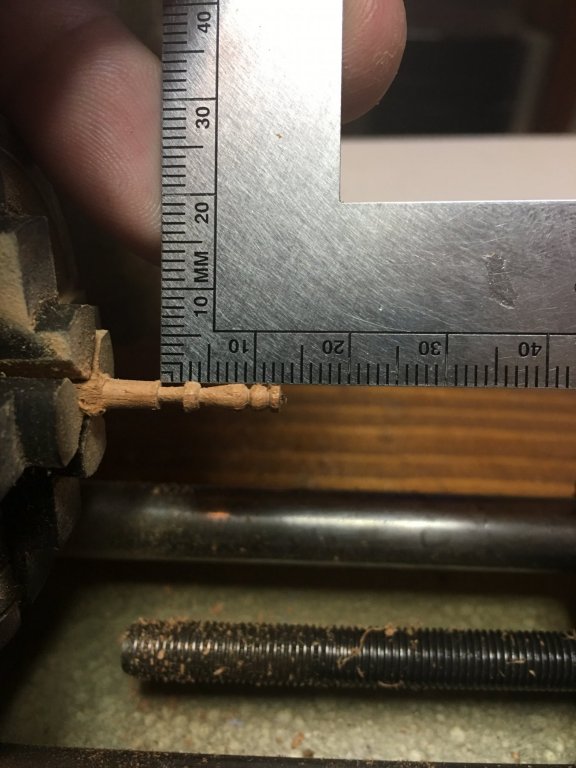
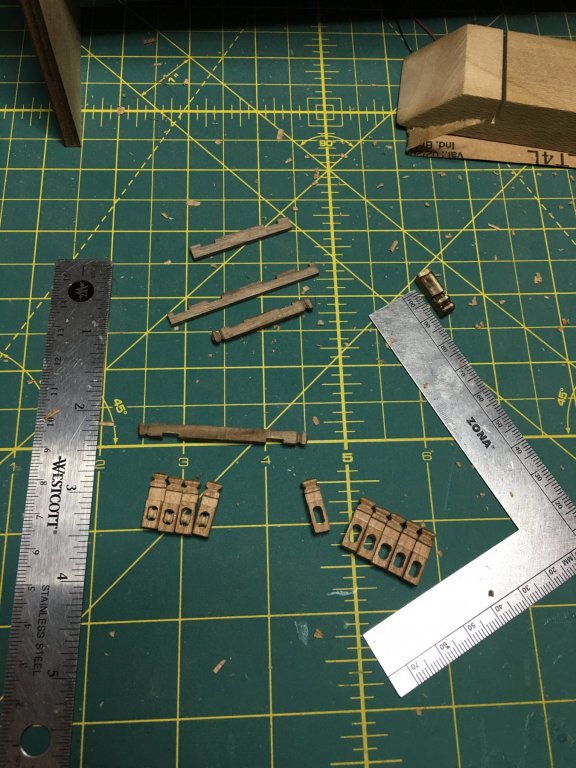
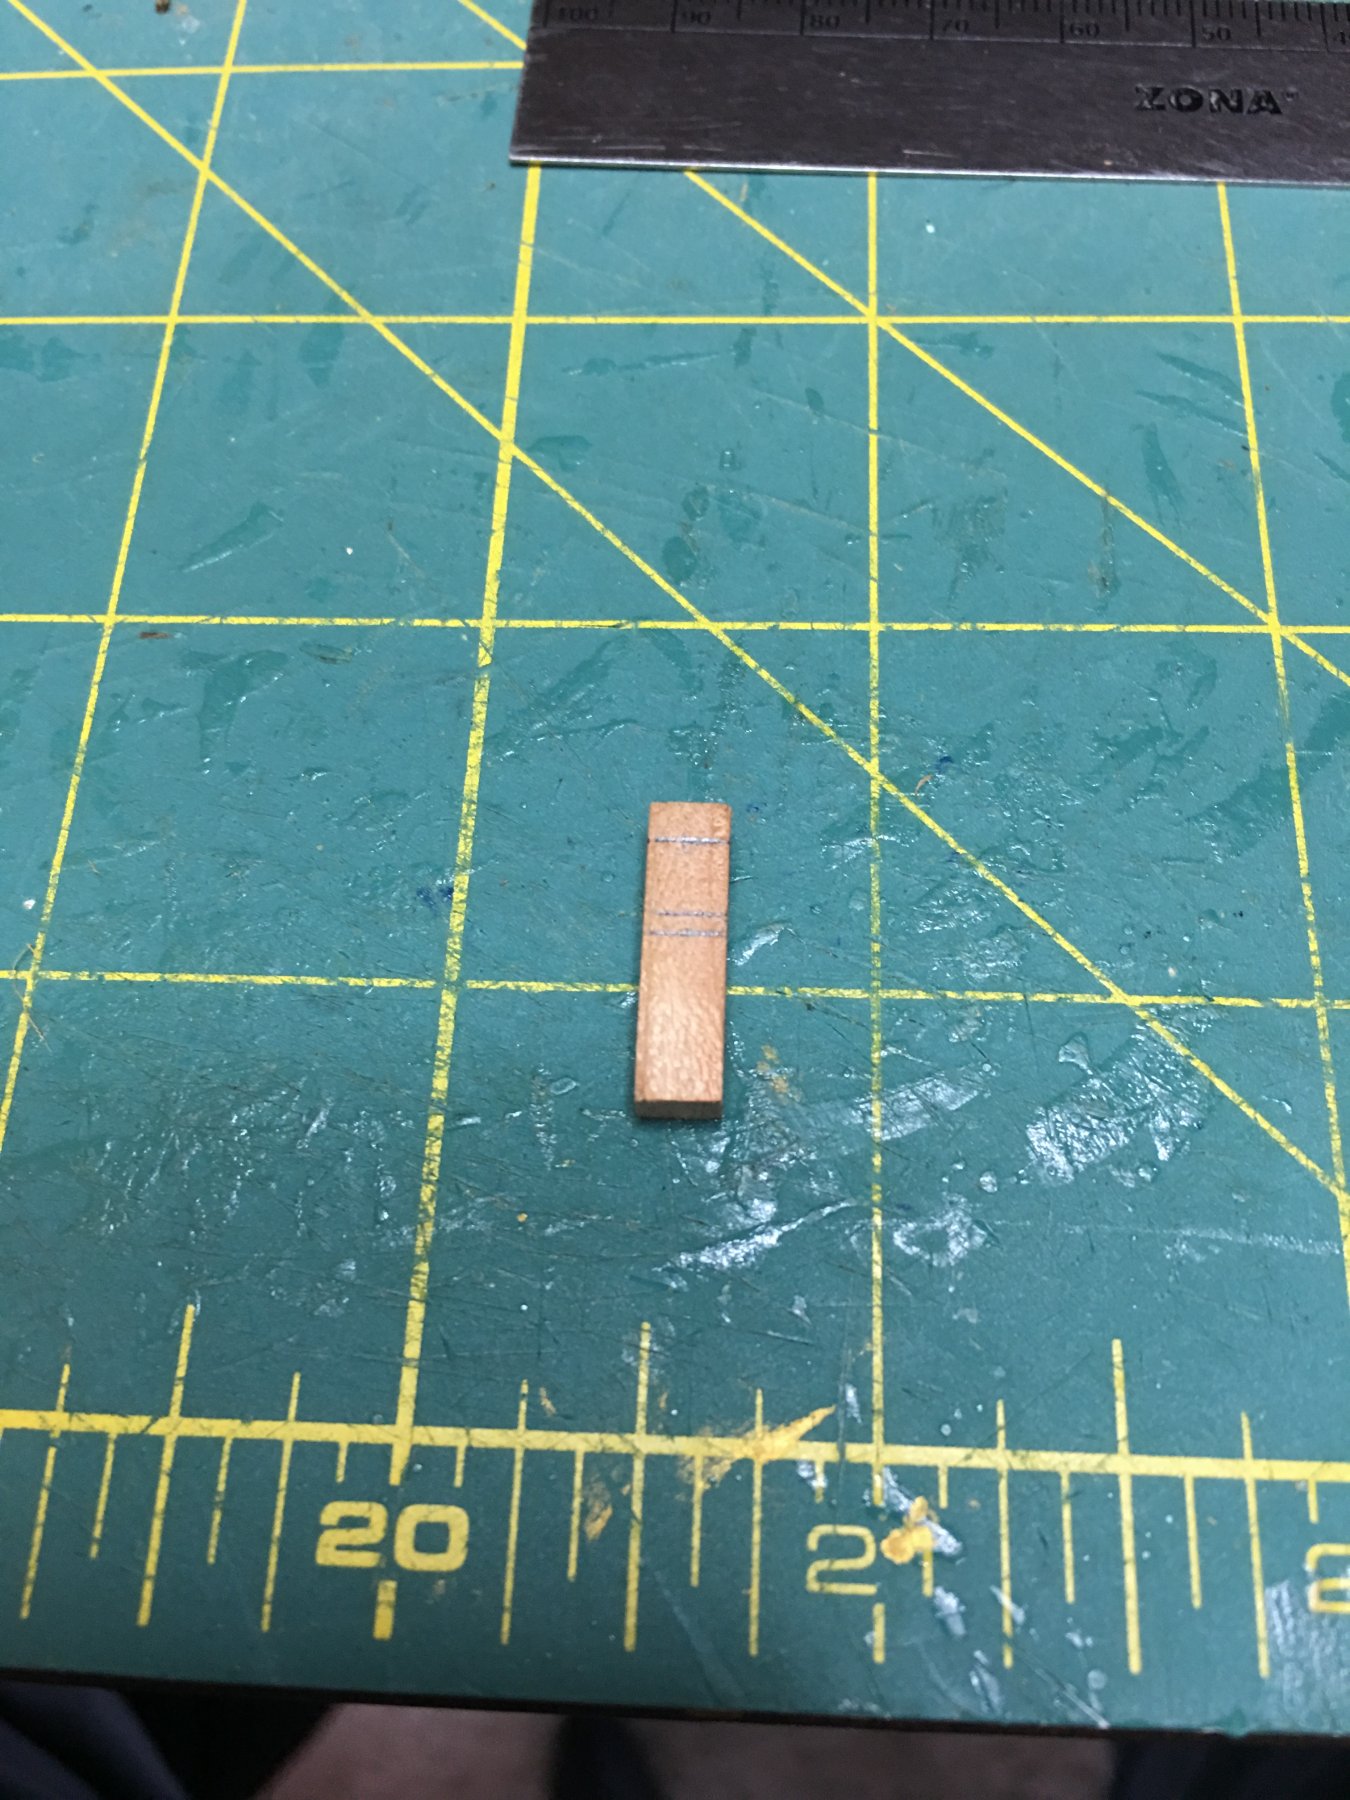
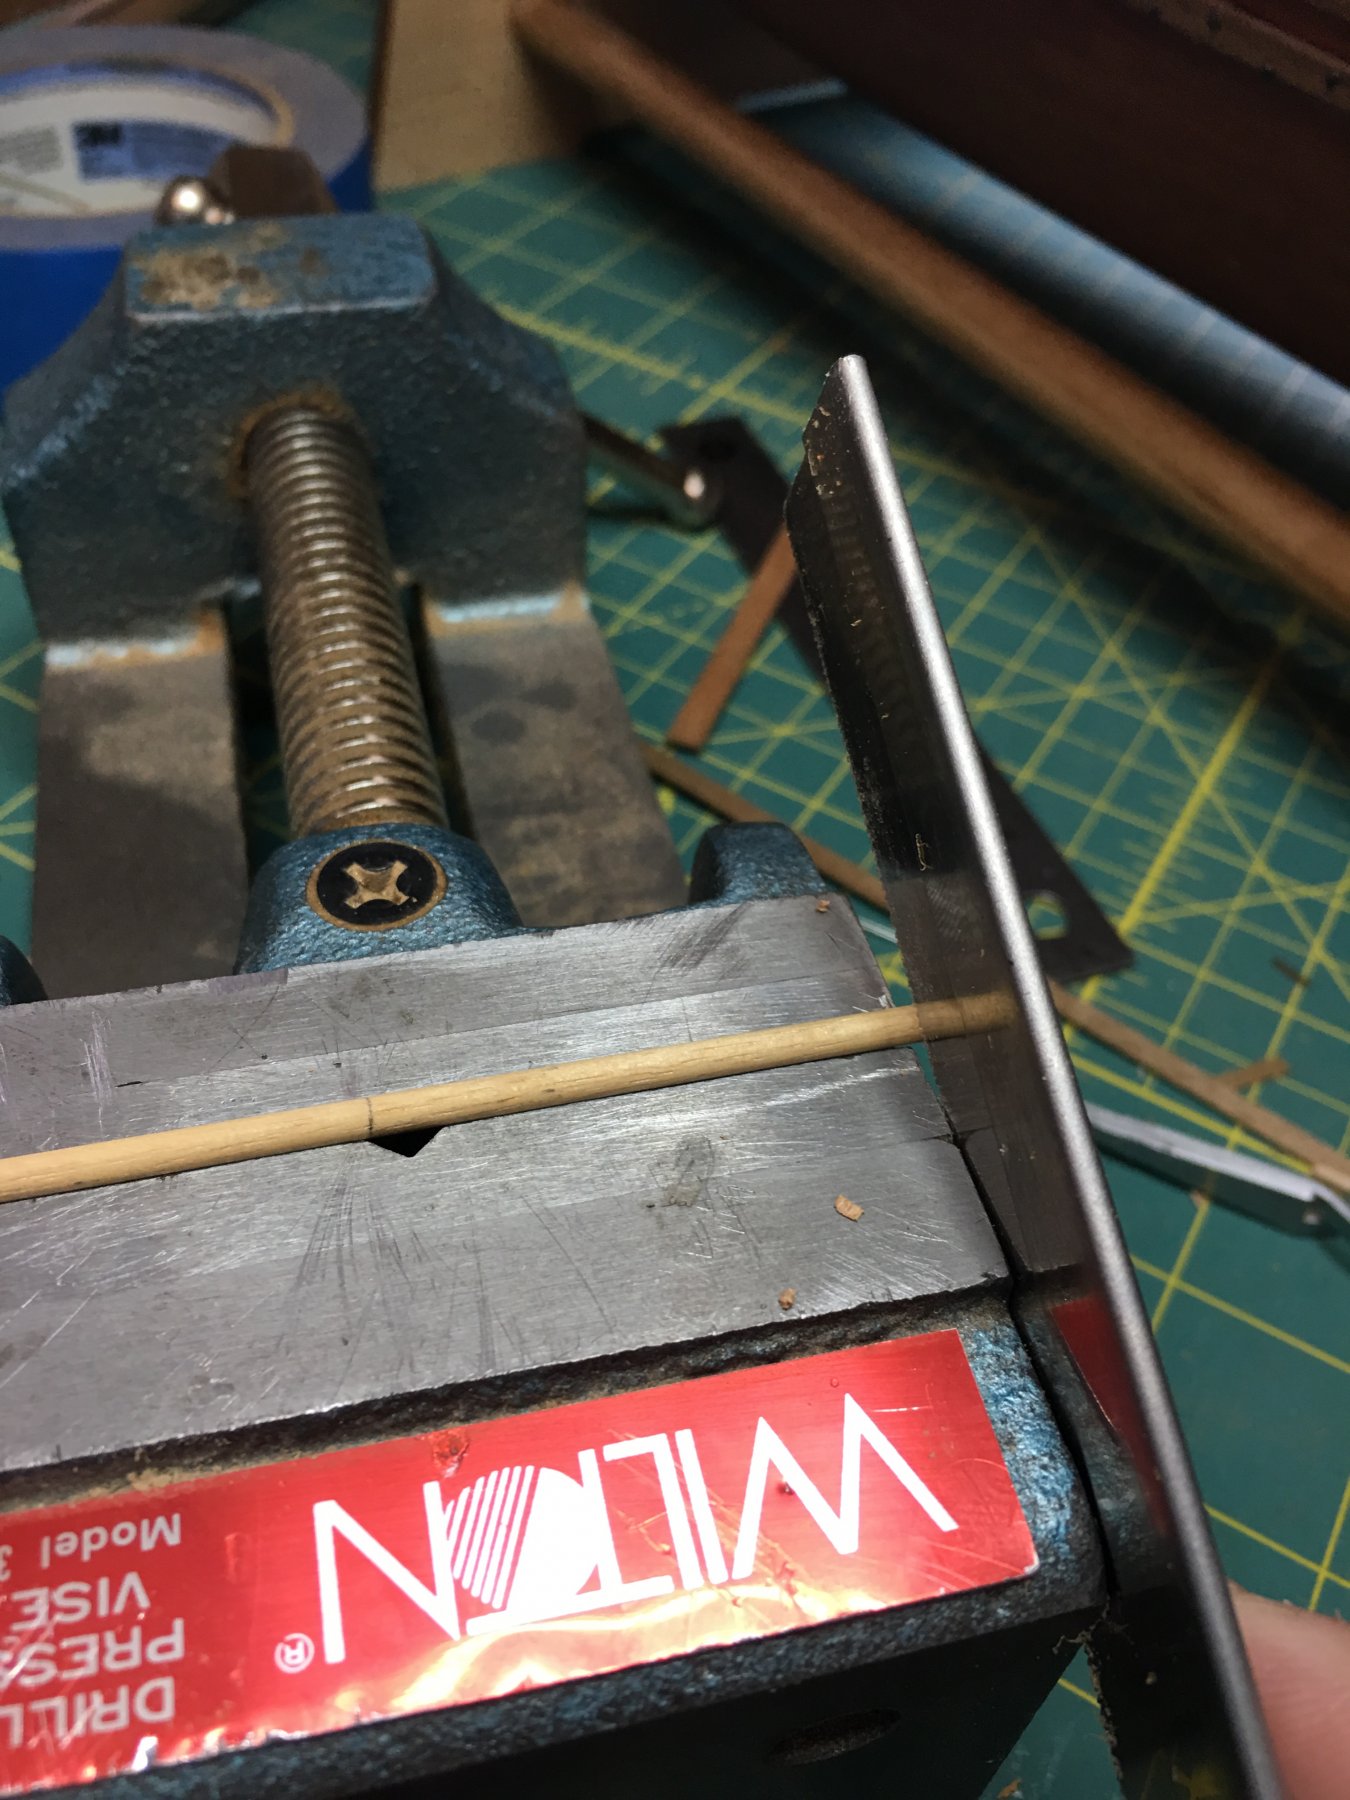
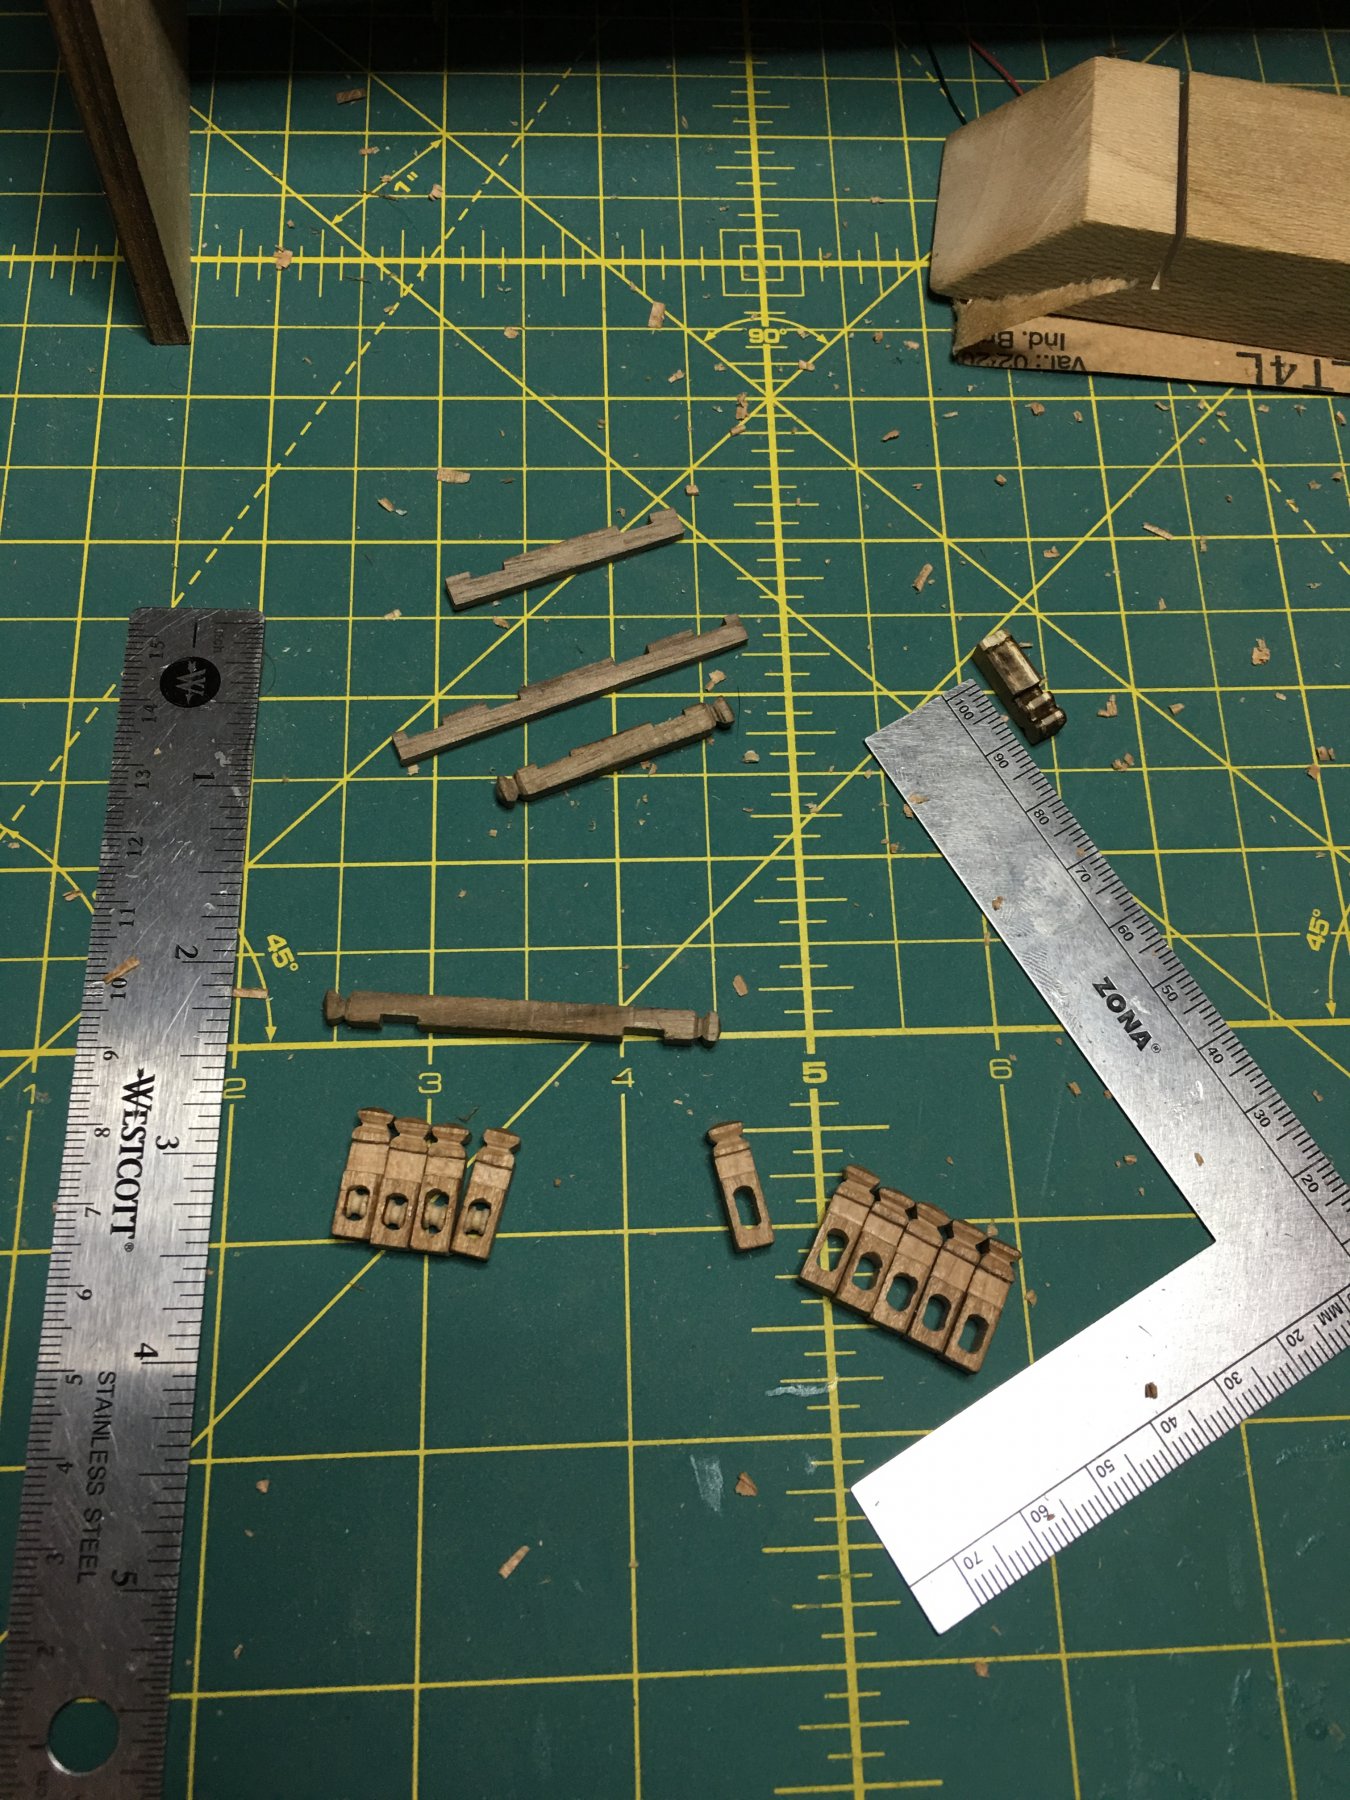
Tom, no templates just measuring and filing to shape. Here is how I make them.
Cut a piece of stock to length. Measure out where the cross beam will go and where the groove at the top will be.

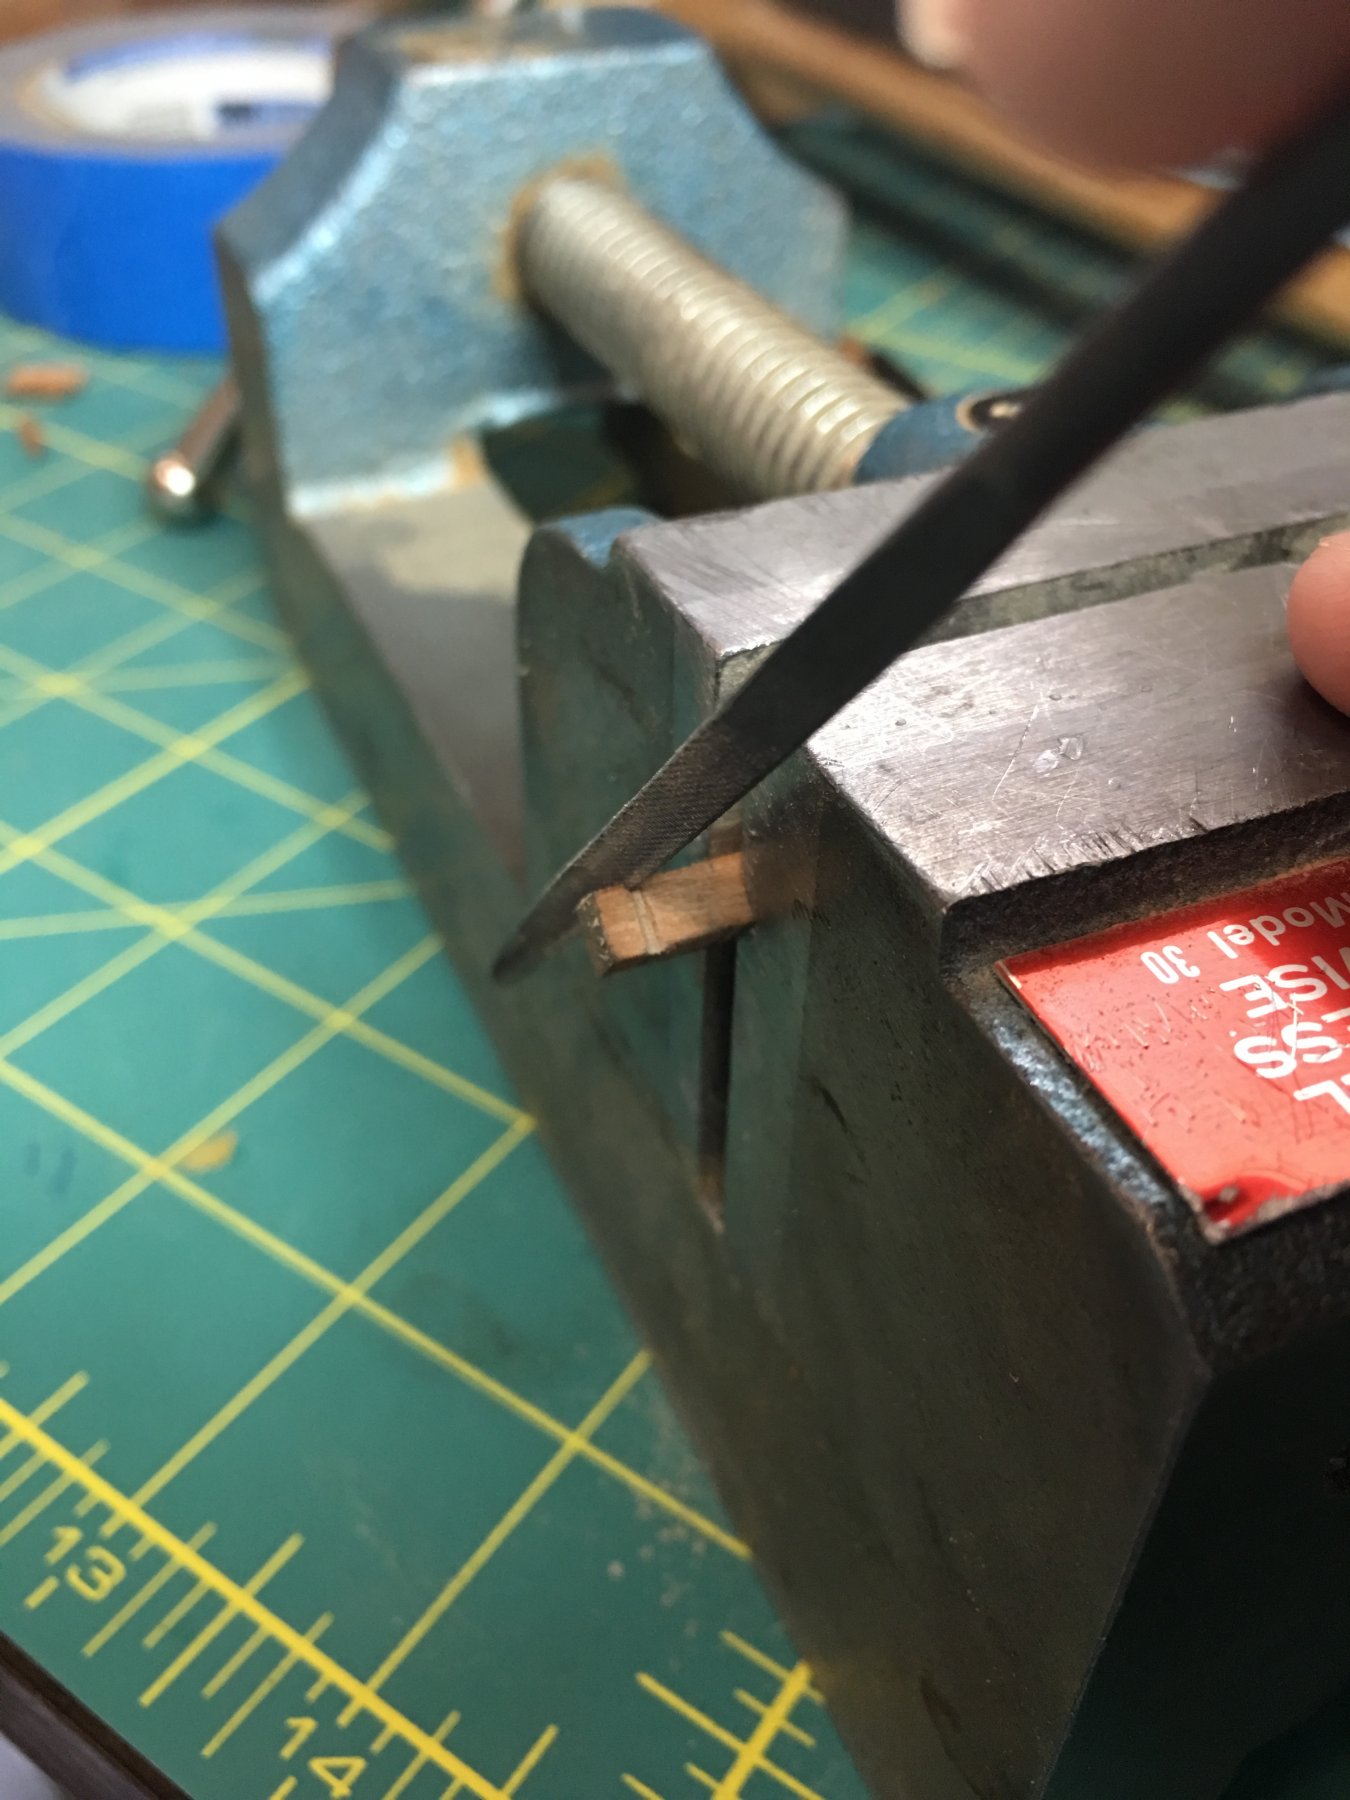
Use the saw to score a line for the top groove.
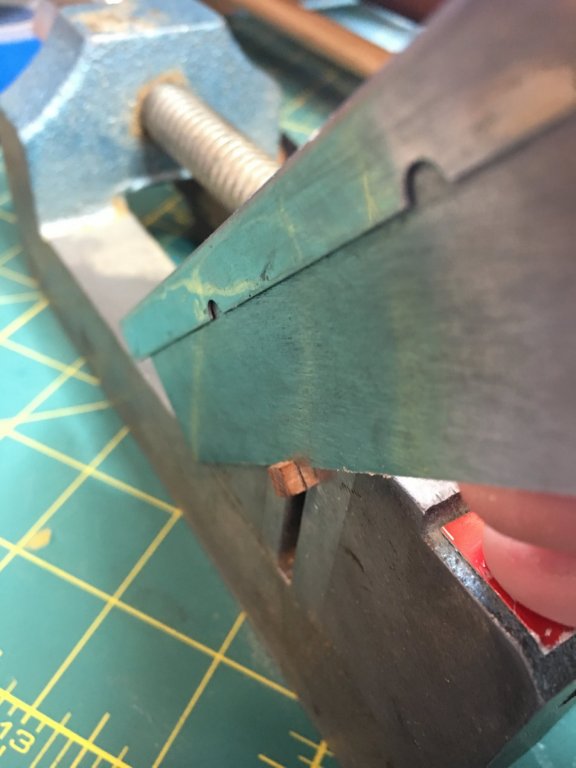
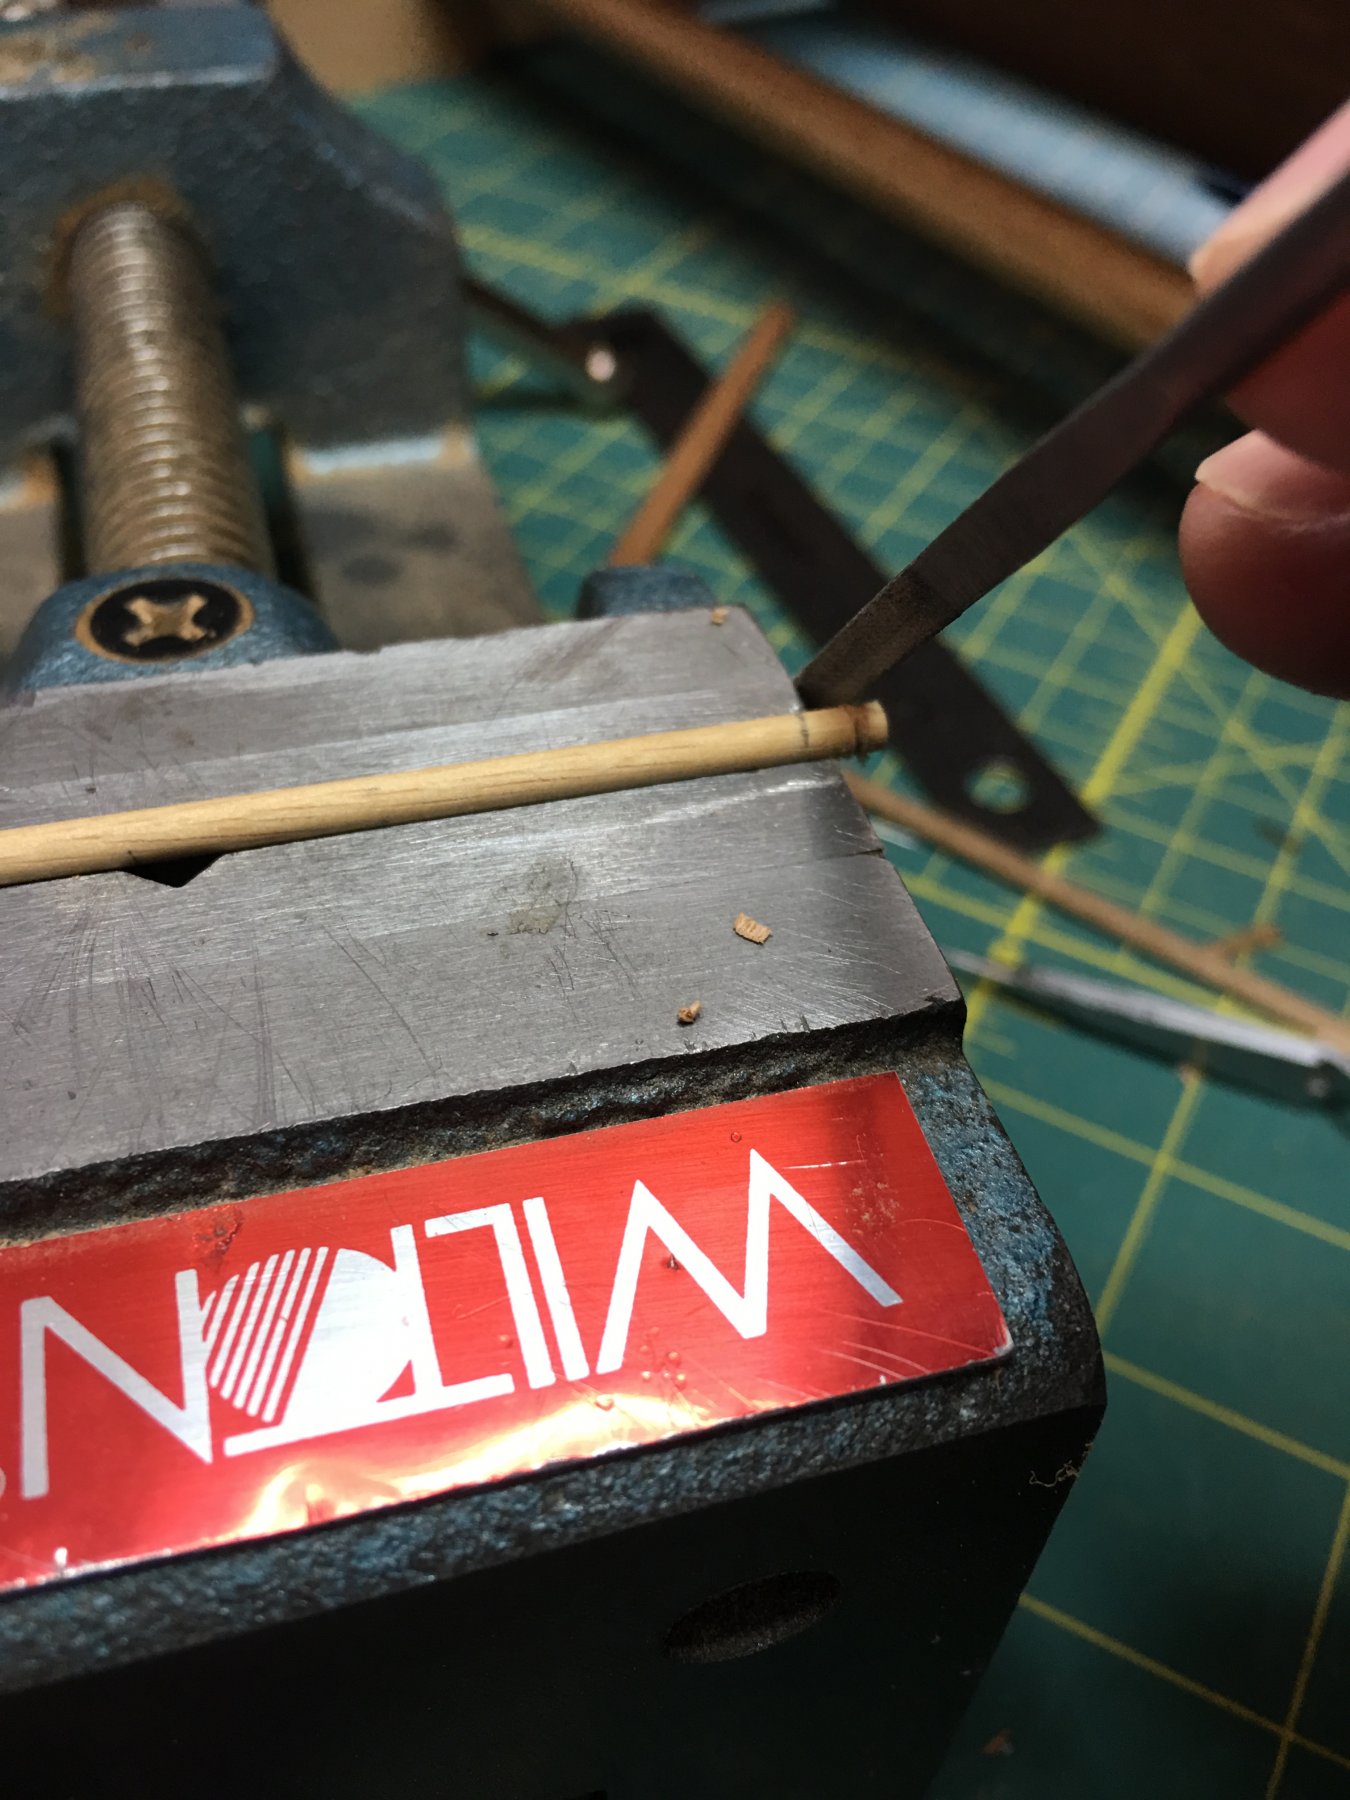
Using a triangular file, I deepen the scored line then I switch to a triangular micro file for additional clean up and shaping.
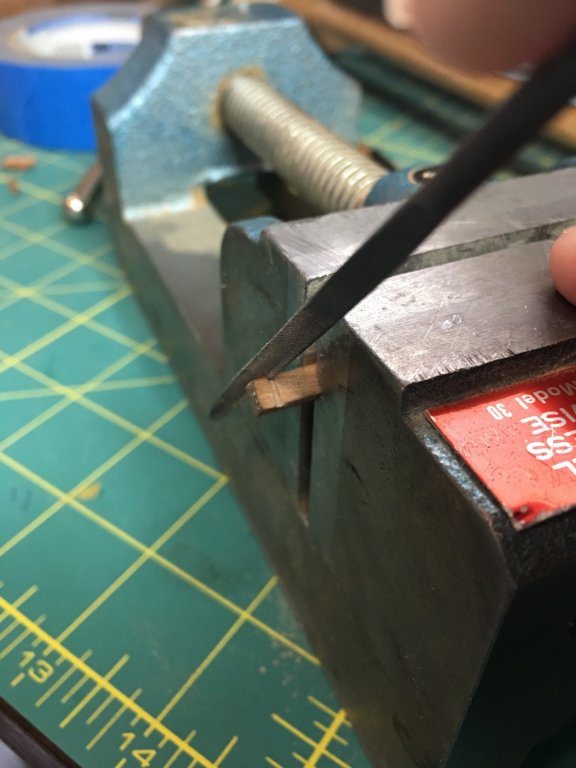
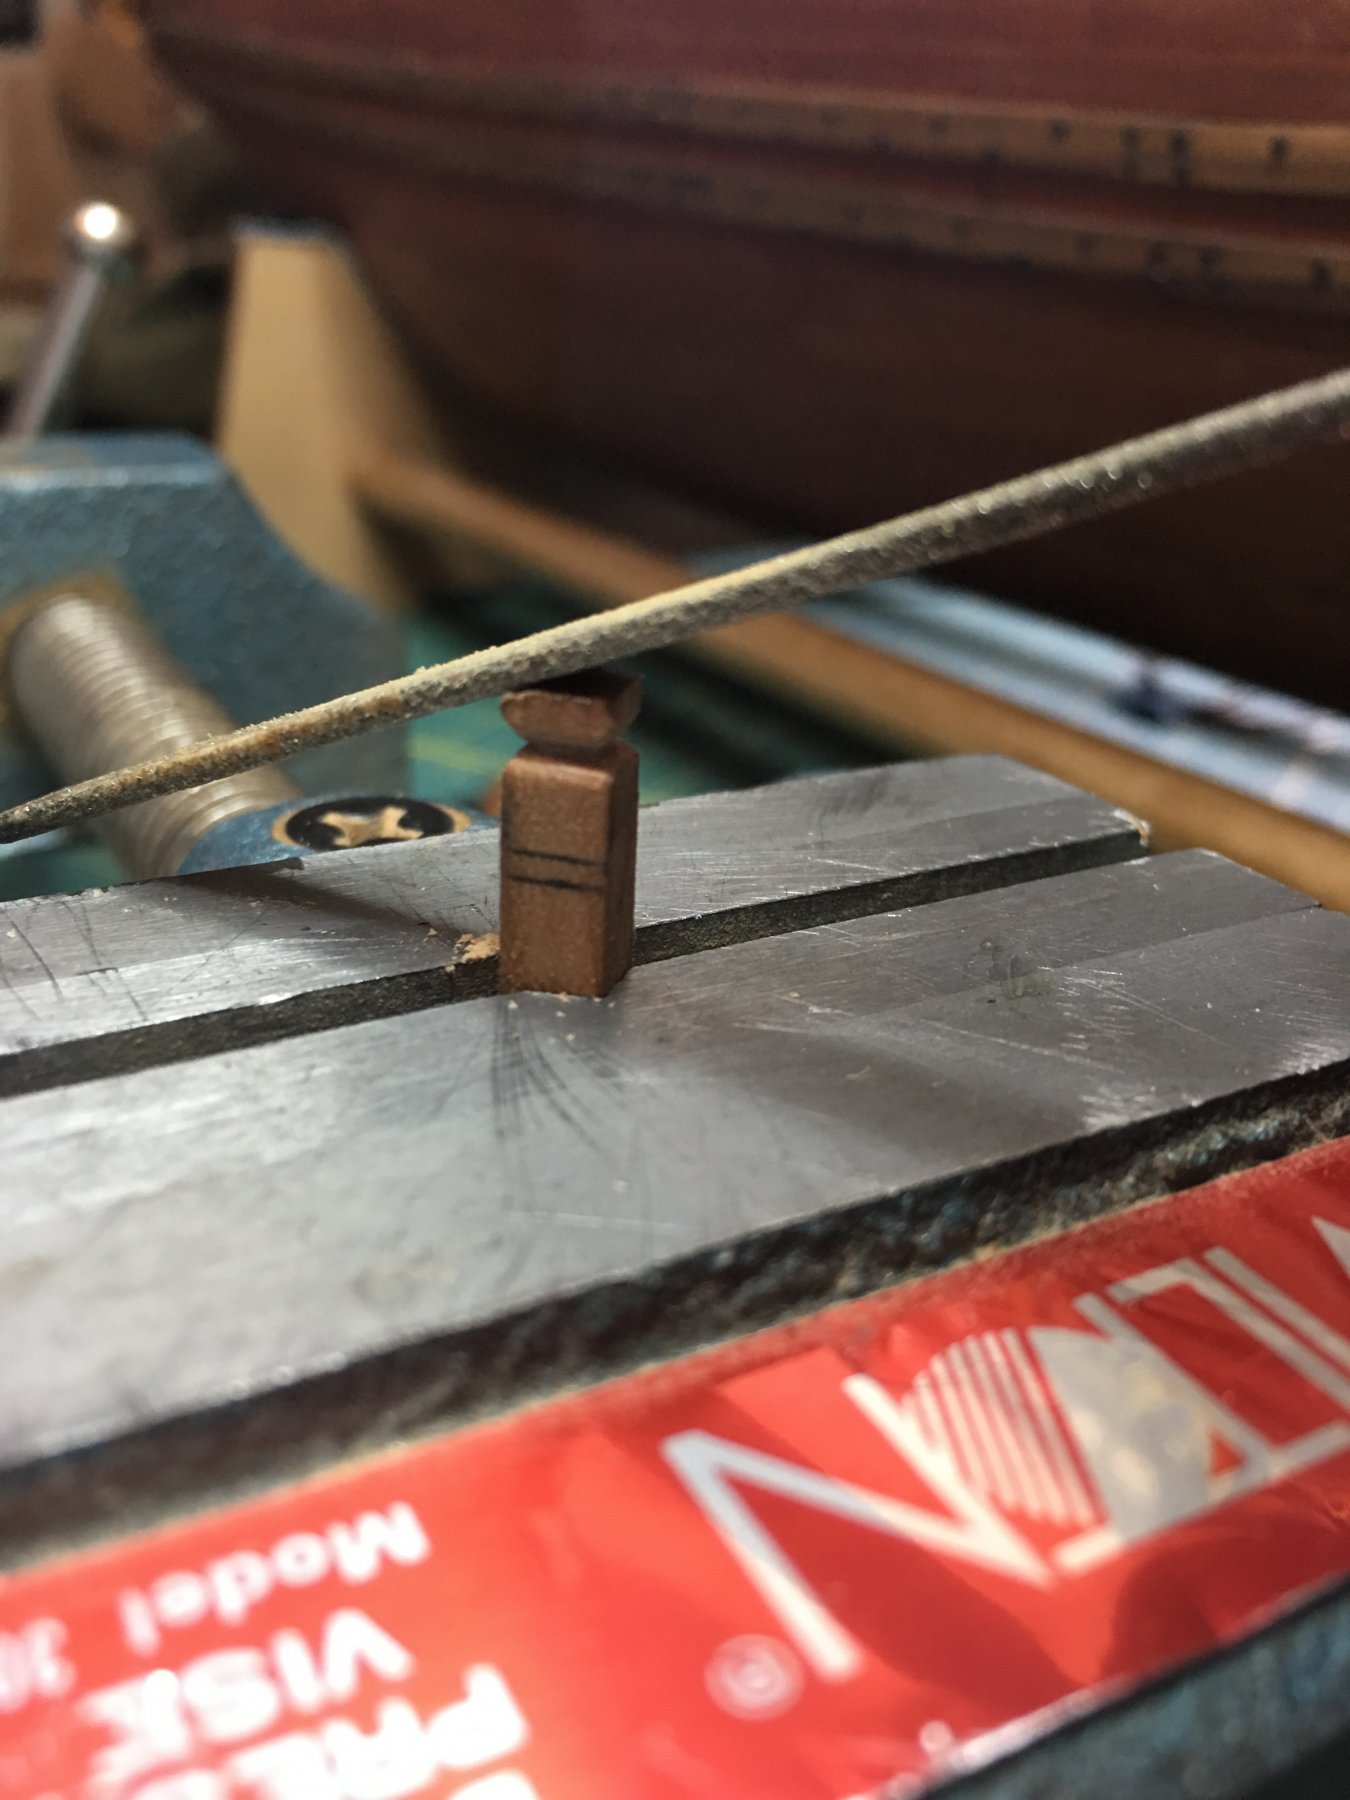
Once the groove is complete, I then start filing down the four top sides.

Clean up and sand as needed.
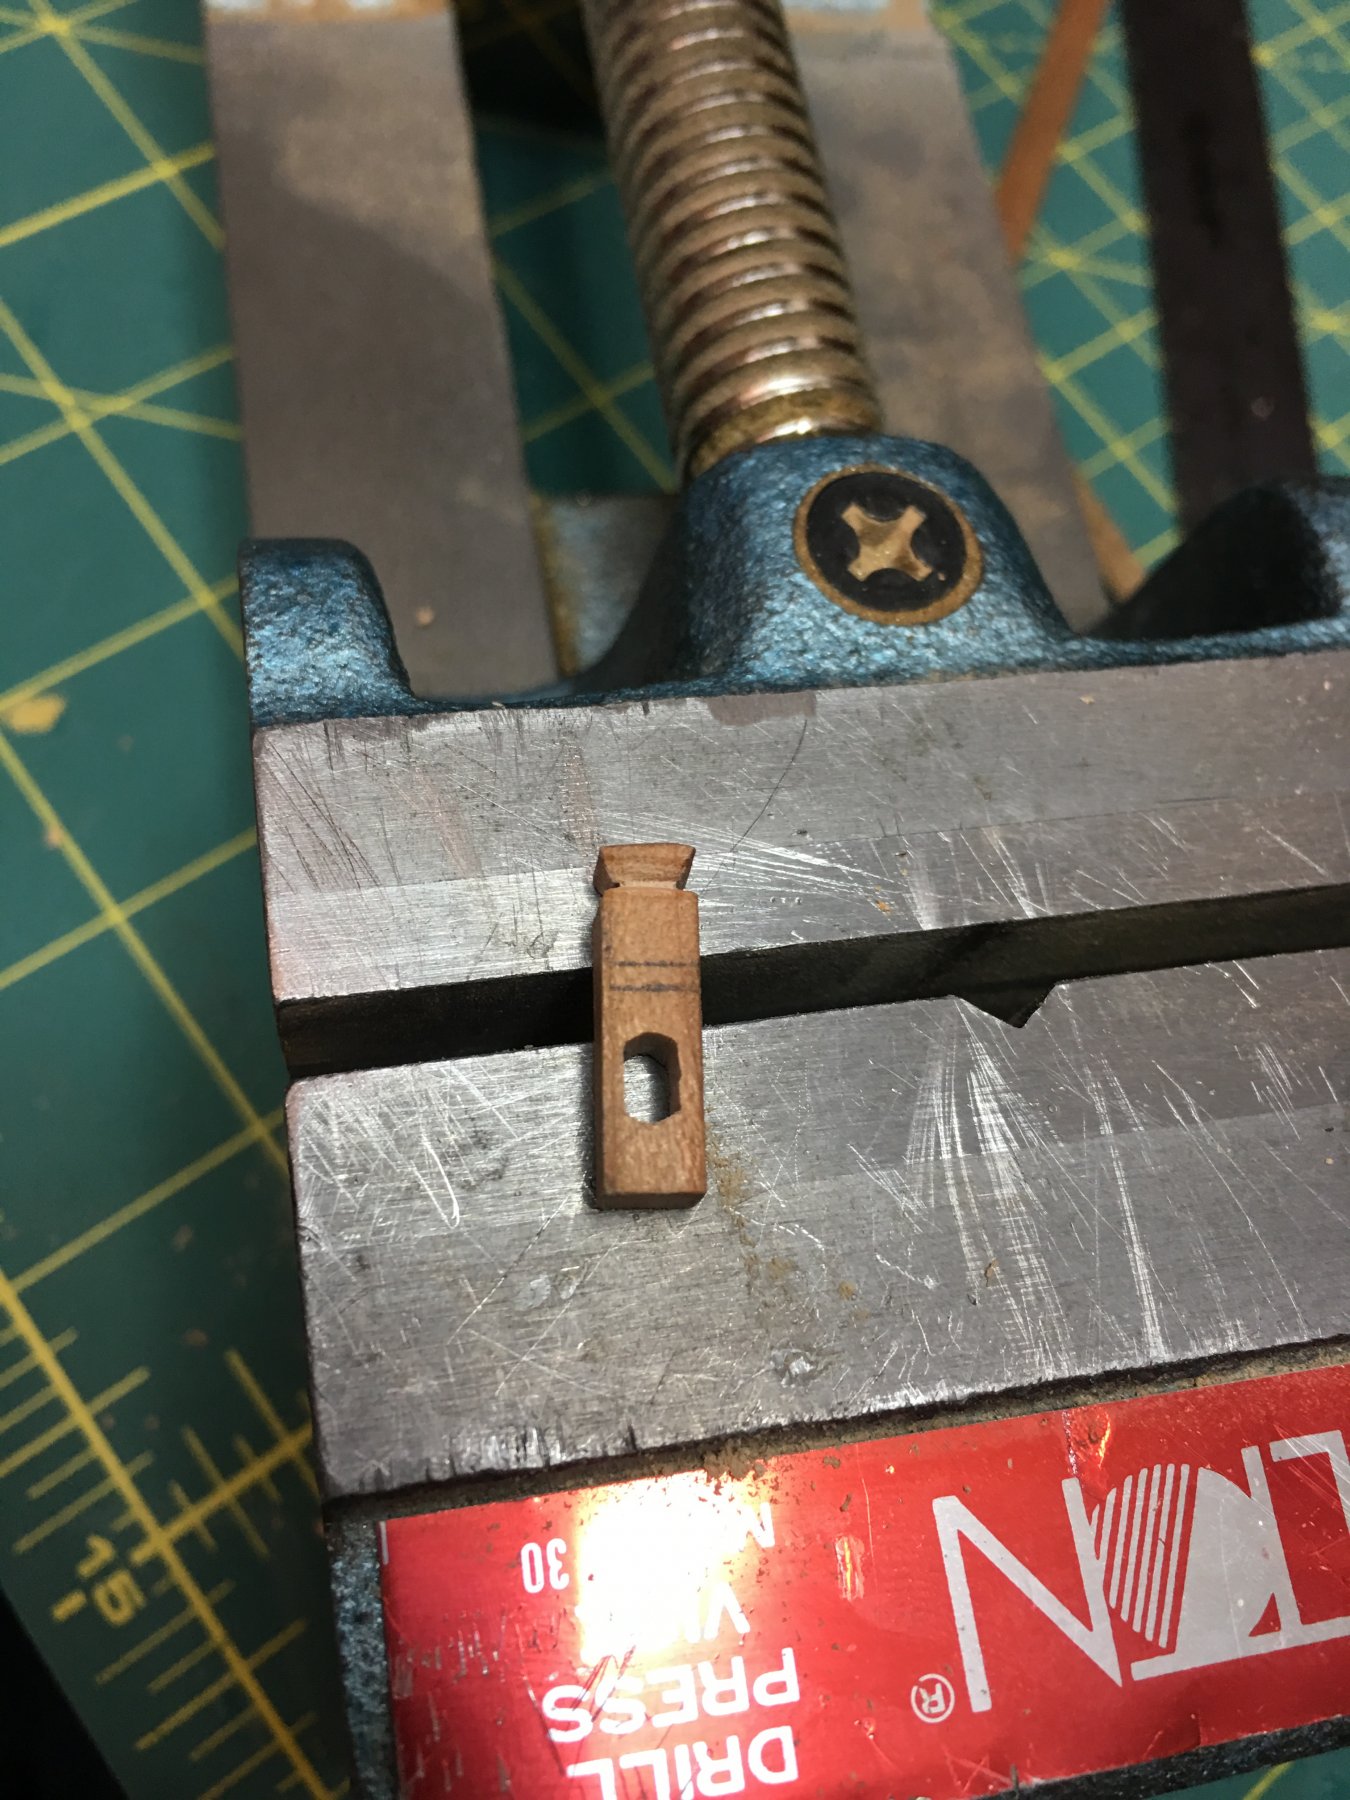
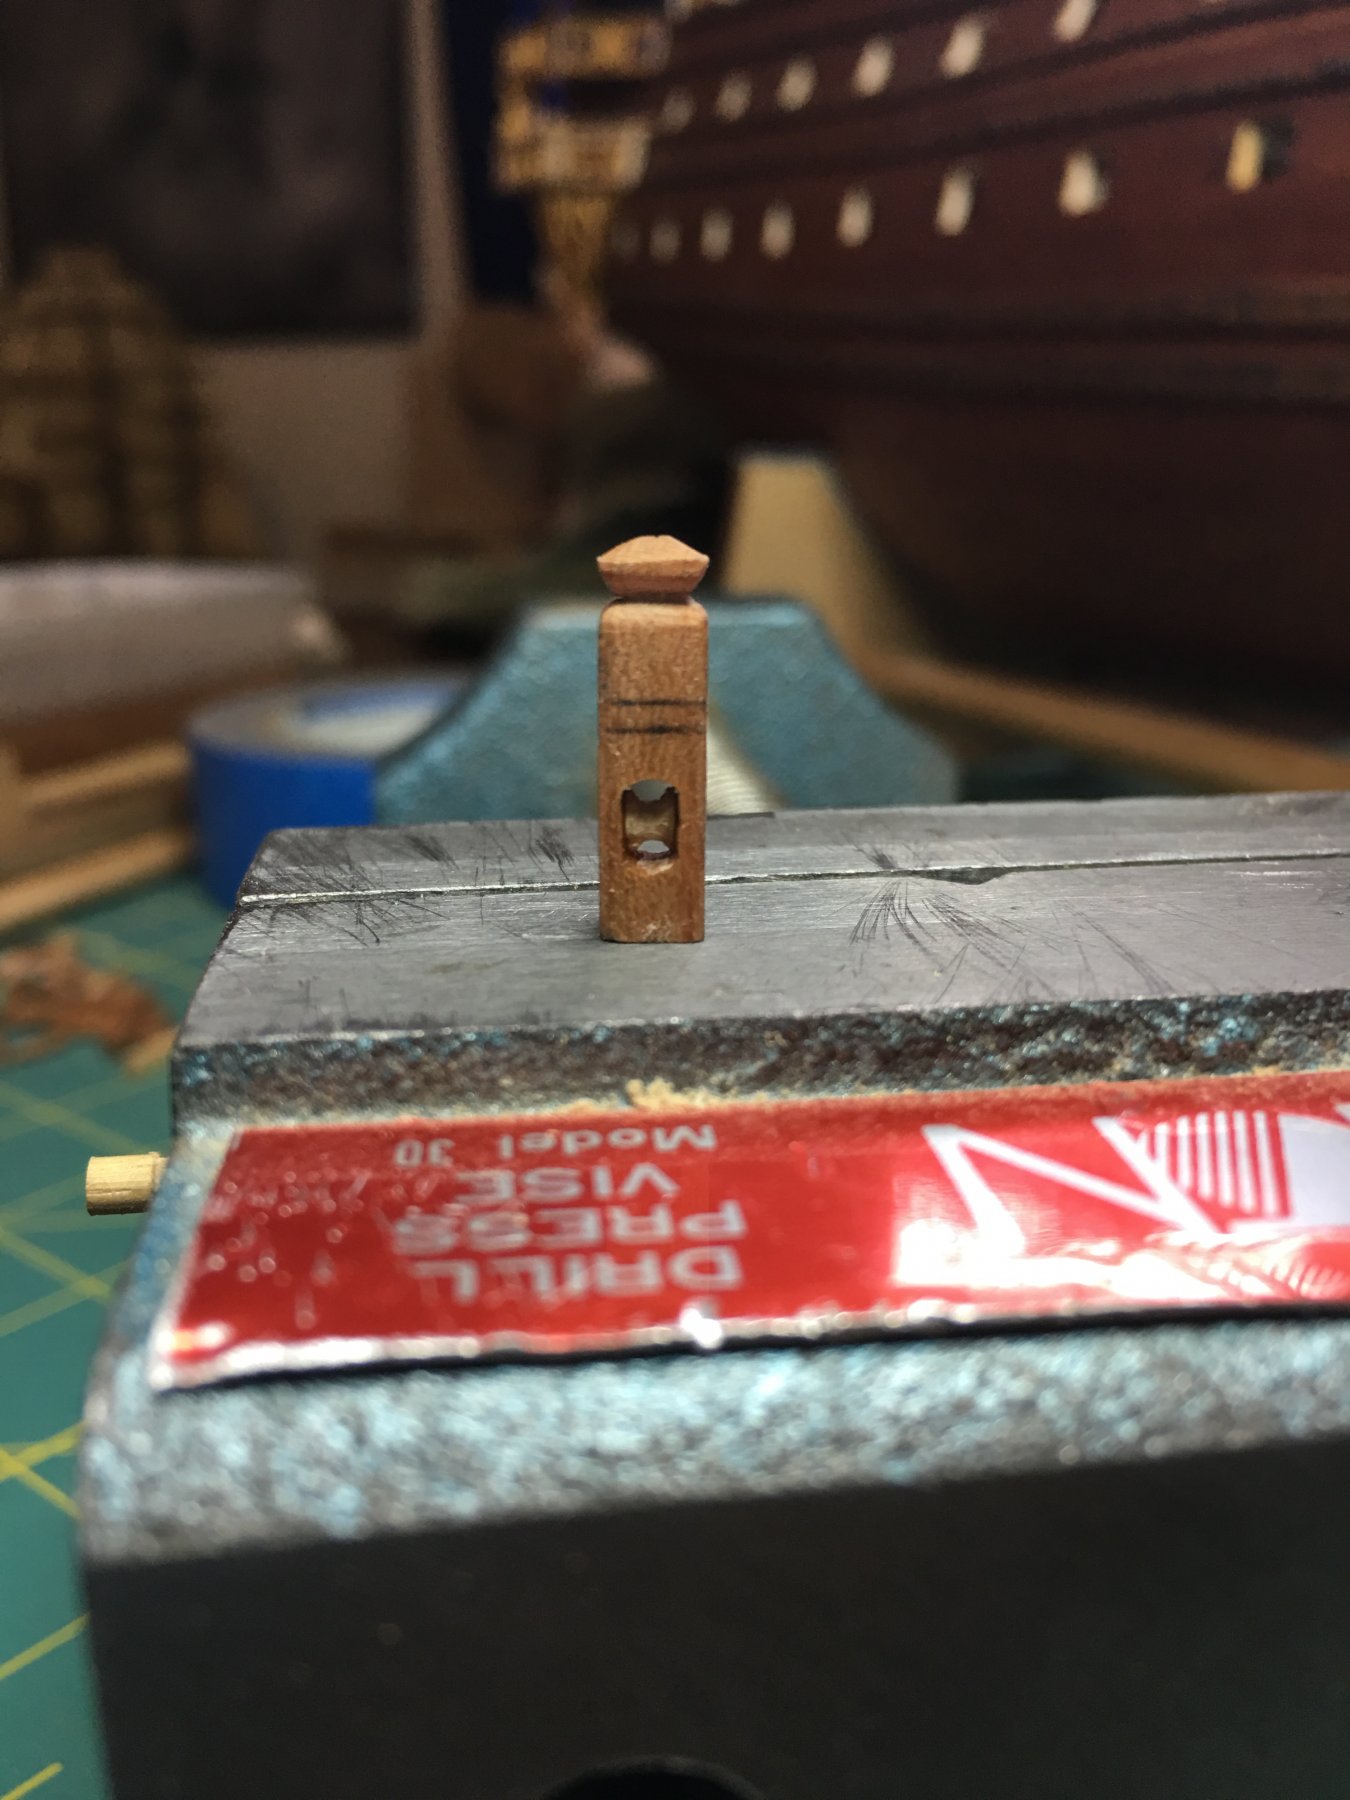
Drill two holes for the top and bottom of the sheave.
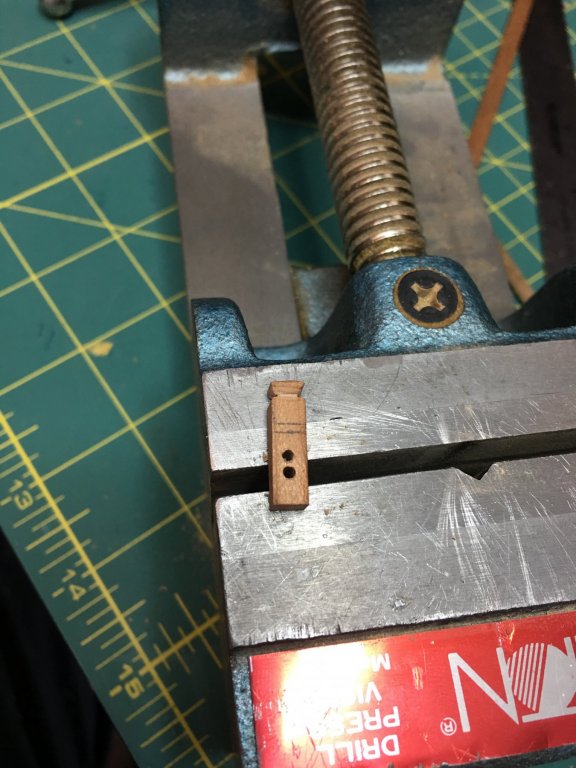
Connect and smooth out the opening for the sheave hole.

Next take a dowel and score a line around it for the pulley.

Use a triangular file to deepen and widen the groove.

Finish the pulley by using a round micro file to finish shaping and smoothing the pulley.
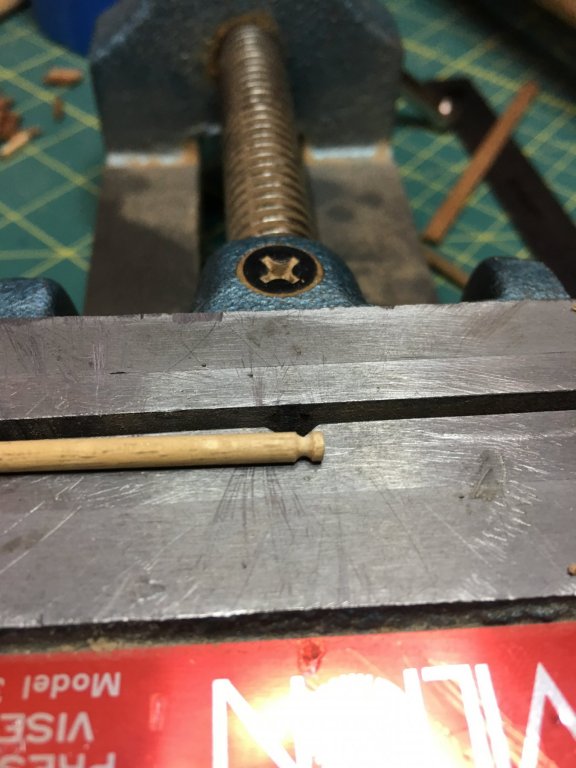
Cut the pulley off the stock dowel and file the ends down smooth and to fit within the sheave hole.
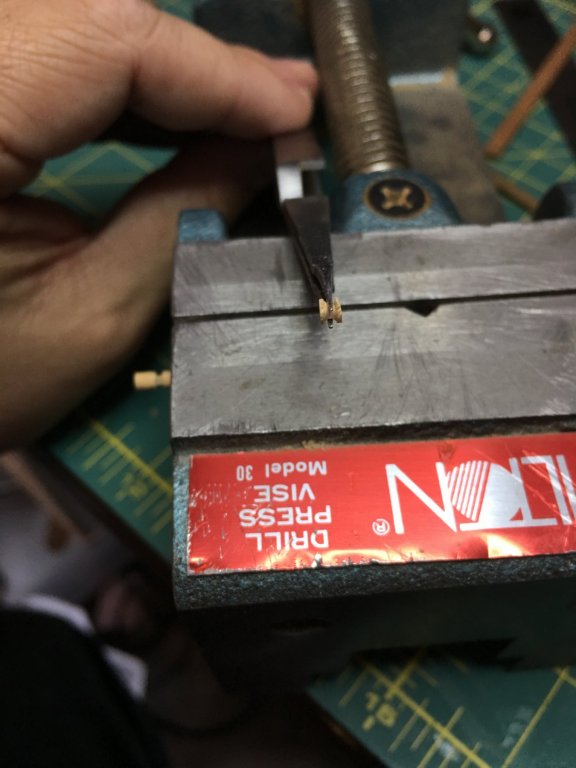
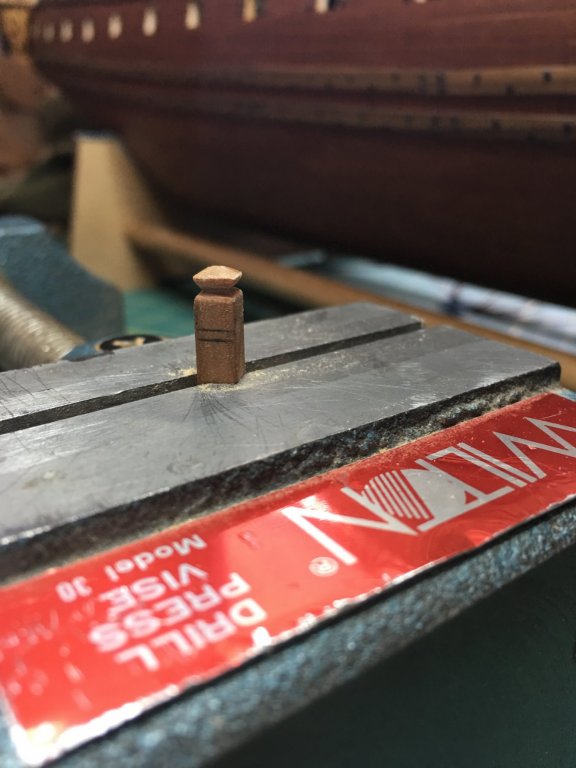
Finally insert into the sheave hole and the post is ready for finishing. I typically wait till I have several items ready before applying the sealer.

If the post is to be crossed for use in a bitt, the groove for the cross piece would now be cut and filed smooth. This particular post is for the forecastle head rail and assembly will be different so i have only marked where the rail will intersect and not cut it out.
-
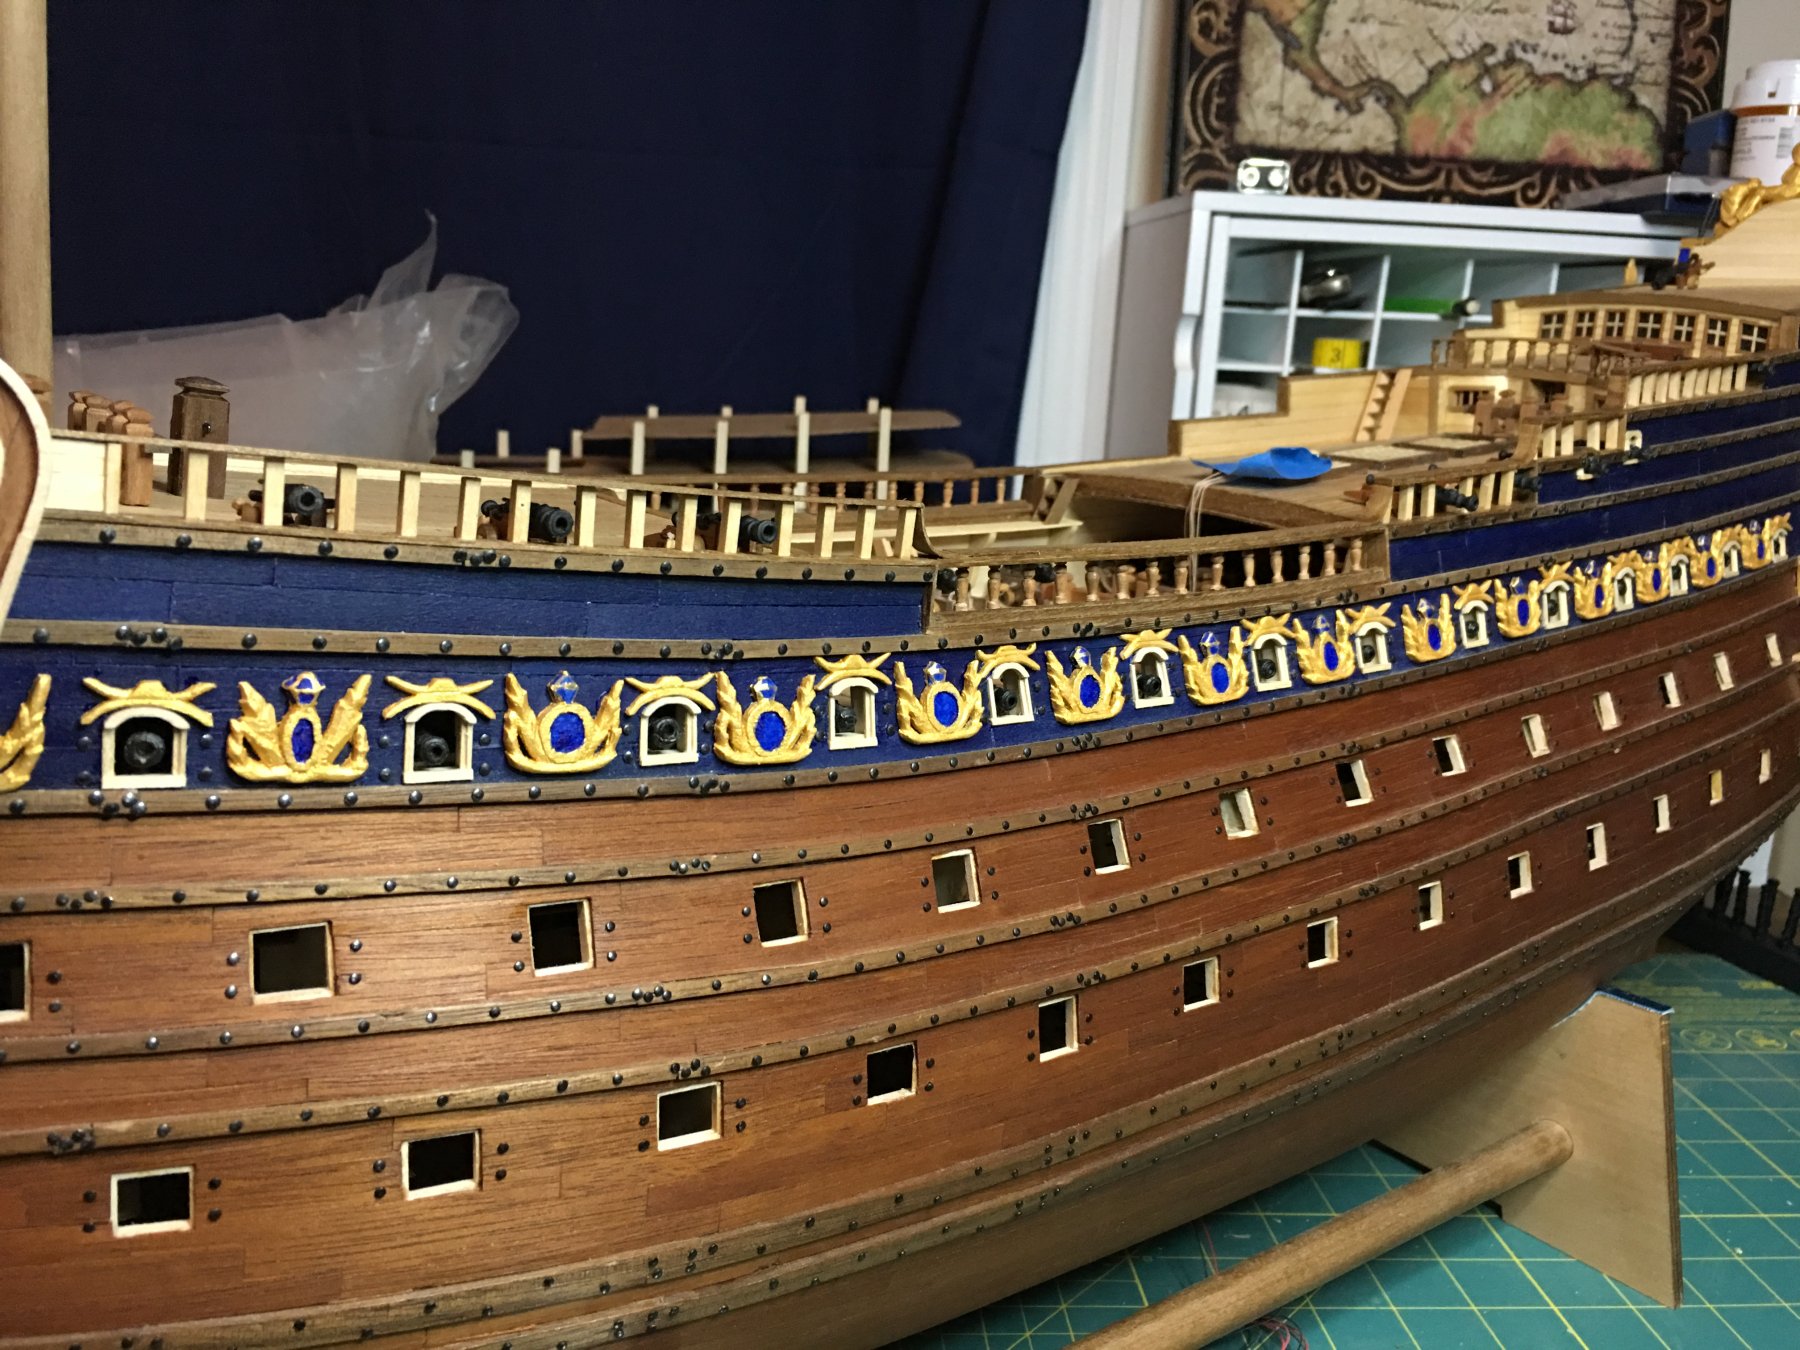
Port side and quarterdeck railings have gone up. Still have a lot more to go!


- CDW, Old Collingwood, Elijah and 9 others
-
12
-
One of my favorite phases to see is when they get their guns installed. Transforms them from a large barge of floating lumber to a war machine. Looking good!
- Canute, popeye the sailor, Piet and 2 others
-
5
-
-
Welcome back Mark! I hope this is a sign that those things in life are improving. Happy New Year!
- Canute, hexnut, popeye the sailor and 5 others
-
8
-
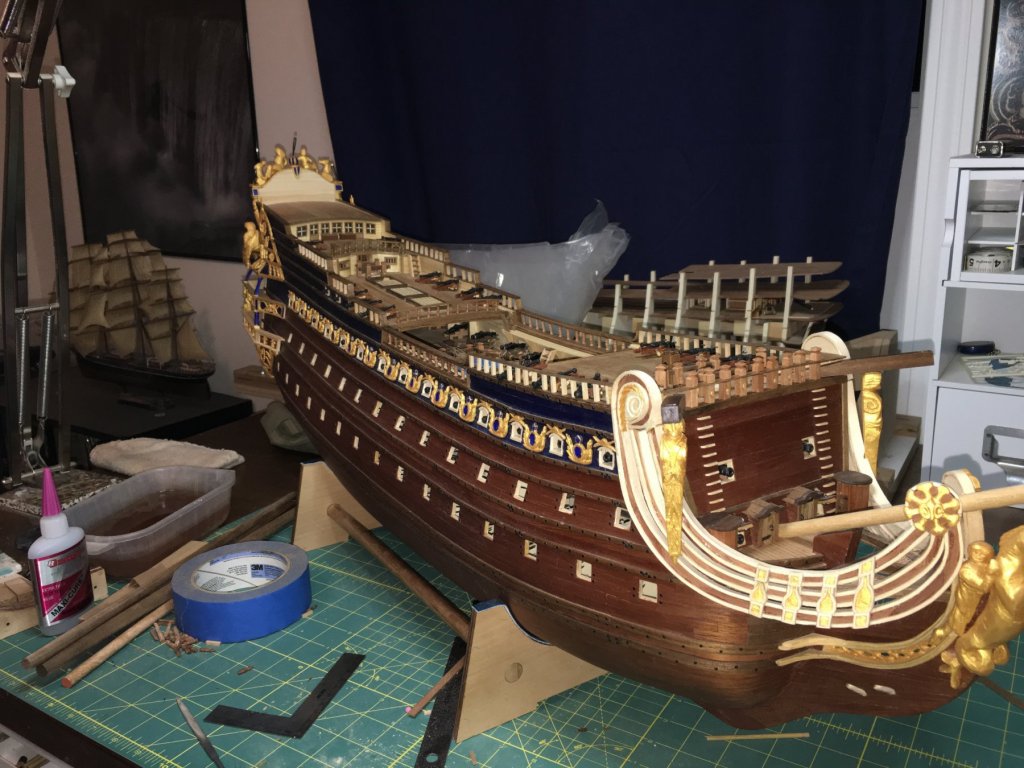
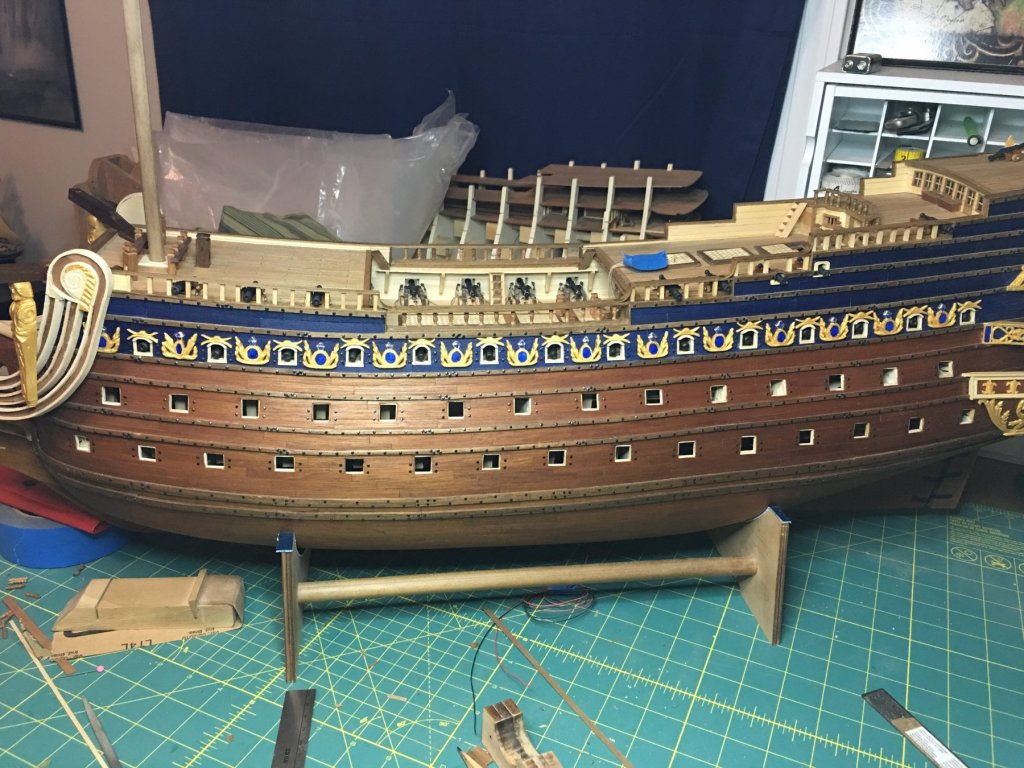
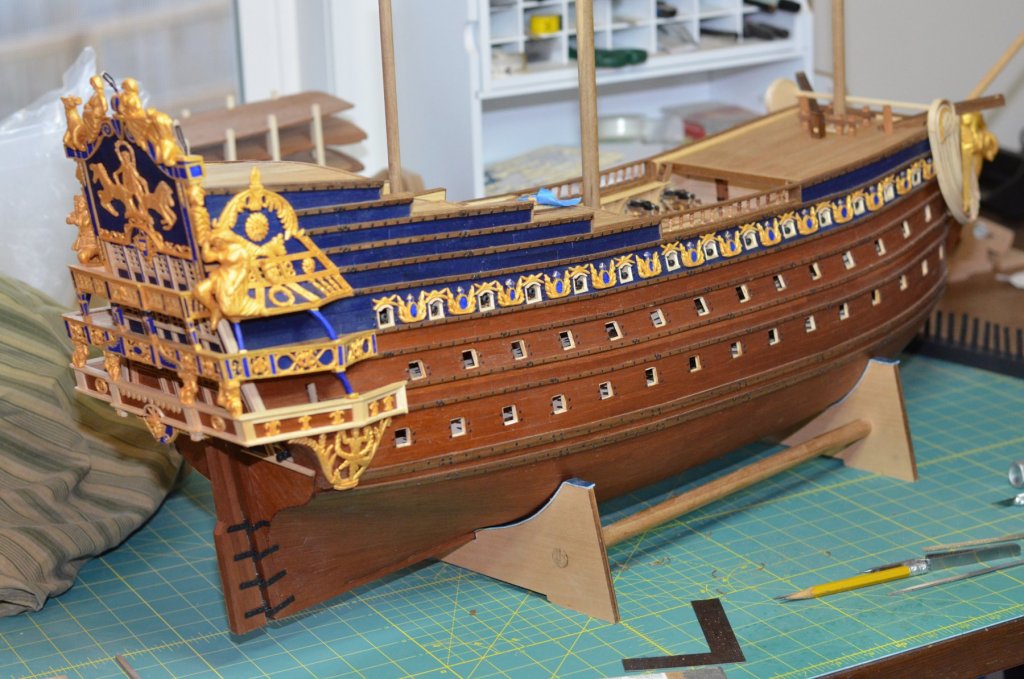
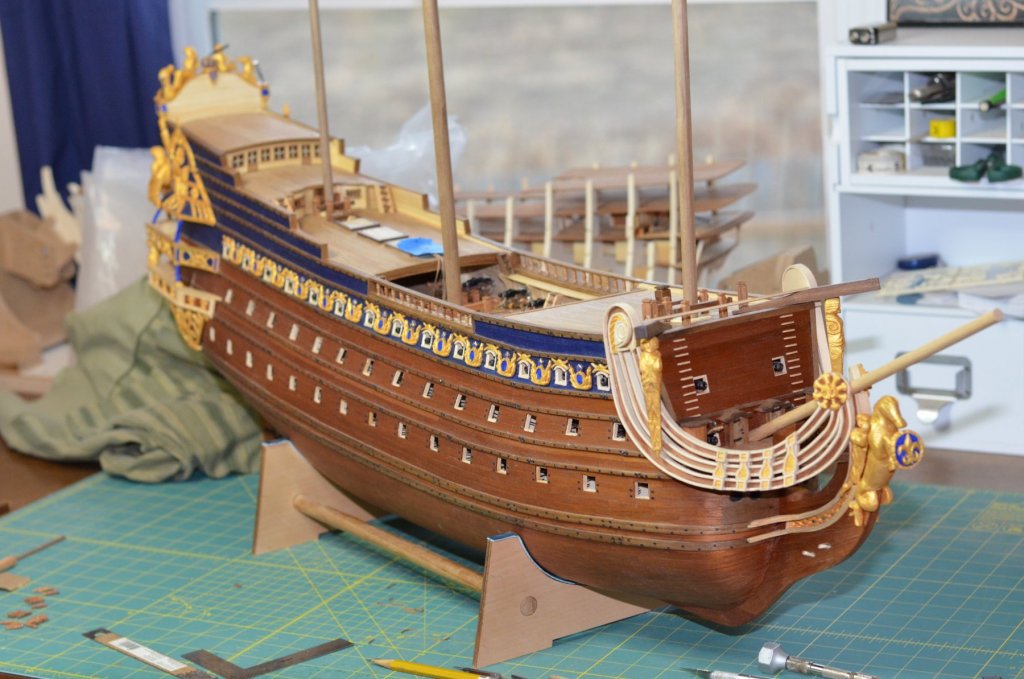
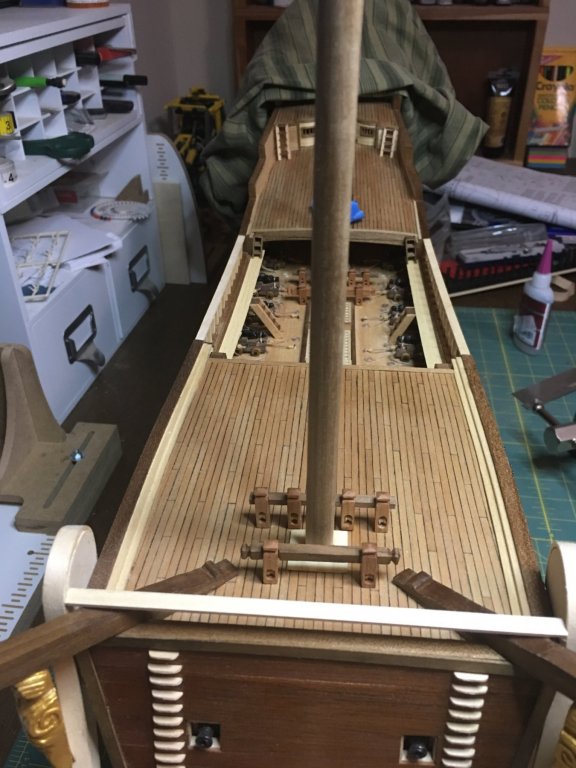
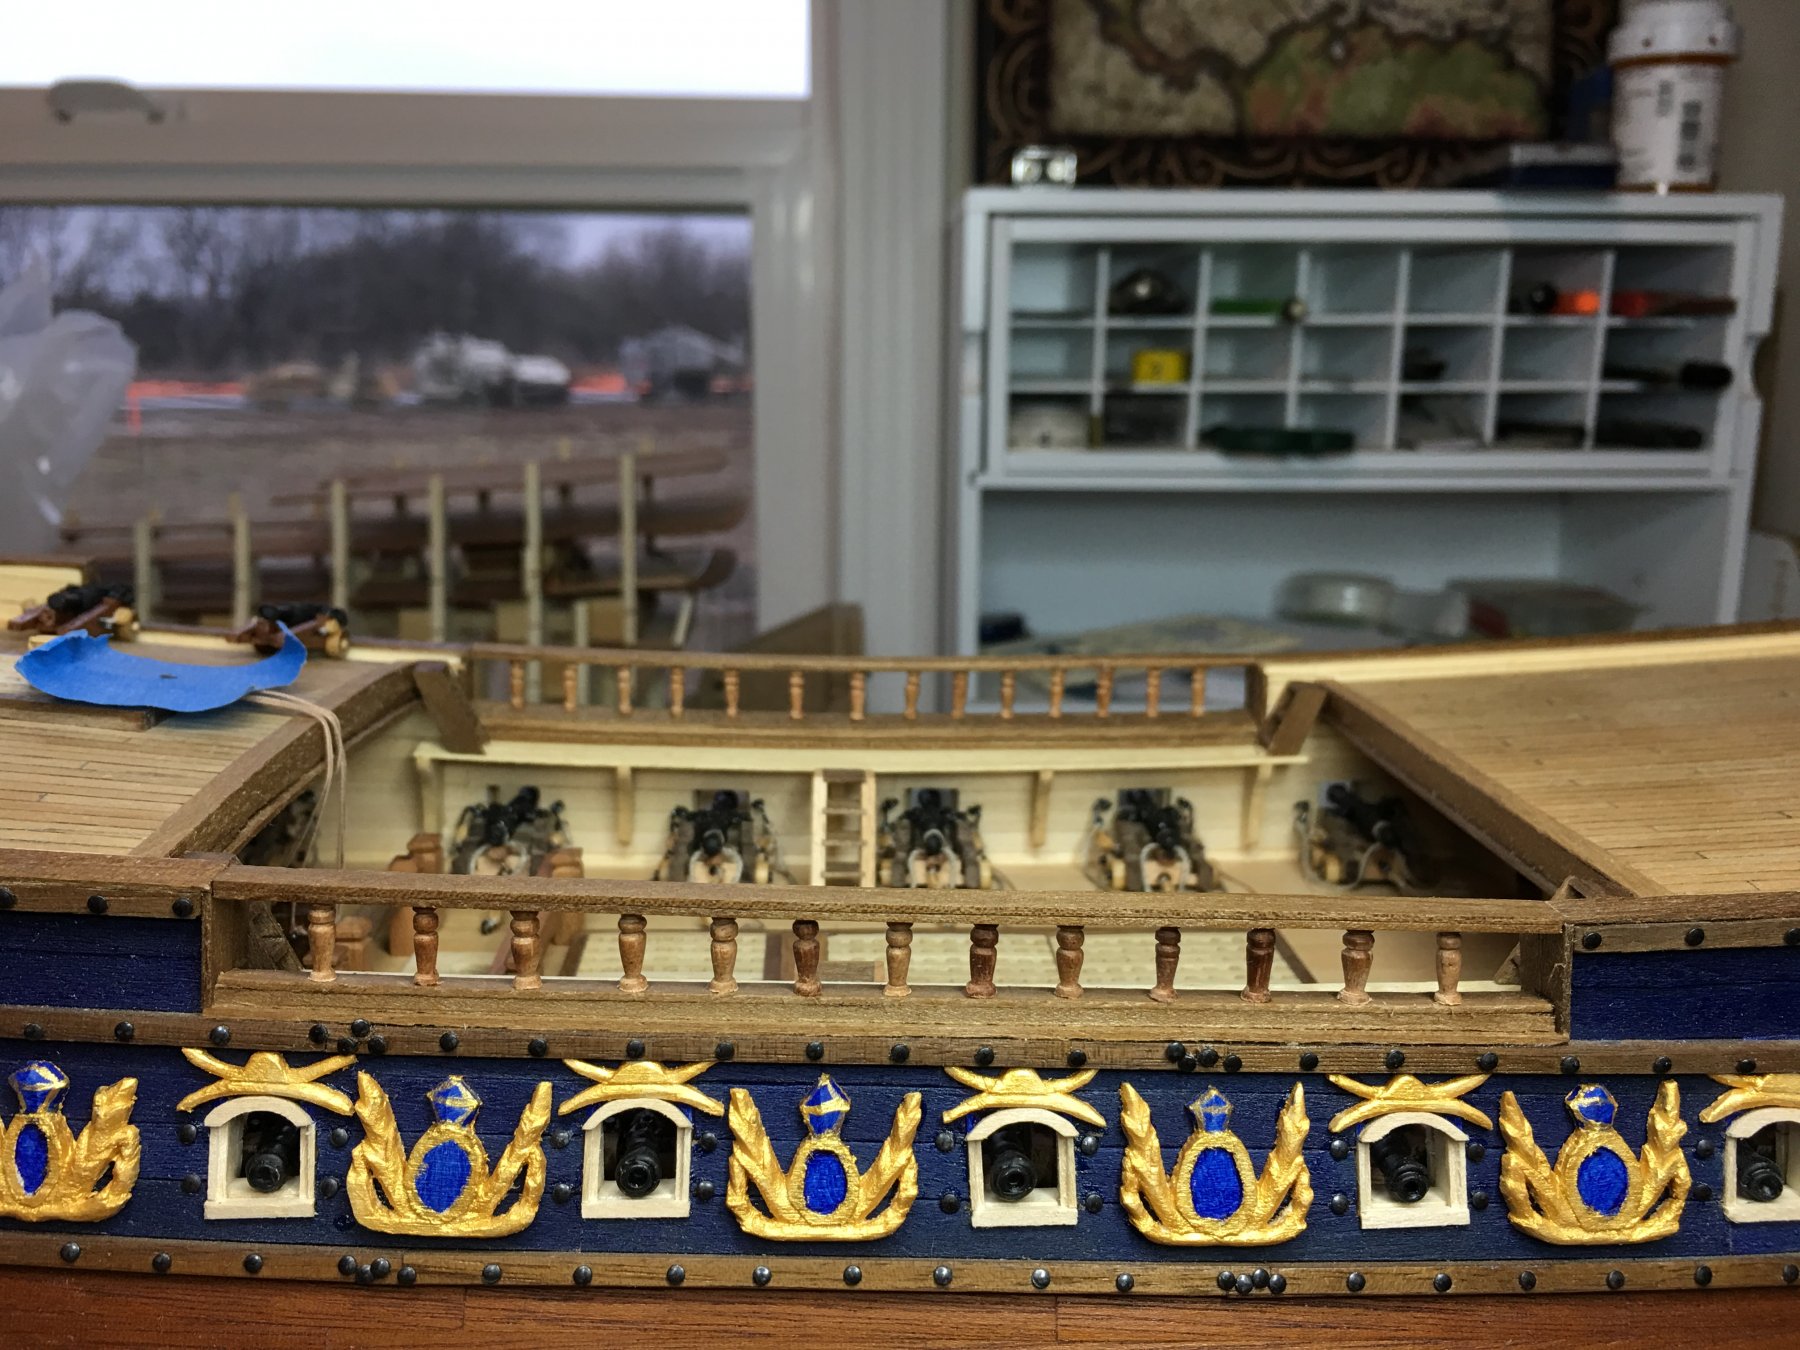
Well, turning those spindles took some time but, it was worth it in my opinion.

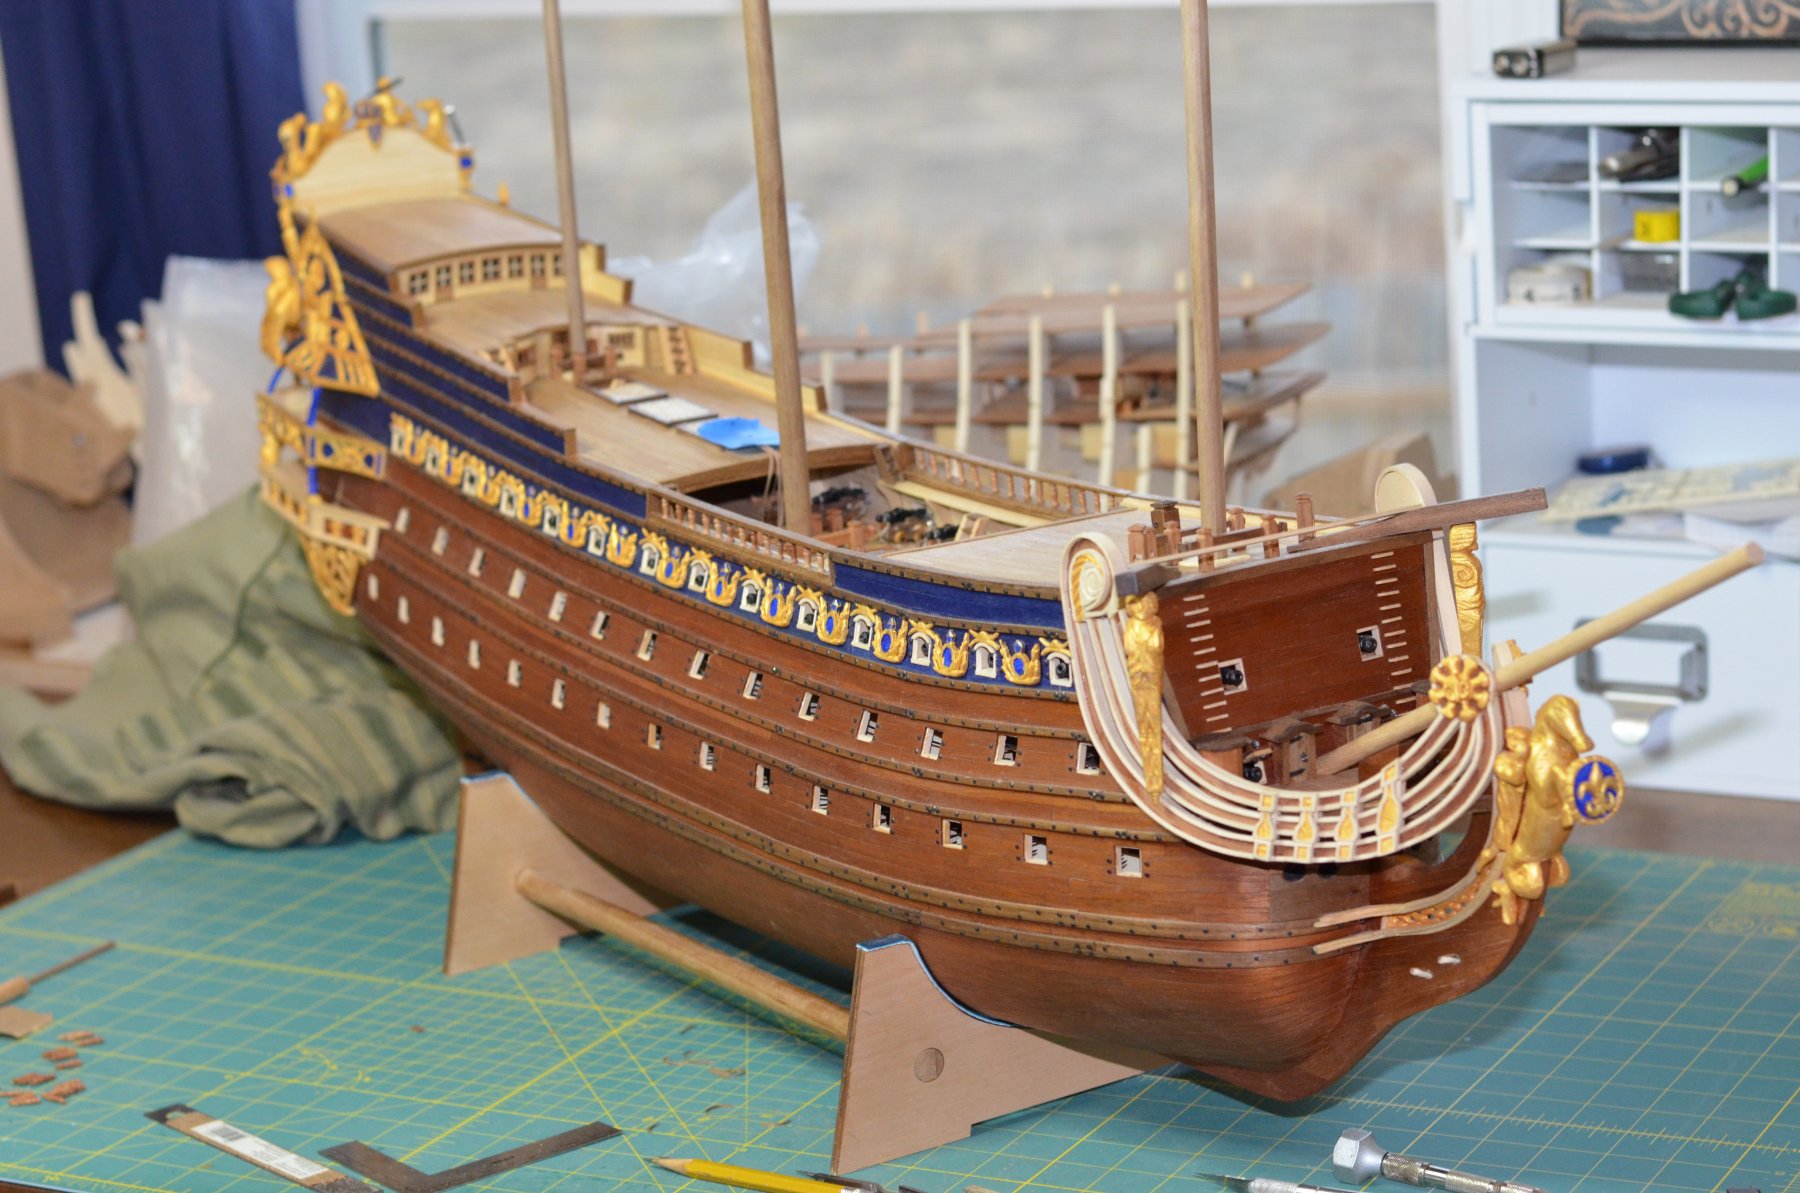
As the last day of the year comes to an end, I thought some overall pictures of the ship would be nice. Over 2 years and 1,448 hours logged in. I'm thinking that 2019 may be the year she is completed. Still have a lot more to do some refresh your popcorn and drink and get comfortable. I'm looking forward to another fun year of model building with you all. Happy New Year my friends!!

-
Spindle making in progress. This is number 10 out of a lot more. Picking up the pace though and they are turning faster the more that I do.
- Sjors, CDW, popeye the sailor and 7 others
-
10
-
Welcome Heinrich! I will add that book to my wish list as well. I’m planning on buying several and expanding my library greatly in 2019.
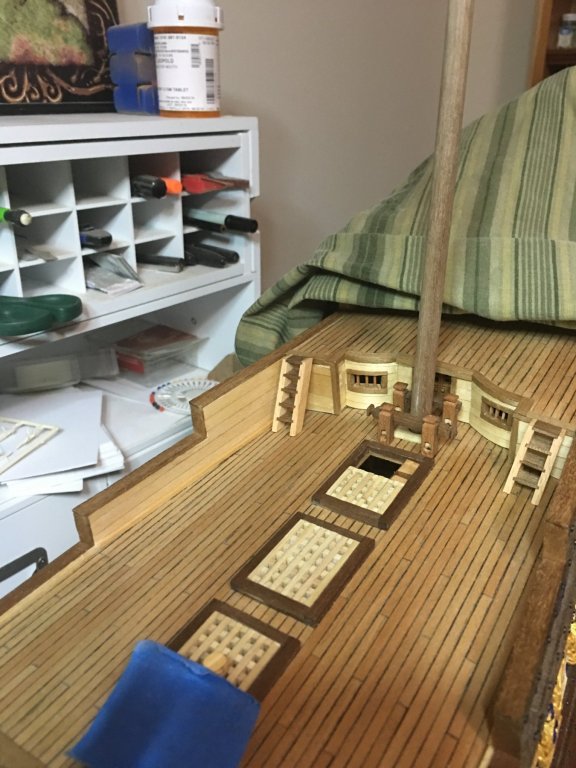
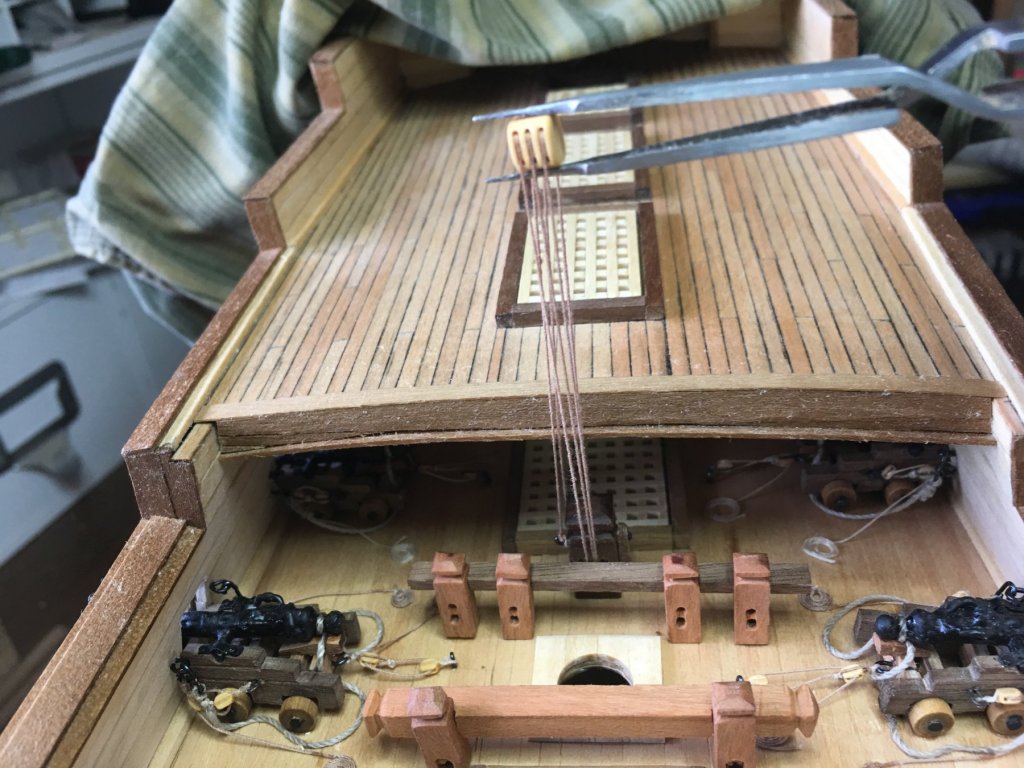
I’ve added the rest of the bitts. Building knight heads now. There are still a few that are shown on the plan sheets that I am trying to figure out what their purpose is. Rigging is such a tangled mess sometimes! 😜
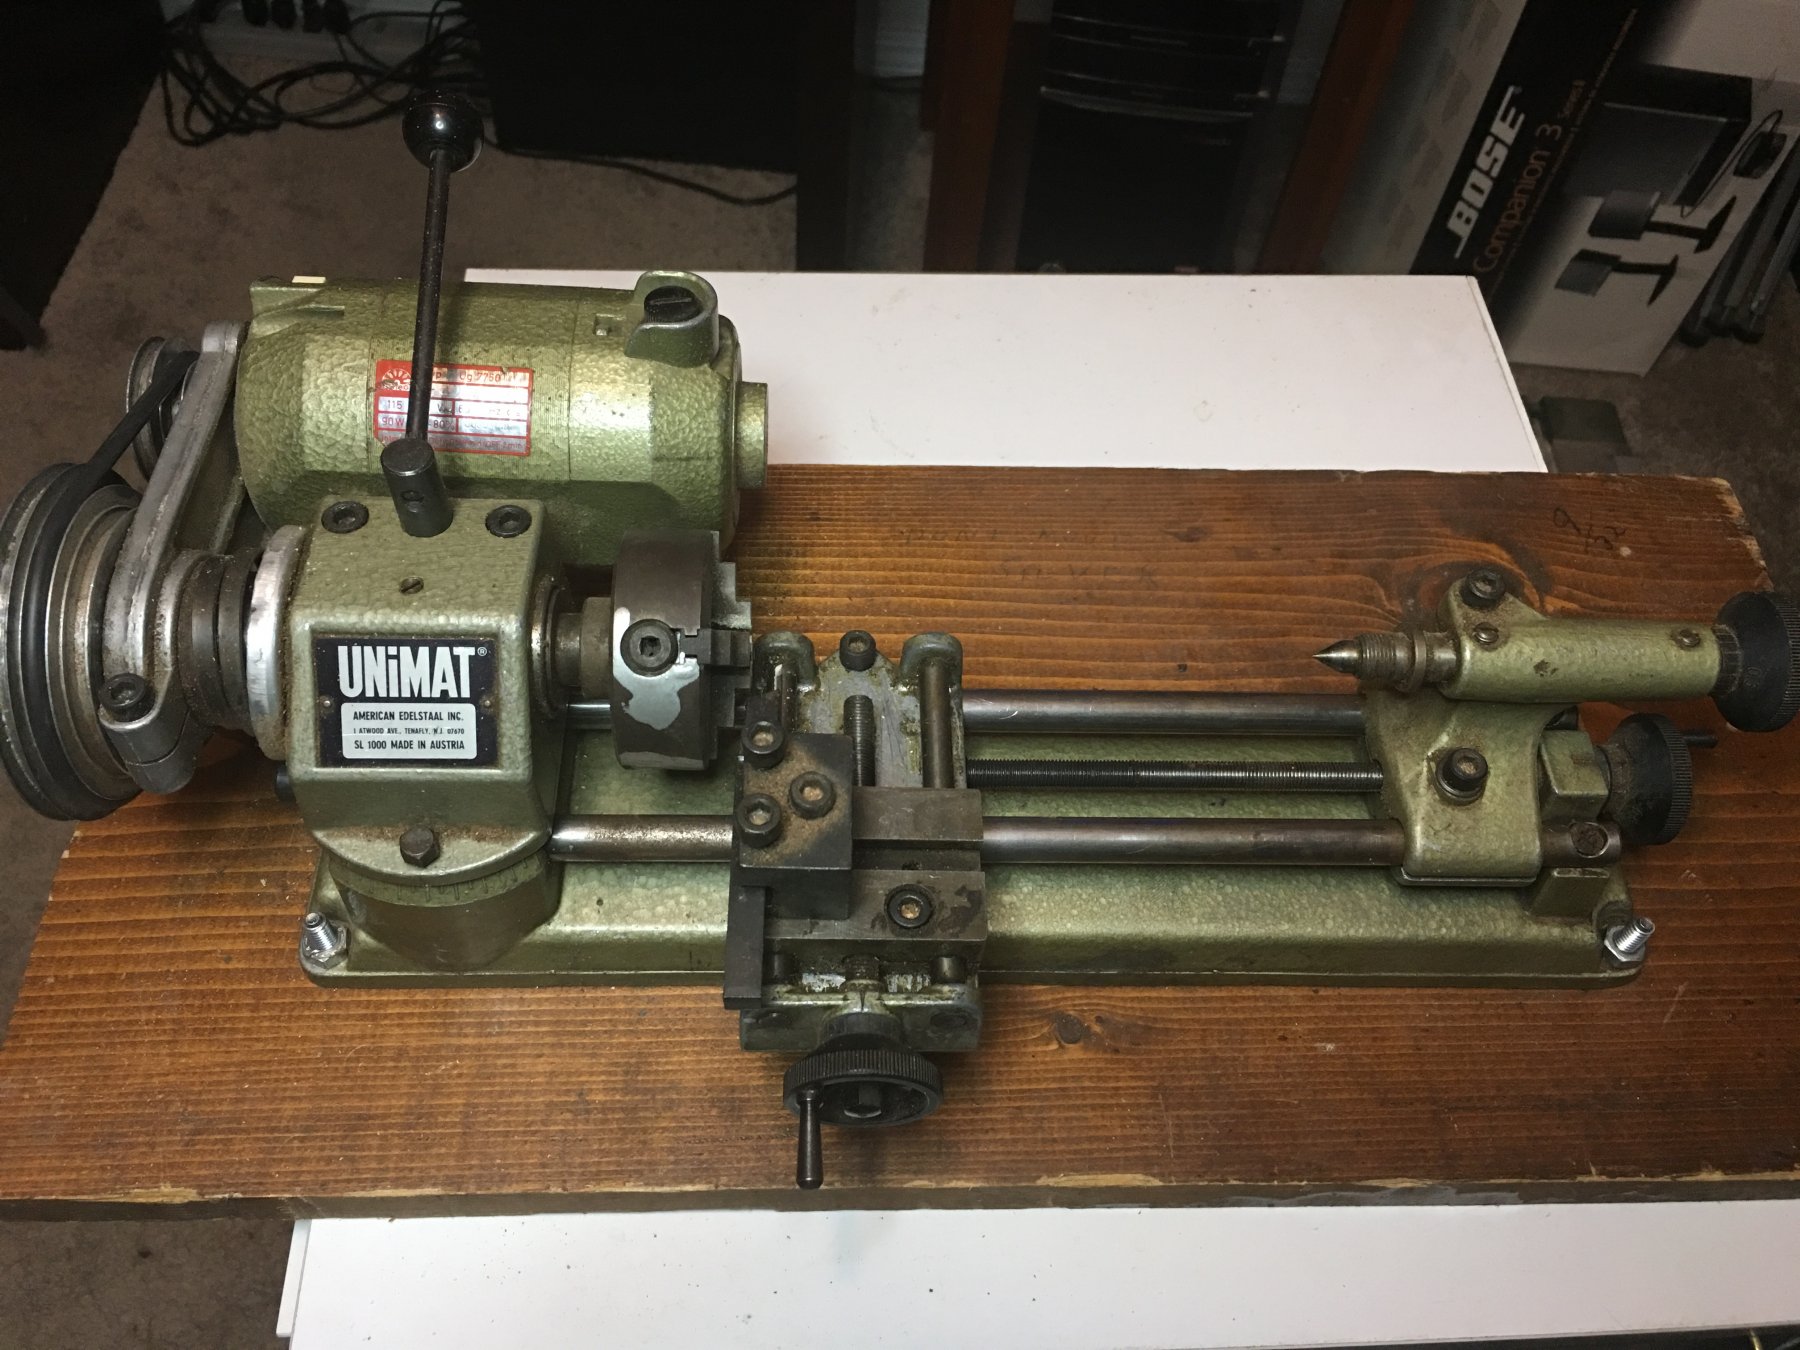
Took a break from direct work on the ship today to clean up a mini lathe I got from the admiral’s grandfather a while back. It doubles as a milling machine though with limited motion till I get a new x,y,z table. For my current needs, the large portion works great and now I can start turning the hundreds of spindles that I will need for the railings.
The plans show, and I already installed square spindles on the waist rails but, after looking at them over the last few days, the square look appears to plain to me for this ship. Therefore I will make more decorative ones instead. Lots of turning ahead but, I think it will be worth the effort.

- popeye the sailor, CDW, zappto and 8 others
-
11
-
That furniture is awesome!
- Mirabell61, BETAQDAVE, druxey and 4 others
-
7
-
-
Vic, I will try to remember to post some pictures of how I make the coils soon. I meant to do it this weekend but, it slipped my mind till just now. The process is very simple but, worth showing multiple times for anyone who doesn’t know.
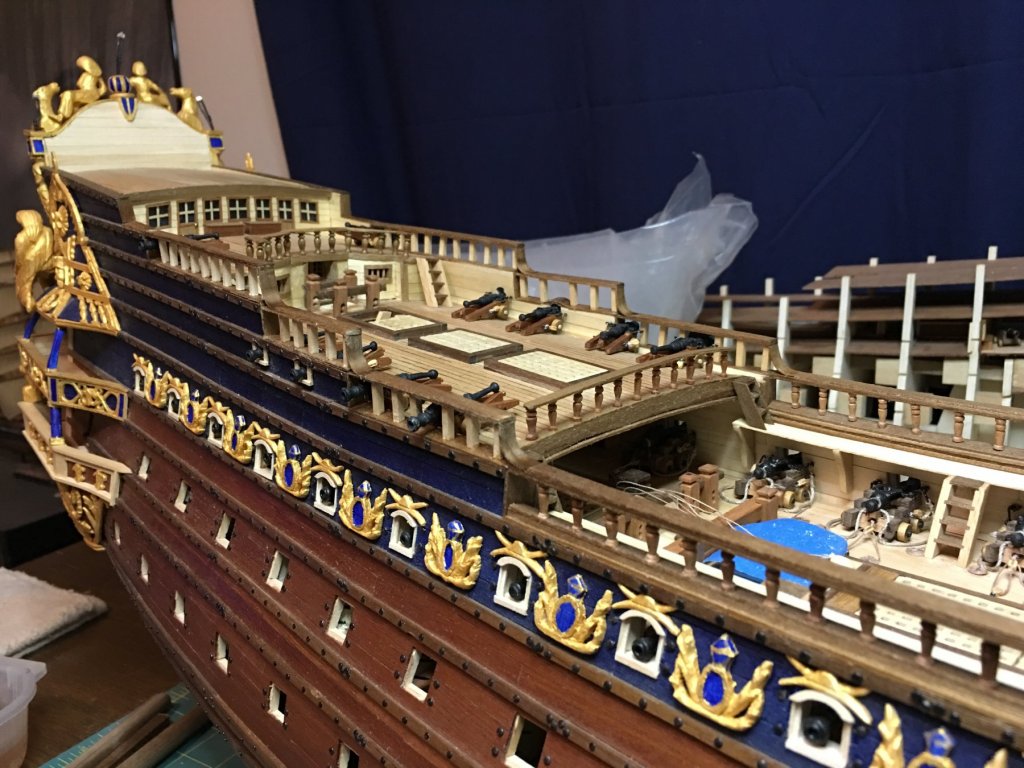
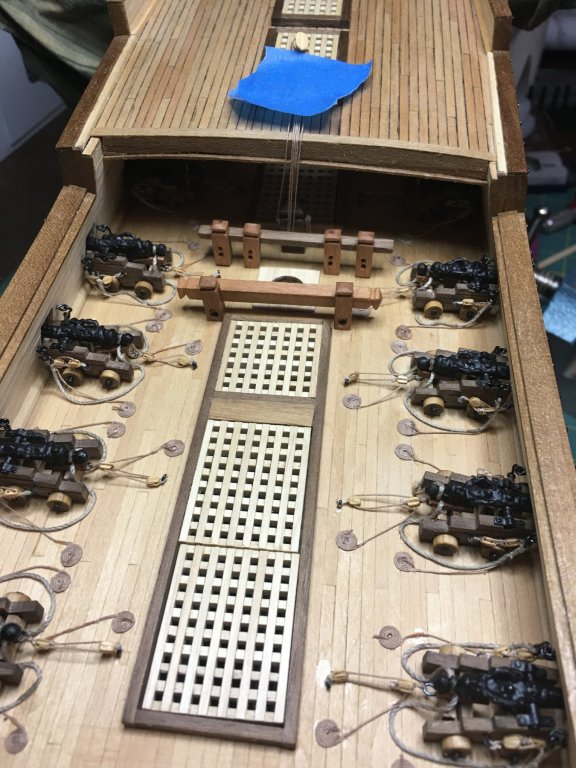
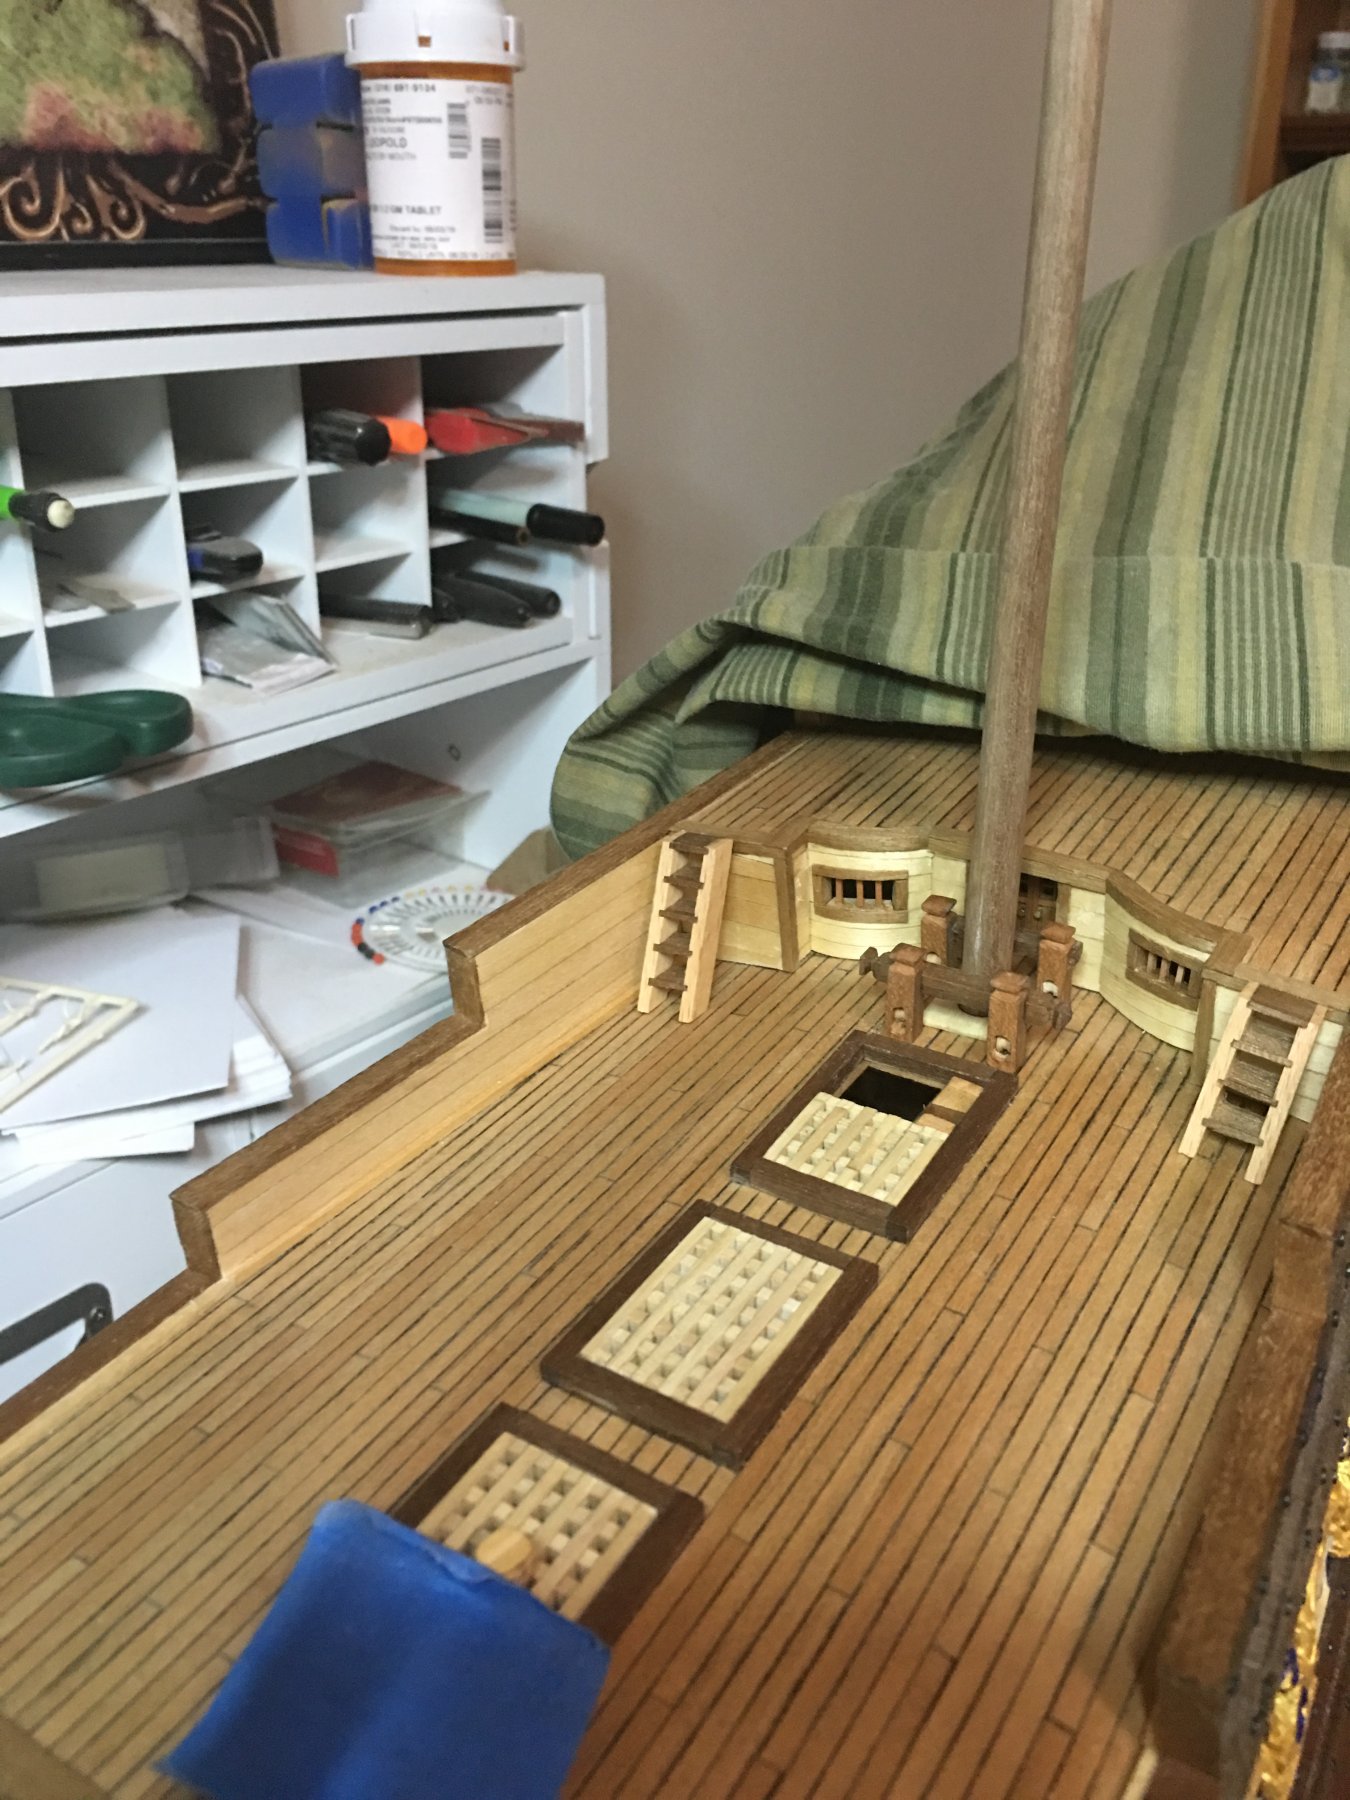
I did get quite a bit done over the last few days. Walkways are installed across the waist, ladders have been built and set and the first of he side rails have gone in. Now I am fabricating the remaining bitts for the fore and mizzenmast masts as well as the remaining knights which brings me to my next major challenge, deciphering the rigging plans.
I spent several hours hours yesterday with colored pencils tracing out the lines to deck locations as shown on the plans and have come to the conclusion that the person who created these drawings did not double check the design. Many lines foul each other, several lines connect to nothing and others share the same point of termination in ways gay I know would not have been done.
So, that means I will turn to much more useful books, particularly Anderson’s great works as I did for La Couronne and make the best out of that source.
No, I am not yet ready for rigging but, in order to make sure that I have all the deck fittings I need ready and correct, I must start looking and figuring things out now. Reality is, once I finish up with the deck pieces, dummy guns and port lids are next followed by channels and any other miscellaneous parts I have forgotten. Then the masting will start.

-
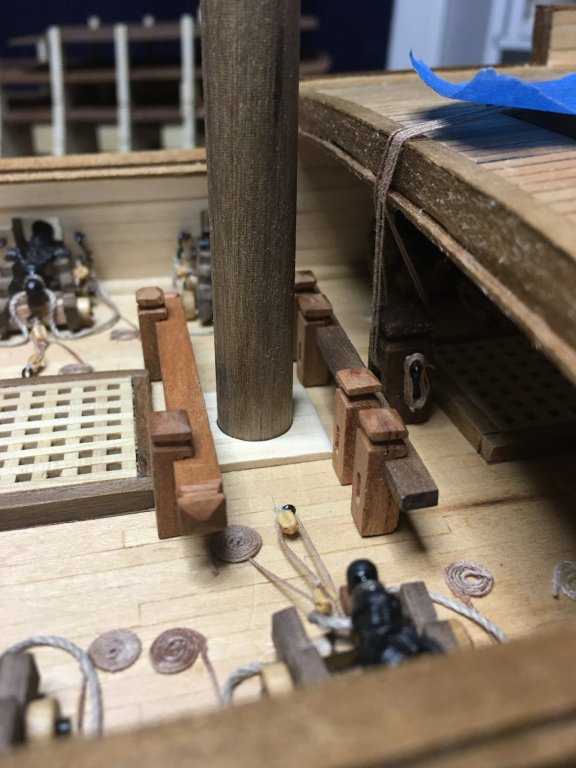
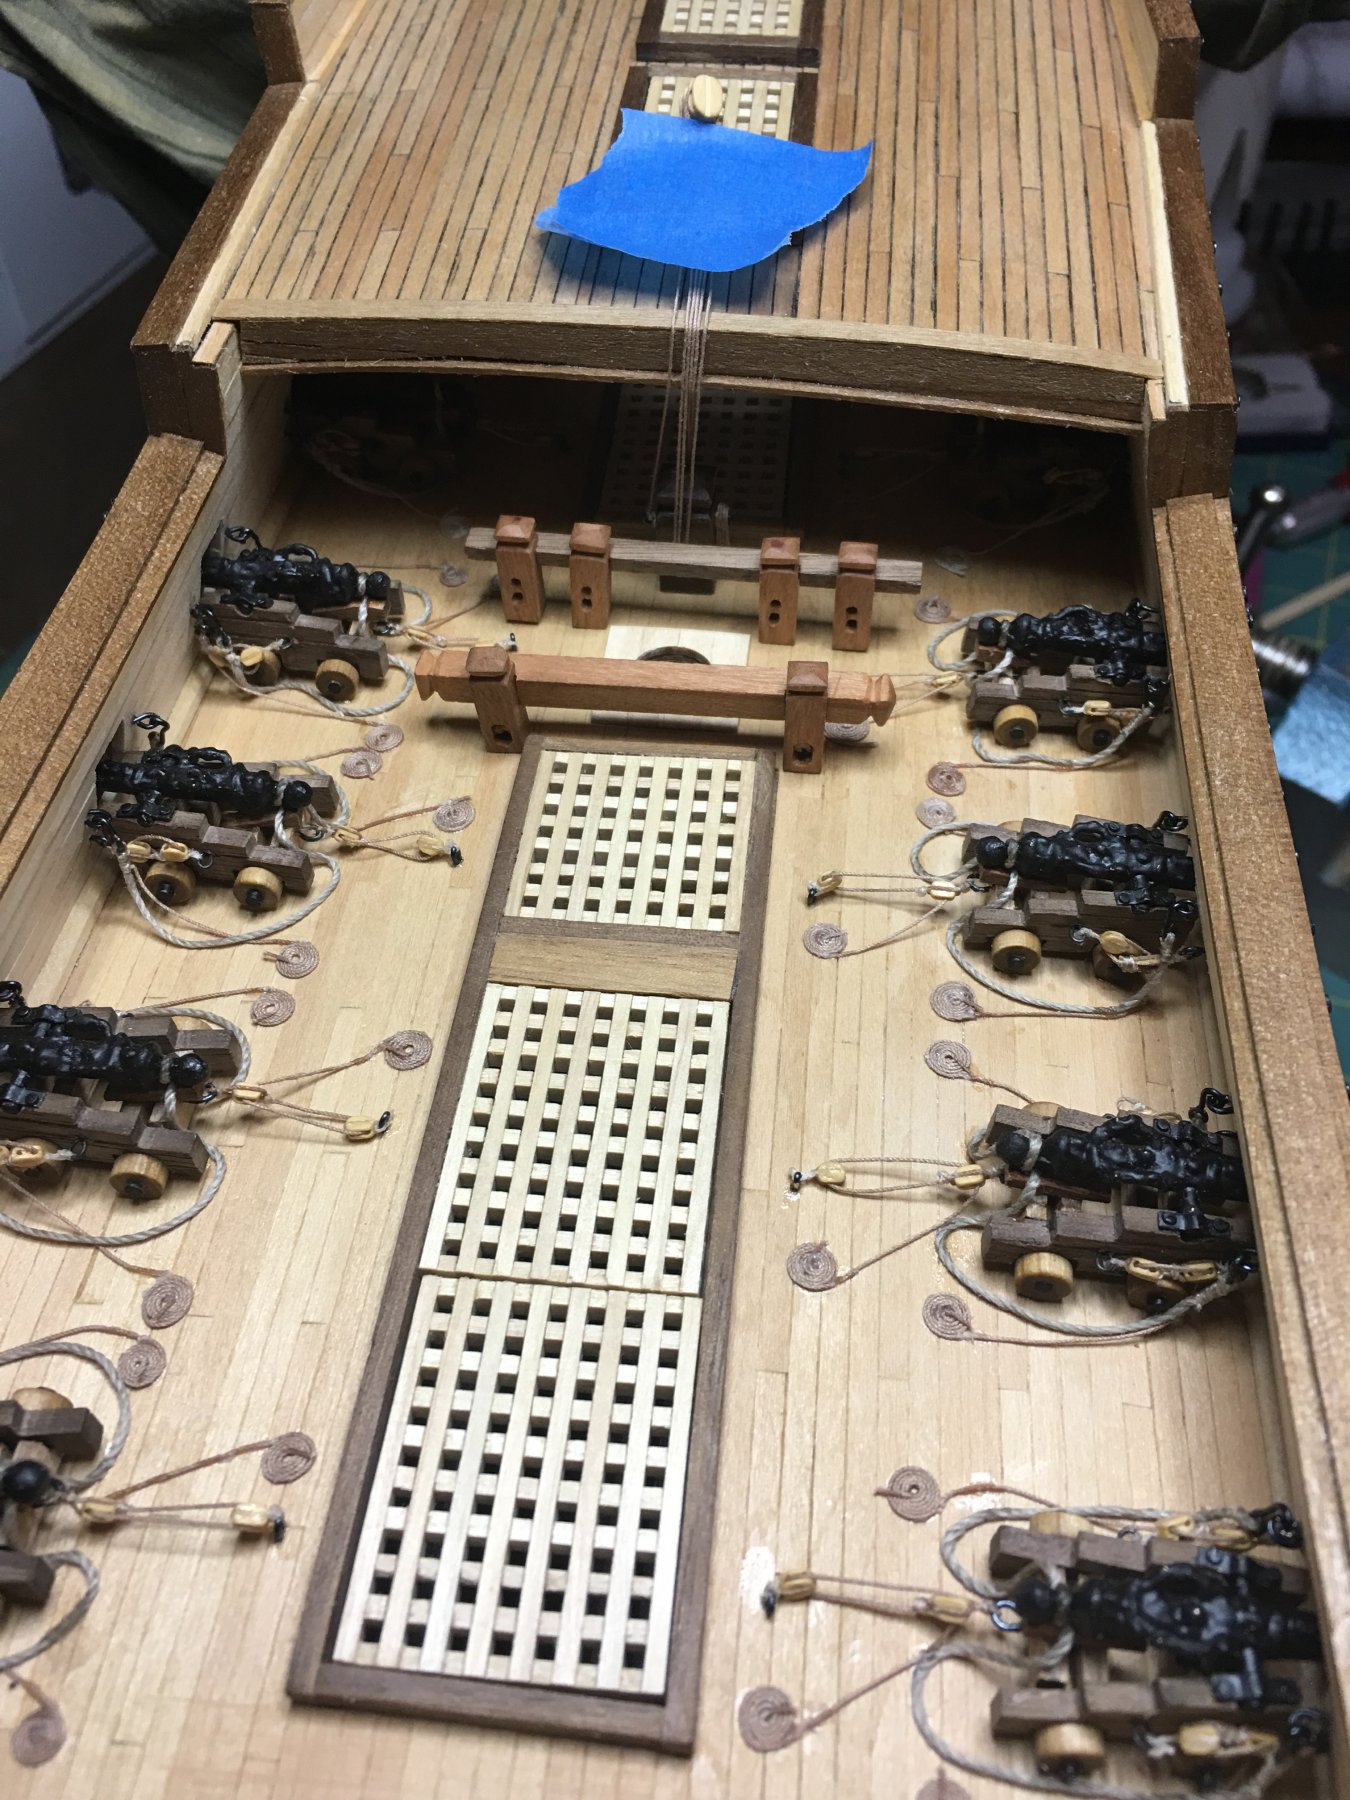
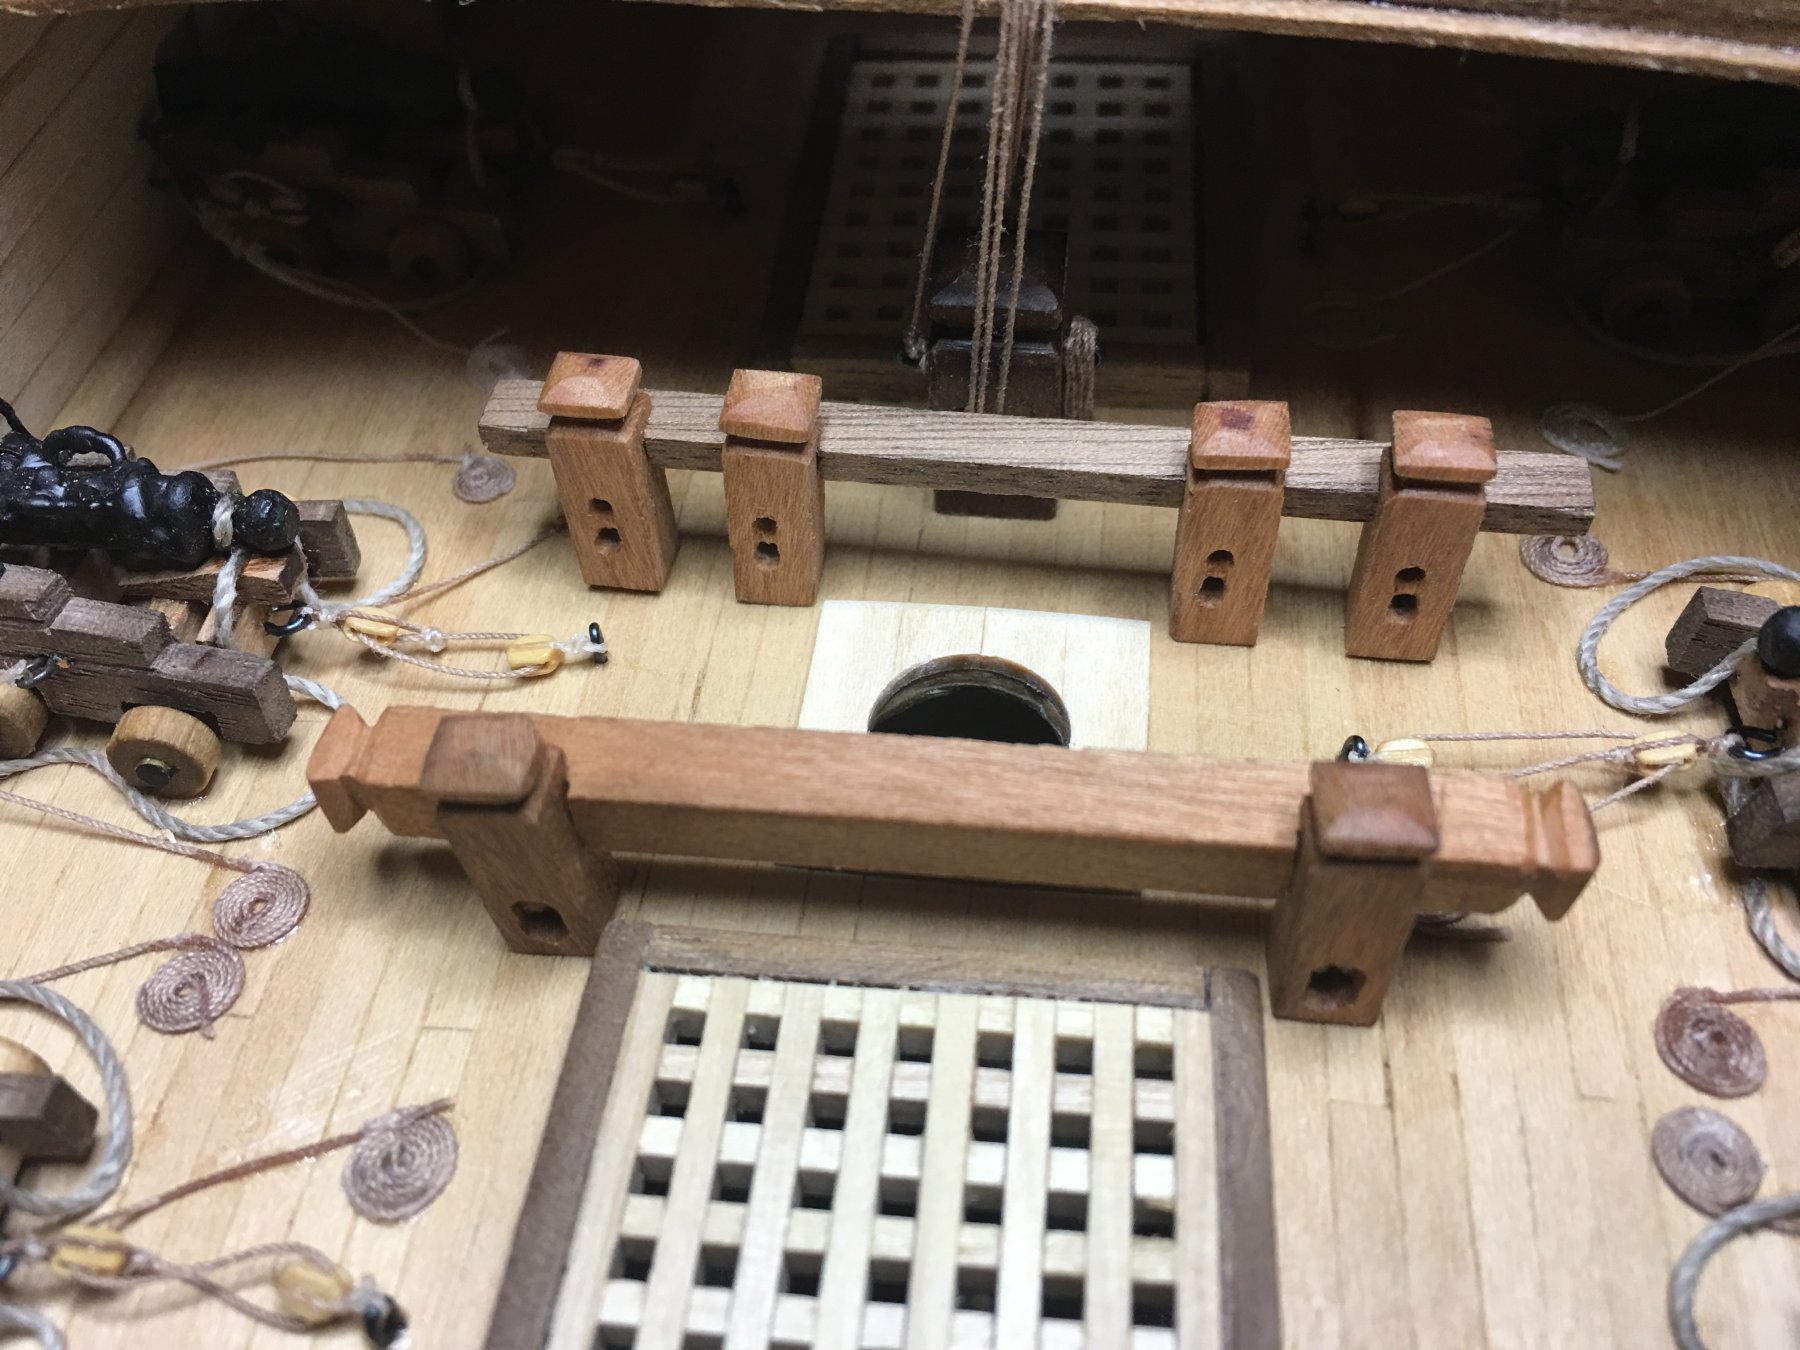
Added the main mast bitts and knight. Since the knight sits under a deck, I went ahead and rigged up the lower portion of the lift rigging to make it easier later on.

- yancovitch, Elijah, GrandpaPhil and 3 others
-
6
-
Welcome to MSW! There is plenty to learn here so I'm sure you be kept busy till you are ready to get started.
-
Welcome to MSW! Best wishes to you as you continue your build. Looking forward to seeing pictures of her.
-
Welcome to MSW Dan! Looking forward to seeing the ships you choose to build as that is a minority era with not as many builds going on. Should be fun and I'm sure very educational!
-
Incredible! The level of detail you are able to achieve really has to make one consider the usage of different materials on a build. I have always tried to stick with wood but, after seeing what you can do with clays and foils I'm considering more and more mixing materials, especially when the appearance of the model is more important than how it is built. To be honest, if one were to just look at a random picture of your model, I don't think they would be able to tell it isn't made of wood!
-
Looks like you are off and running nicely on this one. I think I’ll stick around and see how she turns out. Keep up the good work!
-
I'm quickly approaching the lid dilemma myself. How to make them and make them look good.... I'm becoming more and more tempted to try Doris' method and make the decorative pieces by clay and mount them to the wood lids. The nails... well that is still uncertain.
-
I've read that as well that often there were unarmed ports that had versatile uses with ventilation being chief among them on the lower decks as air struggled to get down there especially on the two and three deck ships. Other causes of lack of full armaments could include the availability of the guns themselves particularly during war when many ships were being outfitted and refitted and during peace when demand to produce new guns was at a low. This problem was largely encountered in foreign ports as supplies would be low.
Cost of the guns came into play as well as it was not uncommon for the Navies to only supply a limited amount of shot and powder and left additional munition supplies up to the captain. If a captain found himself unable or unwilling to fully stock the ship, a smart trade off would be the number of guns being carried in exchange for more ammunition for those he could afford. A well trained crew could always shift guns rather quickly and easily from port to port to set up for action as needed.
Weight played another crucial role as a captain might find that while his ship can carry 110 guns, she sails better with only 100. If those 10 extra guns can be traded out for maneuverability without costing the effectiveness of combat, I believe that is a trade many captains would have taken as sailing the ship was even more crucial than the fire power.
These are of course only my opinions as I am far from an expert on the subject but, from readings and the apparent commonality of the extra ports and lesser guns than the rated number suggests, I feel that they may hold some credit.


Hi all!
in New member Introductions
Posted
Welcome to MSW!