EJ_L
-
Posts
2,246 -
Joined
-
Last visited
Content Type
Profiles
Forums
Gallery
Events
Everything posted by EJ_L
-
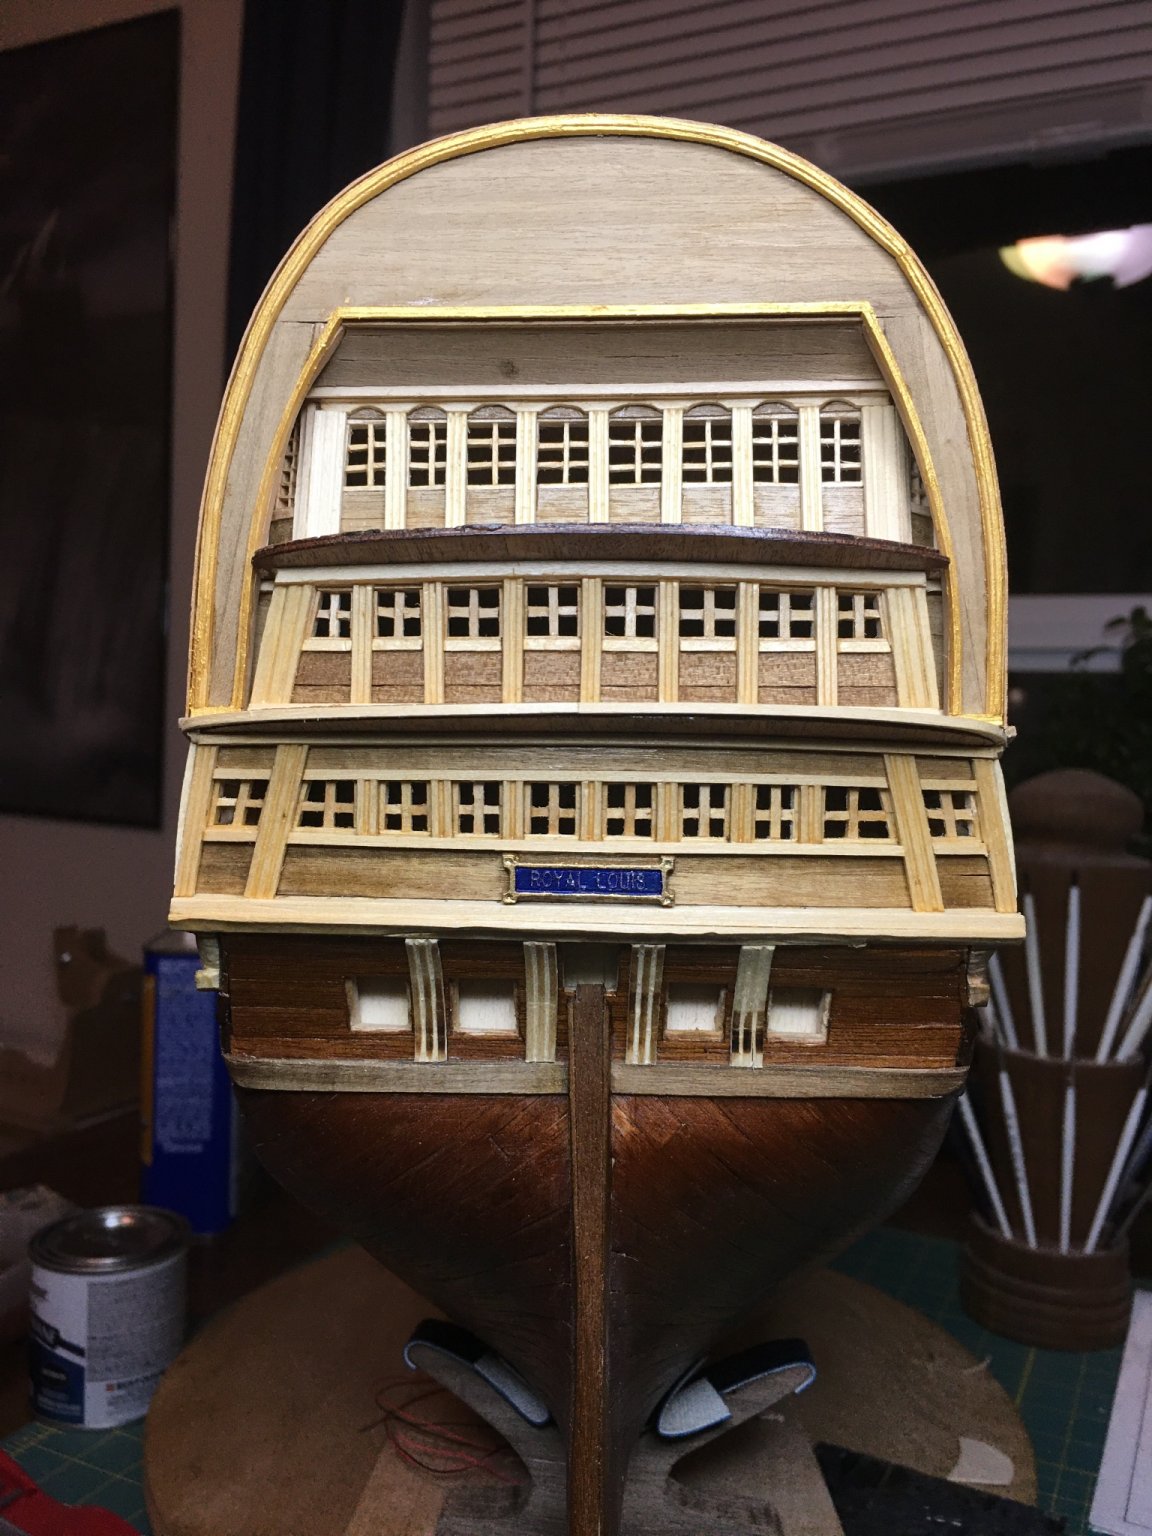
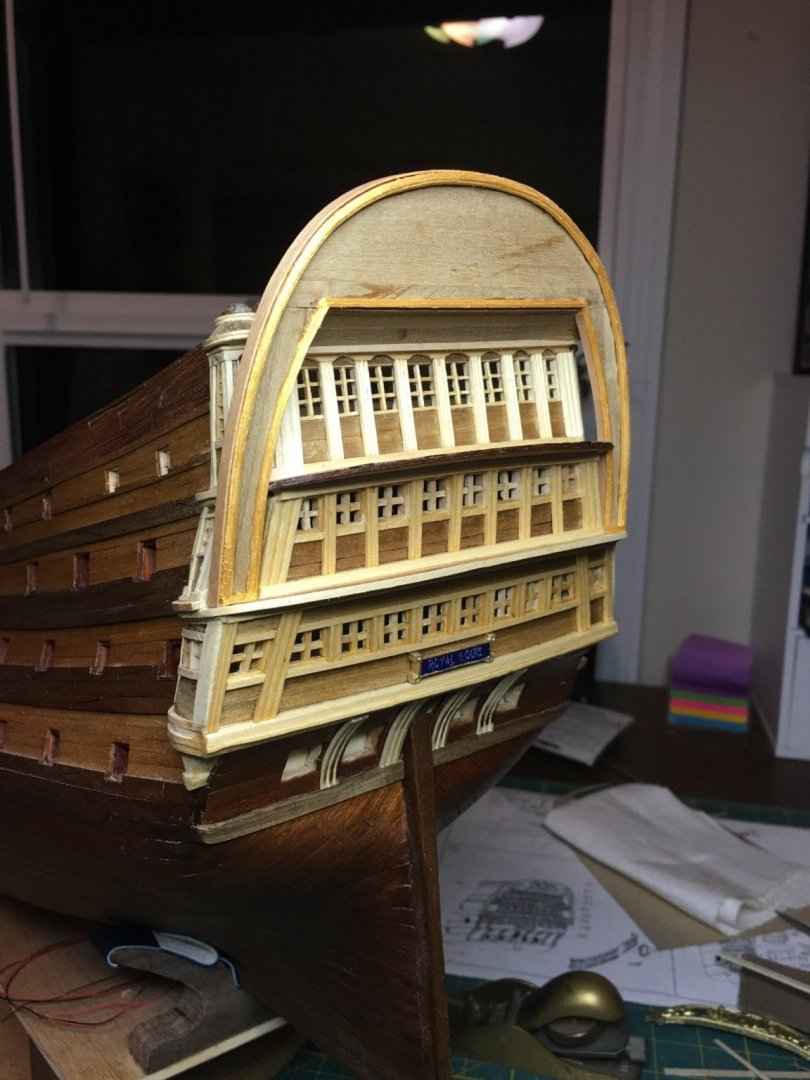
 Work on the decorations continues with the outside of the taffrail arch completed. Next up will be work on the frieze. Slowly the stern decorations are coming together.

-
Well done! Beautiful, clean work.
-
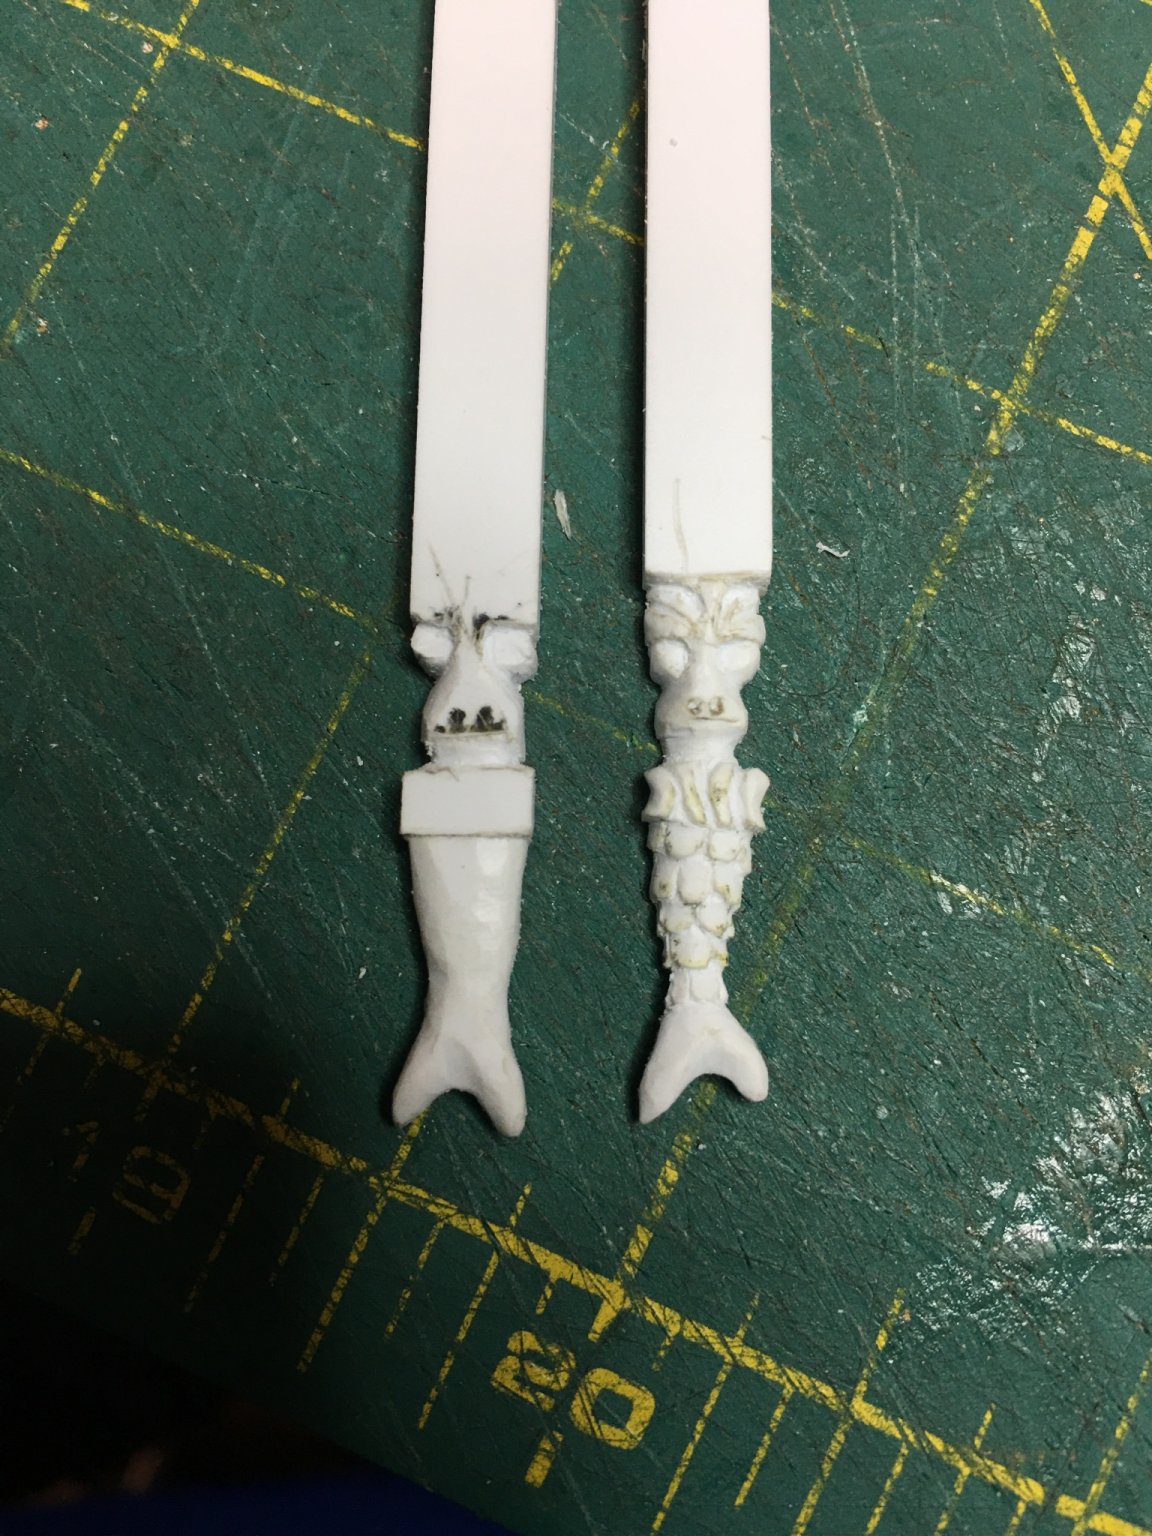
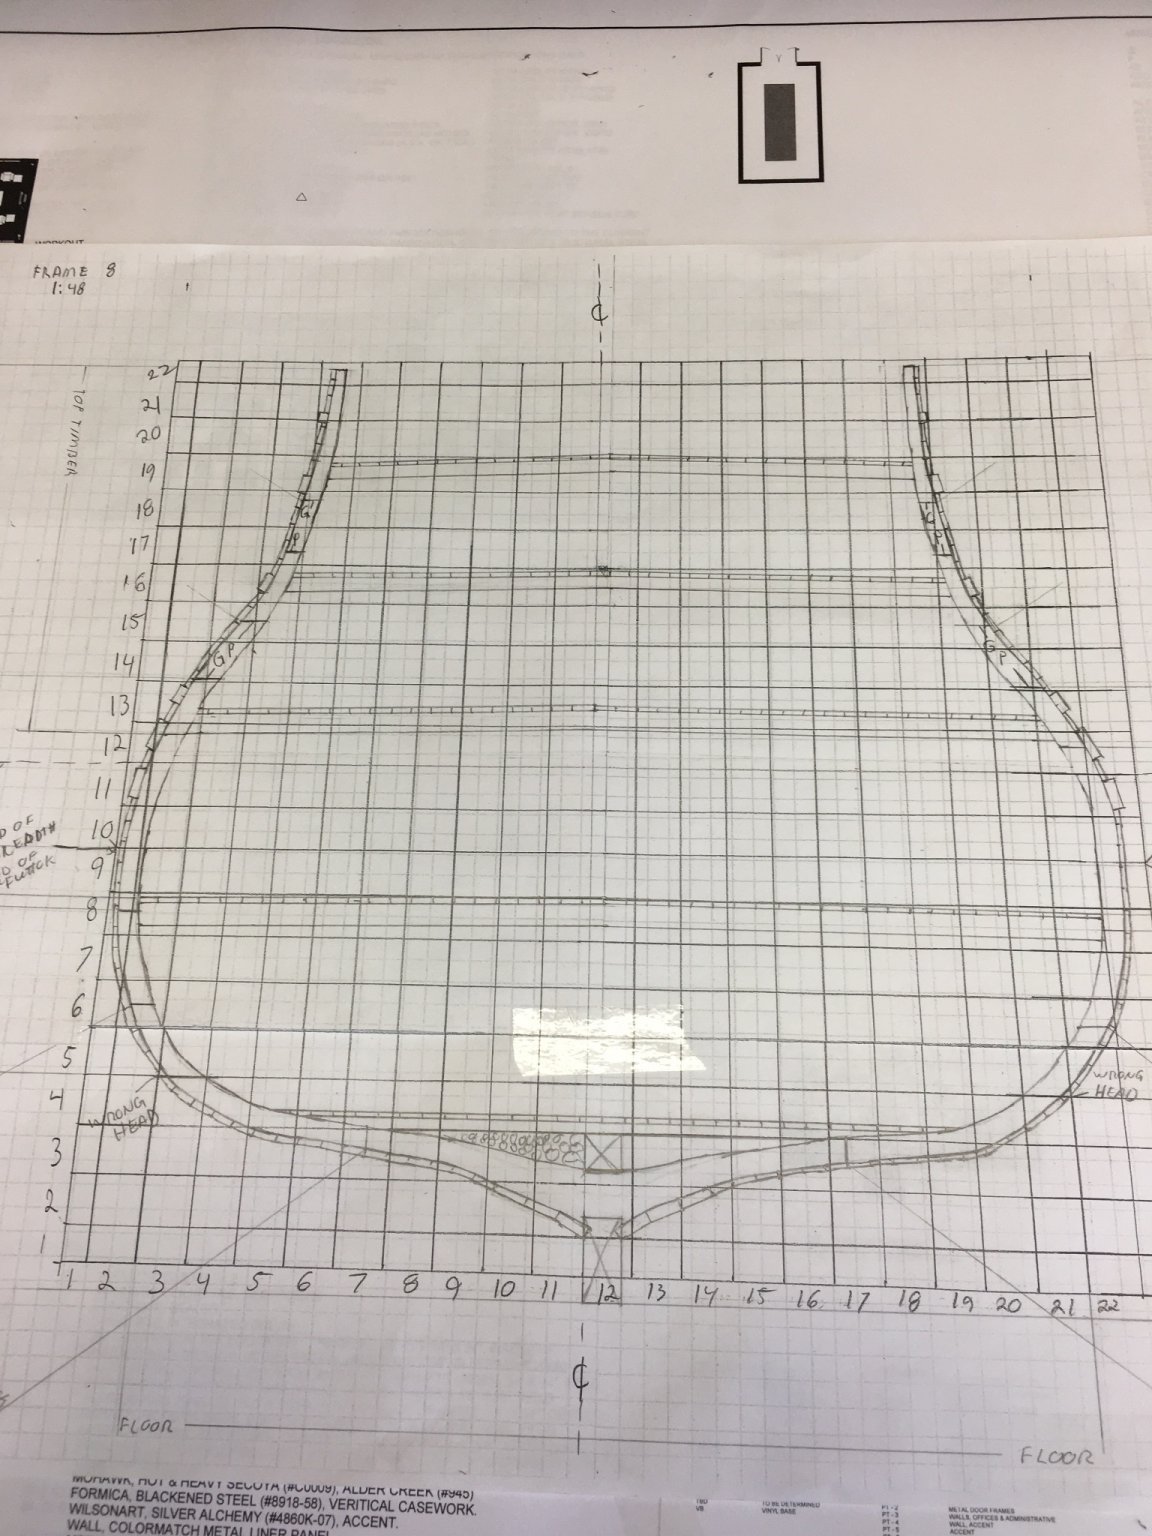
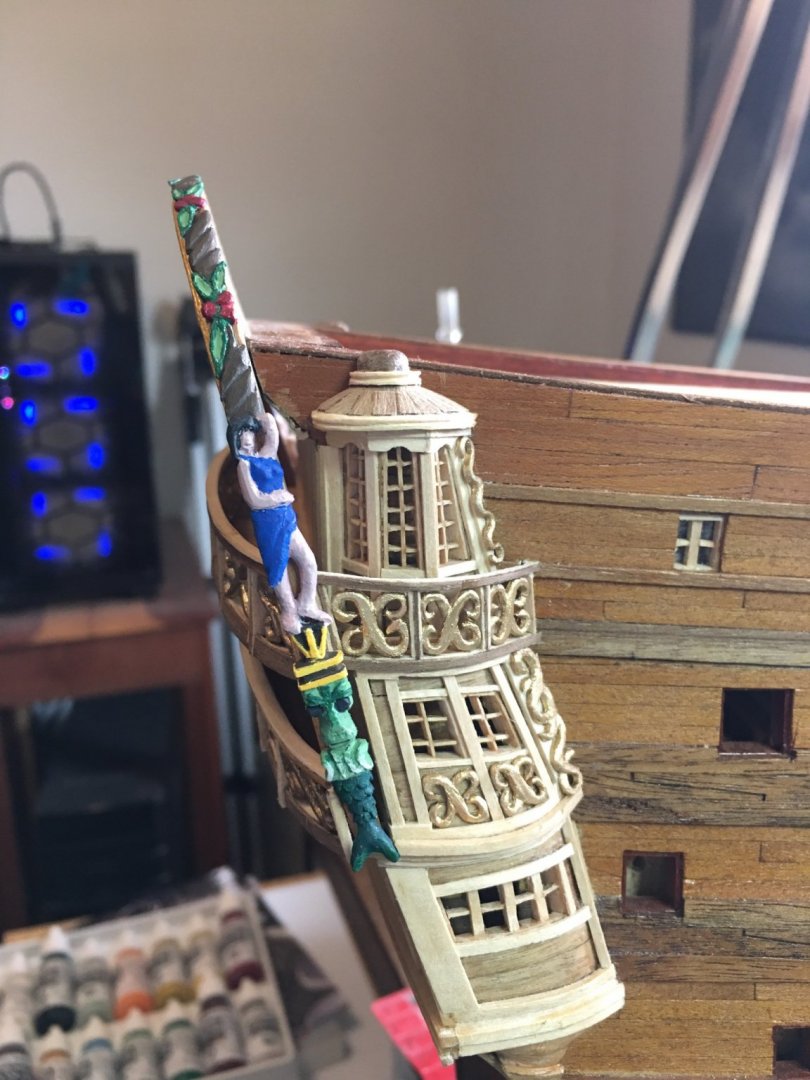
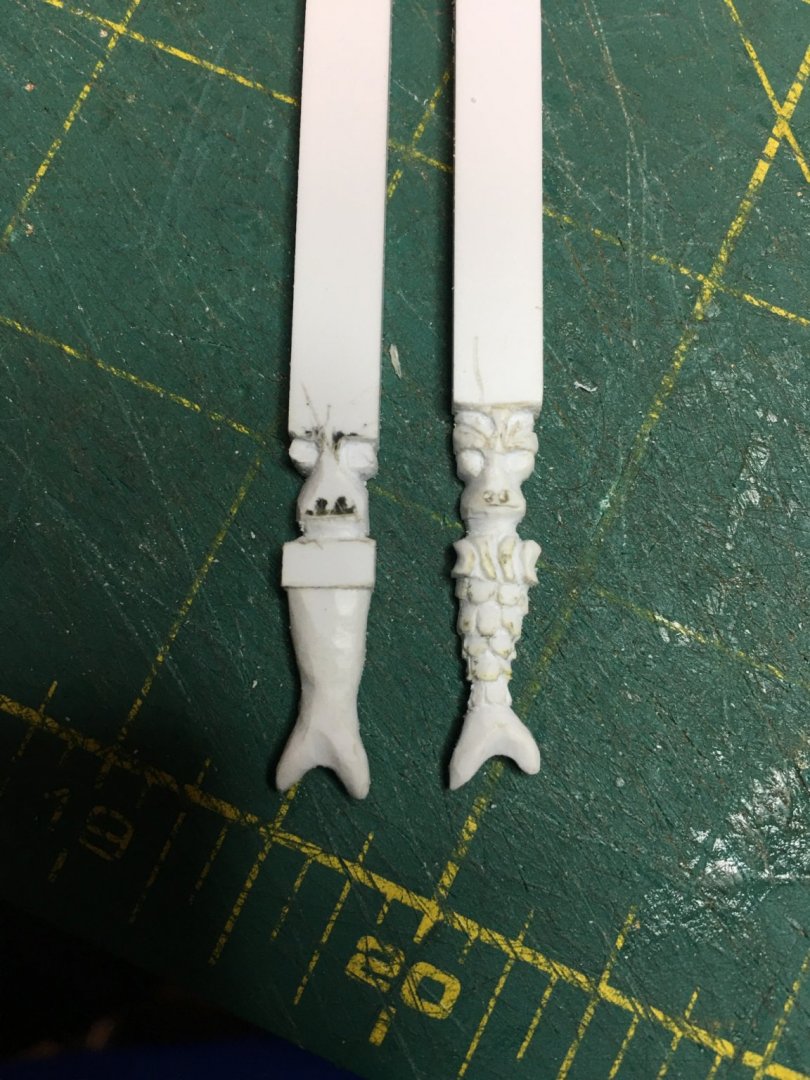
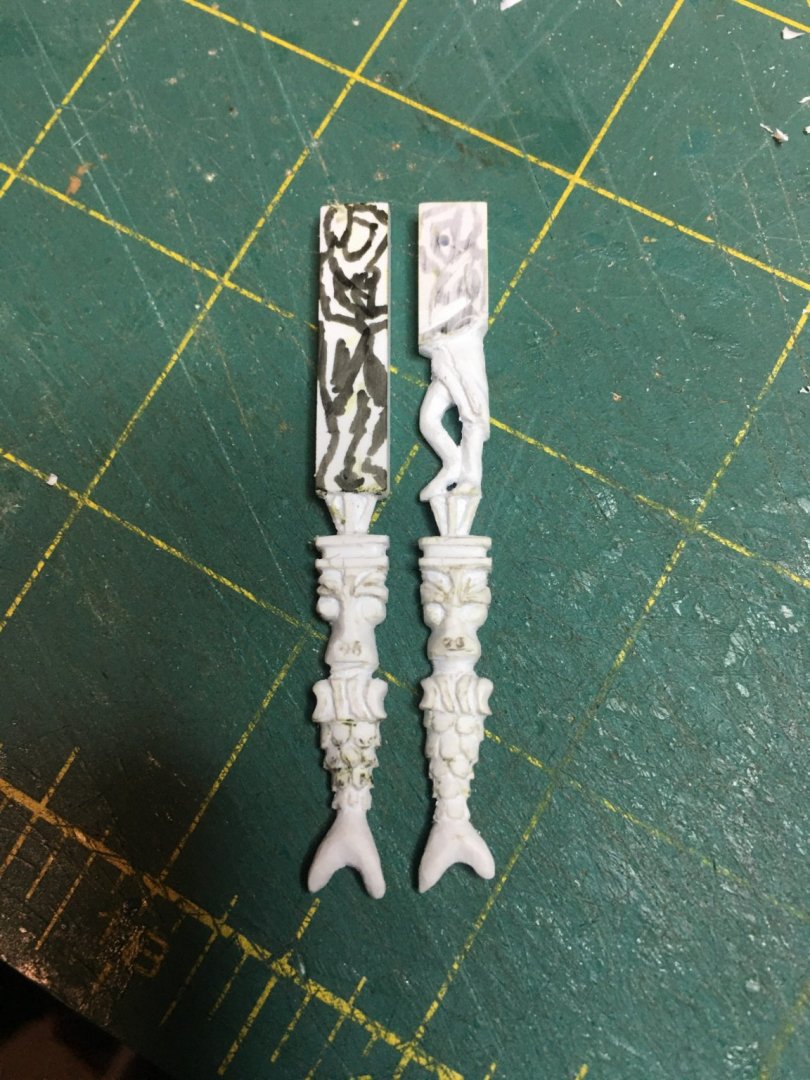
Progress on carvings is moving along. I have matched the port QG to the starboard and am now working on the first of the sculptures that will line the outside curve of the taffrail. I am not completely certain just what/who is being portrayed as none of my drawings nor the cast pieces are very clear. My wife said they look like a stripper on the head of a dragon so I’m going with that for now. We will see what emerges... I wish I was better at figure carving but that will come with time and practice so for now, I let my imagination run wild! In other projects, I have started the drawings for a new scratch build model that I have been wanting to do for a long time. I am designing a cross section of La Couronne. I am making it in 1:48 scale which will yield a model approx. 12” wide, 12” tall and 8” deep. (30.48 x 30.48 x 20.32 cm) I will not include rigging as that is not the point of this model. The main mast will stop a short height above the gunwales. I am wanting to provide a detailed view into the construction of La Couronne and as such I plan on replicating framing and planking as accurately as I can for the early 17th century. While I have found some great works addressing some of these practices, the early 17th is still much assumption and comparing similar practices from multiple countries. I know there will be errors but I feel that my guesses are at least educated ones. My reason for choosing La Couronne to model is simple really, I wanted a cross section of a ship I have built to display next to each other. The other main reason is that I also wanted to do something that is not readily available. Not there is anything wrong with a Victory, Constitution etc cross section, but there are already a lot of those out there. My hope is that I am documenting all of my steps through these early design and later through the building that I may be able to offer the plans at least to others and put a new model into our hobby. That is a long way out, but a goal I feel worth pursuing. Here is a first look at my drawings. I have the outer hull planking and wales, drawn in. I have also designed the framing as close to real practice as I could. They will not be made in one piece but instead their individual components, floor, futtocks, top timbers, naval timbers, keel, keelson, etc. I have located the decks and am now placing the interior planks, clamps and knees. I still have a lot of items to check off with mast, ladders, deck framing, and a myriad of other details but I am getting there. Eventually, I will start a log for this project to show how I came up with the drawings and of course the build itself. As you can see, lots of work and this is just one view. And it’s by hand as I don’t really like computer drawing. 😀

-
Even unfinished your work is stunning Marc. While I did build my S.R. in the traditional color scheme, I can fully appreciate being "bored" with seeing the same paint job over and over, especially on a ship that we do not have a well known, specific paint scheme, Constitution & Victory for examples and even those have been altered over time. Right or wrong, this will be a spectacular model that highlights the grandeur of ships in the 17th century.
- 2,699 replies
-
- 2
-

-
- heller
- soleil royal
- (and 9 more)
-
Thank you so very much! QG carvings are progressing, filling in the empty spots and making my eyes extremely tired! Still have a lot more to go and since the holidays are past progress has slowed back to normal. Once I get the port side caught up, I get to start on the sculptures.
-
Those window frames look fantastic! Looking forward to seeing how your glass panes turn out. That has been one area that I have not yet found a medium that I like using so I am curious to see what your ingenious mind comes up with.
- 2,699 replies
-
- 2
-
-
- heller
- soleil royal
- (and 9 more)
-
My Mamoli kit plans also show one on the forecastle, though it shows it on top of removable hatch covers which does not seem like a good idea as it would be a much weaker place on the deck for something that will be taking on a lot of pressure and torque. My plans also have the smoke funnels from the cook stoves piercing the covers as well. That makes some sense as in theory, the covers could be removed to service the galley easier when in port. I have not yet decided how I will handle the capstan yet. I suppose it could be used for lighter duty lifting such as ship's boats or even the grapples for the anchors to run them up the catheads. It could also be for extra manpower, providing yet another set of push bars to help in turning. Still, the location does seem odd...
- 22 replies
-
- 4
-
-
- royal louis
- heller
- (and 1 more)
-
HMS ROYAL KATHERINE 1664 by Doris - 1/55 - CARD
EJ_L replied to DORIS's topic in - Build logs for subjects built 1501 - 1750
I want to praise this model, as it is truly an incredible build, but I also want to say my deepest condolences at your loss. I hope you find comfort in this rough time and that this model preserves and reminds you of the love and good times you shared with your husband.- 1,035 replies
-
- 7
-
-

-
- royal katherine
- ship of the line
- (and 1 more)
-
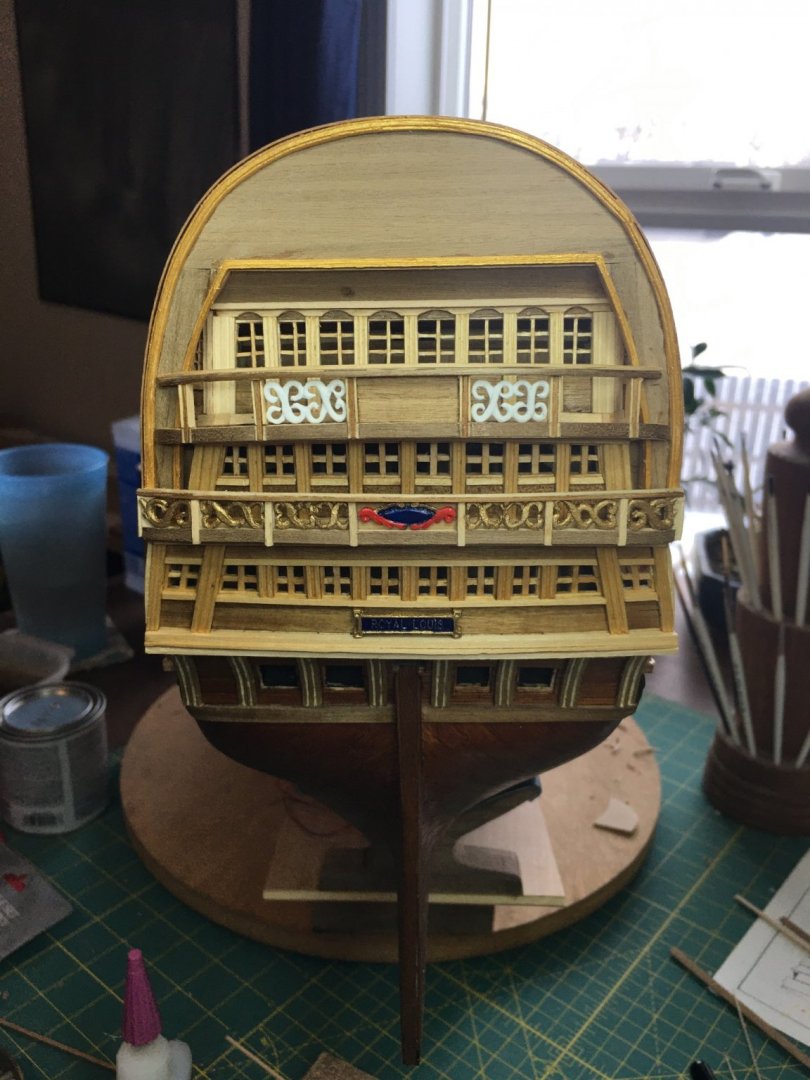
Thank you all! I’m glad I can inspire you as you do me with your own builds. Last day of my long holiday and I have the upper balcony railing going on. Will soon turn my attention to the QGs and the taffrail.
-
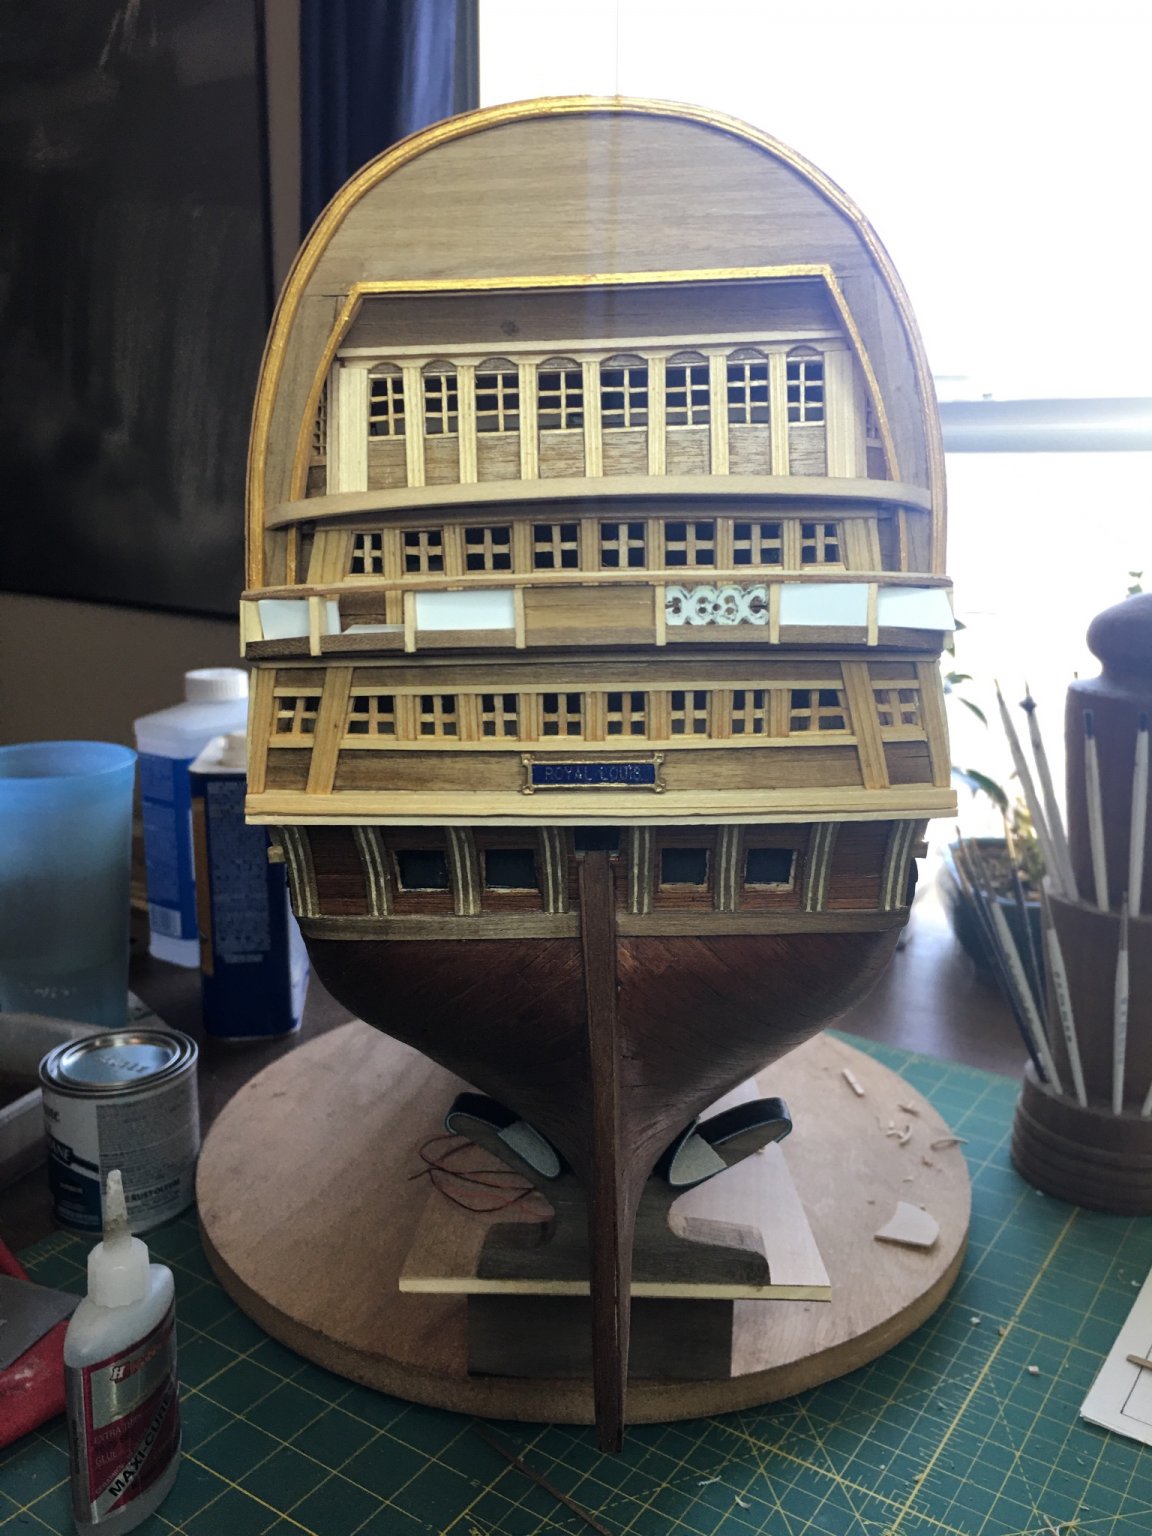
Happy New Year fellow modelers! I hope this first day of 2021 finds you all well and I wish you all the best in this new year. Just a small update today. Work is progressing on the upper stern balcony, making the decorative railings, and fitting the various pieces. I do find that carving polystyrene plastic to be far easier than wood and it does take and hold detail very well. Granted, much of my issues with wood in the past has been more from inferior quality blocks of wood that was too soft for fine carving and lack of decent carving tools. Regardless of medium, neither wood nor plastic bestow talent to carve, and for that, I will need more practice. While I do that, I am still satisfied with the results I am producing if for no other reason than I did them.
-
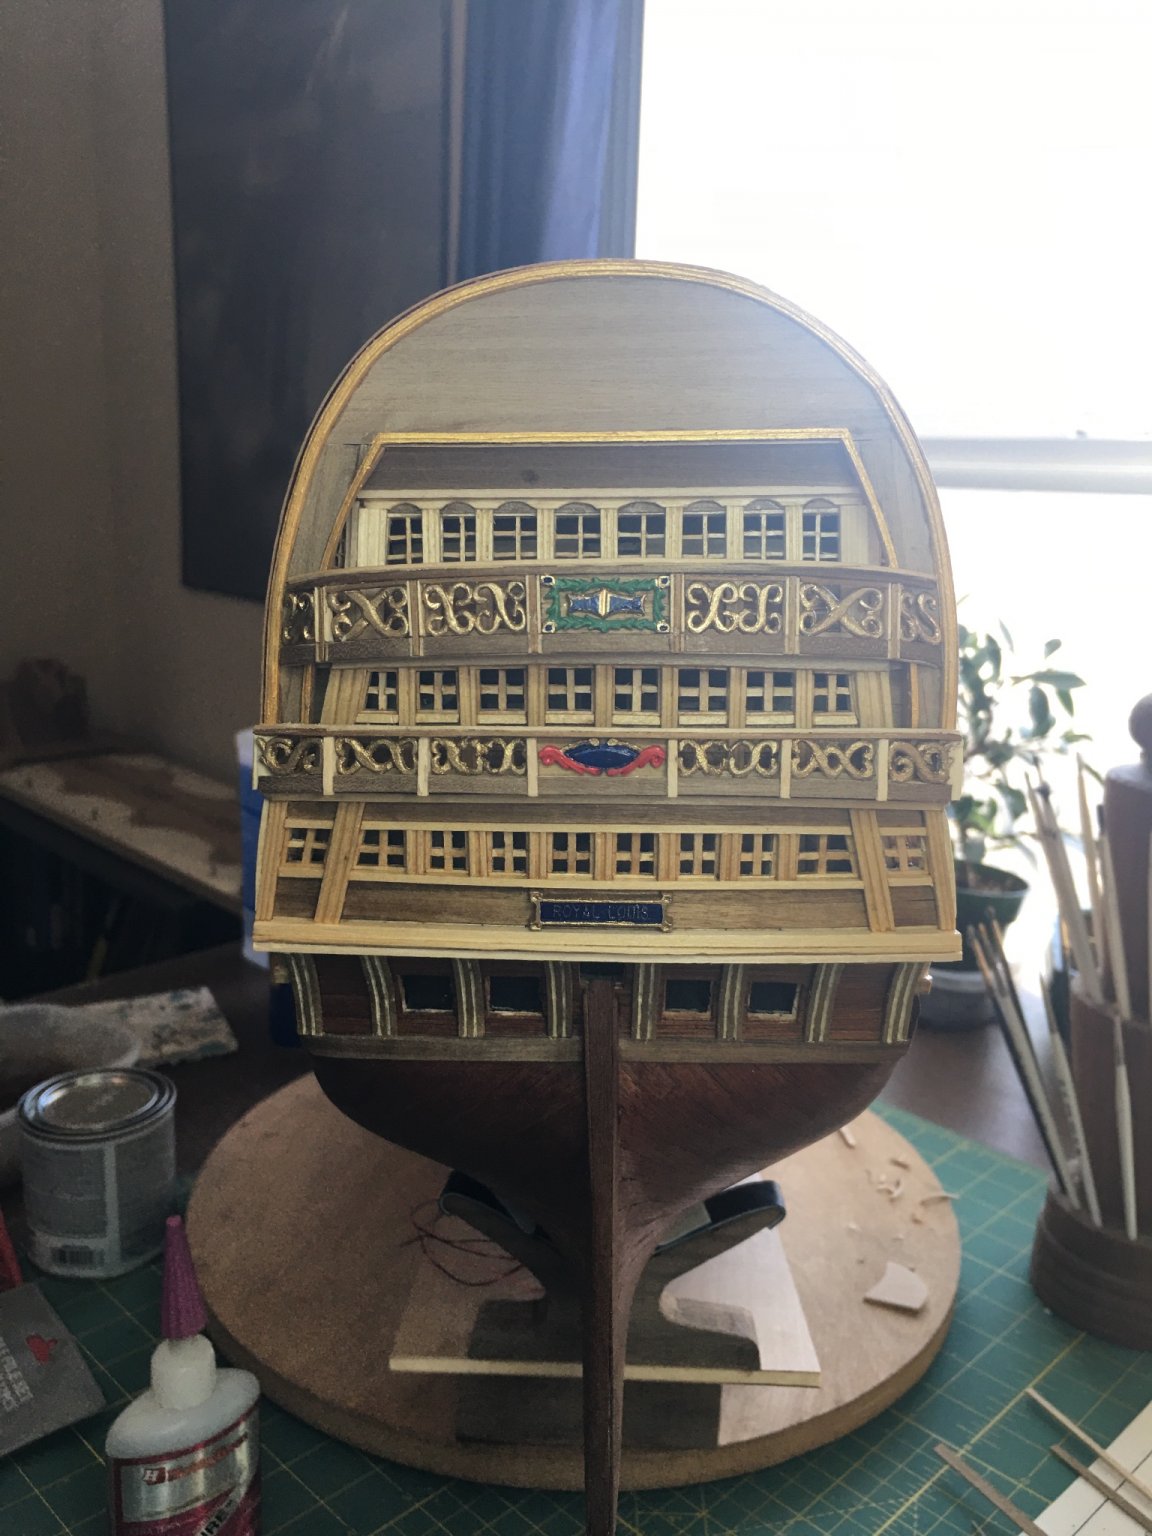
The middle balcony railing is coming together.
-
The ship is looking beautiful! That water is also amazing! I know from trying to make rivers and lakes on my model railroad that getting color and wave patterns can be a nightmare sometimes but you did it very well. I like how you can remove the ship from the water as well to see the lower hull.
- 22 replies
-
- 3
-
-
- royal louis
- heller
- (and 1 more)
-
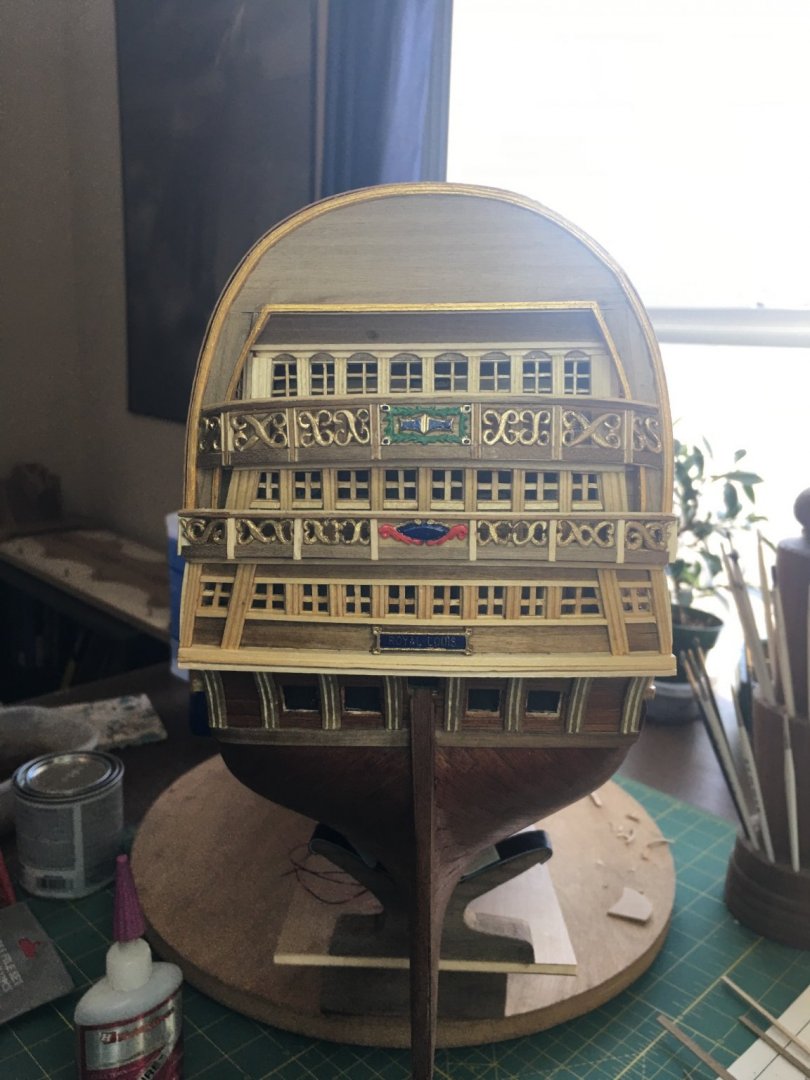
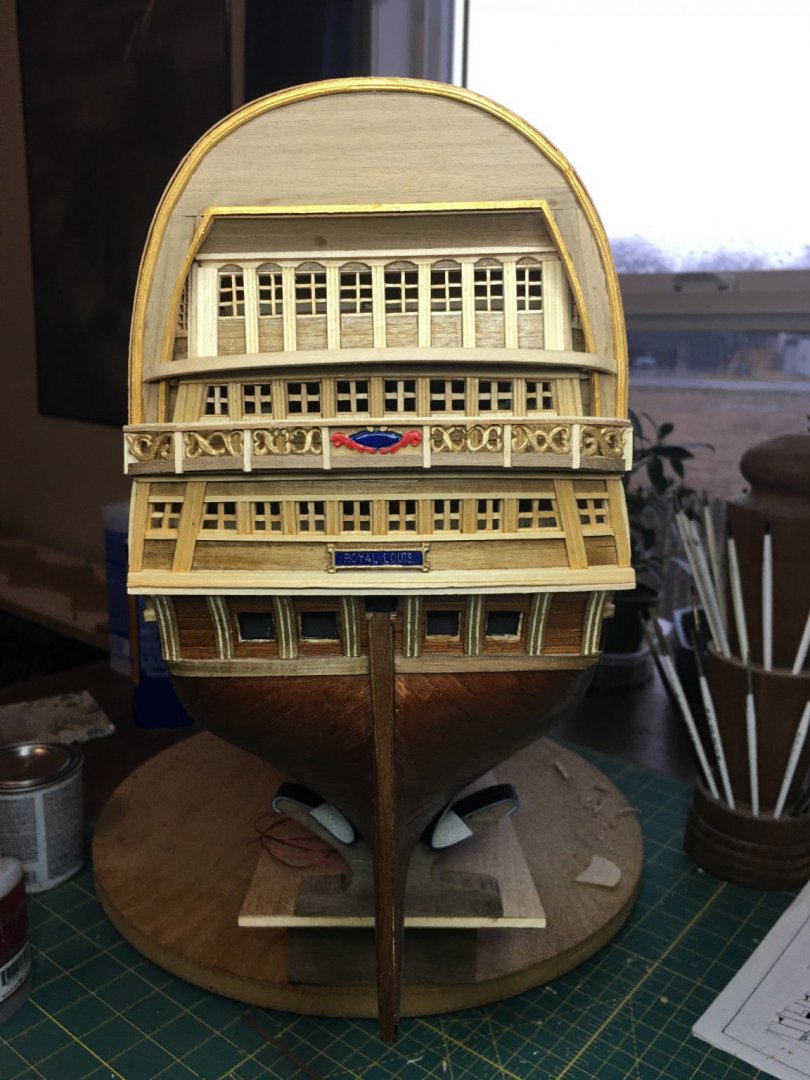
Balcony railing work underway. Pilasters are set but the top rail is still loose. The white blanks are plastic will be carved and painted then set in place. There is also a decorative wreath that will be carved and set in the center. The upper balcony will be of similar design. I have also done some more work around the stern gun ports and counter.

-
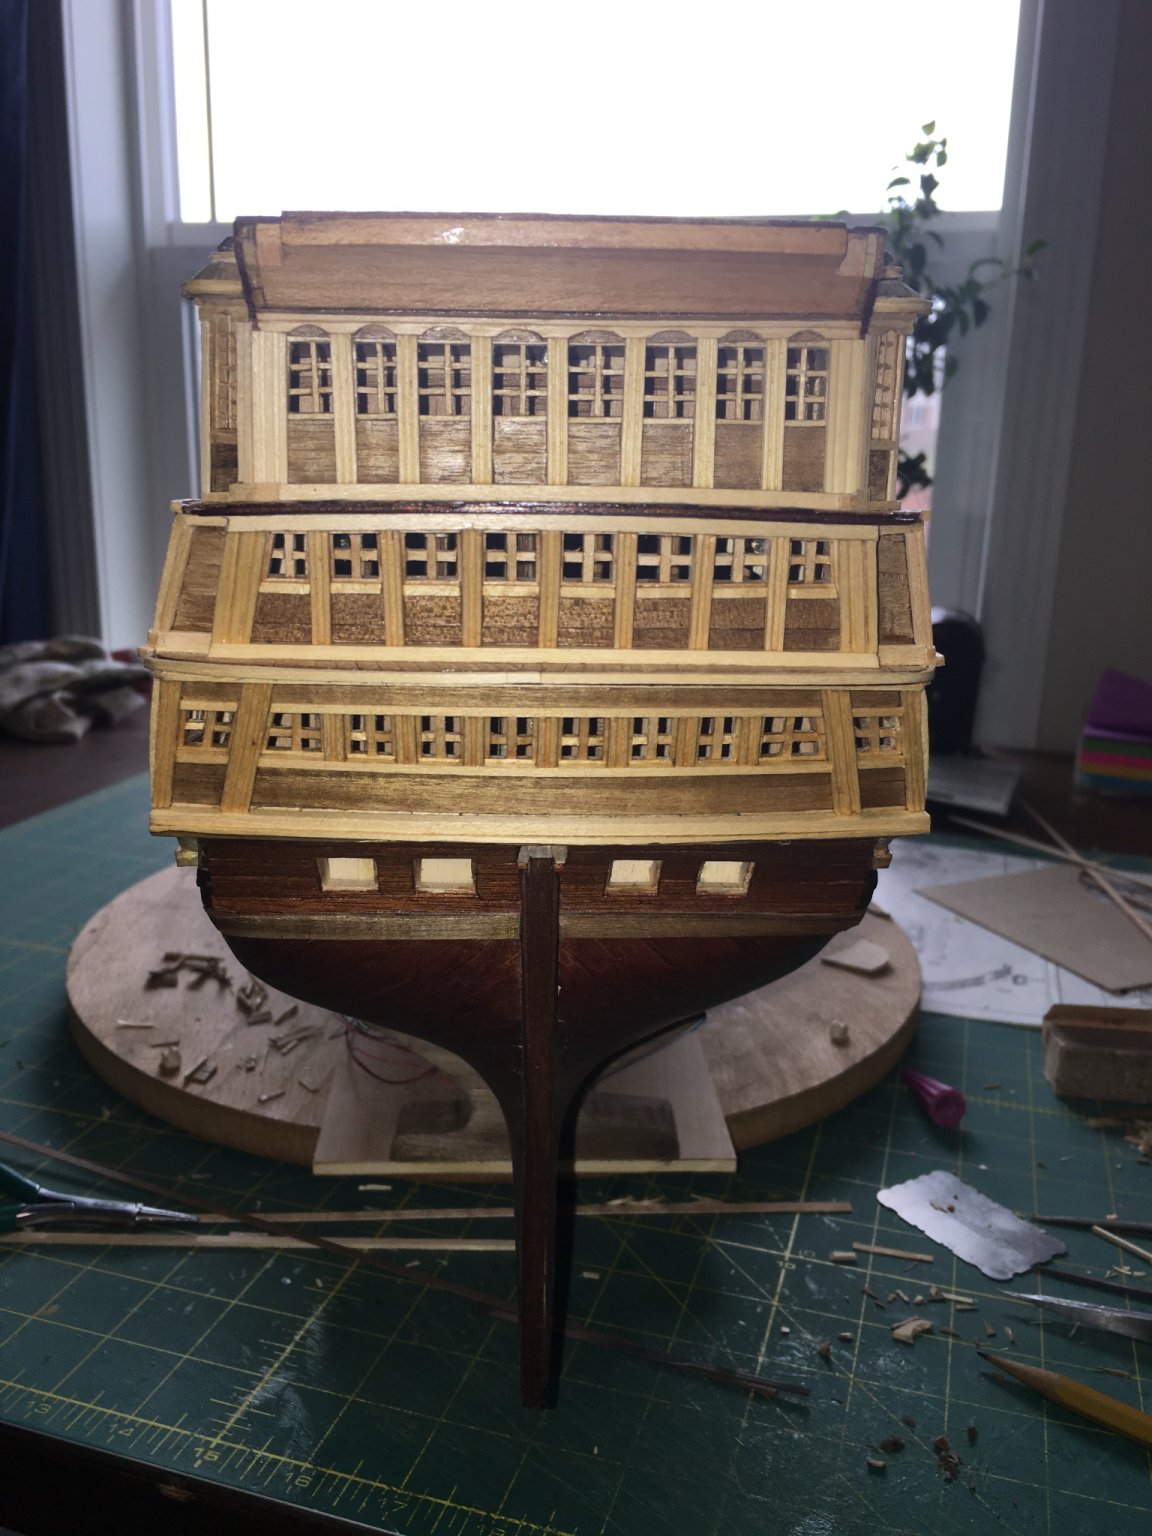
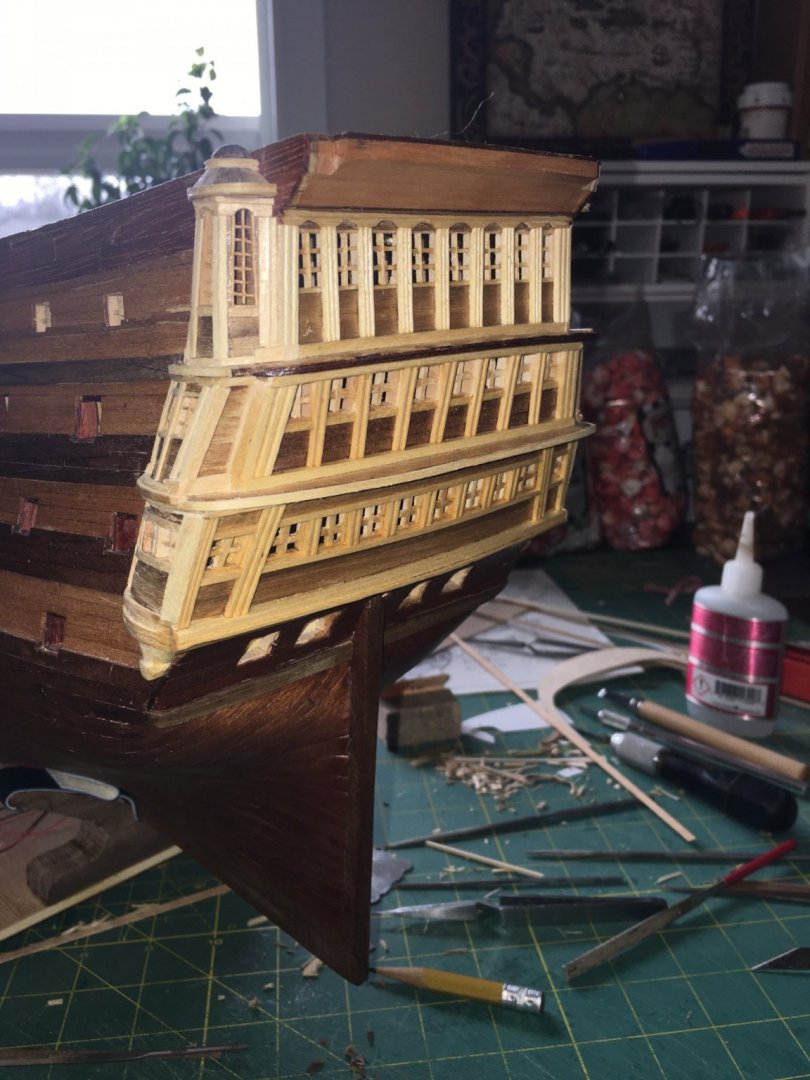
O.C., Marc, thank you both for the kind words and thank you to all who have followed along. The co to using support is always welcome. More work on the stern and I now have a complete taffrail upon which I can now fit and carve the ornamentation. This also allows for the balcony railings to be designed as I now know the spacing I have to work with. For the railings, the structure framework I plan to build from wood, the decorations, as with the carvings on the taffrail, will be made from plastic then painted. I have a bunch of time off work coming up till the end of the year and am hoping to take advantage of it to get some of this done. Best wishes to all of you for happy holidays whichever ones you celebrate, and here’s to a better 2021!

-
Thanks Ken! She is huge indeed and with this being my third one of this size, finding place to display them once done is becoming harder. Still, I love building them and plan on doing many more.
-
Beautiful boats. I always struggle with those, but yours look fantastic.
-
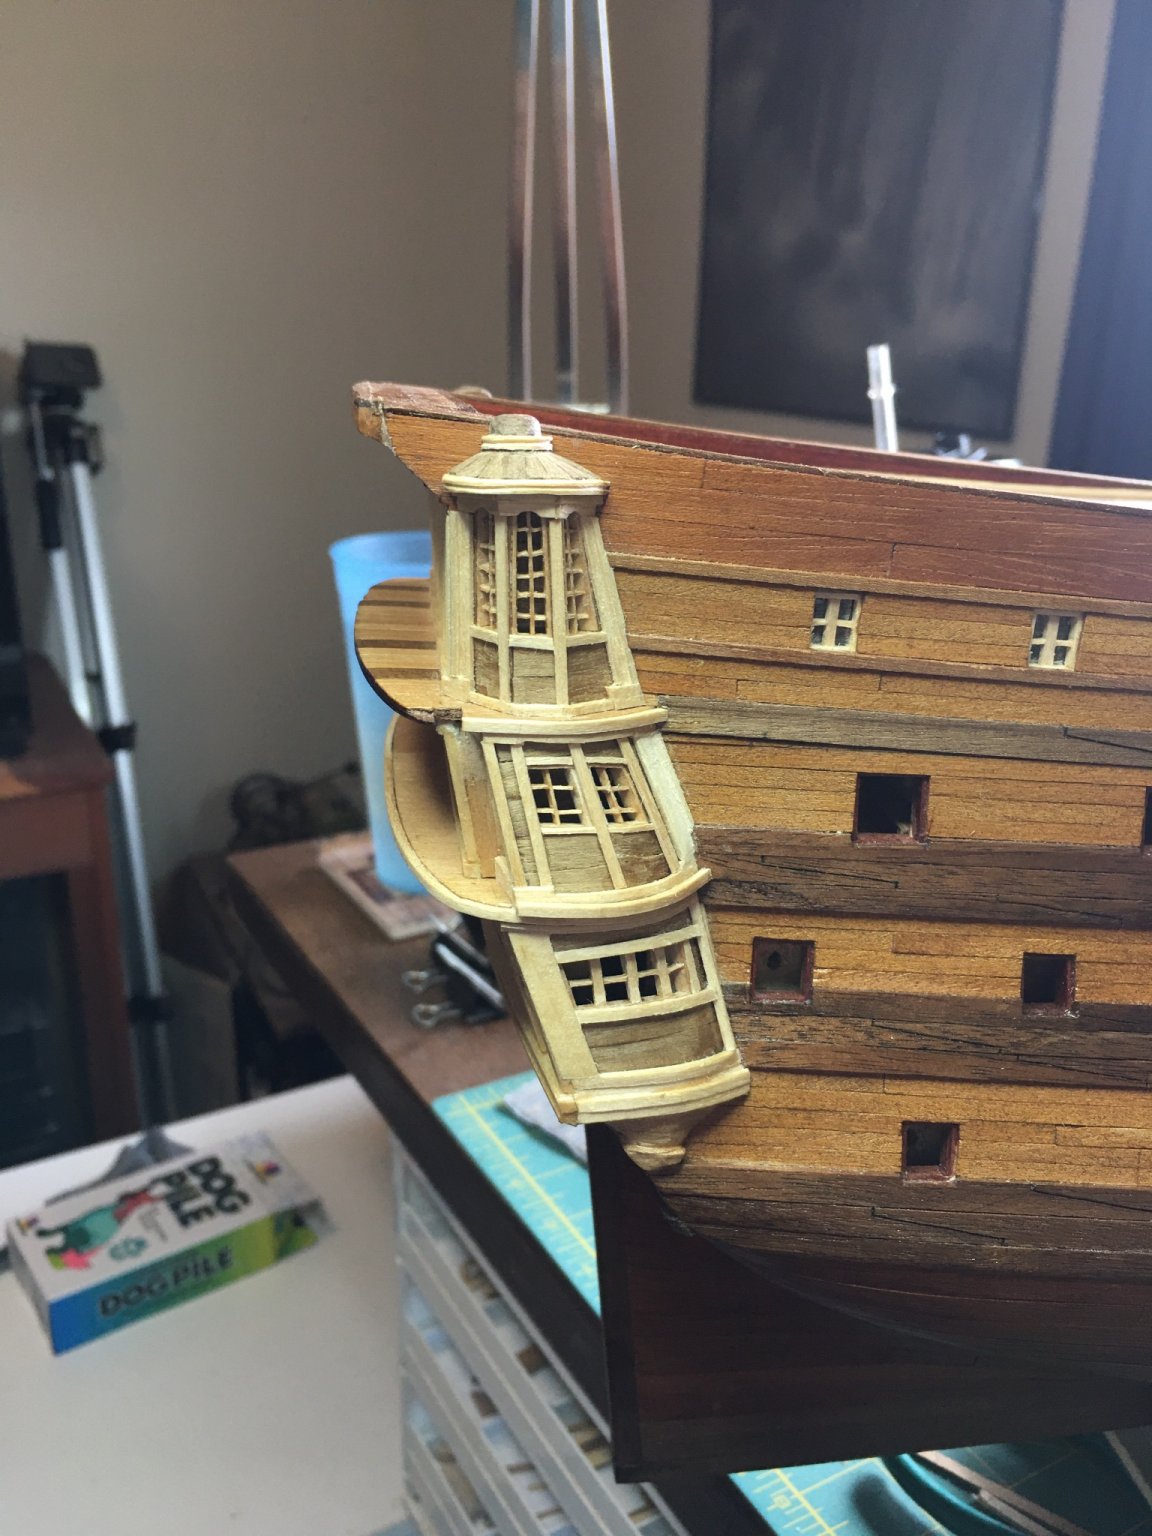
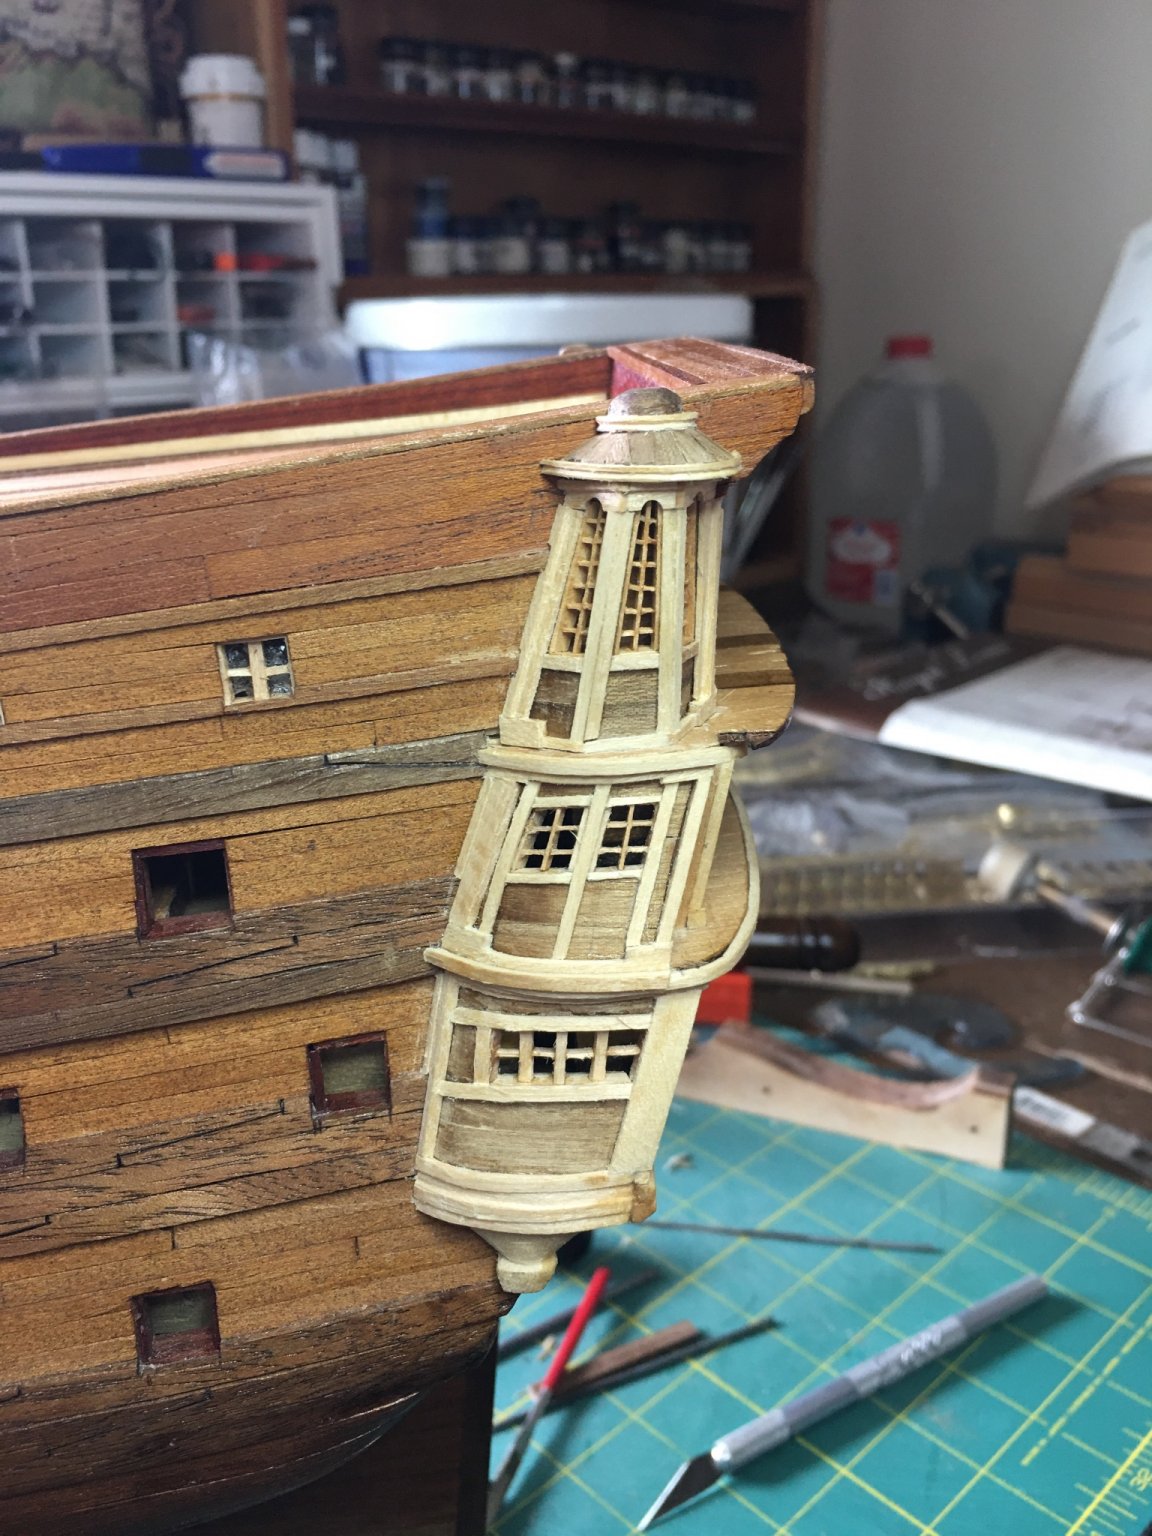
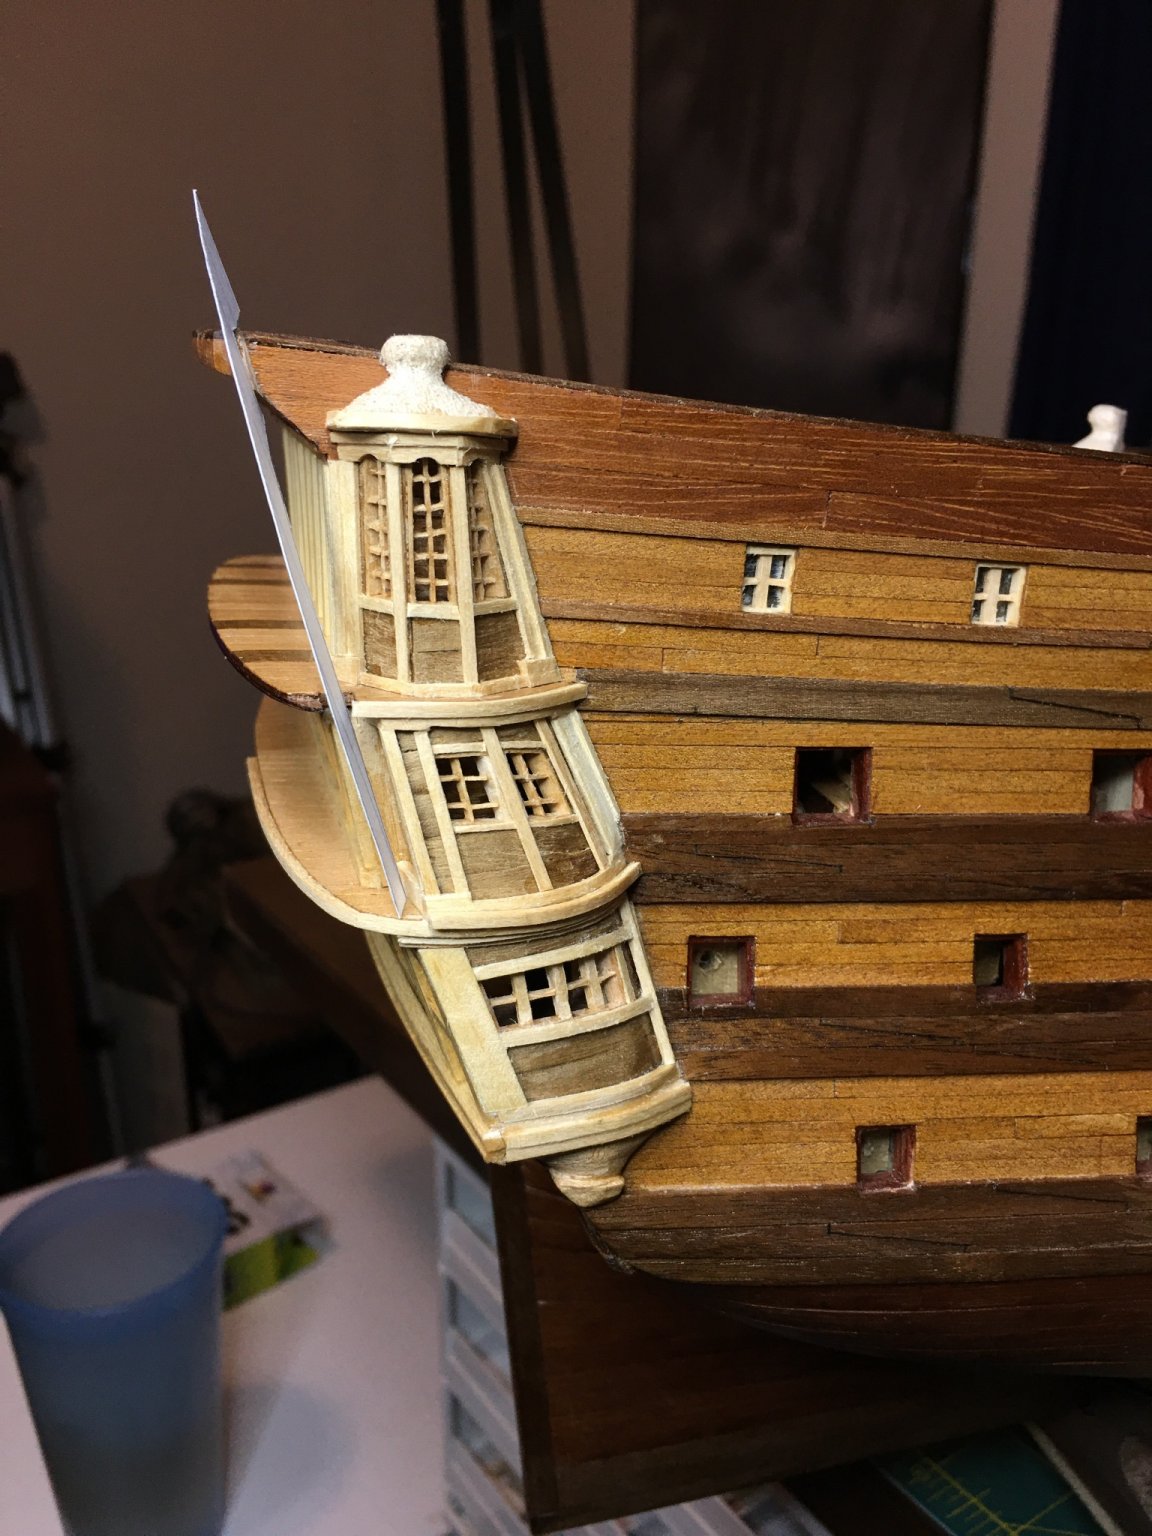
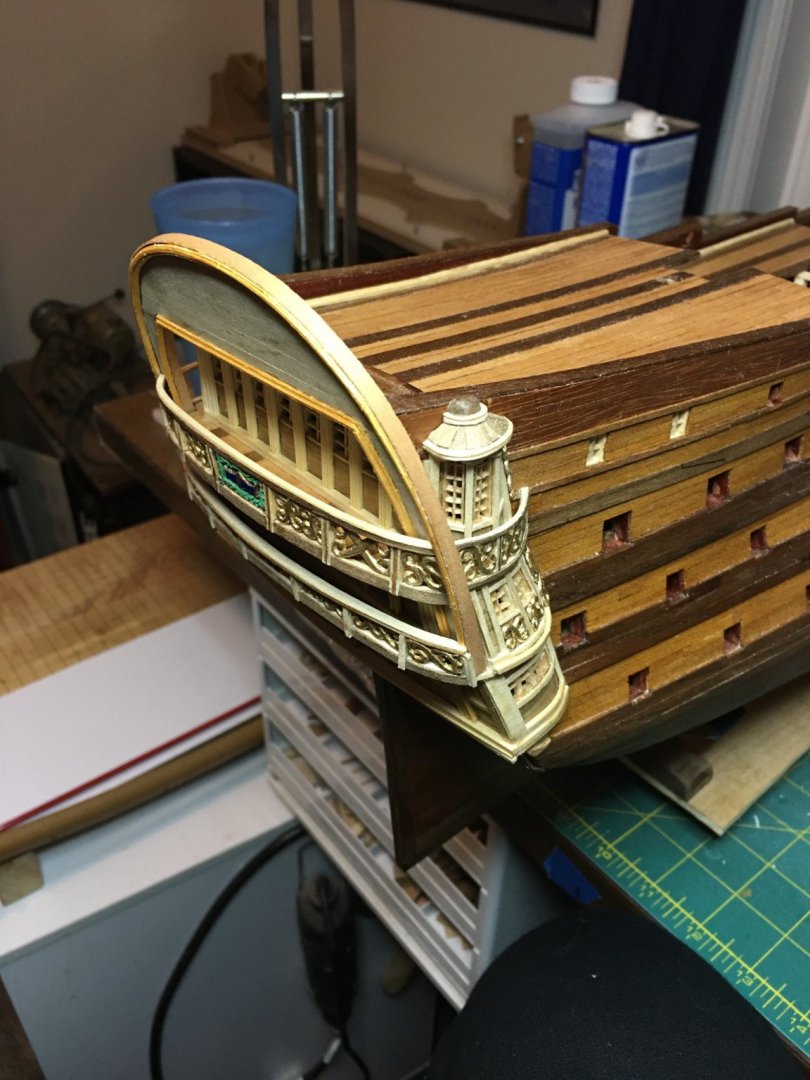
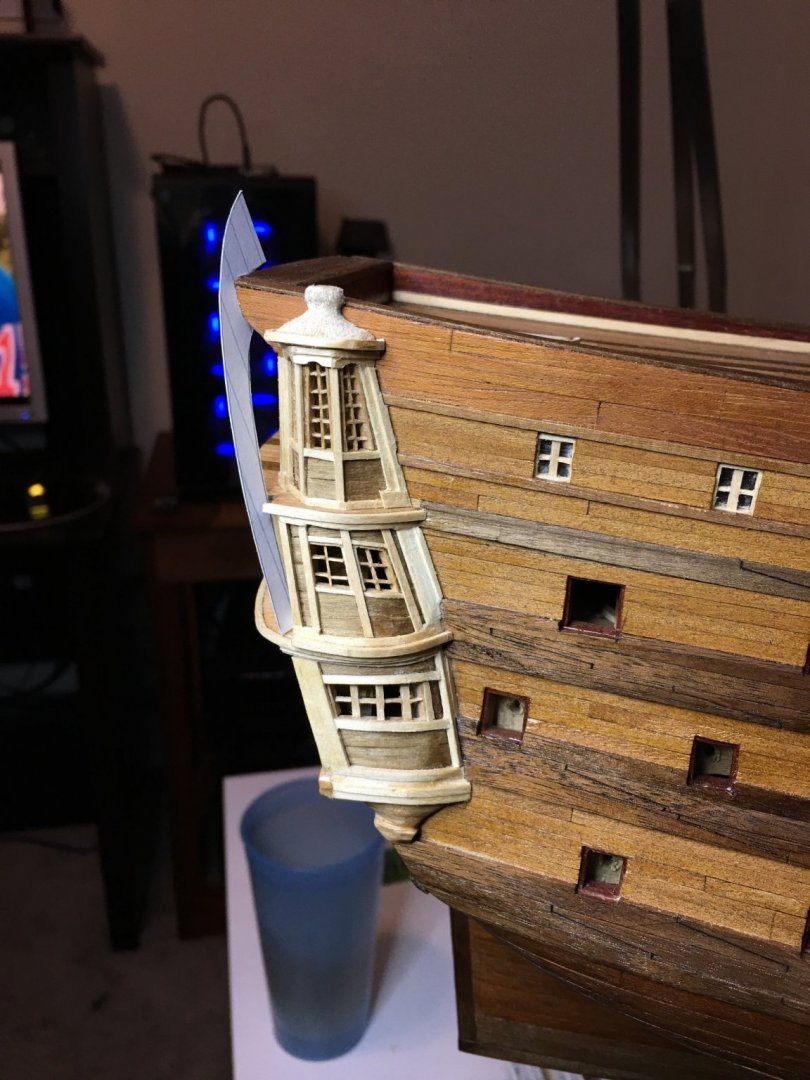
Quarter galleys are built. Next up will be the structure for e decorative arch on the stern, and then I can begin adding the decorative carvings.


-
Bo, possibly. I have actually used several of the cannon carriages already for the one mounted on the main gun deck below the quarter and forecastle decks. The middle and lower gun decks only used wood blocks. I will likely be using the provided barrels, though that may change. I am looking at ways to possibly cast or turn my own barrels, especially for the exposed guns on the upper deck, but I am not yet fully decided. If I decide not to use these parts, I will let you know.
-
Indeed, very beautiful paintwork. I'm loving the direction you are taking the paint scheme. Most S.R. builds end up somewhere closer to the scheme I used on mine, simple ultra marine blue and gold. What you are doing here puts my mind towards the elaborate paint scheme found on the Vasa. I think this is going to be a truly insightful model worthy of scholarly discussion and providing a rare look at what could quite plausibly have been what she looked like during these years. I'm looking forward to seeing these pieces come together with the hull. I think they will enhance each other brilliantly.
- 2,699 replies
-
- 4
-
-
- heller
- soleil royal
- (and 9 more)
-
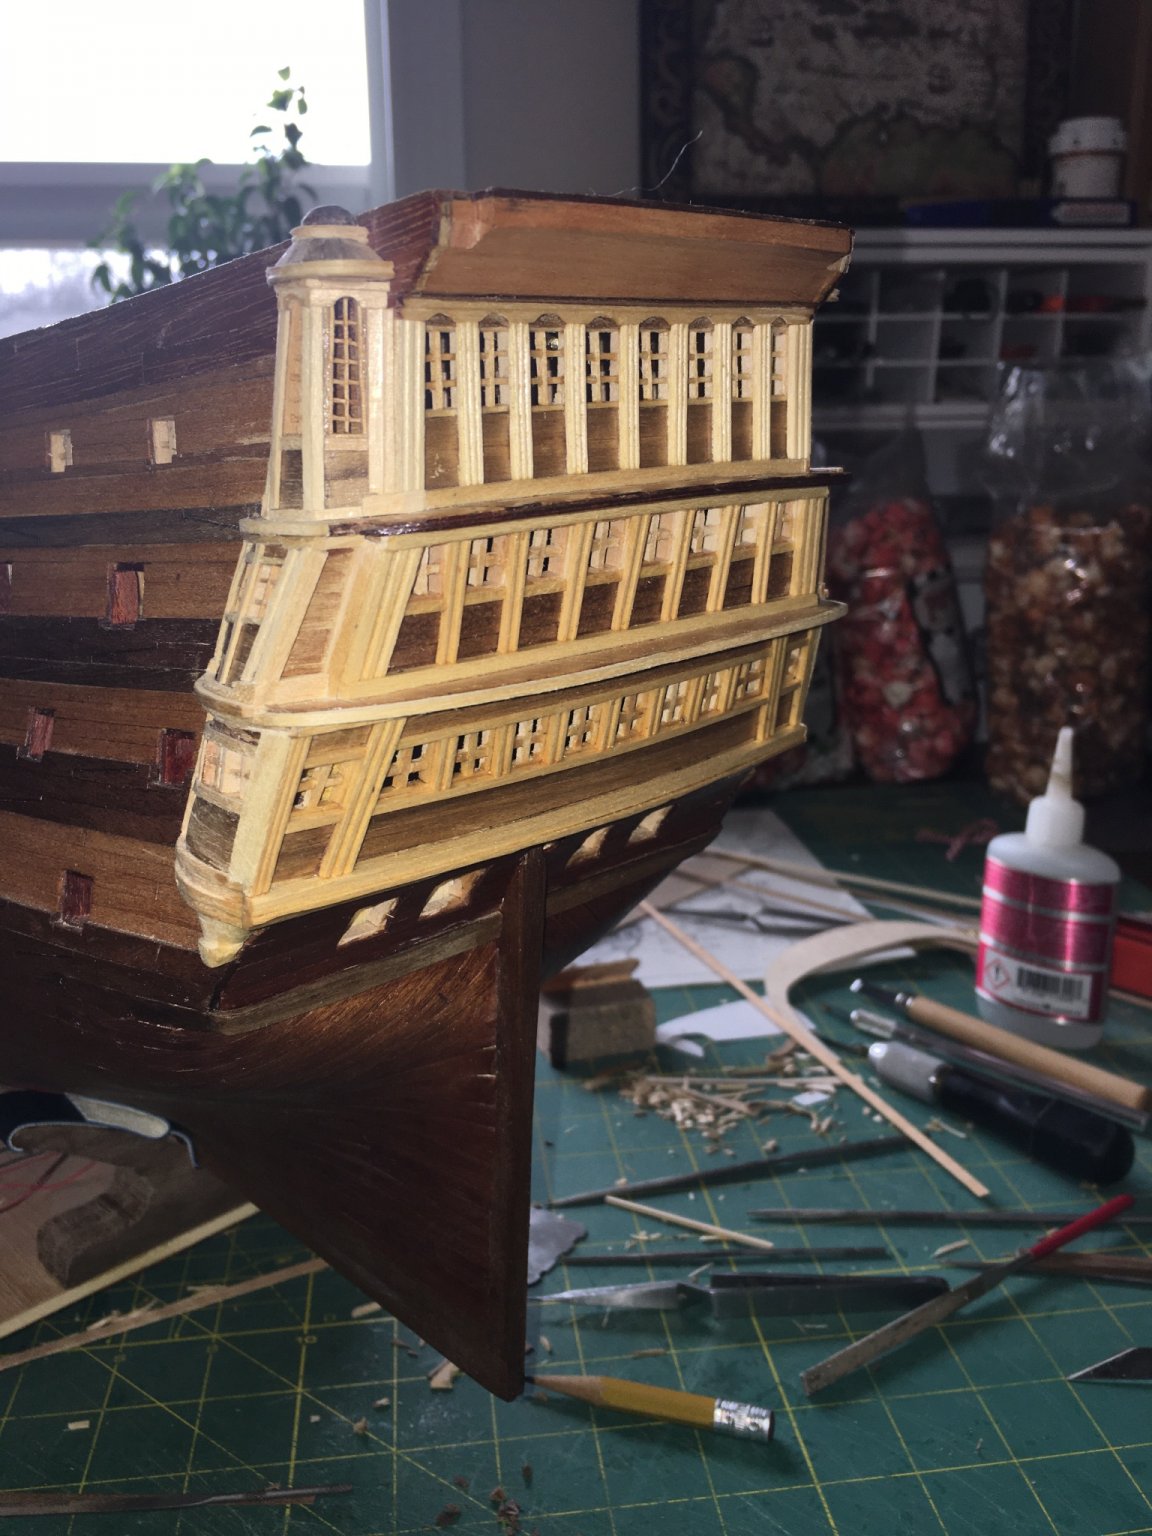
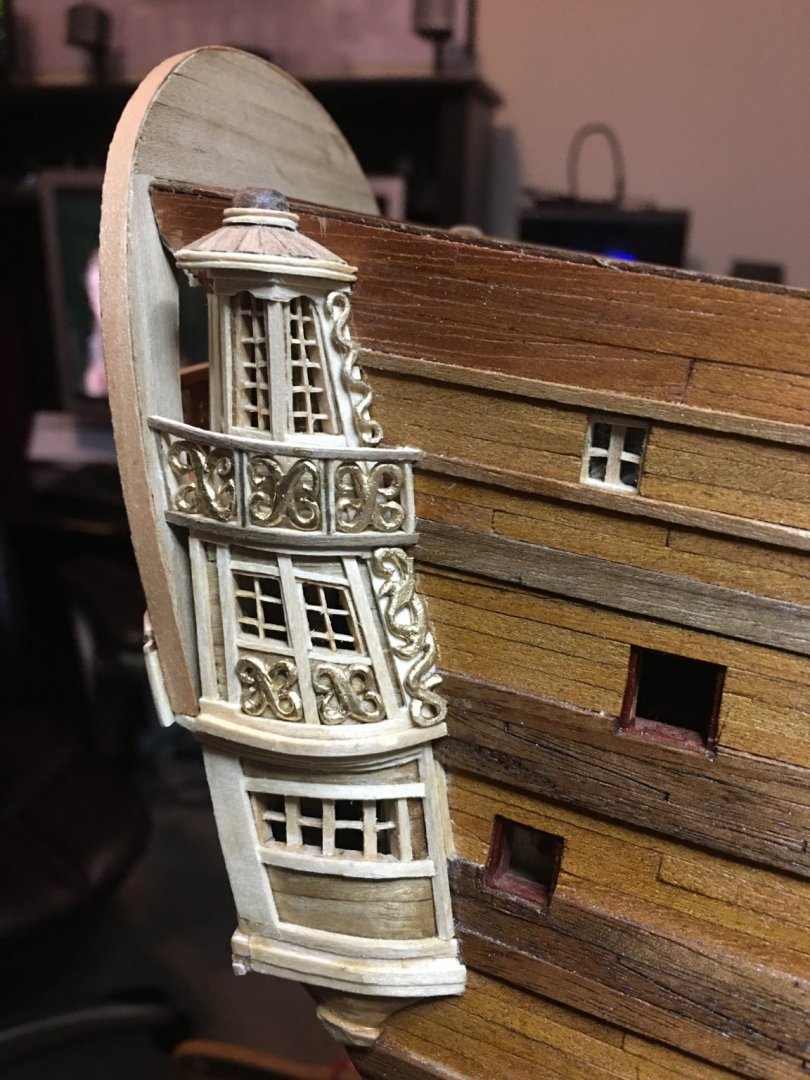
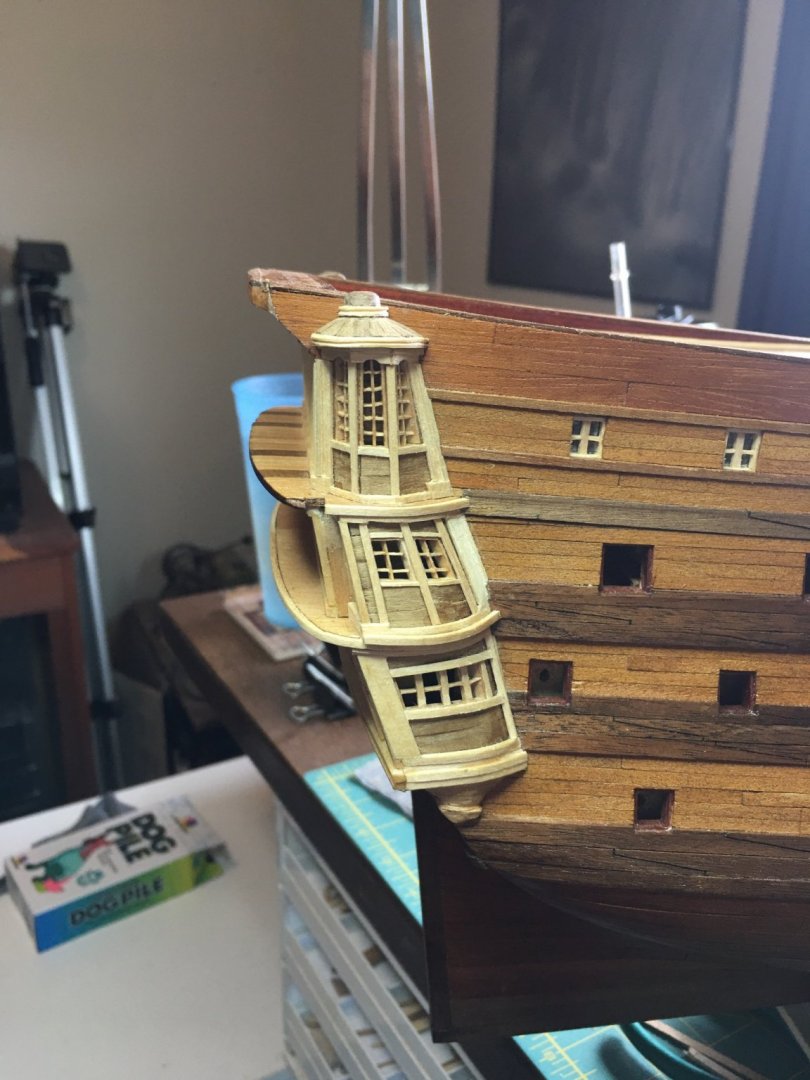
Building the quarter galleys, again... I’ve had to do a few rebuilds but I am getting there. On the wide blank spaces on the trim as well as the walnut panels below the windows will have decorative pieces that I will carve out of plastic once the wood trim is completed. The upper QG will also have a wrap around rail that will connect to the arched taffrail.

-
Excellent idea to carve the trim along the edge of a flat piece rather than try to make actual molding strips to install. I tend to try to apply normal construction techniques to these models which is extremely difficult and often times I end up with sub-par results. I'm going to have to remember this idea.
- 2,699 replies
-
- 2
-
-
- heller
- soleil royal
- (and 9 more)
-
This sounds like how my last model railroad layout went. Wife allowed me to start with a simple 4x8 sheet of plywood and a simple oval track. Over the following 10 years, it grew into a horseshoe shape covering the entire 14 x 24 basement room until we moved. She is being much more cautious on what she approves for my new train layout. 🤣 Looking forward to seeing this evolve as I love dioramas and I think you have a good plan to get started. I would suggest that besides raising the entire land area the inch for the water beds, you slope the entire land area from the castle to the water, to give a more noticeable elevation change and most castle would be built upon higher land than the surrounding village.
-
This looks like great fun! May have to look into getting myself a kit.
-
The lower cabins are looking great. I love seeing interiors being built on these ships. Too often they are omitted and overlooked as they are rarely able to be seen once the ship is built. To me this is a tragedy as the interiors are an entire world of fascinating detail that really show how life was aboard a ship. Also, the "wife's request" looks very intriguing! I would definitely be interested in seeing a log for it.
- 322 replies
-
- 4
-
-
- enterprise
- caf
- (and 1 more)