HOLIDAY DONATION DRIVE - SUPPORT MSW - DO YOUR PART TO KEEP THIS GREAT FORUM GOING! (Only 13 donations so far - C'mon guys!)
×


EJ_L
-
Posts
2,246 -
Joined
-
Last visited
Content Type
Profiles
Forums
Gallery
Events
Everything posted by EJ_L
-
 Great job on the gun ports and sill placement Sjors! I know what that is like to have some out of place and that is always a nervous feeling until you know they are good.
 -
Very educational reading. Those captains had to be some of the smartest and bravest men to sail when you think about having to keep their heads while canon shot was flying at them and parts of their ships were raining down on them. Knowing how to keep your ship fighting while it was falling apart around you was no small task. On top of that having to stand tall and strong for your crew's morale and as honor demanded takes a special kind of person. I am currently reading Patrick O'Brien's books. I will be thinking of this now when I reach that book and the Java.
-
Her beauty is indeed showing through now. Good job on that deck planking. Once you have her all polished up that will look great!
- 414 replies
-
- 3
-

-
- riva aquarama
- amati
- (and 2 more)
-
Nice job on the coppering. I'm sure you are glad to have that stage behind you and on t the next. I've never had to do that on a ship as the ones I have done with copper hulls have all been plastic so it was just a matter of a couple coats of copper paint and done.
- 701 replies
-
- 3
-
-
- phantom
- model shipways
- (and 1 more)
-
Cats are the bane of model builders everywhere. Glad to hear nothing major was damaged. Hopefully you can get her put back together and continue on without too much lost. If you have a small vacuum, empty the canister of any previously vacuumed debris and vacuum the area. That is haw I have recovered many a lost block and eye bolt from the floor.
-
Incredible work Johann! Your details are simply amazing and everyone you add just increases the awe of your ship.
-
Robin it looks like you have got all your stuff together and are doing some excellent research while you wait to get started. I am looking forward to following along on your build as I have a feeling I am going to learn a lot about biremes which is exciting as I love learning something new.
- 473 replies
-
- 6
-
-
- greek bireme
- dusek
- (and 1 more)
-
Mike, I may need that help myself! It seems no sooner than I purchase one then another grabs my attention. My wish list grows longer, the shelf space shrinks and my bank account looks smaller all the time. Now if I could just get that clone to go to work for me so I can find the time to build them all!
- 701 replies
-
- 2
-
-
- phantom
- model shipways
- (and 1 more)
-
Thanks for looking into it and going through all the tests. It may indeed find it's way into a few parts, especially on a larger scale model. Good to know what it's limits are and what we can expect if we choose to work with it.
-
That is awesome Elijah! Never a bad thing to have extra ships and ones that just fall into your lap are even better! Looks like you have nice future ahead of you on ship building.
- 701 replies
-
- 2
-
-
- phantom
- model shipways
- (and 1 more)
-
How is the weight? I guess if it was only a few pieces it would not be very noticable but if you used a lot of it, say if you were to use it make canons on a 100 plus gun ship, how much weight difference do you think there would be? I am familiar with Corian as my wife sells it at her work but I have never worked with it personally and she is not familiar enough with model ships or the scales we deal with to give me an accurate estimation on the weight ratios.
-
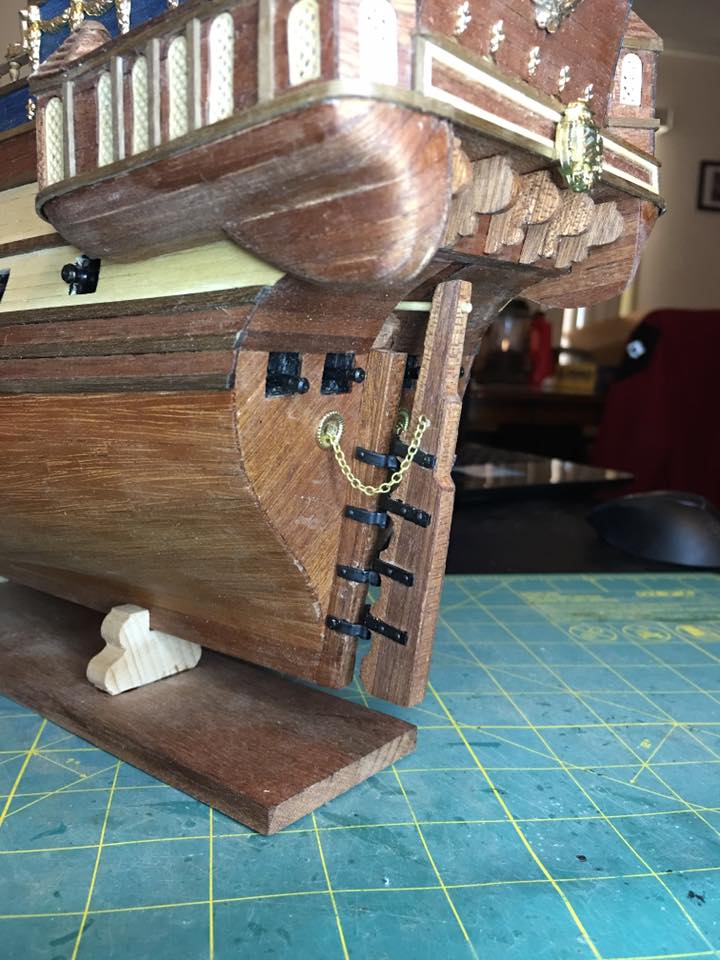
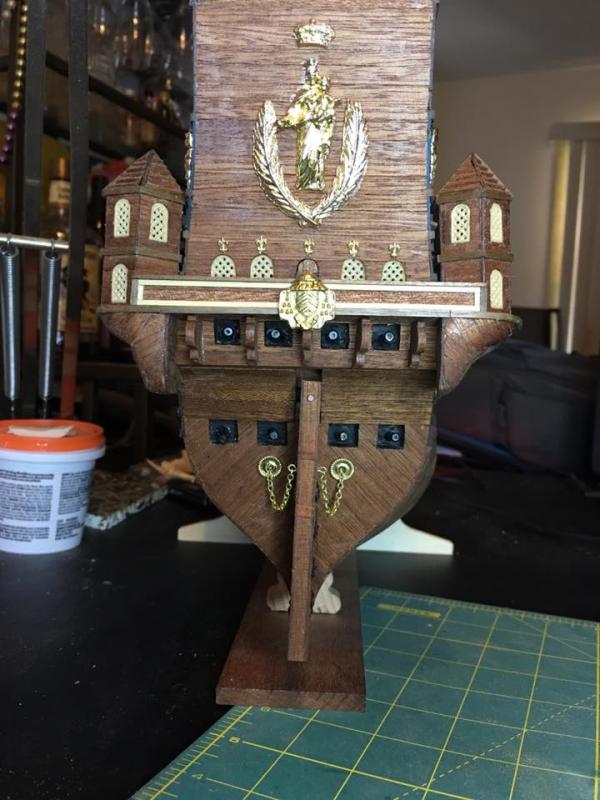
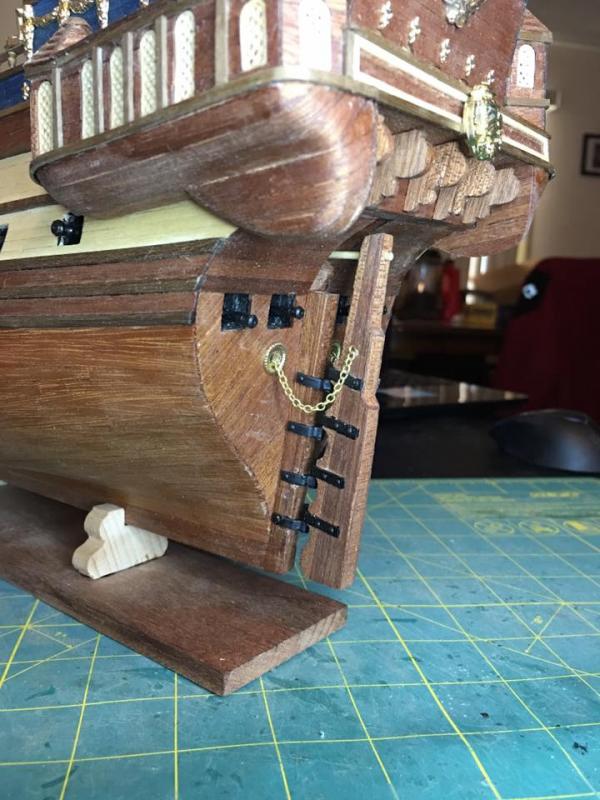
Rudder is installed. I do have a question for anyone who can help. Every model ship I have built has always been supplied with a gold chain for the rudder and sometimes the anchors as well. On a model I like the color as it adds an accent to the ship but from a realistic perspective wouldn't the chains have been black or dark grey in color? I just have a hard time thinking that they would have gilded the chains. In any case, rudder is done. Next up is completing the bow and ram details.
- 608 replies
-
- 12
-
-
- la couronne
- corel
- (and 1 more)
-
Yes it will. Do not paint the surface that will be glued or sand the paint back off before glueing. Painted parts can be glued together but it is best if they are raw surfaces as the glue will bind better. On wood, if the wood is sealed with paint or another finish, the glue will not penetrate the wood and therfore the bond will not be as strong.
-
If the model is for yourself and not for competition or museums then really it is completely up to you what materials you use in its construction. I would be interested to see what all could be done with different materials. Corian is interesting and the company my admiral works for deals with it on a regular basis. Might be something I could look into though personally I would not put it on my wooden ships as I prefer to keep those all wood but I may have a use for it on the railroad.
-
Happy belated birthday and congratulations on the birthday present! I think that will be a great one to progress into after the Phantom. I will be sure to follow along when you start that one but till then I am looking forward to seeing your ship yard open back up and more work resume on the Phantom as she is coming along nicely.
- 701 replies
-
- 3
-
-
- phantom
- model shipways
- (and 1 more)
-
As always but can never be said enough, thanks for all the kind words and likes. It is always a good feeling to see others enjoying a build as much as the builder.
- 608 replies
-
- 4
-
-
- la couronne
- corel
- (and 1 more)
-
Thanks for flipping the pictures, I was starting to get a blood rush to my head from being upside down. Seriously though great job. The colors on her are great. Everything is nice, crisp and clean.
-
Switching to wood is a good idea but instead of laminating it over the plastic just do away with the plastic all together and build them completely from wood. That will look a lot better as the laminated wood on plastic will make the carriages look too thick. Scale wise the wood should be fine. The sides of the carriages were made up of multiple pieces of wood that were nailed or bolted together. If you have to use multiple pieces to make them that will be fine or if you have a piece wide enough to get it in one, at 1:100 scale you will be just fine too. Build a test carriage and see what you think. For what you are trying to achieve I think that would be a good solution.
-
I too am a fan of natural wood. Nothing wrong with a good paint job but if I am going to go through all the trouble of making nice wood look good then I want to show it off to it's best which means just clear coats to bring out the natural colors and that is it. I even prefer to use either a flat or at most a satin finish as I've yet to see a glossy tree.
- 653 replies
-
- 6
-
-
- trabakul
- marisstella
- (and 1 more)
-
They really were magnificent creations. It is well documented though that they were not the best built ships though. Many of them only had a short service life due to either poor maneuverability, weak structurally or just unable to hold their own against the much better built English ships. Not saying they did not have successes but their record is rather weak when compared to other nations of the time. Granted, the French Navy at the time had a less aggressive strategy as well. They trained their crews to focus more of crippling the rigging of an enemy ship to allow them to escape rather than destroy or take the enemy's ship. As such, when they would fire they would wait till the ship was rolling back to gain more elevation on their guns. This is great for targeting rigging but left the lower hull vulnerable to enemy fire. The English especially at the time trained to fire at the hull of a ship to sink them. This proved to be a downfall for the French at sea. Still, their ships did inspire awe in their decorations and appearance. It is a shame none of the ships from this great era of sail survived like the ones of the 18th century. The Vasa is almost the exception to this but it didn't truly survive and much of it's glory was lost over the time it spent under water. As awesome as she is in her condition today it would be even more so to see her when she was new.
- 608 replies
-
- 5
-
-
- la couronne
- corel
- (and 1 more)
-
Don, I just spent my lunch break reading though your build and now I will be sure to follow along. Great job on her so far as she sure is shaping up nicely. It is always impressive how varnish brings out the colors of wood. Instantly takes something from bland and rough looking to a beautiful creation.
- 653 replies
-
- 6
-
-
- trabakul
- marisstella
- (and 1 more)
-
The Mantua plans were lucky finds on Google and Yahoo searches. I thought I had saved them but I cannot find them. I will keep looking but they were bad resolution and small. I think there are some on modellismo.net. The link is for a nice build of her but I do not think the plans are in this build log. I do know that model-dockyard.com and hobbyworldinc.com have them for sale.
- 608 replies
-
- 3
-
-
- la couronne
- corel
- (and 1 more)
-
I have the Corel plans, and have seen most of the Mantua/Sergal ones online. Now I have these and each one is different. The overall layout and design is the same but there are considerable differences in each that have made me question what was authentic and what is "educated guess" or just an artistic rendering that looks good. My model has become a mixture of all the various references I have found combined with what I have been able to read about her and common building practices of that era. She won't end up in a museum but I can justify my decisions and until a time machine is invented so I can go back and see her in person that is good enough for me.
- 608 replies
-
- 5
-
-
- la couronne
- corel
- (and 1 more)
-
Good work on the anchor. I have had similar issues with having to scratch build a new rudder as there was not a good way to hide the plywood layering.
- 305 replies
-
- 3
-
-
- deagostini
- vasa
- (and 1 more)
-
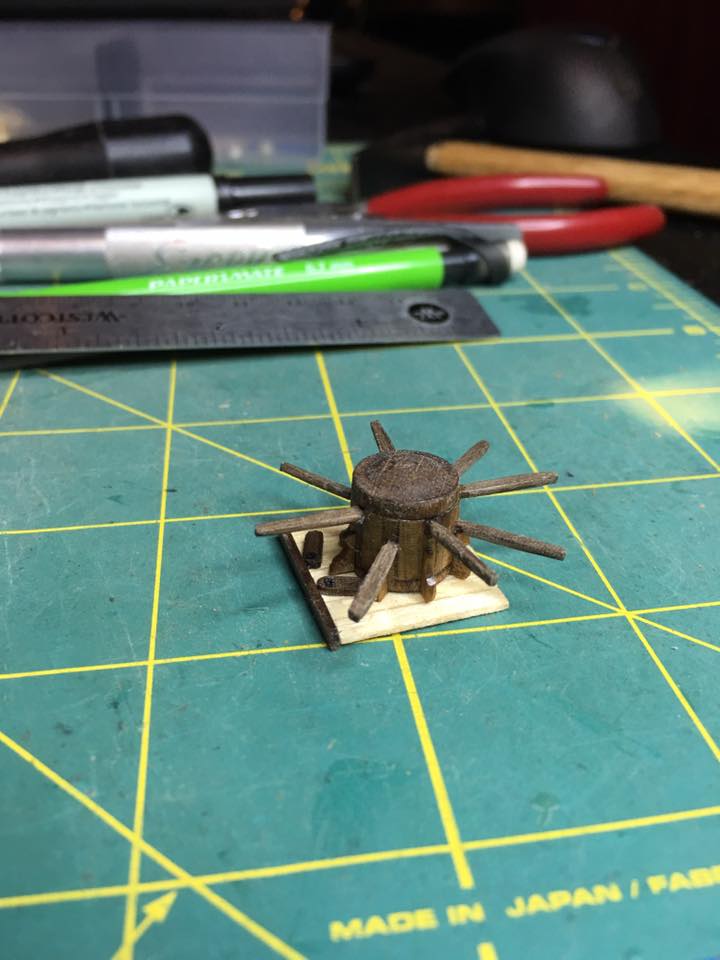
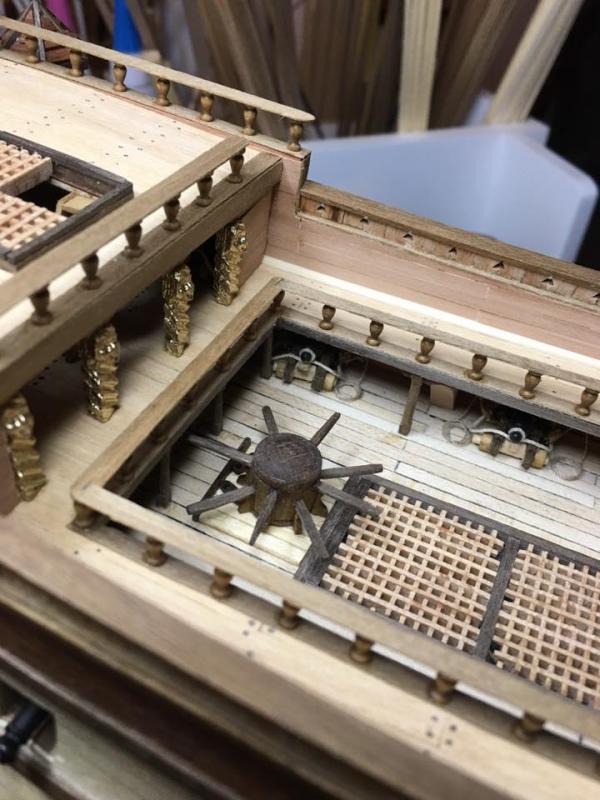
So I have been building a few smaller items lately. One of those items is the capstan which I finished up last night. I never could find a good representation on what it should look like so I made up my own largely based on the photos from the Vasa museum and models of ships of the same era. I decided to model it with the poles in place since it sits so far down on the upper gun deck that once the launch is in place and rigging up it would look like a oddly placed wooden post. This way a viewer can instantly tell that it is the capstan. On a design note, when in use, the clearance is very tight against the spar deck support columns. I may have these to far forward but in all reality, the clearance was probably minimum though if scaled up that tiny gap is probably closer to 1 or 2 feet. Well, enjoy the pictures and I hope to have the rudder finished and installed soon as that is the other item I have been building lately.

- 608 replies
-
- 10
-
-
- la couronne
- corel
- (and 1 more)