HOLIDAY DONATION DRIVE - SUPPORT MSW - DO YOUR PART TO KEEP THIS GREAT FORUM GOING! (Only 13 donations so far - C'mon guys!)
×


EJ_L
-
Posts
2,246 -
Joined
-
Last visited
Content Type
Profiles
Forums
Gallery
Events
Everything posted by EJ_L
-
 Mark, Thank you very much for those. I can see a lot of differences between those plans, and the model and the current plans and models that are out there. It has me wondering what she really looked like and how much artistic freedom has taken place over the centuries to bring her to her current design. It is also interesting to see that she has guns pointed across her deck much like SotS does. This was a common feature in the 17th century but this is the first I have seen it on la Couronne. I will be spending a lot of time studying these as every time I look at them I notice something new and different than what I've spent the past year looking at. Thanks again!
- 608 replies
-
- 4
-

-
- la couronne
- corel
- (and 1 more)
-
Always nice to have a good shipmate along with you.
-
More scale figures would be nice to see but with so many scales available I would think that would have to be a custom order from someone with the time and equipment, mainly a 3d printer, who would be willing to do that. If anyone knows of someone who is let me know as I would love to have some sailors on my ships!
-
You are right in that the wood detail will probably not be visible once everything is installed especially if you going to fully rig the canons in place. Still, it is a good idea to add texture to the carriages. Even if the wood grain was heavily painted over on a real carriage, there would have been some rough spots and you would have seen the seams between the layers of timber stacked together to form the carriage. Looking forward to seeing them installed!
-
Well she is in fine shape for spending 10 years waiting in dry dock. I don't see anything that can't be repaired. I'll follow along and watch you finish her journey.
-
You might try a little less glue. Wood glue is surprisingly strong and if you apply a little and spread it evenly over the plank before applying so that it is a thin coating instead of a thick line or blob it will adhere just a strong without the squeeze out. A damp cloth will also wipe up any glue that does come out without soaking the wood or getting on your fingers. If all else fails a pair of latex gloves might help prevent your skin from cracking. I am of that group of modelers who tend to glue their fingers to things then rip off the glue removing skin in the process. I am fairly certain that all my ships have parts of me on them. Blood from a cut finger or glued skin, I leave my mark on them as they leave theirs on me.
-
Martin, Mark thank you both for the kind comments and to everyone who has liked this and followed along. The appreciation is motivation enough to keep going. Mark, I don;t know if I would call it quickly. As of last night I am at 490 hours and over 6 month in. What helps is that with my admiral in graduate school and a clinical internship I have a lot of free time where I am alone and able to work uninterrupted. In a couple of months when the new shipyard is built and we move that free time will shrink considerably as I will have a lot of work to do setting up the admiral's office and the rest of the house. So I am taking advantage as much as I can in the meantime. By the way, I would love to see those pictures of the admiralty model as well as the plans if you would be willing to share them. I have been doing a lot of research on the ships of this century and would love to see how they show her framing. Thanks,
- 608 replies
-
- 7
-
-
- la couronne
- corel
- (and 1 more)
-
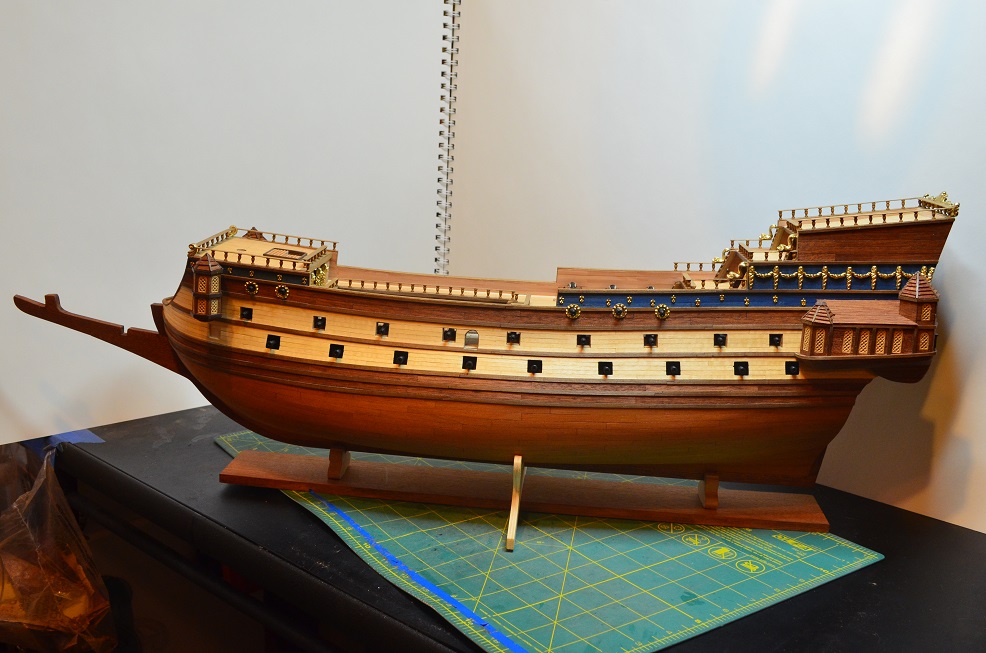
Finished the second tower! All of la Couronne's hull structures are now built. It is good to see her looking like herself. I still have a long way to go but I feel like I have reached another big milestone on her build. Now to work more on all the misc. decorations, rudder, furniture and the build out of the ram. Also sometime soon I will need to build her launch. The kit came with a preformed, solid hull to use for this. I think I will build that one for a place holder but I would like to frame and plank one from scratch. I have never done that before but as my desire to learn how to do actual framing is constantly growing greater and greater I think this may be a good place to attempt a first try. Worst case I have the solid hull one I can use and best case I will make something great! I also need to give her a good dusting/cleaning. Since most of my work is currently being done very close to her she is collecting some saw dust build up on her edges. I am looking forward to having my large table back at the new shipyard to help prevent this. I will try to give her a good cleaning hopefully before the next major set of pictures. Working around the bow more lately I have also noticed the very pronounced twist at the forecastle deck. I new this was there but as much of the build up till recently has focused on her stern I didn't pay that close of attention. Now however it bugs me. There is nothing I can do at this point and really other than acknowledging my mistake the reason I bring it up is to stress the importance of making sure the false keel, on these kits especially but on any build really is straight and true. Most of us know this but reminders are always good and for anyone new who is reading this, there is your warning! Still I am very happy with the build as she is by far still my best wooden ship to date. Enjoy the pictures and I will get back to work!
- 608 replies
-
- 10
-
-
- la couronne
- corel
- (and 1 more)
-
Bob, you are not far off with needing sunglasses. When the LED lights on my visor reflect back off those pieces it can be extremely bright and blinding when looking through magnification. If this cloud cover will break I want to take her outside for some pictures. I have a feeling it will be even brighter then! Mike, glad you are enjoying it! The kit wood is not too bad. I did add some other wood to it though. The mahogany on the lower hull, below the bottom wale, and the pear wood that is on the interior bulkheads and the cabin walls came from Jason at Crown Timberyard. All the rest is from the kit. I have found that most kit wood is usable it just sometimes takes extra effort to make sure the thicknesses are even and the edges straight. Nothing that we shouldn't be doing already anyway. I will keep an eye out for that Unicorn build if you decide you want to give it a shot.
- 608 replies
-
- 1
-
-
- la couronne
- corel
- (and 1 more)
-
Looks like you are progressing nicely. I think I will pull up a chair and follow along.
-
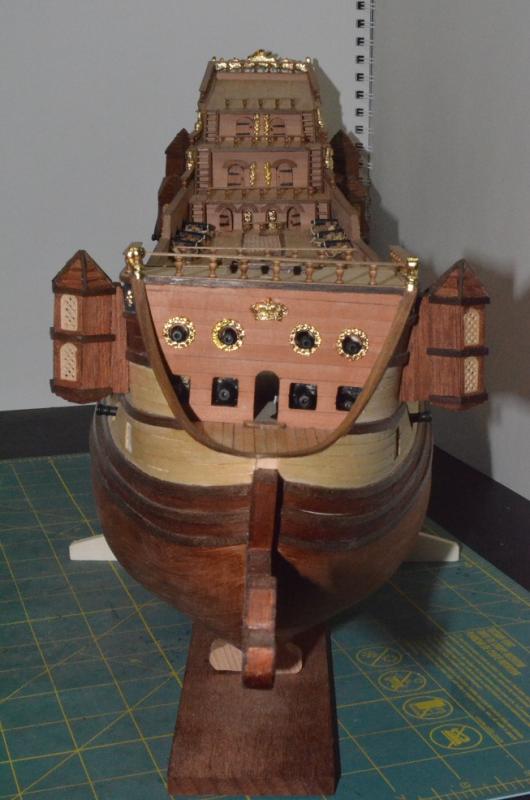
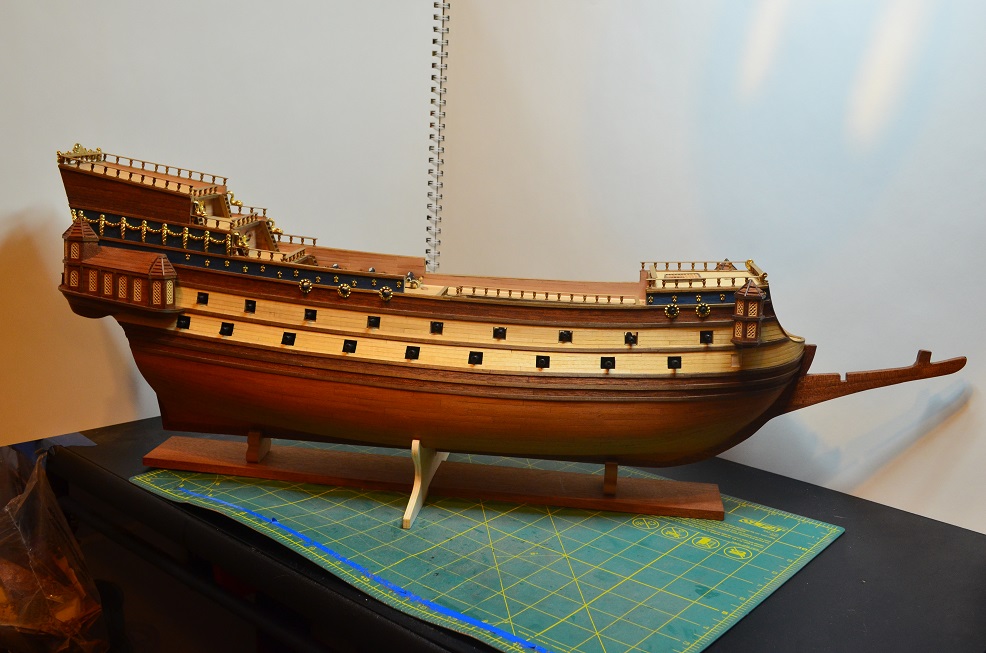
Completed the first of the front towers as well as adding more of the gilded decorations with 32 fleur-di-lis. Now to repeat on the other side. She really is looking more and more like the iconic ship she is.
- 608 replies
-
- 9
-
-
- la couronne
- corel
- (and 1 more)
-
Nice job on the shield. That will look great on the ship. I agree that the wait times would definitely help in keeping the desire up to work on her. Having wait all those weeks in between steps would have me ready to get going every time that package showed up on my porch. On a plus side though, it would be great for allowing two builds to happen at the same time. Being able to work on a different one while waiting would help with the downtime and keep burnout from happening on either one.
- 305 replies
-
- 3
-
-
- deagostini
- vasa
- (and 1 more)
-
Henry, thank you for that. I will look him up over there. Also, your own build of this ship is very nice. I will be following your log with great interest also.
-
Henry, I just found your log and I must say that you are doing a fantastic job. As I'm researching this ship and looking through build logs for ideas and clarifications for my own build in a few months I will be following along with yours as it is truly great. Keep up the excellent work!
- 196 replies
-
- 1
-
-
- plastic
- soleil royal
- (and 2 more)
-
Fantastic work. I know all those parts are a pain to install but the end result is more than worth it. You are going to have an awesome model when completed.
- 75 replies
-
- 6
-
-
- scharnhorst
- dragon
- (and 2 more)
-
Bill, Can you provide a link to his build? I am going to be starting a wood version of the Soleil Royal in a few months and would love to see his as I am currently in research and ideas mode on that build. I have tried searching both his user name and the log title you provided but I cannot seem to find it. Thanks,
-
Well you can't go wrong with any of those choices. I do wish that the hardest choice any of us would have to make is which ship to build next. Life would be much more enjoyable on the day to day level. I look forward to seeing whichever you choose.
- 608 replies
-
- 2
-
-
- la couronne
- corel
- (and 1 more)
-
Looks like you are off to a good start. Smart decision to wear the gloves. A person usually tends to learn more from a mess up than a success. Mostly because they happen a lot more frequently! Nothing wrong with collecting future projects ahead of schedule. I think we all have a few sitting in the boat yard waiting their turn. Which one did you choose to do next? Have a good vacation! Look forward to seeing more on your Phantom when you get back.
- 701 replies
-
- 6
-
-
- phantom
- model shipways
- (and 1 more)
-
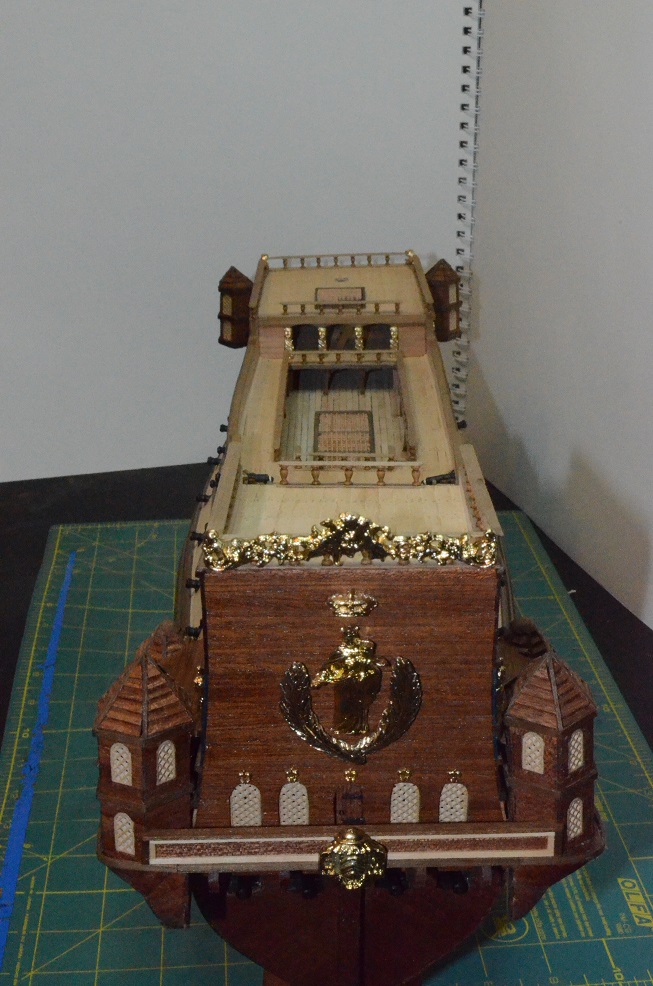
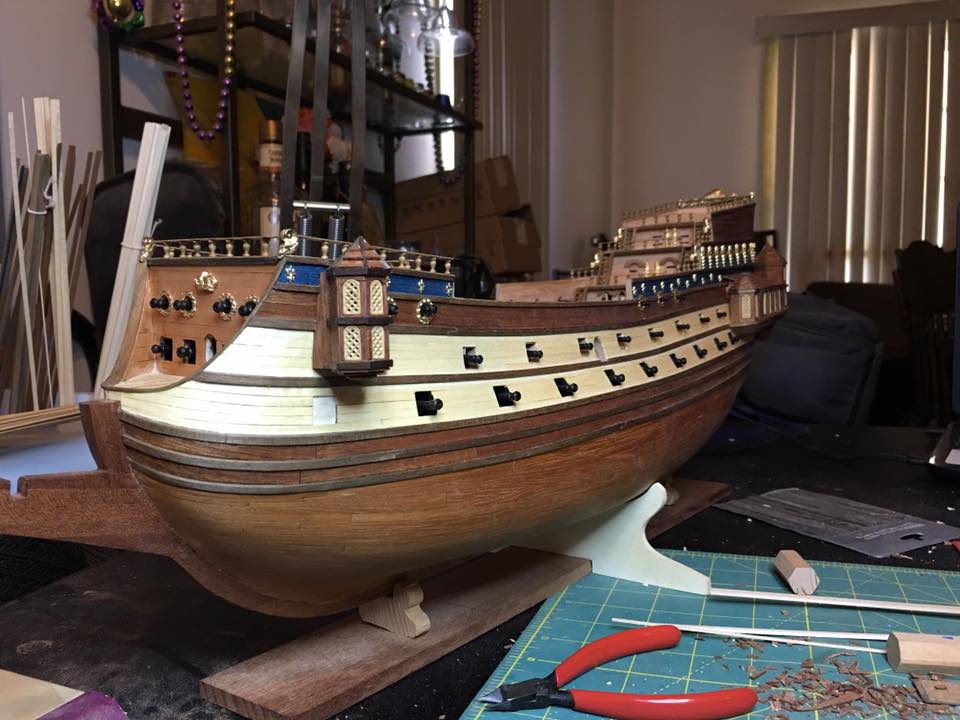
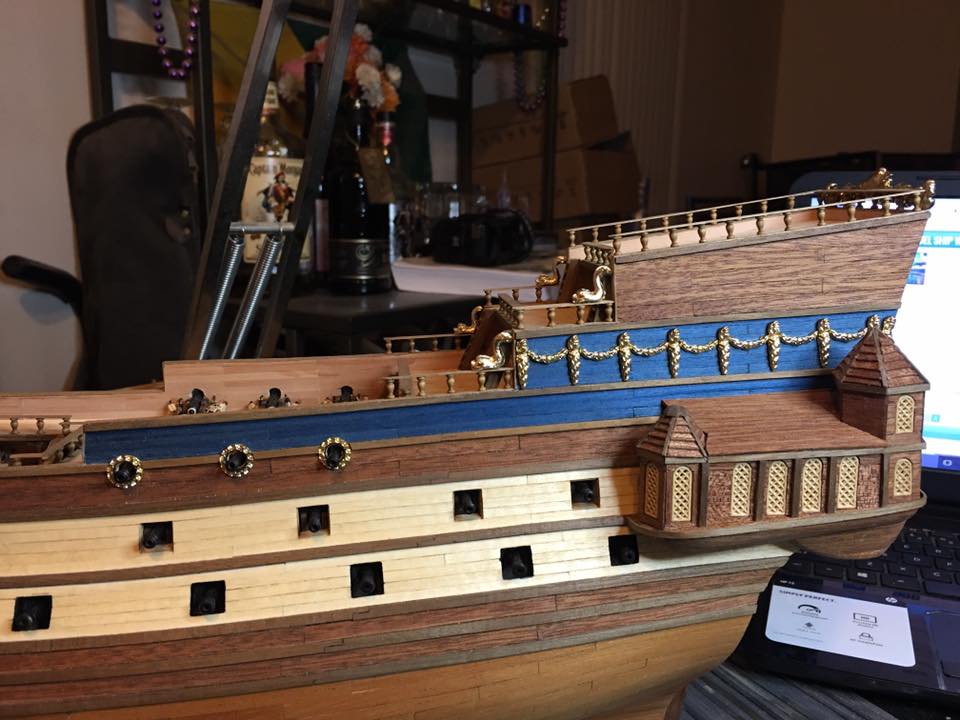
Thanks MIchael! I have spent several hours over on the scratch build side looking at many of the awesome ships shown there. Many unbelievable works there. The gilded works are adding some nice character to her. In the below photo I have started to add more of them to the sides now that I have finally completed the port side quarter galley. I did find out that some of my carving skills will be put to the test shortly as the decorations that go on the uppermost wedge directly below the poop deck do not fit the dimensions of the ship. I am not completely sure what happened as my measurements match the 1:1 drawing and all other decorations fit but in any case they are too short for this model. Luckily they are some of the simpler ones so I believe I can do it. We shall see. At least I do not have to make a hundred fleur-di-lis! The metal ones actually look fairly good so that is a relief. Enjoy the picture. Once I finish up with the current decorations I will add some updated pics of the whole ship.
- 608 replies
-
- 9
-
-
- la couronne
- corel
- (and 1 more)
-
Great find Kevin. Thanks for this.
-
Great idea with the sticky tack. That looks like a great way to hold those small parts for painting. I will have to remember that one for later use.
- 75 replies
-
- 6
-
-
- scharnhorst
- dragon
- (and 2 more)
-
The most common way of making sure your planks are going to lay right on your frames is to "fair" the hull. This is done by laying a temporary strip of wood across all the frames. If the strip lays flush with the frame then no sanding is needed. If there are gaps then sanding must be done on that frame. On most ships almost all the frames at the bow will need to be sanded to some degree. The stern can vary depending upon how much curve there is. The mid section typically does not need much sanding. Again this varies per ship. I highly recommend taking the time to do a proper fairing of the hull. It will help immensely when you go to plank her. Skipping this step usually only leads to headaches later. Also, if you are planning to plank the inside bulkheads then fairing needs to be done on the inside of the frames as well. I know this is a lot of tedious work but we all do it and I think you will see if you read the beginning of almost any P.o.F. or P.o.B. log that this is a vital step. Otherwise, your framing is looking great. You are well on your way.
-
Welcome Kevin and thanks for the kind words. Always room for one more and thanks for the fresh popcorn, the old popcorn was getting stale after 6 months. The great thing with these build logs is no matter when you join in it is fairly easy to get caught up and look back through the build to see what has been missed.
- 608 replies
-
- 5
-
-
- la couronne
- corel
- (and 1 more)
-
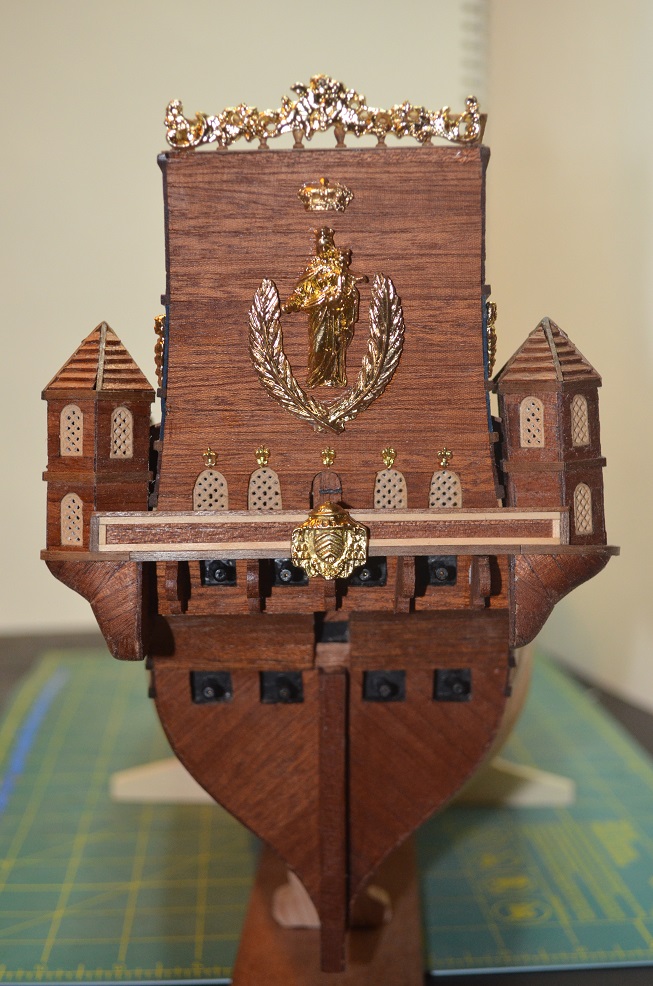
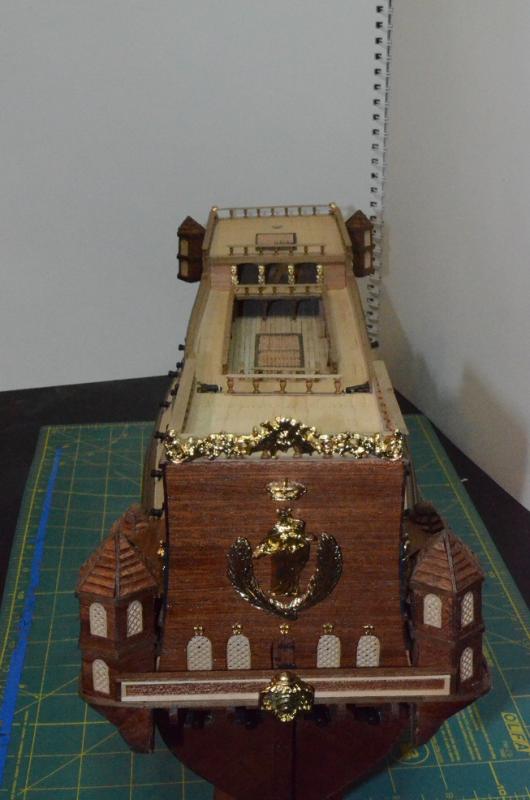
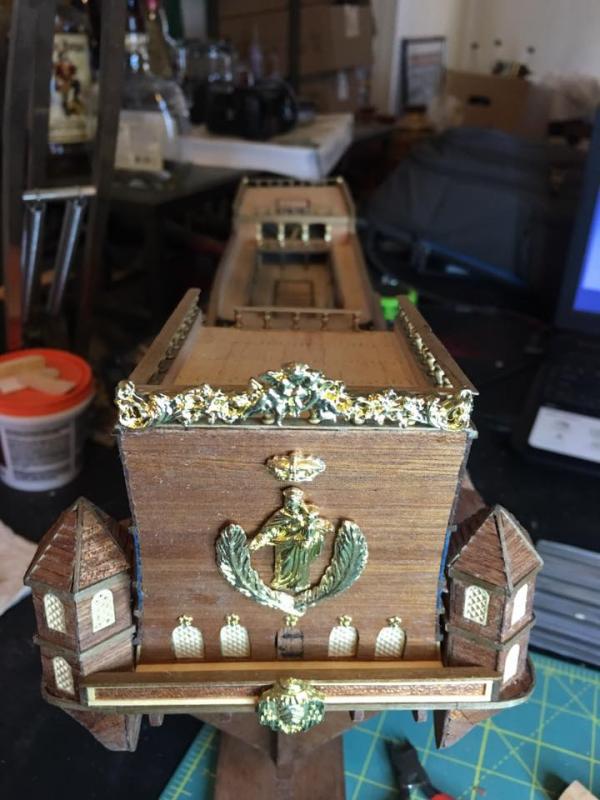
I have not found much consistency in decorations on this ship. Put 6 different renditions of her and you will get 6 different styles of decorating. The fleur-di-lis and the Madonna as well as the crown above her head and a variation of the crossed palm branches are usually there. Size, and number varies but they are present. The rest of the stern decorations come and go depending upon the builder, manufacturer of the kit and even the year the kit was produced. As I have no definitive drawing that can confirm exactly what was there I decided to use the pieces that Corel has provided. Not saying they won't change later as I am constantly researching for more and better information and if I find something that can confirm the look one way or the other I will change it when I carve the new pieces.
- 608 replies
-
- 6
-
-
- la couronne
- corel
- (and 1 more)
-
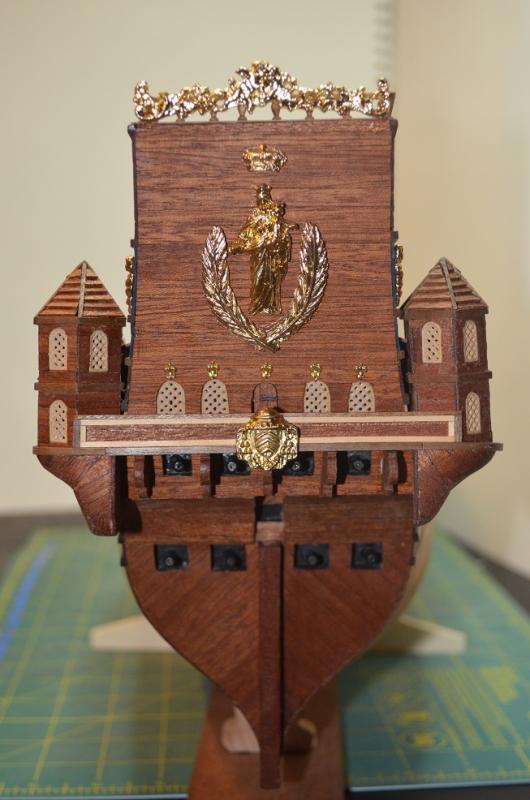
Latest update has the tall tower on the port side quarter galley built and the balcony completed. I also went ahead and installed the decorative carvings. I decided to use the metal ones provided by the kit. They are not the greatest looking, but for now they will work. I would like to one day replace them with wooden ones that I carve myself however, as my carving skills are not that great yet it will wait. I figure I can always pop off the metal ones to replace them when I can. Work is still progressing on the port quarter galley. The small tower is in production and hopefully I can get it done today and start building the center cabin. Better get back to work!

- 608 replies
-
- 12
-
-
- la couronne
- corel
- (and 1 more)