HOLIDAY DONATION DRIVE - SUPPORT MSW - DO YOUR PART TO KEEP THIS GREAT FORUM GOING! (Only 20 donations so far - C'mon guys!)
×


EJ_L
-
Posts
2,246 -
Joined
-
Last visited
Content Type
Profiles
Forums
Gallery
Events
Everything posted by EJ_L
-
I am guilty of not finishing some of my kits. In fact there are a few of them listed in my signature as unfinished. One of them I do not feel bad about as it is a joint projects with a friend while I was still in the Navy and is now awaiting his retirement. The others either had issues with the kit, the instructions or I just lost interest in finishing them. The fact that they are plastic kits also has something to do with it as I have grown to love wooden ships more. I still may sit down and finish them one day.
-
 She sure looks good Ken. You have done a fantastic job! Looking forward to seeing you rig her.
 -
This has always been a tough decision whit model building in general. My first ship build was the Constitution. It was Revell's plastic 1:96 scale kit. Granted I had been modeling for about 15 years at that point so I was not new to model building, nor complicated builds. I do admit though that there were times when I thought I had bit off more than I could chew with that kit. Even with the kits two piece hull and very good instructions, it is still a very daunting kit to someone who had never built a ship before and maybe more than I should have undertaken. That being said, it came out beautiful two years later and sits proudly in my dad's house as it was him I built it for. Now that being said, I was not interested in building other ships at the time. That one was undertaken as a gift for my dad as he was not able to finish his model of the Constitution and it had become too badly damaged to salvage. Had I started building a simpler ship but without the motivation to build it other than "this looks fun" I may not have wanted to push through to completion when I hit those hard places. I learned a lot on that first build and every time I managed to struggle my way through to completion of a part I would (and still do) sit back and admire it for a long time. This is where my love of ship building was born. Seeing that majestic ship come together and knowing that I made that happen created a love of this hobby and filled that void that other models were not able to do. I know my story is in the minority of first time ship builders. I also know that models are put on hold for many reasons other than burnout. My dad's had to stop because he had me, was going to college, working 2 jobs and then my mom died. He has built models since but never had the time to complete his Constitution before the ship got ruined. A friend of mine from the Navy has a great model railroad layout that never got completed since he was constantly getting deployed and now is getting ready to retire and move so he has to disassemble it. Just recently my own build has stopped as I found out last week my dog of 11 years has cancer, no way to fix it and we had to put him down yesterday. My wife and I are still devastated over this loss. I think it is wise of us as a community of experienced builders to encourage first timers to choose easier kits as it is a shame to see so many unfinished builds out there. However, I do not think we should discourage them if they choose to take on a harder one to start. Instead, be sure to constantly follow their builds and try to offer help and suggestions on how to get through those tough areas when they are reached. We do not always know what outside circumstances may cause a build to stop.
- 241 replies
-
- 18
-

-

-
Most metal fittings should be blackened. The decorative pieces such as the ship's bell and ornamentation would be a polished brass or gold plate so those should be shiny.
- 701 replies
-
- 3
-
-
- phantom
- model shipways
- (and 1 more)
-
I think it wold look good with a half and half display. Worse case if you are unhappy with the planking turnout due to either color or the planks themselves you can always copper over them.
- 701 replies
-
- 5
-
-
- phantom
- model shipways
- (and 1 more)
-
The brass wire is a nice touch to those canisters. Little details like that make a huge difference especially at that scale. Great job!
- 206 replies
-
- 7
-
-
- battle station
- panart
- (and 1 more)
-
I am also new to wooden ship building, this being my second build, but I have not sealed my first planking and have not had any problems gluing the second planking to it. I do have some filler but it is minimal and after sanding the hull down I have not had any problems with glue adhering to either plank. I do not know about longevity of planks coming loose over time as the hull on my first build has only been complete for about two years. I will agree with Don in that it is probably not the surface issue but instead either the type of glue or the application of it. I rarely glue sealed areas of wood to each other even in my regular wood work. I will sand off any sealer as I prefer to keep connecting wood surfaces raw. This is my preference as I have seen it go both ways to the same results so I do not believe there is a right or wrong just personal preference combined with the instructions on the glue being used. Application is important so you might double check the instructions on the bottle just to be certain. Sometimes it is a simple mistake that frustrates me for days till I stop and read.
- 10 replies
-
- 1
-
-
- El Pilar power boat
- 1:27
- (and 1 more)
-
Excellent work. One of my favorite parts of these models is adding the furniture and accessories. Every item adds life to the model and makes it easier to picture the deck filled with sailors going about their duties.
- 206 replies
-
- 6
-
-
- battle station
- panart
- (and 1 more)
-
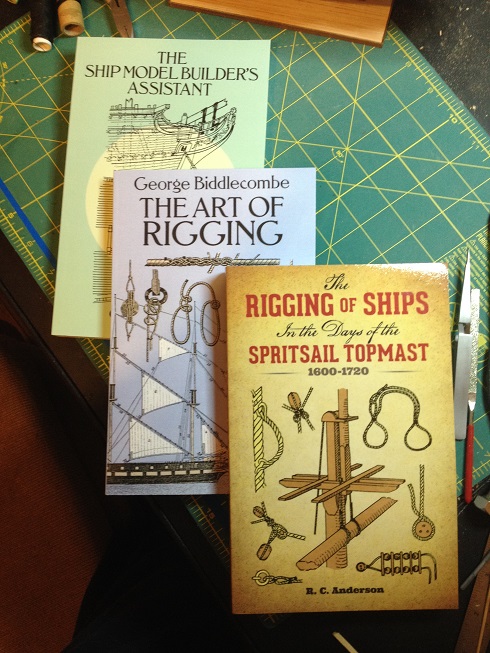
Dave, thanks for the recomendation on that book. It was one that I did not have though in a few days that will be corrected as it is now bought and on its way!
-
The book they are referring to is The Rigging of Ships in the Days of the Spritsail Topmast 1600-1720. It is a very useful guide for that era of ships. Below is a picture of it from my collection. You can find it on Amazon as that is where I got my copy.
-
That has always been a pet peeve of mine in model building. The instructions/plans may show the part but not tell you what it is or name a part but not show you where it goes. The latter is easier to figure out thanks to google searching or posting the question on here. The former however bothers me because I want to know what I am building and why. I build ships to learn about them as much as to enjoy building them. I want to know what that piece is for, what the rope does, where they go and why they go there. Most of that I can figure out through reading other books and minor research but not if they do not tell me what the part is to begin with.
- 206 replies
-
- 8
-
-
- battle station
- panart
- (and 1 more)
-
I was also thinkimg that they were probably the containers for the powder bags. Would love to find out for certain. In any case they, along with the rest are looking quite good. I too am excited to see you start on your endeavour model but push through and finish as you are near the end!
- 206 replies
-
- 6
-
-
- battle station
- panart
- (and 1 more)
-
That is almost unbelievable in that it came that way in a kit. In my experience there is usually at least some sanding, trimming or filling that has to happen to get a good fit. Says a lot for the quality of DeAgostini and as someone who has not had an opportunity to try their products, this is very encouraging. I hope the rest proves be of the same standard.
- 305 replies
-
- 2
-
-
- deagostini
- vasa
- (and 1 more)
-
Making Shackles my way…
EJ_L replied to Thanasis's topic in Metal Work, Soldering and Metal Fittings
Great tutorial Thanasis. Very well done and extremely useful! Genius idea using that old processor for pins. I have a few of those laying around that I now have a use for! -
looks like you are off and running with the planking. It is looking good. Good idea for the cradle also. It is nice when your ship stays upright so you can see how she looks without having to hold her yourself. Take your time with the planking and I look forward to seeing her when you have progressed some more.
- 701 replies
-
- 3
-
-
- phantom
- model shipways
- (and 1 more)
-
Hahaha! I've done that a time or 20! I once spent probably close to ten minutes looking for an eye bolt that I thought I dropped only to find it glued to the side of my finger. Though, when it comes to leaving DNA behind on a build it tends to be blood for me. Never fails that I will cut or poke myself with a carving tool or knife, shrug it off then later look at the piece I was holding and there will be smears of blood on it. Maybe I should take up a safer hobby.
- 206 replies
-
- 7
-
-
- battle station
- panart
- (and 1 more)
-
That I understand. I've had some days where I felt like I peeled more glue off my fingers than I put on the ship! No wonder it feels like I'm always out of glue...
- 206 replies
-
- 6
-
-
- battle station
- panart
- (and 1 more)
-
Very nice. I'm enjoying seeing the details at this larger scale. Especially the rigging which is nice as with smaller scales it can often be hard to see just what the ropes are doing. This also makes your photos look like they are on an actual ship rather than just a model of a ship. Of course that is also due to the great job you are doing on building these models.
- 206 replies
-
- 7
-
-
- battle station
- panart
- (and 1 more)
-
That is what I had till it broke a few weeks ago. Worked great but didn't last long, (I bought it in January). I'm gonna try to get something with adjustable temperature and an on/off switch. Might help prevent burn out on the next one. The end piece on the electric plank bender is just held on with a screw so I can always switch it to the new one.
- 608 replies
-
- 3
-
-
- la couronne
- corel
- (and 1 more)
-
I have not tried steaming yet. The closest I have come to that has been to soak the wood then use a hot air gun when bending. That worked okay but not as good as a hot iron. Of course care must be taken not to burn the wood with the iron so steam may have the advantage there. Might give it a try till I get a new soldiering iron.
- 608 replies
-
- 3
-
-
- la couronne
- corel
- (and 1 more)
-
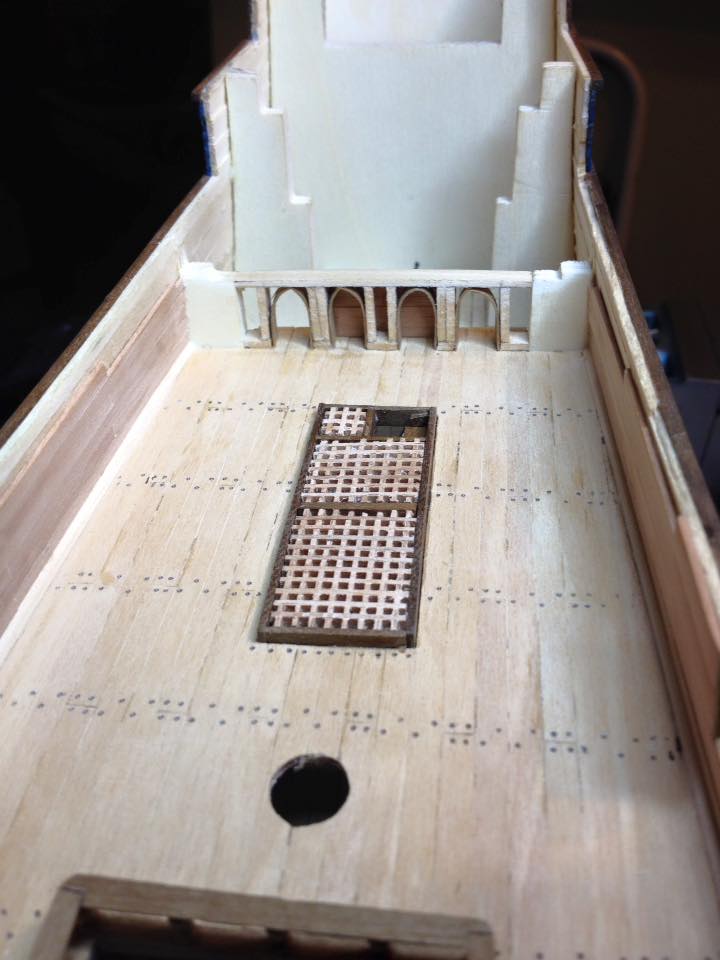
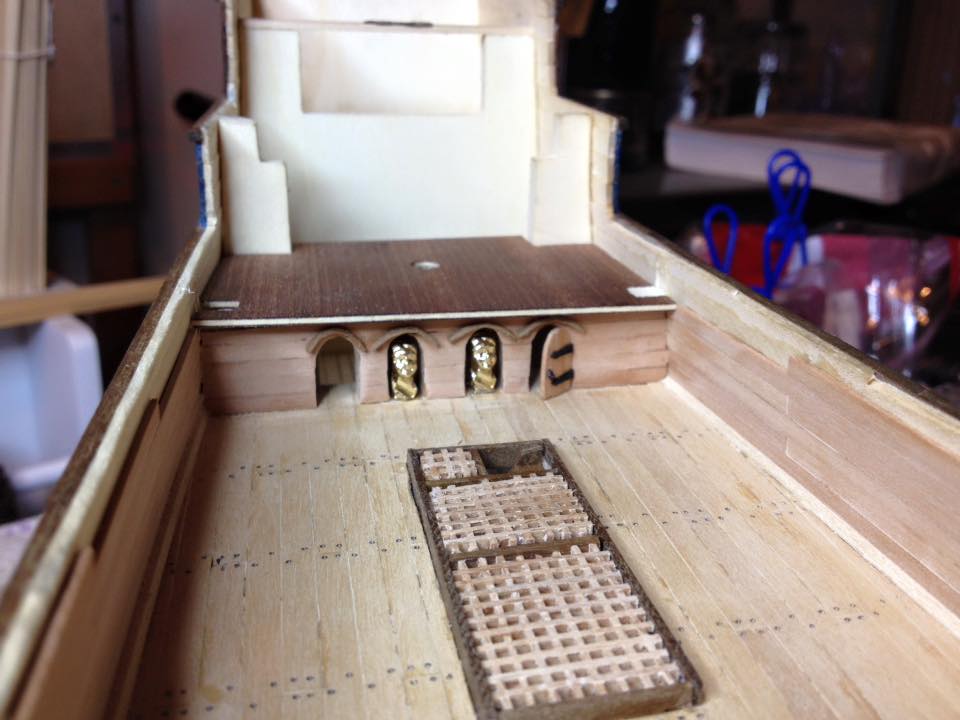
So after spending the last couple of days looking at the results on the cabin bulkhead, I decided that I was not happy with the trim arches over he doors and alcoves and so they are now in the trash. My plank bender crapped out on me a few weeks ago and I have not yet bought a new one so I had tried to bend them without it to less than satisfactory results. Now I am making new ones and carving the arch instead of bending it. So far I am much happier with the results. Pictures soon to follow.
- 608 replies
-
- 3
-
-
- la couronne
- corel
- (and 1 more)
-
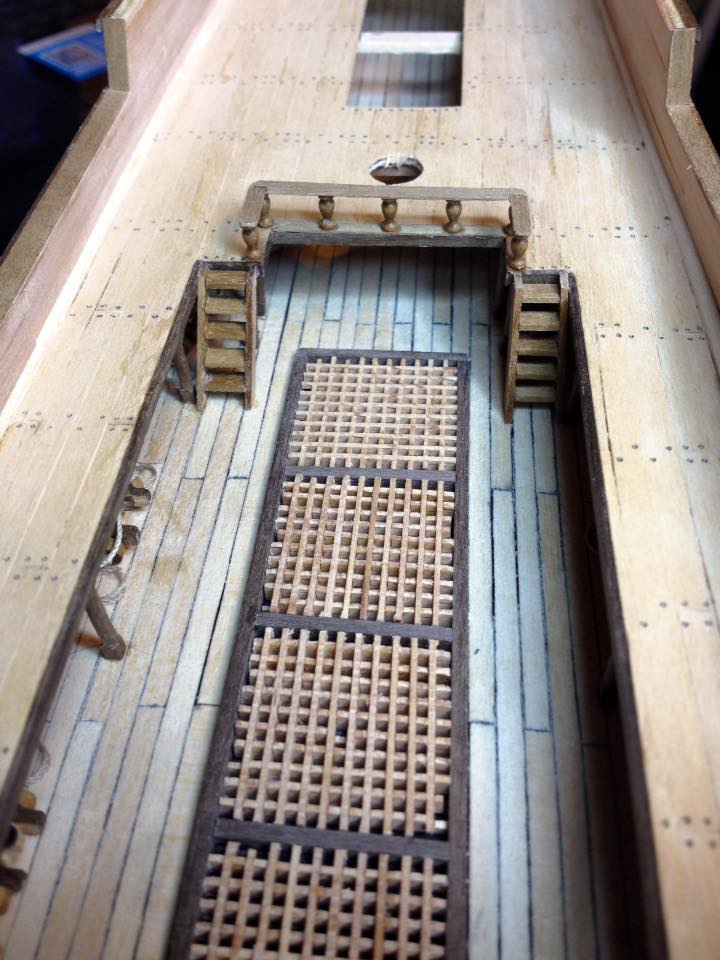
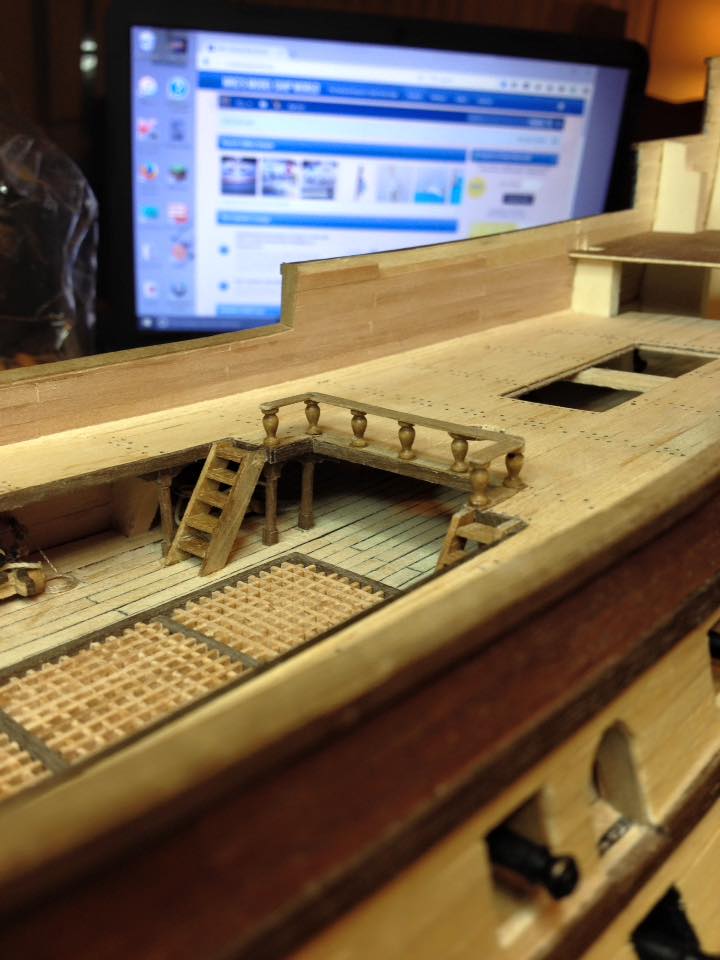
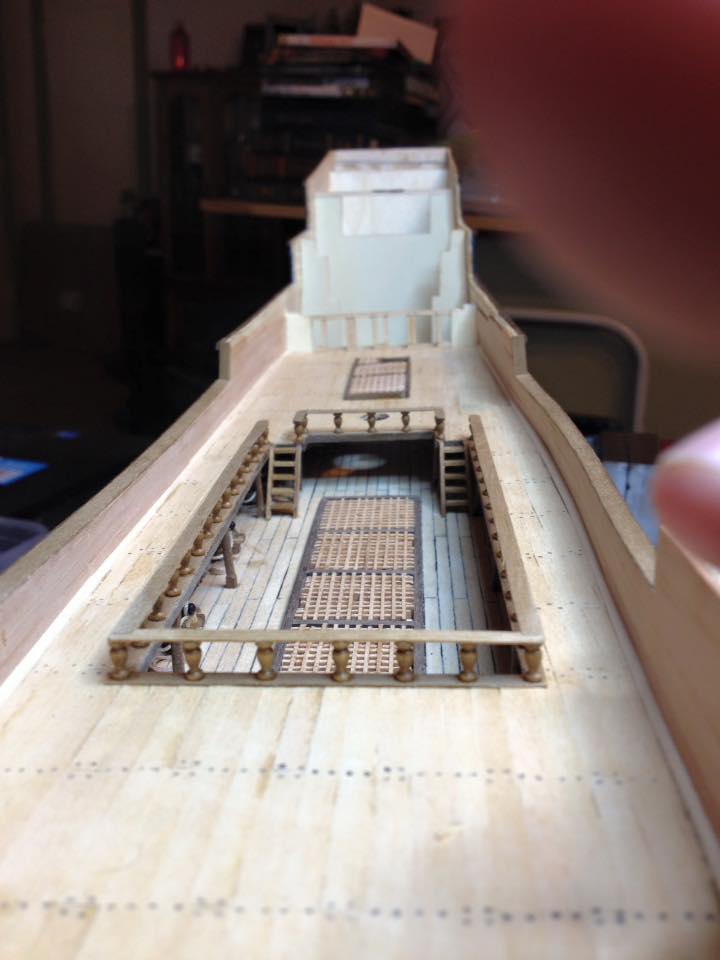
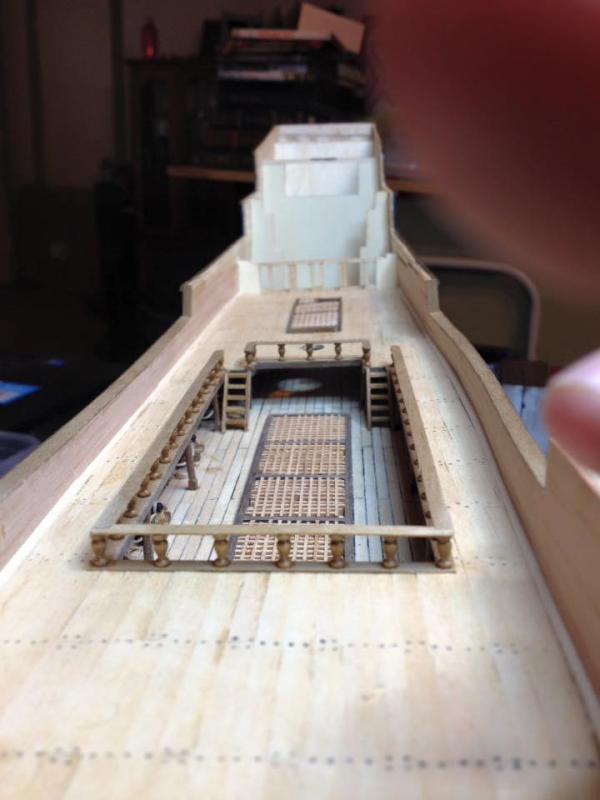
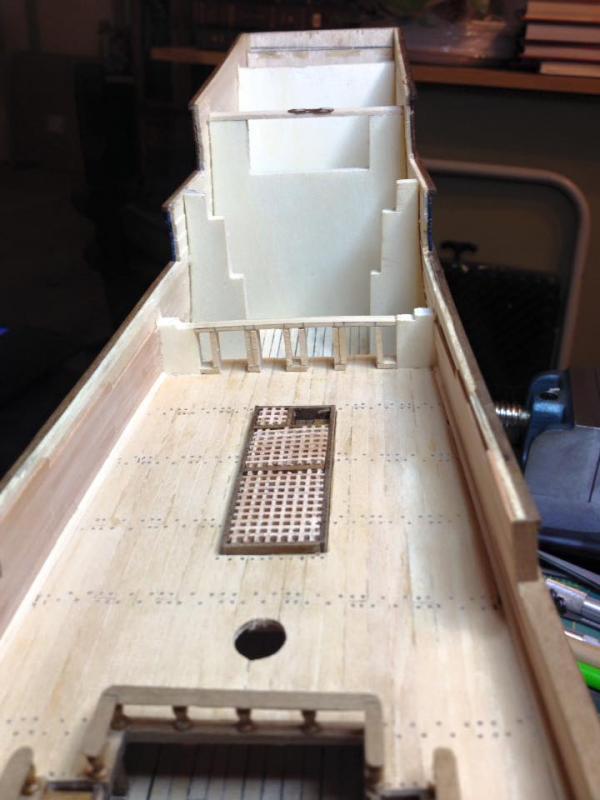
So this week has seen a lot of smaller details come together. I got ladders built and installed from the upper gun deck to the spar deck, railings installed, more cargo hatch gratings built and most of one of the cabin bulkheads built. Still have one more door to build and some clean up to do but overall a lot has changed. She is starting to come alive with these details.


- 608 replies
-
- 12
-
-
- la couronne
- corel
- (and 1 more)
-
I second Don in saying real good idea for the anchoring the canons. I have had a few come loose over the years and that is a nightmare trying to put them back in place after decks have been installed and rigging has gone up. That will be great insurance against the glue not holding.
- 206 replies
-
- 5
-
-
- battle station
- panart
- (and 1 more)