DONATION DRIVE - SUPPORT MSW - DO YOUR PART TO KEEP THIS GREAT FORUM GOING!
×


EJ_L
-
Posts
2,246 -
Joined
-
Last visited
Content Type
Profiles
Forums
Gallery
Events
Everything posted by EJ_L
-
 Very good job on the weathering. Reminds me of the fishing boats down at my Uncle's cabin in Louisiana. They have that same rugged, neglect look that you have recreated. I may have to try your technique when I weather some of my structures on my model railroad.
 -
Wow! That is fantastic work! You can't even see where it broke. This is truly a remarkable build.
-
Recommendations for essential tools for a beginner?
EJ_L replied to Cindyp's topic in Modeling tools and Workshop Equipment
Welcome to the Hobby!! I would add a good light and magnification. A table top swivel lamp with a built in magnifier will work but a headset such as an Optivisor is better still. Being able to see what you are working is very critical and no matter how good your eyesight is, staring at these tiny pieces or trying to tie miniature knots will strain your eyes and cause them to hurt in time. -
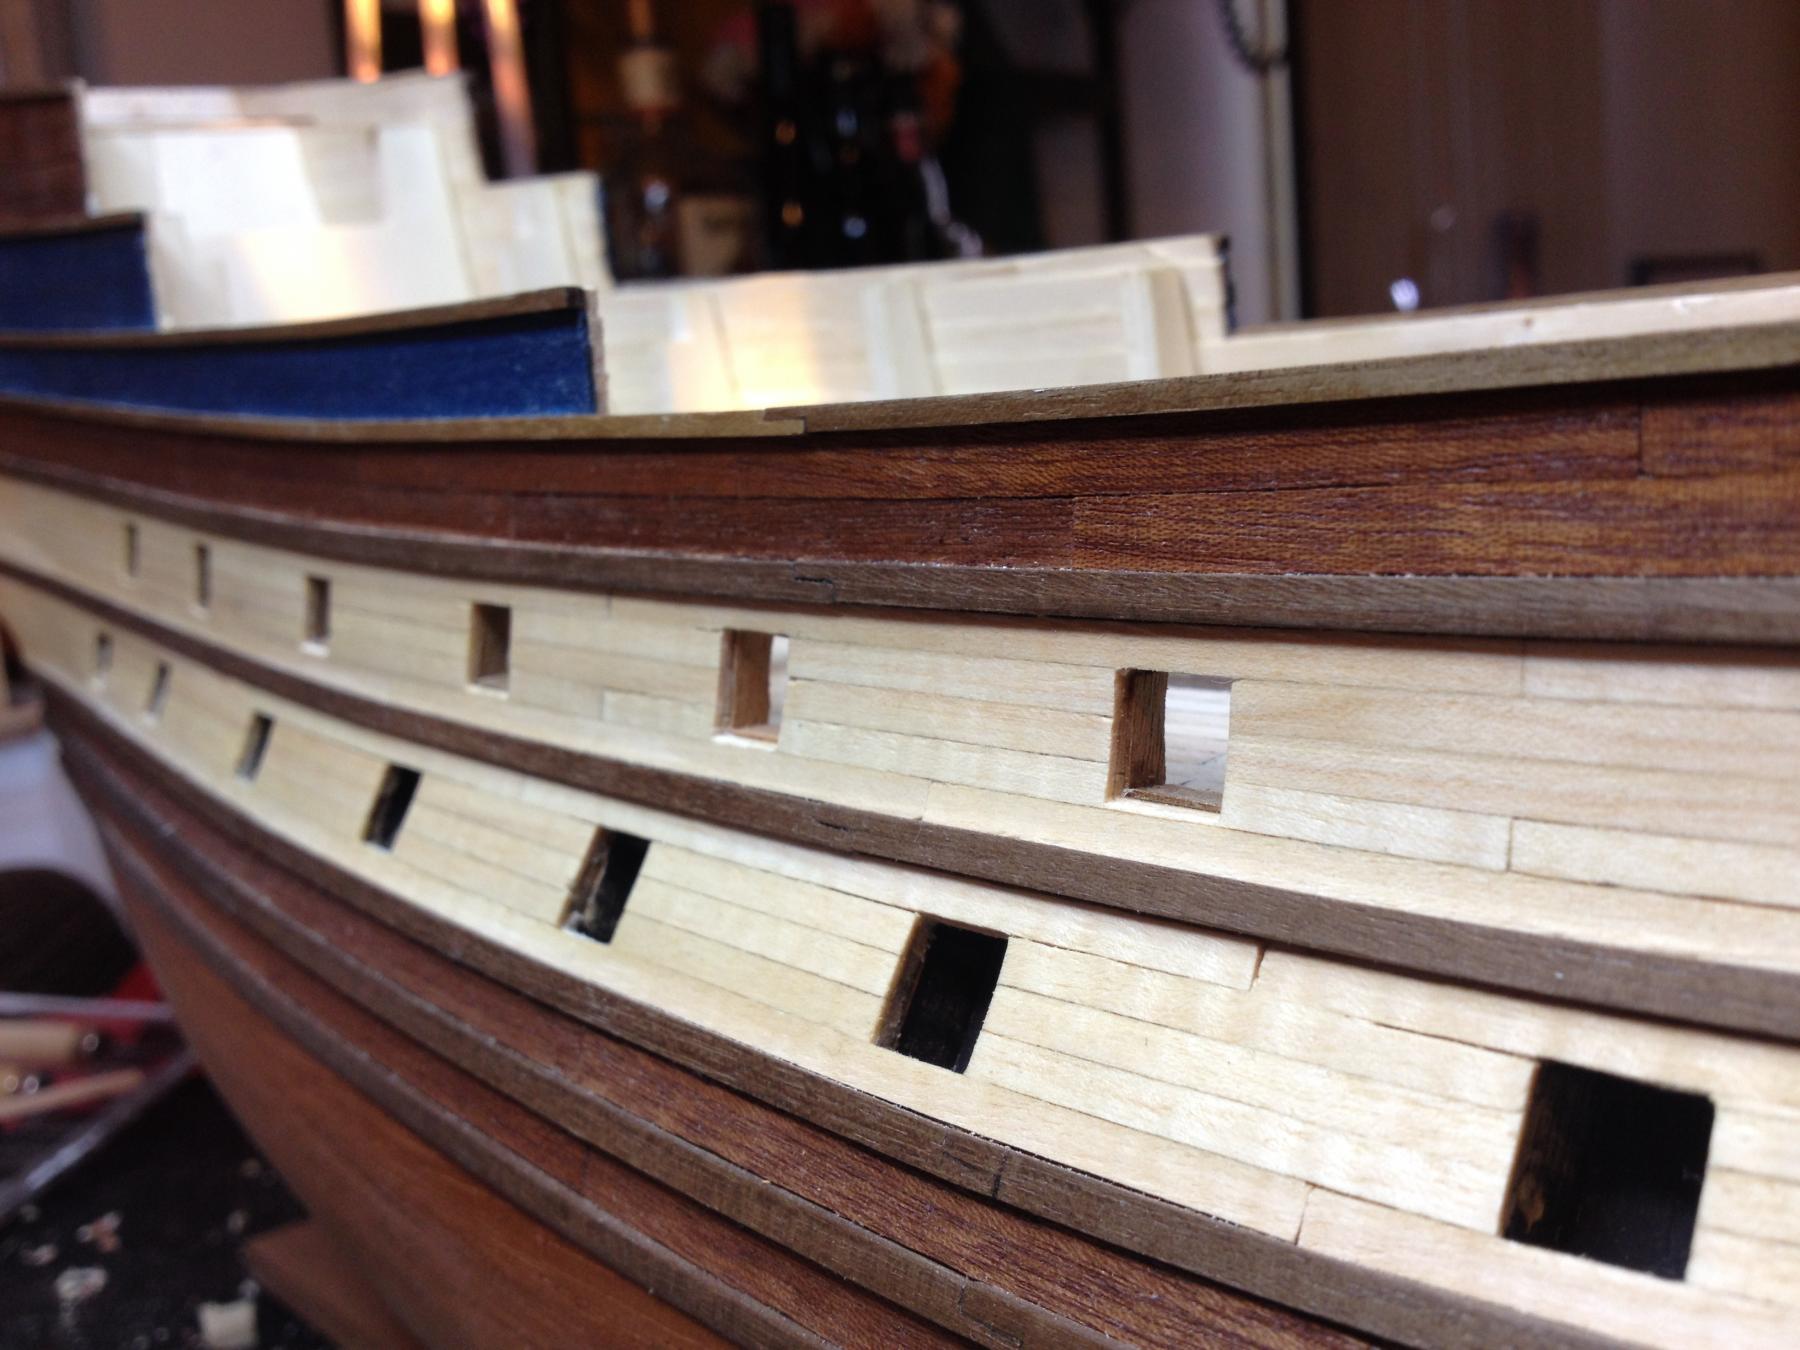
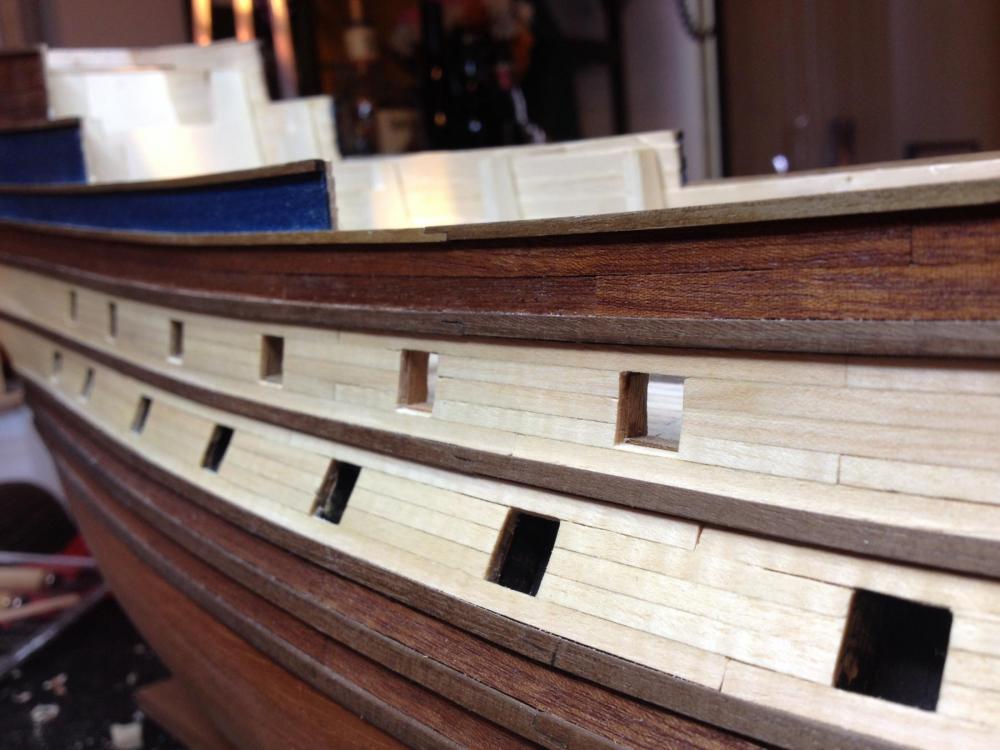
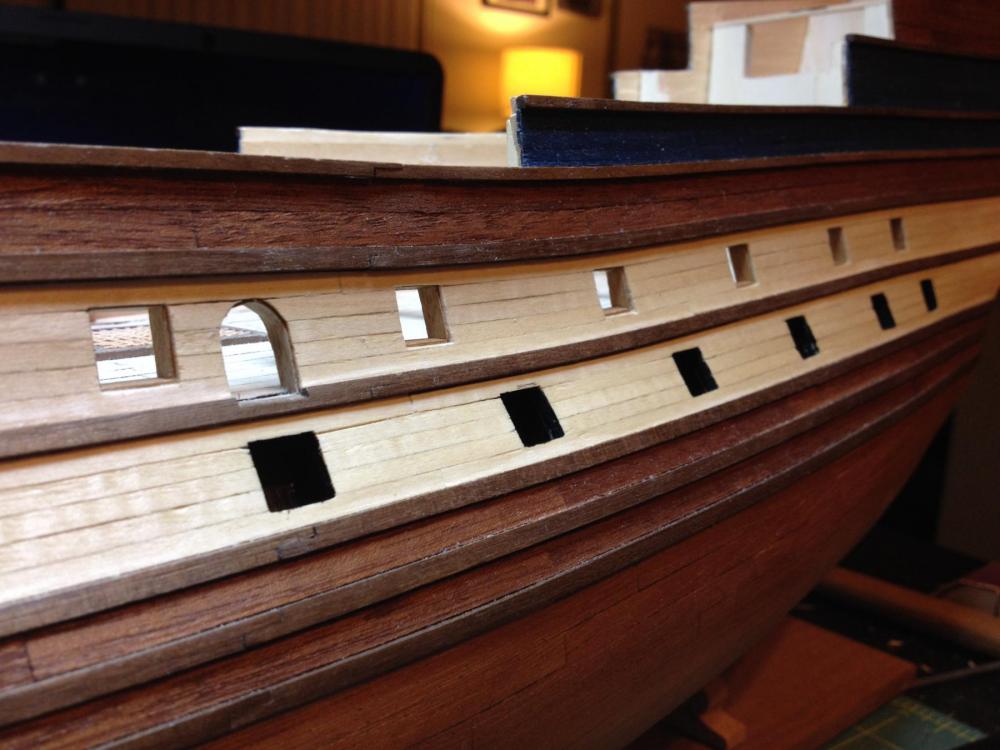
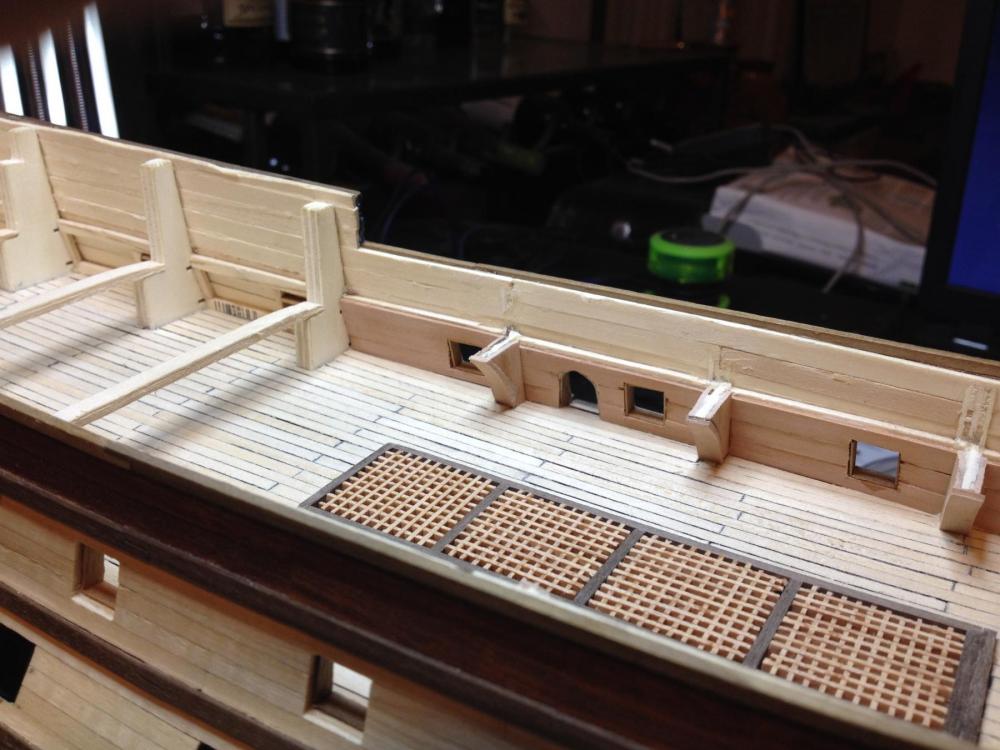
I have spent the last few days casing the gun ports and planking the inside bulkheads where they will be exposed to view. Still have some work to do on the planks but the casing is mostly done minus a couple of touch ups. Then it will be time to switch gears for a while and build canons. As most of the canons on this deck will not be seen some of them will go fast. However I still have 10 that will be getting the full detail treatment. The rest will just be a simple carriage and minimal rigging as the only way to view them will be through the ports which does not allow for much viewing especially into a dark interior. I will also be installing most of the dummy canons. I will take some more complete pictures once I finish everything but here are a few progress pics till then.
- 608 replies
-
- 12
-

-
- la couronne
- corel
- (and 1 more)
-
That is it. Though I did think there was instructions on how to make a home made one out of a small can.
-
Sorry to hear about your mishap with the keel. That is never a good moment when you are looking at a ruined project after putting in all that time and effort. Good to see you were able to recover and she is looking good again. I'm looking forward to seeing all her details come together to complete this great build.
-
Elijah, a protractor like that can be picked up almost any place. Look in school supply aisles or if you want a nicer one in crafting stores in the drawing/drafting aisle. They are really inexpensive. A few dollars will buy you one. Tim, she is looking good! I also have the same question about what to do with the running rigging if there are no sails. I would imagine that most of it would remain in place and you would just model it as if the sails were furled. I do not think I will install the sails on mine either but, as that is a long way out, things may change. Also I remember reading about a "block tumbler" on here to help shape blocks or clean up the kit supplied ones. I do not remember where that thread went to. Hopefully someone can shed some light on it.
-
It's almost over then you have 3 months of building!
- 701 replies
-
- 2
-
-
- phantom
- model shipways
- (and 1 more)
-
Thanks Ken! I'm glad I chose to use mahogany on the hull. It gave it that nice deep tone you mentioned which is what I was wanting.
- 608 replies
-
- 2
-
-
- la couronne
- corel
- (and 1 more)
-
Just incredible. You are doing a great job and teaching me a lot in the process. I thank you for that as it will be knowledge I will need on my own build.
-
Your framing is looking great! All this time you are taking will pay off big time when you get to planking. No, the plans will not improve. For someone that believes in building things right and is detail oriented as you and most model ship builders are then plans are never good enough. Whether it is framing, rigging, furniture or the multitude of little details found on ships, something will always be lacking. That is I think something that I like with this hobby. It is beyond frustrating at times but that is what makes us better modelers as we don't just follow a set of instructions that anyone can follow. We have to research, learn to read blue prints, search for art work of the ship and then figure out the dimensions from there. You are doing a great job on your build. Keep it up!
- 117 replies
-
- 5
-
-
- constitution
- model shipways
- (and 1 more)
-
Elijah, my photos from my good camera are often too large to post also. I just do a quick resize and shrink them down to 20-40% and they work great. Most computers will have a edit program like Paint that is already installed that you can use.
- 701 replies
-
- 2
-
-
- phantom
- model shipways
- (and 1 more)
-
la Couronne by francisb - Corel
EJ_L replied to francisb's topic in - Kit build logs for subjects built from 1501 - 1750
Mark, yes I had a lot of modifying to do to get that deck to fit. Below is a picture of how mine currently sits. In the first fittings I had to enlarge the forward openings and basically had to double the size of the aft ones as there was no way to make the precut ones fit. However, even after all that I finally decided that I did not like the way the ribs looked due to their huge size. The hull is not that thick to encompass them at that size and they are not supposed to show on deck so I cut them off. When I finally install this deck I will plank over the holes and add an interior plank along the hull to thicken the hull properly. I'm going to be cutting down a lot of the ribs where they come through as they are not the correct size to be part of the framing.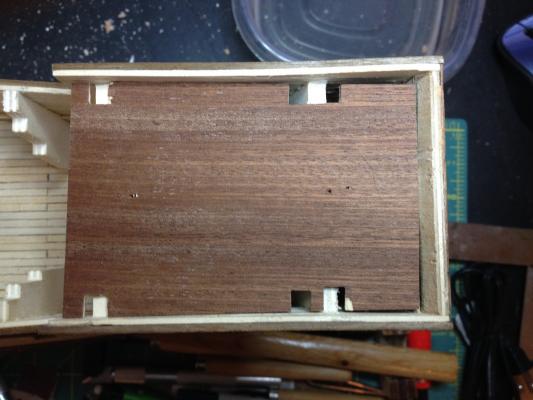
-
la Couronne by francisb - Corel
EJ_L replied to francisb's topic in - Kit build logs for subjects built from 1501 - 1750
Looks like you are off to a good start. Yes, the lack of available pictures of this ship is frustrating. In addition to my own build here is a link to another good build of la Couronne on here. This is the Mantua version but is still a good guide as many of the elements of construction and of course the overall shape and design is the same. http://modelshipworld.com/index.php/topic/1022-la-couronne-by-majq-mantua-198/ I have used it extensively for ideas on how to build and especially for decorative ideas. One thing you may consider doing is replacing the kit supplied wood with better quality when you do your hull planking. What came in mine I used for the wales up and the decking but for the lower hull I used wood from Crown Timberyard ans I am very glad I did. I will follow along and watch your progress as I am excited to see another Couronne being built. Good luck!! -
That is what it feels like sometimes. My initial layout took me most of the day one Saturday. I don't remember how many times I rechecked what I did but I do remember completely erasing everything and starting over at one point when I was certain I had something messed up. A glass of bourbon and some time playing with my dogs in the yard later I went back in. Turns out I had it right when I did the second layout and my marks were int he same place. I had worried myself into doubting what I was doing!
- 608 replies
-
- 3
-
-
- la couronne
- corel
- (and 1 more)
-
RedDawg, How I did my planking was I first laid the wales and built the upper half first. reason being is simply that the upper hull is simpler to plank as it is mostly straight runs without any crazy curves. Then I laid the garboard strake along the keel. Once those were in place I used a tailor's tape measure to determine the distance between the bottom wale and the garboard. I knew that the widest plank I wanted to use would be 5mm in width. So at the center bulkheads, which are the widest, I took that measurement which in my case was 110mm and divided by the 5mm width of my plank. This gave me 22 strakes. I was fortunate in that it ended up being an even number. Had it been otherwise I would have adjusted the number of strakes so that none of them would have been wider than 5mm. Now that I have the number of strakes at the widest point I measured along each bulkhead to find each distance. I then took those numbers and divided them by the 22 strakes that would be on the hull. This gave me progressively smaller widths, 4.75mm, 4.5mm, 4.20mm, 3.8mm, 3.5mm, etc., as I worked out from the center to the bow and stern. The trick became measuring along the front edge of the bow as the bottom of the boat does not extend out as far as the top. Here I could not measure from the wales to the garboard as they simply did not line up. I instead measured the curve of the leading edge of the bow and divided that number by the 22 strakes. In doing some research I learned that the width of a plank should not be reduced past 1/2 it's overall width. In this case a 5mm plank should not go below 2.5mm in width. Fortunately my leading edge came out to be 3mm in width so I was safe. While I was measuring all this out I also placed tick marks along the lines of measurement just to use as guidelines to help make sure I stayed on track. Something to keep in mind when you go to plank your hull is that you may lose a little width of your planks if you have to bevel the edges for a tight fit. This can easily throw off a layout even if it is a very small amount as we are dealing with measurement in 1mm or less. I recommend continually rechecking your measurements as you proceed so adjustments can be made if necessary across the entire hull and not just in the last one or two strakes at the end. It is easier to hide a few mm mistake when spread out over 50mm vs suddenly having a couple of planks much wider than the others. The other reason for checking is it will ease your mind when it looks like you are running out of room towards the ends of your ship. Due to the way hulls curve it will quickly begin to seem like there is no way your planking will fit in the remaining space. If you are measuring and cutting them to the measured widths, they will fit. It trips me up every time I do it and I spend a lot of time remeasuring to verify it will work. Good luck, and if can help anymore I will be glad to try.
- 608 replies
-
- 5
-
-
- la couronne
- corel
- (and 1 more)
-
Excellent looking canons Bob! Those are going to look great in the model.
- 206 replies
-
- 4
-
-
- battle station
- panart
- (and 1 more)
-
Outstanding work Michael! You have inspired me to do more research and see what I can do when it comes time for the masts on my Couronne. Once I have seen those and how great they look I don't think I could be happy with a plain mast anymore.
-
First block looks great! Smart to hold off installing it till all your pieces are shaped and ready.
- 117 replies
-
- 4
-
-
- constitution
- model shipways
- (and 1 more)
-
Looking good. Those counter blocks can be a pain as they often curve in two or three different directions. Yours came out looking very nice. I've also had blow out problems while drilling holes on ships. Even with using smaller sizes and working up it can still happen especially with the softer woods and plywoods. Your idea of using needle files to reach the final dimension has worked best for me though I am curious to hear how others have dealt with the issue.
- 117 replies
-
- 4
-
-
- constitution
- model shipways
- (and 1 more)
-
I have built Revell's Constitution, the 1:96 scale, twice and I think the quality was excellent. I have pictures of it on here if you would like to see. Like all plastic kits there will always be some modifying that will need to be done and flashing that has to be cut away. This holds true whether it is a car, train or ship kit and is no different than wood really. I compare that kit to Heller's Victory, which can make a great ship ship but, I have had to do a lot more work making things look right and the instructions have been harder to follow than Constitution's were. Best advice I can give is do what you are doing and ask around to see what people think of any kit you may be looking at. Read the reviews and always ask yourself how much work are you willing to do outside of what the instructions say.
-
The foundation of any build is a great place to make sure things are right. The extra time is worth it later on. As for the extra little details, why not put them in. Yes it takes longer and no most people will not notice but they just might be the detail that sets your build apart from someone else. Besides, lets face it, when working on something that takes a thousand hours to build is a few more really that bad? Looking great!
- 117 replies
-
- 5
-
-
- constitution
- model shipways
- (and 1 more)
-
Mistakes are what help us grow and learn. They also teach us new ways to curse and swear.
- 701 replies
-
- 3
-
-
- phantom
- model shipways
- (and 1 more)
-
Looking great! Too echo another post, it is nice to see a type of ship that is not commonly built on here. Always good to have variety as that is how we learn and grow.