HOLIDAY DONATION DRIVE - SUPPORT MSW - DO YOUR PART TO KEEP THIS GREAT FORUM GOING!
×


EJ_L
-
Posts
2,246 -
Joined
-
Last visited
Content Type
Profiles
Forums
Gallery
Events
Everything posted by EJ_L
-
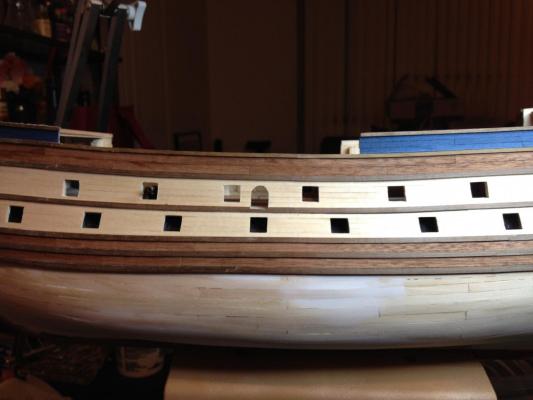
 Almost have the starboard side planked. Hopefully this weekend will allow me to finish it. I'm still very pleased with the results I'm seeing. Even around the bow which was my biggest fear has so far been coming along as planned. I'm getting real excited to see it complete. Yes, I still have a whole other side to plank but I will hopefully be able to do it with less fear and worry if I know that what I'm doing actually works.
- 608 replies
-
- 14
-

-
- la couronne
- corel
- (and 1 more)
-
Excellent work! Thank you also for posting all these highly detailed pictures and steps. I am learning a great deal from watching your ship come together.
-
Your ship is looking great Elijah. Excellent work and good to see you taking your time and making sure that everything is coming along just right. You will be very happy with the results from doing that. A solid hull ship is a great learning kit. I just completed one myself a few months ago of the Bounty. I've pulled up a chair to watch you build your Phantom. I look forward to watching the progress and sharing this journey with you.
- 701 replies
-
- 2
-
-
- phantom
- model shipways
- (and 1 more)
-
Mike, I have seen and done a couple of different solutions to bulkheads crossing hatches depending on whether or not the lower deck is detailed out or if it is just a "dummy" deck. The easiest is if it is just a "dummy" deck with no details. Simply remove anything that would be visible to create an opening for the ladder and then blacken everything in so that you gain the appearance of descending into a dark hold. This is very useful for the lowest decks that are often covered up with more decks or in solid hull construction. The harder way happens when the deck you wish to descend to is to be detailed. Now you have to modify the framing to accommodate the hatch. The details on how to do this vary from ship to ship as the building process varies. Also this can depend upon how visible that deck is. If you cannot see the framing below the deck then just build the opening and frame it in to appear as though the correct framing is in place. If you intend on the lower deck to be visible than researching framing plans for that ship or similar construction is a must. I would start looking at cross section models as they often times have a ladder going down and should provide a good start as to how they were framed.
-
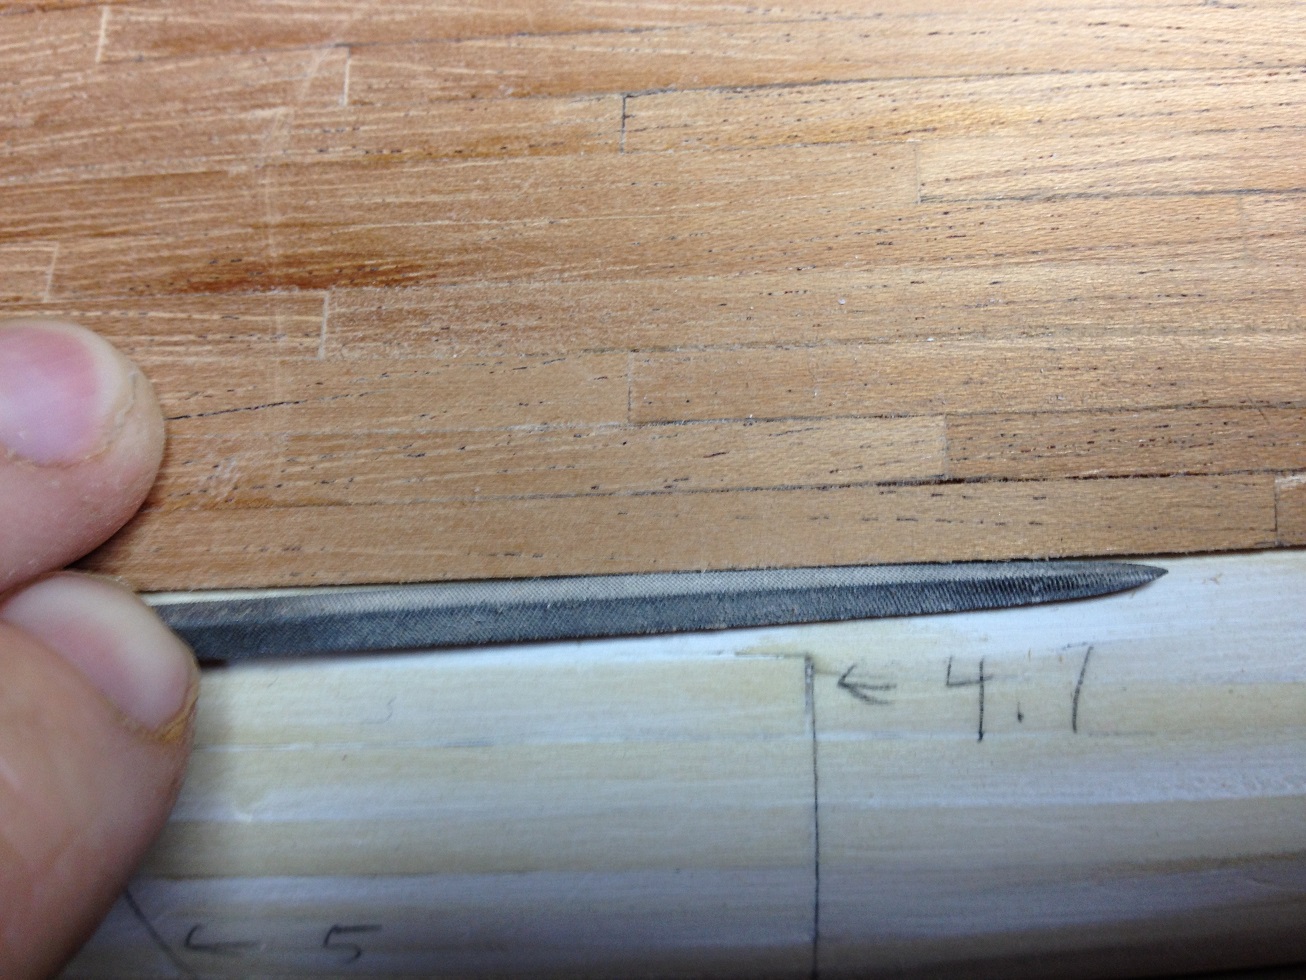
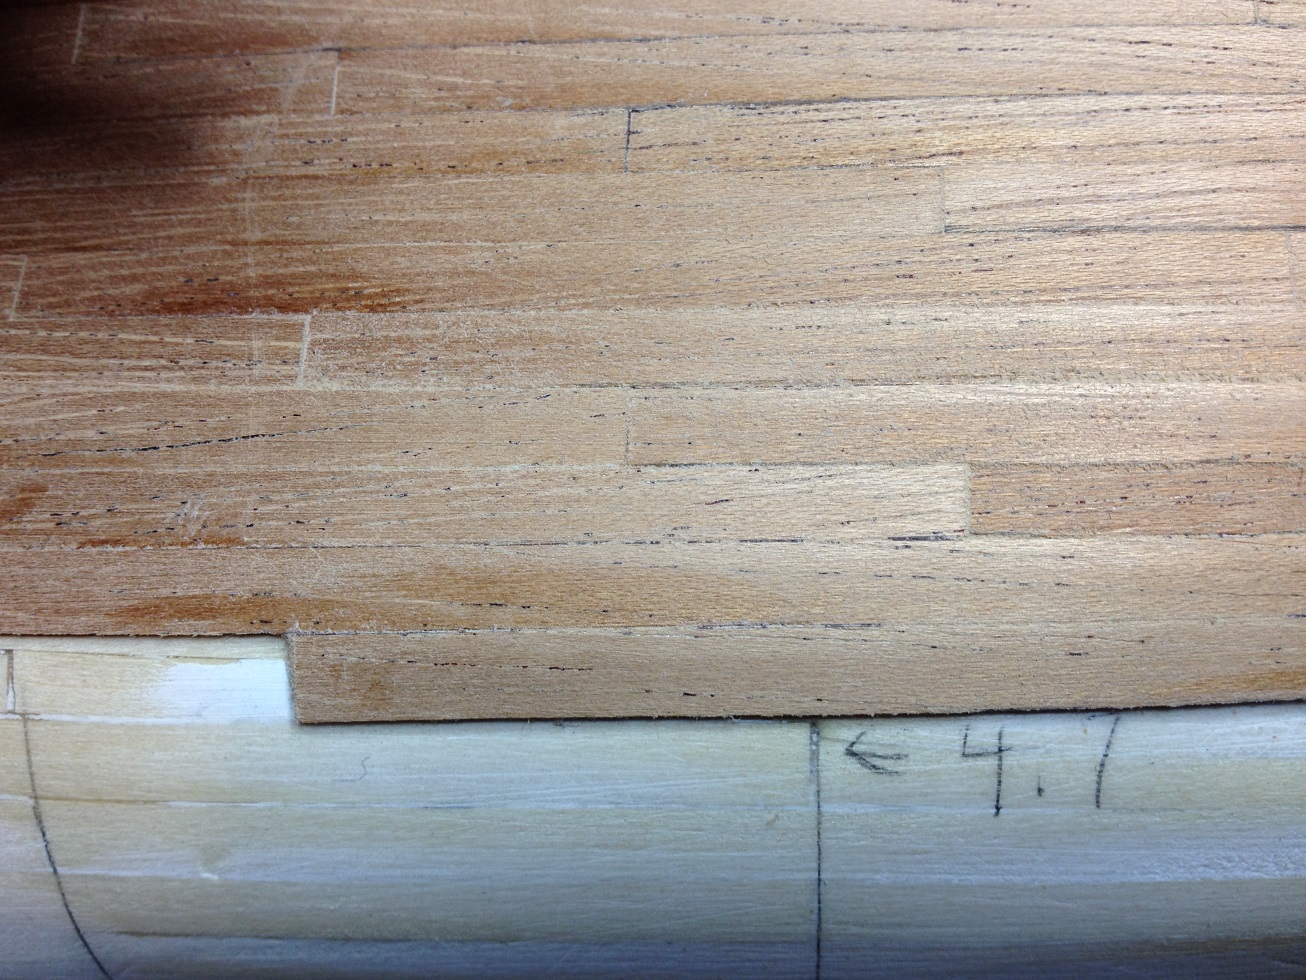
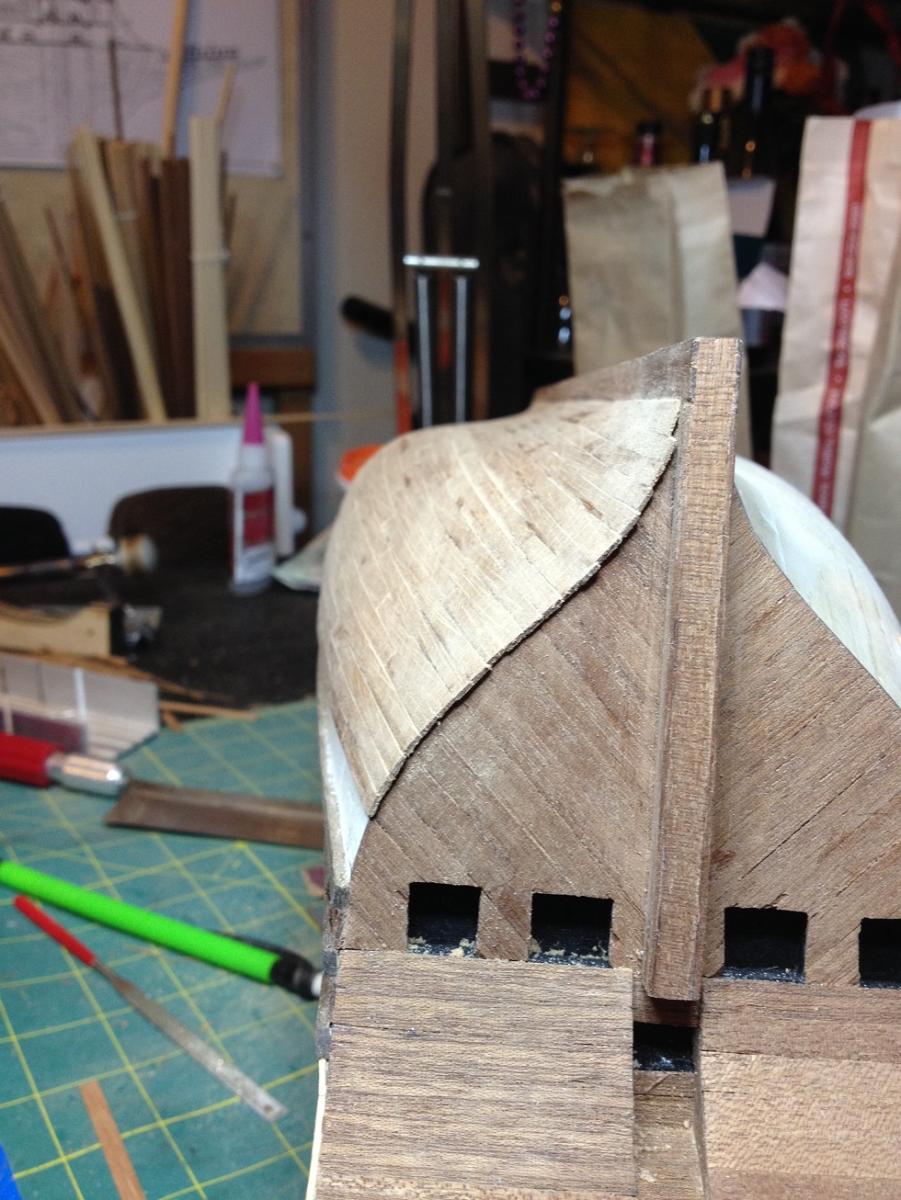
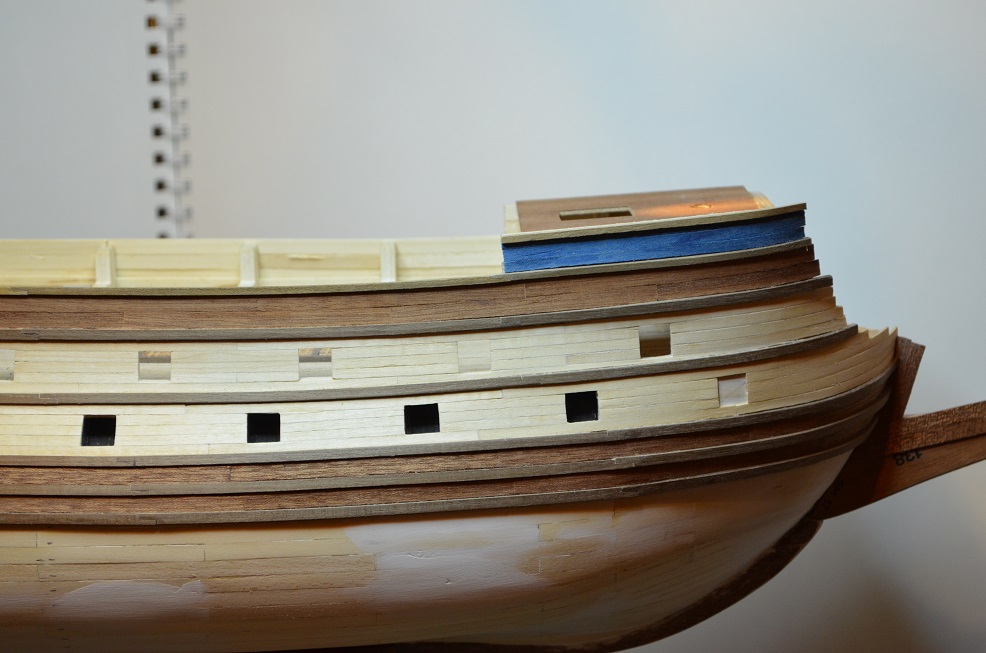
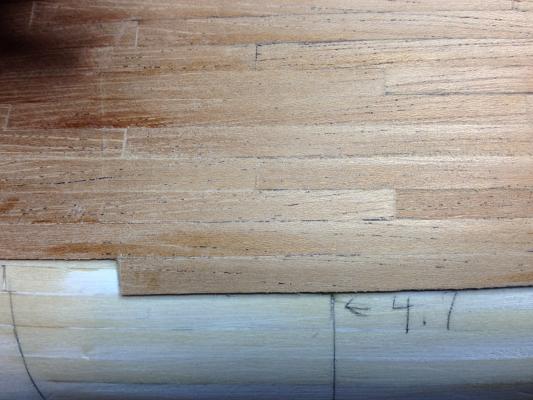
A full day of planking has ended on a high note in that so far my layout seems to be working. So far I am very happy with the way it is looking and it is quickly on it's way to being the best planking job I've done to date. I still have a long way to go so the ultimate verdict is still a long way out but, if things continue to go like thy have, I believe I will have a nice looking hull. One tool that has been a huge help is a triangular needle file. To get the planks that go over the widest curves on the hull to lay flush along their edges I have been going in and angle filing the underside of the previously laid plank so the new one can slip under it and close out the joint. See the pictures below. This is keeping the joints nice and tight so hopefully I will not need any filler on this 2nd planking. I still have not done much at the bow yet. The couple of strakes that have reached there have turned out good though. I will be focusing on the bow area in the next few days as I gradually make my way forward. Also, I know some of these pictures are not the best. I am using my phone to take these progress shots as that is easier than clearing off the table and setting up the good camera and background boards for nicer photos. I will take some of those when I hit a bigger milestone, say when half the hull is planked. I will definitely need to clean up all the sawdust then anyway!


- 608 replies
-
- 13
-
-
- la couronne
- corel
- (and 1 more)
-
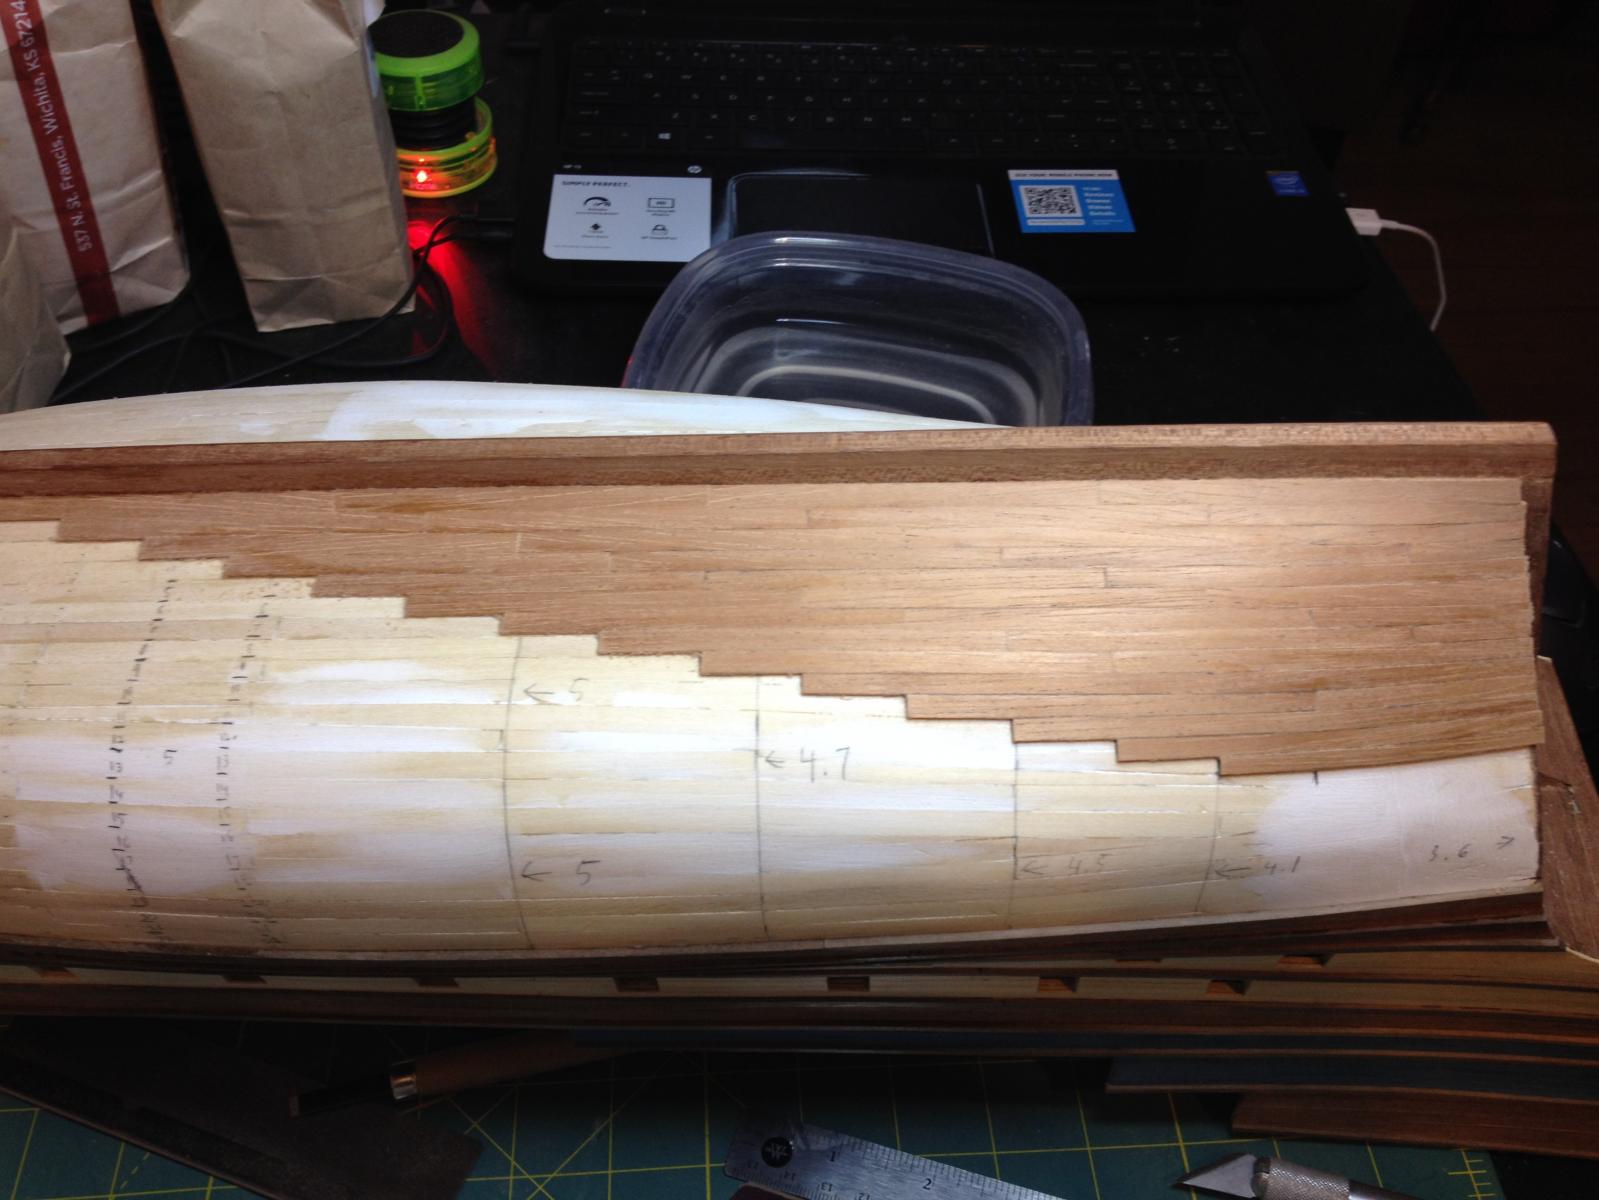
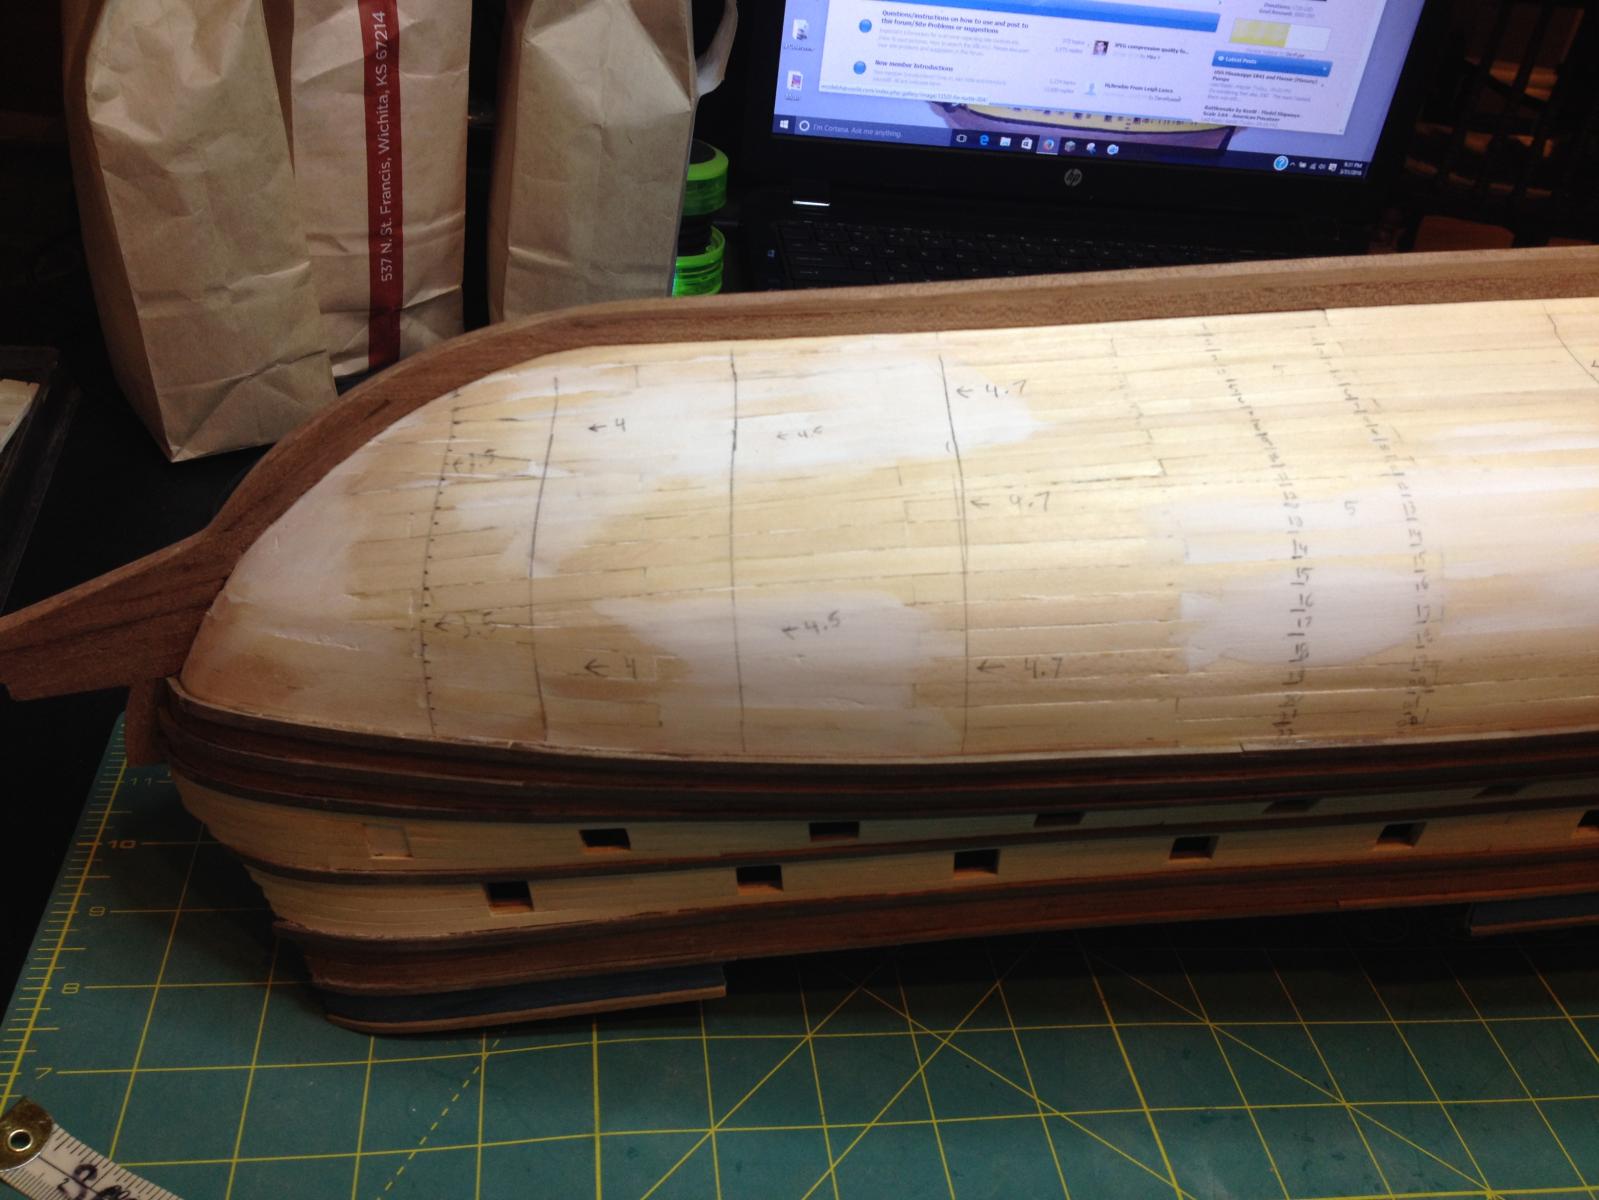
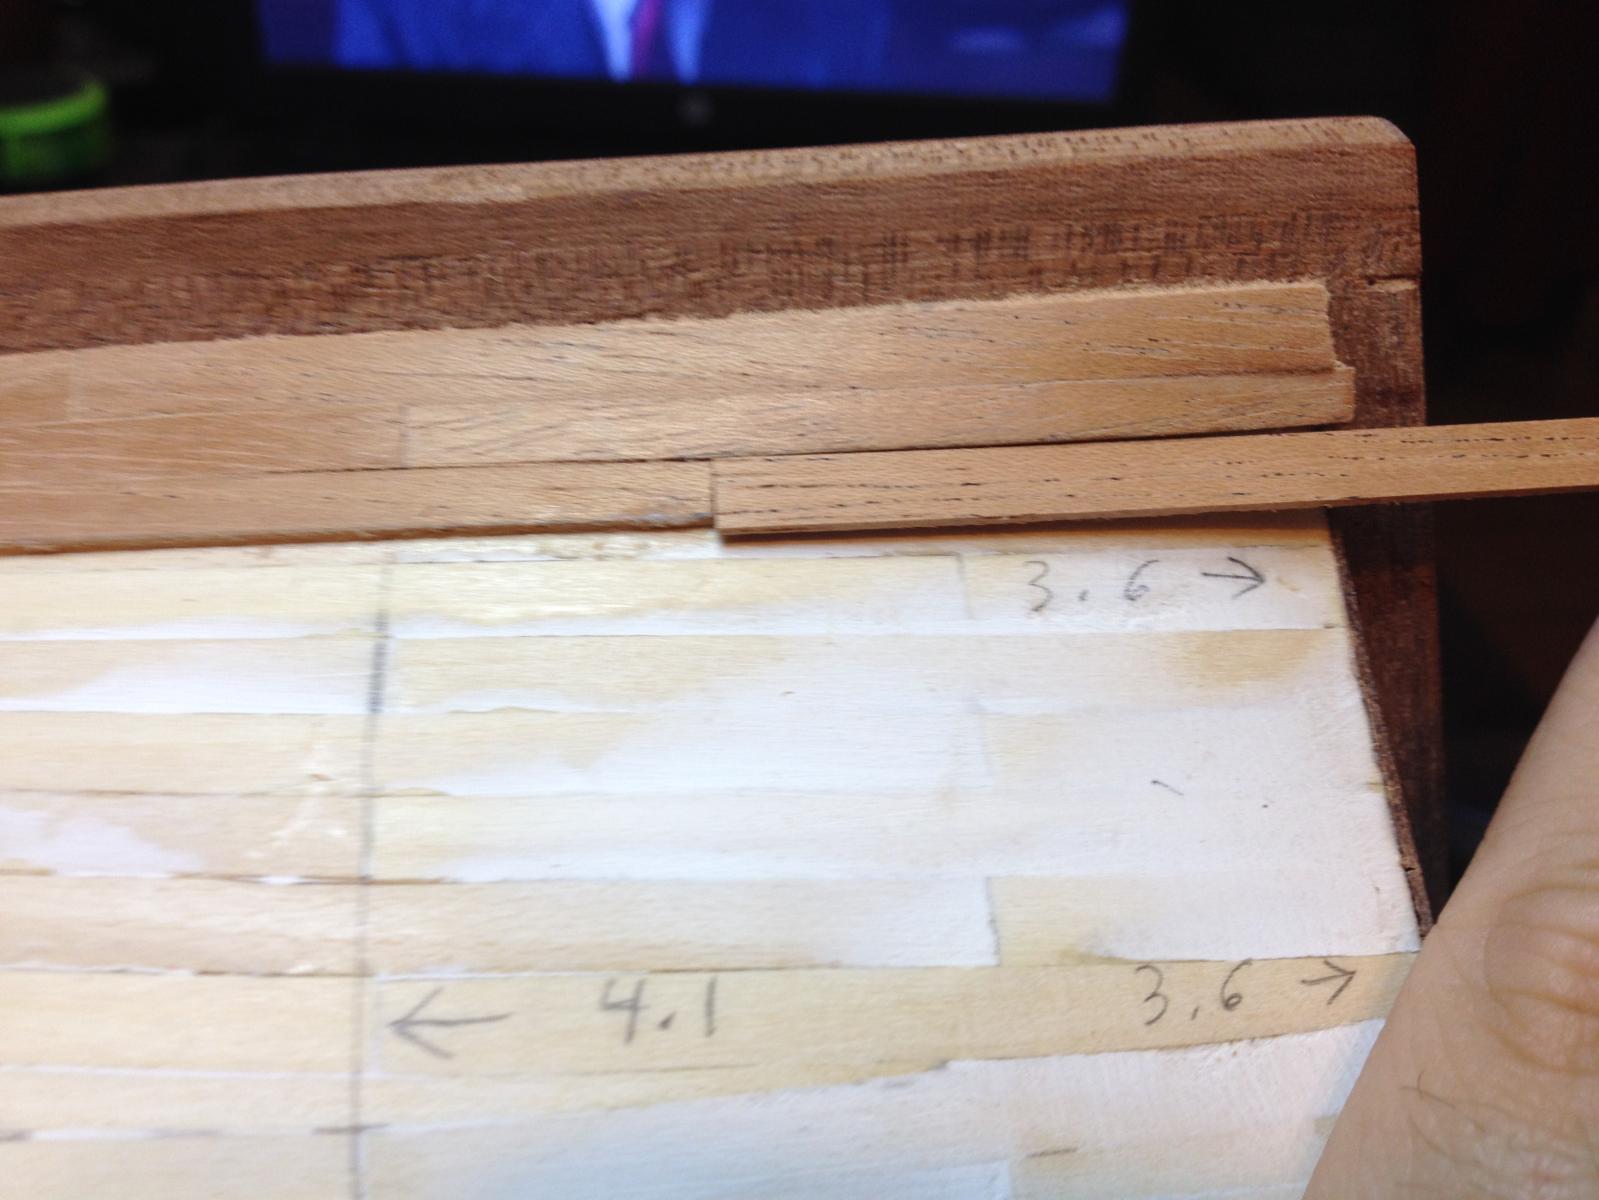
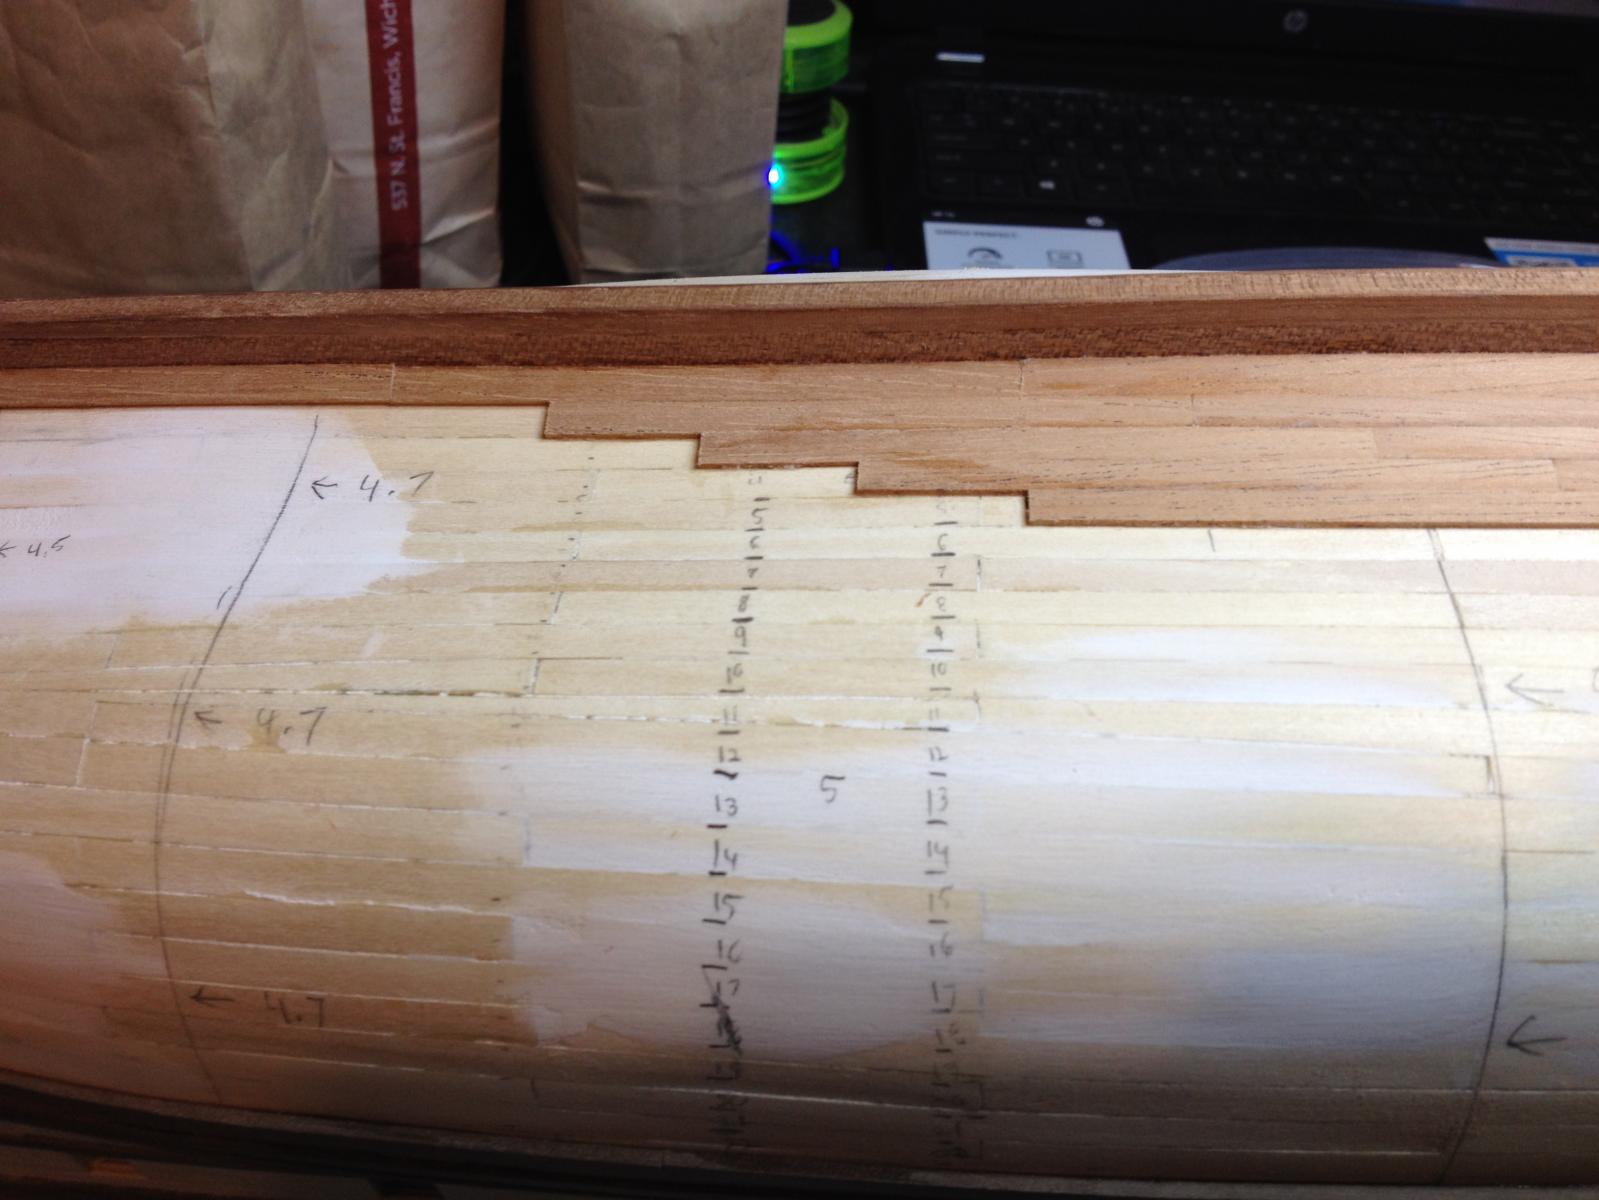
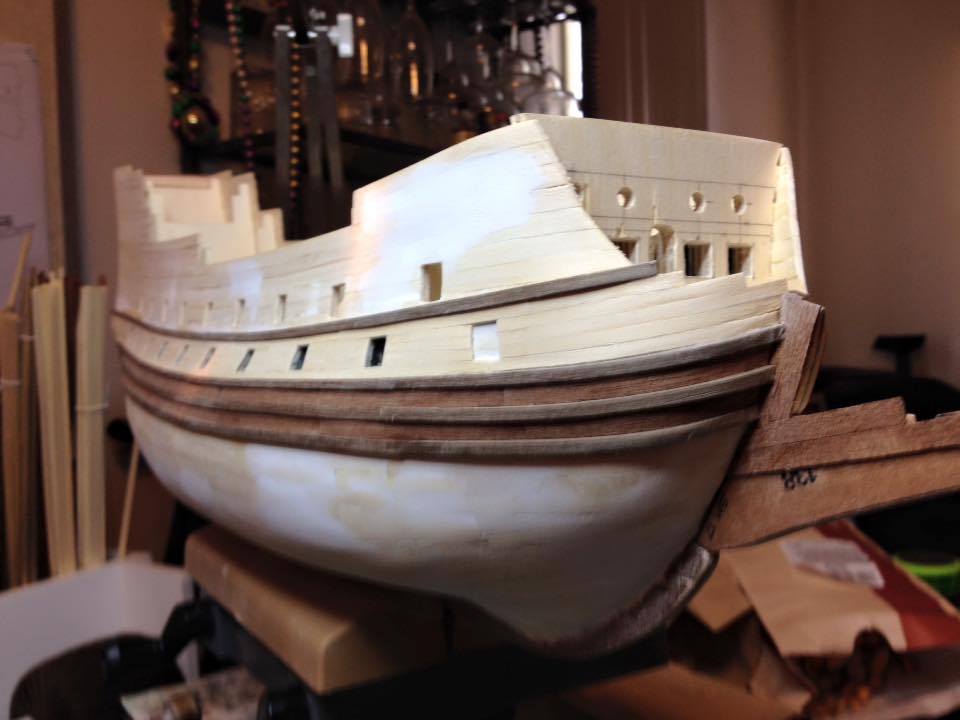
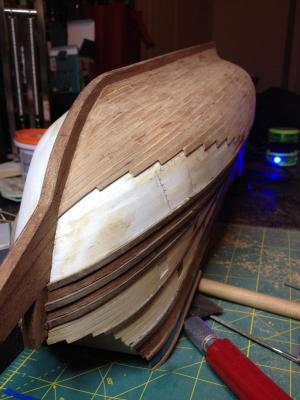
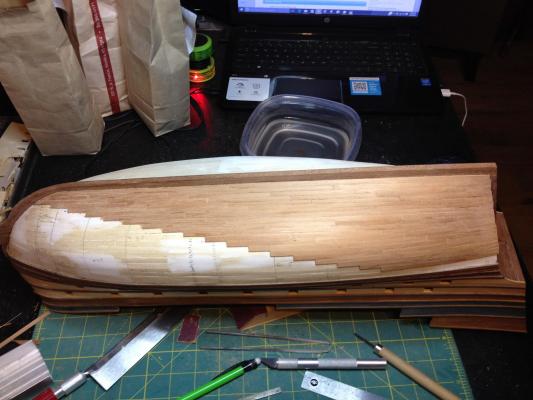
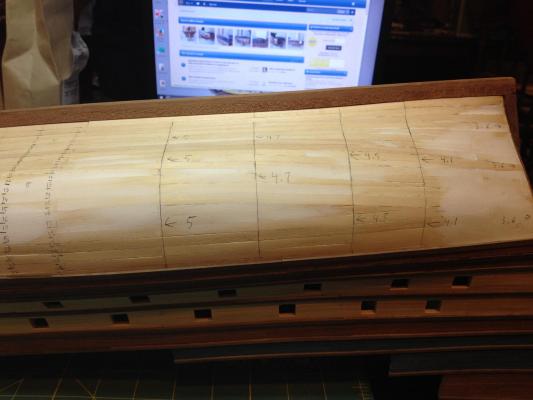
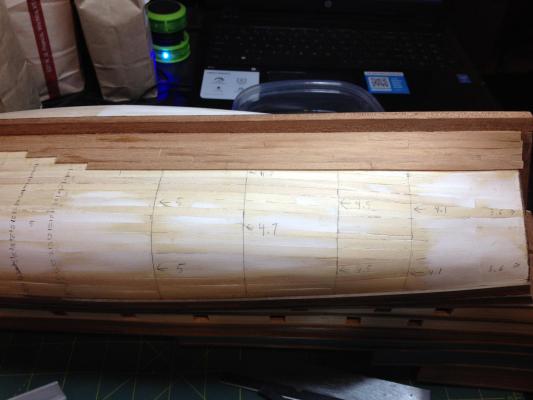
Well I have started the lower hull planking. I'm using Mahogany for this area. I have sectioned off portions of the hull and after determining the number of strakes that will be needed, (22 in this case) I have divided out each section to determine the widths of each plank. My widest is 5mm tapering to 3.5mm at the extremities. After doing some reading I have learned that a plank should not taper to less than half the width which would be 2.5mm. At 3.5mm I am good with 1mm left to play with if I did something wrong with my layout, (which is quite possible). I started by laying the garboard strake first. I decided to start from just forward of mid ship and work aft and upward. I will come back to plank the forward portion later. Next I measured out 80mm lengths for the individual planking. This would come out to be about 8 meters or 26 feet on the real ship. I'm sure this is probably too long of length for an actual plank but I think it looks good on the model. If anyone knows what an average plank length should be I would be interested to know. I've also had to curve and taper the planks as needed though nothing too extreme yet. I've tried to show this in a couple of pictures but as the shape is minor it may be hard to see.. As I've laid each strake I have set the starting plank back 20mm from the preceding strake's edge. So far I think it is coming out right. At least I'm still on track with my plan.....


- 608 replies
-
- 7
-
-
- la couronne
- corel
- (and 1 more)
-
Dave, I am just now starting to plank the lower portion of the hull on my Couronne build. This is a double plank hull and the first layer I used for practicing as I am still learning myself. I ran into the problems mentioned above of the bulkheads being to far apart which did create problems where the planks met and with flat spots in the shape. Fortunately as this will all get covered up I was able to use wood filler to smooth the shape out in preparation for the 2nd planking. For this I have swapped out the kit supplied wood for better quality as much of what came in my kit was not cut as straight as I wanted. Doing this I was able to buy strips of varying sizes plus some sheet material to allow me to attempt spiling for the first time. This will be a great learning experience. Whether I learn how to successfully do this or how not to do it remains to be seen. I like to try to cut each individual plank too. This may make things harder and I constantly consider using full runs and simply scoring the joints later but I'm like you in that I take a lot of pride when I tell people that I cut each plank one at a time. What I am doing now is laying out the spacing on the hull. Measuring, drawing lines and making notes and often erasing and starting over. Going slow and taking your time is vitally important here. Best advise I can give is to take your time with the initial framing. Make sure your bulkheads get positioned correctly and fair them up so all your planks lay flush and true with them. This is another step that I know I have been guilty of rushing and can make huge differences in the quality of the planking later. Good luck to you! I look forward to seeing your build as it progresses.
-
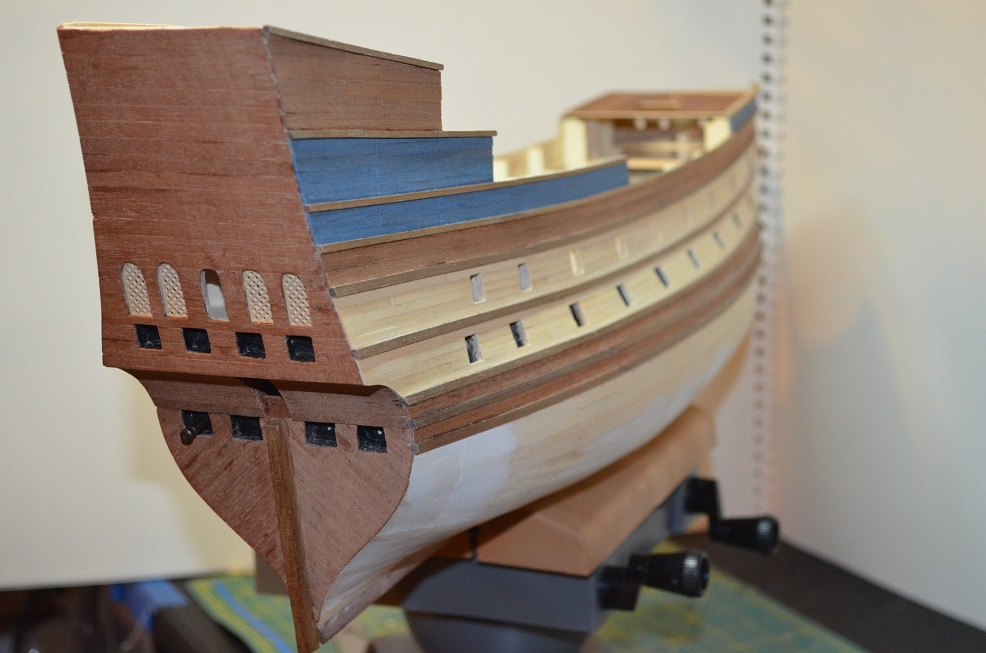
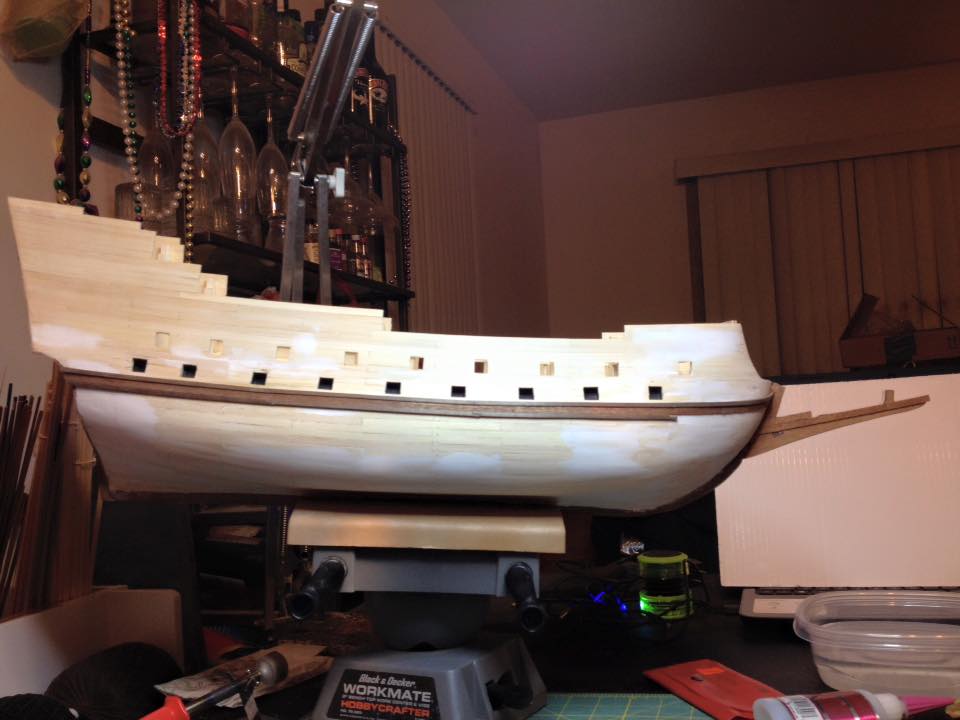
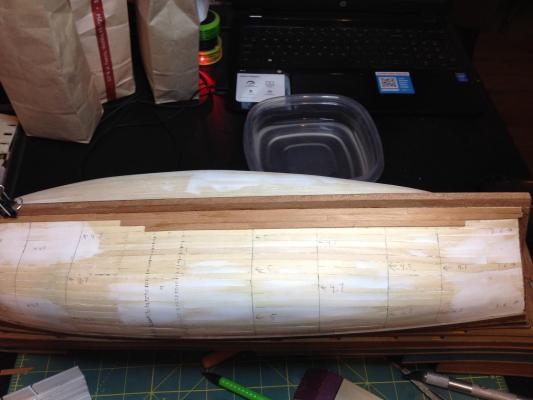
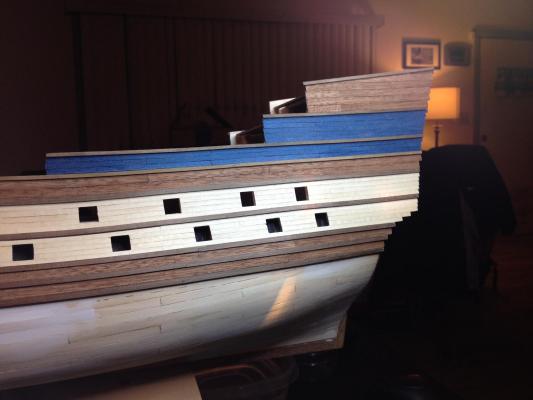
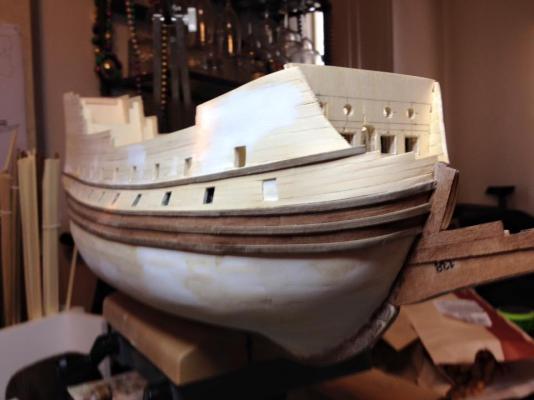
Here are some more progress shots. Finished the upper planking on the port side over the past week. I still need to trim up some of the over hanging planks and sand everything smooth but she is together. Now it's time to attempt the lower hull. I've been putting this off as I still struggle with planking this area with all the curves and size changes. I've been reading up and watching videos for tips and practicing so I am as ready as I will be. Just have to keep telling myself to go slow, draw it out first, measure twice cut once, and if it starts to look wrong stop and see what is going on. I find I will stay focused on a small section and lose the over all perspective. That always leads to planking that may look great in a section but is doing something crazy elsewhere. Wish me luck fellow ship builders! I will keep the log updated with how it is going.


- 608 replies
-
- 10
-
-
- la couronne
- corel
- (and 1 more)
-
Beyond amazing! I'm just in open awe at the work you are doing on this build. Keep up the incredible work!
-
Tools and Supplies for My "Shipyard"
EJ_L replied to daveward's topic in Modeling tools and Workshop Equipment
I would agree with all the suggestions on here but keep in mind that most of these model ships take a long time to build and there are many things that do not need to bepurchased at once. Spread it out as the stages of construction demand so its a bit easier on the wallet. Also I would suggest to pick out a couple different measuring devices. Both a rigid ruler and a flexible measuring tape such as one a taylor would use is advisable. Make sure they have both standard and metric units as depending on where you kit was made you may have to do a lot of converting back and forth. As to the light, for years I only had the bench light with magnifer but lately I have been looking into the head band magnifyer for working with tiny details. I do not think I will give up my bench light as I need the extra light but I admit that I do not use the magnifyer much as it is akward and does get in the way more often than not. -
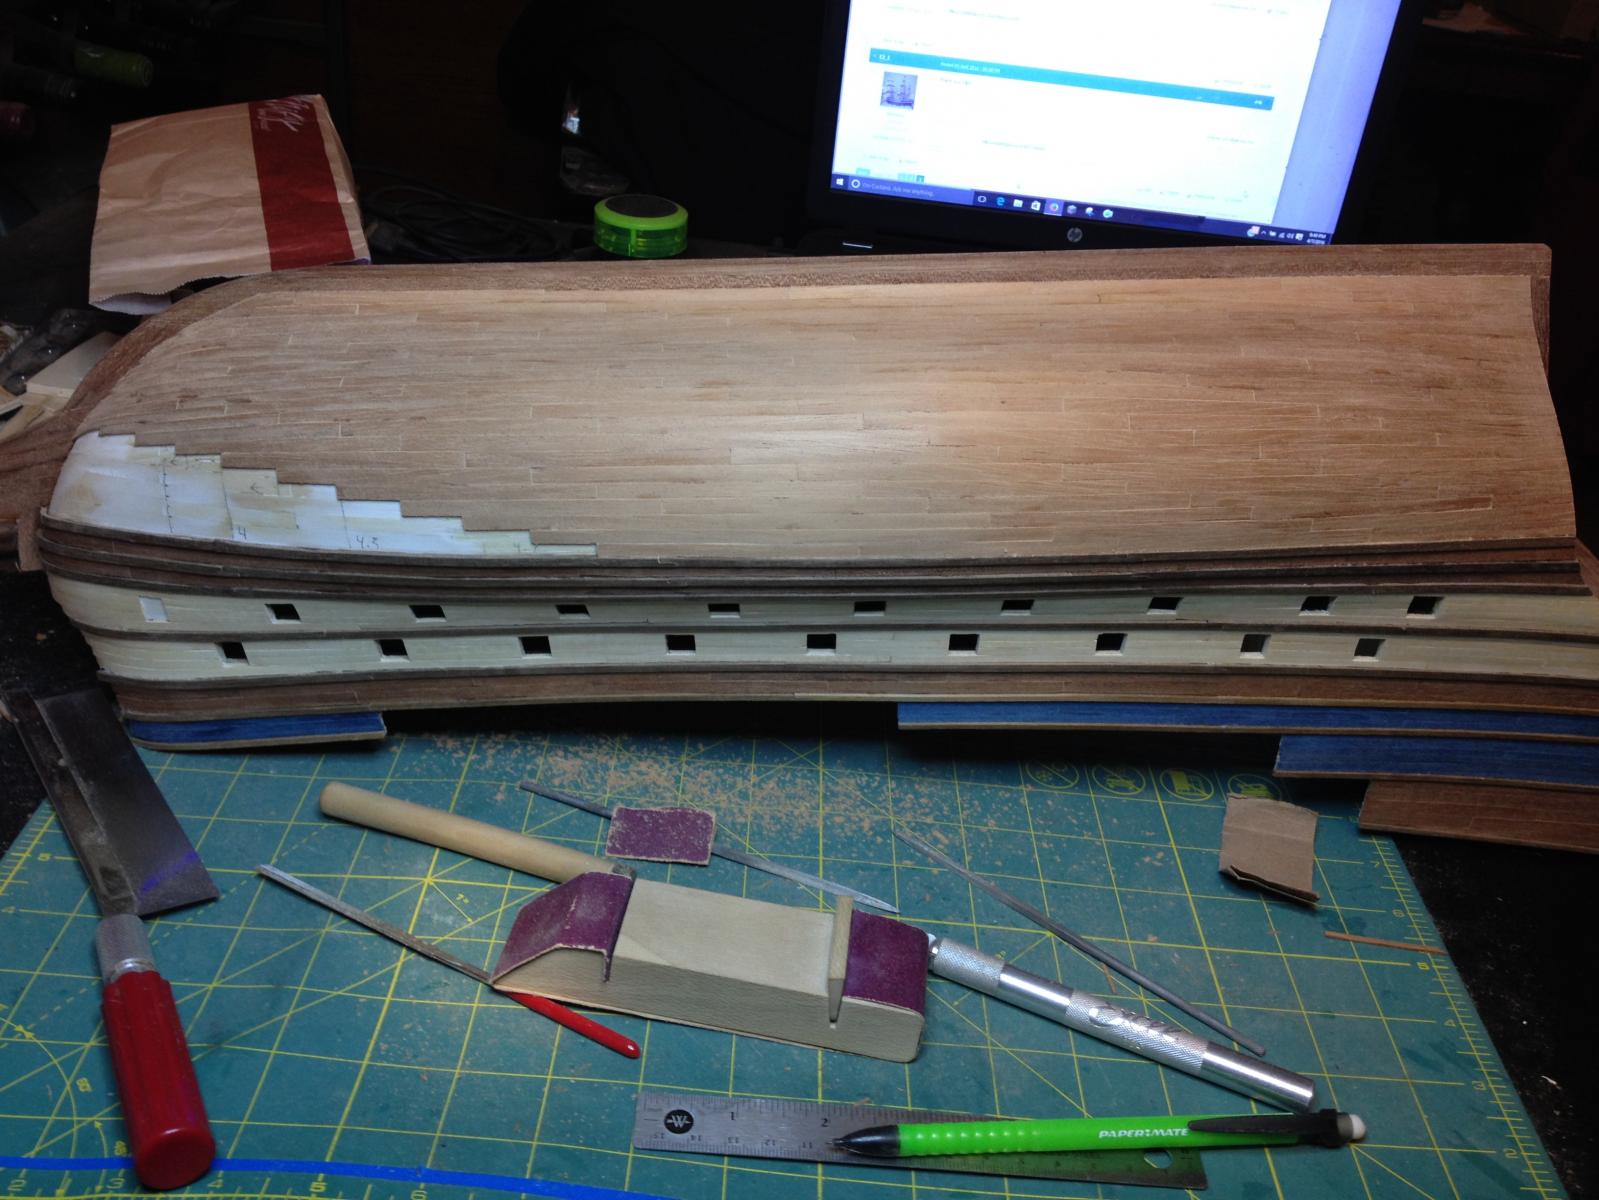
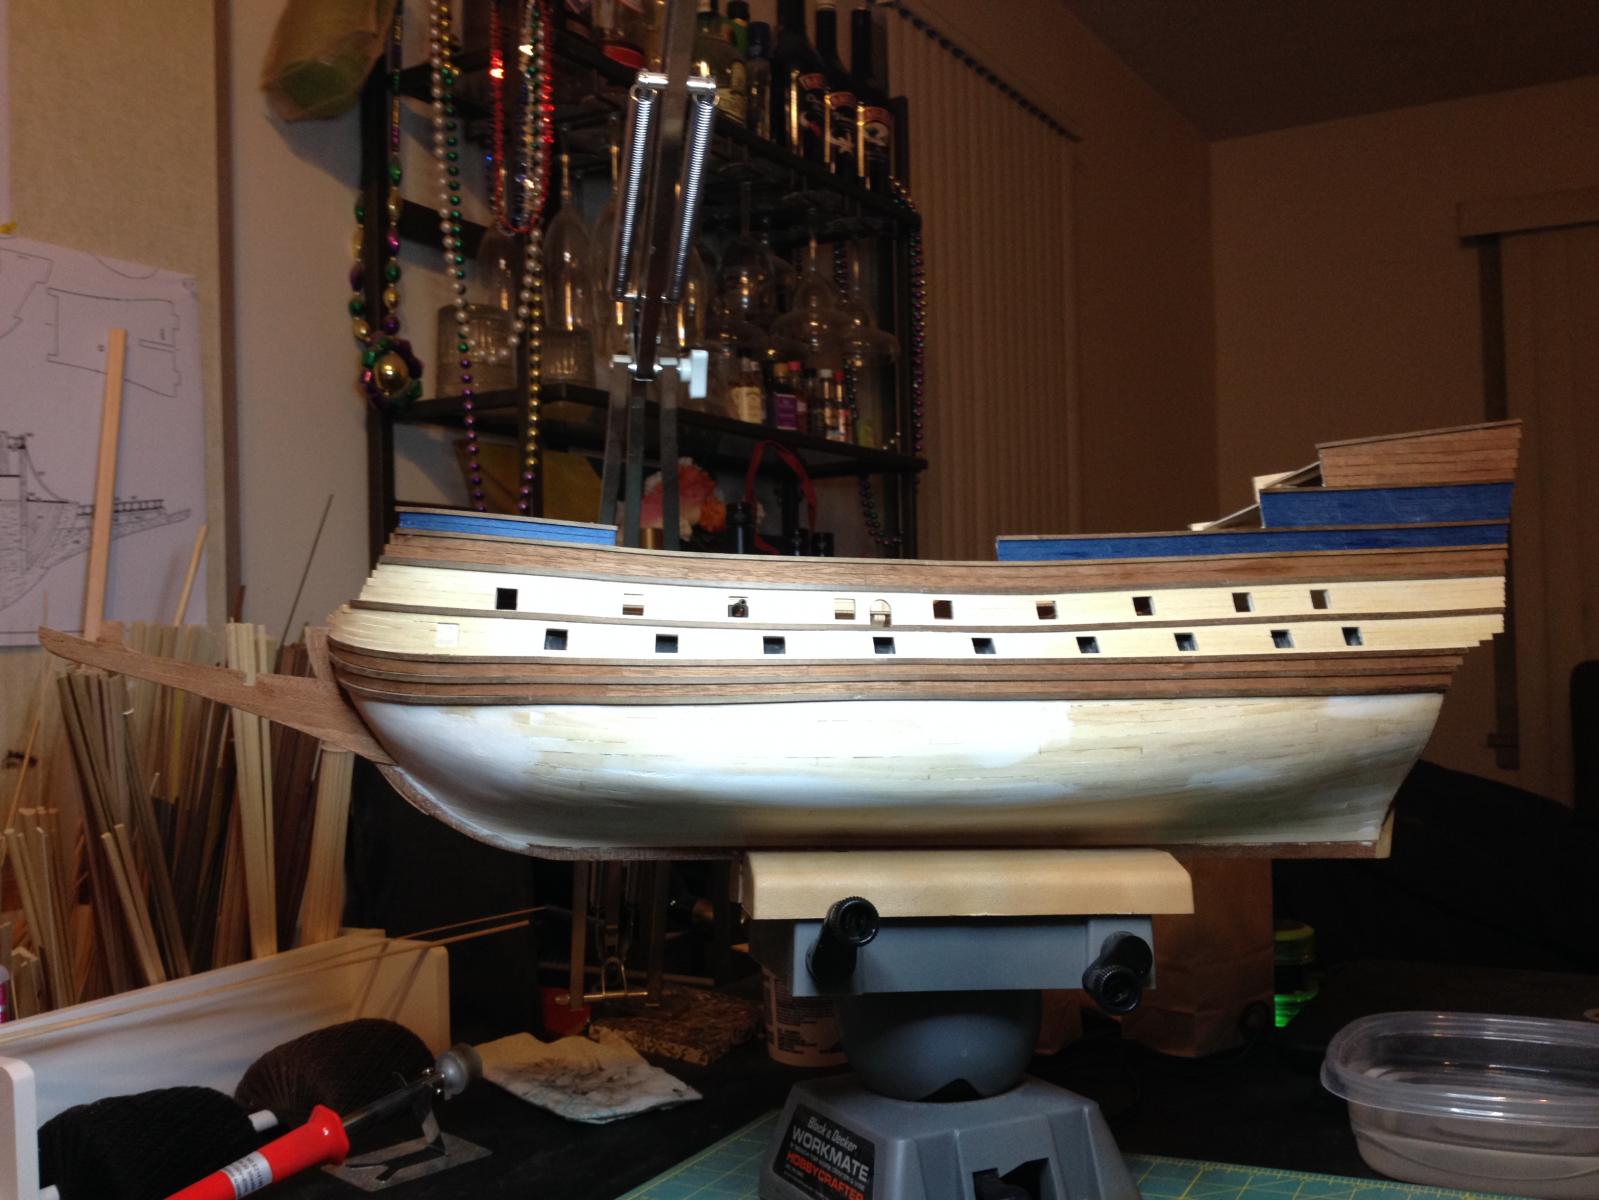
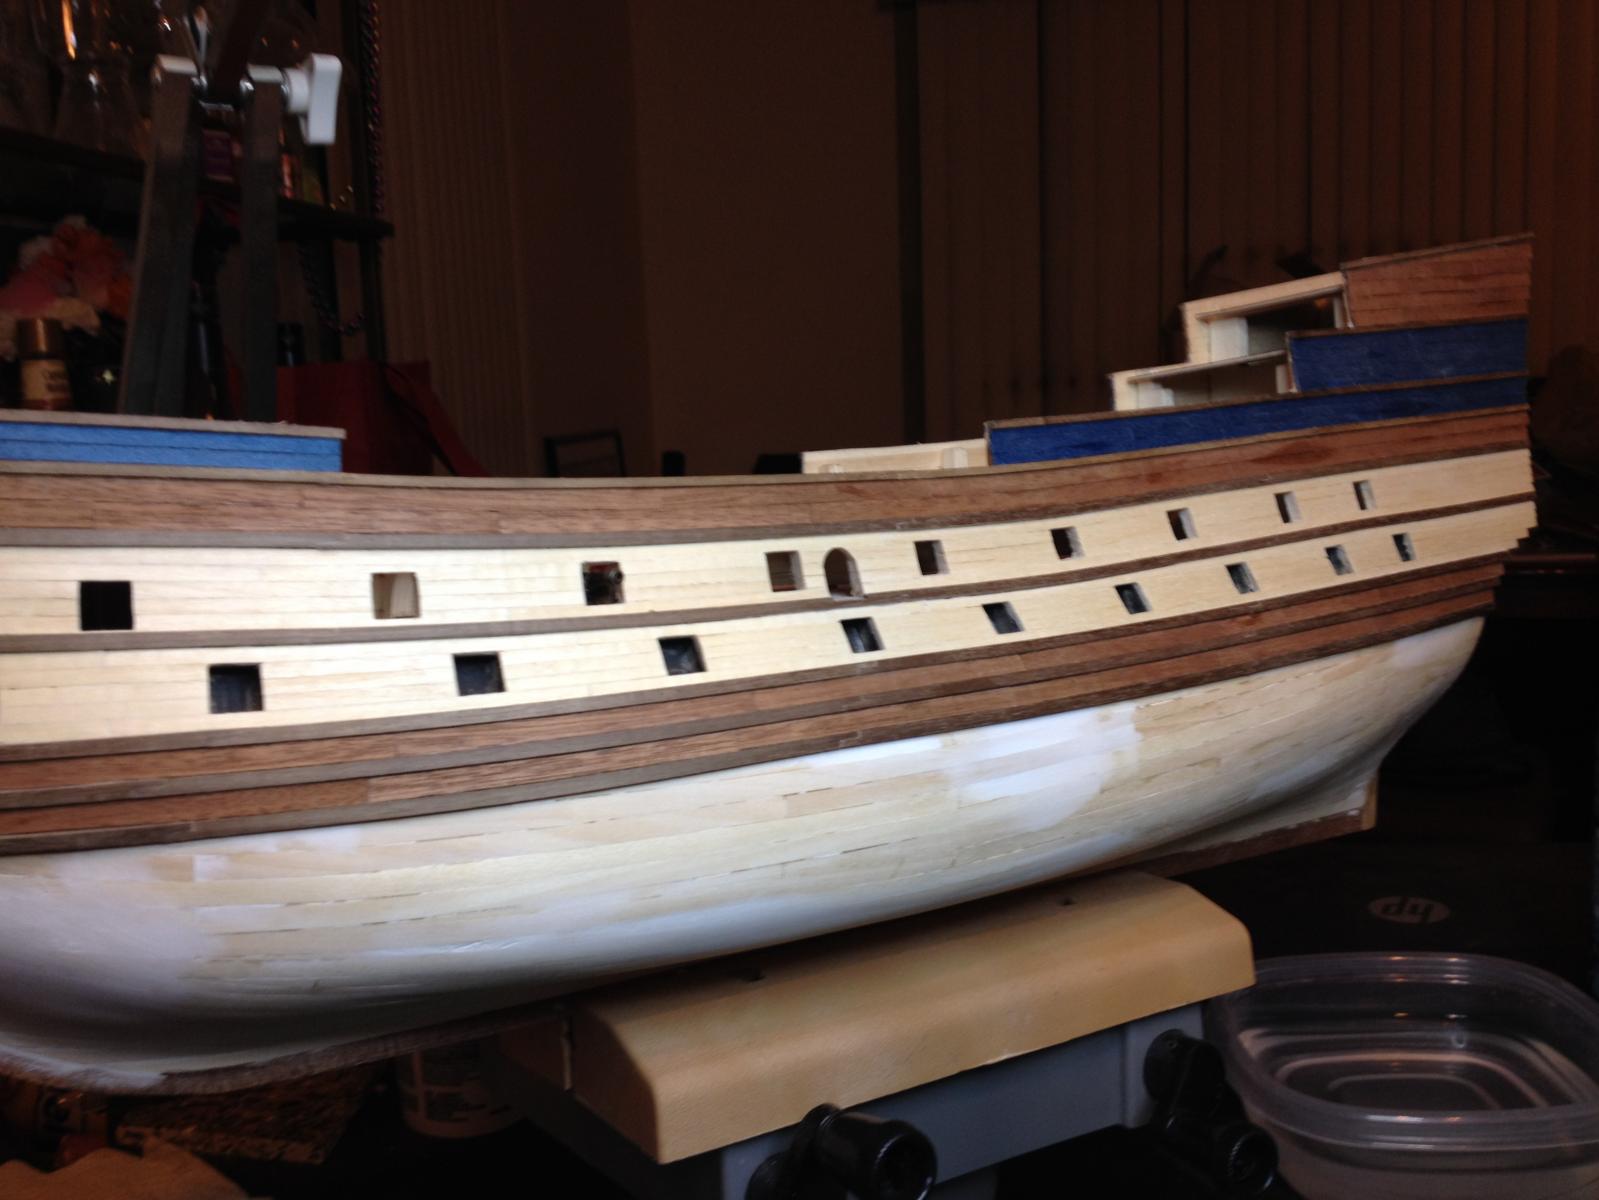
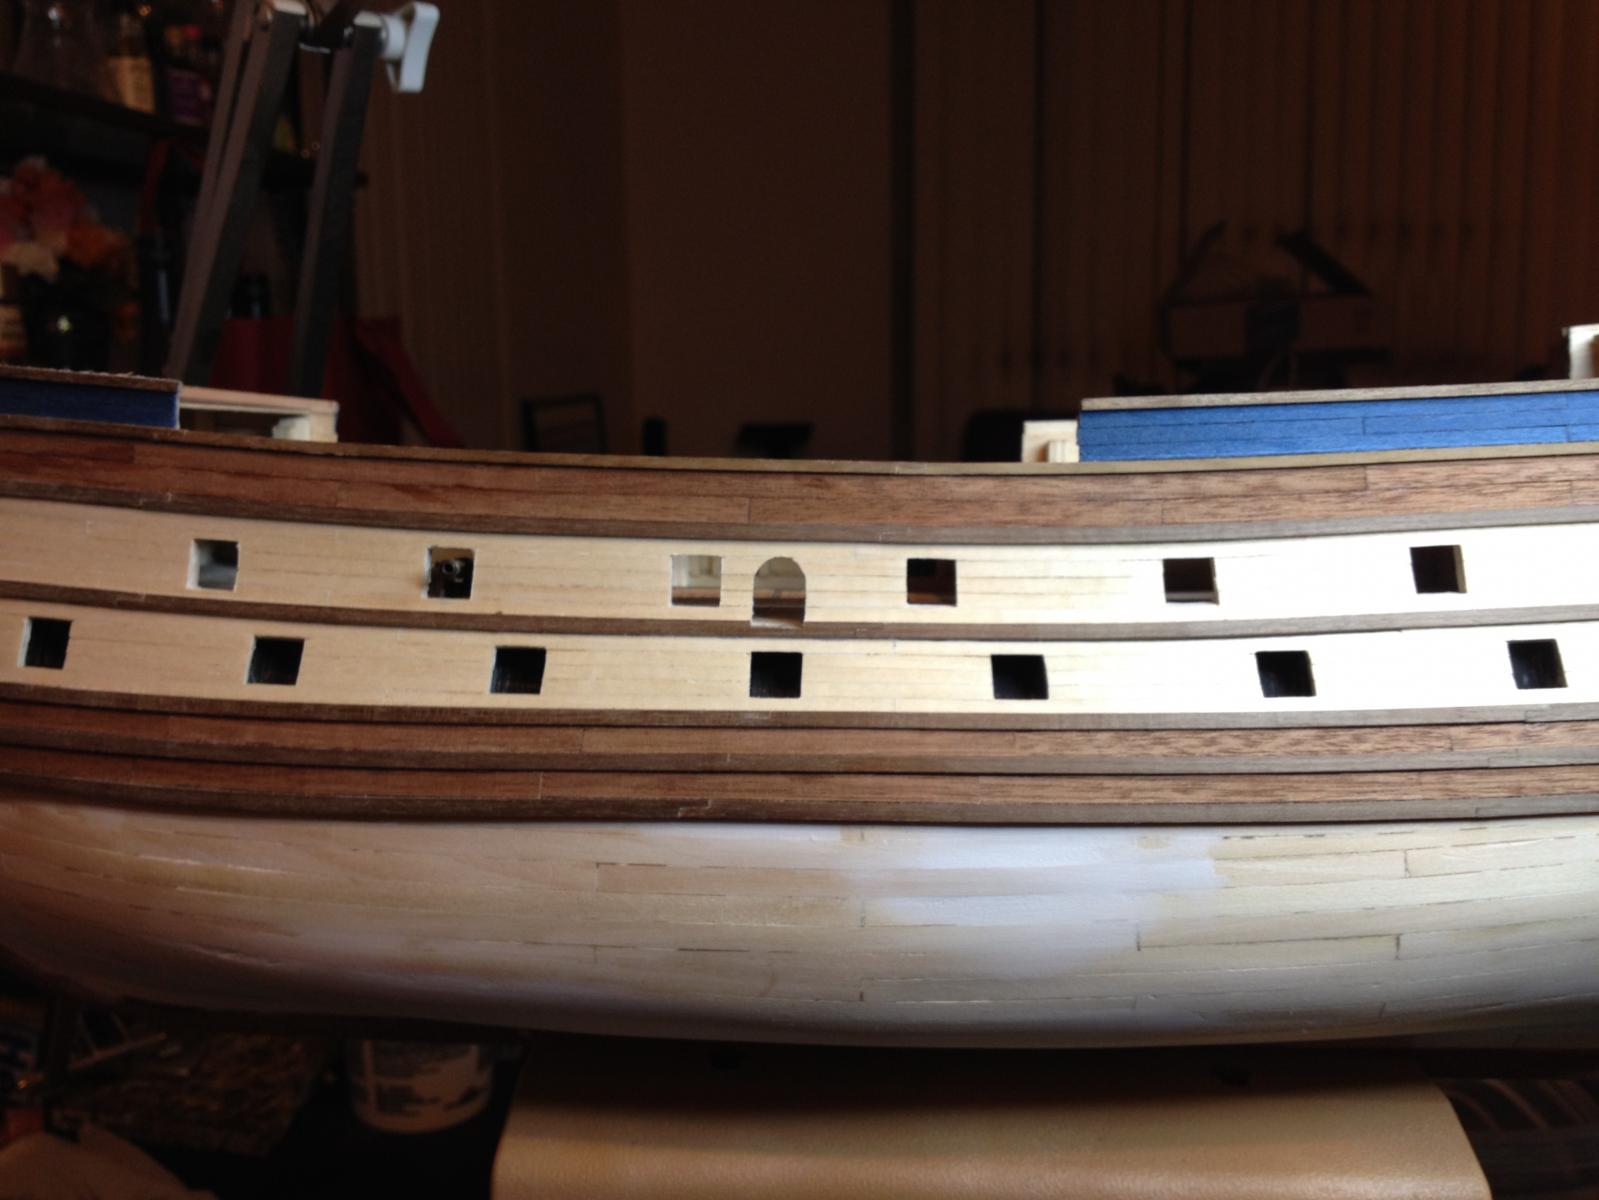
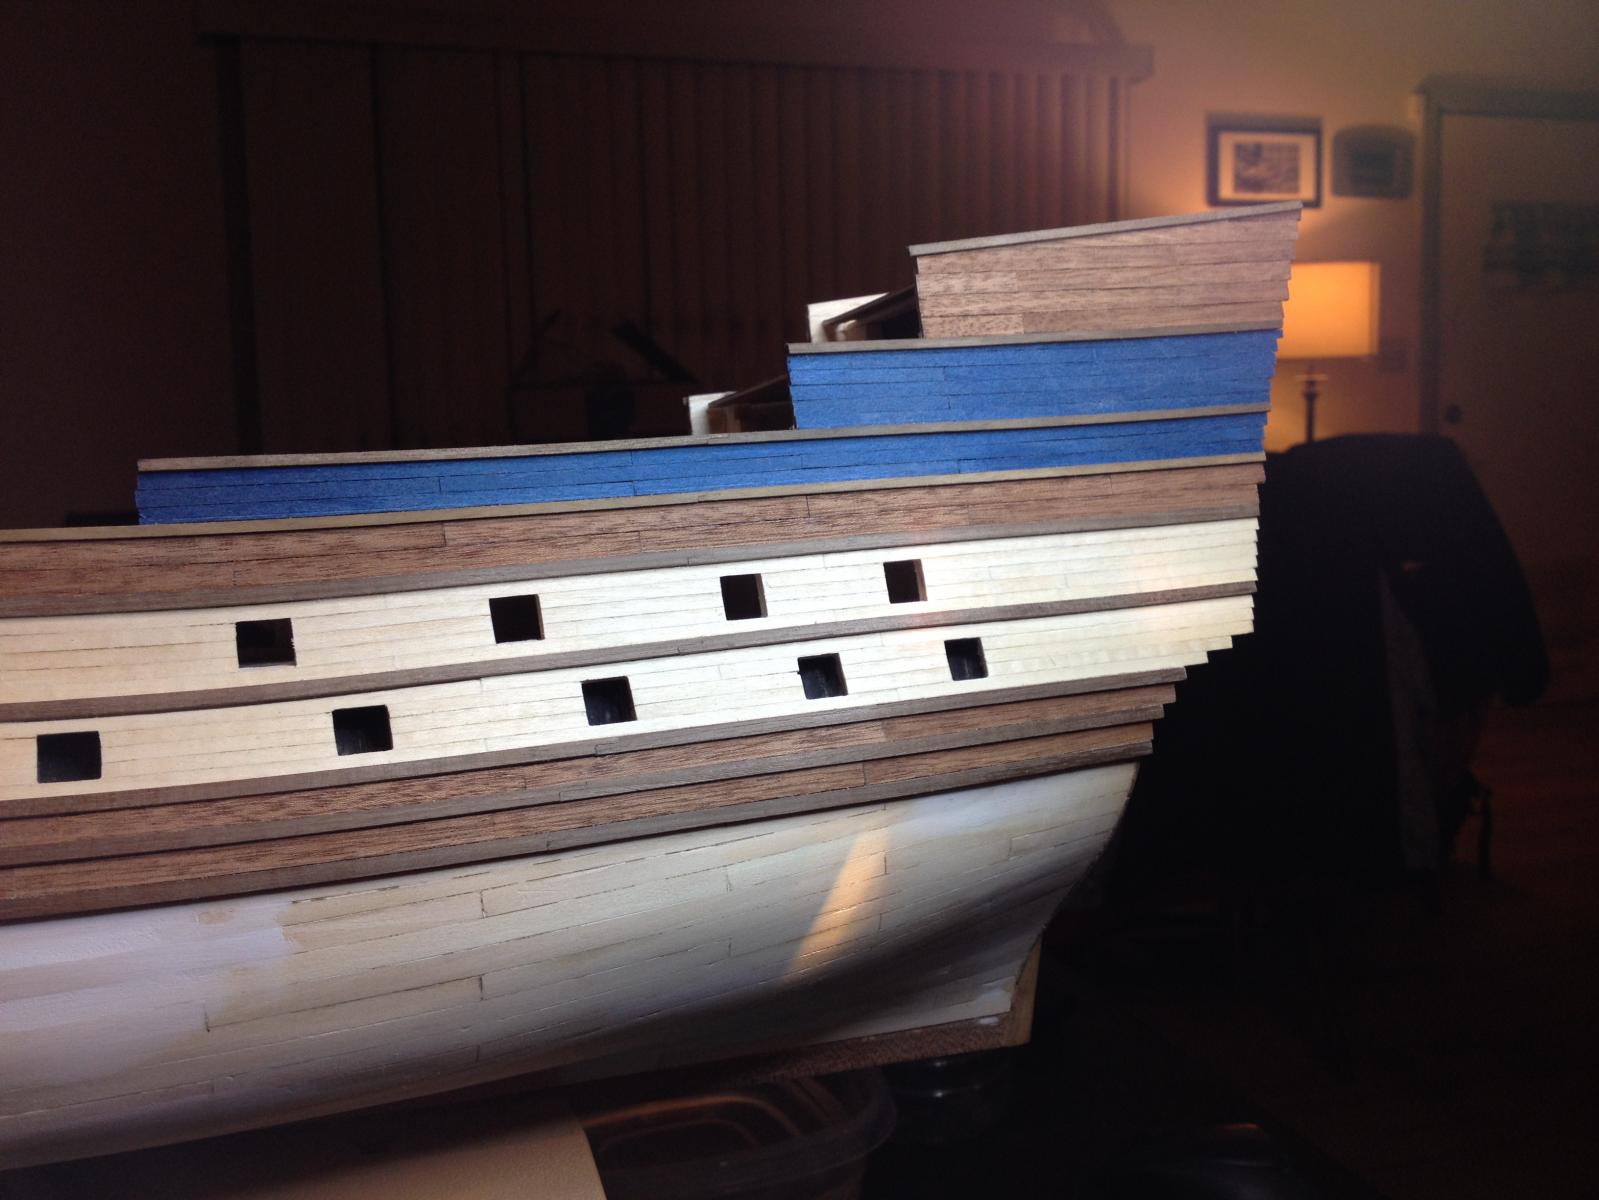
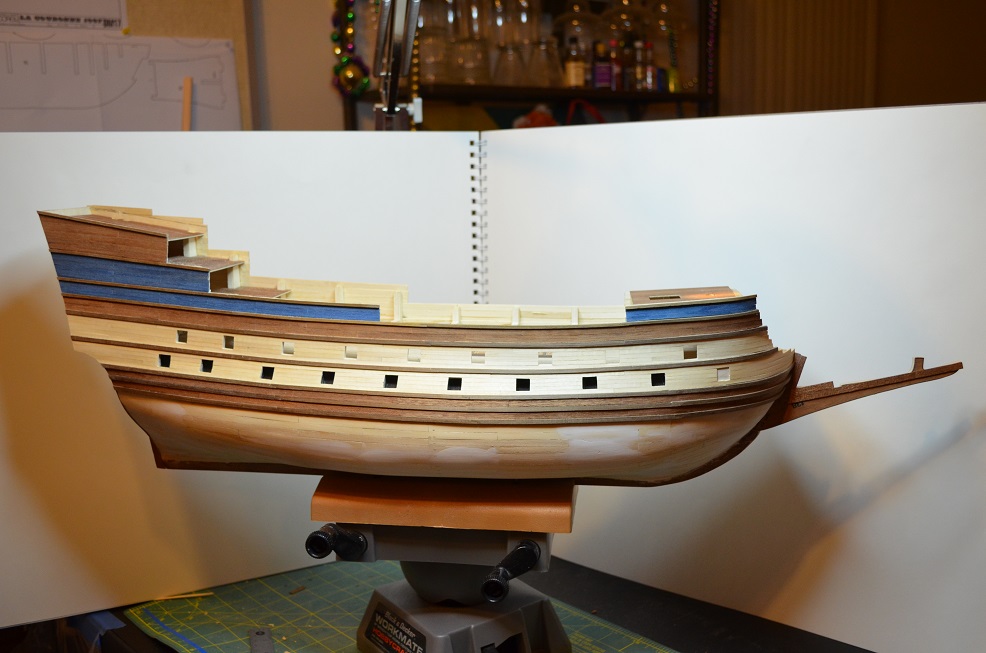
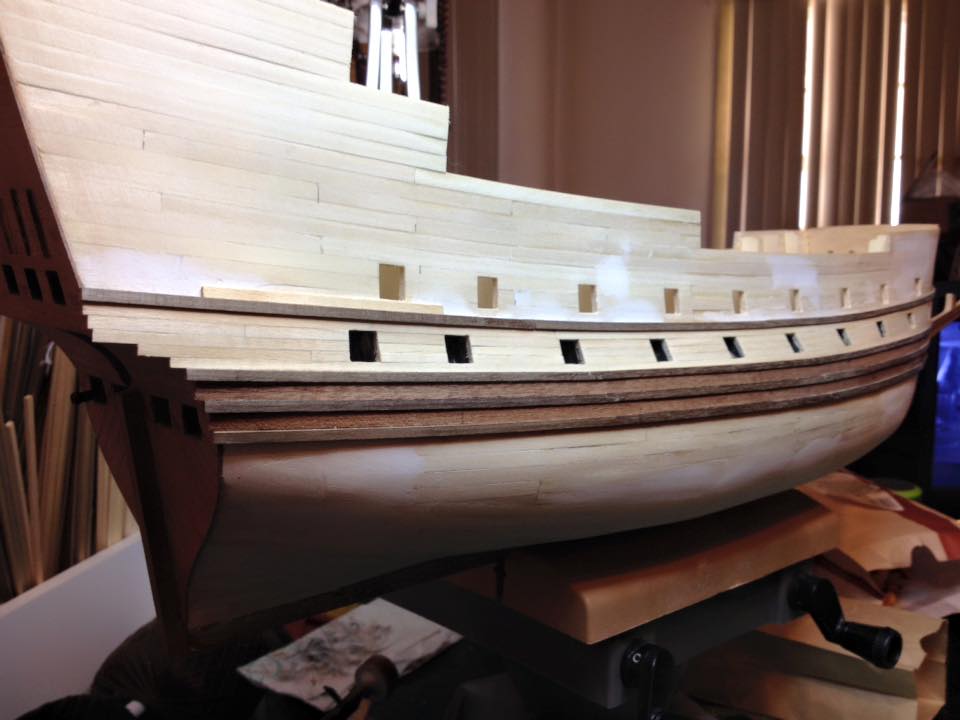
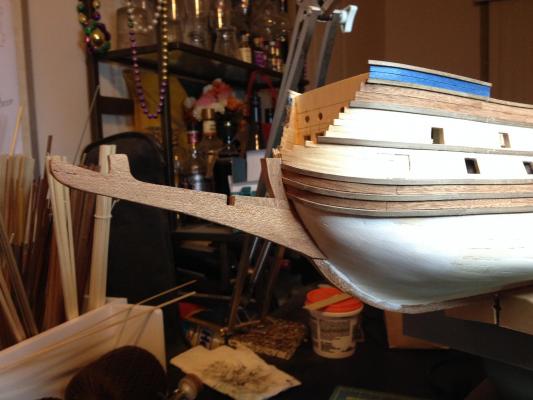
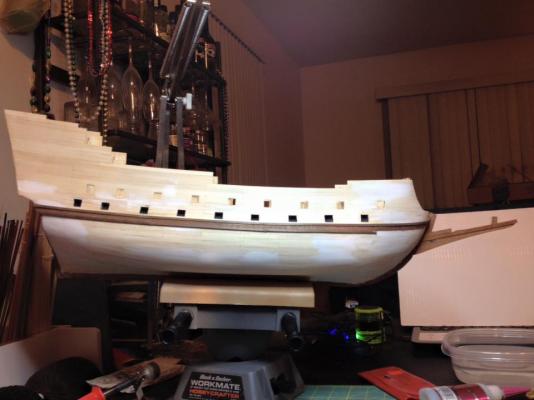
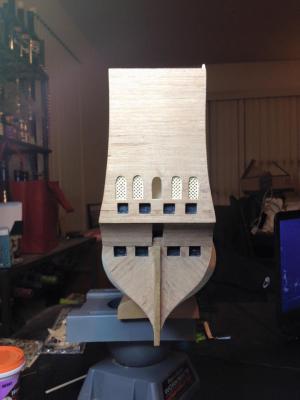
A lot of progress has been made in the past few days. I have been very fortunate to have been able to dedicate so much time to this build at 158 hours as of tonight. Not counting research, studying plans and reading some really wonderful articles and other build logs. I would love to dedicate more time but as much as people at my job love seeing progress pictures they are not yet sold on the idea of paying me to build ships. So here she is. I have topped out the 2nd planking on the starboard side and have started the final shaping of the hull at the stern. Now to duplicate this on the port side.


- 608 replies
-
- 11
-
-
- la couronne
- corel
- (and 1 more)
-
She is looking good! Very nice job with the weathering on the deck and hull. Gorgeous paint detail with all the intricate designs as well. This is one of the ships I'm considering for my next build after la Couronne. I want to build her in wood so there will be differences but this is a great preview for me. I look forward to watching the progress continue. Keep up the great work!
-
The planking looks great! That sucks about the hatches being off just that tiny bit. I know how frustrating that can be especially when it forces you to remake and entire piece! Rest of the decking looks real nice from what I can see. Looking forward to seeing more!
-
PeteGee, I have actually used my Bluejackets Manual when I first started building ships. I also have pulled out my old Boy Scouts Handbook to remind myself how to tie a few knots. It is interesting to see what books that were not meant for model ship building can contain useful and relevant information.
-
Simply beautiful! This will be a ship to display proudly for generations to come. Thank you for the all the nice detailed pictures and steps along the way. Your log is full of great information on the construction and especially the rigging that can be used for many other builds of this period. Excellent work!
- 249 replies
-
- 3
-
-
- billing boats
- vasa
- (and 1 more)
-
This is a prime example of why I love MSW. A great community with a wealth of knowledge that the members are willing to share with each other regardless of experience. My wish list on Amazon seems to grow longer with every visit. I have purchased a couple of books already to help better understand ship rigging, "The Art of Rigging" by George Biddlecombe and "The Rigging of Ships: in the Days of the Spritsail Topmast, 1600-1720" by R.C. Anderson which deal specifically with the time period of my build, la Couronne. I have found both books to be useful so far though I will also check out some of the other suggestions that have been posted. I have rarely found one book with everything in it I need and often times information has changed as the years have gone by.
-
I have been interested in building either this kit or one similar. I have seen lots of finished ones but I have not seen one being built. I look forward to seeing yours come together. I like the idea of working on this to take a break from your bigger build. Sometimes a break from lots of small tedious pieces is a good thing.
- 206 replies
-
- 2
-
-
- battle station
- panart
- (and 1 more)
-
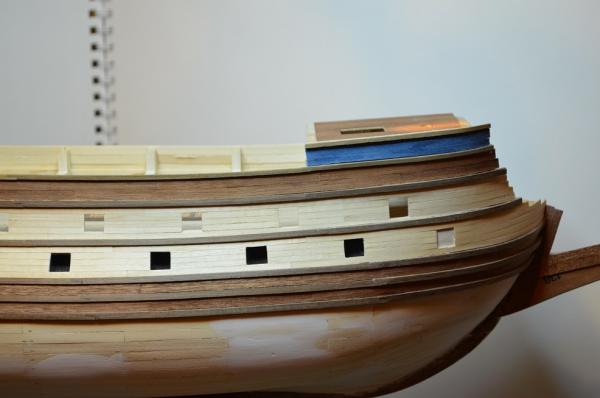
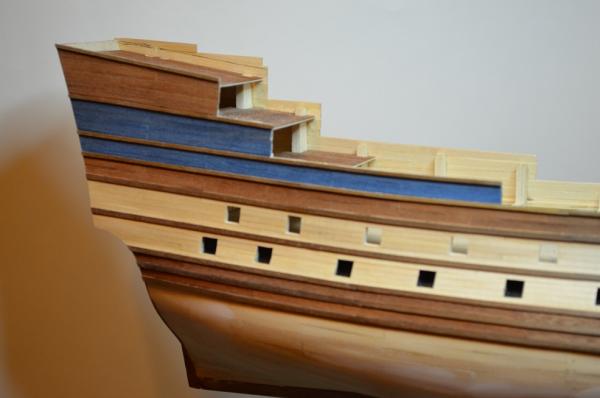
More work has been taking place in the shipyard and la Couronne is getting her 2nd planking. I am using mahogany for the majority of the planking. The wales and some of the trim is walnut and the white sections at the gun ports are maple. I am trying to have minimal paint and so I want the wood's natural colors to do the job. There is an exception to this as I am using a dyed blue boxwood for parts on the upper hull. I like the look of the blue dye over paint in this case and as it is a small area I think it will look good. Might have some of that on in the next update. I've stated mid ship installing the wales and working upward. I wanted to work on the "easier" part first before tackling the lower hull. I also needed to have good starting points and I've seen from other build logs and planking instructions that starting this way seems to be the most common route for planking. In the past I have tended to just do things my way and hope for the best. Although I am proud of my work, I have discovered a deep desire after viewing many remarkable builds on here to push myself harder to make a better ship. This has involved changing a lot my methods and habits and so far I am very glad I did. I have also discovered that the kit did not come with nearly enough mahogany to plank this ship. Luckily Jason at Crown Timberyard has come through for me and found what I was needing. They say that a bad review will travel faster than a good one and so I am trying to change that. This was the second time I have ordered from Jason and I have been very pleased with the service each time. The wood is excellent quality, and his service, response and shipping is very good as well. This was even more noticeable this time as it was a custom order and not "off the shelf." He wen out of his way to find the lumber to match what I needed. I will use him for all my wood needs for ship building and highly recommend anyone not familiar with Crown Timberyard to check it out if you are needing wood for your build. And now enjoy the pictures!

- 608 replies
-
- 14
-
-
- la couronne
- corel
- (and 1 more)
-
Very nice table. I'm fortunate to have a space for my model building in the house but in my very tiny wood shop, I use several similar setups to move tools and one of my benches in and out when more space is needed. I too have been there when I was racing the weather to get some work done and had several tools in the driveway when it started to downpour. I was thankful for wheels that day! When I move to my new place I will have more room and just might try out your table design.
-
Very nice rigging! Im paying close attention as my la Couronne will have a lot of similar rigging and it is even harder to find information about it compared to the Vasa. Your build is looking great. I have been looking at Chuck's rigging ropes from Syren and I too will be swappin most if not all of my kit supplied ropes for his. Much cleaner and what came in my kit was only one color, a very light tan and I would be forced to dye the restto make it work. Something I would rather not have to do. Keep up the great work! I look forward to seeing more as you progress.
- 249 replies
-
- 1
-
-
- billing boats
- vasa
- (and 1 more)
-
Thanks! I know a lot of people in MSW have built her but there are only a couple of build logs on here about la Couronne so I am trying to keep mine up to date and as complete as I can. What set of plans do you have? I have seen a couple different versions while researching this ship. I have seen a few discrepancies in the forward facing canons above the prow deck but from what I can tell all are in agreement that there are 8 canon in the stern. From what I have gathered for the 1637 version of la Couronne which was a 3rd rate carrying 64 guns, there were 8 on the bow, 8 on the stern, 24 on each side from lowest to highest decks, 10, 9 and 5. Finding reliable information on her has been a struggle so a lot of how I am making her look is based on what I have gathered of my plans (which are Corel), other sets of plans that I have found online, pictures of completed models and comparisons of the construction of other ships of her era. If you have something different that I have not seen I would be interested in looking at it as I may be building wrong.
- 608 replies
-
- 3
-
-
- la couronne
- corel
- (and 1 more)
-
Looking good. I have been enjoying watching your build come together as although it is not an unknown way of building a ship it is still rare to see someone building this way at home. That just may be a large part of the future of model ship building and although I do not think I will completely stray from wood ships, I see the huge potential to aid us in wood models with detail work such as sculptures and fittings that are very difficult to carve from wood. Looking forward to seeing more!
-
Very nice work Ken.