HOLIDAY DONATION DRIVE - SUPPORT MSW - DO YOUR PART TO KEEP THIS GREAT FORUM GOING! (Only 13 donations so far - C'mon guys!)
×


AntonyUK
-
Posts
1,190 -
Joined
-
Last visited
Content Type
Profiles
Forums
Gallery
Events
Everything posted by AntonyUK
-

casting cannon
AntonyUK replied to syartbox's topic in Discussion for a Ship's Deck Furniture, Guns, boats and other Fittings
Hi. A few questions. What do you want to make the cannon out of ? And what scale do you want ? And how realistic do you want ? Have done casting myself and there is a lot of help on Google that gives excellent advice. Making the master plug is the most important part of the process. If you are thinking of using metal then there is a lot of things that can and will go wrong. Trust me I did it in my apprenticeship. Resin is a very nice friendly product to use and gives fantastic detail from the plug. Also paints well and can be coloured. Regards Antony. -
Hi Ron. I don't want to disagree with your views.. But I like the finish and it looks just right. It's what I am trying to achieve with my models I think you build is spot on. Regards Antony.
-
HI. Done a little of the Planking to the exterior of the hull this weekend. Quite happy with the finish. A bit more next weekend. Regards Antony.
- 10 replies
-
- 1
-

-
- Victory
- Deagostini
- (and 1 more)
-
Hi. Looking very nice. Rigging cordage is just the right colour. Regards Antony.
-
Hi. Wow looking very nice. I am learning a lot here when it comes to my turn I will have some very clear goals. It's as close to the real thing... No its better then the real thing Regards Antony.
-
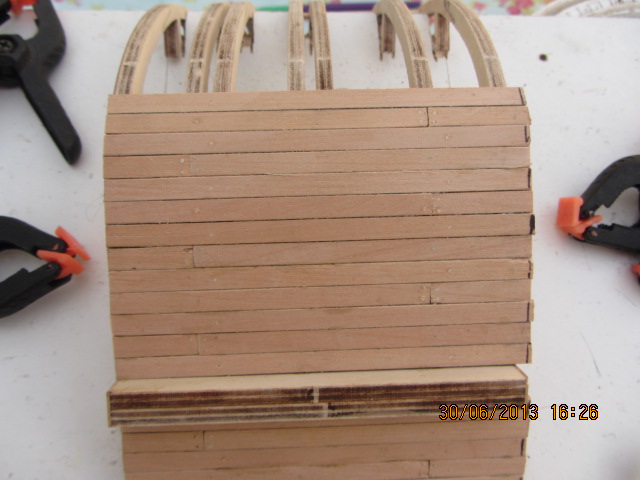
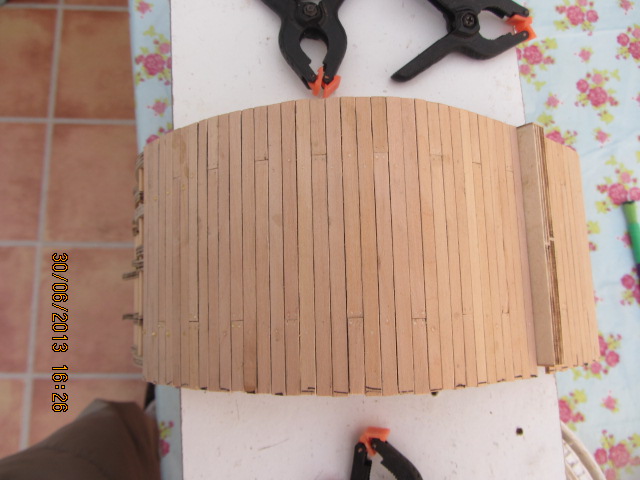
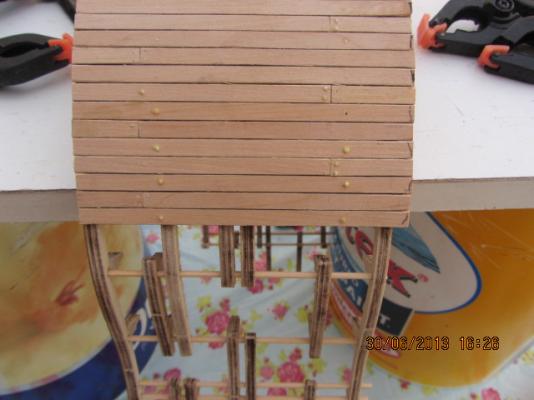
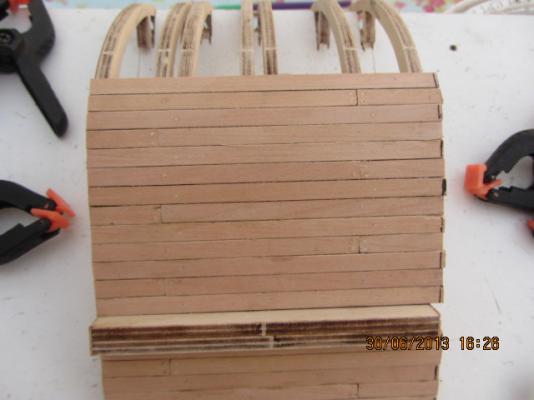
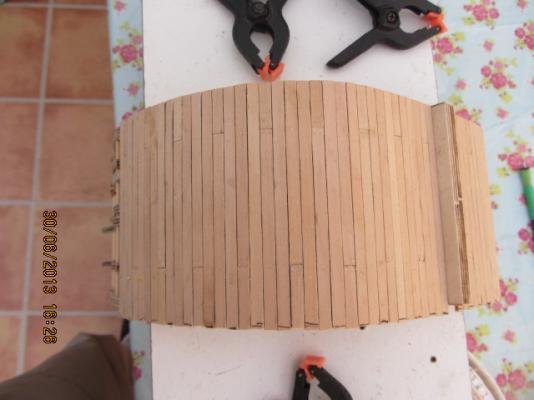
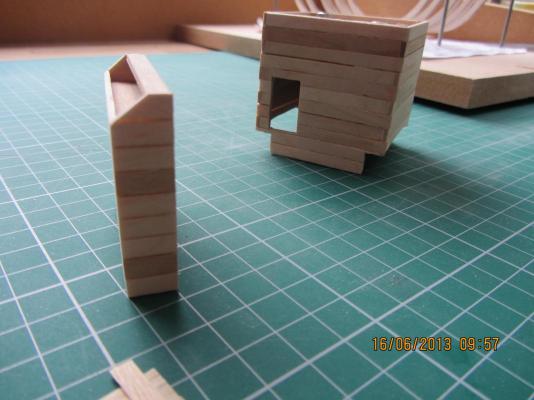
Hi. A little progress. Made up the Pumphouse (personalised ) the planking This is the Jig I used to keep things square. Note the Staggered overlap. I like the look of the corners. Still not Finished the Pump house and Shot locker. This is a test on how the treenails will look. We decided to add the treenails to the planks before planks are added to the model. All frames are in place on the keel. and another view. More next week. Regards Antony.


- 10 replies
-
- 1
-
-
- Victory
- Deagostini
- (and 1 more)
-
Hi Mark. Thanks. Found that link a few days ago. and saved it in my to read list. Regards Antony.
-
Hi. Thanks for the replys.. I believer in the right tool for the right job. I look at the saw as an investment and something I will use a lot. David. As far as the micrometer stop. I did look into weather I would use it and.. no was my own answer. Just looking forward to using the saw.. It's my first power saw so I got myself 2 books "The Accurate Table Saw" and "Table Saw : Workshop Bench Reference" So a bit of reading first. Is there any better books out there that deal with the small saw and close tolerances ?? Regards Antony.
-
Hi. Well I have lashed out and gone for for the Byrnes saw with extra blades etc. Just waiting now ..Tick Tock .Tick Tock. Regards Antony.
-
Hi Juan. That's a very nice cross section.with wonderful workmanship. Please continue to post lots of photos. Regards Antony.
-
Microlux Tilt Arbor Saw Problems
AntonyUK replied to capnharv2's topic in Modeling tools and Workshop Equipment
Hi Tony. Thanks for the information most helpful. It looks like its the Brynes saw for me. Most of my timber will be 6mm thick and I will be wanting to use the saw quite a lot. Regards Antony. -
Microlux Tilt Arbor Saw Problems
AntonyUK replied to capnharv2's topic in Modeling tools and Workshop Equipment
Hi. Jumping in here... Is it not possible to use the Byrnes saw blade in the Proxxon FET ?? Or another manufacture blade ?? I am looking into buying a saw at this time and am watching this topic with great interest. The cost of importing with the vat and taxes makes the Byrnes saw very costly and would be a big chunk out of my hobby cash. Regards Antony. -
Hi. Looks like a wheat freighter on the Great lakes. Antony
-
HMS Pandora 1779 in 3D
AntonyUK replied to ppddry's topic in CAD and 3D Modelling/Drafting Plans with Software
Hi. WOW ...says it all. I could list of loads of words but none would do your build justice. I have Solidworks and never got around to using it.. Having seen this is a real inspiration to me and I guess others Regards Antony. -
Hi. Jim has replied with a price. Looks like I will be getting one after seeking some advice from those that have this saw. I am looking at the 230v Byrnes 4" Table Saw (w/24-tooth carbide blade, 1/8 high rip fence and miter gage) and the Auxiliary Tilting Table And the blade recommended above for the tilt table. Thurston - 4" 80-tooth .04 kerf (recommended for the tilt table) Also getting one of his Drawplates. The question is:- Is there anything else for the saw I might need ?? I will order next Monday so any thoughts please. Regards Antony. Edit - BTW never owned a power saw before.
-
Hi Martin. I think you are right. I will wait for jim's reply and make up my mind. Regards Antony.
-
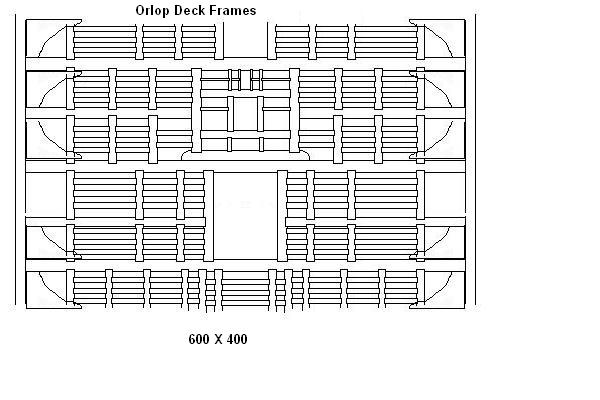
Hi Colin. Very nice I also would like to know how you finished the Orlop deck so nicely. Regards Antony.
-
Hi. I have been looking around for a small bench saw. I found lots of information on the Proxxon FET but a lot of the information is quite negative and I don't want to spend cash on rubbish. The Jim Byrnes saw keeps coming up as a very nice bit of kit.. I have contacted Jim (today) to see if there are any distributors in the UK. And to enquire on the price for shipping to the UK. Now the question I am asking is. :- Are there any decent small bench saws in the UK ? Would be interested to hear from fellow modellers that use a bench saw and there views on what's required for modeling. Thanks in advance Antony.
-
Hi. Second time I have read through the compleat log. Very nice work and nice use of the mill and rotary chuck. I have the same kit to build in the future. Will take your build as a guide and target to standards that I would like to achieve. Please continue posting as its a real inspiration to me and others. Regards Antony.
- 206 replies
-
- 1
-
-
- royal caroline
- panart
- (and 1 more)
-
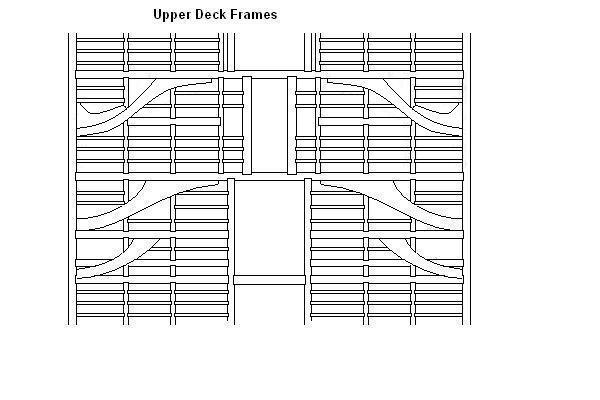
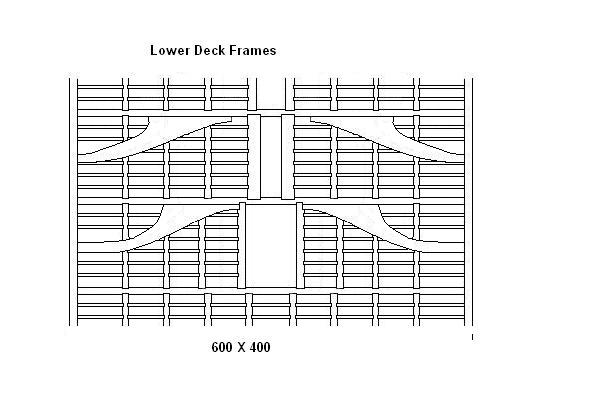
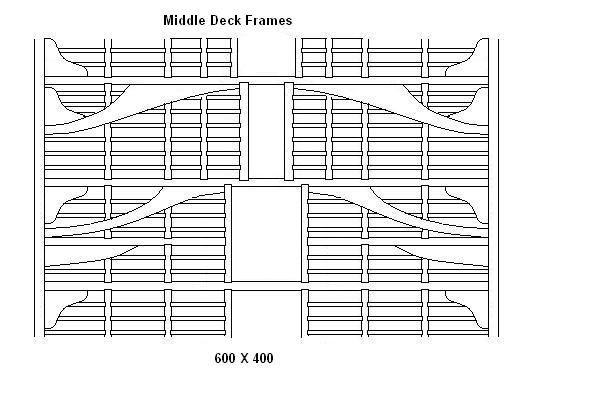
Hi. Having looked at another build :- hms-victory-cross-section-by-zeptraderuk He has constructed the deck as removal while building .. Good idea. and adding deck framing more to scale. Have done me some drawings (basic) that I will use on my build. Will add a few more photos tomorrow as we proceed. Regards Antony and Karl.
-
Hi. Very nice work it's turning into something to be proud off. Love the photos. And I like the way you have added own ideas into the build. Makes it personal. Regards Antony.
-
Hi Tom. Coming along nicely and is a credit to you and your skills. I like the effect and effort you put into the barrels/casks. They look awesome. I must say your finger nails look cool Regards Antony.
- 48 replies
-
- 1
-
-
- Victory
- Cross-section
- (and 1 more)
-
Hi Tom. Very nice work and some brillant ideas. keep the pictures comming. Very intrested with this build. Regards Antony.
-
Hi Colin. Very Nice work. I like the idea of having the Orlop being removable while working on it I also like the extra beams..Adds much more detail and looks just right. Still folowing this build as I have just started mine. Regards Antony.
-
Hi Thomes. Looking like a fine ship you have there. Will you be adding the main mast. yards and standing rigging ? Watching with interest and learning. Regards Antony.