


Overworked724
-
Posts
1,263 -
Joined
-
Last visited
Content Type
Profiles
Forums
Gallery
Events
Everything posted by Overworked724
-
 Really clean work, Dave. Your brass and metal work really sparkle!
 -
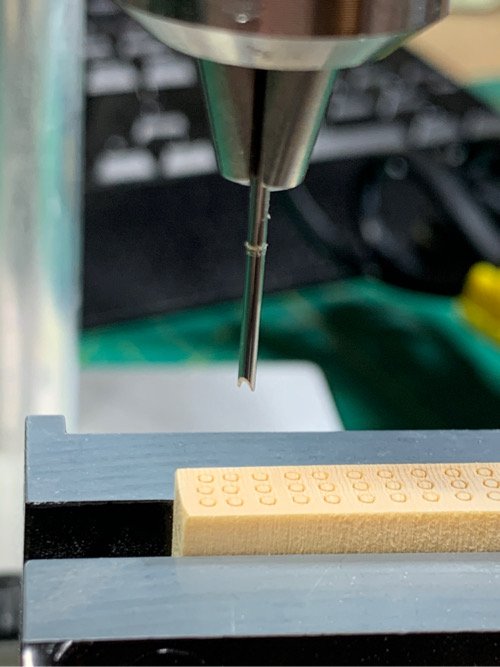
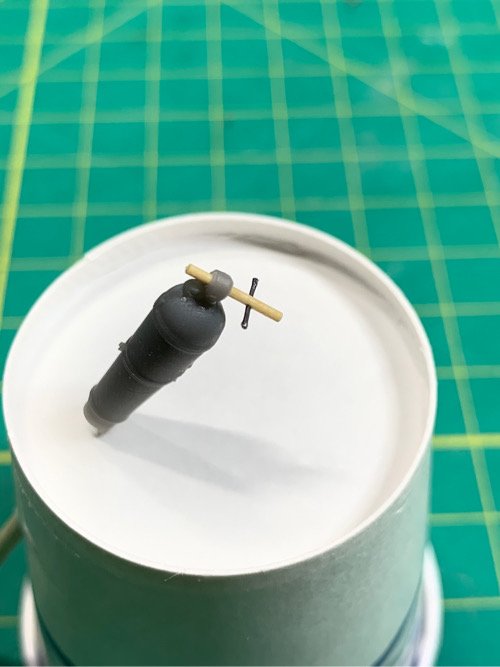
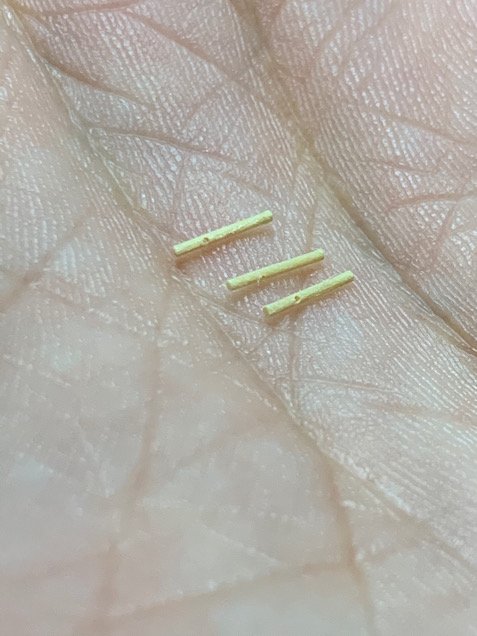
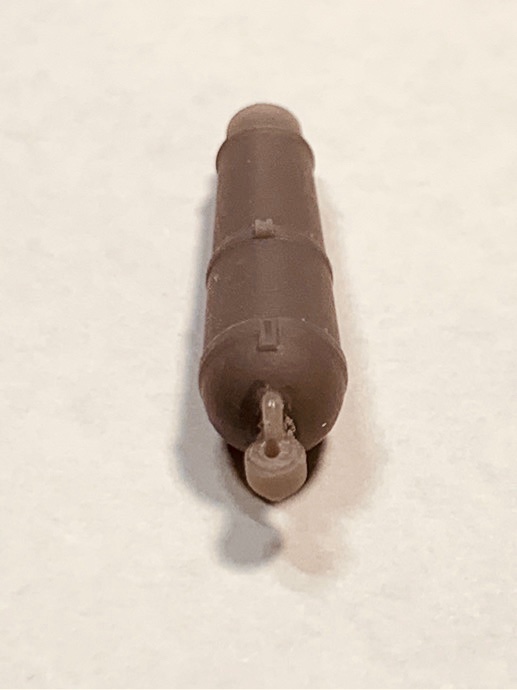
Well...I couldn't help myself. Had to continue on with my train of thought on the elevations screws and elevation handle of the carronades to see if my idea worked and it did. Took an 18G dispensing needle and made a 'tree nail' corer like I did before. Put it in my drill press (with the drill OFF) and pressed out some larger gauge wooden tree nails. The cedar wood is pretty nice for this...the nails come out very clean! After cutting the bottom off the wooden nails stack and poking them out, I found the hole for the elevation screw on the 3D printed cannon was slightly small. So I opened them up a bit wider with a #64 drill bit and they slide in perfectly with a small bit of 'wiggle'. Used my little 90 degree cross drill jig to make a hole of the side of the wooden dowel I'll use for the elevation screw. In this case, the wooden dowel size was a #64 drill bit, and the cross hole which will hold the wire simulating the elevation handle is a #77 bit. Drill my hole in the dowel... And then slid in a little chunk of 0.4mm black wire as a handle...seized it in with a tiny spot of CA and added to each end of the handle. I think it's worth noting that the 3D printed carronade with sled did not have any detail related to an elevation handle on the elevation screw. So...I'm going to call this a win...and move on!
-
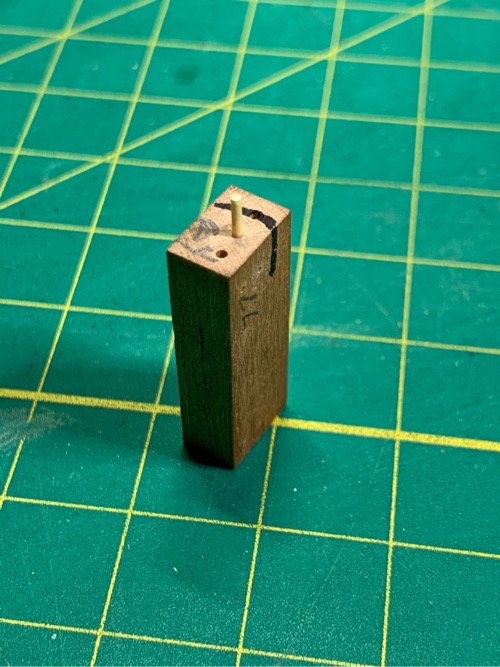
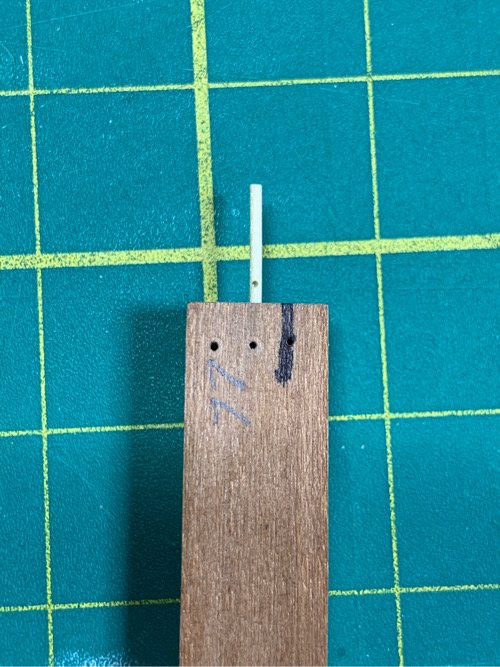
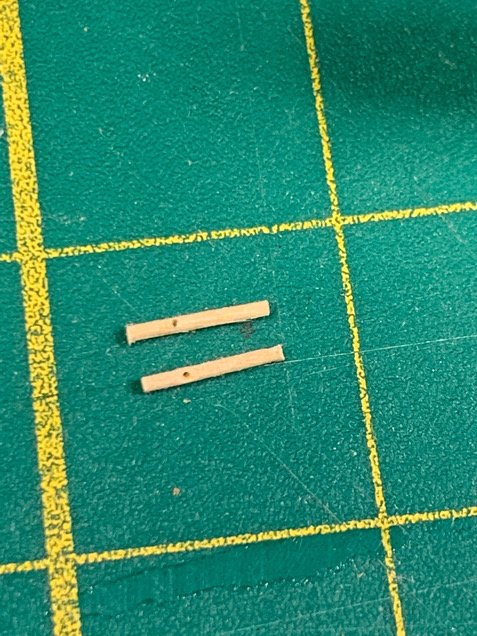
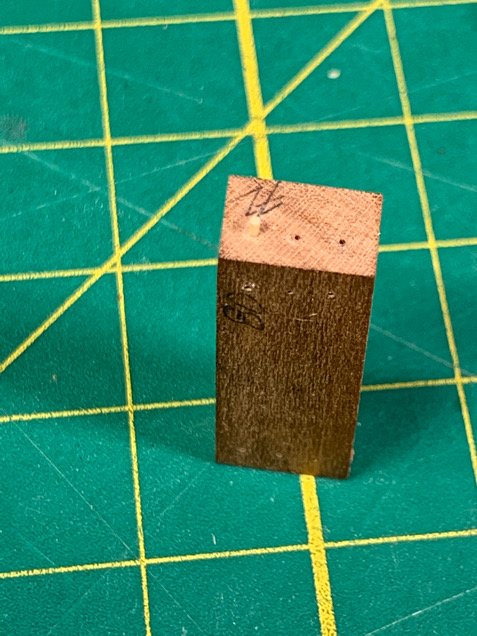
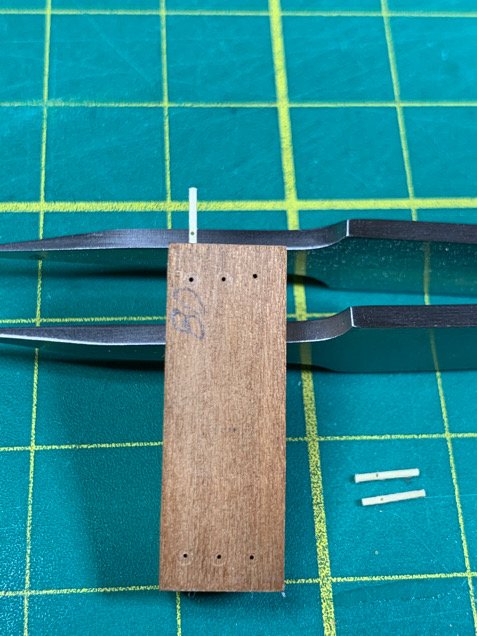
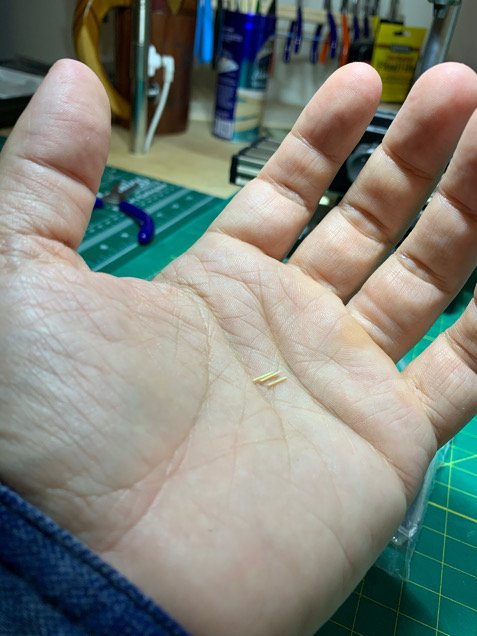
And now for something fun but ridiculous. I finished my interior bulkhead sanding (at least as best I can possibly do...) but took a slight detour back to the carronades. I was wrestling with how I would create the elevation screw handle on the carronade elevation screws. This would be a piece of wire inserted into the elevation screw (wooden dowel/toothpick/whatever). The probelm - these things are fricking TINY! I'm not handy, nor a carpenter, nor a miniature modeler...so this was a bit outside my realm. It occurred to me I can make the reproducible cedar trunnels/nails of exact width...so why not figure a simple way to drill a hole in the tiny dowel. My solution. Use a small scrap piece of cherry wood (hard wood) as a drilling guide. Make some #80 holes at 90 degree angles to each other so the holes intersect. The smaller holes can be widened easier with larger drill bits as needed. I made a #72 and #80 drill bit size cross angle...and inserted my larger cedar nails (made to fit a #75 drill bit hole). Inserted the cedar trunnel into the guide hole (marked #72) - and then drilled by hand into the guide hole marked '80' with my rotary tool fit with a #80 drill bit. And it worked like a charm...the trunnels don't move, and can be easily drilled at 90 degrees for easy insertion of the wire 'handle'. And just for scale...these things are ridiculous tiny!! Just a fun aside! It's probably been done by others on the forums, but it was a nice problem to solve on my own and see it work!
-
Got 2 of those suckers. I absolutely love mine. You might want to ensure you have a good collet collection. The rotary I use accepts the Dremel collets so it makes it easy to adapt.
-
Thanks, Smotyka! Much appreciated. Although, I can only claim responsibility for googling what options are out there, if my efforts help others than it's time well spent! That's the goal of this forum!! 😃
-
Howdy, Red. I can't say for sure what @WalrusGuy used. But as for me, in my build log I show the rotary tool I use which allows a closer approach to tight areas. I used a simple Dremel drum sander (big drum as well as narrow) to 'rough' crop the sills but still allowed them to be proud (wider) than the stanchions. Since you need to add the 1/4" sections to make your gun a sweep ports, the sanding regime never seems to stop. But I used a drum sander on my rotary for the exterior as you mention. Than hand sanded with finer grits for finishing up the exterior with sanding sticks/pads/etc. (I made a bunch of sanding implements for hand sanding). The interior I rough sanded with the dremel and folded section of 120 grit rotary sanding paper with the self adhesive back. I describe this is my blog as well. I'm finishing up the interior bulkhead sanding as I write this and I'll show some pics on what I used in a future post. It's such a bothersome chore...I bet folks simply don't like writing about it! 😃
- 436 replies
-
- 1
-

-
- Syren
- Model Shipways
- (and 1 more)
-
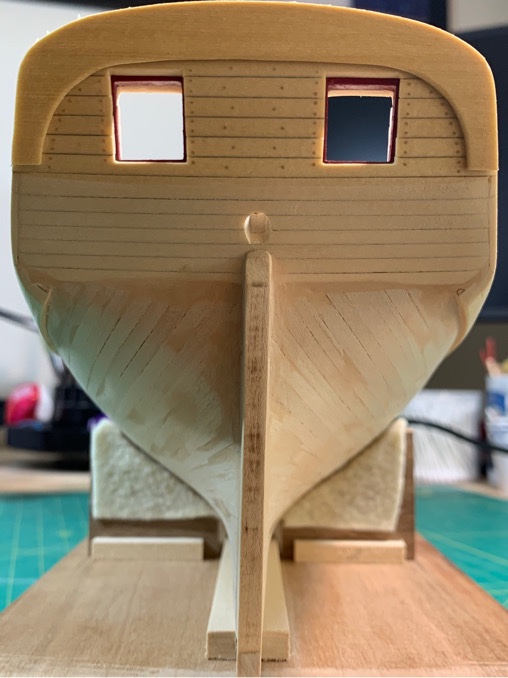
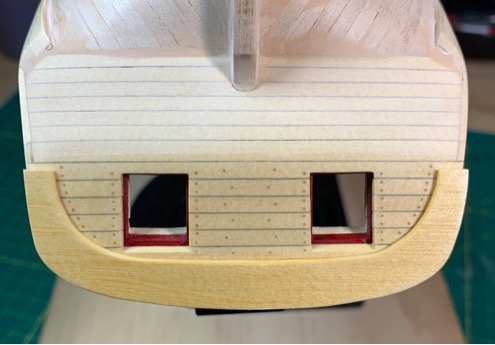
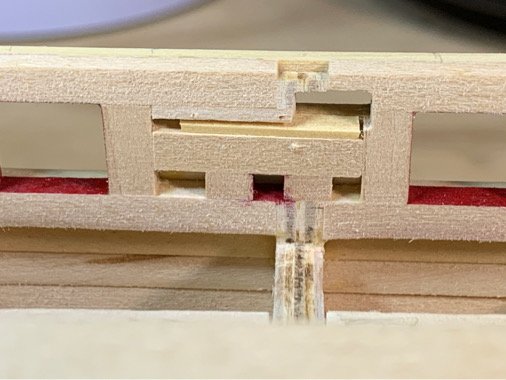
A bit of progress and a bit of a disappointment. Before I painted the transom interior (red) or exterior (black below trim pieces) I wanted to drill out the rudder hole. It’s a bit of a dicey activity for my way of thinking as you have no “redos”. I can say I did a decent job of drilling out the rudder hole without causing damage...but...I can see the rudder hole is a bit offset by about 2mm when viewed from the bow...but it is centered between the stern gun ports, meaning the port side transom extends out a bit wider than the starboard. There’s no fixing the error...just going to build around it and hope the visual noise of rigging and fixtures overwhelms the assymetry. Sigh....
-
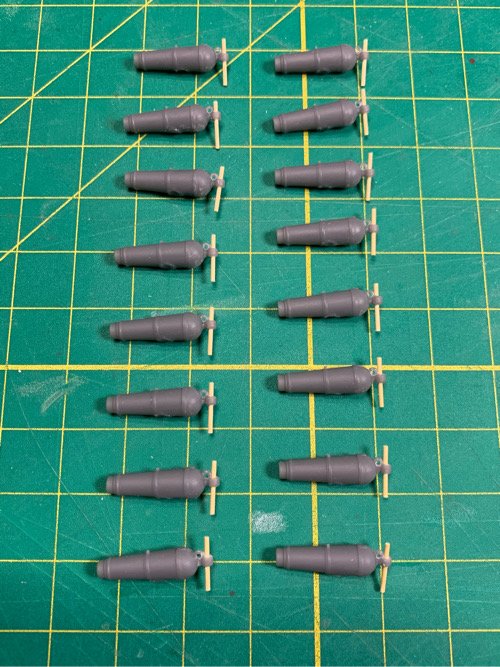
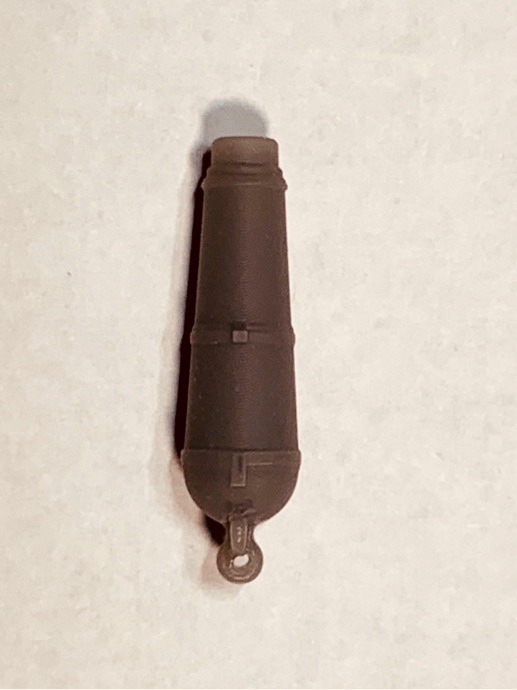
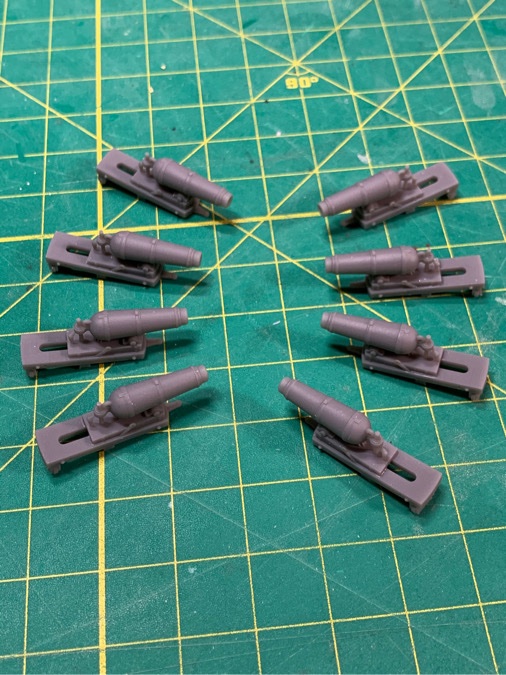
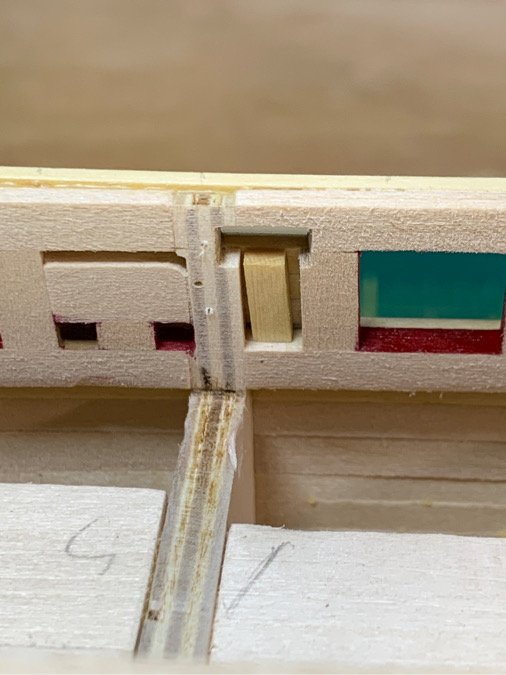
Just a bit more surgery on the 3D carronades. Before I put them off to the side, I wanted to check the fit of the hole on the top for the breech lines. Glad I did...they needed to be opened a bit to accept the 0.025” rope. So reamed them all out with a #66 drill bit. Did the same for the elevation screw holes...they might need additional widening but there is plenty of meat left for that if needed. Was thinking about how to make the elevation screws and think I already know how to approach them...I will use a same approach I used for the cedar trunnels but with a slightly larger gauge needle. Then I’ll have consistency across all the carronades, and there may be (?) enough meat to drill a hole for the screw handles (wire). We shall see... Moving on to inner bulwarks...again.
-
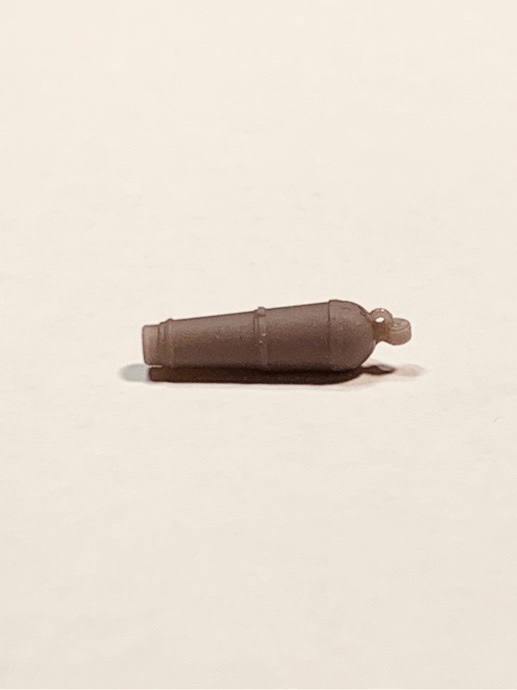
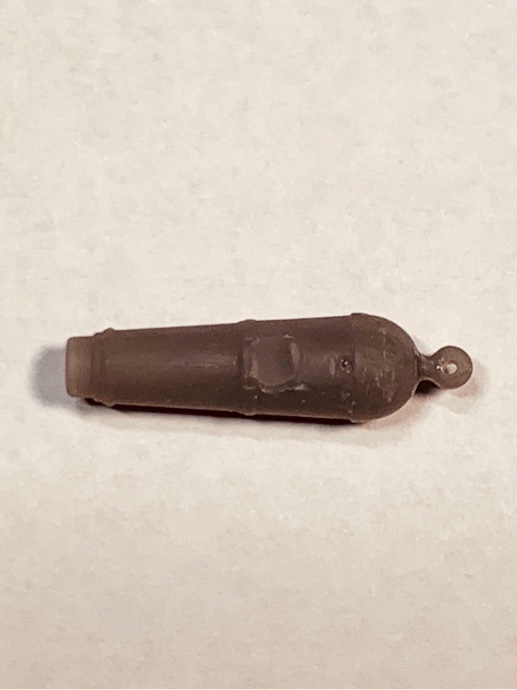
Thanks, Kurt! I do have an airbrush which was working last time I used it a couple years ago. The 3D cannon are very smooth and don’t show any of the linear striations common on printed parts. Whatever they used it printed in very high resolution.
-
Yeah...me too! 😳
-
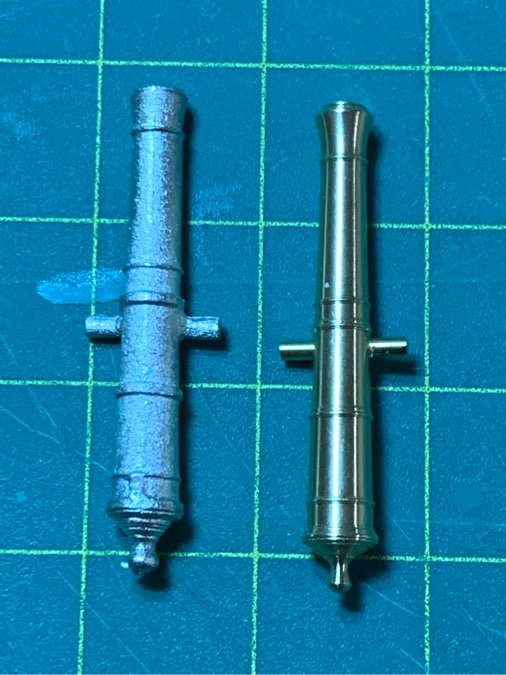
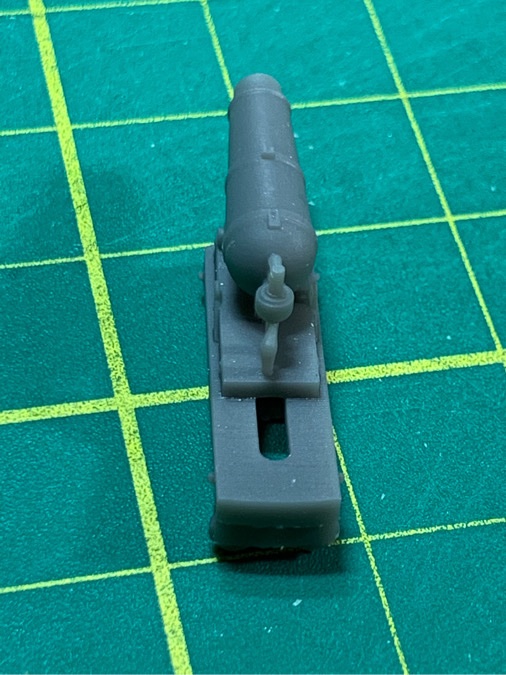
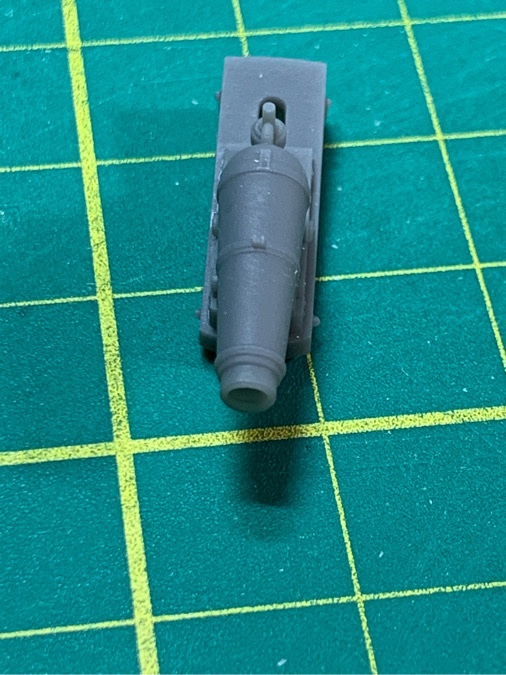
Deck gun day! Ok...while painting the whole assembly is a great option, I went with making the sleds by hand. Mostly because I’ve never done it before and why not? 👍🏽 So I decided to risk it and separate the 3D printed cannon from the sleds. As I mentioned, these are brittle even if they do look crisp and clean. And amazingly, once I got the technique...the reproducibility of removing the cannon (and the minor damage to the underside) was consistent since they are all identical (printed the same way). I used a simple sprue cutter and set the jaws at the connection between the sled and cannon...snip and done. A bit of sanding...and that was that. Only a little unevenness on the underside remained but it won’t be seen. I drilled out the elevator arm (leaving a hole for the scratch built one...that was indeed challenging) and reamed out the eyebolt which will hold the rope. Decided to add a layer of super glue at these points to give them some added support. And now...gratuitous pics. 😊 Versus...the kit supplied parts. Time will tell whether this was the correct decision or not...but at least I have a solid path forward now. And I really was NOT looking forward to trying to make those pieces look clean. Moving on!
-
I agree, Chuck. They are also a more cost friendly alternative to brass fittings if you want to go that way. Delivery was quick as well.
-
Robin, I feel the same when I look at your model! I hope mine comes out half as crisp as yours! I think I bit off a bit much for my second model...but every step taken is another success and learning opportunity. Thanks for the kind words, shipmate!!!
-
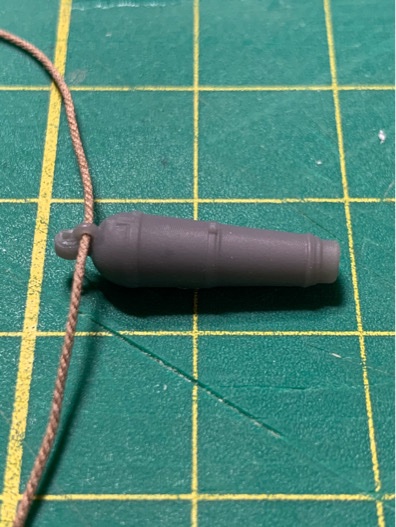
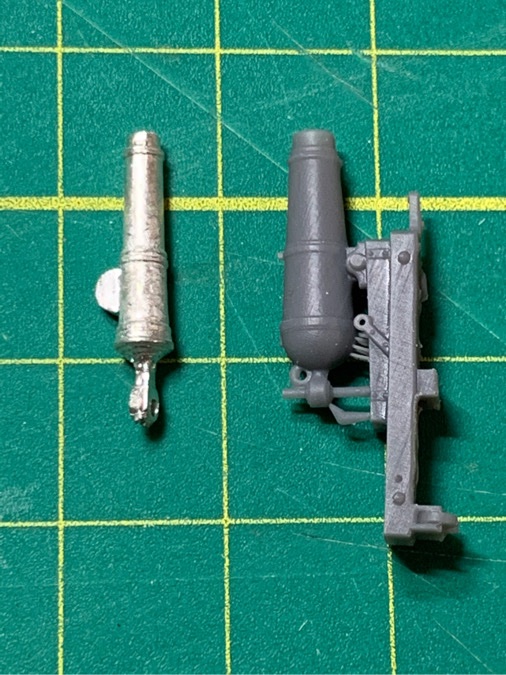
Truly said, Robin. I wanted to dink around with cannon options now versus later. I’ve never seen 3D printed parts before and was surprised at the brittleness of the material. I’m honestly not sure if I can separate the cannon from the sled...which is my original intention. Additionally, I’m not certain how well they will hold up to being manipulated/drilled. I’m a bit more confident in my painting skills than soldering skills...but the level of detail on the historic construction of the printed carronades is extreme...and I’m sure my efforts would only yield something which looks like a decently painted 3D printed part, rather than something diligently crafted which will add to the warmth of the model. What I plan to do is see if I can separate the 3D printed cannon without ‘too much’ damage. If it doesn’t work, I think I’ll go with option #2 which are getting the Caldercraft parts. However, I am not certain how much justice I can do to those nicer brass fittings...so wanted to try to printed parts first.
-
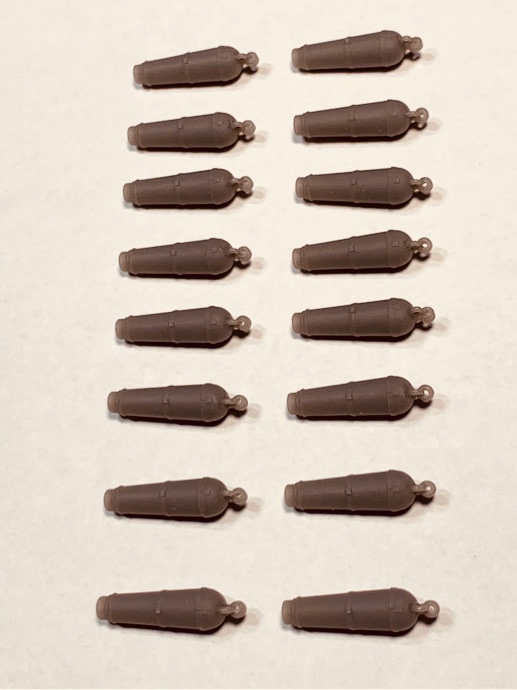
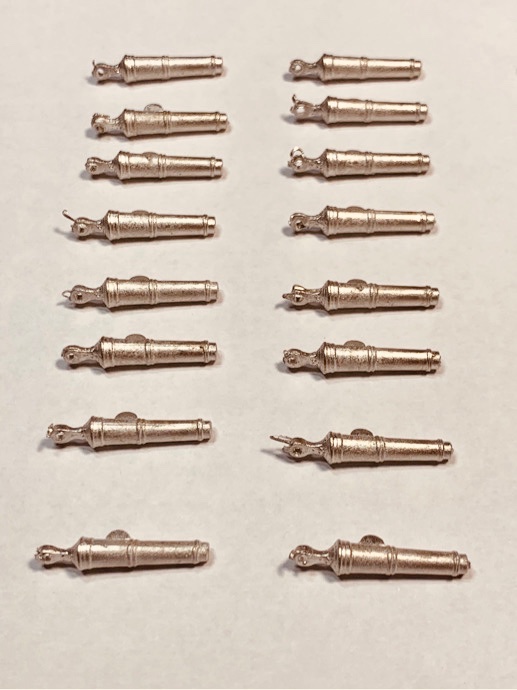
Ok...I’m on vacation and the Admiral just fed me and filled me up with some great Japanese sashimi and sake. So I’m feeling no pain and in the mood to share ridiculous ideas! Cannon. I’m simply not satisfied with the Shipways Britannia pieces. They look like they were made 100 years ago by a blind man. So...since I don’t go out much in the age of COVID...I invested in some replacements. Stern cannon from Syren and 24 pounder carronades from Model Monkey. Stern guns...Syren parts all the way. The quality brass replicas speak for themselves and it’s totally on me if I screw them up. No comparison, really. 24 pounder carronades. Ok...opting for something odd here. Model Monkey sells the 3D printed versions of her guns to scale. So I decided to take a try...these are 3D resin and very brittle...but delivered exactly as described. Although I’ve not tried painting them yet, I’m going to say the 3D printed replacements are definitely a step up from the Britannia kit parts. Seriously...the kit's Britannia carronade pieces don’t even come close to the dimensions in the plans. And frankly - I am not excited about spending hours trying to polish crappy made Britannia pieces that I've already paid for...there...I said it. Not certain if I’ll remove the 3D printed cannon from their sleds and build the carronades by hand or try to paint the carronade assemblies as they were sent....probably will try to just use the cannon. Here are more gratuitous pics. And...moving on. <hiccup>
-
Be careful clamping to those frame horns...I broke them like 3 or 4 times. The laser etching sometimes cut too deep and made them weak. (I think there is a conspiracy between the ship model maker companies and super glue companies!!)
-
Outstanding, Robin. 👍🏽⛵️ Such a clean and crisp build.
-
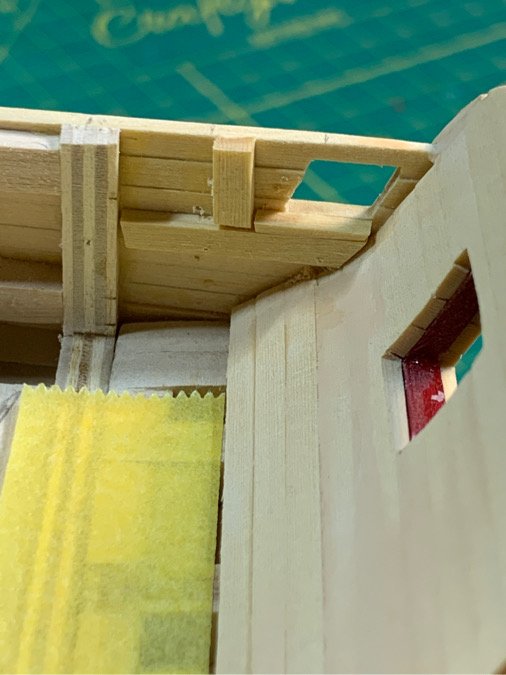
Slow day...decided to added the transom trim piece. Looking ahead to the transom cap rail. Pics not shown but I trimmed down the minimal excess overhang via sanding and dry fit the two trim pieces which bracket the ship name. I realized I didn’t like the dissymmetry between the two pieces since I had created one who a single depression and the other with two. So I remade the two trim pieces using some of my precious boxwood stock! I went for my double depression scraper. I think they will match well with the cedar. Next question...how am I going to present the ship name. 🤔 Details...details....while I continue to sand interior bulkheads. 😷 Moving on...
-
That's excellent. Chuck is probably THE authority and great source for advice for the Syren. Regardless, hope you are enjoying your build! You are doing great!
-
Yep...I had the same problem as did most. There may be a slight discrepancy in the printout vs the actual physical frame. The frames themselves are 'true'. You can consider this as you try to line up the template against the frame - but for me, the most important thing was getting that batten aligned correctly and at the right height. Everything evolves from the first batten - as your lower sills (gun port height above the deck) are based upon it. Your gun port sills will evolve from the level and sweep of the batten. If your frames are squared properly, you should be ok. I found lining up the template from the stern frame first was more helpful for me as mine didn't fit perfectly either. The template is 2D from the side only - so the curvature at the bow is not included in the printout (at least that is what I am led to believe!) - so if you try to line up the template across the curve of the ship at the bow then the template doesn't line up and will come up short...at this point, I eyeballed some of it and relied on the measurements, as well as an understanding of where the gun ports exist in relation to the masts. That's one reason why I put in the mast holes first - so I could pop in my faux masts and confirm my view of where I was putting in the upright sections which form the ports. If you observe the plans, the positioning of the gun ports are most critical at midships, where you need to account for the channels and the chain plate interference. If the gun ports near the masts are offset, you could have some difficulty with the chain plates crossing in front of the gun ports. If you ensure symmetry of the port locations on both sides, and rely on the plans to ensure consistency in the location versus the masts, you can be pretty confident you won't have issues - I found the template useful in clarifying how the gun and sweep ports are built and aligned - but again, used it as a guide and not the rule. Not sure if that helps.
- 436 replies
-
- 1
-
-
- Syren
- Model Shipways
- (and 1 more)
-
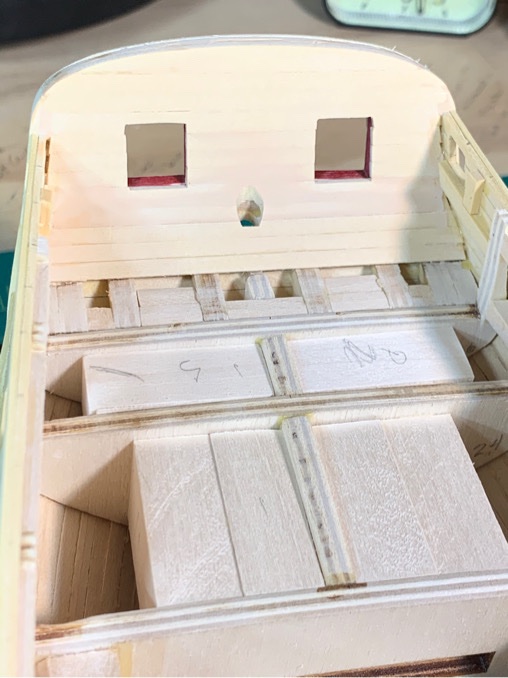
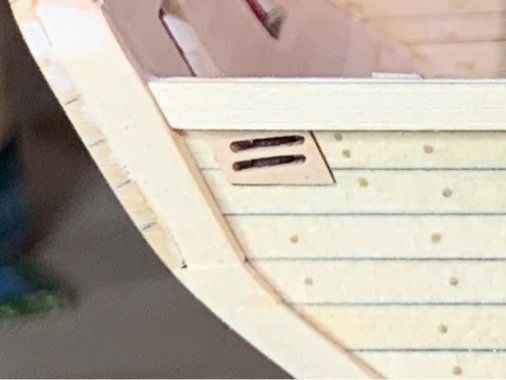
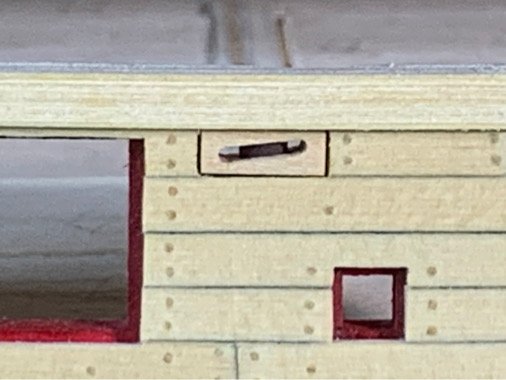
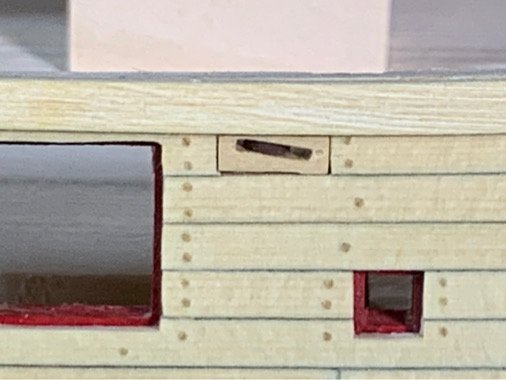
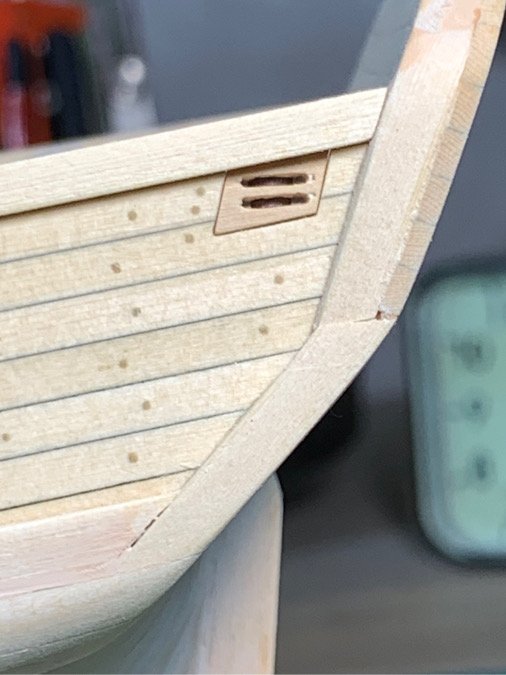
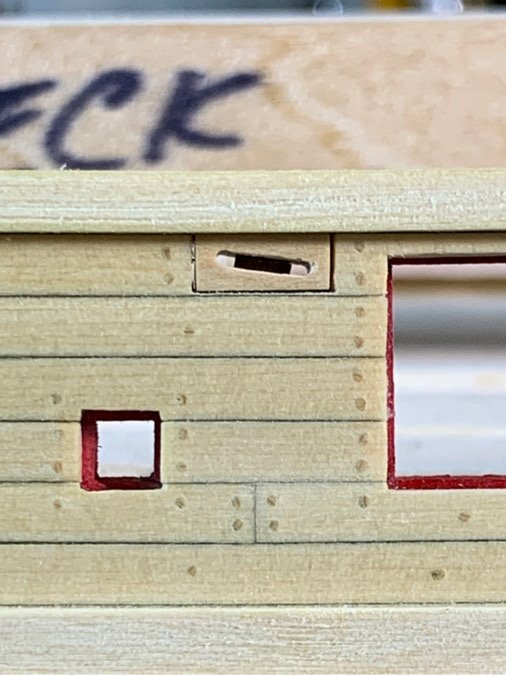
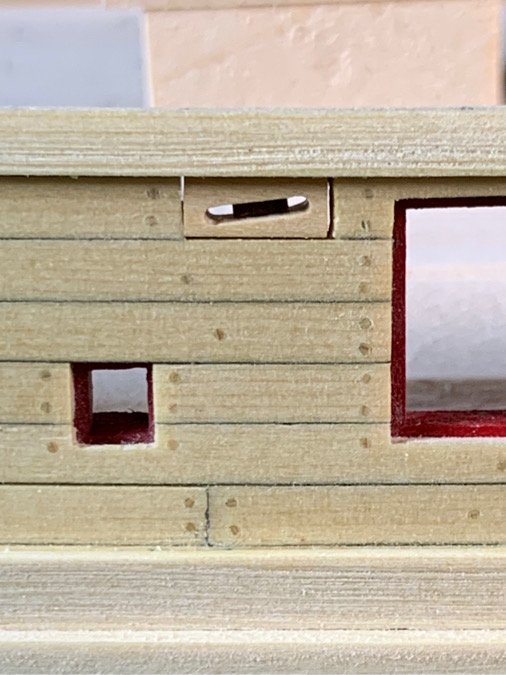
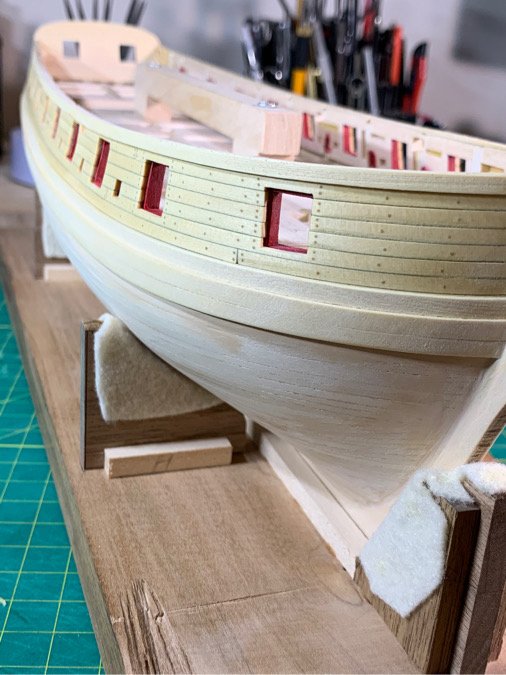
A bit of good progress today. Got the shear strakes (top plank) of 1/32" cedar on the exterior bulkheads put in without much hassle. Once in the upper strakes were in, I realized I needed a bit of an additional sill for the sheave blocks to sit on...so just added a bit of interior wood to support the blocks when I glue them in...as they will need to be 'set' when I finally start putting in my interior planking. At least, that's the way I envision it...so I put in a few bits of wood in the interior wall under the blocks. And finally, I dry fit my blocks on both sides to see how the look, as well as gauge how much additional wood I need to remove during my interior bulkhead sanding. So far, they don't look too bad... I may consider setting in the blocks and using a bit of filler if needed to plug the minor gaps. (I think the fit of the block was pretty good considering I had to drill those rectangles out by hand! Lesson learned...future ships I'll think about this before I lay down a single plank) But one thing I am now starting to think about...is the deck and the exterior colors. I was originally planning to keep my exterior bulkheads their natural color...and the deck made from boxwood. Now I am considering rethinking the stain on the exterior bulkhead, and making the deck from cedar...because I have really enjoyed working with cedar! The jury is still out on this one... Moving on...

-
Might have been me...but I’m sure folks on the forum have a whole series of sanding sticks! Painting stirrers are a mighty useful tool!!!!! Lookkng good, Red!!!
-
Robin, your attention to detail is great. Thanks for sharing those pics on real ships. Your end result looks so realistic! Love your build!