


Keith Simmons
-
Posts
195 -
Joined
-
Last visited
Content Type
Profiles
Forums
Gallery
Events
Posts posted by Keith Simmons
-
-
Thanks for the "likes" and commentary...
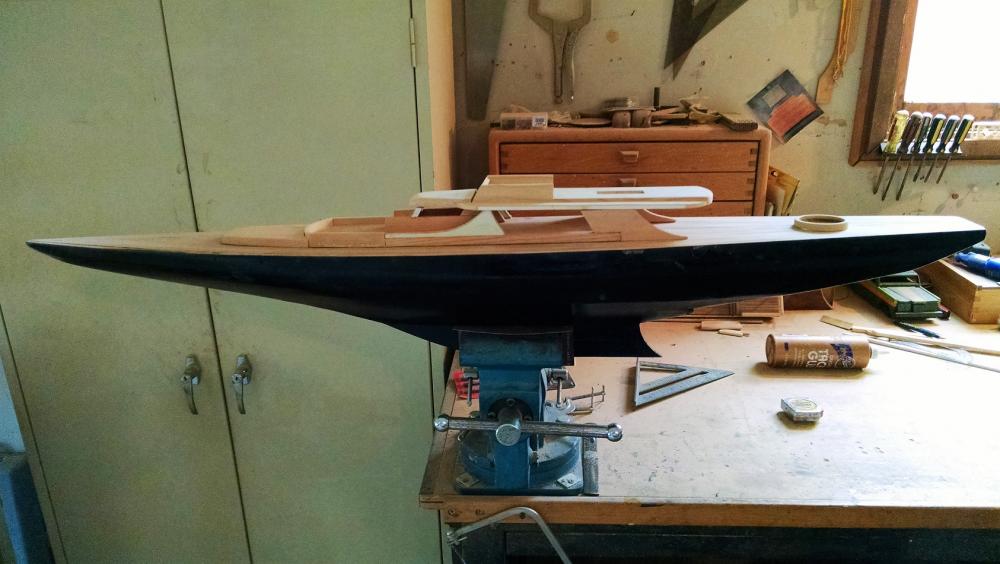
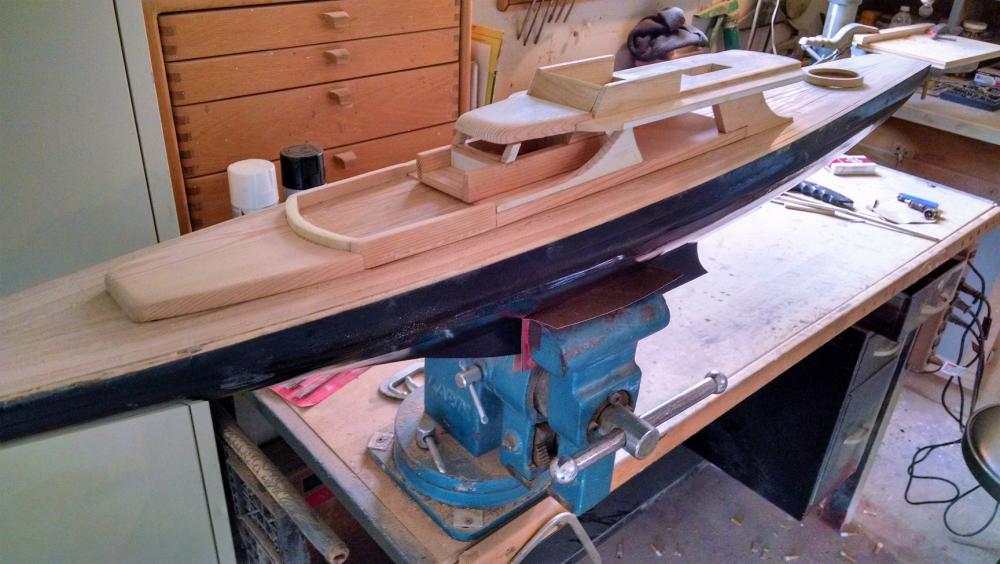
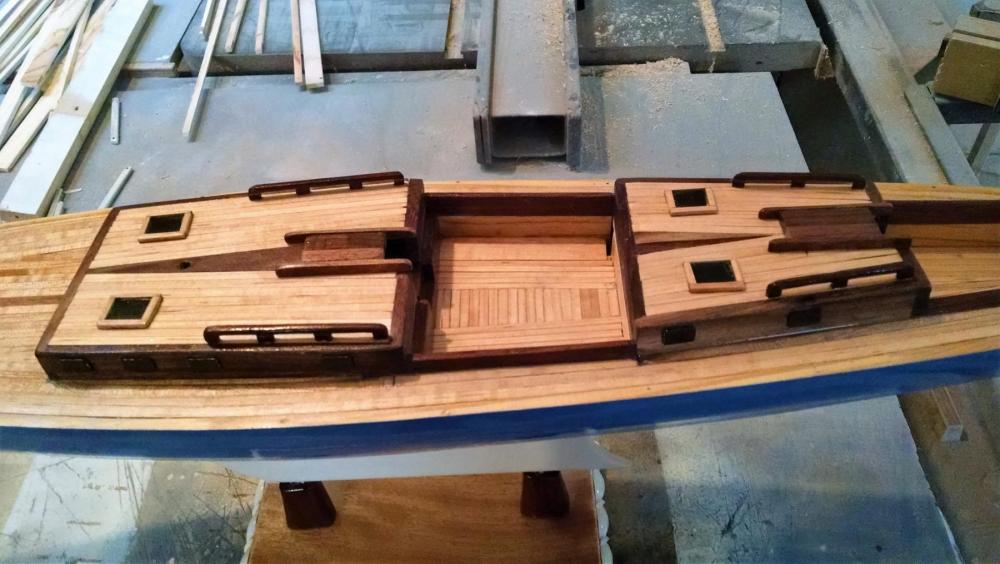
Making progress. The beams are in for the lower deck. There's probably another couple that I'll need to put in once I figure out the shape at the bow and stern. The bow, not so much, but the stern looks different on the drawing than it does looking into the hull. i think it's not at deck level... just has me scratching my head as I know the beams are all at the right height.
Anyway, I'm checking fore and main mast locations and then I'll be dropping a bit of string down the centerline to double check and pin down where I'll need the mizzen mast step, the three hatches, and the bowsprit step. I'm also plotting out the walls and cabins but won't get to far into that until the deck is planked. Which... I'm hoping to get started on this week as soon as I can get the planks cut. The actual next step with the waterways. The wood has been selected (cherry) and the appropriate sized pieces selected.
Here's pictures. Feel free to point out any stupidity or errors on my part.

Beautiful work Mark,
I want to be able to do that when I grow up....

Thumbs up, Keith
- EJ_L, John Maguire, Piet and 8 others
-
 11
11
-
-
Hi Mike,
I will be watching your build with a lot of interest. I am getting ready to start my version of a scratch built stern wheeler soon. Your hull looks great....
 I don't do much painting, but for the ones I have done, I use drywall compound as a filler. It seems to not affect the wood as other fillers do and sands beautifully. As for paint, I like to use gloss ( since gloss has a harder finish when dry) and then sand it till I get the satin or matte finish I'm looking
for. Then I top the paint with a lacquer finish of satin or matte depending on look I am going for. Not that this is the best way to finish paint, but it works for me.
Looking forward to the rest of your build, Keith
- mtaylor, Mike Dowling, cog and 1 other
-
4
-
Hi Glenn,
Beautiful work, after viewing your log you have convinced me that I need to try and build my idea of a showboat. It won't be historically correct (then again, none of my ships are) but it sure looks like fun.

Should be finishing my current Paddle wheeler project soon , can't wait to get started on a stern wheeler.
Thanks for the inspiration, Keith
-
Hi Denis,
All I have to say is " very nice work ".
Keep it up, matey
Keith
- mtaylor, Omega1234, Gerhardvienna and 2 others
-
5
-
Absolutely cannot believe how far you came in such a short time, I think you might be like Gesapo? the shoemaker in Pinocchio and have little elves come out at night and assist. I will call you a visionary that's where you were when you started, fantastic work kudos scale 1 to 10 a 15. :im Not Worthy: :im Not Worthy: :im Not Worthy:
Hi John,
Thank you for the kind words, I really enjoy the design and building process of my ships and boats, I only use the Elves for painting...
 .
.Thanks again, Keith
- mtaylor, Omega1234, John Allen and 1 other
-
4
-
Another day of masking, spraying and finally touch ups by brush and the exterior paintwork is largely finished. It's just some overstay on the red ochre and gunports to finish. I'm faily happy with the result.
Hi Timmo,
Beautiful work, looking forward to seeing her rigged.
Keith
-
-
I am a big fan of using Maple as decking , with the large scale of my models I can get away with the grain patterns. I have also used Mahogany, Bubinga and Brazilian cherry. So I agree with Gaetan, ( your taste , your choice )
Good luck with whichever decking you decide on,
Keith
-
Hi Keith
Amazing. If truth be told, she's more than a model. She's a piece of beautiful art.
Love it!
Cheers
Patrick
Ahoy Patrick
Thanks for the comment, she was a bit of a beast but came out pretty close to what I saw in my head.....
Now onto the next one,
Keith
-
Finally have the Ketch to the final detail stage. Stairs sails and deck furniture etc....
Thanks for looking in, Keith

- GrandpaPhil, hexnut, ggrieco and 7 others
-
10
-
Hello everyone and thanks for your comments and all the likes, it's much appreciated.
No ratlines on this ship Jan. She'll have only two shroud lines per side per mast and made from steel.
Here's where I had re-engage the silk thread I had bought initially. First I thought using my own hair or that of Gwen but she wouldn't part with hers and mine was too fine. I did try using the mono filament for the stays but they were even too thick for scale. I cut a piece of the silk threat and unraveled it so I had the individual threads as they came out of the silk worm's spinnerets. They were the most unwieldy threads to work with, it was like working with smoke.
What I did was take three of the strands and with a drop of nail polish that I squeezed into the threads between index finger and thumb, pulling it down several times till the nail polish set up. It stiffened up quite nicely and produced a more realistic thickness for the shrouds and the rest of the standing rigging. It even took most of the twist out of it. The lines between the boom ends and the gaff ends are two of the silk threads.
Attaching the shrouds was simply looping them around the lower masts, secured with a tiny dab of nail polish. After all of them were secured to the masts I pulled two of the shrouds down to the hull, securing one at a time with nail polish. I had to be careful not to pull too hard because they did pull the masts out of plumb.
next was making the chain plates. They were just four slivers of bamboo. I left them long in order to have something to hold on to and with a tiny dab of CA ,that I mostly wiped away, I attached them over the shroud ends against the top of the hull. After they were secured I cut them off with my trusty #11 blade. In one of the pics below you may be able to see them.
Next came the topsail yards. Here too I tied a piece of mono filament to them and then around the mast with a tint dab of CA.
After all that nerve wracking work I added the rest of the standing rigging and the topsail yard lifts. I do have to redo one of the shrouds because they seem to have loosed up on one side and the aft mast is not quite horizontal anymore.
Holding the ship at normal looking distance she looks quite presentable, better then in the pics.
Okay, my next project was cutting the 75 Watt lamp to function as the globe over the diorama.
This shows the difference between the mono filament (bottom) and my hair. It just worked out so that three of the single silk threads was slightly thicker then my hair, just right for my purpose. I did not measure the thickness but take my word for for it, they were thin.
This shows all the shrouds attached to the masts,
[attachment=319565:Shrouds cemented on 1.jpg
Here are all the shrouds cemented to the top of the hull. Now I could cement the "chain plates" to the hull.
This shows the top sail yards also secured and rigged. As you can see the rear mast shrouds are a little loose but will be replaced at some future date.
Cheers,
Hi Piet,
Where did you get the HUGE clothespin and exacto knife......
Good job
Keith
-
-
Go Popeye Go,
I like the hull shape, good job mate....
Will keep an eye skinned for further posts....
Keith
-
Hi all,
I myself have a love, hate relationship with rigging. That being said, I build fantasy ships so there are no rules I have to follow, except maybe the basics. I am always in awe of the rigging I see on this site, which makes me try to do better on my builds.
Hopefully someday my skill level will allow me to rig a ship correctly, then I will see how I really feel about rigging...lol
Keith
-
-
Hi Keith
Your true skills as trained craftsman definitely shines through, especially with the quality of the joinery and your ability to choose woods which contrast beautifully.
Mighty fine!
Cheers
Patrick
Hi Patrick
I appreciate your comment, was hoping the ketch would keep it's sleek lines with the addition of the cabin...I think the paint job is going to be critical, nothing to do but go on with fingers crossed....
Thanks again and have a G'day mate
Keith
- Elijah, Jack12477, John Allen and 2 others
-
5
-
Hi all,
A quick progress report on the sloop and ketch.
Just a little bit more work on the sloop such as figuring a way to wire the rails, making a wheel and setting the sails....
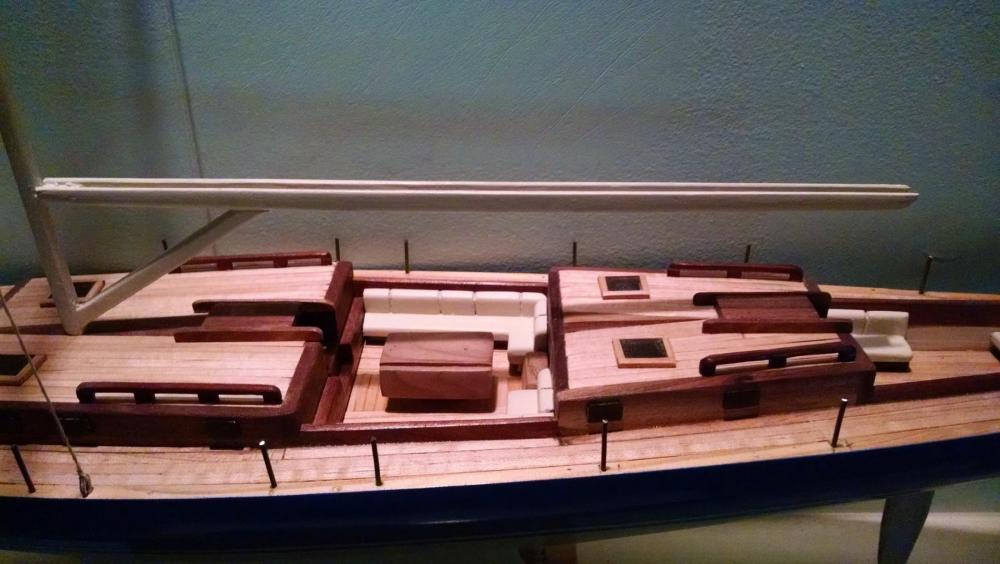
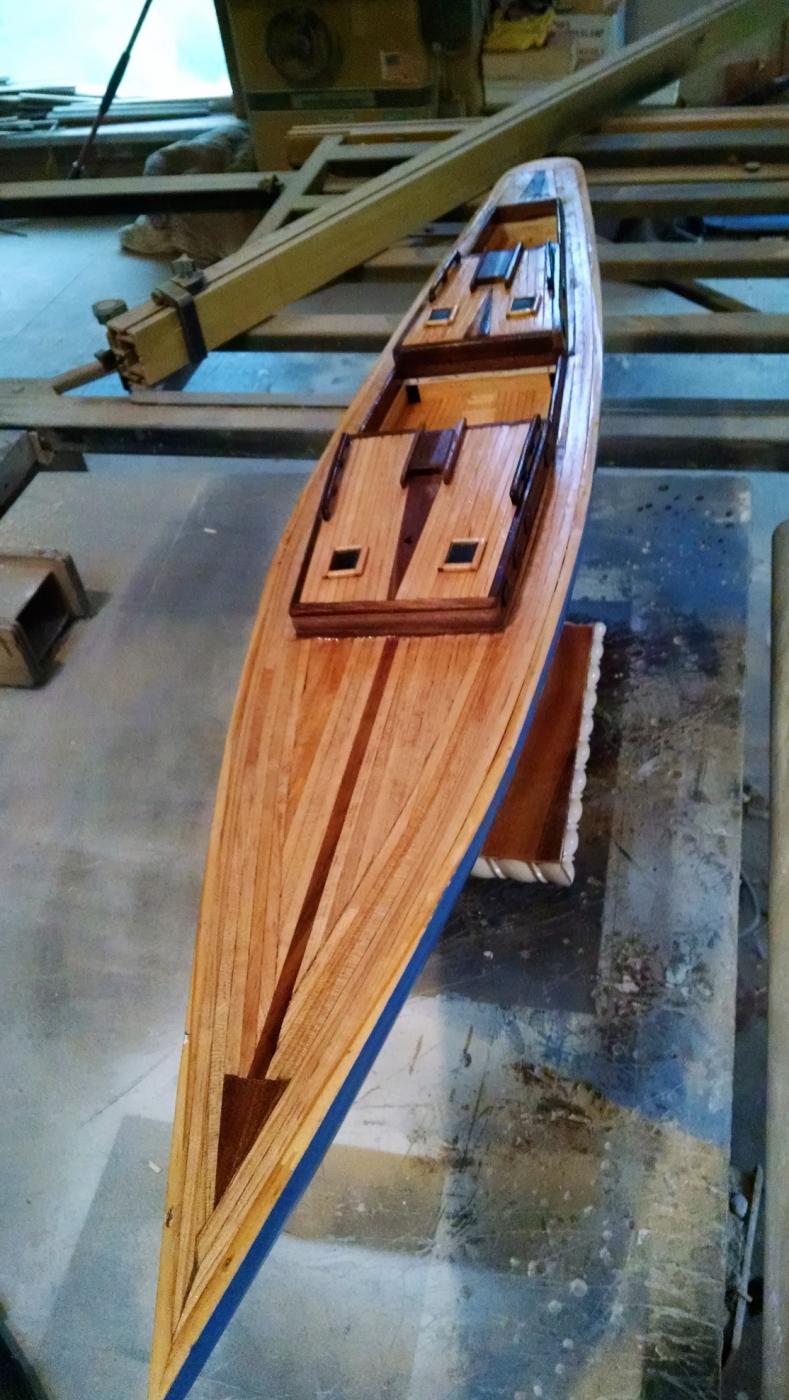
Finally finished the maple decking and started the cabin structure on the ketch.( after 3 attempts I think this is the final design, will be sure once I paint it...
Thanks for looking in, have a great day, Keith

-
Can't argue with that, Keith. She's a beauty, for sure.
Cheers
Patrick
Thank you Patrick
I took some liberties with the shape, was trying to make it as sleek as I could without changing the basic design. Now I want to do the same to the cabin and deck layout. At least I got one of them to look like it should...lol
Thanks again for the kind words, I do value your opinion.....Keith
-
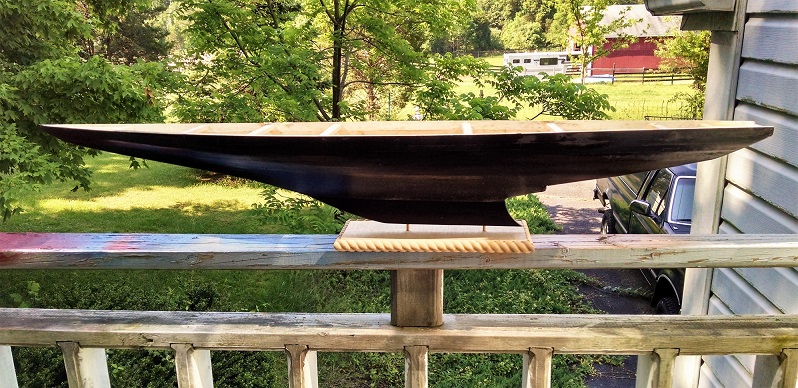
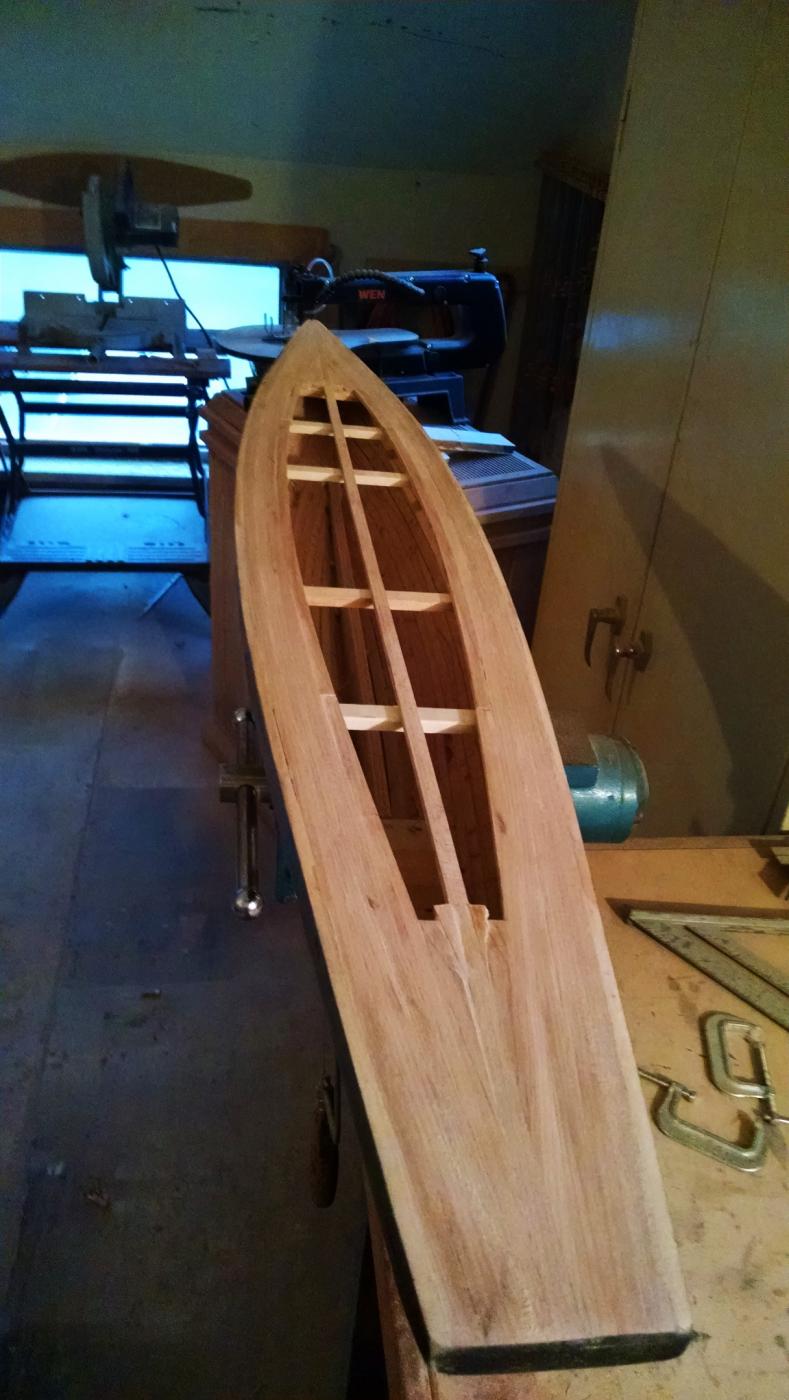
Finally have the ketch hull ready for decking....Yay.....Now that's a hull....
-
-
Hi Keith
Nice one. I reckon you've got the deck planking and deck houses down pat. Man, they look good. Great job on the hull, too.
You're on a winner, Keith, for sure...I can't wait to see what you're gonna do with the ketch!
Cheers
Patrick
Hi Patrick,
Thank you for the comment, I'm happy with the deck overall, now if I can just keep from screwing it up with all the details left to do...lol.
As for the ketch, I'm just about ready to finalize the hull, then I need to come up with a few design ideas within the Tempus style.
Thanks again, Keith
-
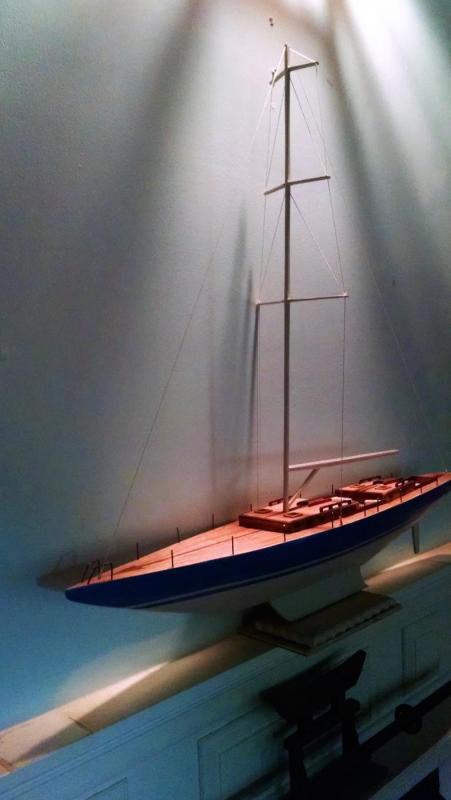
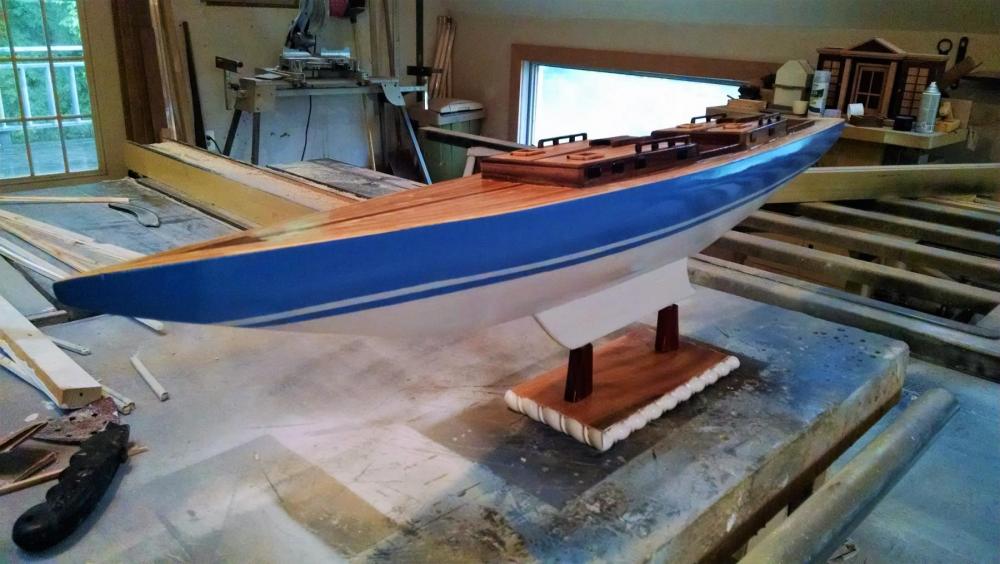
Hi all,
Just a little progress report on the 90. Finally finished installing the Maple decking and painting the hull. On to the mast, rigging and detail work.....
Thanks for looking in, Keith

-
Certainly not hanging about are you Keith!
Michael
Hi Michael,
I used to be a piece working carpenter, and guess I never lost the hurry up and finish attitude, but I'm trying...lol
Keith
- michael mott, mtaylor and Elijah
-
3


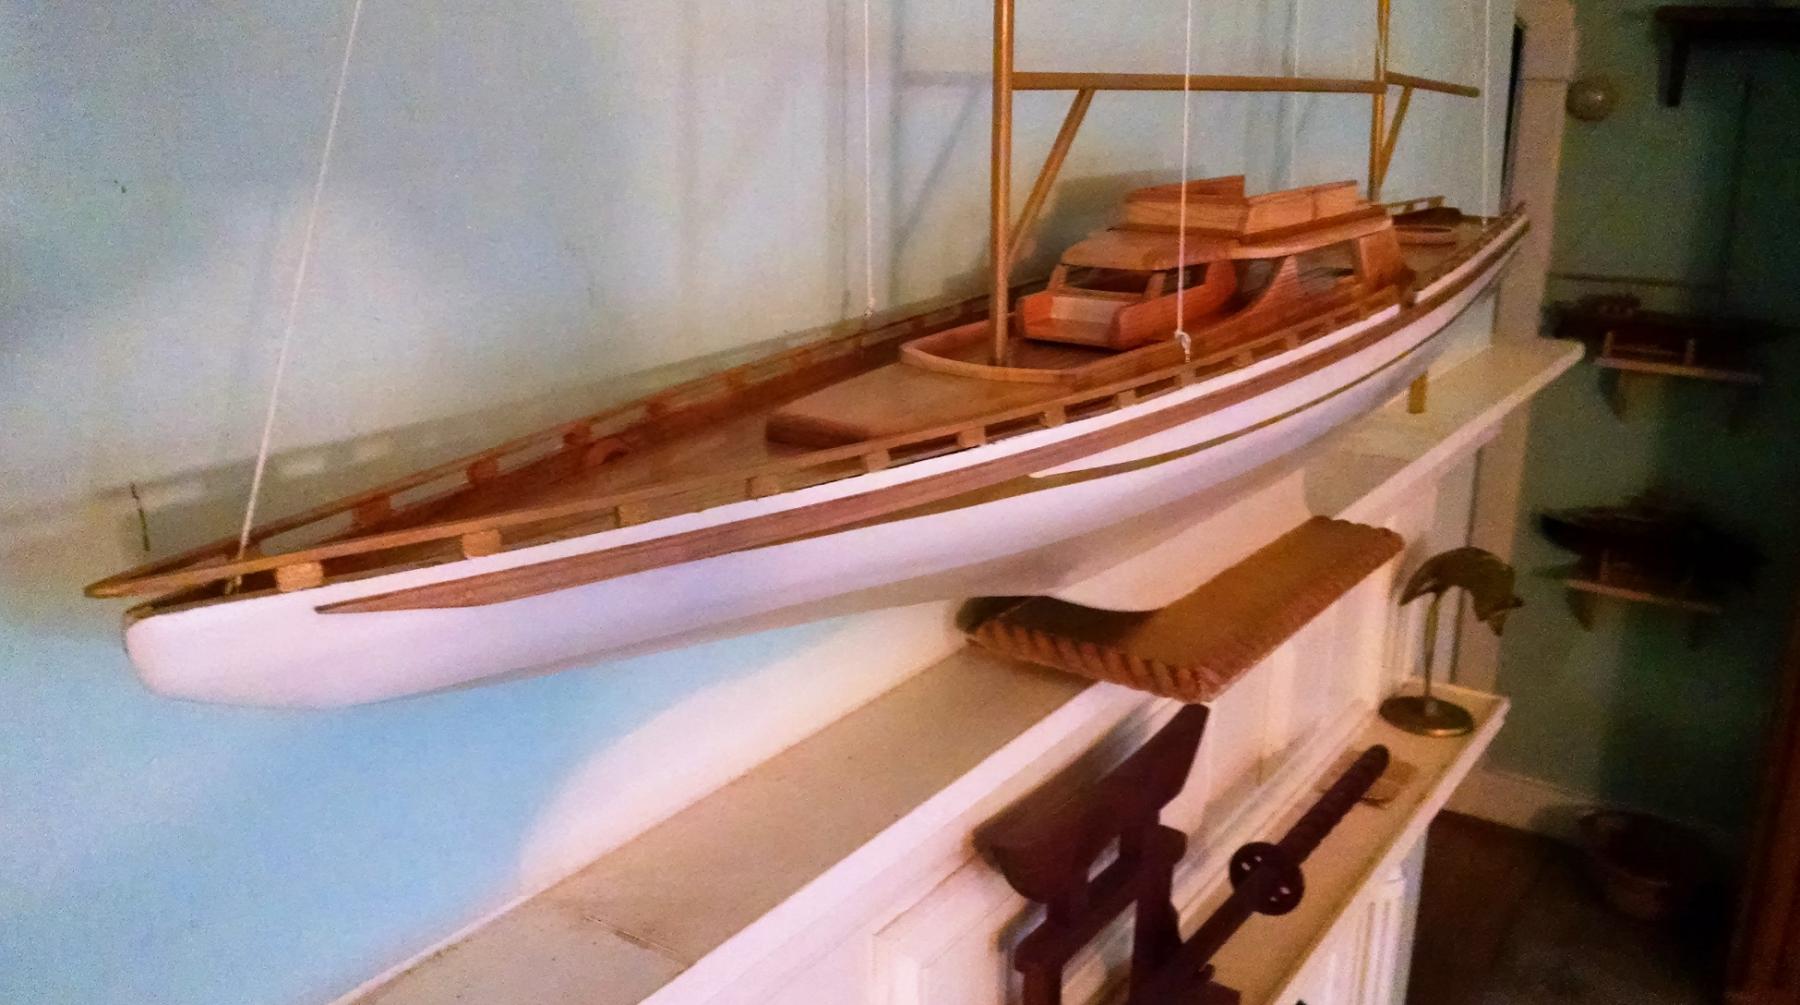


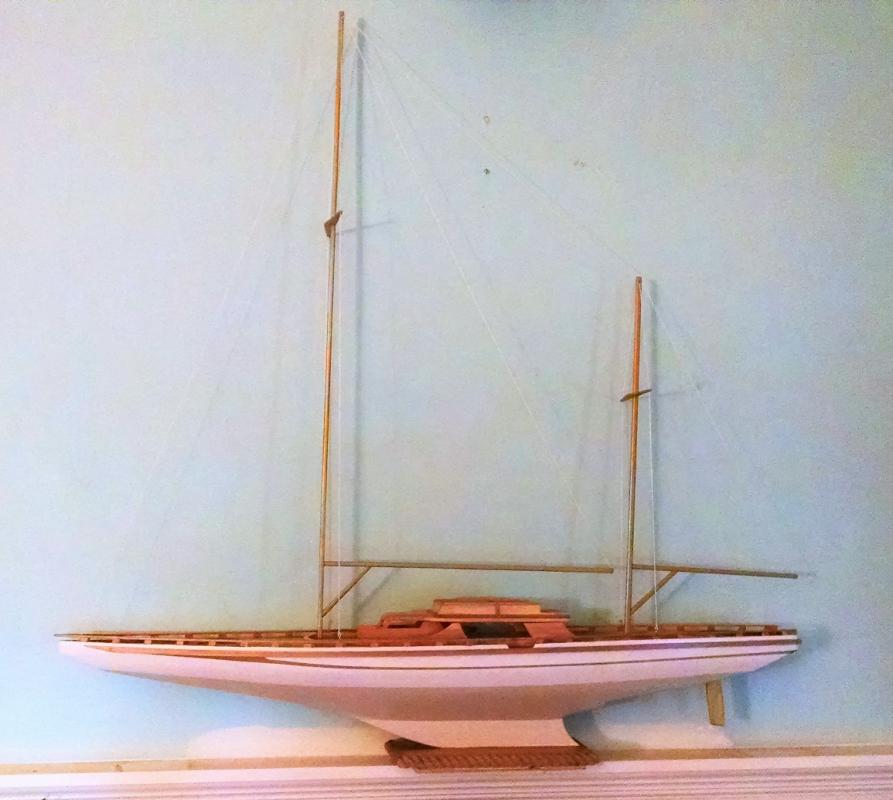
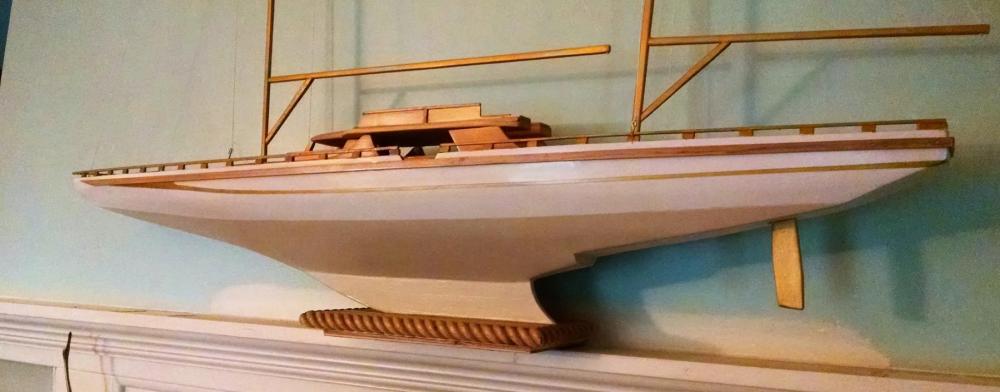
Tempus-class 90 & 150 by Keith Simmons - FINISHED - scale 1/32
in - Build logs for subjects built 1901 - Present Day
Posted
Hello everyone,
Finally finished my yachts so I thought I would share the results....
Thanks to all those that followed along and for the many comments of encouragement.
Thanks again, Keith