HOLIDAY DONATION DRIVE - SUPPORT MSW - DO YOUR PART TO KEEP THIS GREAT FORUM GOING! (Only 20 donations so far - C'mon guys!)
×


Baker
-
Posts
4,234 -
Joined
-
Last visited
Content Type
Profiles
Forums
Gallery
Events
Everything posted by Baker
-
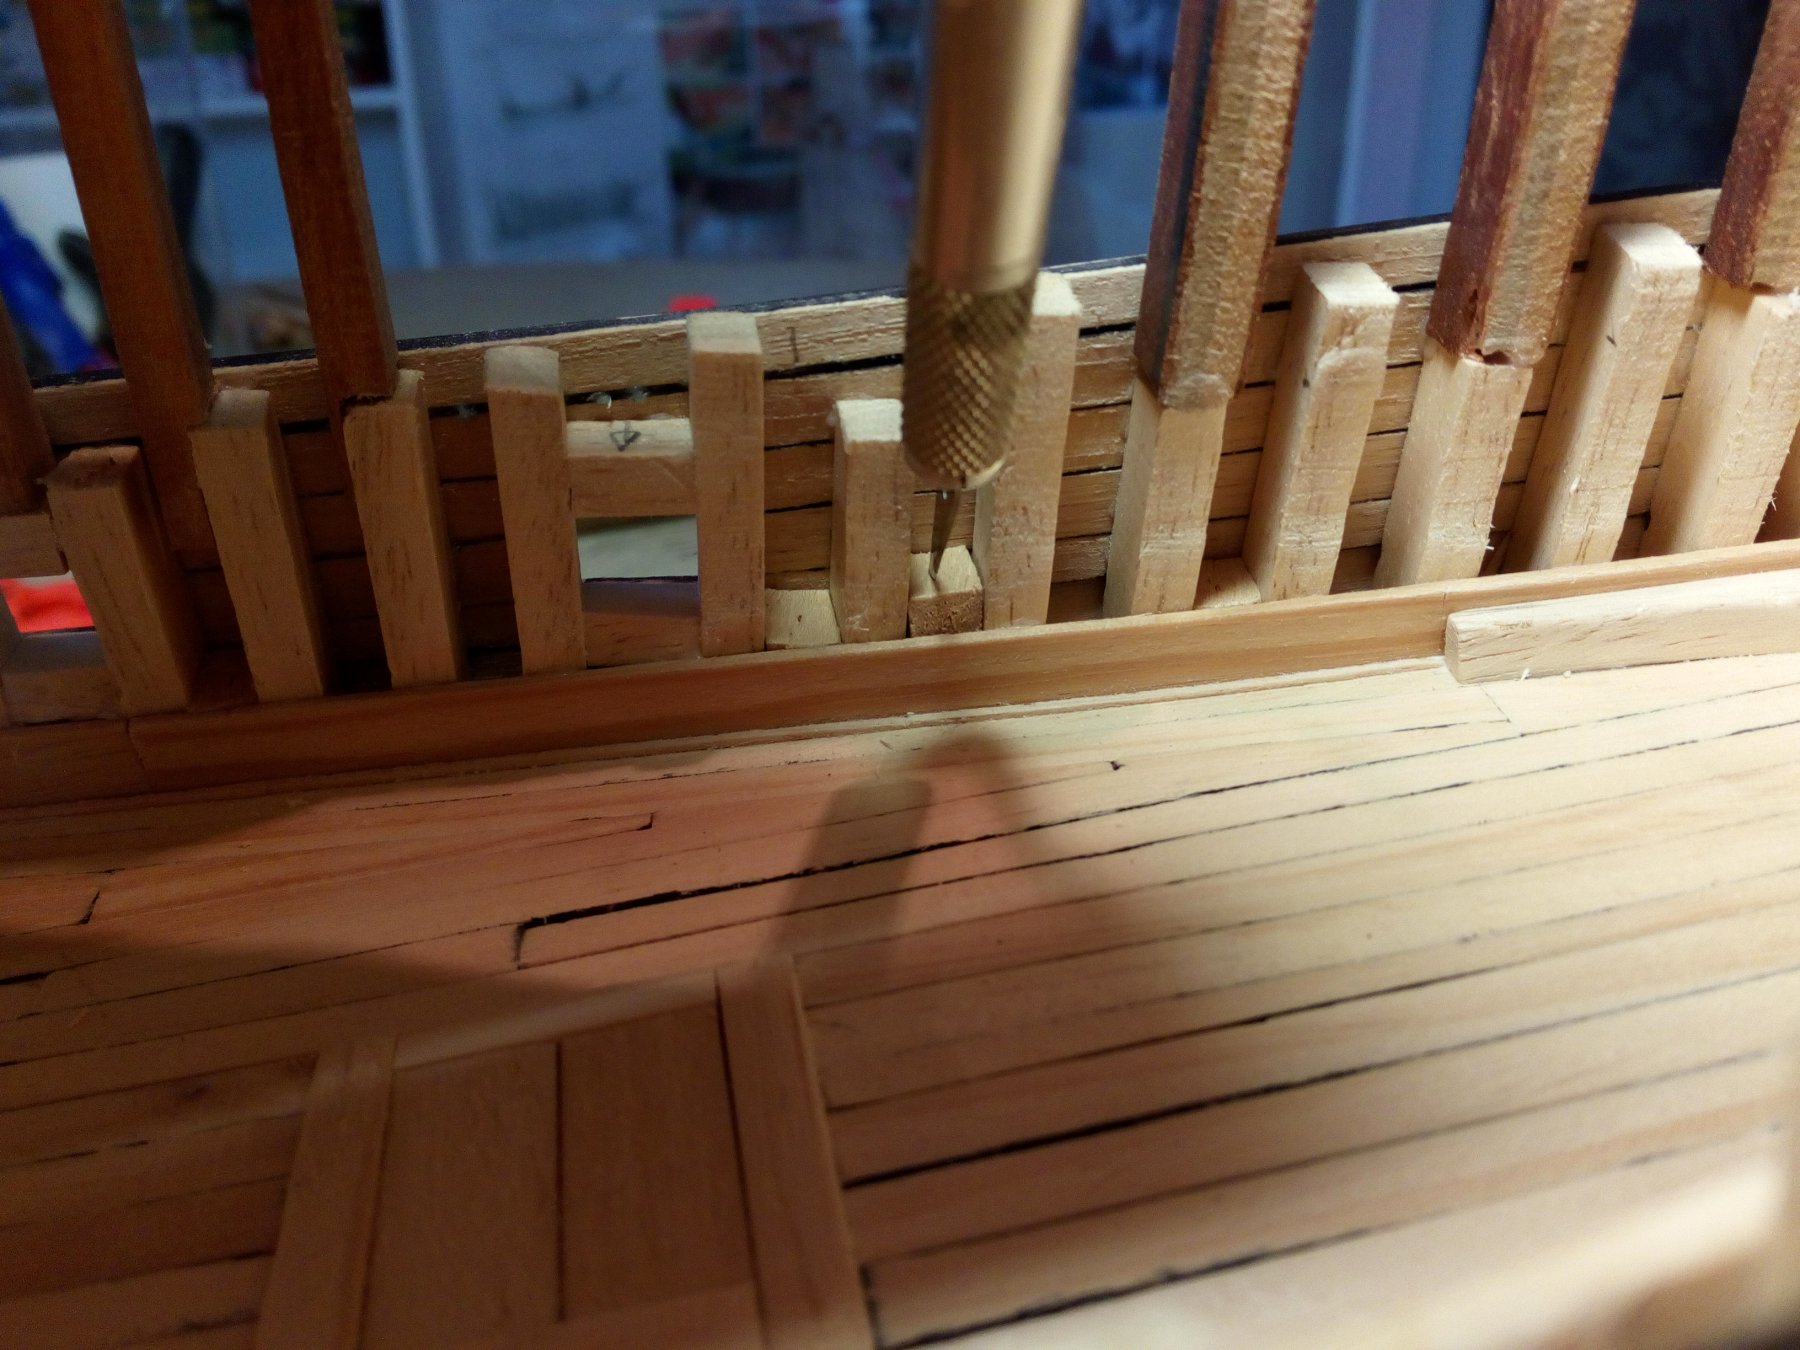
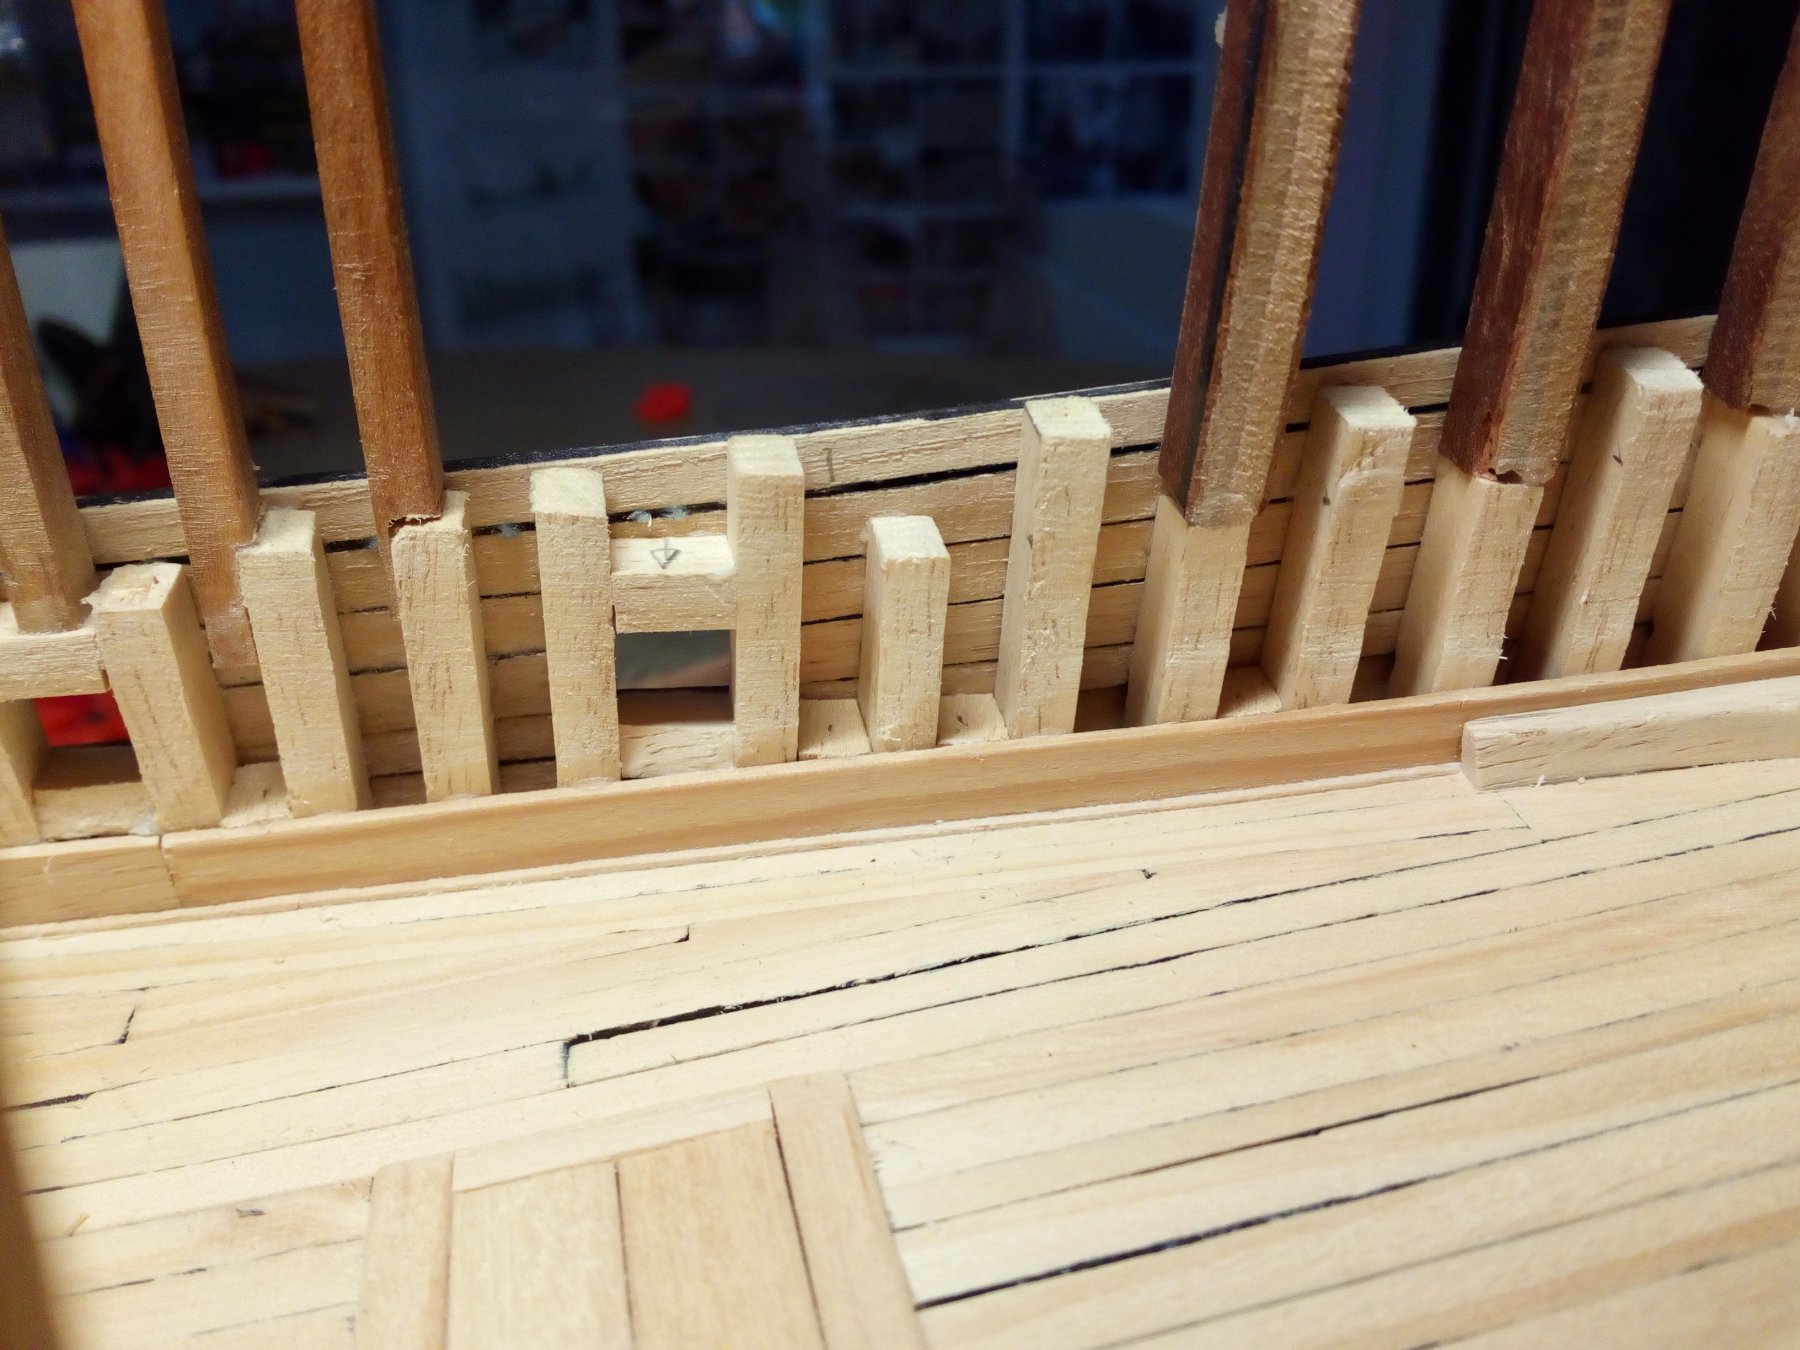
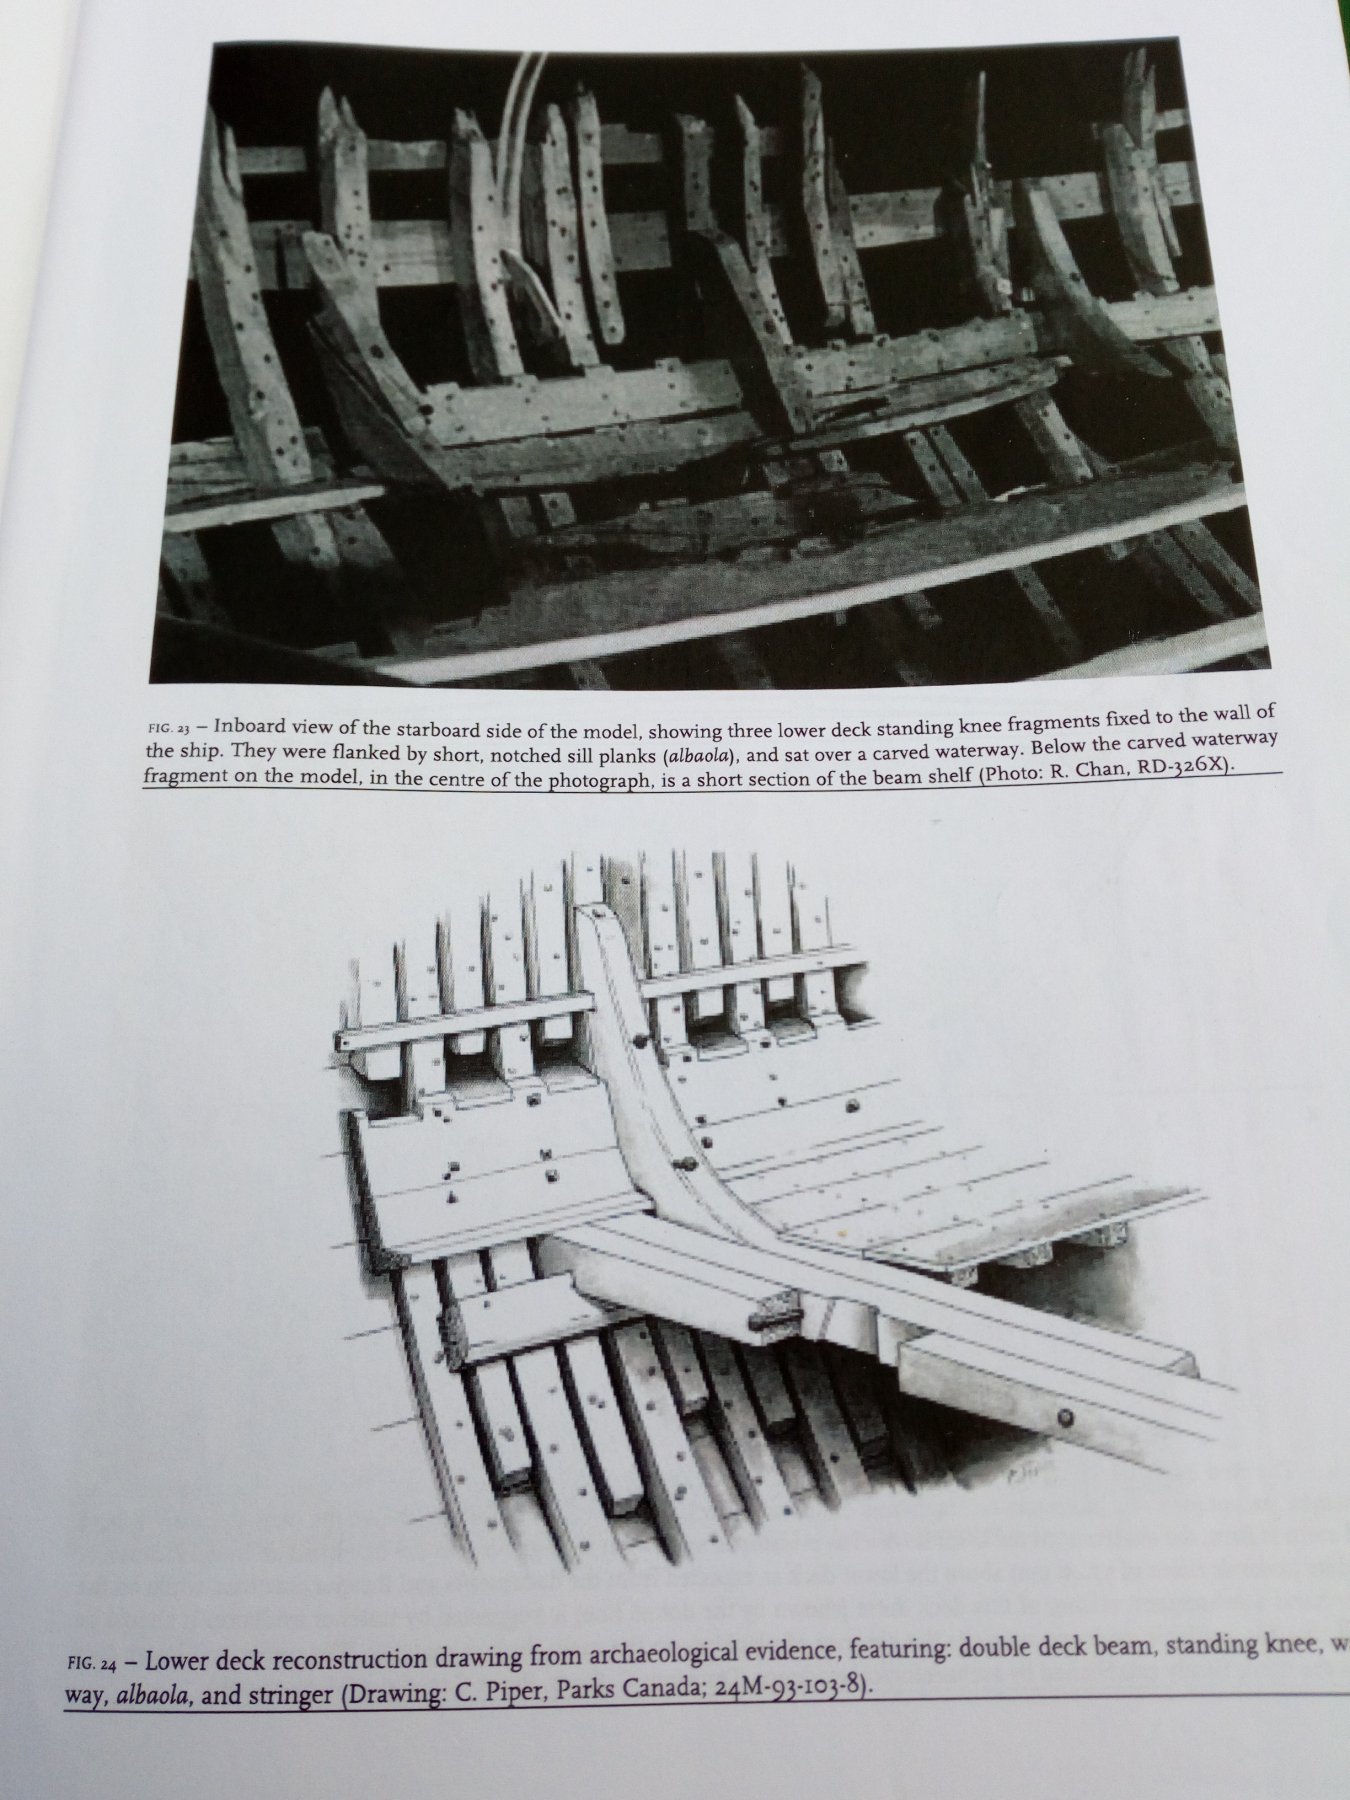
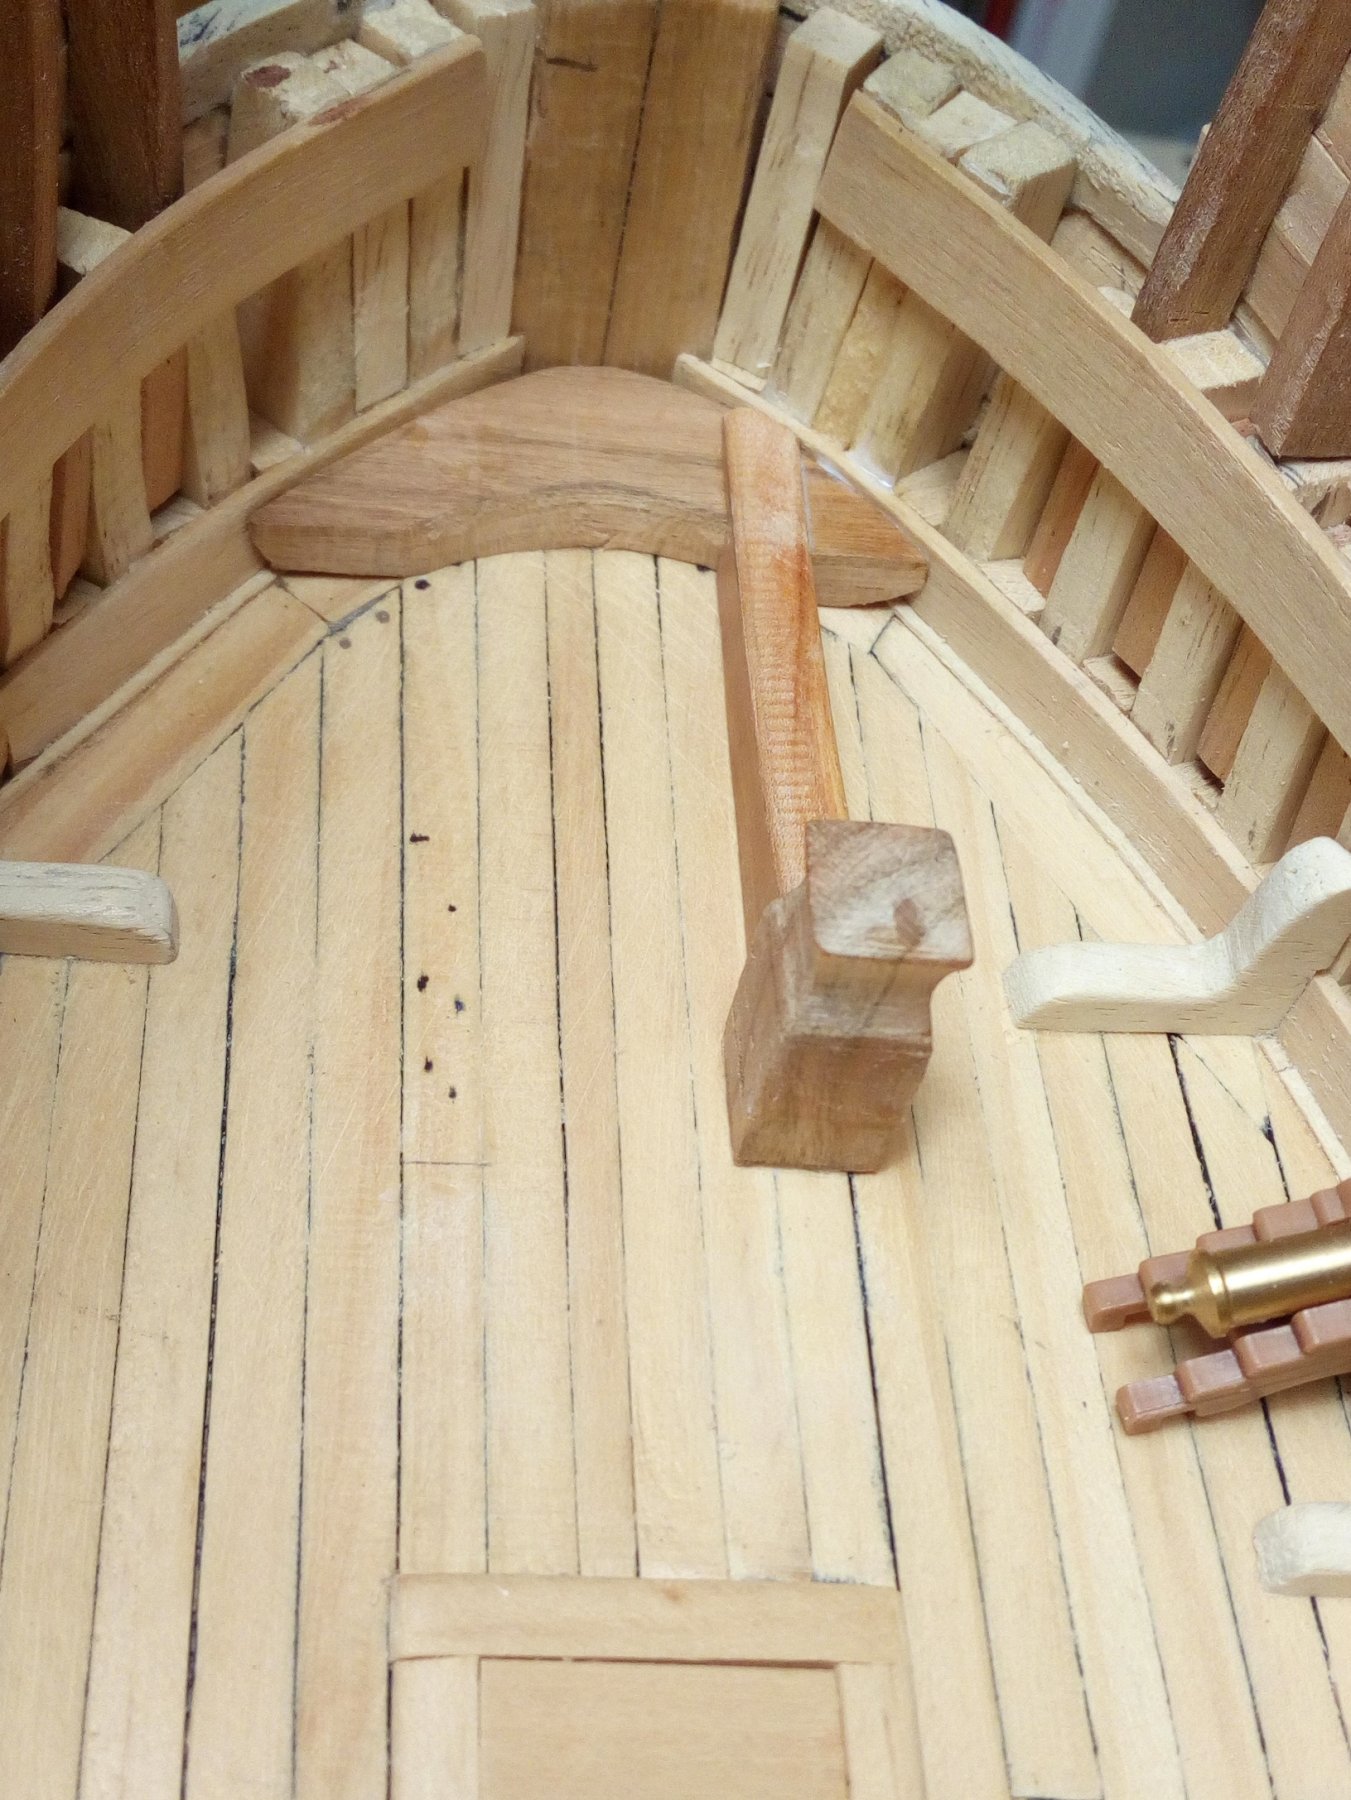
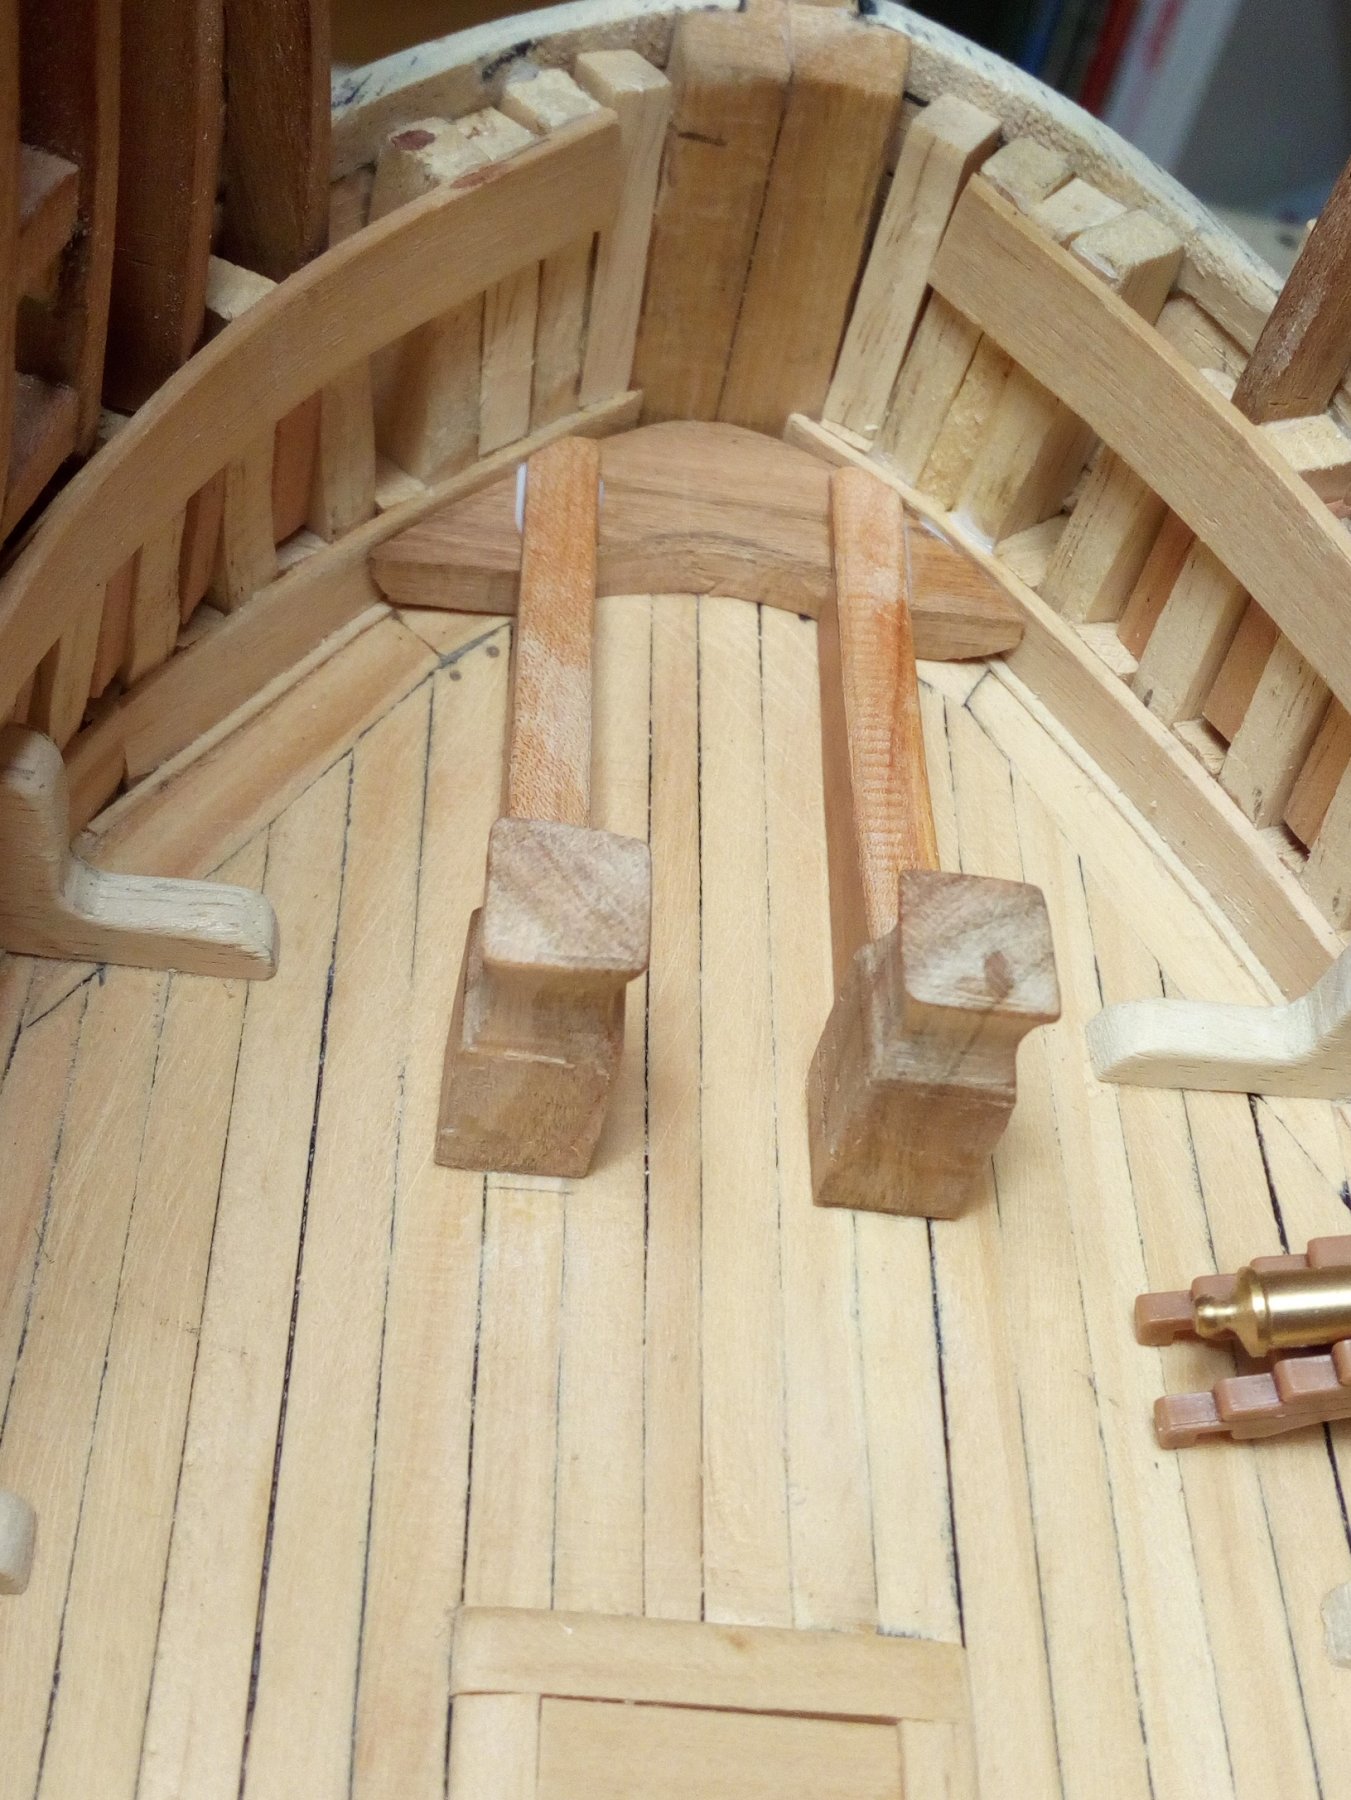
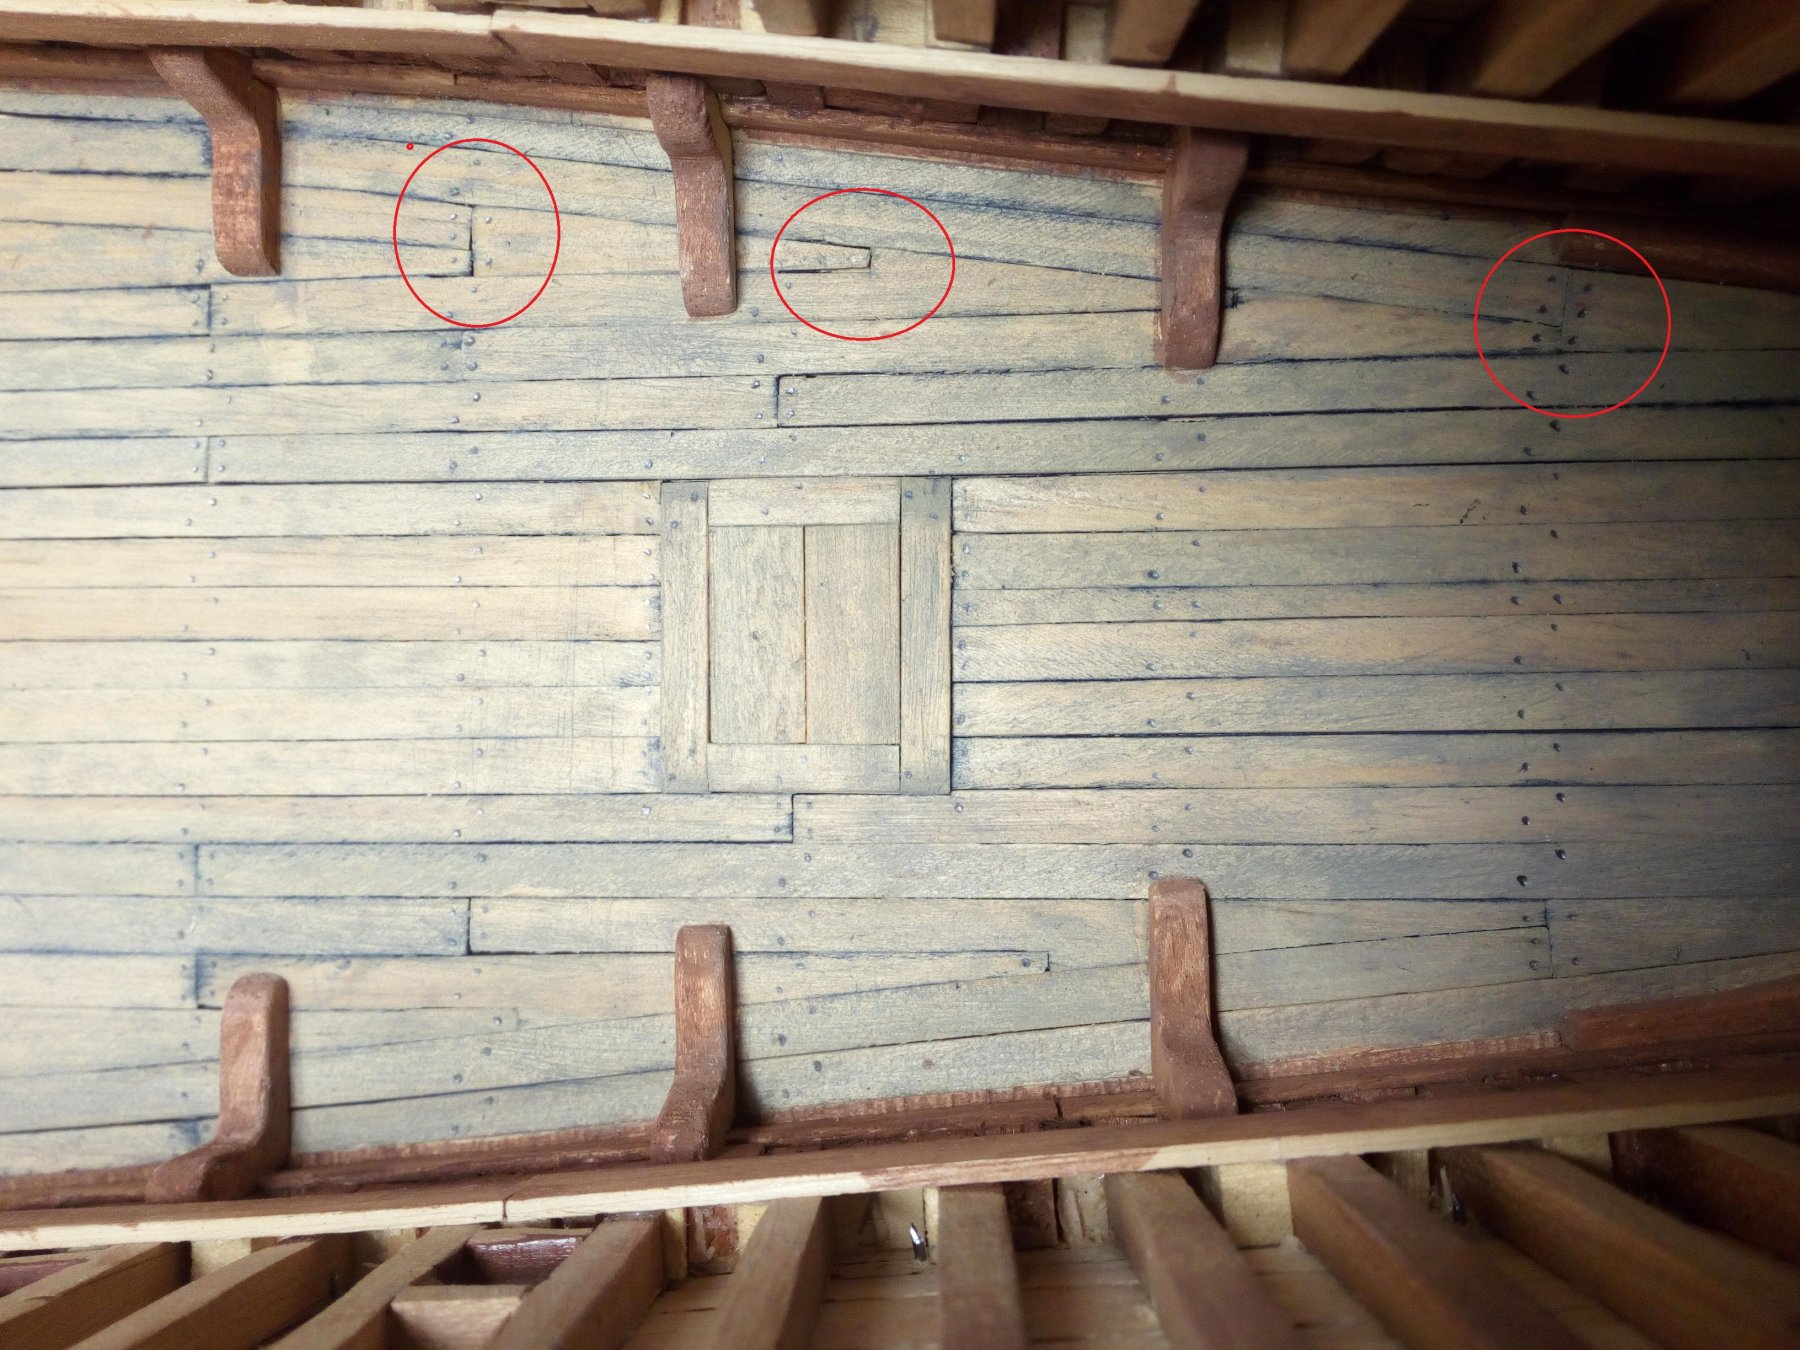
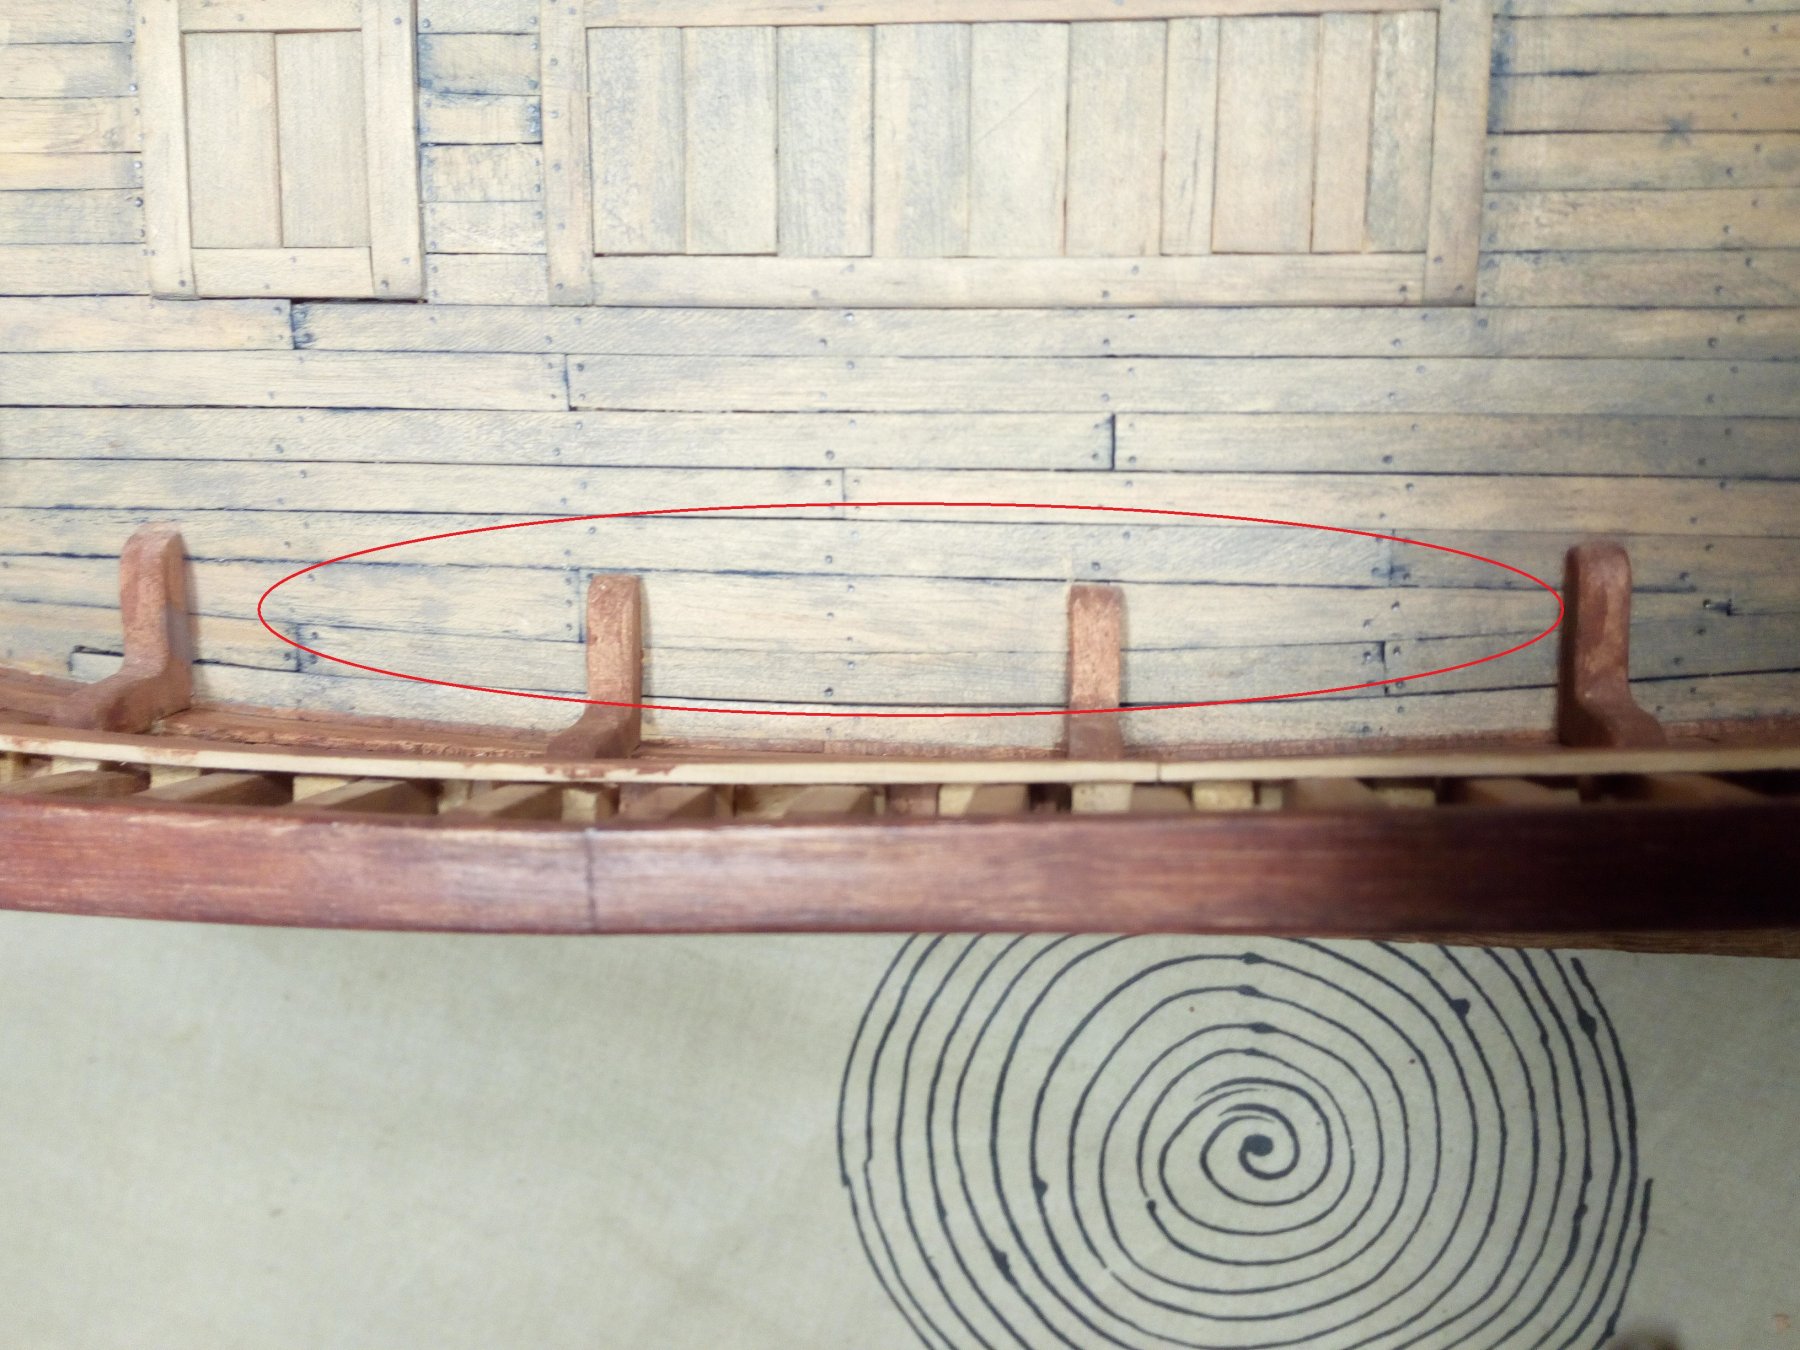
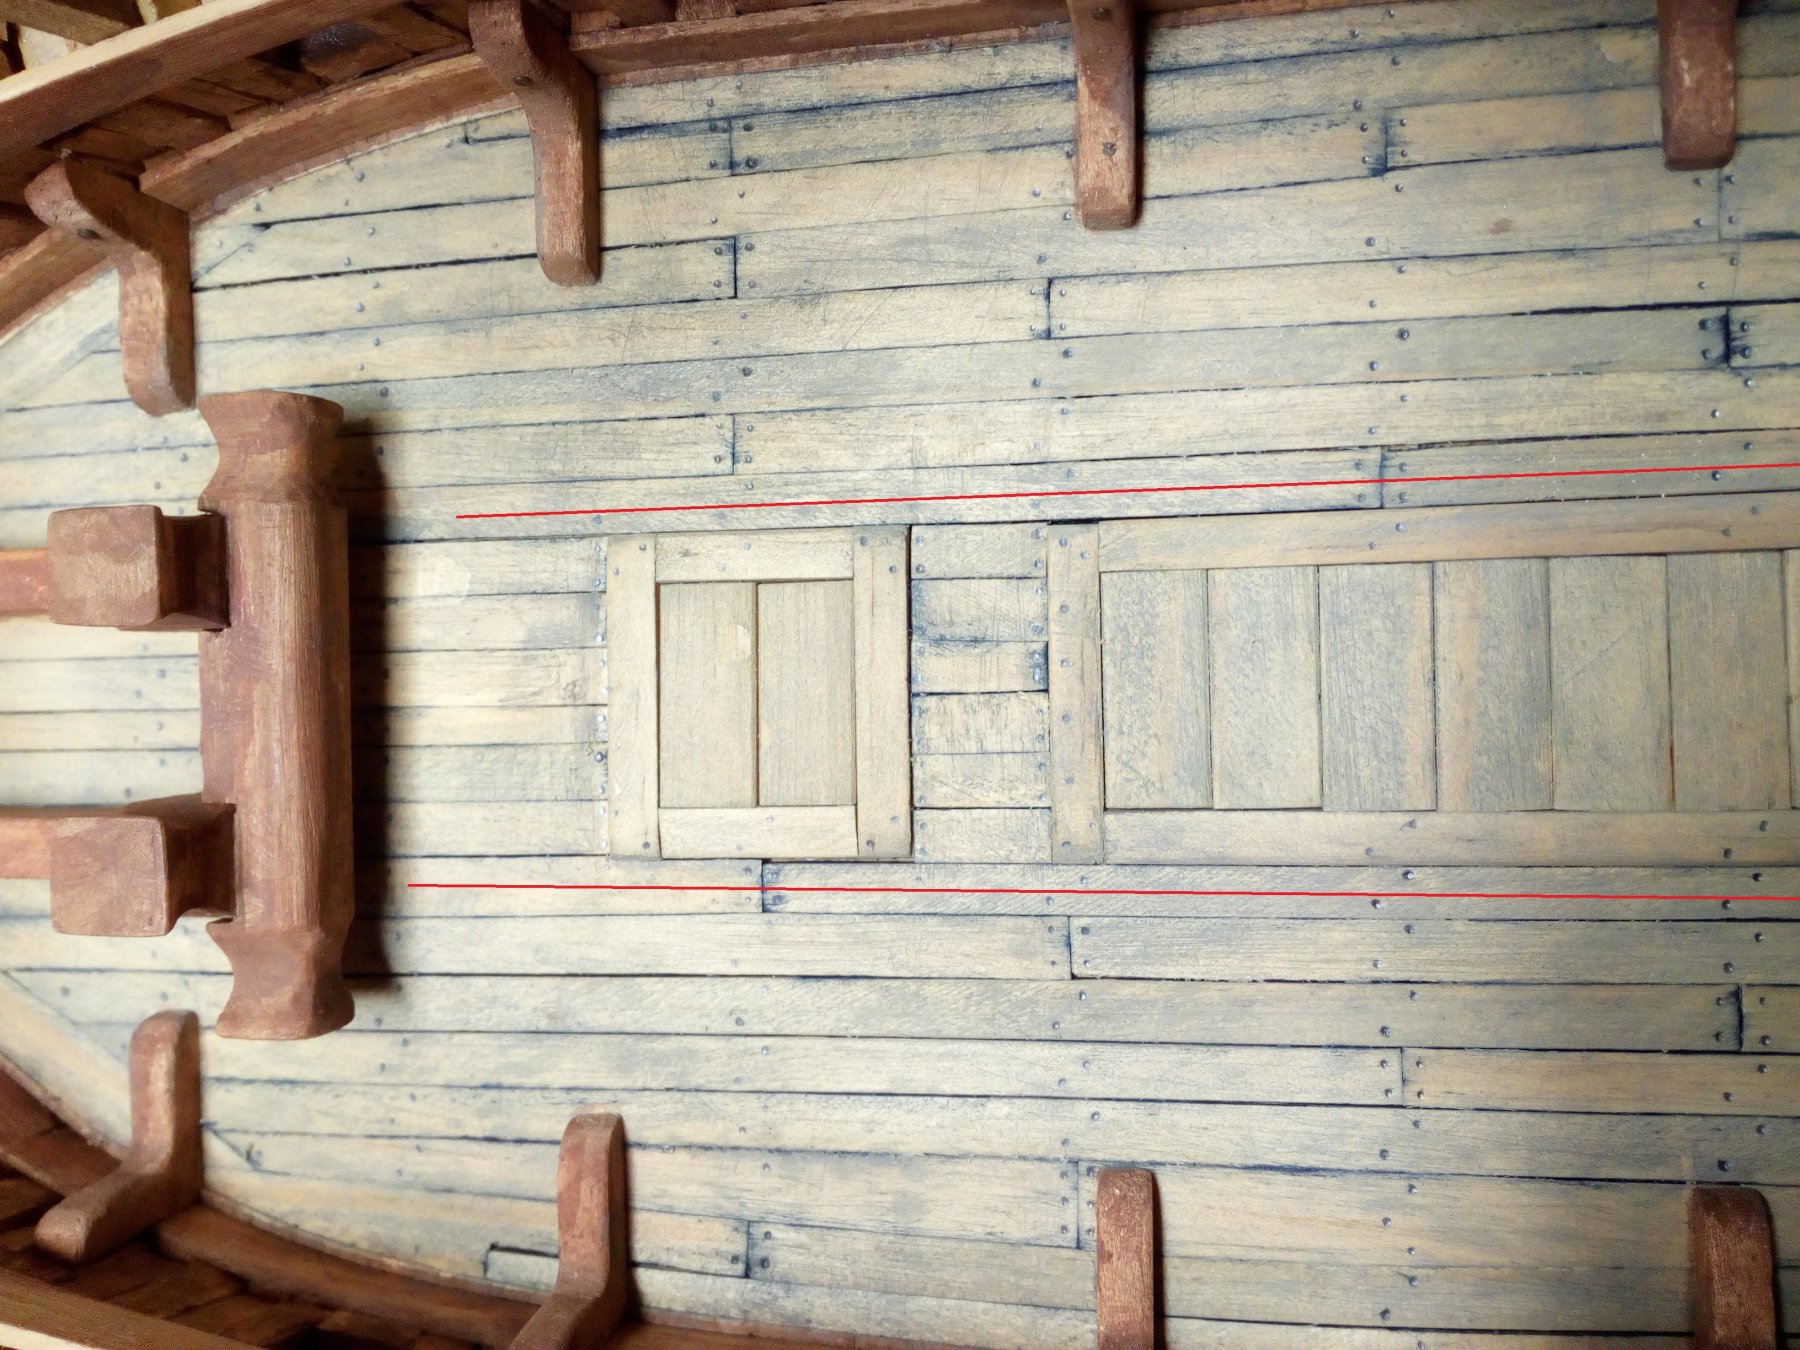
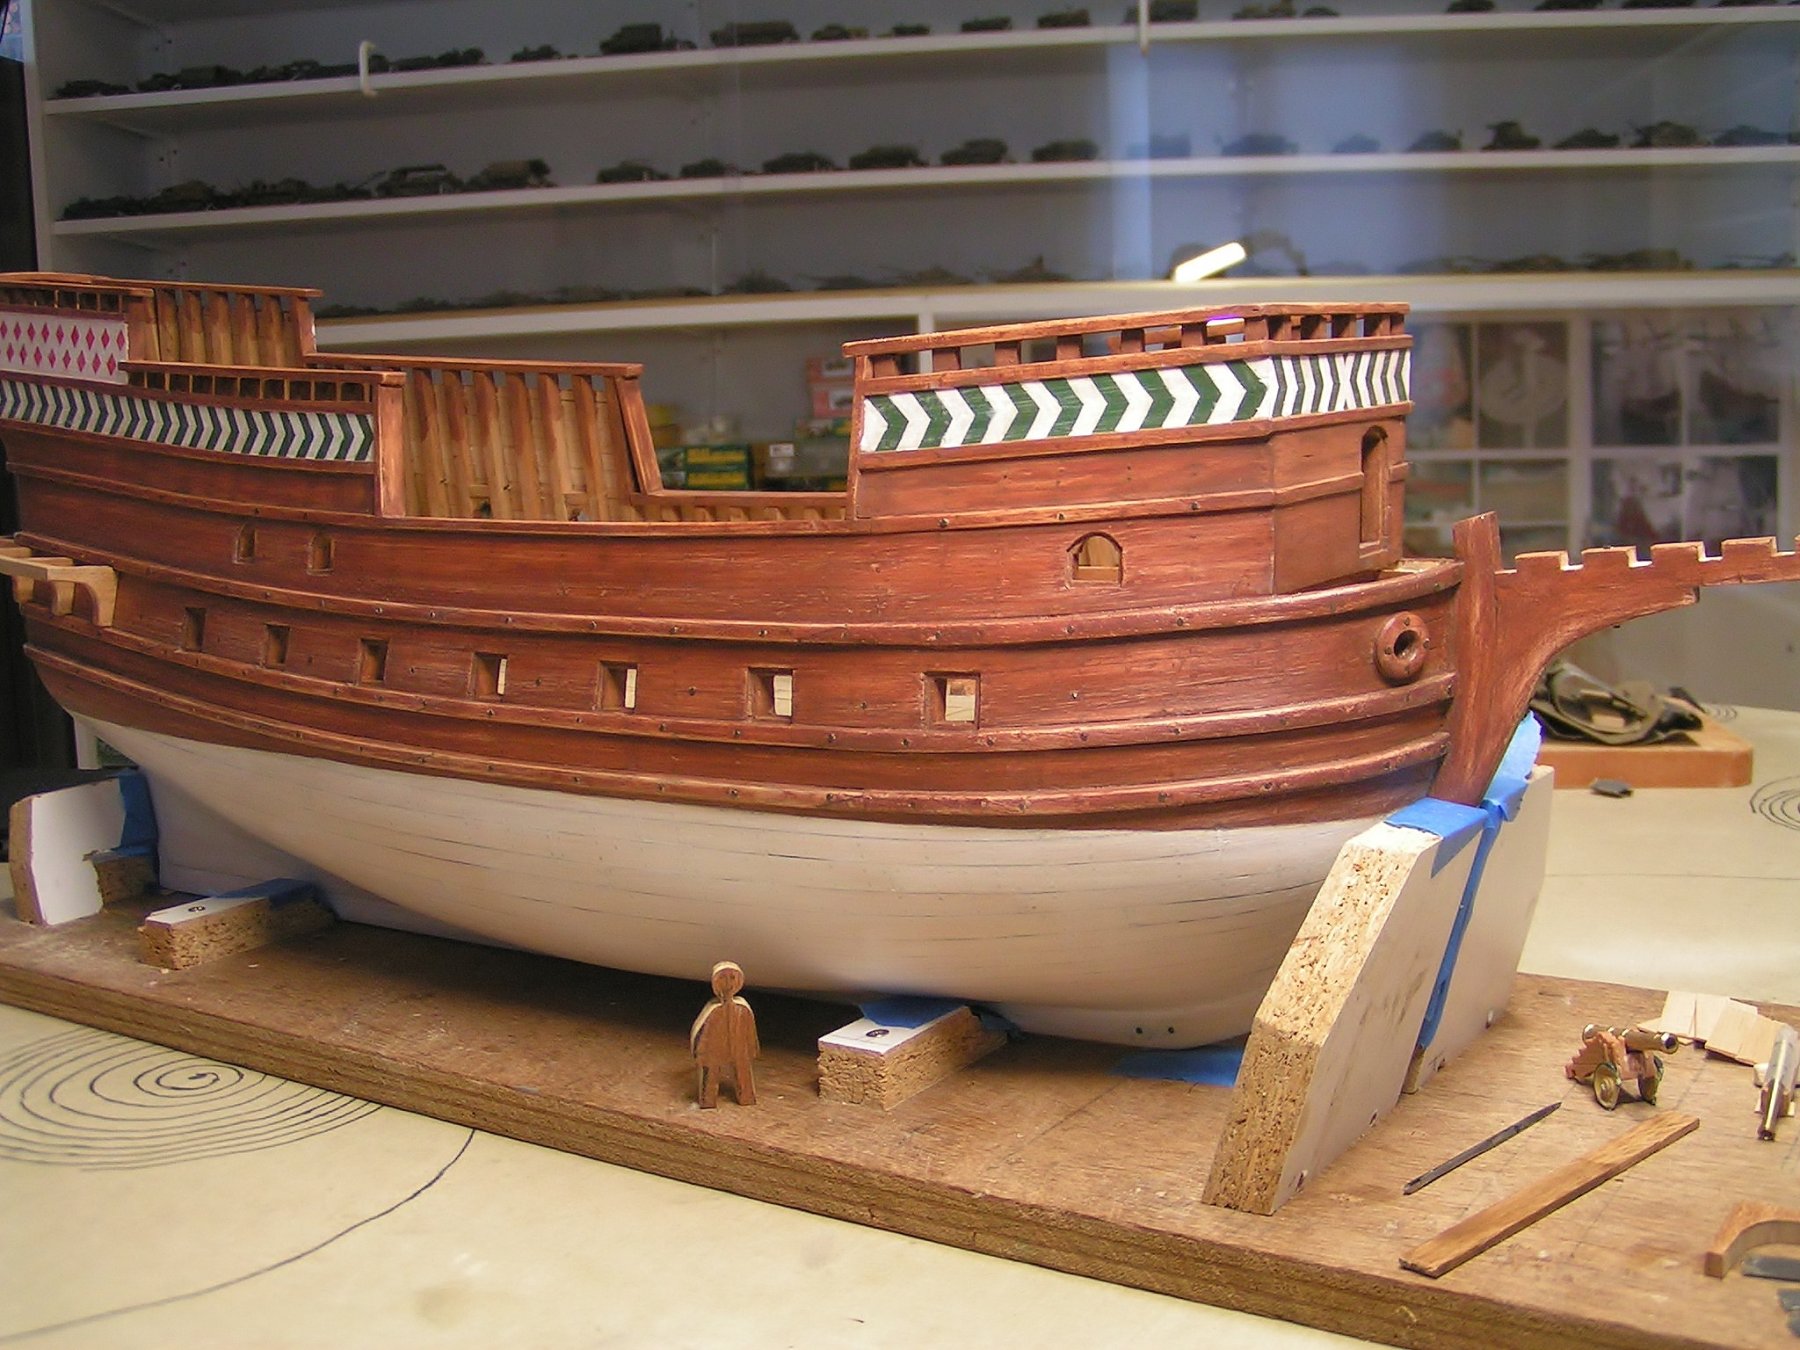
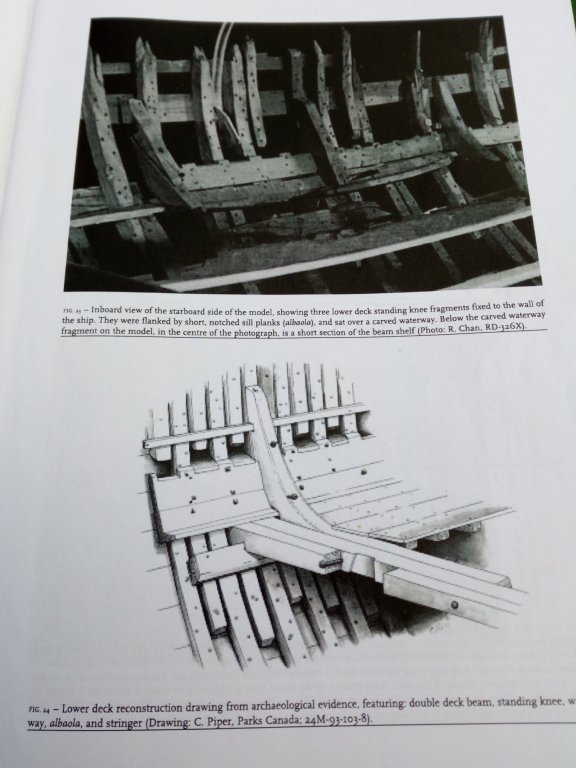
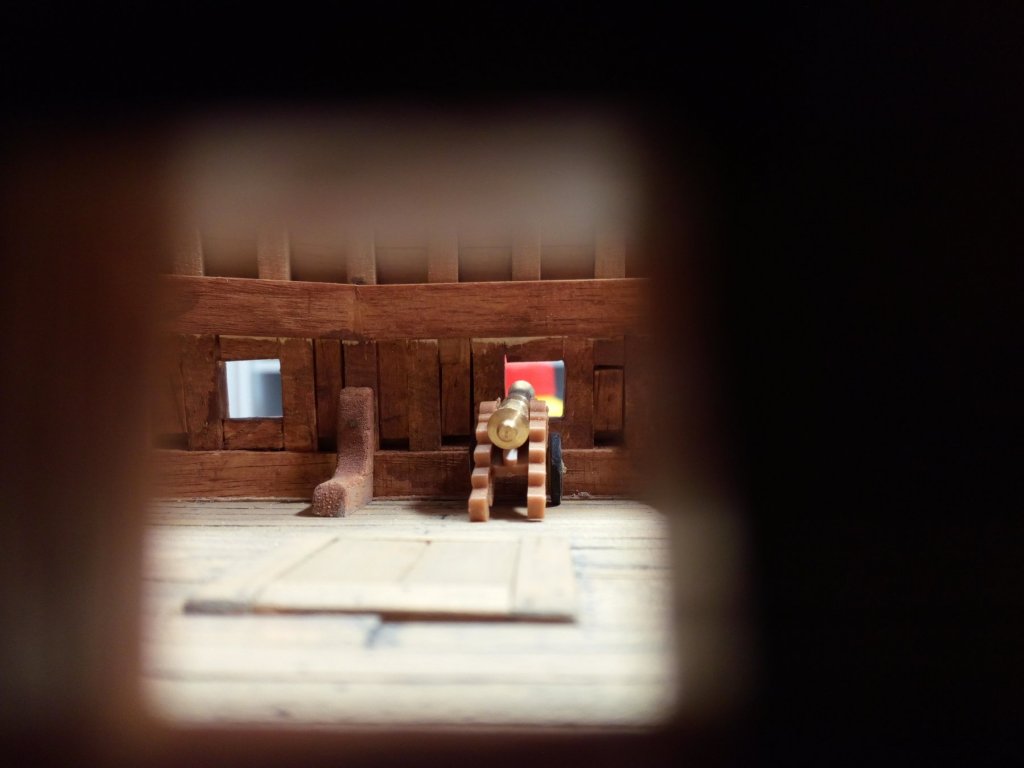
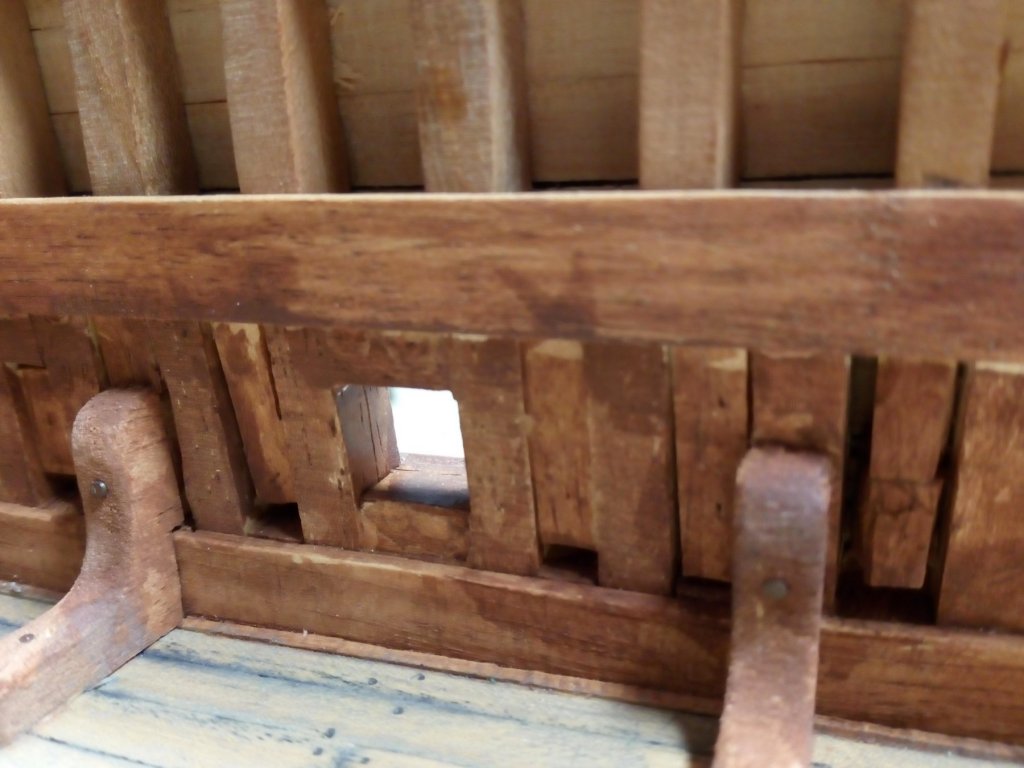
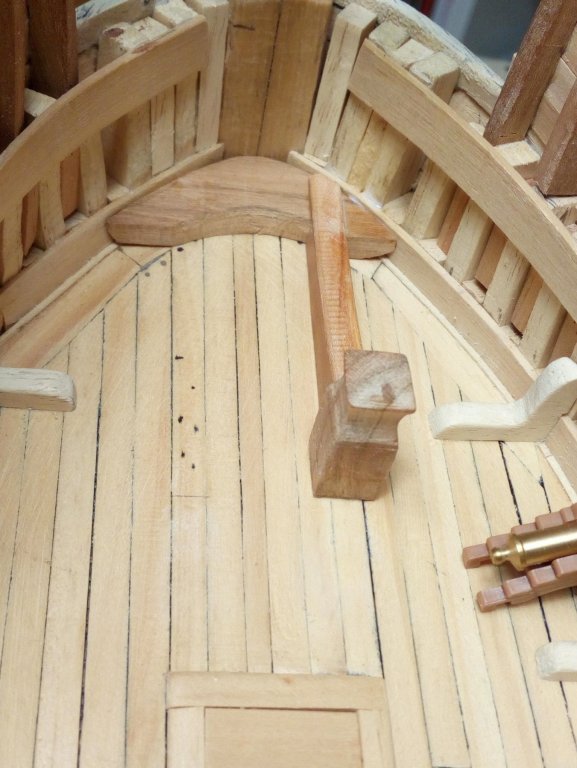
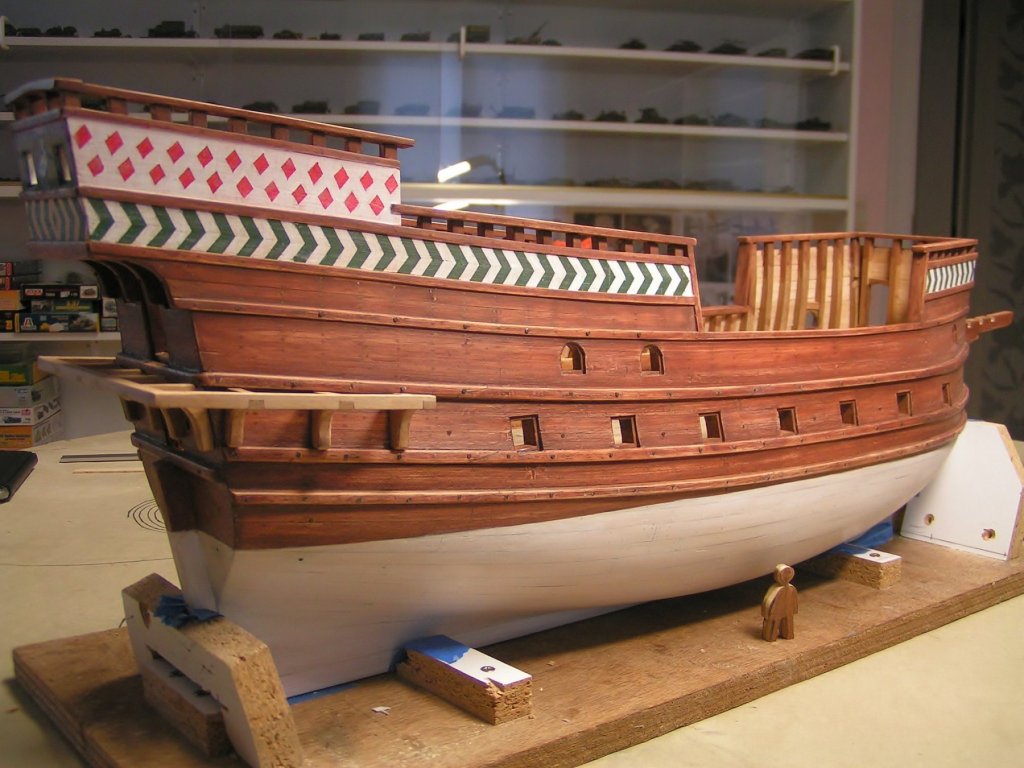
 The sidewalls below deck, All of these objects have been previously installed during construction. But not yet explained Apparently there were 2 ways. With planking on the inner sides or with the frames remain visible. It was decided to leave the frames / futtocks visible. This detail could be done better. But later this part is only visible through the gun ports and possibly an open hatch, so this is good enough. Historically correct for an English ship ?? who knows, this example is Spanish (San Juan) Traces of the standing knees have been found on an english shipwreck (Gresham). And yes they also effectively hindered the free firing field of some cannons. Hanging knees and beams for the upper deck will be applied later. Water that came on this deck was drained through holes to the lower cargo space ( source Gresham ship) A breast hook and the construction for the anchor cable are also made (source : vasa ship and the Batavia replica) The photos speak for themselves. Work on the balcony has also been started up again. Thanks for following


- 756 replies
-
- 9
-

-
- galleon
- golden hind
- (and 2 more)
-
Thanks Lawrence The pictures that are now being explained are indeed from a while ago. Work on this gun deck was done between other works on the hull. At the moment there is little time to build. Work in the garden and other jobs. Translating to English is also time-consuming for me, because I never learned English in school. So for now only updates with explanations about this cannon deck. Ps I am already looking forward to your new build log
- 756 replies
-
- 2
-
-
- galleon
- golden hind
- (and 2 more)
-
Greetings
-
Greetings from Belgium. Beautiful model.
-
The penanten are indeed a part of the foundation (I was too slow to translate with google and I did not even know what penanten were until now ) I found this : replacing the "kruipalen" on a mill http://www.zoutelandeopfoto.nl/zoutelande-nieuws-fotoalbum/nggallery/galleries/vervangen-kruipalen-molen-2016
-
Tiger Tank 334 by torpedochief - 1/16 - Radio Control
Baker replied to torpedochief's topic in Completed non-ship models
well done -
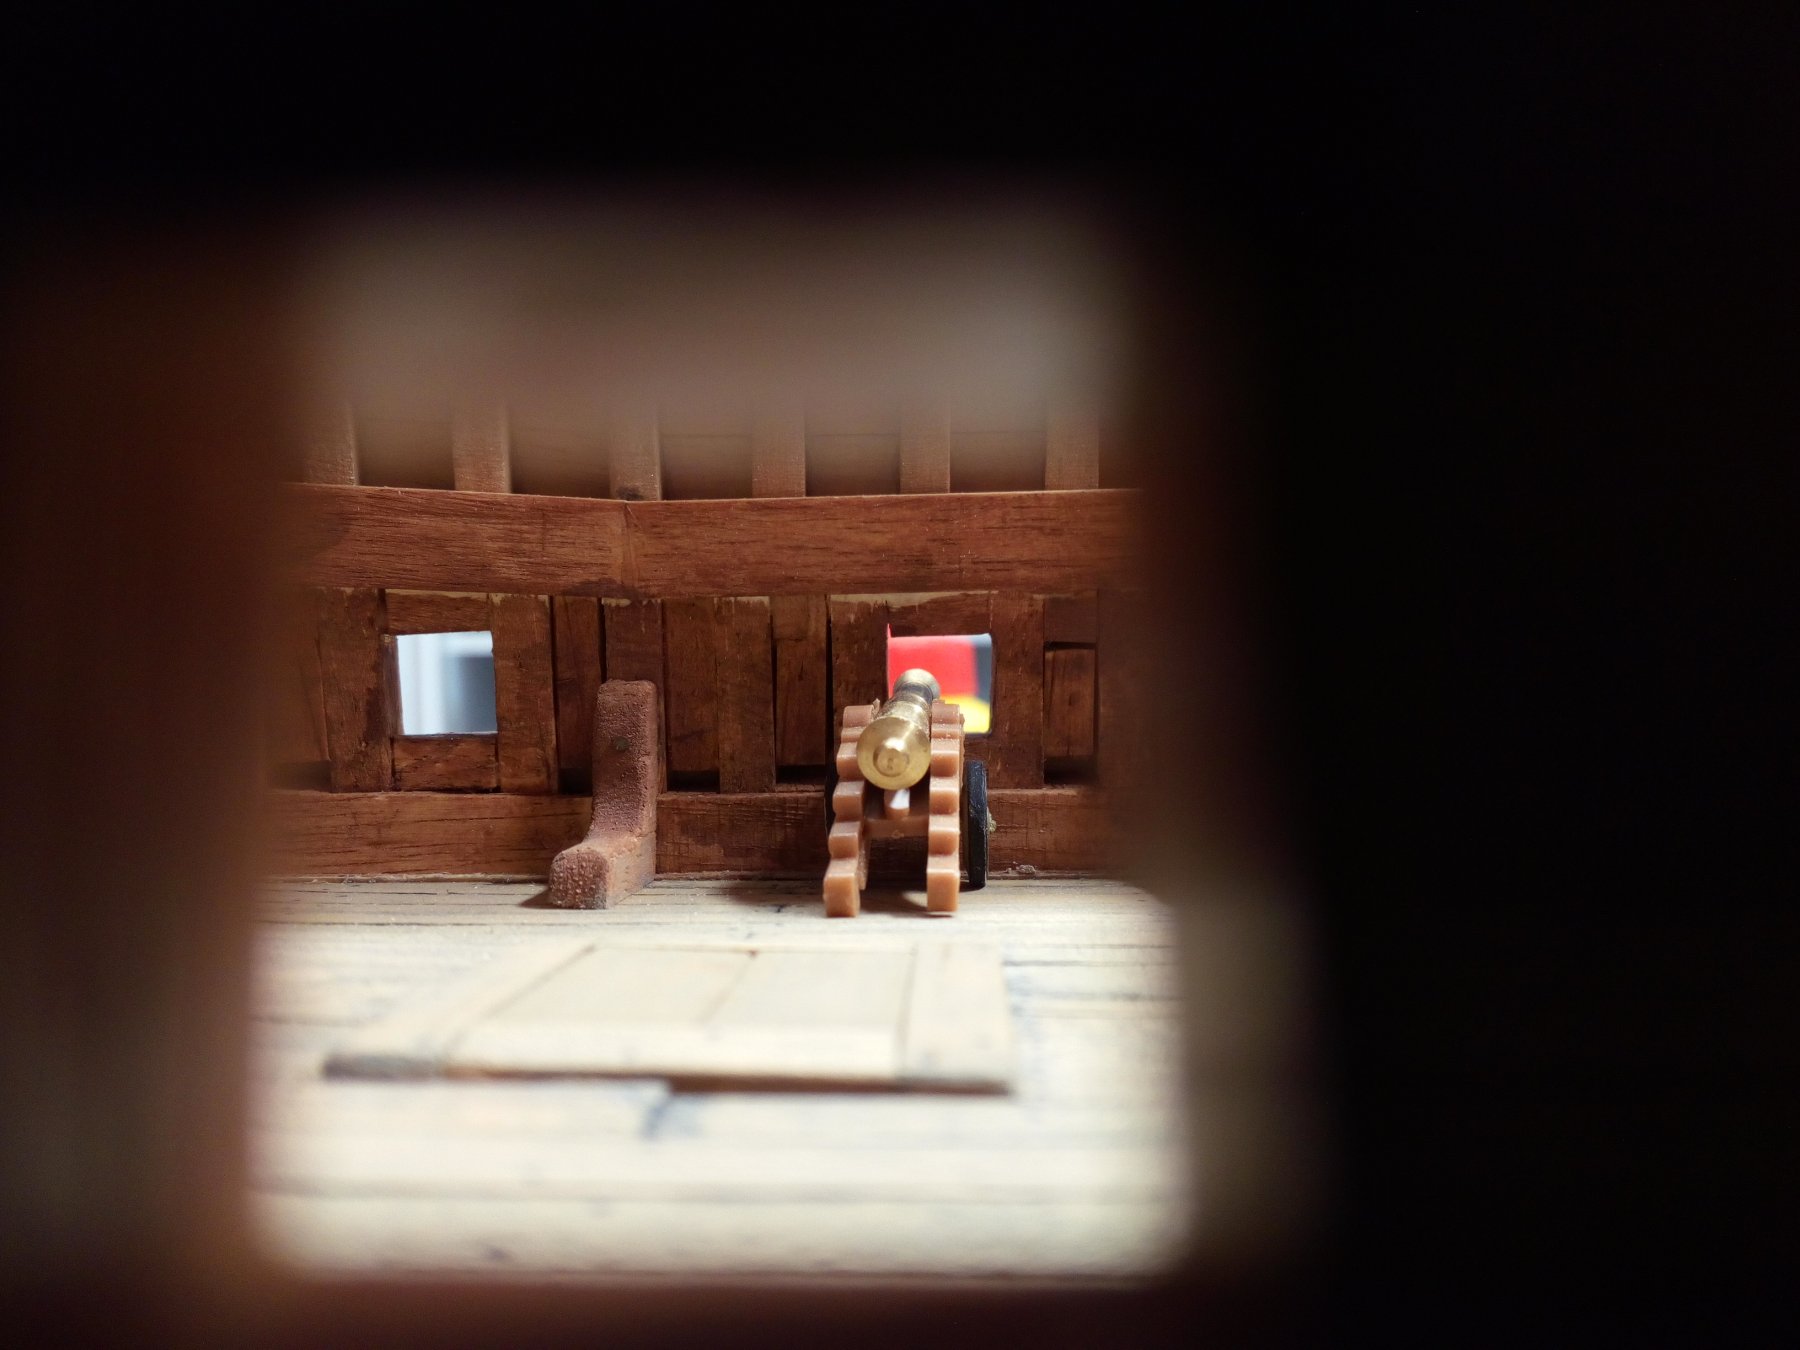
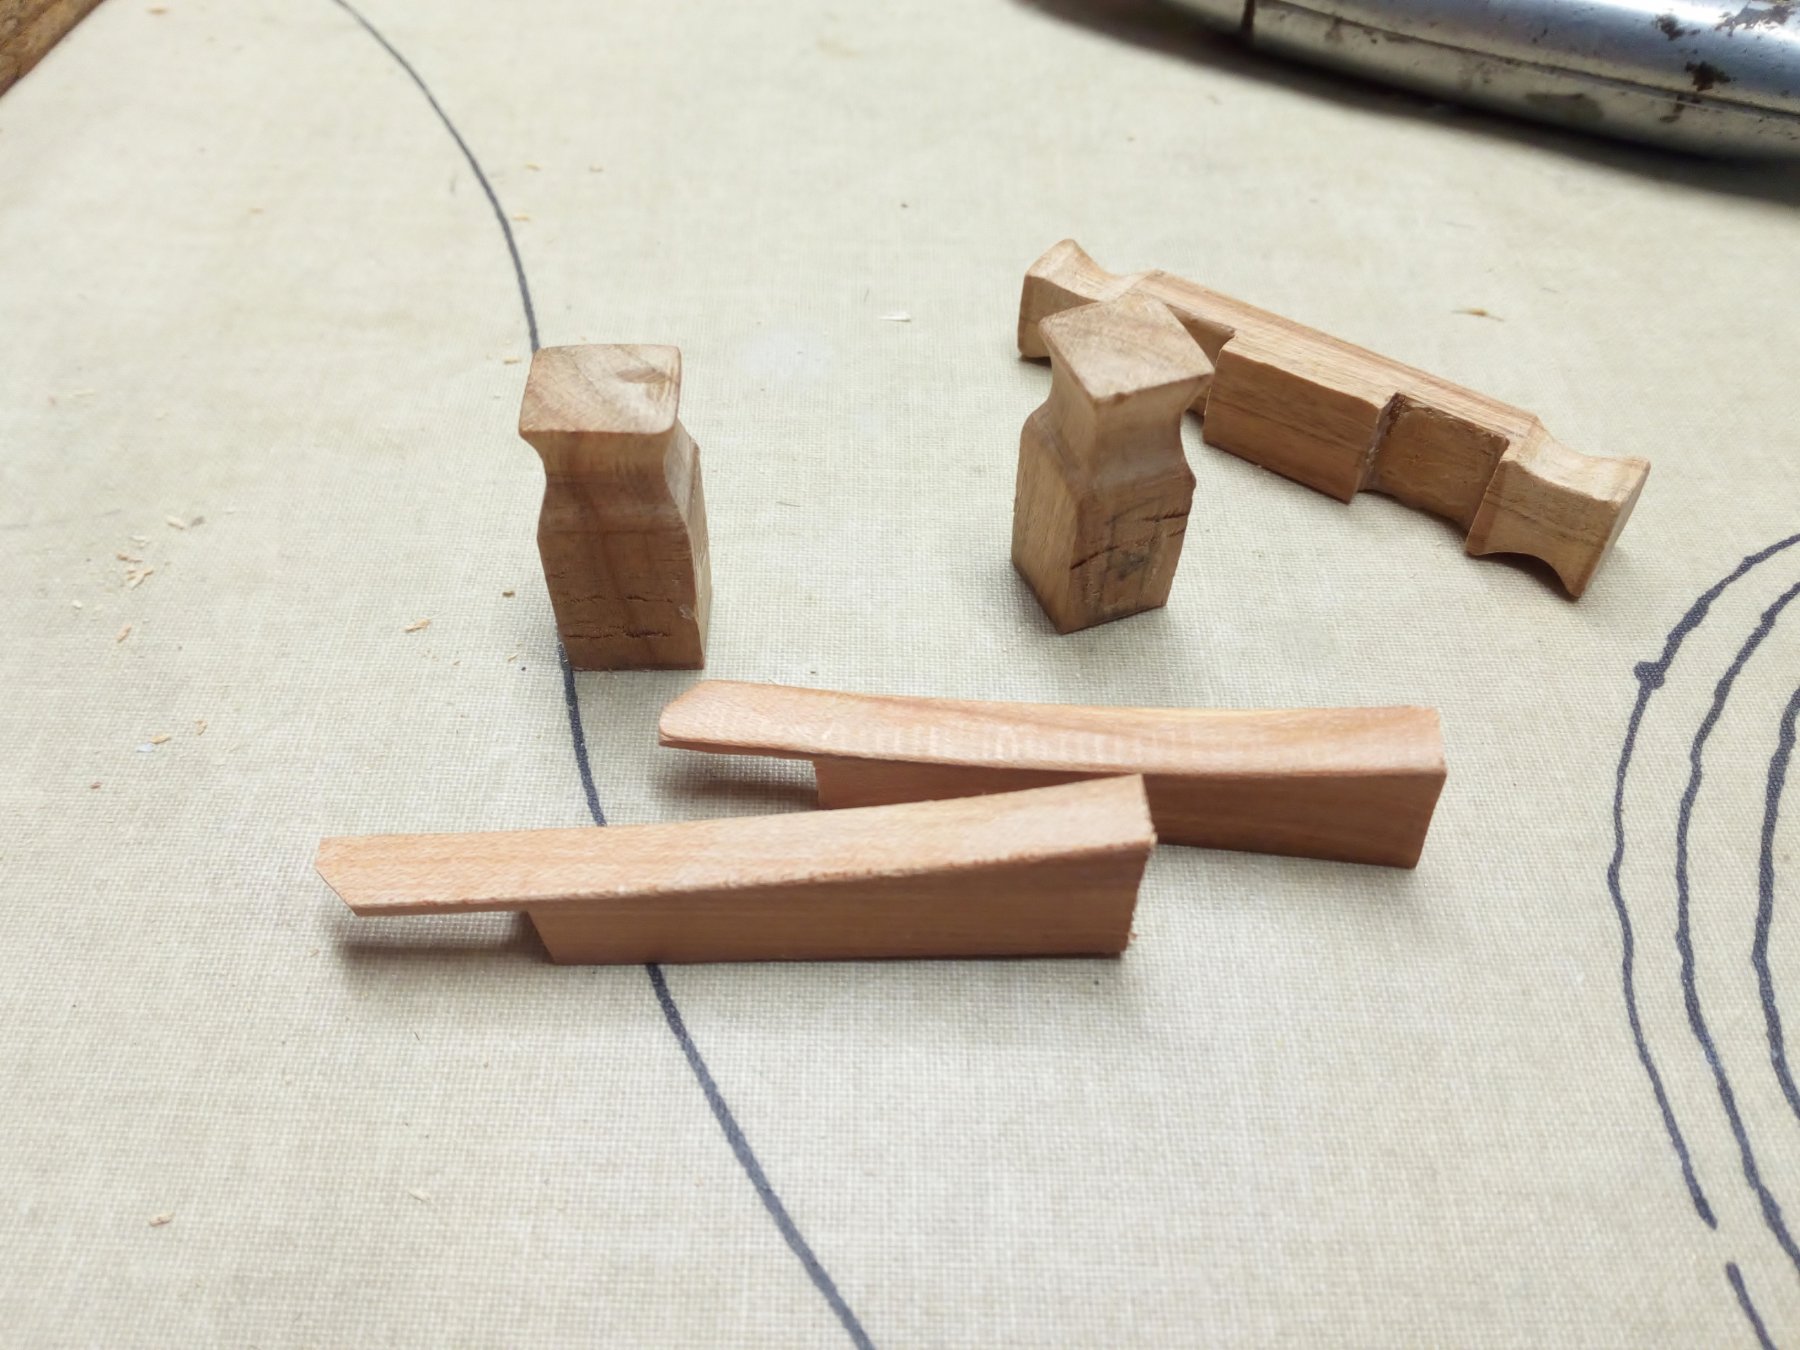
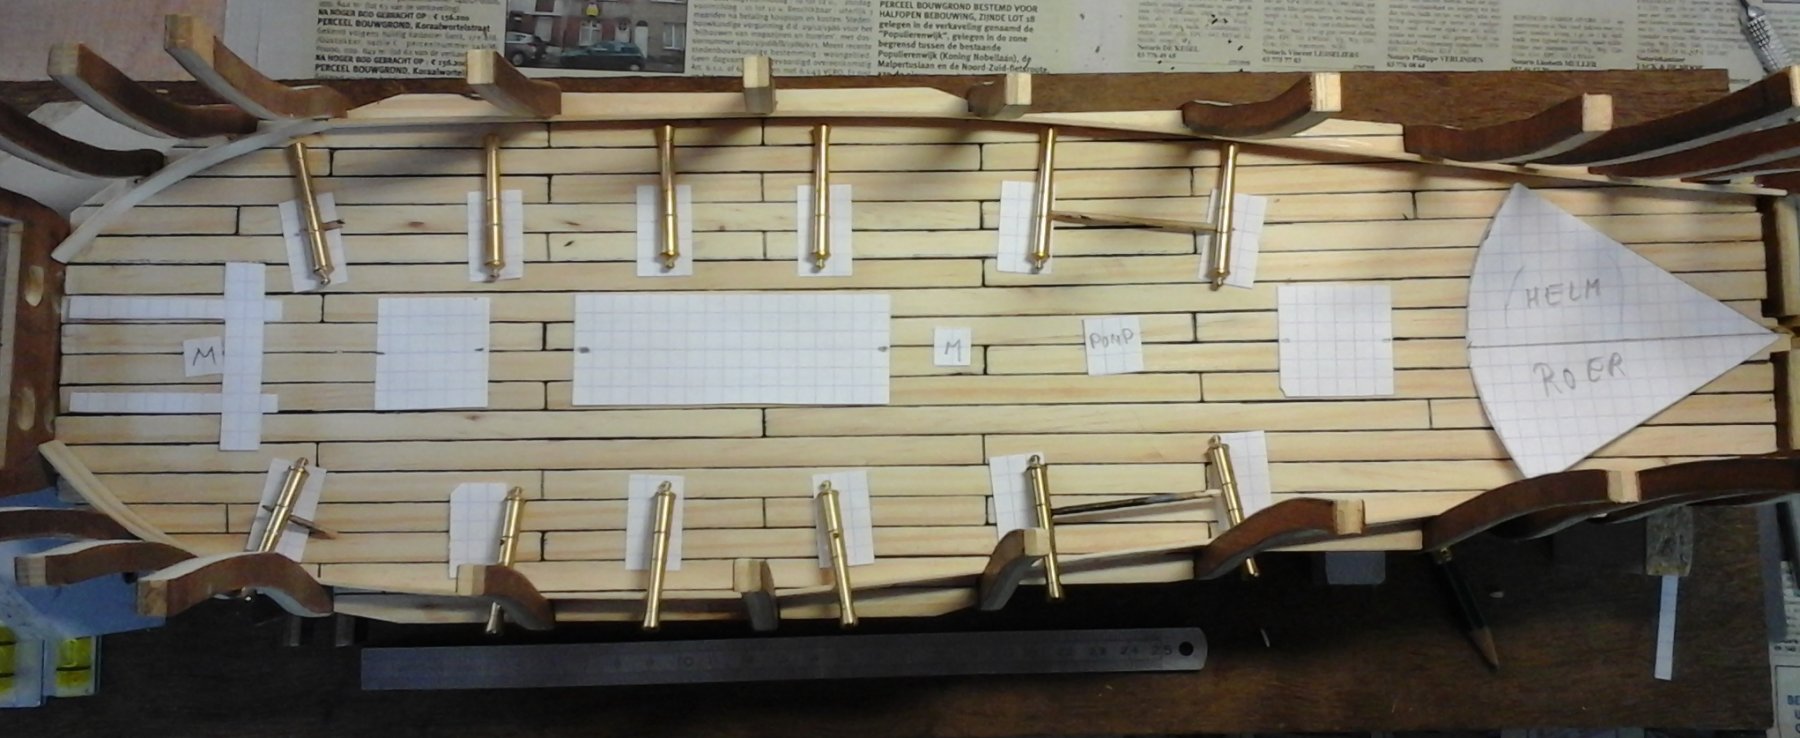
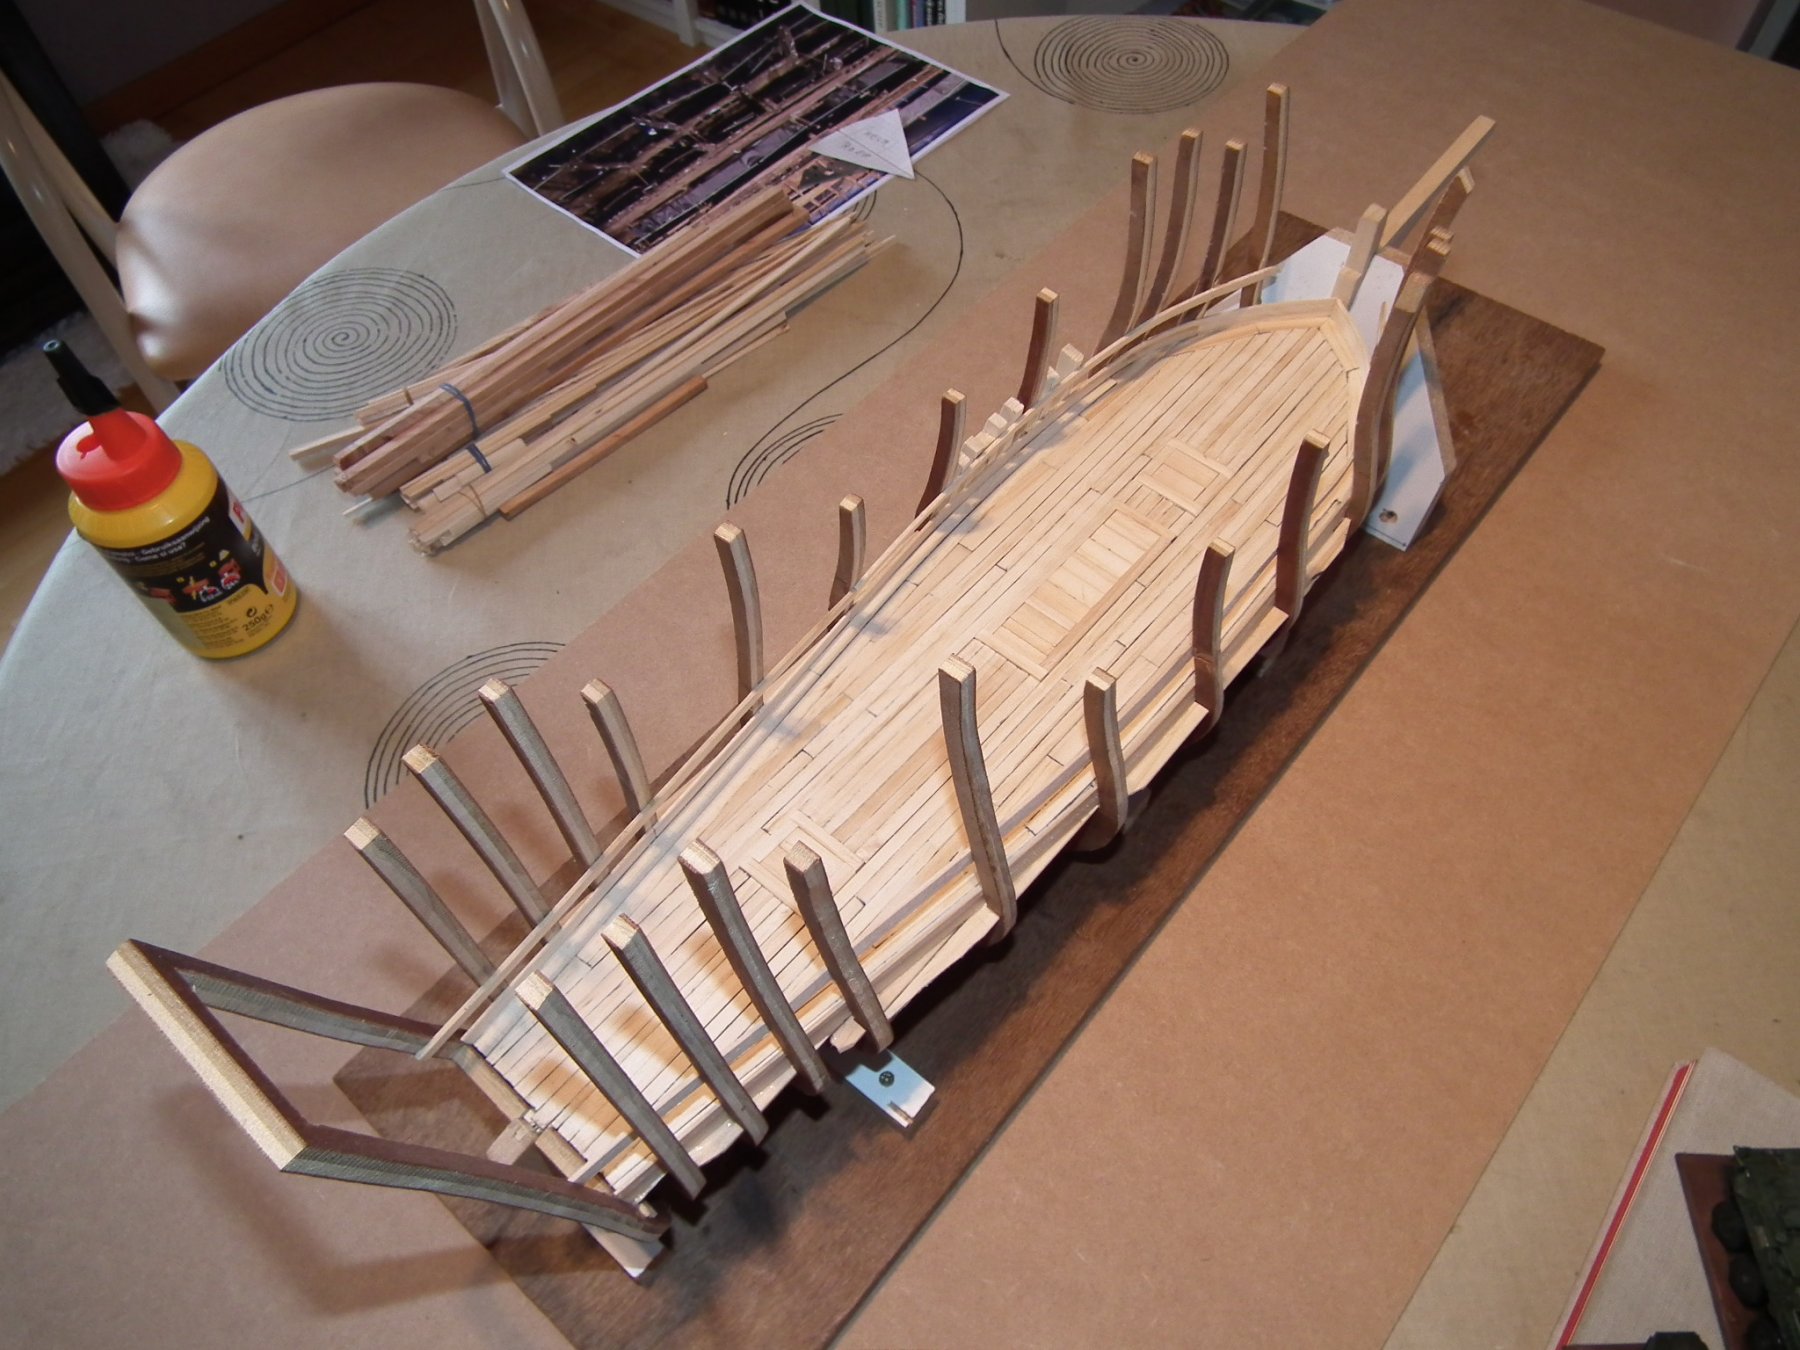
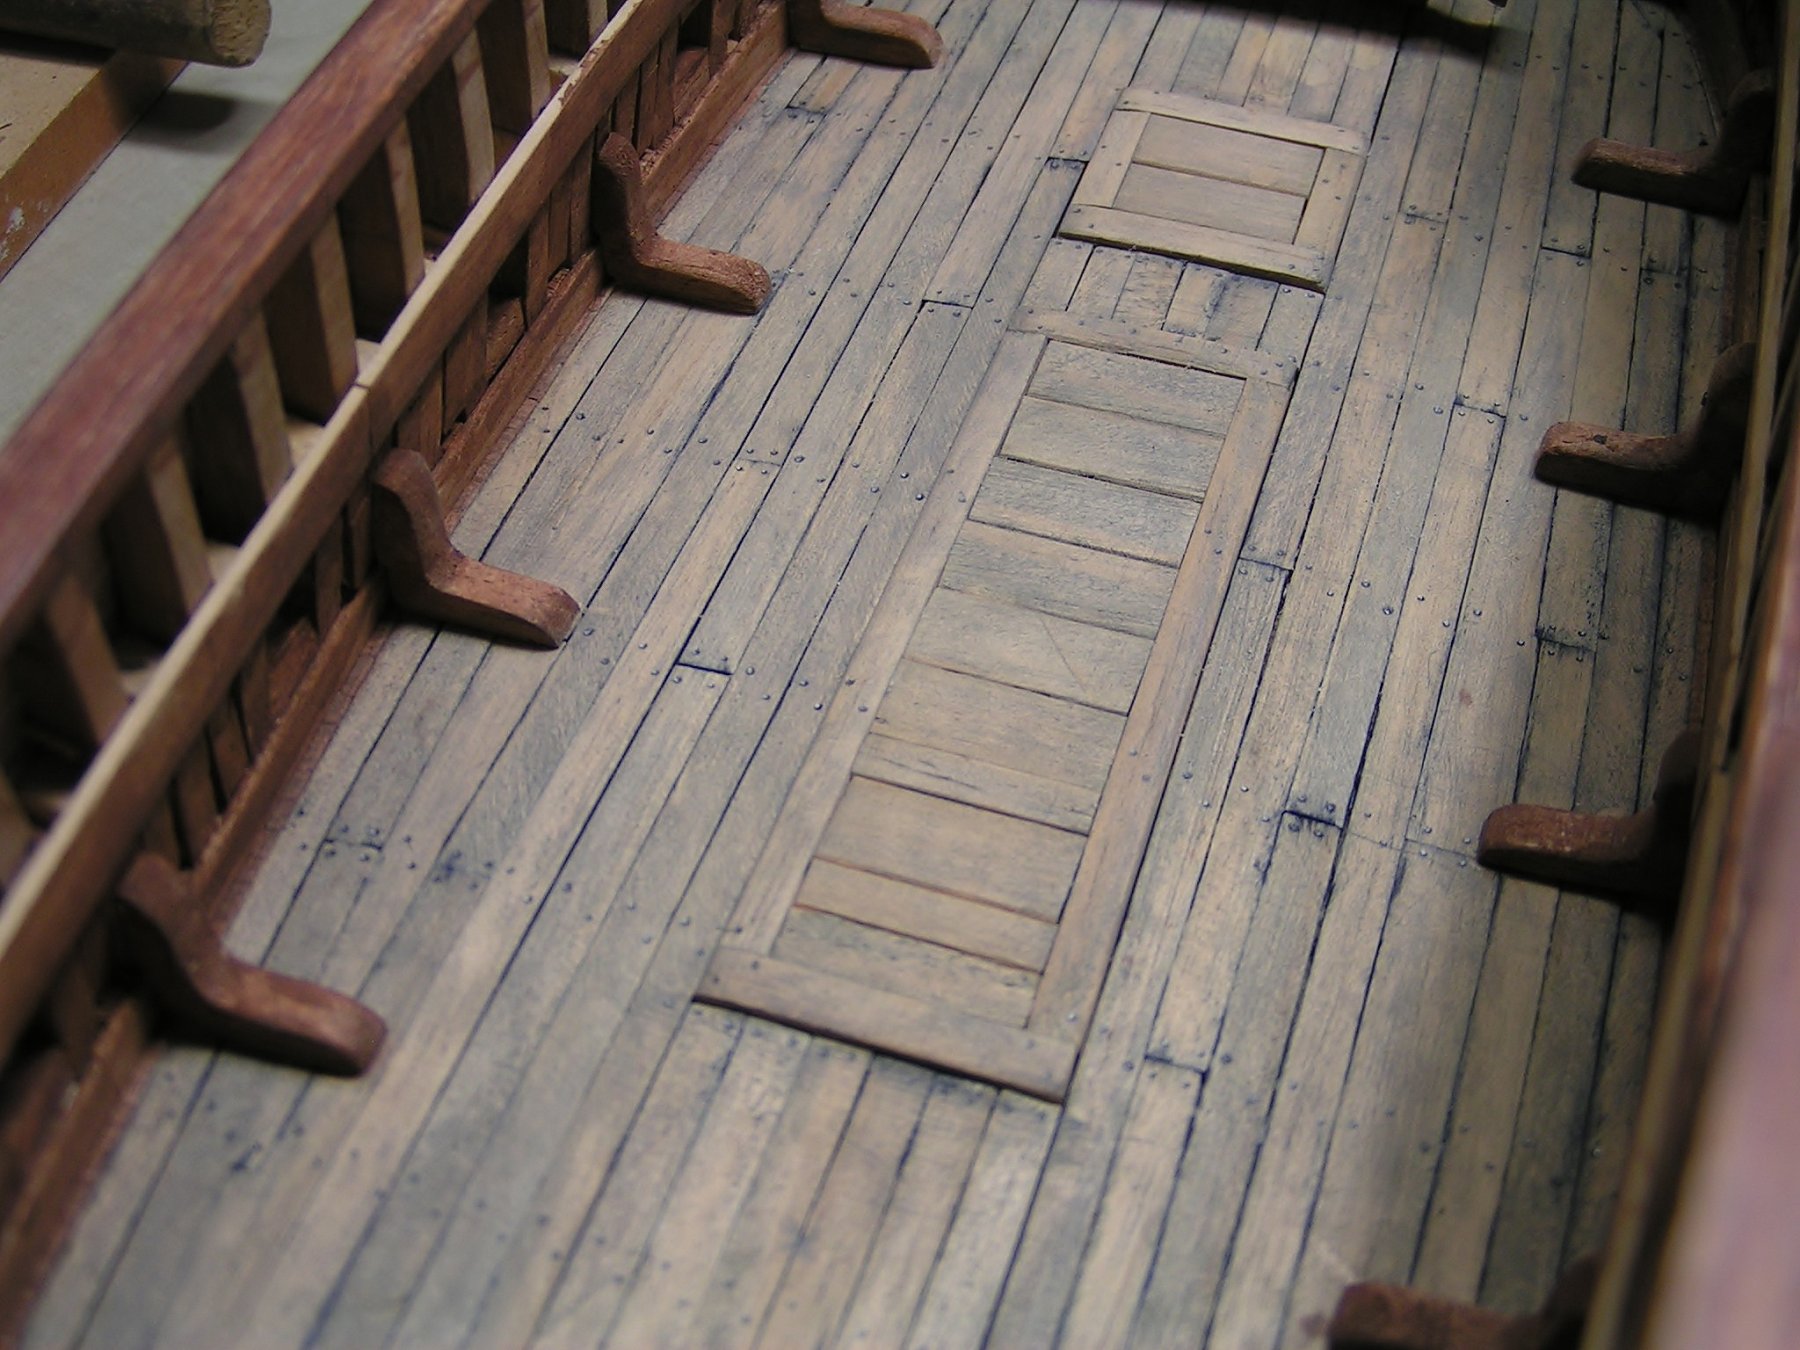
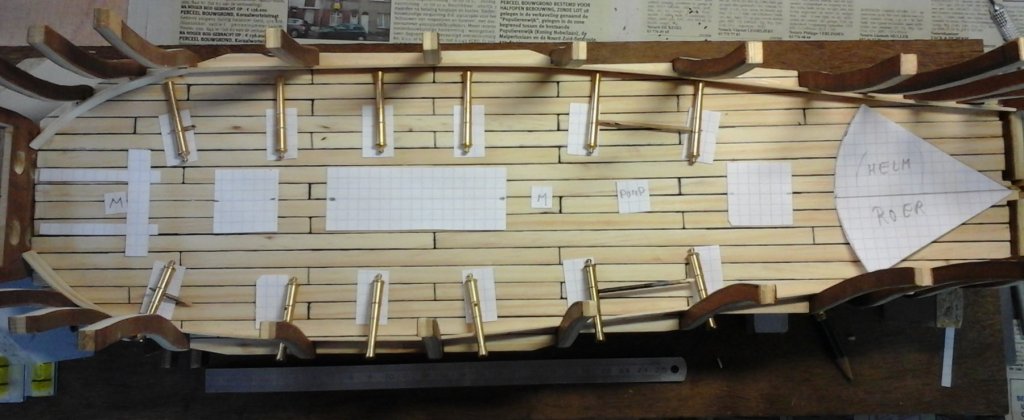
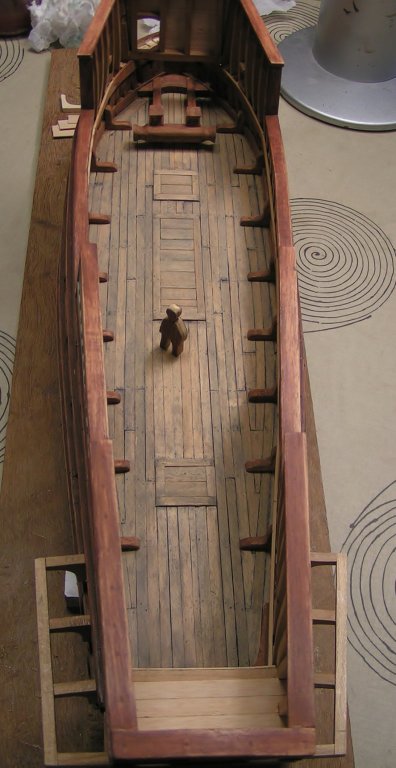
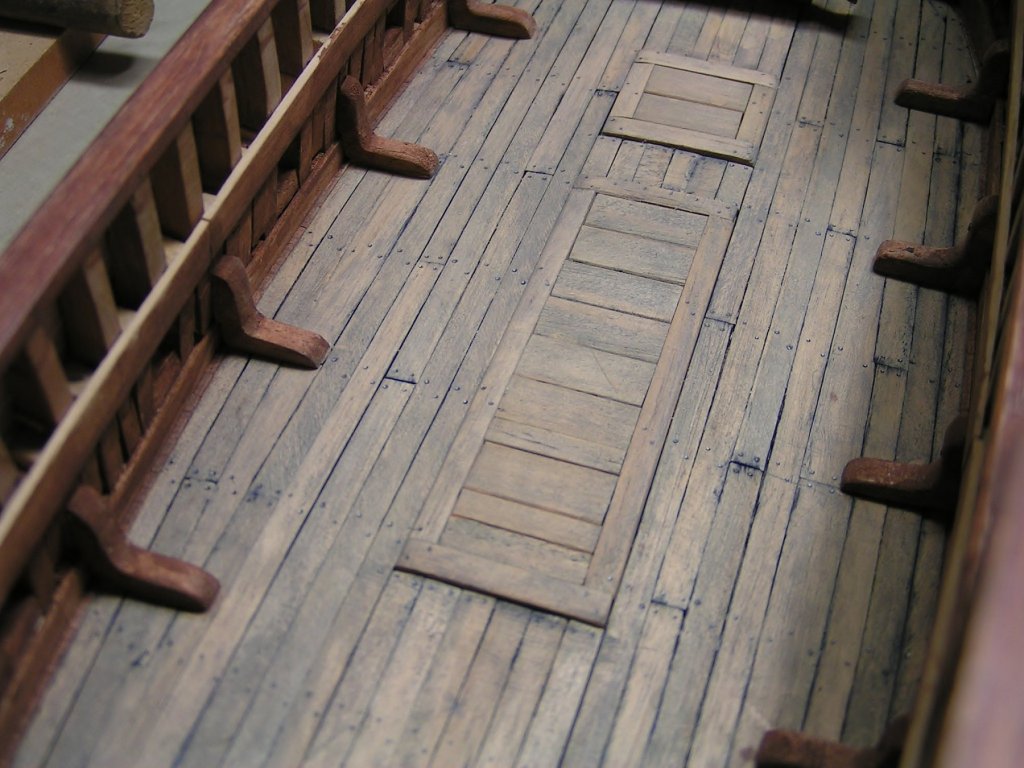
The Cannon deck or orlop deck. Most details on this deck are guesswork. As soon as the upper deck is built, there will be little left visible of this deck (the idea is to place LED lights inside later) The planking of the deck. My only references were the Mary Rose (early 16th century) and the Vasa (early 17th century) The Mary Rose deck looks like one big puzzle. The Vasa deck looks beautiful and looks good. What to use from the 2 as an example? So a "mix" of the 2 (Mary Rose deck) My first attempt The hatches were applied to this deck And i started planking a new deck above the first deck. And then forgot to take pictures Started planking at the sides of the hatches Apparently never stop with a sharp point. Just stop a plank like this. Wider planks to fill larger holes. Result There is some "Vasa" order in Mary Rose "puzzle" I used a marker pen for caulking the planks, and will NOT use this on the upper decks. I dont like it after the painting is done. The treenails are made with a pencil, fast and easy. And good enough fot this deck. Coloring of the deck. 2 thin layers of thinned Tamiya dark sea grey XF-54 (20% paint 80% isopropylalcohol) are used. I like the result It looks pretty good as old weathered oak Thanks for following


- 756 replies
-
- 7
-
-
- galleon
- golden hind
- (and 2 more)
-
Roter Löwe 1597 by Ondras71
Baker replied to Ondras71's topic in - Build logs for subjects built 1501 - 1750
Ondras, Your planking (tiling) is not Your planking is
-
Spanish shipbuilding, 2 centuries earlier. About the same pricipe. Only the frames are built differently and there are no ceiling planks on the inside.
-
Great work Michael. some ideas : Then looking at the profile grrr –these kit supplied planks look way too thin – and out of scale?, especially with the weight of the ballast rocks that these planks need to support. Remember that there are more frames and placed closer together (= more support). Minor update that includes some frustrations, using the kit supplied planks; I thought that I would try also using Pinstripe tape to simulate the caulking. Was there caulking on these interior planks? Maybe you should not do caulking here I am not at home now (work ). But I will see this evening at home if I find more information about this
-
Thanks Michael I have looked at your Santisima build a few times. Looks promising. But be careful I see many differences with the construction of a hull in the 16th century and in the period of your ship (18th century ?)
- 756 replies
-
- 1
-
-
- galleon
- golden hind
- (and 2 more)
-
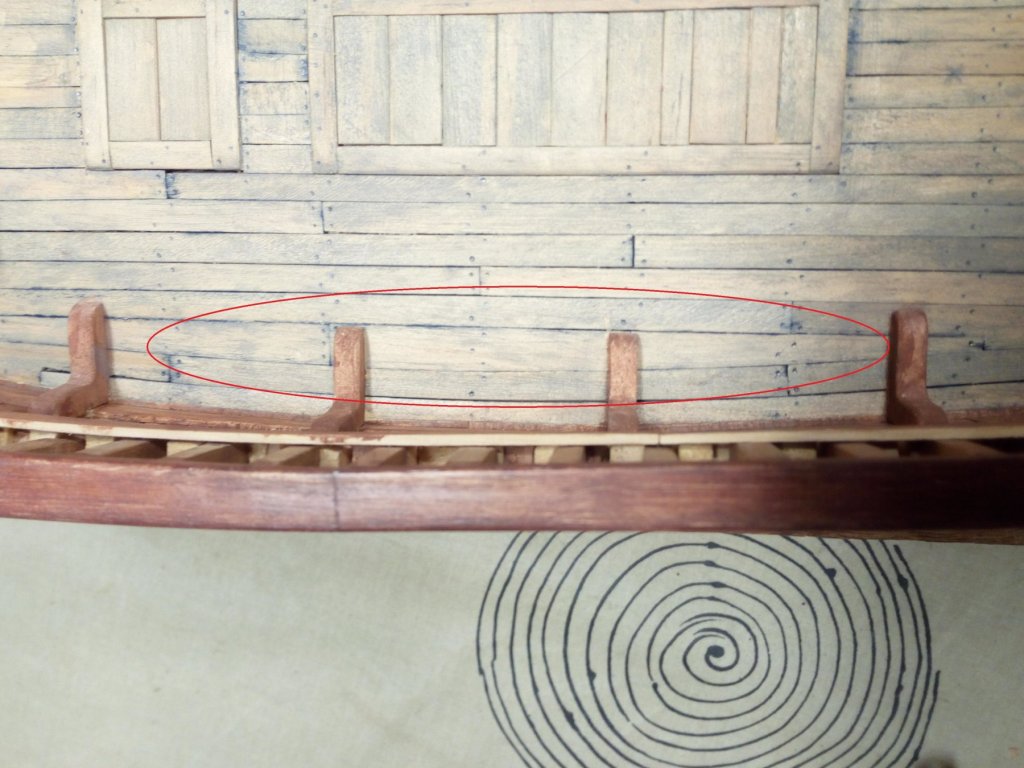
Time for an update of the canon deck / orlop deck. This deck will be little visible later.The intention is to detail as much as possible as an exercise for building the higher decks. The deck planks are a mix of the decks of the Mary rose and the Vasa Side walls such as the San Juan wale ship Standing knees like the Gesham ship. This is the current status. The construction method will come in different posts. Spring has begun and there is a lot of work in the garden and the spring clean up Thanks for following Buildlog index see post 1
- 756 replies
-
- 11
-
-
- galleon
- golden hind
- (and 2 more)
-
Finished the bolts in the wales, keel, stern and stempost (the bolts below the waterline will be painted white later). Thanks for following

- 756 replies
-
- 10
-
-
- galleon
- golden hind
- (and 2 more)
-
I also follow the construction of a Dutch mill Made in the USA
-
Welcome to MSW Kristoffer. WEe have been a few times to Norway on holiday. Beautiful country
-
Another hello from Newcastle, Australia.
Baker replied to Jobbie's topic in New member Introductions
Beautiful models Jobbie. Welcome to MSW -
Beautiful model Cristian. She deserves a special place in your house where everyone can see her.
-
Beautiful painted and very realistic.
-
Looks great Marcus. Congratulations on your first scratch build. Mooi gedaan
- 305 replies
-
- 3
-
-
- utrecht
- statenjacht
- (and 1 more)
-
It is a pleasure to follow this build, A fairly unknown ship A kit from unknown manufacturer (for me anyway) And in between a complete story about this ship Dank u Piet (Thank you Piet).
- 378 replies
-
- 5
-
-
- java
- pacific crossroads
- (and 2 more)
-
Welcome to MSW. And greetings from Belgium
-
Roter Löwe 1597 by Ondras71
Baker replied to Ondras71's topic in - Build logs for subjects built 1501 - 1750
Great work Ondras Pins, Treenails ... Once you have applied them to the model, you will not regret it. But it is indeed a lot of work.