petervisser
-
Posts
579 -
Joined
-
Last visited
Content Type
Profiles
Forums
Gallery
Events
Everything posted by petervisser
-
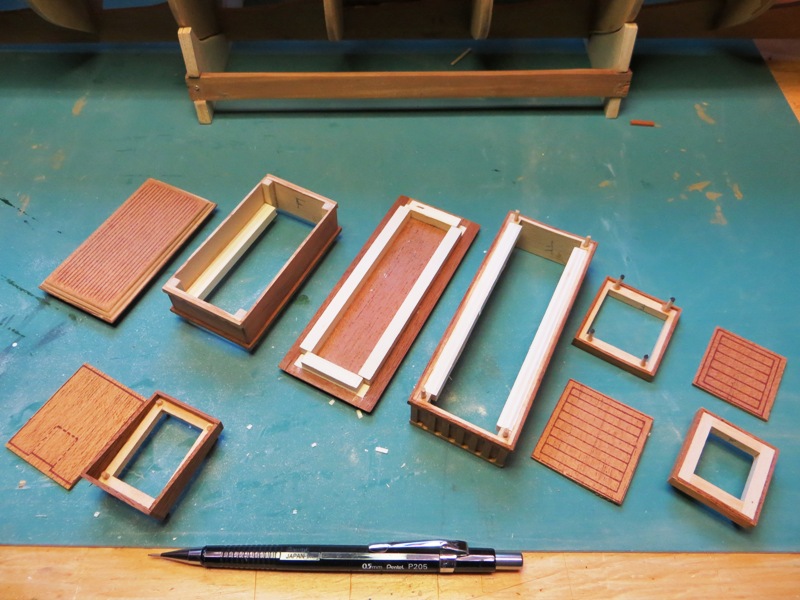
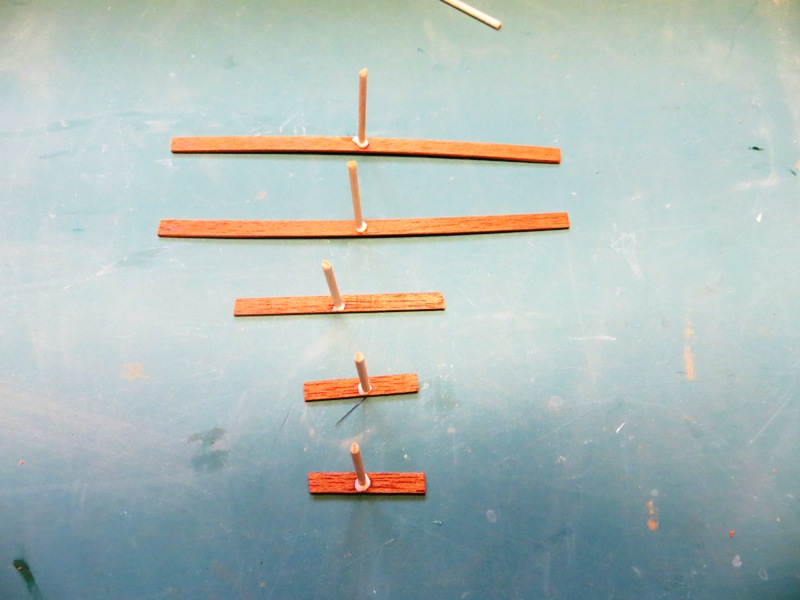
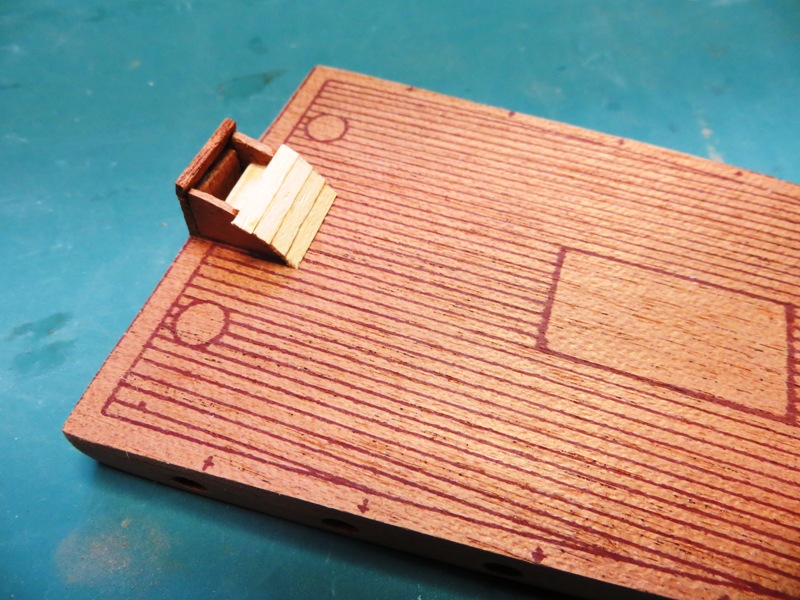
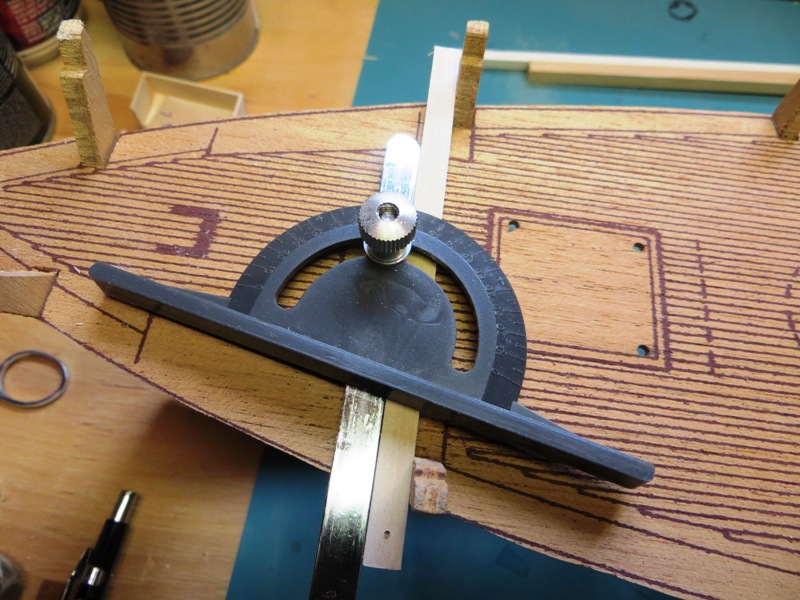
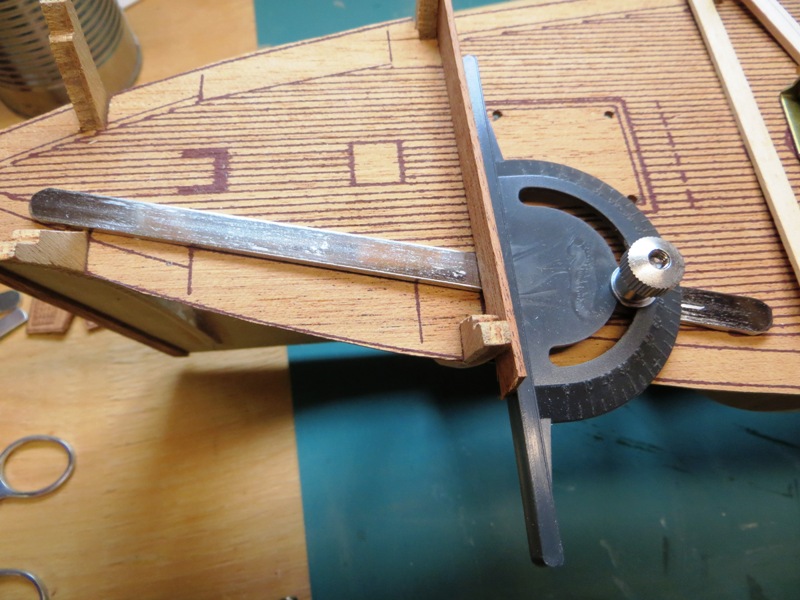
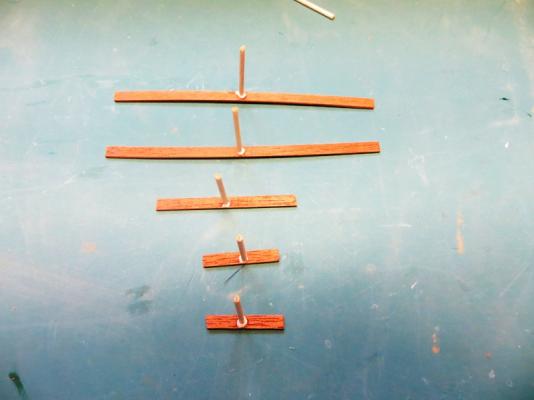
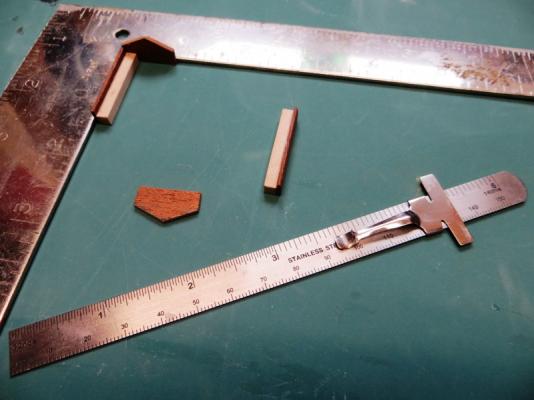
 Thanks guys for the encouraging comments. They have not gone unnoticed. Work resumed in the ole dockyard this past week. It was spent building more components of the deck furniture in the forecastle area of the ship. I noticed that although the old kit included the paint locker and pig sty under the fo'csle deck, the modern instructions don't include them. Oh well, I thought I would build them anyway. there were some interesting angles and I built them somewhat oversize on the outboard sides, so they could be trimmed just before the hull planking is installed. Here then are some progress pictures... I measured the angles for the various sides first which could then be transferred directly to the little table saw I have. The square stock would then be used as a suitable backing for the bulkheads faces.
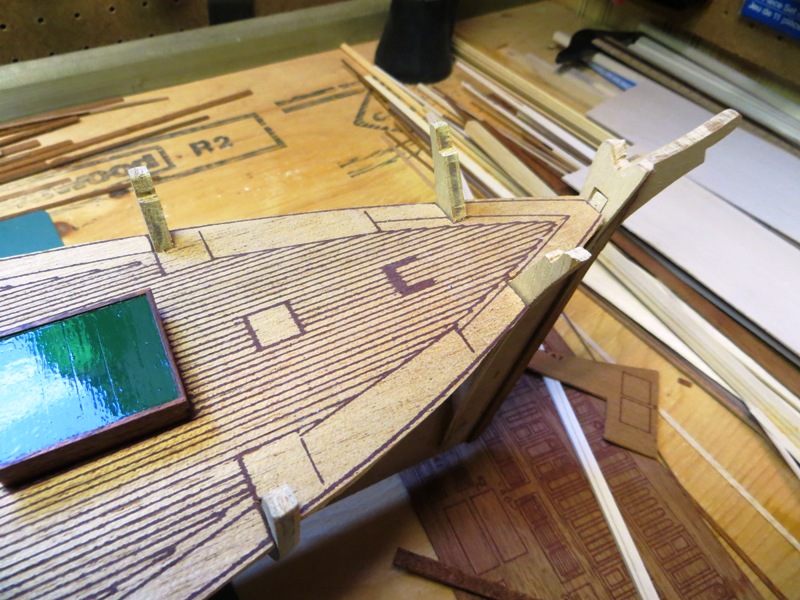
- 207 replies
-
- 1
-

-
- billing boats
- cutty sark
- (and 1 more)
-
Hi Glen, and welcome to MSW. I was excited to see your post because I built this model some time ago and have not seen it since. You are very lucky to have acquired such a unique kit. Mine was built pre-MSW and pre-internet, truth be told, so I built it much as Mr. Billing intended it. It is to this day, my favourite model that I have built. The lines of the hull and sail plan are a thing of beauty. The kit and instructions are pretty straightforward so you shouldn't have any issues. As you mentioned, the original wood may have to be replaced. My kit contained obechi wood and some mahogany strips, so my kit was an '80's version that I built when it was new. I shall follow along on your build log and re-live my time building this kit. I wish you all the best and many hours of enjoyment. Cheers, Peter p.s. Thanks for posting the photos of the actual ship.
- 101 replies
-
- 1
-
-
- L Toile
- Billing Boats
- (and 1 more)
-
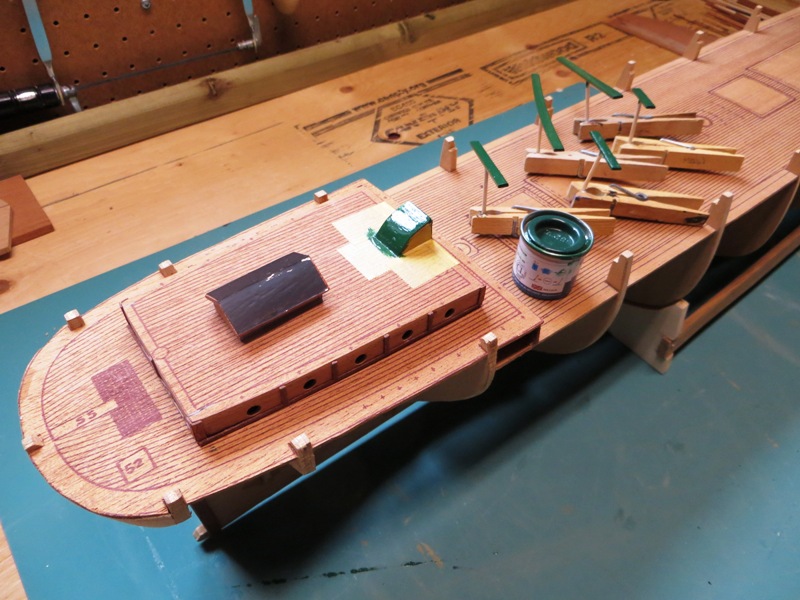
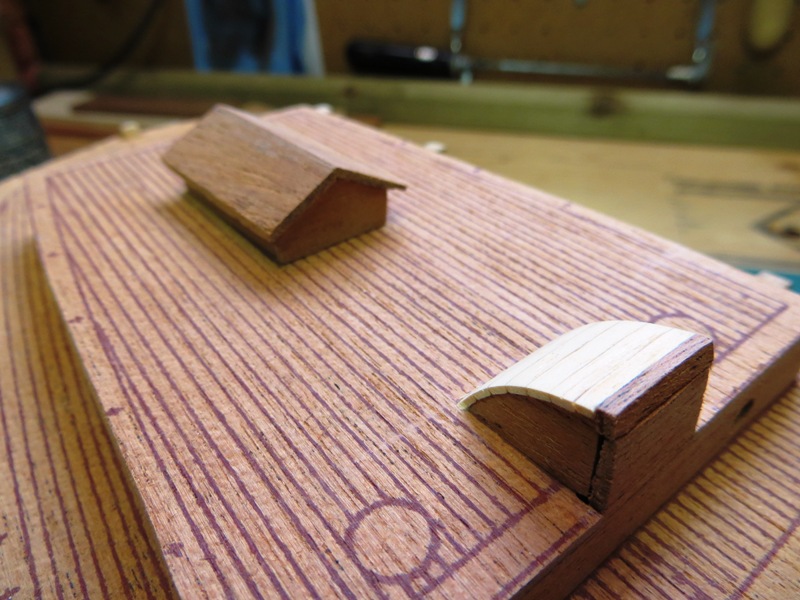
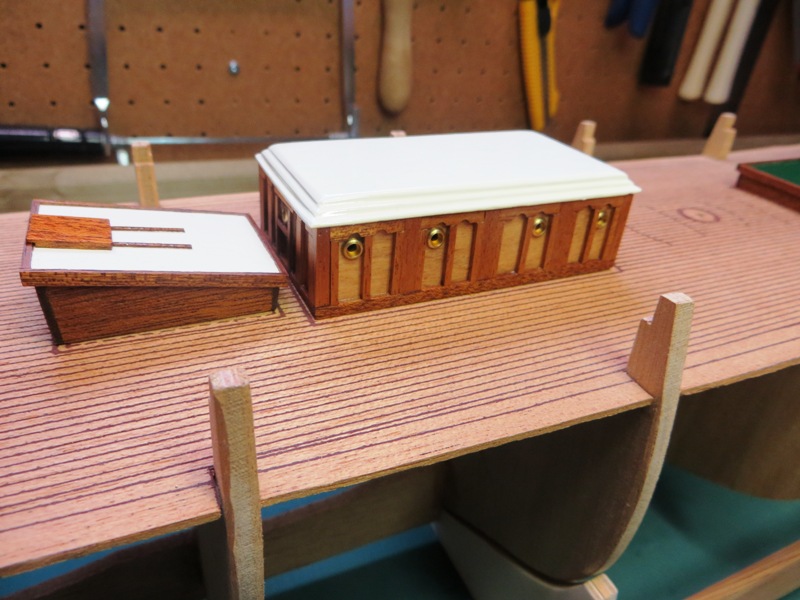
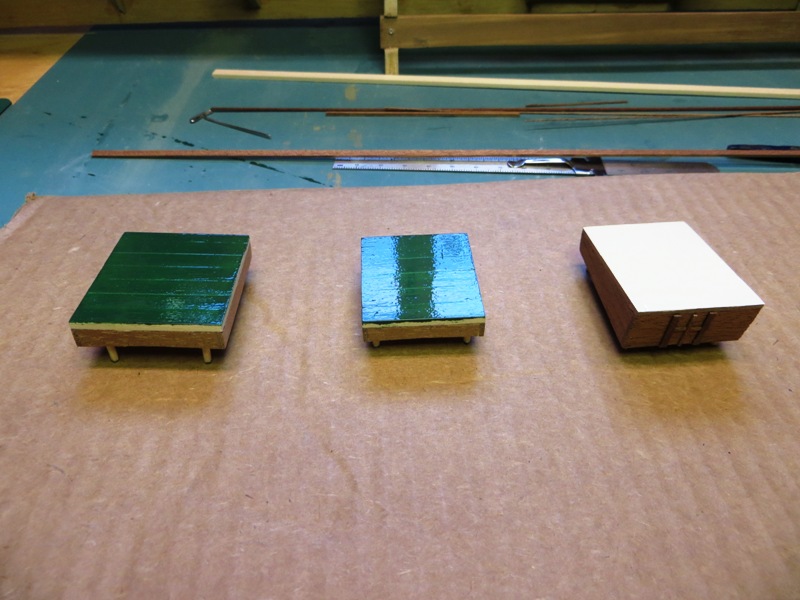
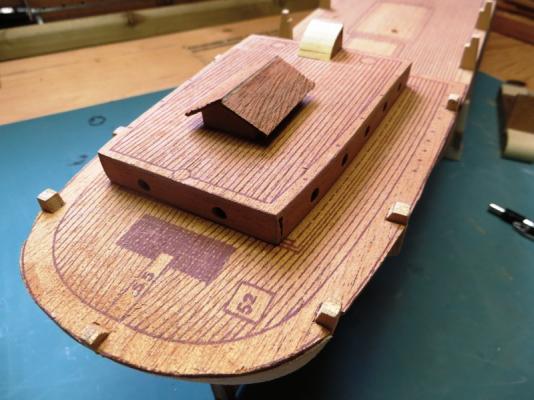
And here are the finished products of just some of the deck furniture. The model building will now have a short hiatus while I go back to work... Happy modelling! Peter

- 207 replies
-
- 4
-
-
- billing boats
- cutty sark
- (and 1 more)
-
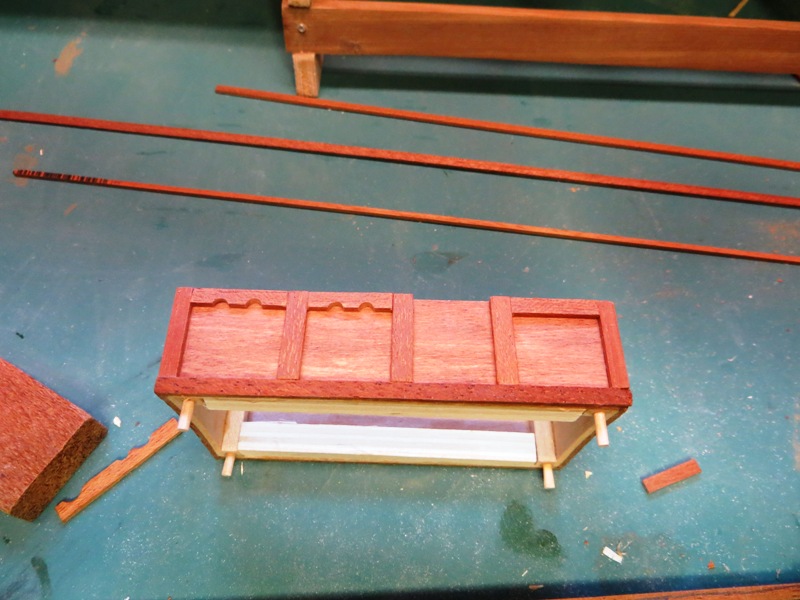
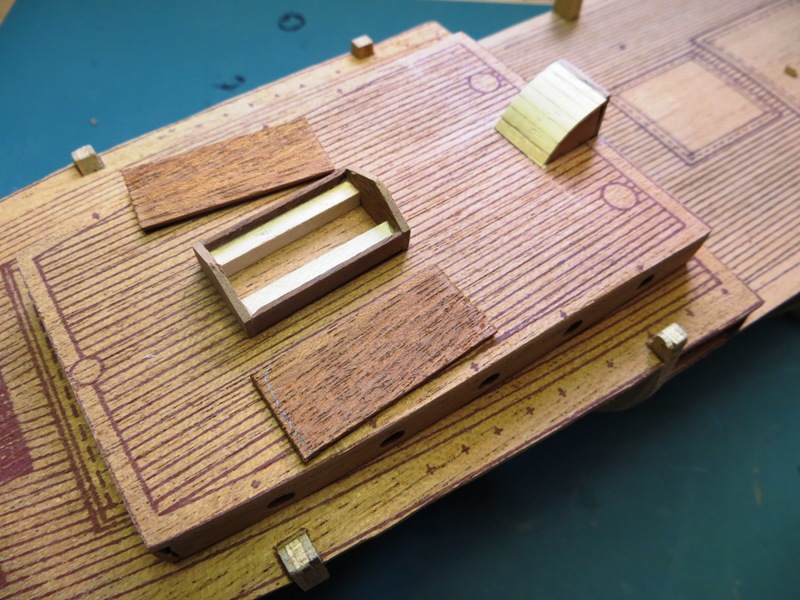
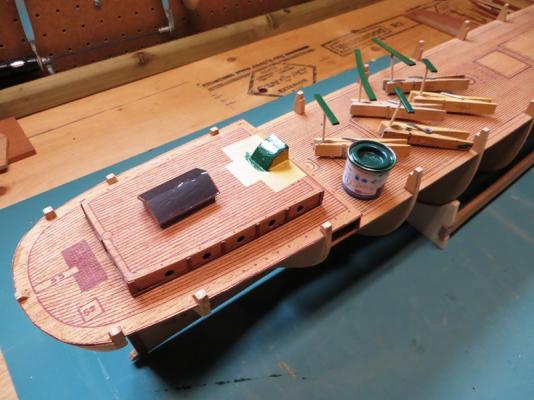
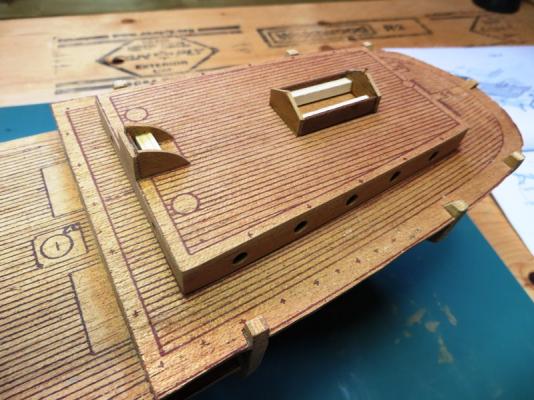
The hatches were also constructed along with the deck houses. These were pretty simple to construct as can be seen by the photos. I dispensed with using the printed "hatch covers" and made my own hatch boards. I then painted the hatch boards and booby hatch top before adding some trim to simulate coamings.


- 207 replies
-
- 3
-
-
- billing boats
- cutty sark
- (and 1 more)
-
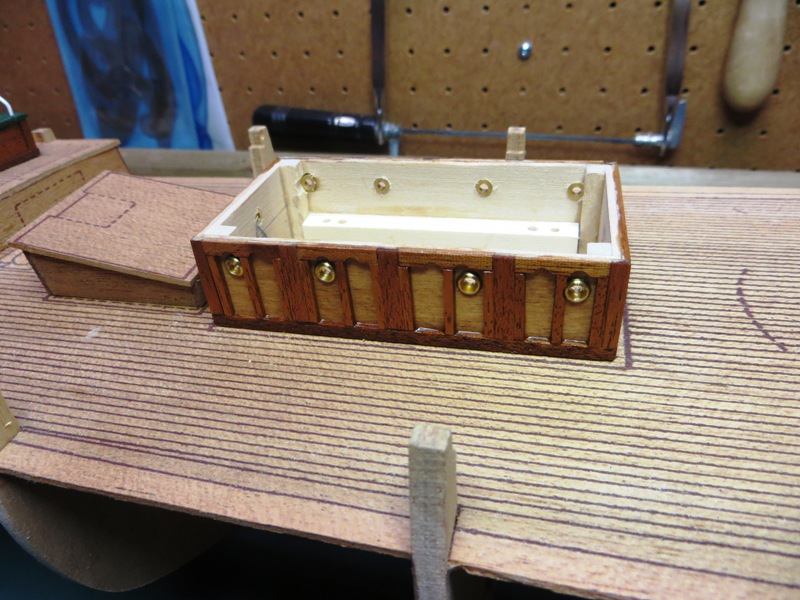
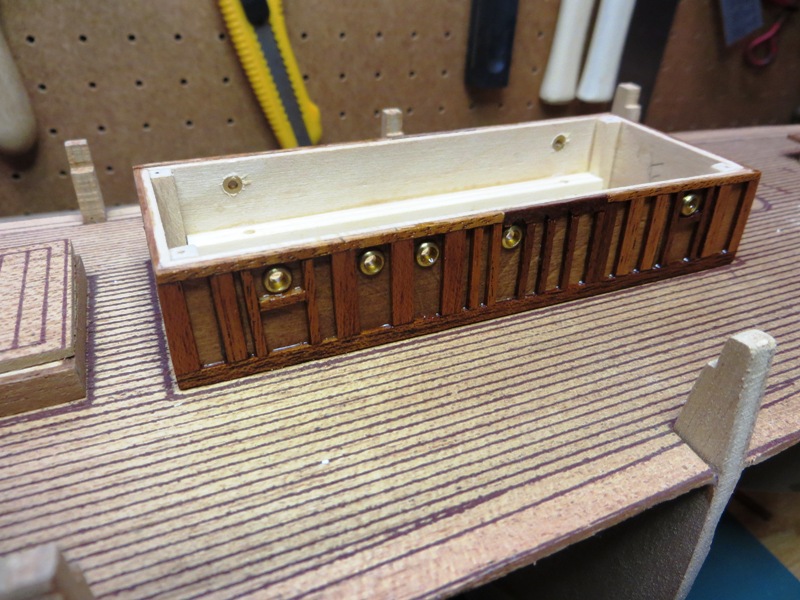
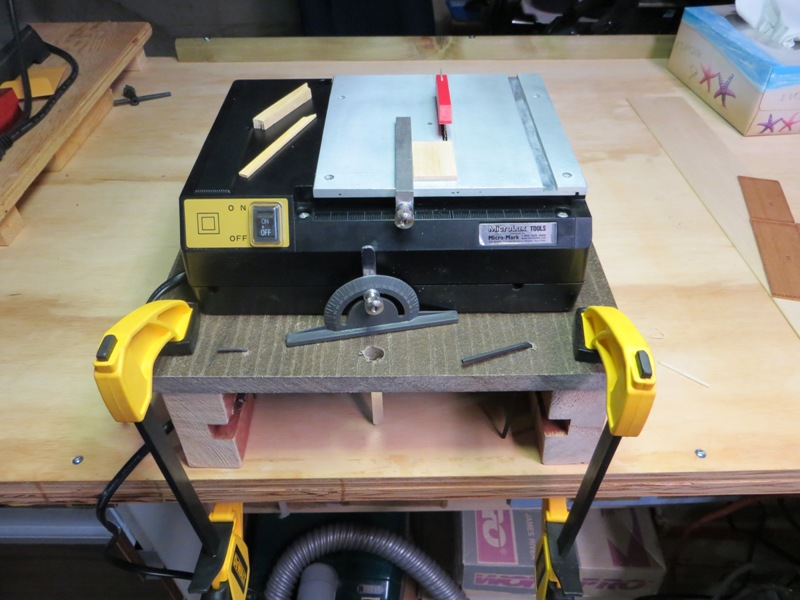
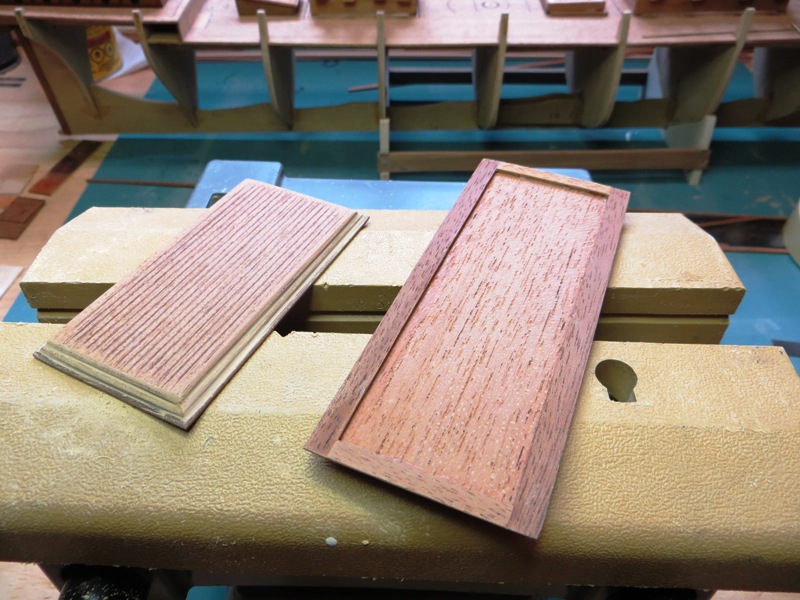
Plan B. I decided to fabricate the deck houses using plywood bulkheads, but utilise the printed deckhouse tops, as there was not issue with them. Enter the MicroMark table saw. It sure was handy cutting the panels used for the sides of the deck houses. In the past, I used a ruler and Xacto knives. Not the best... Stay tuned, more tomorrow. Peter

- 207 replies
-
- 2
-
-
- billing boats
- cutty sark
- (and 1 more)
-
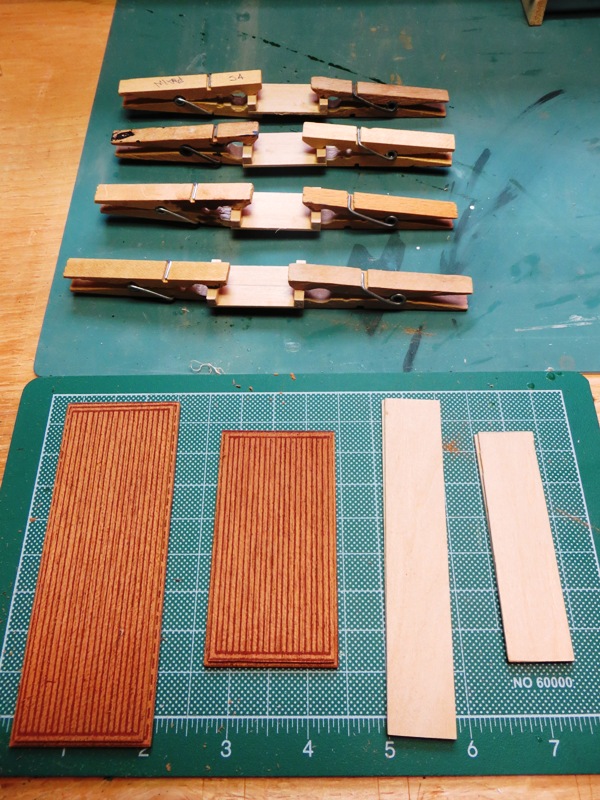
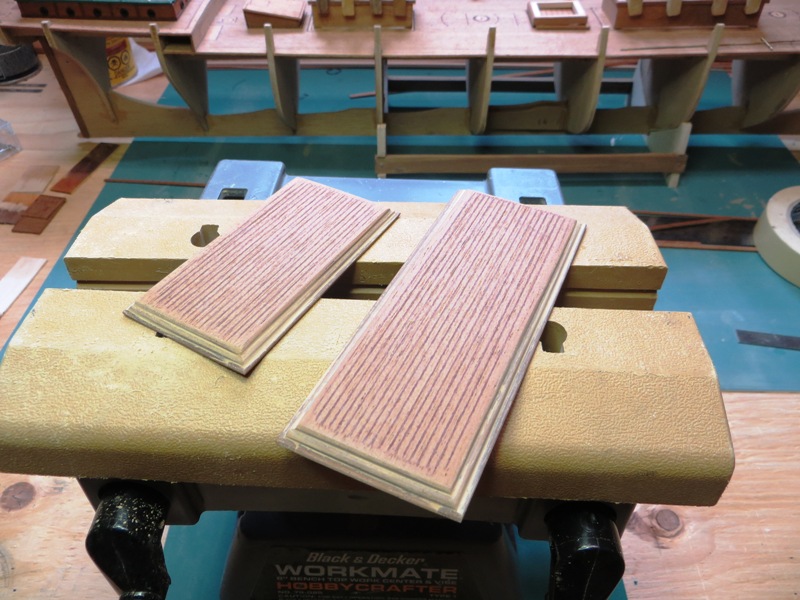
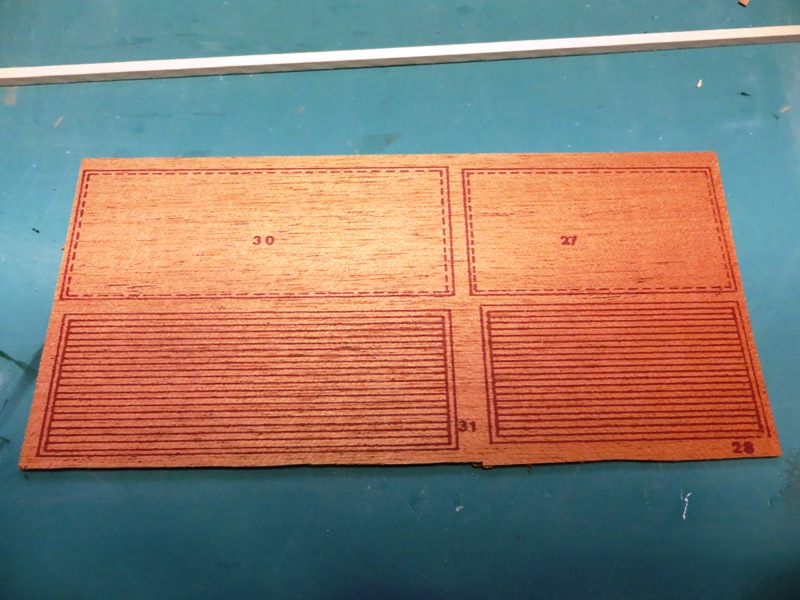
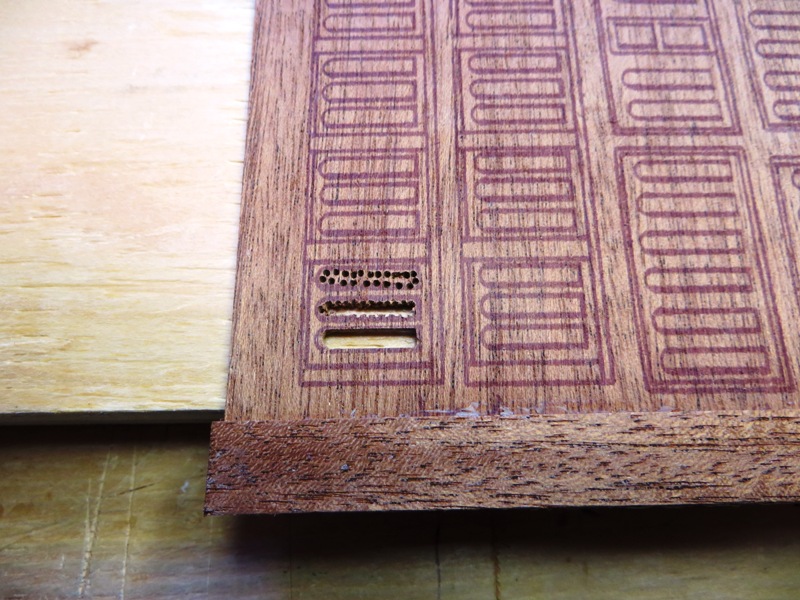
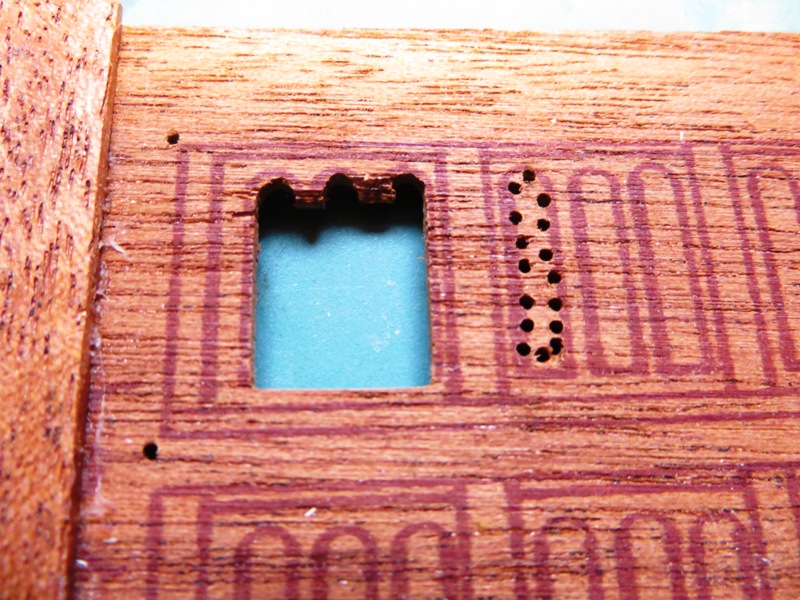
Contrary to popular belief, I am still involved in model boat building. I took a long break over the summer months, and then once I got going again, held off posting until I had something to show. I have decided to alter my construction order somewhat. In the past, the decking and hull planking were the first orders of business, once the bulkheads were attached to the keel. With this build I decided to complete the deck houses and hatchways first. This is because I have access to so much and the bulwarks and hull planks are not in the way. Once these are completed and the deck furniture is prepped, I will then plank the decks and then the hull. Here then are some fruits of labour. First of all, I was to discover that the 50 year old wood is not as moist and pliable as it once was. I am trying to use as much of the original kit as possible, only because this is what Mr. Billing provided. However, I soon learned that this might not be possible as the photos show. The wood was only too eager to split and crack. These are the original sheets provided with the outlines of the deck house components inked on. Because there was so much flex involved along the grain of the wood, I suspected that the sheet might split. Therefore a couple of battens were glued to the edges of the sheet to prevent it from doing so. A waste of time and glue as it turned out... I then attempted to cut out the panels and include the 3D aspect of the wood panelling. It didn't take long to realize that the exercise was hopeless. But hey, I had to try.

-
Hi Steve, Great work on your Bounty! Lots of progress made and the results are very nice indeed. The hull planking is especialy good, considering the bluff bow is a challenge. I once read that the white applied to the bottom of the hull was some kind of coating to discourage marine growth. Quite toxic in fact. I don't know how effective it was. I like the white too and used it on my Unicorn. Anyhoo, thanks for all the great photos, and I'll continue to follow your log. Peter
- 291 replies
-
- 5
-
-
- bounty
- billing boats
- (and 1 more)
-
Hi Steve, I've just stumbled onto you log and have really enjoyed watching the progress so far. I have built the older version of this Billing kit years ago, and seeing your log takes me back. I have also noted some of the building techniques you practice, and I'm hoping to get some ideas. You have some obvious talent as a carpenter. I have just subscribed to your log and look forward to following your progress. I would be interested to learn your plank tapering technique. I have used an xacto knife and sanding block in the past, but your method looks professional. If it's easy to explain I would really like to hear about it. Ahhhhh, I just looked back at your tapering technique and I think I figured it out! That is slick! Now I just have to look back at your plank cutting jig... Happy building! Peter
- 291 replies
-
- 4
-
-
- bounty
- billing boats
- (and 1 more)
-
Hi Primey, I'm a user of copper tape for my copper bottomed hulls. I have used it on my Bounty and E'toile with satisfying results. Being an adhesive tape, there's no glue involved so it's quick and easy. I'm a fan of "quick and easy". The tape is also thin enough that a rebate is not necessary. Hope this is a help. Cheers, Peter
-
Hi Primey, I just ran across your CS log and just wanted to chime in on your great planking work so far. I am also a Cutty Sark builder so I'd like to follow along. It will be interesting to see the materials and fittings supplied with the kit as your build log progresses. The wood looks to be in great shape for such an old kit. I have never heard of this kit manufacturer, and I suspect you're the only member on the site with this kit. A unique build log, to be sure! Have fun! Peter
-
Too true Patrick. I also have an old Billing kit and have been replacing the old warped wood with newer material. However, having built several Billing models, I can say that talented builders like yourself can bring out the best in them. It just takes a little extra care and attention. Cheers, Peter
- 63 replies
-
- 3
-
-
- vasa
- billing boats
- (and 1 more)
-
Stunning model Patrick. I think we can put the debate of poor model quality by Billing to rest. You have built a lovely model so far. Thanks for all the photos. Peter
- 63 replies
-
- 2
-
-
- vasa
- billing boats
- (and 1 more)
-
Your model looks fantastic Jens. A real inspiration to get the lead out in my own shipyard. Thanks for all the updates and photos. Peter
- 188 replies
-
- 2
-
-
- cutty sark
- billing boats
- (and 1 more)
-
Fantastico Mark! What a bruiser of a ship, once you see the size of the hull. Thanks for the update. Very inspiring. Peter
- 652 replies
-
- 1
-
-
- royal william
- euromodel
- (and 1 more)
-
I'm really enjoying your build log Mark. You have taken great photos and it is a pleasure to look at your work. I can't wait to start my own Royal William. With three amazing build logs to go by on the site, it should be a piece of cake....just kidding! Looking forward to more posts! Peter
- 652 replies
-
- 3
-
-
- royal william
- euromodel
- (and 1 more)
-
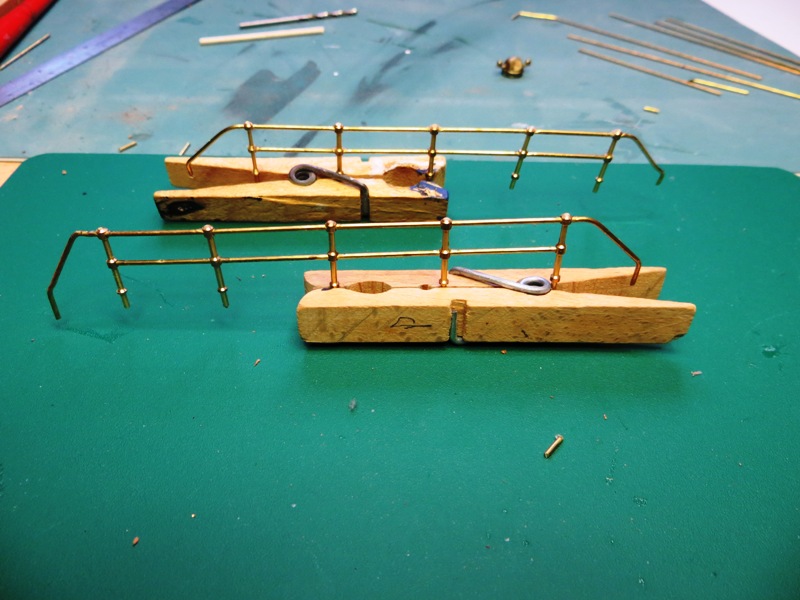
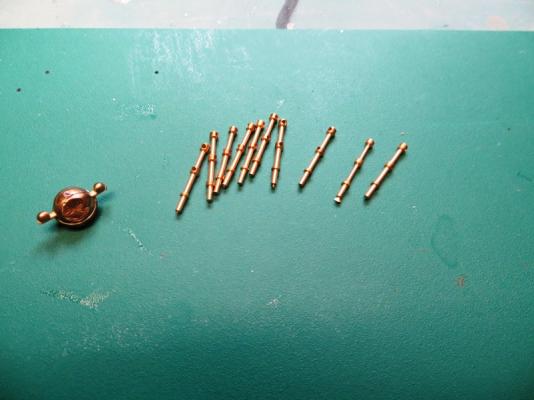
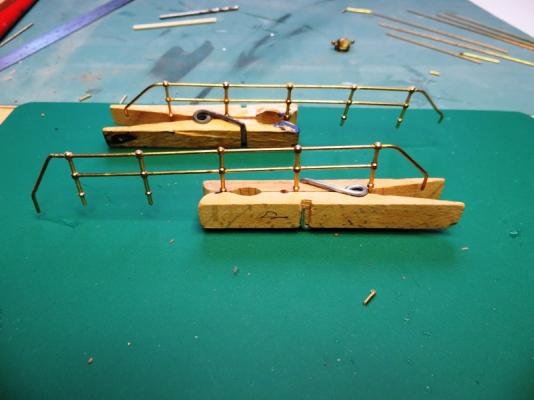
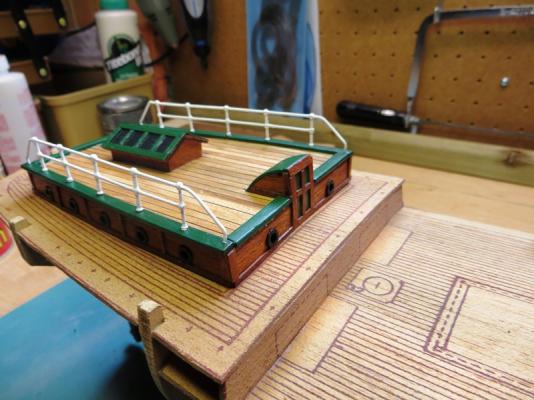
Time to add the railing to the cabintop... I made the railings to measure in the model and then removed them for painting. That just about does it for this part of the build. Now onto other deck structures....

- 207 replies
-
- 6
-
-
- billing boats
- cutty sark
- (and 1 more)
-
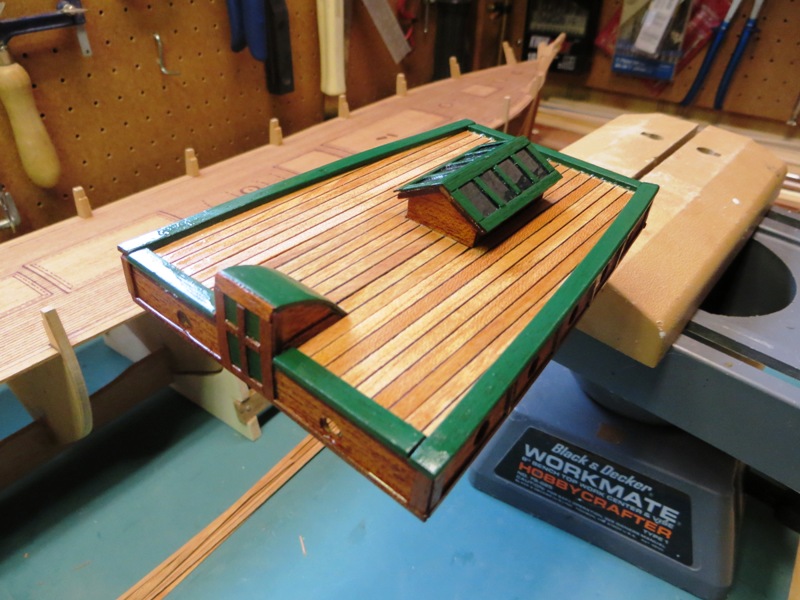
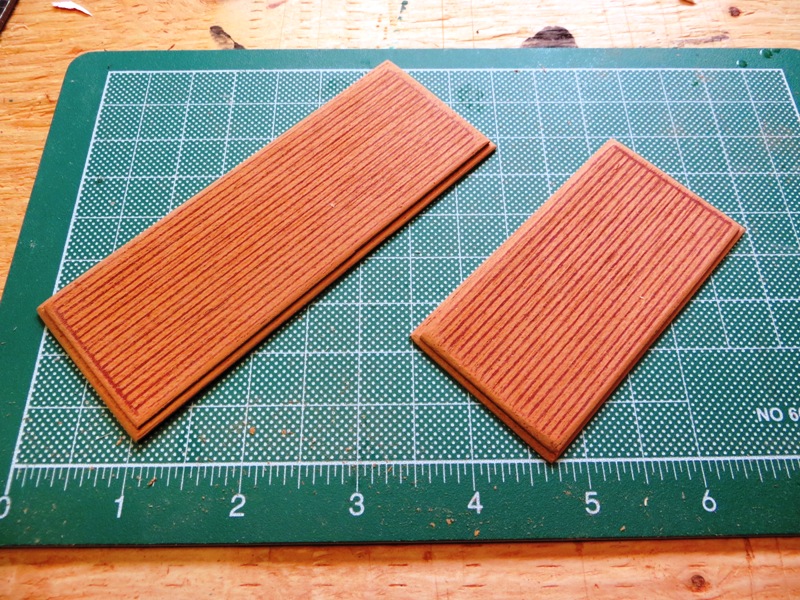
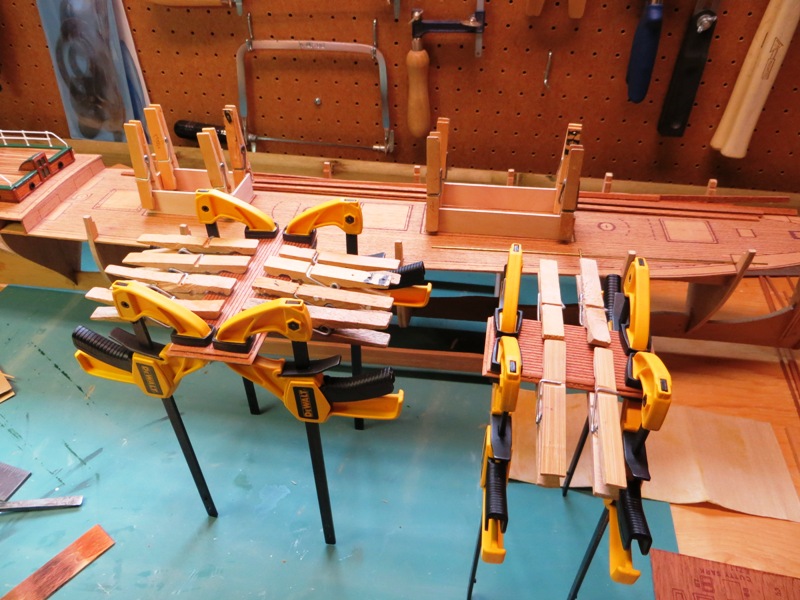
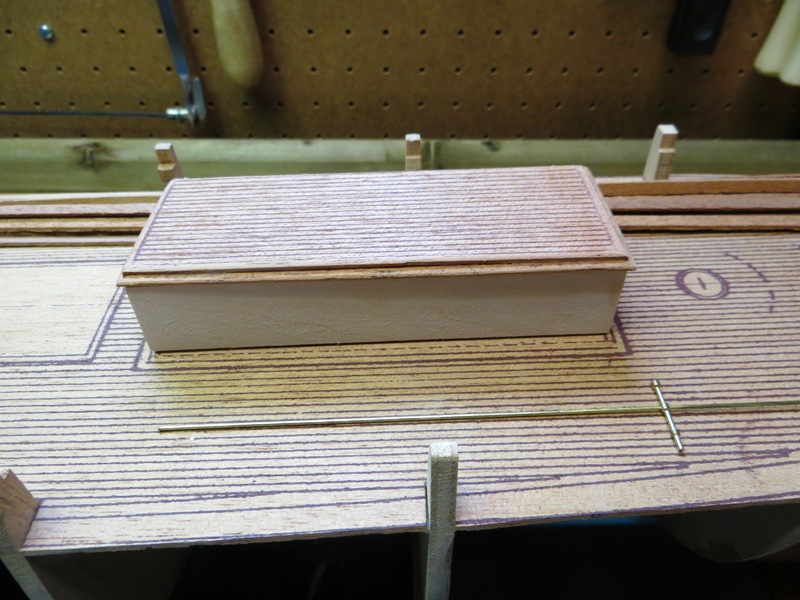
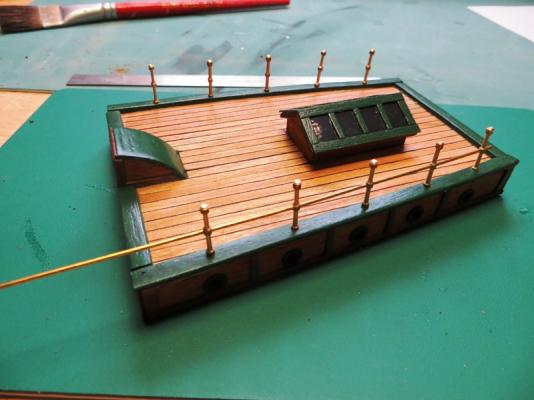
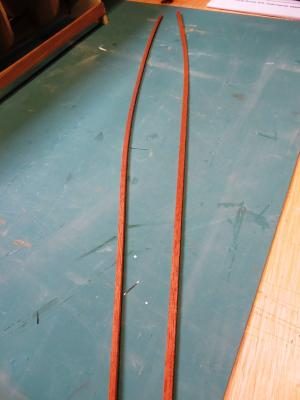
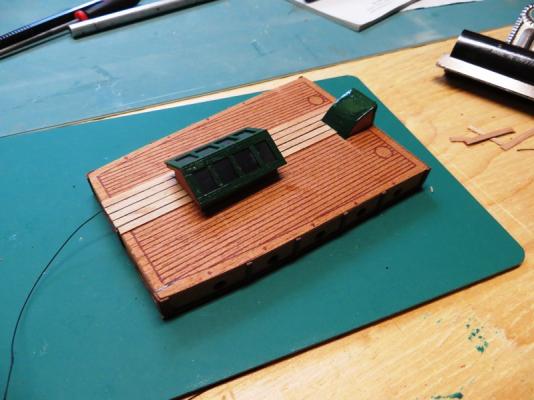
Time to dress up the cabin roof with some planking and trim... The advantage of a 50 year old kit and its wood become apparent when you're looking for some planks with a curve along their horizontal length! I needed them to follow the fore and aft contour along the sides of the cabin top. Here the deck planking is being installed along with the "caulking".

- 207 replies
-
- 5
-
-
- billing boats
- cutty sark
- (and 1 more)
-
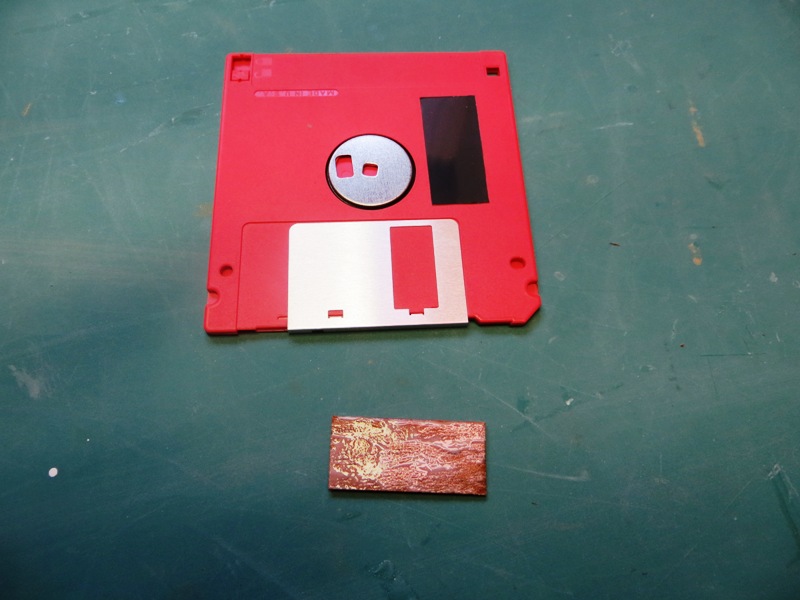
The skylight needs glass and for this I use a floppy disk. And you thought they were obsolete! I simply glue the disk onto the skylight roof. Easy-peasy! Here it is finished.


- 207 replies
-
- 6
-
-
- billing boats
- cutty sark
- (and 1 more)
-
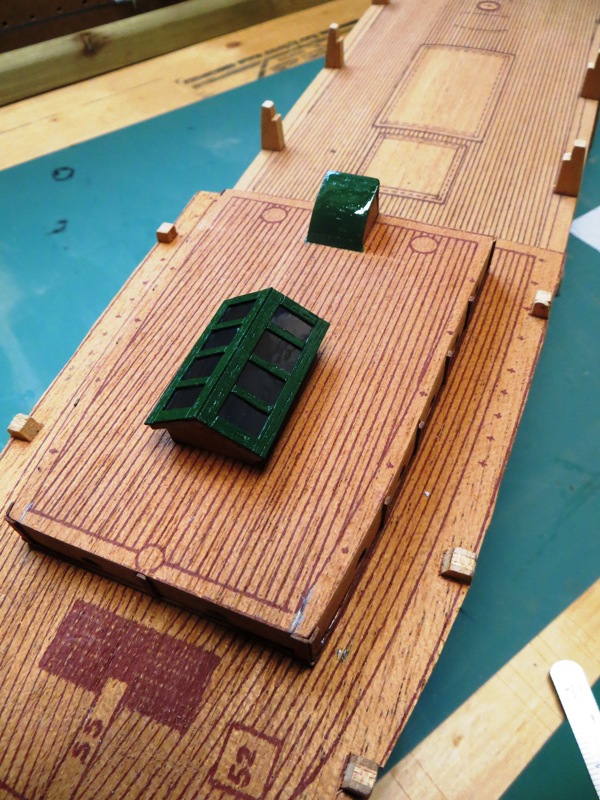
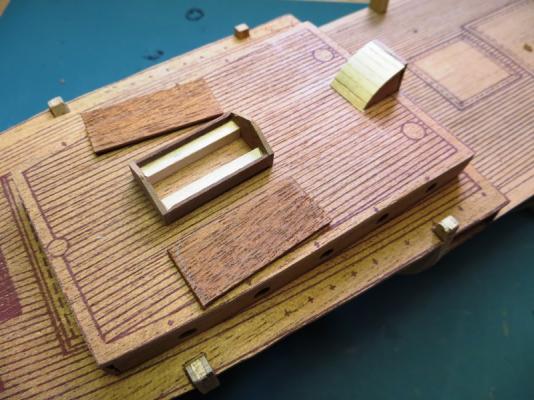
Here's the assembly of the skylight and companionway...

- 207 replies
-
- 4
-
-
- billing boats
- cutty sark
- (and 1 more)
-
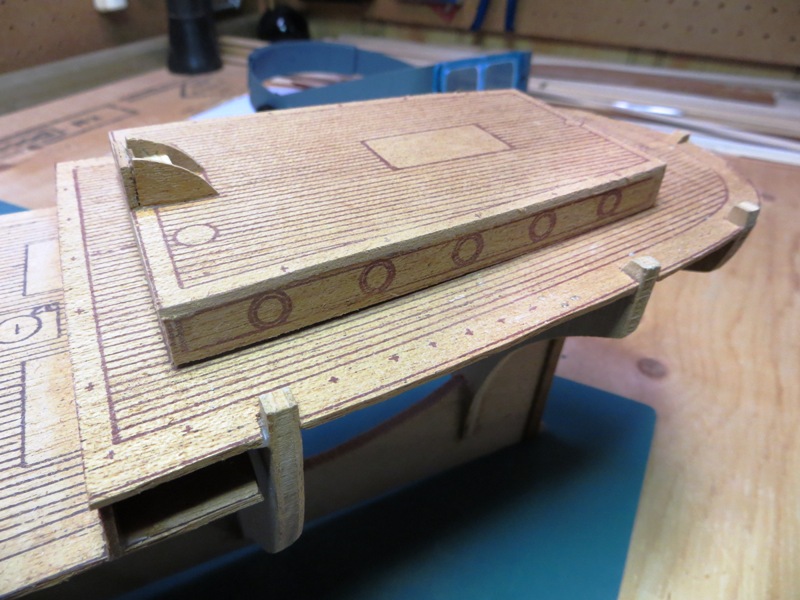
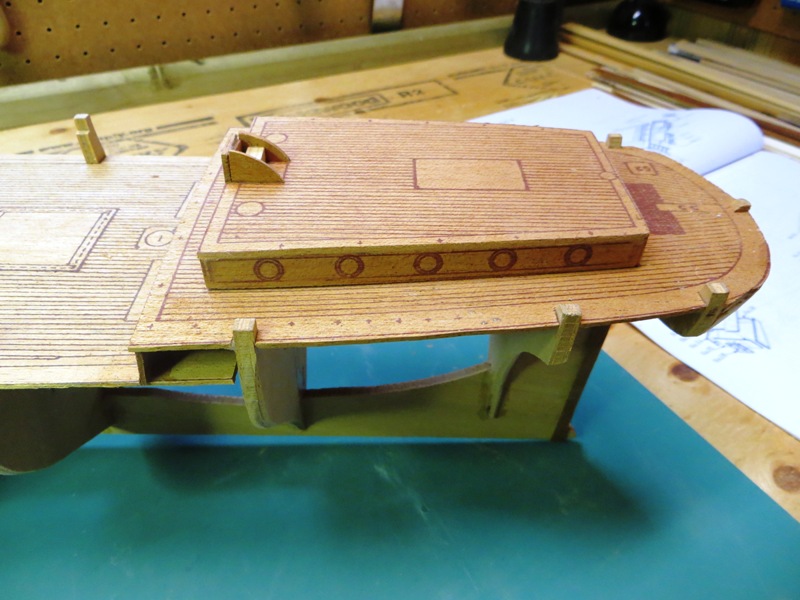
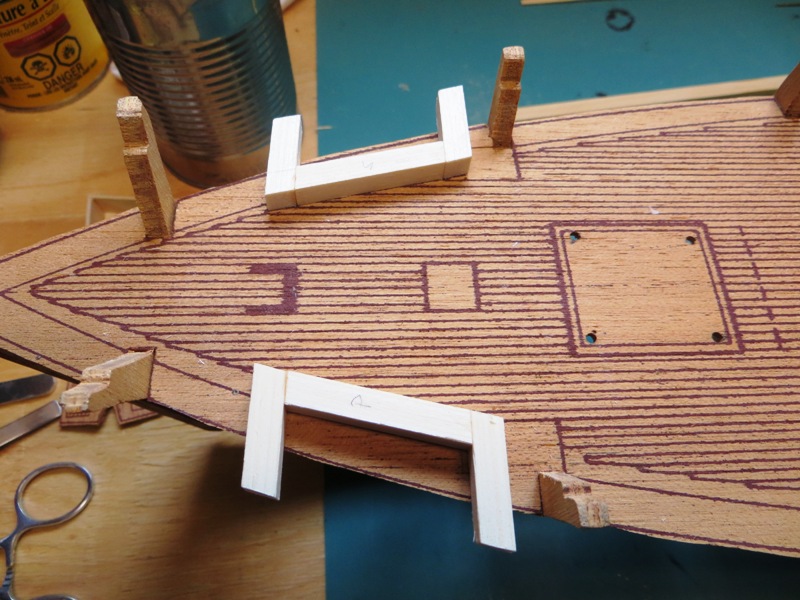
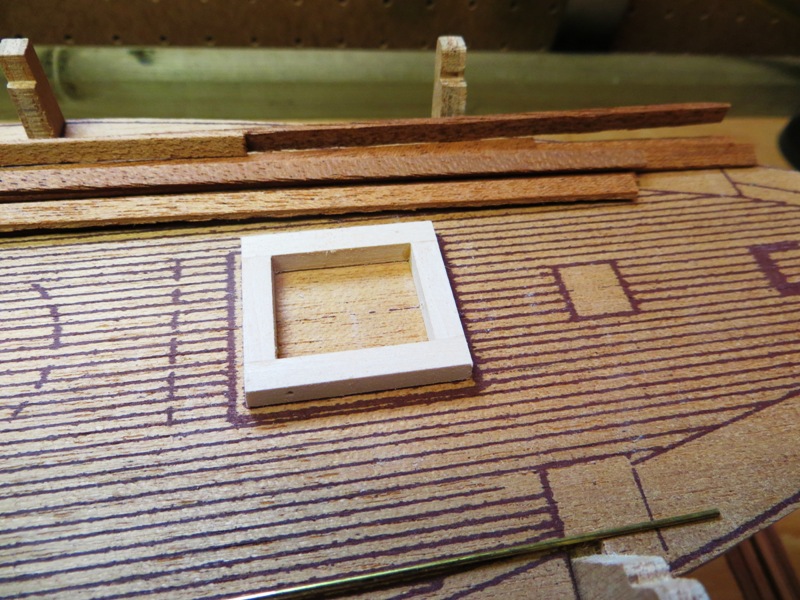
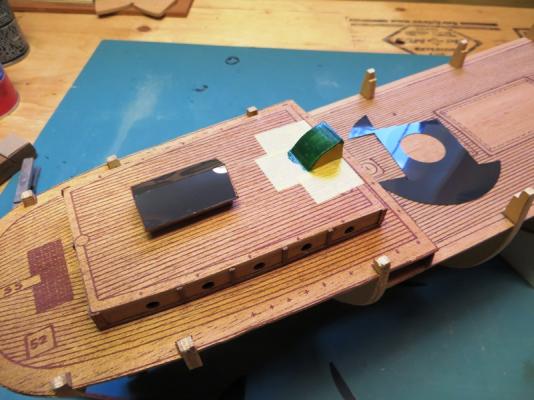
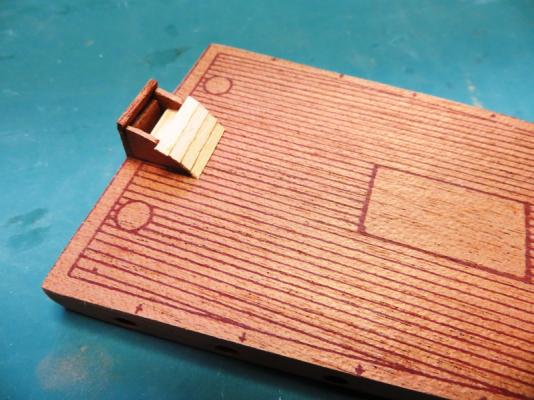
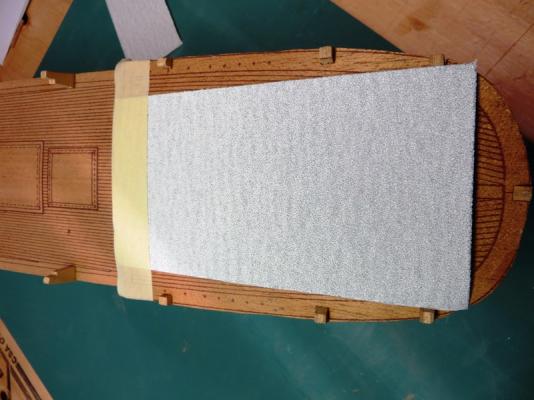
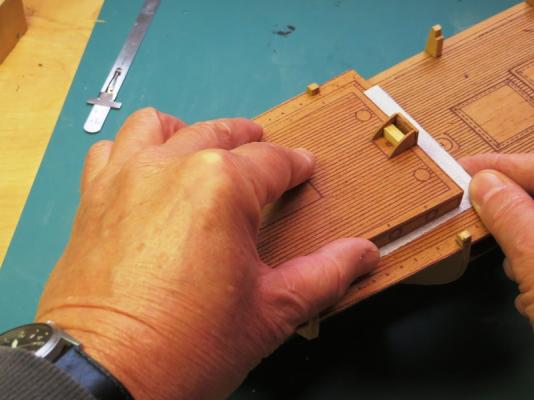
The coamings of the cabin roof did not fit flush onto the aft deck so some modification was required. Here's how I did that.. Here you can see the gap between the deck and the coaming. Then I laid a sheet of sandpaper on the deck and skidded the coaming fore and aft along the sandpaper to introduce the camber into the coaming assembly. Now the coaming makes full contact with the deck.


- 207 replies
-
- 6
-
-
- billing boats
- cutty sark
- (and 1 more)
-
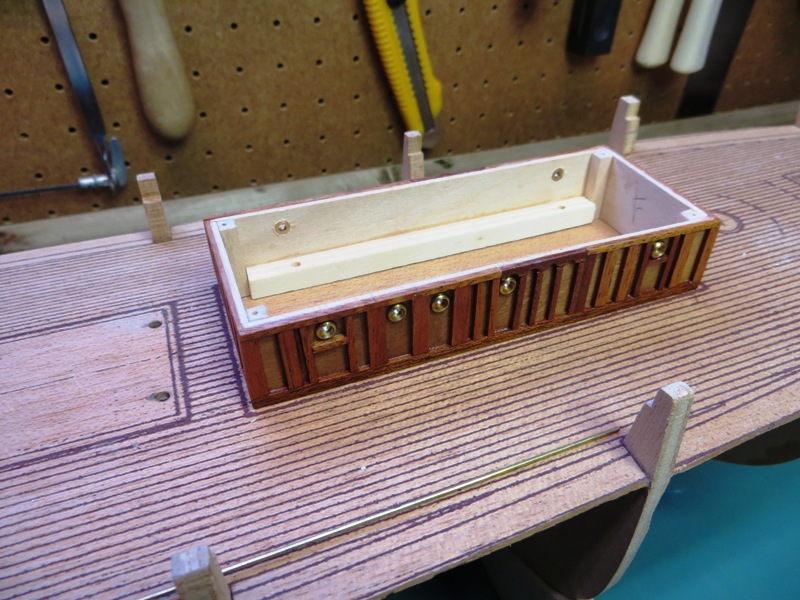
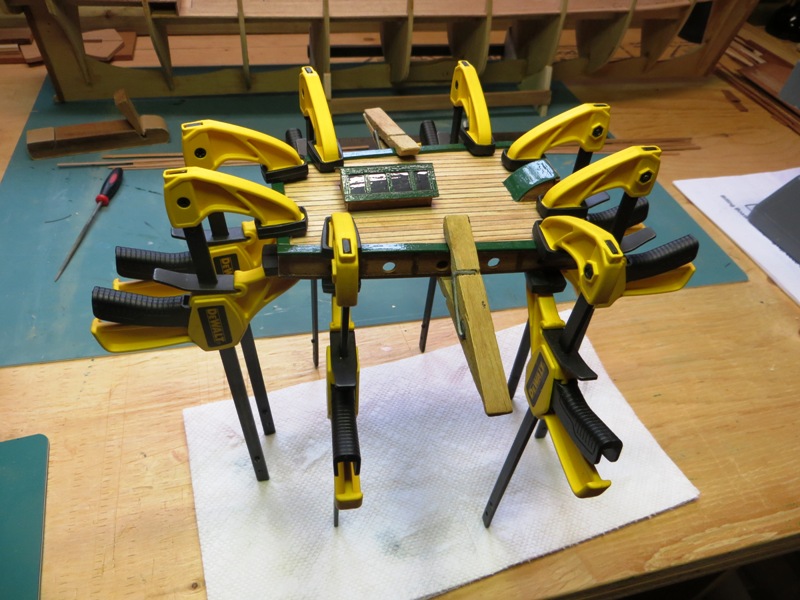
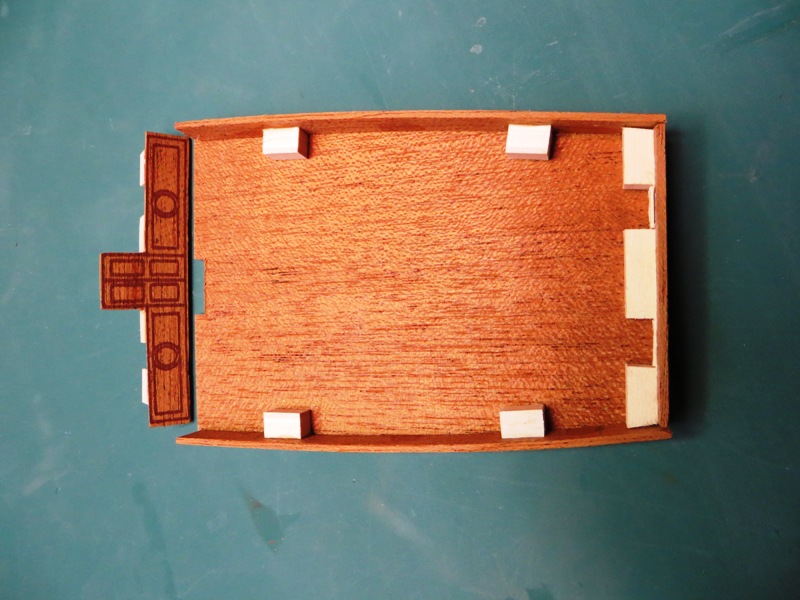
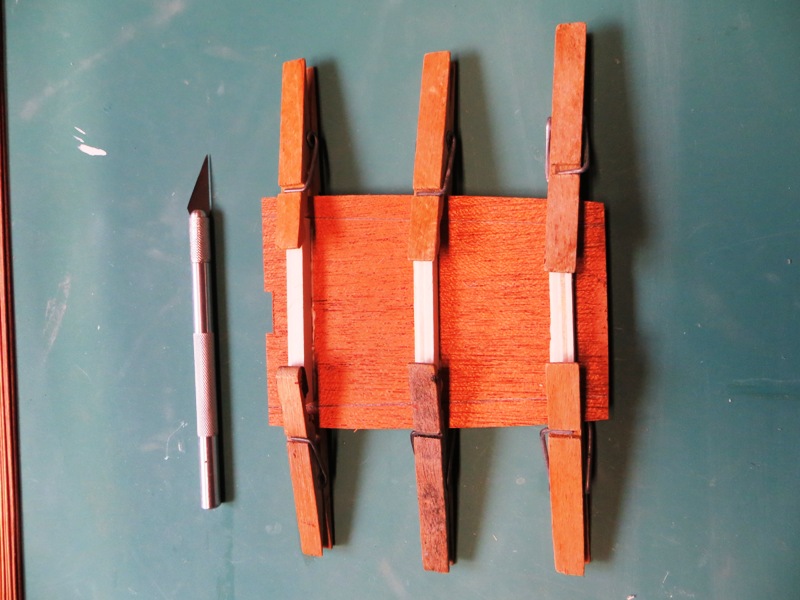
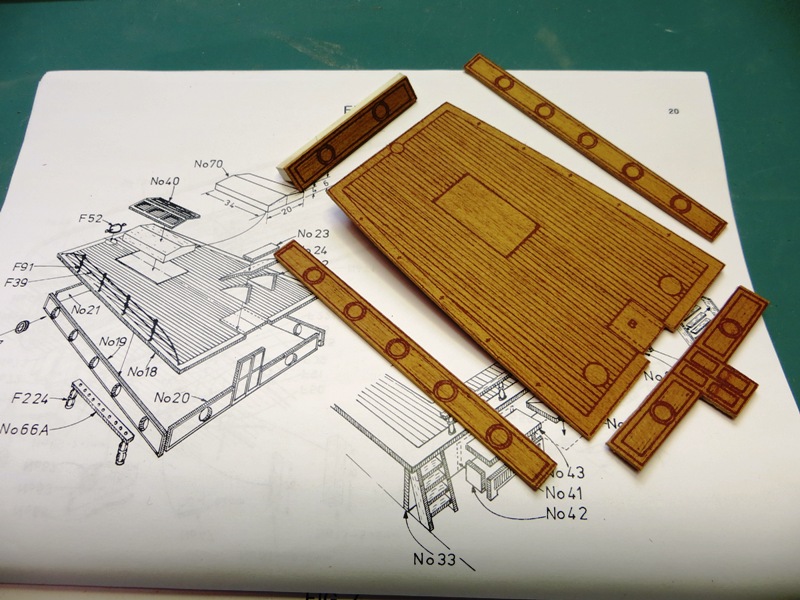
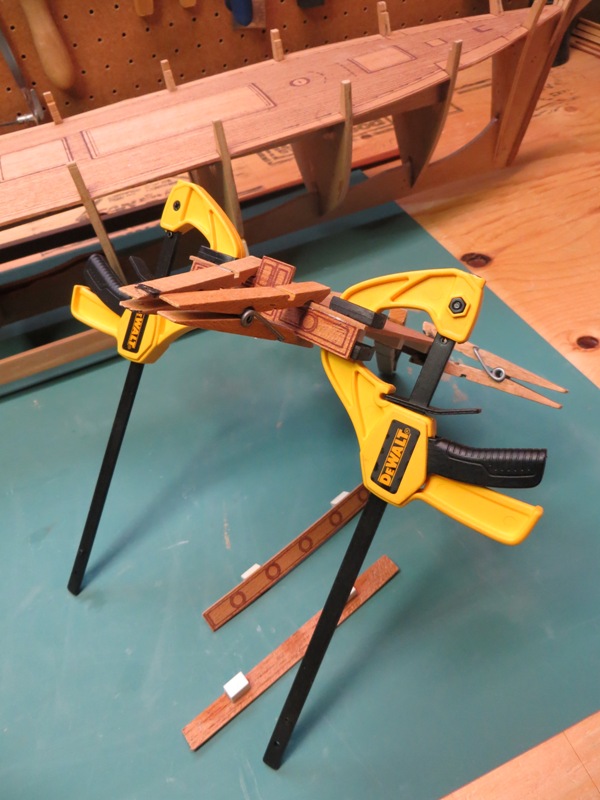
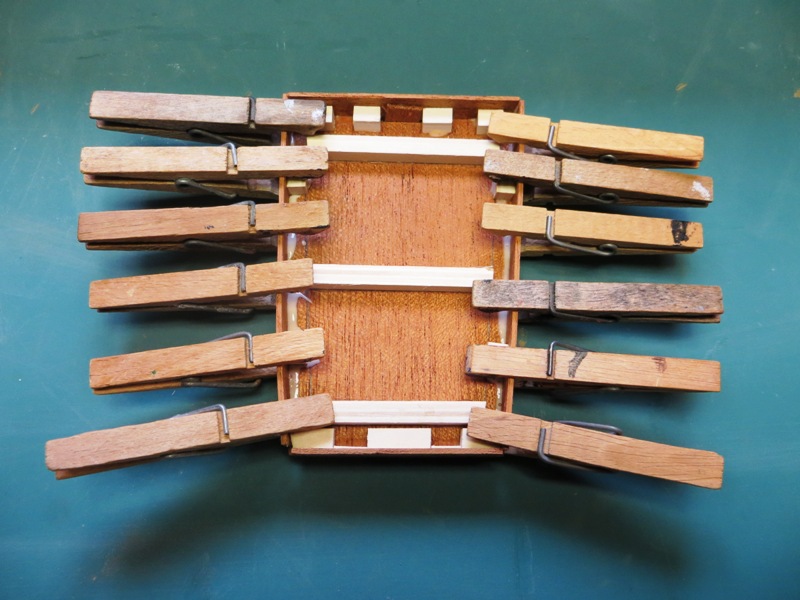
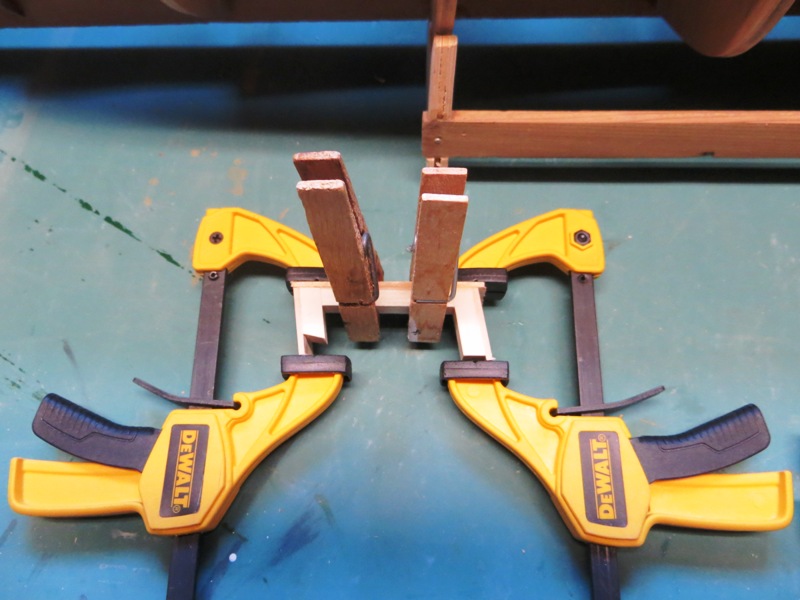
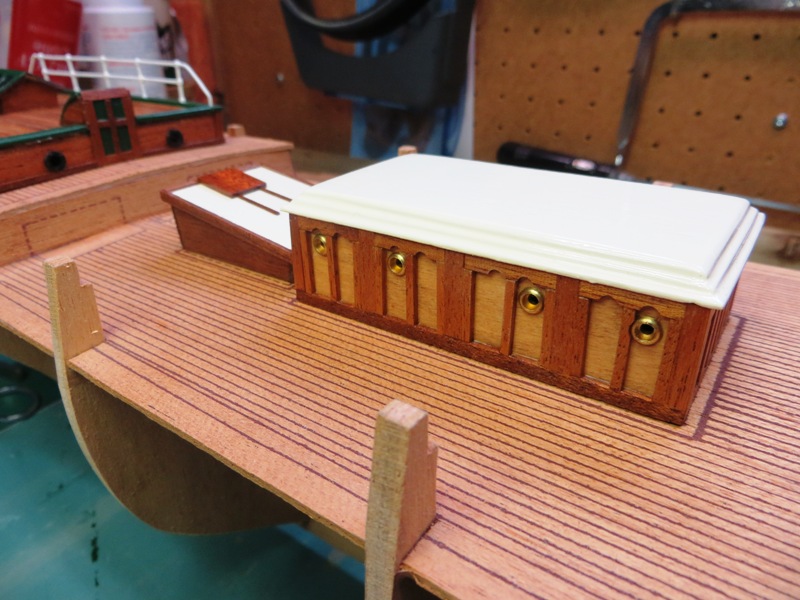
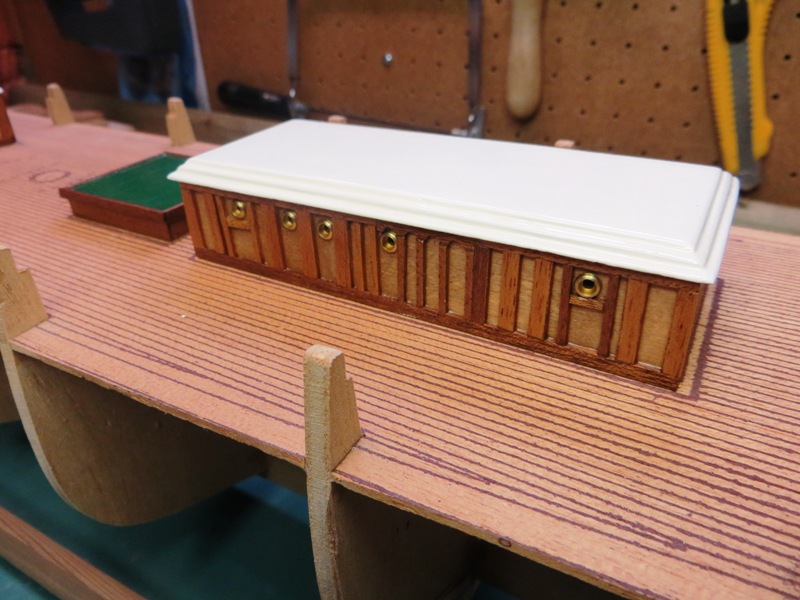
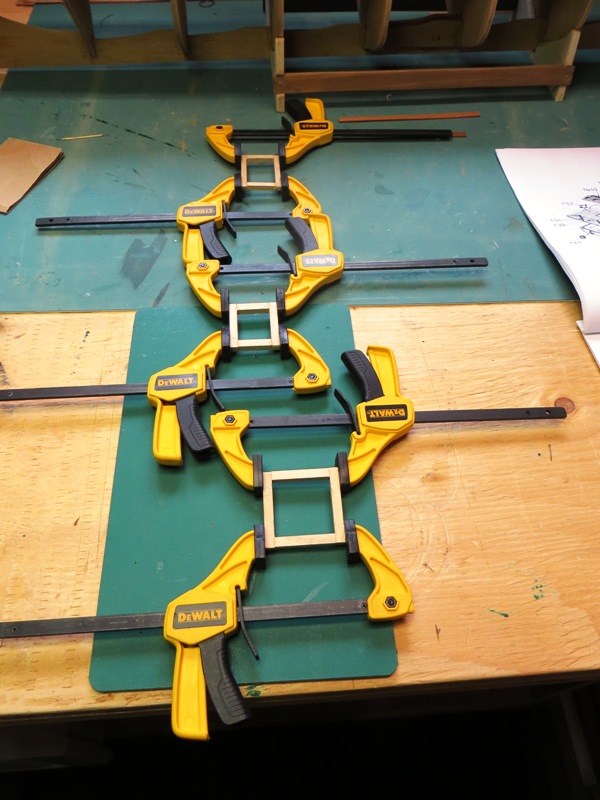
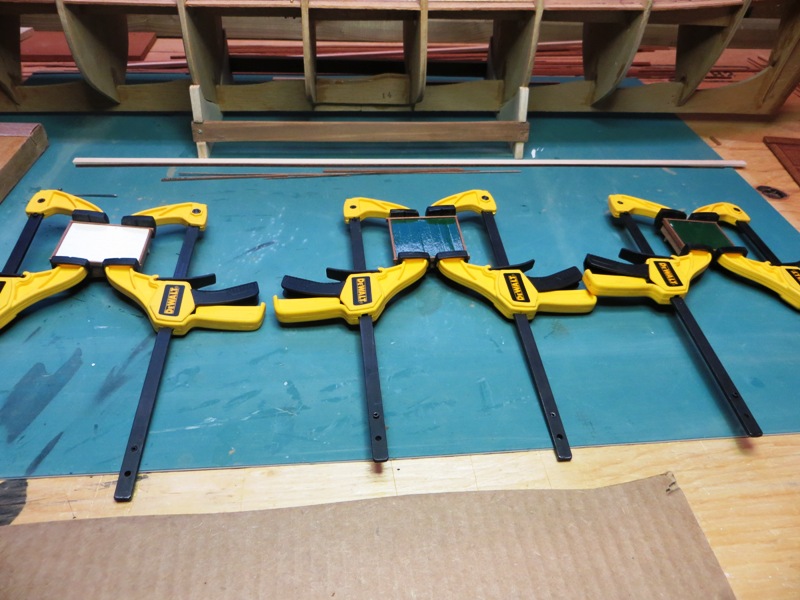
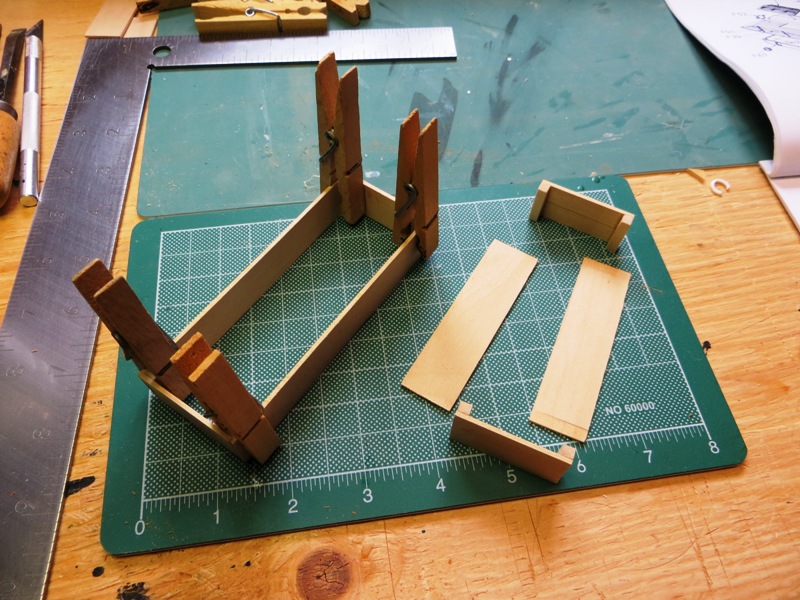
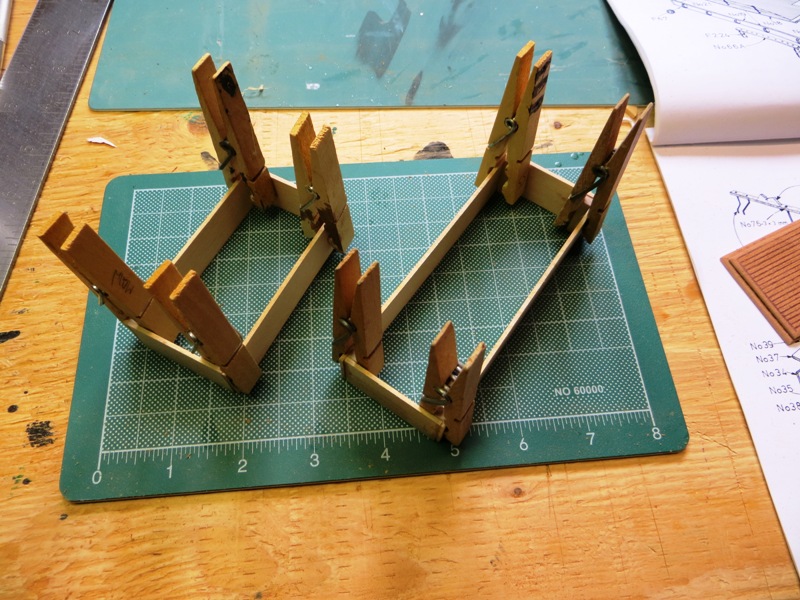
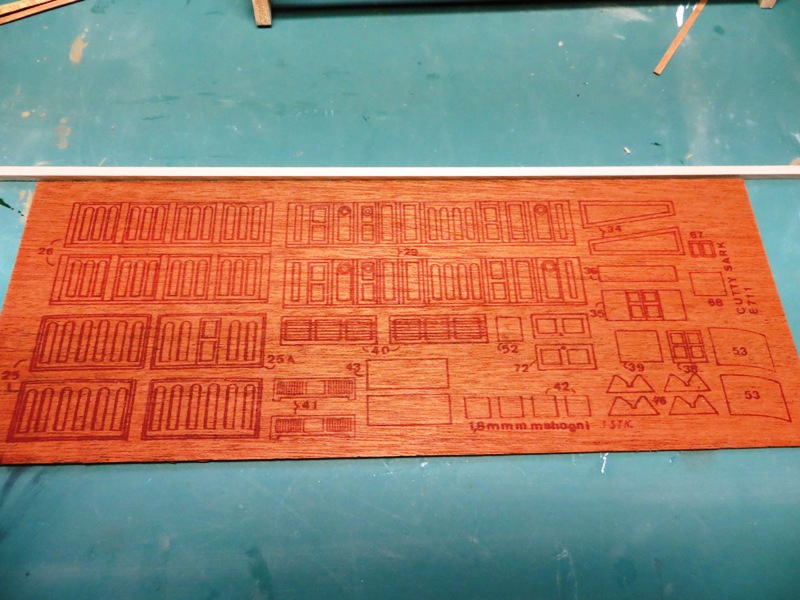
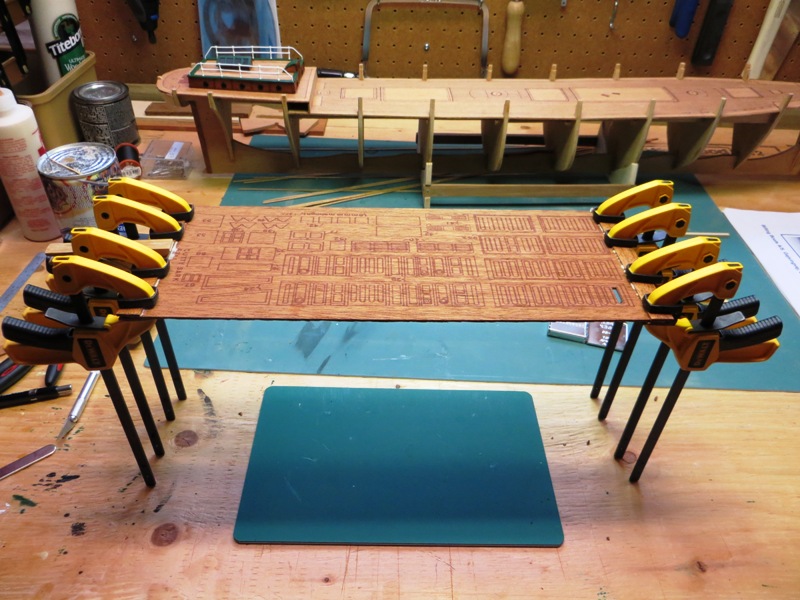
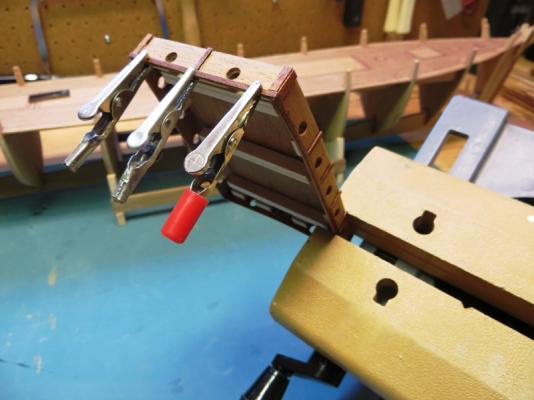
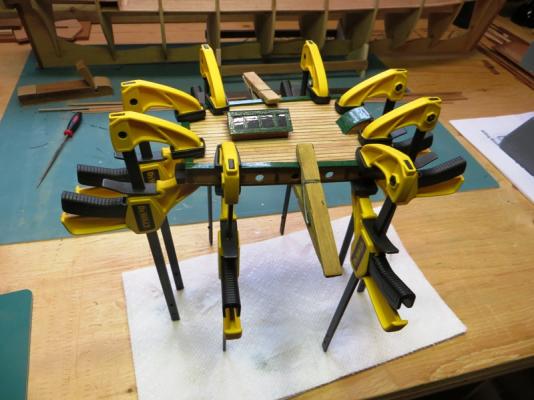
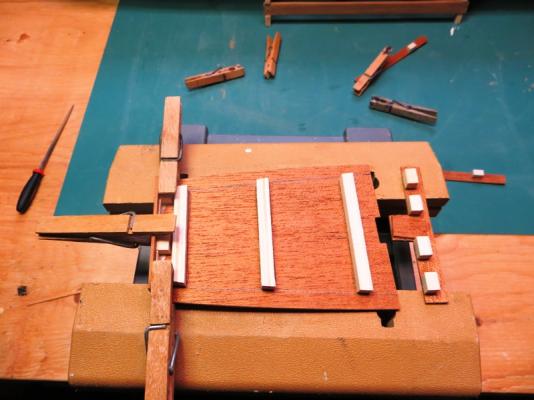
Hi guys, Thanks for looking in and the encouragement and ideas. It's much appreciated! After lots of consideration on where to start, I decided to tackle the after cabin roof of all things. I thought I would make the deck planking the first job on the build. And then I was thinking about the camber the deck has and how the deck houses would be installed. With the absence of the deck planking I could assemble the various deck structures and sand the cambers into them. I will demonstrate later with a picture. So, here goes.... I have decided to use as much of the material supplied with this 50 year old kit and build it much as Mr. Billing intended. The "pieces" are not laser cut but inked onto sheets of mahogany, which must be cut out manually. I have a modern day version of Billing's instructions for the current Cutty Sark kit which you can see in the photo. The instructions that came with the kit I have are minimal. I prepped the various pieces for assembly. This entailed adding blocks of wood to the edges of the sides so that there would be more surface area to glue the pieces together. Also the cabin roof was a bit warped so I glued some "beams" on to straighten it out. Here, the sides, front and rear coamings are added to the cabin roof, using high tech clothes pins. I have also purchased the clamps recently and they are awesome! My new favourite tool!


- 207 replies
-
- 5
-
-
- billing boats
- cutty sark
- (and 1 more)
-
Hi Mark, Beautiful hull! It's a special phase of the build to complete. Now onto the finishing phase! I am also one of the "Cutty Club", building an older Billing kit. I'll follow along with yours to get ideas and inspiration. Cheers, Peter
- 71 replies
-
- 1
-
-
- cutty sark
- mantua
- (and 2 more)
-
Hallo Jens, I am also building this old kit, that I received from a friend. Mine has the even older mahogany wood for the hull planking which I will be replacing. I enjoyed looking at your build. You have used some original techniques which add alot of interesting details. Thanks for posting your log. Peter
- 188 replies
-
- 3
-
-
- cutty sark
- billing boats
- (and 1 more)
-
Hi Ian, The binnacle is a great addition to your model! Lovely work. As for the bulwark, I would lean towards a wood dowel of sufficient diameter instead of the brass rod. They are easier to hide I think and easier to sand to the correct length. Just an idea... Looking forward to your final solution. Good luck! Peter