


petervisser
-
Posts
580 -
Joined
-
Last visited
Content Type
Profiles
Forums
Gallery
Events
Everything posted by petervisser
-
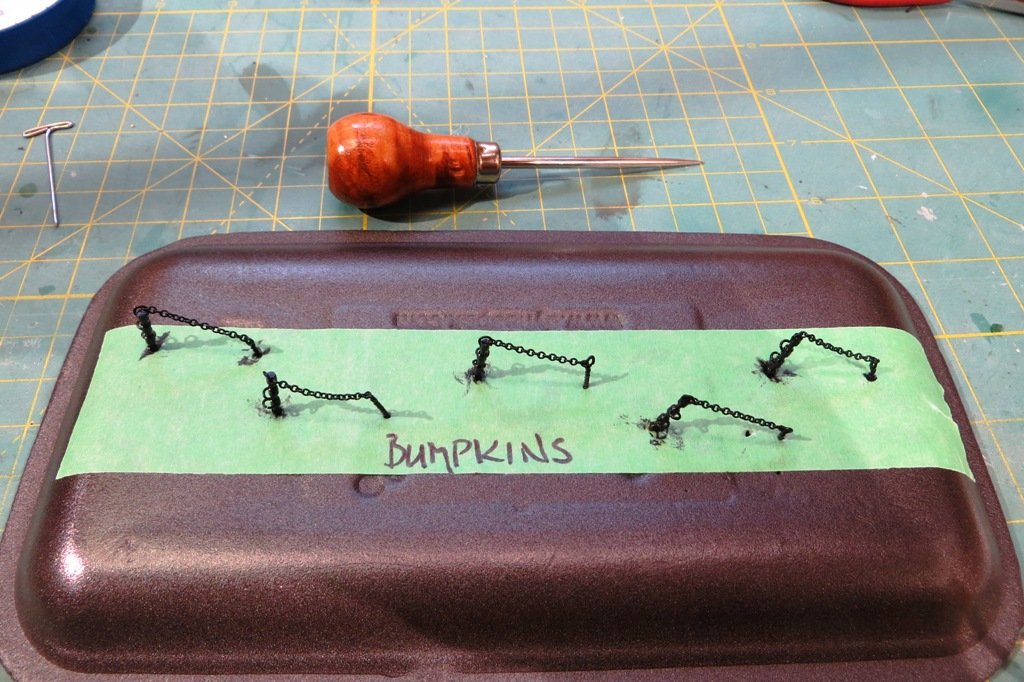
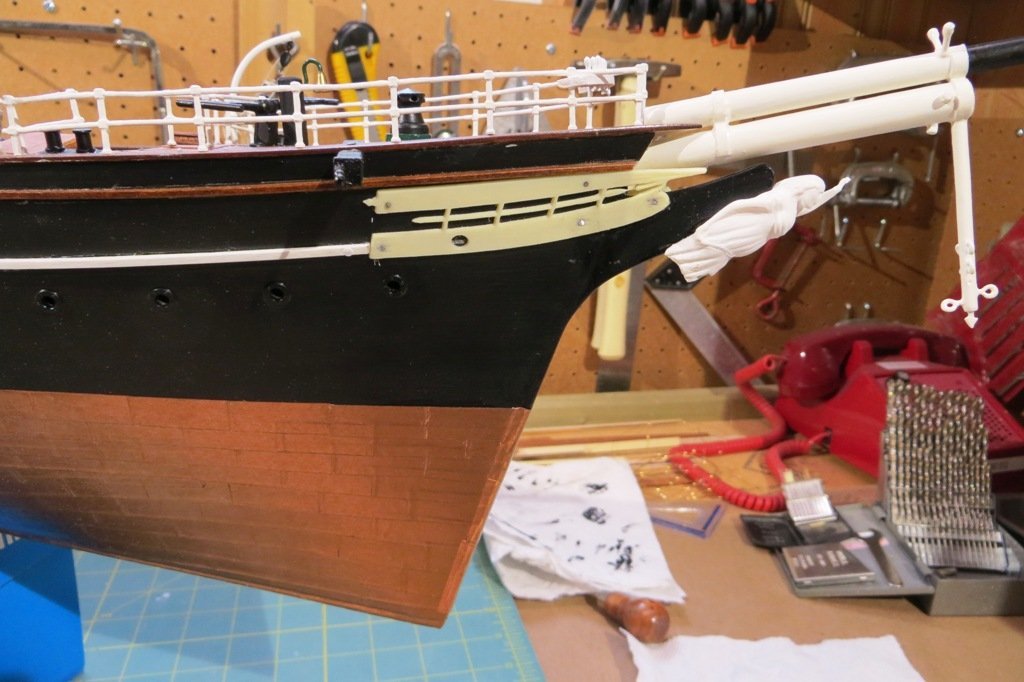
 This morning the bumpkins were taken on. These are made with some stantions and split rings, some chain and manufactured eyebolts as well. Bumpkins are used for the braces on the fore and mainmast sails, including the courses and upper and lower topsails. They're well illustrated in Longridges book of the CS, which I'm relying on more and more.
- 207 replies
-
- 3
-

-
- billing boats
- cutty sark
- (and 1 more)
-
I have recently had issues adding text below a photo. After inserting the photo into the post, I then move the prompt below the picture in order to add a caption. However, the prompt immediately moves to left hand side of the picture at the middle of the picture. I have never had this issue before and hope that you can suggest a workaround. Cheers, Peter
-
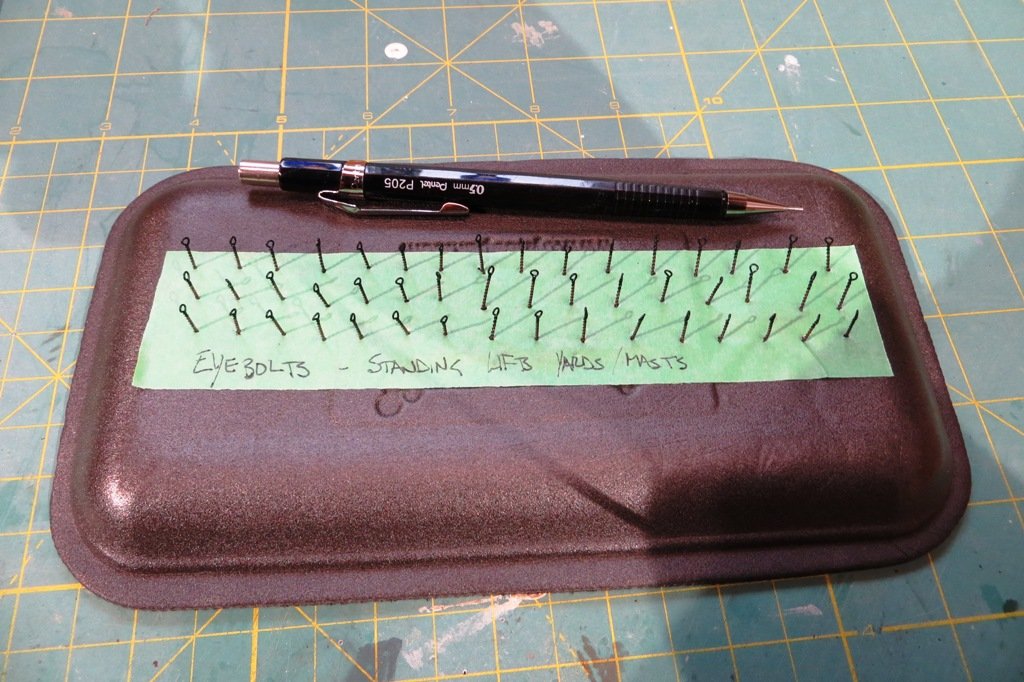
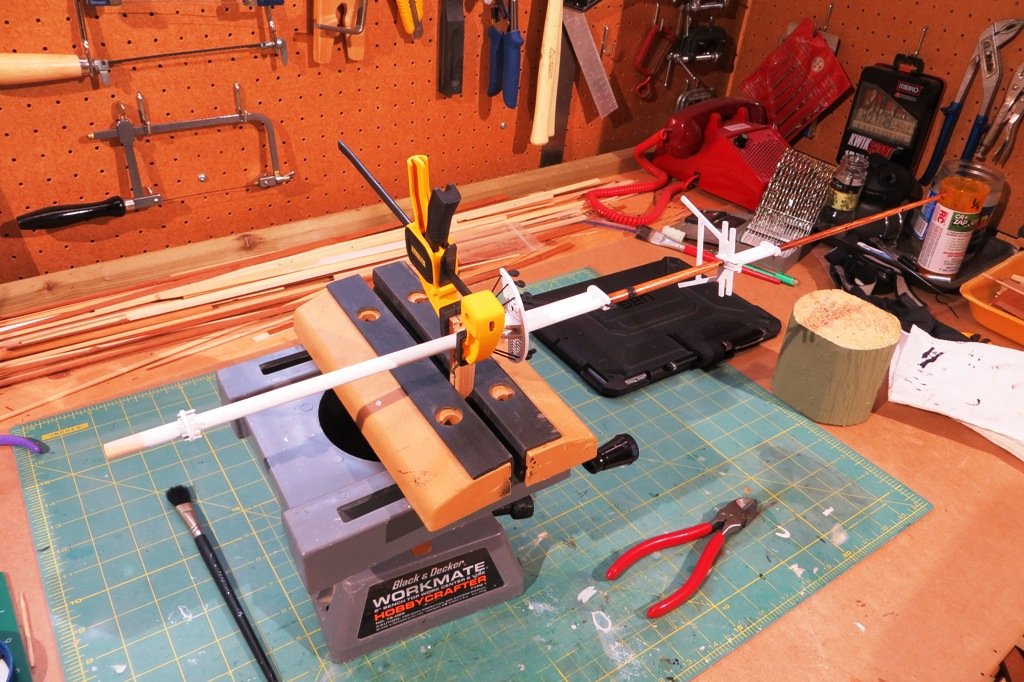
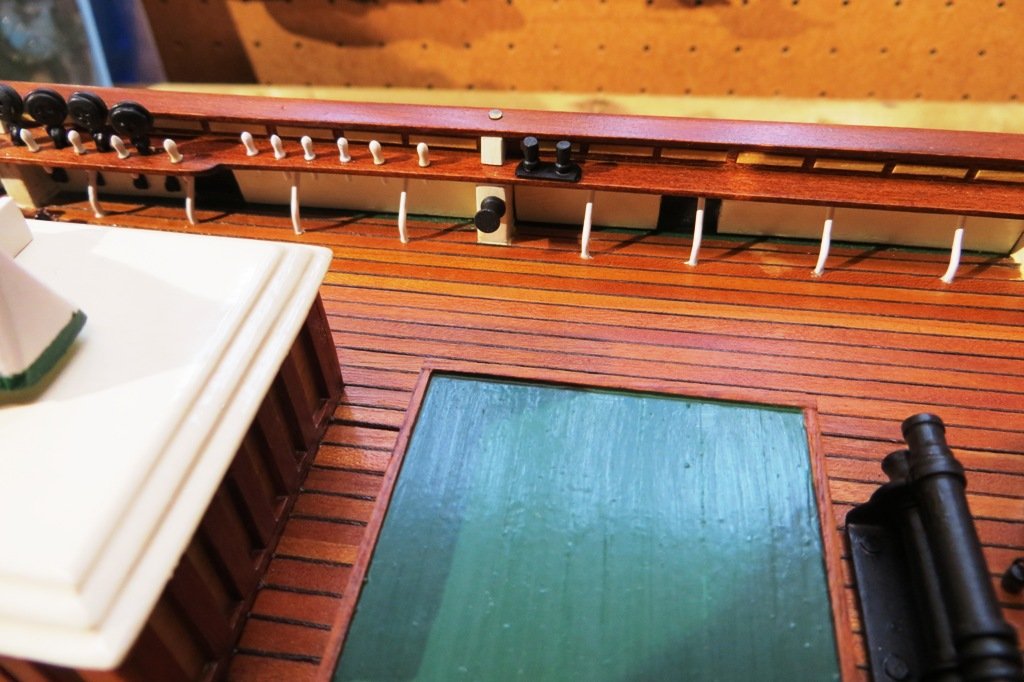
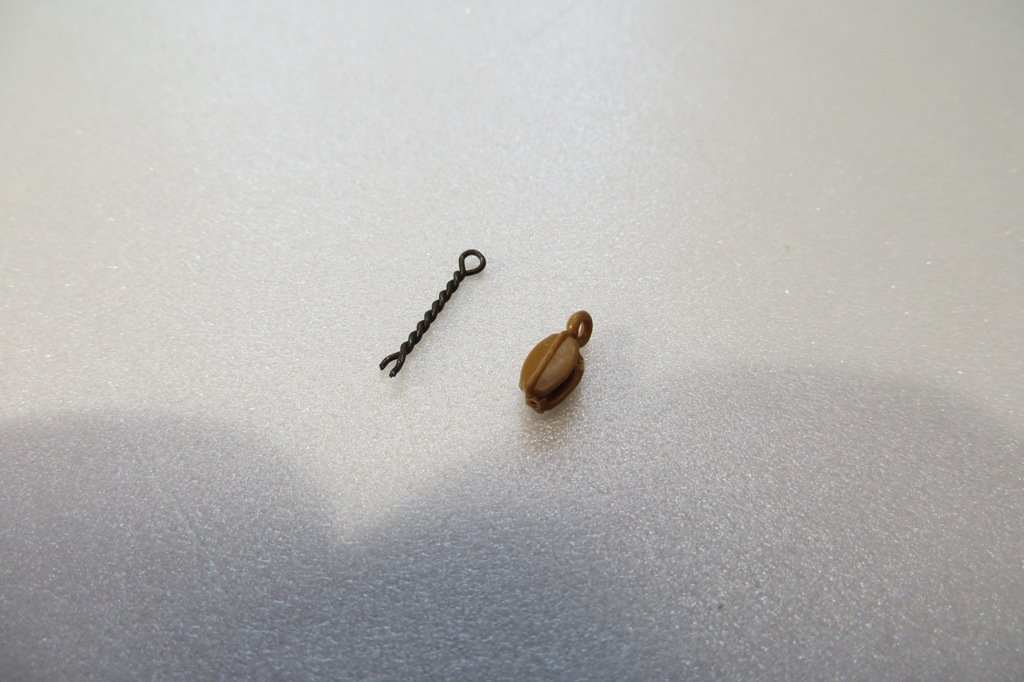
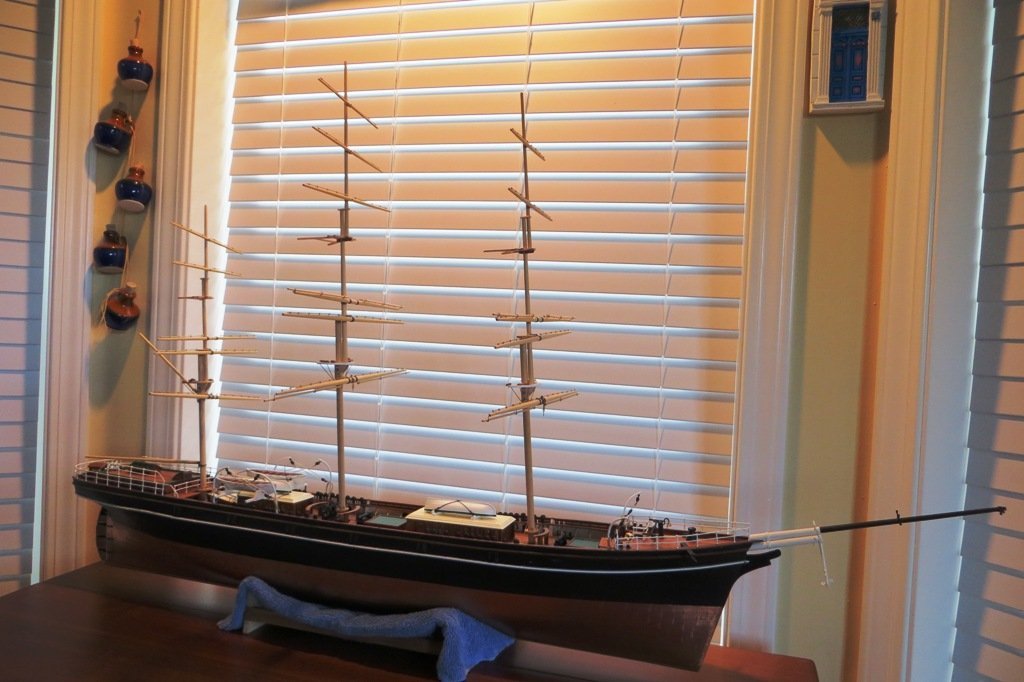
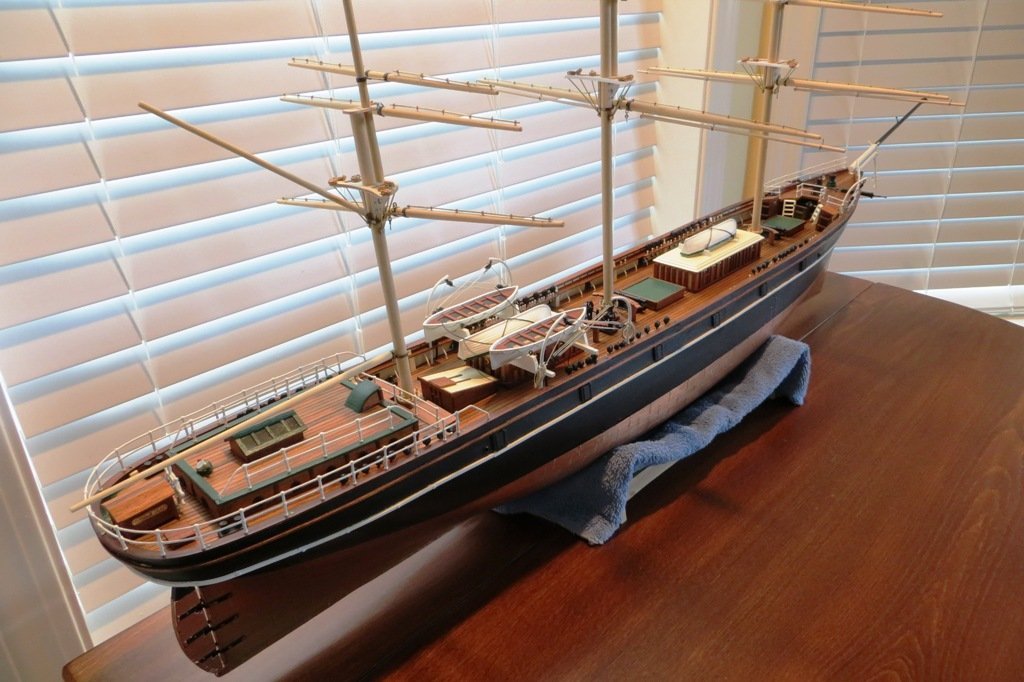
Hi All, It's been a while since my last post, so I just wanted to add a few pic's to the build log and let you followers know that the project is still on the front burner... I am in the process of gleaning over several sources of rigging instructions as produced by the Campbell drawings and the books by Longridge and Underhill. Needless to say, it can be a little daunting as the original ship is said to have had 11 miles of rigging. Not sure if those are statute or nautical miles. It's alot... What I'm trying to do at the moment is work ahead on the running rigging, to determine what gear I need to place on the decks and masts before the standing rigging is set up. Here are just a couple of photos of the progress. I've given up trying to add captions to the photos. After buying eye pins in the past, I am now "manufacturing" my own. These are made with 28 gauge wire. I simply bend a 1" piece in half, insert a pin in the crease and use a small vice grip to twist the wire. The beauty of making your own is that you can make the eyes much smaller in diameter. The beauty of using Campbell's plans is that they offer a ton of detail concerning the deck fittings. Here I've added a small rail winch and bollards. My "third hand" in action. I am adding a number of eye bolts and blocks to the masts, so drilling holes is so much easier when the mast is held in place. The model as it stands today. Lots of fittings to add before the shrouds and stays. Thanks for looking in!
- 207 replies
-
- 4
-
-
- billing boats
- cutty sark
- (and 1 more)
-
I LOVE this book too. I am using it to help me with the rigging of my Cutty Sark. It helps answer some questions I have while trying to decipher Campbell's drawings which are also very helpful. But sometimes there is just too much information on the drawing to see clearly how the running rigging "runs". All the best going forward with the strings and things! Peter
-
Hi Ed, What a great buld log so far! You're certainly getting me excited about starting my own NL. However there's this pesky Cutty Sark on the bench that requires finishing. Thanks for posting your build log. Hope the recovery continues as planned! Cheers, Peter
- 48 replies
-
- 1
-
-
- norske love
- billing boats
- (and 1 more)
-
Billing Boats Zwarte Zee - rare find
petervisser replied to popeye the sailor's topic in Wood ship model kits
Score!!! This is such an interesting kit and you are so lucky to get your hands on one Popeye. A beautiful old school deep sea tug with lots of interesting features and nice lines to boot. Have a great time putting this beauty together! I wonder if Billing might still have the odd fittings kit kicking around. It might be worth your while to send them an email with photos of your "new" Zwarte Zee to ask after a fittings kit. Good Luck!! Peter -
Hi Rob, Congratulations on your superb model. A brilliant achievement to be sure. And inspirational as well. Time to get my butt in gear and finish my own model at the moment. Time to slice the main brace! Cheers, Peter
-
Hi RH and welcome to the site. Rigging a model ship/boat can be the most challenging aspect for a newly minted model builder. A book I can highly recommend for your gaff rigged schooner is Lennarth Petersson's "Rigging Period Fore and Aft Craft". This book gives an easy to learn, step by step guide in the art of rigging. It's available on Abe Books for less than US$20! Check out their website. Happy modelling! Peter
-
hi Ed, Nice job on the tank! Glad to see you back working on the Norske Love! Looking forward to more pic's of your build and any handy tips you can pass along. Cheers, Peter
- 48 replies
-
- 2
-
-
- norske love
- billing boats
- (and 1 more)
-
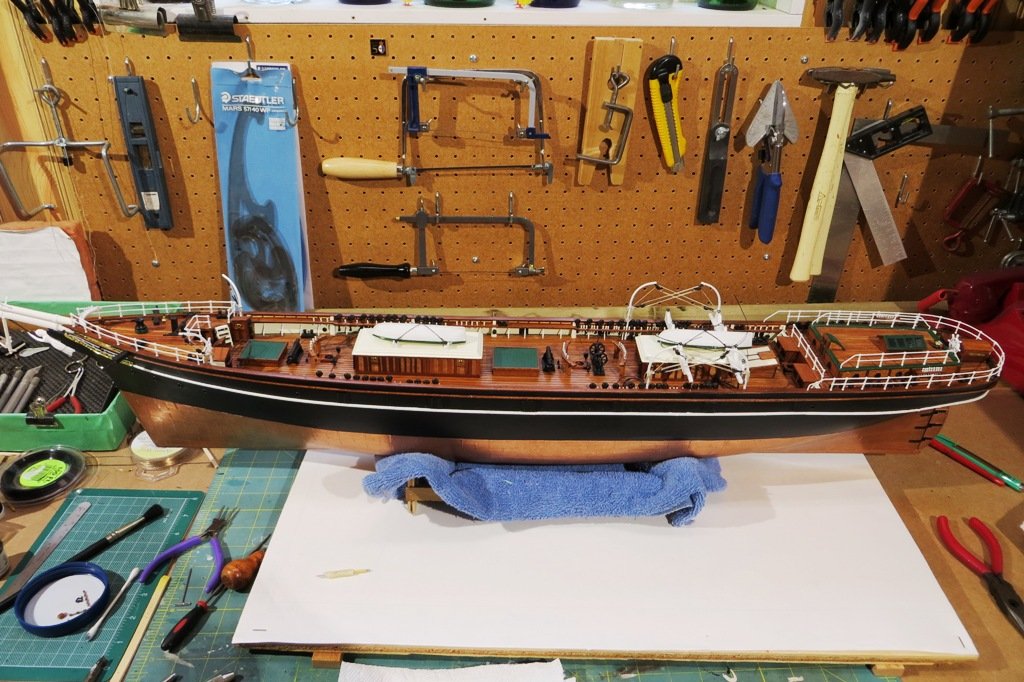
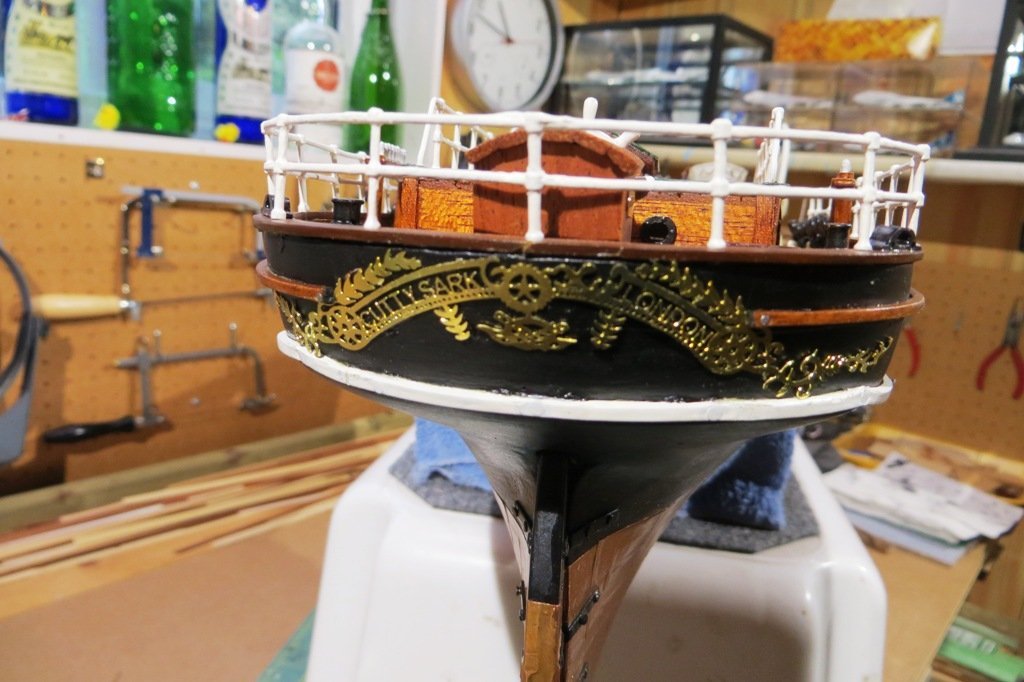
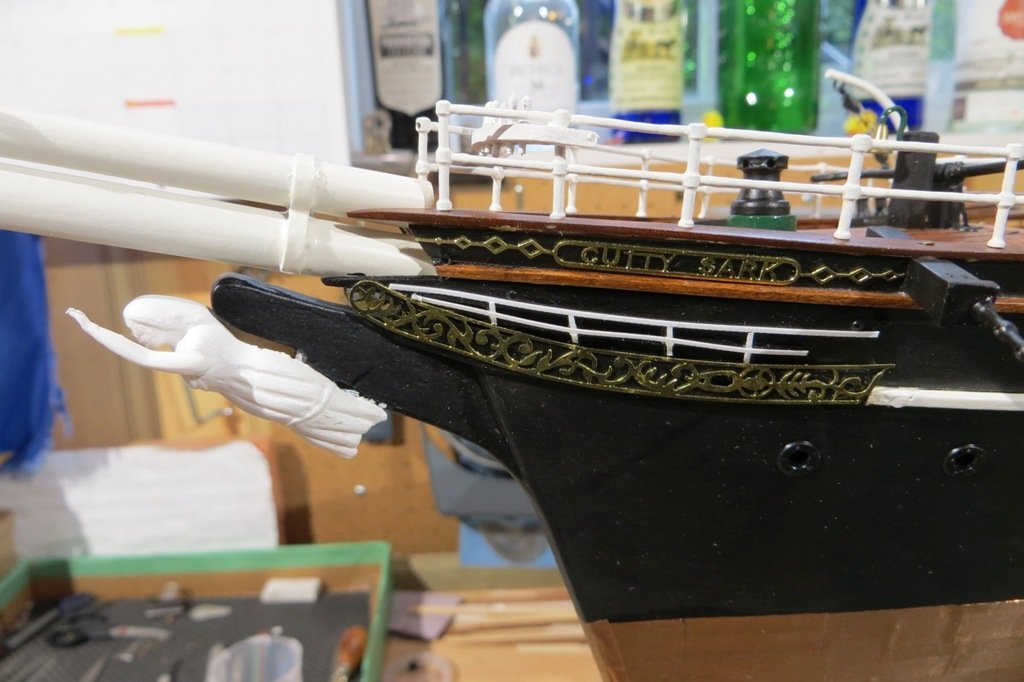
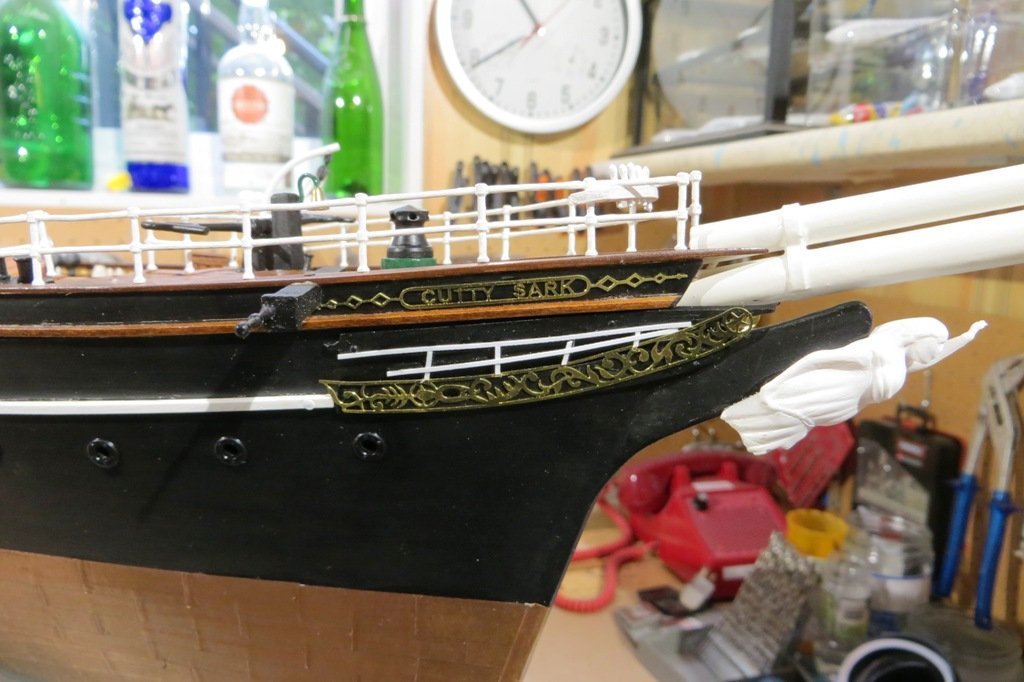
Hi Guys. It's been a while but I'm still plugging away. Albeit slowly. I finally got around to fitting the decoration to the hull. It's a part of the build that I had been struggling with. The parts that came with the kit included two plastic molds of the name and scroll work for the bow and a decal with the name, port of registry and scroll work for the stern. Nothing too inspiring to attach to the model. I then searched around for suitable replacements, first acquiring the brass fitting sheets that come with the Sergal kit which is 1/78 scale. Although the scale is very similar to my model I found the name boards and scroll work to be a bit oversize. Then I discovered that Artesina Latina also does a Cutty Sark model at 1/84 scale and they sell fittings seperately on request. Bingo! A perfect solution. I decided to use the scroll work pieces that came with my kit to provide some relief and added detail to the bow. I simply sanded off the scroll work to make the pieces smooth. A bit of paint, and presto, they were installed on the model. The decoration arrived from AL and were then also added to the model. The scroll work on the stern meant that the wood strake around the hull had to be modified to accept the decoration, but the sacrafice is worth it I think. I also added some white styrene strips to the bow decoration to jazz up. Here are some pic's of the result...
- 207 replies
-
- 6
-
-
- billing boats
- cutty sark
- (and 1 more)
-
Hello from Canada’s west coast
petervisser replied to Twokidsnosleep's topic in New member Introductions
Hiya Scot. Welcome to the site. I'm in Victoria. How about you? -
Hi Marc, Just looking in and your model is looking fantastic. You are a braver man than I, rigging the model with sails. After rigging a previous model with square sails, it's a task that I want to avoid from now on! But your sails look great and they're a very nice addition to your model. Good luck going forward. Cheers, Peter
- 525 replies
-
- 1
-
-
- cutty sark
- mantua
- (and 2 more)
-
Welcome Brian, from one former mariner to another. Good to have you here. Cheers, Peter
-
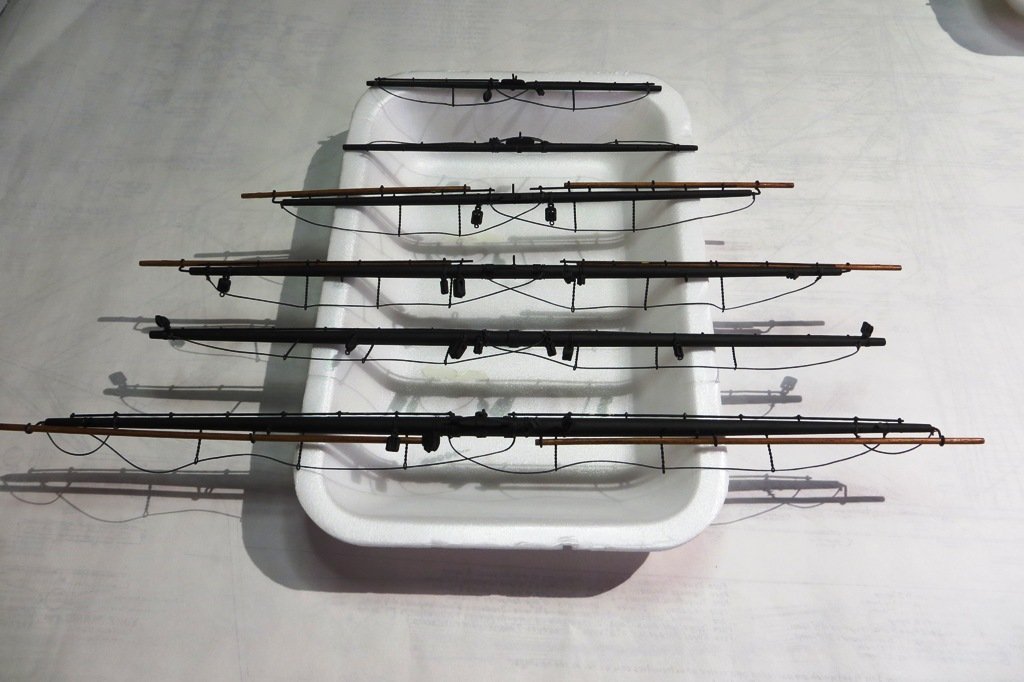
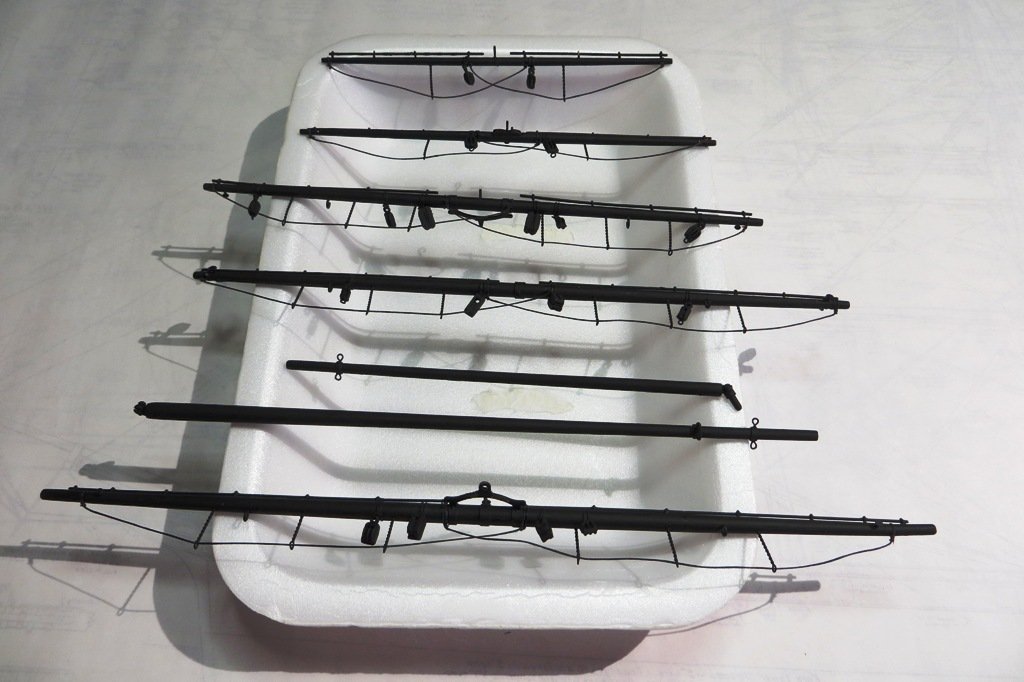
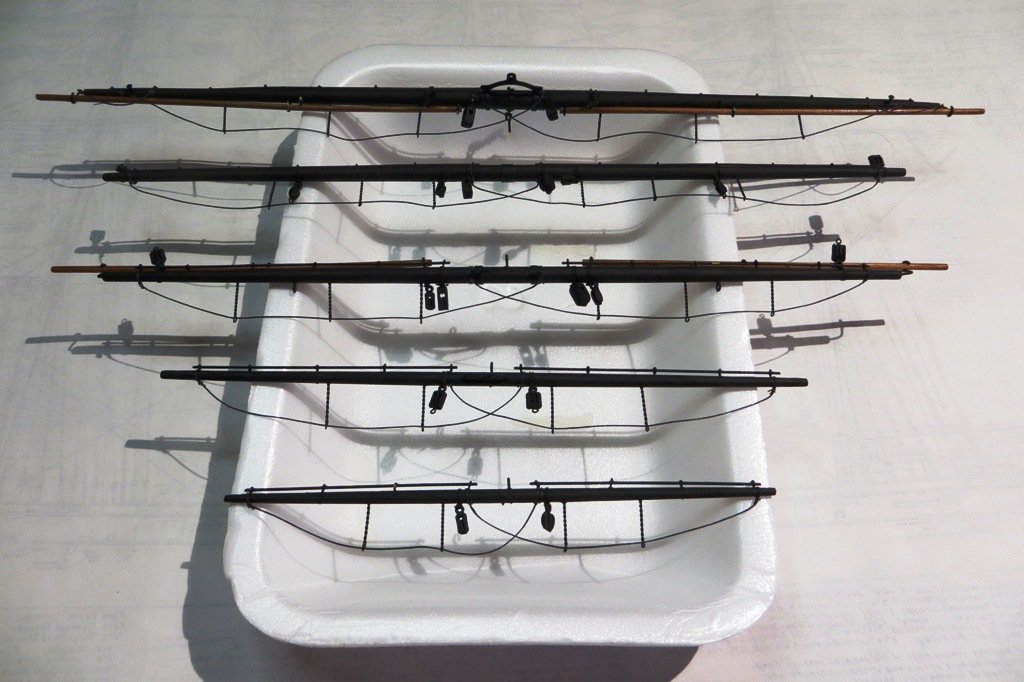
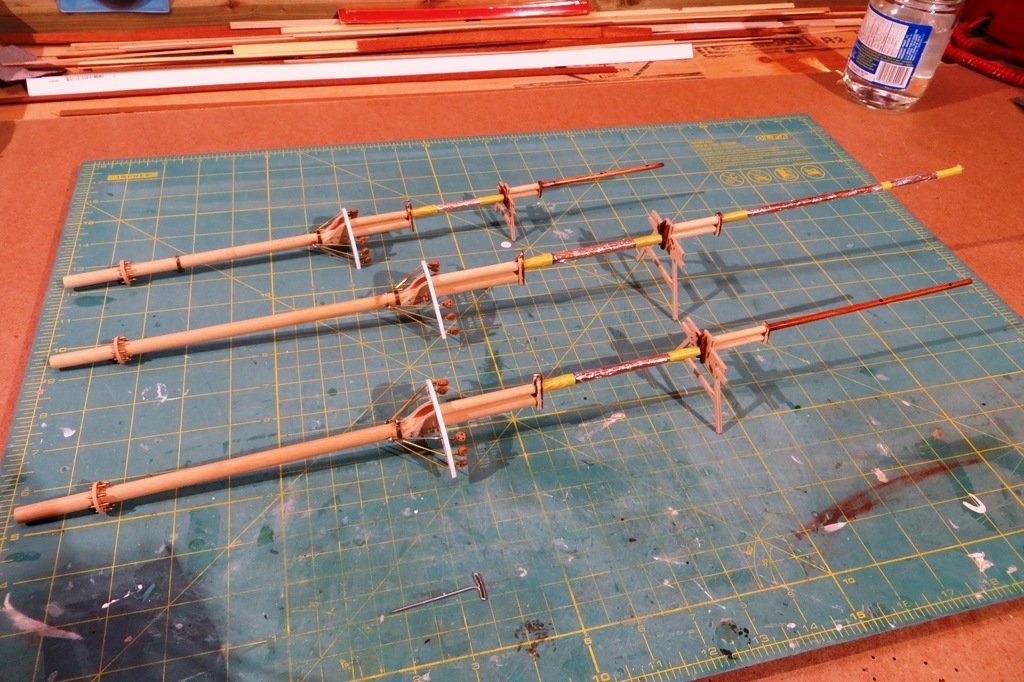
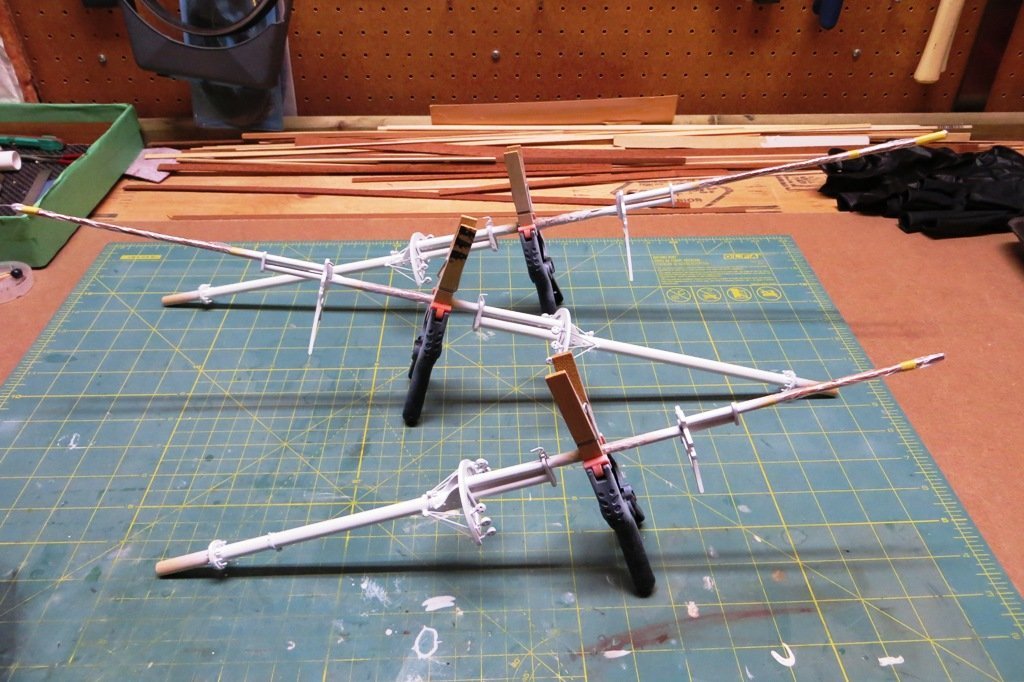
With all the blocks attached and jackstays installed along with other odd and sods I could now apply some paint to the yards. My new airbrush came into its own and made short work of getting a uniform coat of black to cover the different materials that make up the yards and their jewellry. The studding sail booms were stained and varathaned. I also took the opportunity to install the footropes. Next step is to paint the blocks that make up the braces and install them on the yards. So lots to do before any real rigging takes place. Here are some pic's of the yards getting prepped. Yards prior to painting with blocks, jackstays etc. attached. Yards primed. Main mast yards. Mizzen mast yards. Fore mast yards.
- 207 replies
-
- 7
-
-
- billing boats
- cutty sark
- (and 1 more)
-
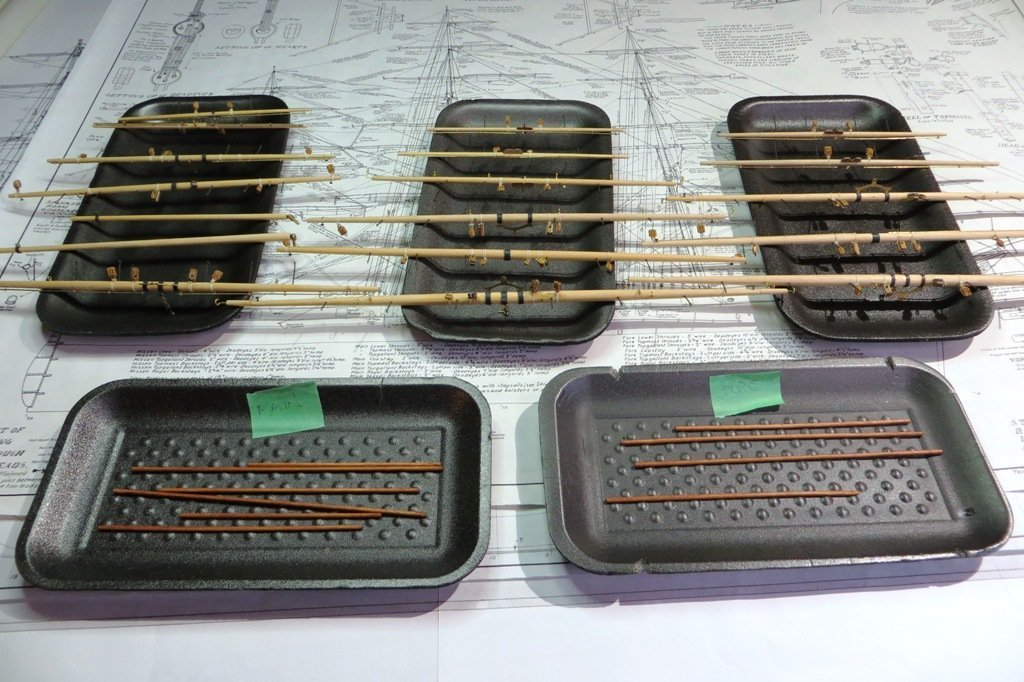
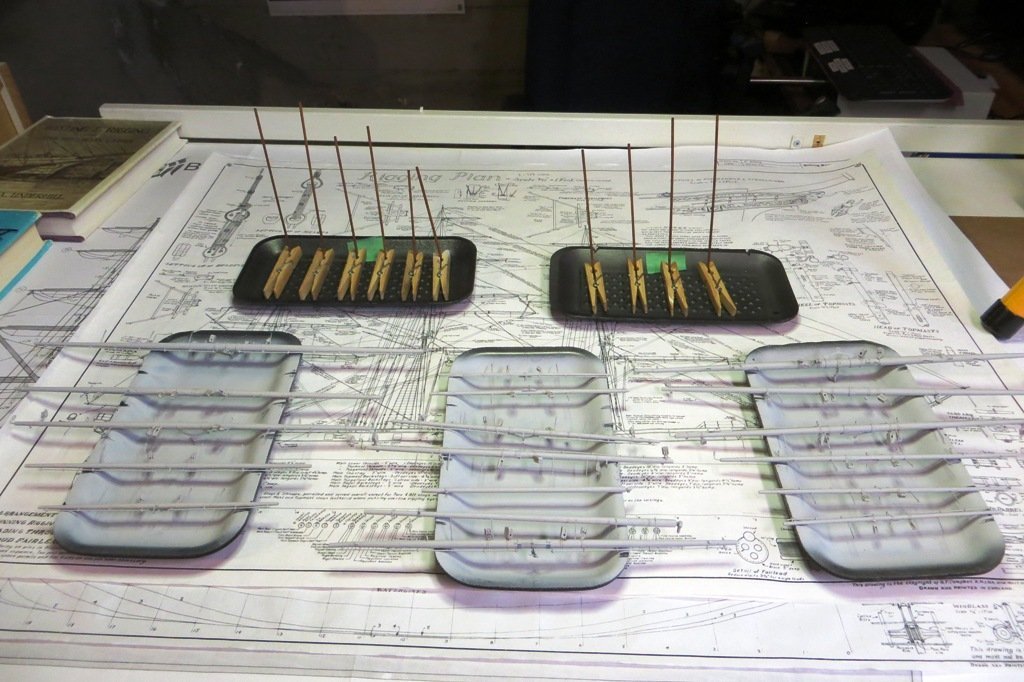
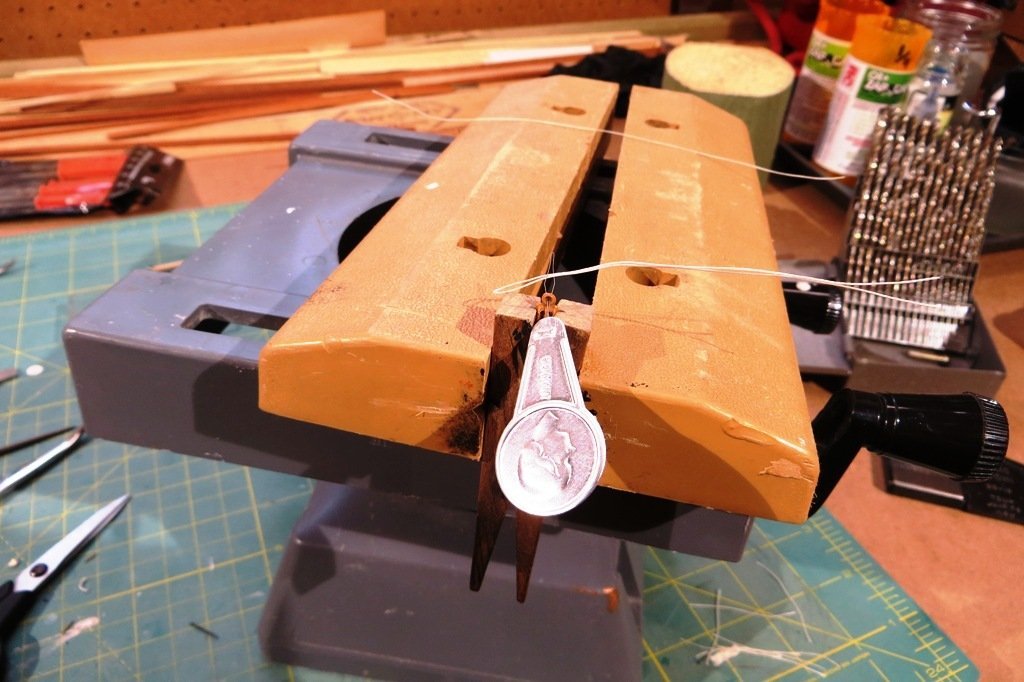
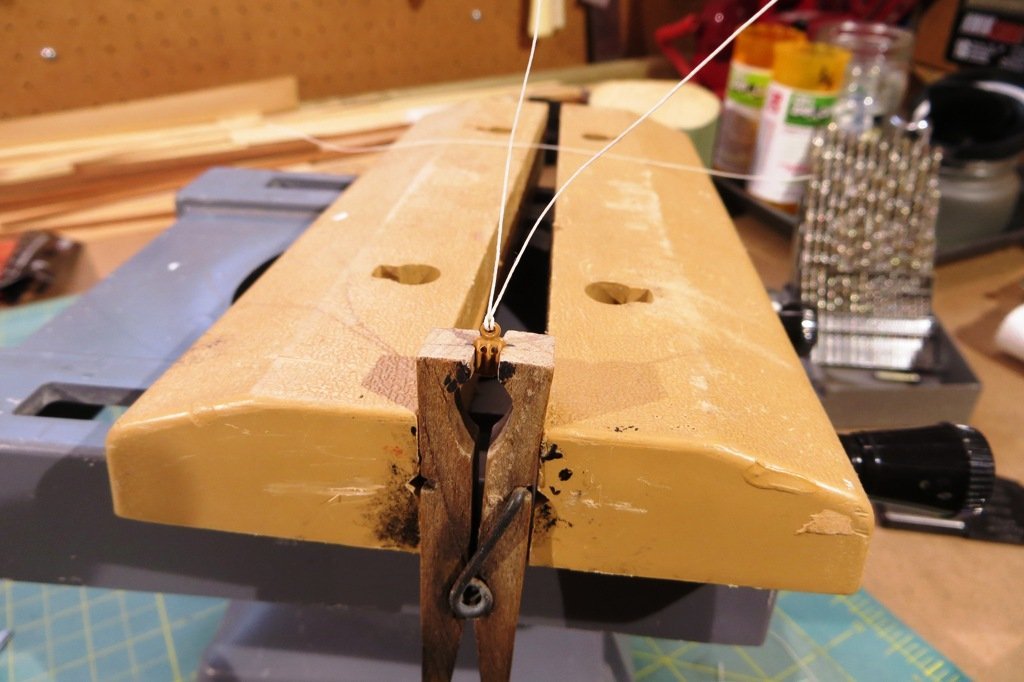
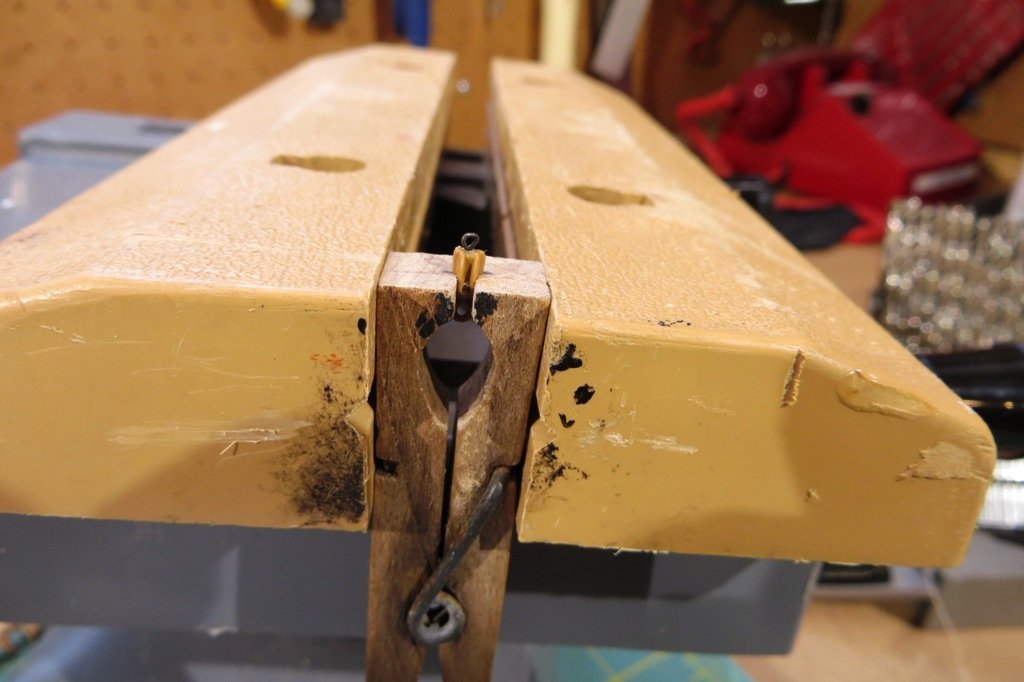
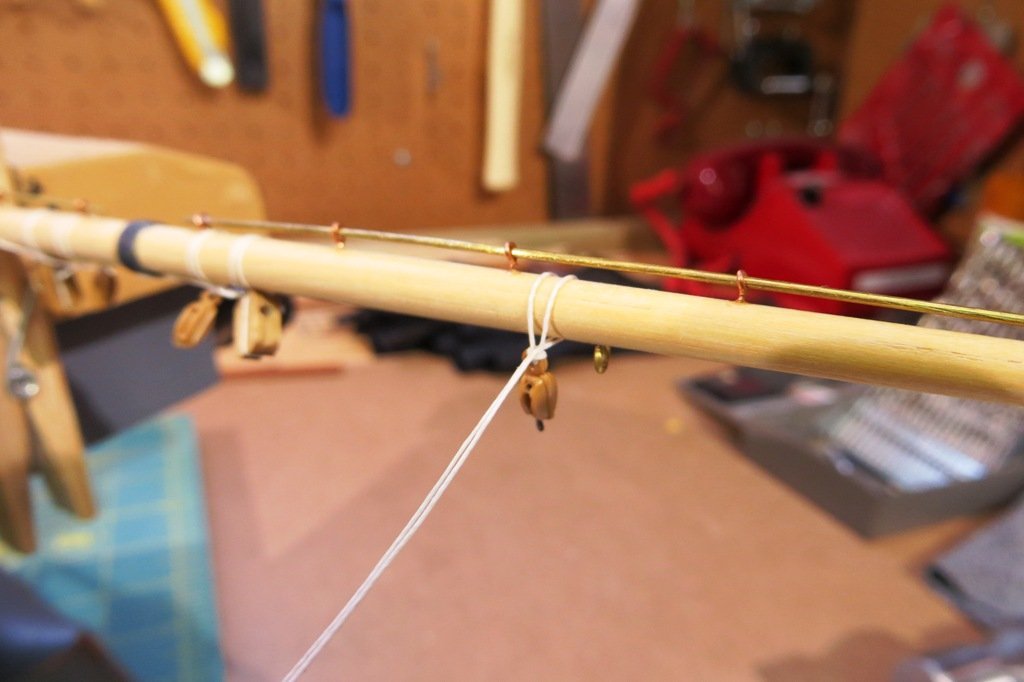
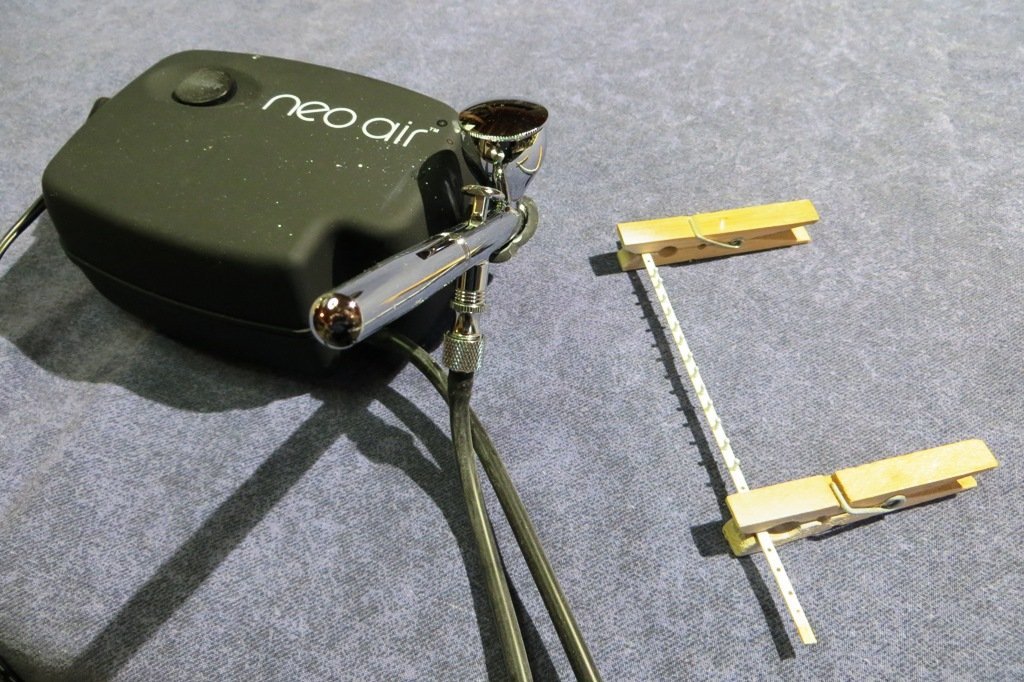
Another update. Of late I have been working on the yards of the model. They were all precut for length and tapered at the Billing factory. The lengths were for the most part accurate. I can't speak to the diameters but I'm gong with what they are. The trick is to study the material I have as to what blocks to afix to the yards, prior to their installation. I am using Campbells plans along with Longridge's Cutty Sark book and Underhill's Masting and Rigging book. Using three sources can get a bit confusing, so I come up with a hybrid solution to get the results I want. Although not 100% accurate it will at least be realistic. Here are a few pic's of the block preparation... And yes, I am using the plastic blocks that are provided with the kit. I realize that there are some who would consider this a faux pas, but my reasoning is this. They're readily available, having come with the kit and will be painted once installed. I have used these blocks with all my Billing kits and have not had any issues. They do require some shaving and trimming to remove the excess plastic and the holes need some reaming. This is usually a huge pain but after much trial and error I modified a clothes pin to hold the block while I work on it, saving huge amounts of time and curse words...
- 207 replies
-
- 4
-
-
- billing boats
- cutty sark
- (and 1 more)
-
Hello Dirk and welcome to this great site. I have built the Marie Jeanne by Billing a long time ago now. I really like the lines of this boat and it's colourful paint scheme. I ran across another site that had photos of the same model built by other modellers with totally different colourings. It was a treat to see! Anyway, all the best with your project. It was a fun build for me and I hope a fun one for you as well. Happy New Year! Peter
-
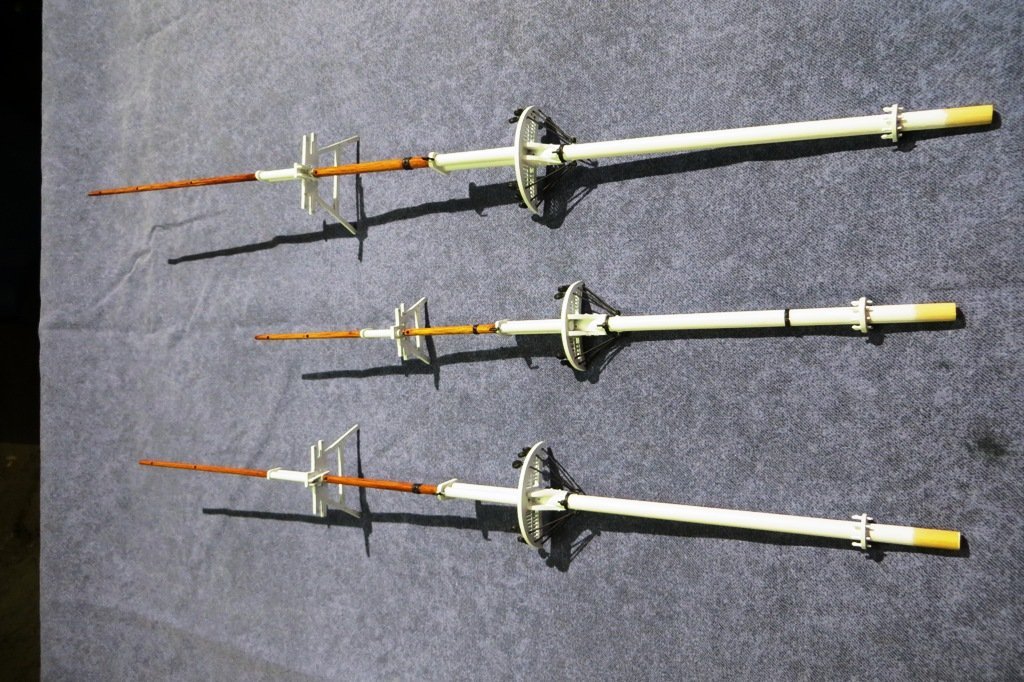
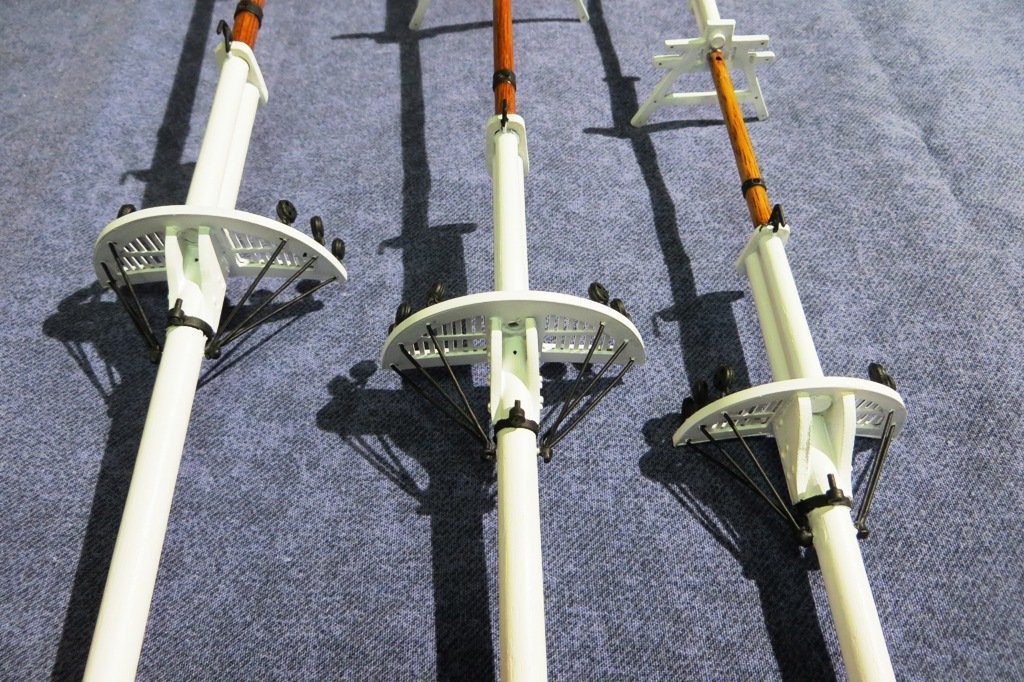
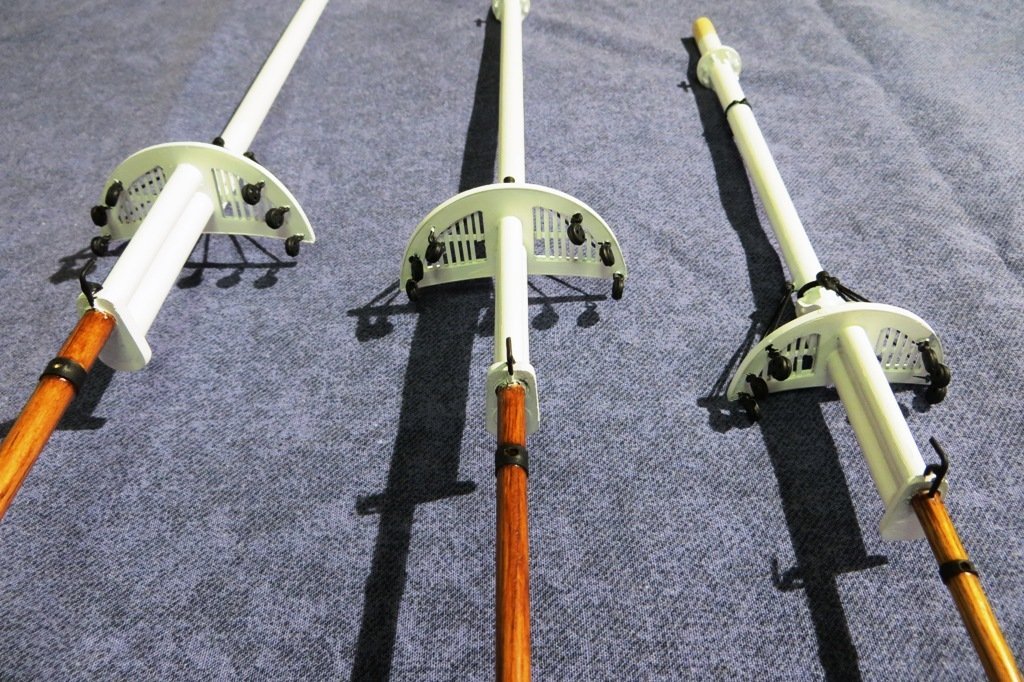
Just a little update with the masts of my Cutty Sark. It was quite the process getting the masts, tops and crosstrees assembled. I tried to prep them as much as possible before the paint came out. I decided to paint/stain them as they now appear on the actual ship in Greenich. They were first stained and varathaned and then masked off for painting. In the past I have always painted by brush and Humbrol enamel paint, but decided to invest in an airbrush and acrylic paint instead. The primary reason behind this is because of the many, many blocks which I will be painting in the future when the yards are assembled. What a time killer! Airbrushing them will be way more efficient! So with a brand new airbrush in my shop I opted to airbrush the masts as well. A bit to learn but I am very happy with the results. And no more "holidays"! A super investment that only took several decades to find out.... Here are some pic's of the results. In this picture the masts are stained and varathaned, and some are masked with tape and saran wrap. Here they are spray painted which went super slick. The finished product with the deadeyes and mast bands painted. The underside of the tops. The topsides of the tops. The crosstrees. This is my new airbrush. It came as a complete set with the compressor as well. Beside it are a bunch of belaying pins. I can't believe I used to paint these by brush. And two coats at that! Thanks for looking in. Peter

- 207 replies
-
- 7
-
-
- billing boats
- cutty sark
- (and 1 more)
-
Devastating news Mark. You've left a lovely legacy of beautiful ship models in your wake. Smooth seas and a following winds on your next journey my friend. Peter
-
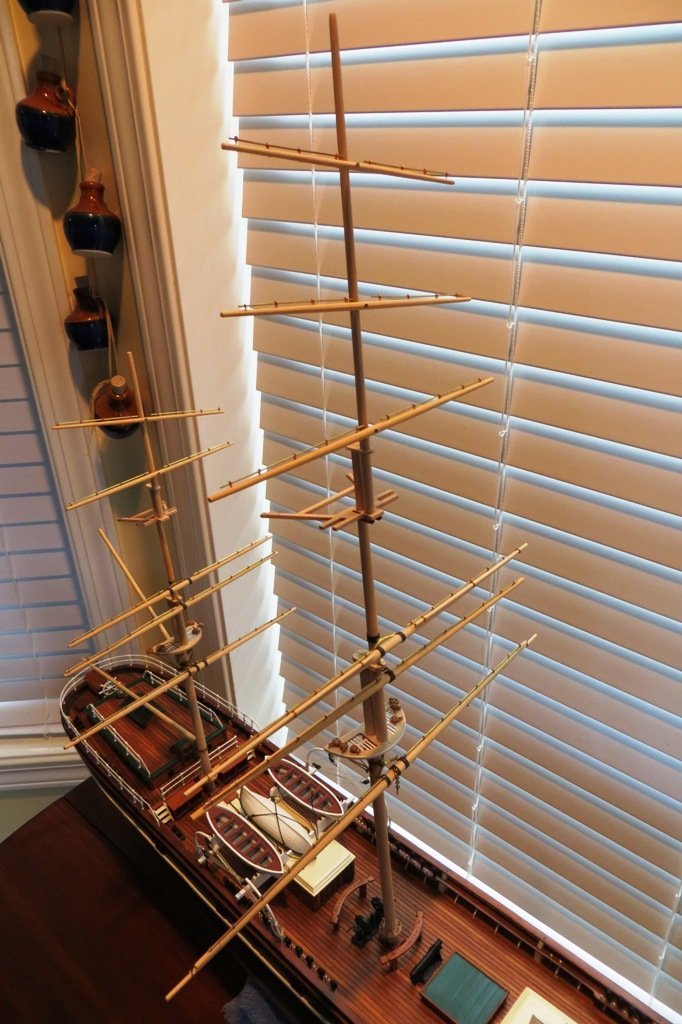
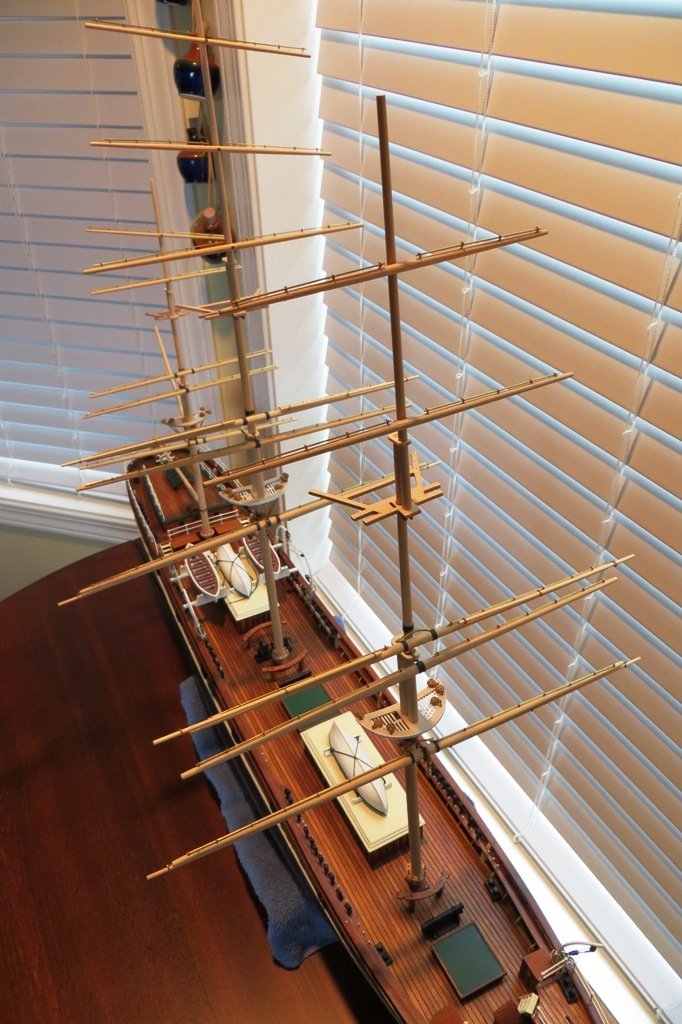
Hi All, Just popping my head up after a long while with Cutty Sark. I have been in the shop from time to time, but that was for other projects. I have been working lately on CS's yards and they are now done except for the paint. I am now poring over the Campbell's rigging drawings, Longridges chapters on rigging as well as Underhill's book covering the same topic. All three are invaluable. Less so the drawing that accompanies the kit. That said, not everyone is a rigger and the drawings are adequate for a completed model. Here are some pic's of the yards in place. They are dry fitted for the moment, so not all are level.
- 207 replies
-
- 10
-
-
- billing boats
- cutty sark
- (and 1 more)
-
I just ran across your build log for the first time. Having built the Unicorn a few years ago, it brought back some fond memories. As you say, not the most accurate model of an authentic British frigate, but an attractive model in the end. I modified mine in a few areas, using John Mckay's AOTS book, Pandora and Petersson's rigging book. All the best going forward. You're certainly doing the model justice. Peter
-
Thanks for the pic's Pete. I have put in a request to AL for the parts comprising the bow and stern decoration. Fingers crossed that they get back to me... Cheers, Peter
- 19 replies
-
- 1
-
-
- Cutty Sark
- Artesania Latina
- (and 1 more)
-
Hi Blunty. Your model looks great! Lots of very nice detailing. As for the rake of the masts they do vary a little. I have Longridge's book and he states that the foremast is raked at 86*, the main mast 85*and the mizzen mast 84*. The angle is measured from the horizontal to the after side of each mast. Therefore they are angled aft, for clarification, By the way, I wondered if you could send me a photo of the bow and stern decoration that's included in your kit. The ones from Billing that I have are not ideal, especially, the stern. I am thinking of applying to AL to see if I could purchase a set of theirs. Anyhoo, great work so far. Good luck with the masting and rigging! Peter
- 19 replies
-
- 1
-
-
- Cutty Sark
- Artesania Latina
- (and 1 more)
-
Hi Ed, I just ran across your log and will be following along. I have this kit on my shelf as well, and it's one I've always wanted to build. Handy that you've started yours so I have an idea what's involved. And I have the self same "deck plank clamps" that you have so I'm set in that department! Good luck with your build. You have made an excellent start! Cheers, Peter
- 48 replies
-
- 1
-
-
- norske love
- billing boats
- (and 1 more)
-
Hallo Riat. You would be better off getting some thin plywood or sheet stock and starting from scratch. I am building an old Cutty Sark that Billing produced and had the same issue. Starting with fresh lumber is the way to go, I think. Cheers, Peter
-
Hi Dave, Have you thought about using bee's wax on your rigging? I use it all the time for most of the rigging I do. it adds a bit of stiffness to the thread you're working with and it does away with the "fuzziness" of the thread as well. Try drawing the thread through the wax a couple of times. It also adds a little tackiness to the thread which helps hold it in place to certain contact points and holds knots a bit better. The only places to put glue on rigging is on the knots to make them permanent. However, I prefer dulcotte laquer on my knots, using a paint brush. Hope this is a help. Cheers, Peter