
HOLIDAY DONATION DRIVE - SUPPORT MSW - DO YOUR PART TO KEEP THIS GREAT FORUM GOING! (Only 13 donations so far - C'mon guys!)
×


Steve 12345
-
Posts
438 -
Joined
-
Last visited
Content Type
Profiles
Forums
Gallery
Events
Everything posted by Steve 12345
-
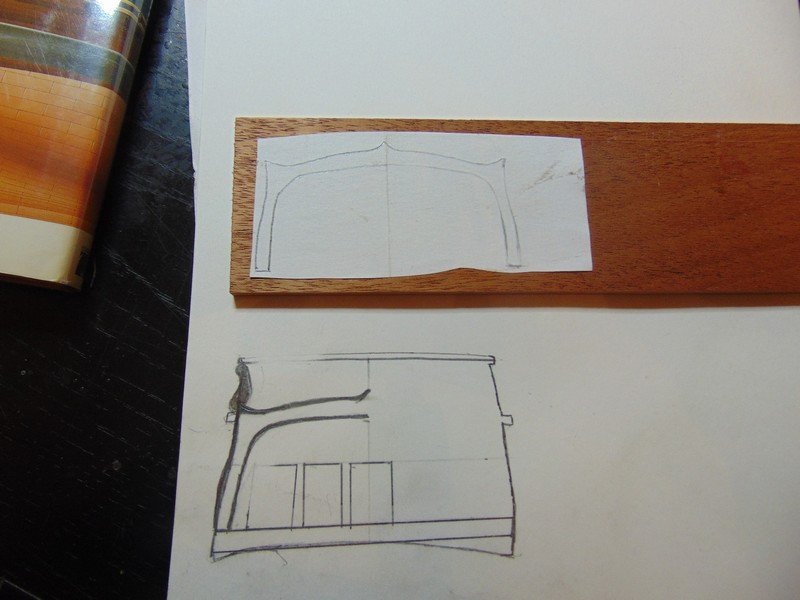
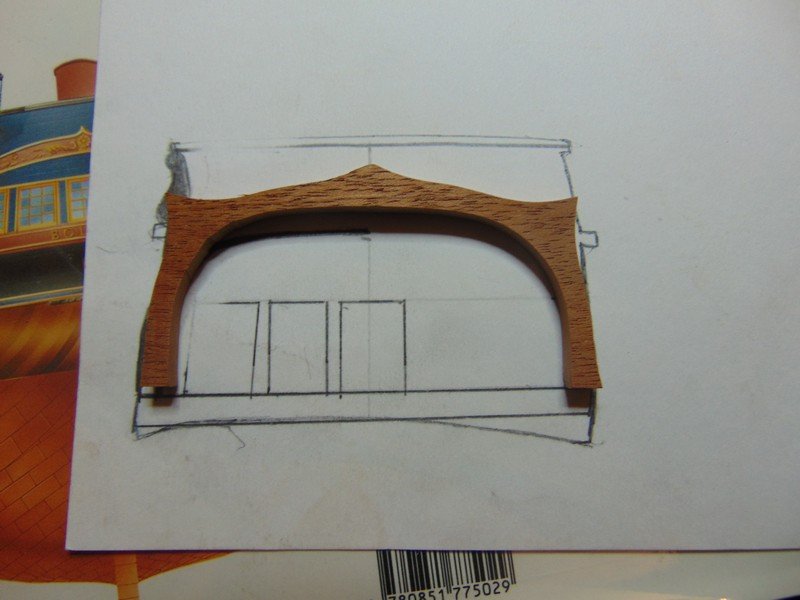
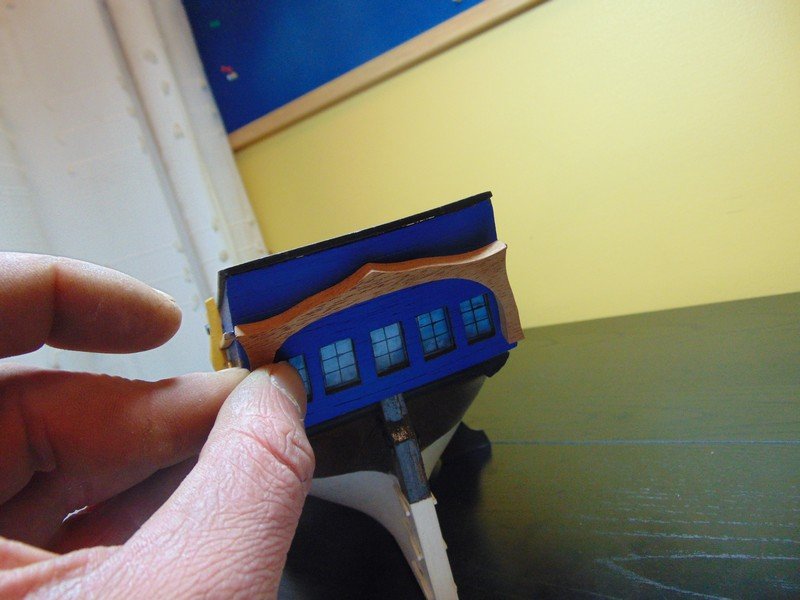
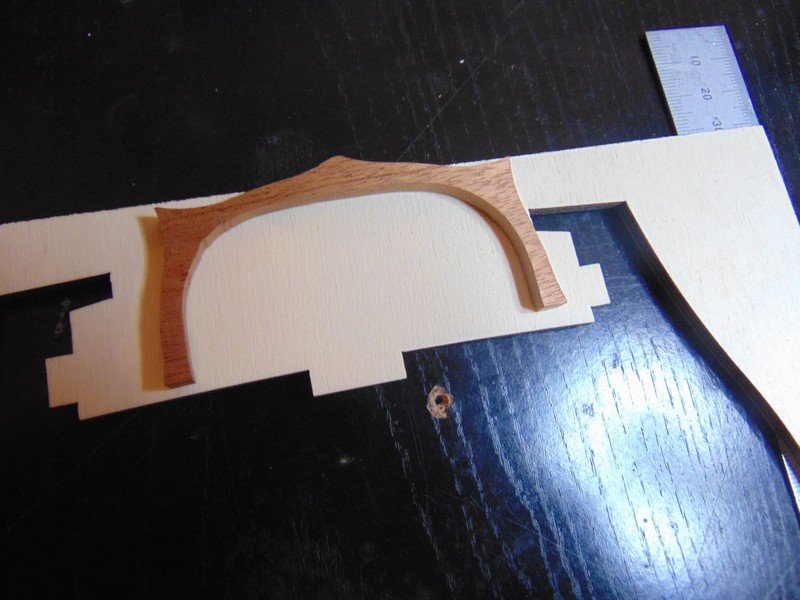
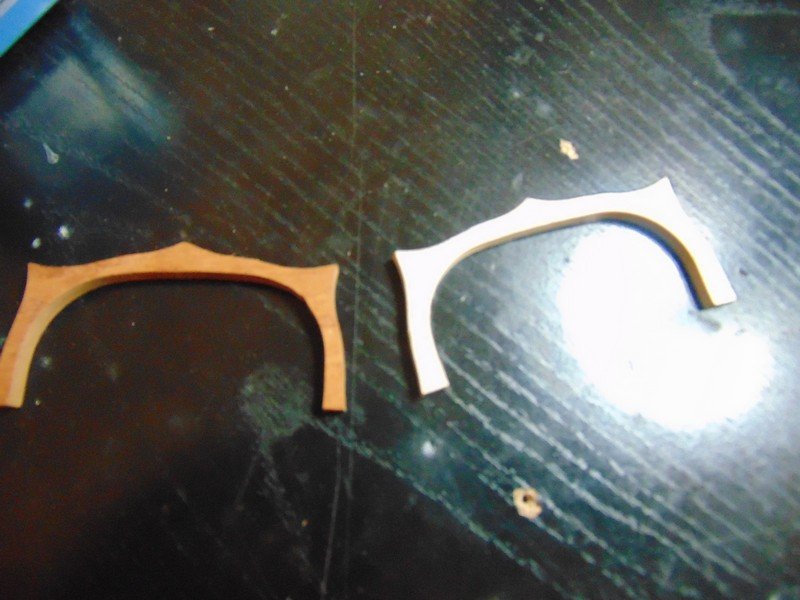
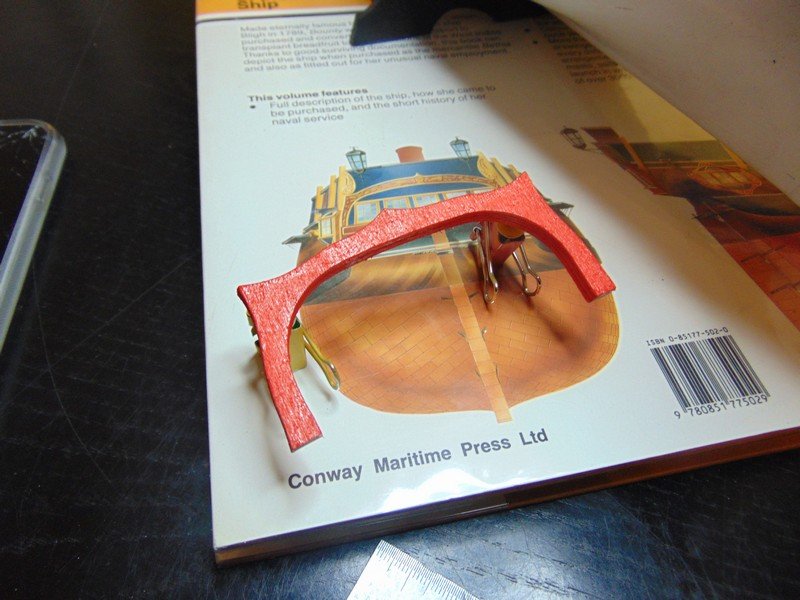
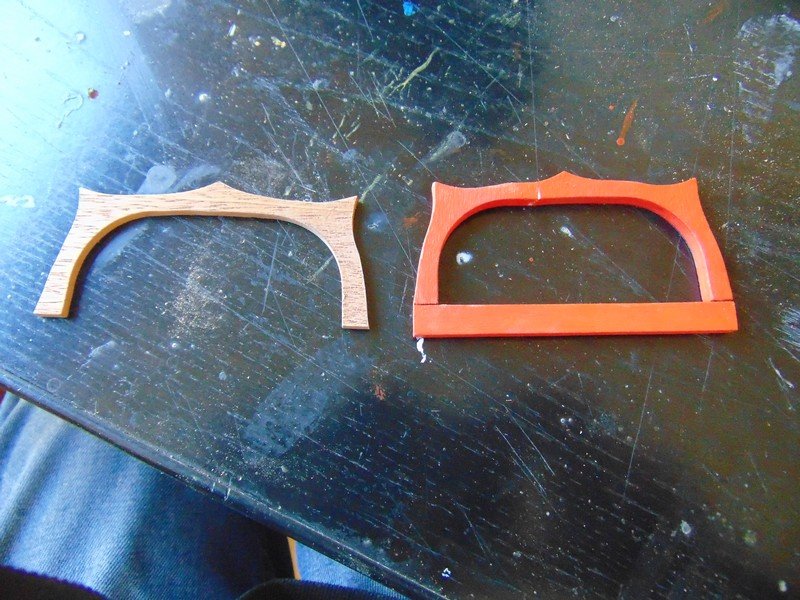
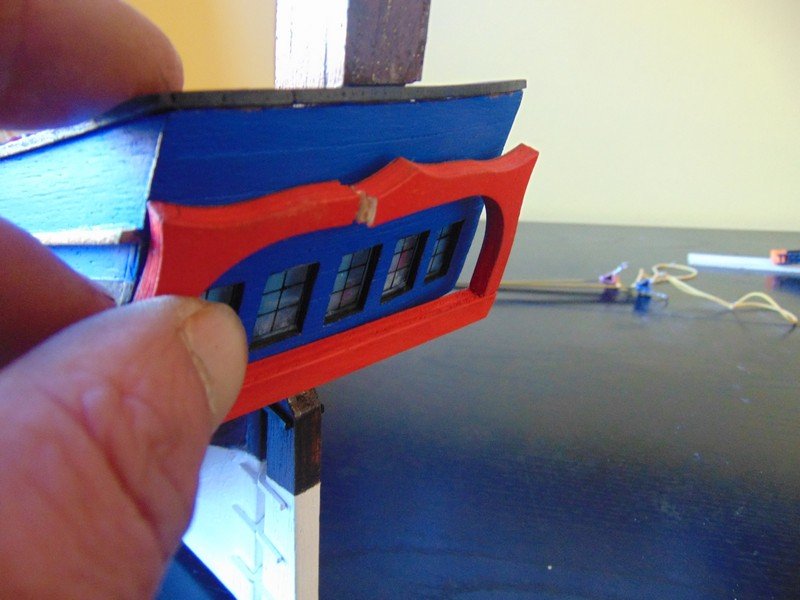
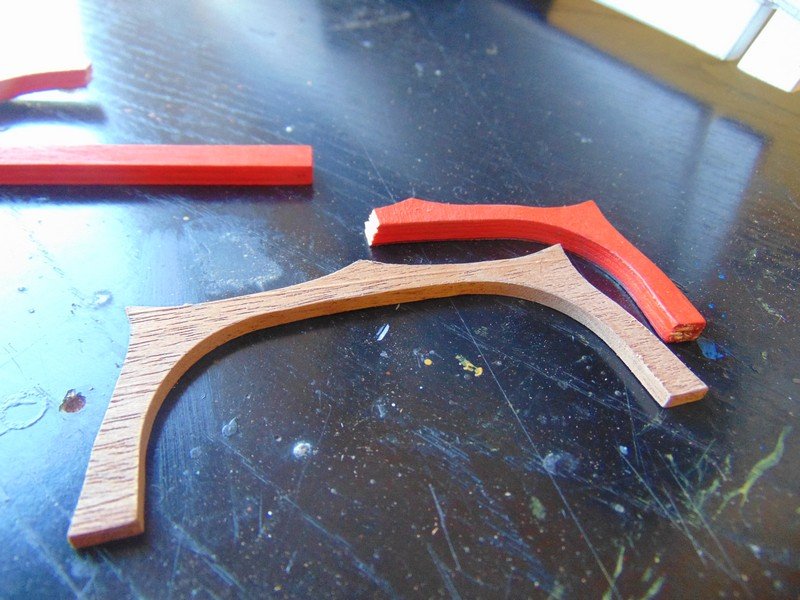
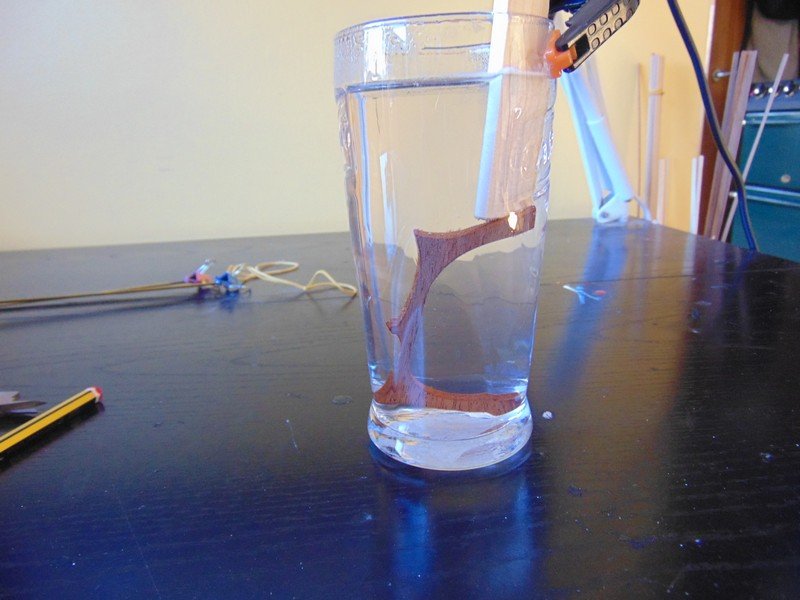
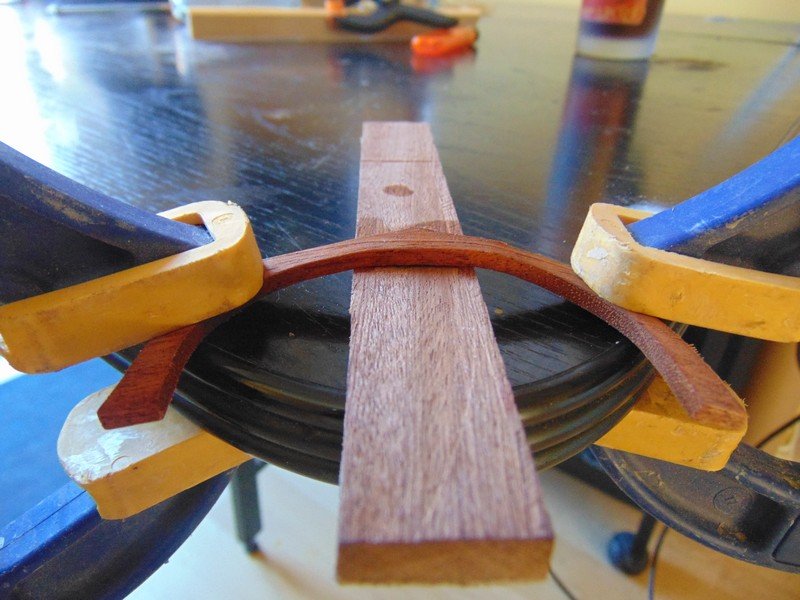
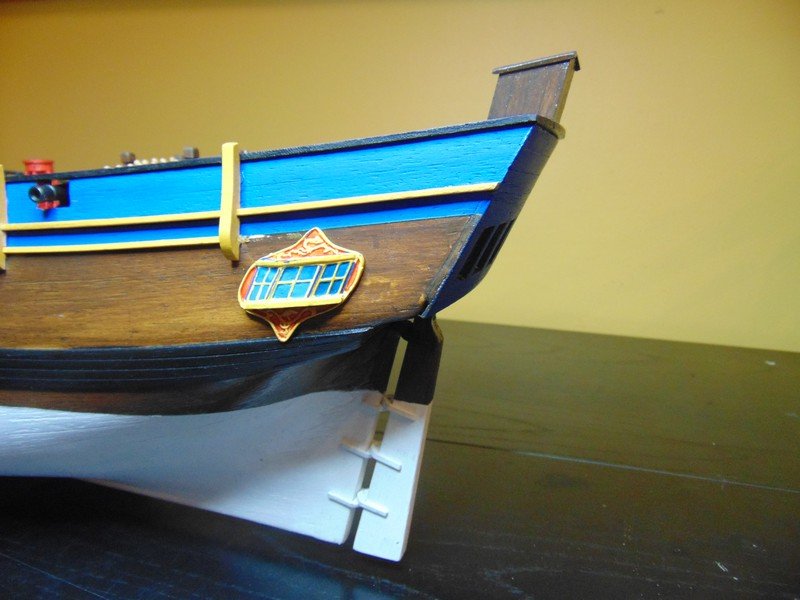
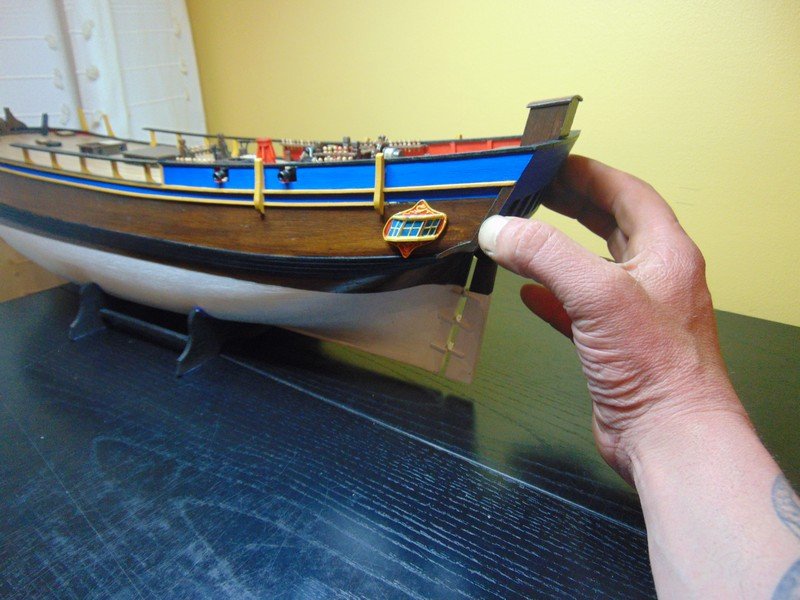
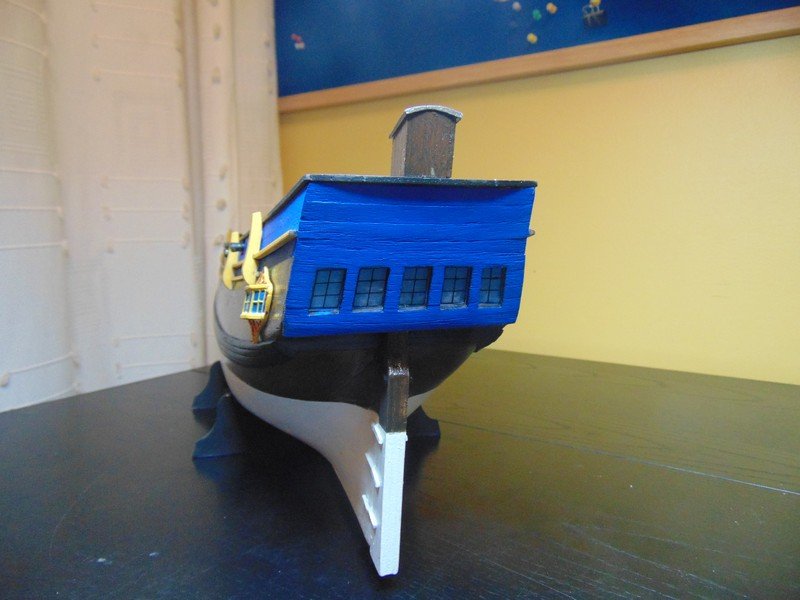
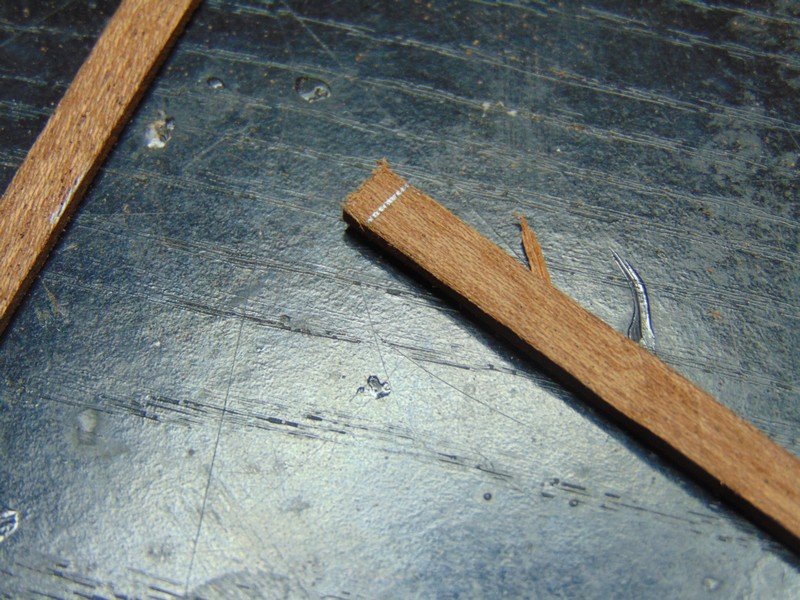
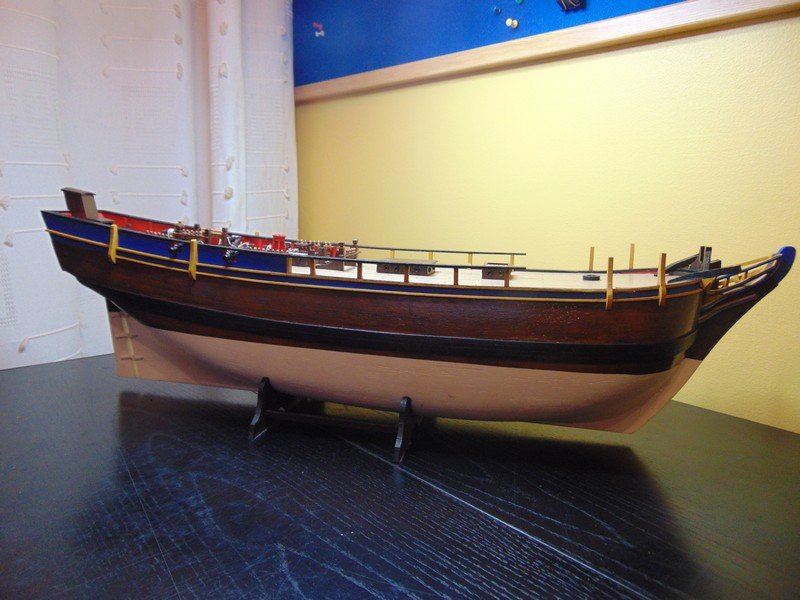
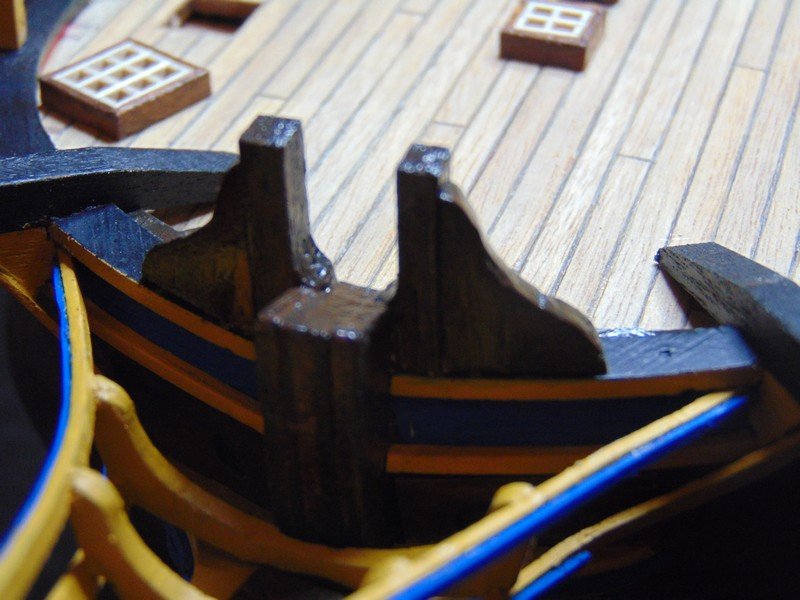
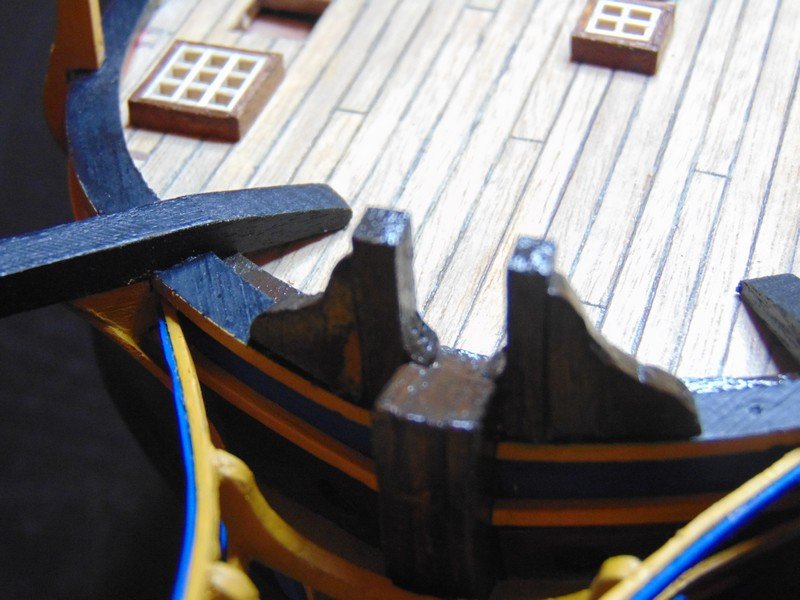
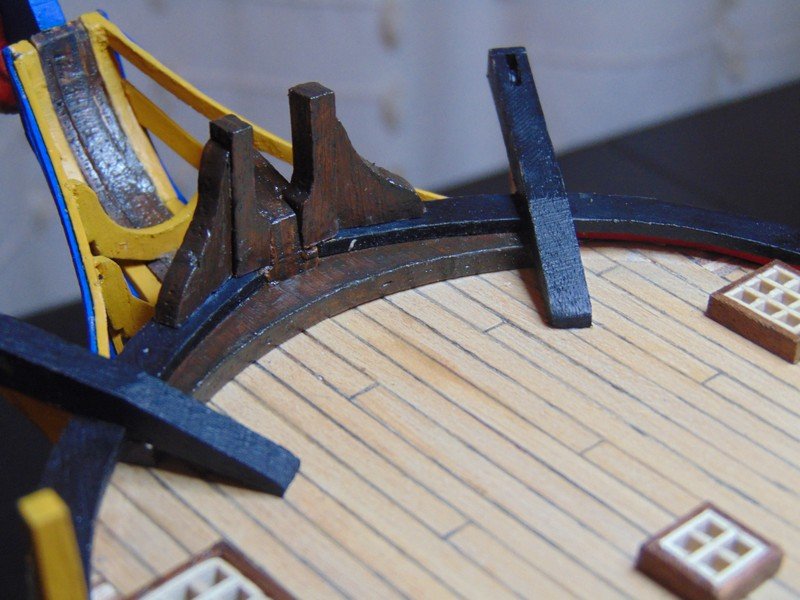
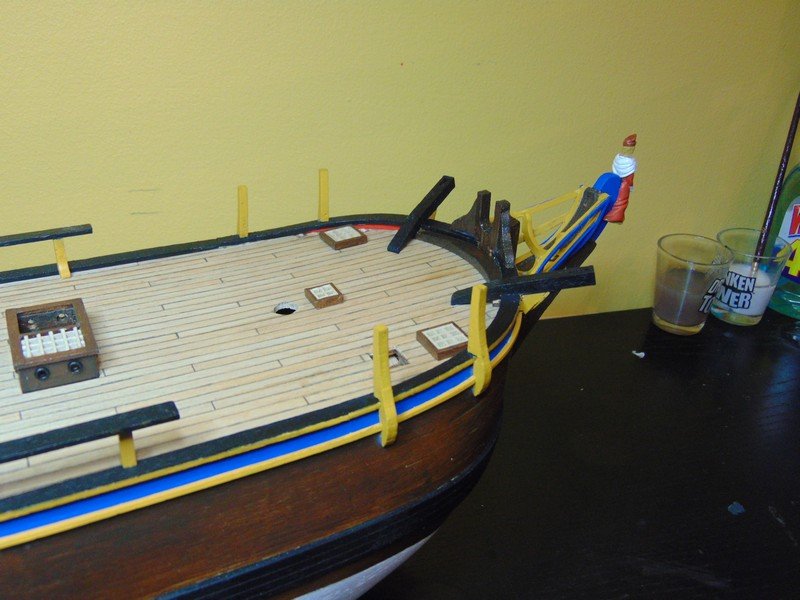
 struggling on with the transom decorations I traced the outline then drew in what I want I first made this with mahogany and felt it was to thick so tried a piece of ply the ply was also to thick and broke when trying to bend it so back to the another mahog I am much happier with the thinned down version ive soaked it and will clamp it for 24hrs with more than a bend than it needs I plan to paint the part then add prepainted ocre strips around its perimeter kinda how I added the blue stripes at the bow
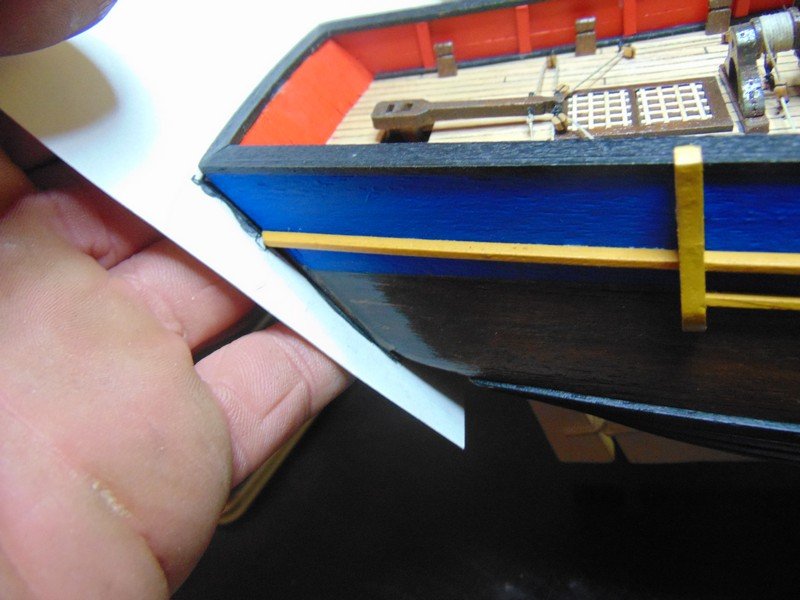

- 291 replies
-
- 4
-

-
- bounty
- billing boats
- (and 1 more)
-
I will be happy to follow along with this build I like the look of the instruction manual nice colour pictures I've built a mantua kit in the past not to bad instructions but they did add what must have been revised instruction on very poor photo copy and I thought there was no excuse for that . i recently built an artesania latina kit and it provided a cd that was very good however it's not as good as a book right in front of you . All the best with your build I will follow with interest steve
-
Duncbe what part of the world are you from if you don't mind me asking I see a few things in the background like your clear plastic storage container and the paint brushs that look familiar to stuff I have
- 49 replies
-
- 2
-
-
- sherbourne
- caldercraft
- (and 1 more)
-
Hi harry it should work in theory but I've glued the moving parts ,it's just one less thing to notice out of place after you put it in a cabinet
- 291 replies
-
- 4
-
-
- bounty
- billing boats
- (and 1 more)
-
Absolutely beutifull and a pleasure to follow your build very neat work , I think think your correct on the pumps adding the hexagon effect also great build lovely pictures
- 49 replies
-
- 1
-
-
- sherbourne
- caldercraft
- (and 1 more)
-
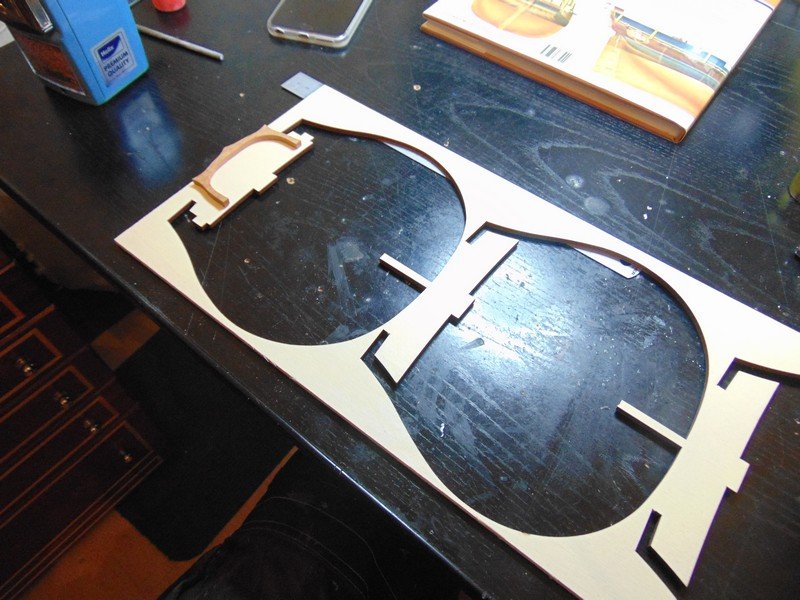
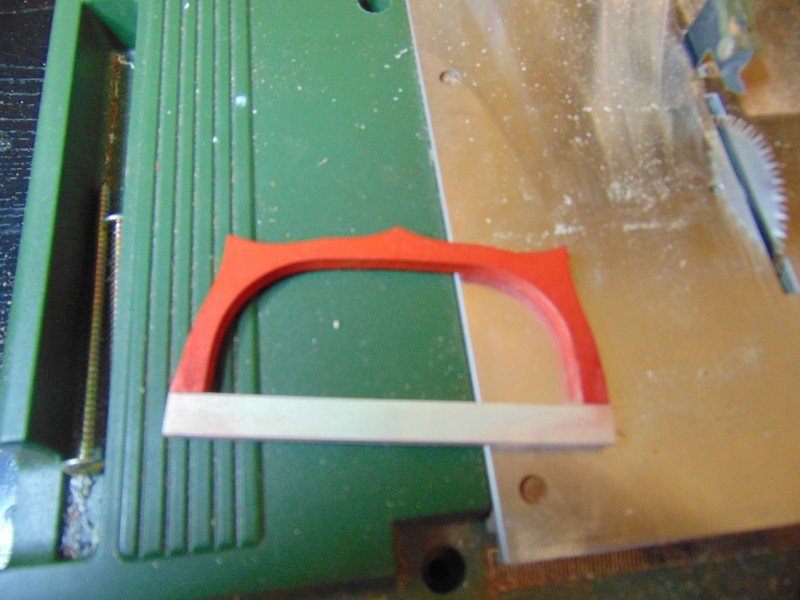
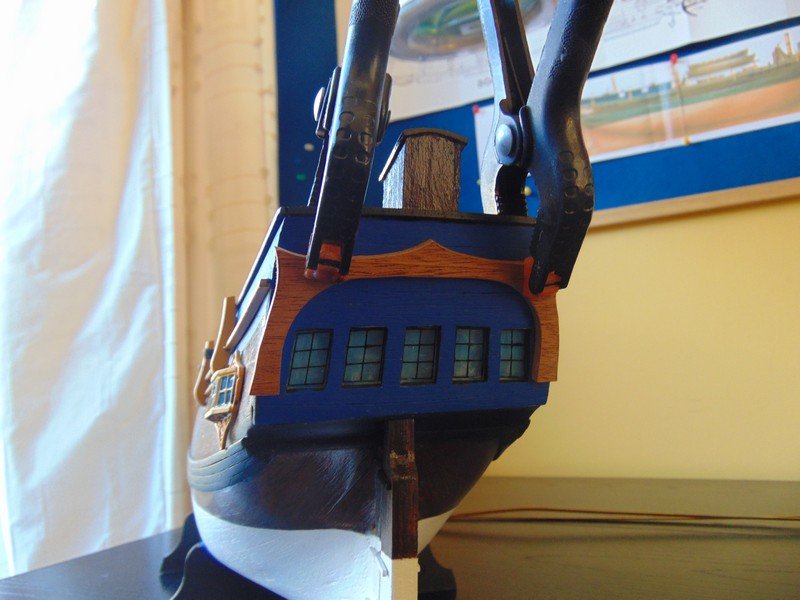
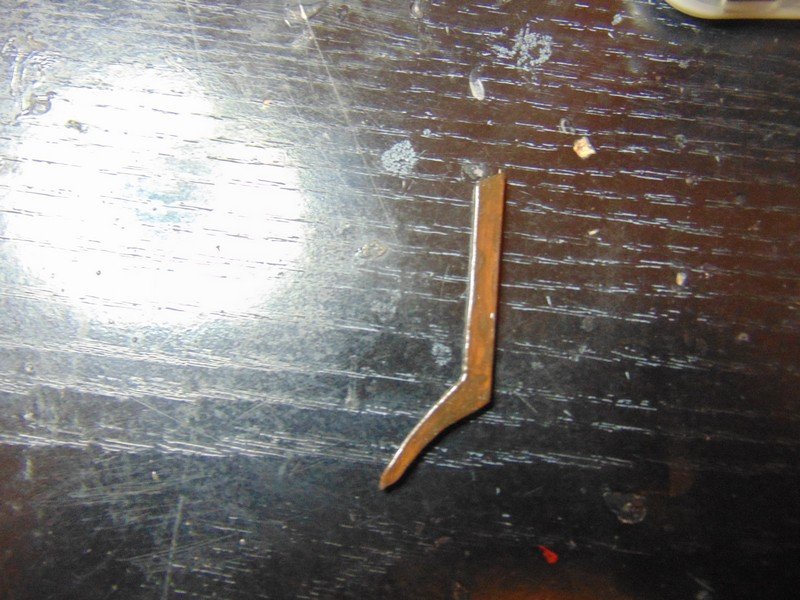
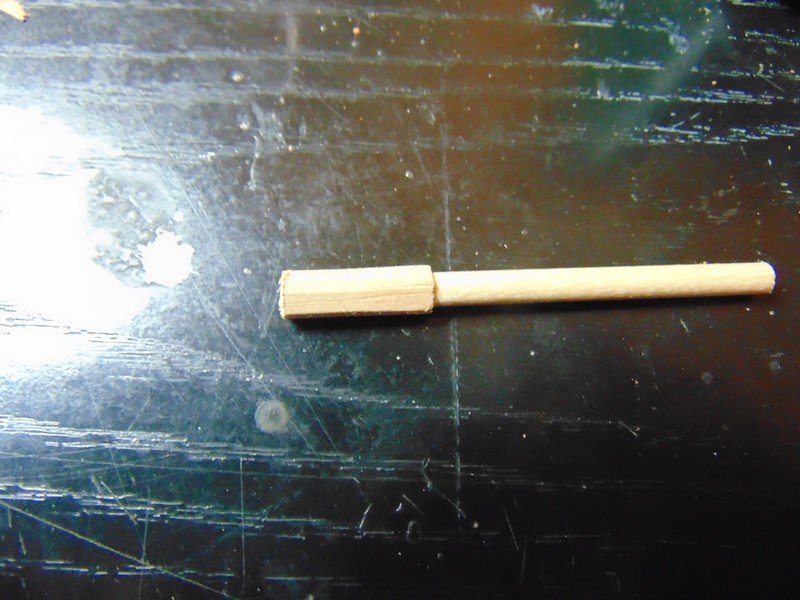
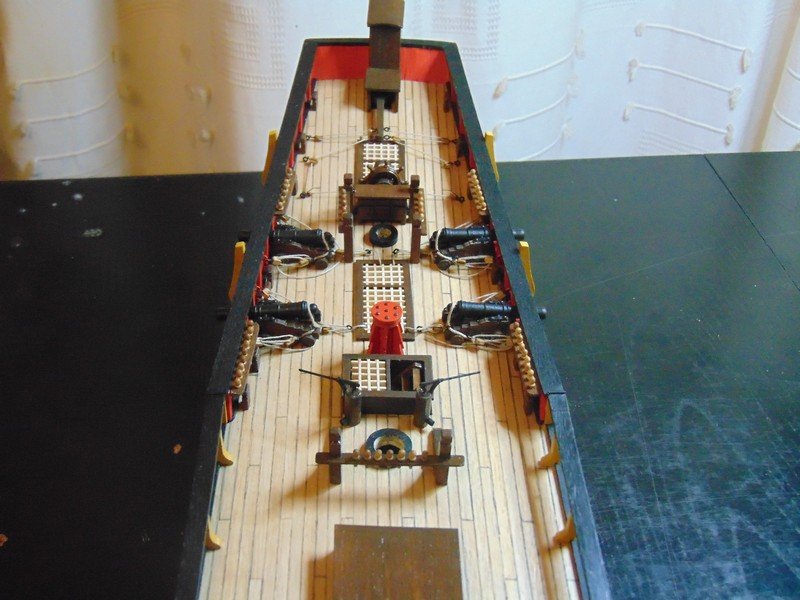
Thanks again EJ for the kind words and the encouragement I find being part of this community believe it or not actually spares me on sometimes I think for my next part of the build I really must address the elephant in the room and that is the transom carvings I binned the kit pieces early in the build thus forcing me to come up with something myself ive added a few pics of the start of that process
- 291 replies
-
- 6
-
-
- bounty
- billing boats
- (and 1 more)
-
I have chosen to follow the john mckay book not so much to stay acurrete but more simply cause I feel it looks better than the billings approach
- 291 replies
-
- 3
-
-
- bounty
- billing boats
- (and 1 more)
-
Looking good derek all things considered later in the build what's bothering now won't even cross your mind
-
Hi Ken I just found your log it is off to an excellent start and very well documented ,I will be keen to follow along
-
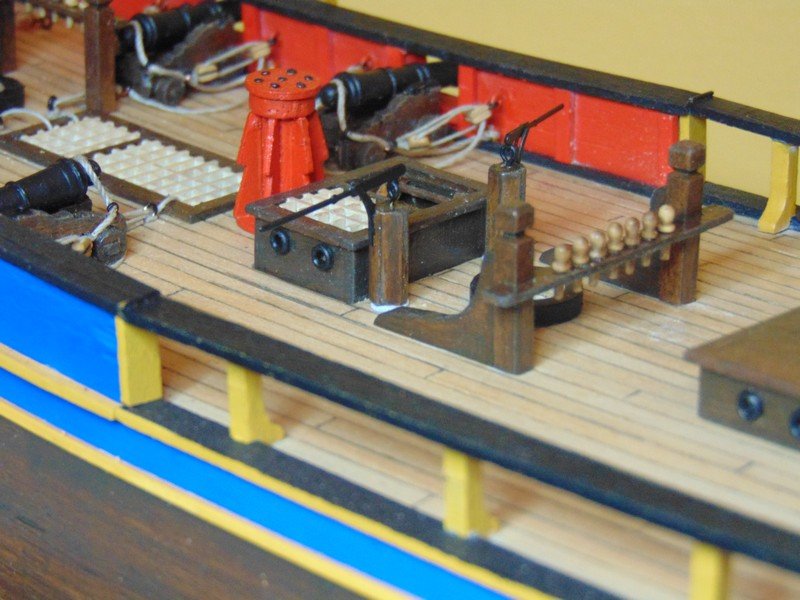
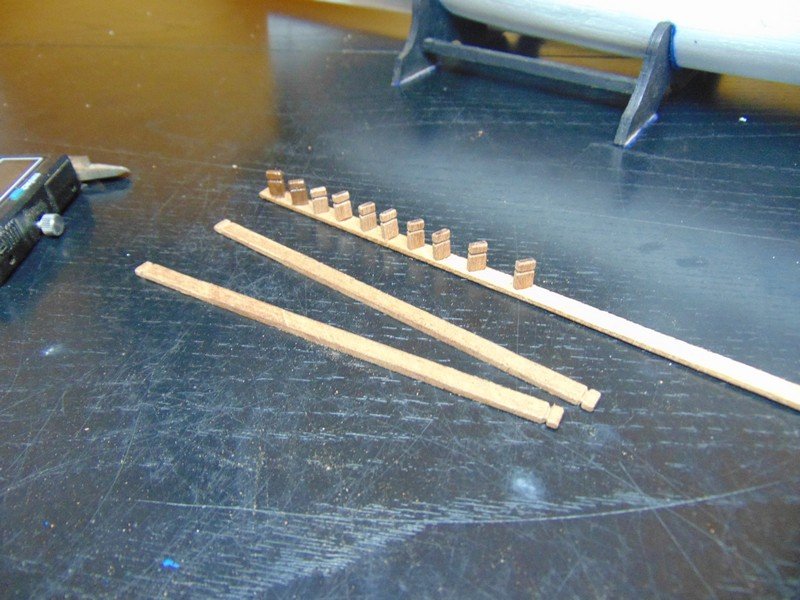
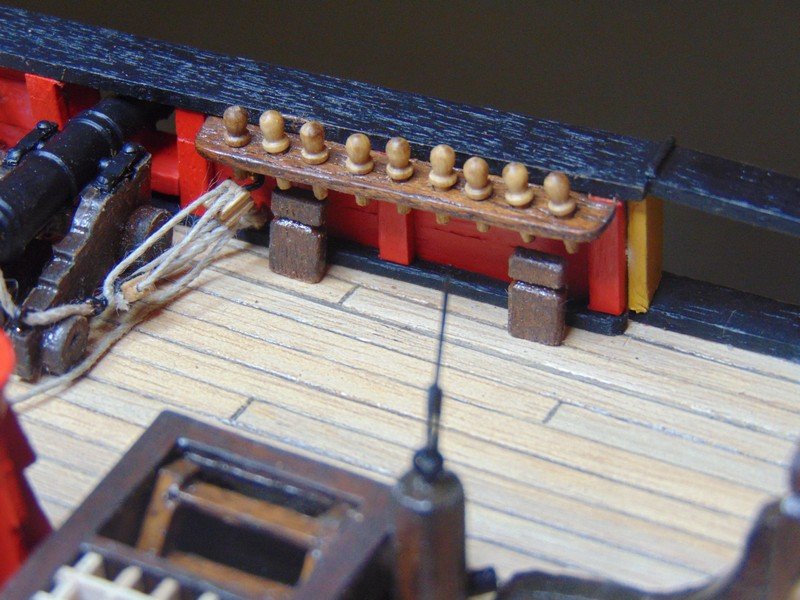
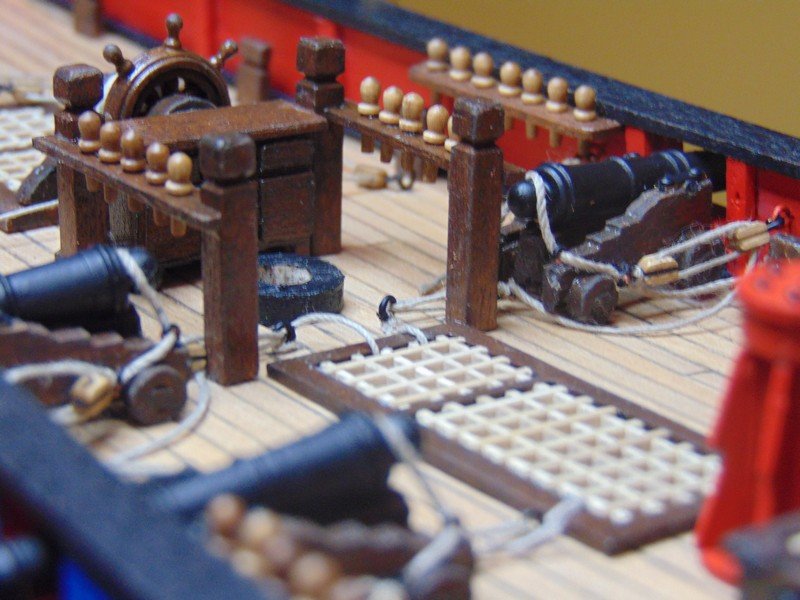
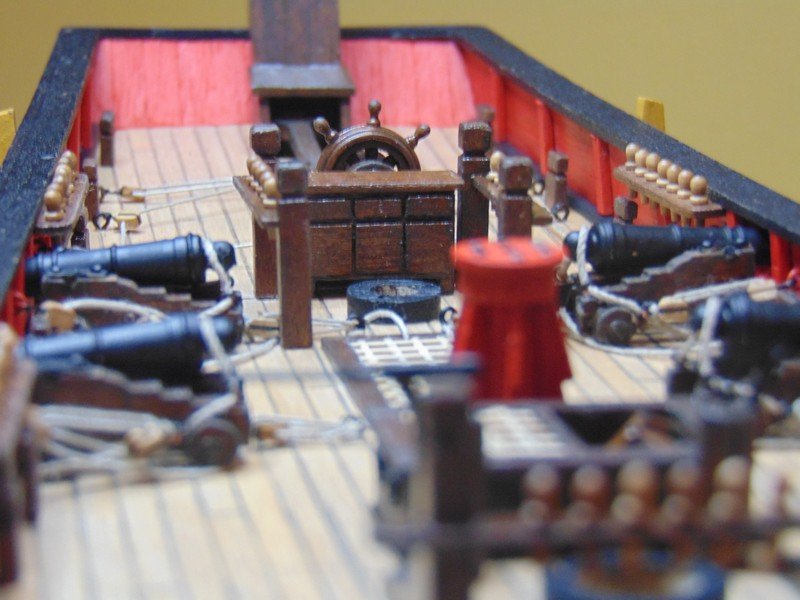
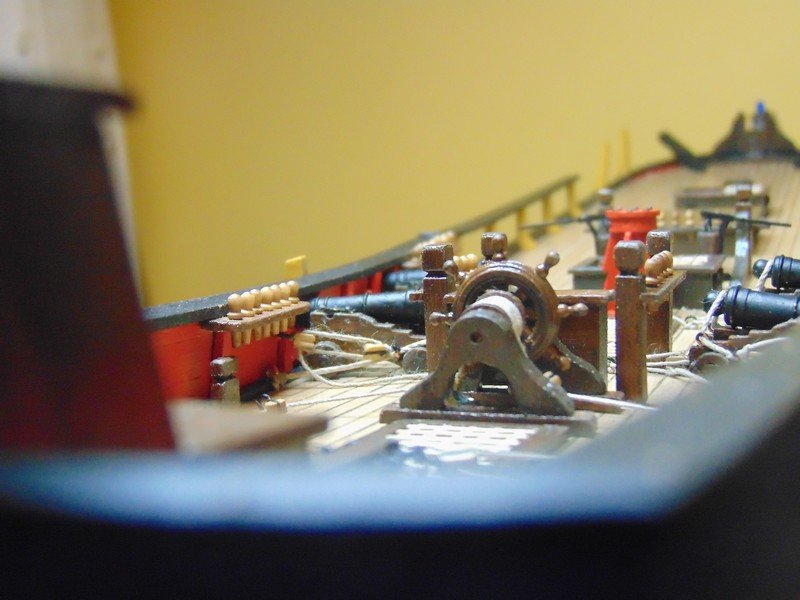
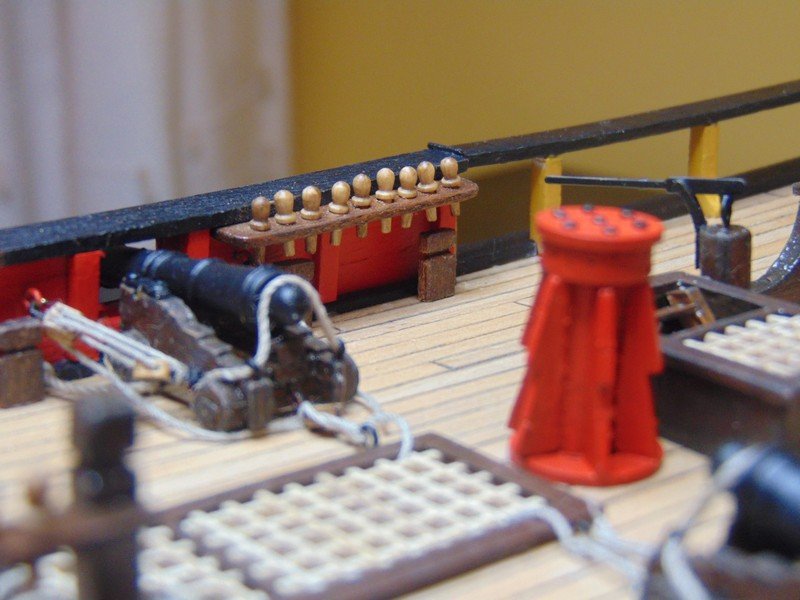
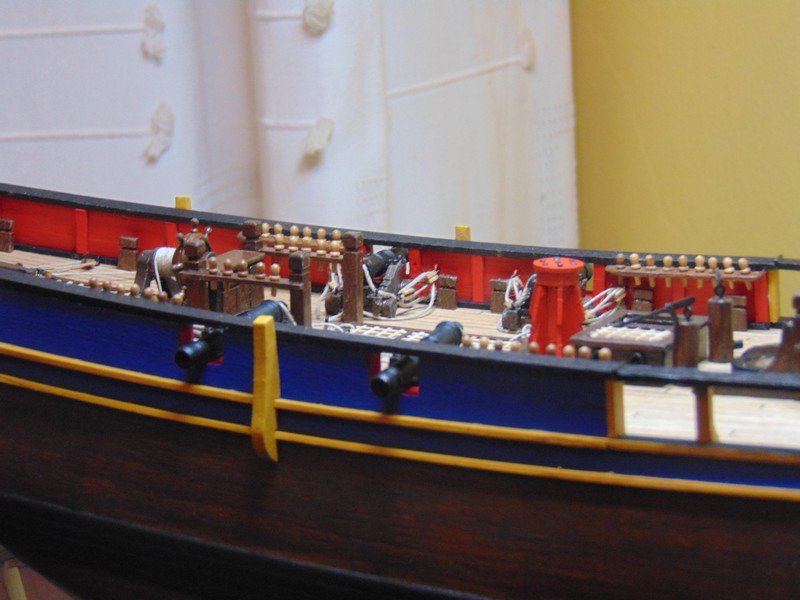
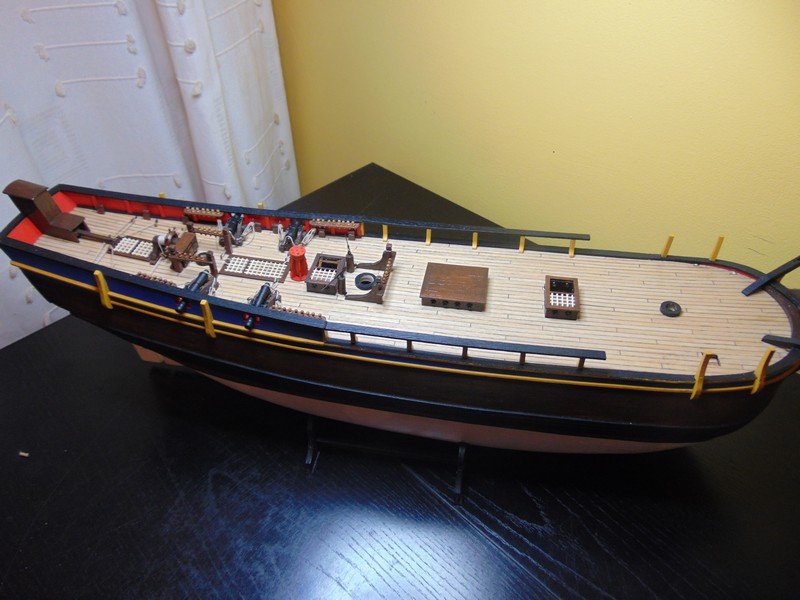
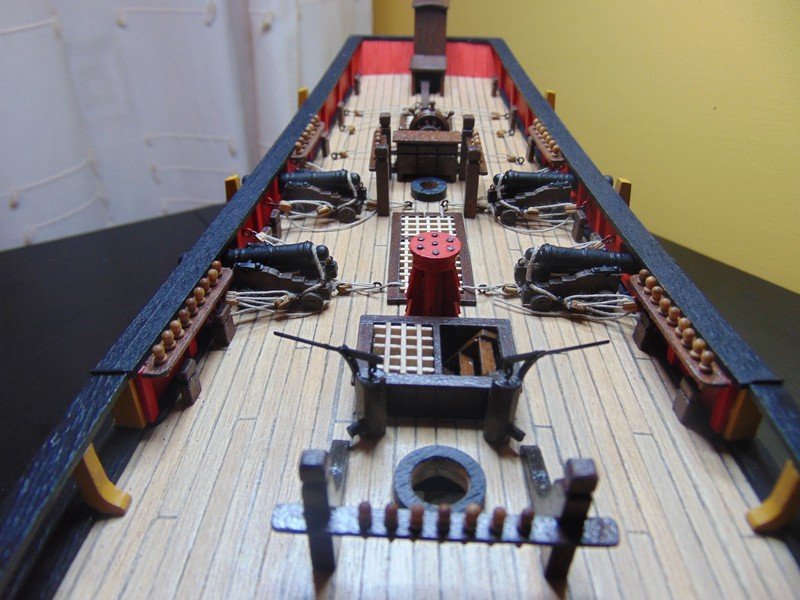
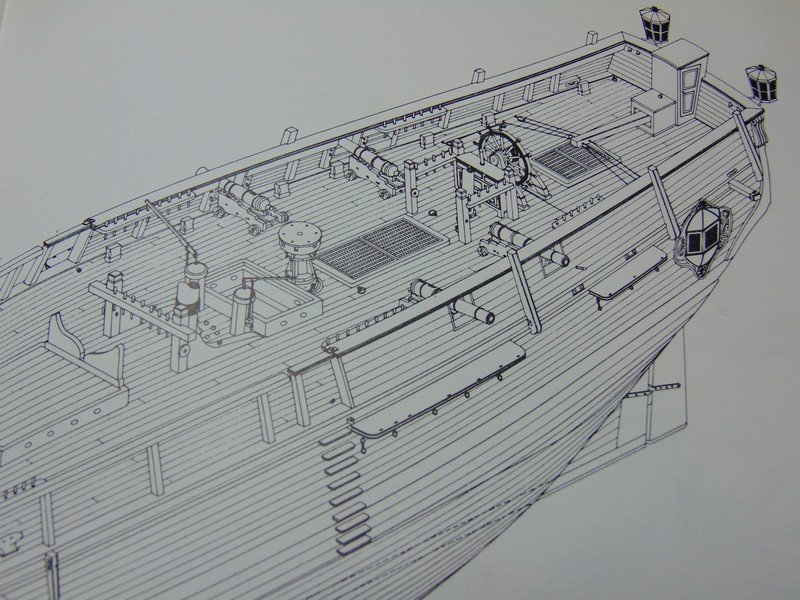
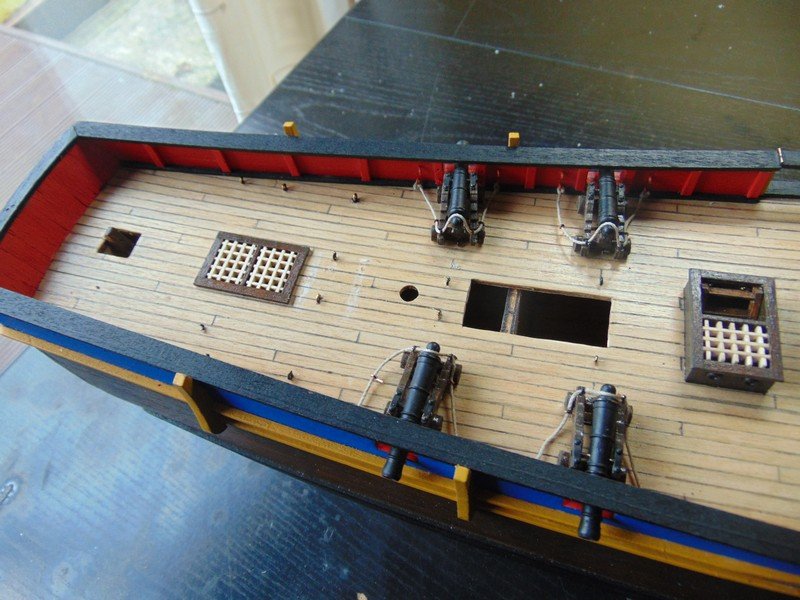
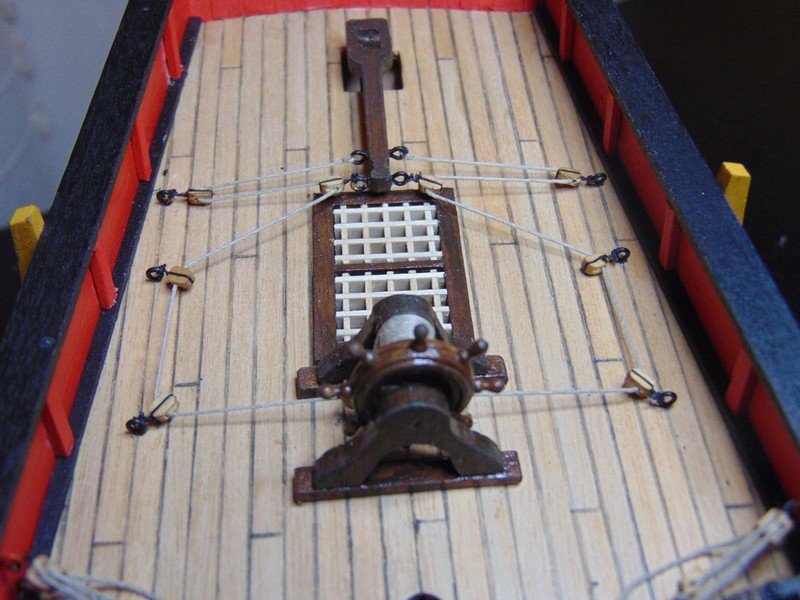
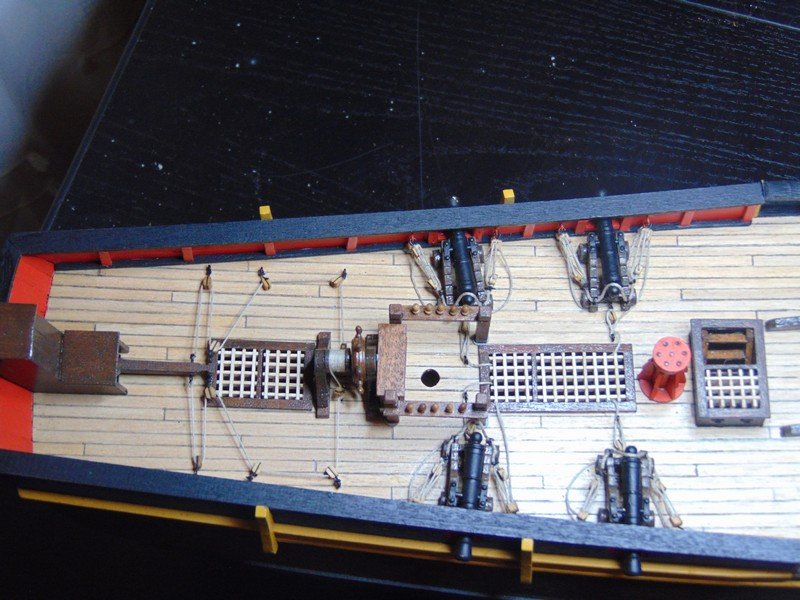
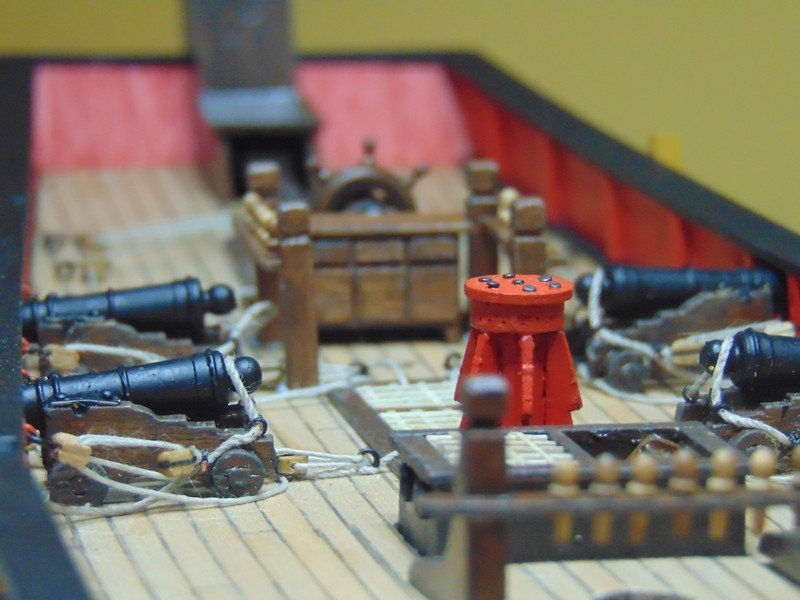
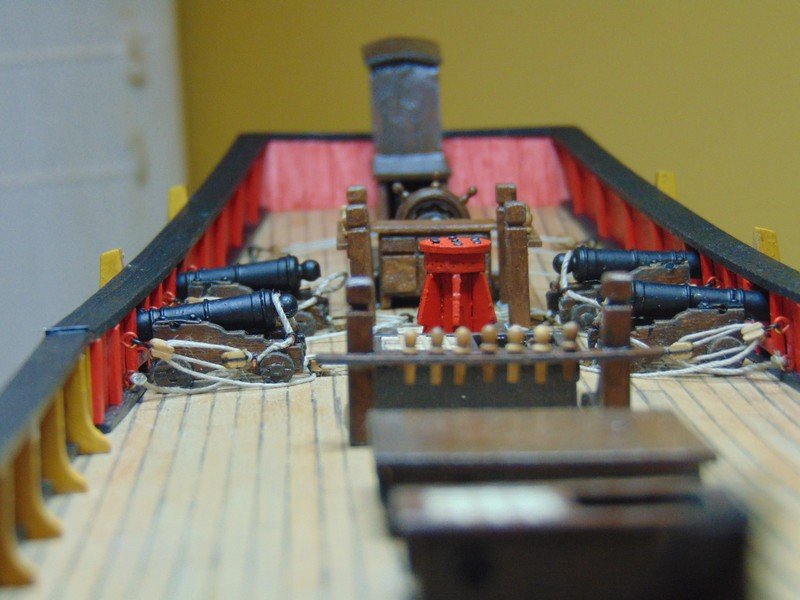
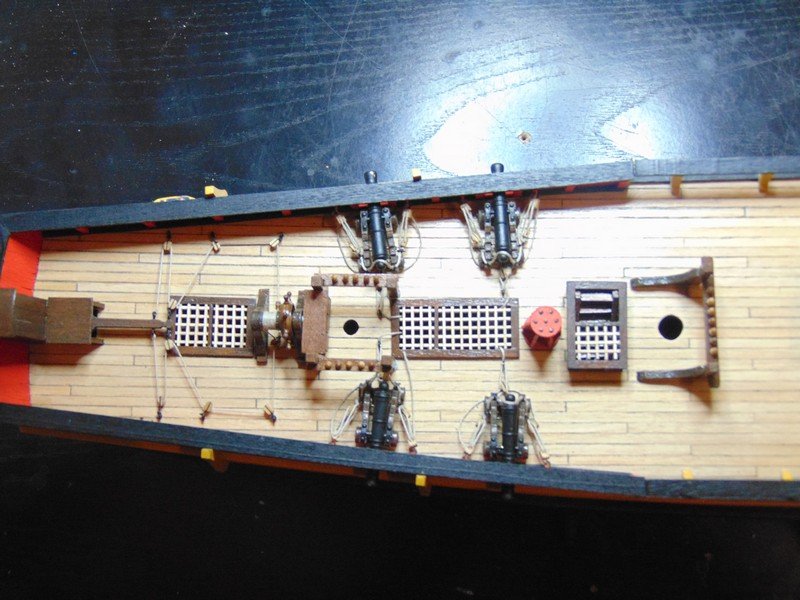
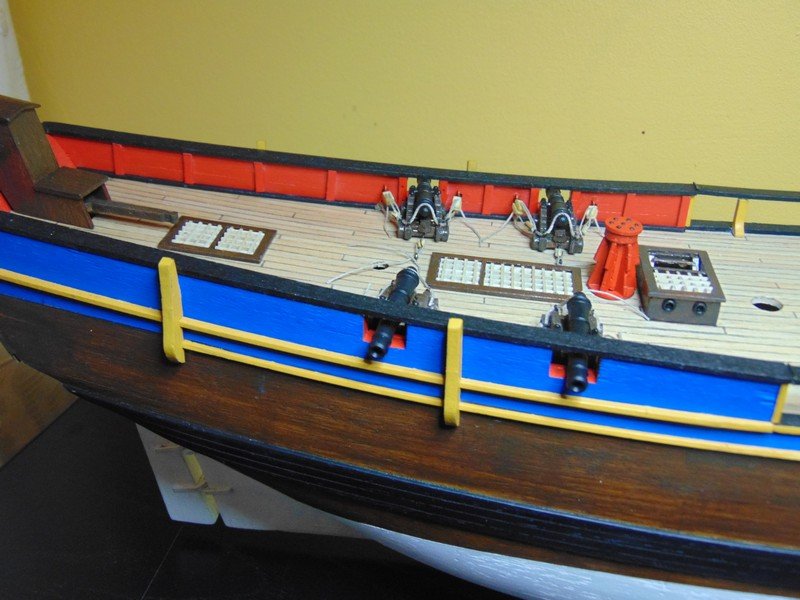
Hello all some further progress on deck I have added the elm tree pumps these where not included in the kit I have used caldercraft pumps and scratch build some belaying pin rails and stanchions the belaying pins themselves where also replaced earlier in the build to 8mm walnut from the kit provided 8mm brass. I have include a picture of the billings plan and the McKay plan ( layout )

- 291 replies
-
- 7
-
-
- bounty
- billing boats
- (and 1 more)
-
Thanks peter I'll have to look those up will make for interesting viewing
- 291 replies
-
- 2
-
-
- bounty
- billing boats
- (and 1 more)
-
i have no symphony for you bud I thought ship building was a manly thing you just gone and let the side down
-
Thank you derek I consider this part of the build (the furniture part) more suited to the doll house type builder I much prefer the planking stage but I'm trying
- 291 replies
-
- 2
-
-
- bounty
- billing boats
- (and 1 more)
-
Whilst channel hopping I happened to come across the original old film mutiny on the bounty with Mel Gibson and Anthony Hopkins just got done watching and seen no flag locker also the paint scene was very different from mine so from this point on I'm just gonna do what looks pleasing to my eye
- 291 replies
-
- 2
-
-
- bounty
- billing boats
- (and 1 more)
-
I should have mentioned you can still use you carpenters glue between planks just ca for where they meet the bulkheads speeds things up a lot
-
Hi derek looking great I would perhaps give the ca another shot as you will be giving the hull a thourougly good sanding anyways so won't have to deal with any residue just a thought. as for the seizing of the line I'm impressed that is something I haven't tried or have any experience
-
HI frankie I have watched your builds on utube I was not aware you where on here it's a very plesent surprise I will certainly be keeping an eye out for your future posts steve
- 20 replies
-
- 4
-
-
- cutty sark
- revell
- (and 2 more)
-
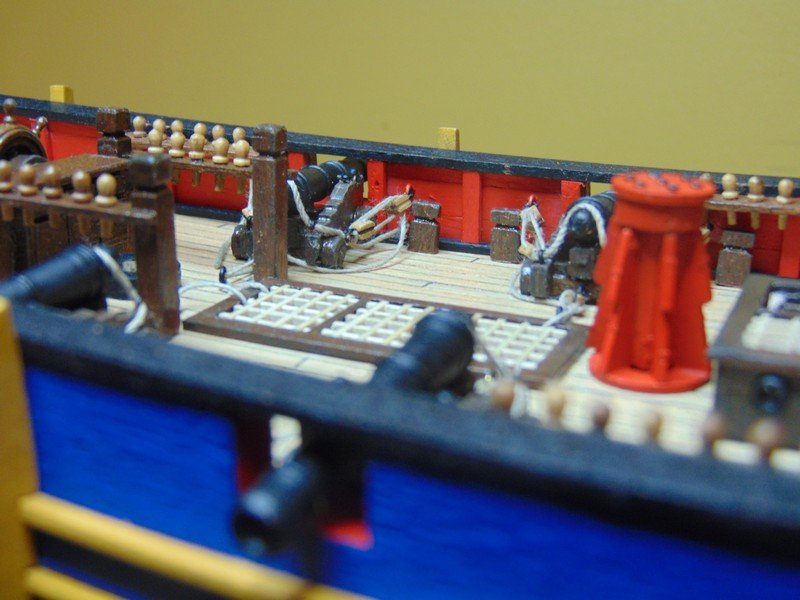
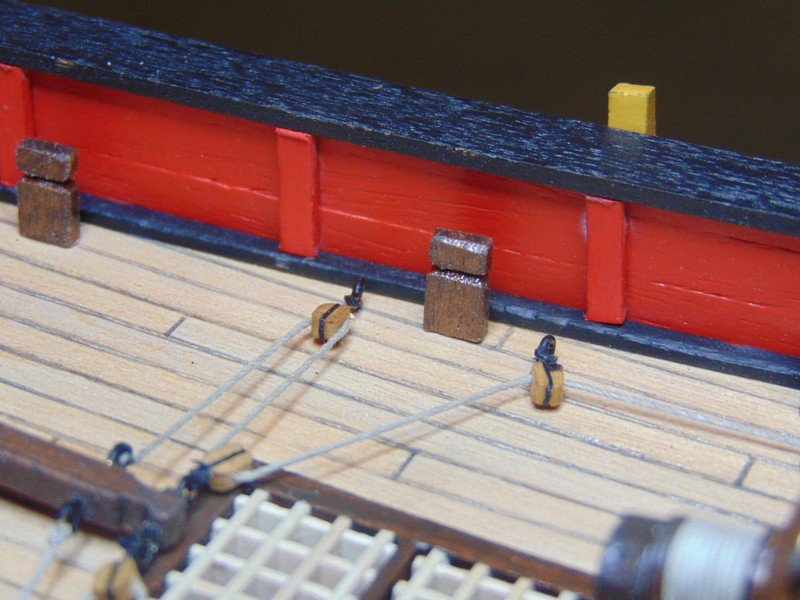
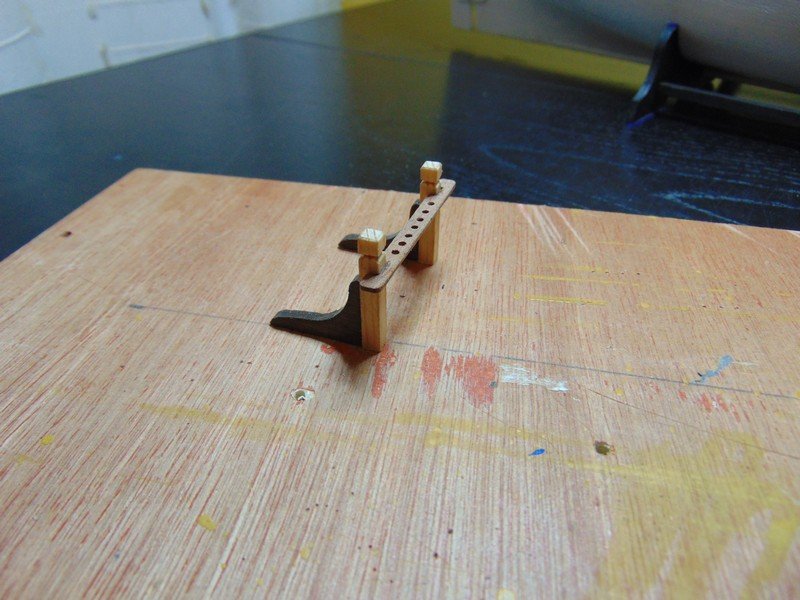
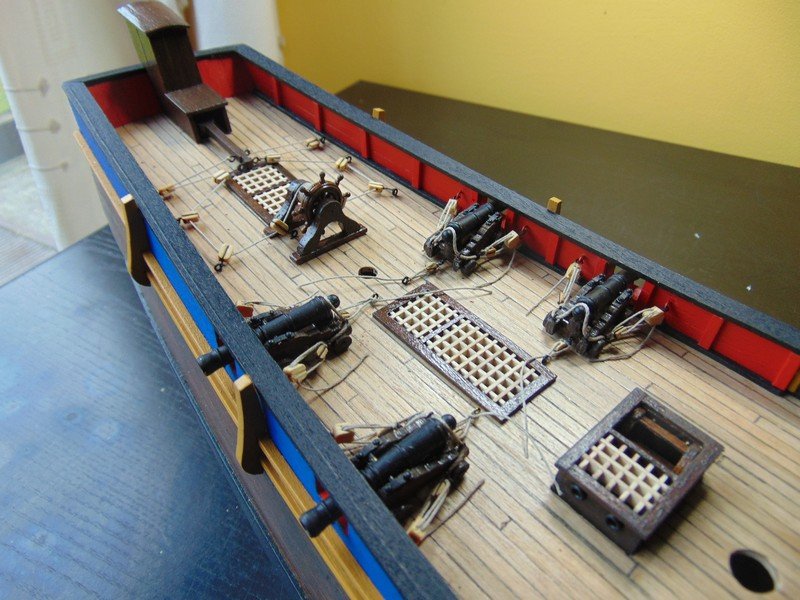
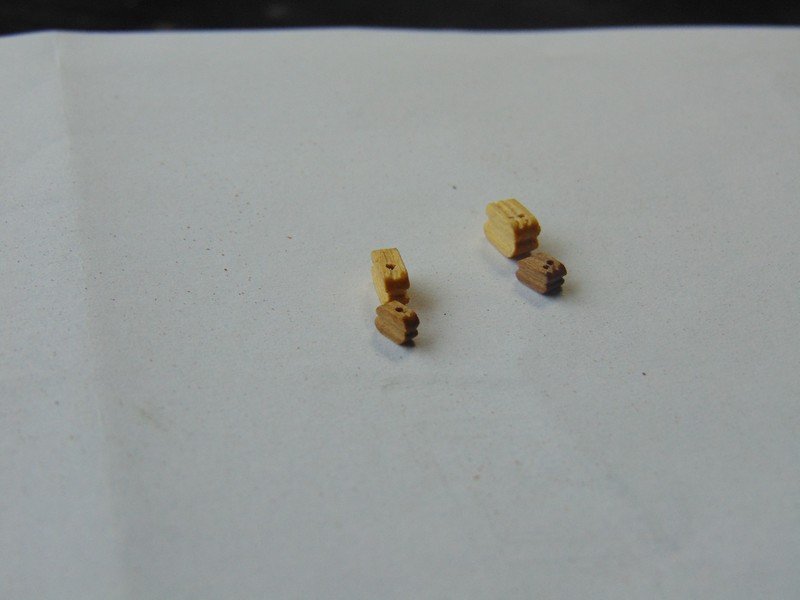
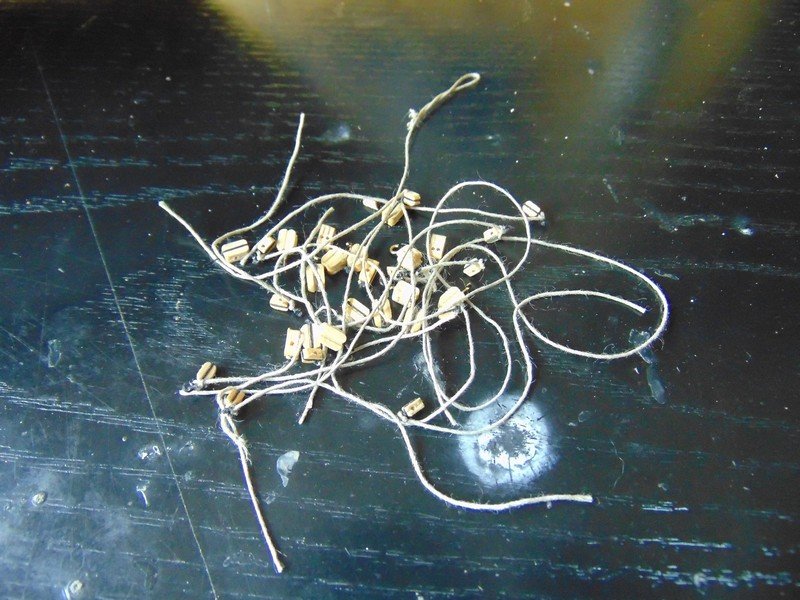
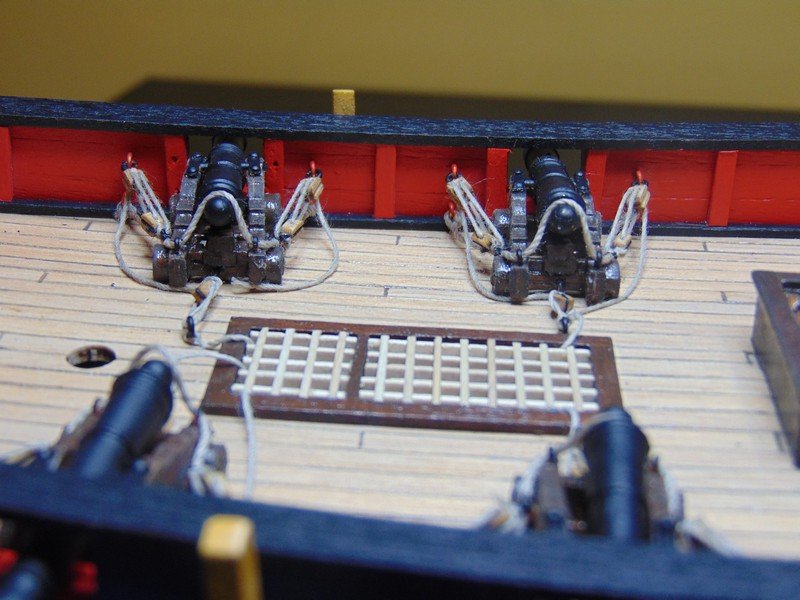
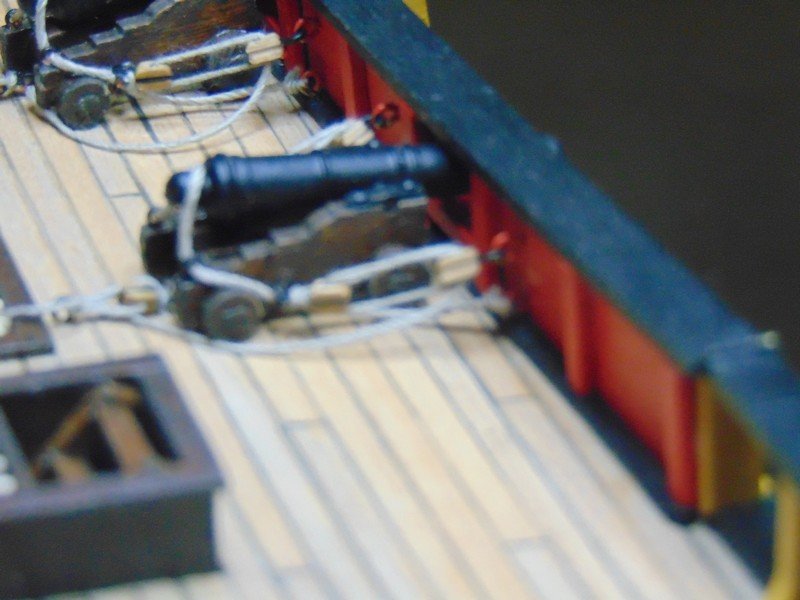
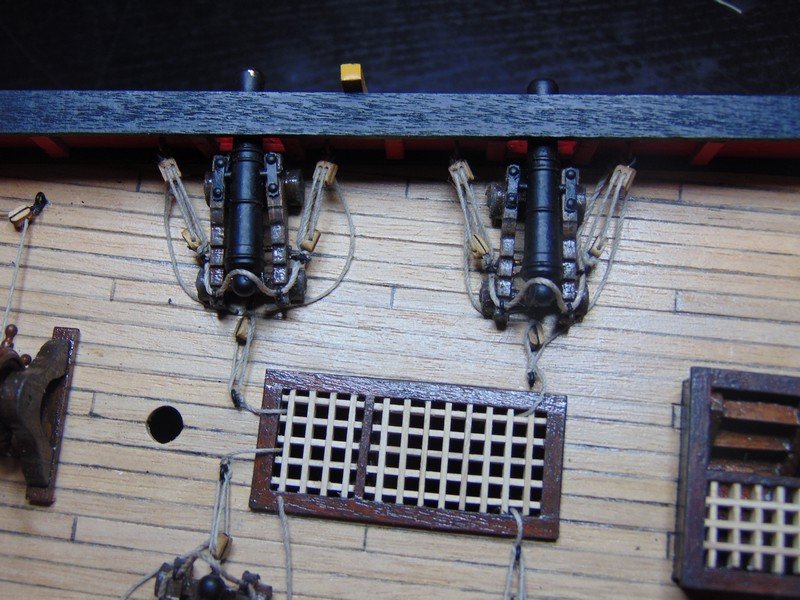
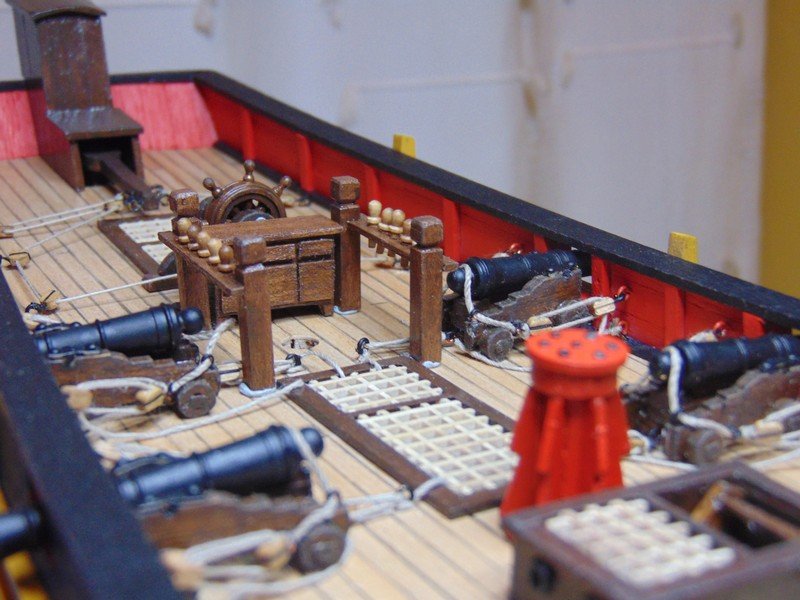
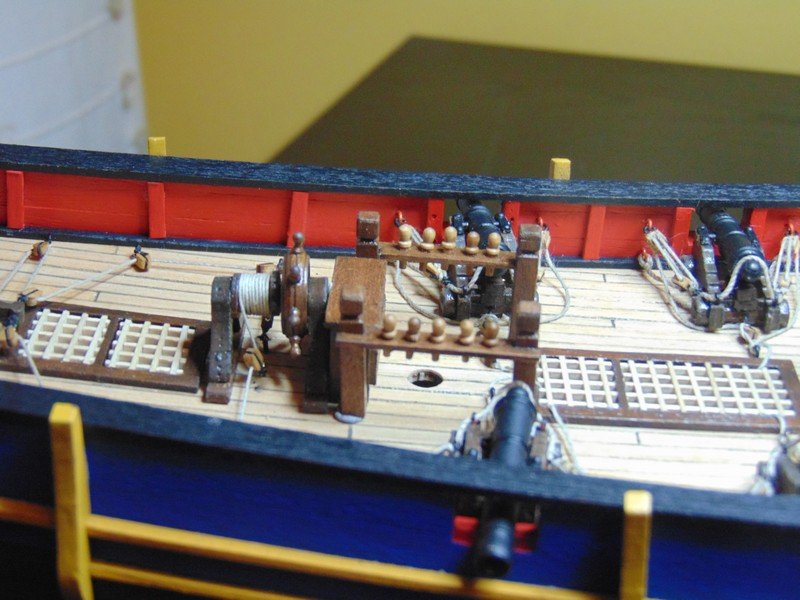
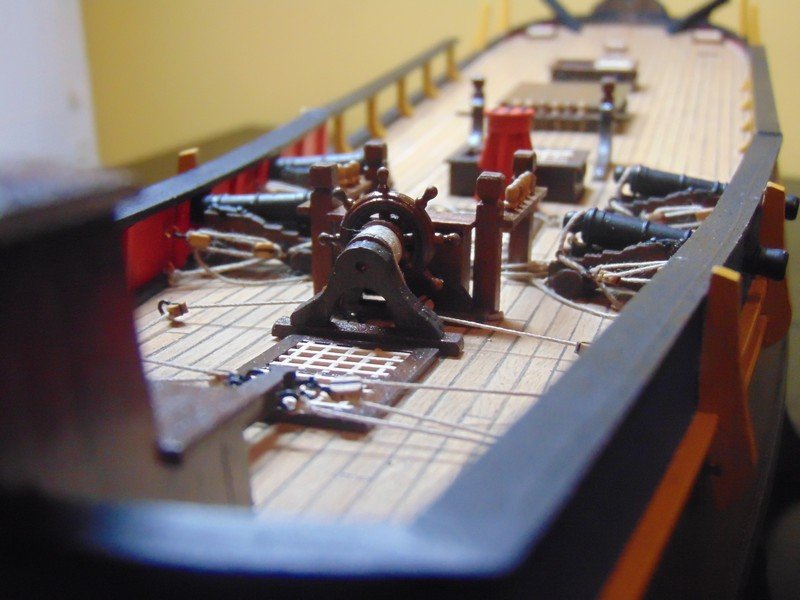
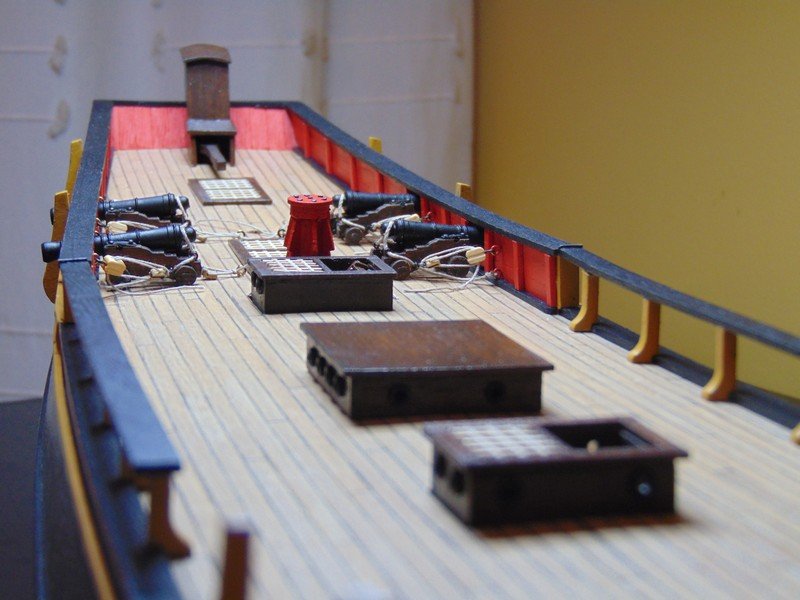
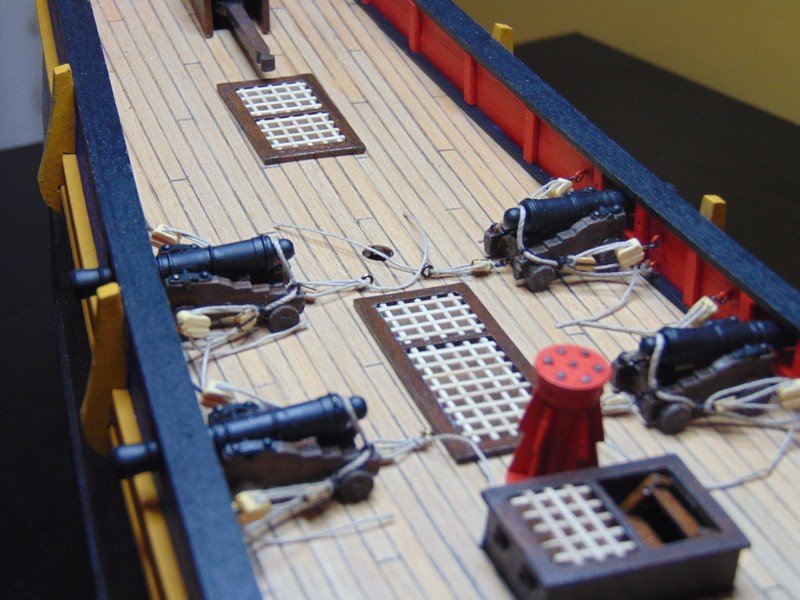
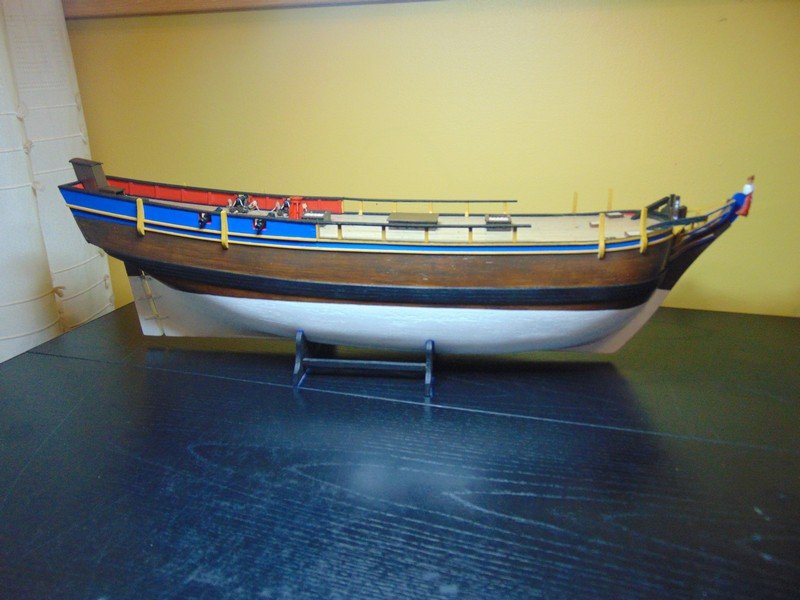
Hello all back with another update ,after rigging the ships wheel and rudder control lines using the kit supplied blocks I decided to replace the blocks with smaller walnut blocks and whilst I was at that I ordered up some replacement blocks for the canons and had a redo on those ,and also while I was at it ordered all new walnut deadeyes to replace the kit boxwood deadeyes .there has also been a few more bits built not included in the kit like the ships binnacle and belaying pin racks I built from scratch and added using the john McKay book for ref.

- 291 replies
-
- 11
-
-
- bounty
- billing boats
- (and 1 more)
-
Hi captain al my comment was not based on your gallery pics it was based on the status of the build .its been a pleasure to follow your great build I'm sorry it's finished would have like to see the top mast fitted but hey each to there own you have a great build there and something to be very proud of I look forward to your next build
-
I think your build is great however I am sorry if this offends you but I just can't accept it as complete without the upper mast I am sure others feel the same but won't say so I am giving an honest opinion that is my opinion and mine only please don't be offended
- 265 replies
-
- 1
-
-
- finished
- artesania latina
- (and 1 more)
-
UK Supplies of good blocks and rigging line
Steve 12345 replied to JRB9019's topic in Masting, rigging and sails
Hi john regards rigging line on my first build I spent a fortune on kit brand lines in ten meter rolls then it occurred to me it is not magical ship rigging line its just thread so instead I searched ebay for thread manufacturers and can now buy 300m spools for very little cost that suits me cause I normally use a 1 meter piece of line to tie a line 30mm long it took a bit of experimenting but finaly got right colour and size ,from memory I think they where sized in the thread industry in the uk as follows 0.25 is known as size 40 0.5 is known as size 20 1.0 is known as size 10 don't quote me exact sizes I chucked the packaging when they arrived hope this helps steve -
Hi husky thanks again for following and commenting I'm basically trying to base it on the john mckay book and a mixture of some of the other logs and what look I prefer.
- 291 replies
-
- 3
-
-
- bounty
- billing boats
- (and 1 more)
-
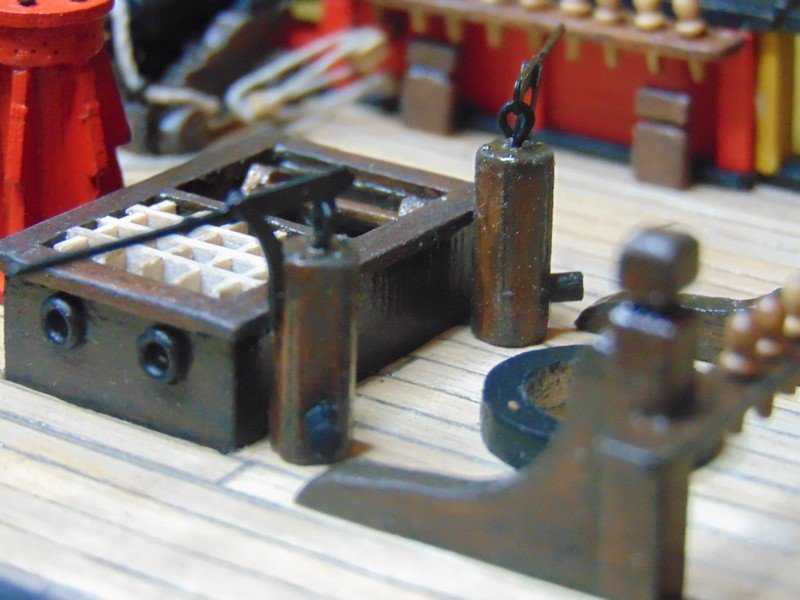
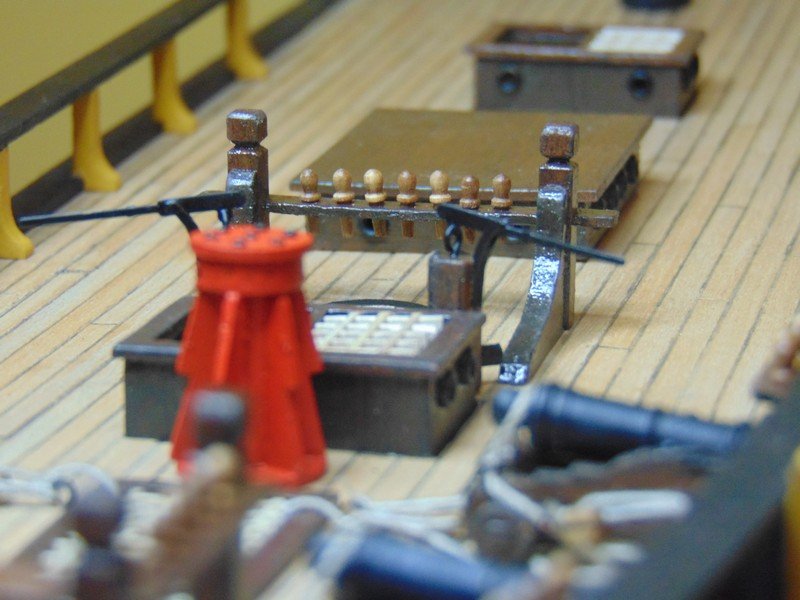
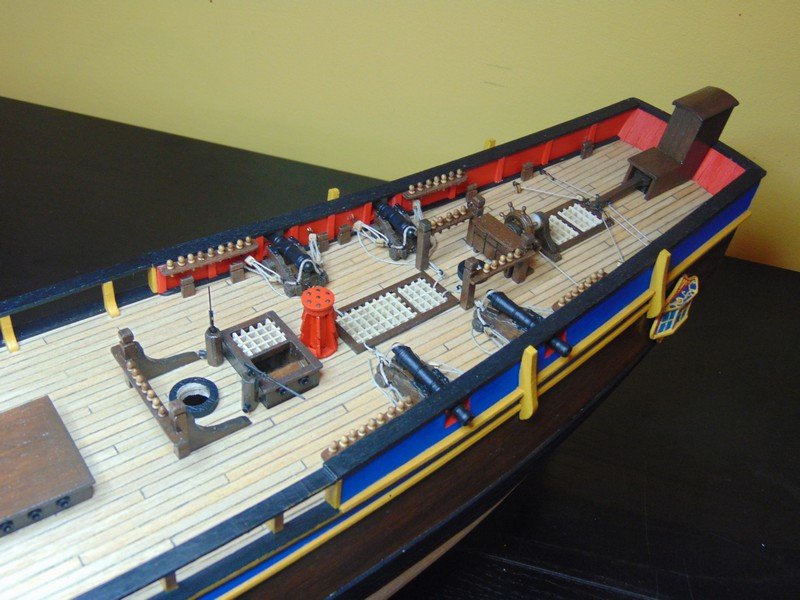
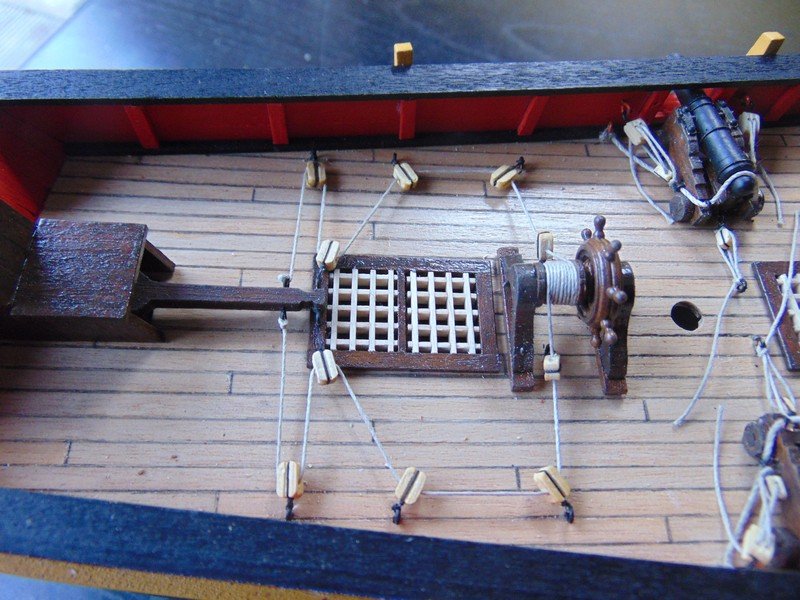
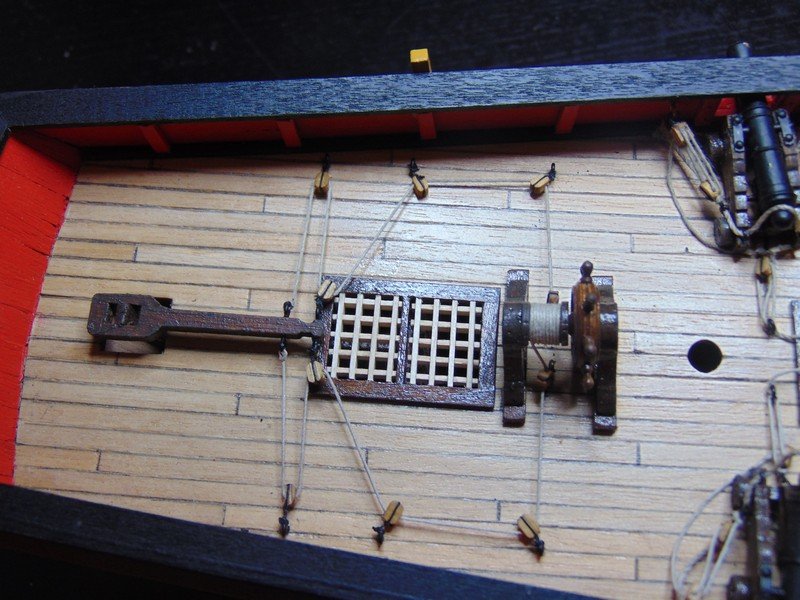
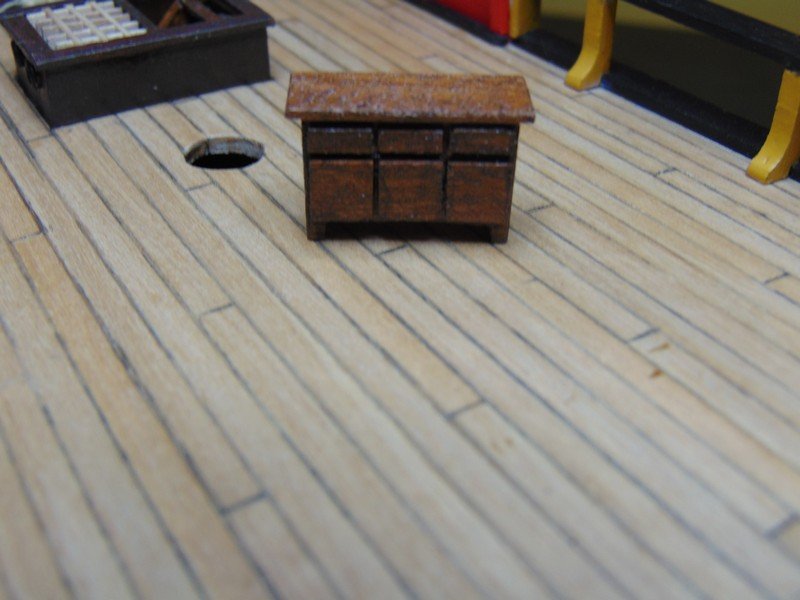
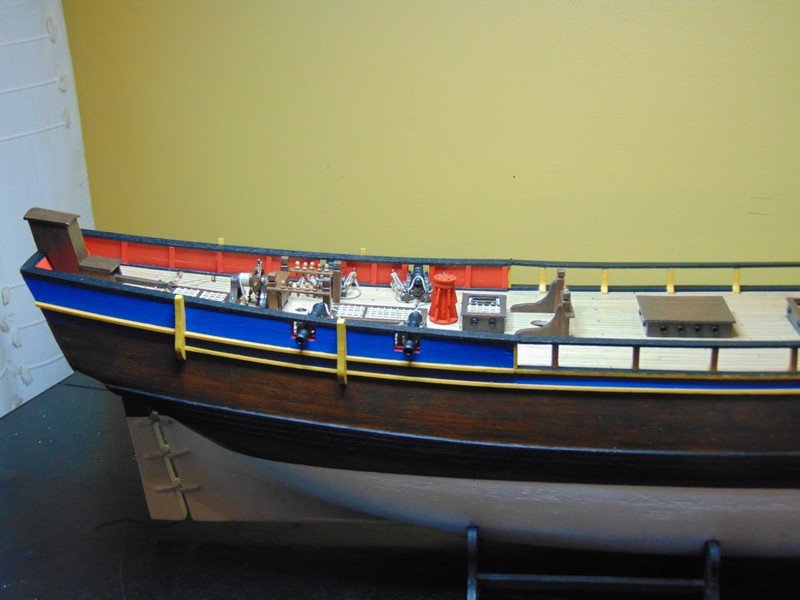
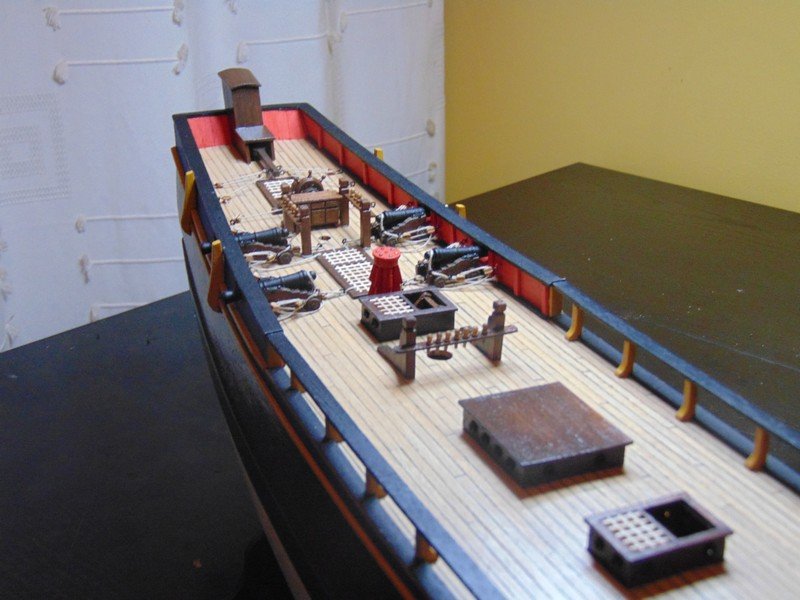
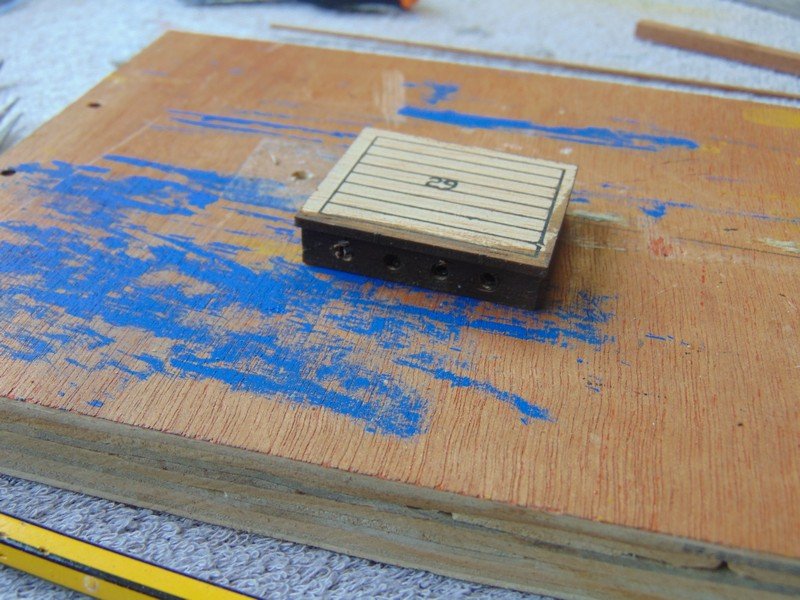
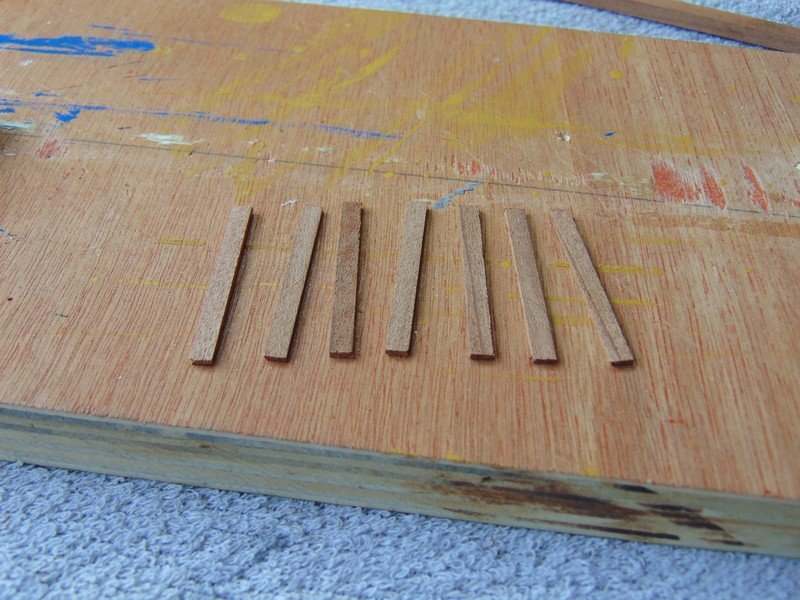
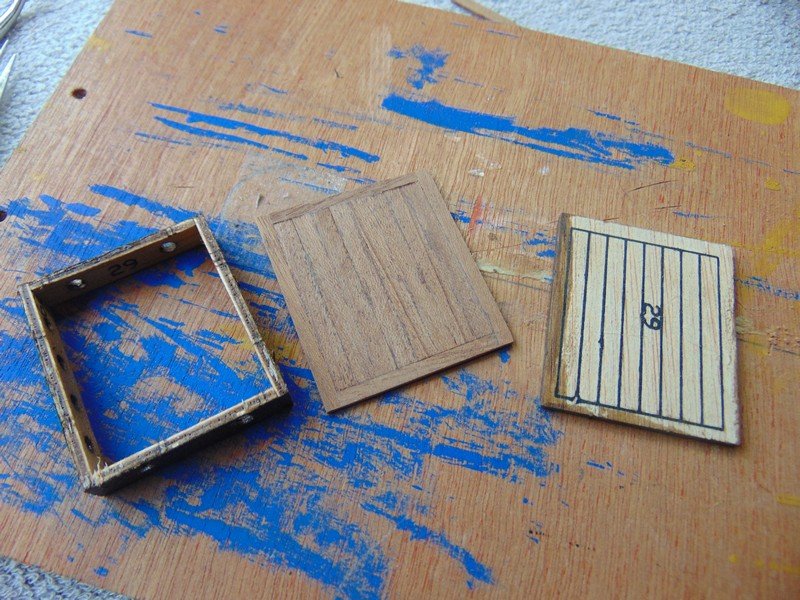
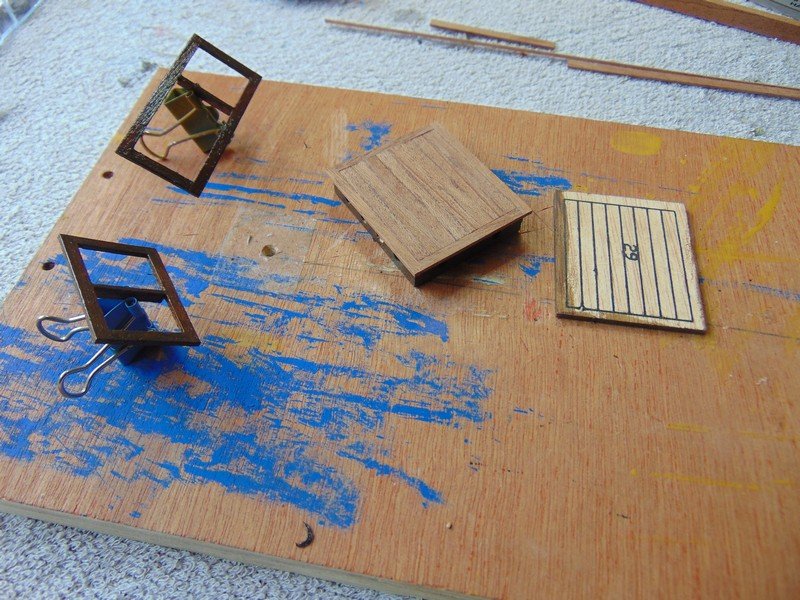
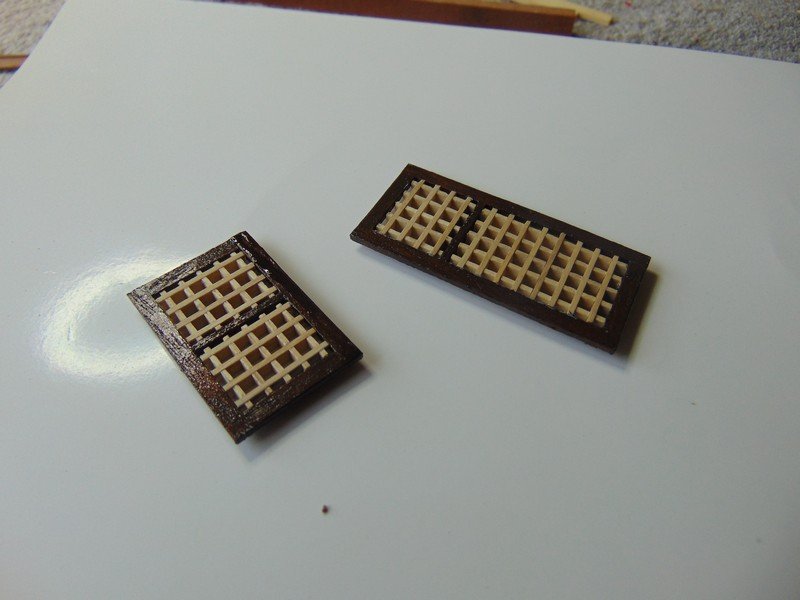
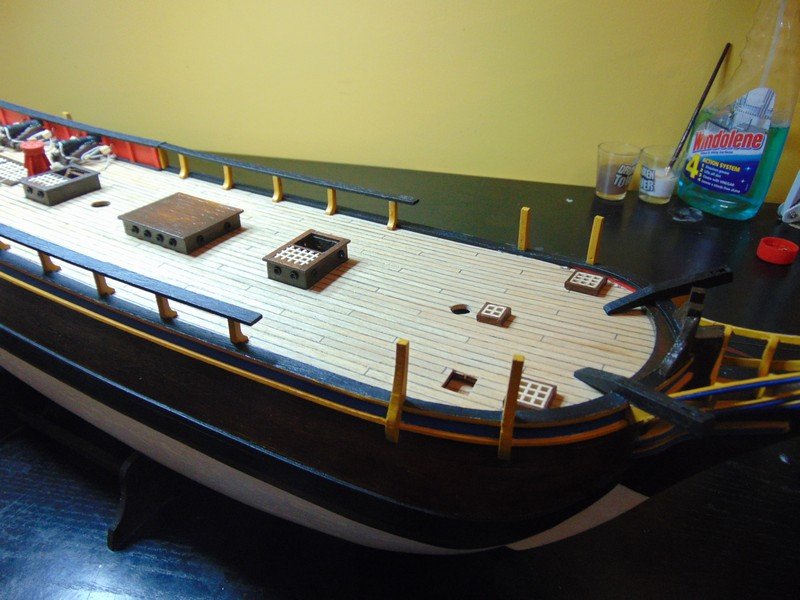
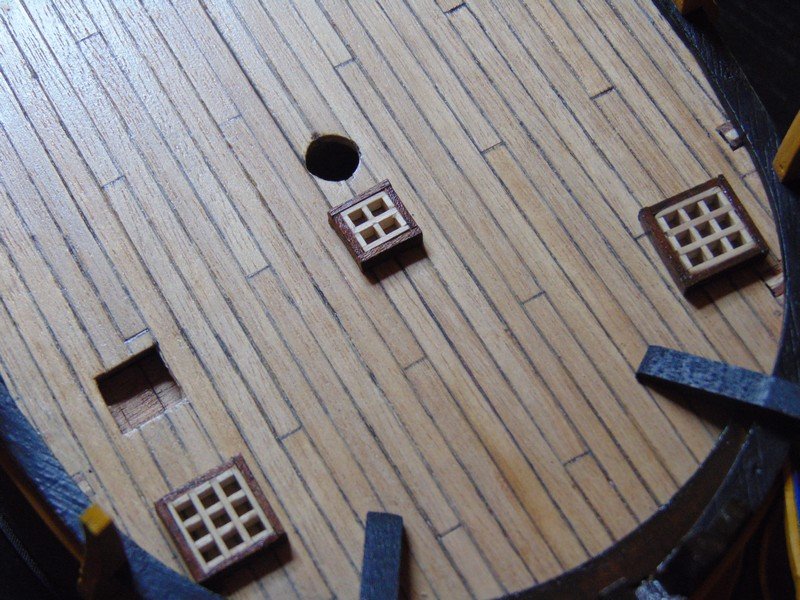
Some of the deck furniture and gratings built and fitted im trying to replace plywood parts with hardwood where reasonably possible the plywood will stain or paint up but I find less coats required with hardwood . The next few pictures show the bowsprit bracket fitted or how I fitted it billings instructions don't show much in this, after studying for a few hrs a checking all other logs I found nothing so decided to rebate the brackets into the keel I know this will make more sense if your actually building the billings version so I hope these help

- 291 replies
-
- 7
-
-
- bounty
- billing boats
- (and 1 more)
-
Hi EJ i like the idea of planking upwards and the finish line growing easier rather than harder I think I will adopt this on my next build
