tlevine
-
Posts
2,033 -
Joined
-
Last visited
Content Type
Profiles
Forums
Gallery
Events
Everything posted by tlevine
-
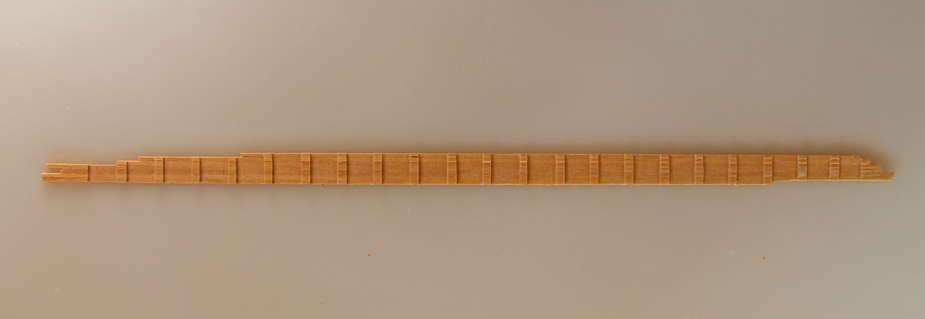
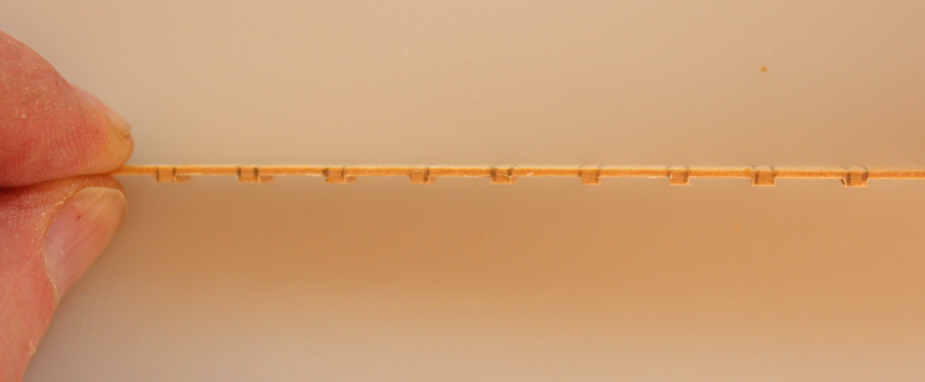
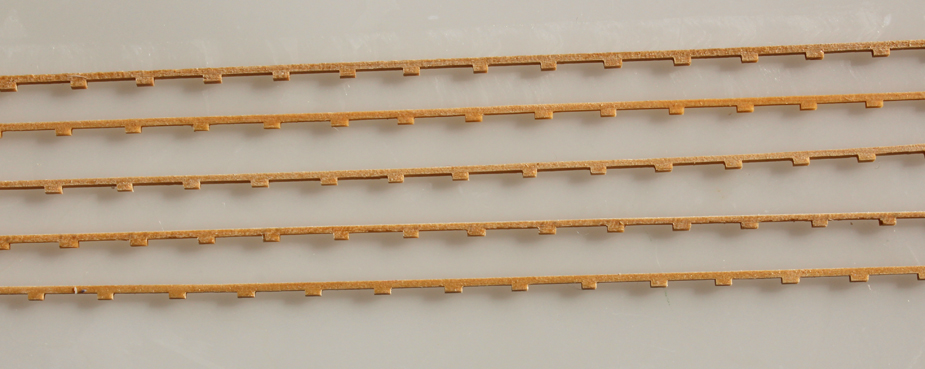
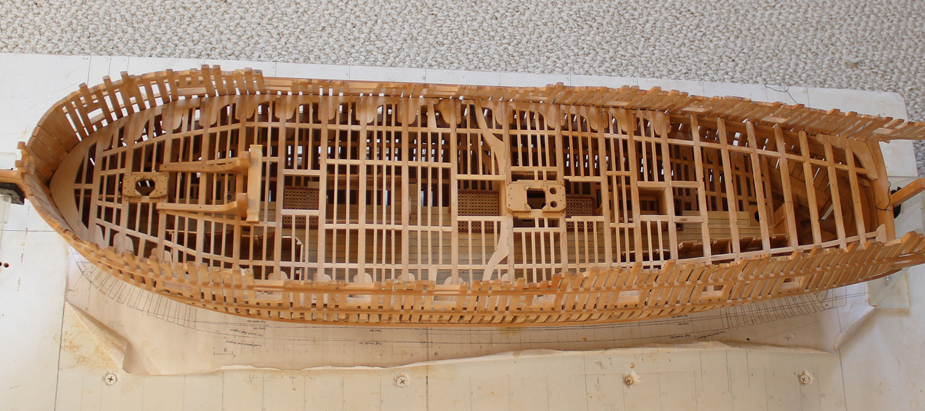
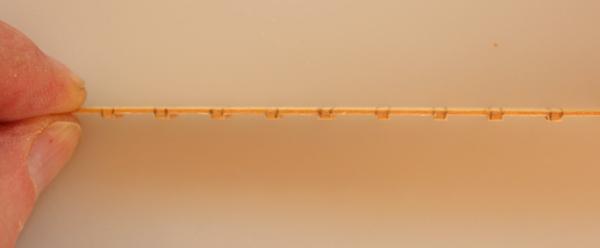
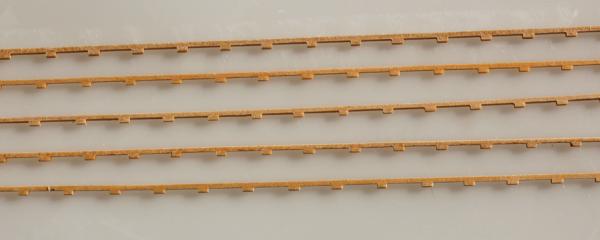
 Because of the server issue I went back and checked all of the photos in the build log. It was necessary to repost about a dozen pictures. I have made and installed the hammock battens. These are pieces of tooth shaped wood that attach to the beams just under the carlings. Their function is to provide a hook to secure the hammocks. I first made several strips of wood the correct dimension (2" x 3") and glued them together. I set the height of the blade on the table saw to the depth of the notch and sawed all of the strips simultaneously. The distance between the teeth is 12". The piece was then put into a bottle of isopropanol and the individual pieces separated from each other after several minutes. The interior and exterior edges were rounded off with files. The nails attaching the batten to the beam were simulated with an awl highlighted with pencil. I decided to only place these on the starboard side since I have not yet decided how much decking I will install on the port side. I have also finished the upper row of planks for the aft bulkheads. They now extend to just below the beams.


-
Gorgeous as always, Remco.
-
I am not usually a sail person because of their tendency to overwhelm the model. However, the sails on your model look really sharp. Congratulations on a lovely build.
-
Thank you, gentlemen, and thanks everyone for the likes. Greg, you mean there is a platform down there? All kidding aside, even though it is very difficult so see into the bowels of the ship, it was definitely worth installing. First, it gave me a better appreciation of the construction of these ships as well as the tight quarters endured by the men. On a more practical level, it gave me the chance to improve my woodworking skills where the mistakes will not be as noticeable.
-
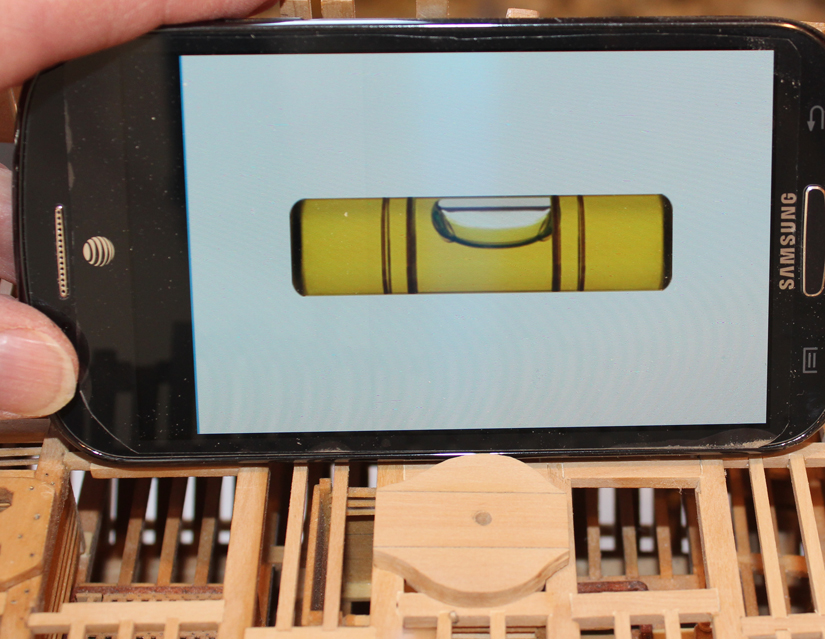
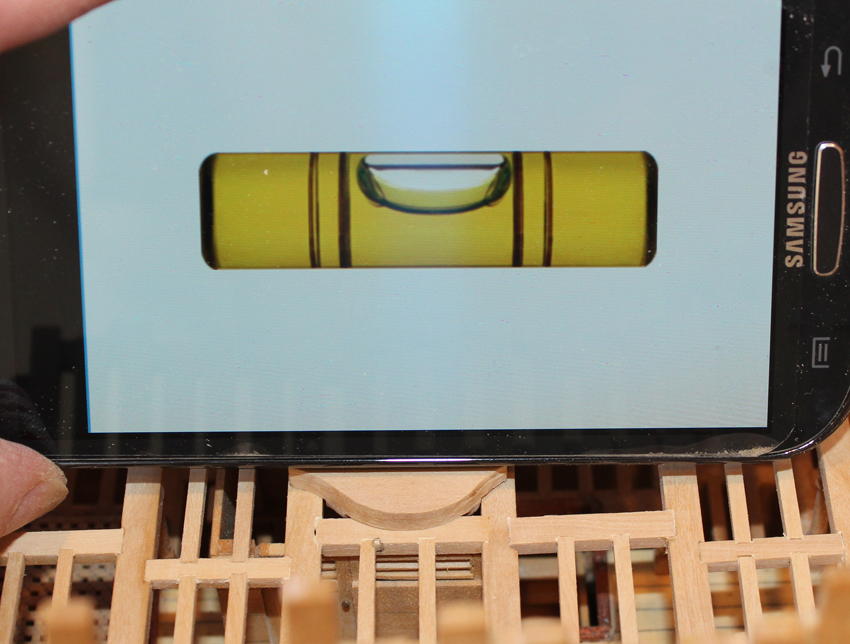
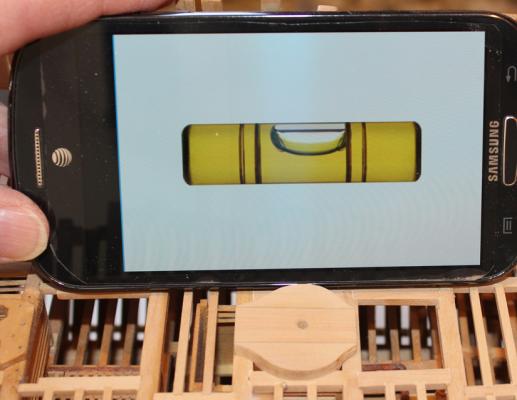
Thanks, Grant. David, it is an app on my phone. It's a freebie called Bubble. You have to calibrate it first with a known level surface but then it works great.
-
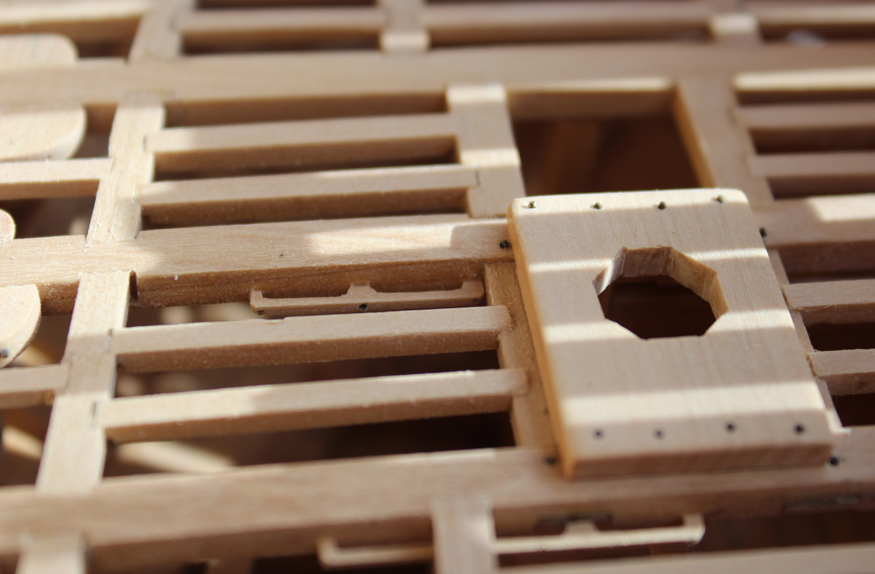
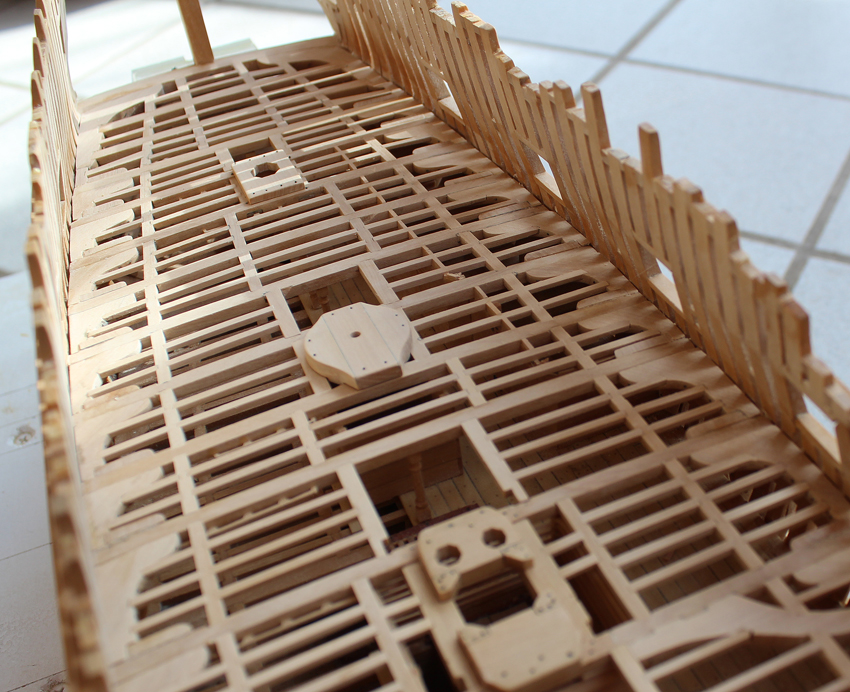
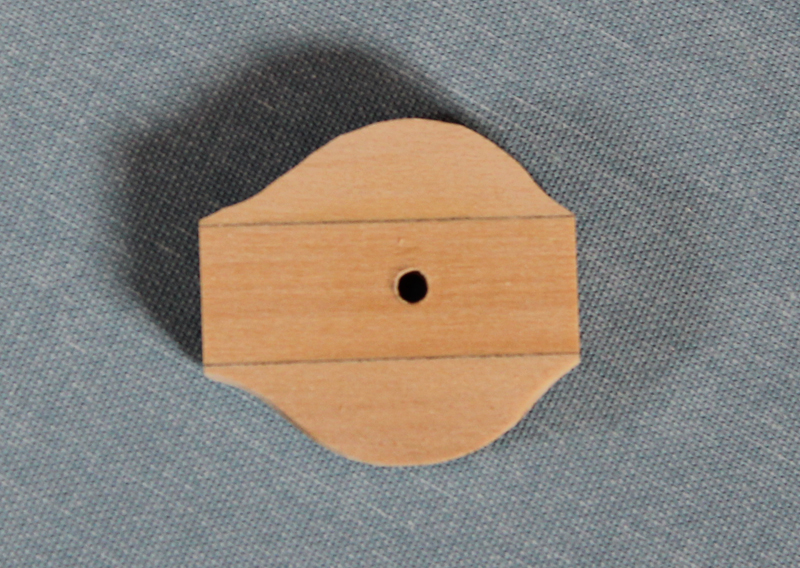
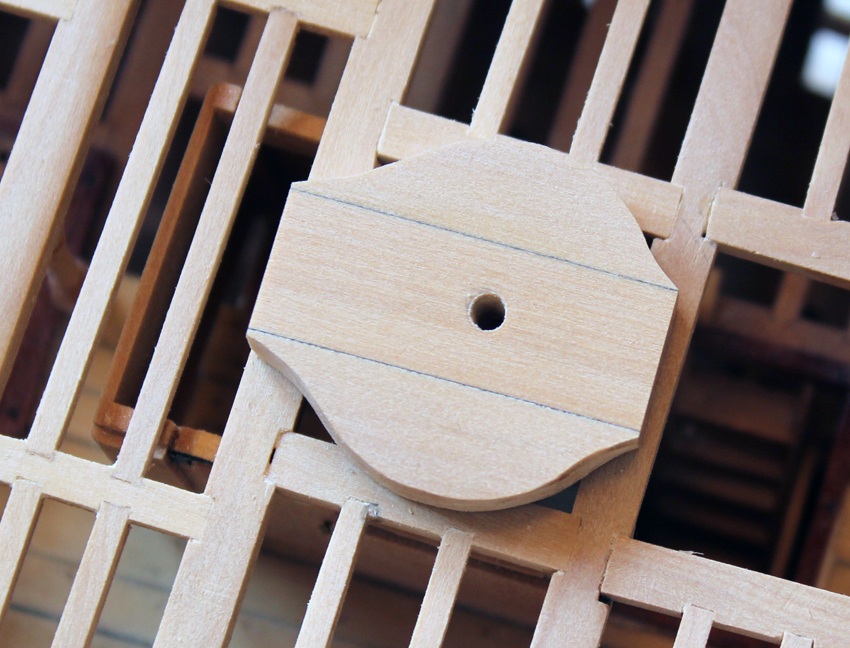
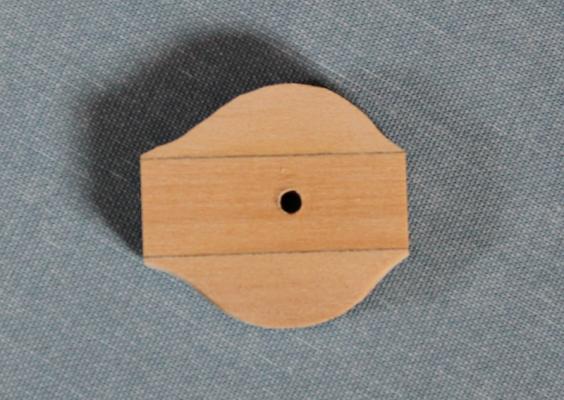
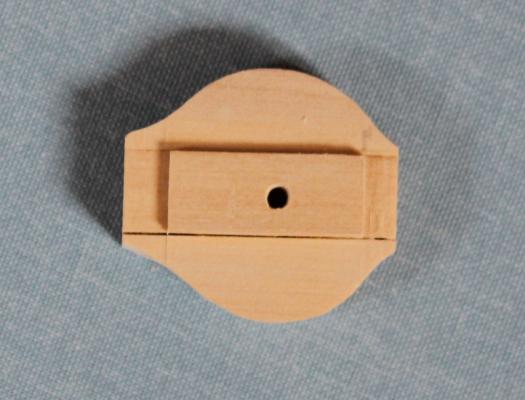
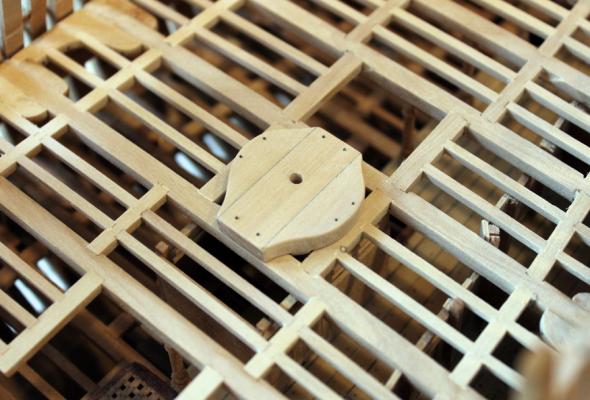
Druxey and David, thanks. The only thing I could think of as I finished the deck was...thank god this isn't a frigate! I deferred making any of the items that attach on to the upper deck (except for the fore and main mast partners) until the entire deck was completed. Now it is time for some small projects which will vastly improve the monotony of the appearance of beams and scantlings. The first thing made was the capstan step. The shape of the step varied among the Swan class ships. In TFFM, David shows a three piece rectangular step. Atalanta has a tear-drop shaped step. At this point I was still psyched from finishing the deck, so I forgot to take pictures of the step fabrication. The step is made of three pieces of wood rabbeted together. The inner piece was 14" thick and the outer pieces were 10" thick. The edge of the 14" thick wood was highlighted on both sides with archival ink. The top of the step is flat, stands 7" proud of the beam and is parallel to the waterline, not to the deck. There is a hole in the middle for the capstan post. The step is secured to the beams and carlings with bolts. The mizzen partner is a simple plank, in contrast to the complex structures of the fore and main partners. The most difficult part is placing the hole in the correct location because of the rake of the mizzen mast. I do not plan on masting and rigging Atalanta so I took the location of the opening off the plan rather than make a dummy mast.


-
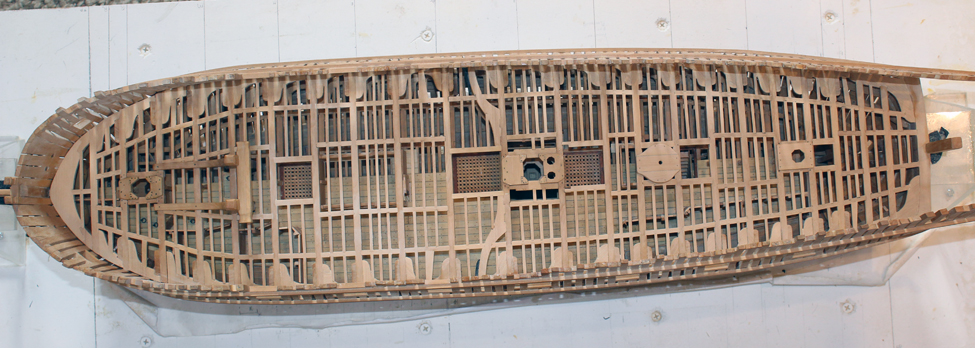
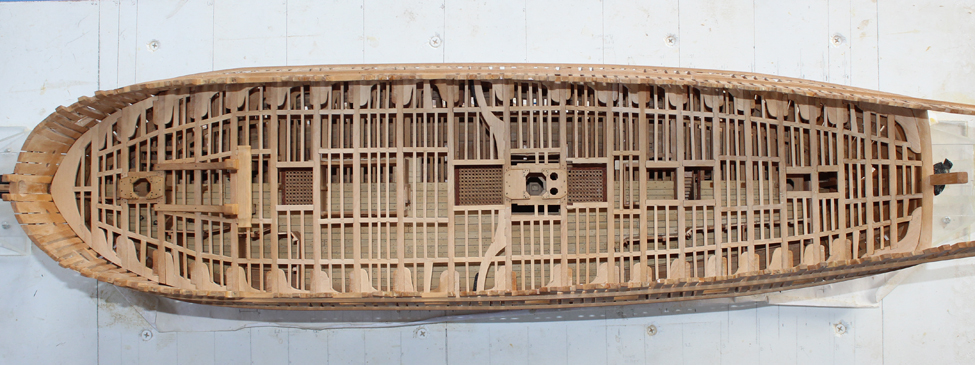
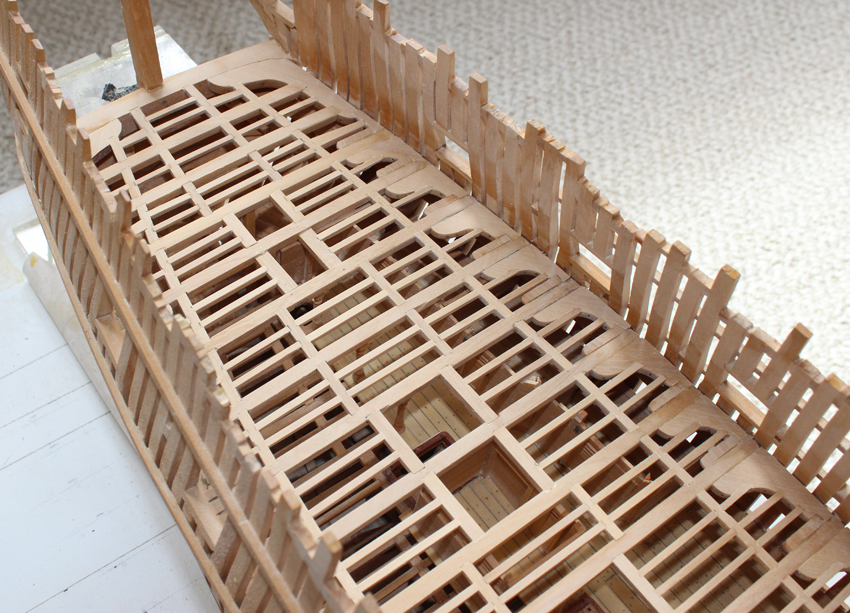
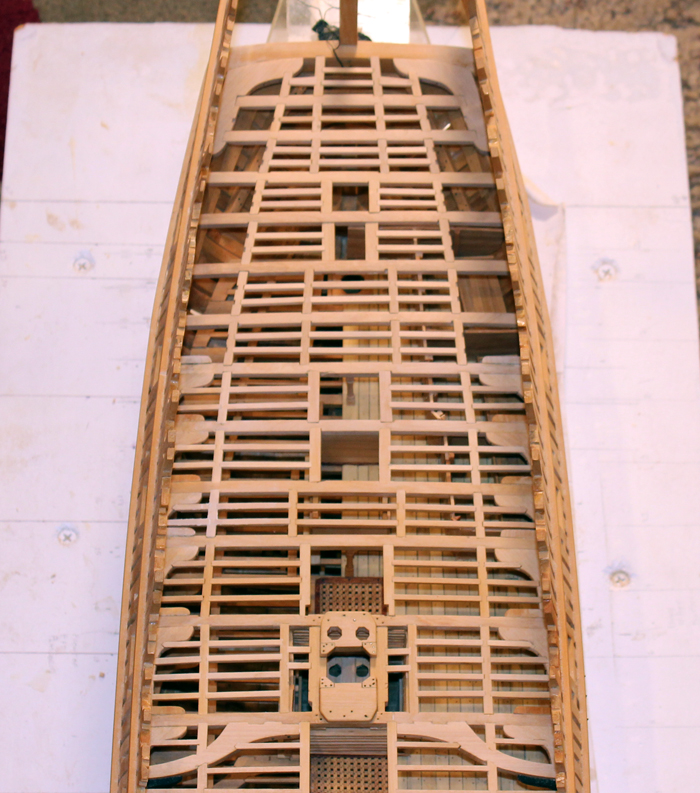
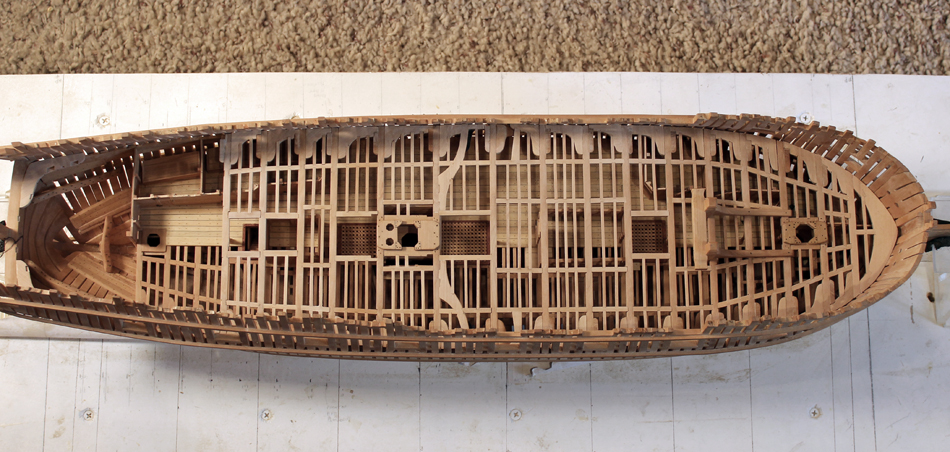
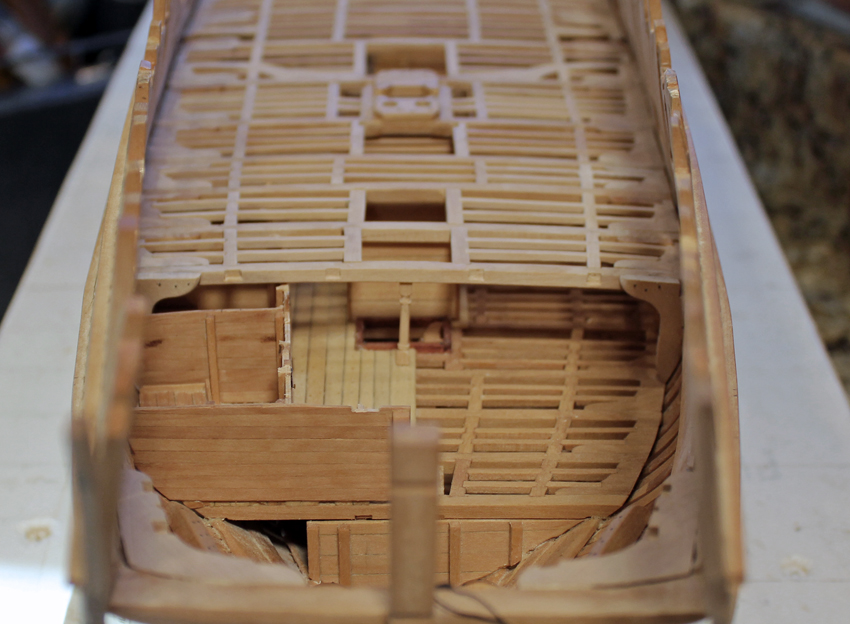
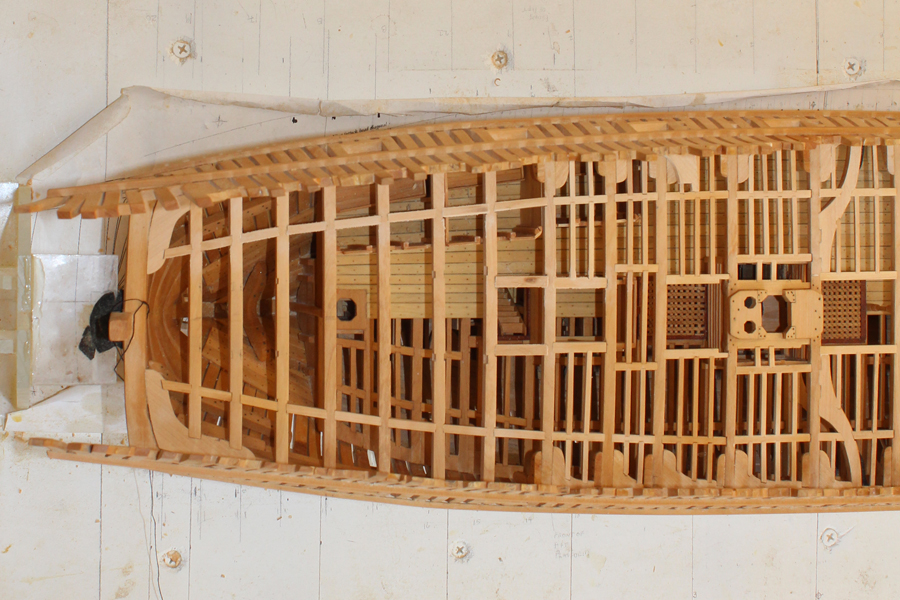
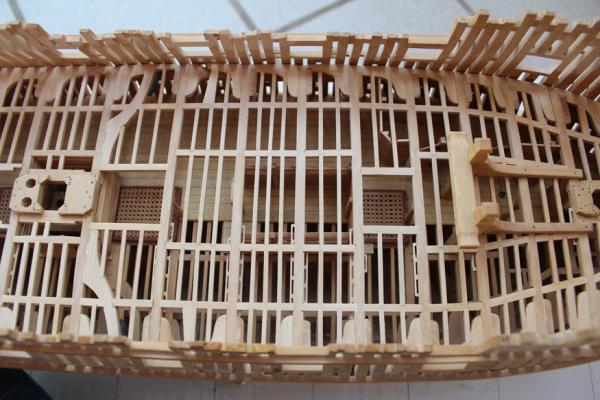
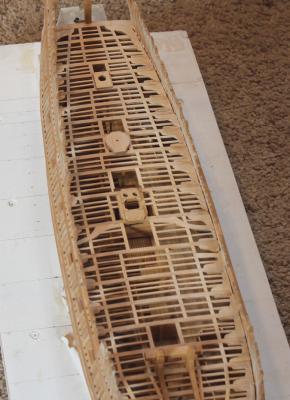
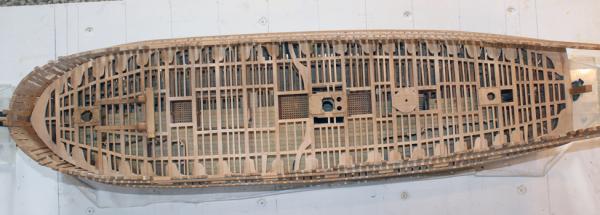
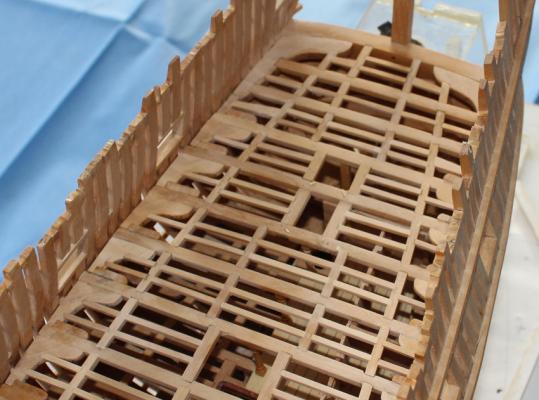
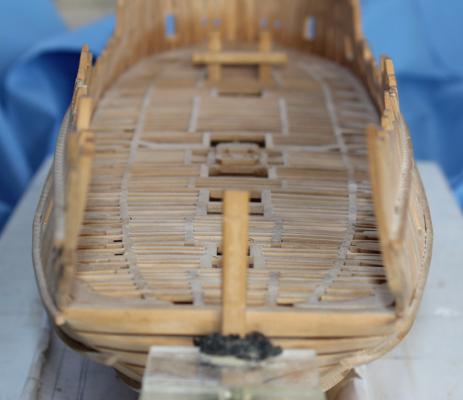
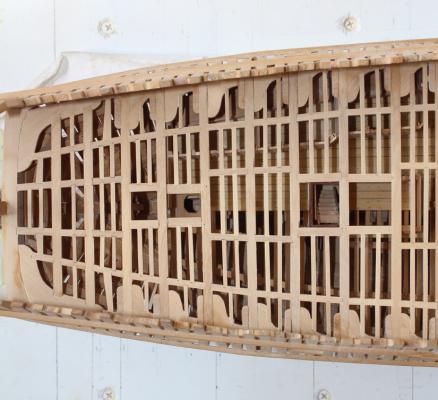
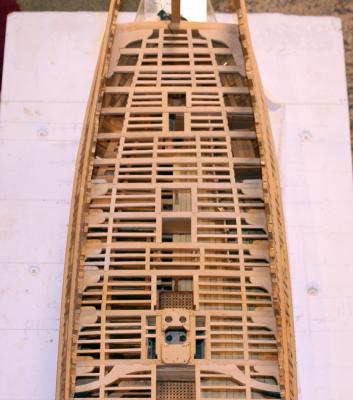
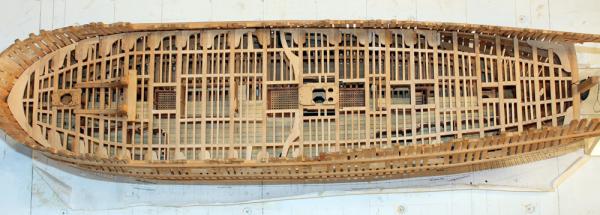
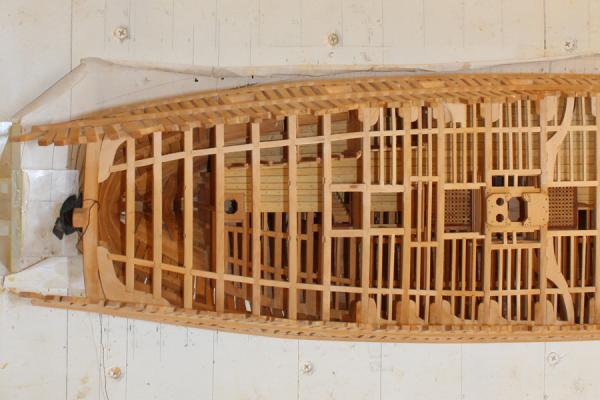
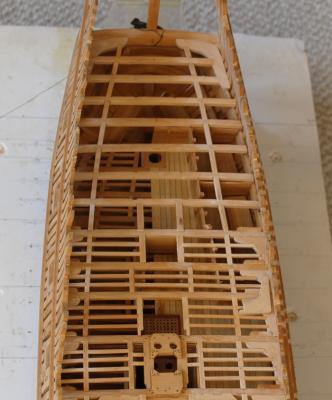
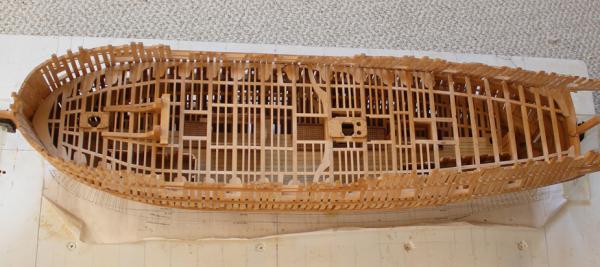
I have finally finished the upper deck framing. The first three photos show the deck before final fairing. The last two are after everything has been sanded down. I started with 100 grit and progressively sanded down to 400 grit. I finished with a razor blade scraper. There was a slight hump in beam 20 which was corrected with the sanding.


-
I don't know what is more impressive...the brass metal on the guns or the hardware on the carriages. Could you tell me more about the metal on the guns? I have never heard of "brass beaten metal".
- 662 replies
-
- 1
-

-
- bonhomme richard
- frigate
- (and 1 more)
-
I used flat white enamel to touch up the transom edging. Hold off until you are ready to mast her so you won't need to repeat the paint work. Then I covered the frieze with a matte clear finish to prevent future fading of the ink.
-
Druxey, the counter timbers are safe (so far). David, I've seen your hands! But even my fingers are too large for some of these spaces so I do most of the fine work with needle holders and jeweler's forceps. A needle holder is similar to a hemostat but it has no deep ridges and the joint is much closer to the tip. Ed, I did just as you suggested a few frames forward but these beams are too short to spring them sufficiently. It is almost as easy to temporarily glue the knees to the beams in situ, mark their positions, debond, rebuild off the model to drill bolt holes and re-install using the bolt holes as a guide. Ben and David, thanks for looking in.
-
Ed, Nils, John and Ben thank you. Hope to have some more progress this weekend. What I am discovering is that fitting everything together in these last few beam sets is a logistical challange. Because the hull is tapering, I can no longer slide a beam/knee assembly in to place. Right now the best sequence is of construction is beam-carlings-ledges (to stabilize the carlings and prevent lateral shift)-hanging knees-lodging knees. For final gluing, the lodging knees should be installed before the hanging knees. Finally, the ledges between the outer carlings and the lodging knees are installed.
-
Thank you Druxey and thanks everyone for the Likes. The rest of the lodging knees have been cut out and I hope to get a few sets of hanging knees installed this weekend.
-
It has been a few weeks since the last update. Not that much has been accomplished because of that four letter word...work. I have all of the carlings temporarily installed, as well as the ledges between the carlings. I am still adjusting the height of the last two deck beams. The transom knee was made overly thick and now the top of the beams is lower than the top of the knee. The knee will be sanded down once I am happy with the fair run of the deck. Beam set 16 is completed. Only six more beams to go! The bracing across the outer counter timbers has been removed for the pictures. I decided not to build any more structures that stand proud of the deck until the deck is completed and sanded fair. The main mast partner kept getting bumped when I was truing the middle part of the deck. This should make sanding easier.


-
I also used brass rods for mounting. Both the rods and the "fancy" base came from Hobby Lobby. I did not taper them but I did drill a pilot hole in the keel assembly prior to press-fitting them in place. I then removed them until the model was completed. Keep in mind that the model weighs next to nothing so minimal strength is required for the mounting supports.
-
I used castello boxwood for my planking. My approach was different from the kit instructions in that I spiled the planks in a more prototypical manner rather than attempting to edge-bend them. I did not have to soak any of the planks. The castello is a pleasure to work with. It holds an edge and there are no fuzzies after sanding. I did not apply a sanding sealer...a must if you are using the enclosed basswood.
-
Druxey, suggestion well taken...and done. David it really isn't all that fragile except for this area and the stem. I have broken this off several times already and until now it was good enough because this is the side I intend to plank. So far the stem has been unscathed.
-
My general approach for fabricating and installing the beam sets has been one complete set at a time. This worked well where there was no curvature of the hull but I had difficulty with the run of the outer carlings at the fore end of the upper deck and decided to change my approach as I neared the stern. I set out all of the beams and tack glued them in place. I then drew fair lines for the outer carlings. The deck beams were removed as I worked on them, only mortising the outer carlings. The carlings were then tack glued without gluing the beam. This continued until the last two beams. The transom knee abuts the for end of the transom and extends along the hull just past beam 20. It is set down on to the deck clamp and "bolted" to the frames and transom. The last two beams are mortised into the transom knee. The pictures show the run of the lateral carlings. No finish shaping or sanding has been done yet. I broke off the port counter timbers (again!) and just stuck it back on so that area looks out of whack. I will probably have to remake it when it comes time to make the counter.
-
That drawer set is fantastic. This is coming from someone who's Dremel, hand tools, sanding supplies, Optivisor, clamps, etc. all fit into a small tackle box to take with me when I travel to work.
-
Druxey, your post passed as I was responding to Remco. I'll go with low-tech.
-
You are absolutely right Remco. In fact, I have a tripod in my car trunk and on occasion I do use it. Just lazy I guess. Also, the dog has knocked the tripod over in the past (thank goodness the camera was not mounted on it at the time) and once I open it up I tend to leave it open the rest of the day. The dog is on vacation this weekend with the husband, so I will drag it out of car.
-
J.D., my cameral setup is anything but fancy. I use a Canon T3i camera fitted with the standard lens (18-55mm). I turn on all the lights in the kitchen, hold my breath so I can use shutter speeds of 1/60 and hope for the best. Sometimes I use the built-in flash but that normally gives me too much shadowing. Needless to say, I take 4-6 shots of the same thing and save the best one. A macro lens is on my "someday" list, along with a mill, a disc sander, a Jim-saw... David, see you in a few months.
-
drillbitcity.com They are located somewhere in Chicago. An alternate would be any model railroad shop.
-
Now that makes sense to me, Druxey. When following a 300+ year old plan, it's difficult to pick the brain of the architect. Since there are many things on the plan that are not drawn in but simply assumed (carlings, knees, etc.) I thought this might be another one of those cases...a squarish step with a round base on top of it. Thank you.
-
As Chuck says, it is an optical illusion. Be careful not to make that aft line too much of a smiley-face. Once you install the rudder you will end up with a visual break in the curve. Looking good. Loved the kid's pictures in the Fiferail.
-
Thanks, Danny. I should have checked your build. It just seems so odd since the shape detracts from the strength and stability of the step.