tlevine
-
Posts
2,033 -
Joined
-
Last visited
Content Type
Profiles
Forums
Gallery
Events
Everything posted by tlevine
-
 The amount of detail is incredible. They look like they are ready to fire!
 -
Absolutely beautiful work. I feel your anxiety of cutting those mortises on the beam arms in situ. Mine would have probably crashed into the hold.
-
A delayed thank you to Maurey and Pavel. Druxey, the tracks are now installed and, like so many details that we add, are now almost invisible! But we all know they are there... Beam sets 9 and 10 are in place. The only unusual items are the opposed lodging knees at the dead flat. I did not have thick enough wood with me this week to make them, so they will be installed next week. They will be identical to the ones on the lower deck. Look at page 10 of this build to see how they are shaped.

-
Druxey, you caught me! Actually, I wanted the glue on the door to be secure and then put the track on on top. Going back to my stall door model, there is no track on the bottom. Was there one on a ship? Greg, I thought about cutting the mortises on the Preac (and when I do the upper well that is my plan) but I did not have a thin enough saw blade with me that day.
-
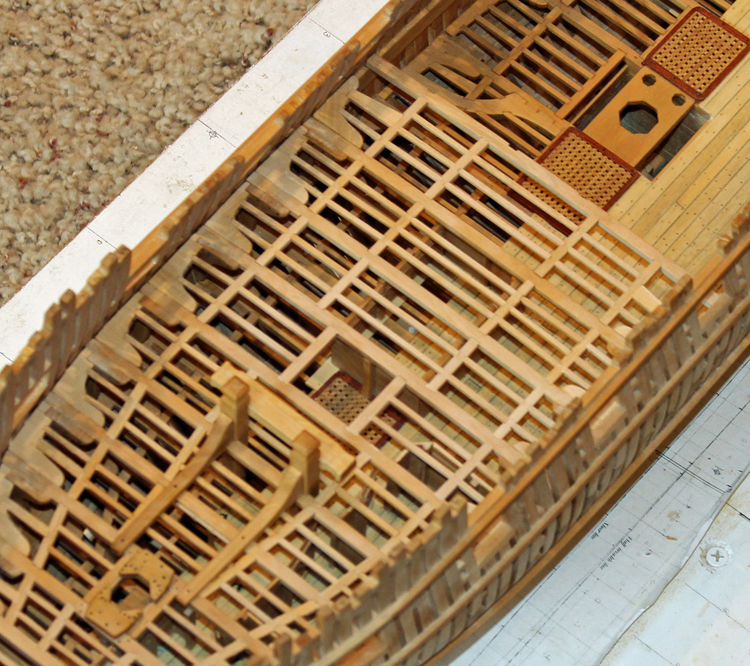
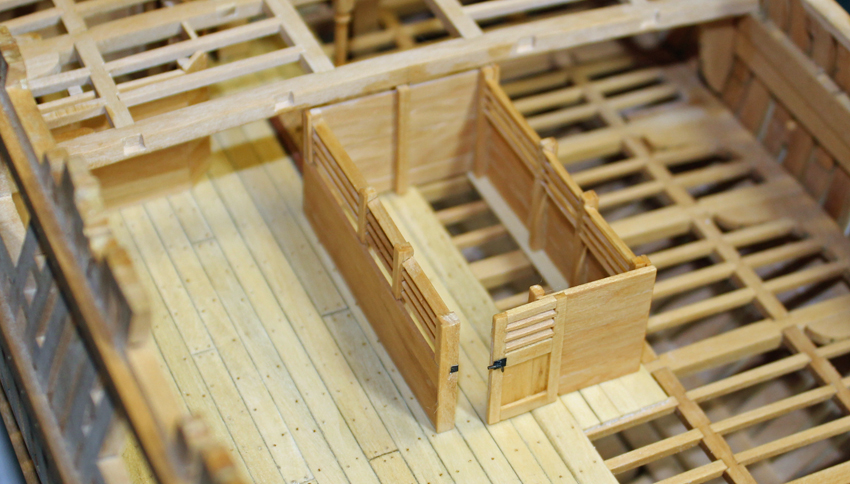
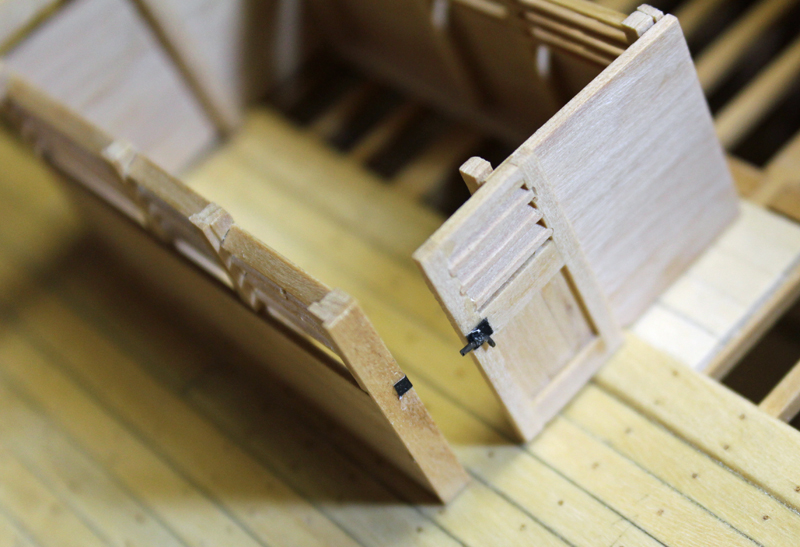
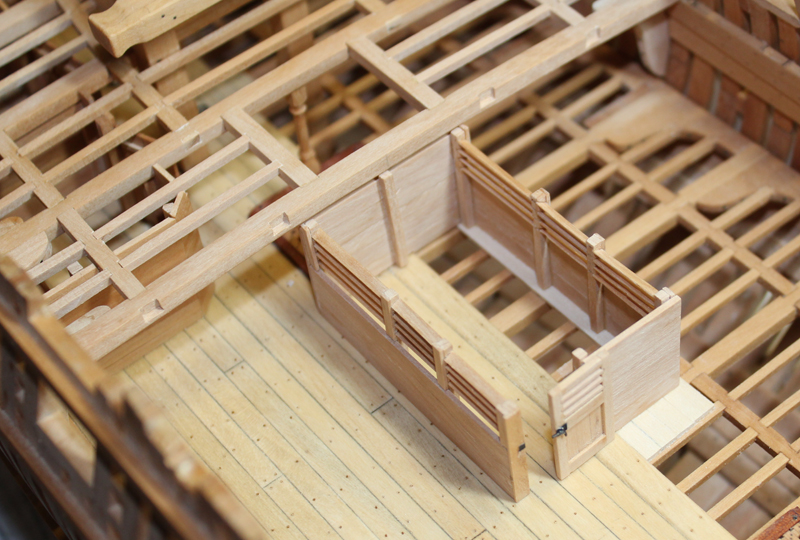
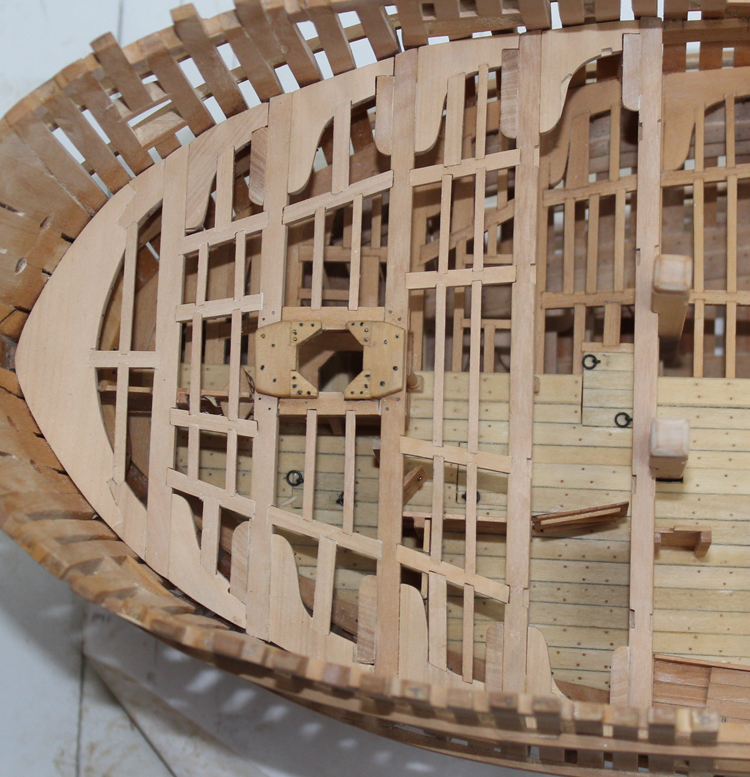
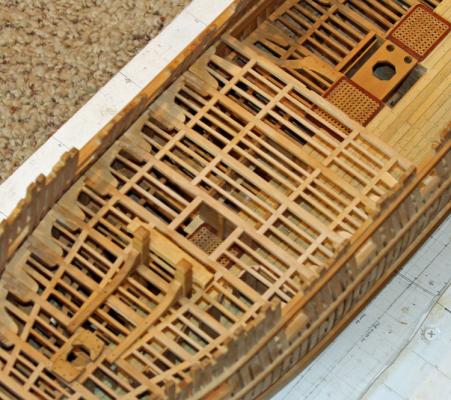
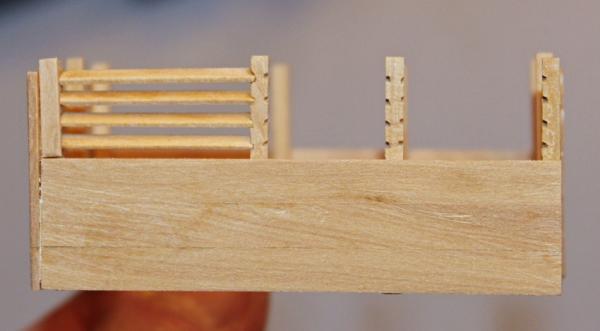
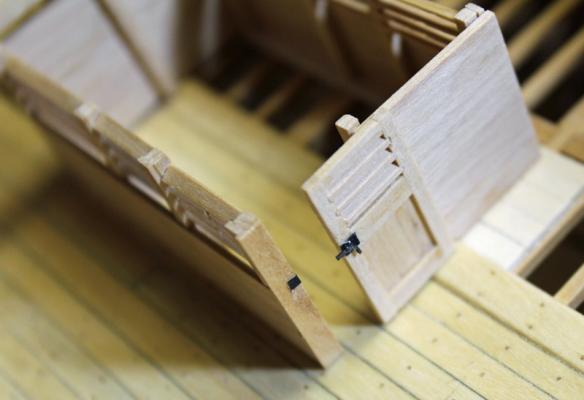
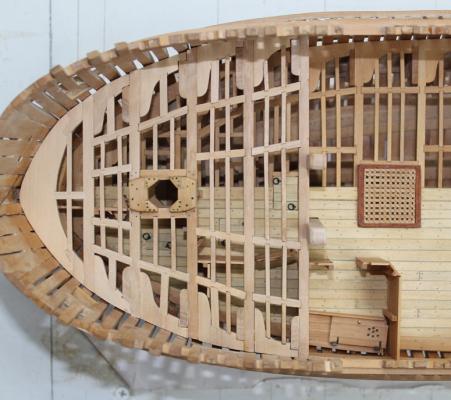
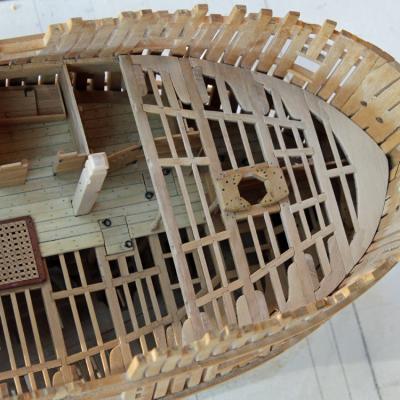
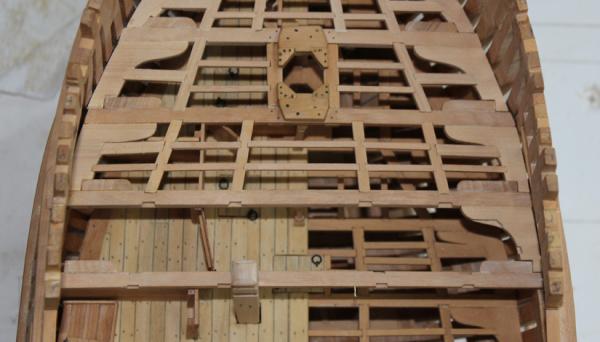
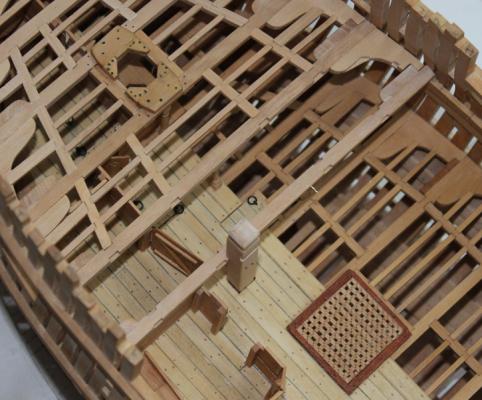
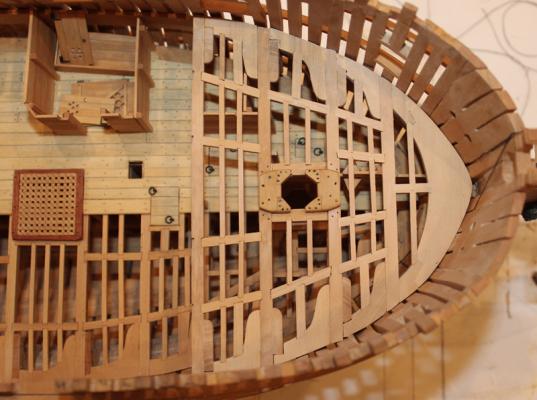
Beam set 7 includes the opening for the fore hatch. These carlings are a little larger than the standard ones. As I am building the lower deck structures as I move aft, it was time to build the aft sail room. The fore sail room is one of the small rooms on the port side near beam set 4. This was a fun little structure to make. The lateral walls have louvers to allow ventilation into the room. I do not own a mill so the mortises for the louvers were made with an 11 blade. On Atalanta, the door into this room is a slider, not a hinged door. Consequently, the door must be made wider than the opening and it will be on the outside wall of the sail room. There is a pillar on the inside wall precluding placing the door there. Not having built a sliding door before, I went over to the local stable and looked at my horse's stall door. The latch is a L-shaped bolt on the door with a U-shaped piece of metal on the door frame to receive the bolt. The bolt measured 3" x 4" x 3/8". This would require making a u-shaped channel 0.01" square. Needless to say, this is well beyond my skill set so I have a flat piece of metal on the door frame representing it instead. Decking was placed under the assembly on the starboard side. The last two pictures show the sail room assembly before and after a coat of finish.


-
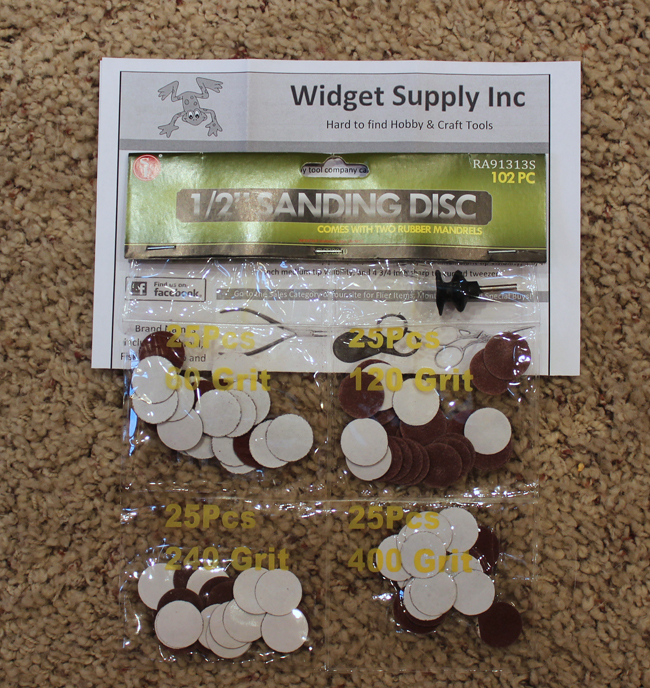
I don't recall havin a problem with gaps but if they are that small paper and white glue should work just fine. What are you going to use for the frame and keelson reduction process? Those frames will need to be thinned by about half. I used a disc sander in my Dremel with low rpm. Be careful with a drum sander as it will have a tendency to tear the frames away from the planking. I used to get them at MicroMark but they no longer carry them. I found this today at Amazon. http://www.amazon.com/Proxxon-28982-28983-Sanding-Discs/dp/B001LRQSJ8/ref=sr_1_3?s=hi&ie=UTF8&qid=1384799810&sr=1-3&keywords=dremel+sanding+discs
-
Ben, I always had problems with the after market micro chucks for the Dremel. Drill Bit City sells resharpened carbide micro drills that are fantastic. (And the prices are similar to HSS bits.) Because they are carbide, they are more brittle and work best with a steady hand or in a drill press. They have a standard shaft that fits into a regular collet for the Dremel, resulting in much less wobble and a true-to-size hole. Usual disclaimers.
-
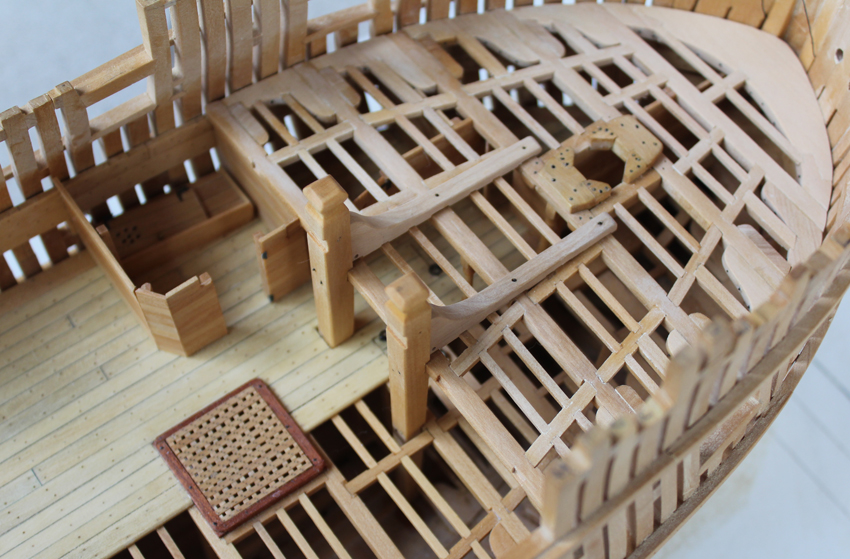
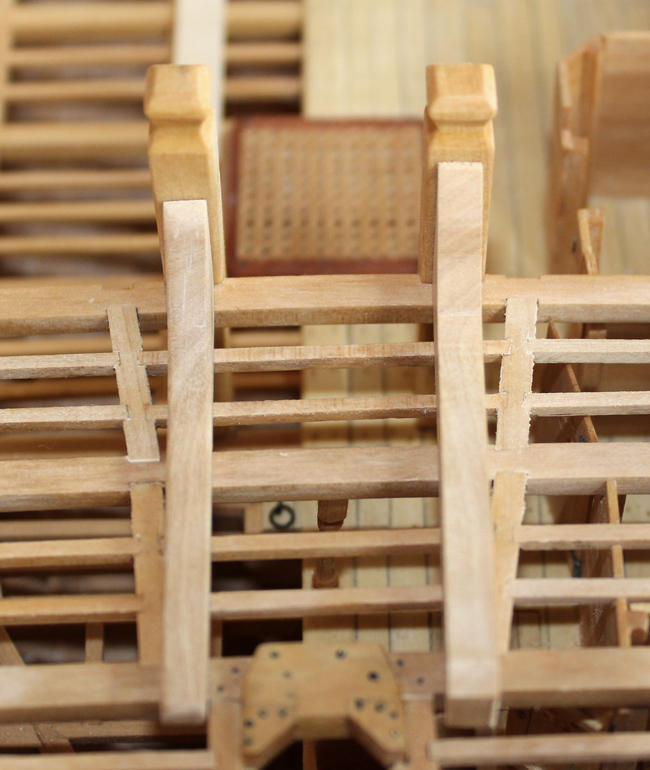
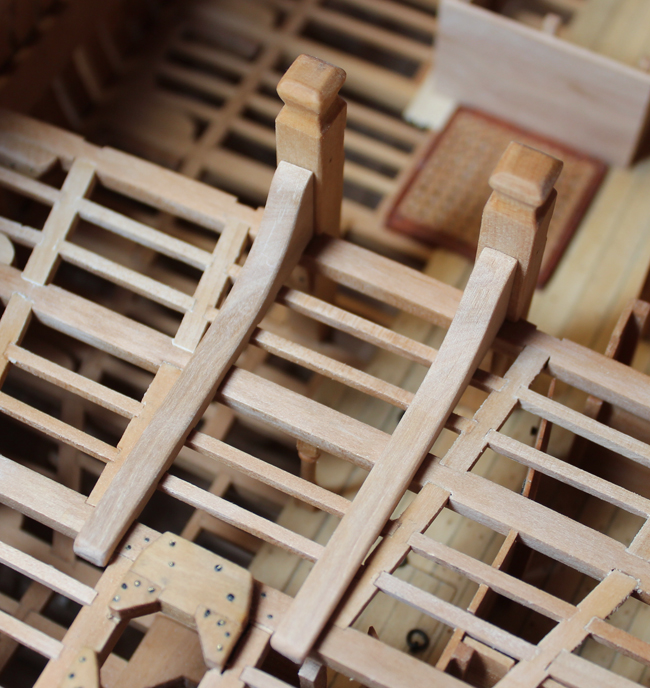
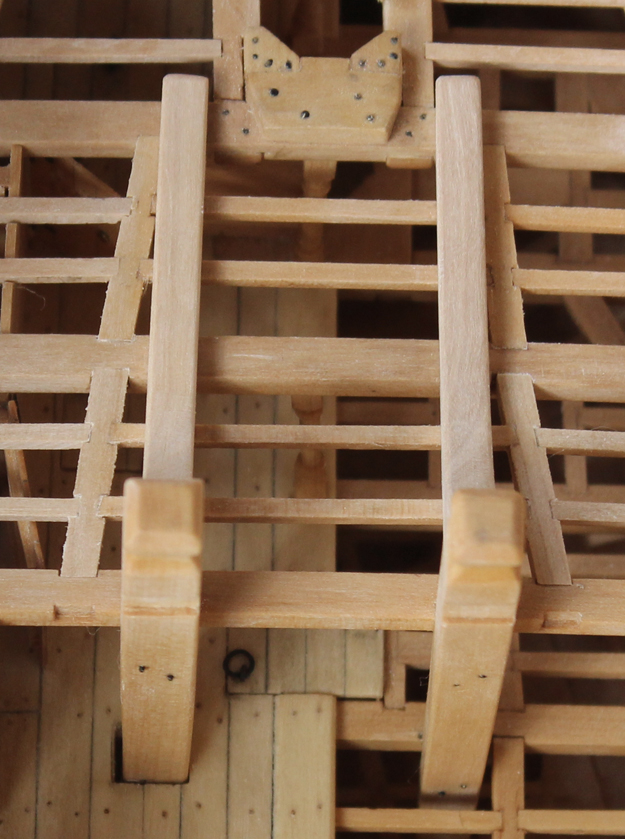
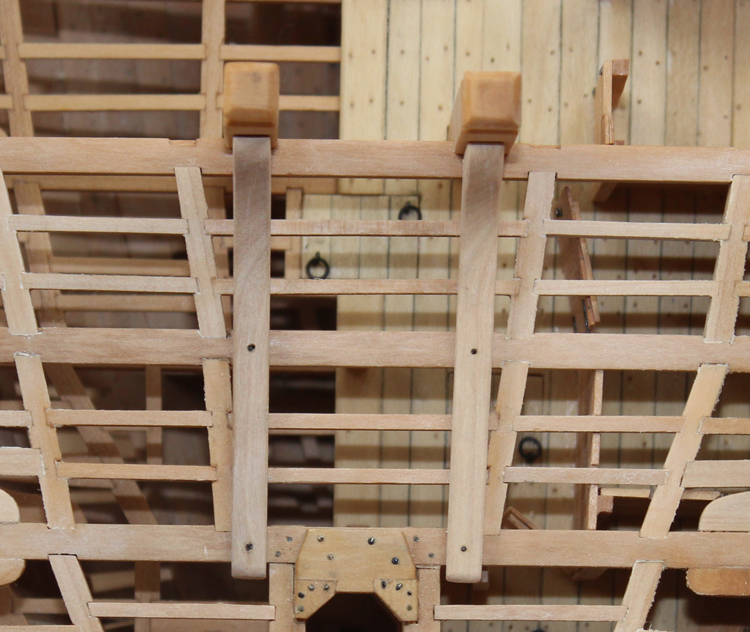
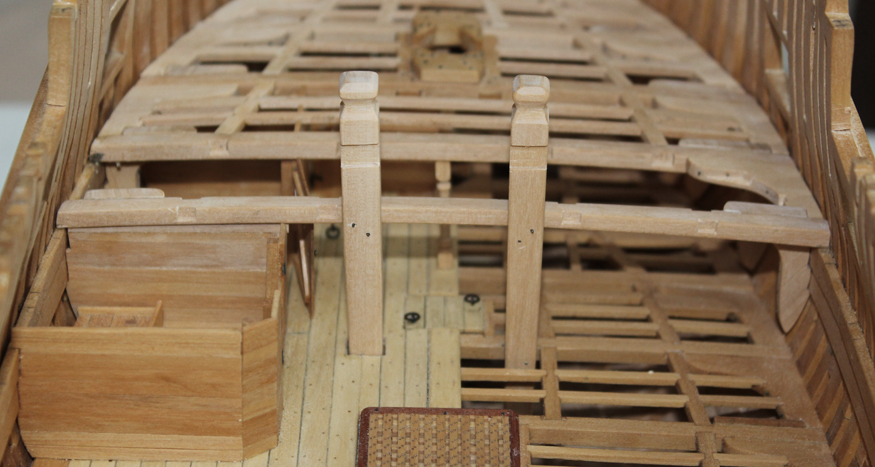
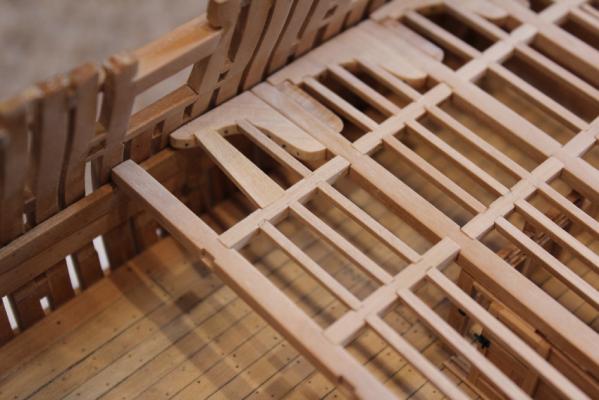
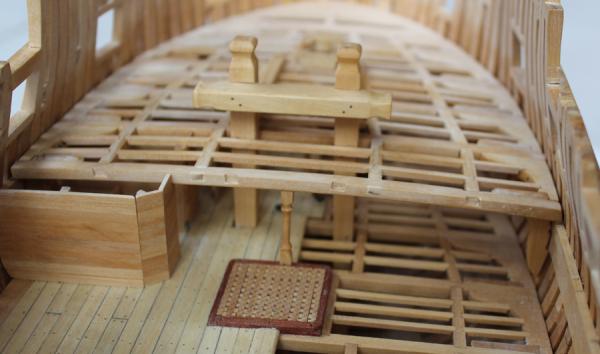
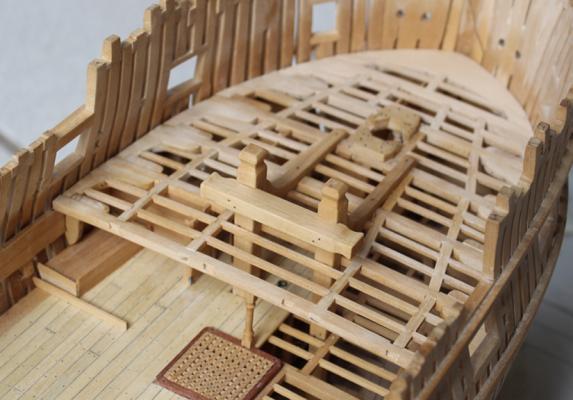
The sixth beam set is relatively straight forward. The aft bulkhead for the boatswain's cabin was temporarily removed to make installation easier. The pillar is supposed to go through the hatch coaming. I cheated and it is simply glued to the surface of the coaming. There is a tenon on the superior aspect of the pillar with a mortise on the under surface of the beam.
-
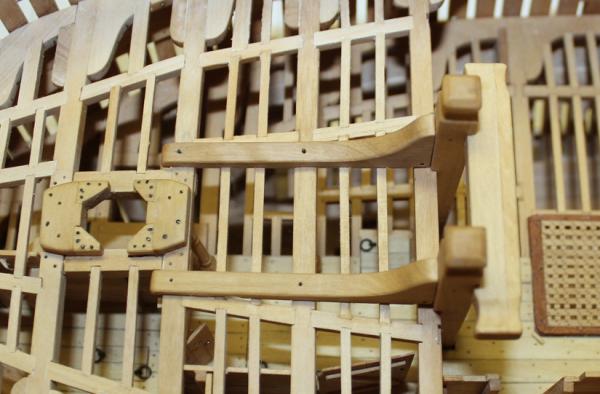
The crosspiece of the bitts is comprised of two different wood species. The fore section is oak and the thinner aft section is elm. Both of these are light-colored species so I did not want a stark contrast between the two pieces. I used pau marfin for the "elm". The crosspiece is attached to each pin with two bolts. The metal work for the bitt will wait until I have a few other metal projects, although the holes to accept the metal pieces have already been drilled.

-
Gentlemen, thank you for your comments. It was a little fiddley but I am pleased with the appearance. Druxey, I looked at a lot of build logs and did not see anyone else notch the standards. Remco, this was nothing compared to the detail work on your Kingfisher.
-
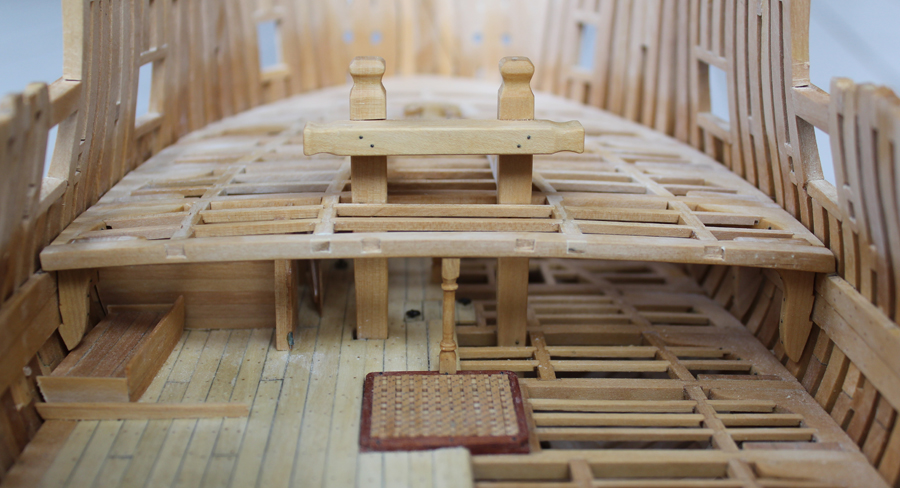
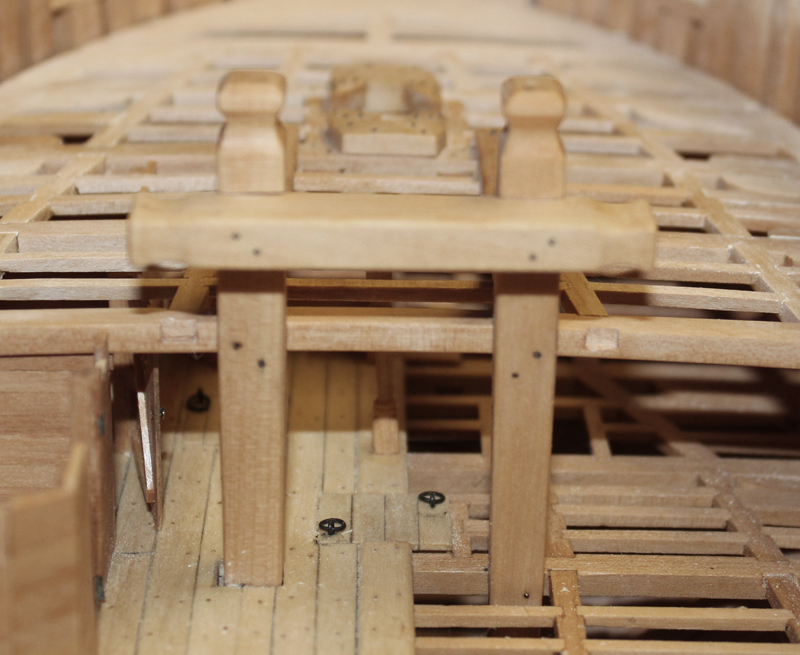
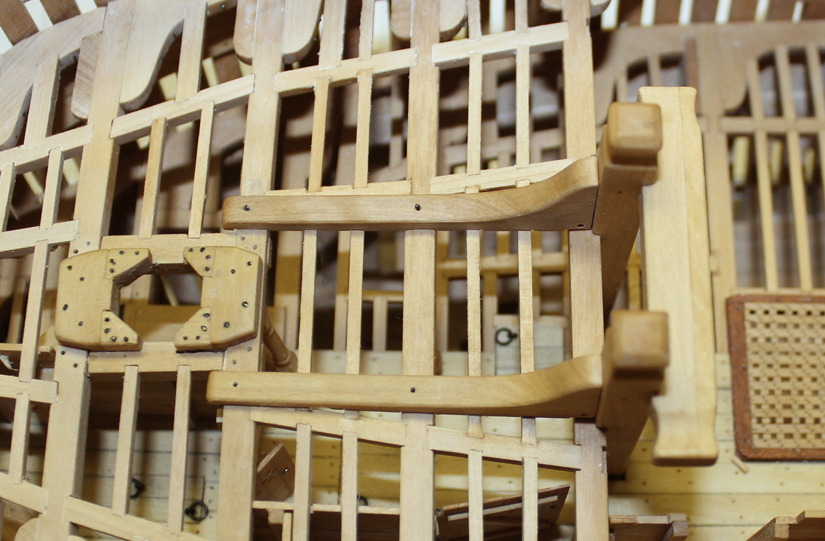
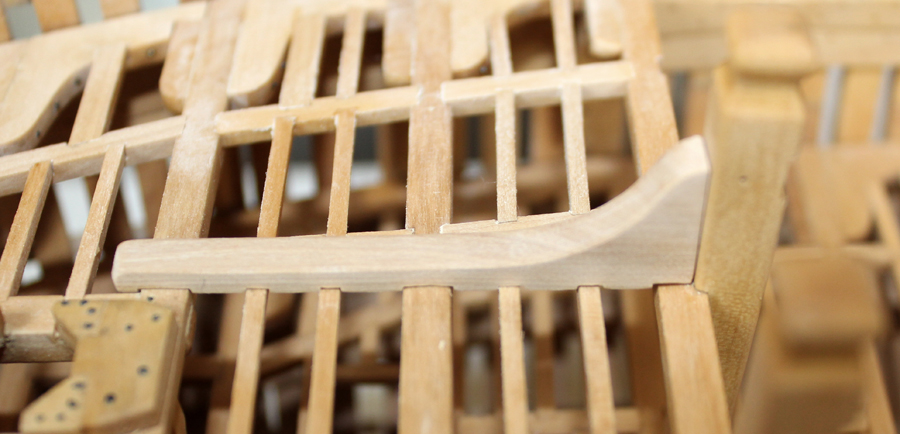
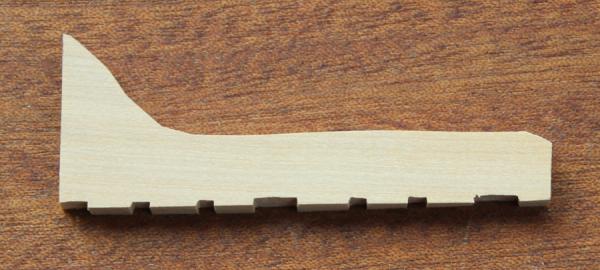
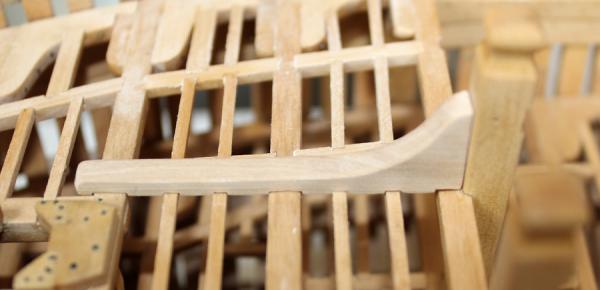
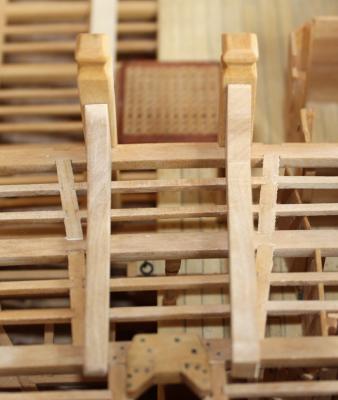
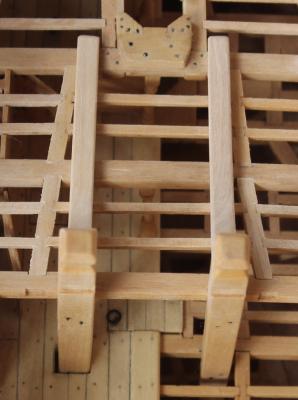
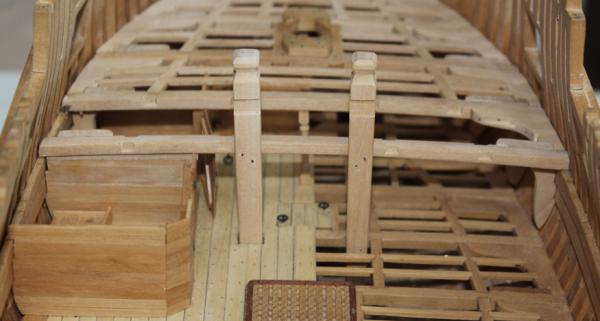
The bitt standards are knees that extend anteriorly from the bitt pin. They are let into the deck beams and ledges by 1". I rough-cut the standard and then cut in the notches using the Preac saw with the blade elevated 1" above the table. To make things more interesting, the round-up of the deck needs to be taken into consideration. Also, the deck slopes upward towards the bow but the bitt pin is perpendicular to the water line. That angle had to be cut on the aft side of the standard so it would fit snuggly against the pin. Once I was happy with the fit, I transferred the shape of the standard onto the rough piece and cut it to the correct shape. The edges are beveled. After the starboard standard was fabricated, the port one was made. The pictures show the port standard before and after final shaping. The standards are bolted to the underlying frames. The cable stopper hole is drilled near the intersection of the pin and the floor height. It is 2.75" in diameter. I used a #60 drill bit and then enlarged and rounded over the hole with Swiss needle files. The hole is barely visible in the last photo. The color difference betweeen the pin and the standard is because I put finish on the pin but will be delaying putting any finish on the standard until after the deck has been installed.

-
The kit supplied metal wire will not accept solder. I used 26g brass wire obtained from either Hobby Lobby or Joanne Fabrics. Since it is coated I ran it through the gas stovetop flame and pickled it in isolation alcohol after forming. I used Tix solder. Stay bright also works well. These are both soft solders which will accept blackening. Take a peek at my build log to see how I made them.
- 234 replies
-
- 1
-

-
- 18th century longboat
- model shipways
- (and 1 more)
-
Thank you Robin and Nils. Joe, I rarely put on more than one coat unless the wood is very porous, like basswood. It simply gets to shiny.
-
Thanks, John. David, I use Watco's Danish Wood Oil. I believe they have changed the formulation since my new can is yellowing the holly much more than did in the past. At this point, I probably would not recommend it unless one is looking for that "old-timey" look.
-
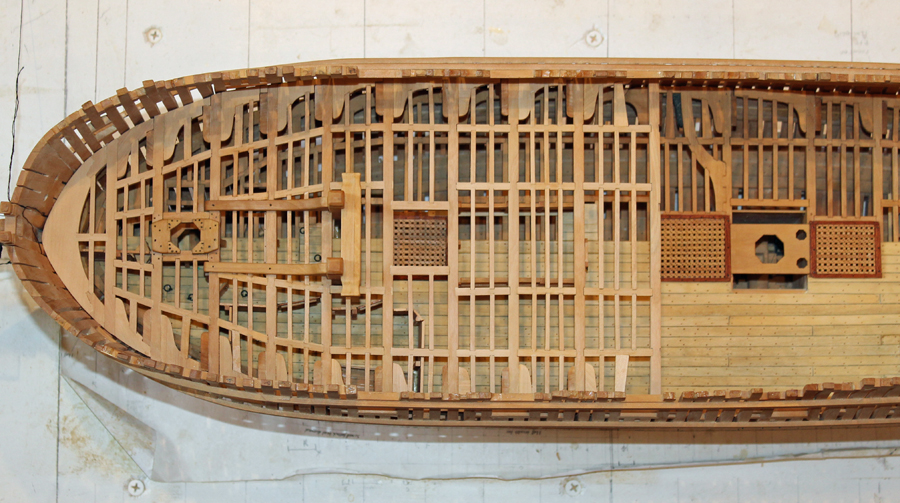
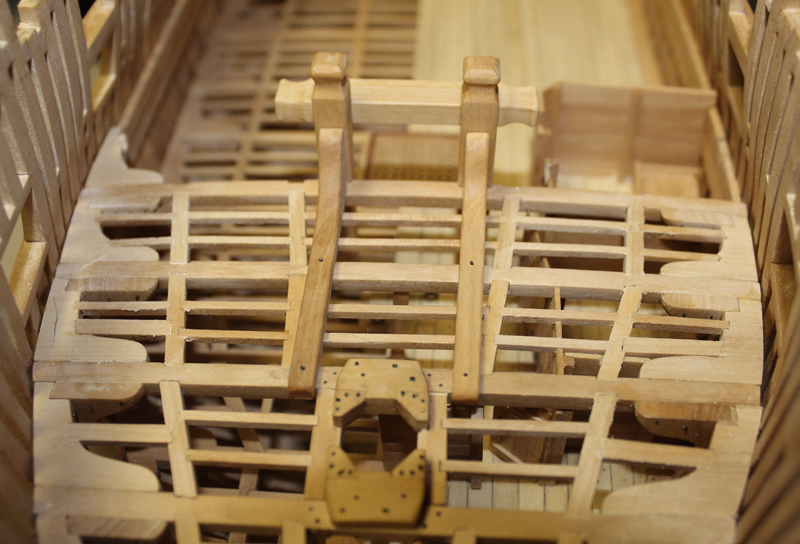
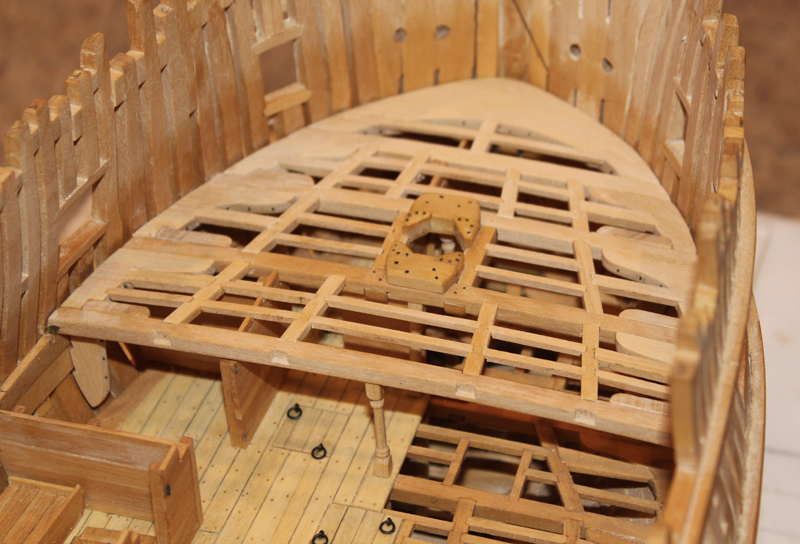
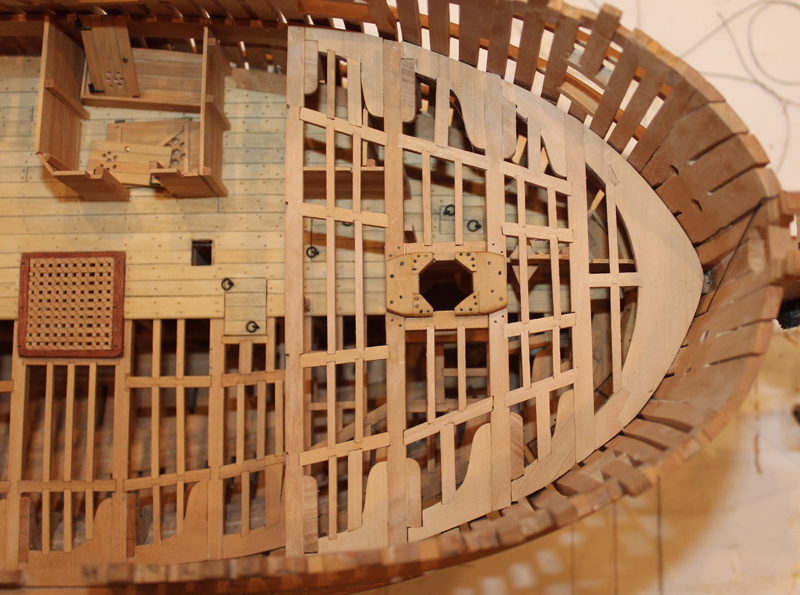
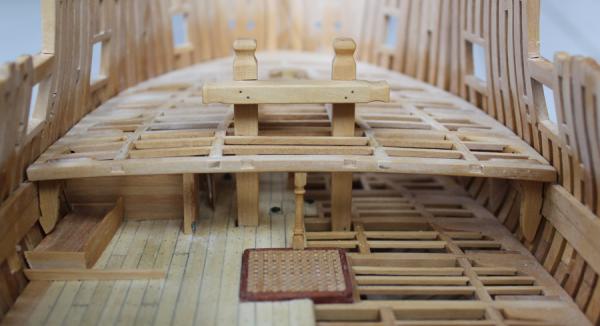
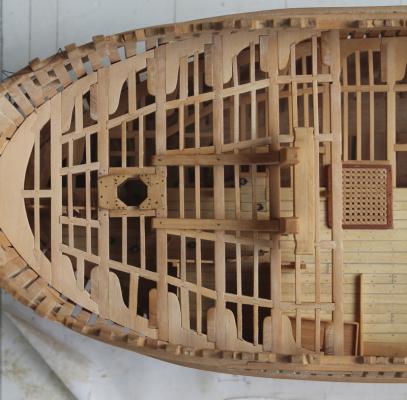
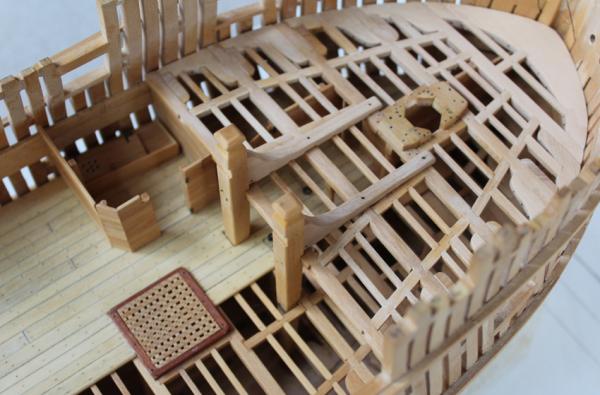
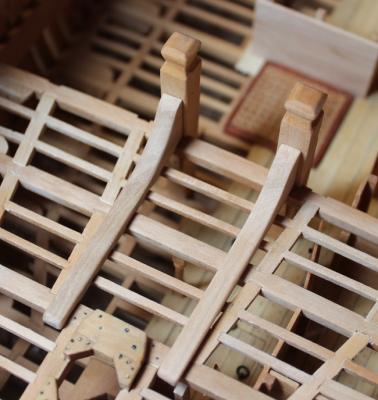
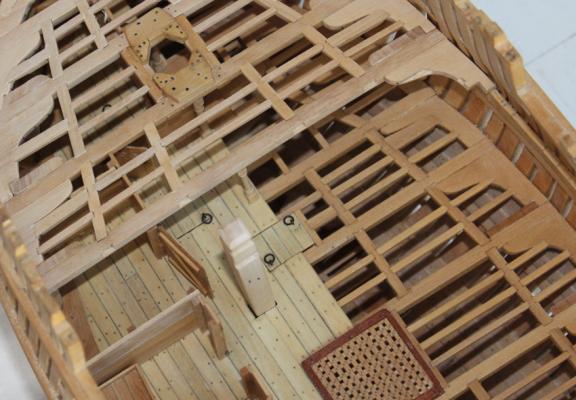
It has been a few weeks since I made any progress on Atalanta. Last week was the NRG conference in Charleston. I met several MSW members when I was there. It is great to put a face to a name. I have installed the fifth beam-bitt pin assembly. This is a complicated area to construct not only because you are trying to fit a piece which intersects three decks (fore platform, lower deck and upper deck) but also because the sequence of installation is critical for a correct fit. The bitt pin is tapered on three sides as it descends into the hull. The aft side is perpendicular to the water line. Because I planked the port side, the port pin had to be reshaped below the lower deck to allow installation. This will not be seen because of the bulkheads surrounding it. Because the sequence of installation is so important, I will show it step-by-step. Please remember that the pictures show a dry-fit assembly. The first step was to build the beam-hanging knee assembly. The carlings and ledges were then glued up and removed from the model as its own assembly. The lodging knees were made and the mortises for the ledges were cut. These were also removed from the model. Once all the pieces had been fabricated, it was time for installation. The first step was to install the port pin and the starboard lodging knee. I also had to remove a section of the fore-and-aft bulkhead abaft the 5th beam to allow the beam assembly to pivot into position. This was replaced after everything was glued in place. You can see the notches in the bitt pin for the crossbar to be added later. The bitt was pinned to the lower and upper deck beams. The bolts for the lower deck beam are decorative. The upper ones are functional. The beam-hanging knee assembly was then installed. An additional piece of bulkhead planking was cut to fit underneath the beam so there is no gap between the wall and the lower edge of the beam. The starboard pinn was installed next. In the pictures the pinn is slightly off plumb. This was corrected when everything was glued up. The port lodging knee was then installed. Finally, the carlings and ledges assembly was put in place. Finish will be applied to the pin (except at the notch for the crosspiece) but not to the upper part of the deck structure. The bitt standards are long knees which extend forward from the pinn to the third beam. David states that these structures should be notched for the beams they intersect but does not say anything about the ledges and carlings that also intersect the standards. Any help would be appreciated as I have not yet decided how much of the upper deck I will be planking.

-
Robin, sorry for the delay in responding but I don't get to the computer every day. The dimensions were taken from TFFM. I would doubt there would be much room for storage underneath the platform. These rooms were more like cells than anything else. No natural lighting, no ventilation and no headroom. You would not have been able to comfortably stand erect. Maybe someone else has some insight.
-
Ed, thank you for the information. I have never worked with copper, except for hull plating. I will probably start playing with both of those so see how they work for me. The cup burr I just bought is coincidentally the type suggested by Remco. I got it because it is described as resistant to clogging. Dan, I have used iron wire in the past but decided it might be too soft. Something else to take another look at. As I am flying in to Charleston, Atalanta gets to stay home. Maybe next year if the meeting is driving distance for me. Look forward to meeting you next week. I'm fairly easy to pick out...one of the only girls in the room! Druxey, I will try hand spinning. I had put them in the Dremel at very low speed to prevent the metal from heating up too much.
-
Thanks Grant and Chris. Druxey, the cup doesn't get clogged from the wood dust?
-
ancre Le Fleuron 1729 by rekon54 - 1:24
tlevine replied to rekon54's topic in - Build logs for subjects built 1501 - 1750
All the superlatives have been taken. Amazing work. -
Great to see you back with KF. Your joinery is lovely, as always.
-
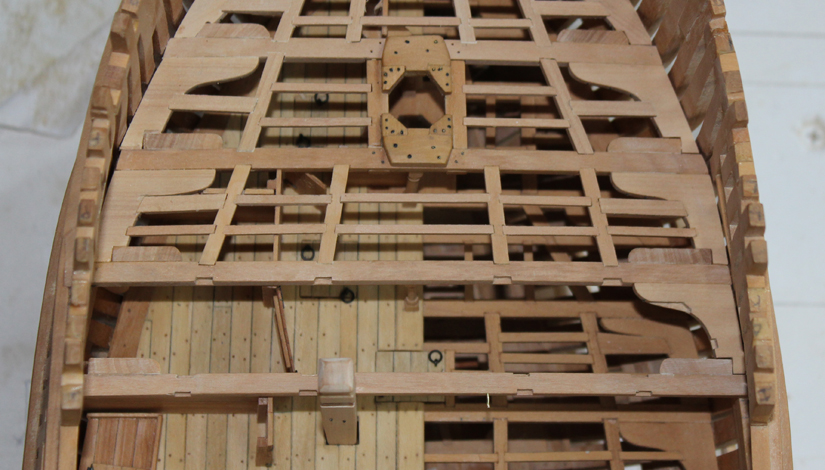
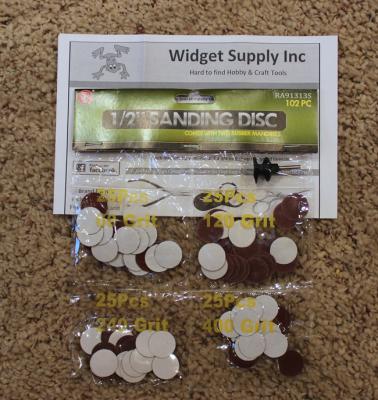
Well, a few days has turned into a few weeks. I received my cup burrs. They do a nice job of smoothing the ends of brass "bolts". There are several sizes available, depending on the gauge of the wire. I purchased my from Widget Supply, a company that sells hobby supplies. While on the site I found a great sanding devise, a 1/2" disc sander for the Dremel with several grits. I used to get these from Micromark, but they stopped selling them last year. The disc sander is perfect for outside tapers and when you want a less aggressive sander than the drum sander. I have no connection to the company, simply a pleased customer. I have installed beam set 4. Notches have been cut into the bulkhead walls for the carlings and ledges. I am much happier with the bolt head on the fore mast partner after rounding them up and painting them. Blackening was not possible in situ and I was pleased with how it turned out. The hole in the deck aft of beam 5 is for the pin of the bit.

-
Looks great. I presume you will mast the "scratch" one?
-
Now aren't you glad you ripped out those planks? Looks much better.
-
Richard, there are two issues here. First, which woods are best suited to model building? Second, which wood species look good together and (maybe) simulate the appearance of the prototype? As far as the first question...any reasonably hard wood with minimal grain will work fine. There are many builders who insist basswood is fine to use for hull planking. Personally, I prefer to use hardwoods. They cut cleaner, sand better and are more resistant to minor damage during the building process. They, however, are more expensive and do not take paint as well as basswood. Pear, swiss pear, costello boxwood, pau marfin, holly and satinwood come to mind for the lower hull planking. For the wales and upperworks, wood with natural color (apple or cherry) or dyed/stained wood gives a nice contrast. Check out the build logs or the gallery for a palate you find pleasing and contact the builder to find out what woods were employed.
-
I have ordered the cup burrs. Anything has got to be less annoying than filing and shaping the ends of countless wire "bolts". In the mean time... I attempted to force the brass wire out from the back side with minimal success. I filed the ends flat and then shaped the ends by pinching them in a needle nose pliers. I decided to paint the ends. In order to prevent paint from damaging the wood surface, I applied a coat of finish first. I used thick acrylic hobby paint and daubed it onto the ends of the wire. Two coats were applied. This paint is the kind used for arts and crafts, not the paints that we normally use in model building. I needed something thick so it would not run out on to the wood. The appearance is much better. Pictures in a few days.