tlevine
-
Posts
1,934 -
Joined
-
Last visited
Content Type
Profiles
Forums
Gallery
Events
Everything posted by tlevine
-
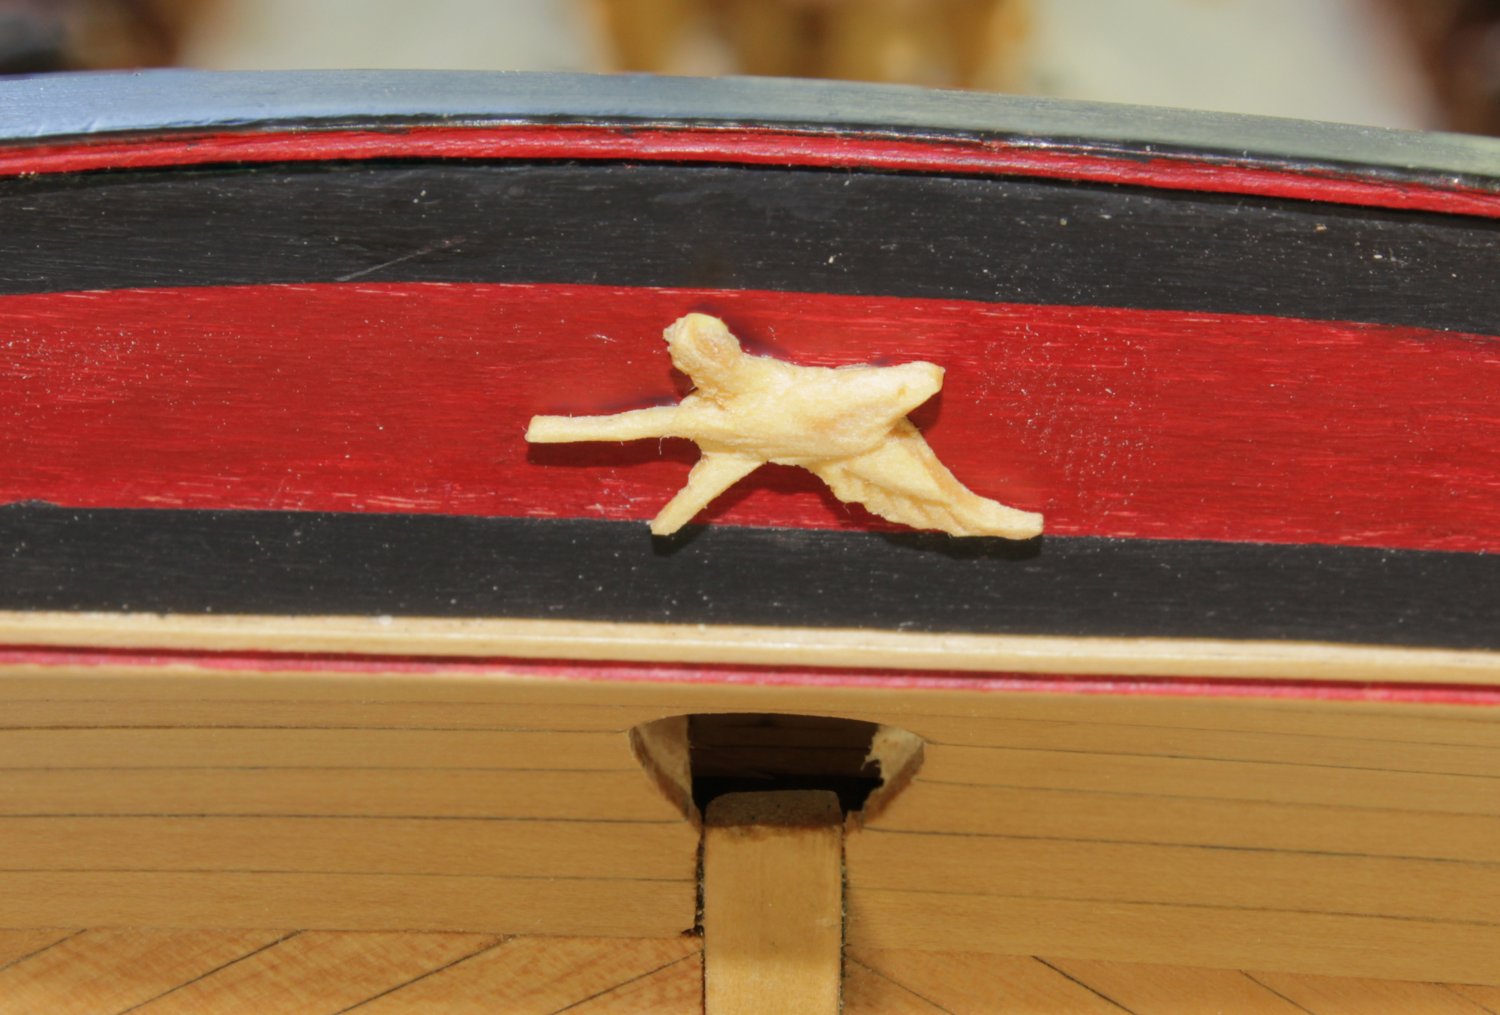
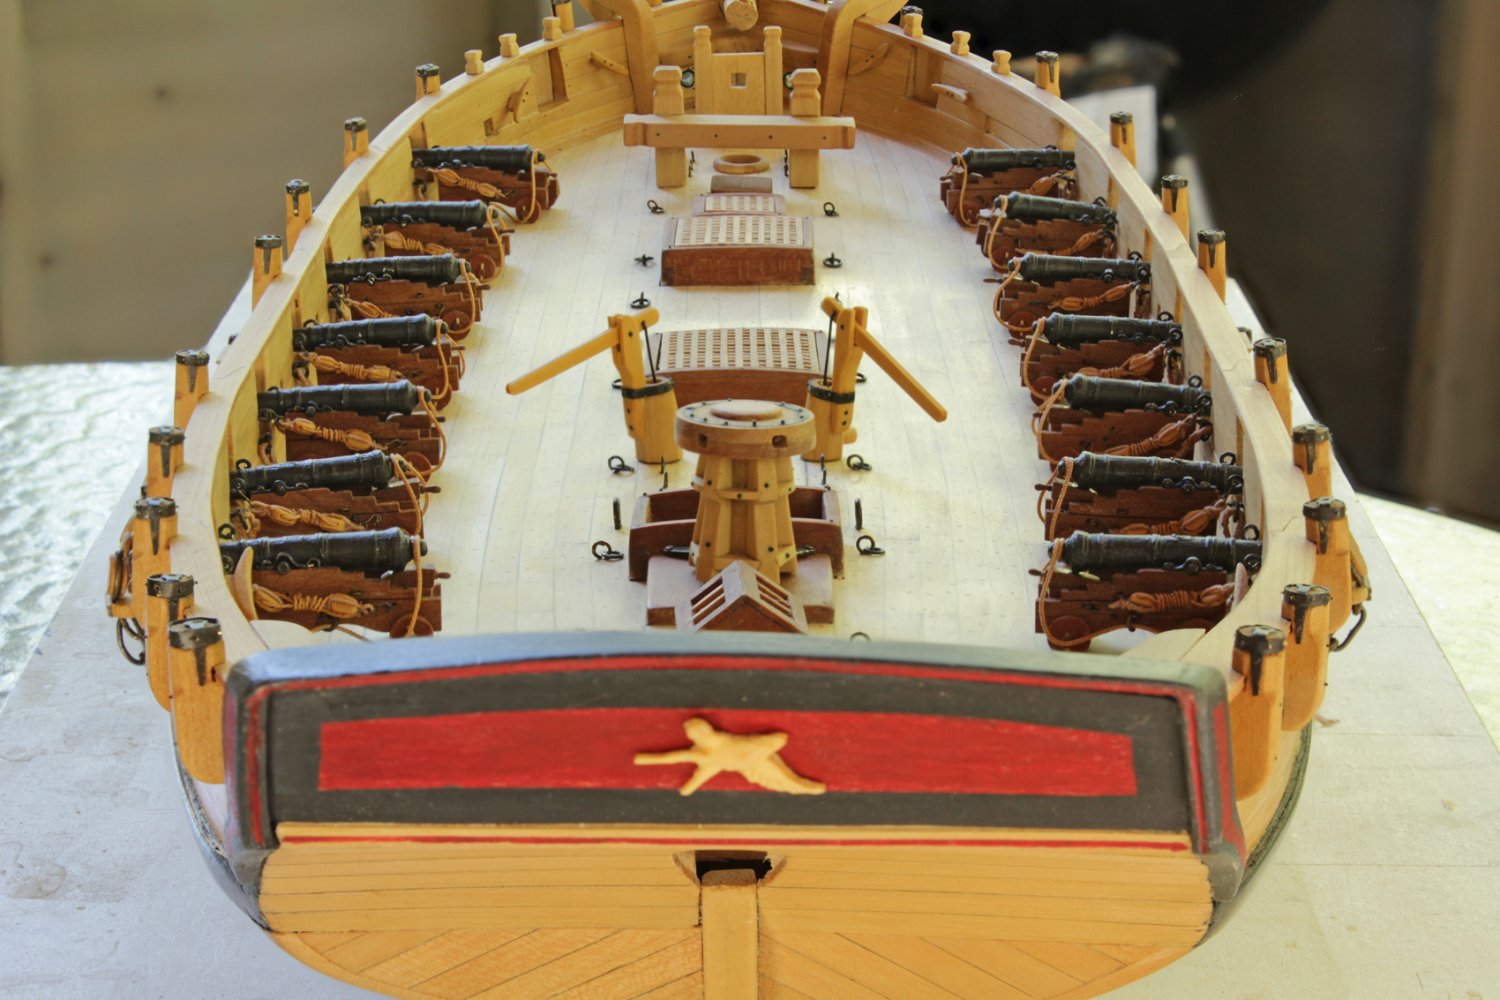
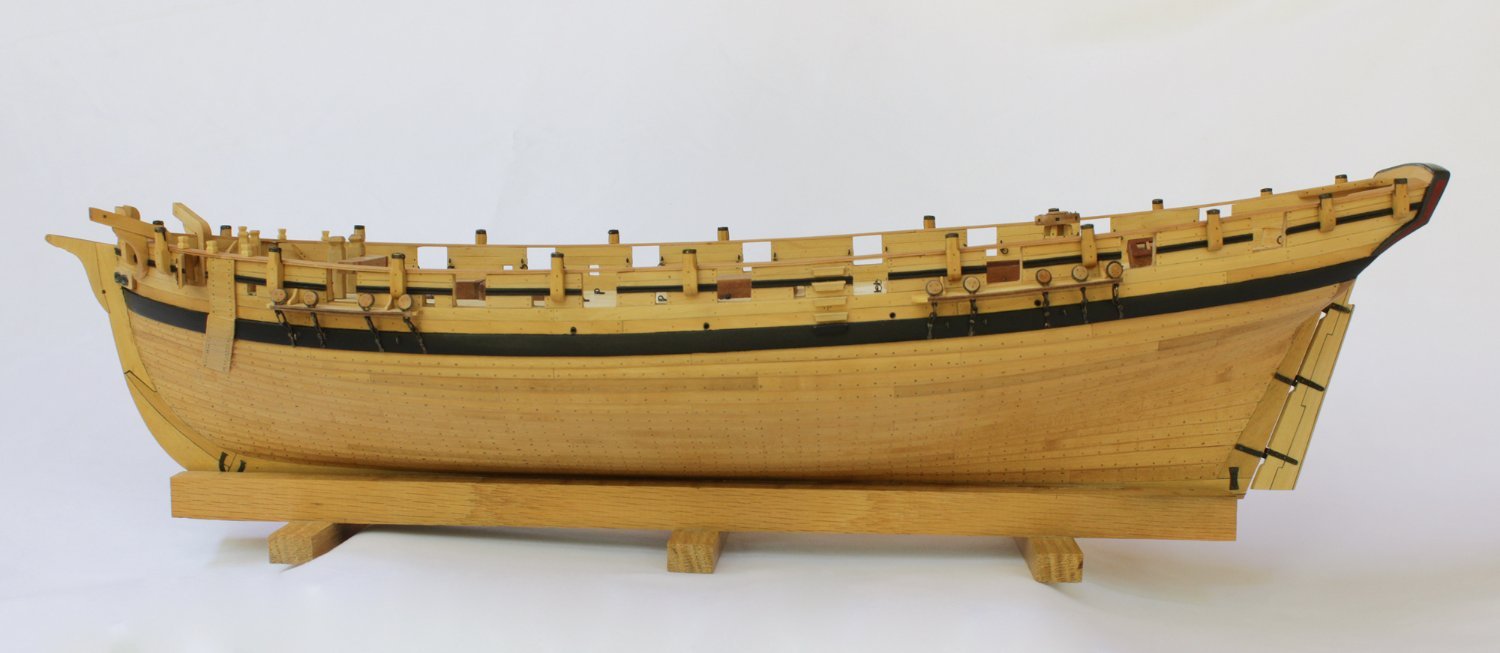
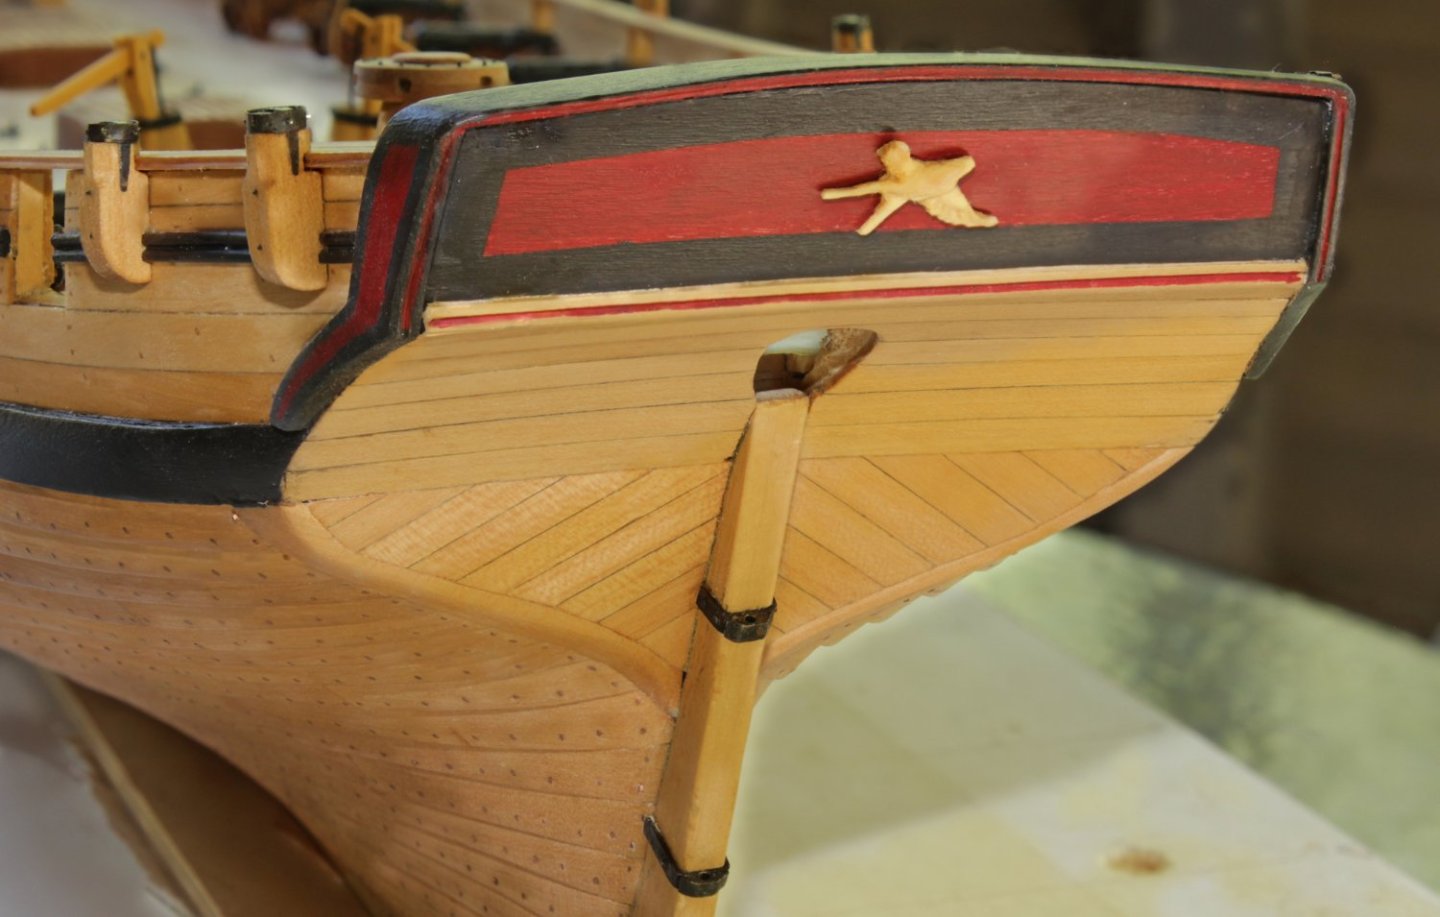
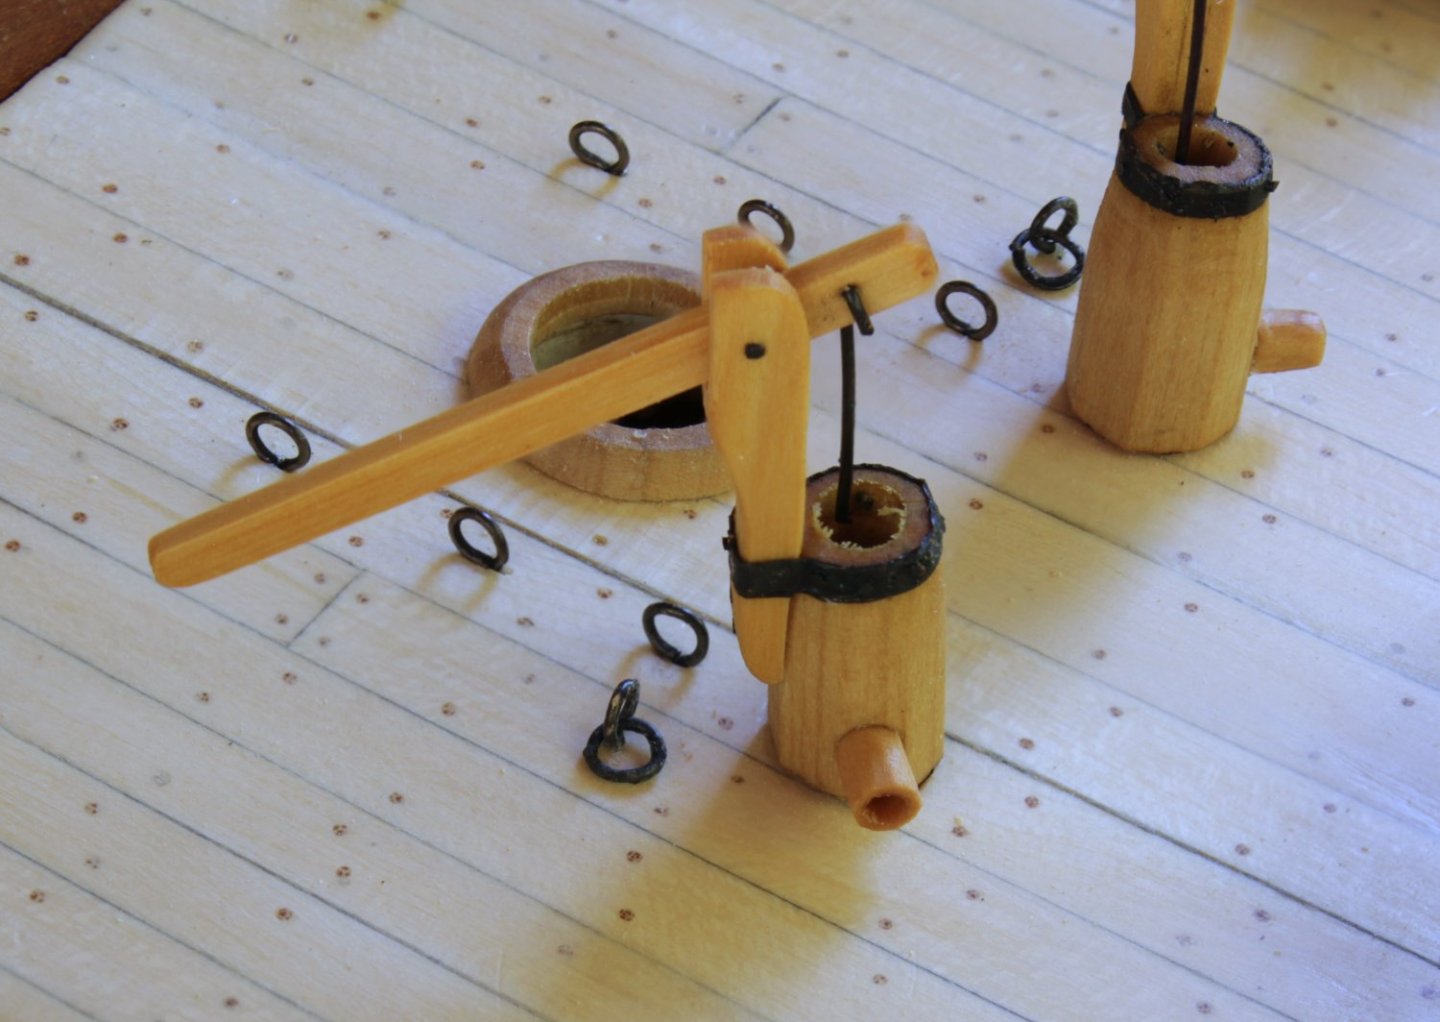
 The next items were the pumps. The band on the top of the pump is self-adhesive copper foil, typically used in making stain glass windows. Looks like I need to clean out the inside of the pump! The original model of Swallow shows a carved swallow on the stern. The carving looks better in person than it appears in these pictures. Making the masts is next.

- 277 replies
-
- 29
-

-

-
As Greg said, the top timber is initially wider. Then, the aft portion of the upper part of the timber is sanded down and the fore portion of the lower timber is sanded. In his picture you cannot tell that the entire timber is narrower because the band is hiding the joint. If you go to the first post in my Echo (link in my signature) you can see the frame in question.
-
Thank you, sir. And thanks to everyone who has been following the slow progression of this build.
-
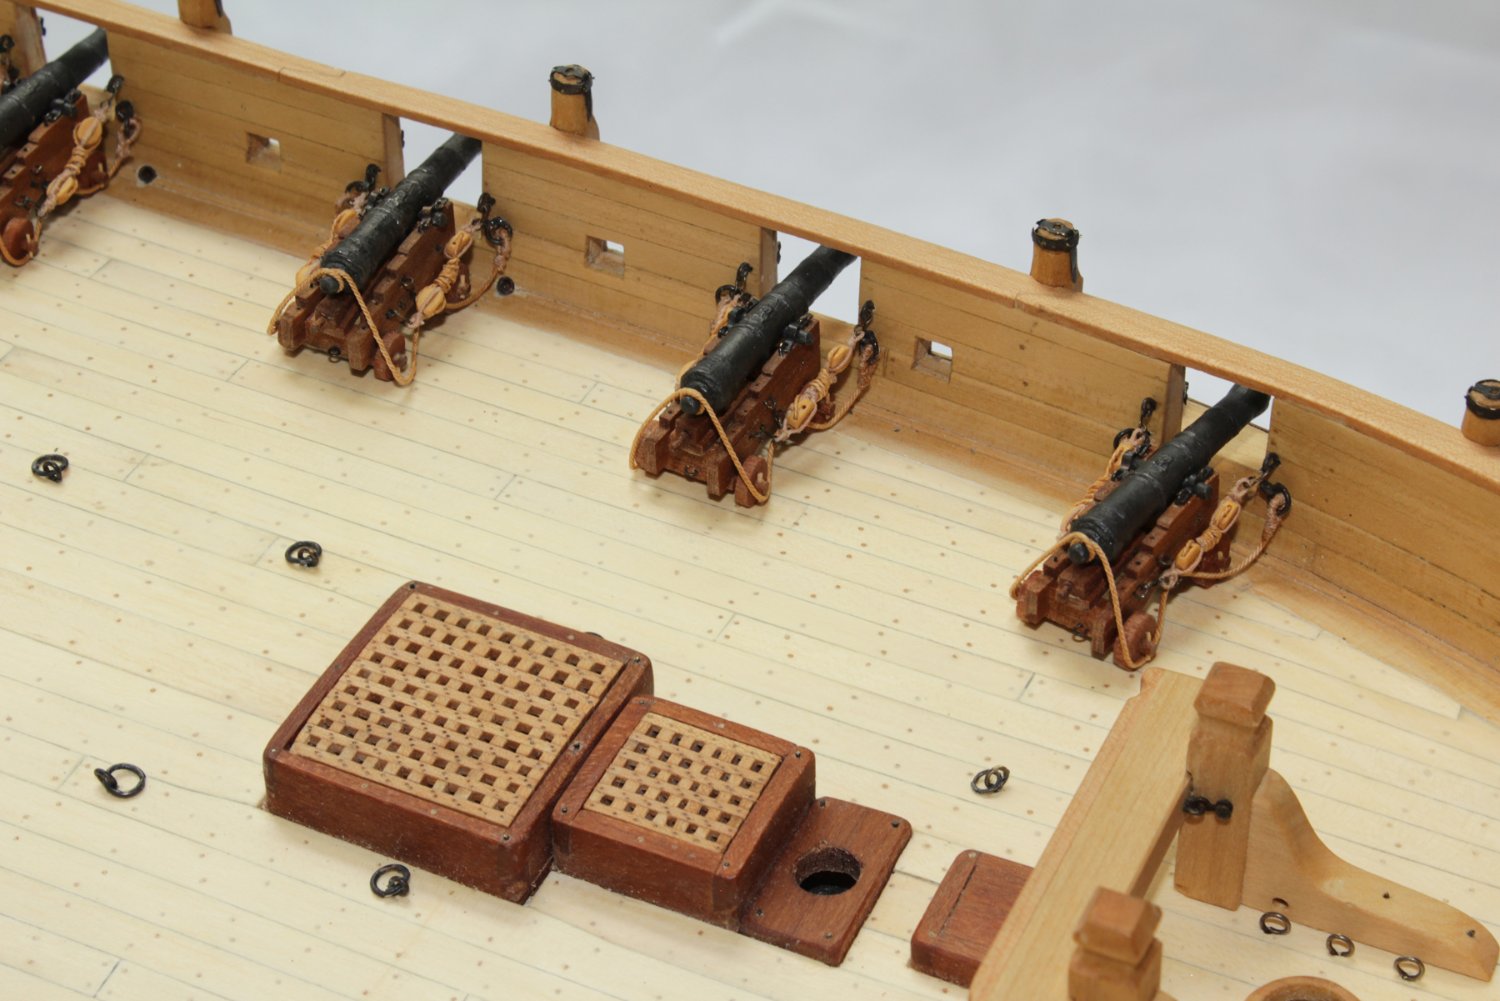
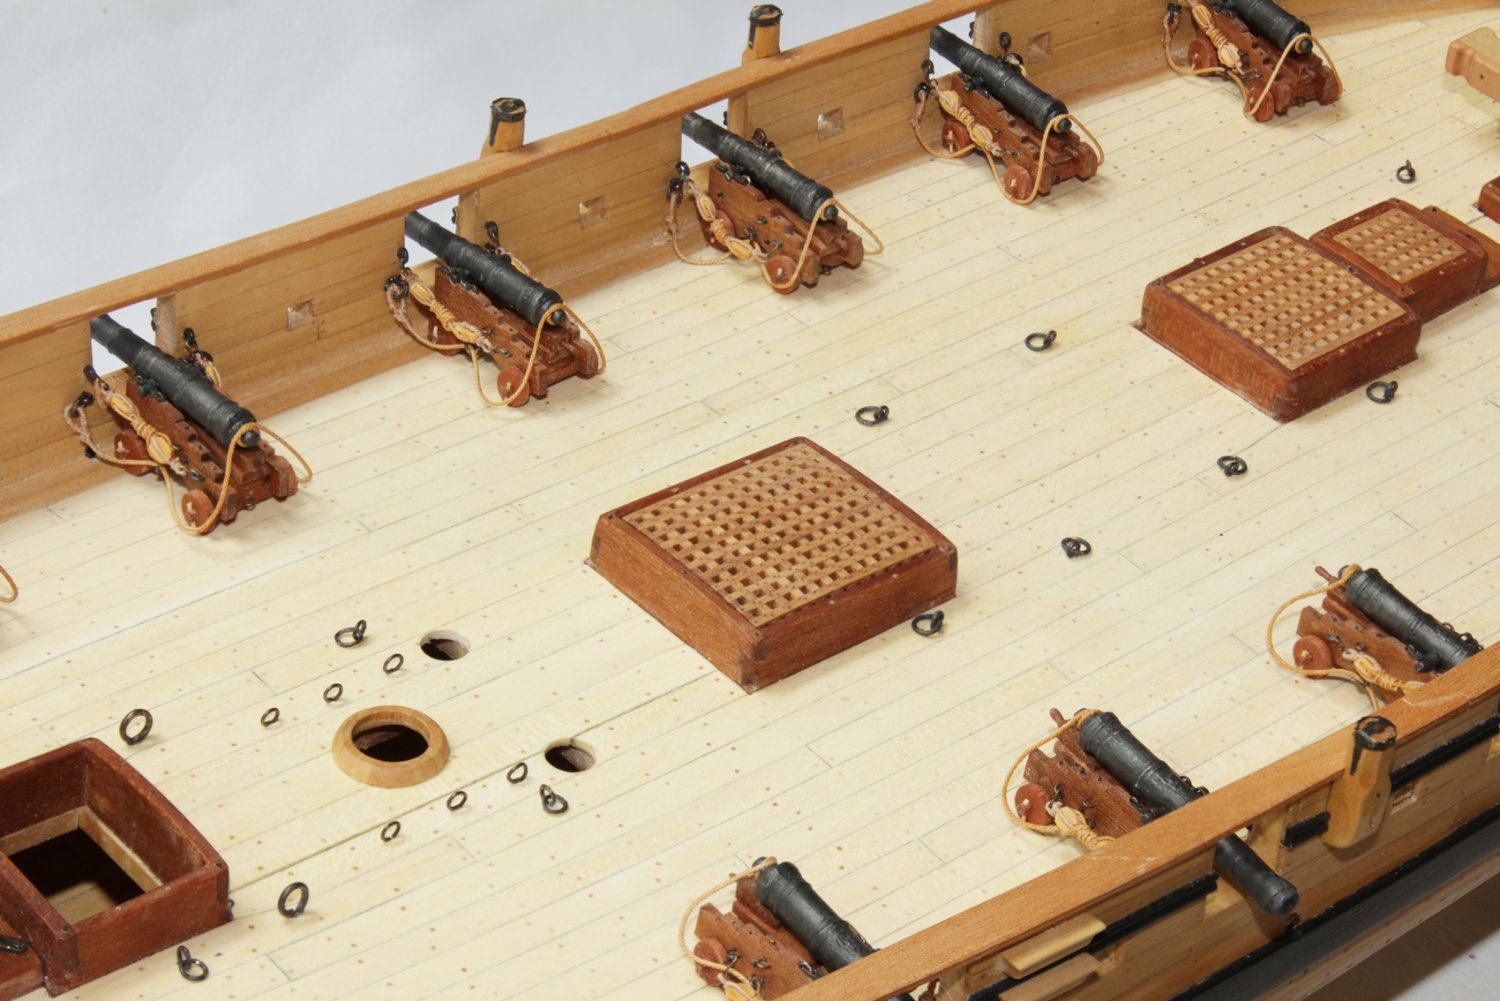
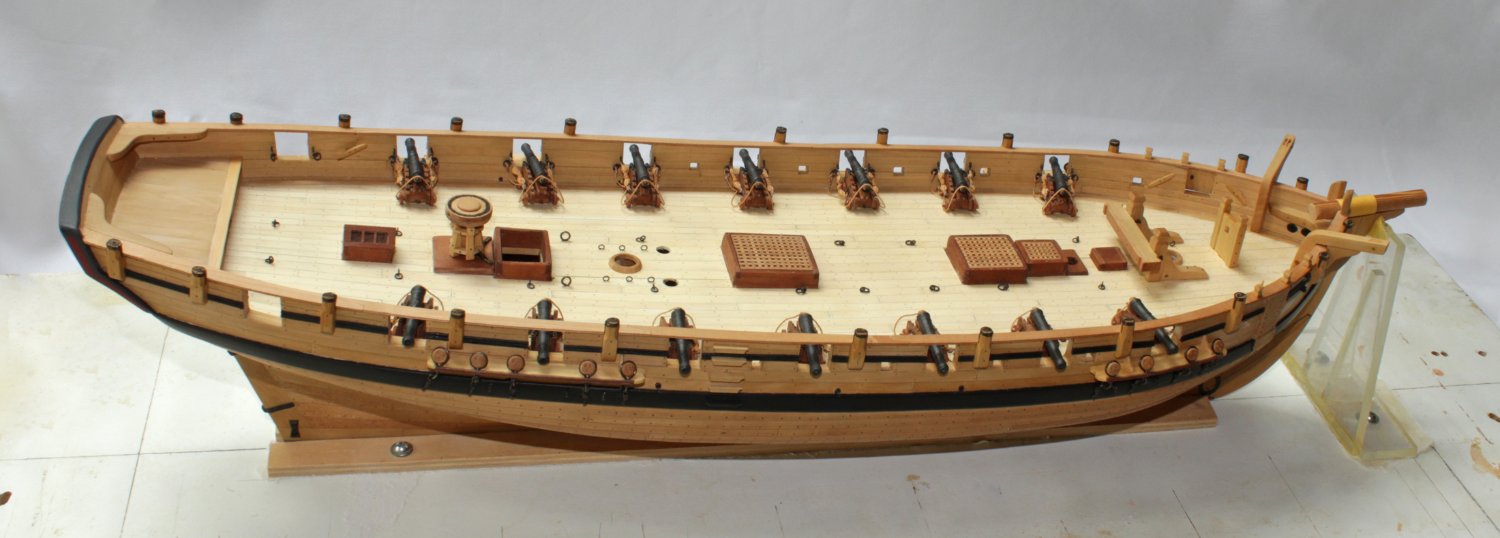
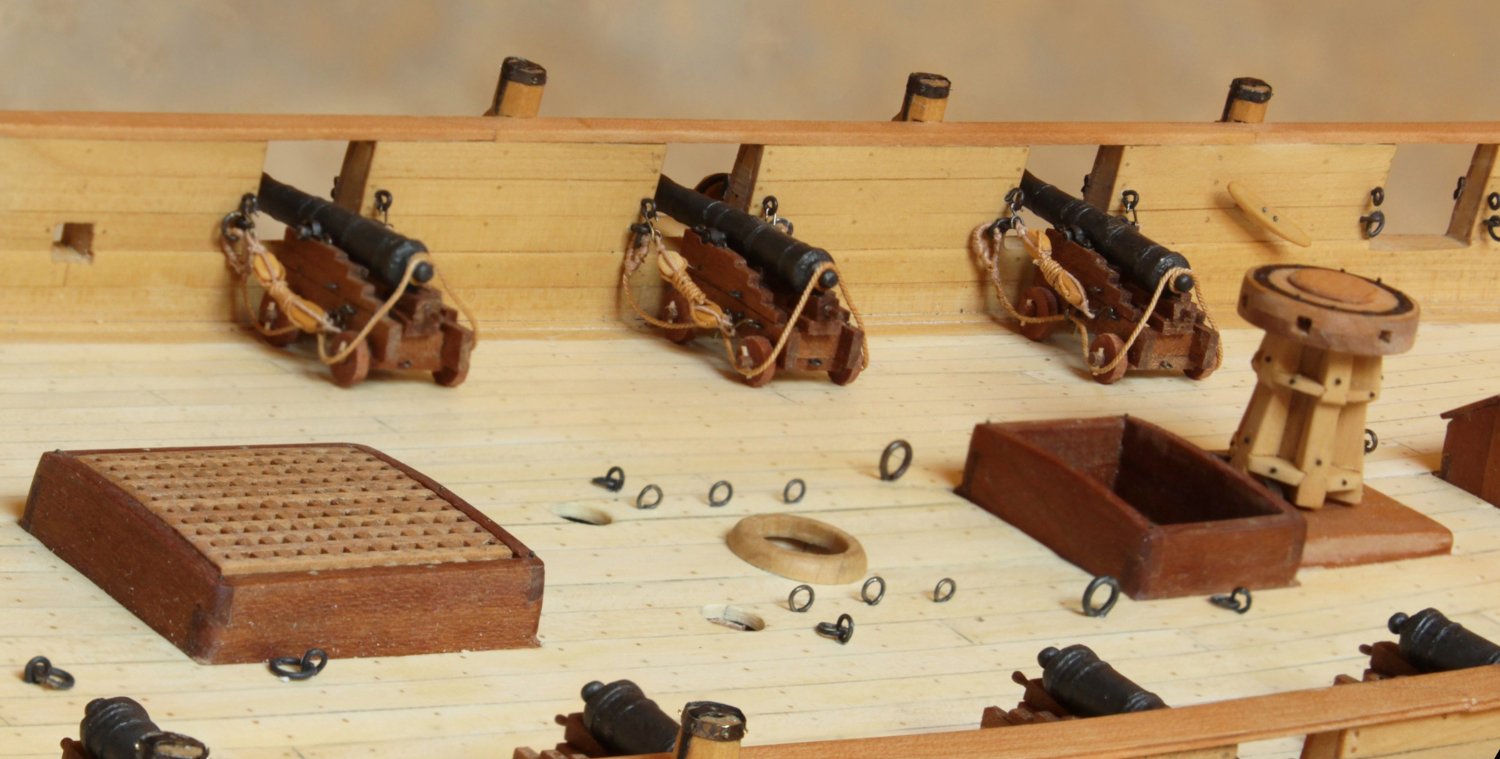
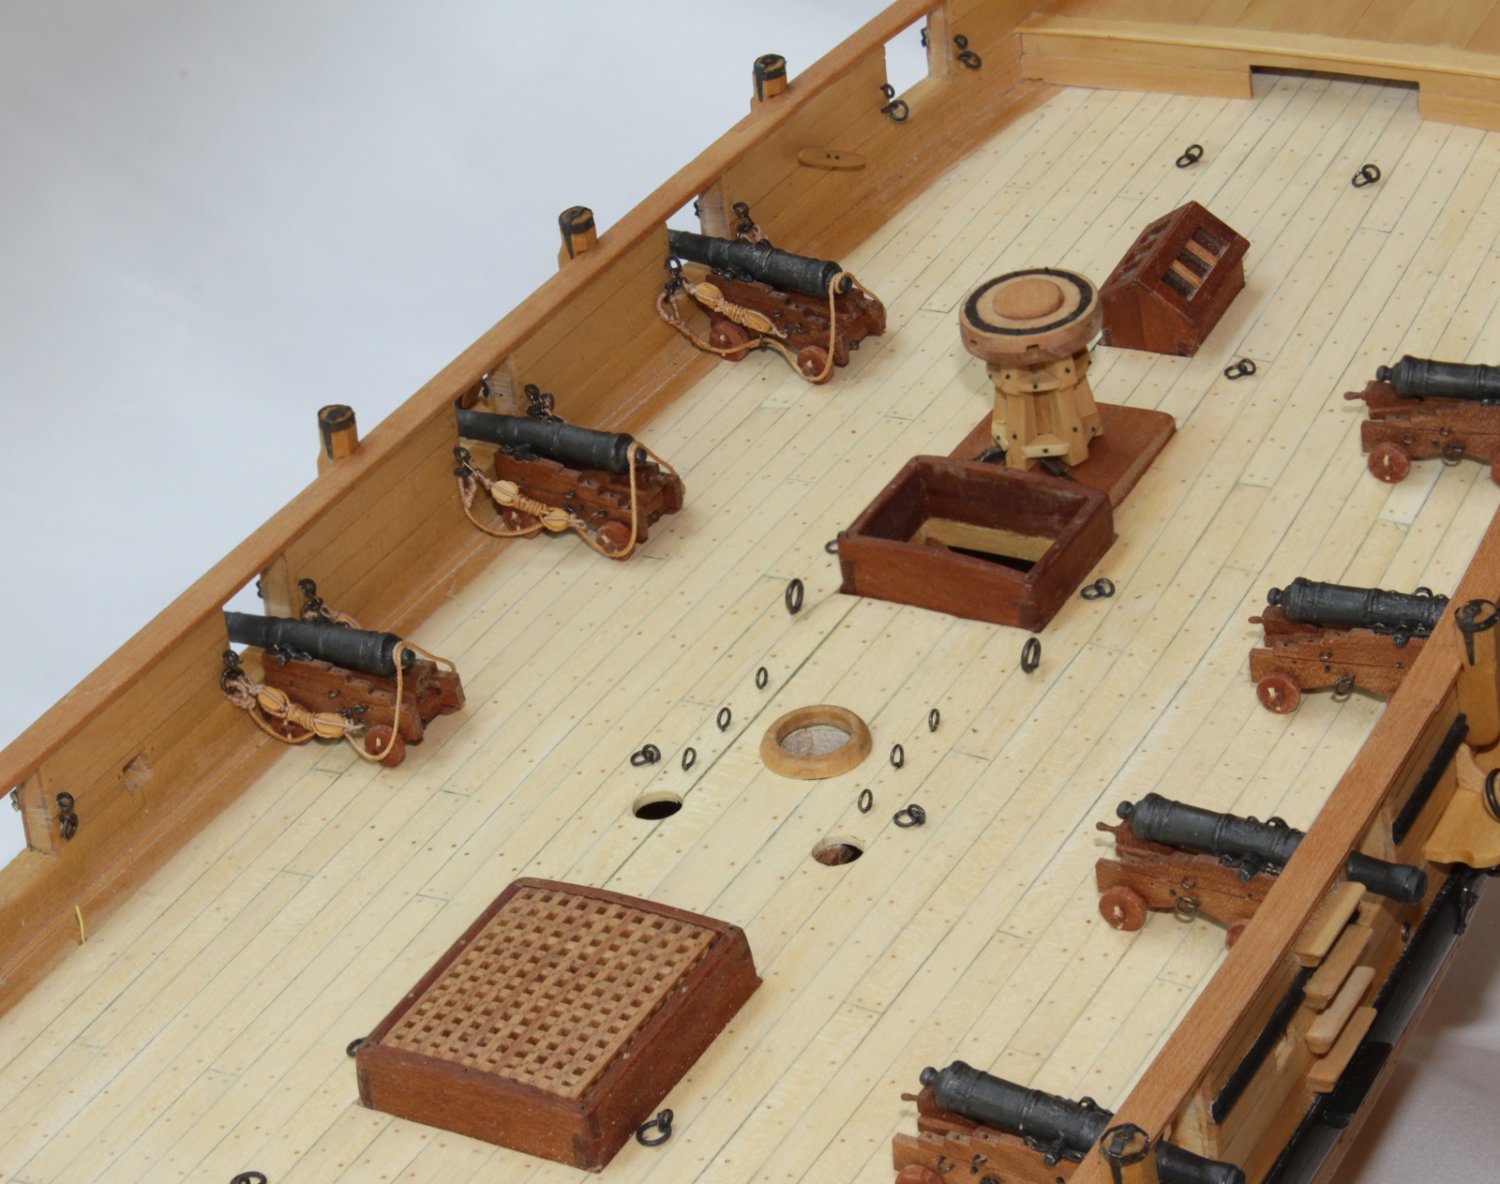
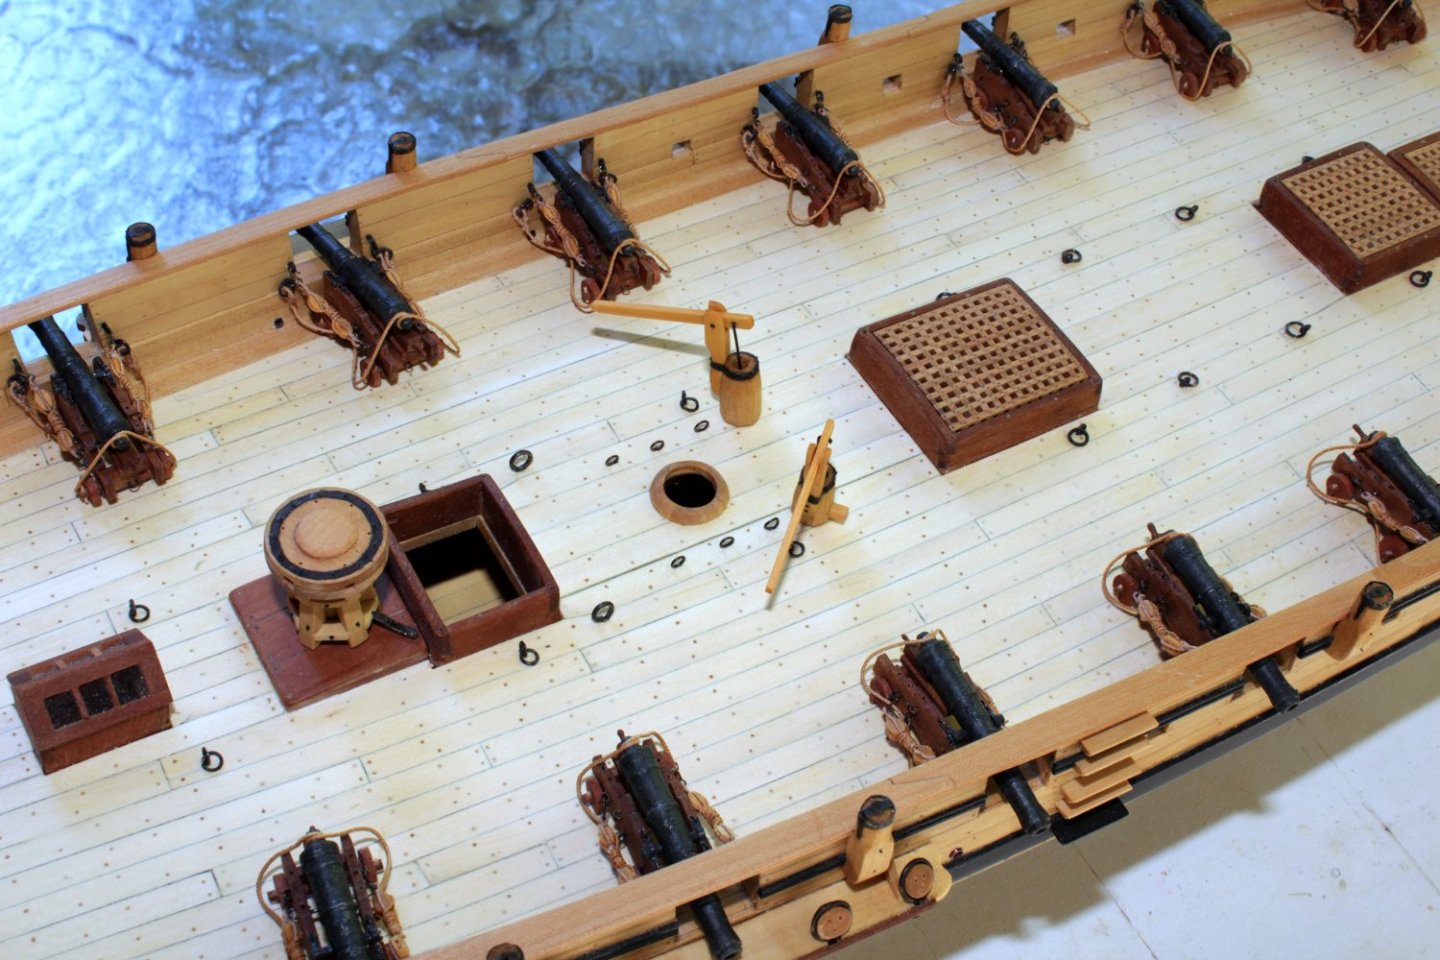
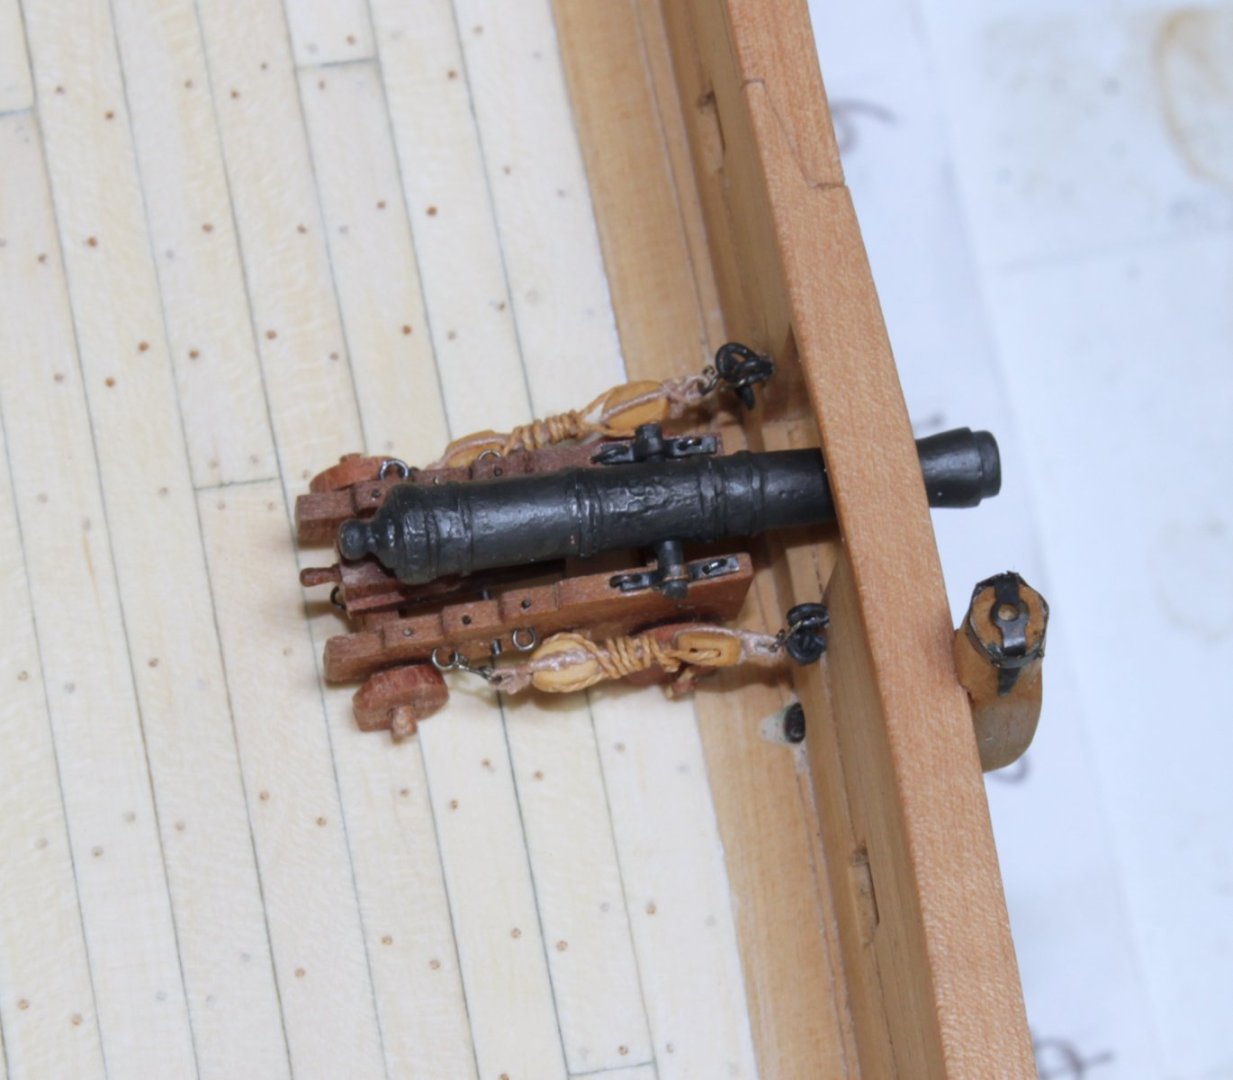
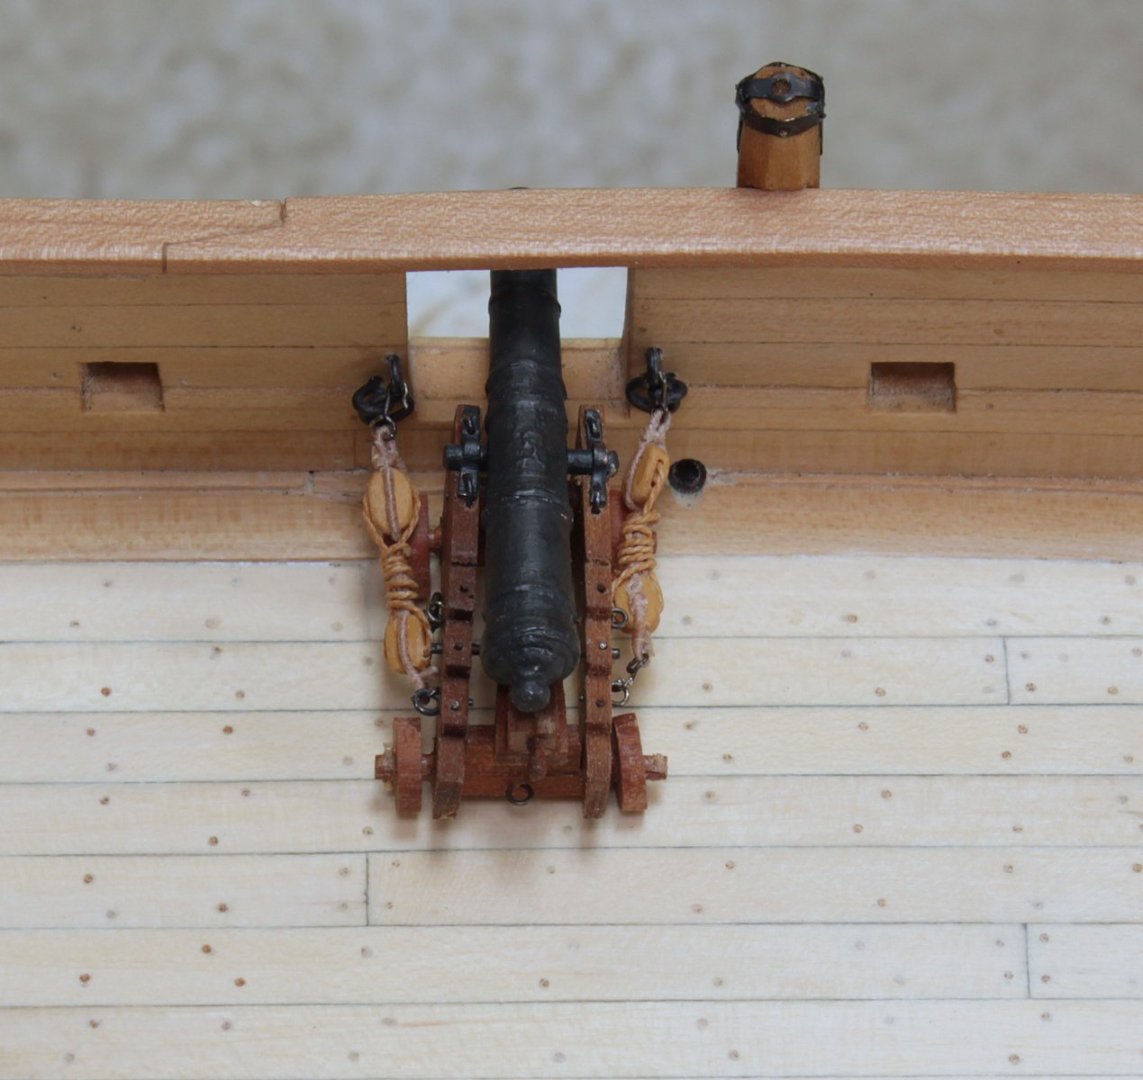
The wobbly truck has now been repaired. I have completed making the gun tackle and breeching ropes. The gun tackle is frapped and attaches with hooks to the bulwark and the gun carriage. The breeching is wrapped around the cascabel and attaches to rings on the bulwark. The end loop on the breeching is formed by splicing; the splice and the loop are served. I used a somewhat unusual tool to serve the loop...a crochet hook. And not the kind that is used to make a quilt. This is a #12 size, left over from when I used to make lace. To prevent the carriages from moving, a #76 hole was drilled into the edge of the deck planking and the front axle. A 24 G wire was inserted and glued with CA. You can see one of the wires in the first two pictures. Three down, eleven to go!


- 277 replies
-
- 25
-
-
-
The first gun has been temporarily installed. Looks like that rear truck needs a little straightening!
- 277 replies
-
- 21
-
-
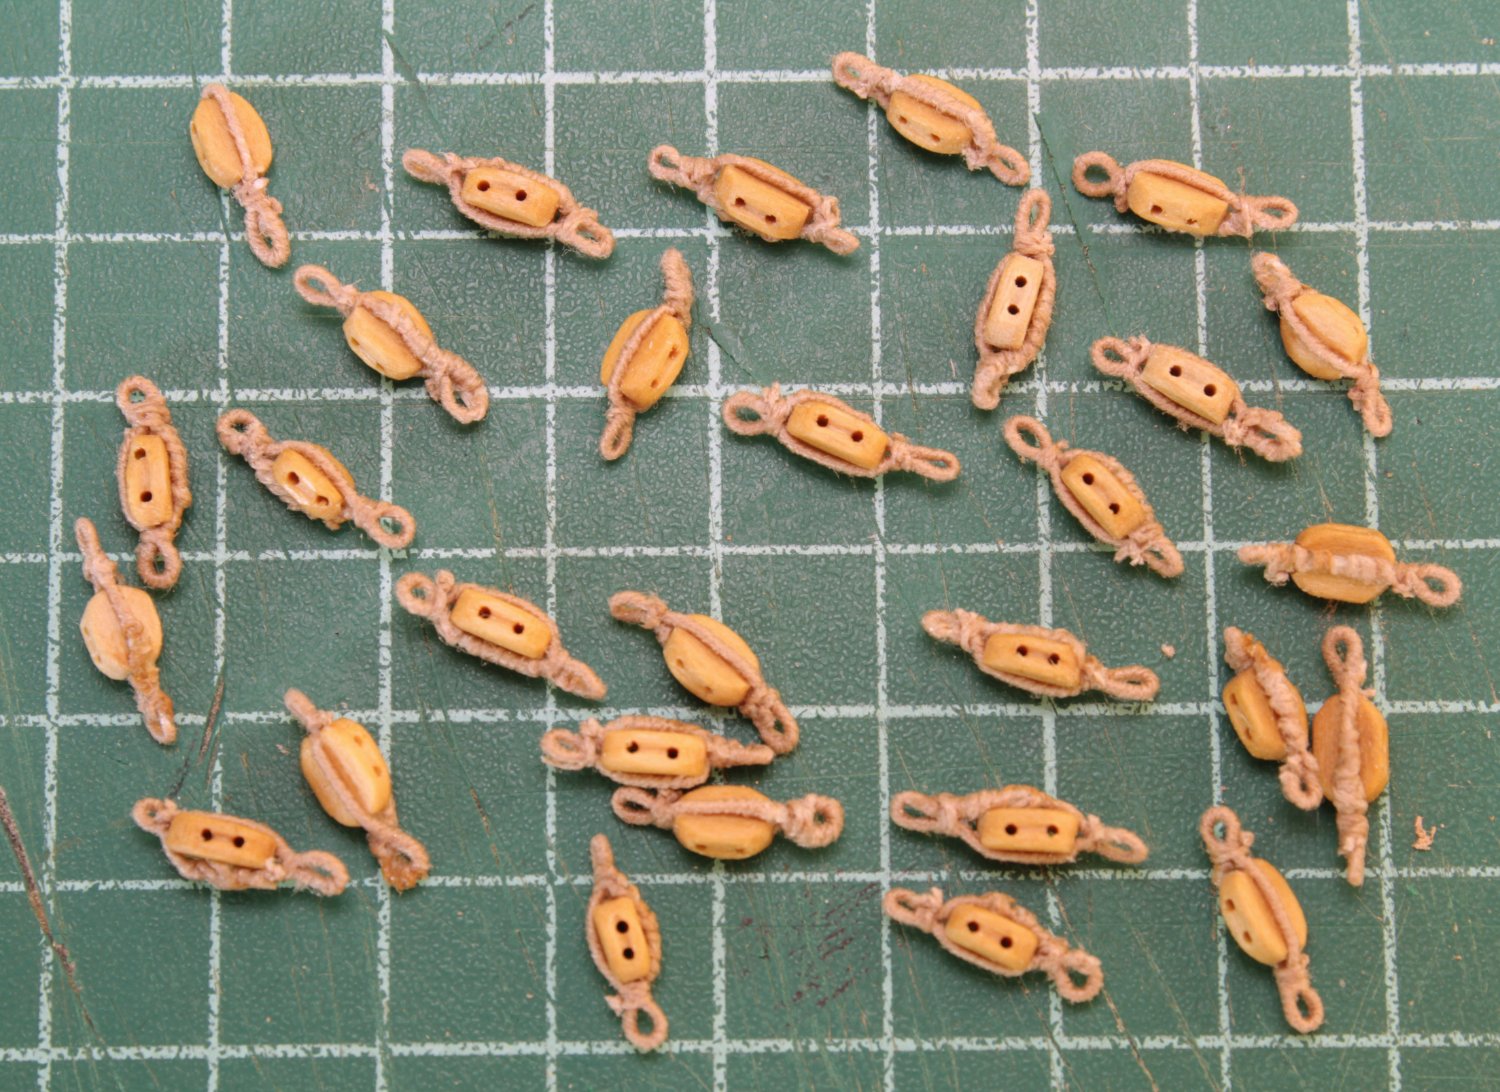
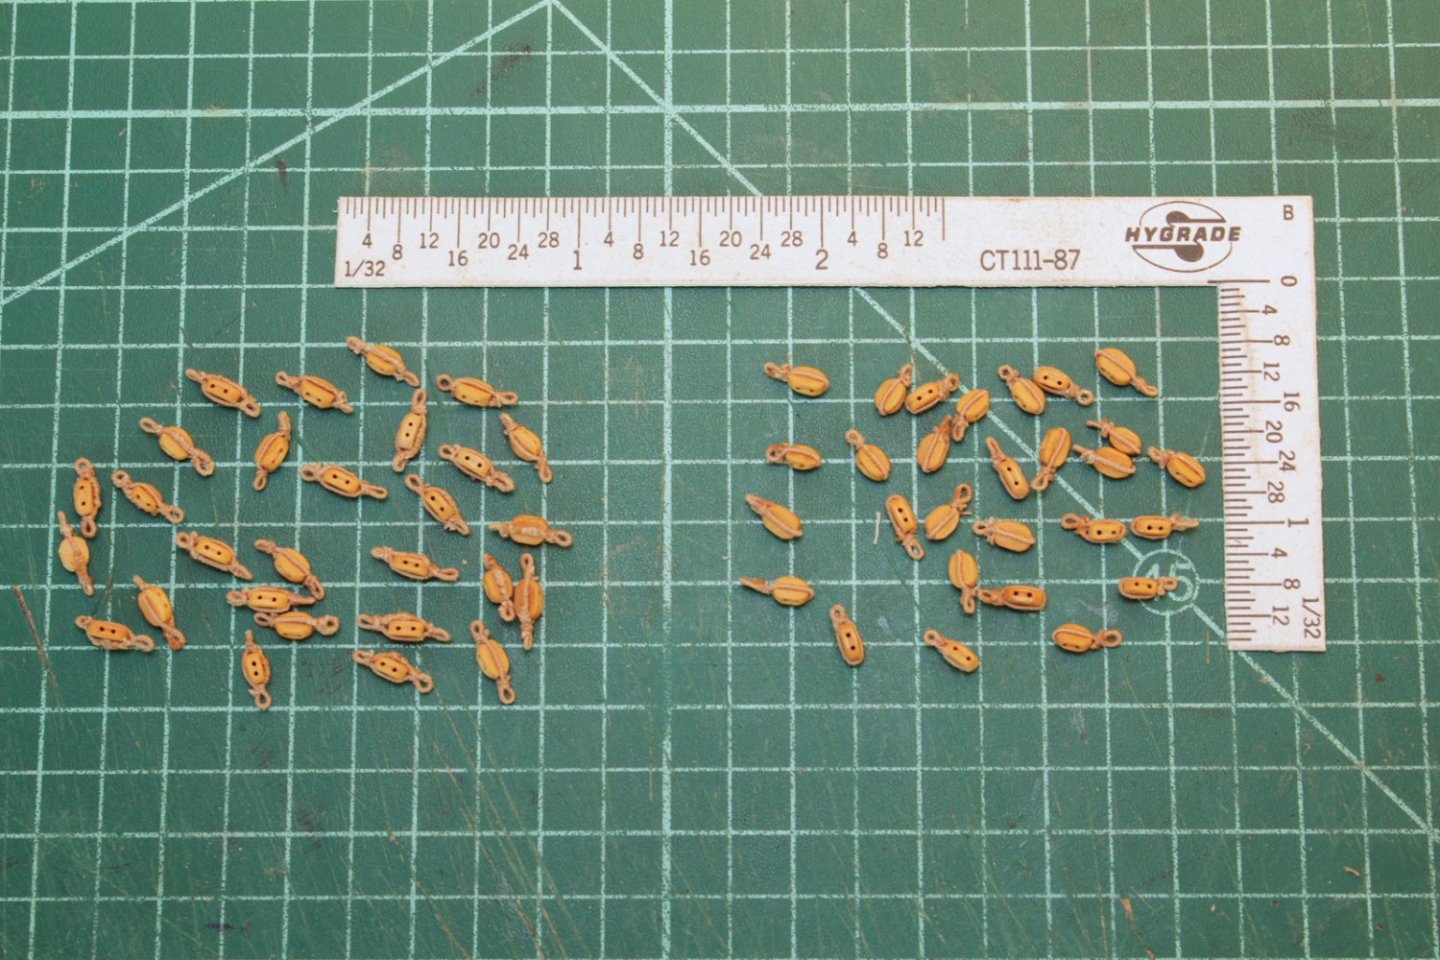
It has been a few weeks since the last posting, but I have been busy in the shop. The next item on the list is installing the cannon. For this, I had to make 56 blocks. There are just over 1/8" long and are made from English boxwood. That was the easy part. Next came the strops. Strops are made from served line with either one or two eyes. Serving, splicing it into a loop and making the eyes took several days. The result is nowhere as good as some of our European brethren, but it is the best I can do at this size. Now to make the gun tackle.

- 277 replies
-
- 21
-
-
-
Dan Vadas found several when he built Vulture.
-
Let me add my welcome to MSW. You chose a great model to replace the pirated Harvey. When you begin, please start a build log so we can follow your journey.
-
"...MINIMUM required shop equipment" I presume you have the usual collection of a Dremel, clamps, forceps, pin vise, razor saw, etc. Whatever you purchase, make it the highest quality you can afford. Crap tools beget crap results. When I started scratch building, the first power tool I purchased was a Preac saw. So a table saw is a must. The next one was a disc/belt sander, now replaced with Jim's disc sander which is whisper-quiet. Until you are ready to invest in a good scroll saw, like a DeWalt, a jeweler's saw and jeweler's pin come next. As a personal challenge, all the frames on my Echo cross section were cut by hand. Other hand tools I cannot live without are chisels and sharpening system and calipers. As others have said, your needs will be determined by what you are building and how you are building it. For the first venture into scratch building, I would recommend sourcing wood the required thicknesses. Otherwise, you will need to add a band saw and thickness sander/planer to your list.
-
My rule of thumb is this: if I feel any irregularity, I keep sanding.
-
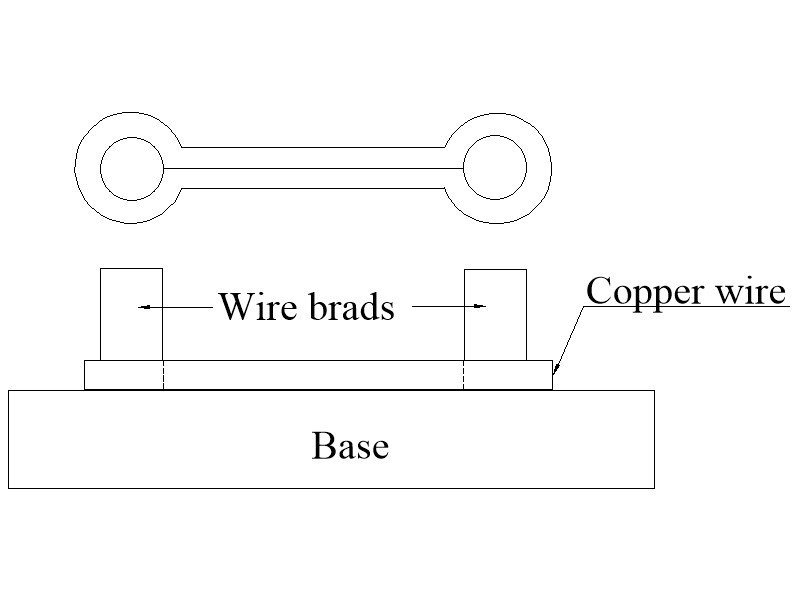
Ian, I set up a jig similar to the one shown below. I nailed two brads into a scrap of 2x4 and wrapped the wire around them, leaving the ends along the straight part of the plate. I then used a needle-nose pliers to pinch the wire just inside the brads (dotted line). The ends of the wire were then trimmed and soldered using a silver solder paste. Some of the silver flowed along the straight part of the plate, securing everything. No drilling required.
-
I purchased mine from Rio Grande but Amazon also has it in smaller quantities. https://www.riogrande.com/product/copper-square-wire-dead-soft/132410GP/?code=132423 https://smile.amazon.com/Gauge-Copper-Wire-Square-Dead/dp/B08K8177PZ/ref=sr_1_24?crid=1YGLS6ZFIR23C&keywords=copper+square+wire&qid=1656709809&sprefix=copper+squ%2Caps%2C347&sr=8-24
-
Thank you to everyone for the likes. I have made the rope for the gun rigging. Making the blocks comes next. Druxey, I started with sheet brass. Then I decided to clean my workroom, In doing so, I found the spool of square wire that I had used for the planking bolts. 24-gauge was the perfect size for the job. After a few "fails", the process went very quickly. I would never go back to the other way. After a Sparex soak, I used brass blackener instead of liver of sulfur and had no issues with blackening.
-
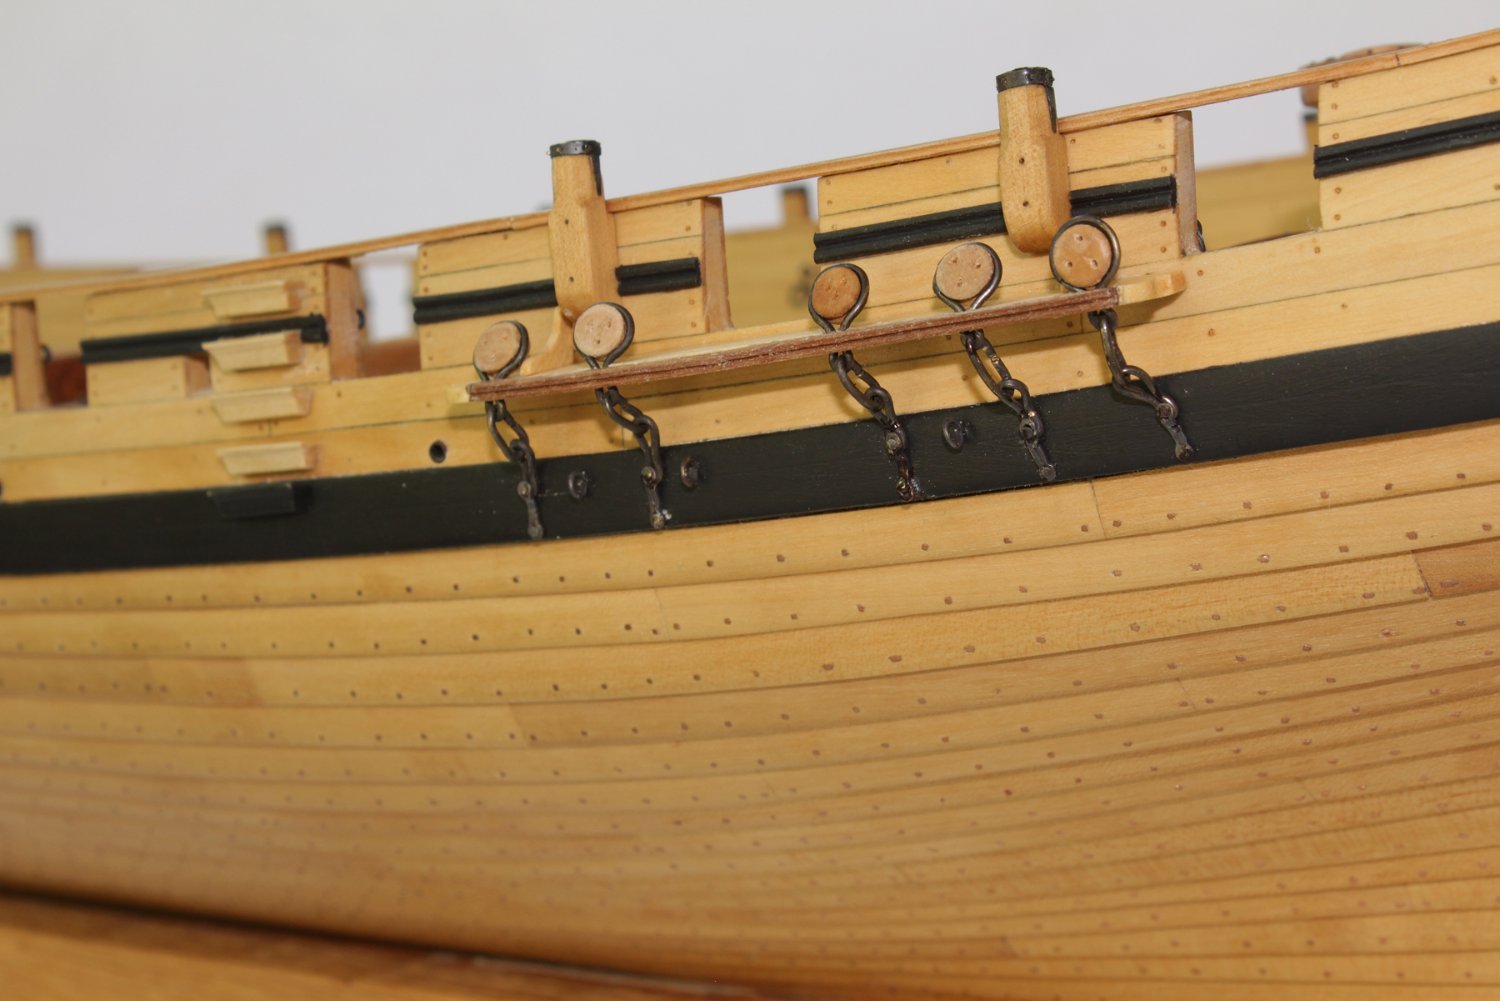
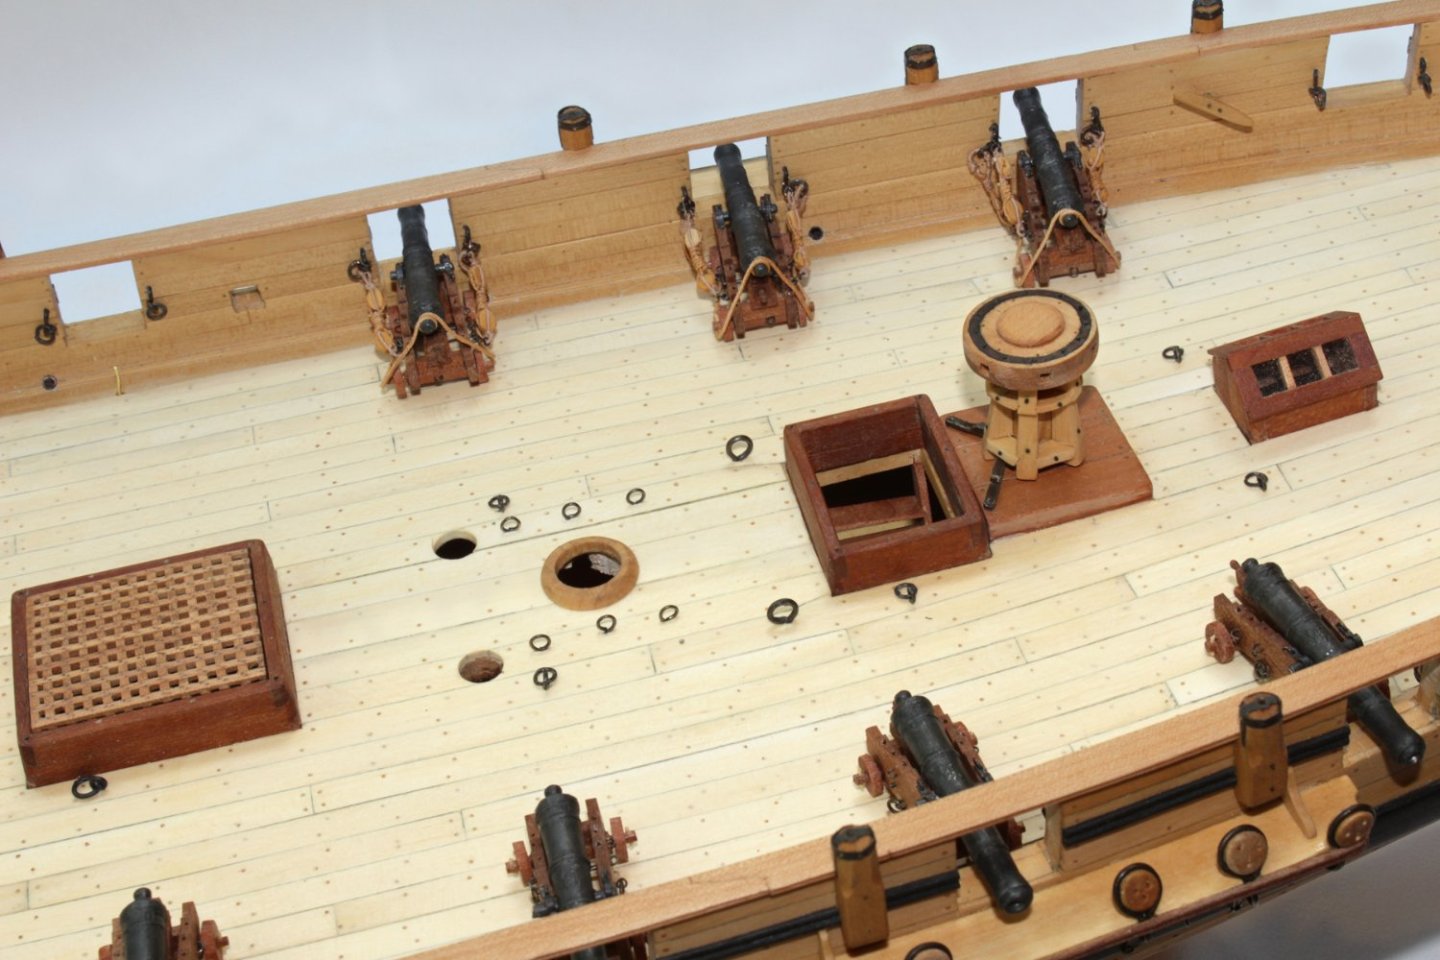
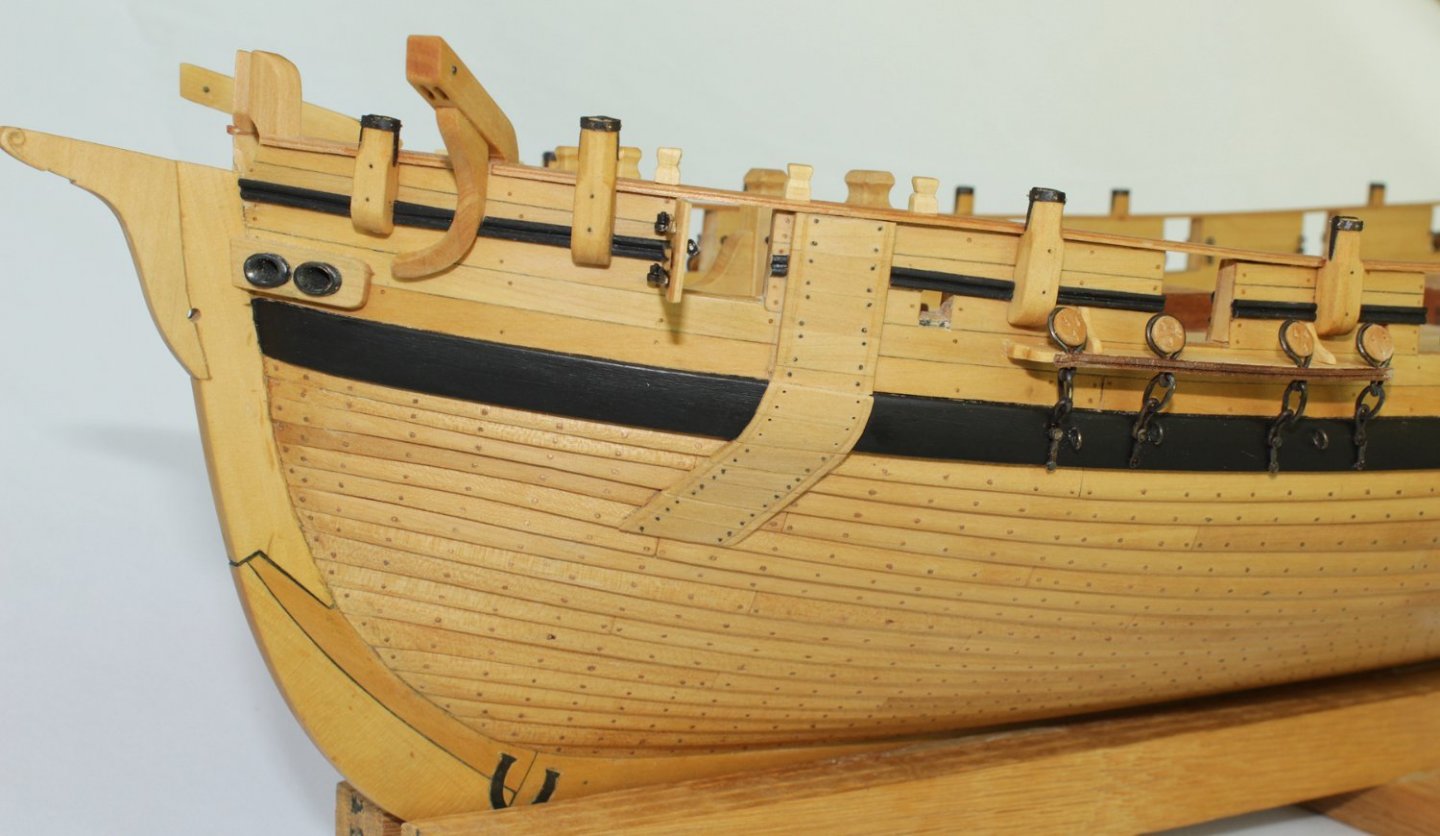
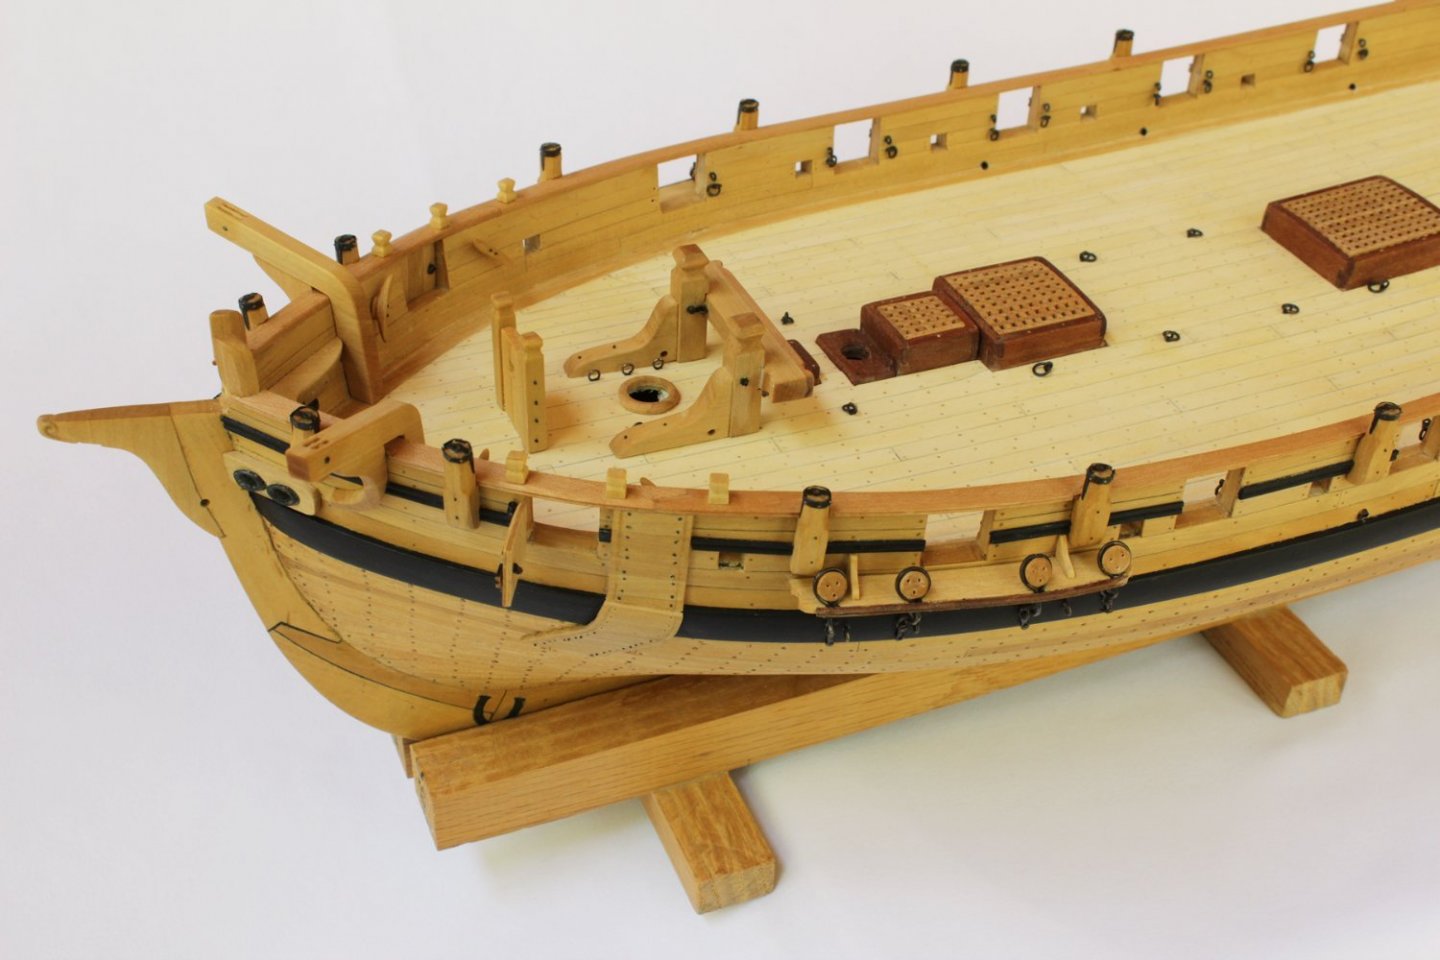
I realize it has been a long time since this build log has been updated. Between finishing the Echo cross-section and the garden, there has been very little time for her. I have finally made some progress. The channels, deadeyes and chainplates have been installed. The angles for the chainplates was determined by stepping a false lower mast and running a line from the top to the chains. The deadeyes are made from English boxwood. I have not decided whether I like the color contrast of the channel moldings. These were made from apple. I tried a different approach on the preventer plate. Previously, I would cut the plate from sheet brass, drill the holes and score the middle of the plate. This time, I used 24-gauge square copper wire. I set up a jig with two brads, wrapped the wire around the brads, pinching at their bases and silver soldered the ends and center sections together. Heating the plate during the soldering process had the benefit of softening the metal so it could be bent over the middle link. Other details have been added. Preventer eyebolts have been installed, as well as eyebolts along the two masts. Only the foremost port was fitted with a cover. This was fitted so it would hinge on its fore side. The contemporary model shows six exposed timberheads, five in the bow area and one aft. The plan only shows three in the bow and none aft. I followed the plan. Next up will be rigging the guns.


- 277 replies
-
- 37
-
-
-
NAIAD 1797 by Bitao - 1:60
tlevine replied to Bitao's topic in - Build logs for subjects built 1751 - 1800
I'm speechless. That is absolutely gorgeous.- 371 replies
-
- 10
-
-

-
NAIAD 1797 by Bitao - 1:60
tlevine replied to Bitao's topic in - Build logs for subjects built 1751 - 1800
I agree. Please show us more of the stove. -
That sums it up perfectly, Greg. If it were not for you and David, my model building would never have become what it is today. What you gentlemen create is the stuff we can only dream of achieving.
-
Looks great!
-
Thanks for the update, Ron. Love the breechings.
-
Echo by tlevine - FINISHED - Cross-Section
tlevine replied to tlevine's topic in - Build logs for subjects built 1751 - 1800
Thank you, Christian. -
Swan-Class Sloop by Stuglo - FINISHED - 1:48
tlevine replied to stuglo's topic in - Build logs for subjects built 1751 - 1800
Convolvulus sabatius Also known as African bindweed or Blue rock bindweed. Not creeping Jenny. I have ripped out enough of that weed to recognize it anywhere. Aren't you afraid that the felt will pick up a lot of dust? -
Beautiful, as always. I am thrilled to see you might actually be human...a few specks of sawdust!
-
Echo by tlevine - FINISHED - Cross-Section
tlevine replied to tlevine's topic in - Build logs for subjects built 1751 - 1800
Thank you to everyone. Druxey, I have a project I am working on for the Guild and then I need to finish Swallow. After that...who knows.