tlevine
-
Posts
2,033 -
Joined
-
Last visited
Content Type
Profiles
Forums
Gallery
Events
Everything posted by tlevine
-
 I absolutely love my carbide bits but I would never consider putting them in a pin vise. Any lateral pressure and they will break. That is just the nature of the metal; it has nothing to do with price. I buy resharpened ones from Drill Bit City. As far as rotary tools are concerned, I just use a small cordless Dremel. It is variable speed. The collet holds the bit steady enough to prevent breakage. For a task like drilling the holes in frames, I put the bit in the sensitive press on my Sherline mill.
 -
I have figured out what I did wrong; have no idea why I messed up. There should only be seven rows of grating battens, not eight. Adjusting the length of the head ledges to 42" solves the problem. I hope to have the corrected drawings finished this weekend.
-
If you think you have a headache, I am going crazy trying to figure out what I did wrong and where, as well as make up new drawings. It looks great, regardless.
-
I never noticed the discrepancy until you just pointed it out to me. I would correct my mistake by moving the carlings out so that half of them are exposed. Nobody will see the original mortice. Again, my apologies.
-
I think you could get away with trimming the base. However, the brakes will be too long as drawn so you will need to shorten them. Having said that, the base is one of the easiest parts to build. I would make another one. Soak your base in isopropanol and you will only need to remake the upper center piece. I would "fudge" on the lower and simply shift it over so the holes align.
-
Echo by tlevine - FINISHED - Cross-Section
tlevine replied to tlevine's topic in - Build logs for subjects built 1751 - 1800
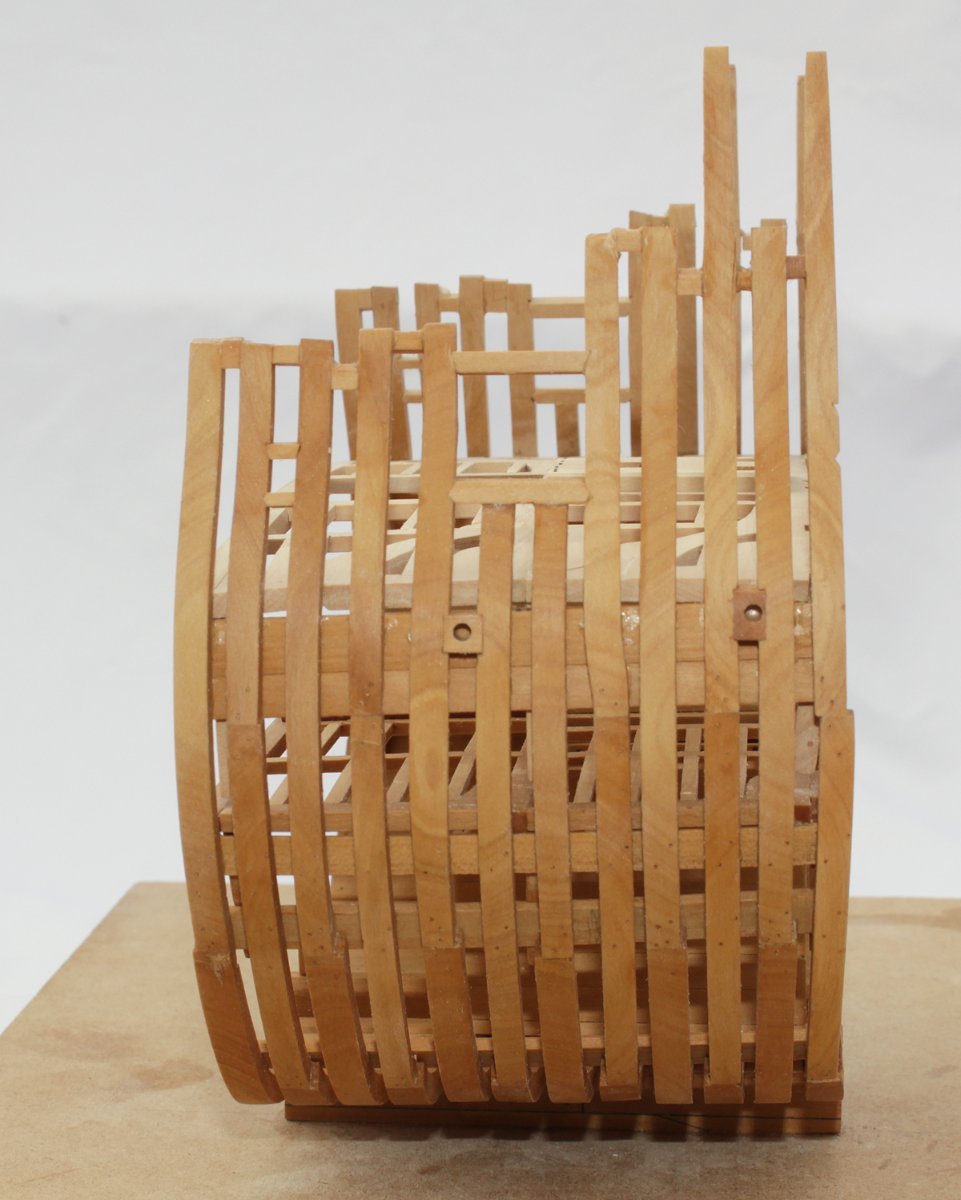
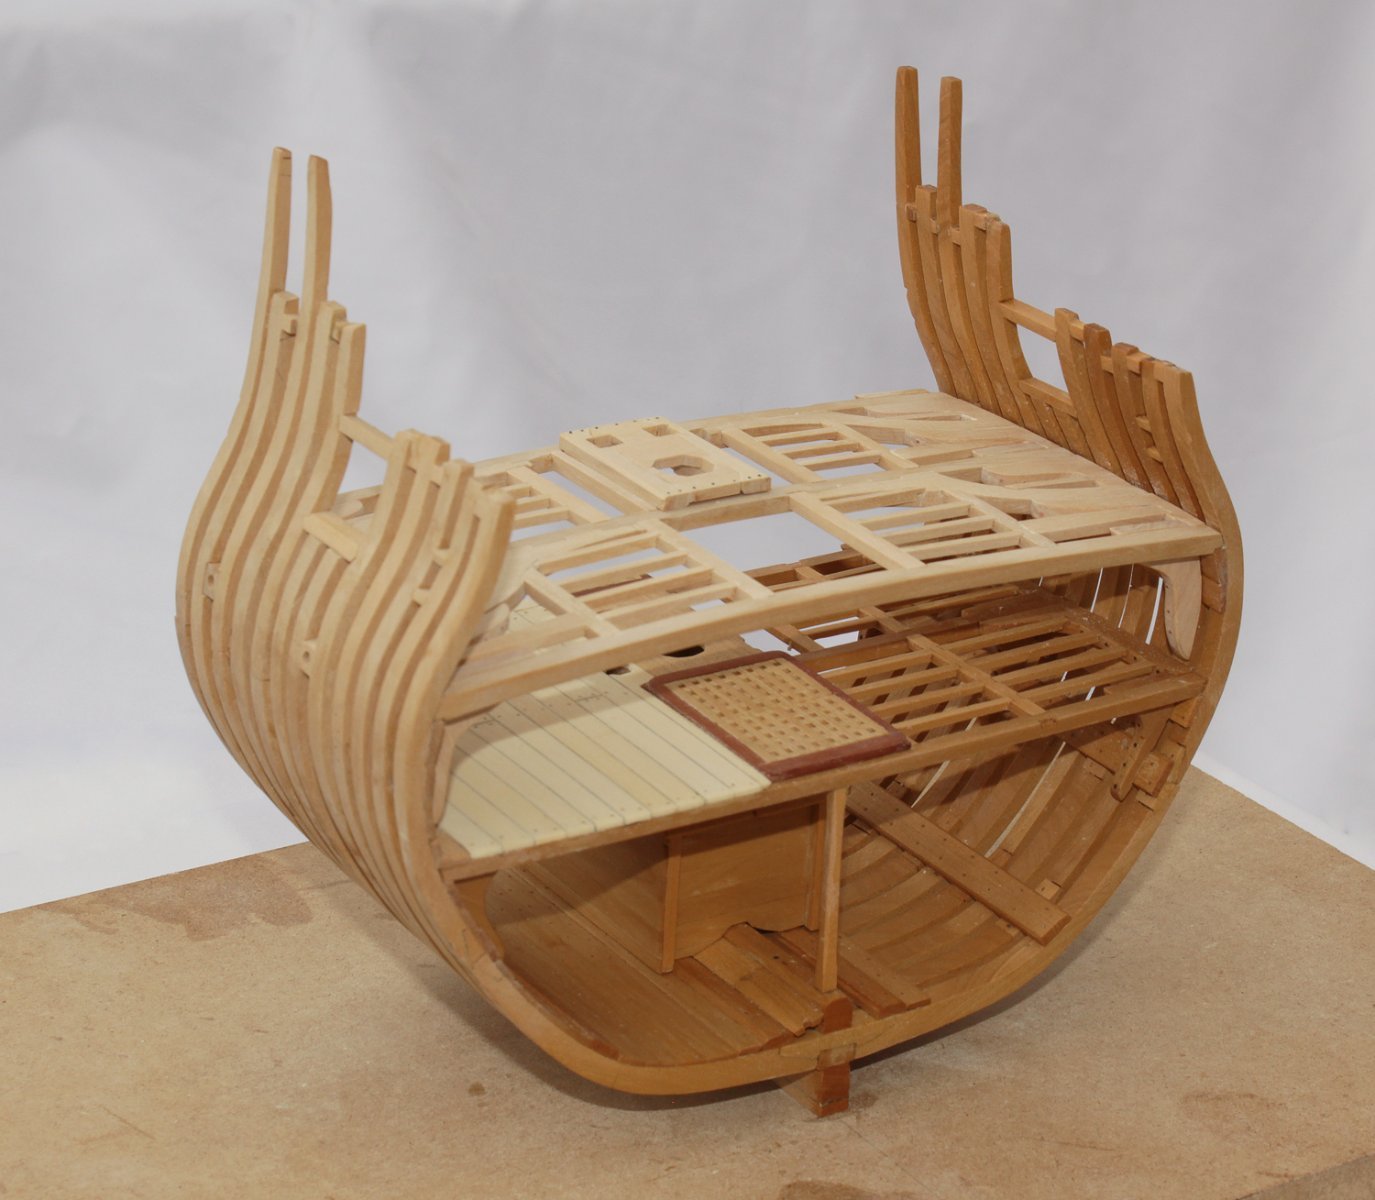
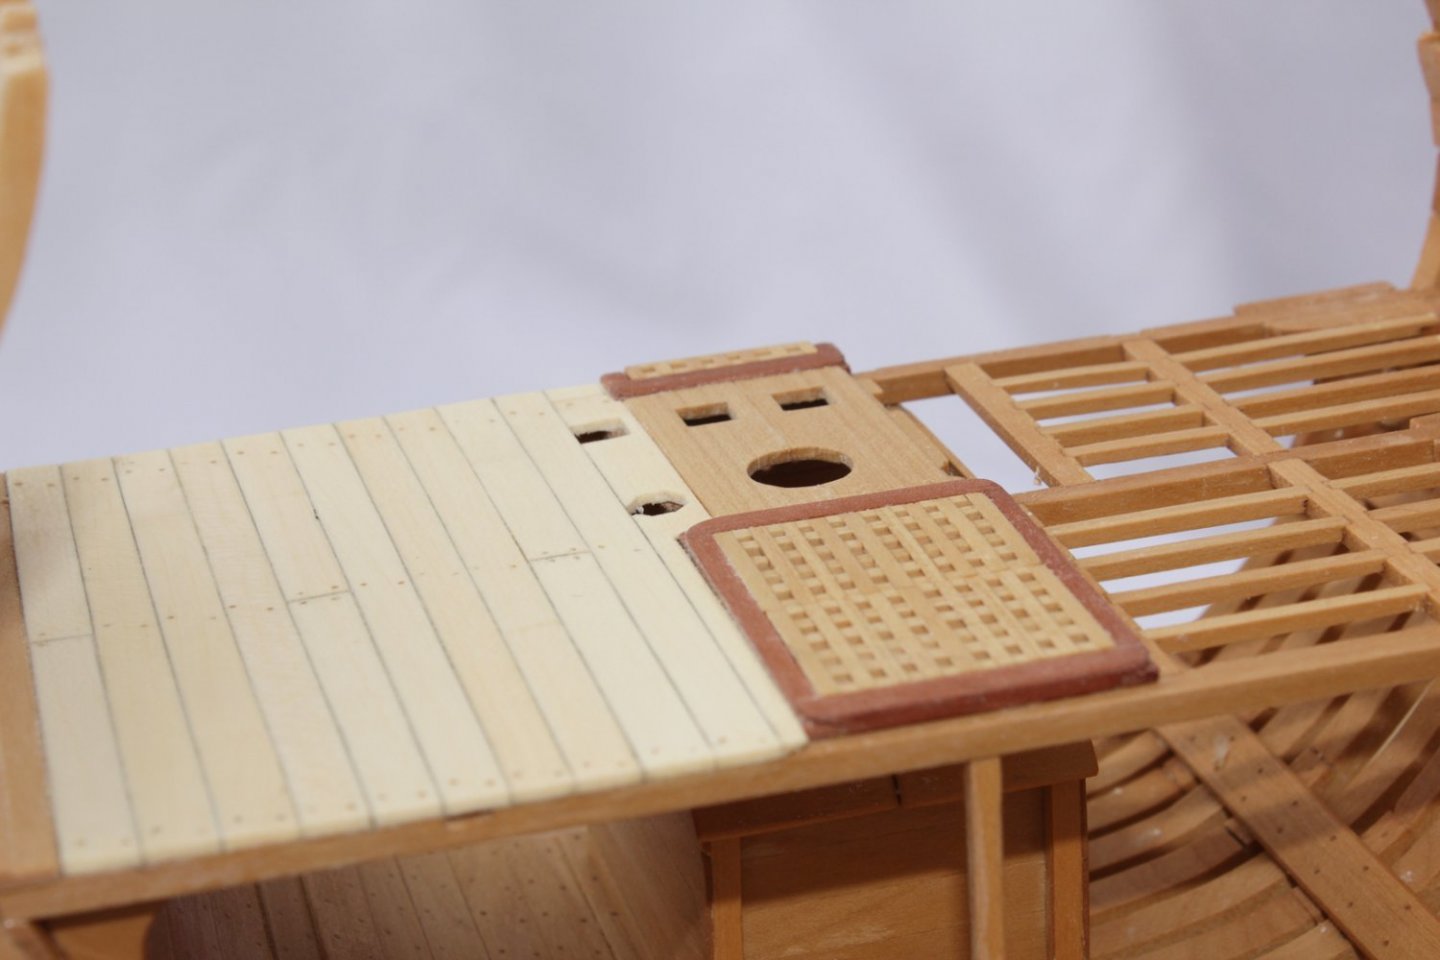
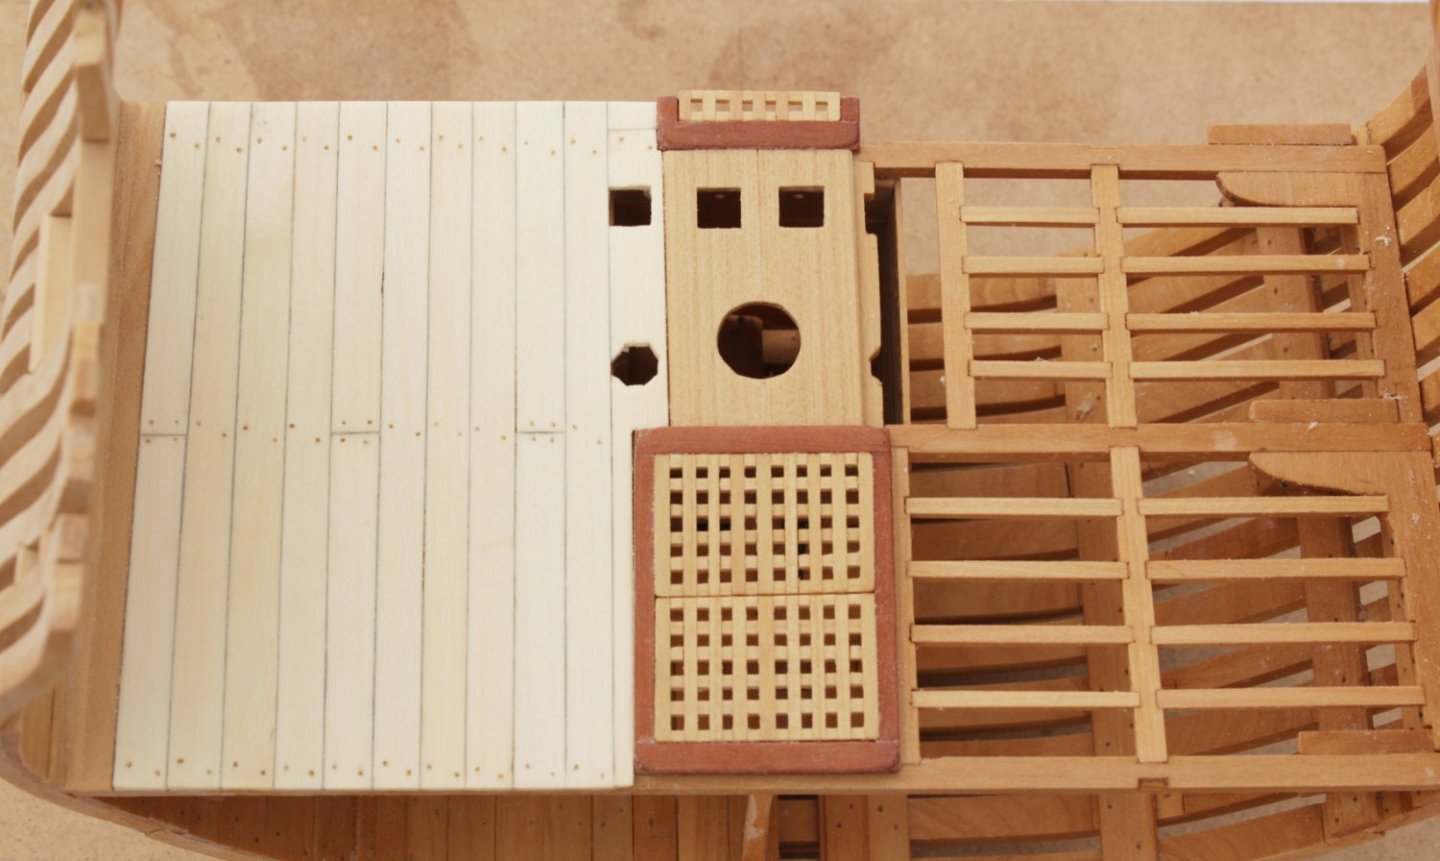
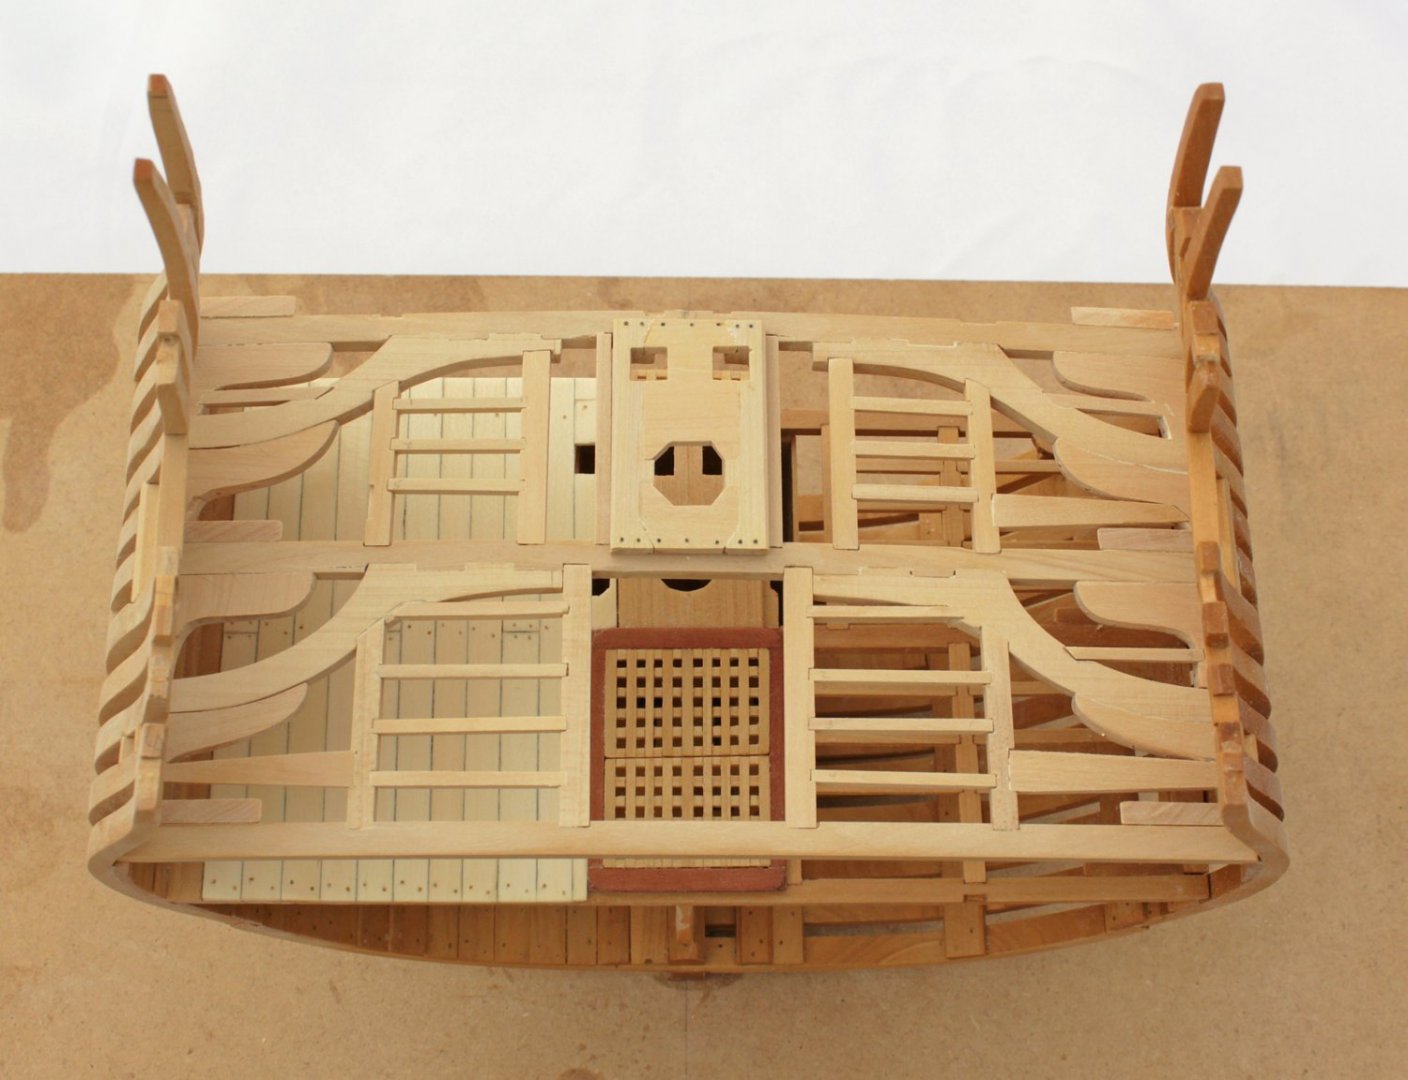
It's only been 3 1/2 years since my last posting! Swallow is on the shelf until Spring. I have decided to return to Echo, hopefully taking it almost to completion in the next few months. I have now finished the lower deck. The port side will remain in frame and the starboard will be planked. The gratings are made in two pieces using the same technique I showed in the capstan construction. The key is to have the grating made first and then fit the hatch coaming to the grating. Everything is made from castelo unless otherwise stated. The coamings are made from cherry. The lower mast partners are in place. The square and octagonal holes are for the pump tubes. The deck is planked with holly and the treenails are bamboo. In this cross section, the hatch abaft the mast partner is just visible, along with a bit of grating. The upper deck framing has been completed. The mast partner are much more complicated on the upper deck. Compare the pictures above and below. The two missing starboard ledges have been installed since the picture was taken. The beauty of a cross-section is that I can slide out the entire deck to work on it away from the model. Finish has been applied to the completed lower deck and the port hull exterior. The Watco's really gives the castelo a warm look without any shine. Next up are the upper deck hatches.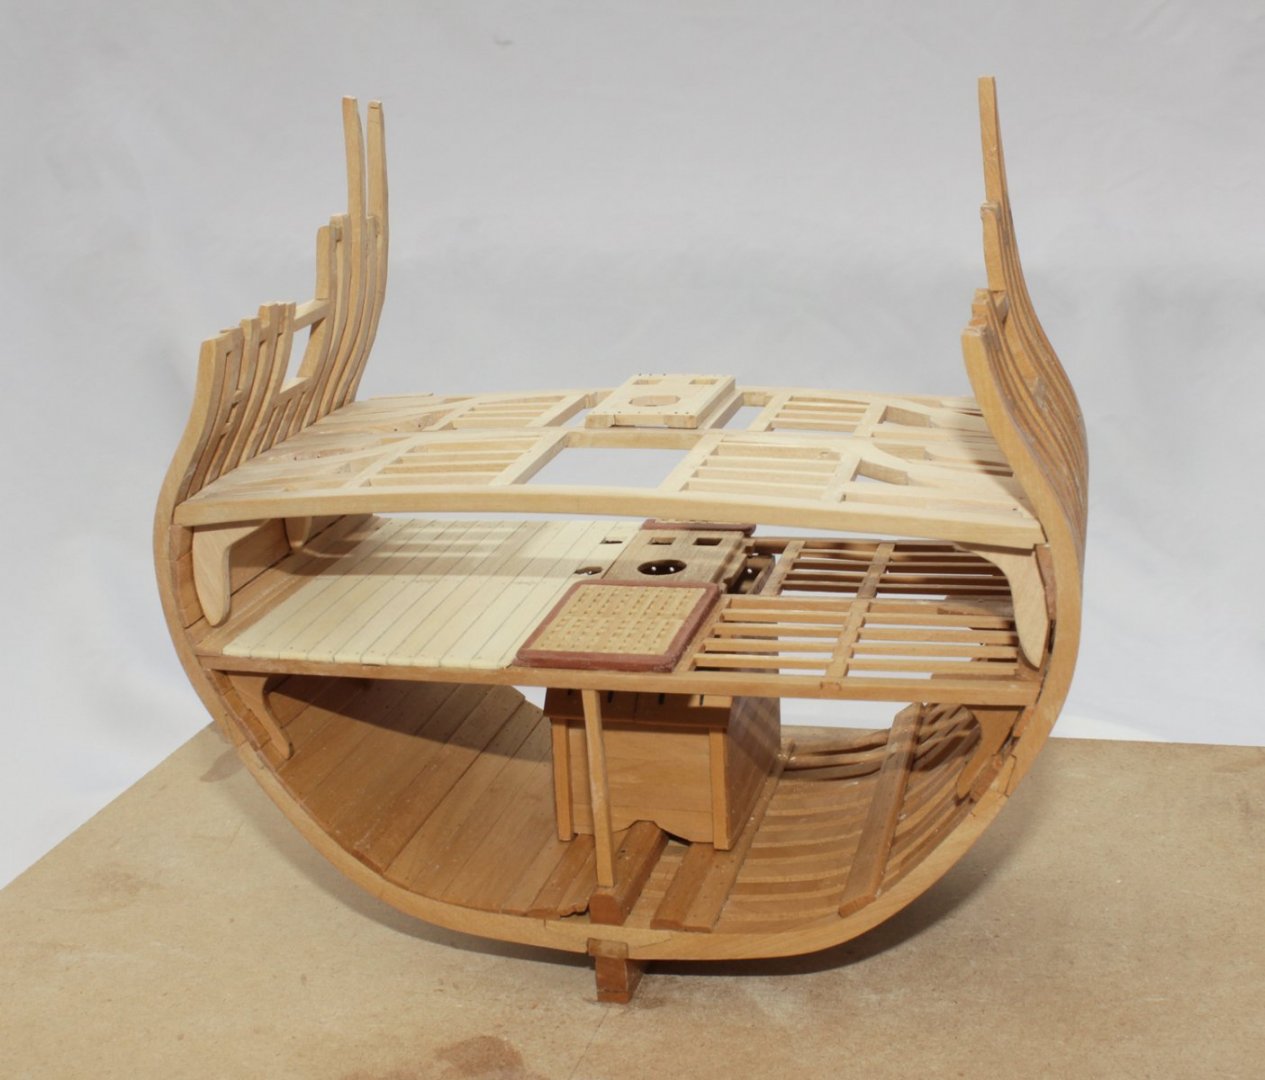


- 52 replies
-
- 20
-

-

-
I am in total agreement with Greg (although my patients only had two legs). Phenomenal work.
-
Here are some new options. https://thenrgstore.org/collections/model-figurines
-
Looks like your schedule is pretty full, Grant. The capstan looks fantastic. Thanks for sharing with us.
-
"Toni’s instructions indicate that the Drumheads are each made up of two semicircular pieces of wood cut with a jeweller’s or scroll saw and glued together. I’m not sure why Toni took this approach, but assume it was because she didn’t have stock of sufficient width to cut them from one piece." Sorry for the late reply. The reason I used two pieces is that it how the actual capstan would have been constructed. Consider for a moment how many oak trees 34" in diameter there are versus 17" in diameter.
-
Swan-Class Sloop by Stuglo - FINISHED - 1:48
tlevine replied to stuglo's topic in - Build logs for subjects built 1751 - 1800
The wales look much better with the fastenings blackened. -
Swan-Class Sloop by Stuglo - FINISHED - 1:48
tlevine replied to stuglo's topic in - Build logs for subjects built 1751 - 1800
I also agree with Greg but we all do things to suit our personal aesthetic. -
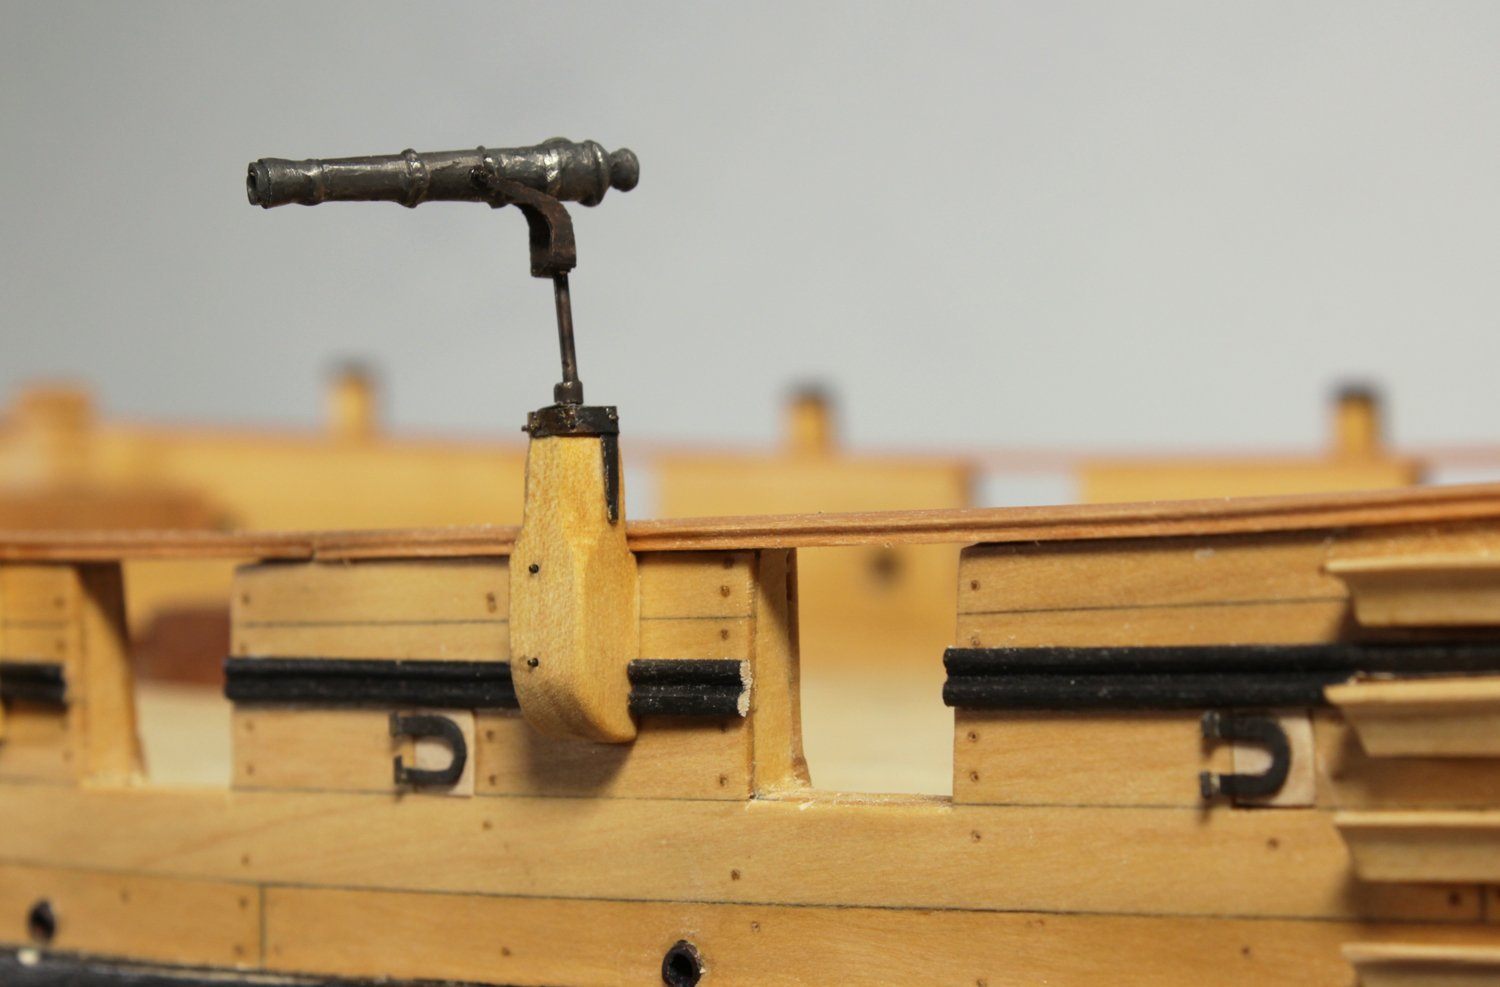
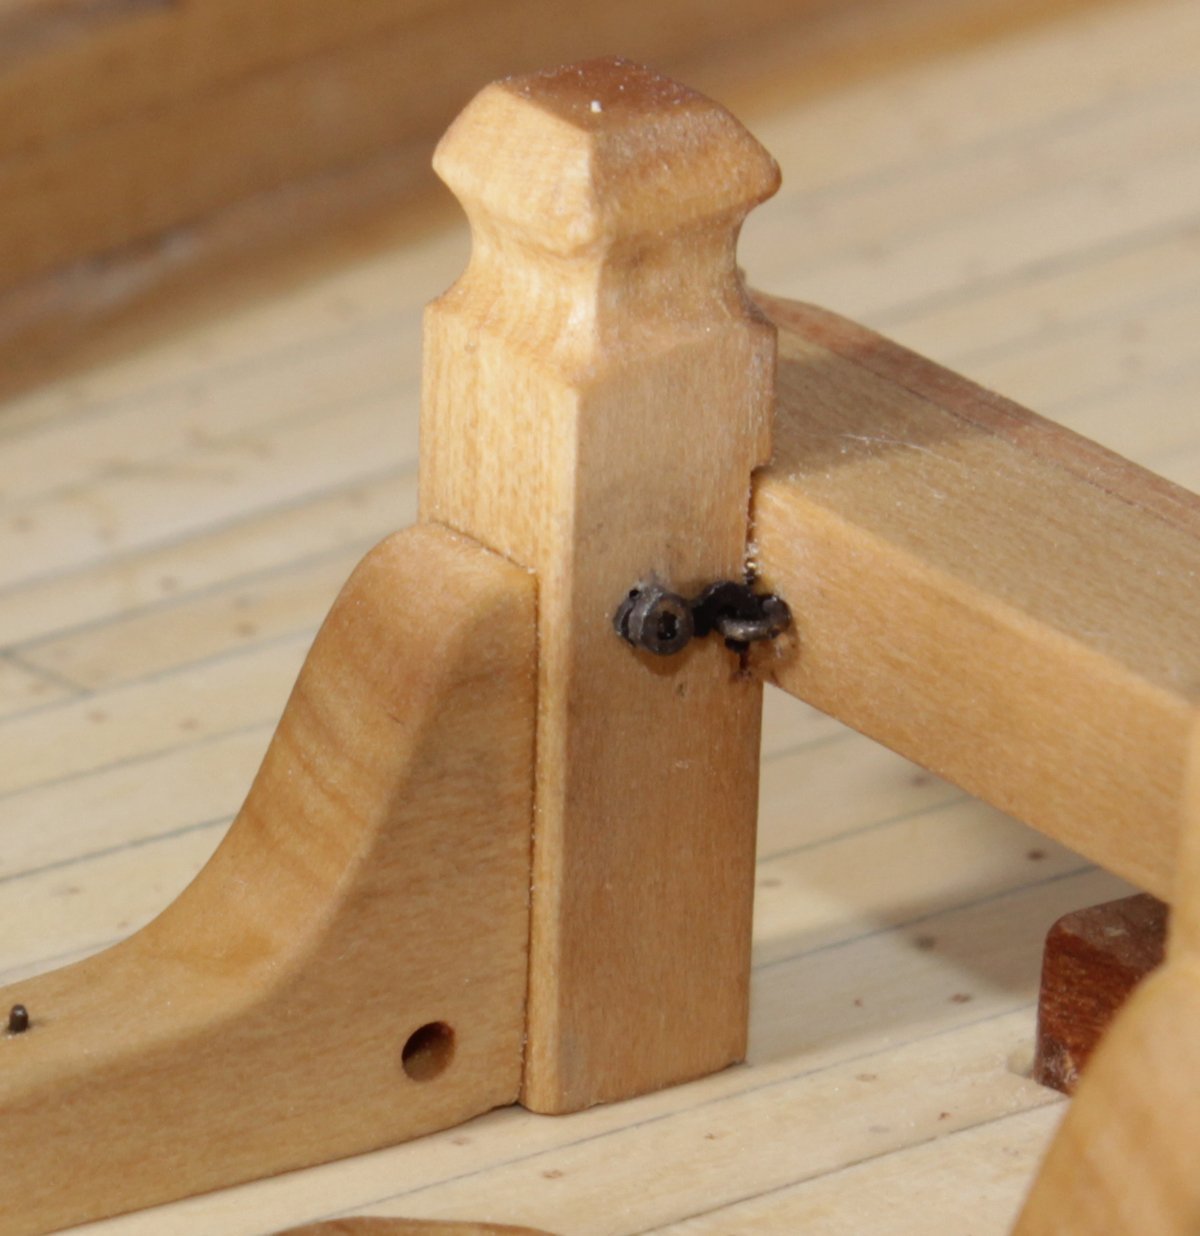
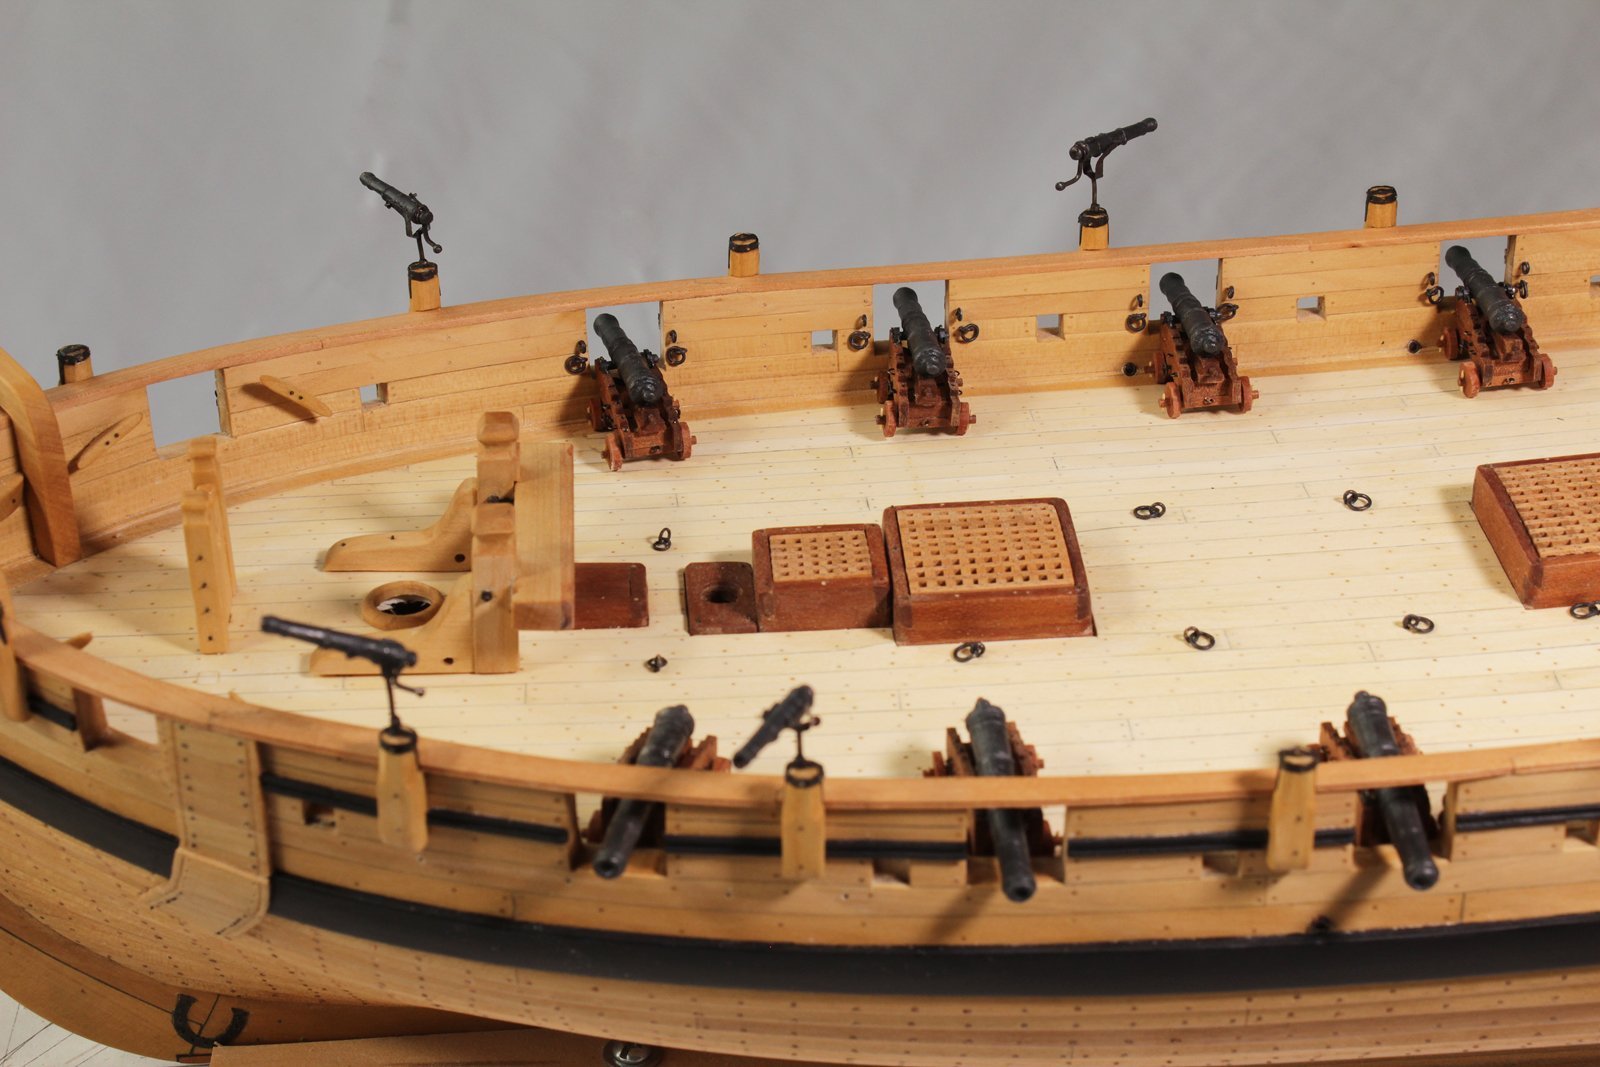
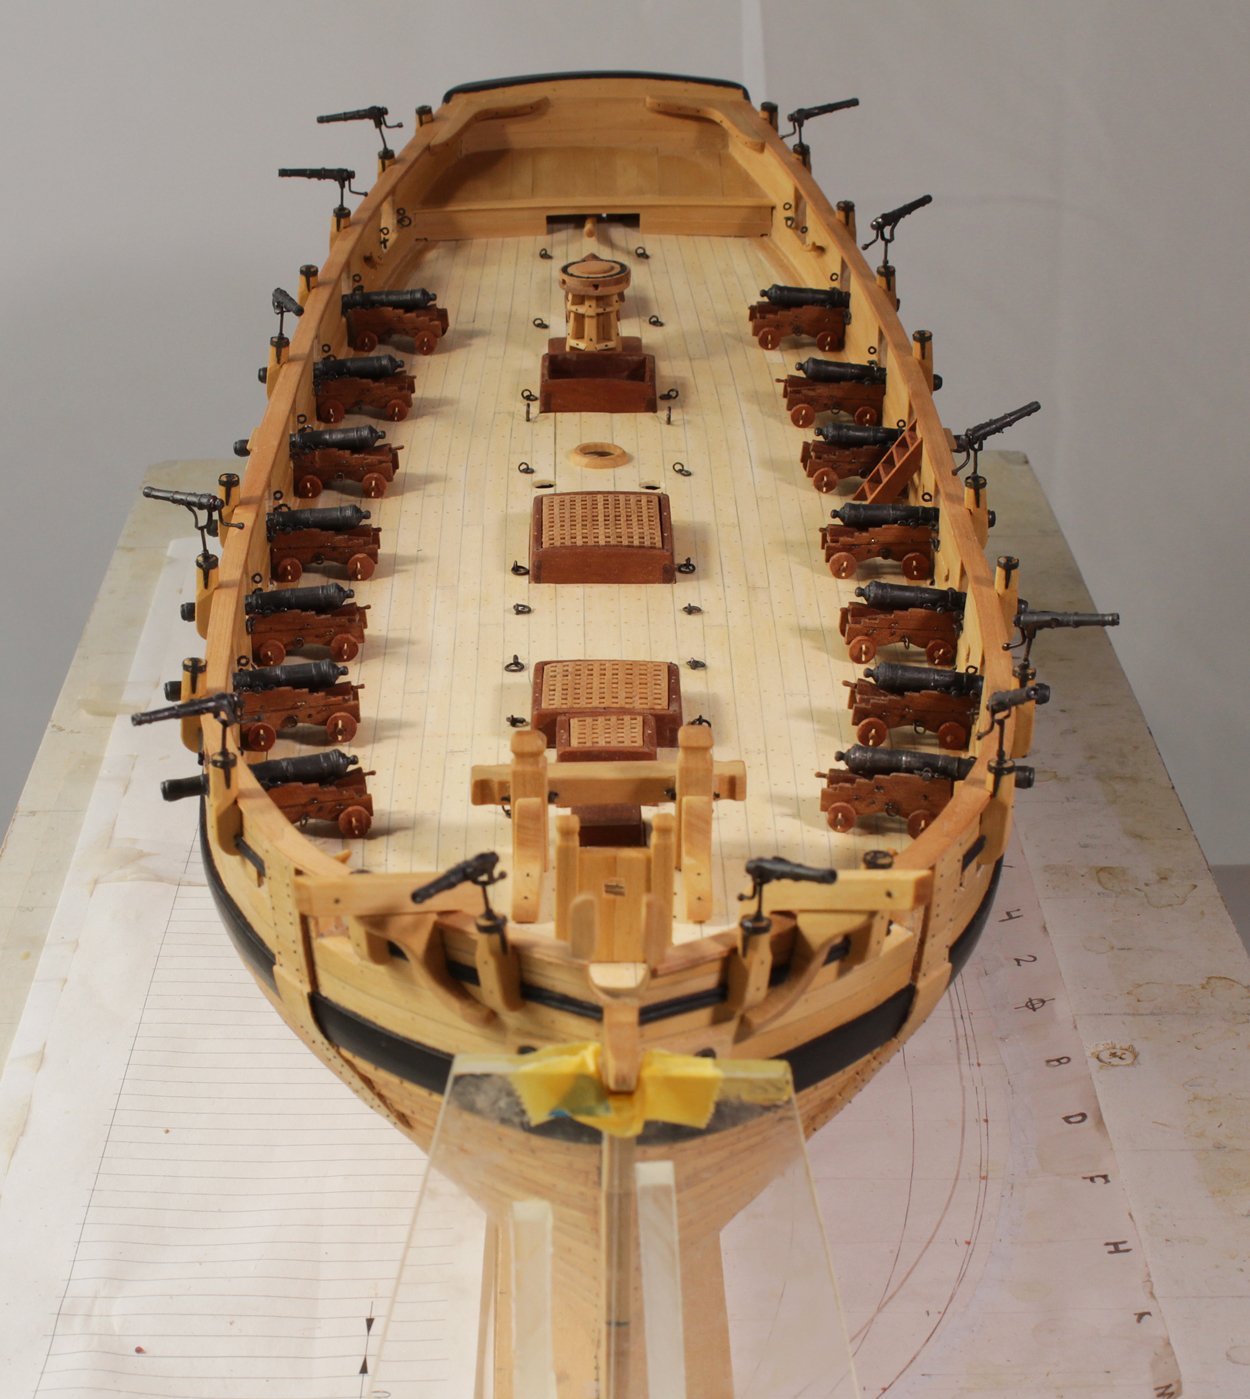
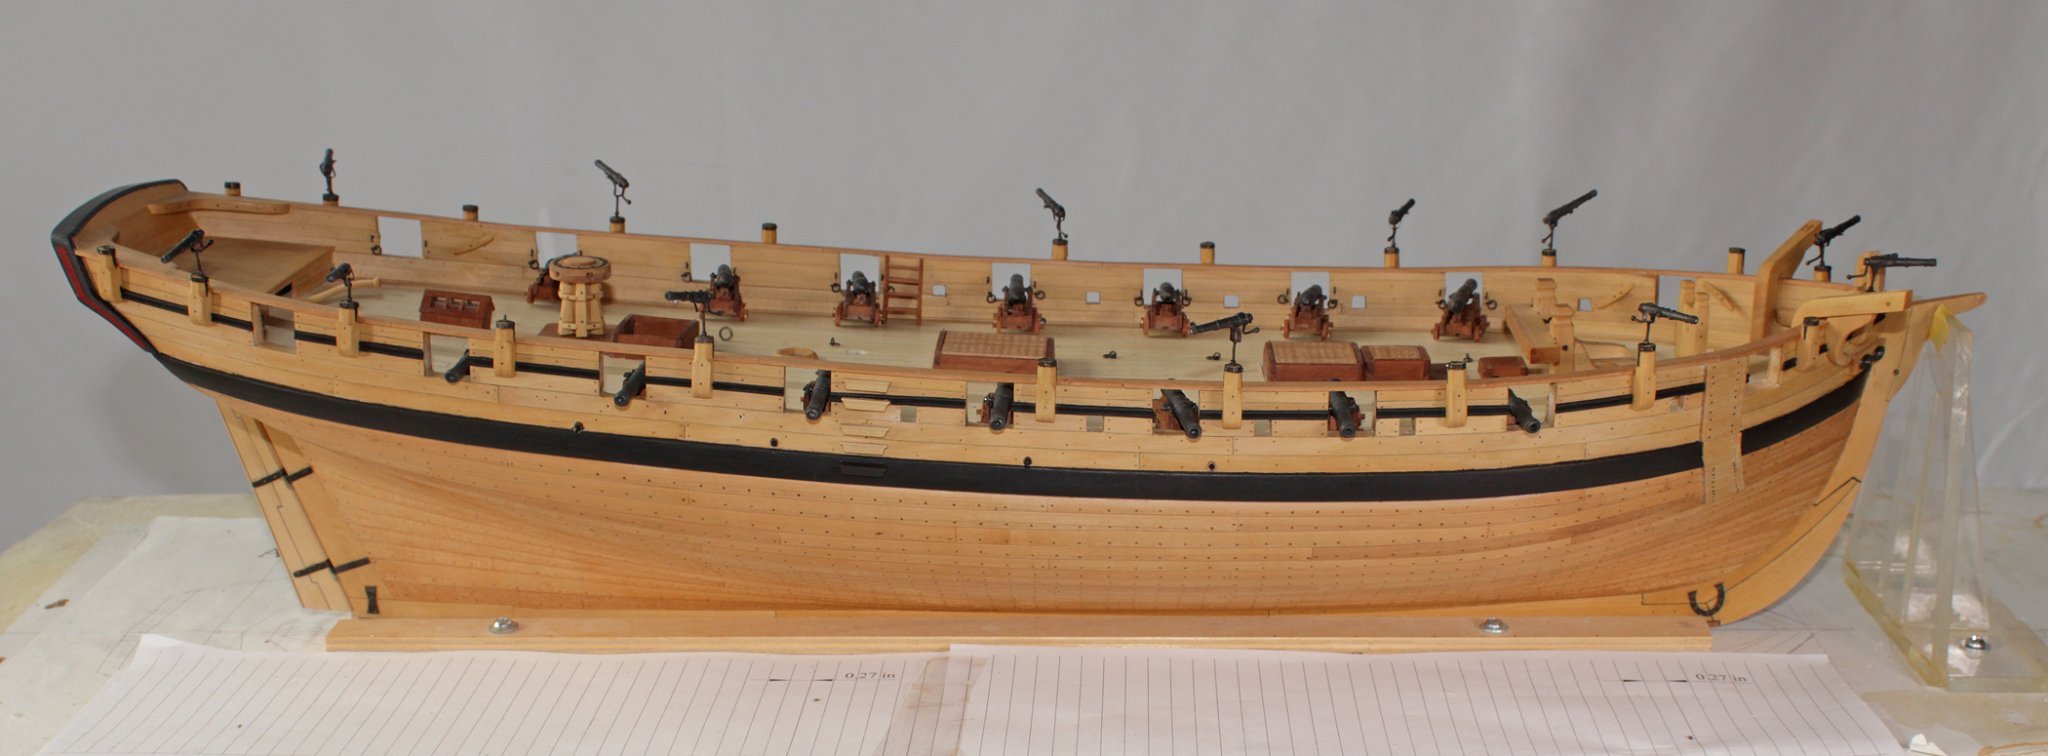
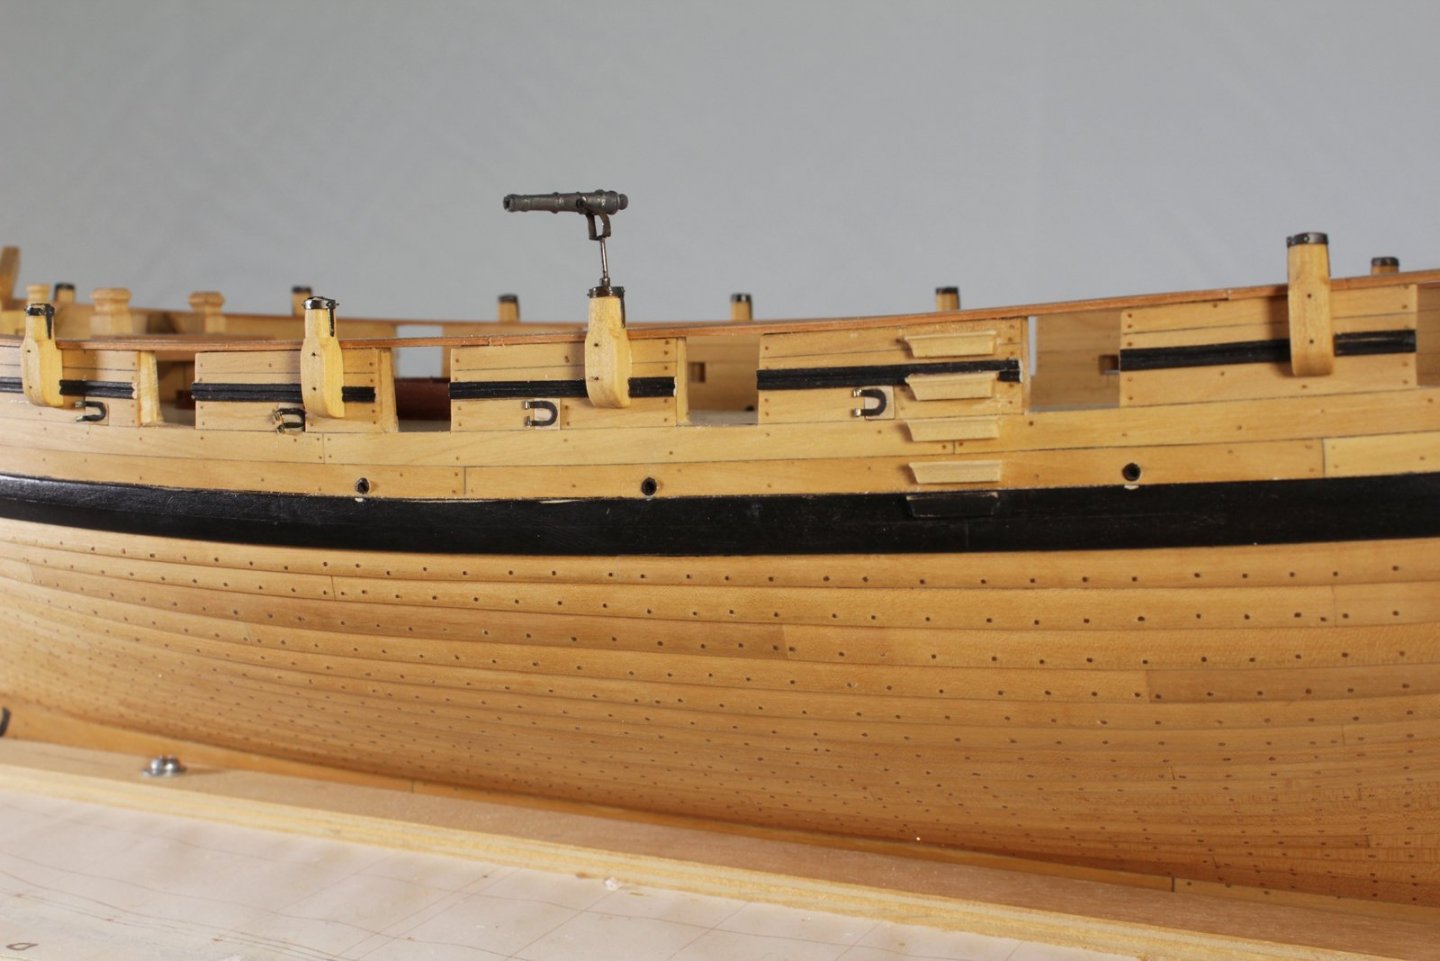
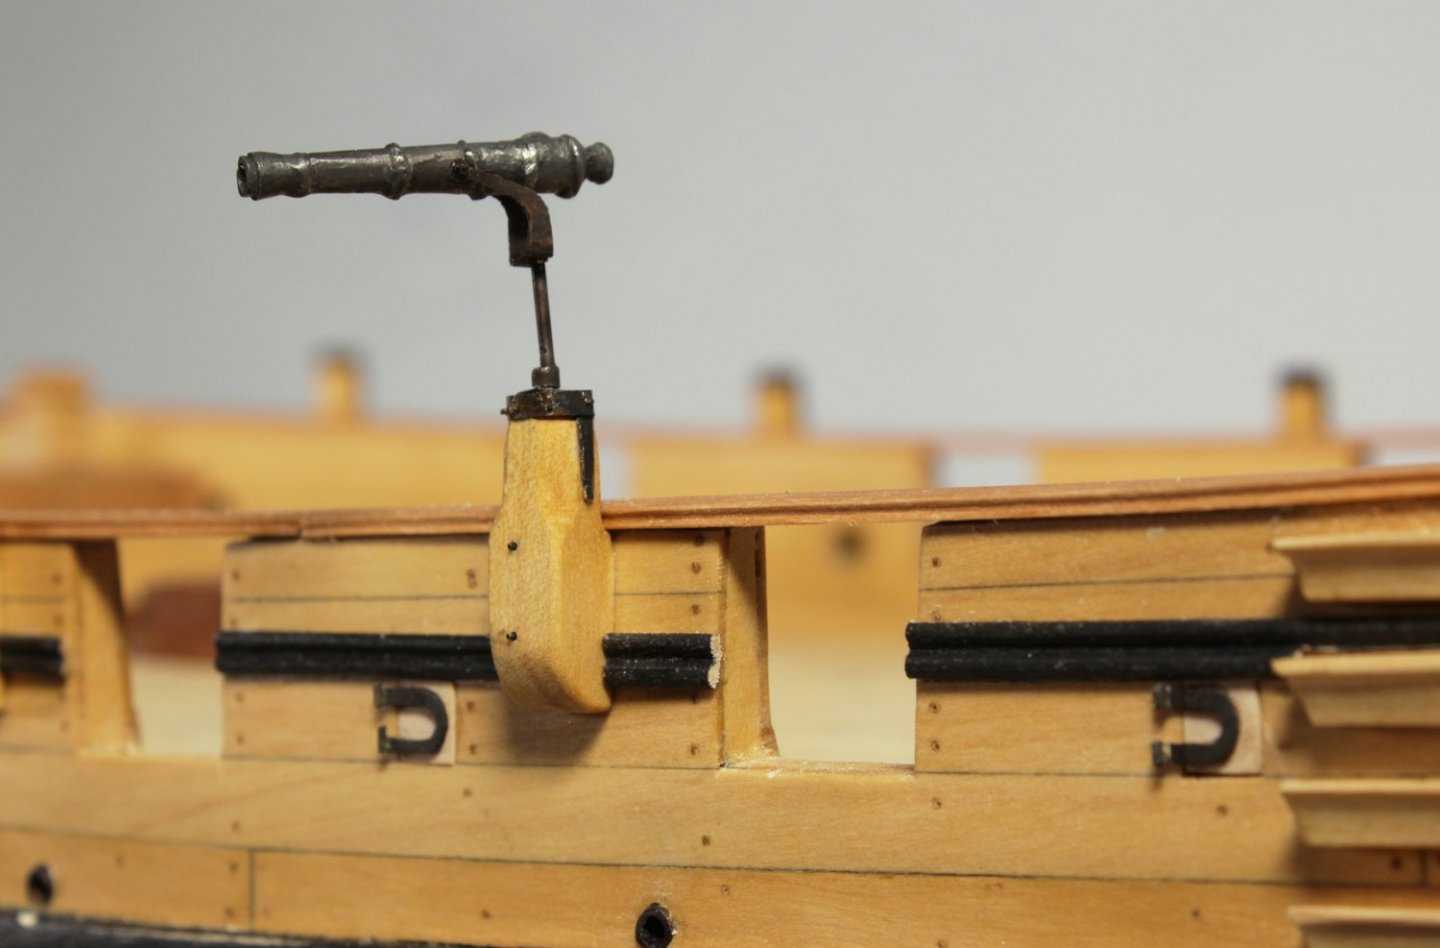
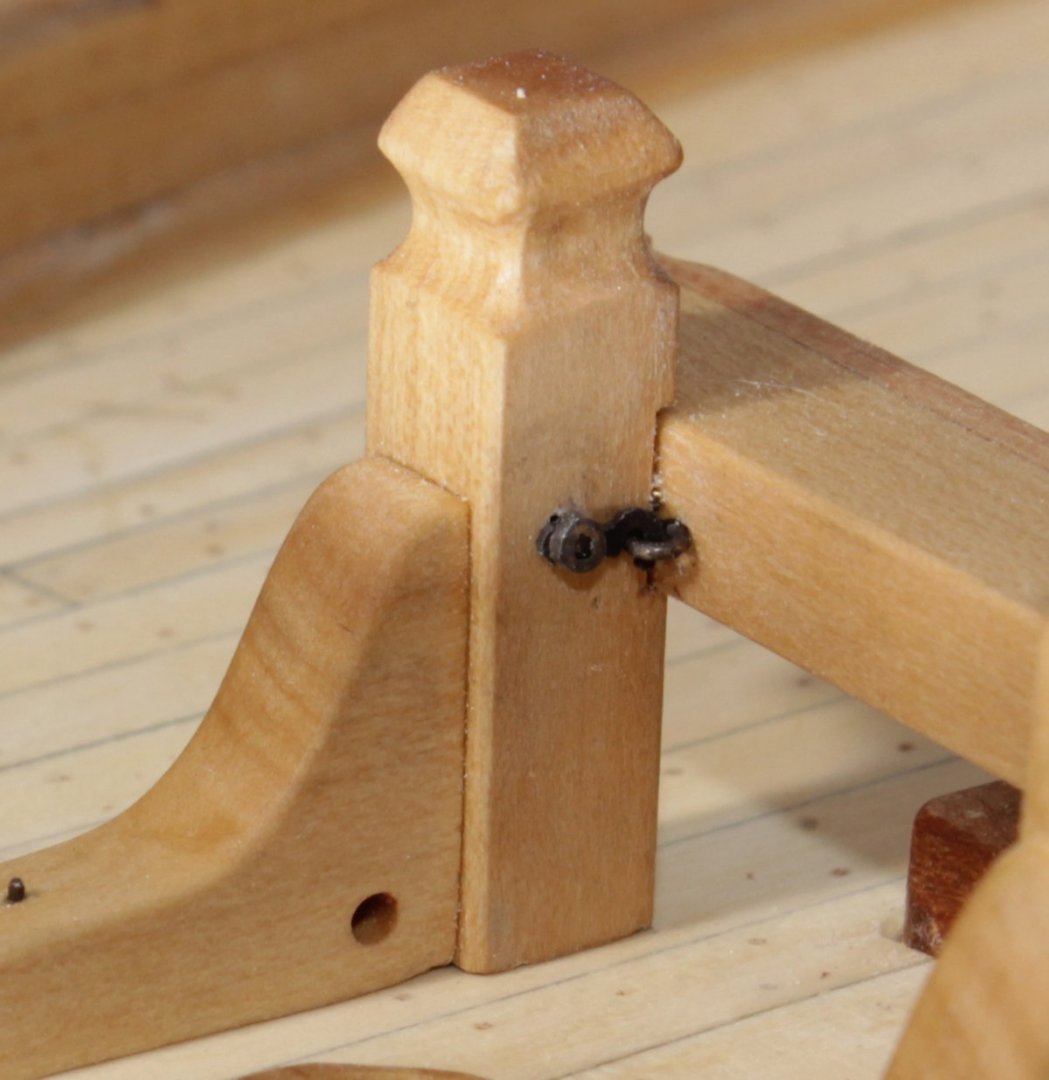
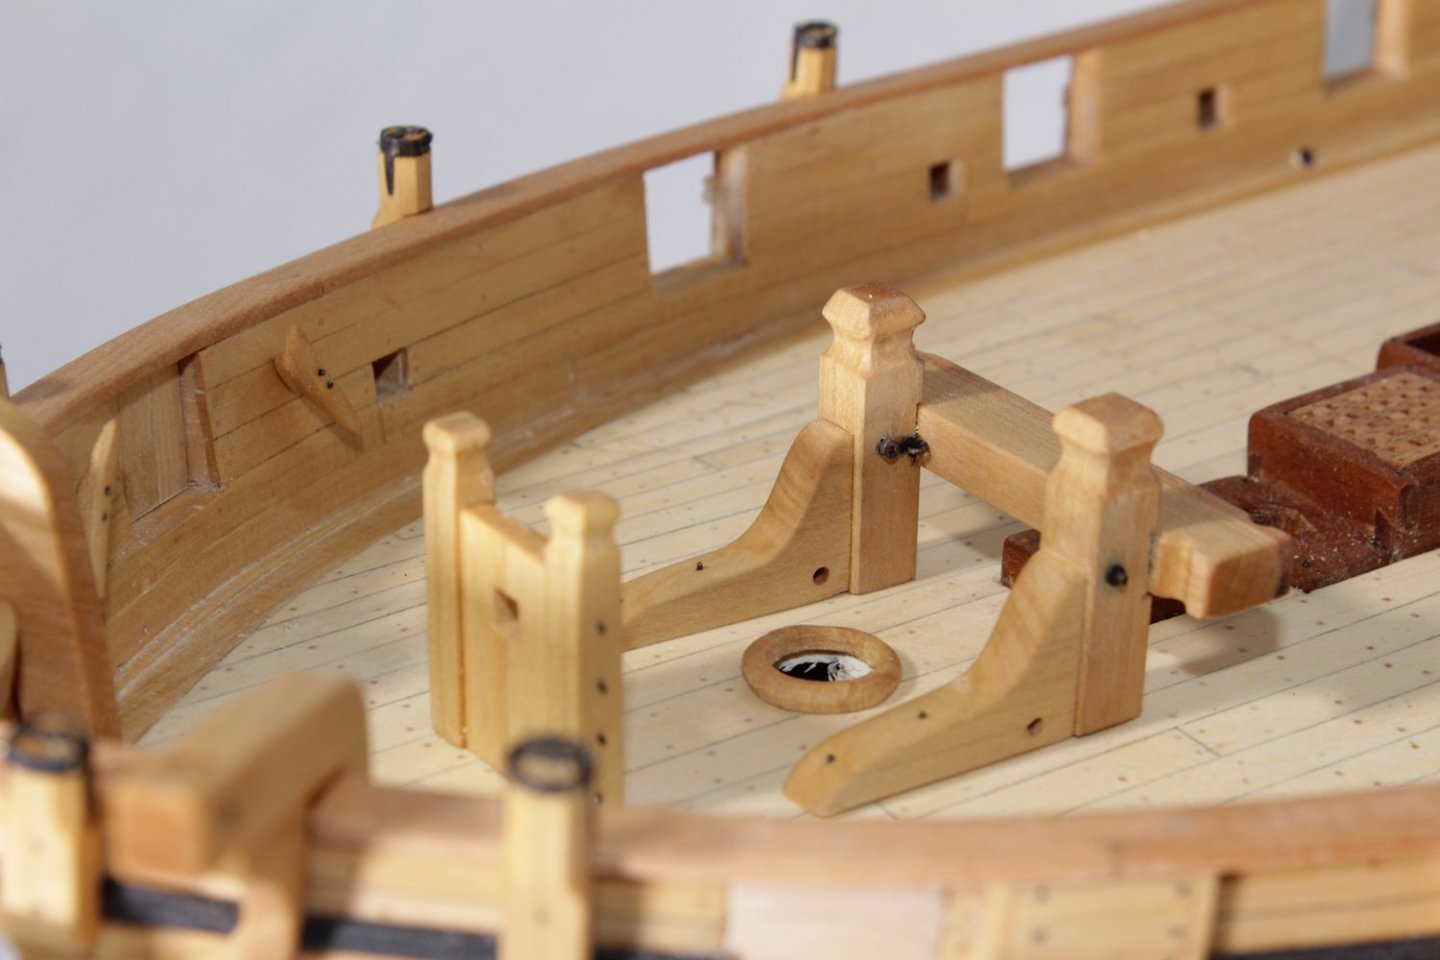
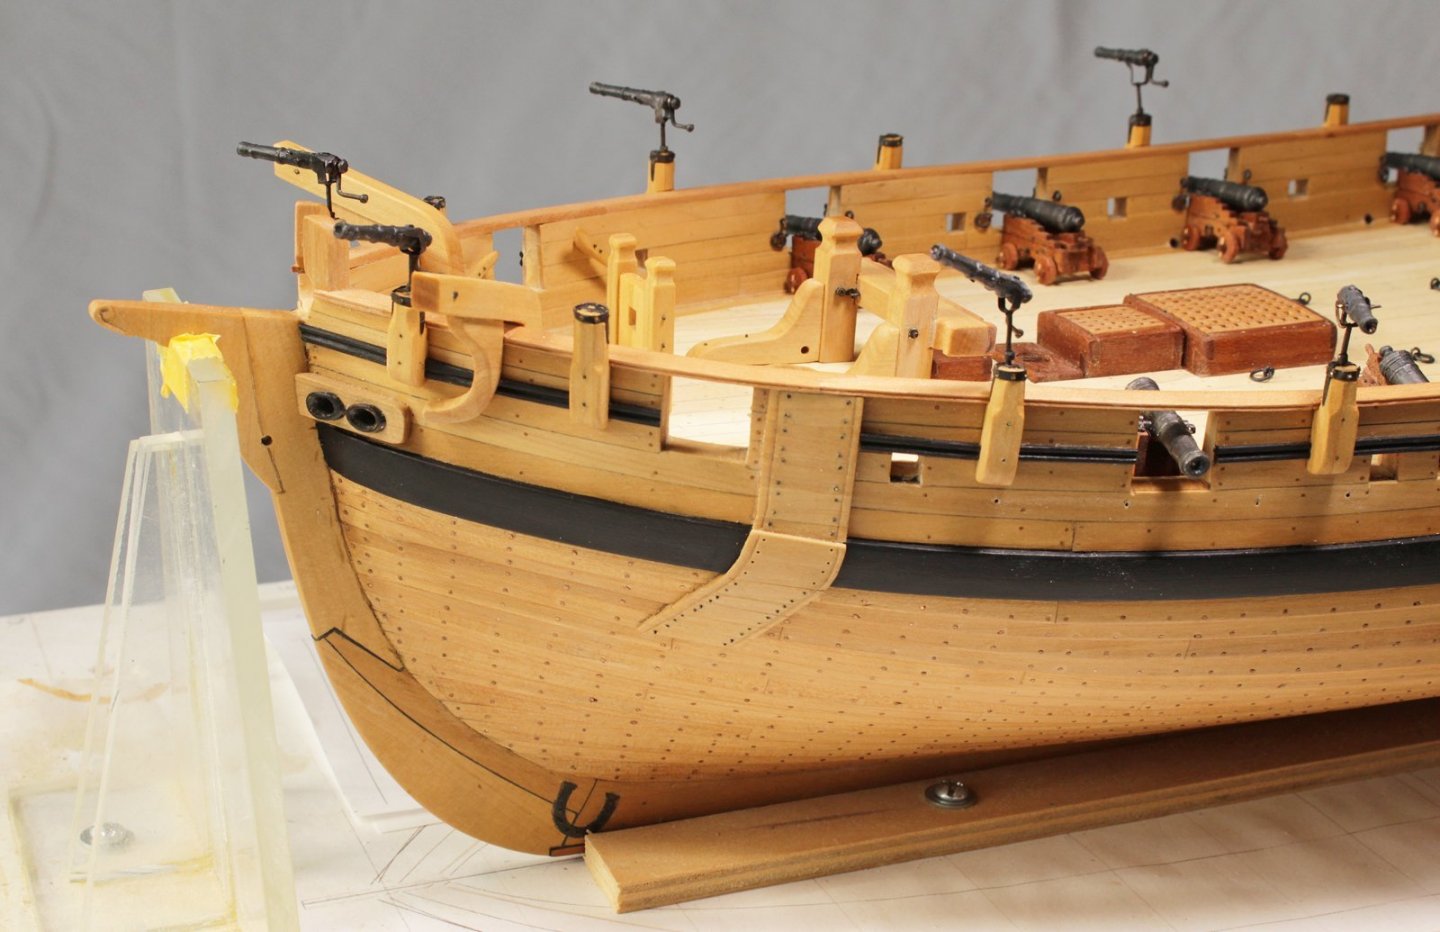
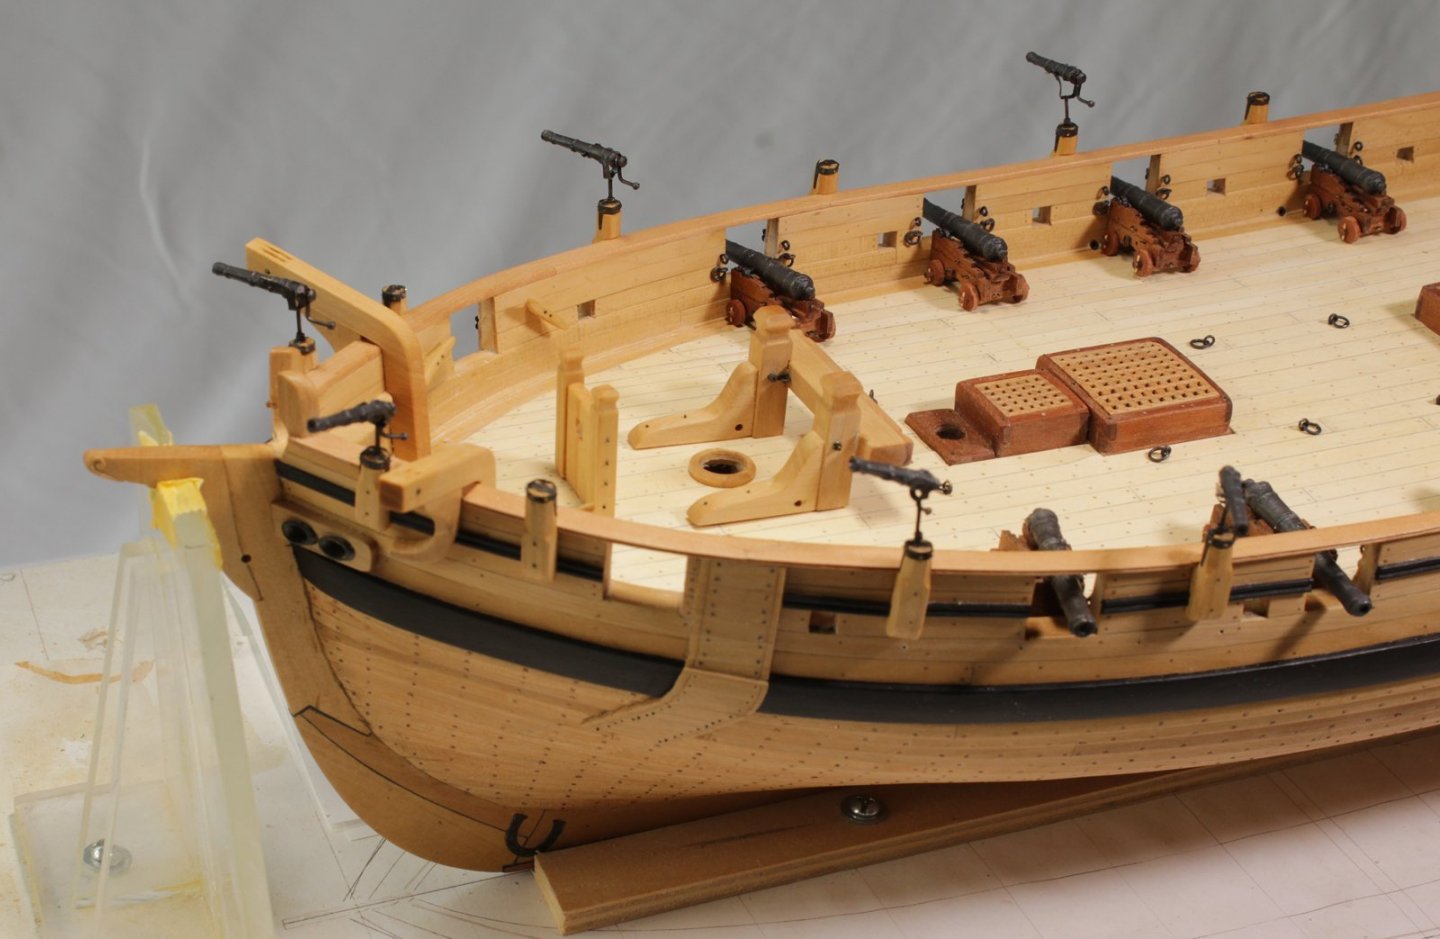
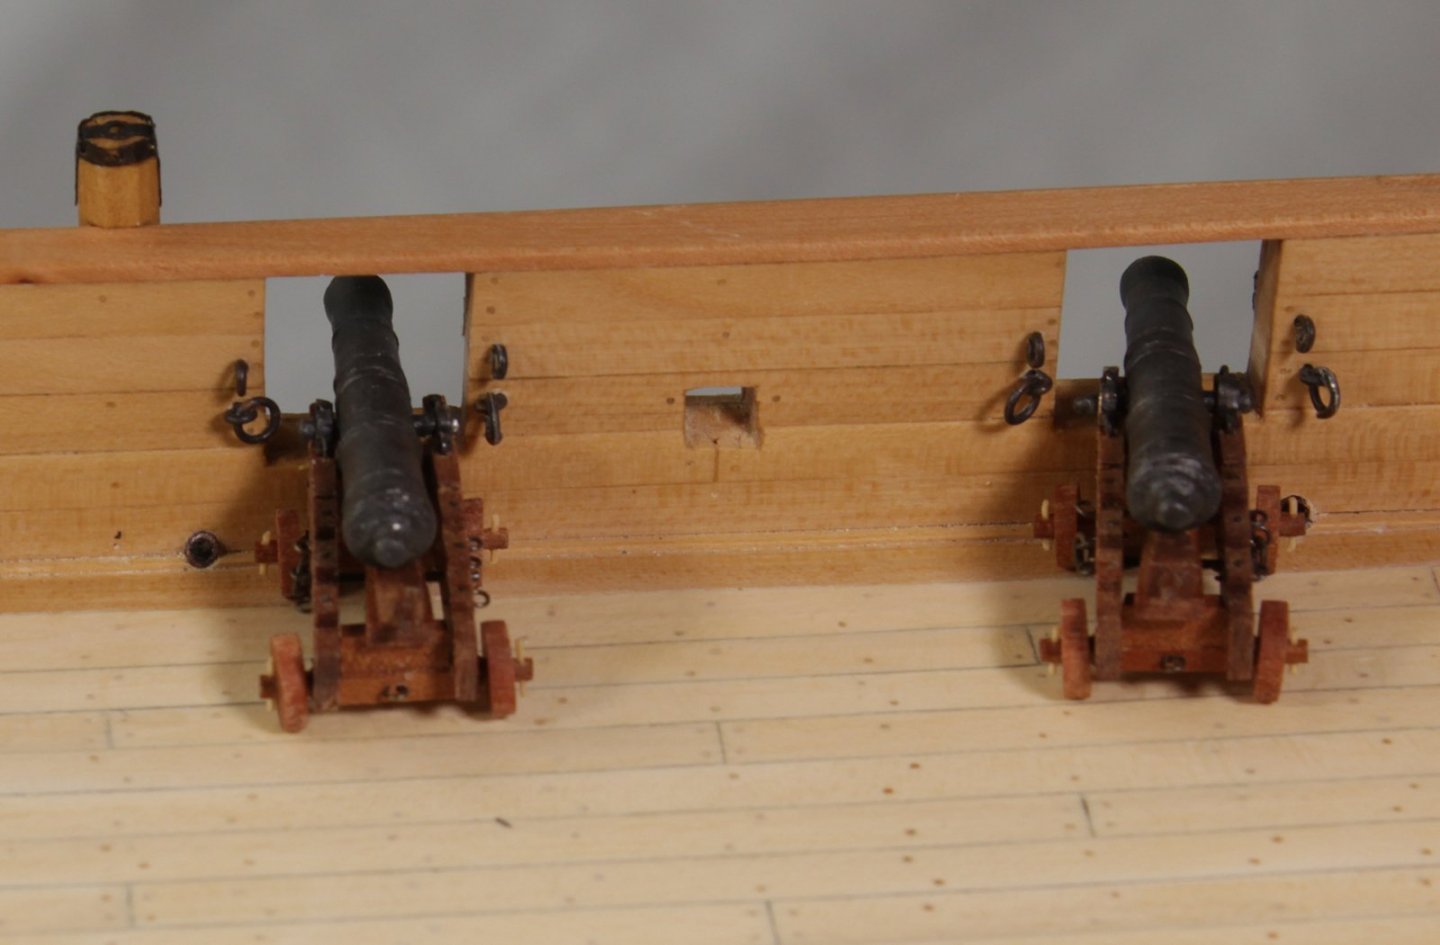
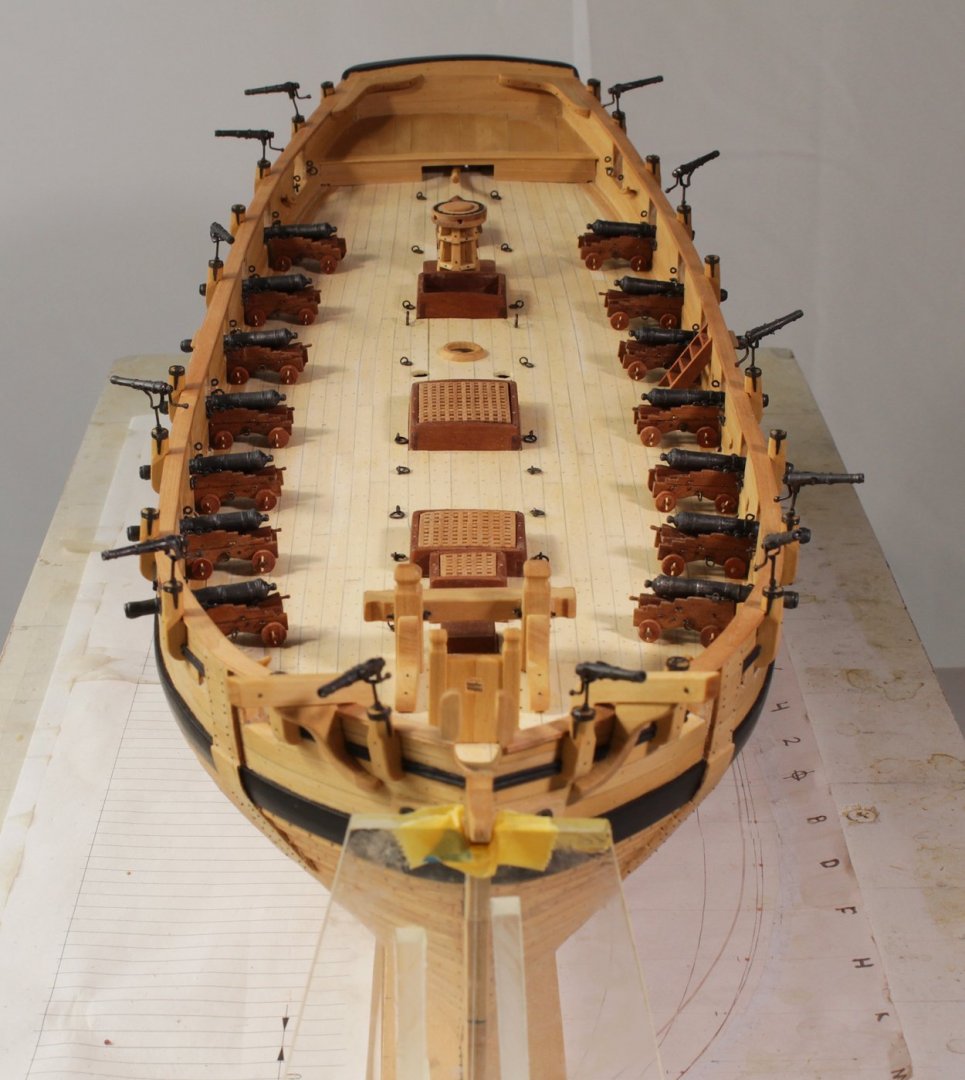
I have managed to get a little more work done on Swallow. The rest of the fittings for the gun carriages have been made and the cannon have been installed on to the carriages. The swivel guns have been installed onto their mounts. I discovered that I did not fit the latches on the bitts, so they were removed and the latches were installed. The hooks are made from sheet brass which was shaped with an A/O thin disc. The tackle for the cannon was installed, as well as miscellaneous ring bolts on the deck. The swivel guns and cannon were temporarily installed and the paint has been touched up.


- 277 replies
-
- 26
-
-
-
2021 NRG CONFERENCE
tlevine replied to kurtvd19's topic in NAUTICAL RESEARCH GUILD - News & Information
Thank you to everyone who attended the 2021 NRG Annual Meeting on Saturday, the 20th. The meeting was recorded but I cannot tell you exactly when it will be available for viewing. As mentioned during the meeting, whether we have an in-person 2022 Conference is dependent on the COVID-19 situation in the Spring. As soon as we have made a decision, we will notify the membership via email. -
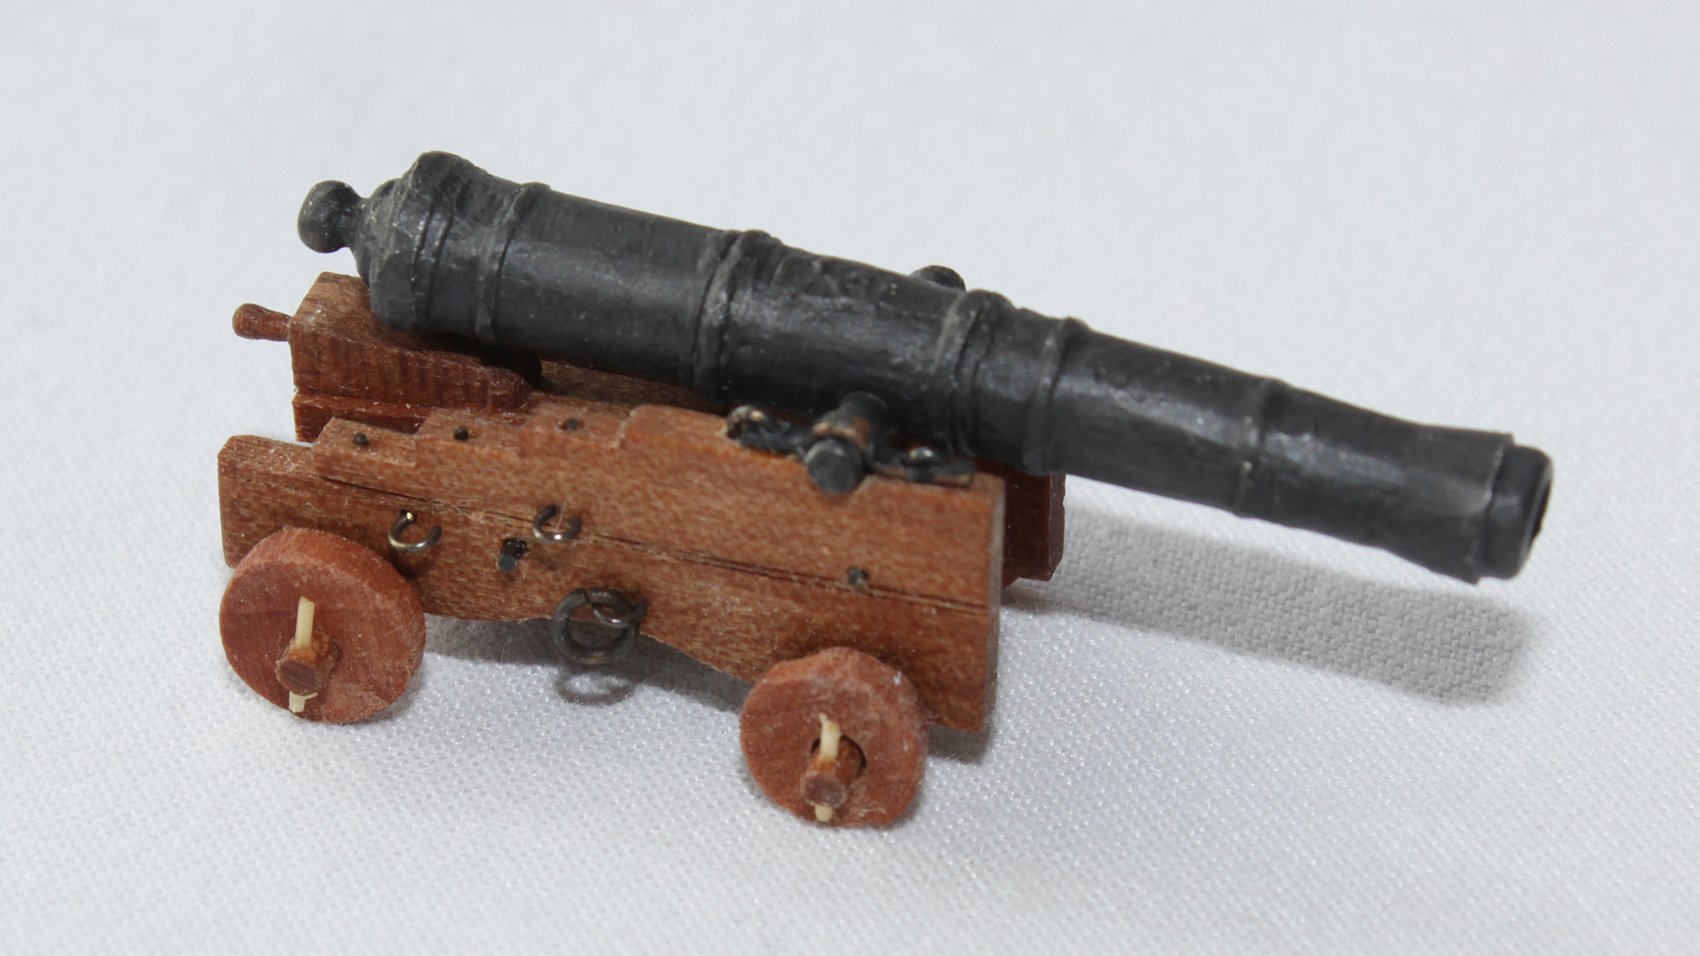
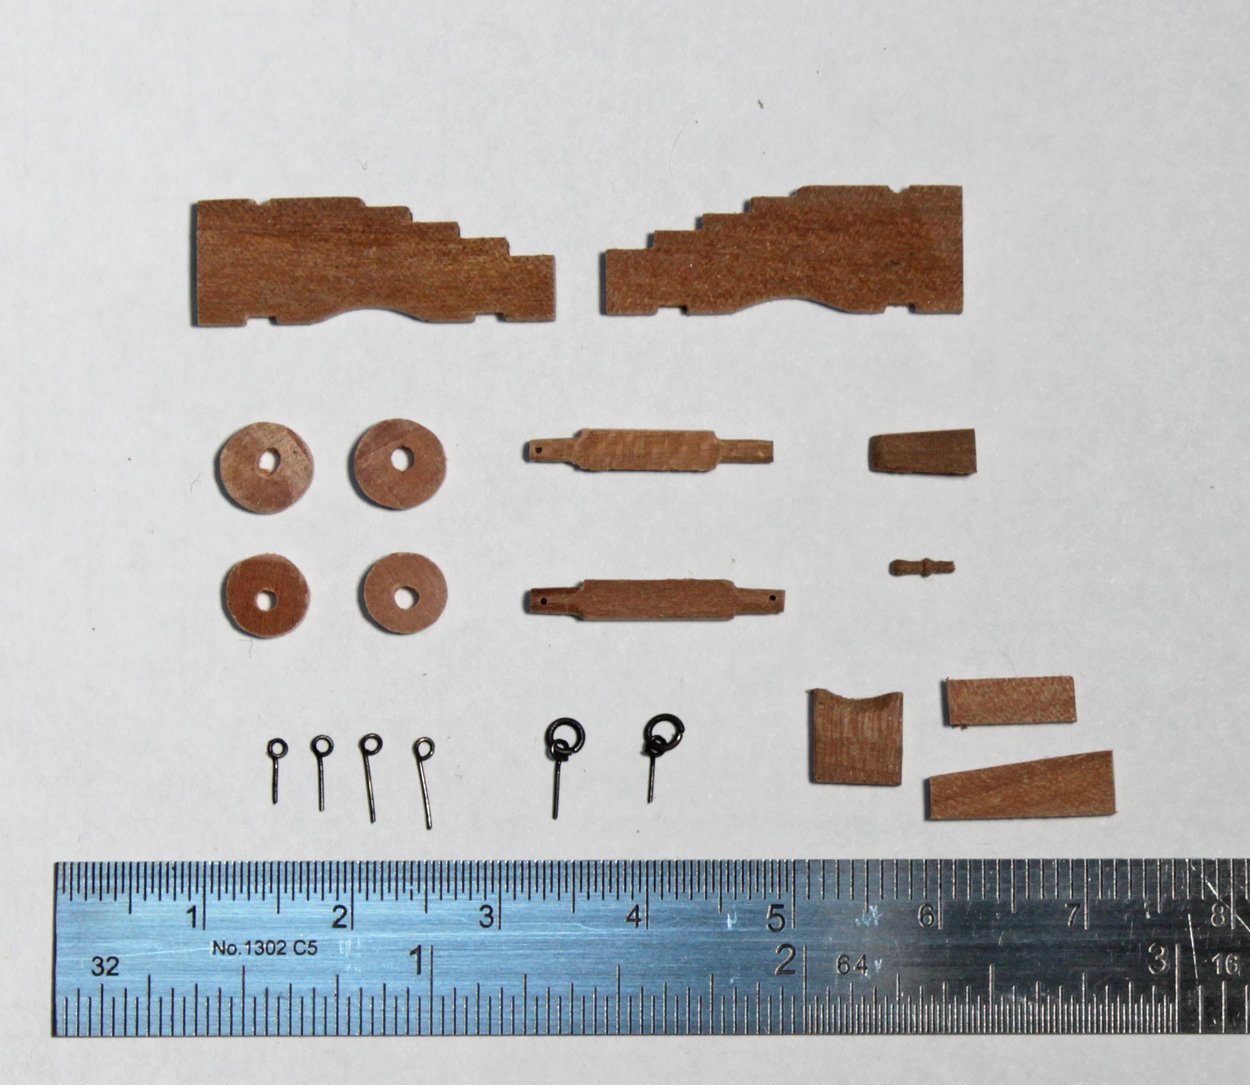
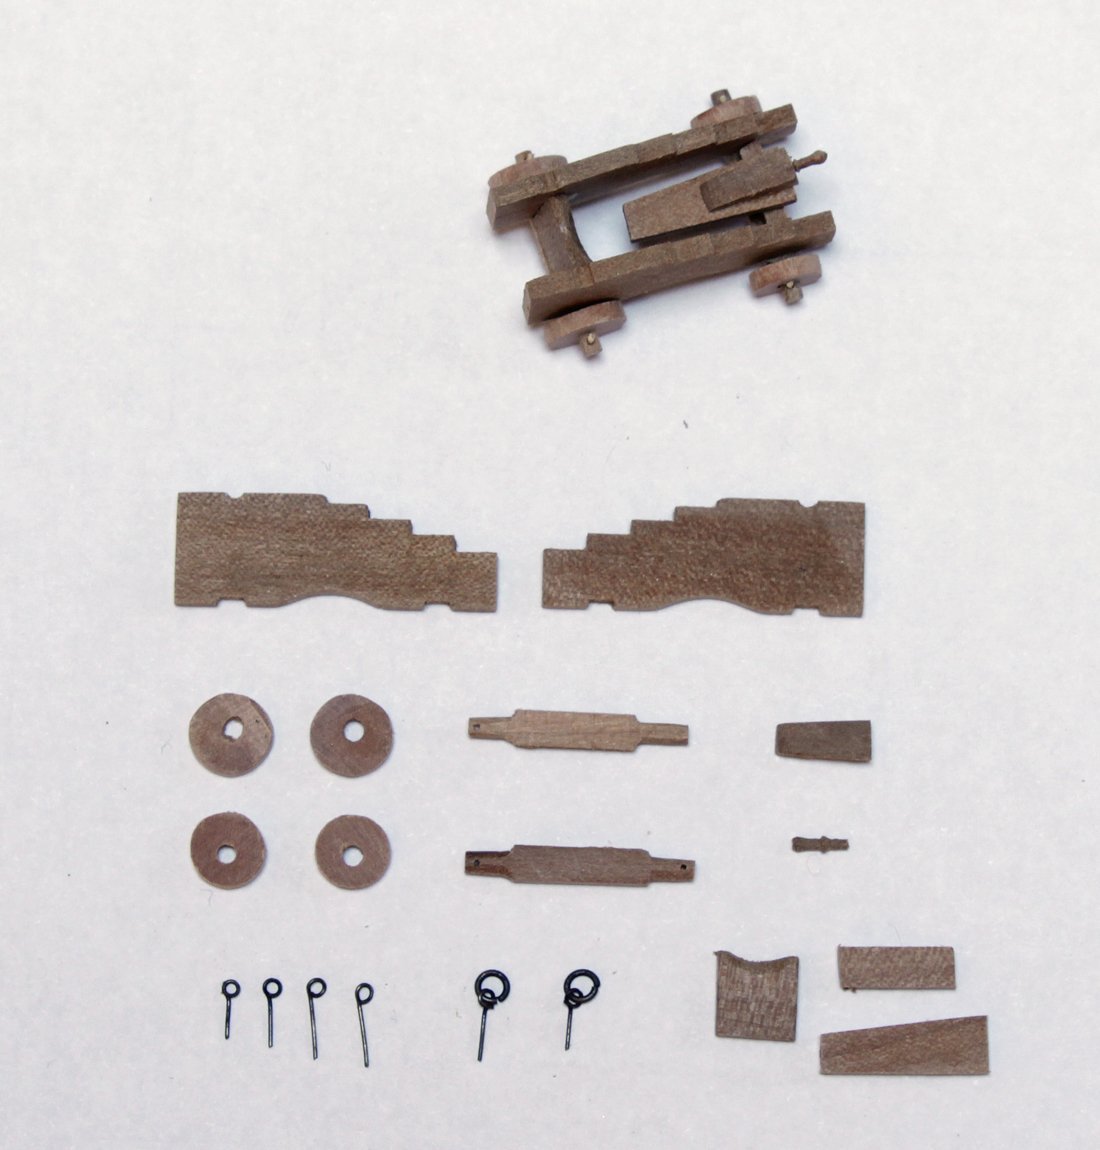
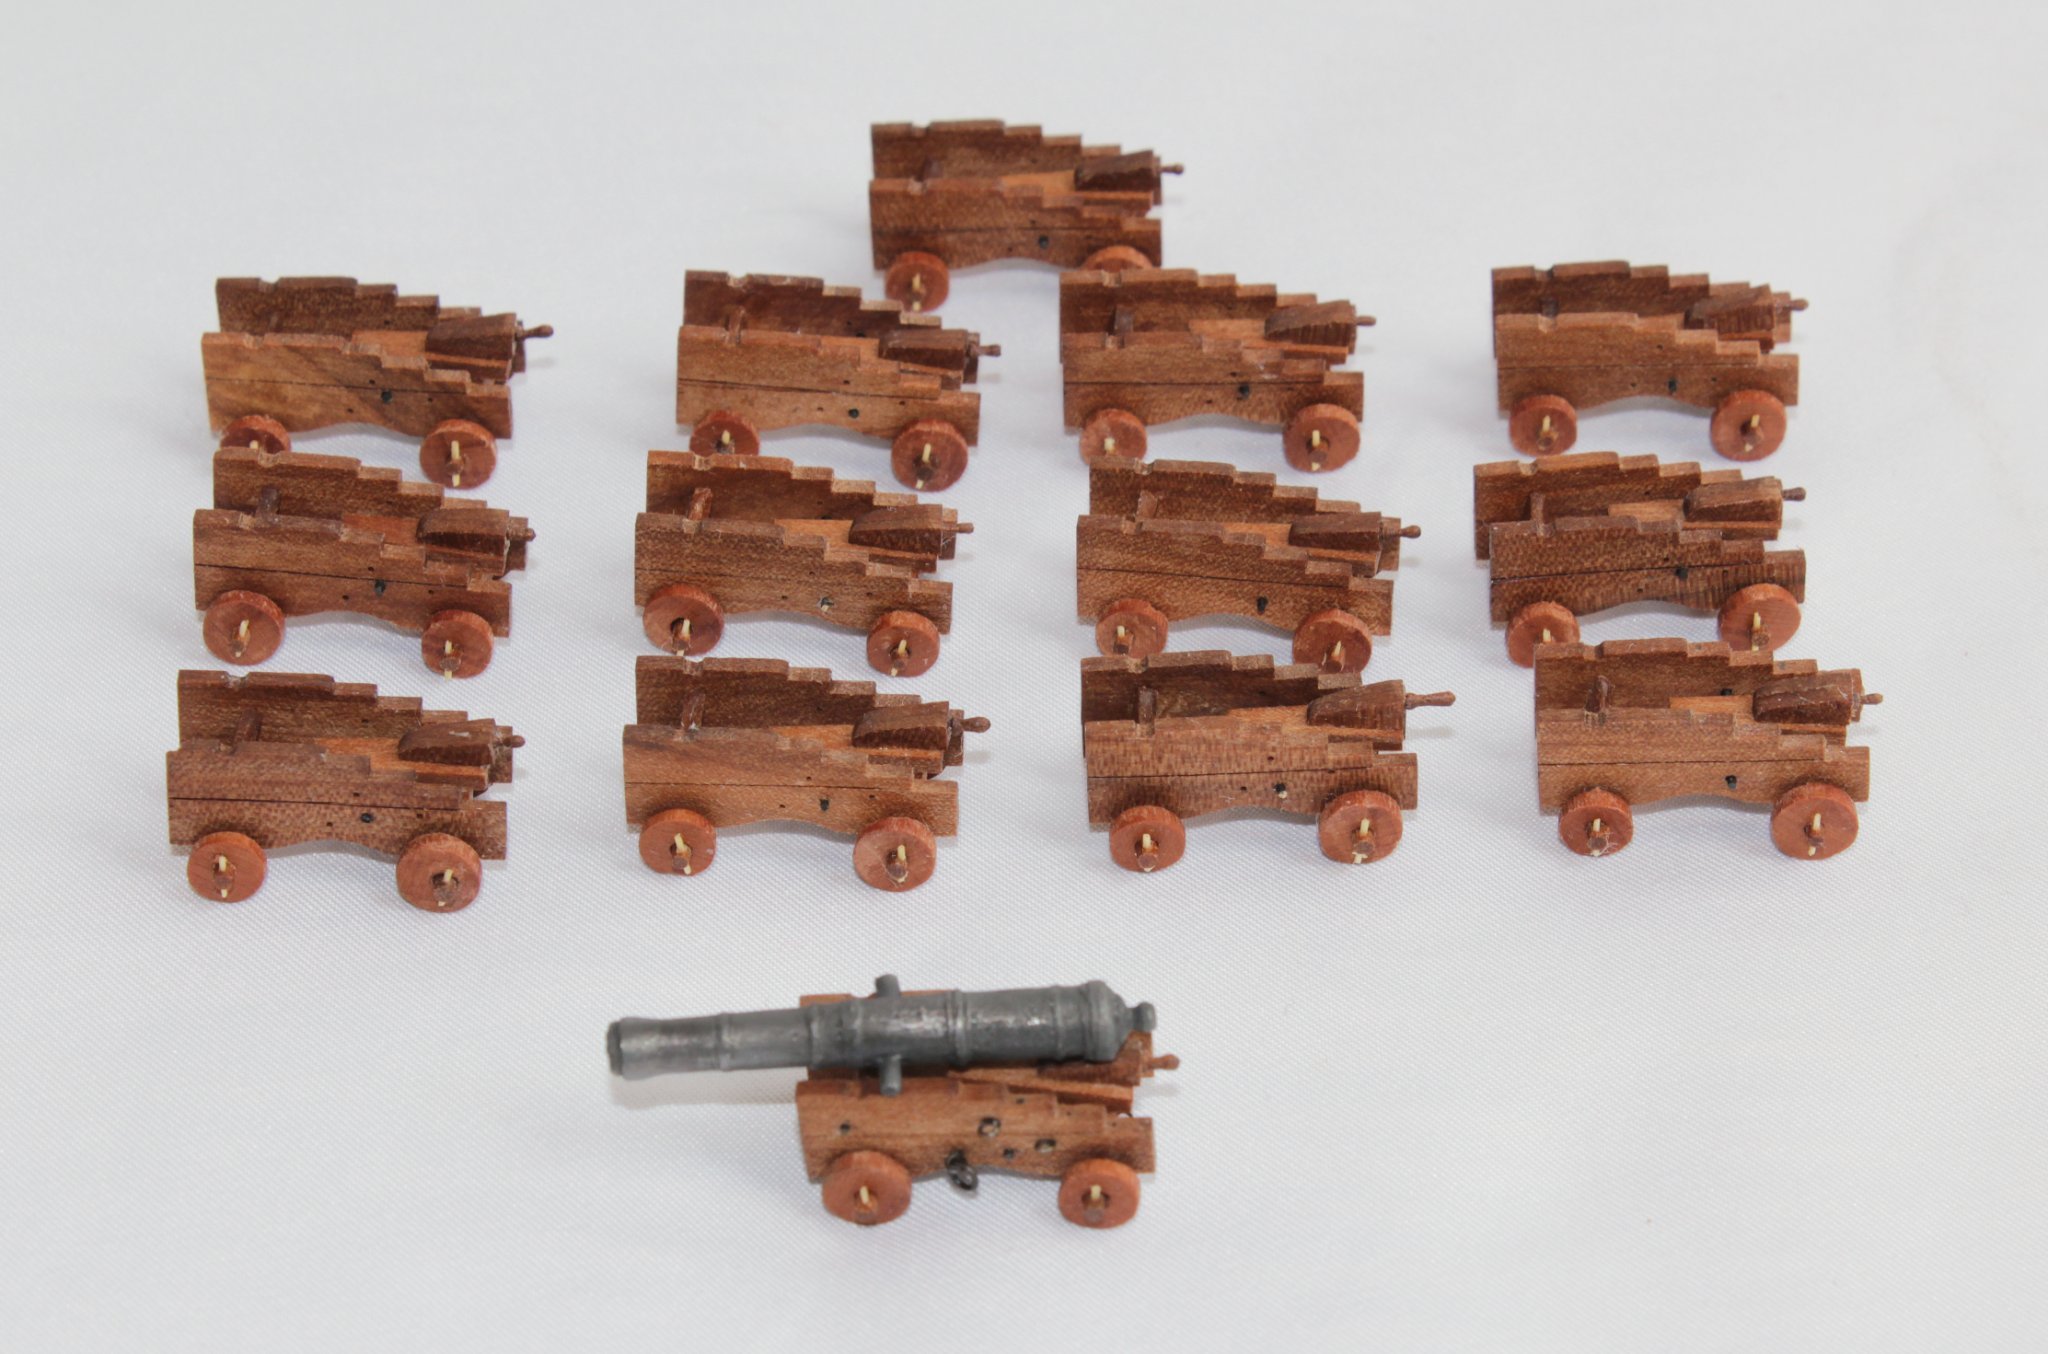
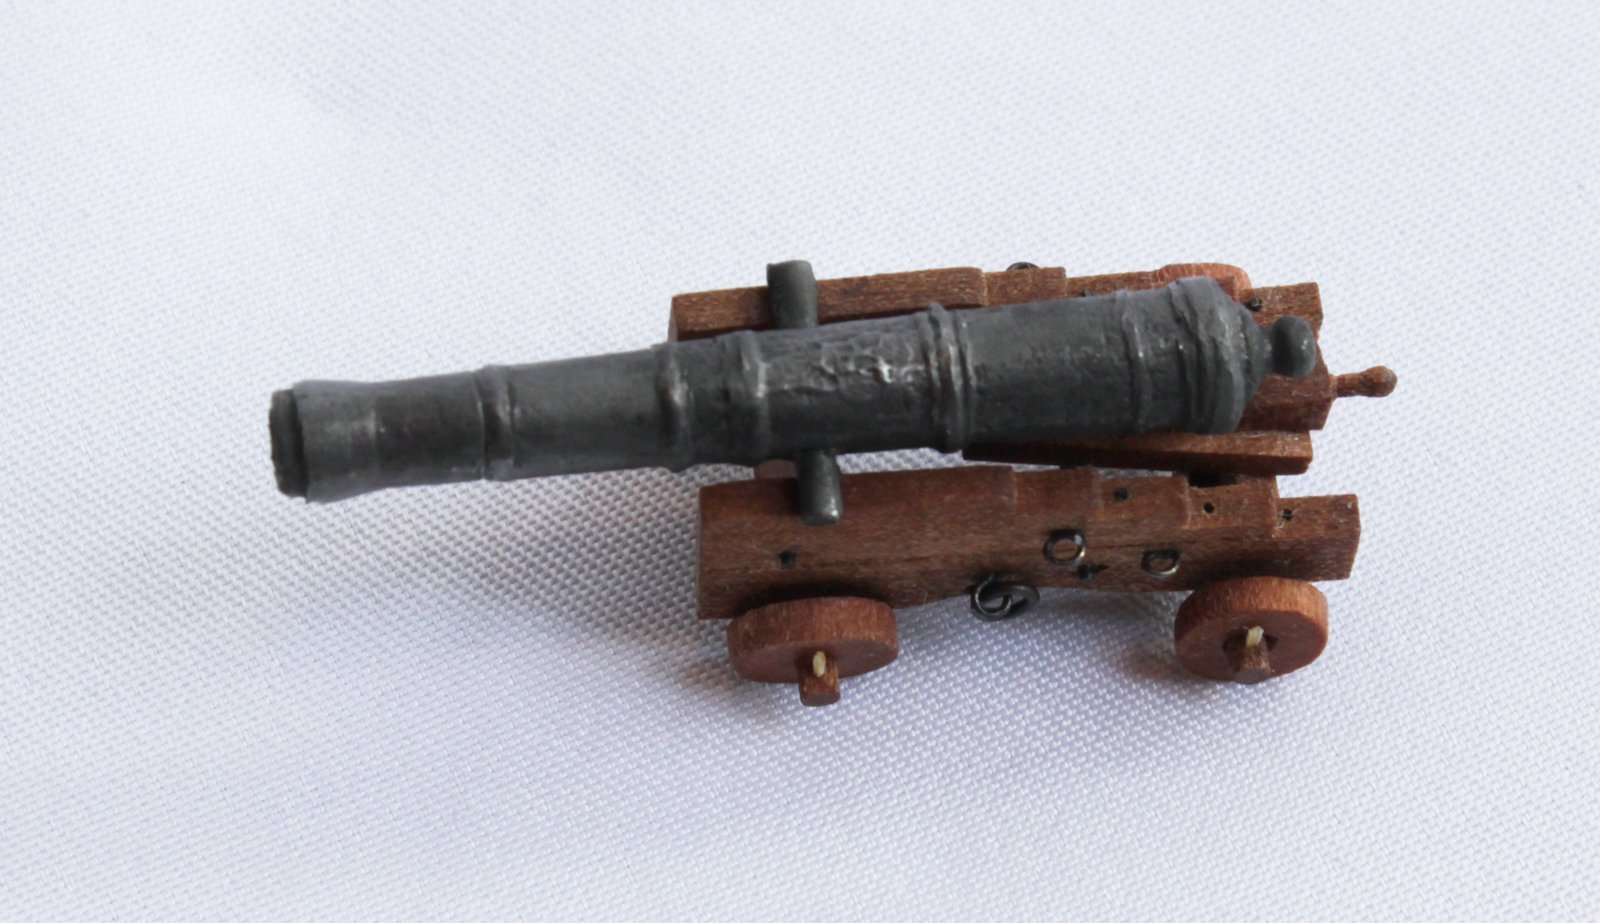
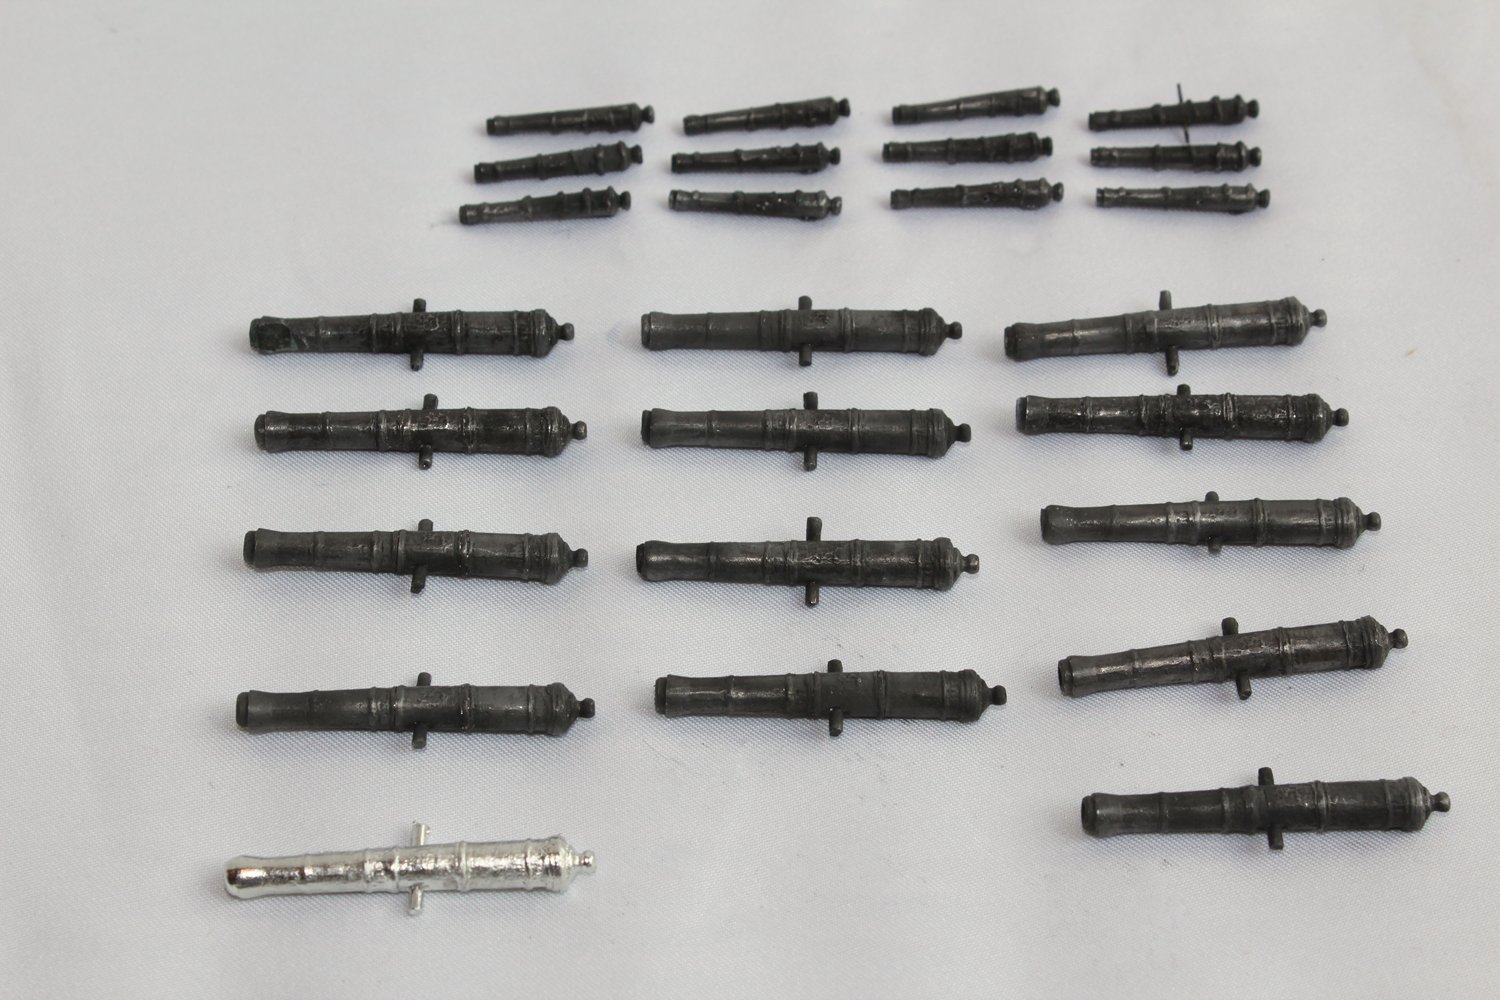
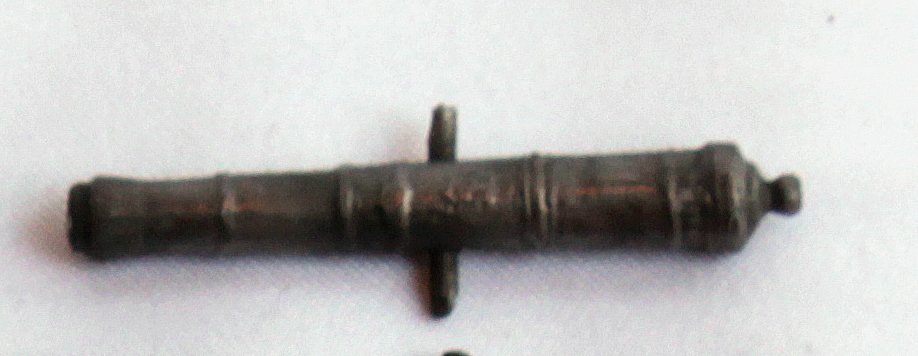
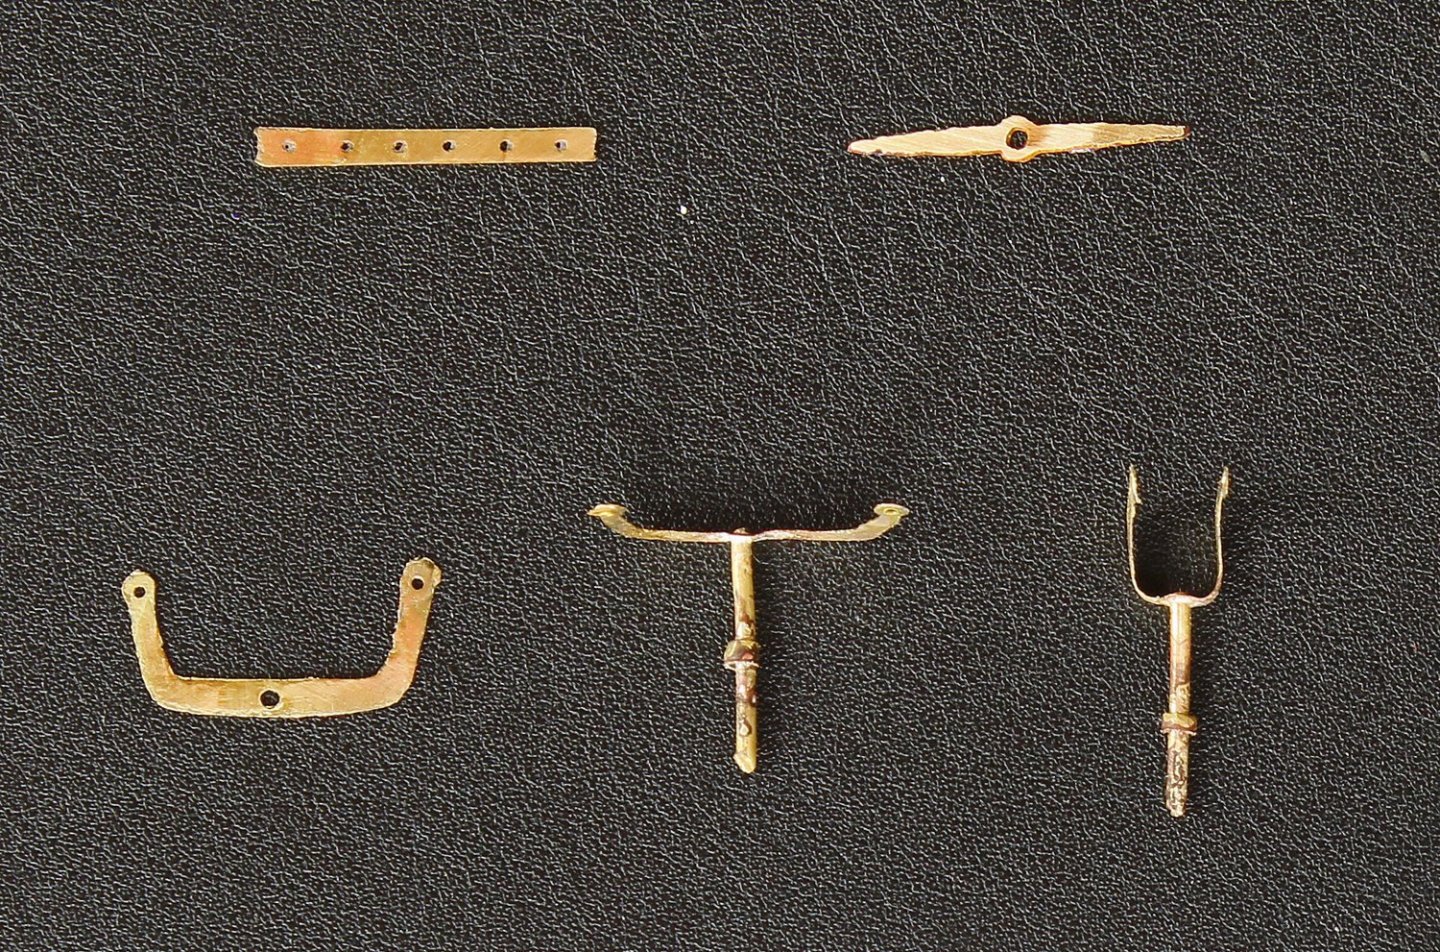
The cannon and swivel guns have all been cast and blackened. The casting process went surprisingly well. I bought a pewter bar and casting spoon from my local jeweler's supply house (Amazon). Using a jeweler's saw, I cut off teaspoon-sized pieces from the pewter and melted them in the spoon over the flame on my cooktop. The guns were cast using the setup shown a few weeks ago without any difficulty. I waited a few minutes between each pour to allow the mold to cool down. Unfortunately, the royal casting mark did not come up as sharply as I had hoped. Most likely this occurred because it is made of paper. Everything was blackened in pewter blackening solution from Blue Jacket. Finally, they were clear-coated with a matte finish. I also noticed that I had neglected to mold the trunnions on the swivel guns. This was corrected by boring through the gun and inserting a brass wire. The cannon barrels needed carriages to rest on. The first two pictures show the numerous parts necessary to construct the carriage. I will not be making the capsquare until the guns are ready to be mounted. The last photo shows the cannon resting on the carriage before the capsquare is installed.


- 277 replies
-
- 22
-
-
Druxey, thank you for your concern. These clamps held very securely and were not removed until the mold had cooled to room temperature. Pictures soon.
-
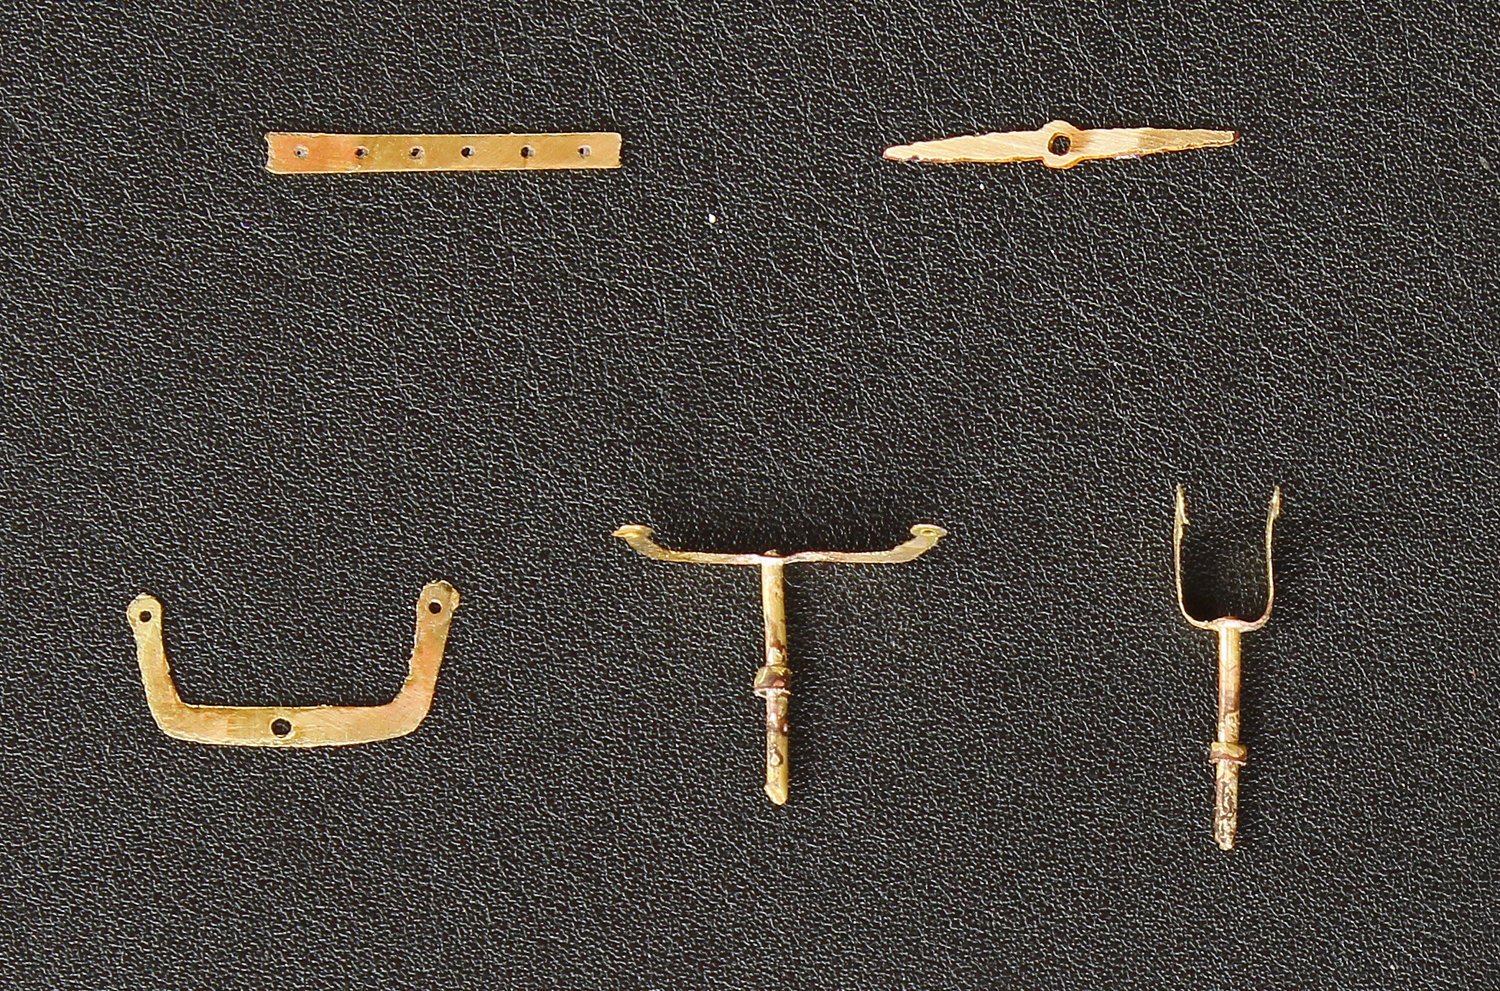
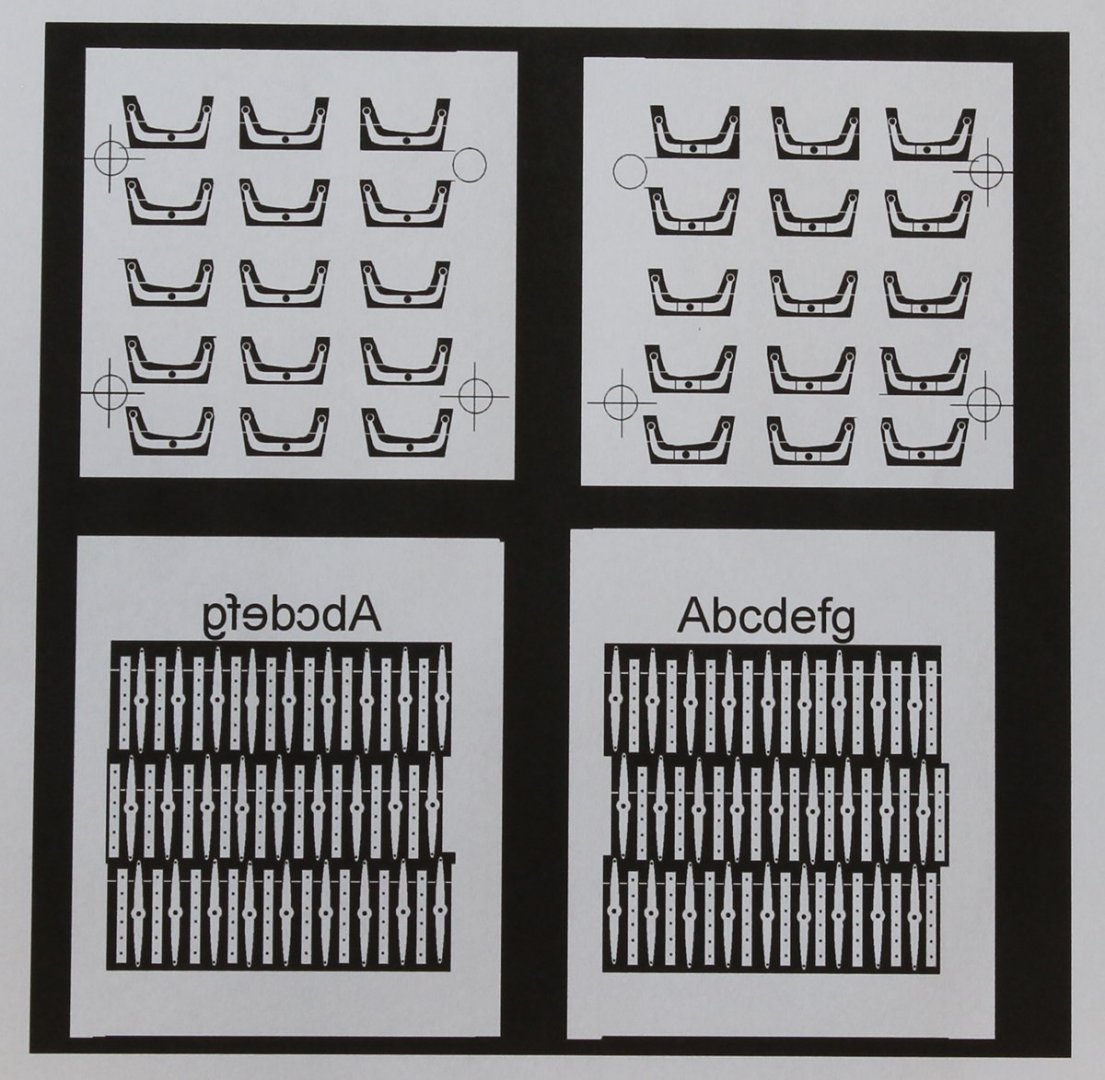
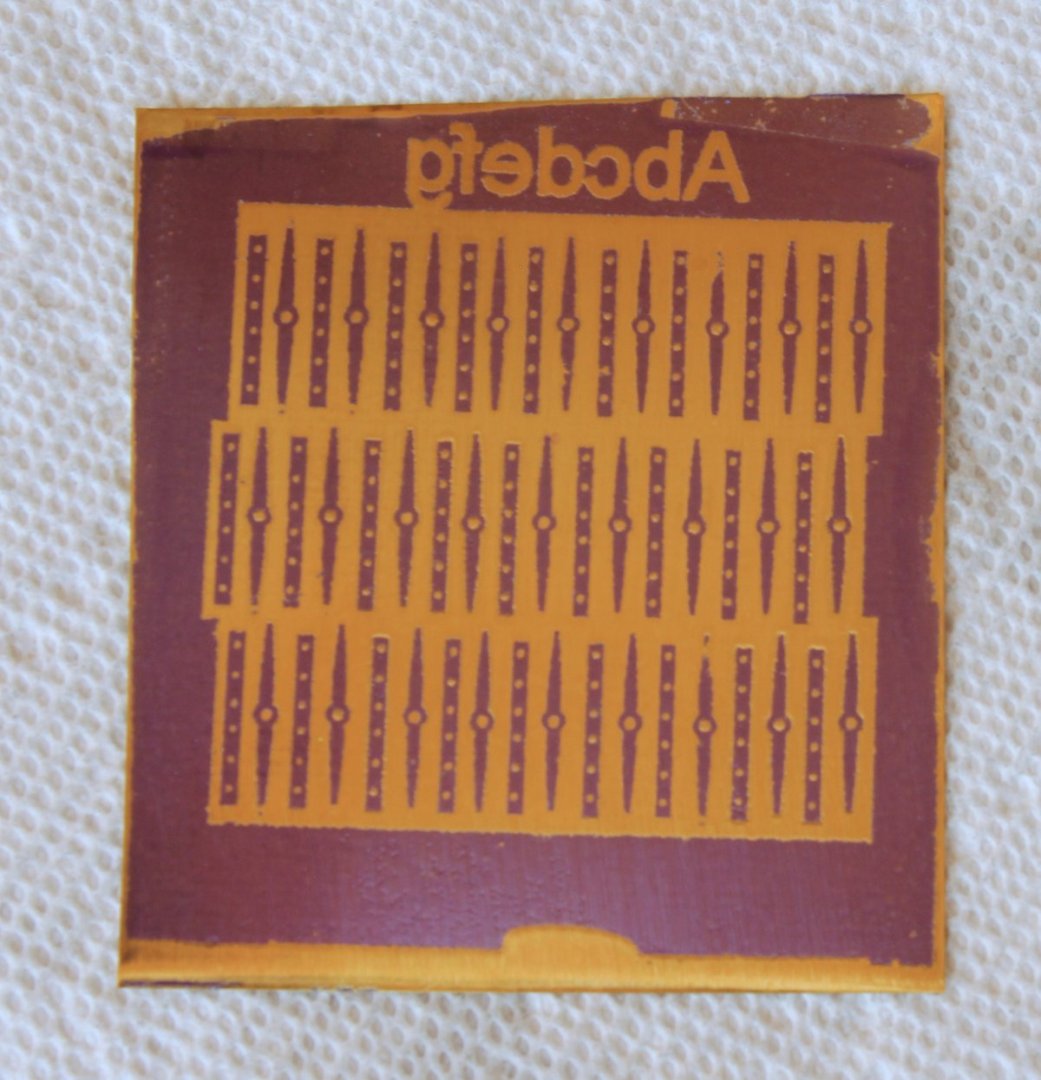
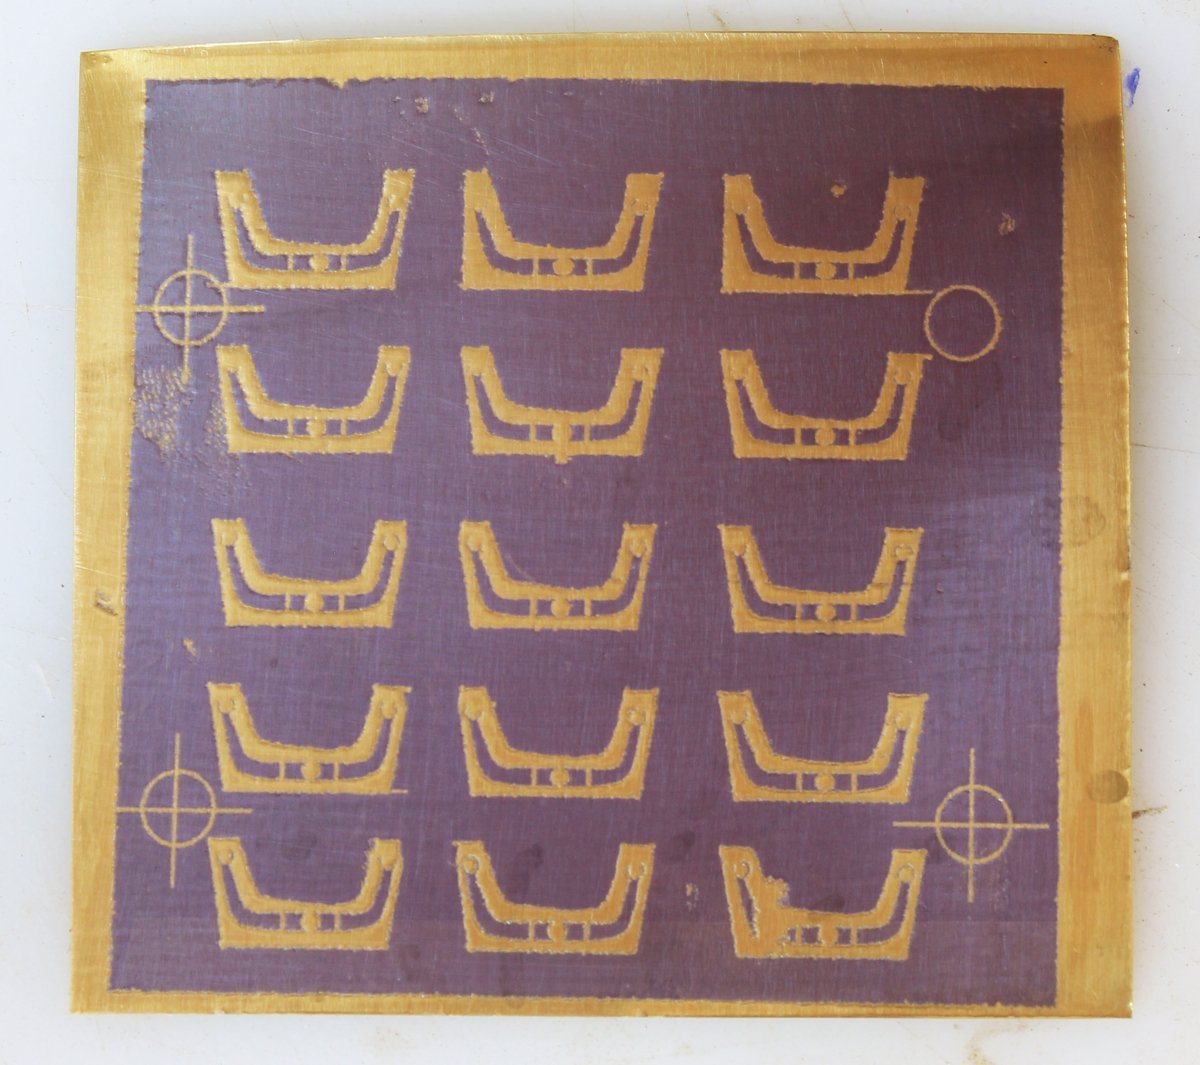
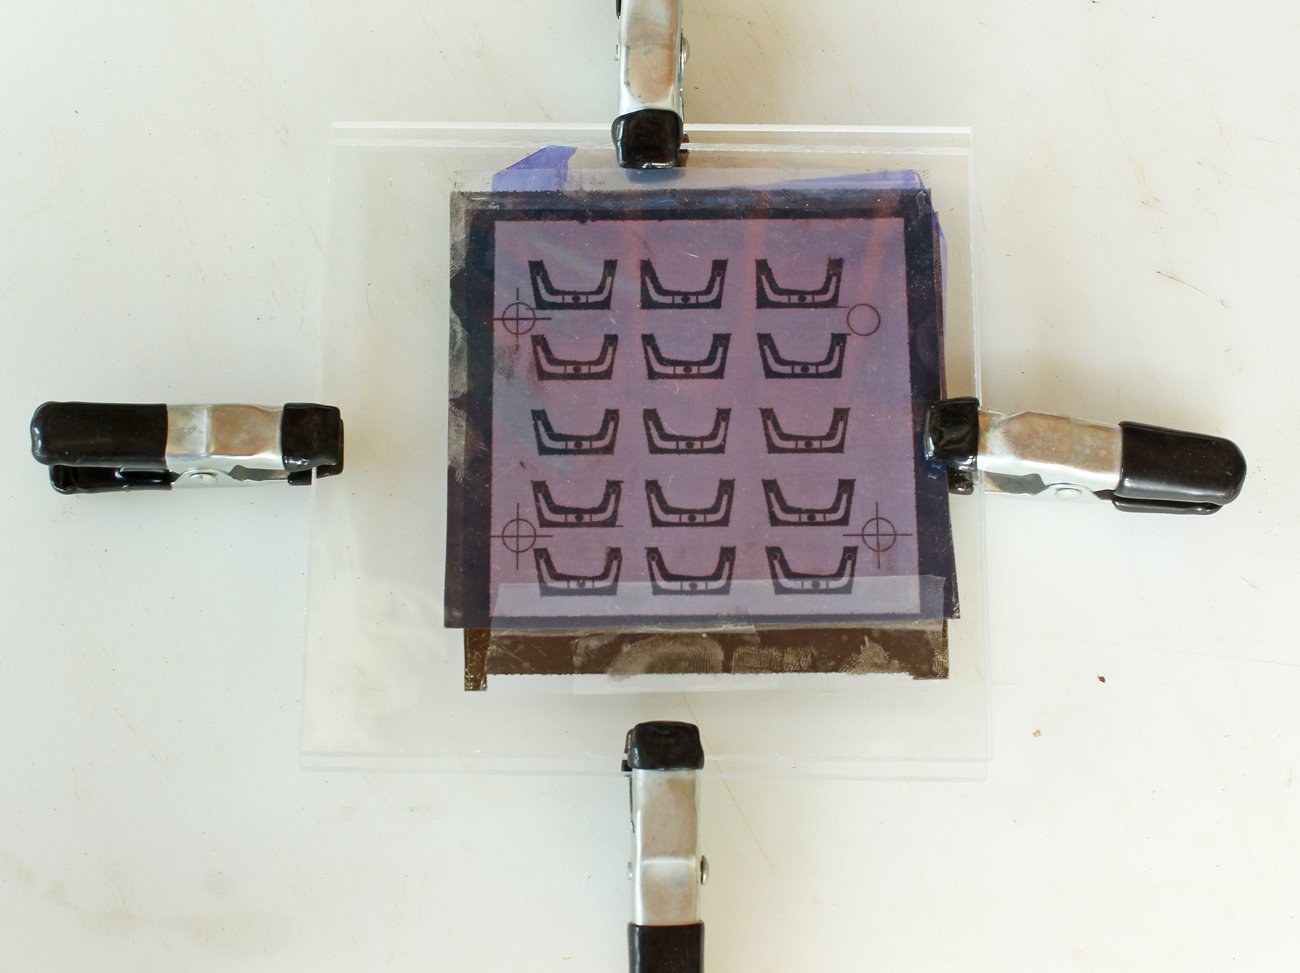
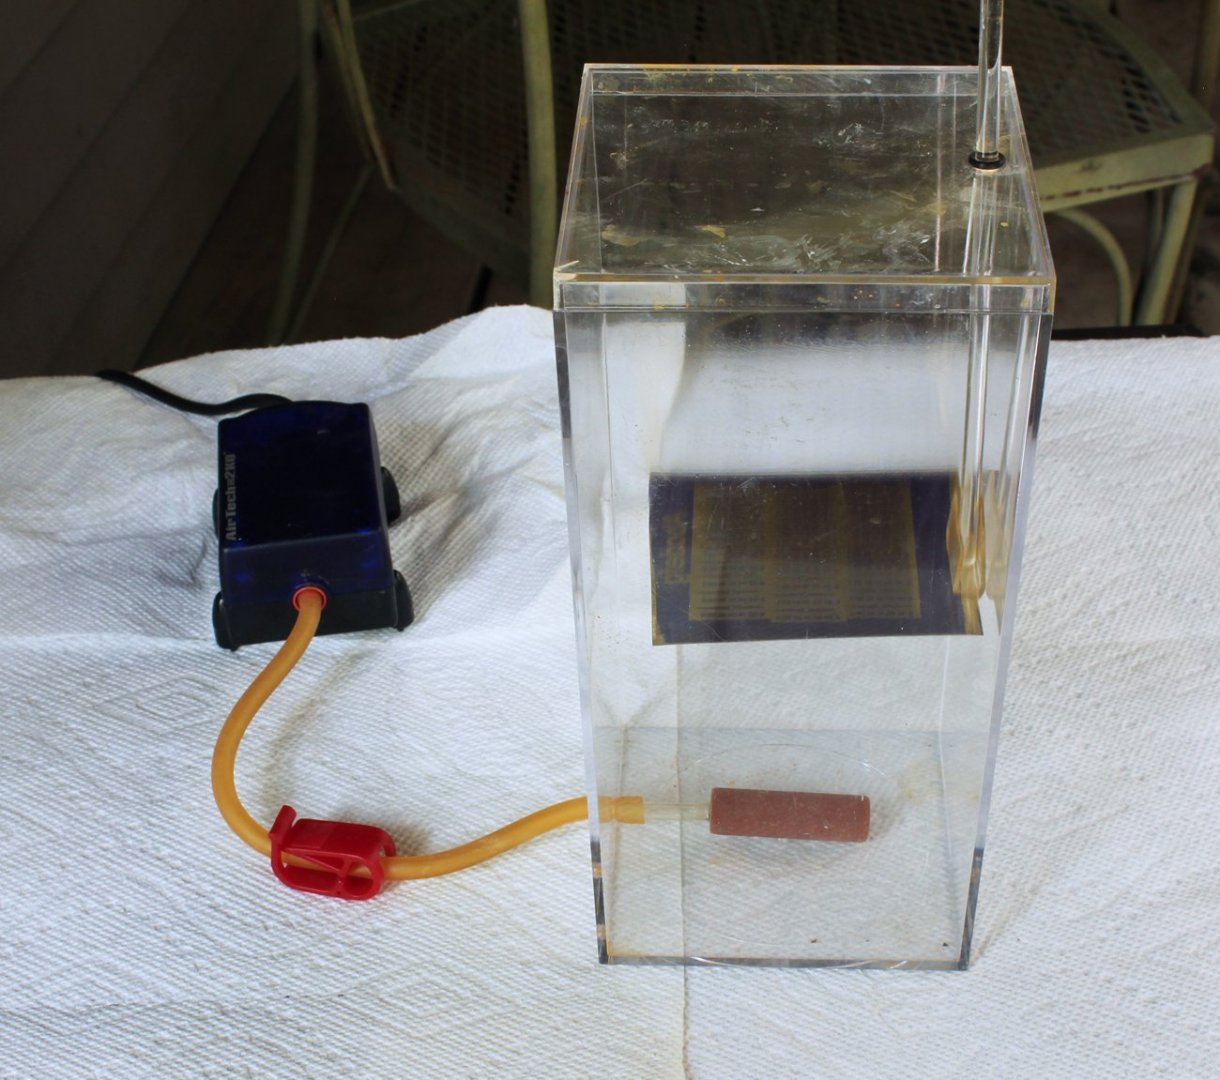
There are 22 swivel gun mounts, even though there are only twelve swivel guns. These were made by photo-etching brass. Photo-etch is another one of those techniques I rarely use but when you are making several copies of the same piece, it comes in handy. These pieces were made with the ProEtch system sold by MicroMark. I designed the pieces in CAD and then laid them out, adding register marks and sprue lines. As the metal is placed between two pieces of photo-resist, a mirror image of the design is also made. The next slide shows the photo-resist sandwich prior to light exposure. The second one shows the metal after light exposure. I redid the artwork on the gun mounts after seeing how it came out but did not take additional pictures. Finally I have a picture of the empty etching tank. An aerator allows more uniform etching. And here are the results before blackening.
- 277 replies
-
- 11
-
-
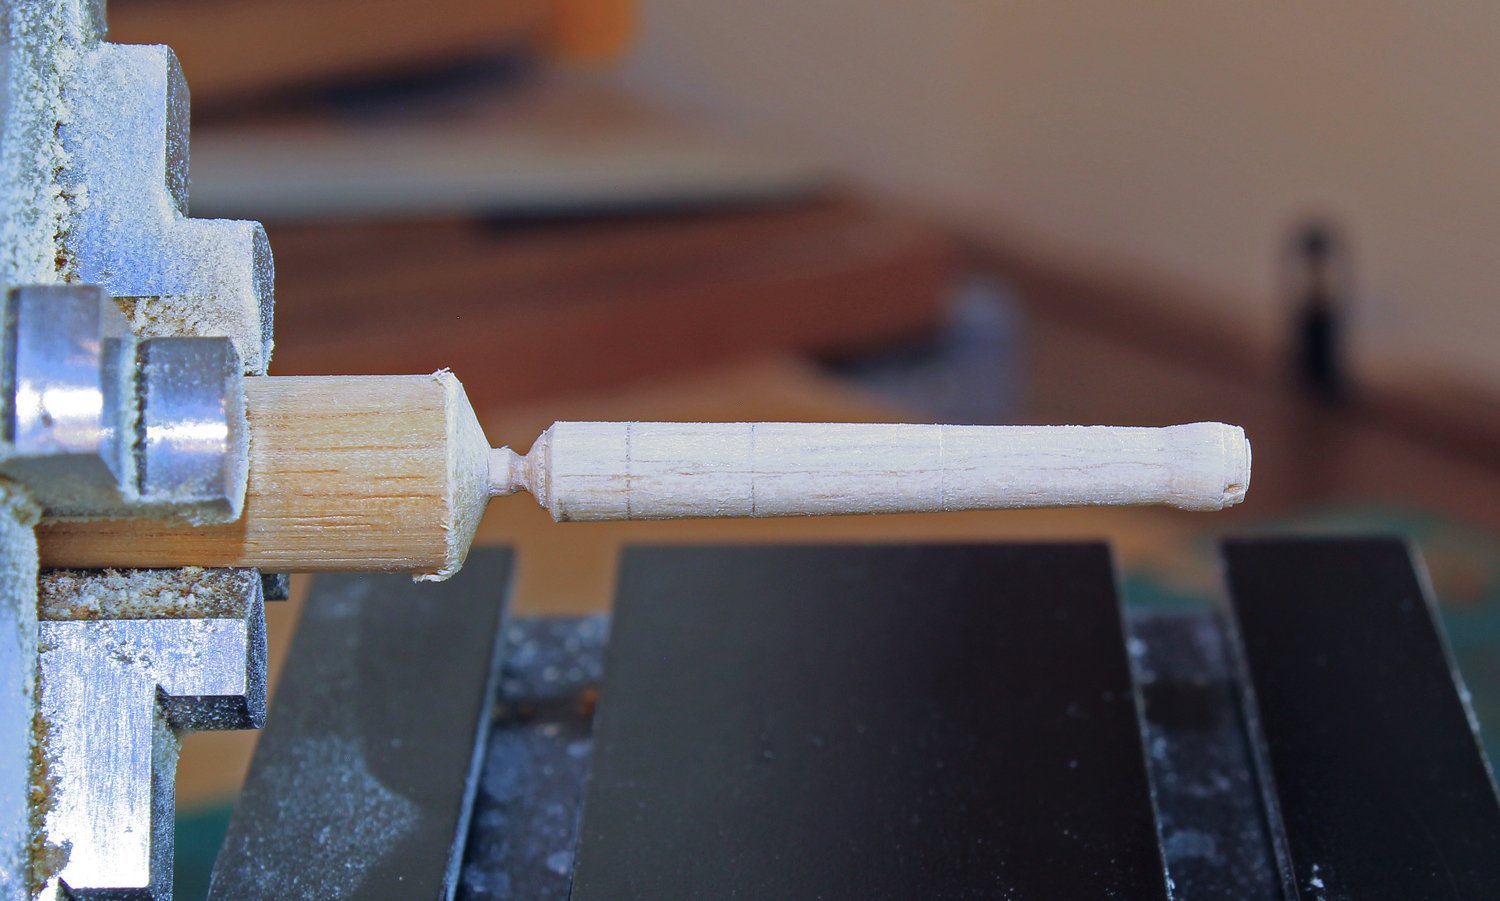
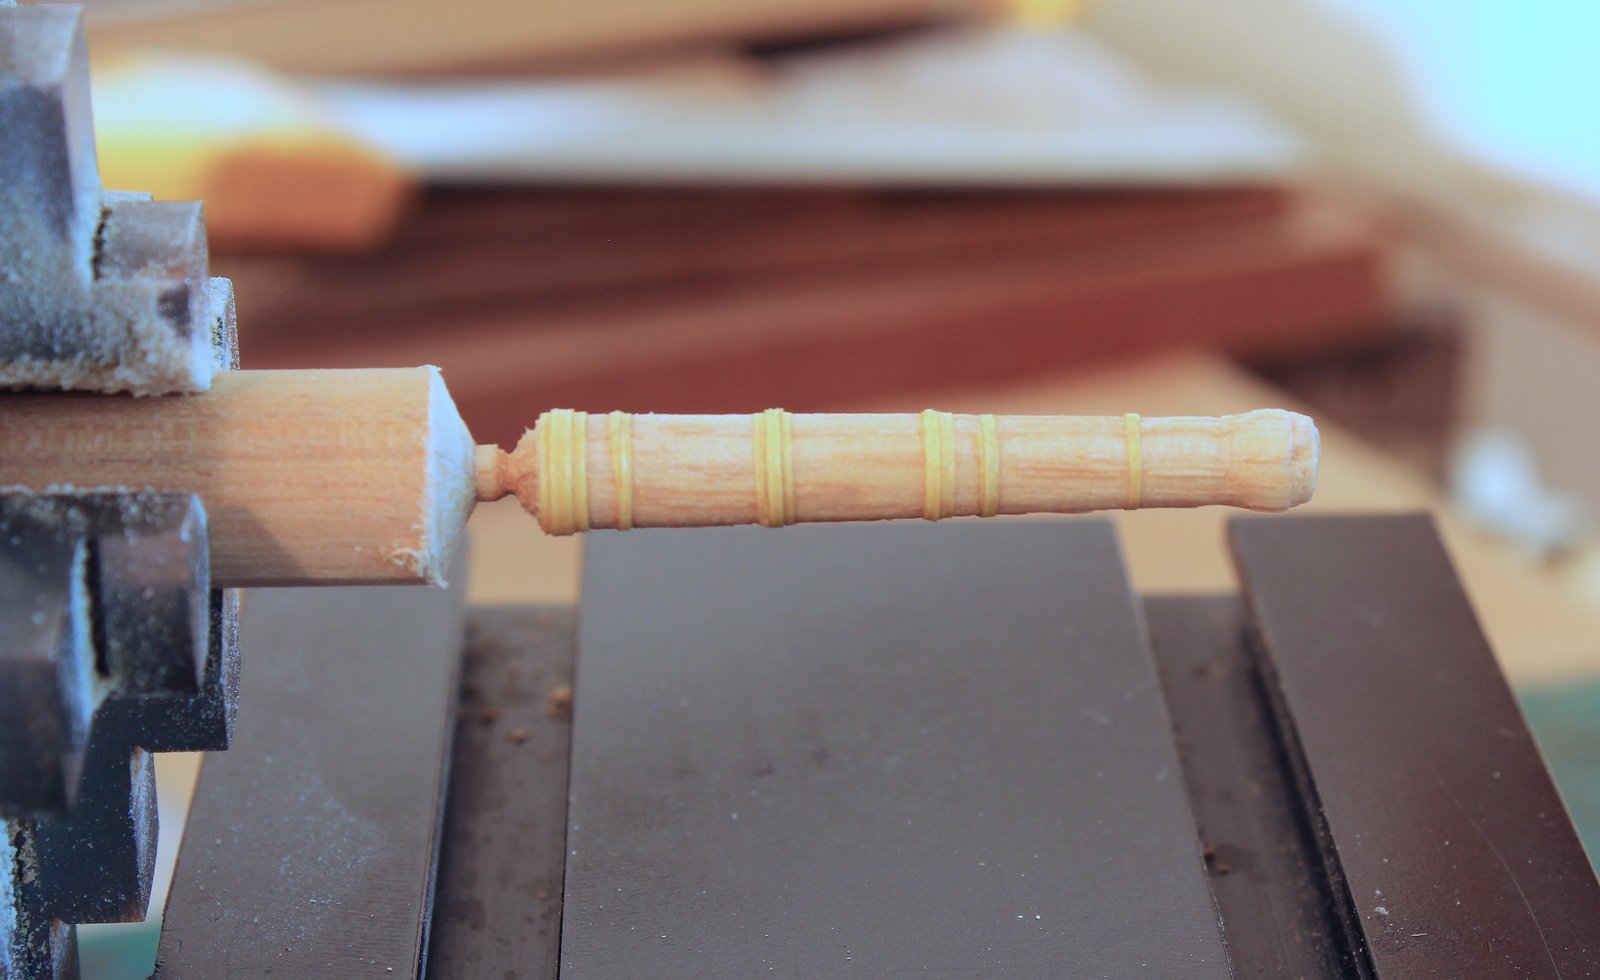
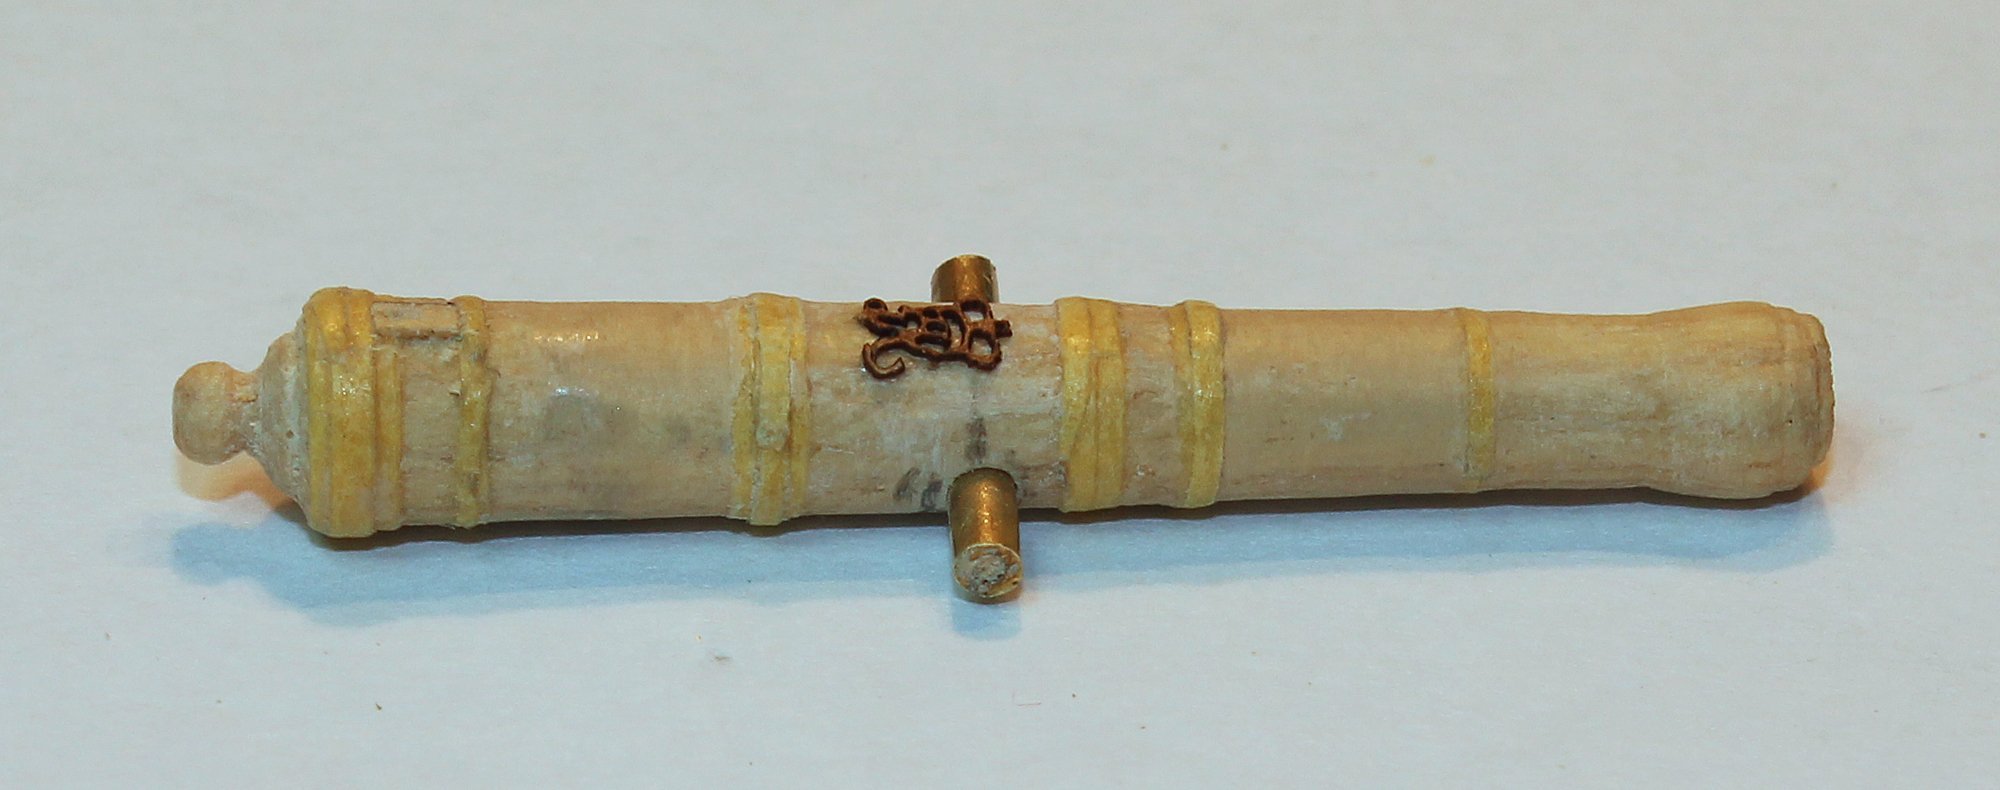
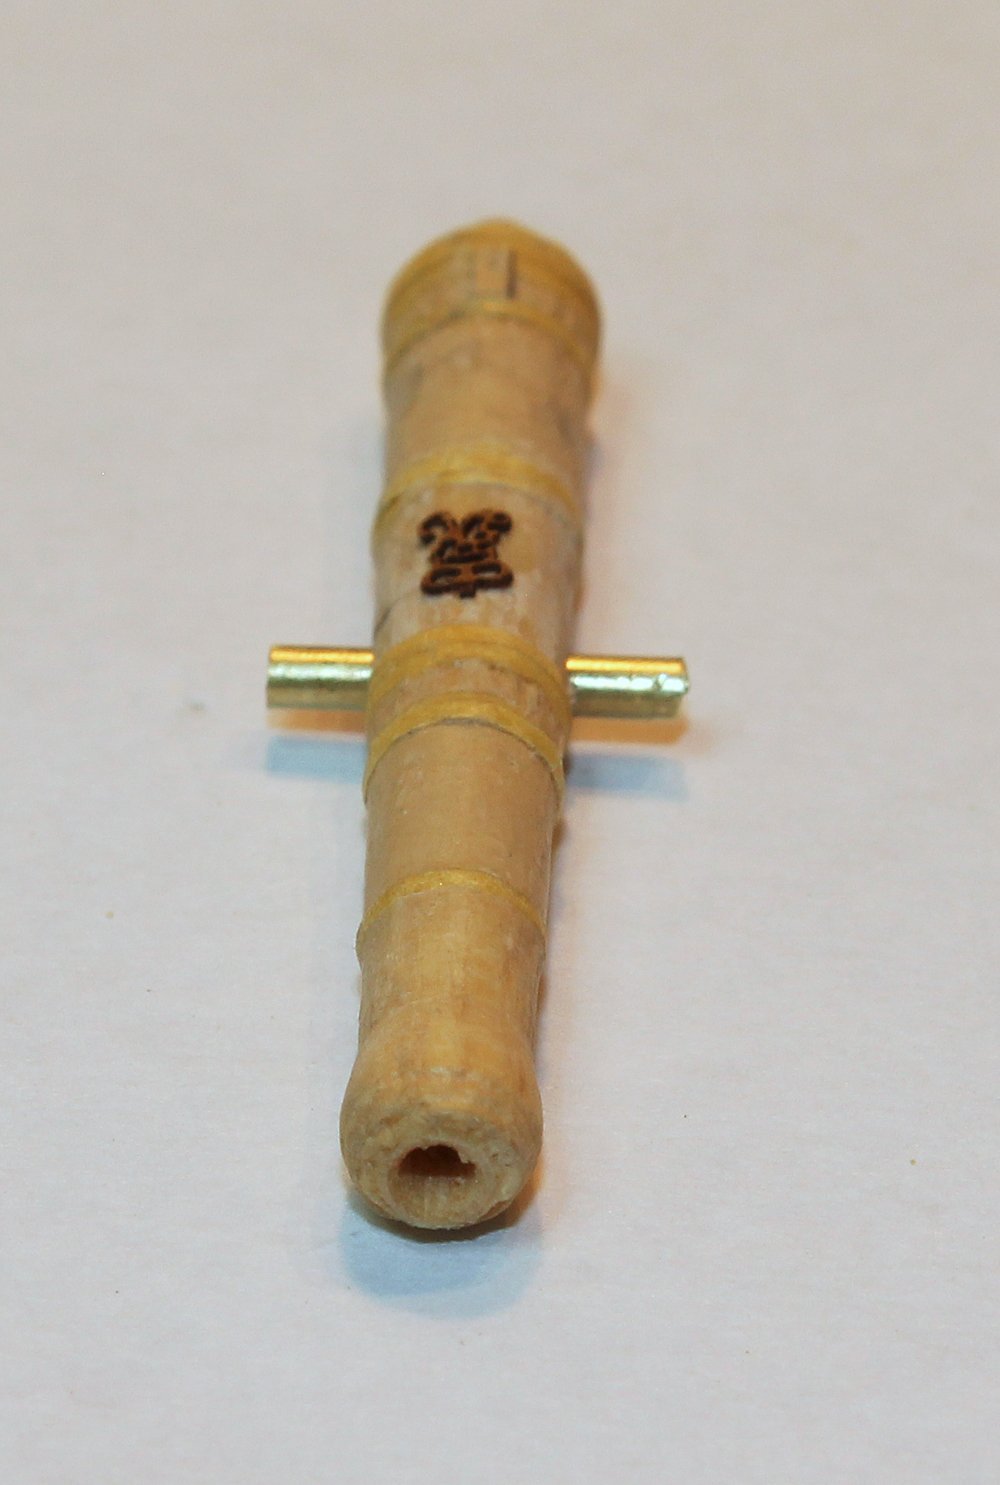
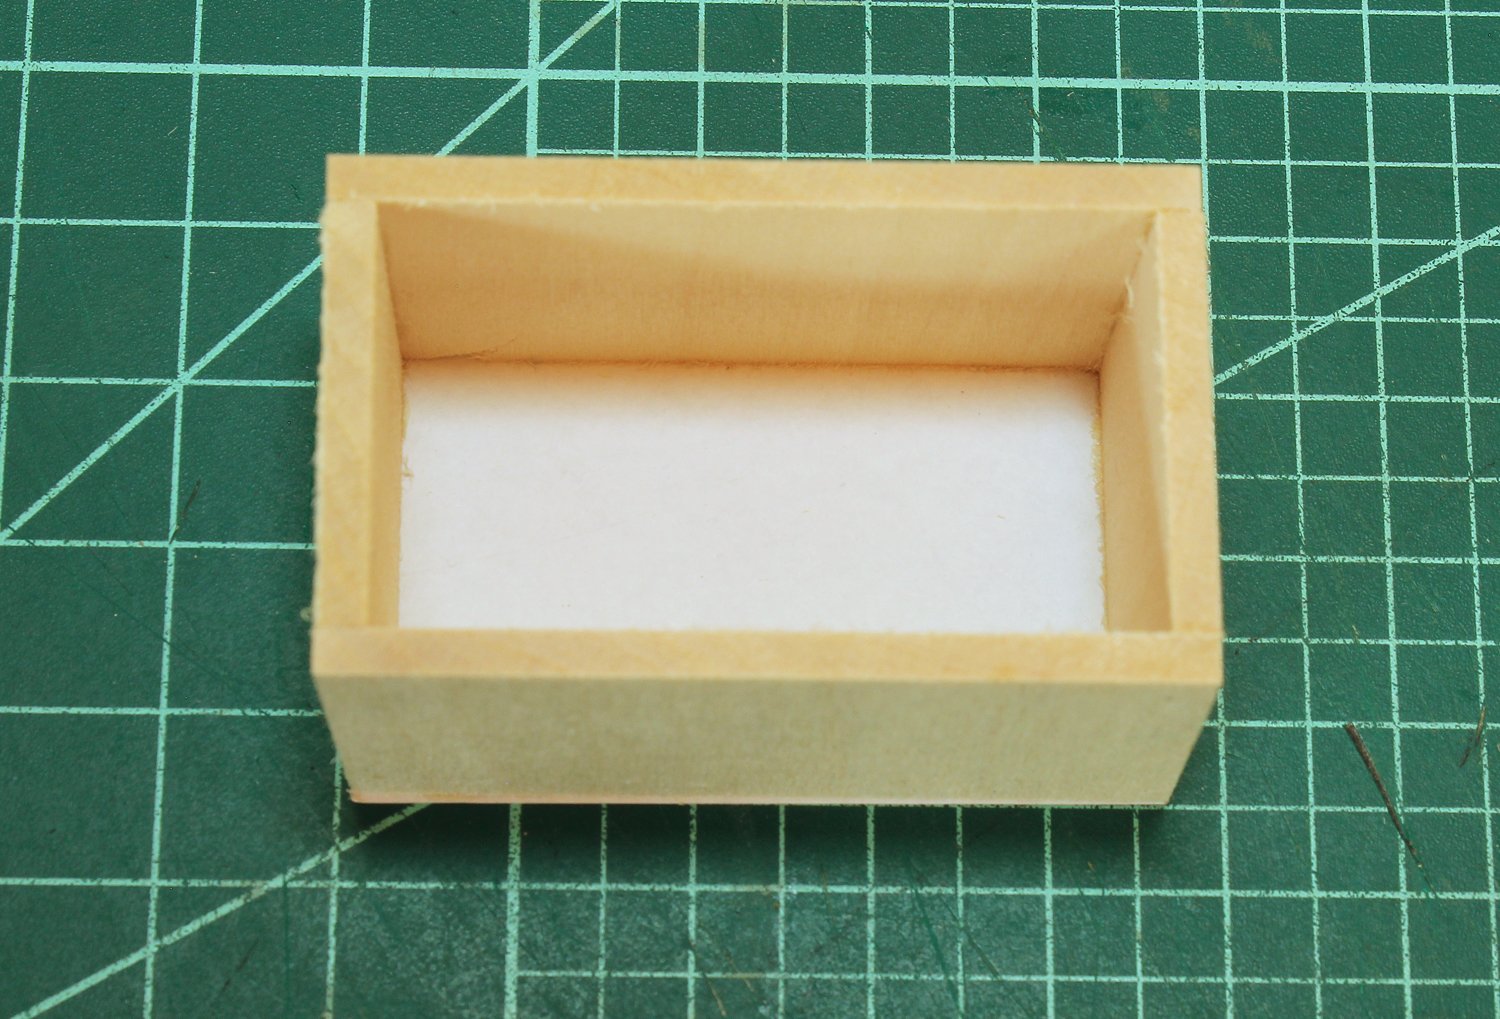
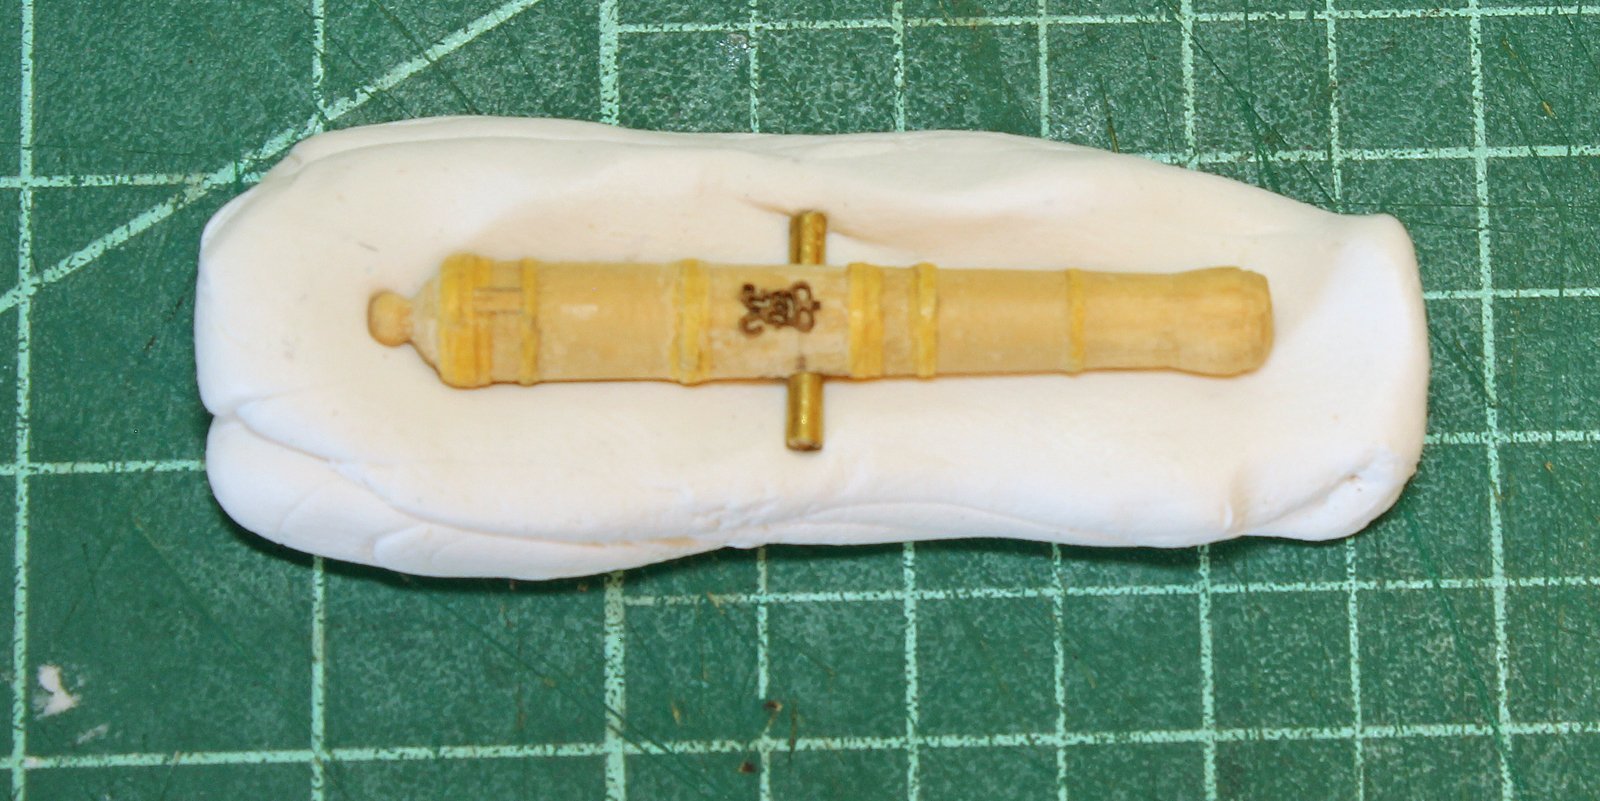
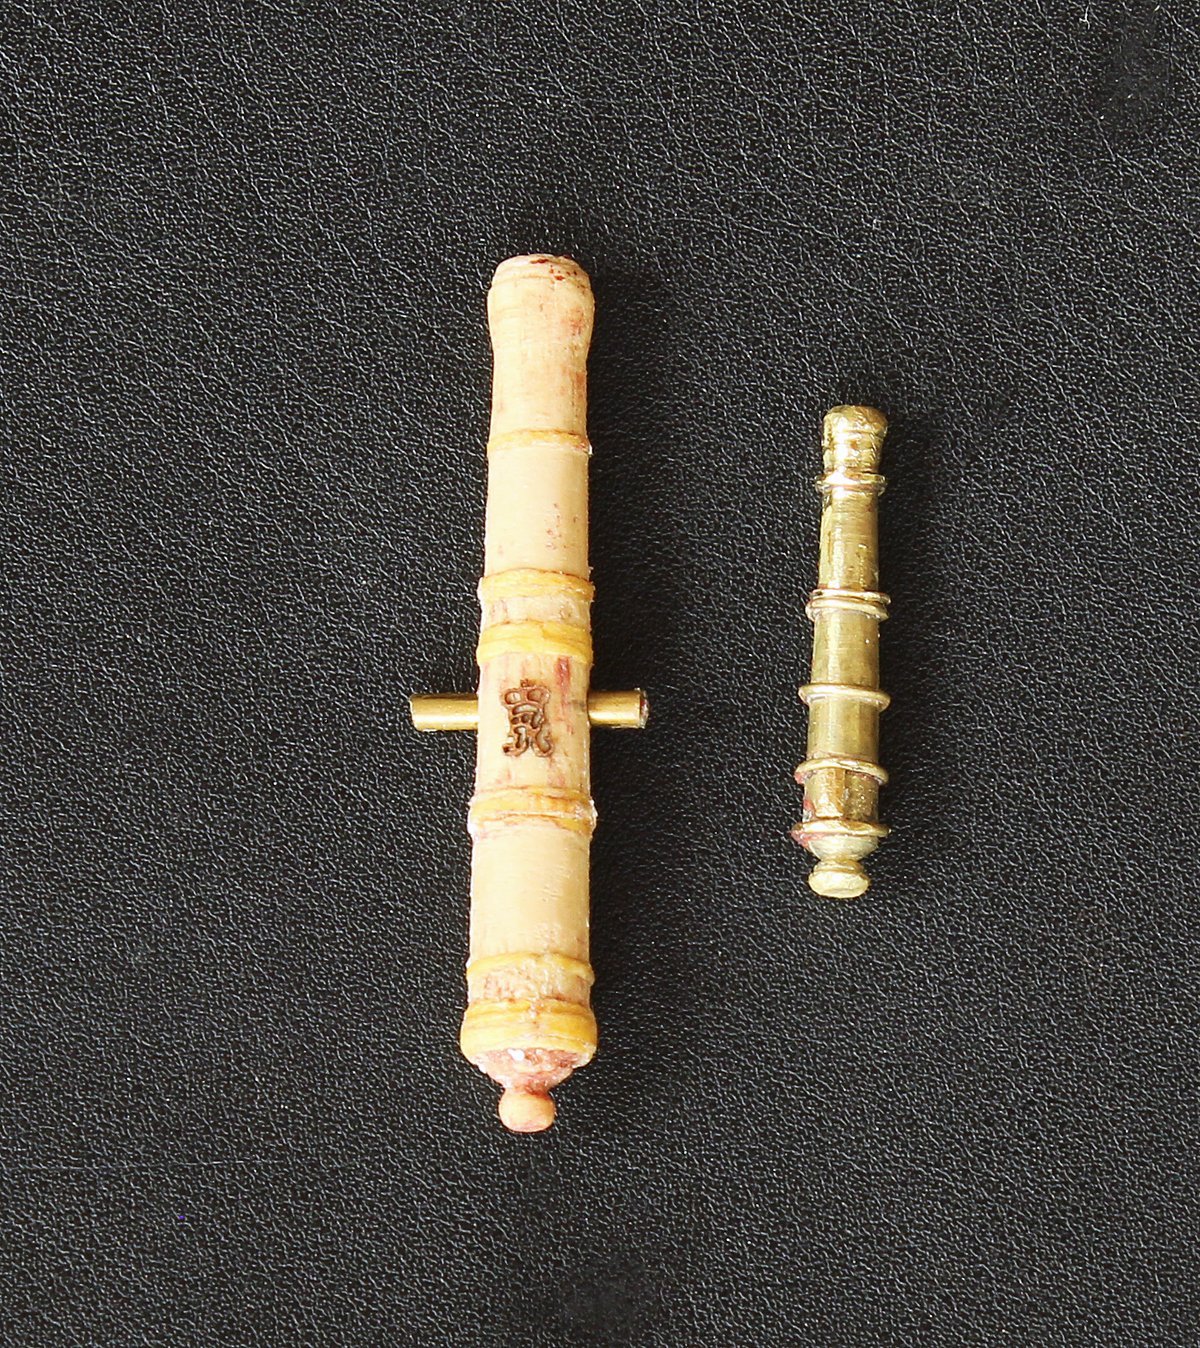
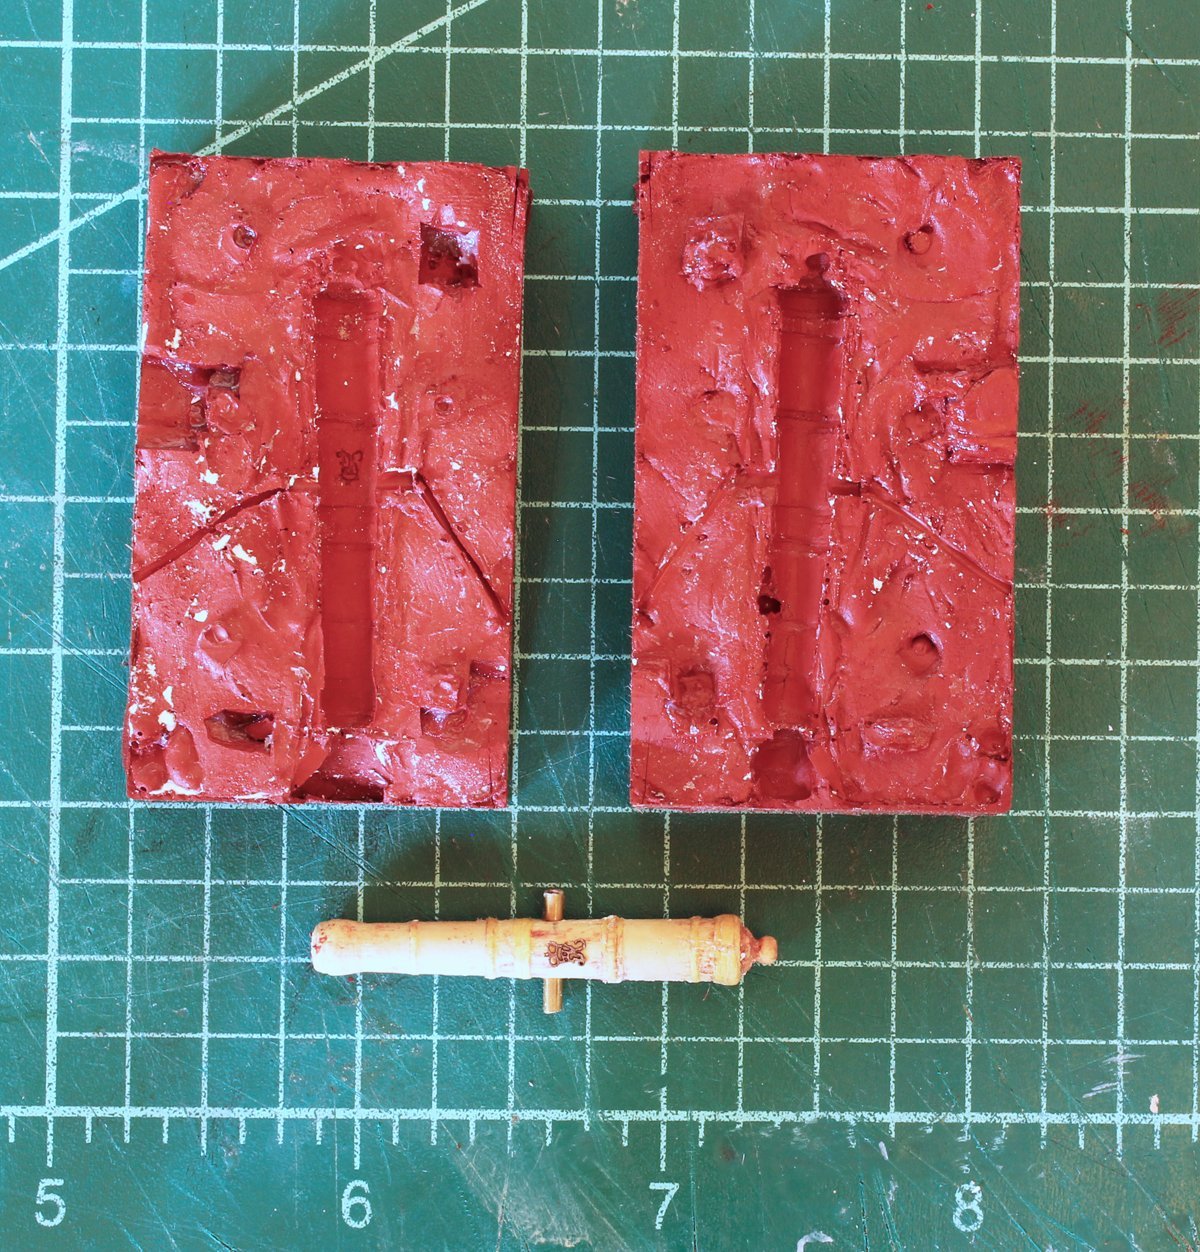
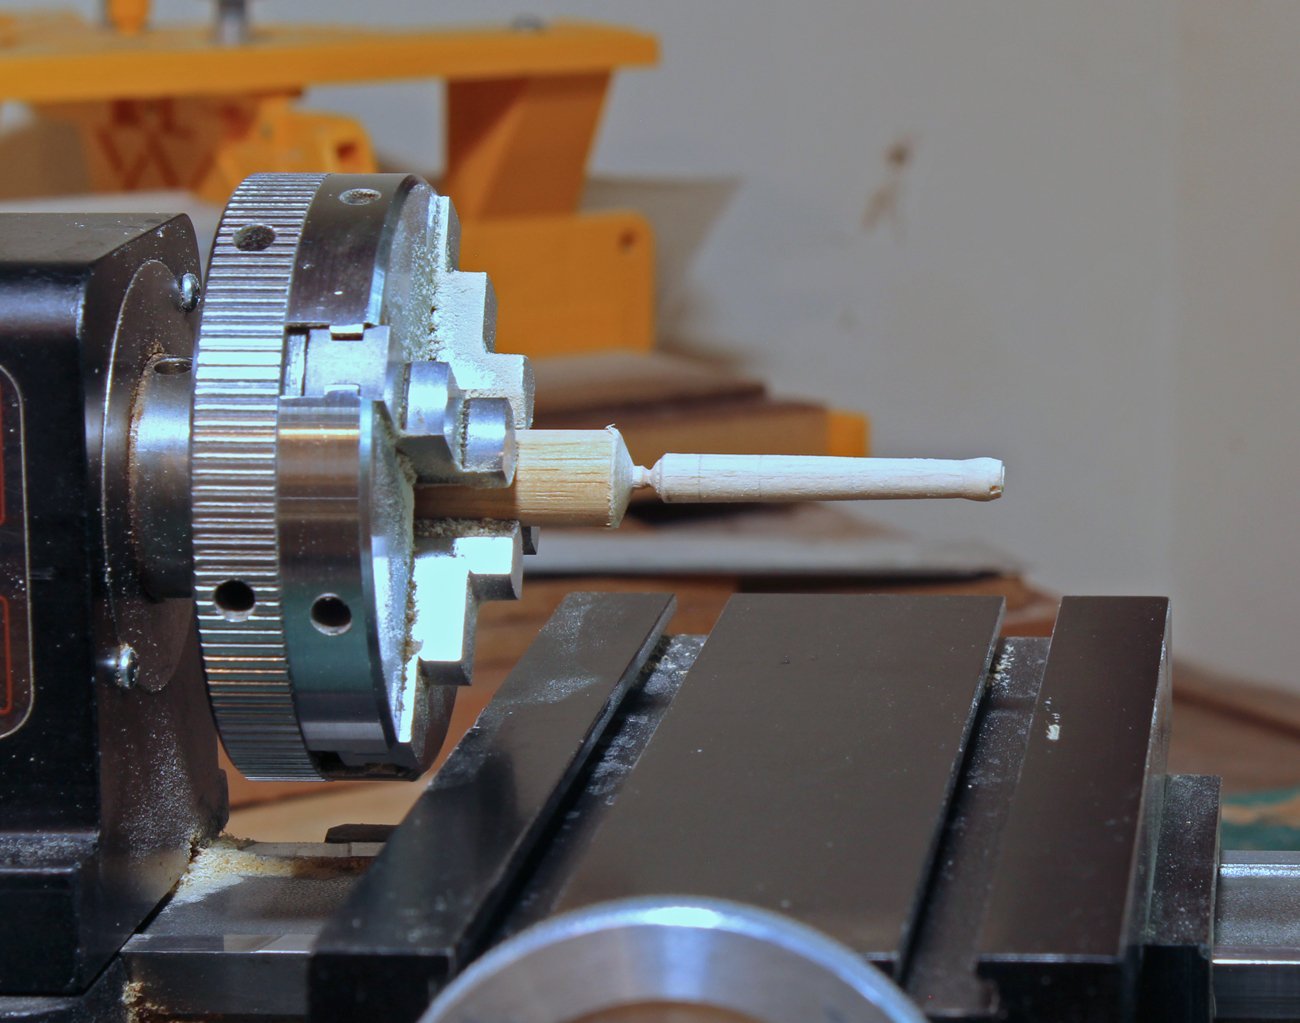
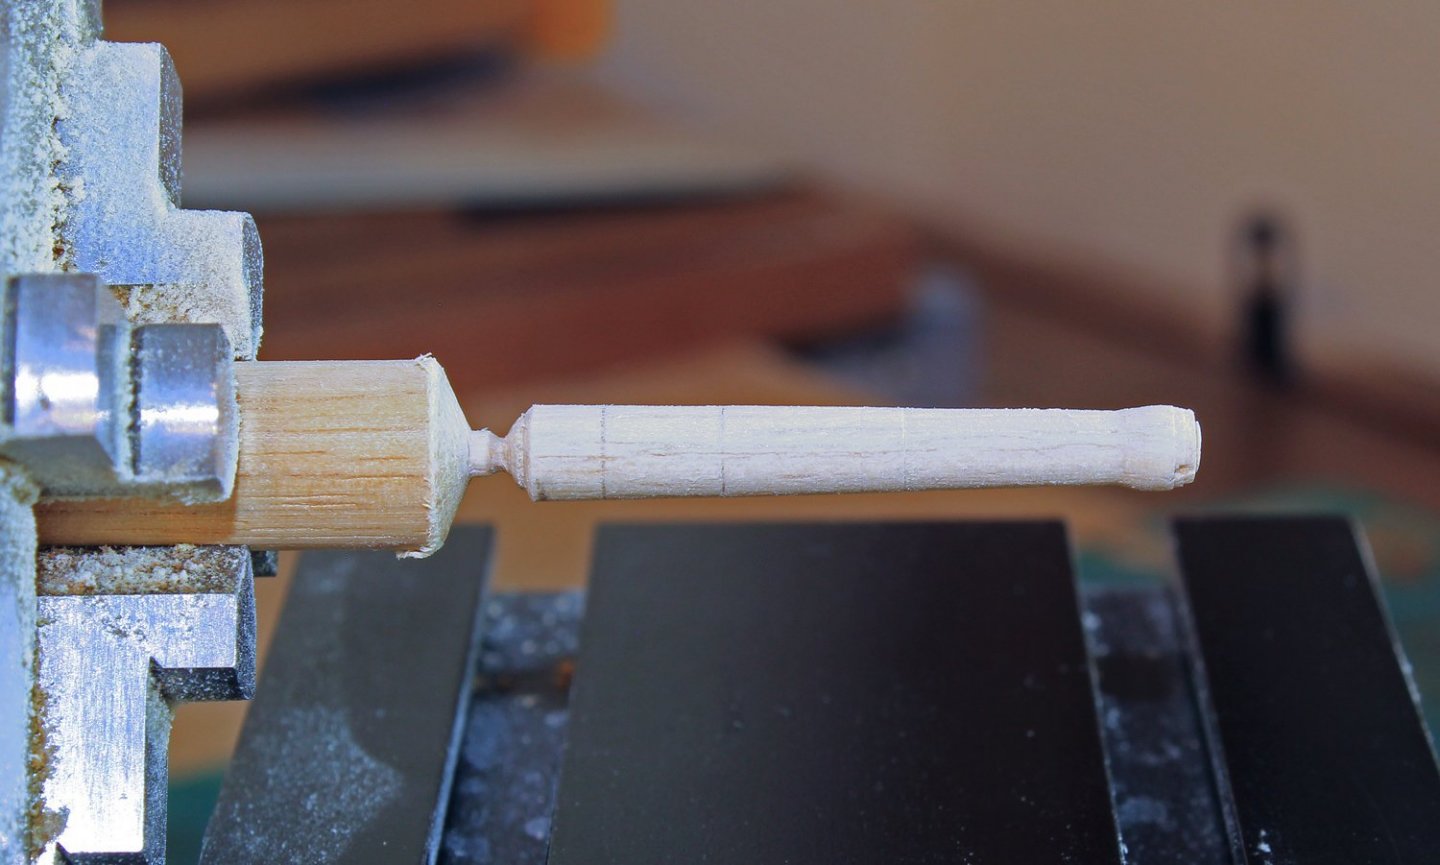
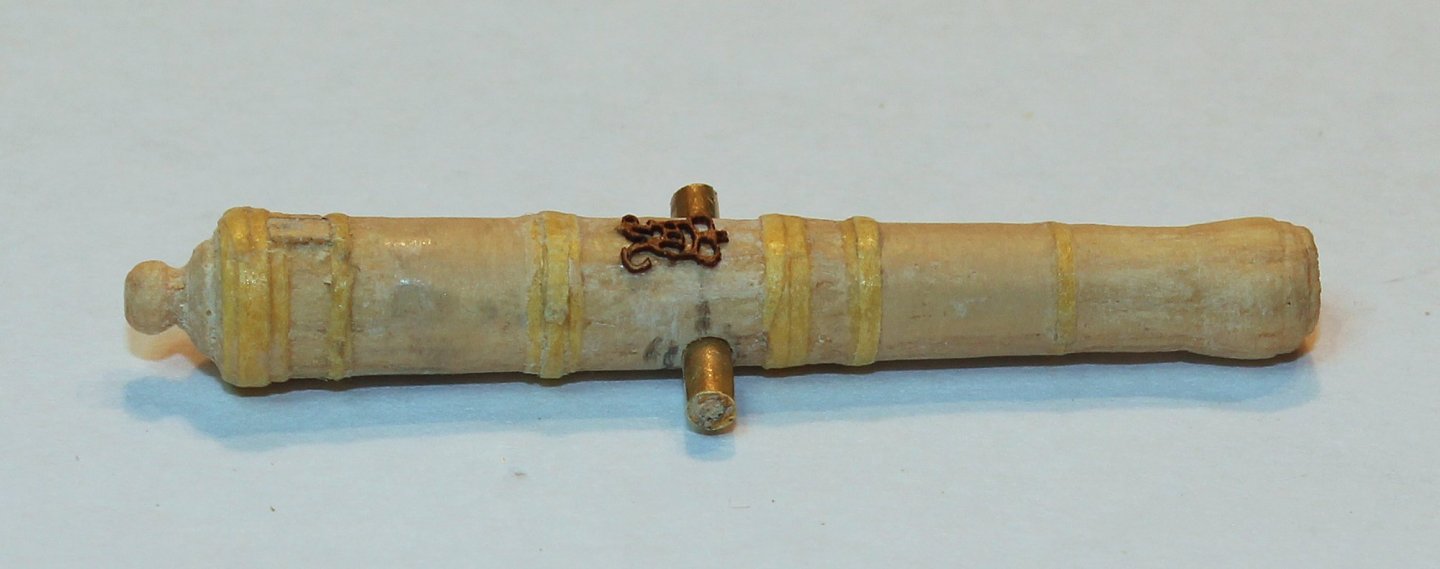
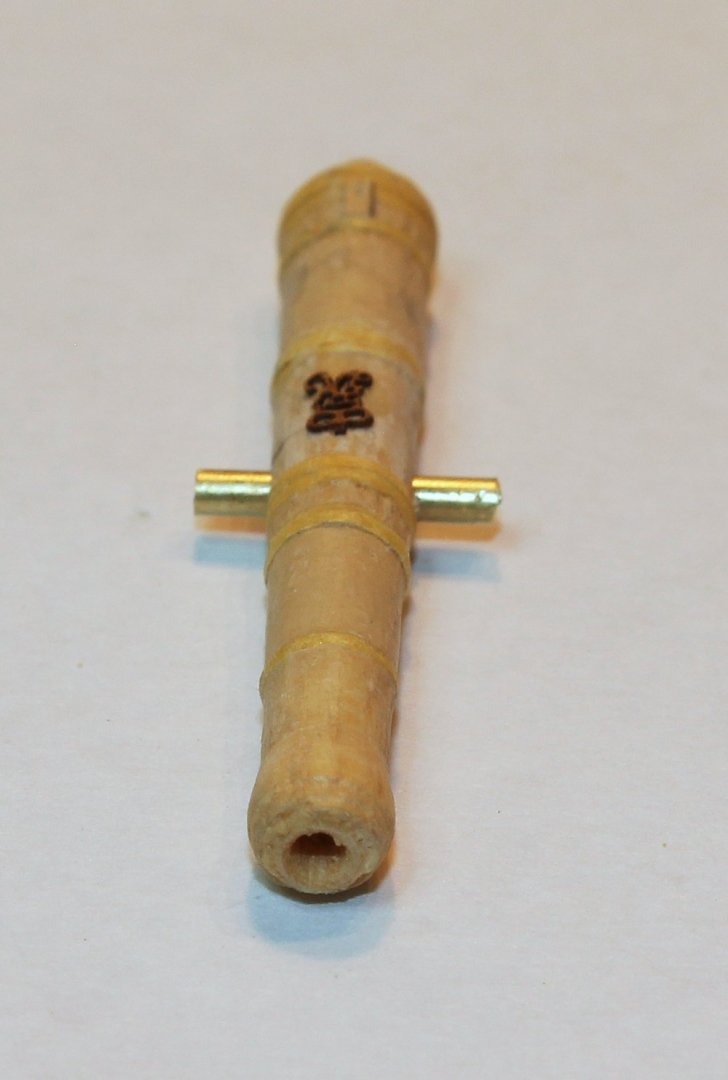
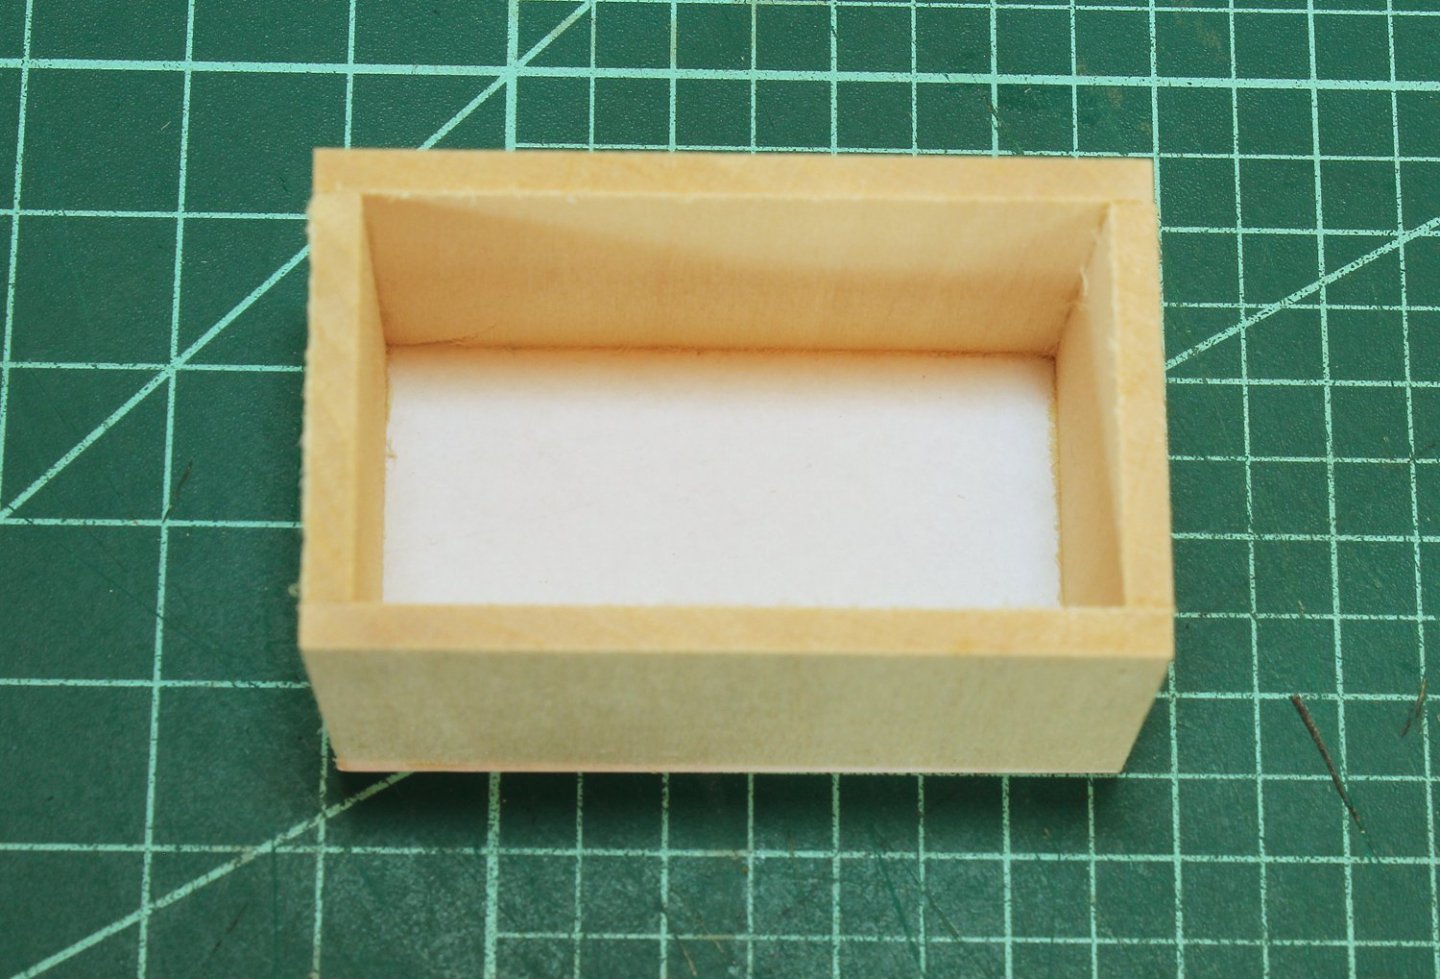
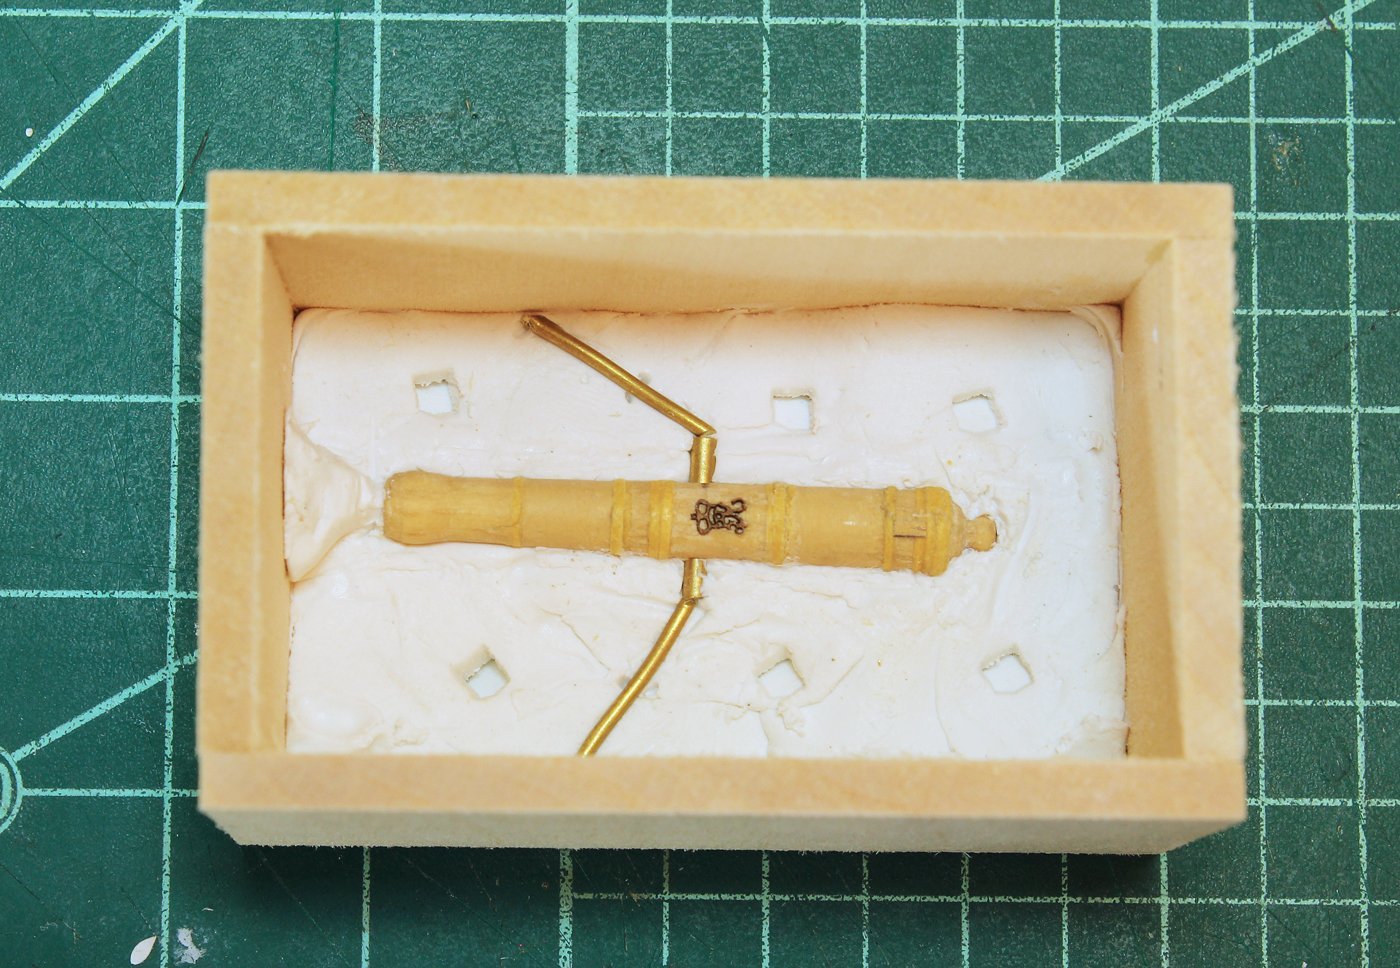
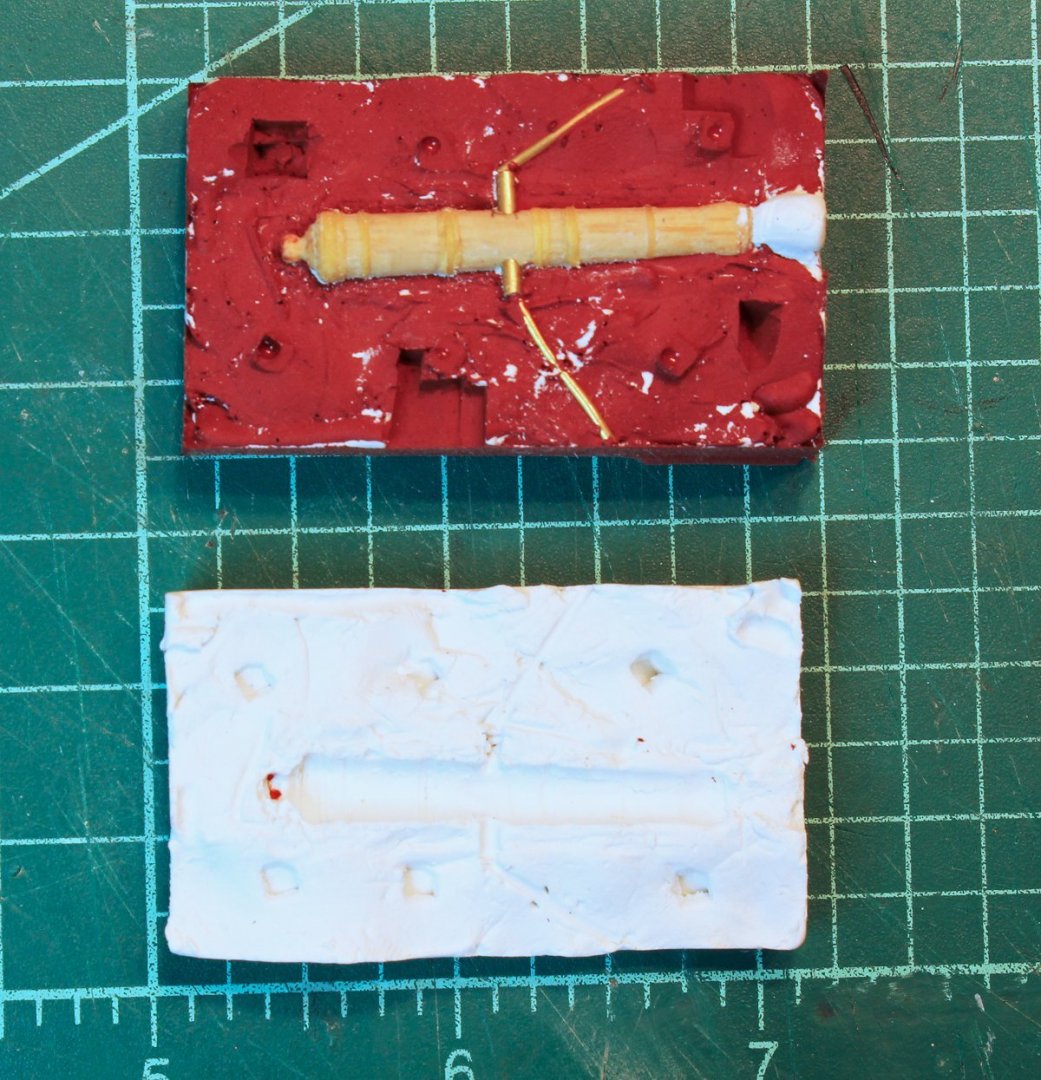
Work has been progressing slowly on Swallow. The next item to work on is the armament. Swallow carried fourteen 4-pound cannon and twelve 1-pound swivel guns. There are no commercially available guns that are the correct size so it was necessary to make them. I intend to make one of each gun and then cast them in pewter. I have never done any metal casting before, so this could be interesting. The basic shape of the guns was made on the lathe. Then, using thin strips of tape, I made the reinforcing rings. The monograms are from Syren. I made a simple casting box from scrap basswood. I glued a piece of paper on the bottom to keep the clay from sticking to the table. The next step was to embed the cannon half-way in clay (I used Sculpy). Once the piece was secure, I transferred it to the casting box, added air vent sprues and made depressions in the clay with a square rod to facilitate registering the mold halves. There is also a spout at the barrel muzzle for pouring the molten metal into the mold. Unlike casting plastic or resin pieces, a high-temperature silicone rubber mold is required. I used Mold Max 60 by Smooth-On. The instructions recommended using a vacuum to remove air bubbles but I had no access to one and compensated by constantly tapping the mold box until the rubber had set. The picture shows the cannon attached to the rubber and freed from the clay. The next day, I liberally coated the mold and gun with Vaseline to prevent sticking and poured the other half of the mold. I waited another day to unmold. For a first attempt, I am pleased. Even the monogram is visible in the rubber. One of the problems with a flexible mold it that it can be easily distorted. I used four parallel jaw clamps to gently hold the two mold halves together.


- 277 replies
-
- 12
-

-
-
The reason to cover the top of the hull is to keep people from looking in and seeing the bulkheads and any other messiness.
-
It looks great, despite the transom problem. You used this project for what it was designed to be: a teaching aid on how to correctly plank a hull. All that's left it to mount it and be proud of what you made.
-
Planking Question
tlevine replied to Malazan's topic in Building, Framing, Planking and plating a ships hull and deck
Glenn, I respectfully disagree. Read everything you can. The more you know, the better your model will be, whether it is the simplest kit on the market or a fully-framed ship of the line. The first time I read Underhill was when I was building a solid hull Bounty by Scientific. It encouraged me to learn more and improve/expand my skills and knowledge. -
Planking Question
tlevine replied to Malazan's topic in Building, Framing, Planking and plating a ships hull and deck
One of the best ways to get started in this hobby is to start developing your library. Charles Davis wrote The Build-Up Ship Model in 1933. It is available as an e-book on Amazon for $10. It takes you through the construction of a late 18th century brig but more importantly, it introduces you to a lot of the terms you see used here. There are more thorough and more expensive books out there but as a starting point you can't go wrong for the price. -
Thanks, John. It's always more personal to talk to a name rather than a screen name.