garyshipwright
-
Posts
939 -
Joined
-
Last visited
Content Type
Profiles
Forums
Gallery
Events
Everything posted by garyshipwright
-
 The pear wood has been sold.
 -
Outstanding Piotrek. What a wonderful build and the detail is out of this world. Thank you for giving us the chance to look at and enjoy your build on a very well built ship model. Gary
-
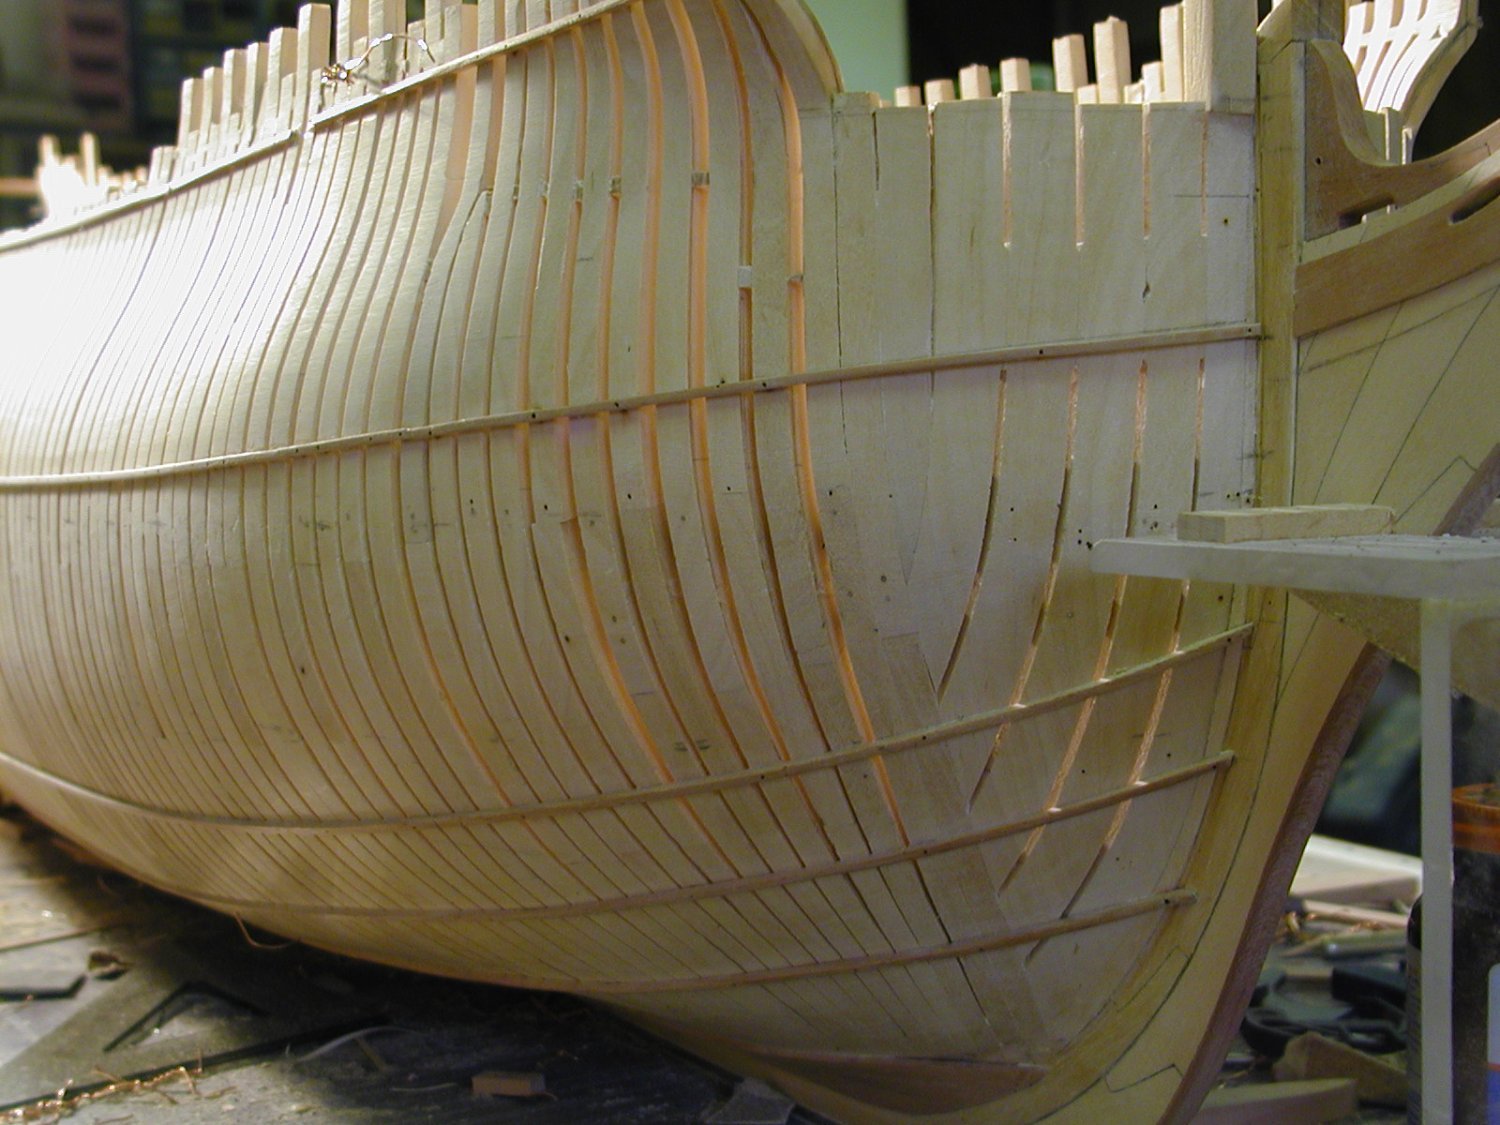
Hi Kevin I have to agree with you on the movement because Alfred's frames did the same thing when I was trying to sand them down. One of the things I did, is along the same lines but I made some temporary ribbands and use bread ties to tie then in place. Didn't think about PVA at that time You can get roll's of this stuff, at a cheap price. The photo's below show some of the temporary ribbands.

-
Alan you will know when its finished when you ran a plank across it and your fingers feel nothing but a level area from bow to stern. This and when your happy with it. It looks like your have a lot of fun but she does look good from my screen. Another thing you could do is cut some small battans and planks and tie them to the hull at different height and this will help you figure out if its faired. Of course you already knew this about the above items. Gary
-
Nice job Toni, you done a heck of a job and enjoyed watching you build it. Thanks for sharing. Gary
-
NAIAD 1797 by Bitao - 1:60
garyshipwright replied to Bitao's topic in - Build logs for subjects built 1751 - 1800
Bitao, that is one outstanding build you have going. She is looking great and ship shape. Look forward to your next update. Gary -
Looking good Alan. Now were have I seen this hull before? When it came to Alfred those many years ago I broke up a glass from a picture frame and use the pieces to help me with all the differnt angle's and tight places. Do be carefull if you do. Can't ever remember cutting my self, not sure were I read this.
-
Good Evening Mark and thank you. That's not good, search results being very limited. Seems it could cause a big traffic jam and long waiting list. I spent a few hour's today and yesterday looking through their plans but never found one of the Queen, accept a deck plan. Well the search goes on. Once again thank you. Gary
-
Thank's Druxey I have already done that, just have not heard any thing back. Hi Siggi your right sir they do have plans but as you said not this one and thank you. Hi Bruce. am not sure but can you let me know how I go about finding that out, picture credit that is. Thanks again guys. Gary
-
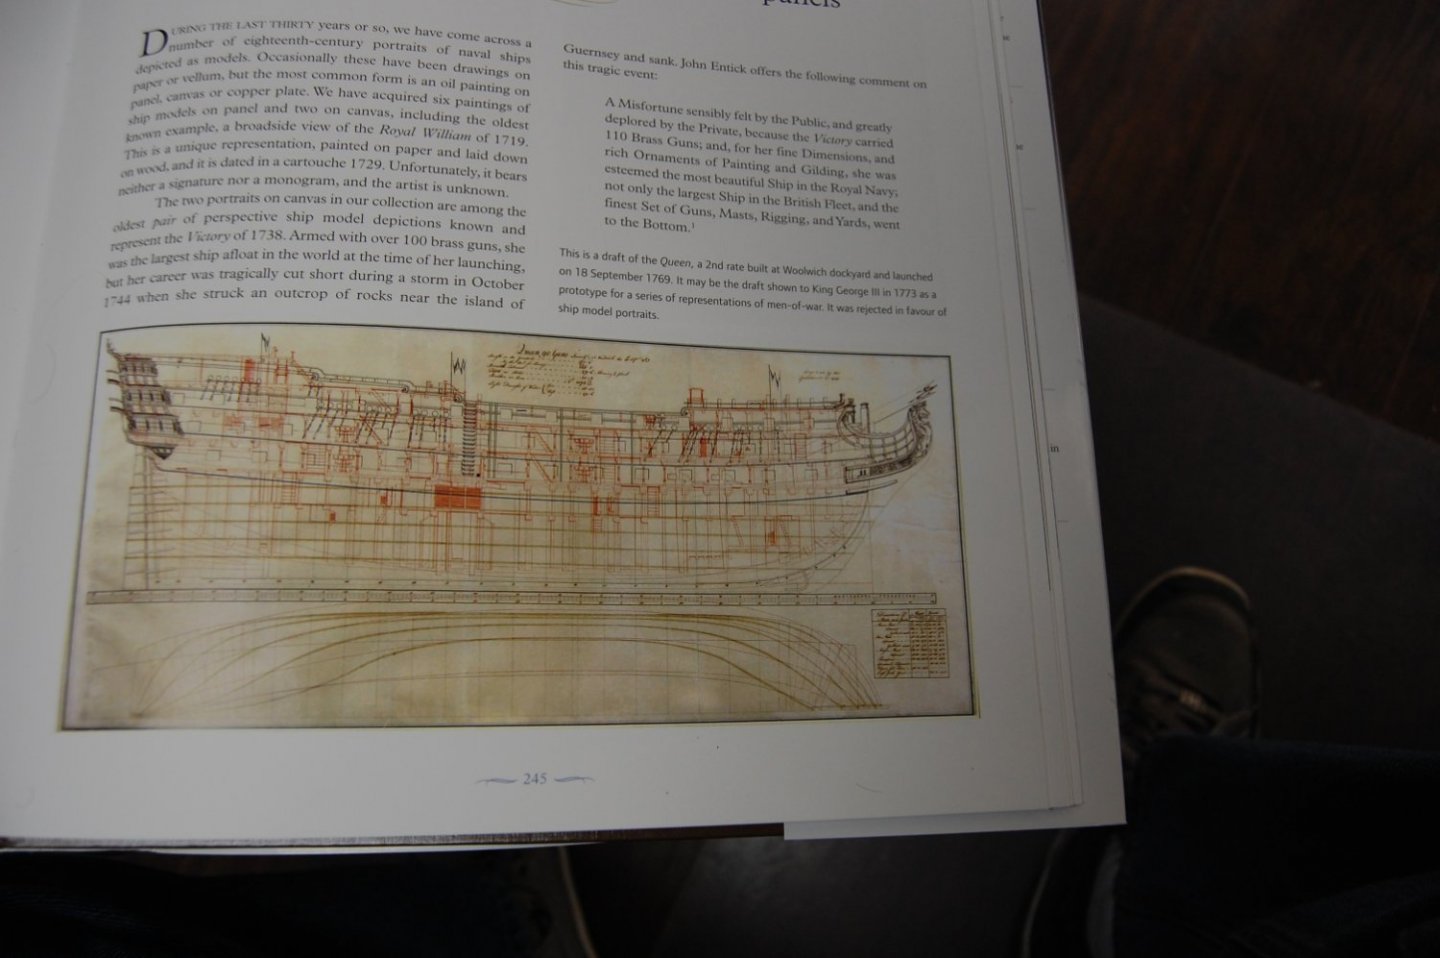
Hello every one. I have a question and hope that you good folk's can help shed some light on this. I am trying to find this print of the Queen of 1769 in Arnold and Henry Kriegstein newest book which is a joy to read and looking at the model's in his book, Historic Ship Models of the seventeenth and eighteenth centuries in the Kriegstein Collection. The photo is on page 245 of the Queen of 1769, a second rate which says that it is draft shown to King George 3rd in 1773. I have contacted the NMM for a number and maybe getting a copy but with out the plan number it a little on the hard side. I did go through the plan site that Allan showed us but no Queen of 1769. I also have been looking through the NMM site for it but so far nothing. I also sent a email about it to seaforth publishing but nothing back from them yet. Any help would be great and most helpful. Thanks guys. Look forward in hearing from you. Gary
-
Very well put good sir,
-
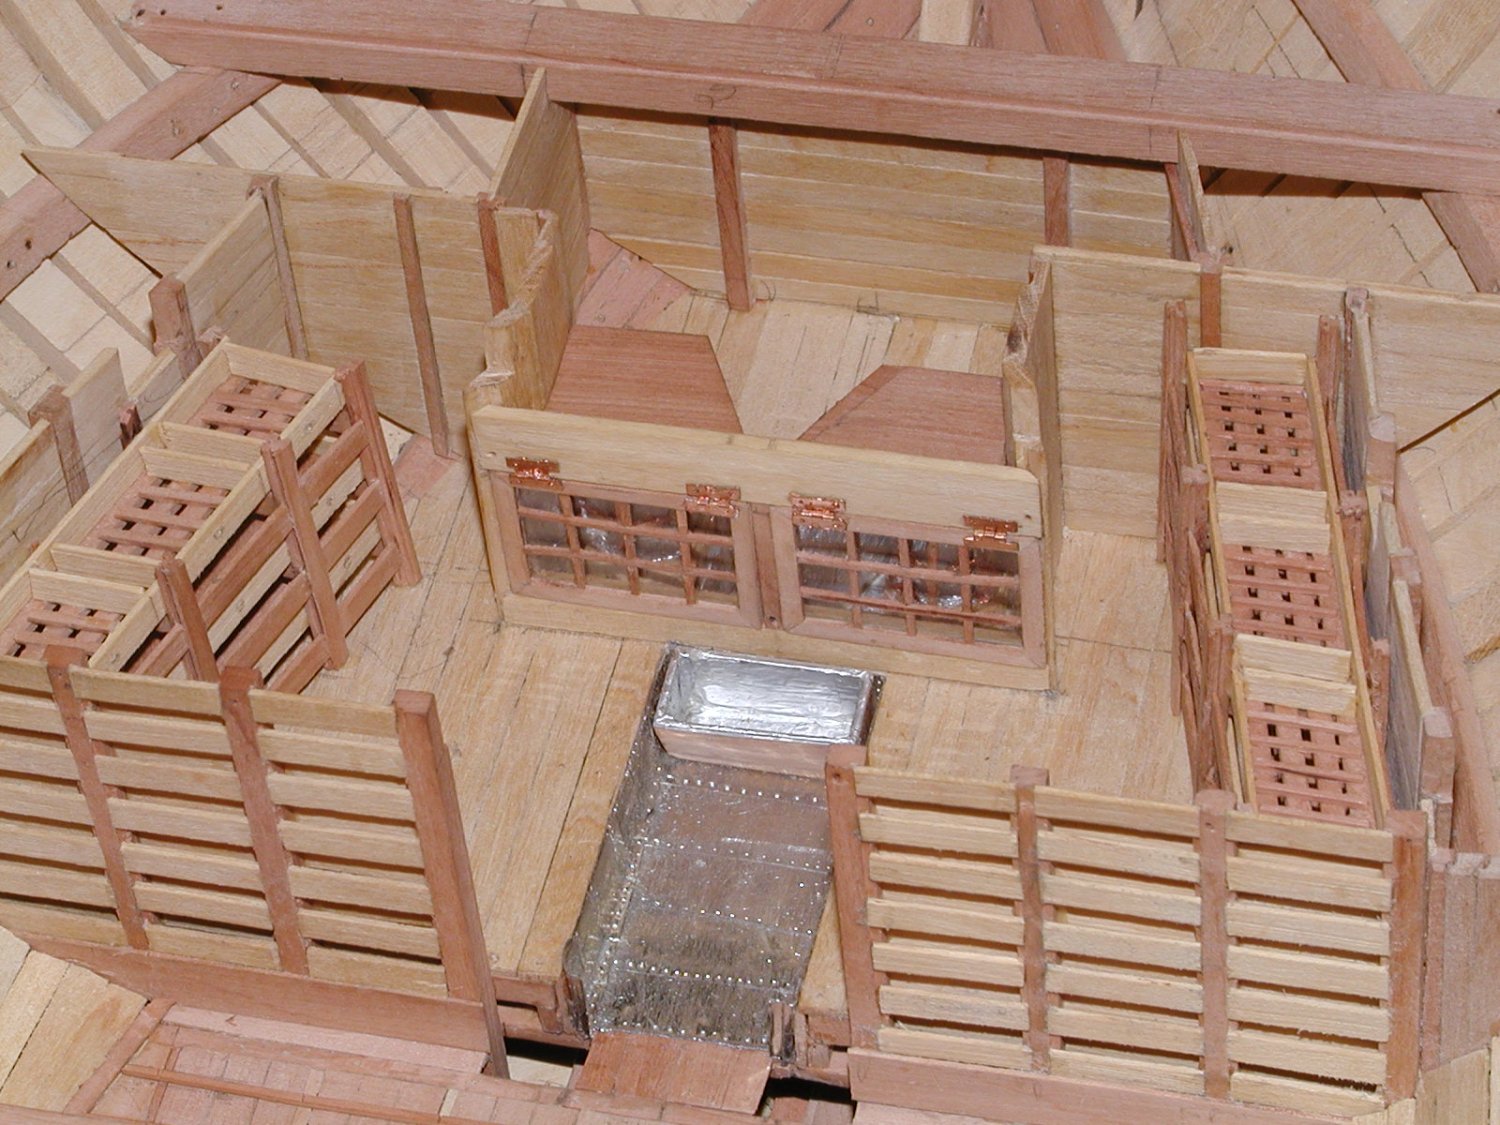
Hi Shipman. You are right and time is short but one can think of it like this. When you build your ships you probably get a lot of enjoyment out of it, just like myself and others. Building the inside I get just has much enjoyment as building the out side even through we won't see it, that is unless you take photo's of them. A lot of folks like you self also don't like building the inside, but that's ok because there is also a lot of folks like to build the inside. It like building a 32 pounder on the gun deck. It takes awhile and building a cannon with a lot of detail just to be hidden by the upper deck, will not be seen so why build them. Guess because I like building them and installing as much detail as my skill will let me. They are just going to be hidden any way and all you will see is the barrel of the cannon. But I still get enjoyment out of building them and adding the detail to them hidden or not. I build them because of the sheer enjoyment that one get's from building a ship. You say that you will never understand the dubious ideal that considerable work on what will be entirely invisible details has any merit what so ever. Well a lot of folks like building the inside knowing that one day it will be covered up. The question is who's merit???? If you get merit out of you building then you must be enjoying it much as I do, making the parts and pieces that go in to it. Of course you may never understand it unless you do it. Which is your chose but getting the enjoyment out of your build is the most important thing. Here is a photo of the magazine that one can not see now in her hold but can be seen with a photo, no pun intended good sir.
-
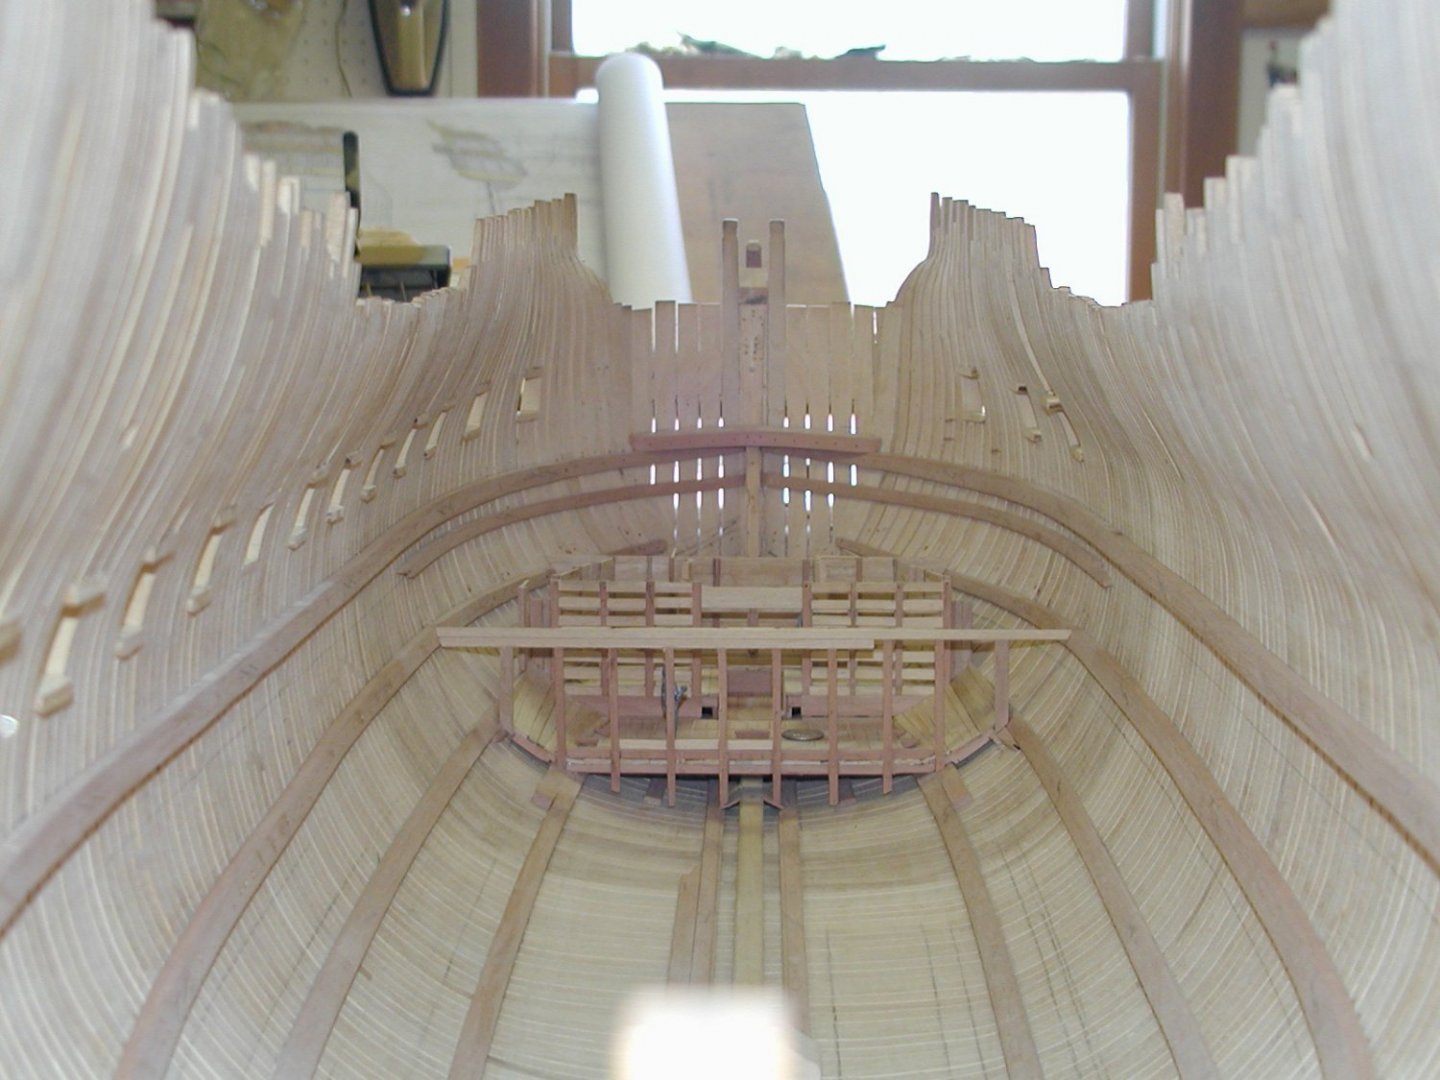
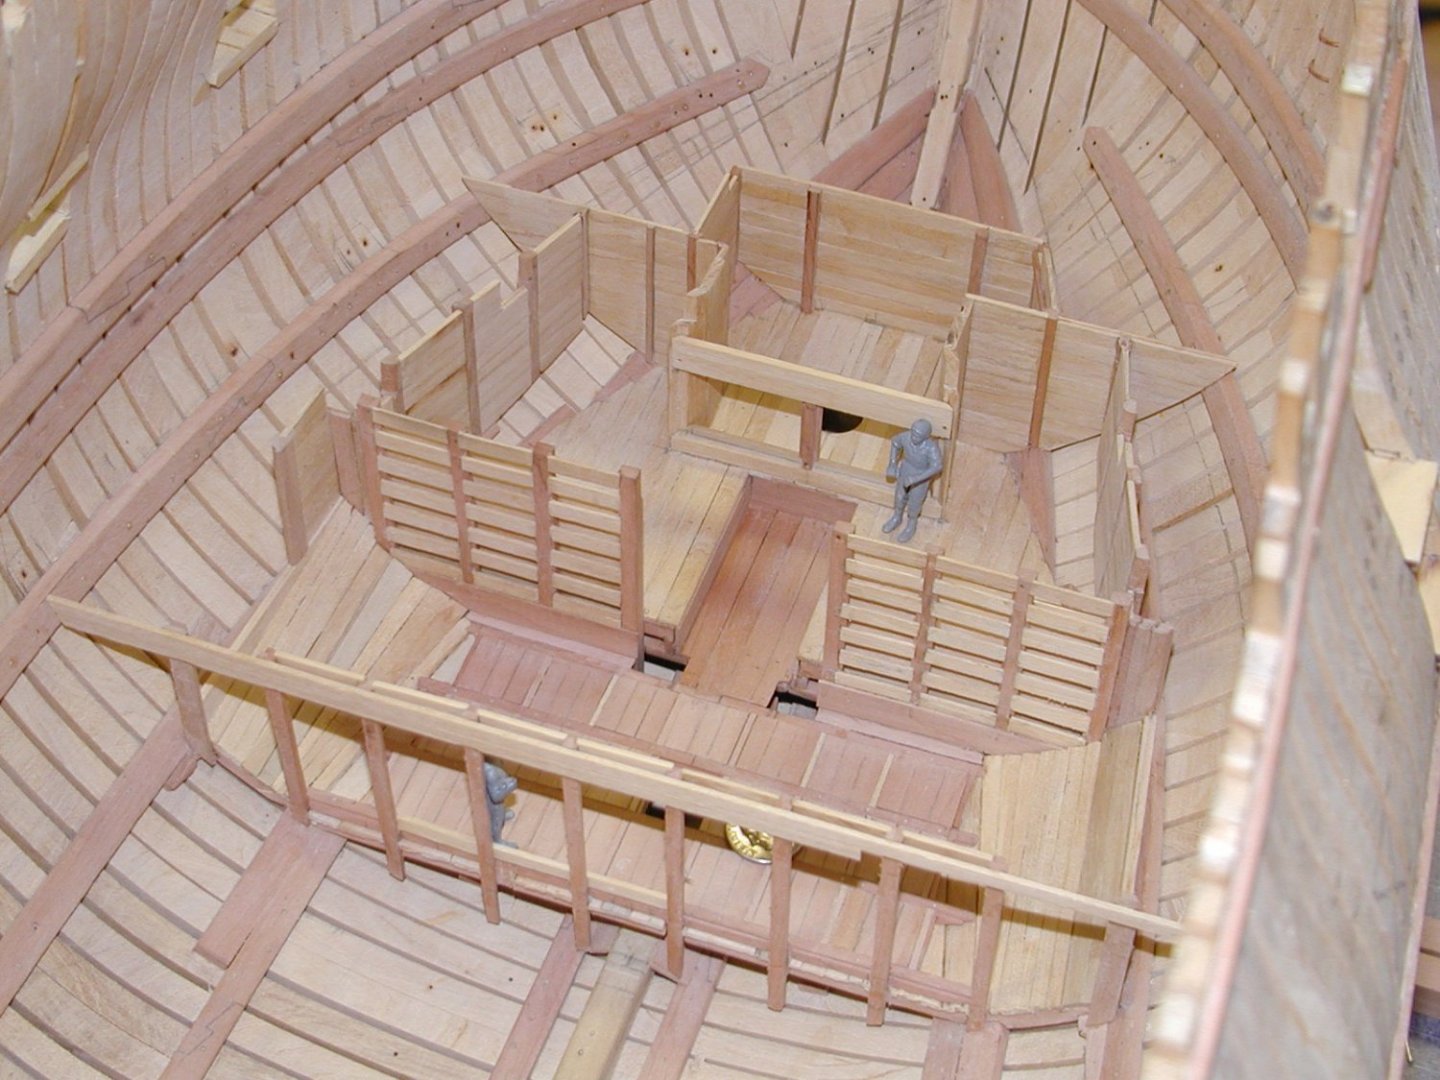
Hi Mark. Sounds like one building a model tank, build it with the guts or just build it as a hull. Lets us have a choice. I much prefere to build it with the guts. To me much more interesting even if I can't see the inside. At least I know it's there. Gary
-
NAIAD 1797 by Bitao - 1:60
garyshipwright replied to Bitao's topic in - Build logs for subjects built 1751 - 1800
Looks outstanding Bitao. Really enjoy looking in on your build and help's me to work harder on my build, to do better on her construction -
Boy do you have you work cut out for you with all those books. Only kidding and a big welcome to you and your misses. Didn't know what I was going to do about my book addiction. Once again a big welcome. Gary
-
Thank you popash42 hope that you enjoyed it. Seems am a little slow at the moment but hope I will be picking up the pace soon. Gary
-
Hi Allan. Nice plant stand's and its a good thing the misses has not seen them or I never get back to work on my ship. Keep up the good work. Gary
-
Hi Mark and thank you very much. Nice to see you are back out it to. Maybe I just may be able to get some work done on Montague in the future. Gary
-
Thanks Tony. I really enjoy working in the shop but because of all the honey do's hard to get to spend much time in there. With winter coming I just may get to spend more time in there. Thanks Johann. The table top goes down to 2 foot 6 inches from the floor so at the moment gives me about 4 feet to work on her above her upper deck. Figure if I need a lower table then that, I just get some shorter electrical actuators but thats for the future. Gary
-
Hi Johann. Out standing job sir and the scissor lift looks good. I built mine a few years ago and the only item that I purchase to build it was the electrical actuators and power supply which were less then 75 dollars I believe. You can find good ones on ebay and amazon. I used the wood that I had in the shop and I believe that was plywood. Has come in real handy and am always moving it up or down to just to get the right height. I wanted to buy one but like JD said, they are very expensive. Since then I have put wheel's on it that fold up when am not moving it around which came from Rockler. Gary

-
Good job Alan. I just may have to build my mast and tops along the lines that you have set. Thanks for sharing. Gary
-
Nice job Allan. Gary
-
Nice work good sir. Will be following your build with great interest. Gary