


flying_dutchman2
-
Posts
1,718 -
Joined
-
Last visited
Content Type
Profiles
Forums
Gallery
Events
Posts posted by flying_dutchman2
-
-
Thanks for all the likes and I am assuming that Sjors is still around.
De stille genieter (The quiet enjoyer). Bad English, but an exact translation.
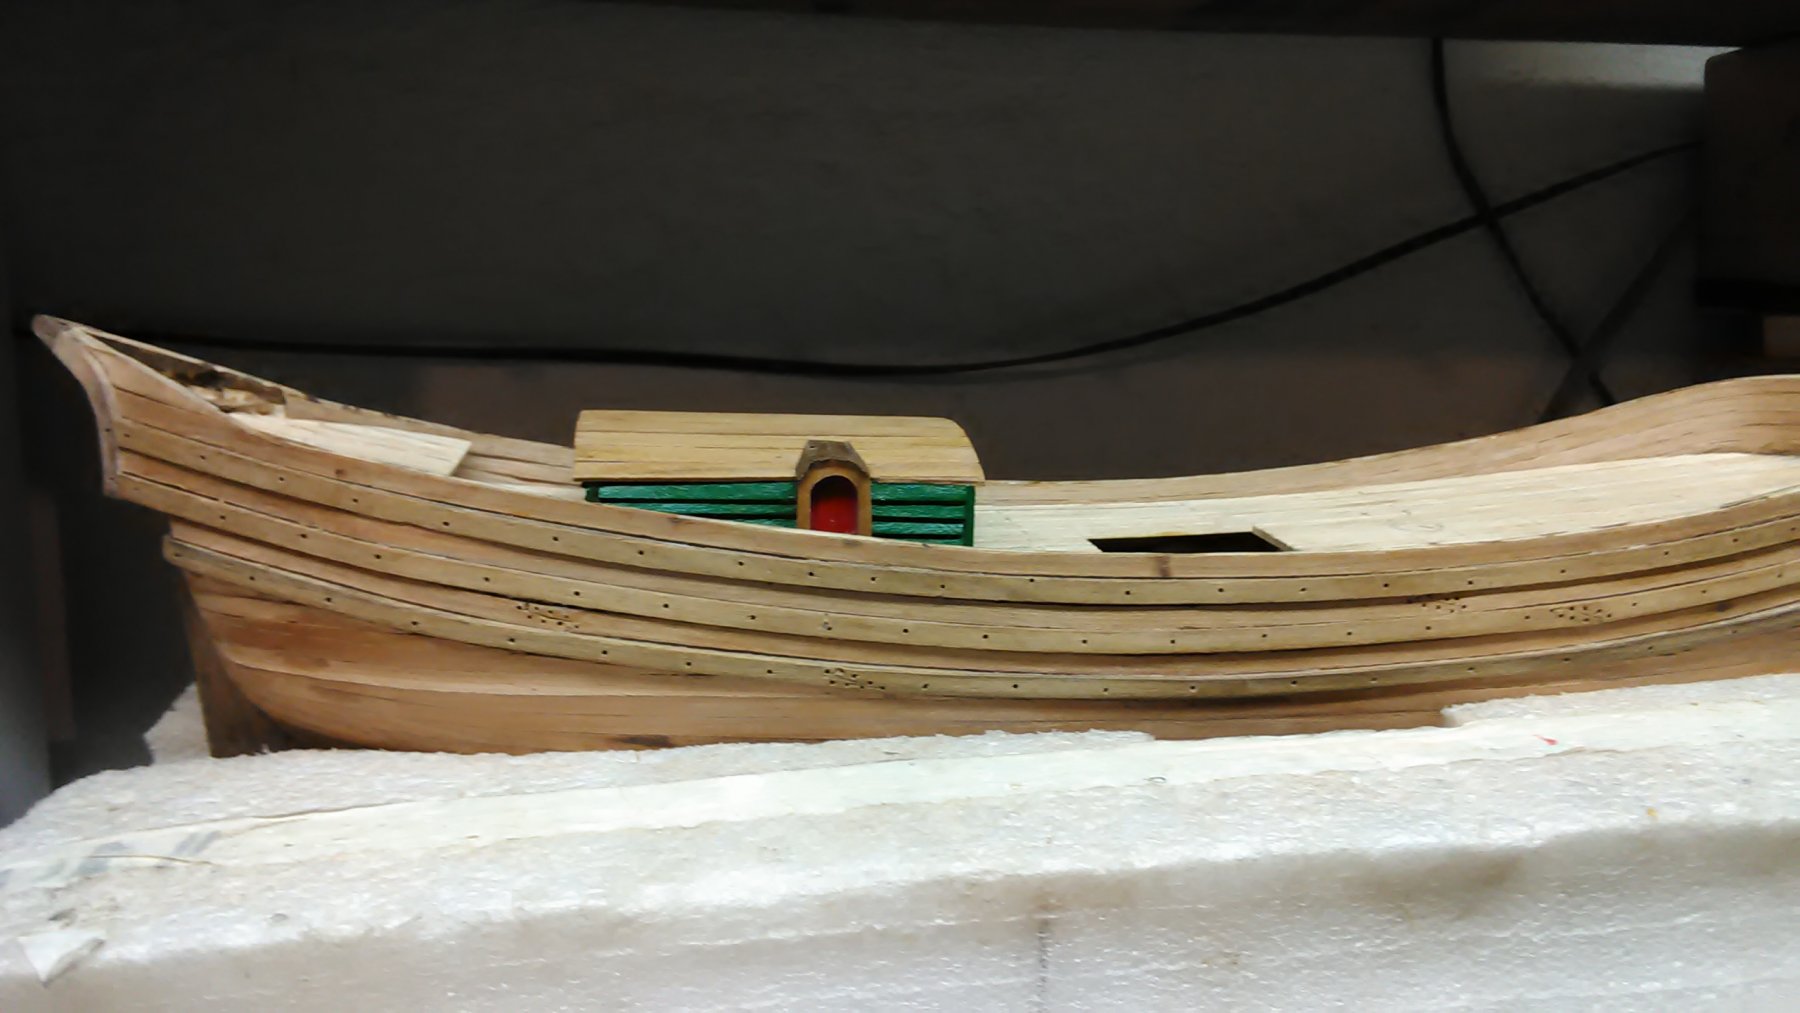
Cog & Jan: I will do what you both suggested. I would like to attach them furled and when I need them unfurl only two (opposite ends). Also stretch the outer bottom point.
Richard : I'll use dye instead.
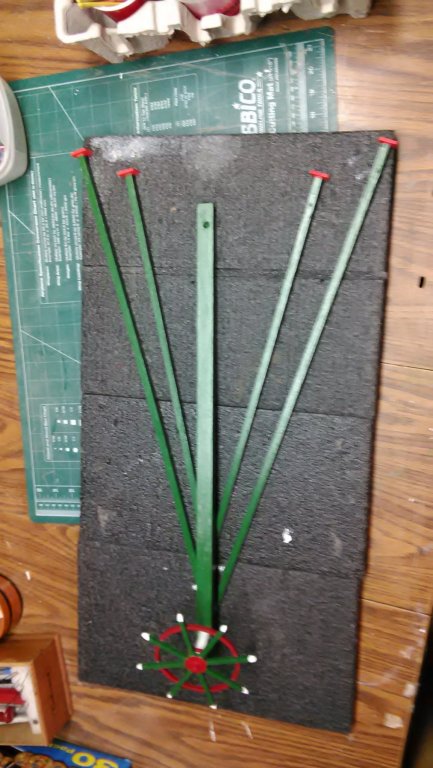
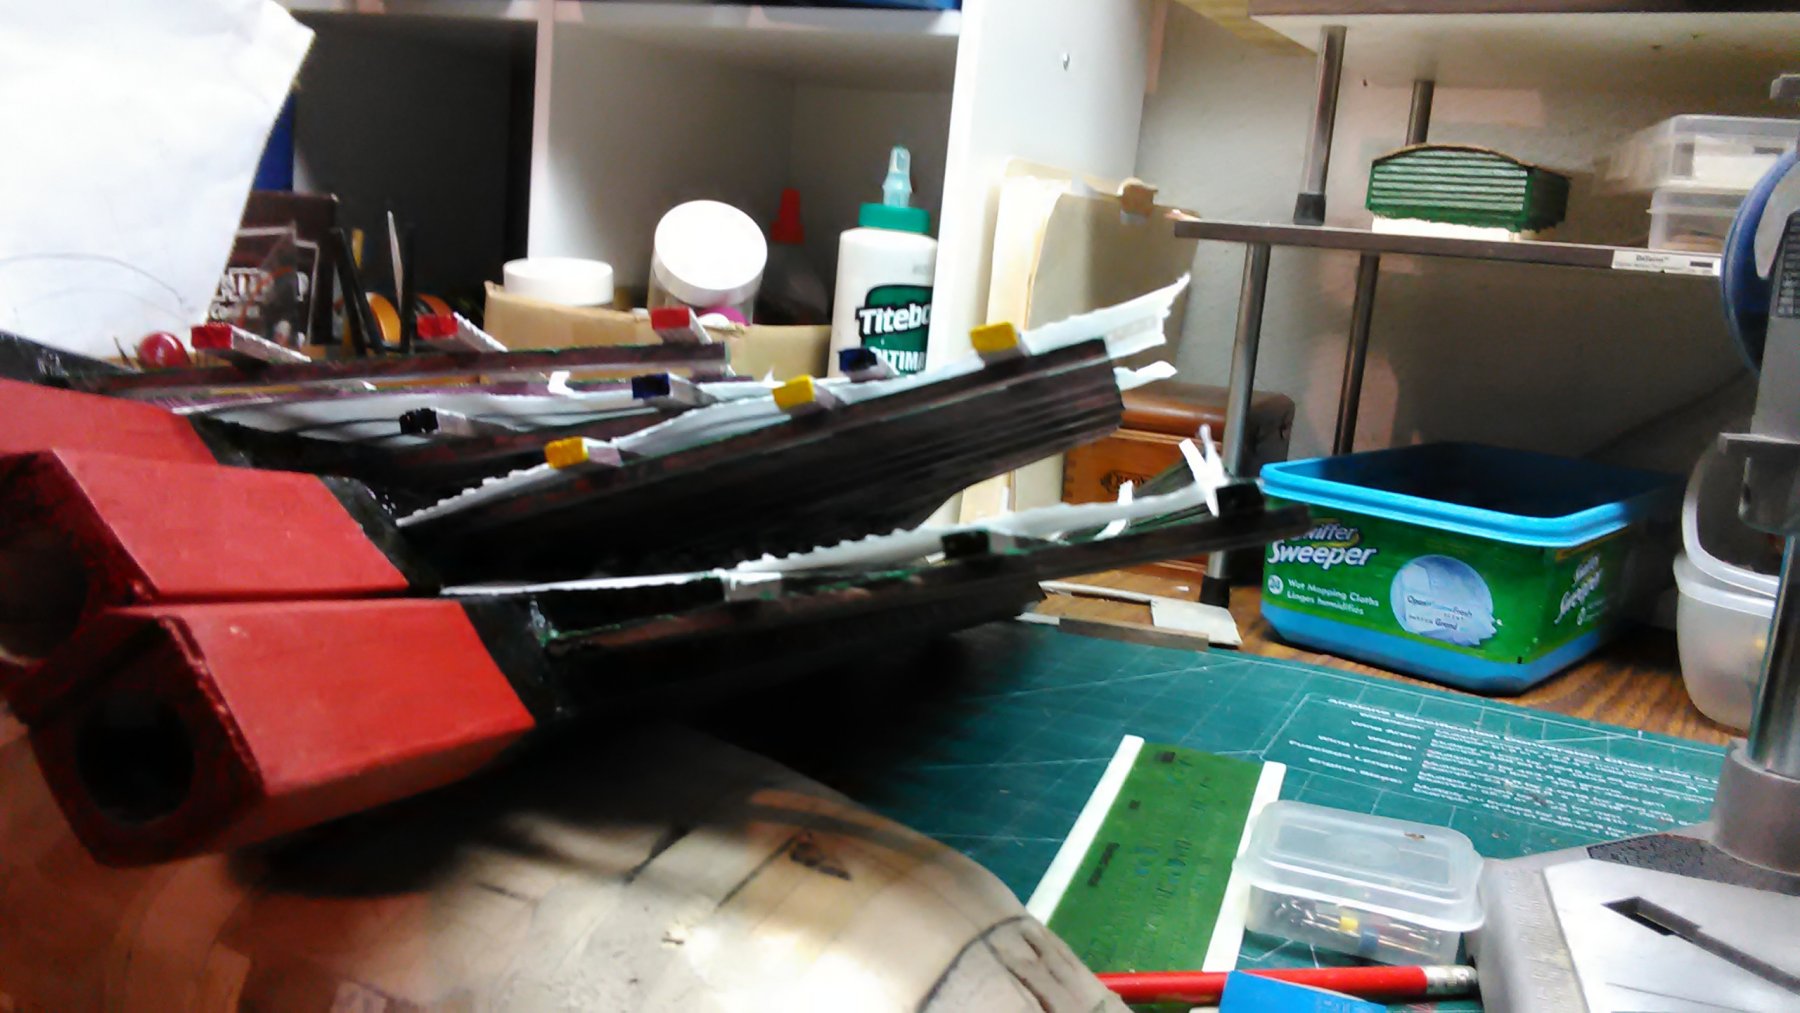
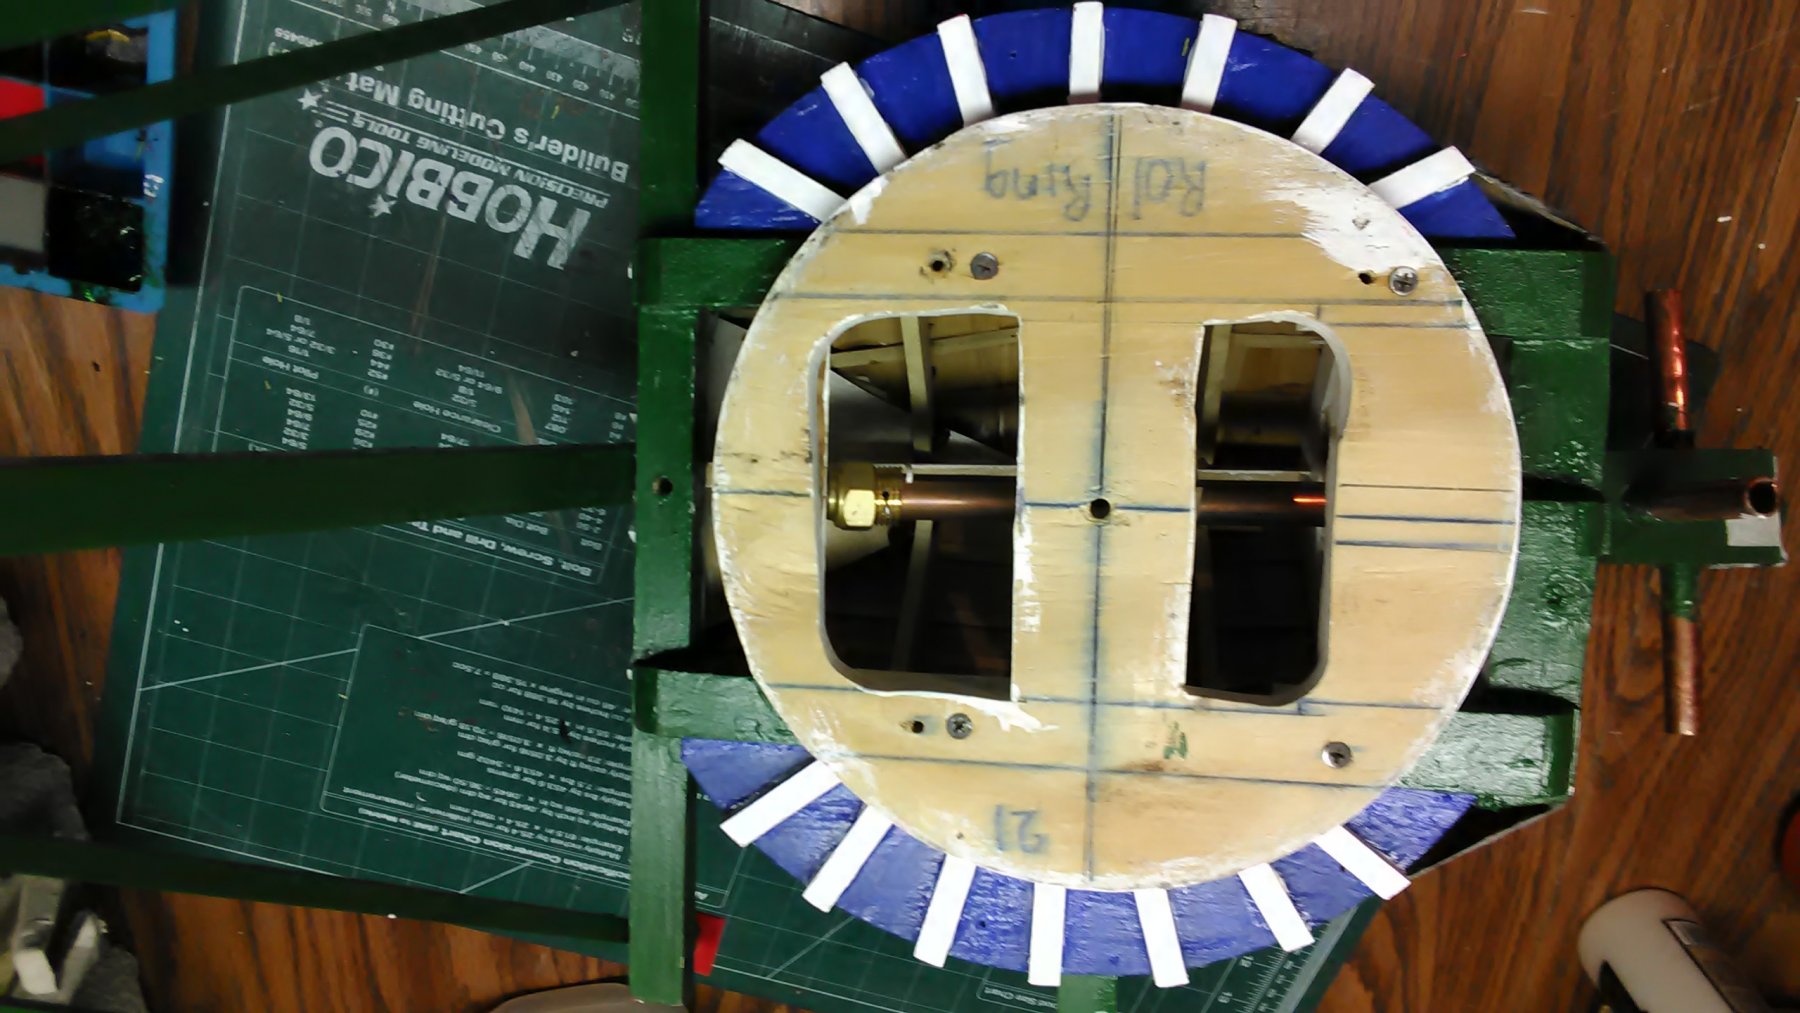
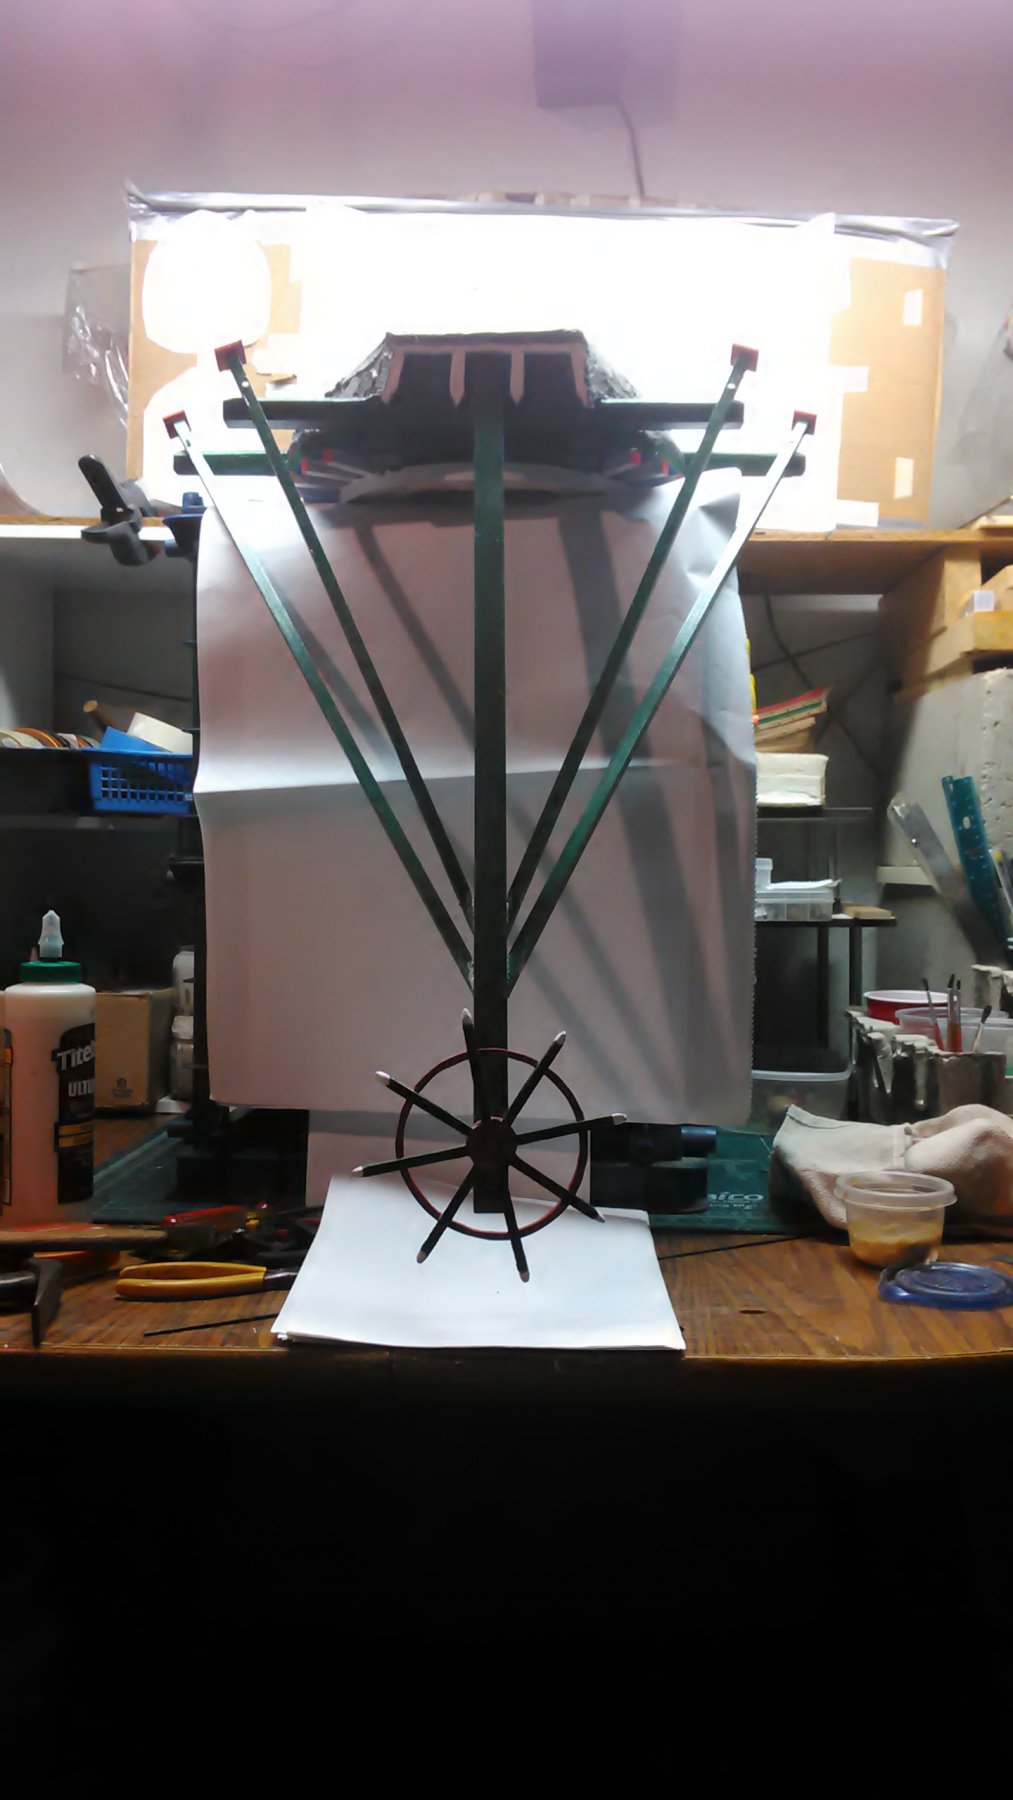
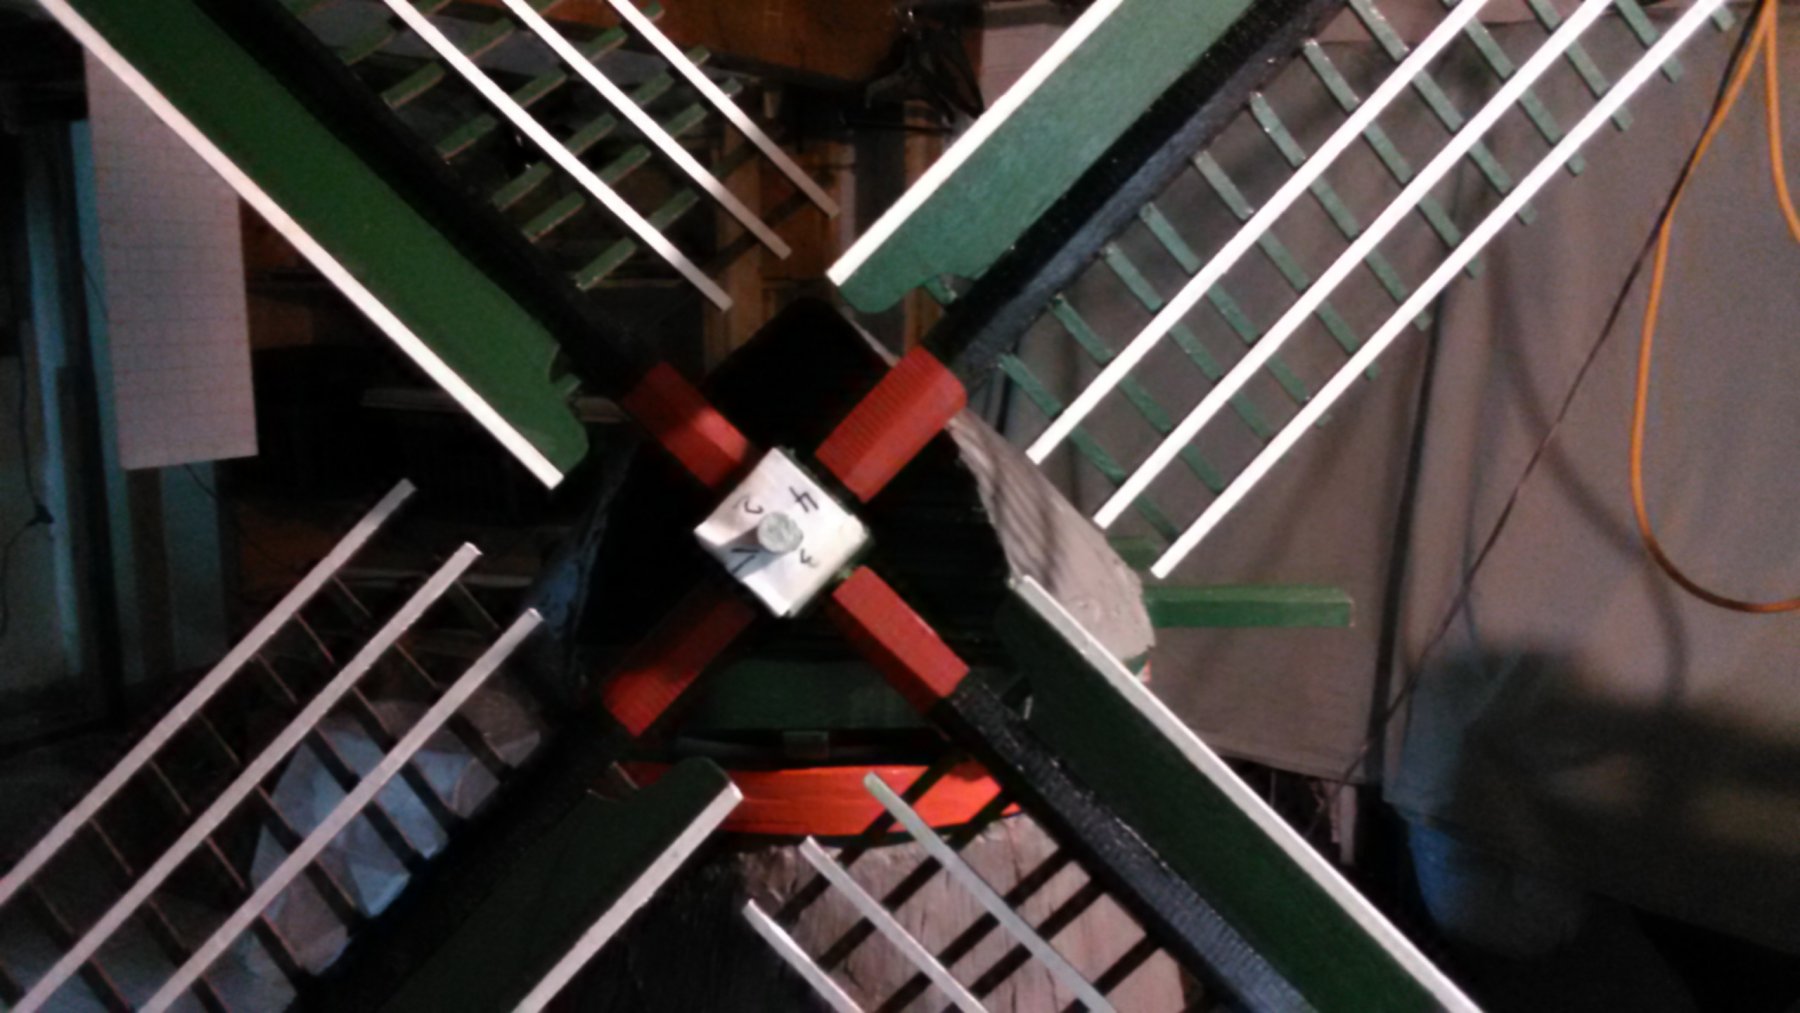
Attempted to do the balancing with all the vanes attached to the tubes.
To keep the same tube with the same vane I had to create a color coded method.
So first painted the bottom of the vane slats any of the these colors. Yellow, green, blue or red.
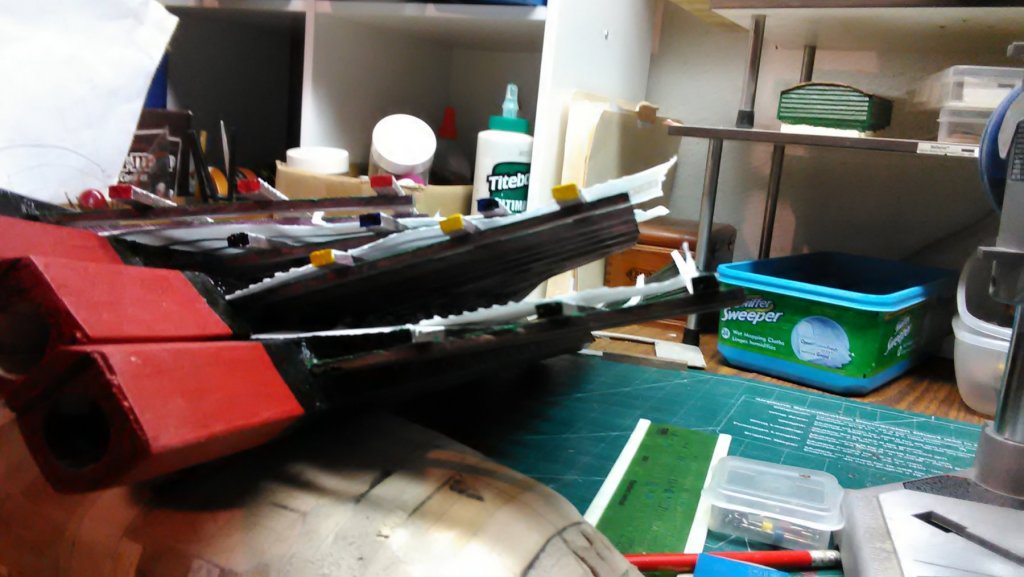
I color coded the copper tubing as well.

When I inserted the copper tubing in the roede, the wood cracked.
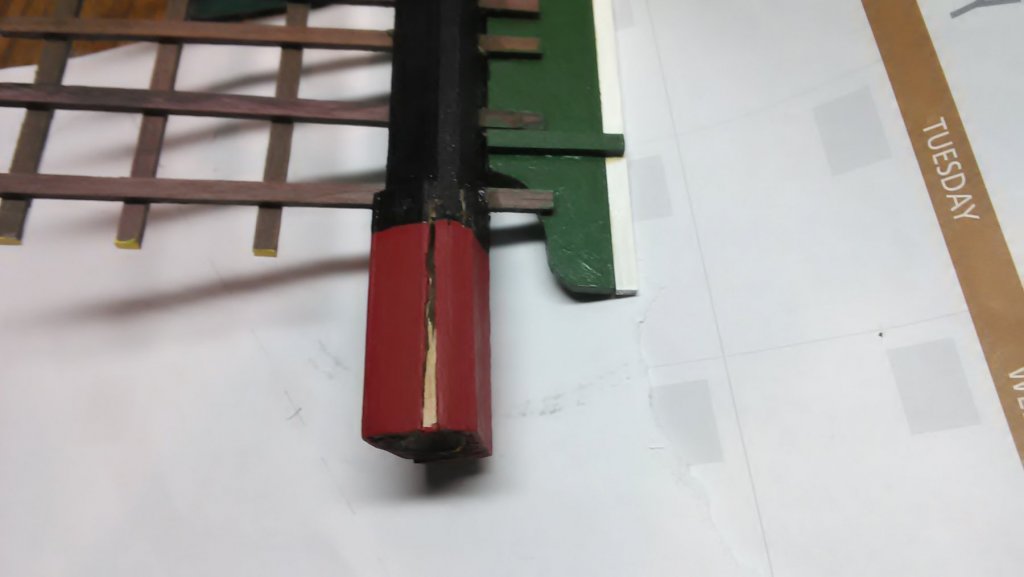
I initially drilled a slightly crooked hole in the roede and don't really want to redo the vane. So, I strengthen the area by wrapping it with rope and than coated it heavily with tight bond glue. Should work.
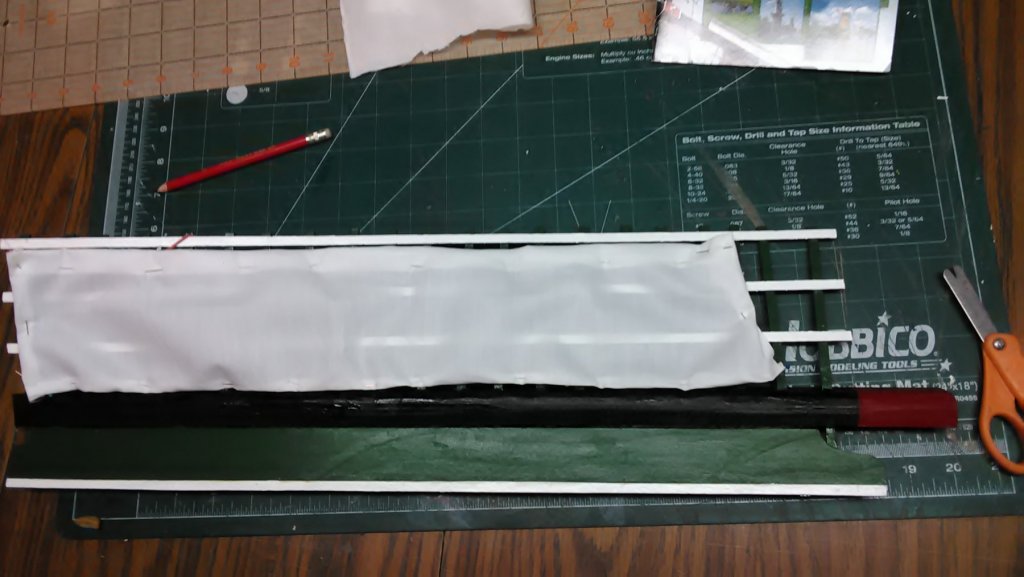
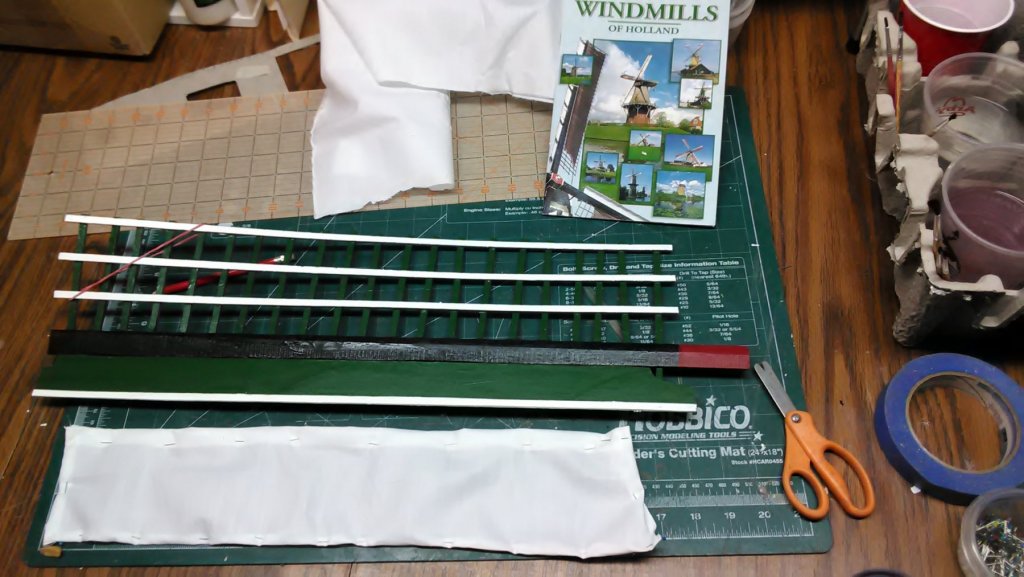
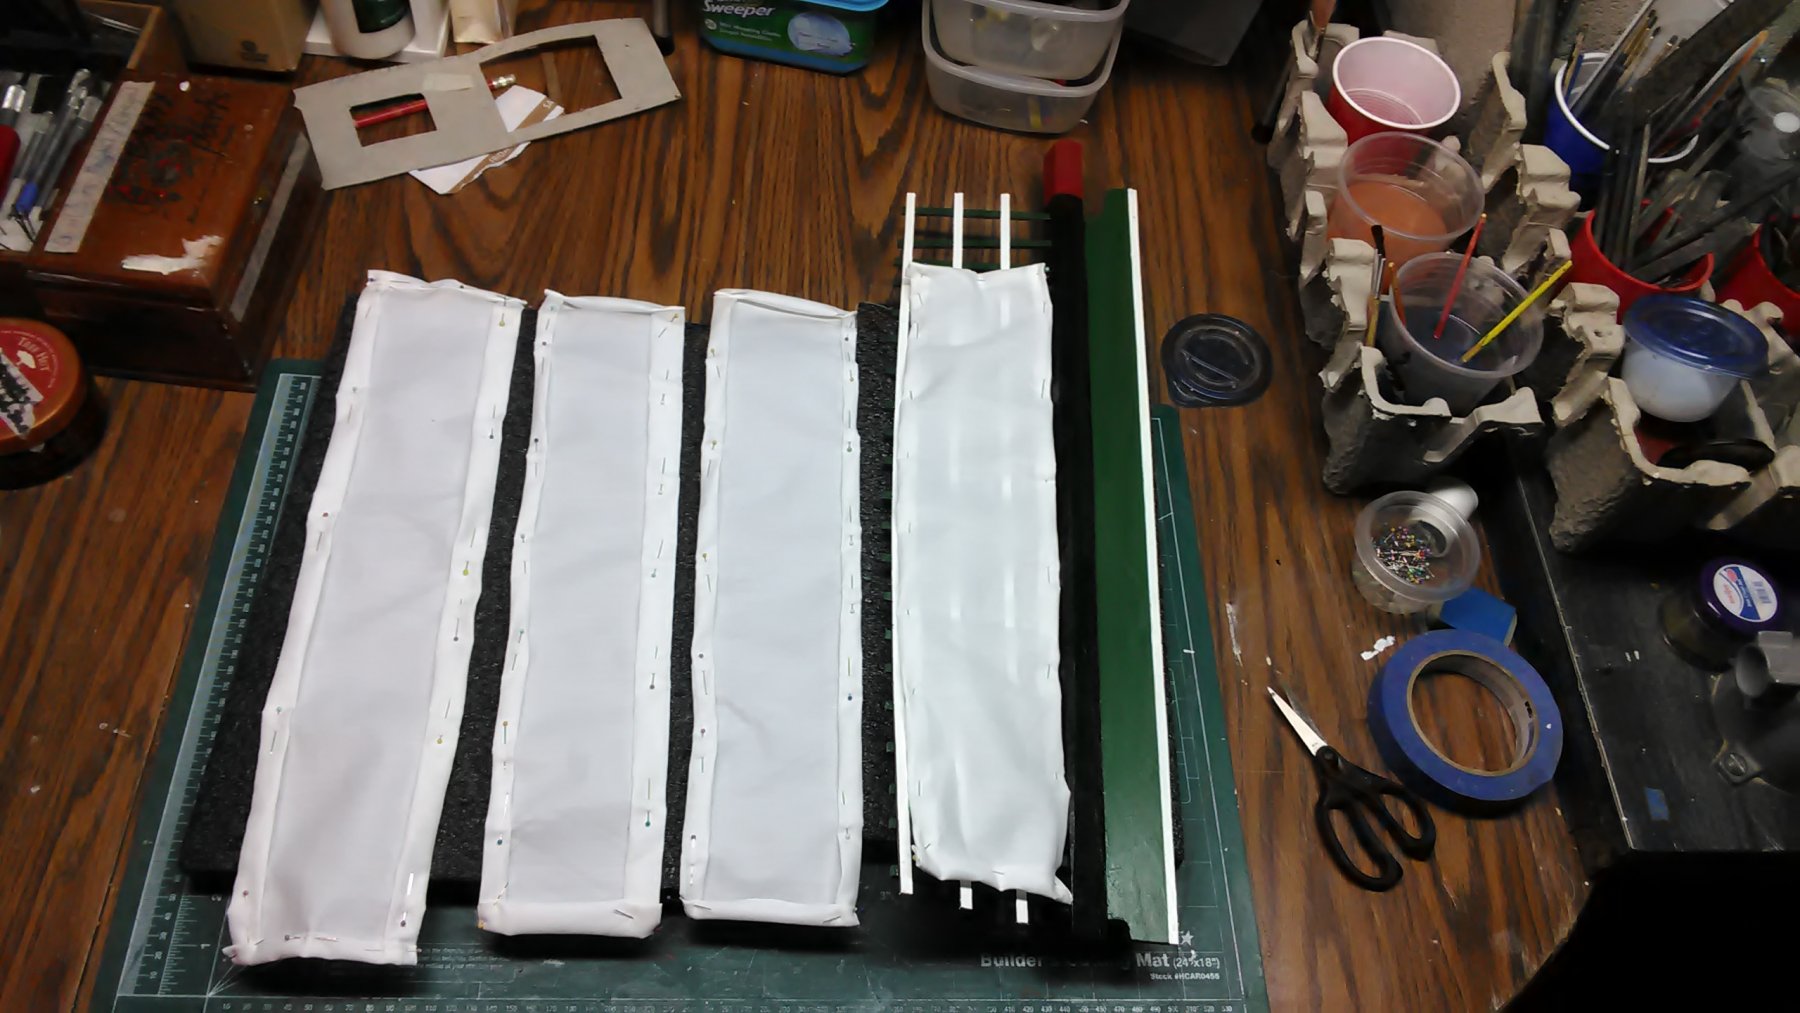
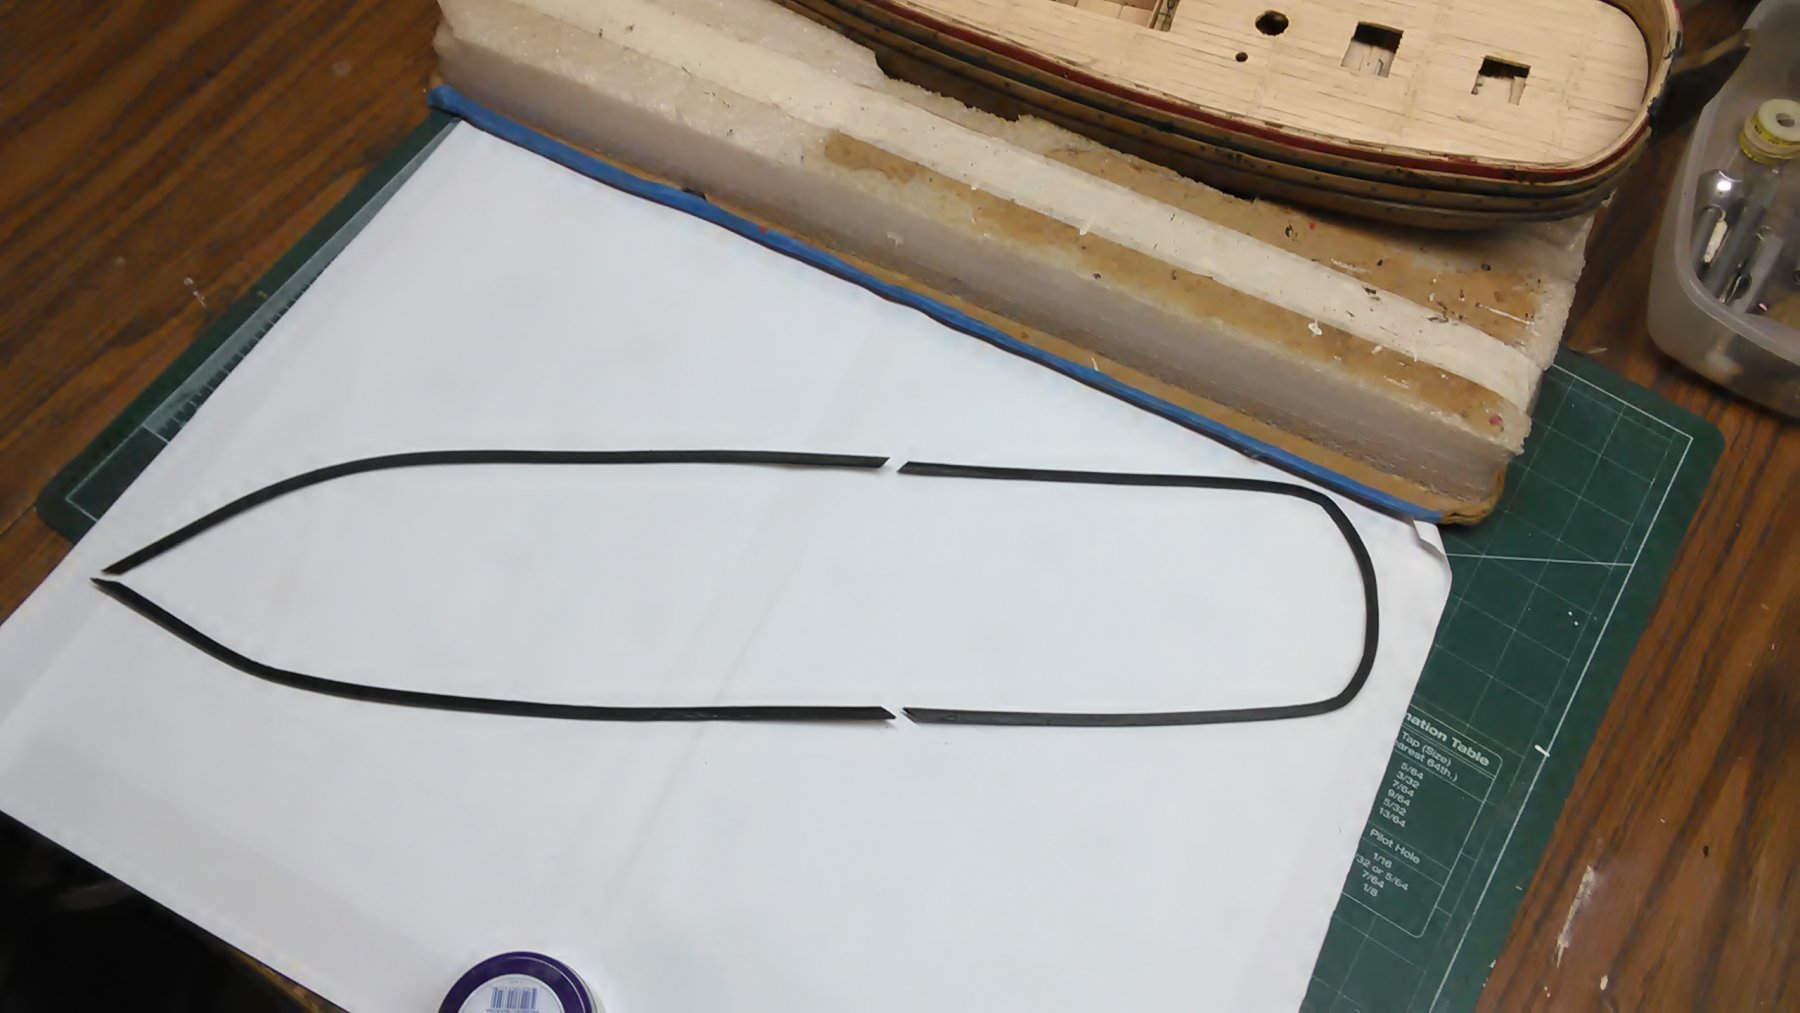
Cut the sails and double folded the edges. Placed pins to keep it folded.

Almost completed mill.
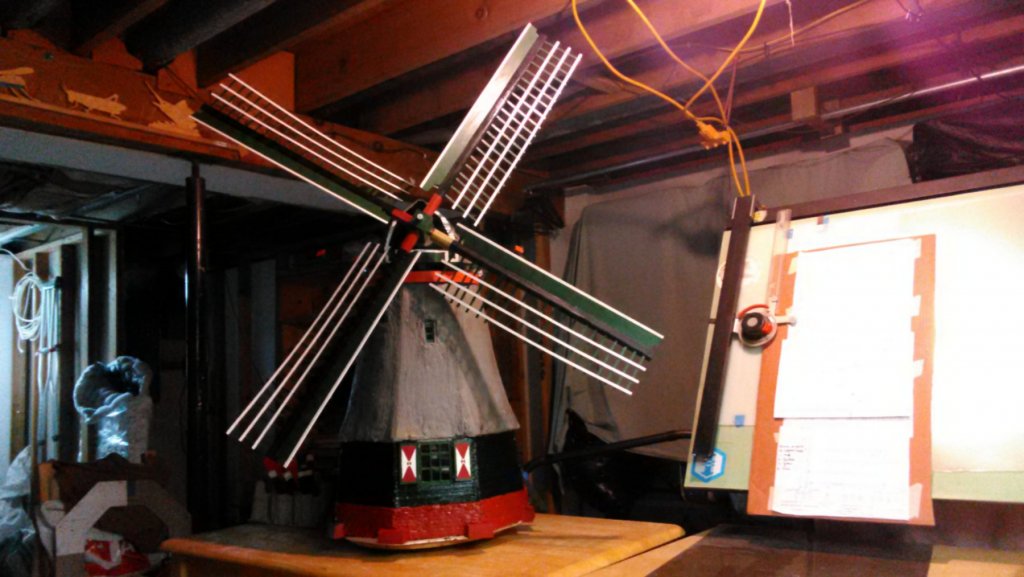
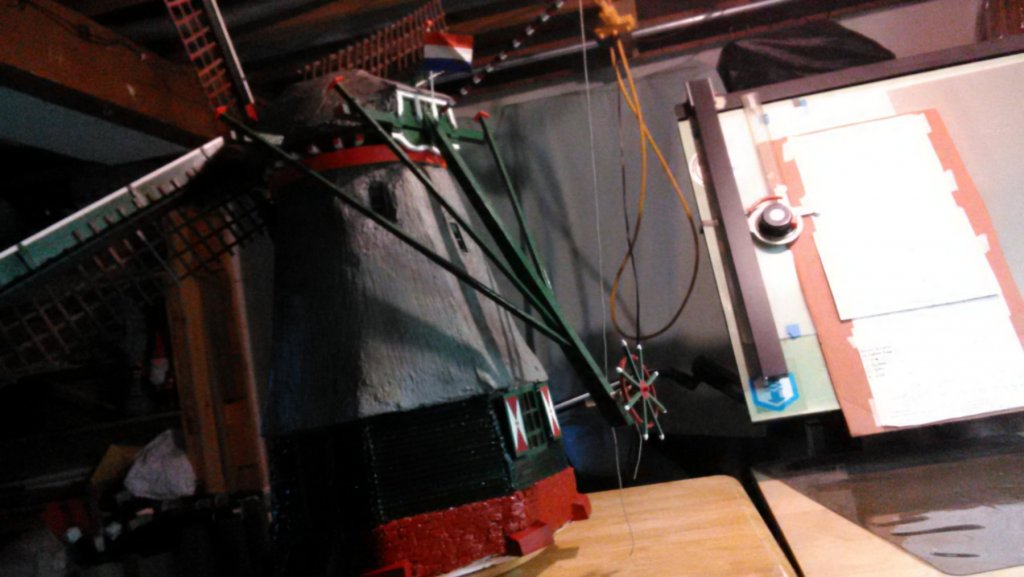
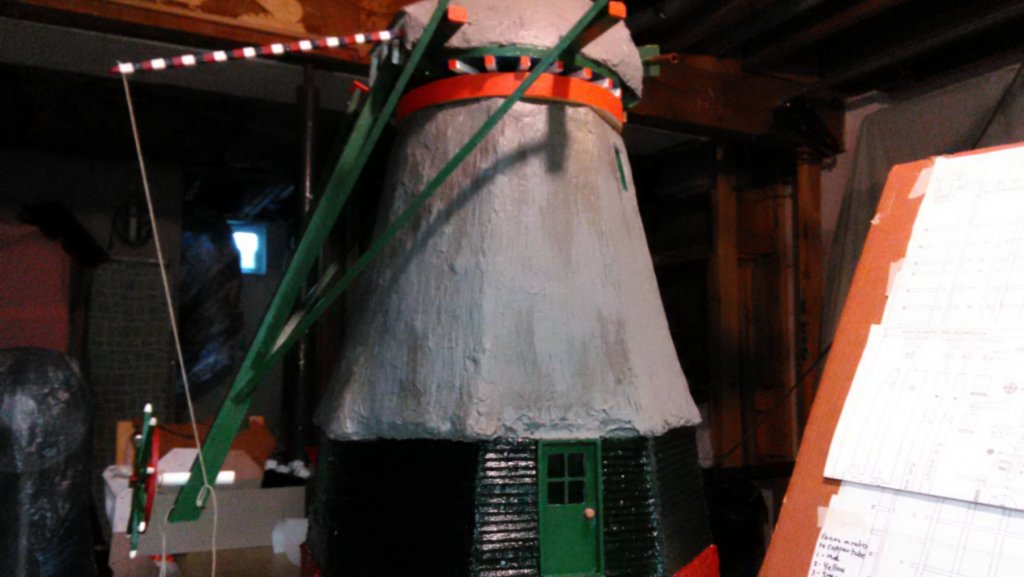
I did add a Dutch flag above the kruibalk.

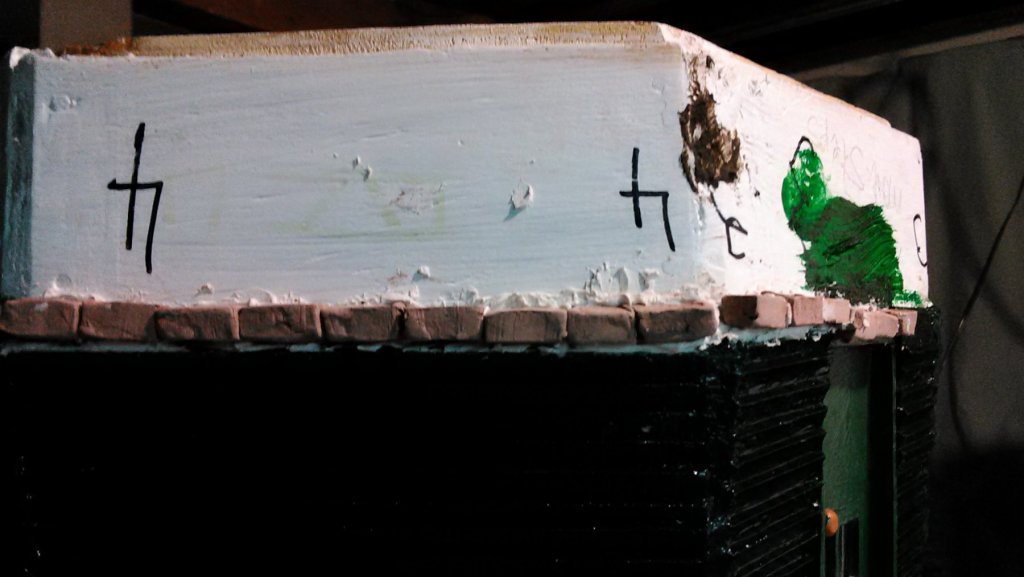
Above is something called a "beard". This one is the voorbaard (front beard) and it has writing on it. I have plastic templates with letters. The kind you put a pencil in and follow the contour of the letter. Won't work on paint. Still thinking about a method of transferring the letters to my beard.
Marcus
- druxey, thibaultron, Canute and 2 others
-
 5
5
-
Cut 4 pieces of tightly woven cotton for the sails. The sails will be hemmed by hand and tied to the vanes. I will also dye them with tea so they have a somewhat darker color.

Few more things and then she is finished.
Marcus
- thibaultron, Elijah, cog and 5 others
-
8
-
-
Glued the main deck into place and installed the top railing after first painting it Mars black.


Deck items are few, but I may fill it up with cargo and add some figures.
The most difficult part is to install the mizzen mast. It is just glued on a flat piece of wood. Right below is the tiller and right below of that is the deck
Strange design. It will be a challenge.
Marcus
-
Installed the various ropes.
The vangstok which is painted in the colors of red, white and blue their is a rope at the end.
At the downwards position means that the vanes are moving.
In the up position means that the mill stopt turning.

Adding a flag mast with a Dutch flag. The flag is a leftover from the Utrecht. Going to see how it holds up to the outside.
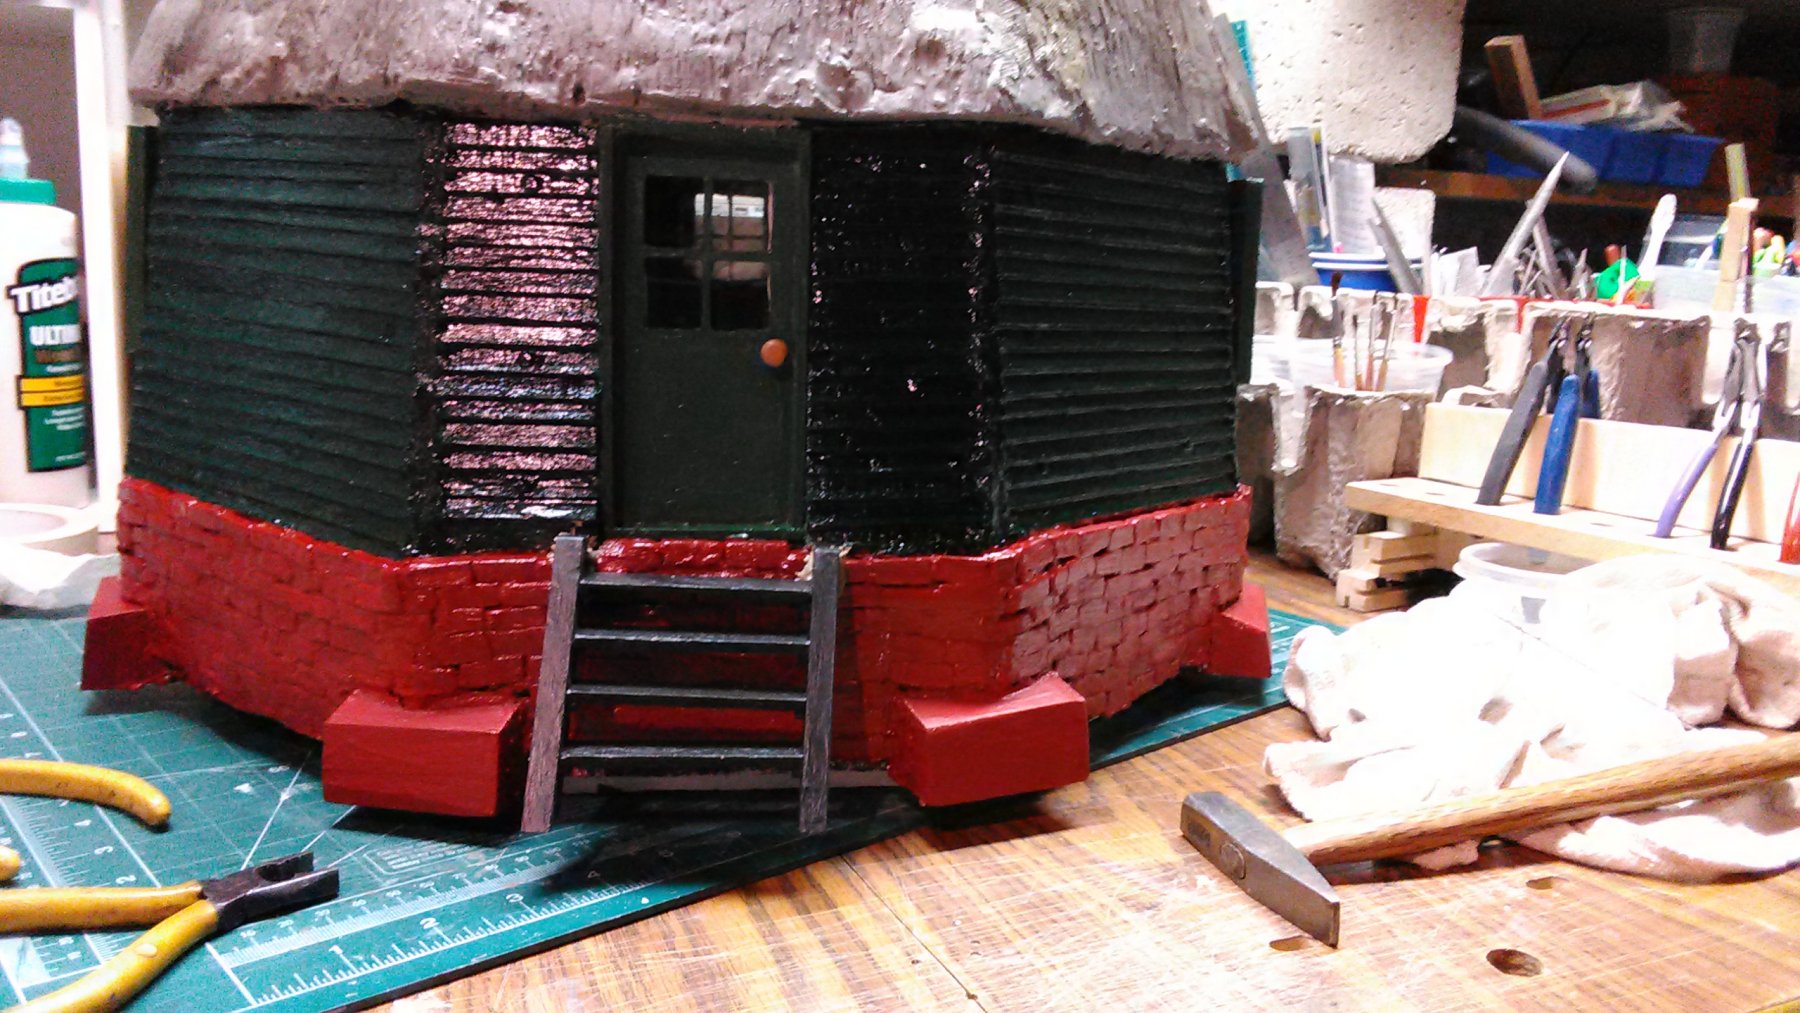
Working on attaching the window shutters to the window frames and addind the steps at the bottom of the door frame.
Marcus
- thibaultron, Elijah, mtaylor and 2 others
-
5
-
To the King of Itty bitty scale:
Impressive, a fine job of putting it all together and the curves on that ship are cool.
Marcus
-
On a different note, anybody hear from Piet lately? Did a hurricane pass through his town?
Marcus
- Jack12477, thibaultron, Canute and 2 others
-
5
-
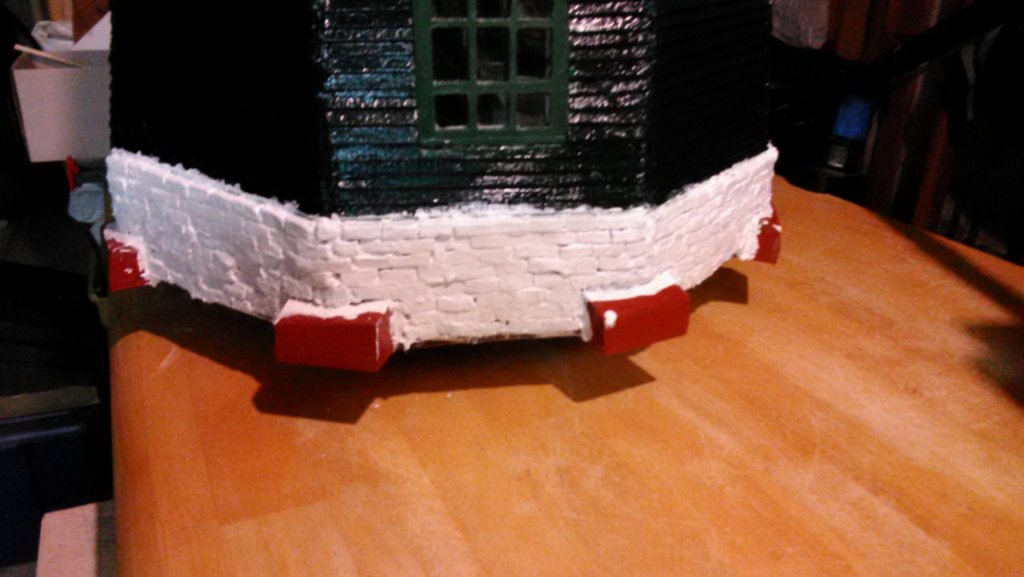
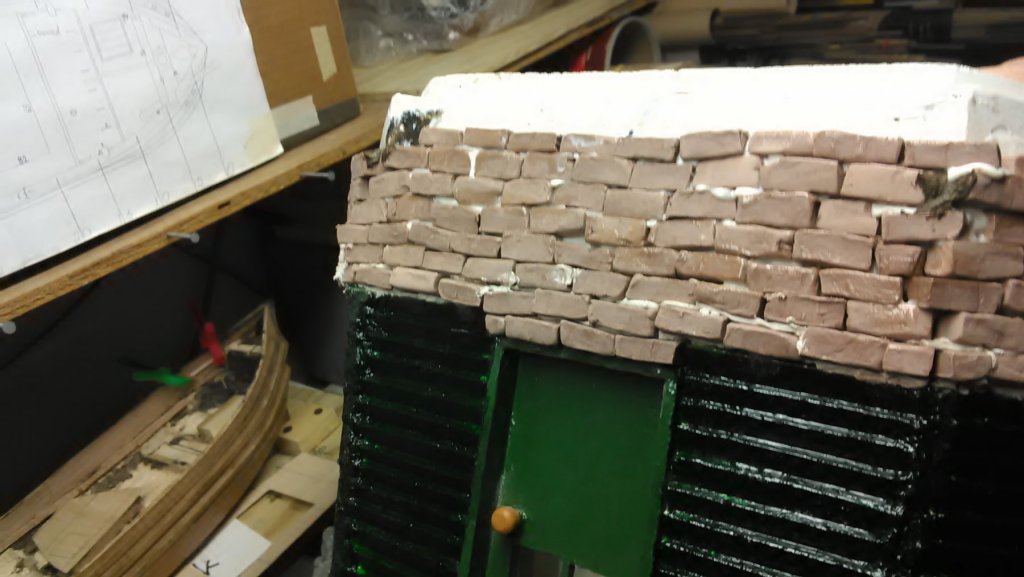
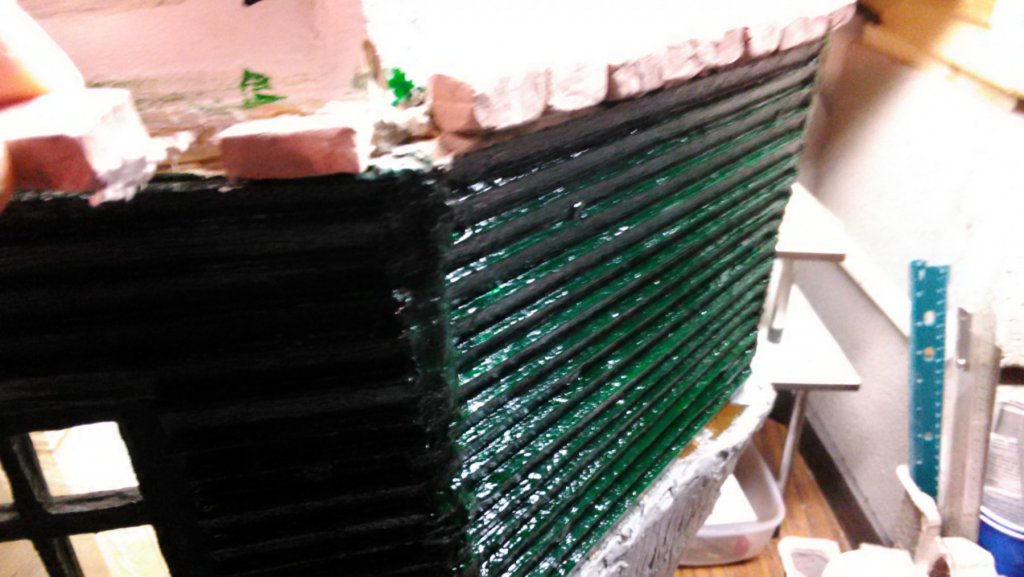
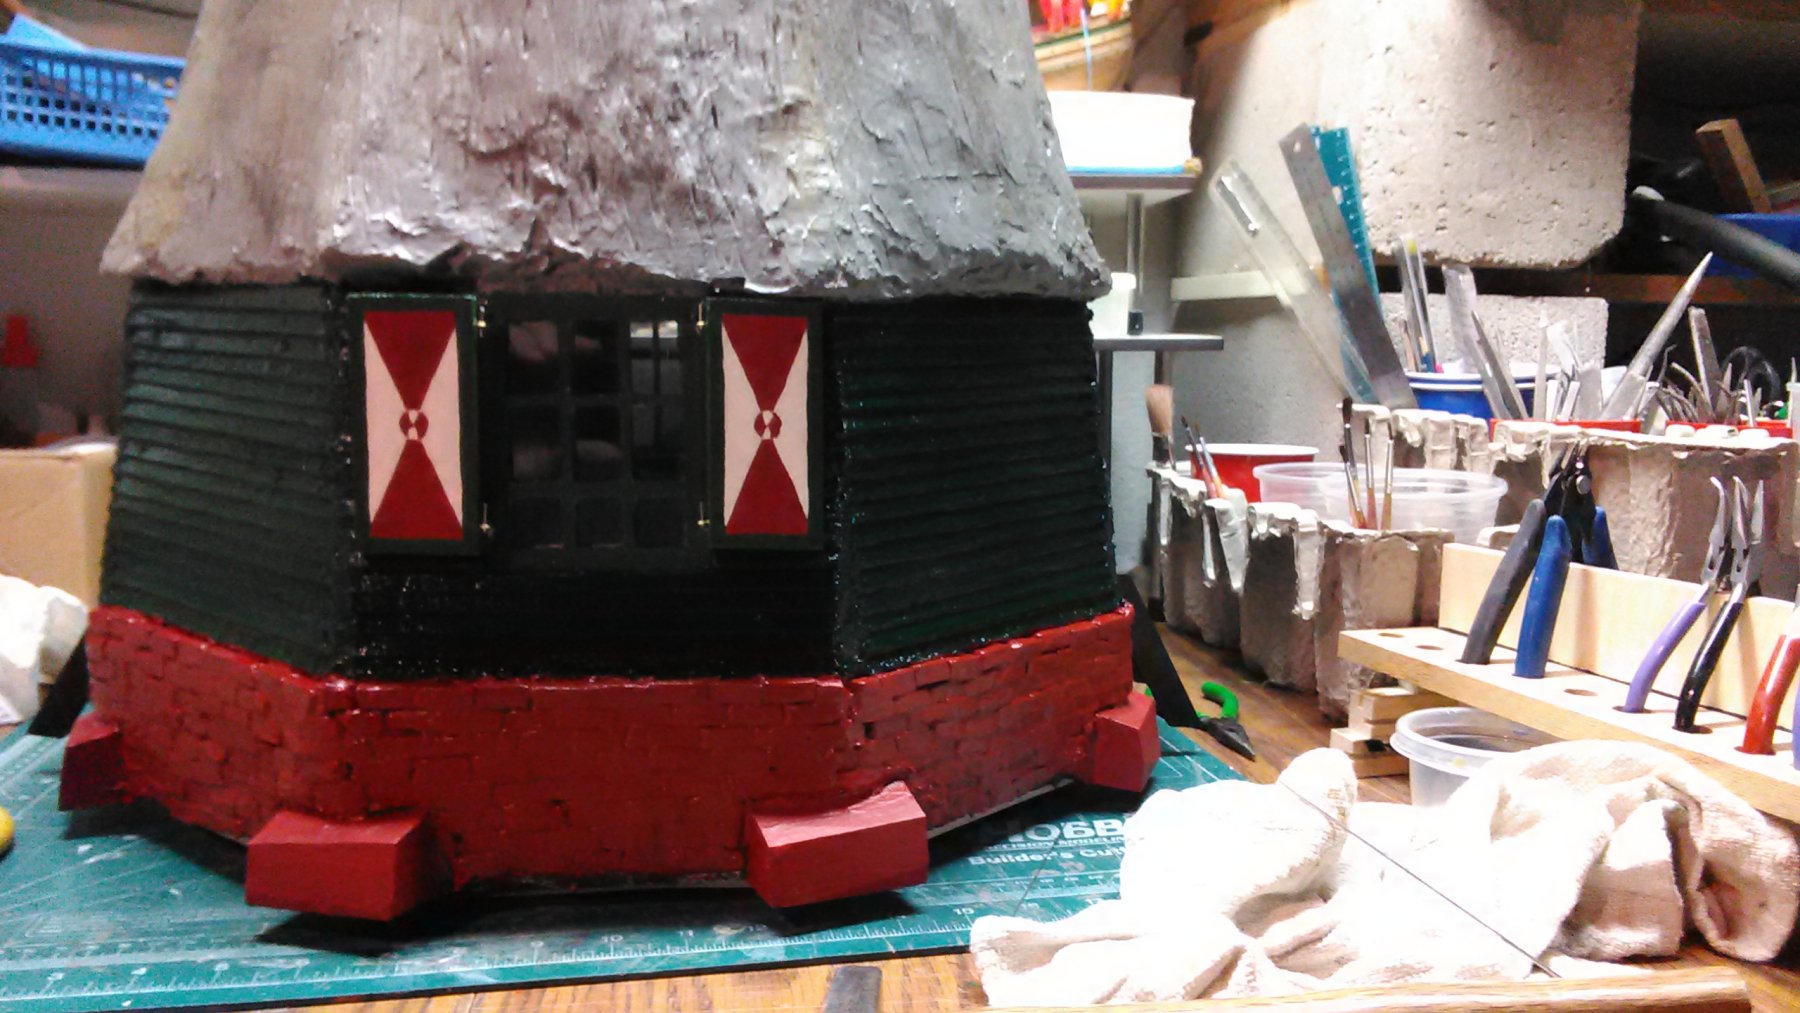
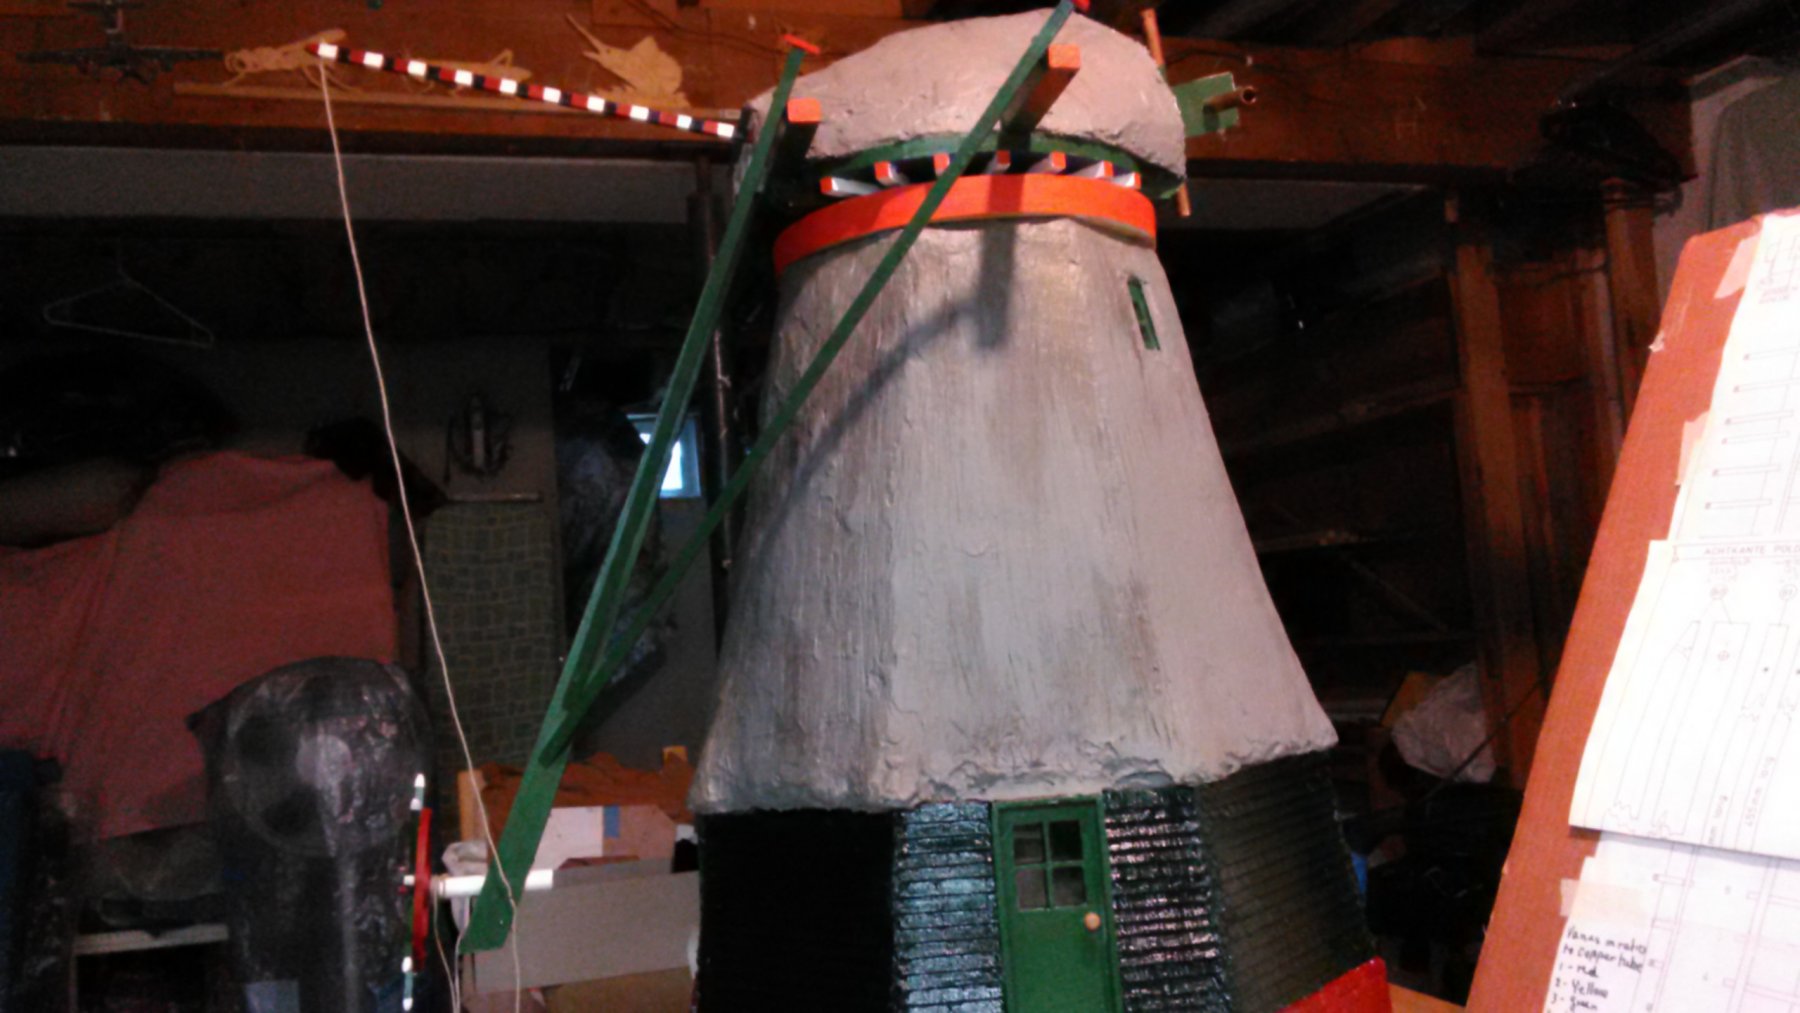
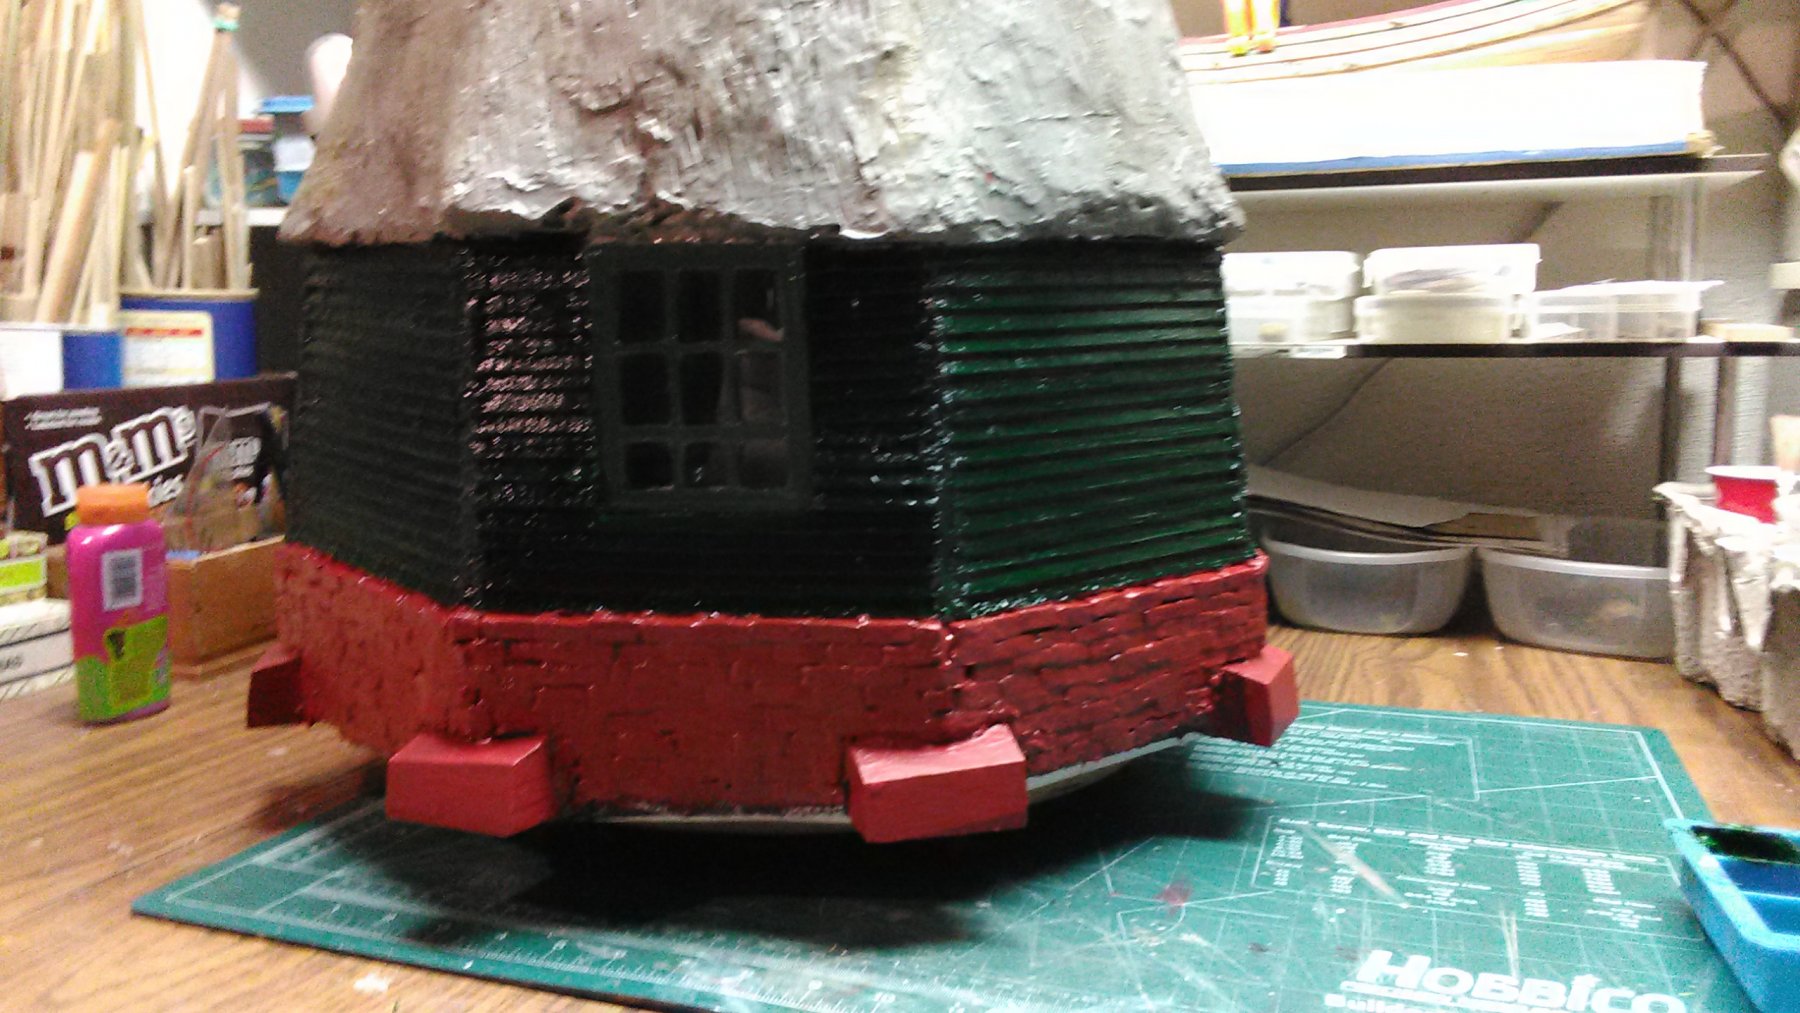
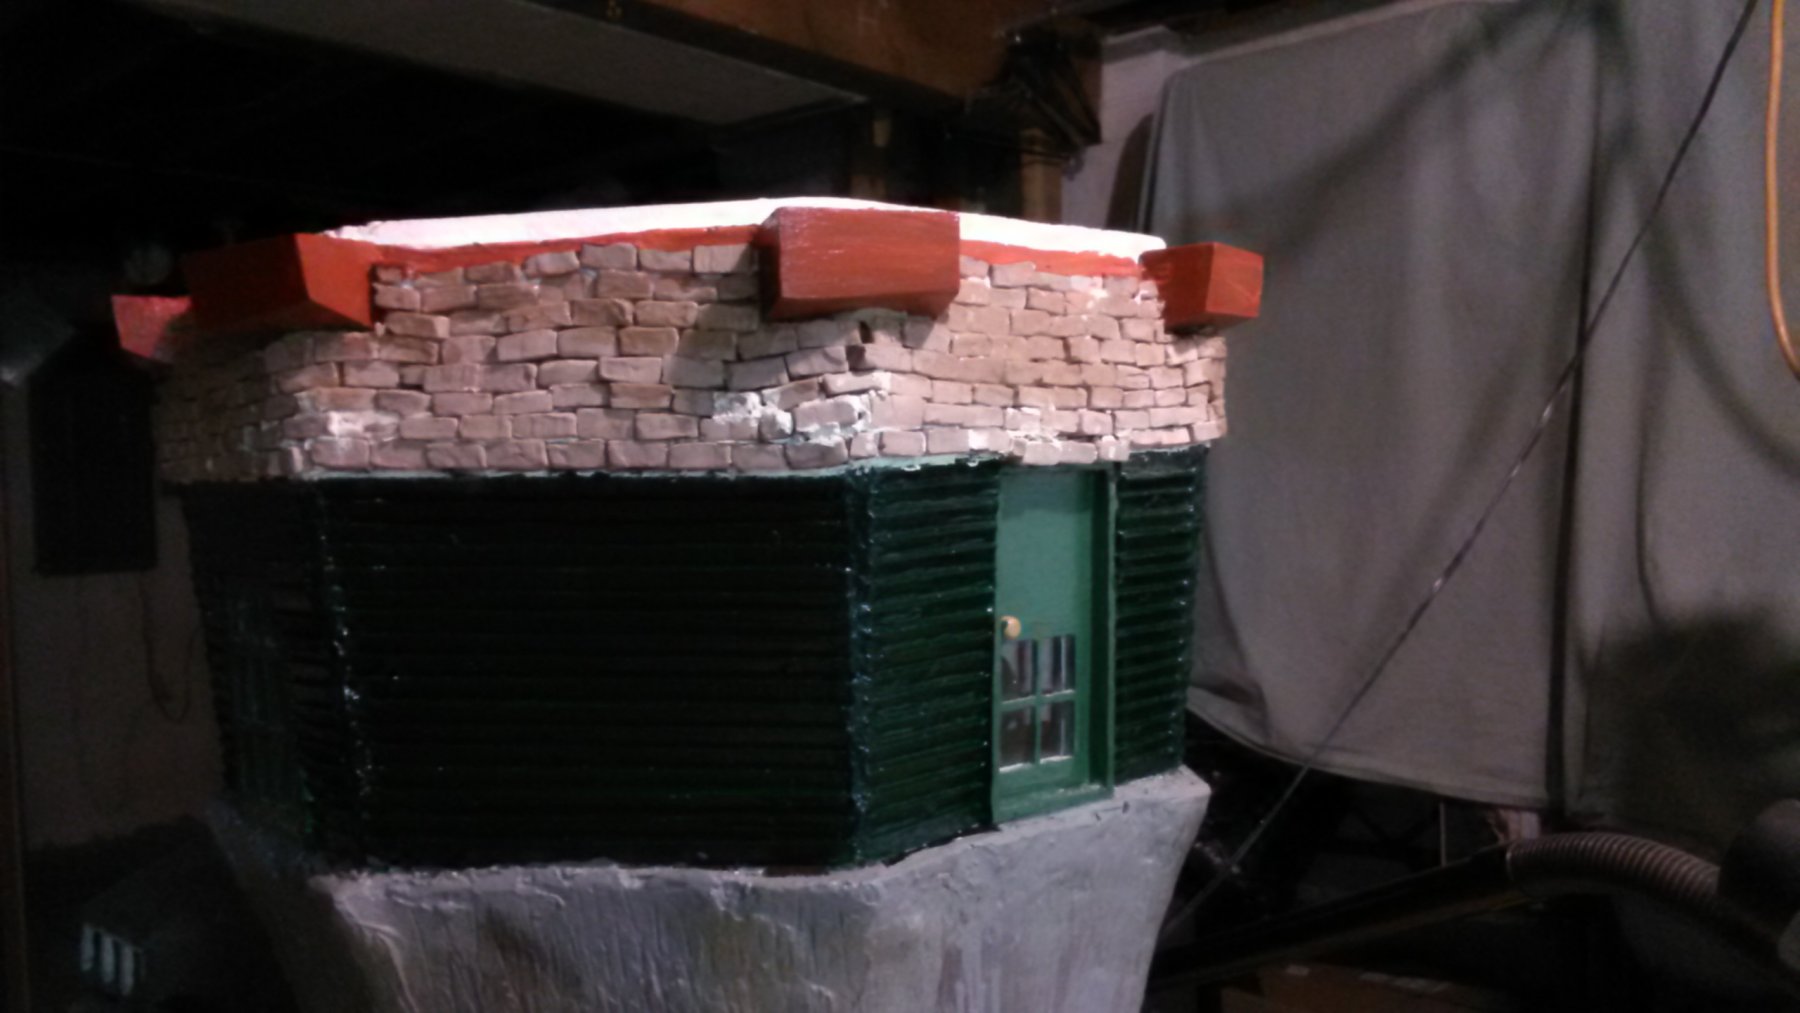
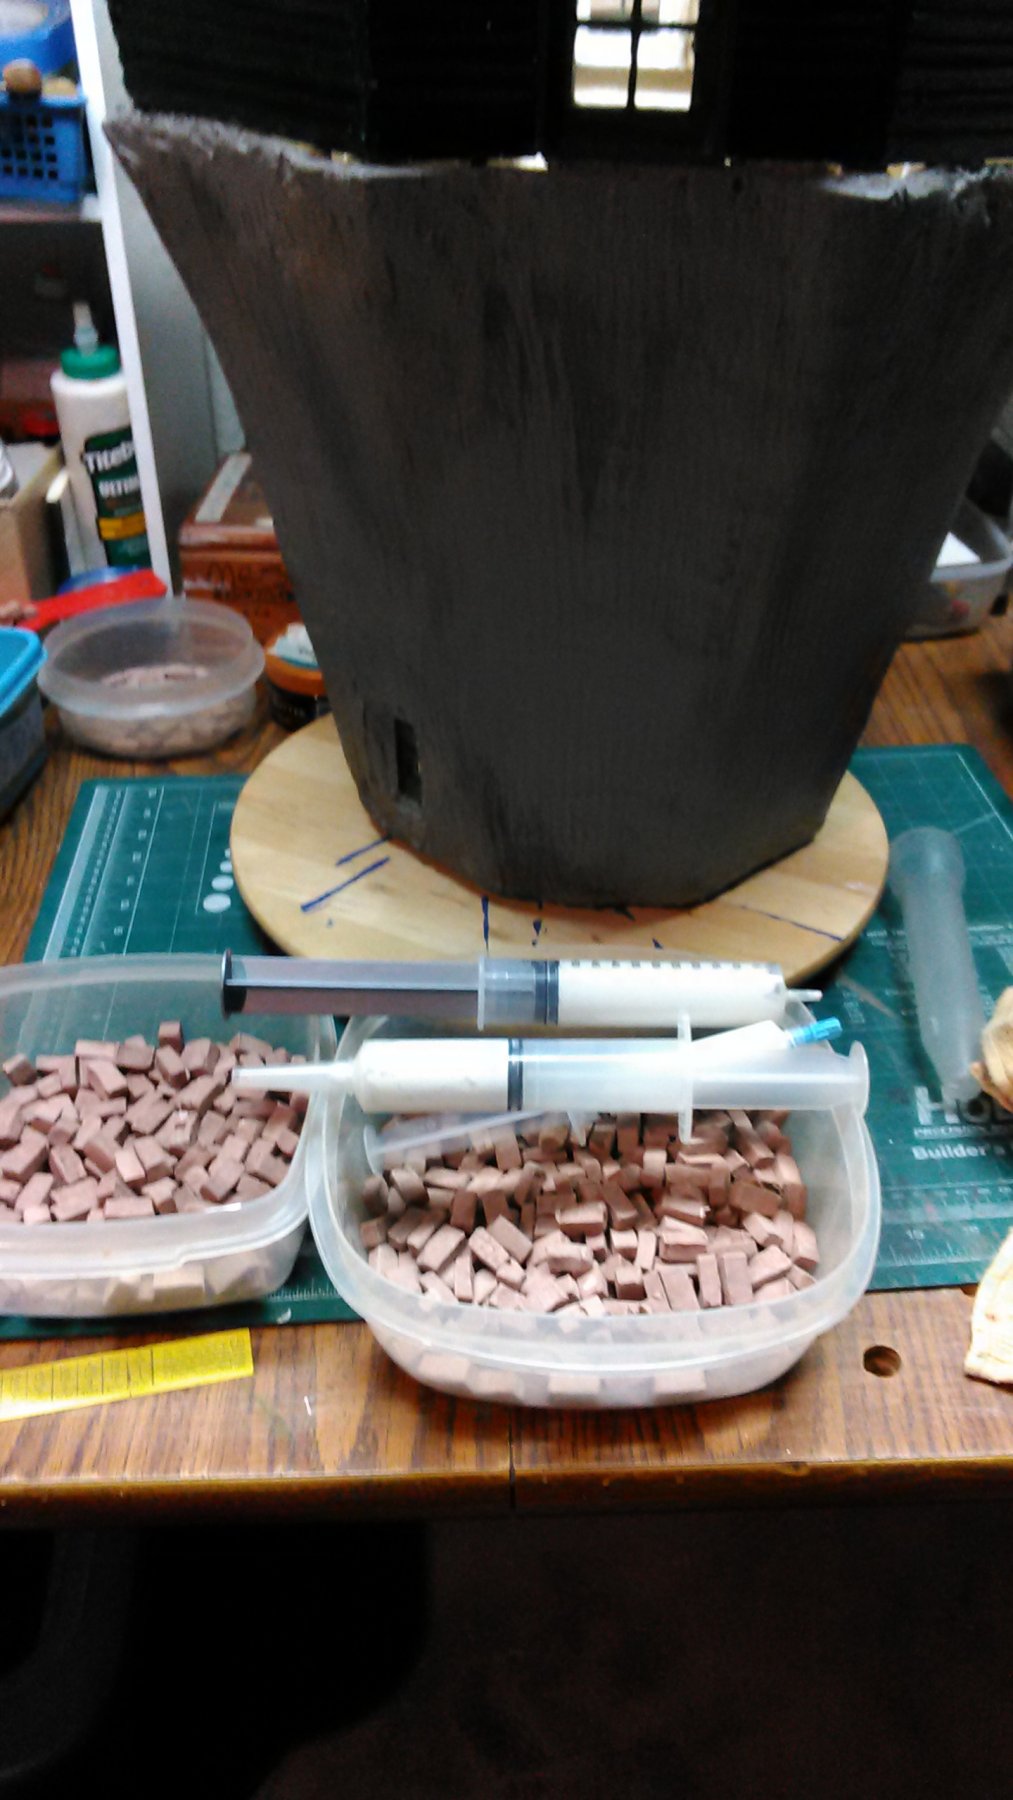
Touched up the bricks and the clinker wall.

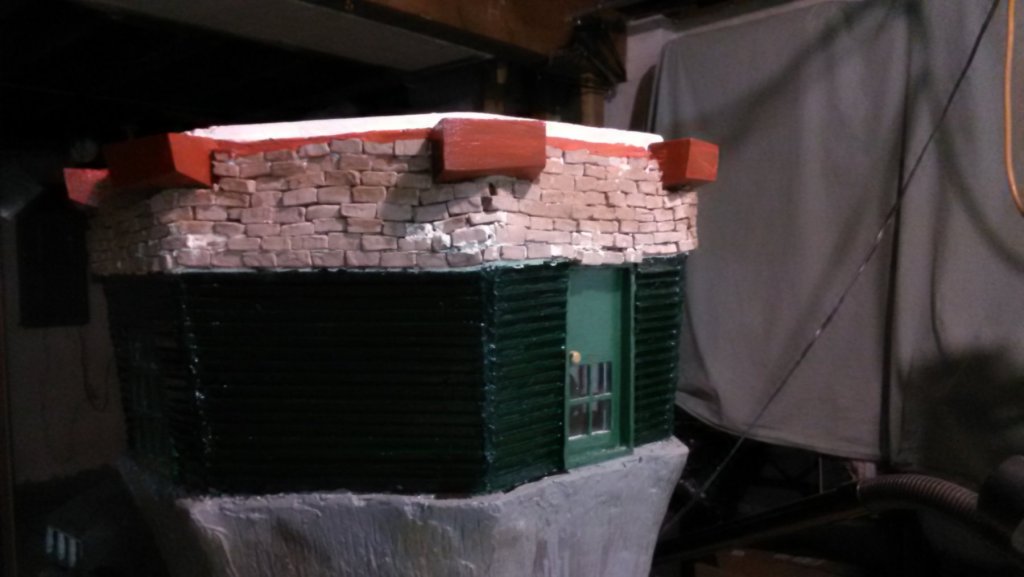
Added a second coat of various colors on top and on the bottom of the cap.
The cobalt blue is called heaven (het hemeltje).

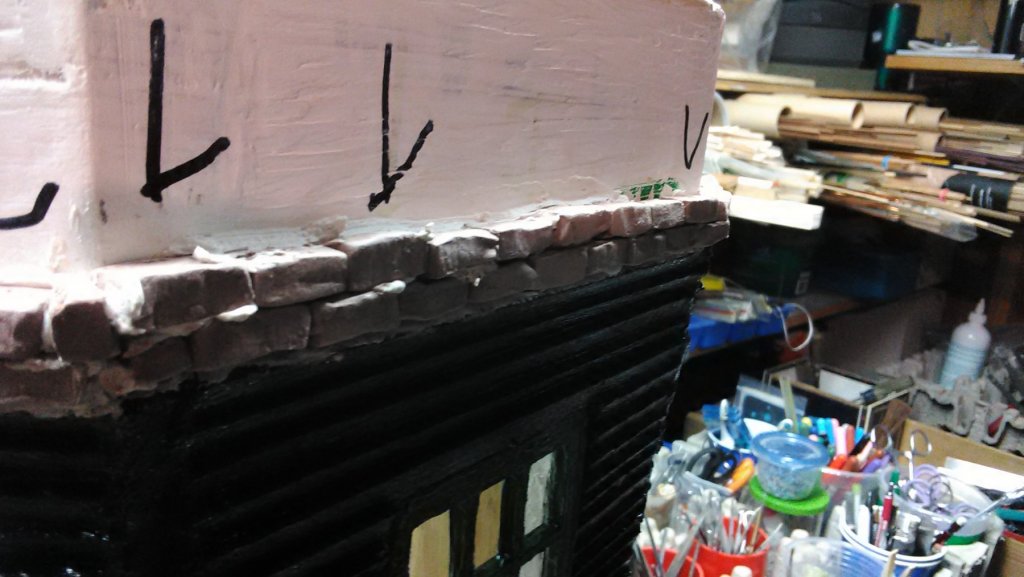
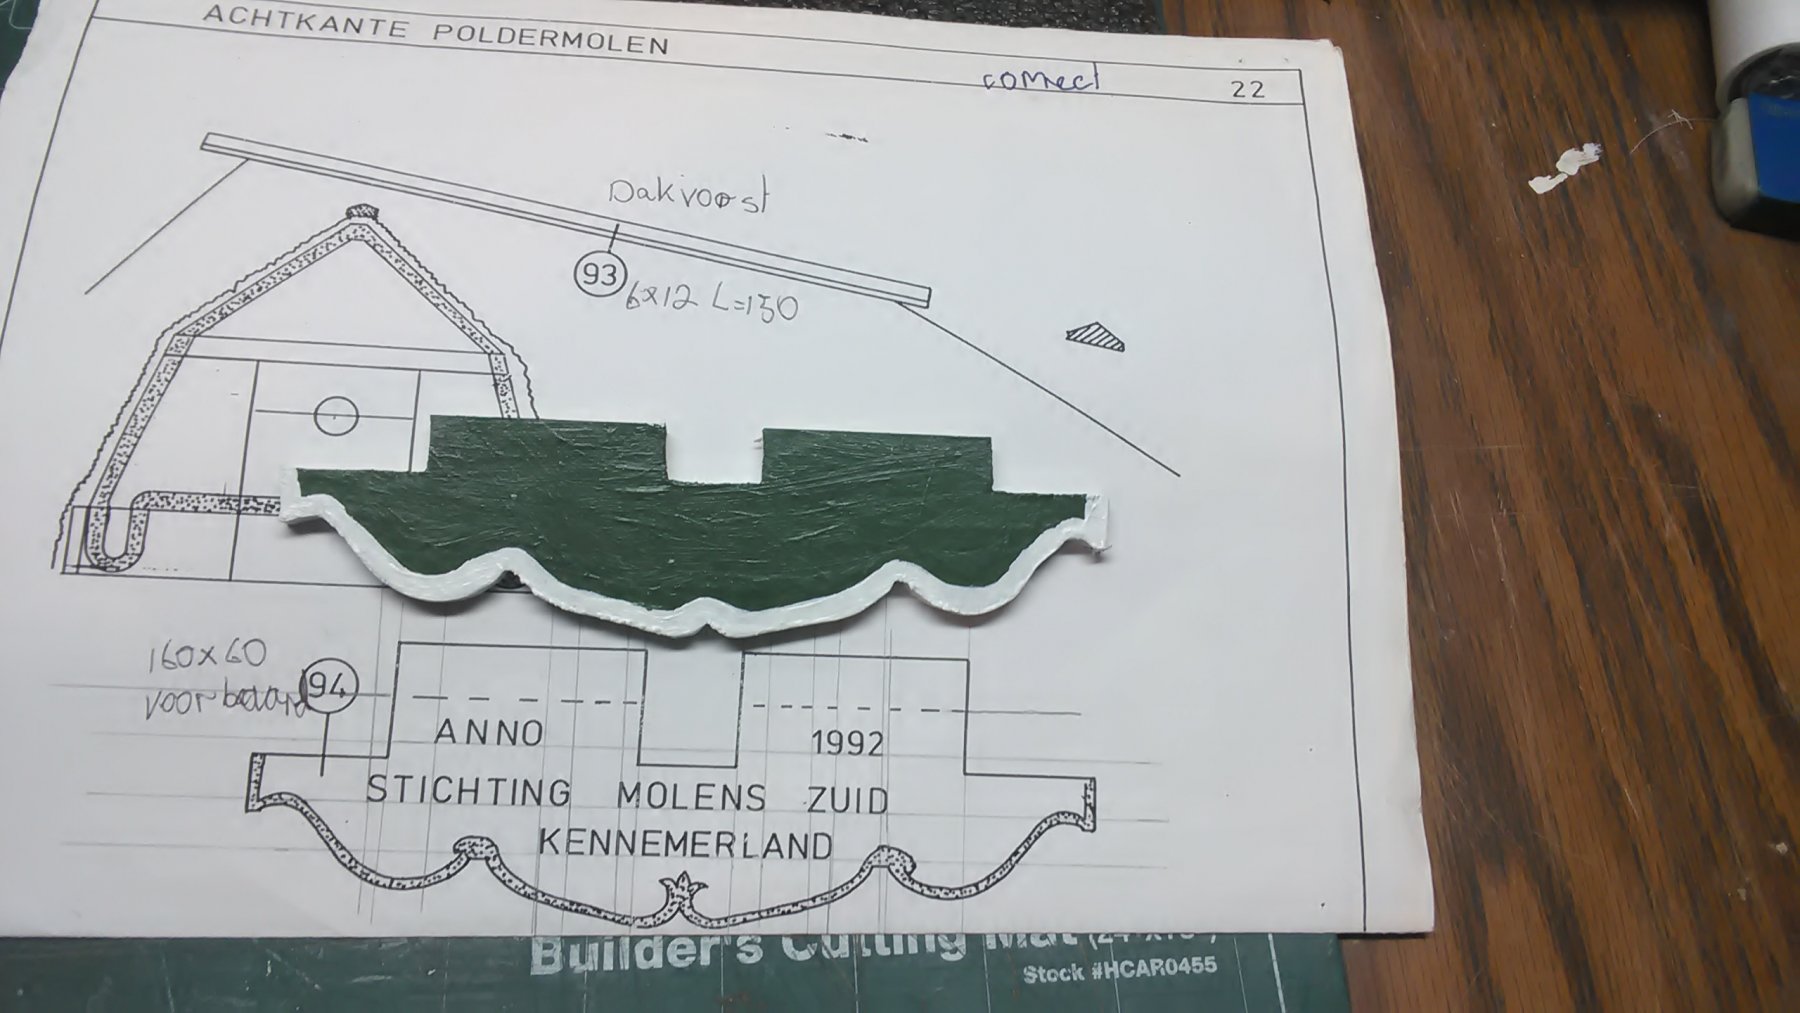
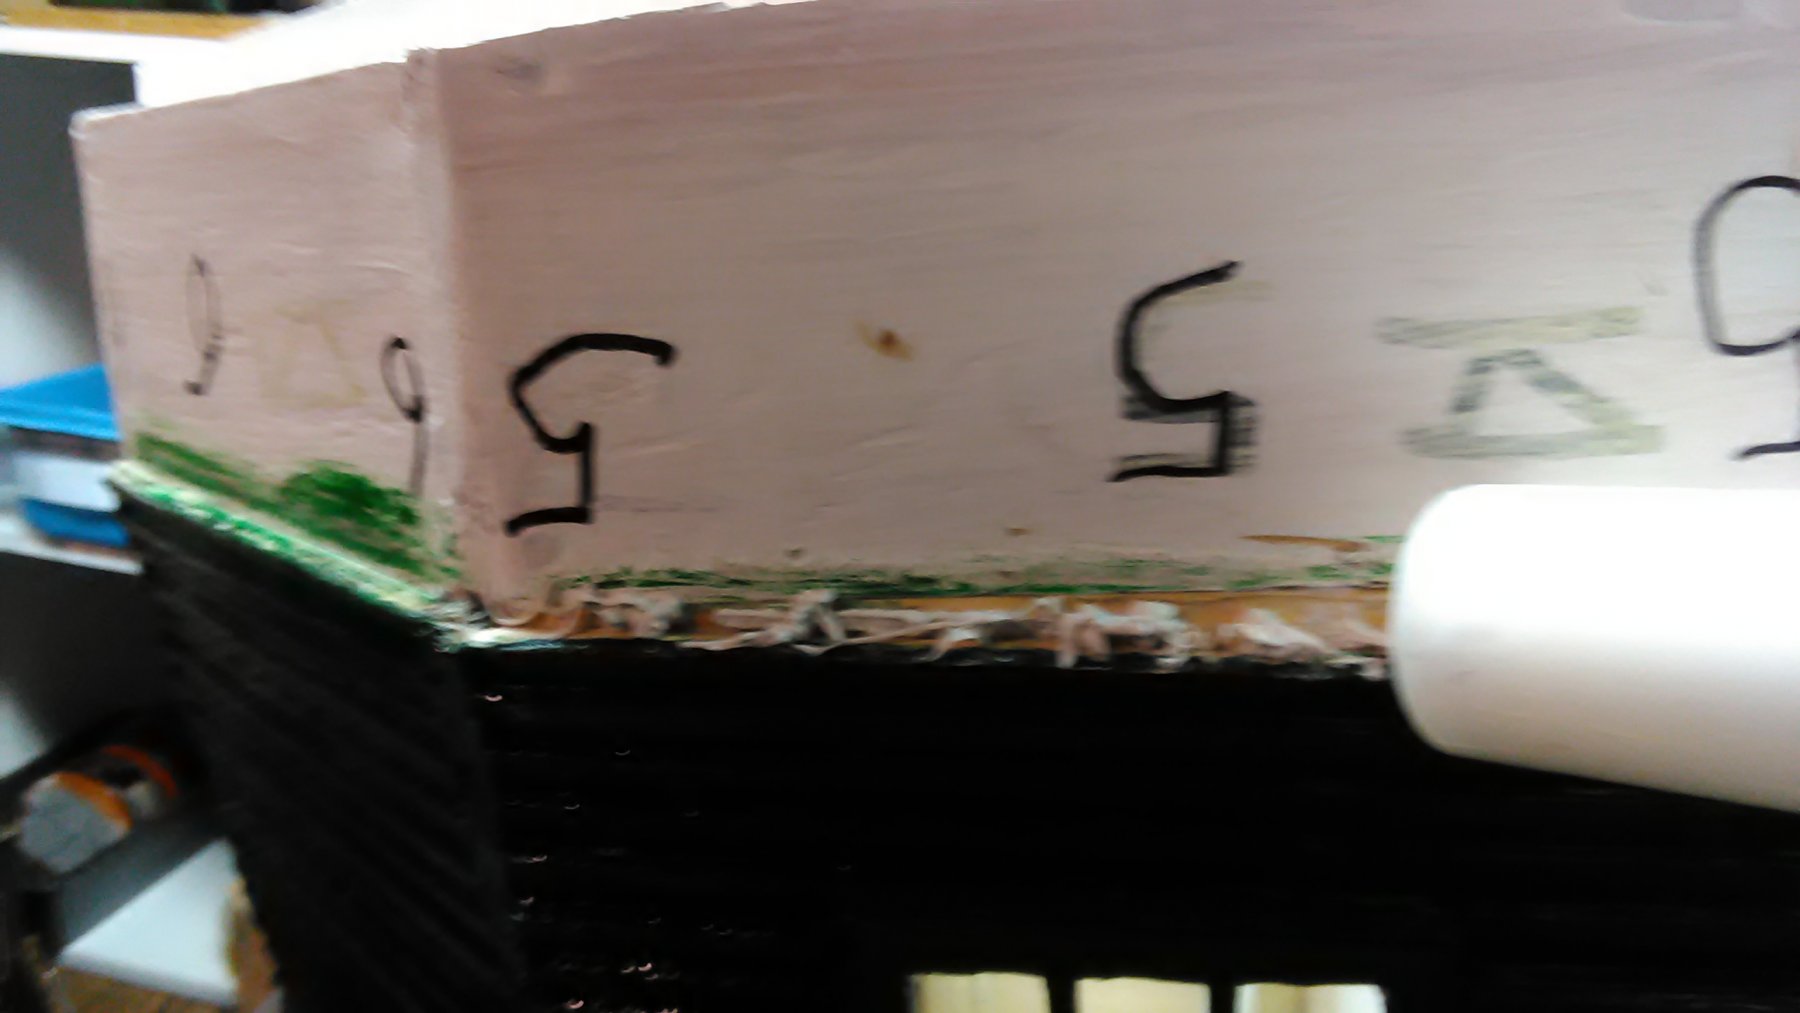
Cut out the front and back beards (voor en achter baard). The front will be located on cap under the vanes. There is lettering on that such as the year it was established and a name. The back one is also located on the cap behind the triangular piece (kruiwerk).
Marcus
-
After filling in the gaps from the bricks with a glue /sawdust paste and let it dry overnight, I put primer on them. This primer dries in 2 hours.
Installed the triangular piece (kruiwerk). Put the cap on two crates and screwed the big piece (kruibalk) in place. Nailed the slender pieces (korte en lange schoor) into the designated area (lange en korte spruit).
Attached the slender pieces to the big piece of wood by first gluing them together, then drill a hole through it and hammering a small metal rod into it. Couldn't use a screw or nail. Let it dry.

Painted the first coat of crimson on the bricks. This will dry dark red.

Marcus
- mtaylor, thibaultron, Elijah and 1 other
-
4
-
-
One word.
IMPRESSIVE
It is amazing what you accomplish with card.
Marcus
- DORIS, mtaylor, popeye the sailor and 2 others
-
5
-
41 minutes ago, Landlubber Mike said:
Coming along very nicely Marcus. I like the colors you are using. Can I ask what brand of paints?
Thank you.
Most of the paints are from Hobby Lobby. There signature brand is called Master's Touch acrylics.
Master's Touch - Chrome oxide green
Liquitex Basics - Cadmium red deep hue
Golden - Mars black (had some left over).
The scratch built yacht Utrecht is painted with both Master's Touch and Liquitex basics paints. These are thick enough to get thick layers, can be diluted with a bit of water and affordable.
Master's Touch 4 oz. = $3.99 and 8 oz $6.99
Liquitex Basics are a dollar more for the 4 oz and the 8 oz. Both available at Hobby Lobby.
Marcus
- Piet, Jack12477, Landlubber Mike and 1 other
-
4
-
-
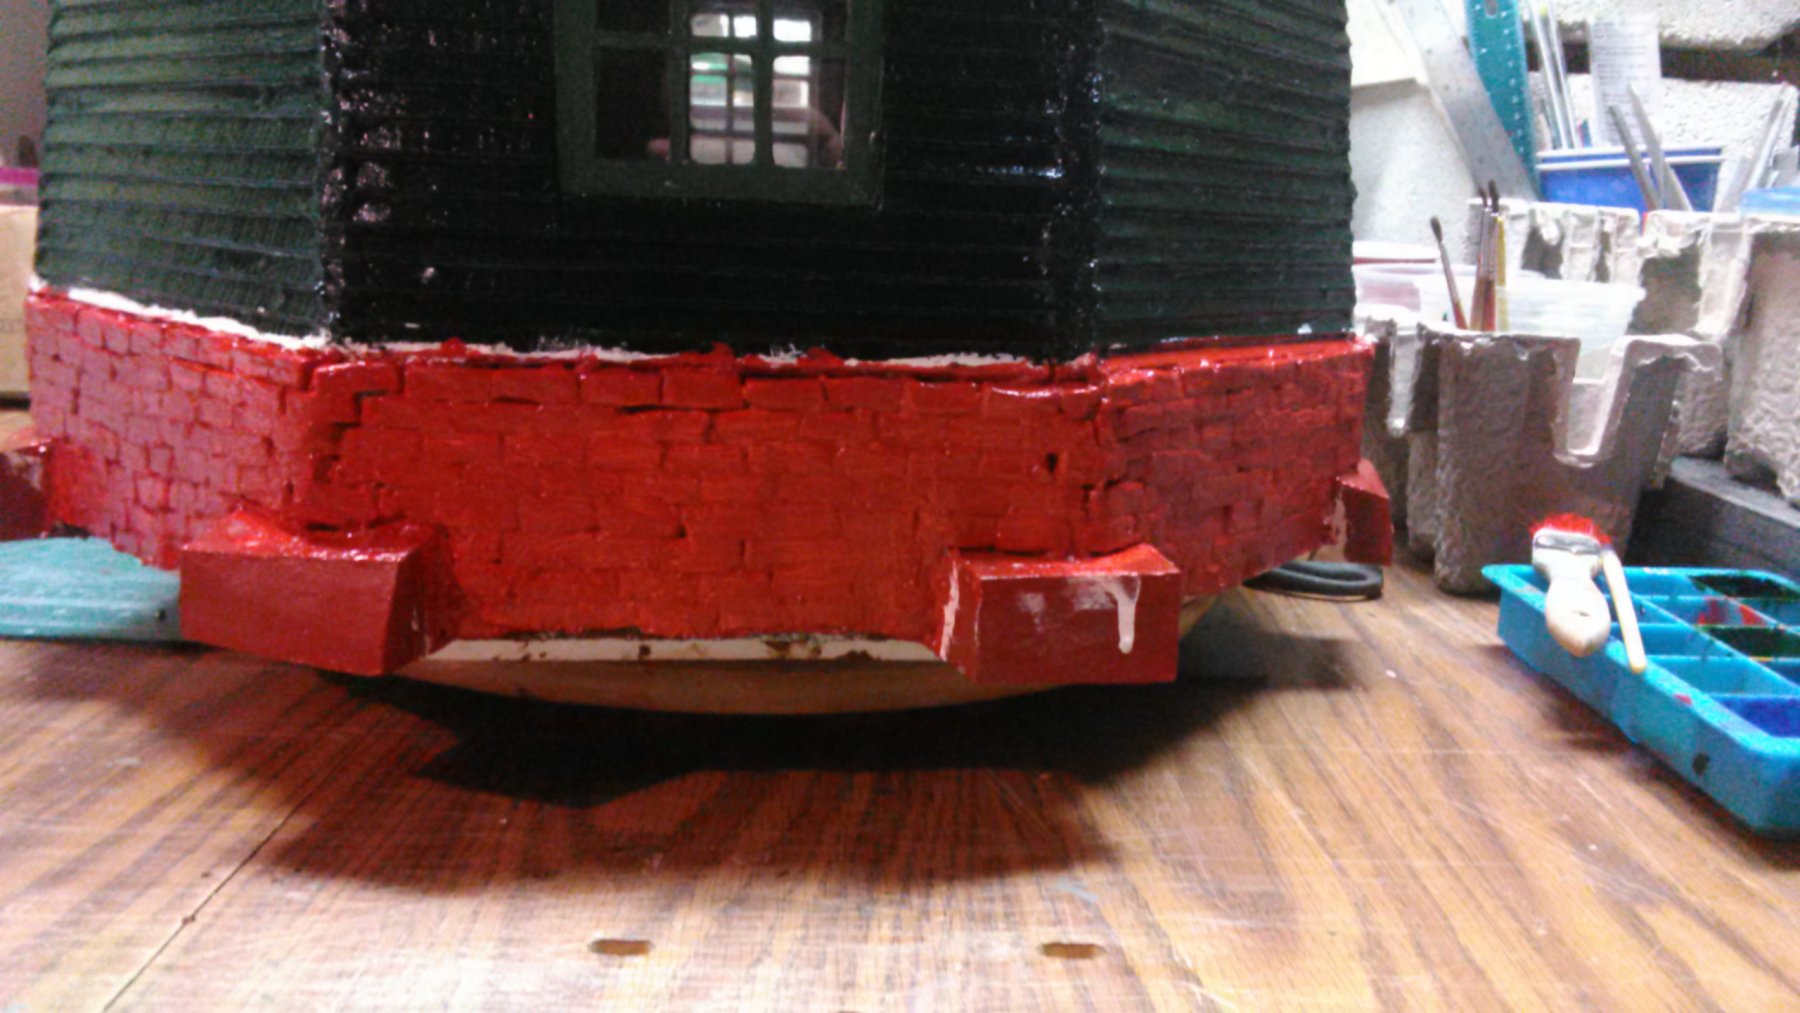
Made another batch of bricks and installed the two bottom layers. Let it dry for a couple of days. Then I will sand the bricks somewhat even.
The red blocks on the corners are called pananten. They are usually made of concrete and are there to keep the foundation walls in place.
Finished painting the triangular piece (kruiwerk). At the end of the long slender sticks there are light red caps (klapmutsen). Jan or Cog might know what they are for.
Once bricks are sanded and painted I will also add a coat of Dullcoat to all the shiny paint.
Still need to make the hooks that will be placed in the window frames which are for the shutters.
Also need to add a flag, a vangstok (long stick painted in red, white and blue stripes, when the stick is down the mill is operational and up, it is not or the other way around) and a few other things.
Than put it all together and balance the vanes.
Marcus
- mtaylor, Elijah, thibaultron and 2 others
-
5
-
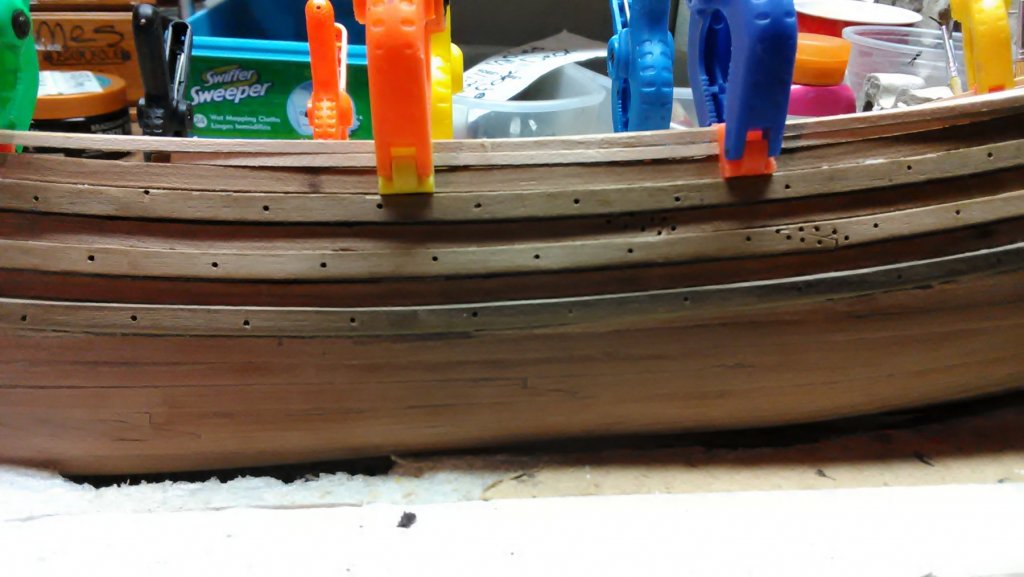
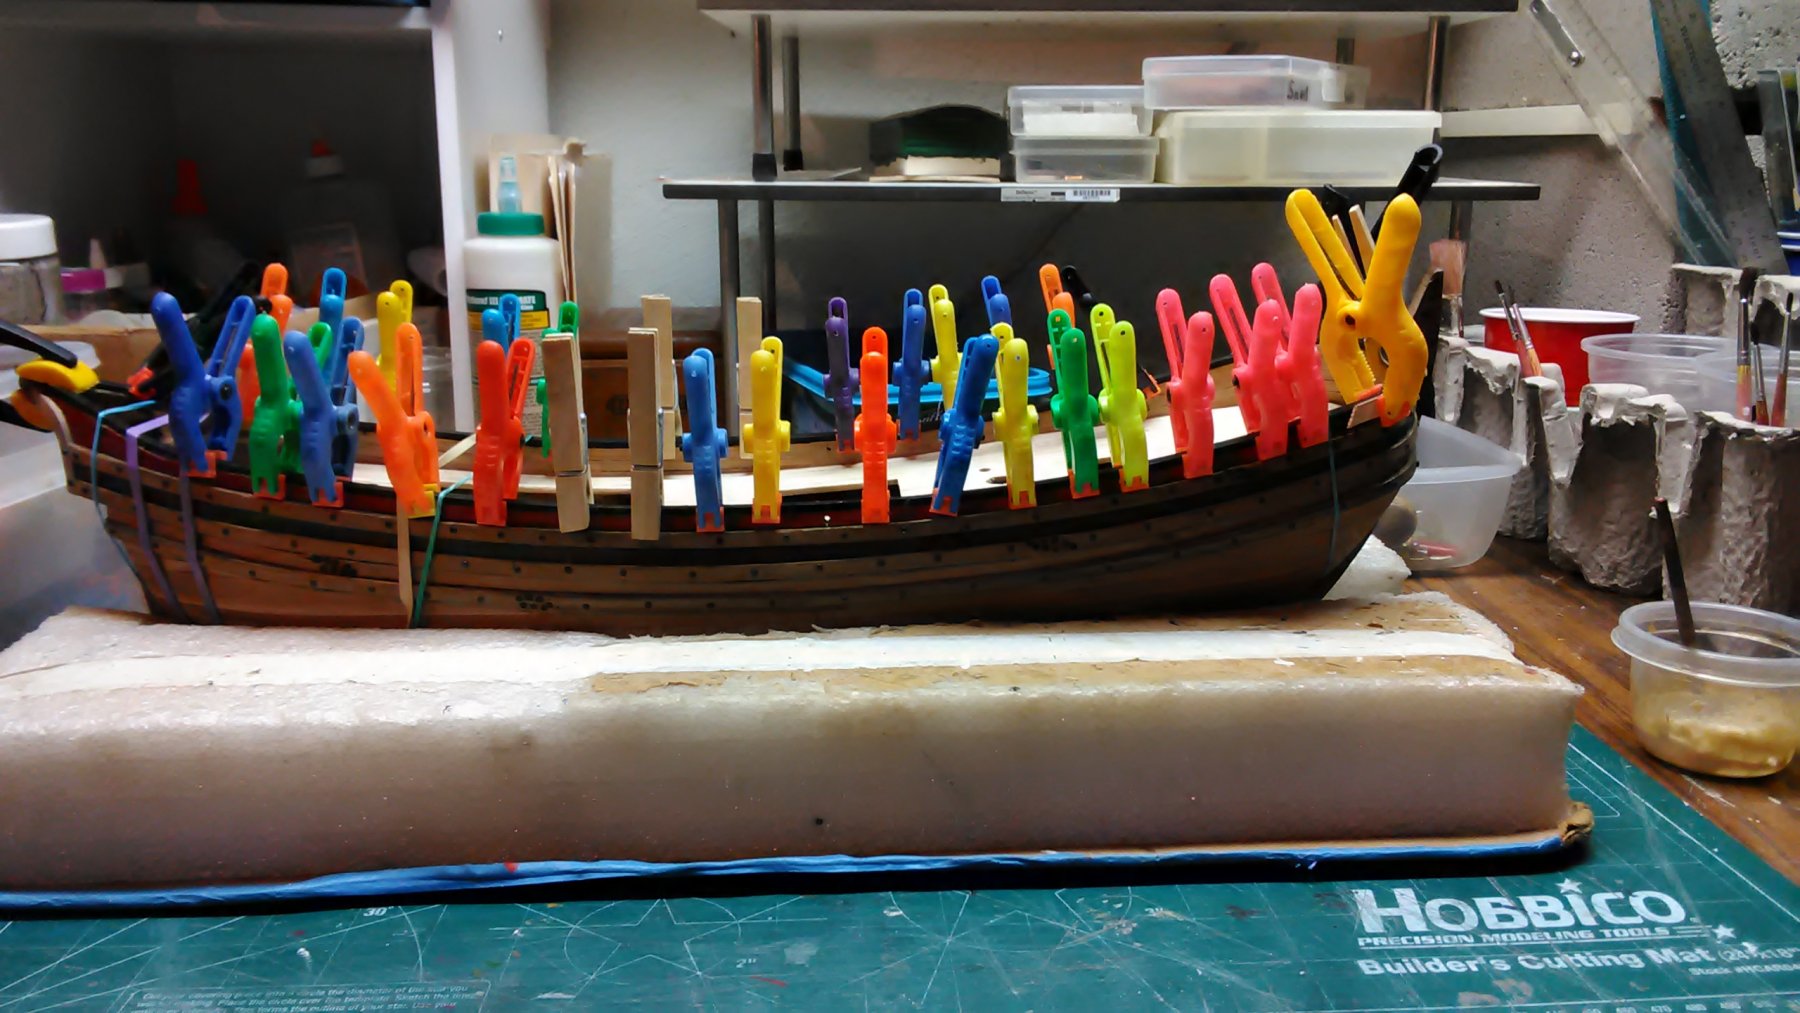
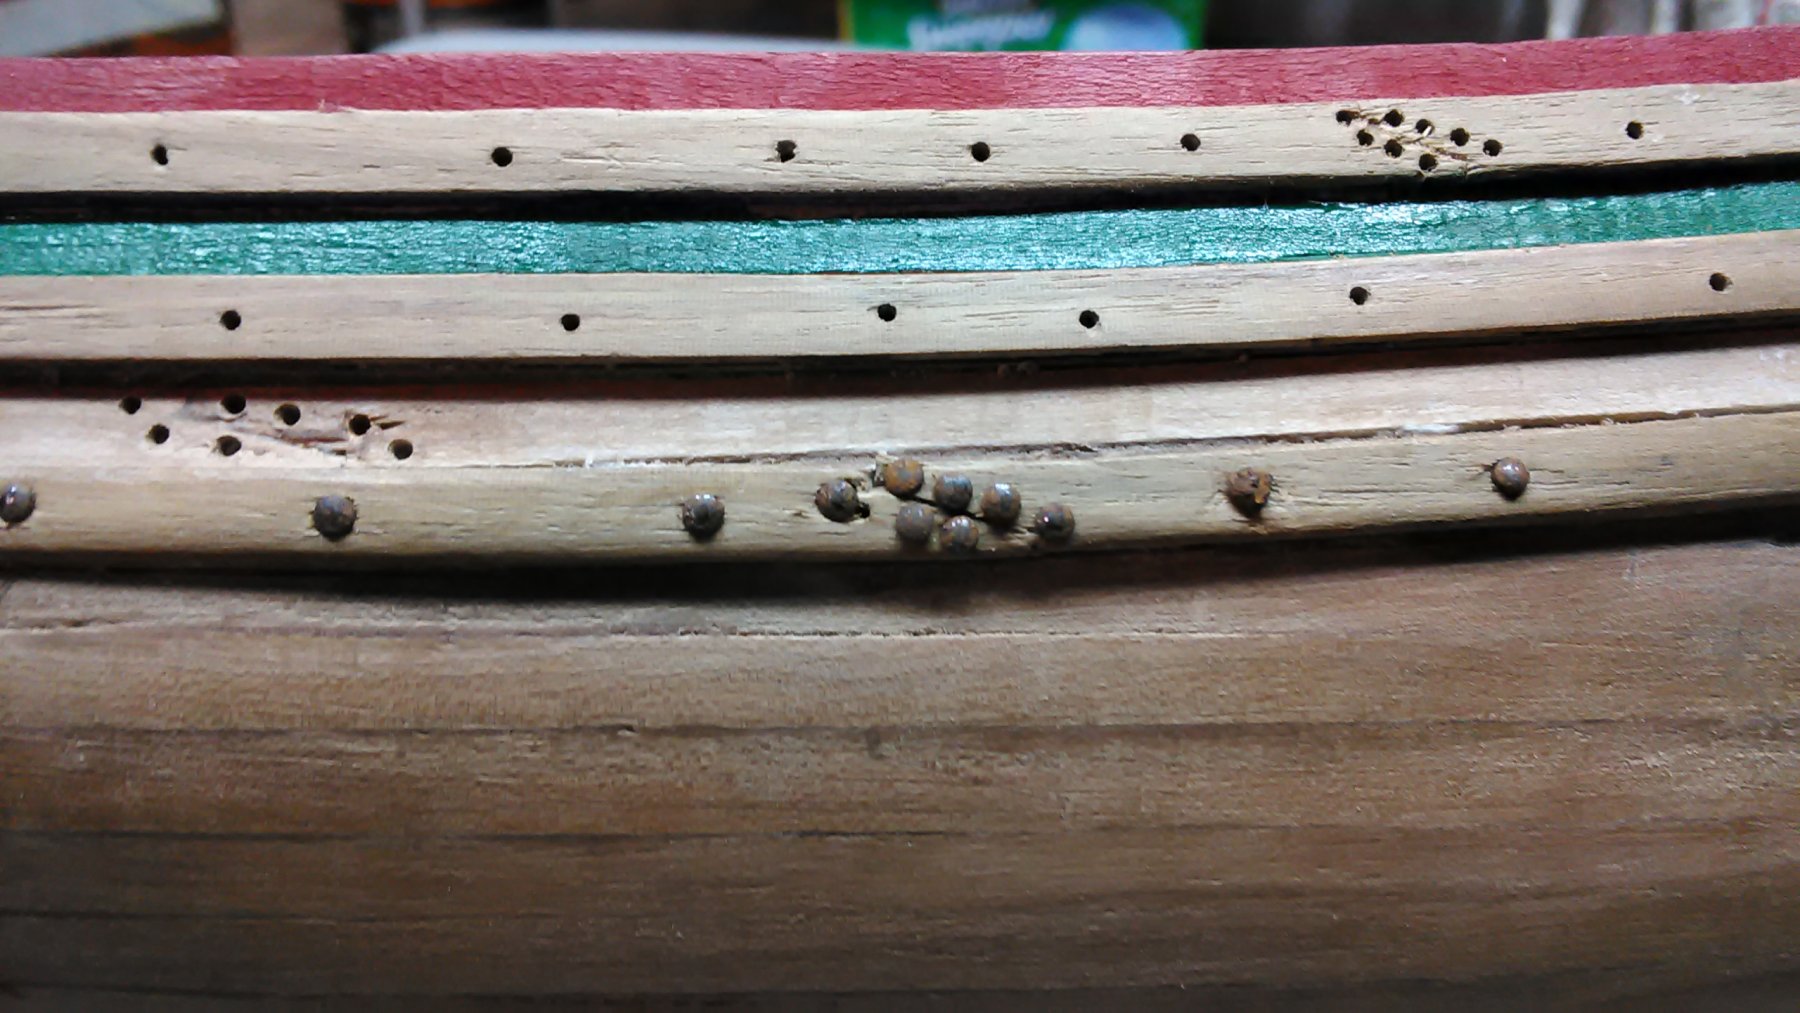
Caulking the deck was done with marking the edges of the planks with a number H pencil. Installed all the planks and did a bit of sanding. Drilled the holes for the imitation dowels. The used a soft lead pencil in each hole, twirled it around a bit, vacuumed the lead dust off and pressed wood filler in the holes. Let it dry and sanded the deck.

First coat of paint in the plank that is above the first wale (Cadmium dark red) and Chromium oxide green above the second wale.
Started on inserting black steenless steel pins in the holes that are in the wales and where 2 planks are fitted together. The above methods are from the book and I like it.

Marcus
- Landlubber Mike, Piet, mtaylor and 2 others
-
5
-
-
Welcome to the forum. Your models that you put in the gallery are beautifully built.
I have been a fan of yours for a long time. I have many books and publications that you have authored in both Dutch and English and have learned many things from that.
I built the Utrecht and now I am working on the Boyer. The plan is to built many of the 17th century Dutch merchant ships.
Your latest book from N. Witsen on shipbuilding has been an education for me. It is an excellent source that I use on my buulds.
When I visit my mother in Heerhugowaard, I always spend a day in Amsterdam and visit the Rijksmuseum and het Scheepvaart museum. Next year when I go I plan to visit both the Maritime museum in Rotterdam and the Zuiderzee museum in Enkhuizen. I take notes and pictures of ships that I plan to built
I do have a question. What are the sizes (height) of the figures you use in your models? I know it depends on the scale of the ship.
Or do you create them yourself?
Regards,
Marcus
-
-
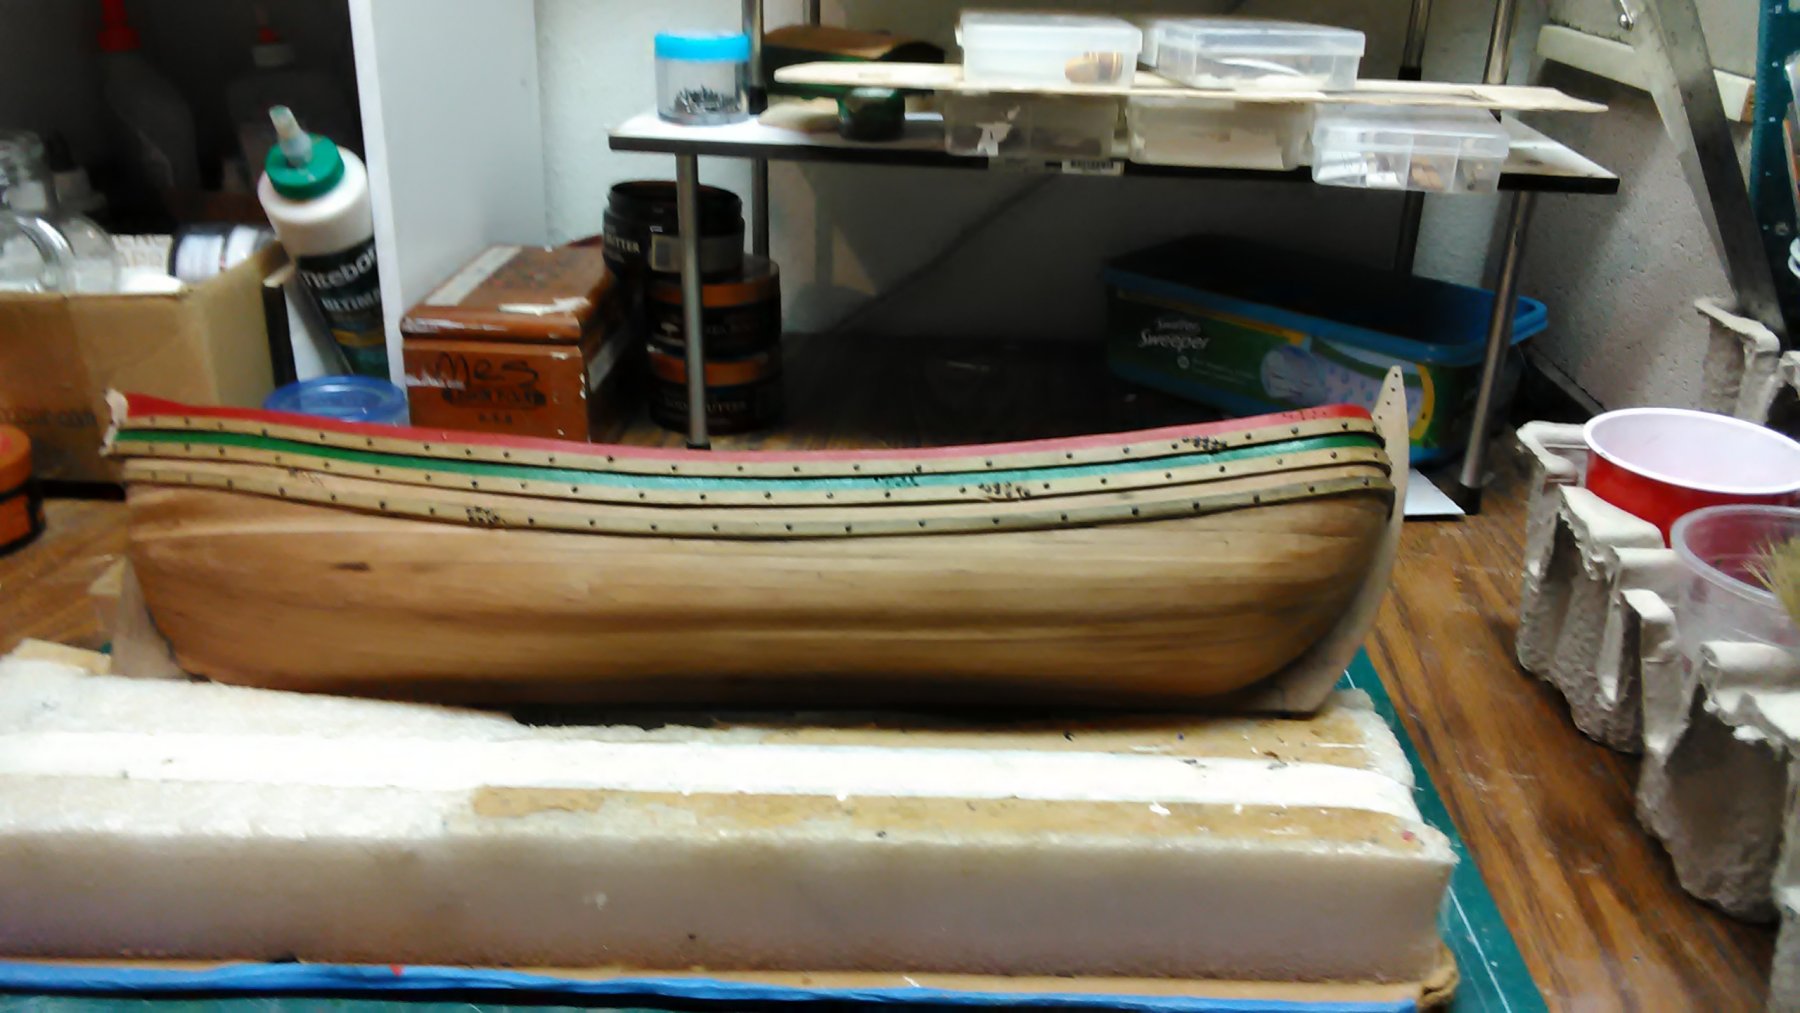
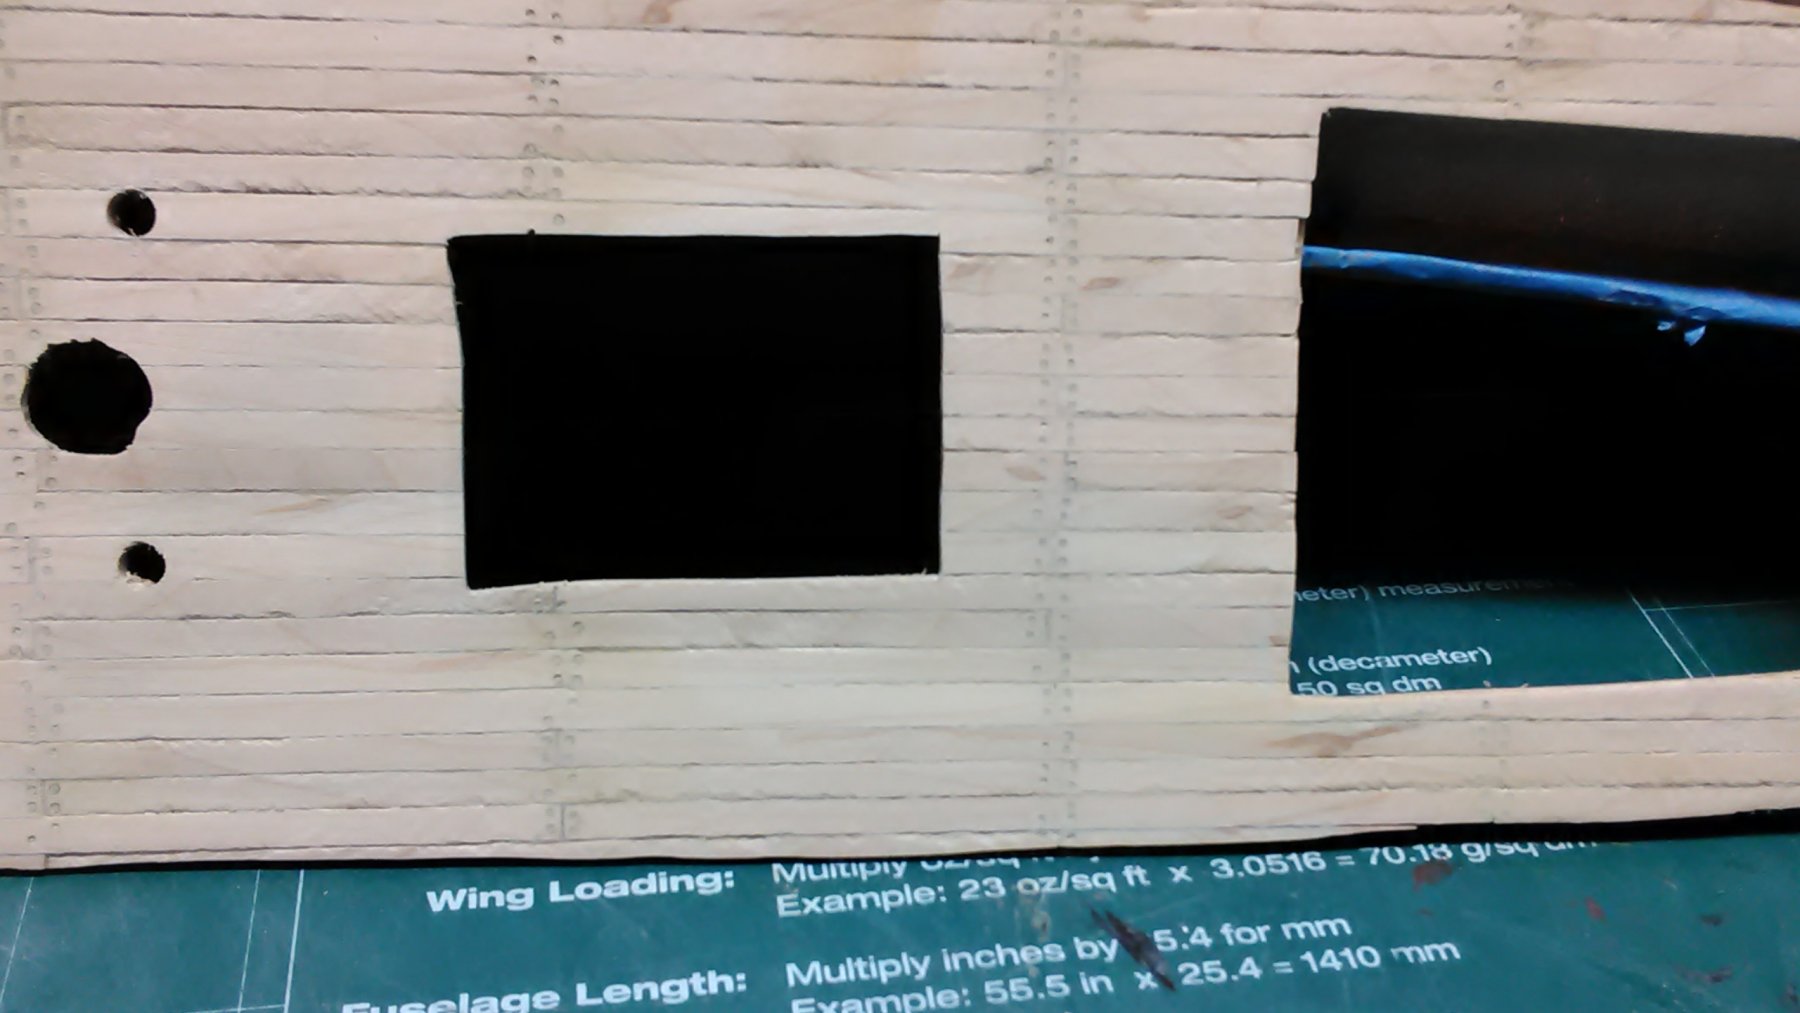
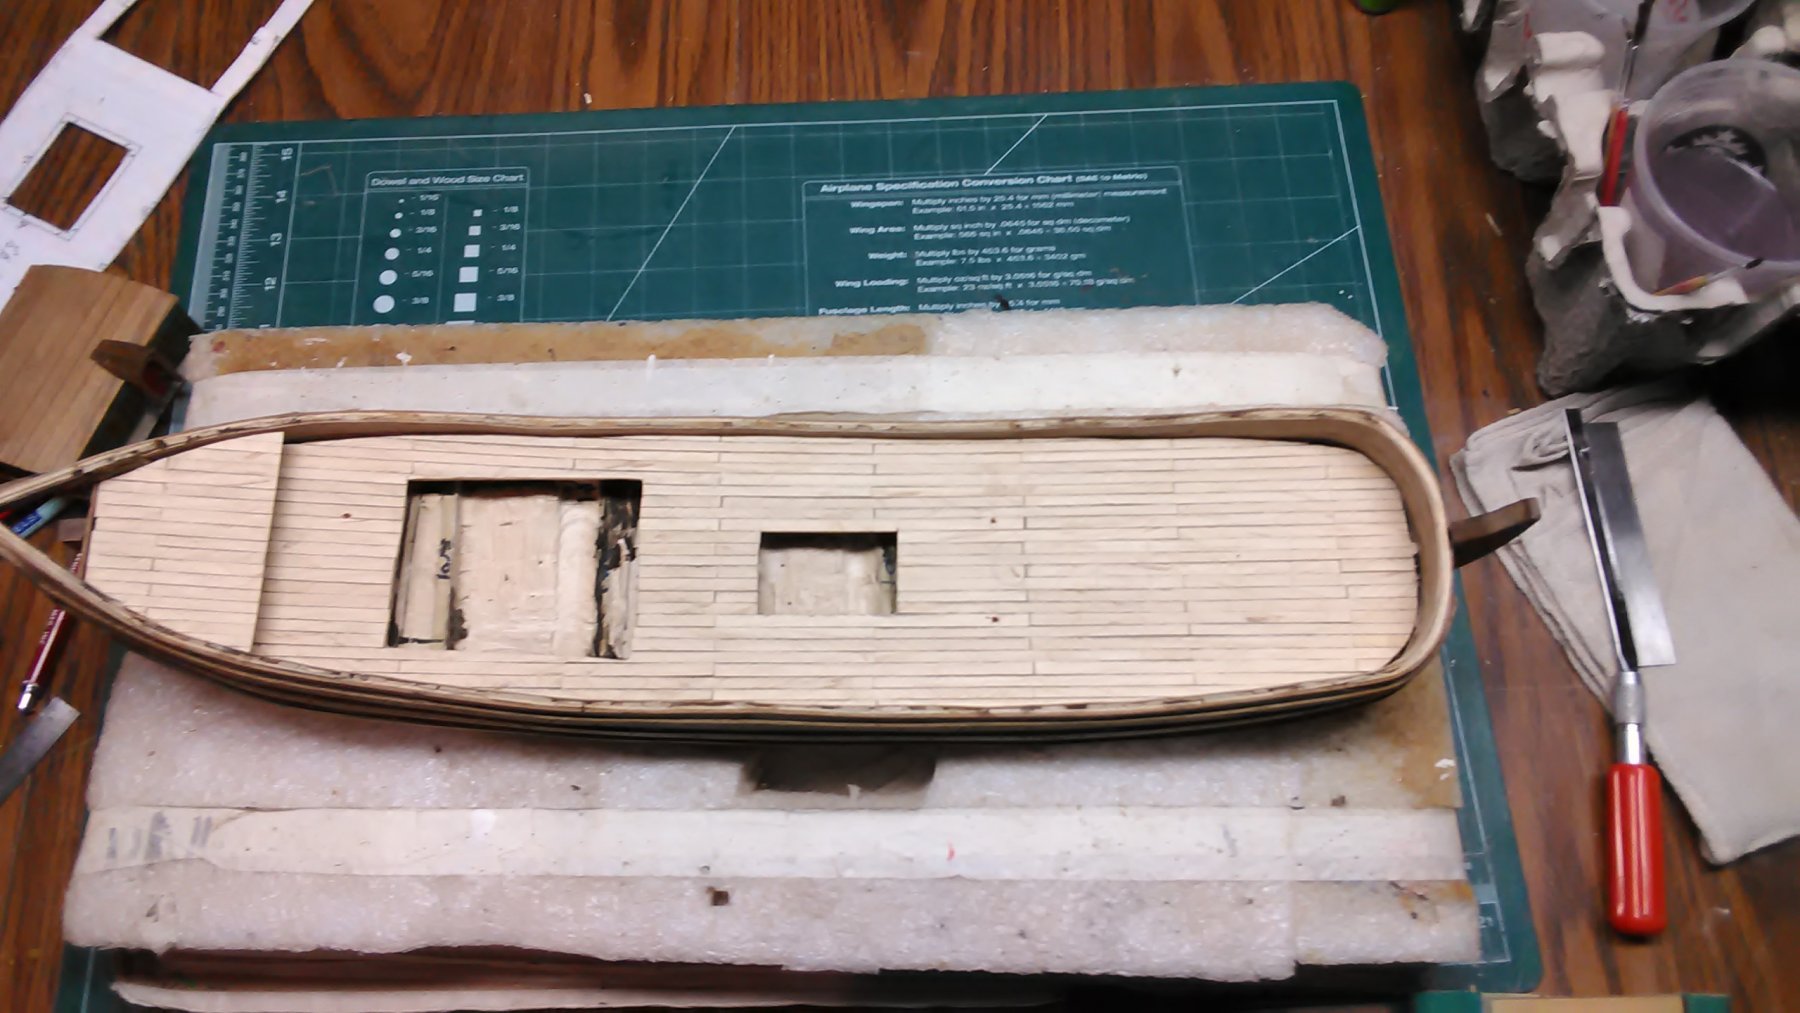
I completed the deck and created it a very 'unconventional' way. I made a false deck from 2-ply maple and sanded it into shape.
Took maple stock and used my table saw to cut long planks of 1mm thick by 360mm long by 5mm wide. The planks for the deck are 120mm (4-3/4") long strips.
Took the false deck out of the hull, laid it on the table and planked it taking into account where the frames were.
Still need to sand the deck and with it being 1mm thick I can sand away. The sides are to be sanded to slightly past the false deck so when it is placed in the boat it will bulge a bit giving it a slight curve
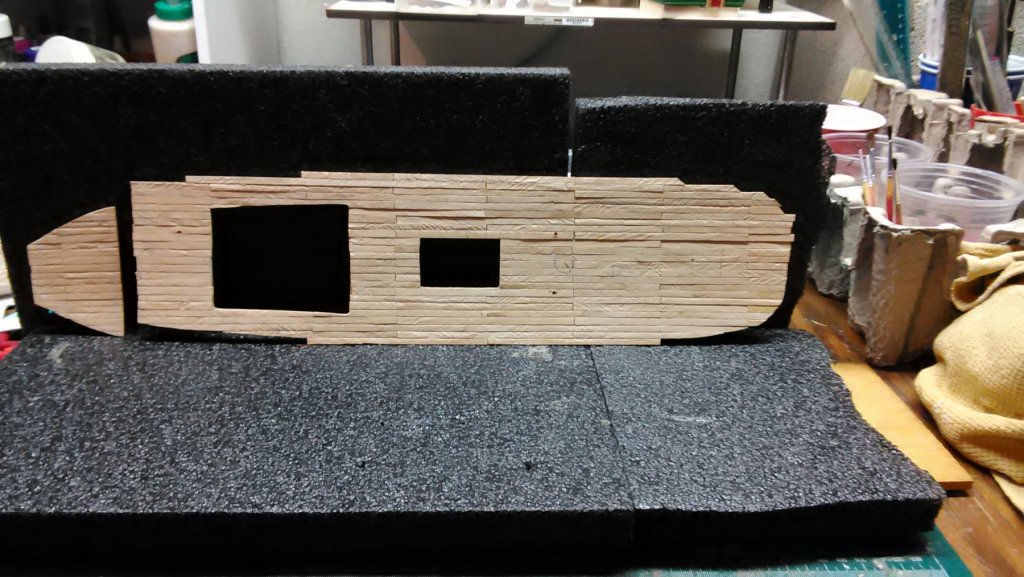
I can do the above method as the deck is in 2 parts. The larger part can slide in.
I also cut the top railing to size.
Marcus
-
Beautifully done. At the scale you build the ice yacht the details are especially great. You can add so much more.
You thought "outside the box" when building this yacht. MSW is not ships anymore.
Marcus
-
Ran out of bricks, need to make another 150.
This is what the wall looks like. Very uneven, but I will sand it.
Marcus
- mtaylor, cog, thibaultron and 3 others
-
6
-
Working on the brick wall. Ran out of the little bit of tile glue I had left over so now I am using flooring adhesive. Works well. More liquidity so it goes in all the empty spaces. I apply it with a syringe.

Layers of bricks.
I know I am going to run out of bricks so I'll have to make more.
Once the foundation wall is finished I will let it dry for a week.
Then I will add a combo of tight bond glue and clay dust to fill in the large crevices, then lightly sand some of the edges to give it a more even look.
Because the clay is a bit brittle, I will use a primer and paint it crimson red which looks like brick red and finalizing with several coats of lacquer.
Hopefully with all these layers of material it will hold out in the weather.
Marcus
- thibaultron, mtaylor, Elijah and 1 other
-
4
-
# Jan and Cog, thank you both for the information and Jan for the video.
So once you have moved the kruibalk with the kruiwiel you leave the rope that is attached to the kruiwiel tied to the kruipaal so the cap and the vanes do not move
Must be a heavy rope or chain to keep it steady.
Took the vanes and the cap of the mill and turned it upside down. Installed the first layer of bricks. As glue I am using the same material that I used to make the thatch. I think it will look good. Bit uneven but that gives it character. 😀
Marcus
-
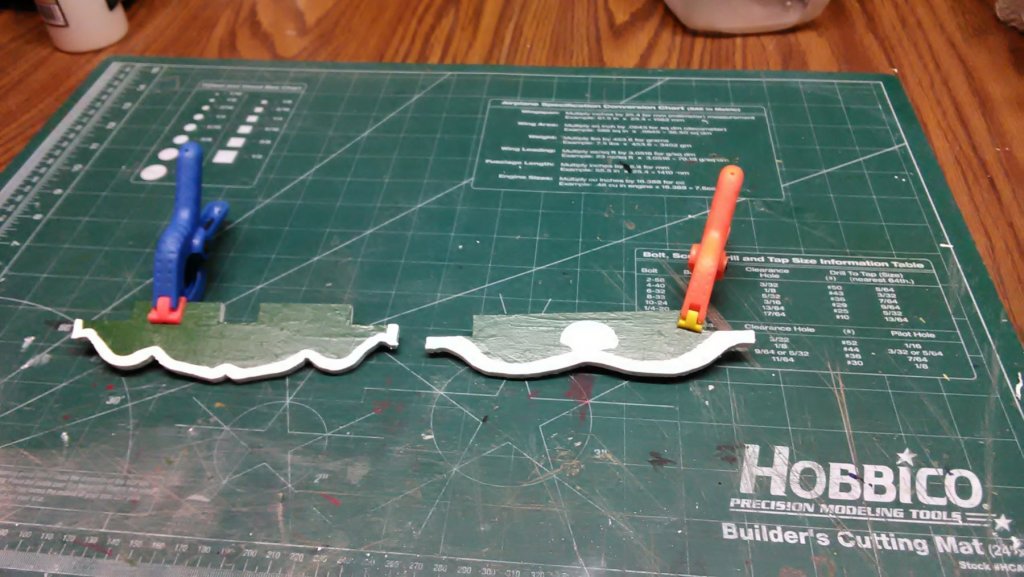
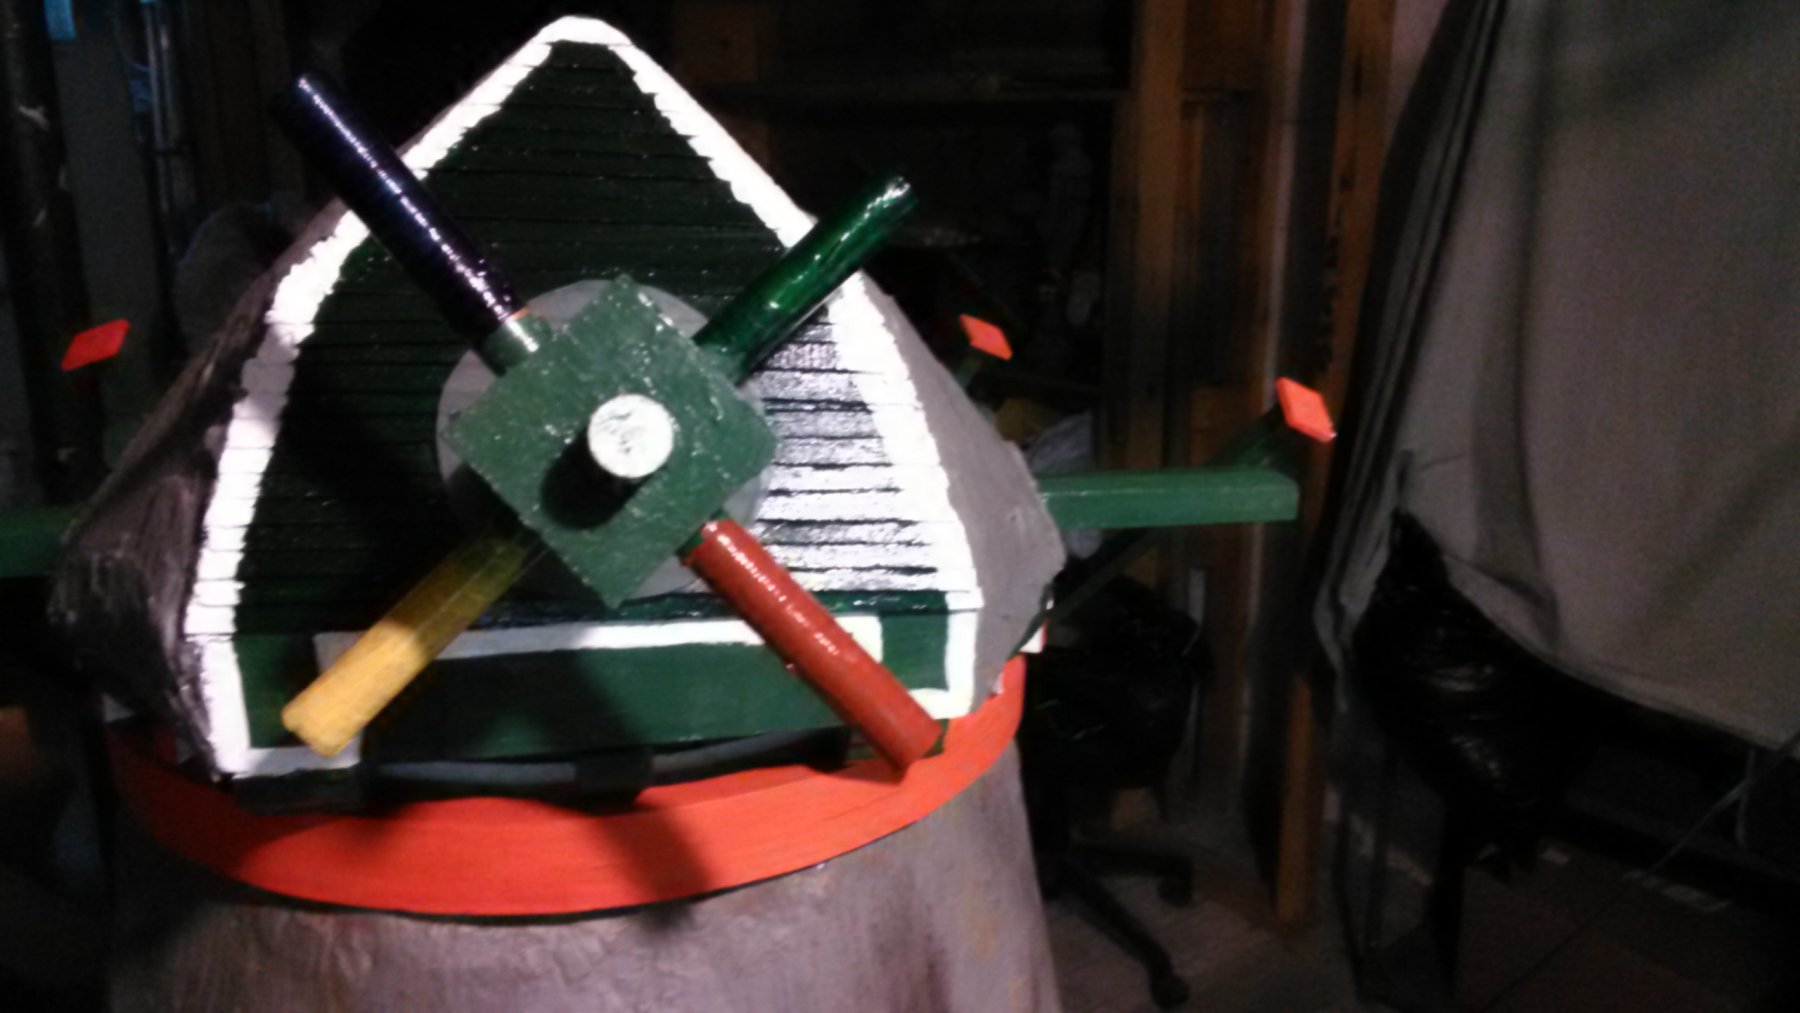
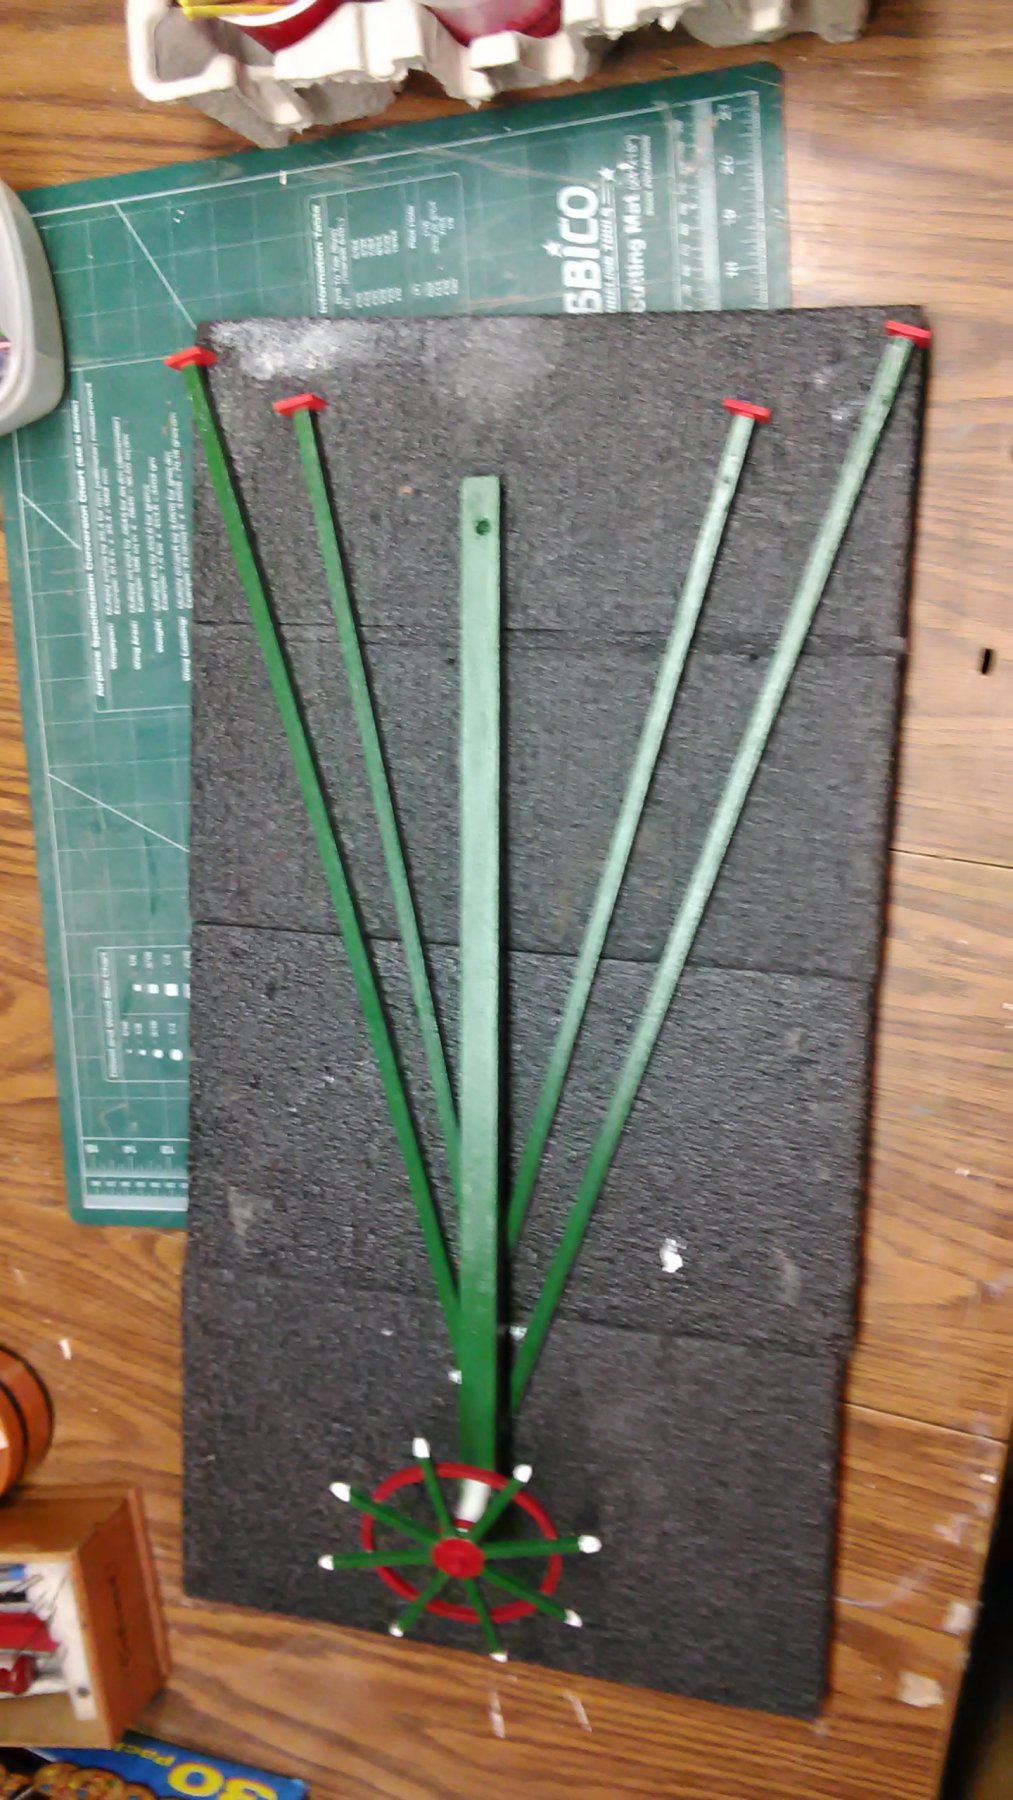
Finished painting the vanes. All I need to do is balance them and once that is completed, drill a hole through the red part and the copper tubing and put a nail through it so the vanes stay in place.
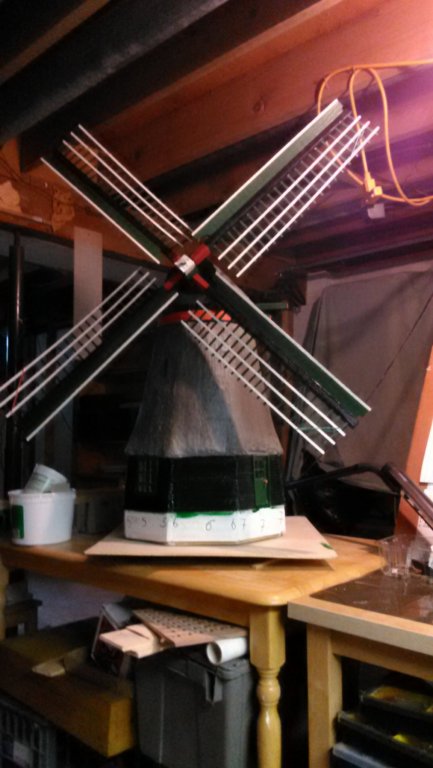
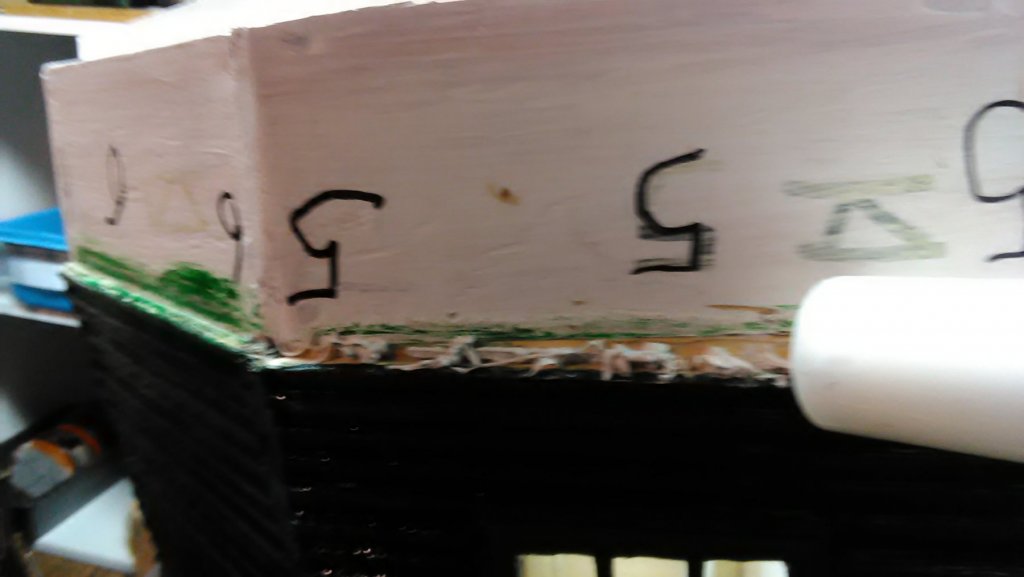
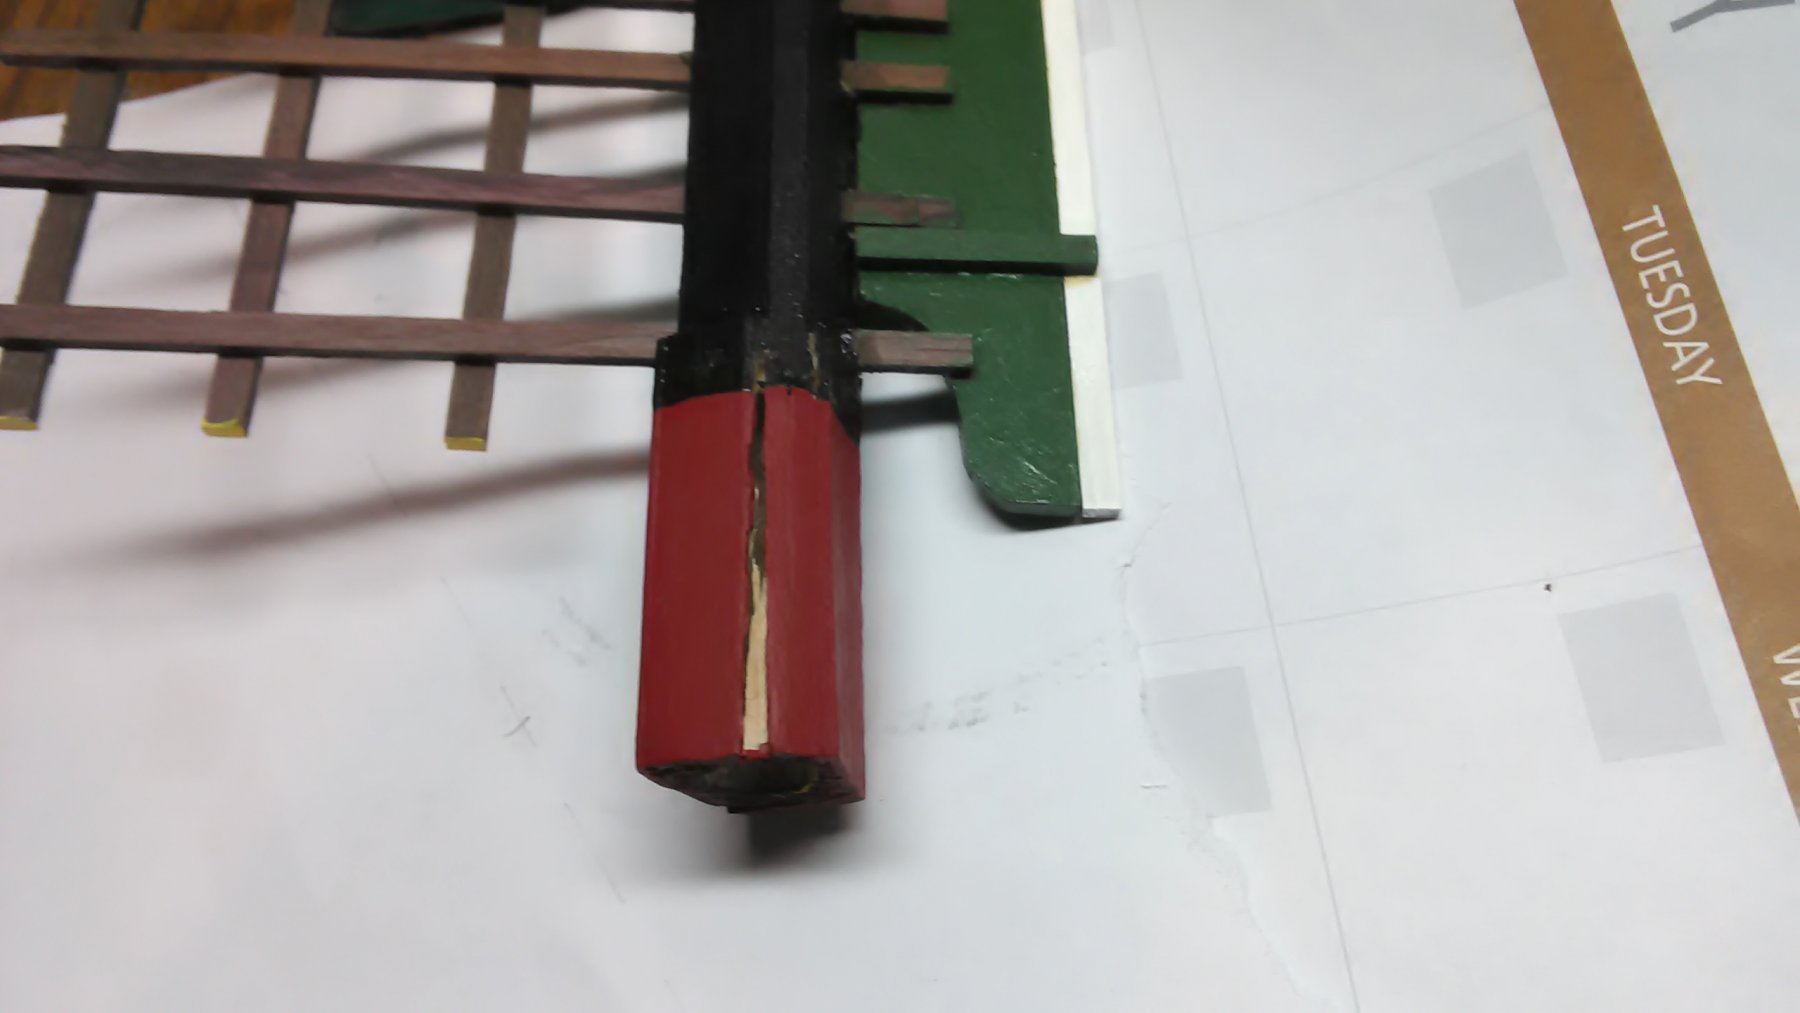
Close up of the axle head. The piece of paper with numbers is that when I take the vanes off I put them back where they were initially.

These are penanten. The are located on the corners at the bottom of the mill.
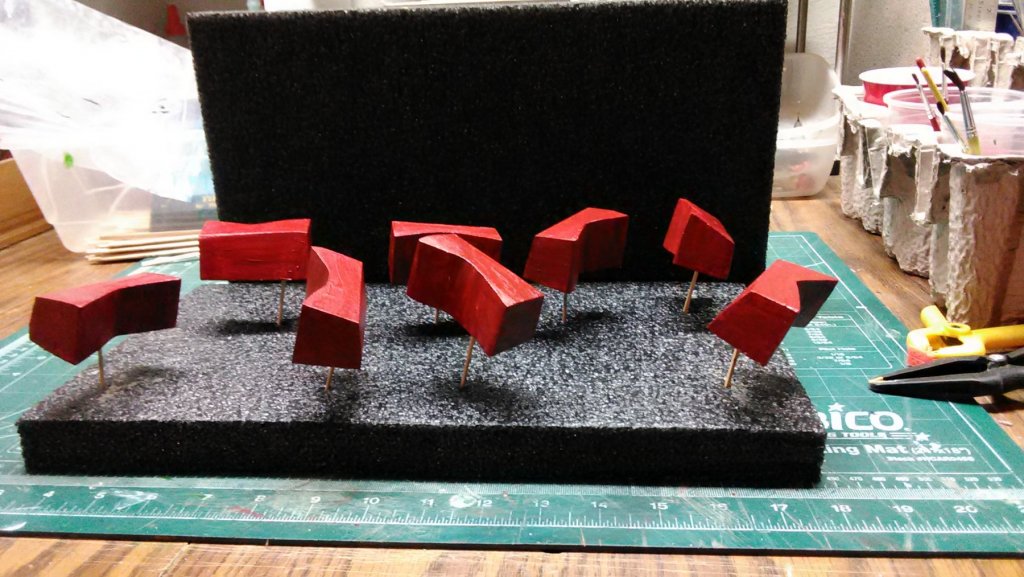
These are called the kruipalen. These stakes are located in the garden. That big triangular piece (kruibalk), the bottom of it corresponds with the stakes that are on the ground.

Questions for Jan.
What are the kruipalen for?
Is it to let people know that this is a danger zone?
What are the penanten for ?
Is this made of concrete and holds the mill in place?
Still need to do the bricks, put and place the triangular piece permanently put the cap and mill together with a bolt and nut and some more painting.
Marcus


Eight Sided Drainage Mill by flying_dutchman2 - FINISHED - scale 1:15 - Achtkante Poldermolen
in Non-ship/categorised builds
Posted
Cog.
The mill sits on a turntable, the kind you have at the breakfast table and has all the add-ons for bread. This is so I can turn it at easy
I'll take it off the turntable and put the mill on the table and see how high it is. I followed the plans for the lengths of all of them.
Marcus