


flying_dutchman2
-
Posts
1,718 -
Joined
-
Last visited
Content Type
Profiles
Forums
Gallery
Events
Posts posted by flying_dutchman2
-
-
Ken,
Thank you.
Marc
-
Druxey;
I have the book from Bill Short and will look at the other 2, thanks for the suggestions.
Marc
-
I must say carving was quite a challenge for me as well - and I didn't come far because my son introduced greenstuff to me. So instead of carving I started claying, and this went very well in fact.
Hans,
Thanks for the suggestion.
There is something called Sculpy and there is some other material. Will research this more and decide what to do. But probably do it myself.
Marc
-
Ahoy,
The following question email was sent to me from an NRG member and I don't know the answer to this. I am putting it up on MSW as we have such a large body of knowledge and figured I would get some type of answer.
"I am interested in purchasing a kit to produce a Blockade Runner Ship that was commonly used to supply forces during the Civil War. Do you know where I might find one?"
Kit, plans and/or references is good. For that matter anything will be helpful.
Thank you in advance.
Marc
-
Nice build Marc! I know it's still a long way ahaead, but how are you going to make the ornaments?
Hans;
I have 2 options.
1 - I carve them myself - never carved before.
2 - Chuck (sys admin) has the master molds from the model that Macardel did. He will make them for me and I purchase them at a reasonable price.
I like option 1 as this is a completely new area of model ship building and it would be a challenge.
Any tips, suggestions on carving is always appreciated.
Marc
-
-
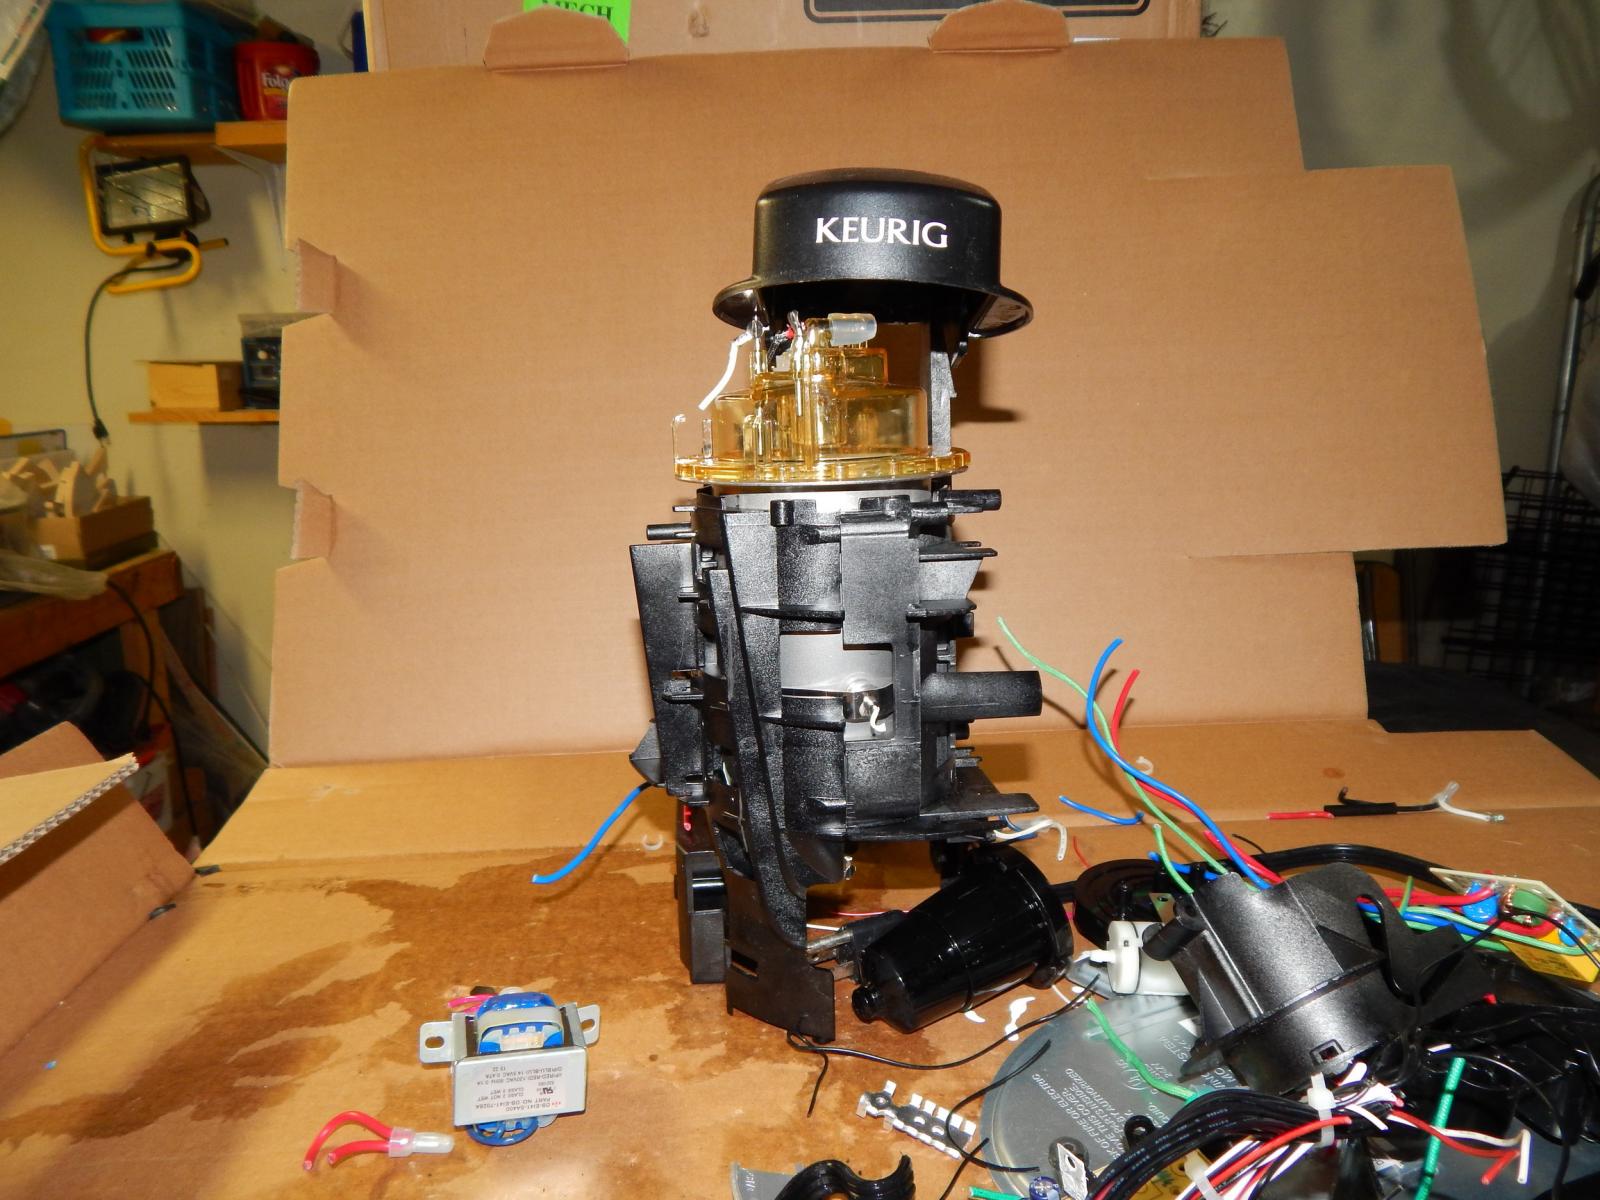
I am not sure if this belongs here.
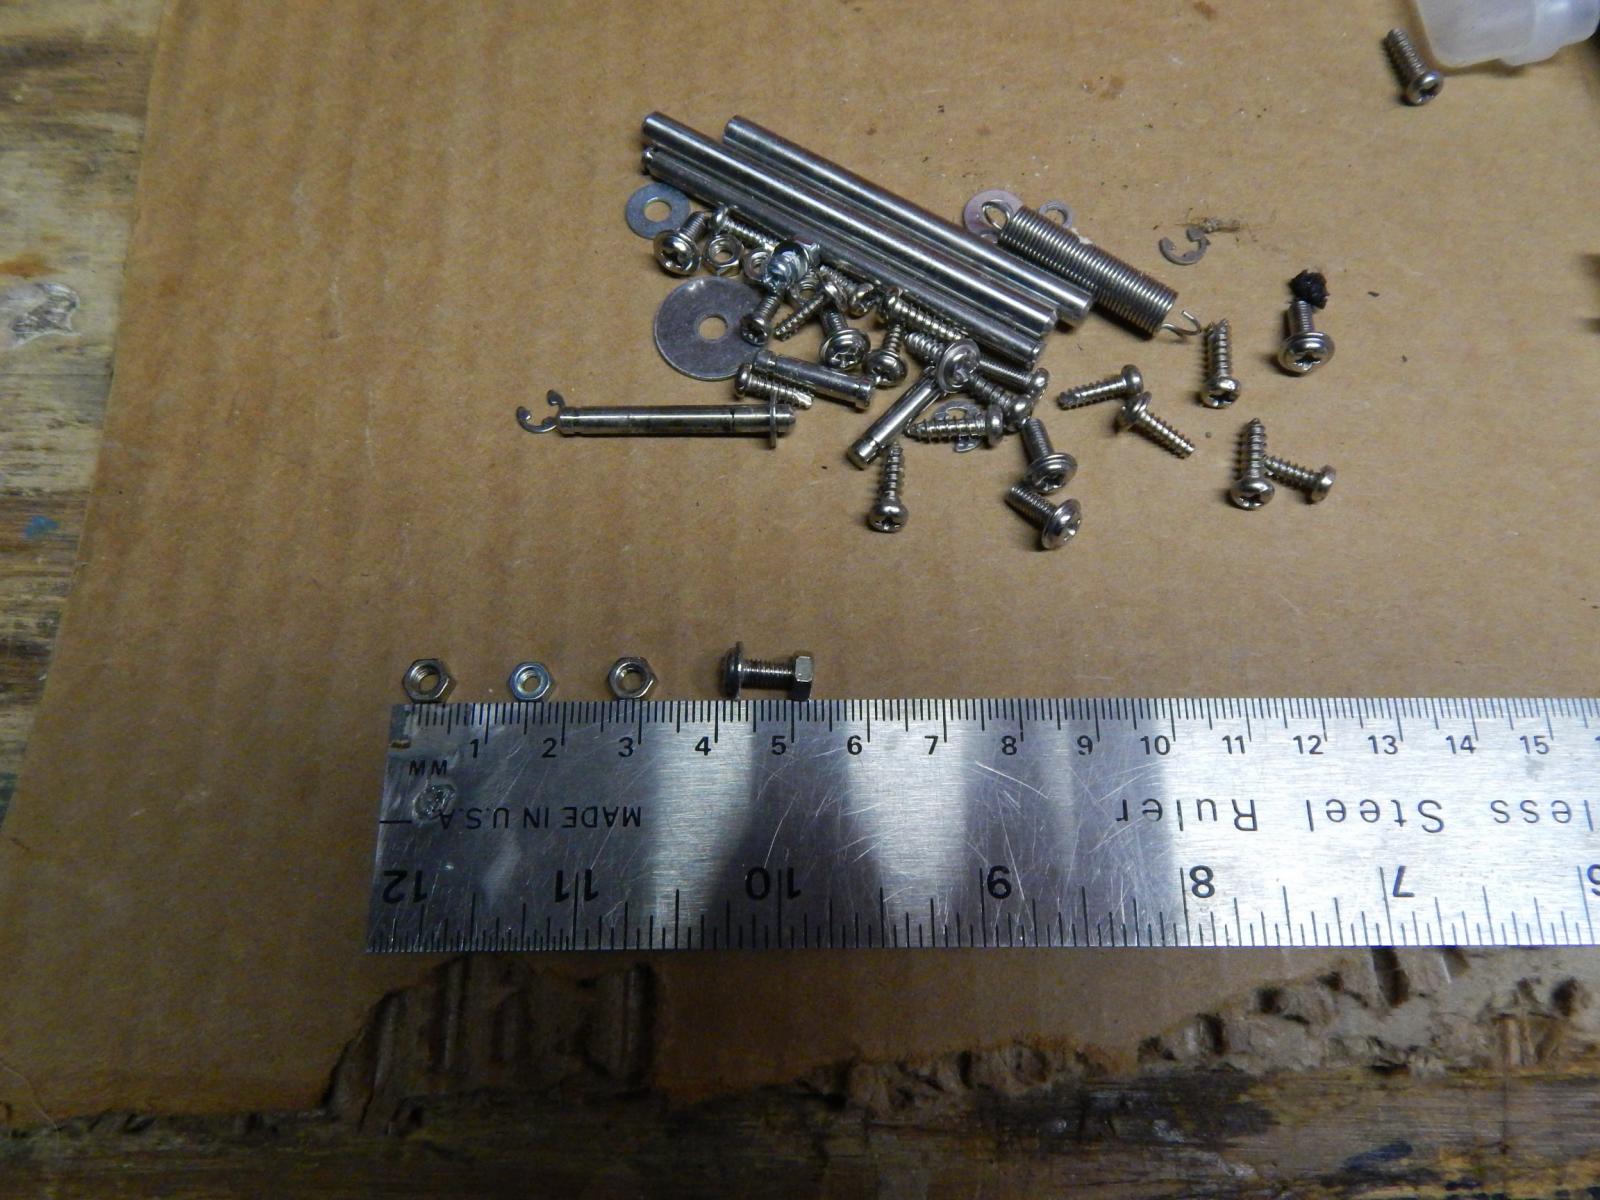
Our KEURIG (coffee machine) died the other day and I took it completely apart to salvage the tiny bolts and nuts which I will be using on my Soling 1m RC sail boat. These tiny items will come in handy when anchoring the RC material to the hull. No pictures of the example yet but what follows is the completely taken apart coffee machine.

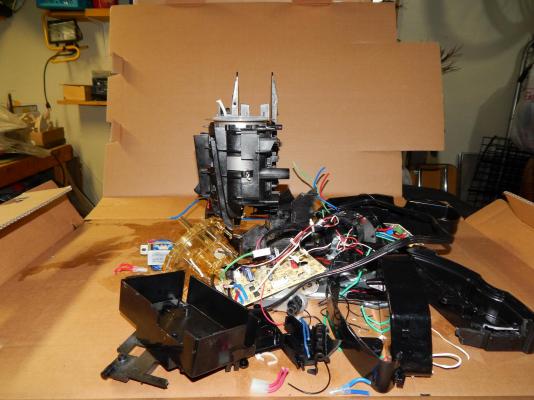
Rest in Peace
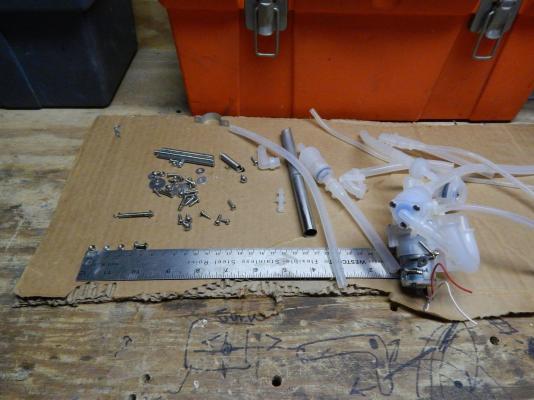
Tubing a tiny screws, nuts and bolts.

Here is the tiny items.
Marc
- hornet, mattsayers148, GLakie and 4 others
-
 7
7
-
The middle piece on top of the rudder sits too high.
This would be the long skinny piece of it? I did copy it from the plan.
There is a beam on which the deck is resting, just above the tiller. That one runs over the full width of the ship.
The same at the top end: there is a beam over the full width for the top-deck.
I've seen that in the drawing from Emke and Macardle.
There is, as far as I know no additional framing in the stern.
Jan
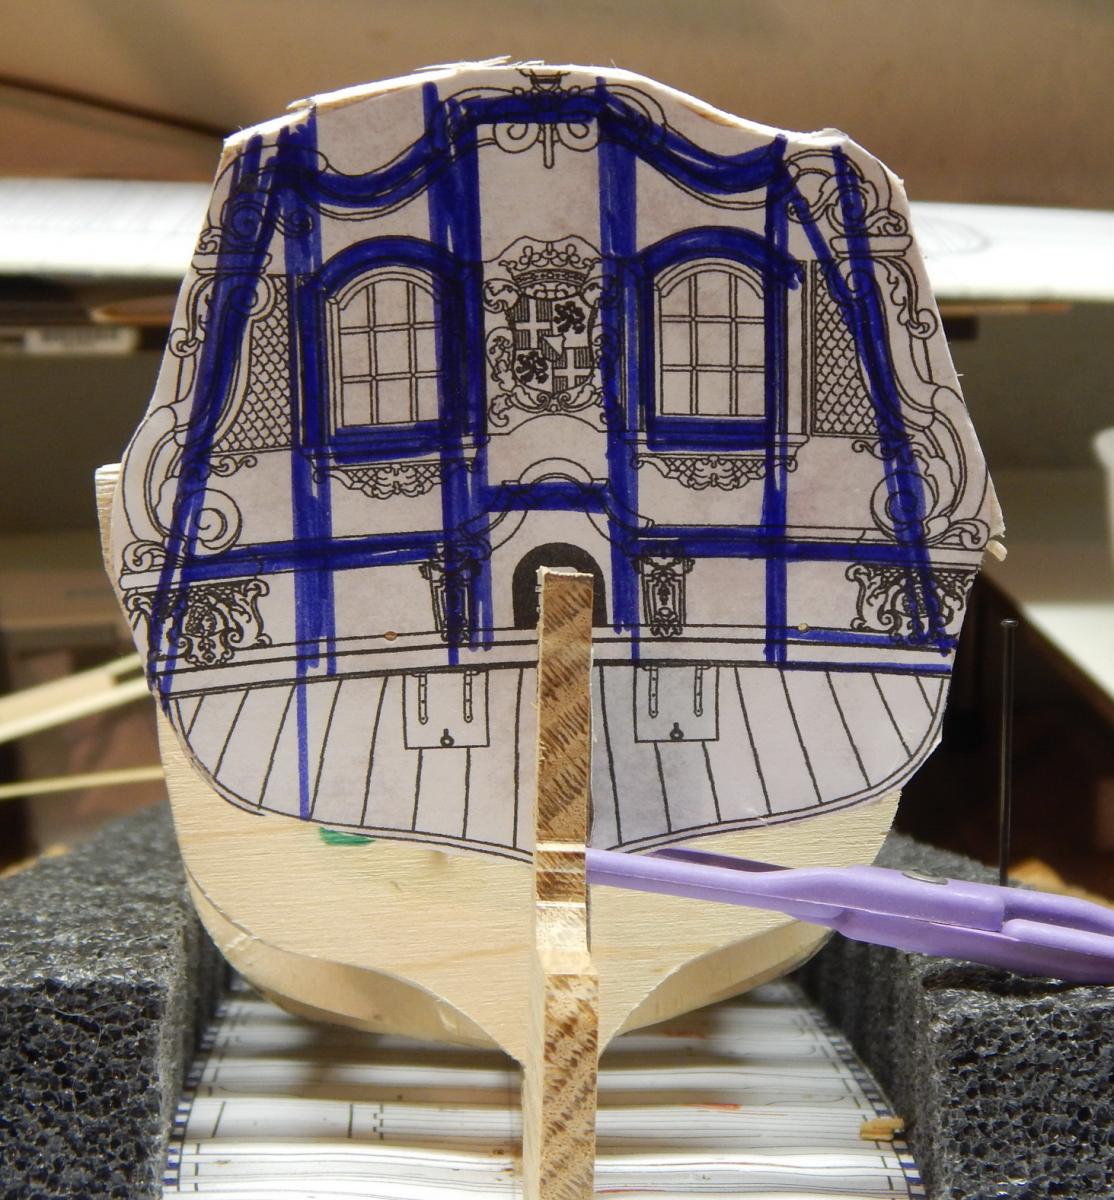
I should have explained this better. The blue lines on template of the stern are going to be small flat pieces of wood to make a frame.
Thanks for the suggestion.
Marc
-
In Europe we have the Euro. The 1 cent, 2 cent and 5 cent coins are in diameter between 12 and 15 mm, and these 3 coins i used for the shields. I hammered them a bit convex, filed the edges thin and removed the euro-marks and value. Then tinned them and blackened them.
That is a great idea and looks good. I wonder if the European Bank is bothered that you took some coins out of circulation.
Marc
- *Hans* and Angarfather
-
2
-
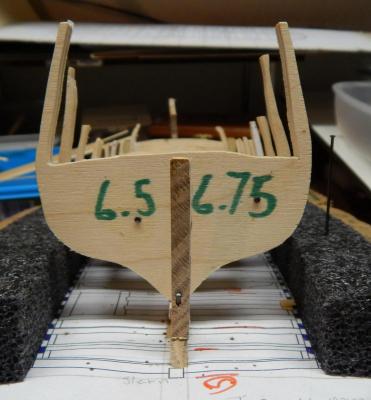
Finished all the frames and working on the bow and stern. I tend to overthink different ways on how to built different items. For instance - the bow - I make numerous templates and come up with many creative ideas on how this item should be built. I make it from balsa and basswood, then dry fit and if it isn't right I start all over again. I then resort back to the first idea.
I also get stuck on a particular measurement. In Emke's drawings the distance from frame 6.5 to the stern is different on 2 plans by 2 mm. I contemplate too much. I want it all exact but then when you think about it, 'nothing is exact'. Not in those days and not now. :-)
Used dark cherry to simulate oak. I am pretty happy about these pieces as they turned out well.
Different view and not sanded yet.

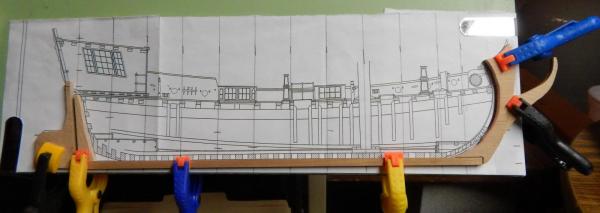
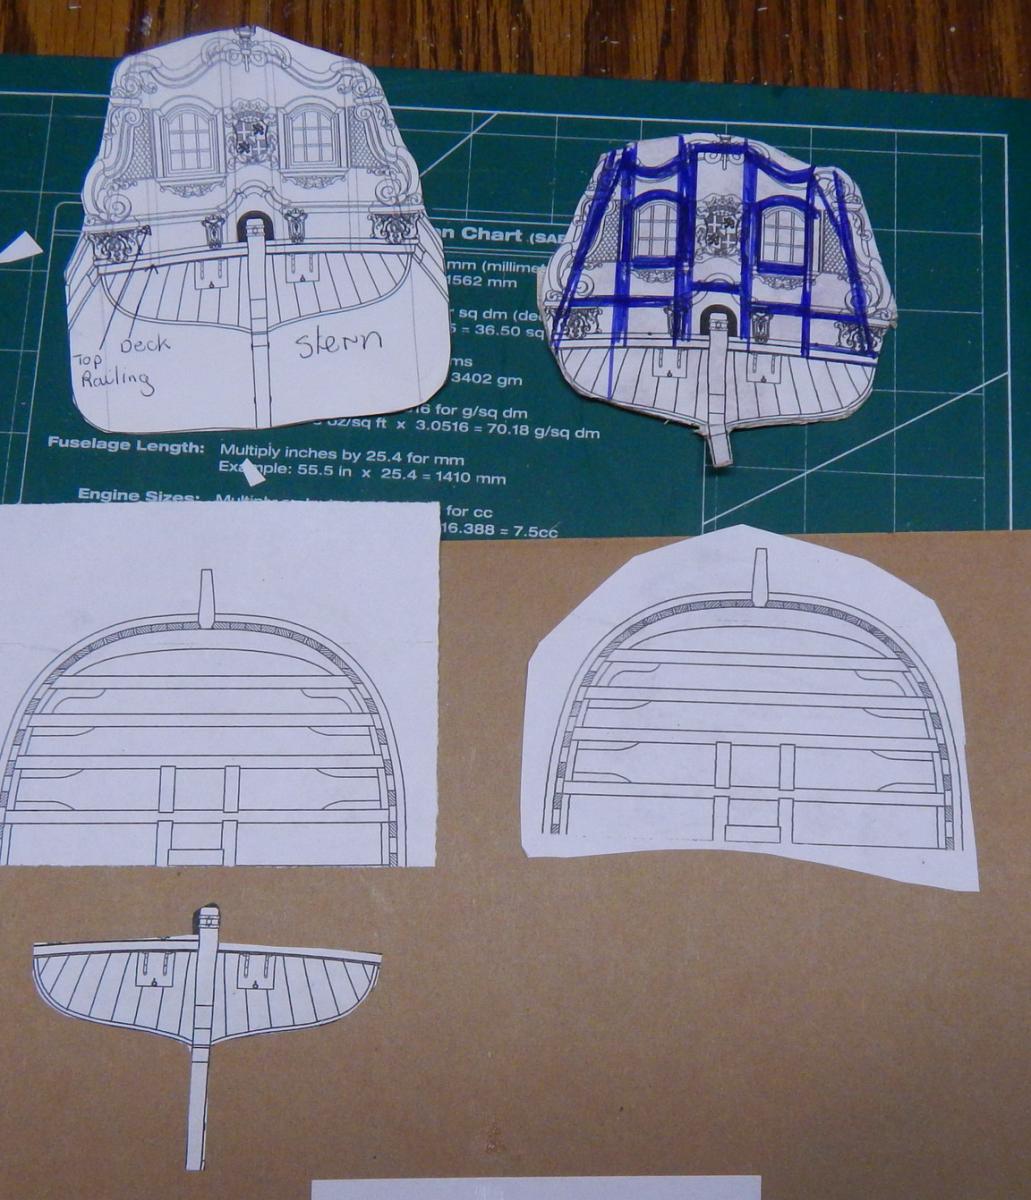
Template of the stern. The blue lines are for the framing of the stern.
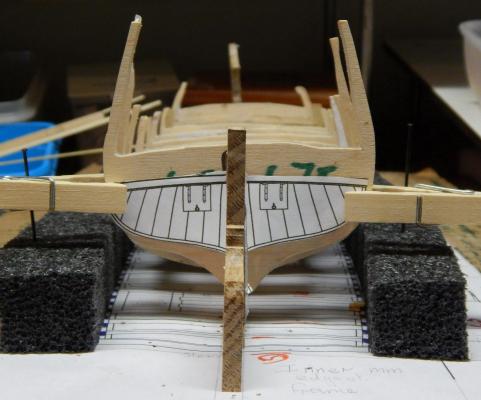
Template of the lower part of the stern. To check distance and how it will be positioned.
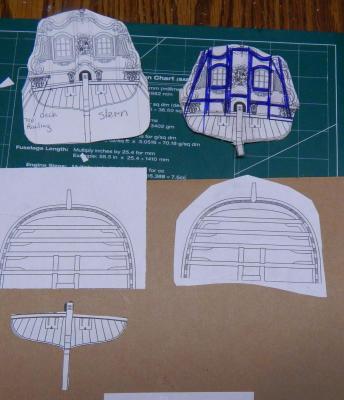
Different templatesw and there are many more of these.
-
Beautiful, Everything that is on the table makes it look so real. I thoroughly enjoyed this log. Thanks.
Marc
-
The compass box itself was made with thin pieces of hardwood because ..................................saw with a sled.
Salty Sea Dog do you create doll house furniture as well? The extreme miniature work you do, making doll house furniture would be pretty easy with your talents.
Marc
-
Since 2011 I've had a Skil SSaw from Sears costing me $90.00. My favorite Power tool. I have used it to cut everything from 3/4" oak to 1/16 basswood. I use it for fret work, clocks and my intarsia has some serious colorful hardwood, 1/2" puzzles and so on. My layered bowls are cut on an angle. It is all a matter of how creative you are.
I have cut brass tubes, aluminum siding, 1/2" Lexan Plexiglas, and other material. (It all depends on the type of blade you are using).
As you can read from the above, I have turned my SSaw into a band saw and a table saw.
I use Olson blades of various types and TPI's. Delta blades are so-so. I have also created some jigs so I can cut in a straight line.
Important note: when I paste a line tracing on the wood I completely cover the plank with clear packing tape. It lubricates the saw. So there is less breakage and burning. I do this to every piece of wood I cut.
Thanks for mentioning additional options to buy blades.
Marc
-
This is one of the best topic on this forum. Thank you CaptainSteve. The sharing of how we build, what parts we use, where we scour and purchase parts. I am going to scour ebay and visit HobbyLobby and Michael's again - jewelry department.
Marc
-
WOW Nils this ship is impressive, the attention to details, the planking.
I like the soldering of the brass (Is it brass?) I am drooling all over what you have completed with the masts and lets not forget the attention of details..... again.
I am just amazed with all the metal work.
I like the way you add a figure in the picture to show the correct scale of the items.
In post 103 I like what you did to 2 clothes pins. Glue 2 together and create a larger clamp (I am going to do that as well), thanks for the tip.
I enjoy how you slowly fill the deck with the necessary items.
On build log part 35 (post #133) what do you use to put the brass railing's together? Are you soldering this? It looks perfect, such even spacing's. I just read post #151 and I think you answered my question.
I am glad you added the sails (as I always do myself). It gives a complete look of the ship but some people say that it hides the rigging and parts of the spars and masts. Just view the ship from all angles.
Excellent paint job as well.
When I lived in Amsterdam in 85, the Tall Ship SAIL show had the Gorch Fock 1 and she was impressive.
I actually did a cross stitch from her. (From all the cross stitches I have done in my life this is one I kept and the rest have been given away).
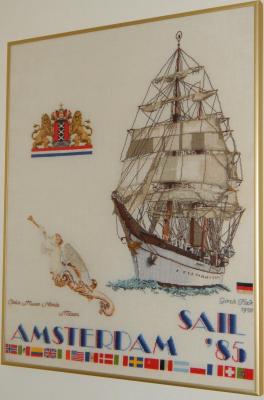
Top left - Crest of Amsterdam
Middle left - Figure head from a museum in Milan.
Bottom - All the flags from countries that participated and rest is the ship itself.
- Piet, Mirabell61 and mtaylor
-
3
-
I lie your picture under "Jan B.". The captain from Tin Tin (Kuifje) is known to have a long sentence of words. Oh Yes, the ships hull looks good.
Marc
-
Last club meet there was a member who got a NEW DOUBLE MULTI-CLAMP HOLD IT PLUS from www.vanda-layindustries.com. Beautiful piece, solid and holds the dremel well into the clamps.
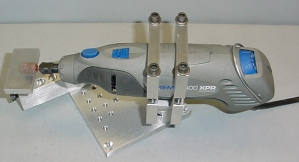
So my next power tool will be the Acra mill press from vanda-lay. I will be able to do many things with that. Furthermore, as I said before and I have other wood hobbies (building clocks and intarsia)
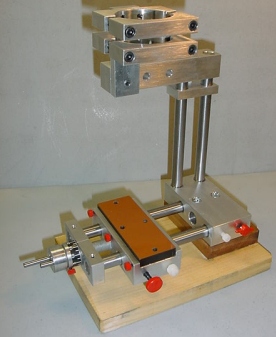
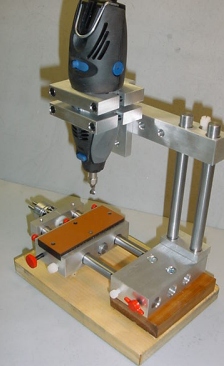
The router table display is similar to what Byrnes is coming out or is already available. Dremel has one as well except for much cheaper, but essentially does the same thing.
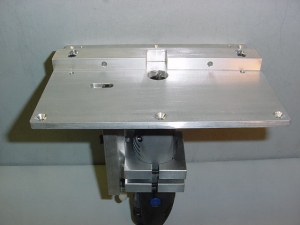
Solid Aluminum Construction
•Large 1/4”X6”X8” Table
•Fits All Dremel & Simular Moto Tools
•Route, Shape, Sand, Grind
•Mount Or Clamp To Any Work Surface
$110.00
-
Bob,
I'm milling planking... 1/16 X 1/8, 1/32 X 1/8 and 3/32 X 3/16 (all dimensions in inches). I'm using my table saw as there isn't any other way to do this that I can see. The wood is ebony and swiss pear.
Is there a lot of waste (saw dust) percentage wise? I am assuming the waste would be as much as the width of the blade.
1/32 x 1/8 - that is amazing. It is accurate all along the plank you are cutting out?
Marc
-
LOL....... "Everyone, repeat after me".If the price is comparable, go with the Byrnes. You won't regret it! If the price is not comparable, go with the Byrnes. You won't regret it!

Conclusion of this thread. Get a Byrnes saw if it is a "table saw" you are looking for and the precision you need for the production work. This topic was discussed in last weekend's club meet and it was agreed by the pro builders. ""GET a Byrnes saw".
Marc
- GLakie, zoly99sask, mtaylor and 1 other
-
4
-
I tried that and my cat became entangled himself and with long hair I had to cut it out. He looked rather ruff.Of give it to the ship's cat. It'll get stretched and spread from one end of the house to the other. Then you can just reel it up.

Marc
- mtaylor, GLakie and CaptainSteve
-
3
-
Just a thought:
With scratch building my jacht, there is not really a correct way of building a particular ship. I scour the NET, especially the Friesian museum that has all there plans of digitized and available. Also search the word "bouwtekeningen" (build drawings) and there is much of that as well.
Look through numerous books and pictures just to get an idea of what certain parts were built.
What I may do is go to several book merchants in Holland and order a book or two on the subjects of jachts. (bol.com.nl; nautiek.nl and lanasta.com).
The original book of the Utrecht - Ab Hoving is really good. The one I have from Gil MaCardle is pretty good. I am just not building according to his method. There is one book E.v.Konijnenburg.Schip Building - available on archive.org and 2 german books; Die Niederlandische Jacht im 17.Jahrhundert and Smakken Kuffen Galioten-1897 (free) that have helped me a lot.
Then one has to be very creative to come up with methods and patterns, etc to put it all together. Compared to English or French ships I find (but I could be wrong) that there isn't much technical reference on early Dutch ships, but, it is getting better.
In the 80's I built a tjalk from a drawing and it was completely wrong. I put 200 years of methods in one little boat. I was so off, I laughed and learned a lot. I put a 1/2 lb weight in the hull and let it sail towards the middle of the local township lake. Top heavy like the Wasa. One little breeze and sank.
Thanks for reading.
Marc
- popeye the sailor and Piet
-
2
-
The easiest way to plank te bow is using a couple of filler blocks to get the shape right, and planking that over.
Jan
I thought of doing that. I glued 3 - 5" x 5" x 1/2" of basswood together and used the scroll saw to cut out the basic shape. Once my sander is delivered I can sand the angles.
Marc
-
I have done something very different for the Jacht Mary and the method comes from a member of a local club and a pro builder by the name of Gus Augustin
Equipment needed to make flags.
You make them from plain white printing paper
Fold the paper to the format you want it to be.
Wet the paper to take memory out.
Hang or put on towel to dry.
Paint the paper with acrylic.
Fold the paper and you have a flag.
Add 1 coat of Dullcoat to dull the paint colors.
It keeps its form whereas the cloth type lose it even if I starch it or use other methods.
Marc
-
Cool looking handle. I have razor saws as well and love them. Since you made the miter box from wood, isn't that going to wear out quickly and then you have to make a new one.
I took the little miter box that came with the X-Acto kit and made the groves 1mm wider with a dremel and a carbide saw blade. Works great.
Marc


The Mariner's Magazine 1669
in Book, Monograph and Magazine reviews and Downloads. Questions and Discussions for Books and Pubs
Posted · Edited by Marcus Botanicus
Cool, thanks for the find. This is going to be interesting. Just dloaded it... 573 pgs? I am going to be busy.
Marc