


flying_dutchman2
-
Posts
1,718 -
Joined
-
Last visited
Content Type
Profiles
Forums
Gallery
Events
Posts posted by flying_dutchman2
-
-
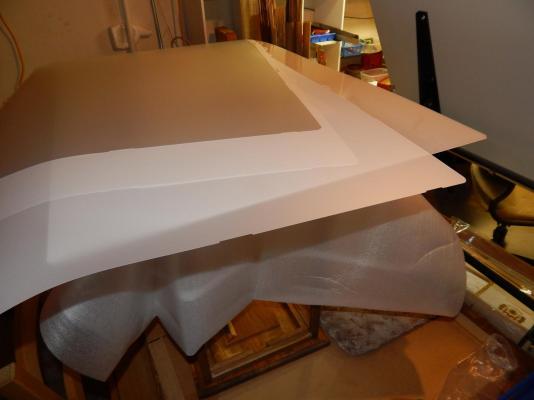
I took apart our 46" old Samsung TV and salvaged this vellum material out of it. Thick and thin sheets. I used them as tracing material. The thick sheets hold there form with numerous touching.
- dgbot, popeye the sailor, hexnut and 5 others
-
 8
8
-
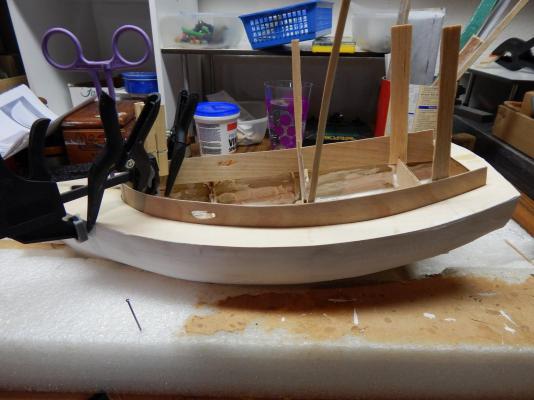
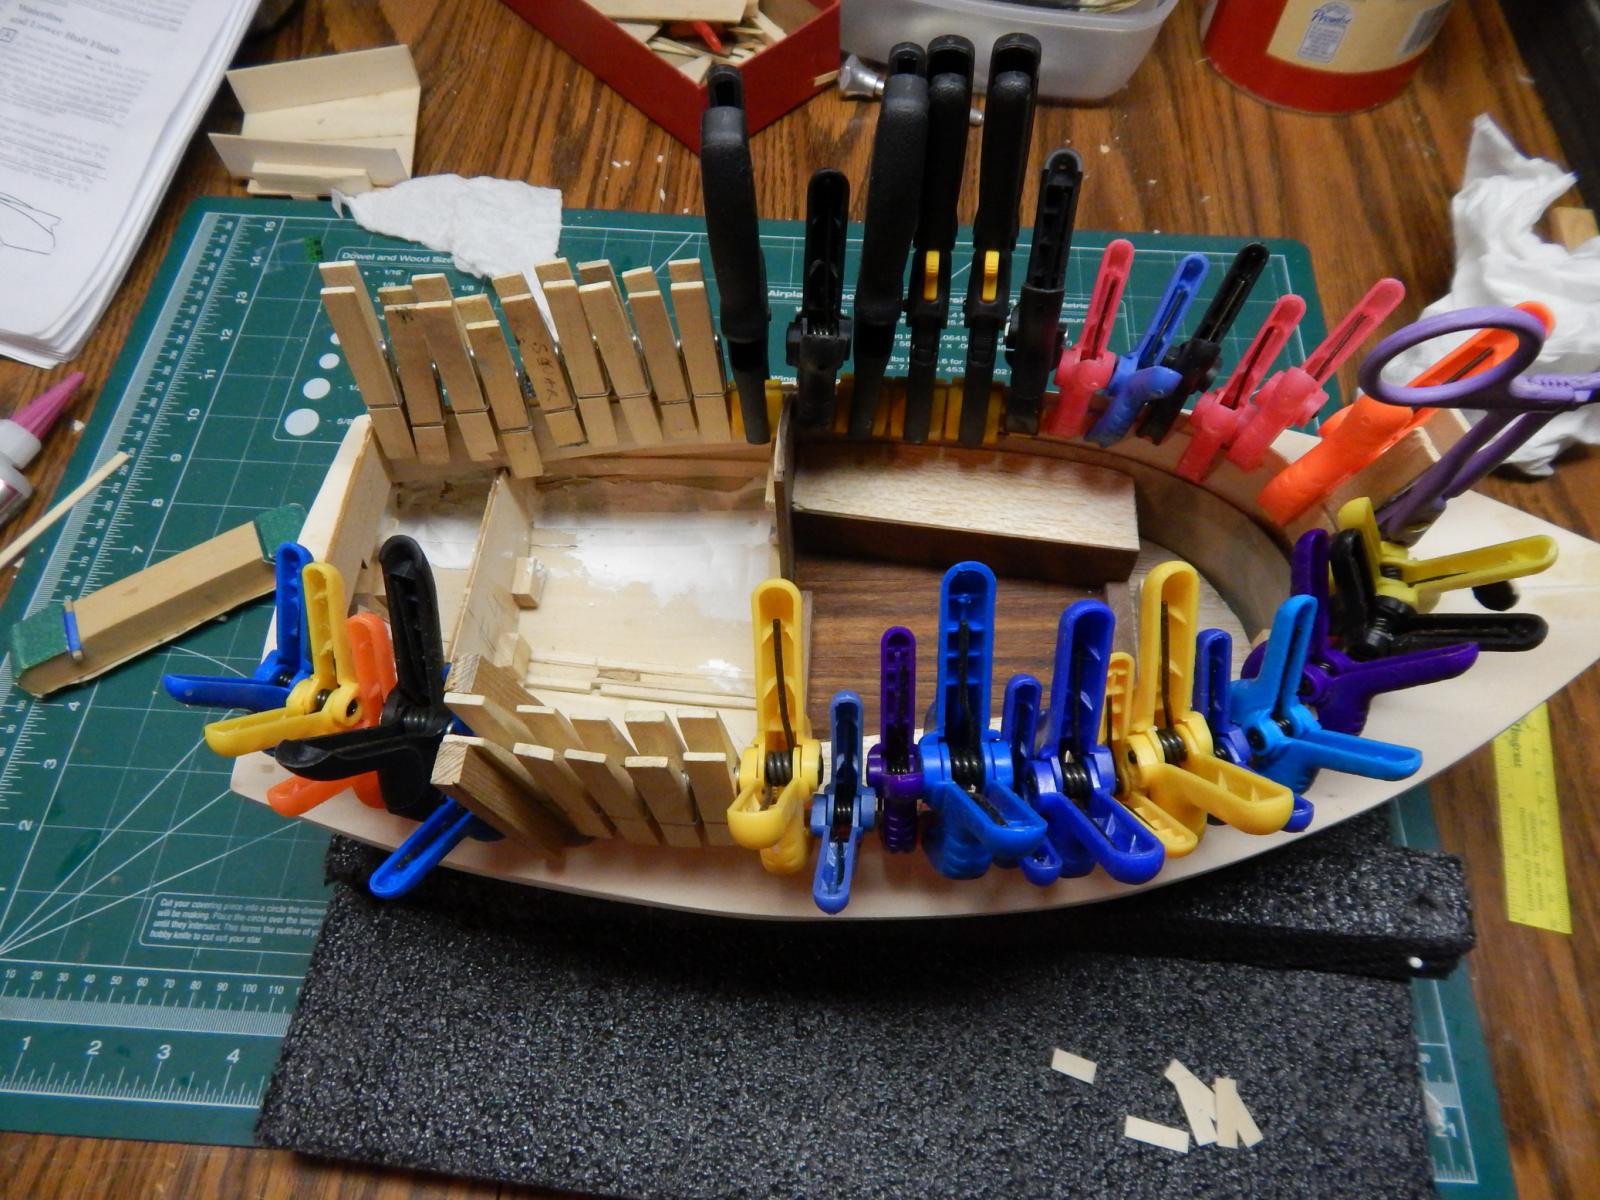
Finished up the cabin
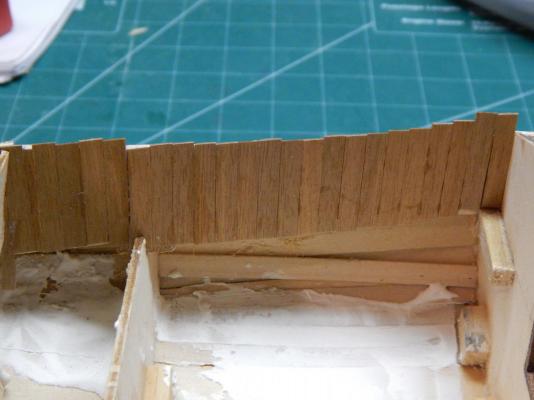
Planked the outside combing with basswood strips.


Planked the inside of the pilot house with mahogany strips.
Completed

-
This model is getting better and better. The molds and the way you do it is new to me and I love what you create with that.
Also, I like the coin you used as size comparison. One Gulden? (WOW, cool beans) For the modelers that don't know what that coin looks like it is roughly the same size as a quarter.
Marc
- Omega1234, kees de mol, Piet and 1 other
-
4
-
-
-
-
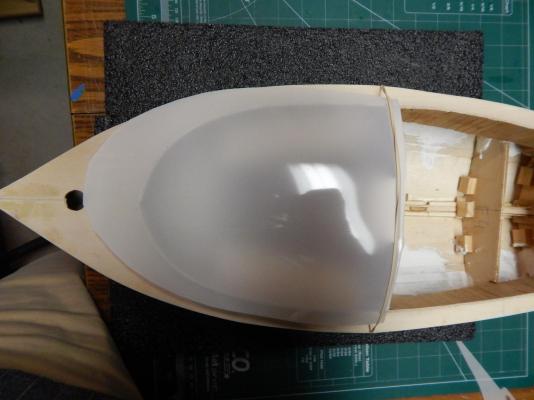
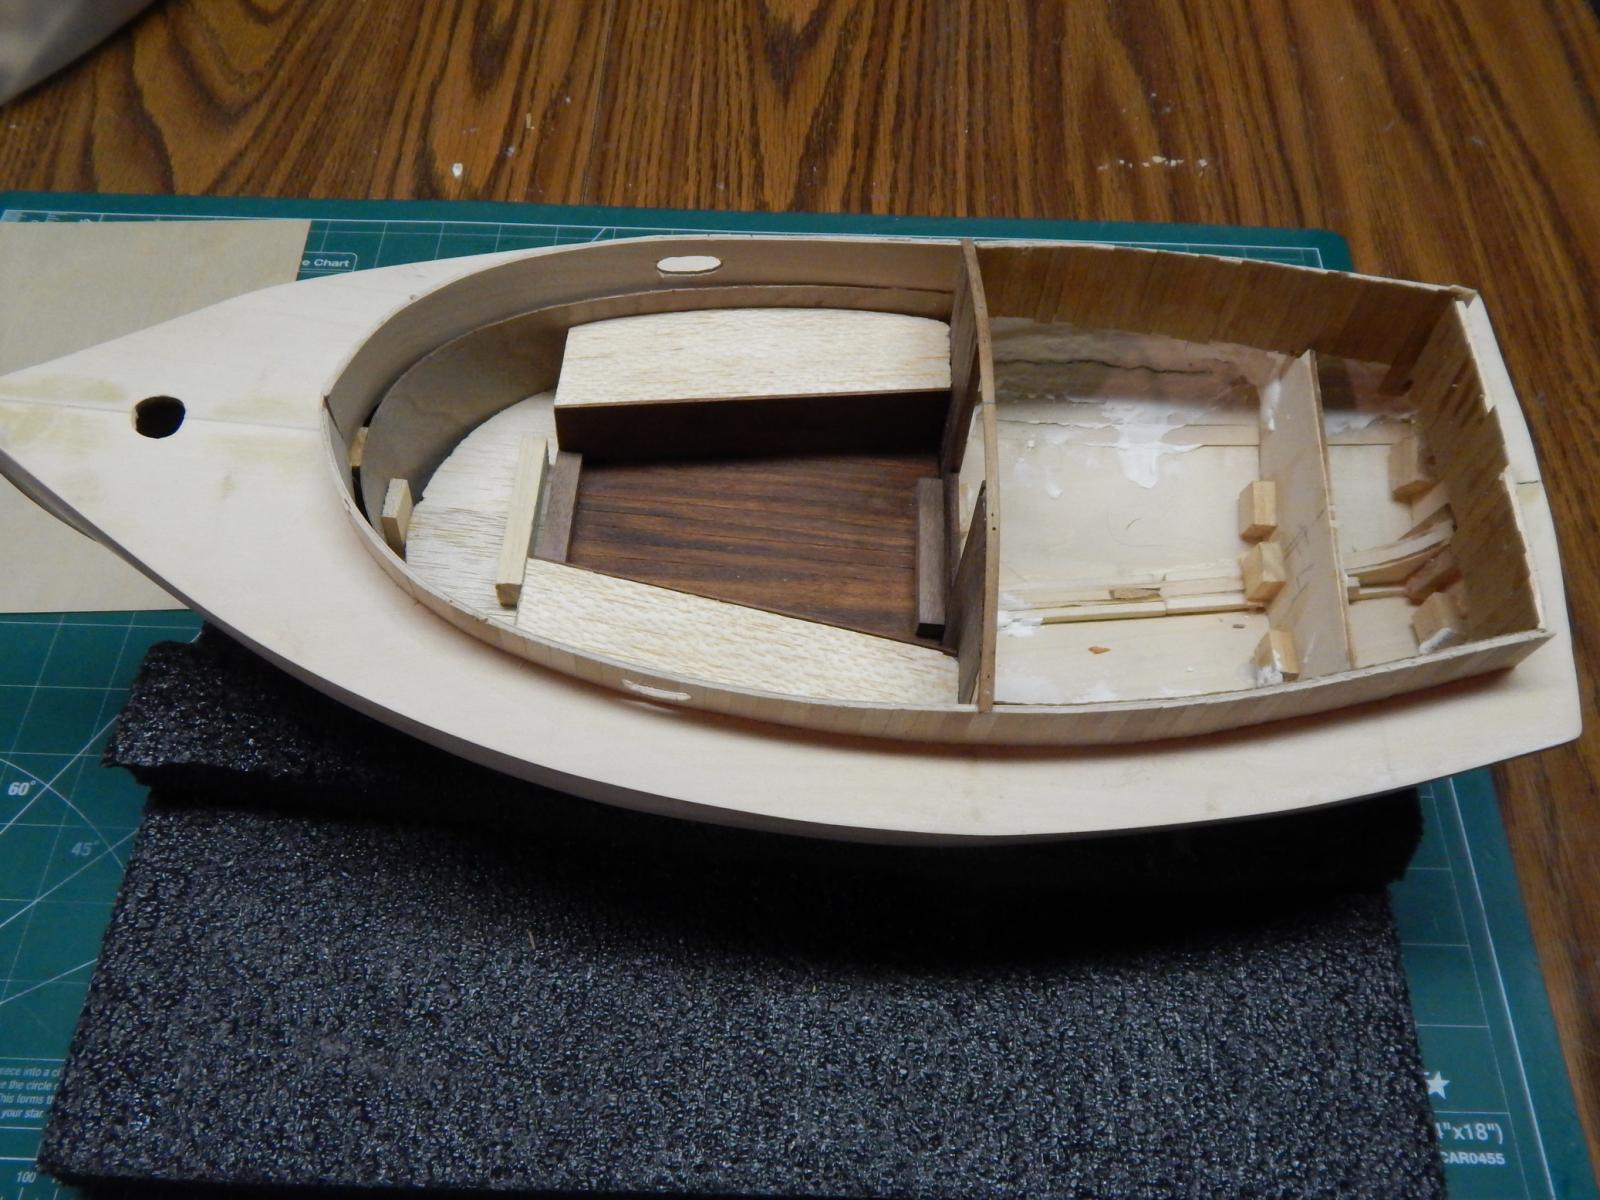
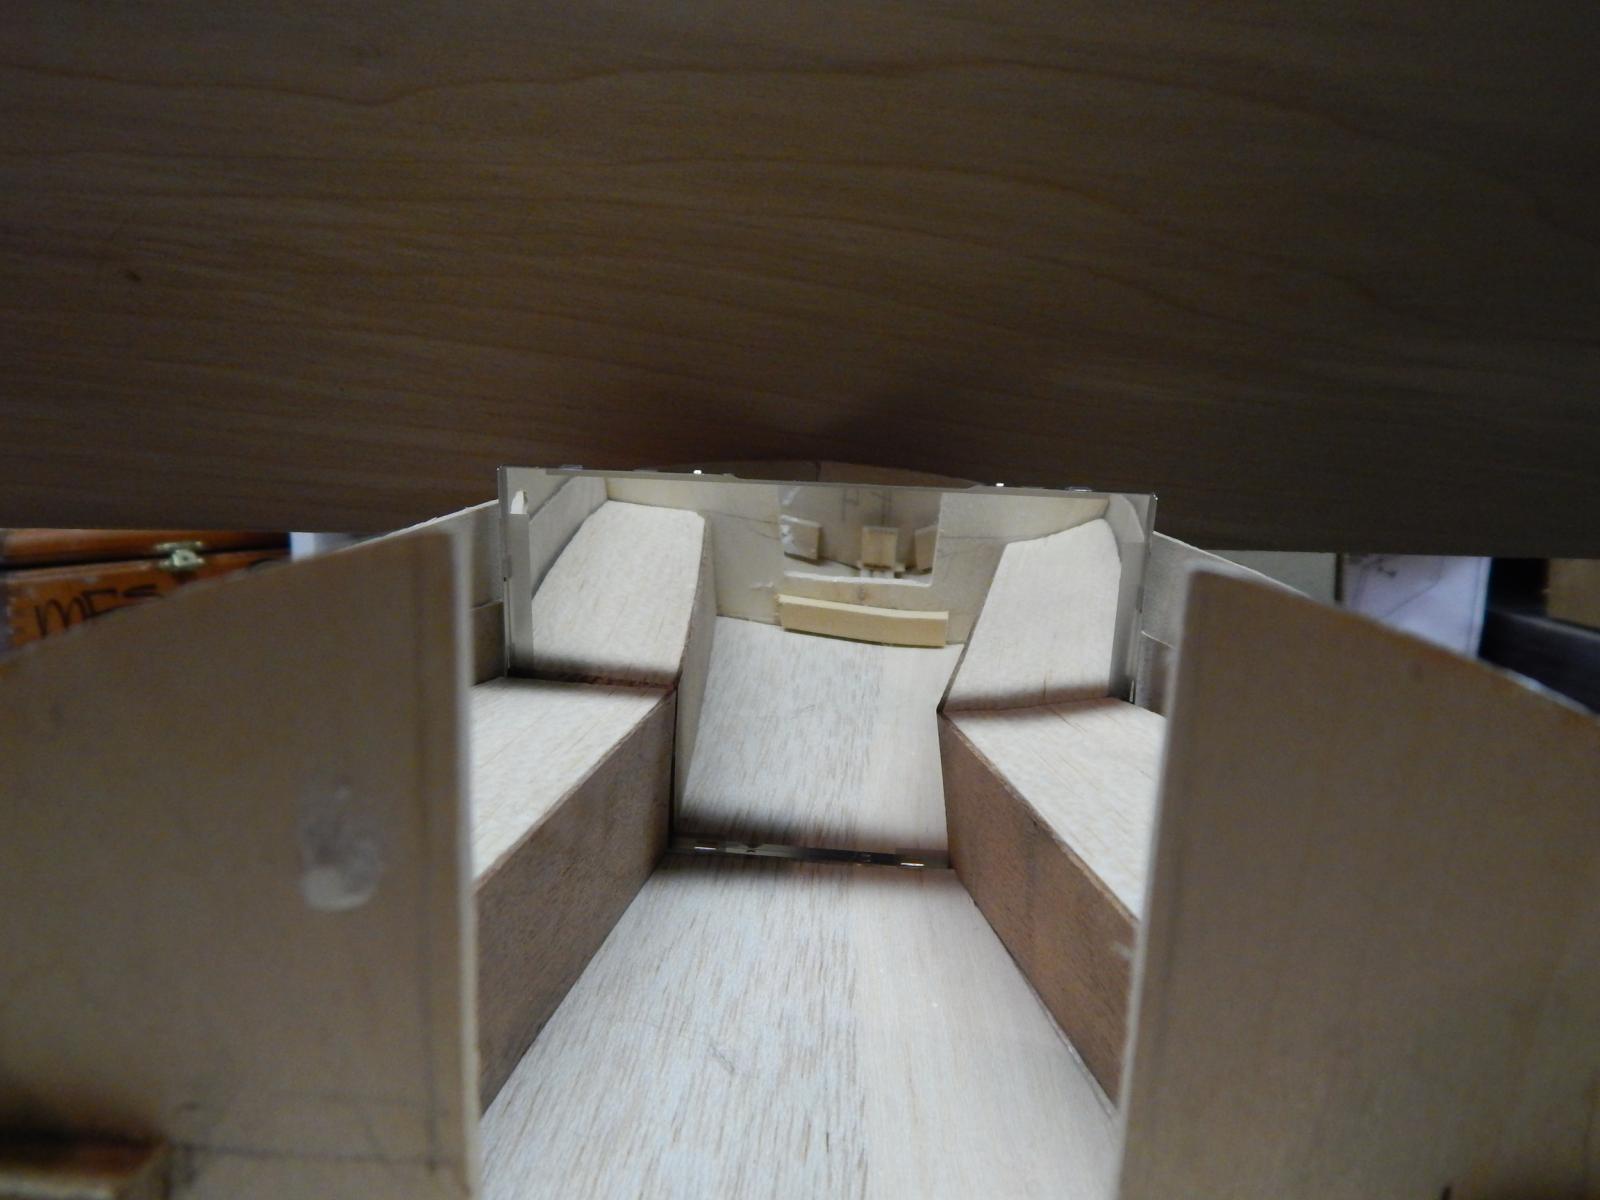
Below is the LCD from an HP printer that died. I took it apart to see what it is made off and found the mirror. Very thin and it pretty much fits in the cabin. The mirror is on the far left.
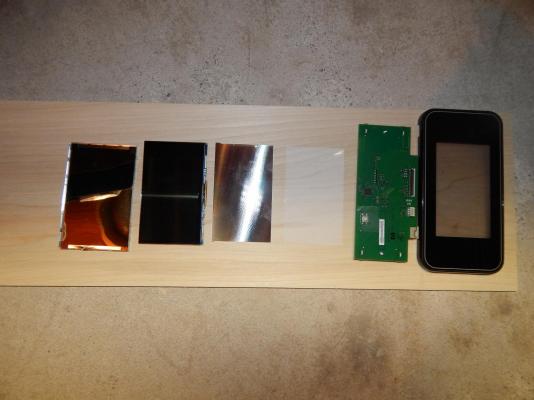
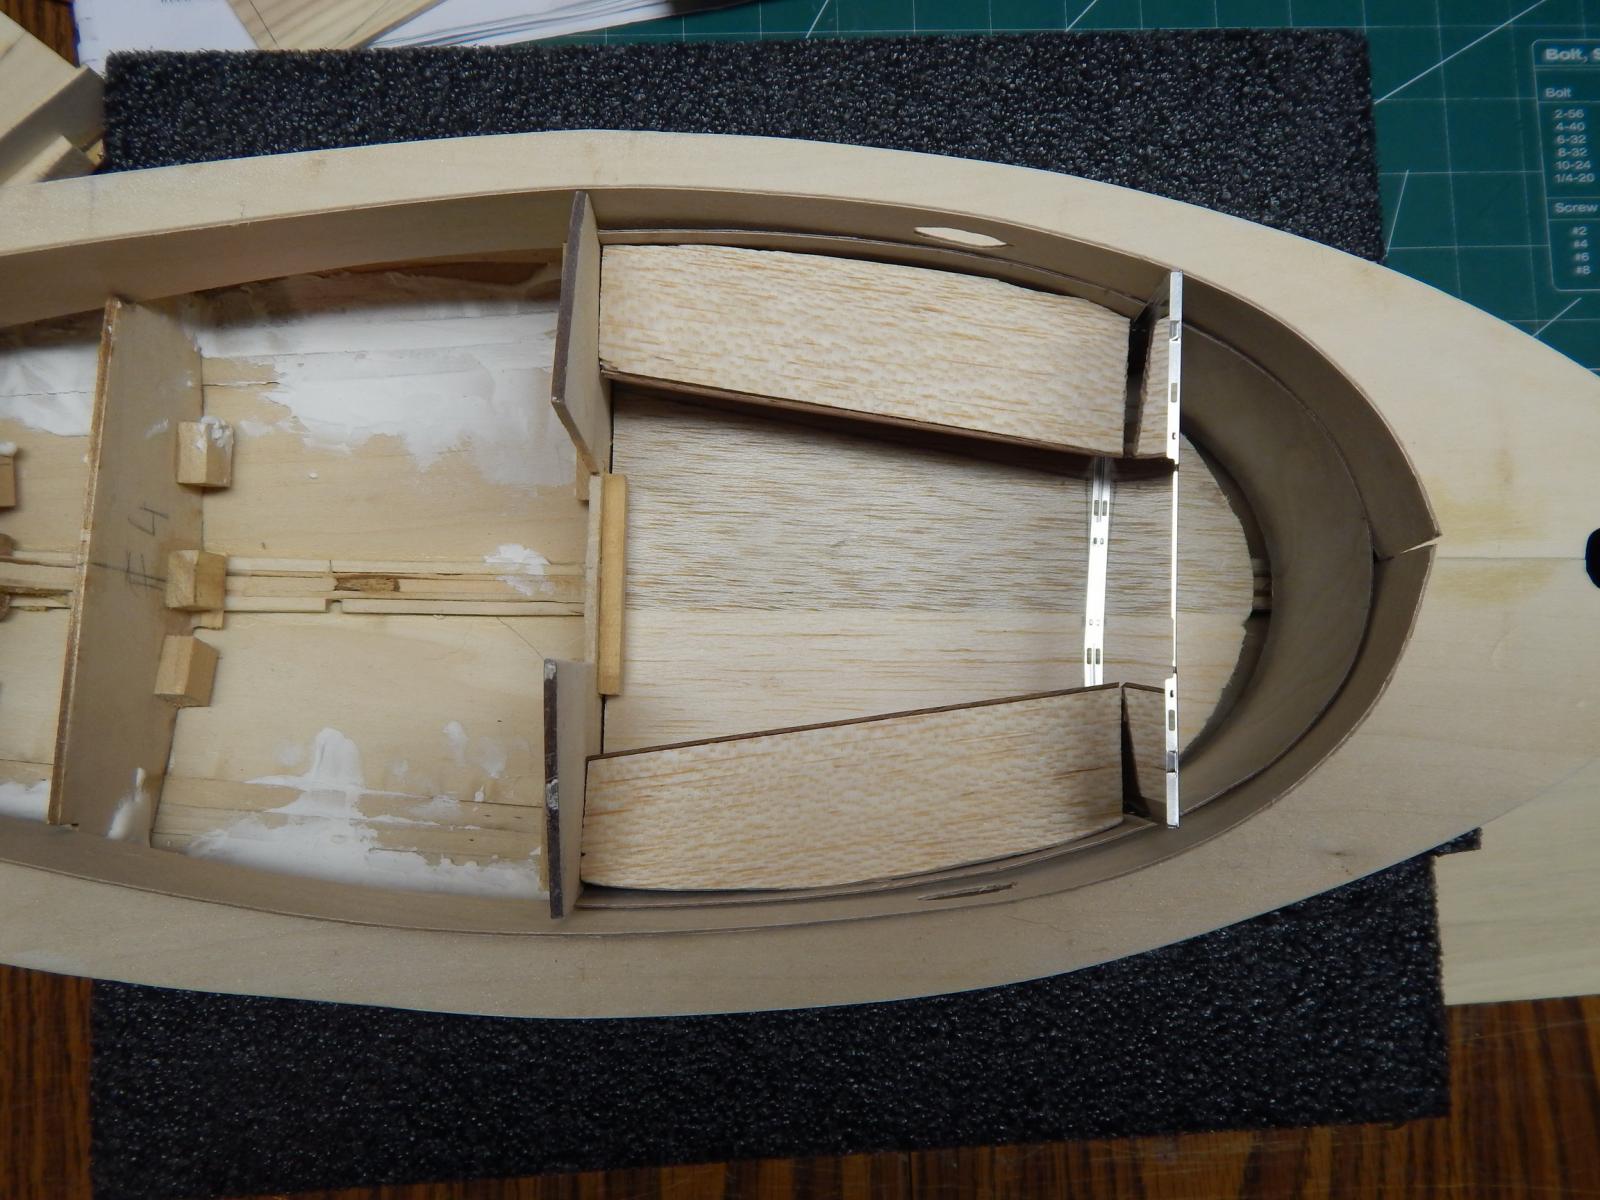
Dry fitted everything.
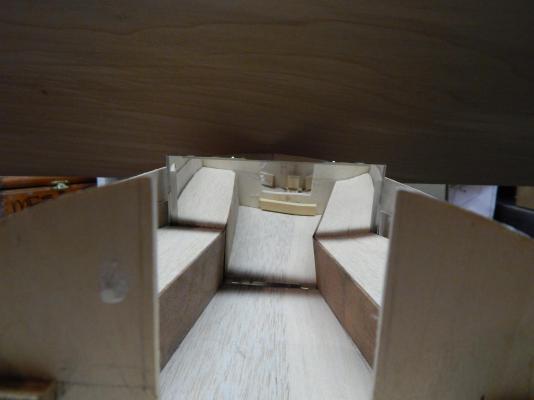
This is what it would look like if you look into the cabin. One needs to use a flashlight for better viewing.
Marc
-
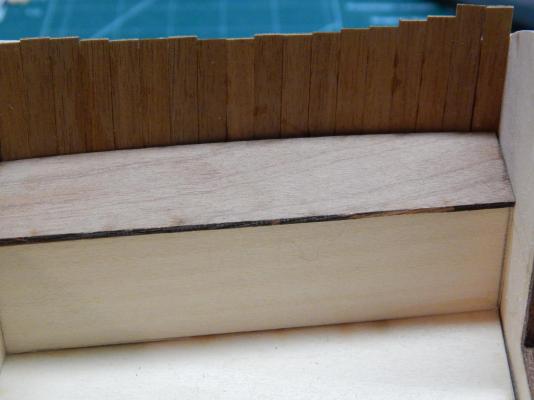
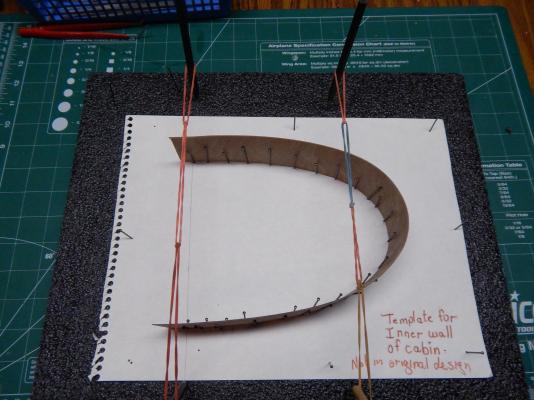
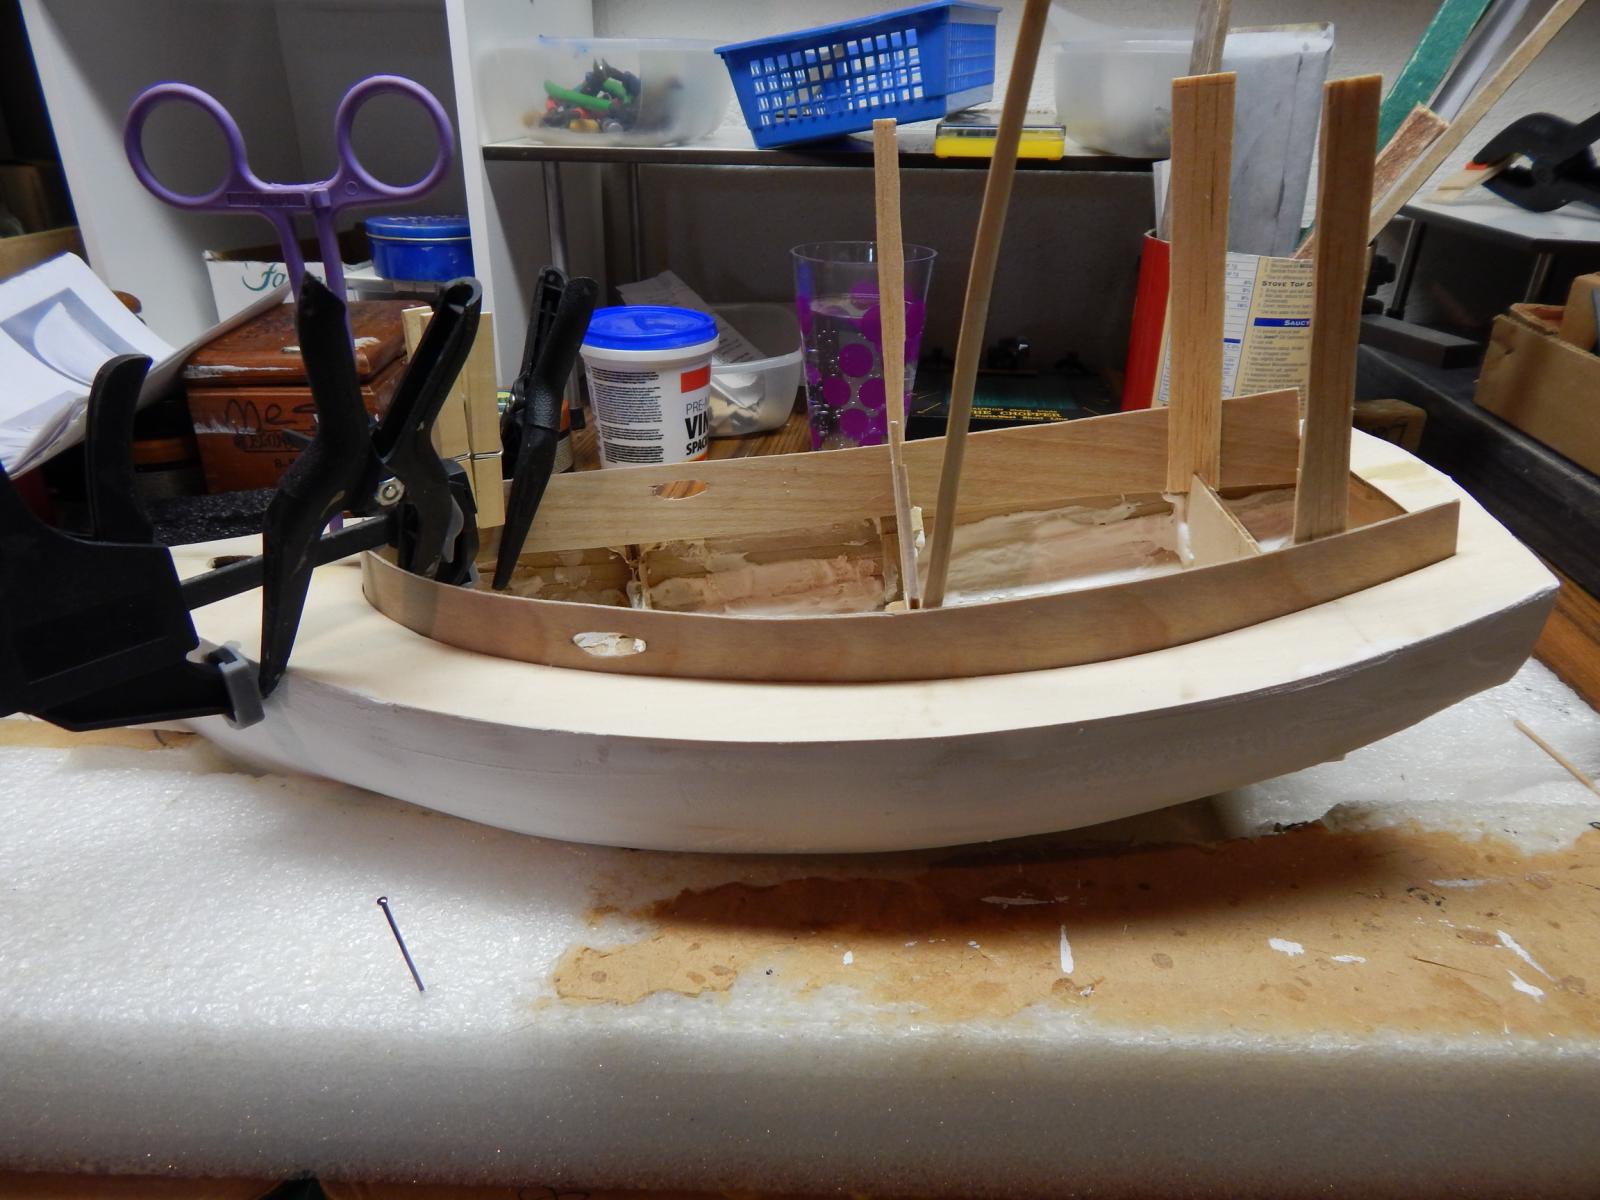
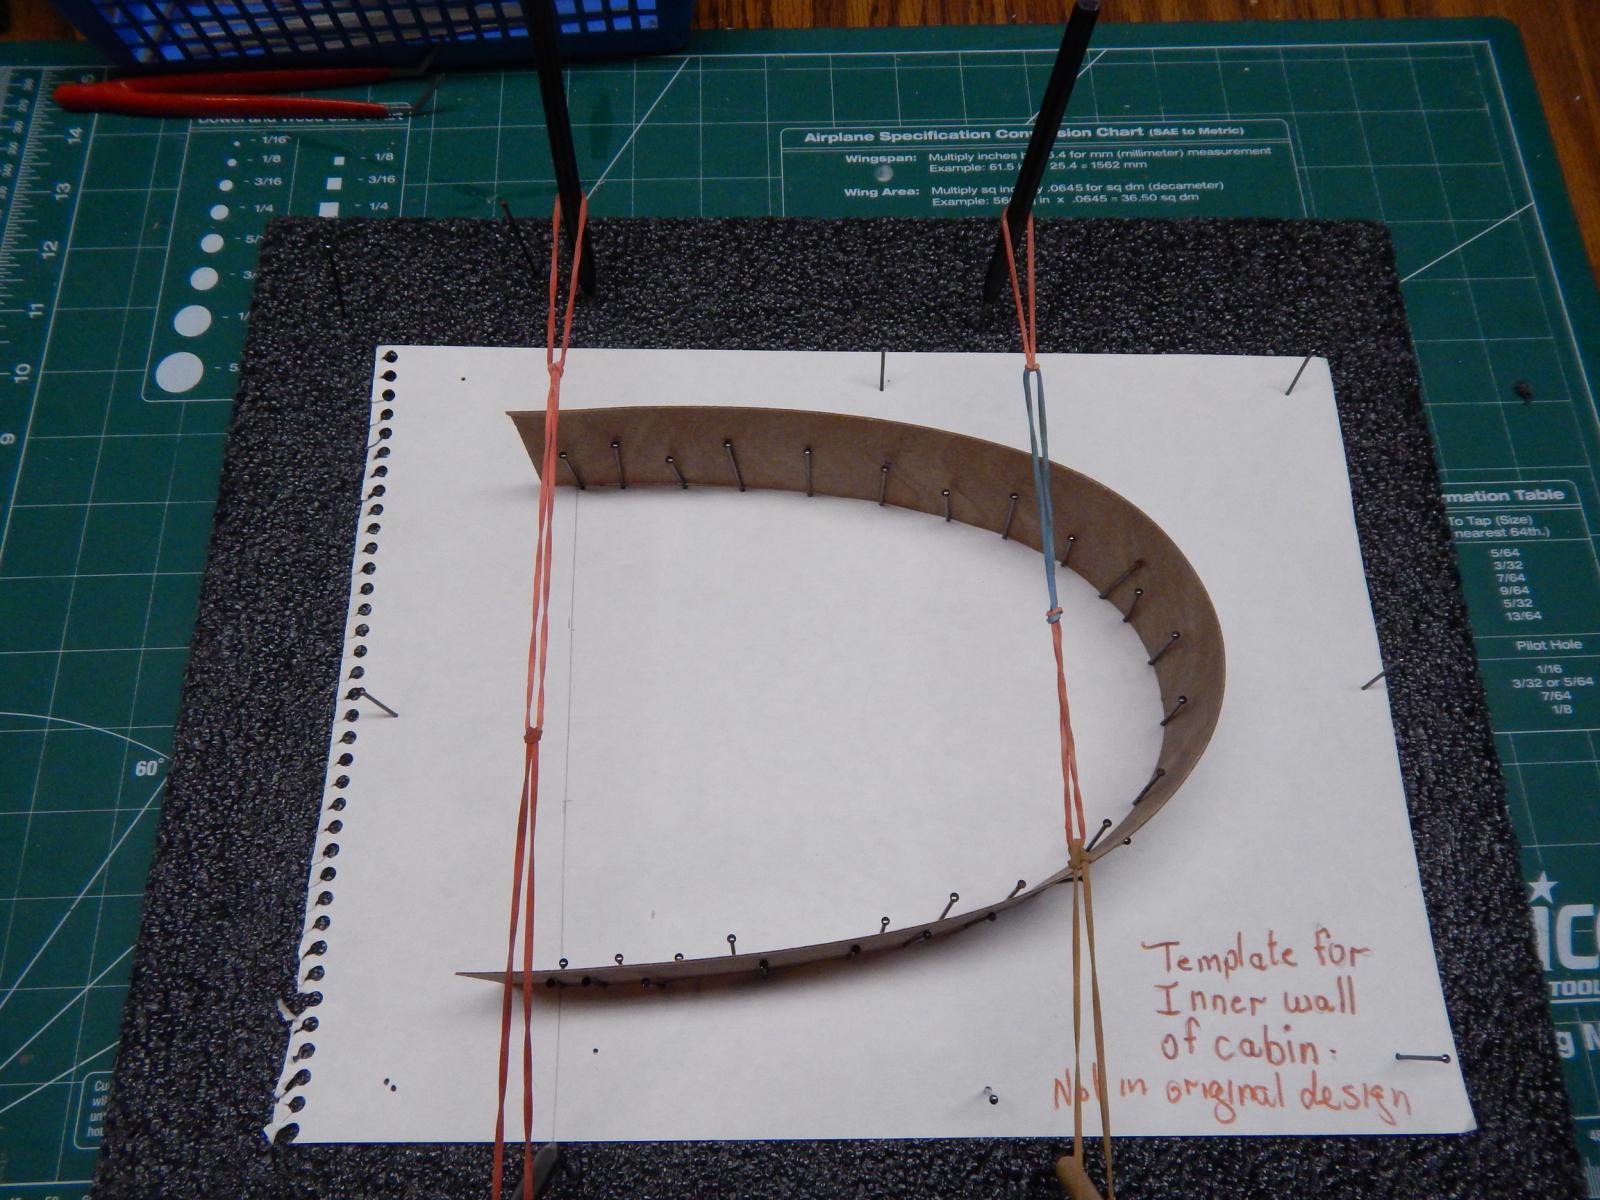
I re-did the cabin / combing with 1/32" birch ply (wonderful wood to work with)and put one window each instead of two according to the kit.
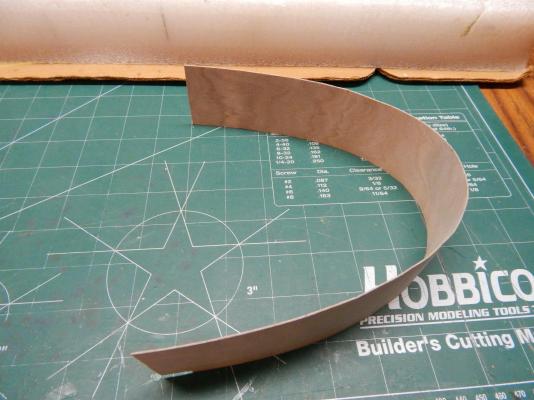
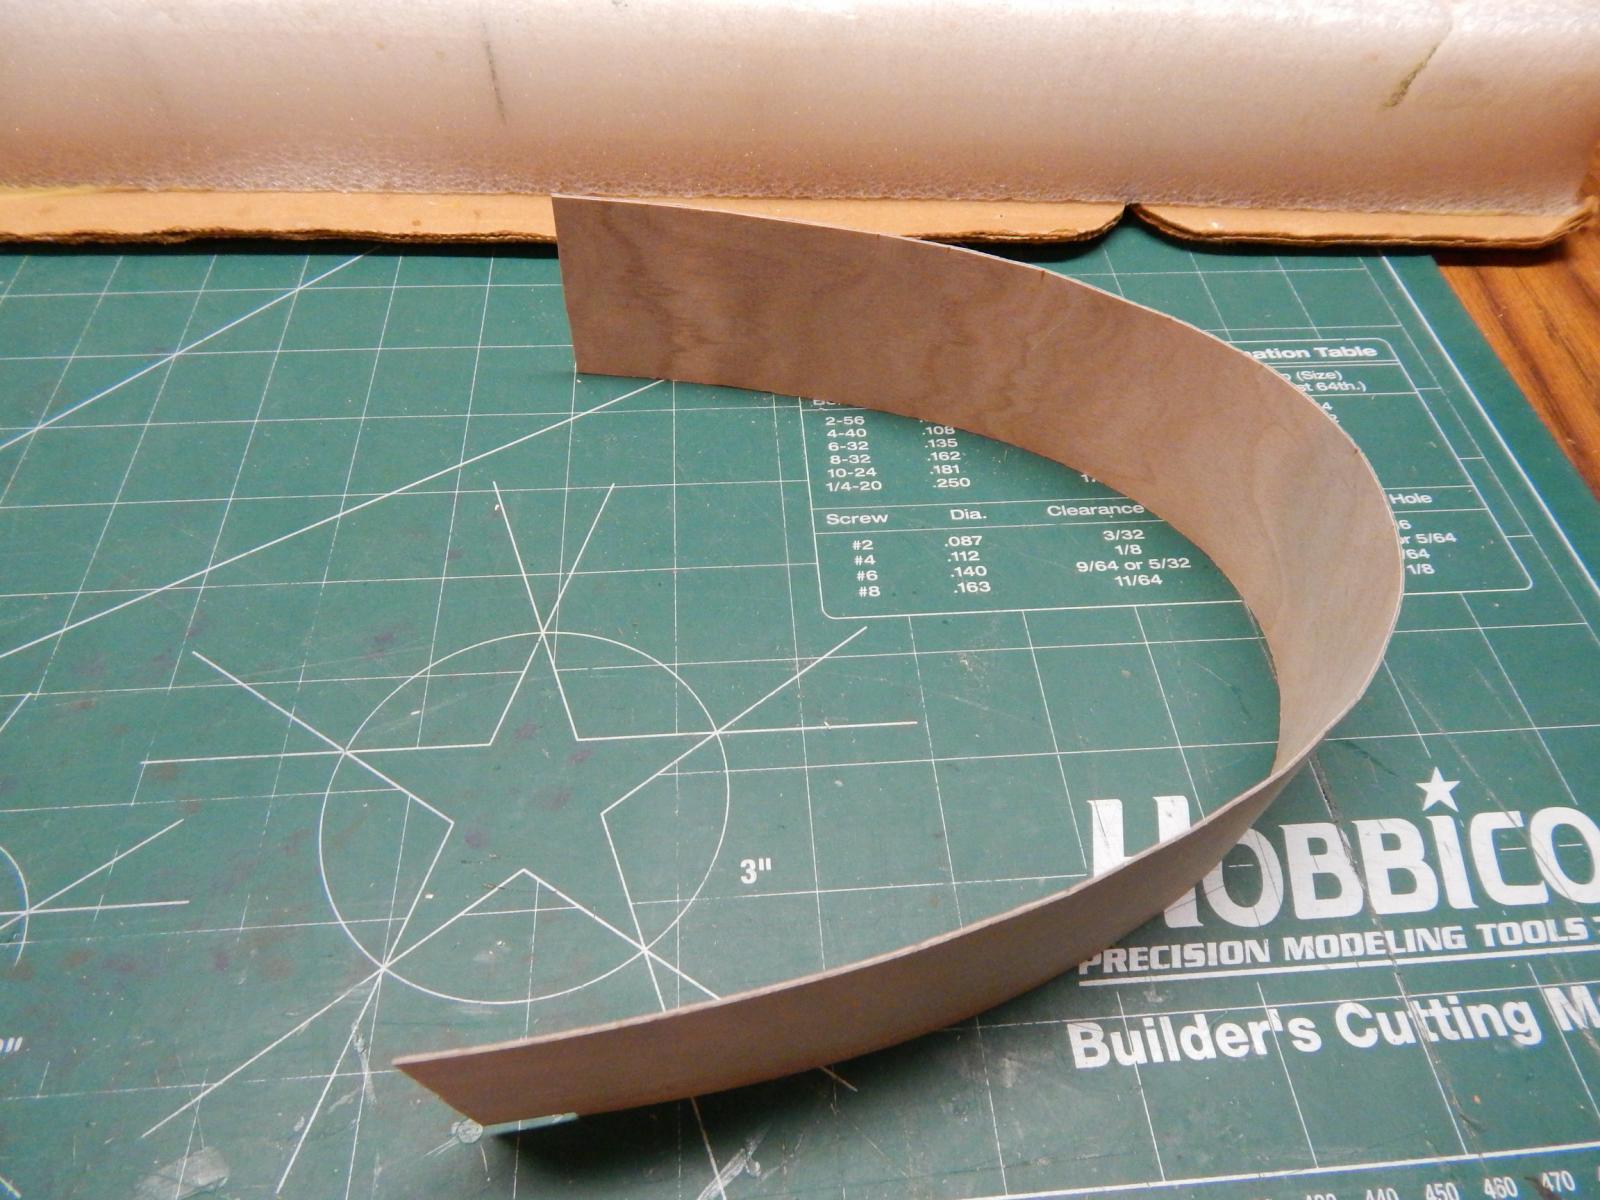
Bending the wood to fit the final shape
This is the cabin wall that goes below deck. Same wood and thickness as the combing.
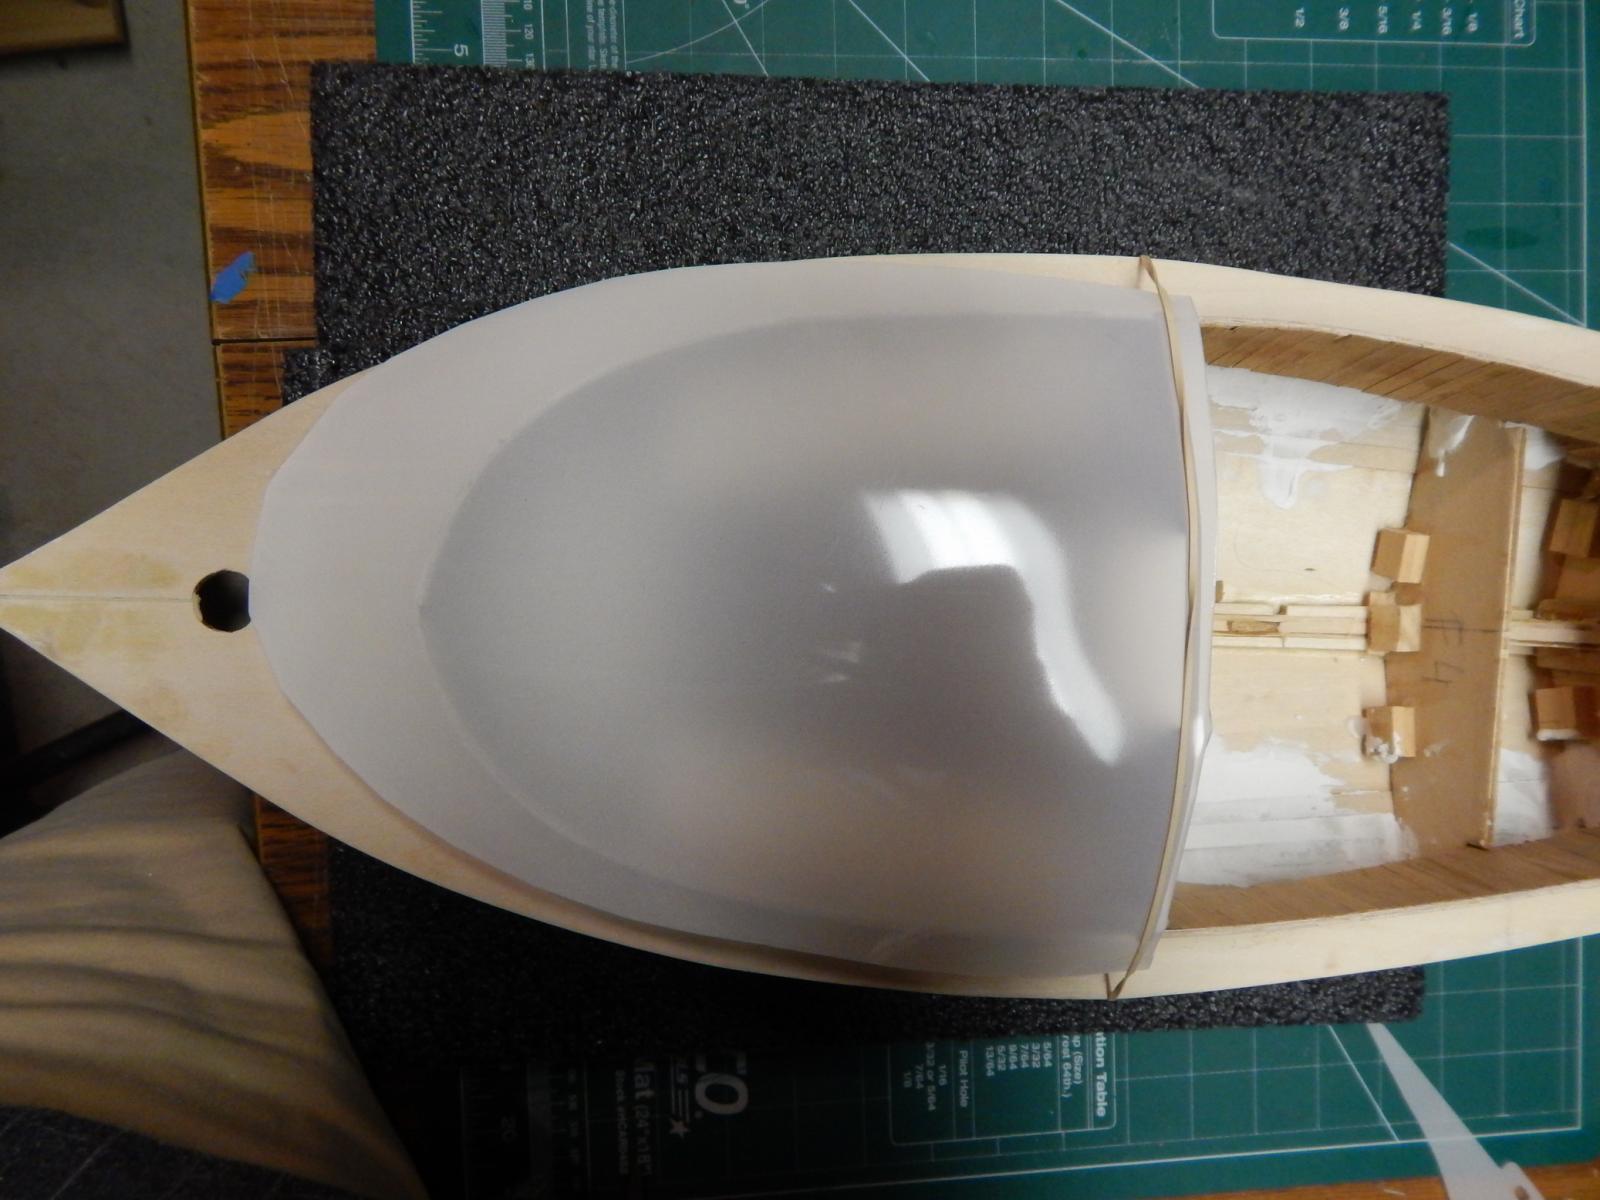
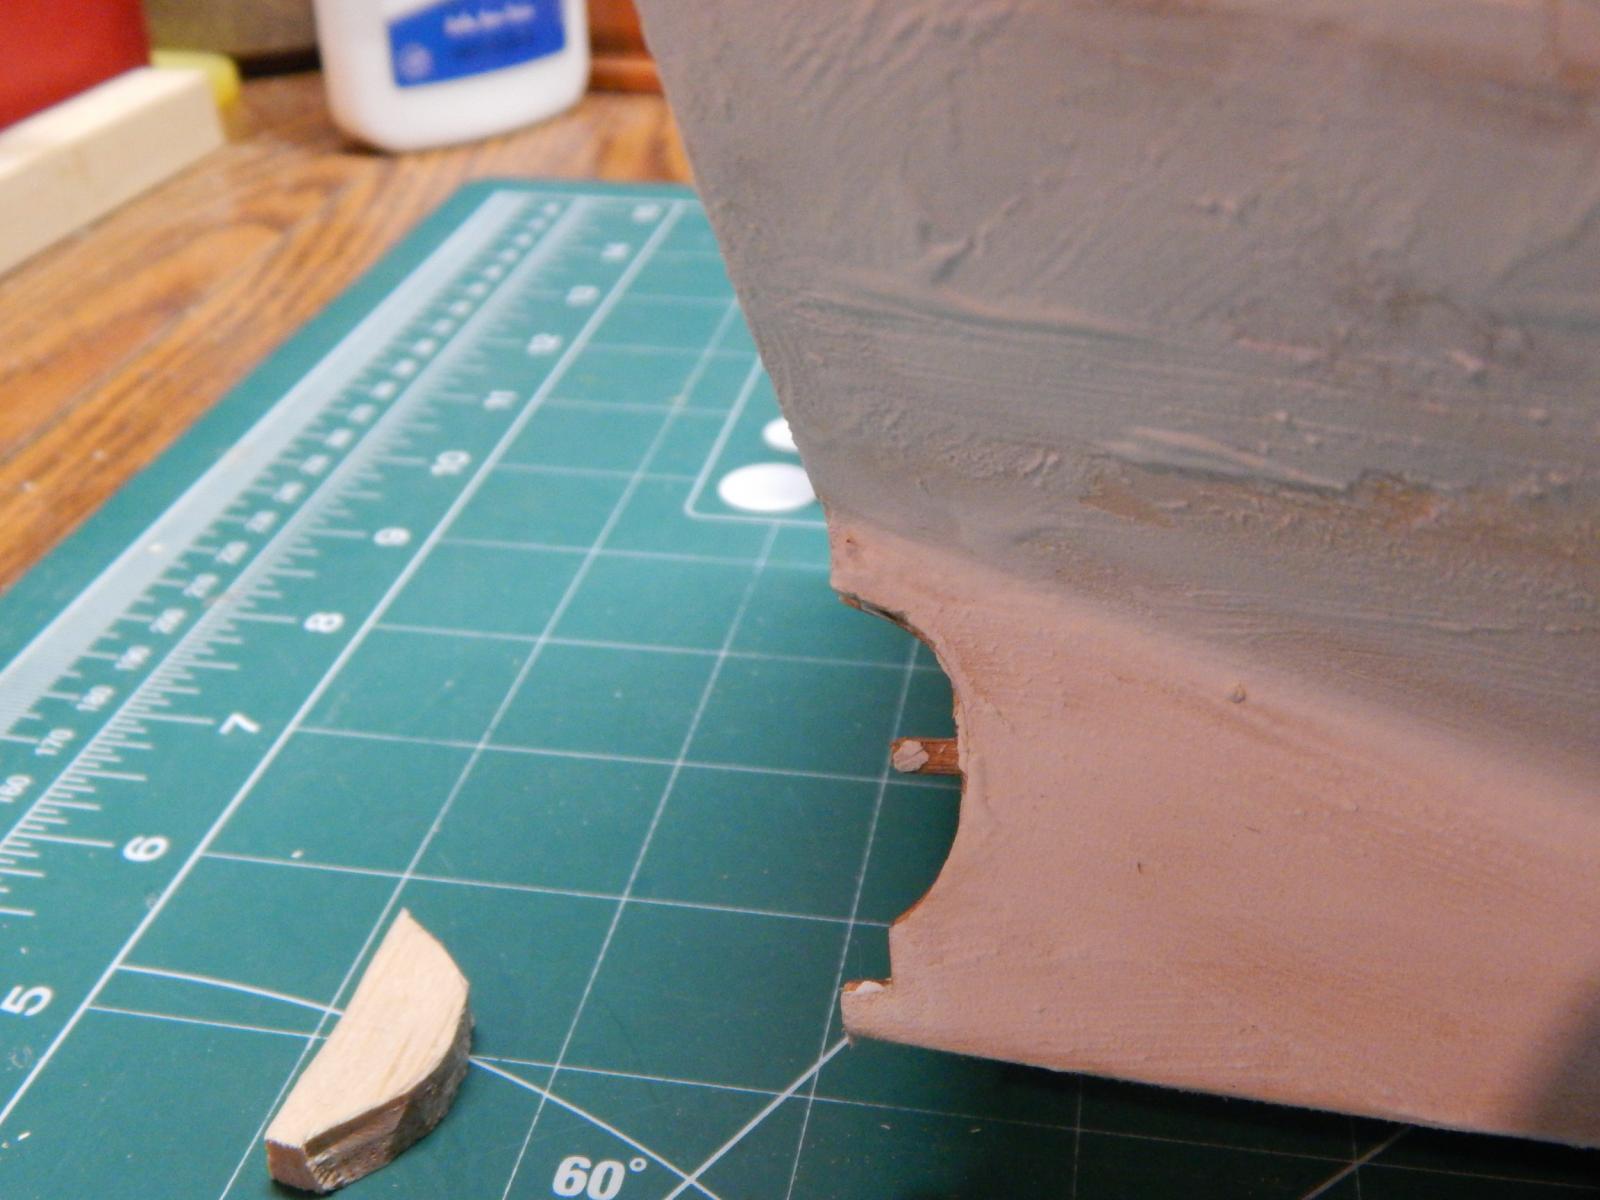
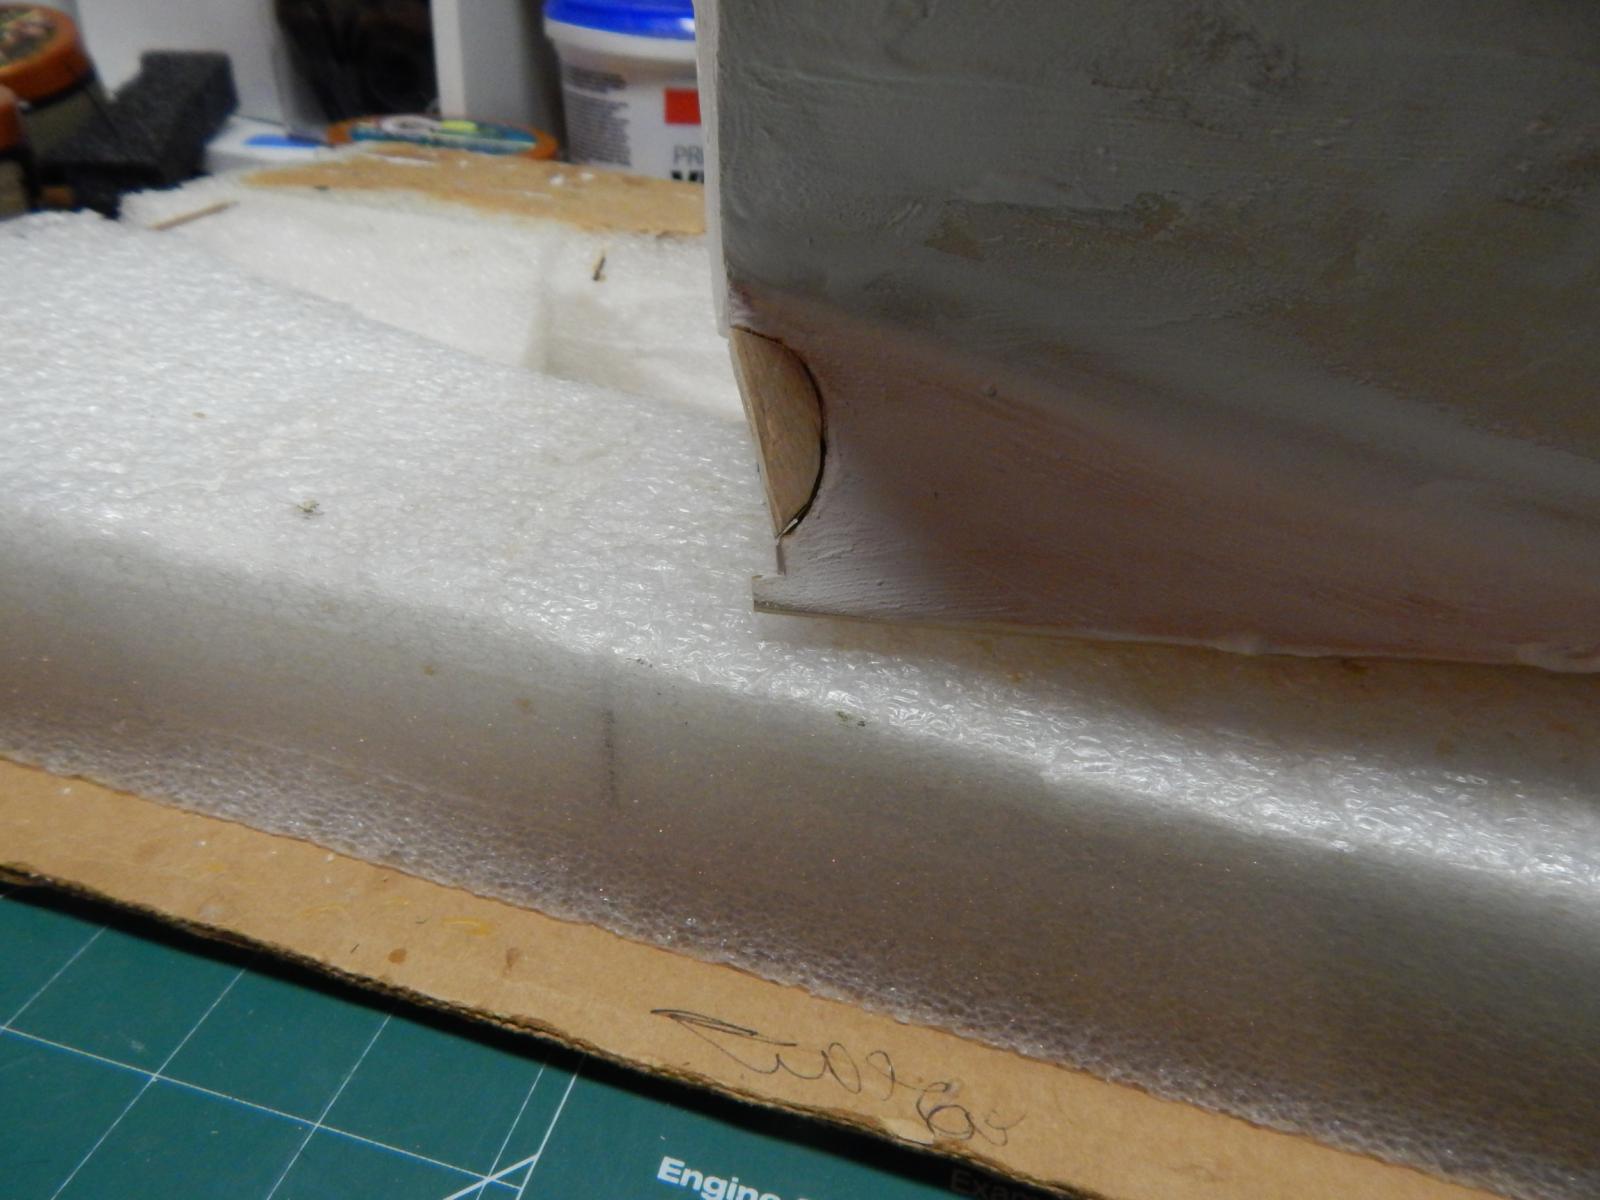
My sisters boat has no screw on the boat, they have a small outboard motor. So I am covering this part with balsa, spackle, sand and paint. I am redoing the rudder as well.


I have sanded the final spackle coat on the boat and spray painted a very light coat of clear on the hull to protect the hull from scratches. In between the kitchen remodeling I am going to start with putting the cabin together and I found a weave thin mirror for the back part of the cabin. It came from a LCD display from an HP printer I scavenged for parts.
Will show that in the next installment.
Marcus
- Piet, Omega1234, Seventynet and 12 others
-
15
-
WOW, way cool. Time to sell everything that is not nailed down in my house on eBay. If I didn't make enough money on that, take out a small loan, get it and make wooden clocks, sell those to pay off the loan.
OR
Just wait a couple of years and get it. It will be affordable.
Overkill? Probably..... how about 3D printing? In a couple of years this will be all automated with lots of extra's and add-ons. Then we will all be Professional CAD/CAM designers and when all the drawings are done, hit the button, and the following day we have all the parts for the ship. Sand and glue and voila....... you have a model. "Look honey, I just finished the Santísima Trinidad and I only started six months ago". " Next in line will be the Victory which will take me about three months". "Then the armed launch which should take no more than a week or two". "Then I will sell all these models and buy my next CNC machine with X amount of axels".Just think, the market will be flooded with crappy models from Asian countries.
Marcus -
-
I am a bit stuck as I cannot find the paint that looks similar to the real boat. I can do an undercoat but a top coat.....
I was mixing different acrylic colors, but that didn't look right ort I am not doing it correctly. I need to read up on "Painting modelships 101". I paint with a brush, no airbrushing.+
My sister sent me a list of the paints and a link to the site where they got the paint. I now have to look similar colors in smaller quantities.
Pettit Easypoxy paints on page 431.
The topsides are Semi-Gloss White
Deck is Sandtone
Sides of the cabin are Grand Banks Beige.
Bottom anti-fouling Aquagard - a qt of red would do it.
Cockpit deck and cabin sole are generic battleship gray.
The woodwork is Sikkens Cetol Marine ( Stright doesn't have it, but Home Depot might. If not, we could get it through Hamilton Marine in Searsport, Maine
Silica Sand should be added to paint on surfaces where people will walk, for grit - roughens the surface.
I will research this and if anyone has any suggestions I would appreciate it very much.
Thanks
Marcus
-
Piet;
Thanks for the instructions. Only one problem. I am planning to put the boat in a display case which means there will be wires and batteries. There is another solution.
I am going to cut a piece of mirror to the dimensions so it fits towards the bow in the cabin. I will leave the cabin door open. Once the boat is in a case, you can use a flashlight and shine it in the cabin and the mirror will reflect the interior.
I am going to use the lights setup for something else.
Marc
-
Outstanding job Marc. Too bad I cannot be up close to eyeball it. This might sound like a crazy question but why are you using spackle after using the wood filler? Wouldn't that give you a smooth hull?
David B
David,
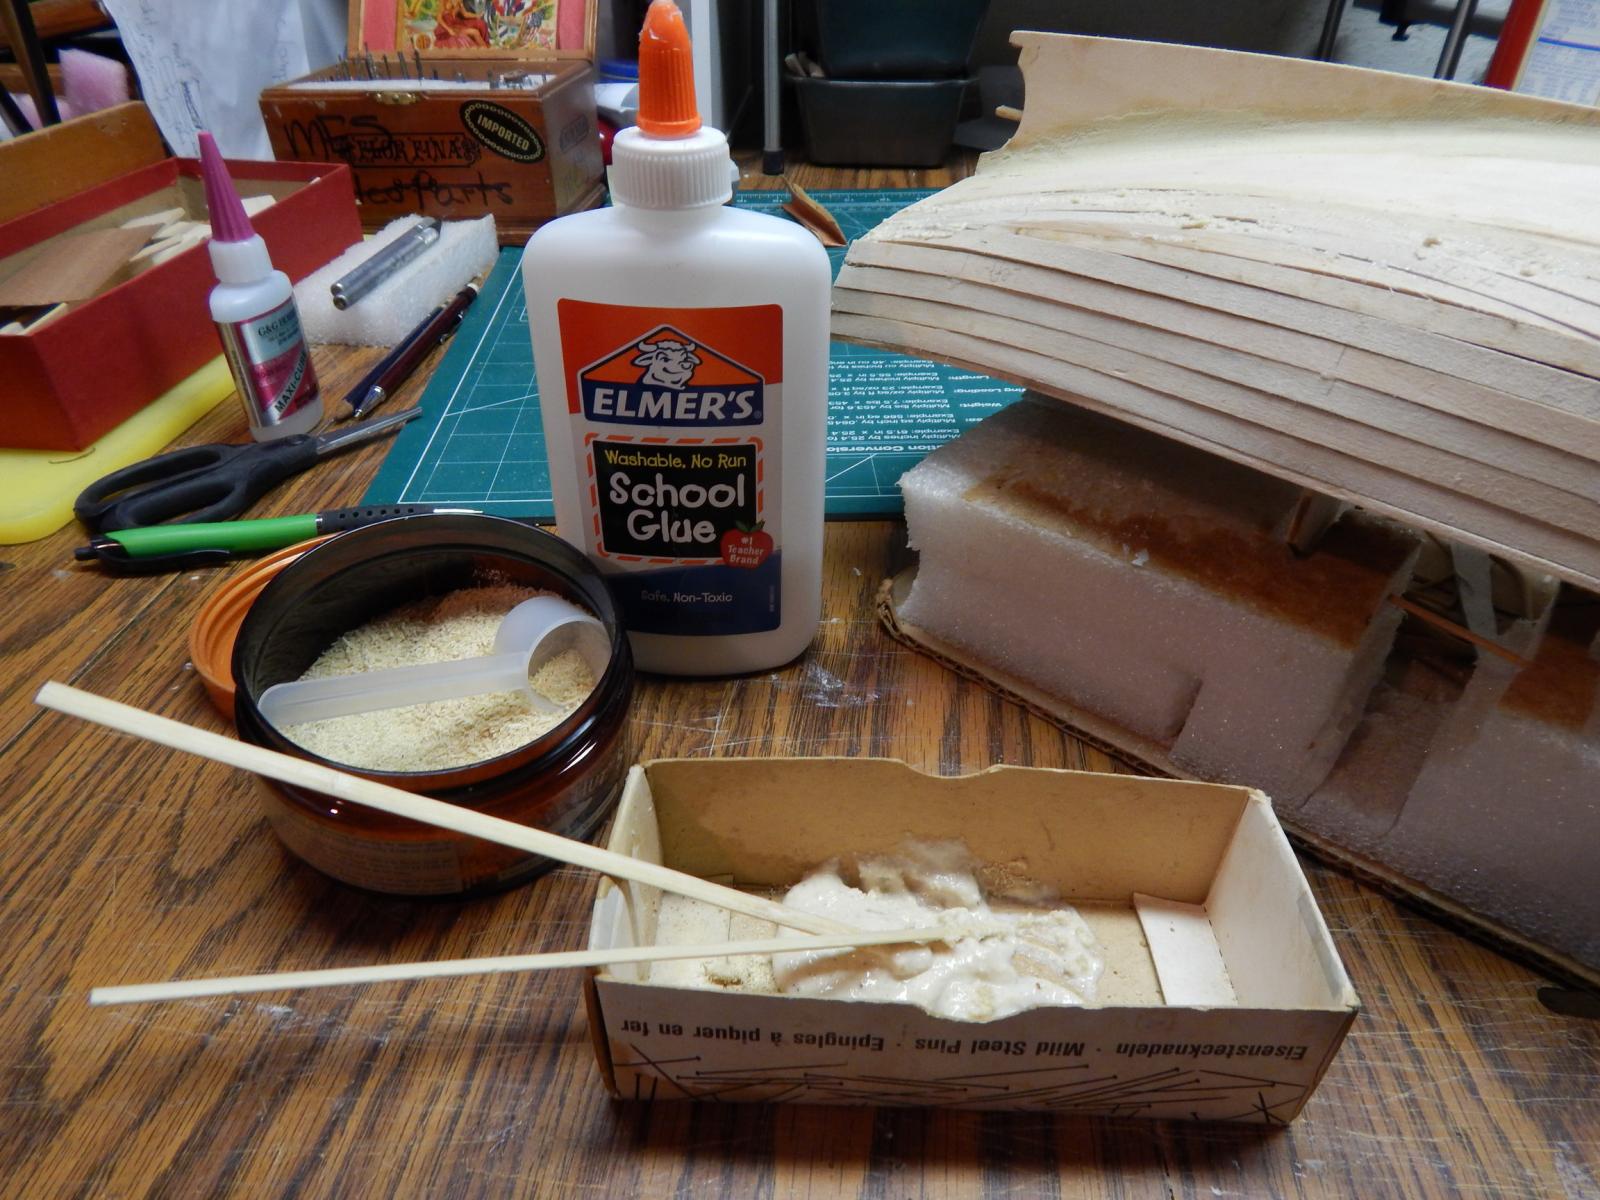
I used the wood filler which is more like Elmer's glue mixed with saw dust to get the large uneven areas. Once very dry the hull gets a good sanding. There still some small unevenness in between the planking and there I use the spackle. I have just sanded that and it is now very smooth (Pictures will follow). I used this method (sawdust/glue and spackle) on an RC boat years ago it I liked the way it looked. But then again maybe it is overkill.
Now I need to look at the paint list my sister gave me and see if I can get this in lesser volume compared to the amount for the real boat.
Marc
-
Marc, I'm still trying to figure out whatever it is you're doing in your avatar. It looks vaguely repulsive.

There is nothing better than raw, young, fresh, caught a few hours ago from the sea herring (Dutch - haring) with a touch of finely cut white onions. Every 2 years when I visit my mother in Amsterdam the first thing I do the next day is go to the local fish shop in her area and have a few of these.
Marcus
-
Piet,
Please give me some idea about how to do the lights in the cabin.
Where do I buy these lights.
How are they powered?
How is it wired? Outside the boat?
Bob Filipowsky (from our club) used a mirror opposite of the cabin entrance and when you point a flash light into it. You can then see the interior. It is no problem with the acrylic in the case.
Marc
-
-
Ed;
When building the Naiad are there any descriptions on how to build the masts, sails and rigging or would this be another volume? Personally, I believe that a sailing ship without masts, sails and rigging is not a Sailing ship. I do like the admiralty models that people built and I see on display in naval museums as well.
As you mentioned about the YA, that there will be rigging, will there be sails as well? For me that would be an impressive ship to build and I would purchase that volume.
Marcus
-
Druxey;
There is nothing better than raw, young, fresh, caught a few hours ago from the sea herring (Dutch - haring) with a touch of finely cut white onions. Every 2 years when I visit my mother in Amsterdam the first thing I do the next day is go to the local fish shop in her area and have a few of these.
Marcus
-
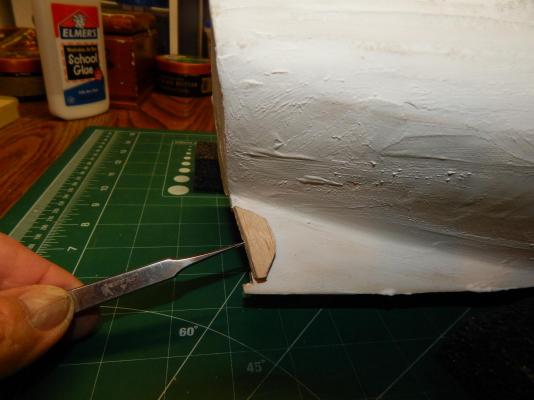
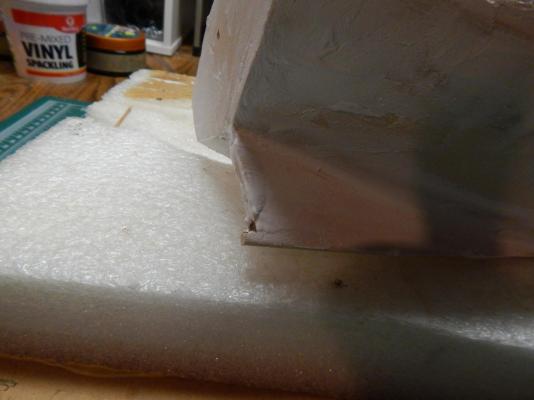
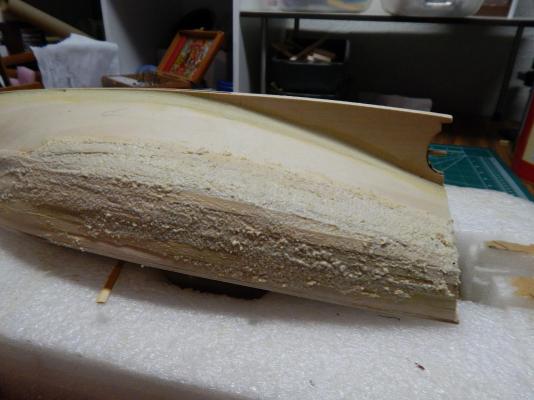
Here I mix Elmer's white glue with fine sawdust. There are some areas on the hull that are very thin (due to sanding) so I spread this mixture out on these areas and once dry it is solid and very hard.
Then I give it a good sanding and because the Catboat will be painted you will not be seeing much of that.

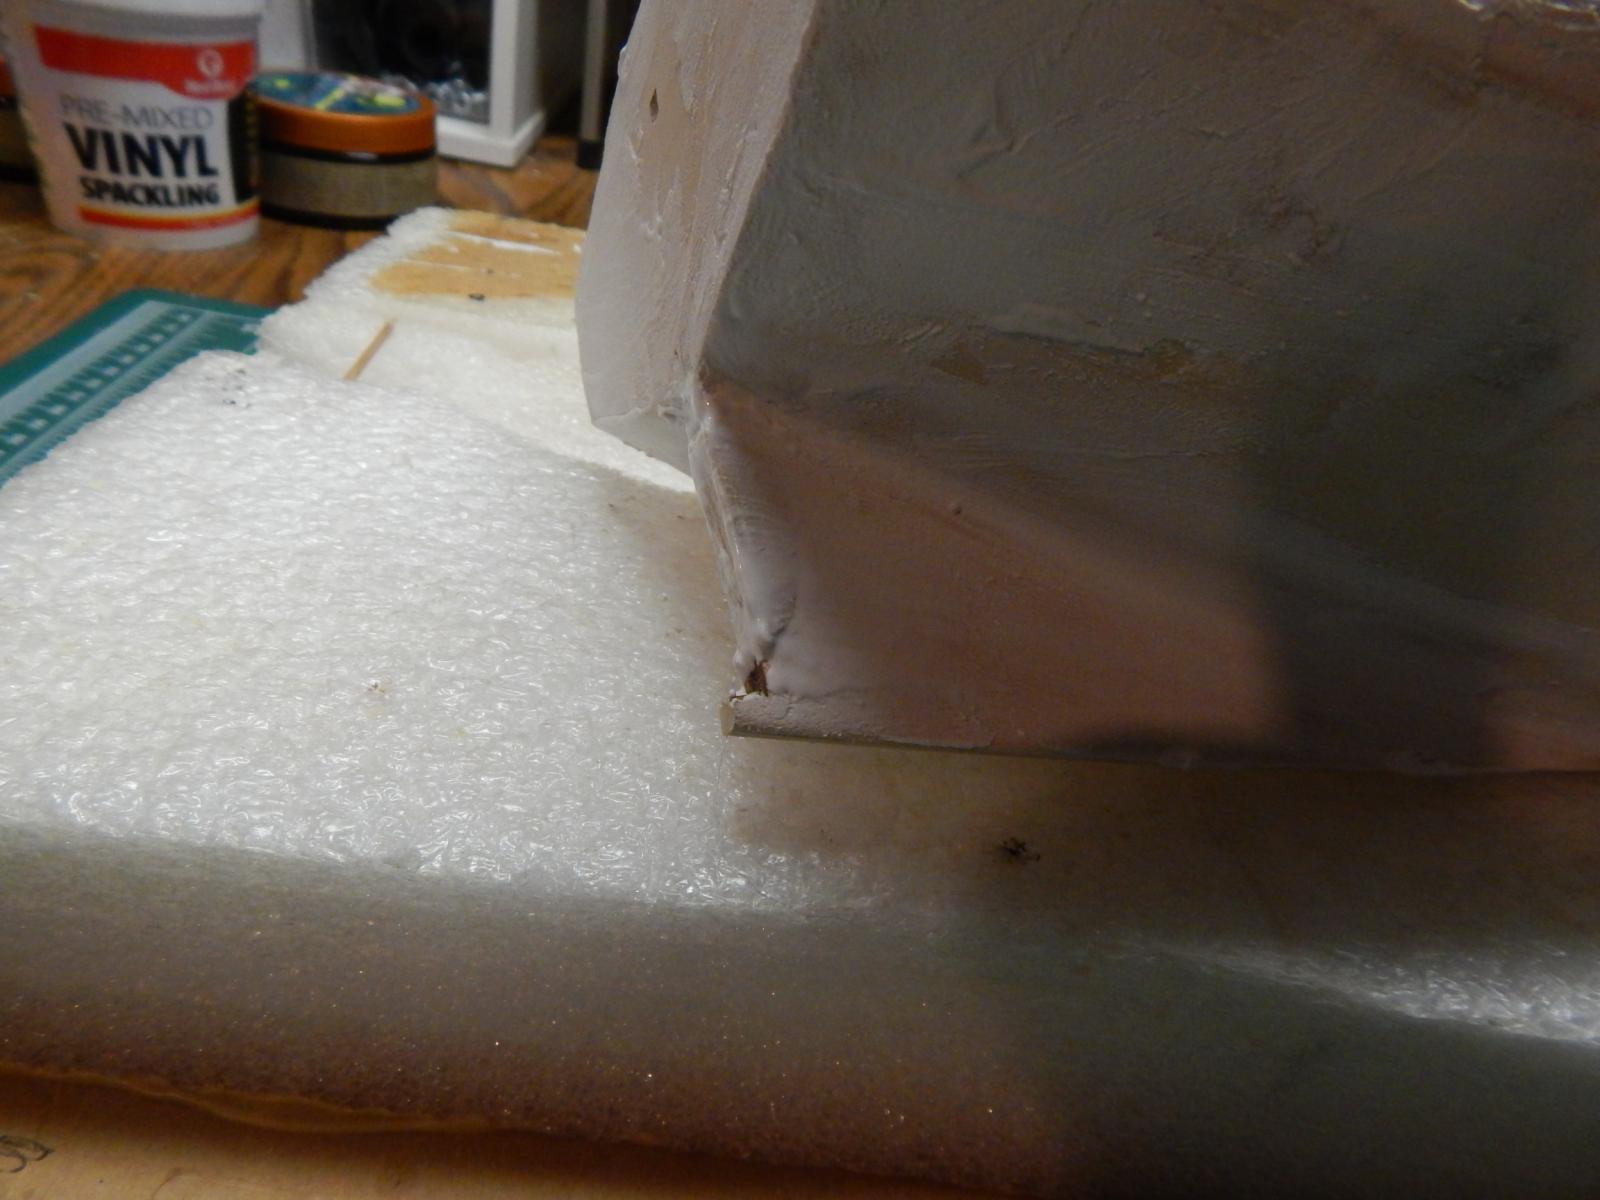
After all the rough sanding I now put on a layer of vinyl spackling. It does not shrink, can be painted, easy to apply.
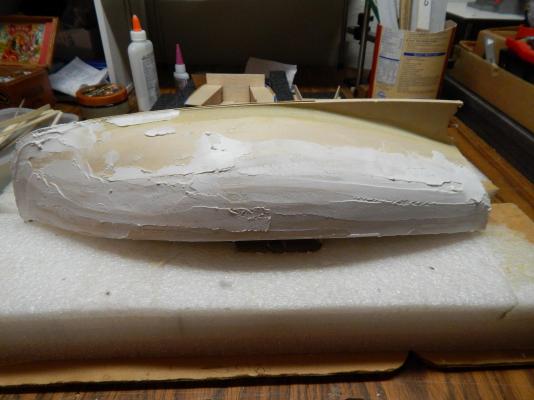
Marcus
- Piet, hexnut, popeye the sailor and 12 others
-
15
-
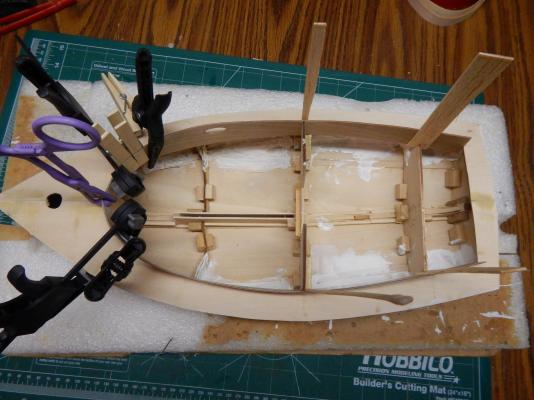
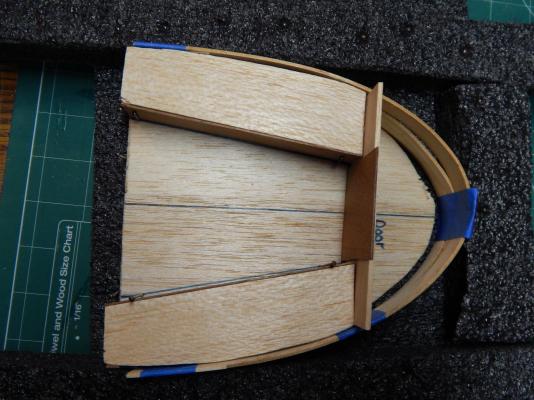
Planking is finished and I gave it a rough sanding.
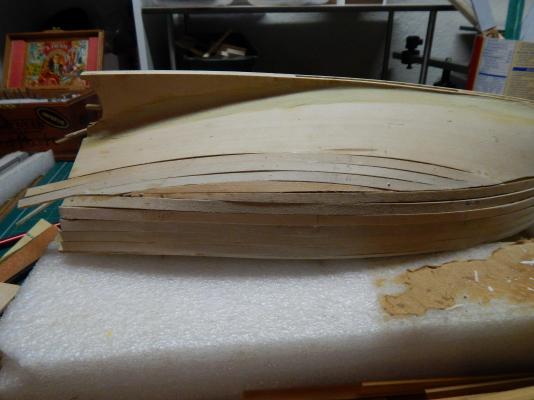

Marcus
-
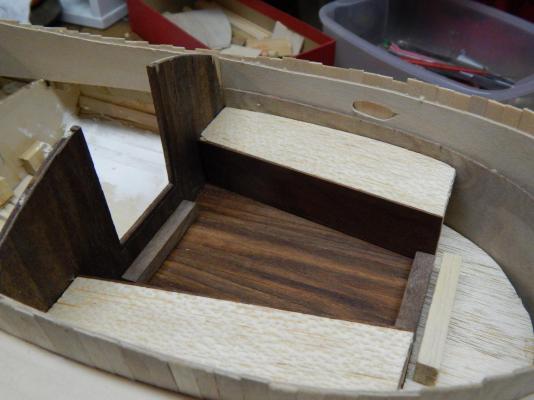
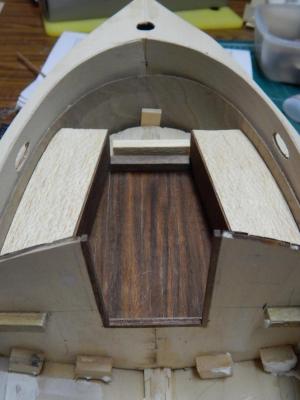
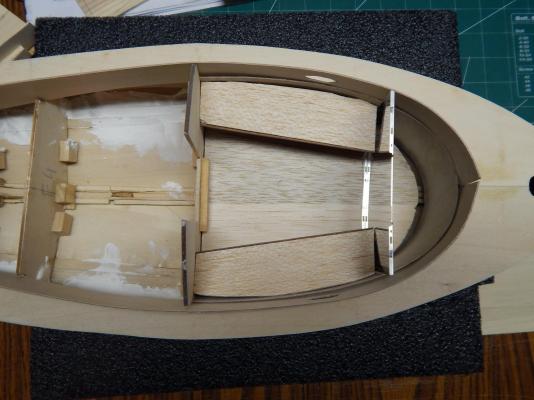
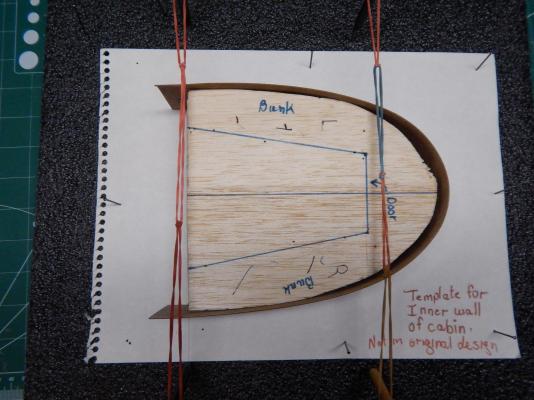
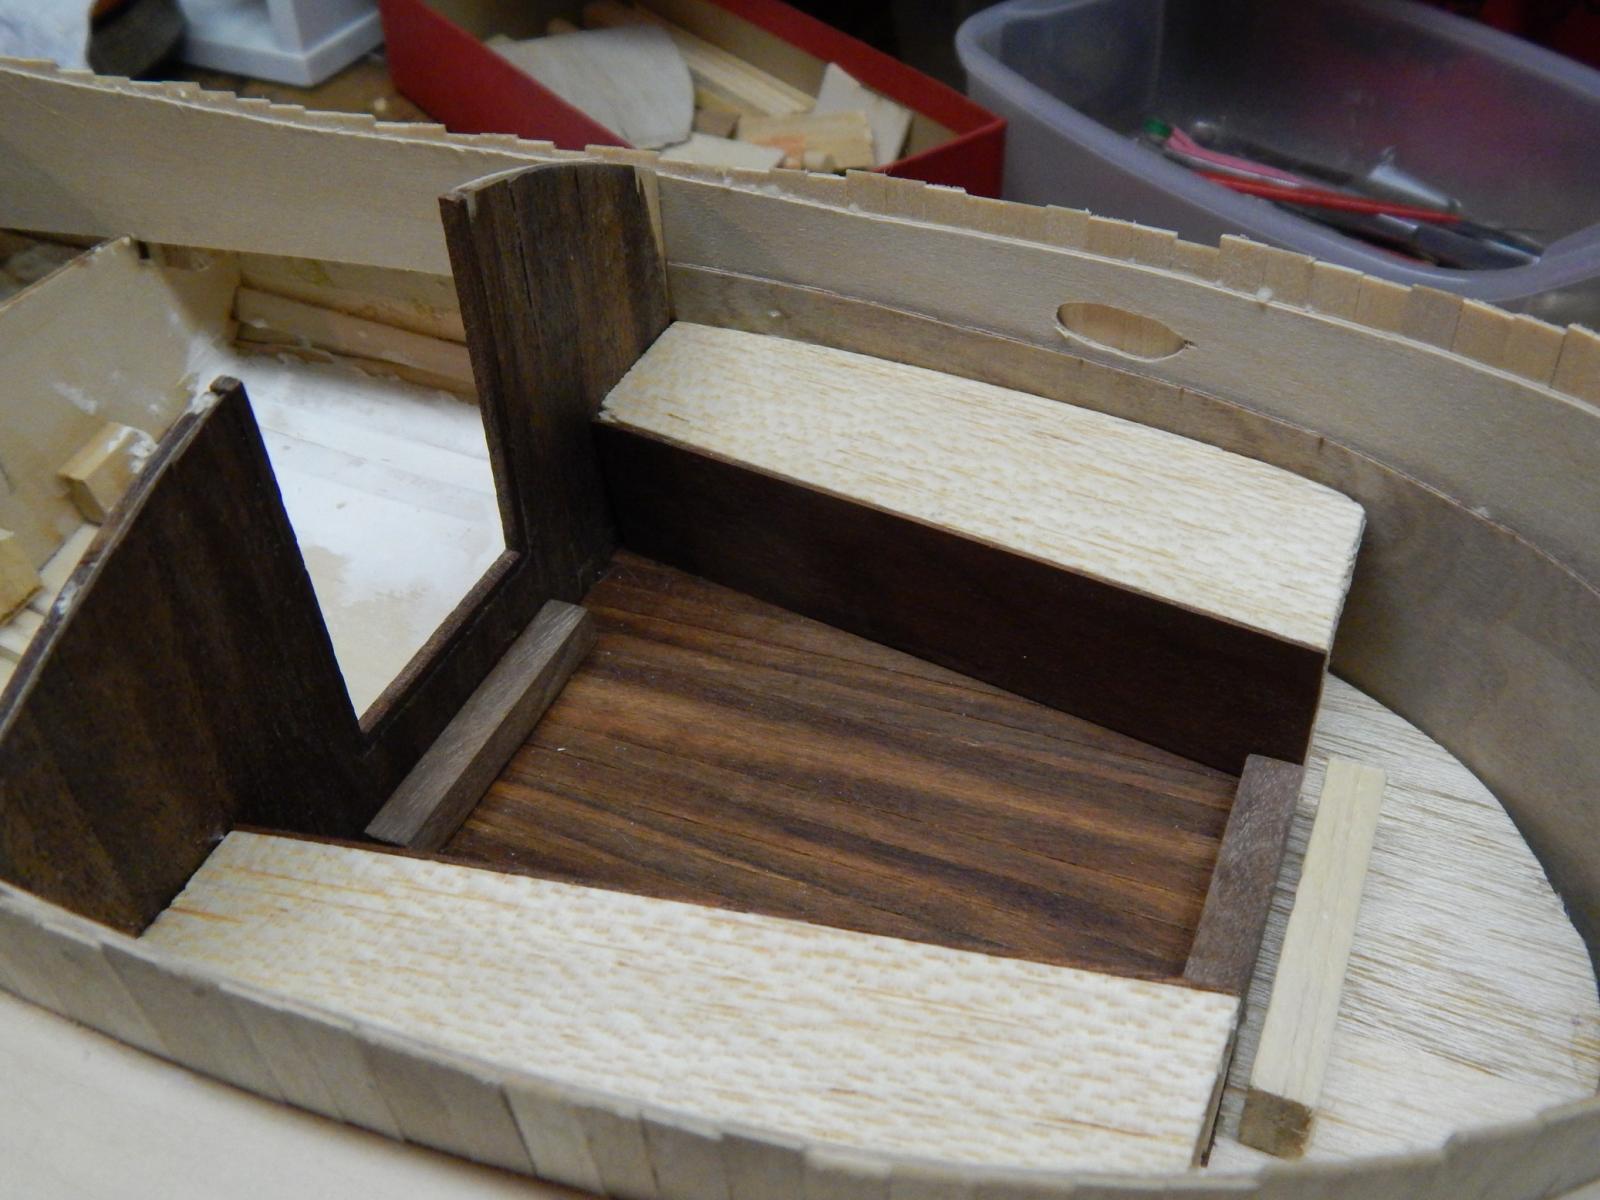
Cabin Furniture: These are the two bunks. Most of it is made of balsa. The sides of the bunks is 0.5mm mahogany. I think they are drawers, but I have to ask my sister.
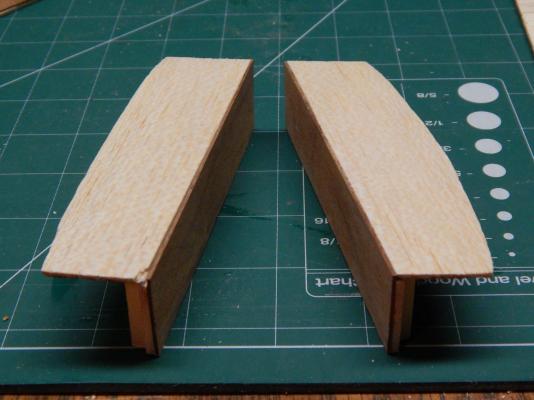
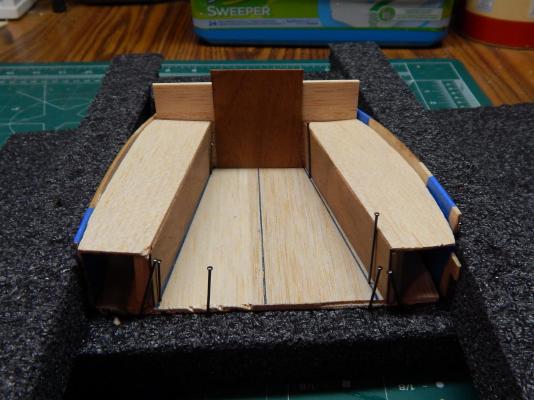
Here it shows how the cabin would look like in the Catboat itself.
Marcus
-
Ed,
Thanks for he explanations. I will want to learn more about your methods so I need to save some $$ to purchase Vol. 1 & 2 of the Naiad. I am not ready to build a ship lie the Naiad, but I am very interested n learning your building methods.
In the book Young America, you mention examples of your methods of building a ship to refer to the books of the Naiad.
Marcus
-
My 2 cents.
I did the Bounty from Constructo and these instructions helped me a lot. Large CAD drawings, color picture booklet of step by step on how to build the ship and the English, Dutch and German instructions were very good. There was French and Spanish as well but I am not so fluent in that.
The Royal Yacht Mary from Mamoli were horrible. NO CAD just hand drawings. Crappy walnut strips.
The Catboat from Bluejacket is skimpy and very few pictures. So far I have more pictures than the booklet itself. There are spelling mistakes and I am taking notes. If they want my pictures they can have those as well to help the next person.
When I built a ship I scour the NET for other websites with builds. Many sites in Europe usually have something that will help your build as well as MSW.
Marc
-
Piet;
Again, Beautiful work. The details are amazing. Finally did read through it all.
No wonder you mentioned lighting in my Catboot. You do it as well. Again, your attention to detail is amazing. Green curtains, windows in doors. But how do you power all those lights? Batteries? Where do you put them or long wires to outside the display case?
On post #6, 2nd picture, you have a very small planner on the table. Where did you get that?
Thanks
Marcus


Cape Cod Catboat by Marcus Botanicus – FINISHED - BlueJacket Shipcrafters – Scale ¾”=1’
in - Kit build logs for subjects built from 1801 - 1850
Posted
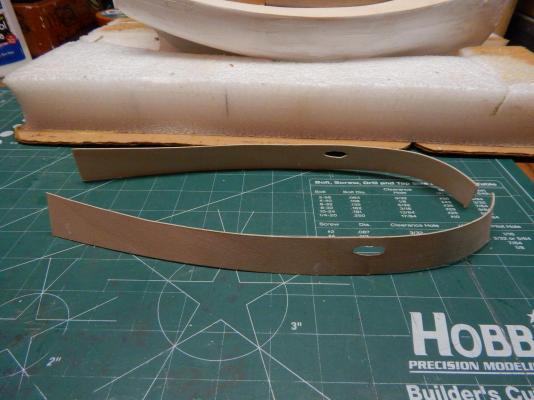
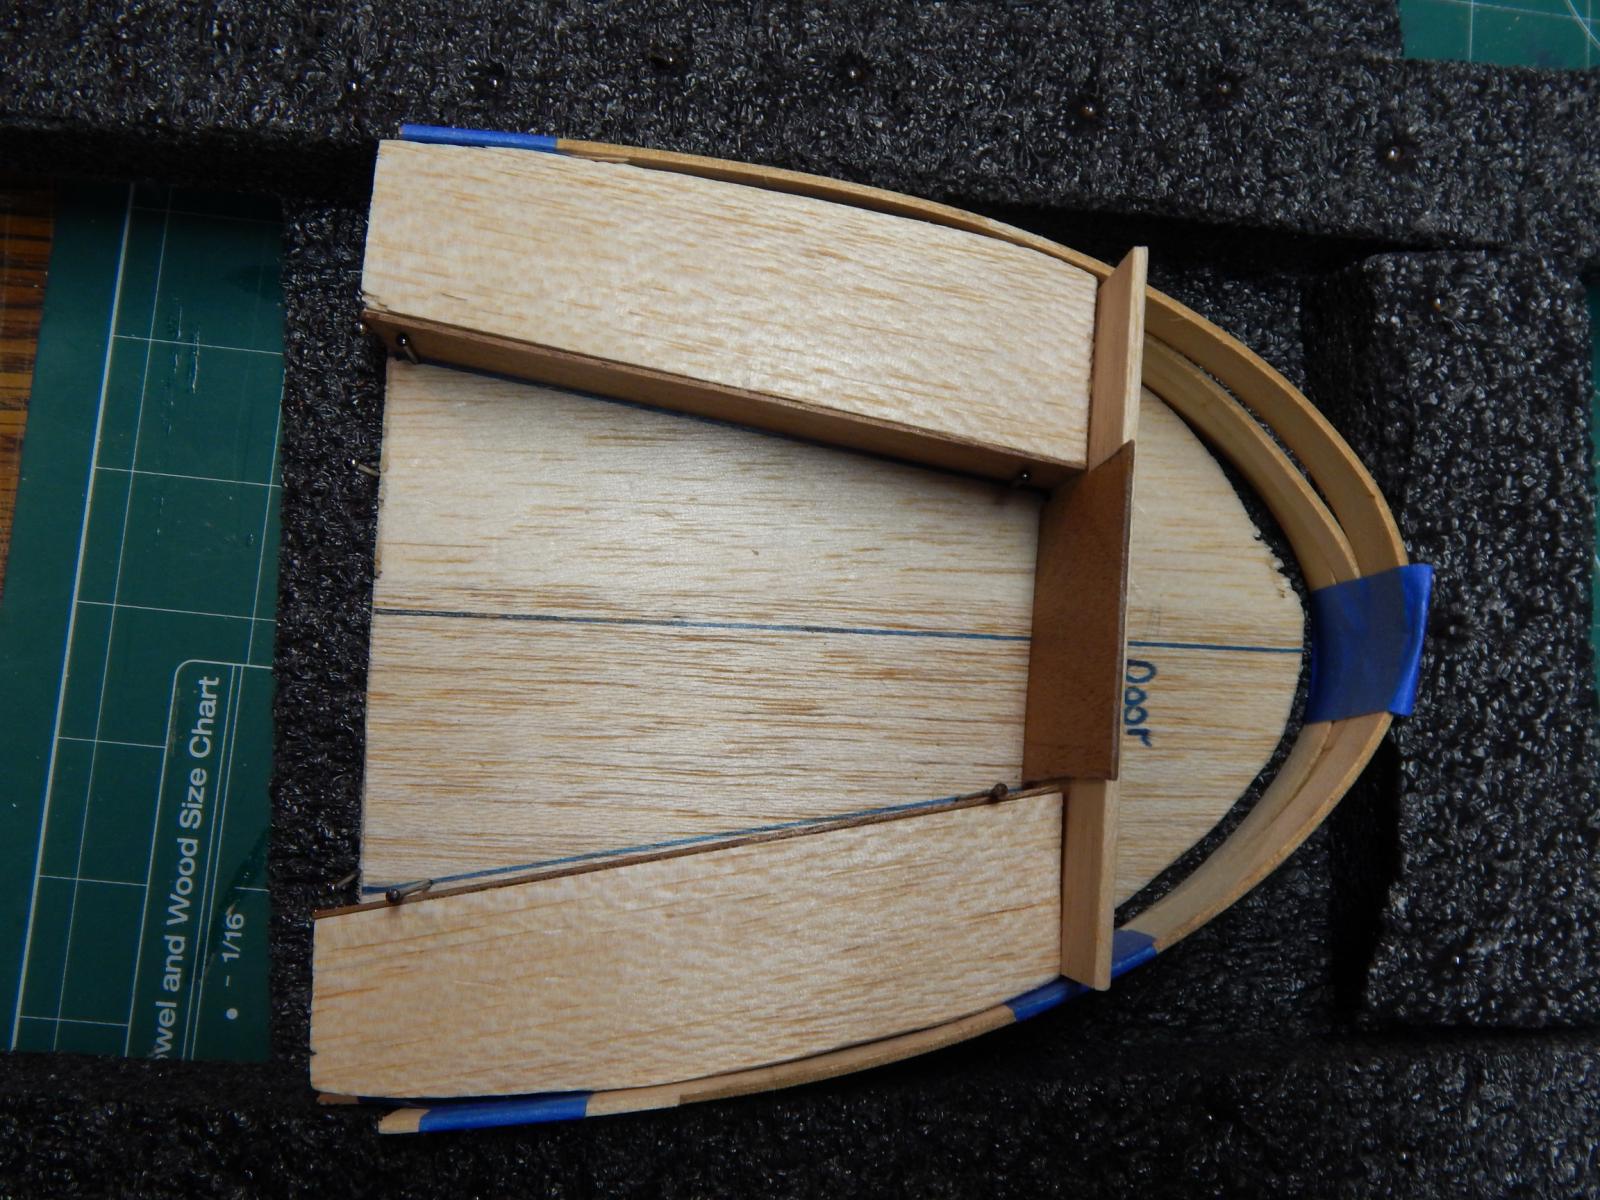
Template of roof and the wood roof.