HOLIDAY DONATION DRIVE - SUPPORT MSW - DO YOUR PART TO KEEP THIS GREAT FORUM GOING! (Only 36 donations so far out of 49,000 members - C'mon guys!)
×

Timmo
-
Posts
609 -
Joined
-
Last visited
Content Type
Profiles
Forums
Gallery
Events
Everything posted by Timmo
-
 Thanks Alec, I bought the kit based on the AOTS book which was in the local public library. Stroke of luck that. I'm sure you'll make a great job of yours. There's plenty of leeway to follow the kit or add extras
 -
Hey Dave. Nice to hear from someone else from the Tron. Go the chiefs!
-
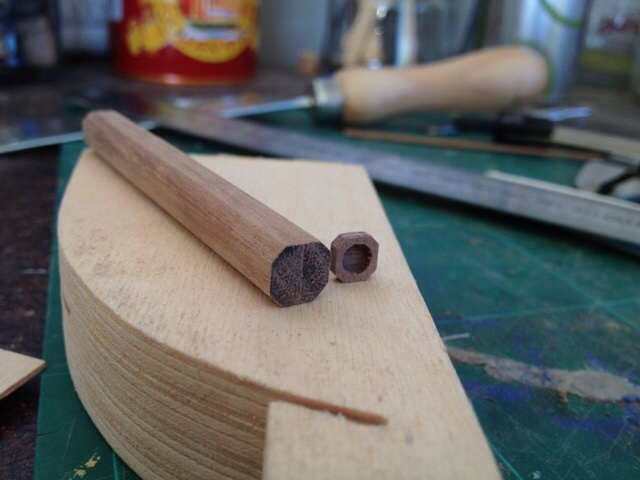
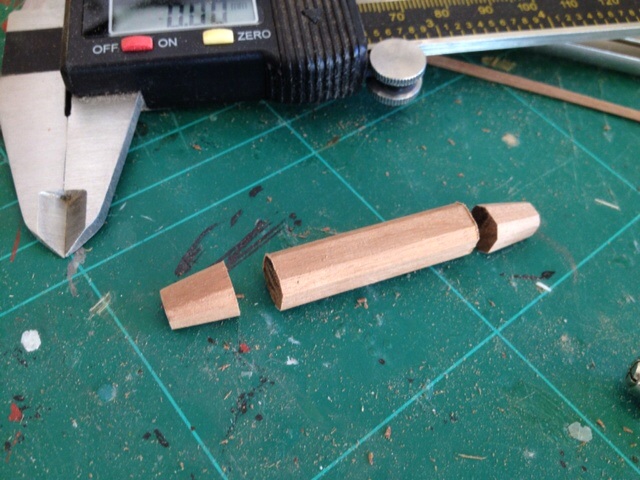
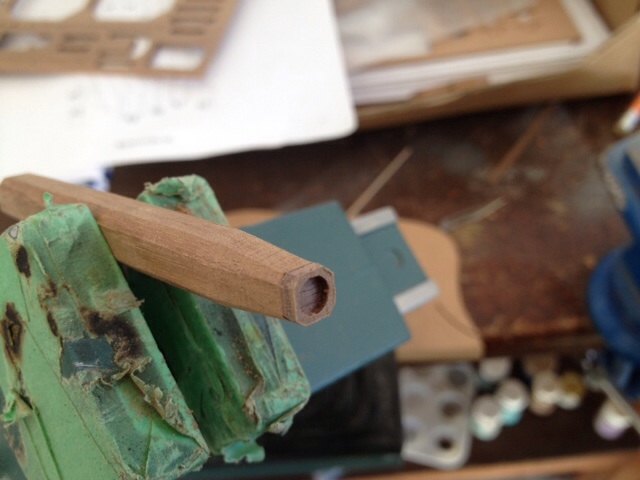
Hi Craig I'm sure red will look great. I lightly stained the ply to give it a uniform colour and painted the exposed ply faces to match. Red would certainly have sorted this a bit easier. Take a look a couple of pages back in this log for the build of my bow chasers. I started with nails and you can drill the caps out to width if you are careful. I didn't like the nails as they were too big and used wire bent over into a kind of loop to match the brackets from the diagram in AOTS Gramado- also in this log. I'm doing the same on these guns and will post some pics when I get one assembled. Here's what the wood carriages look like for a test.

-
Very briefly but I've decided to stick with the bare walnut. No real reason apart from the contrast with the bulwark sides. Painted carriages seem to get more common later in the 18th century so I'm likely to build plenty with red carriages down the line.
-
Oh how I understand that joy. Even better when It's just the kit arriving rather than a slip in the letter box demanding the extra tax paid before they release it.
-
Feeling a bit broke at present so unsure what next. I'm a fan of caldercrafts Diana and there's some nice ones on this site. I really like Chris Watton's Bellona protype and hope maybe it'll reach the market before I finish the Granado. I doubt it though. I'd love to try hand painting the friezes on her. Then there's always a cross section...
-
Those guns look good ray. Also the rope coils are looking neat so far. I've had the same issues with brass blackener but got it to work last time by cleaning the parts I acetone, then water, then dipping them ina water/ blackener mix that had been slightly heated first (microwave,but be careful) and then sat in a hot sink of water to keep it warm. It took a couple of goes to build up the blackness but it worked eventually.
-
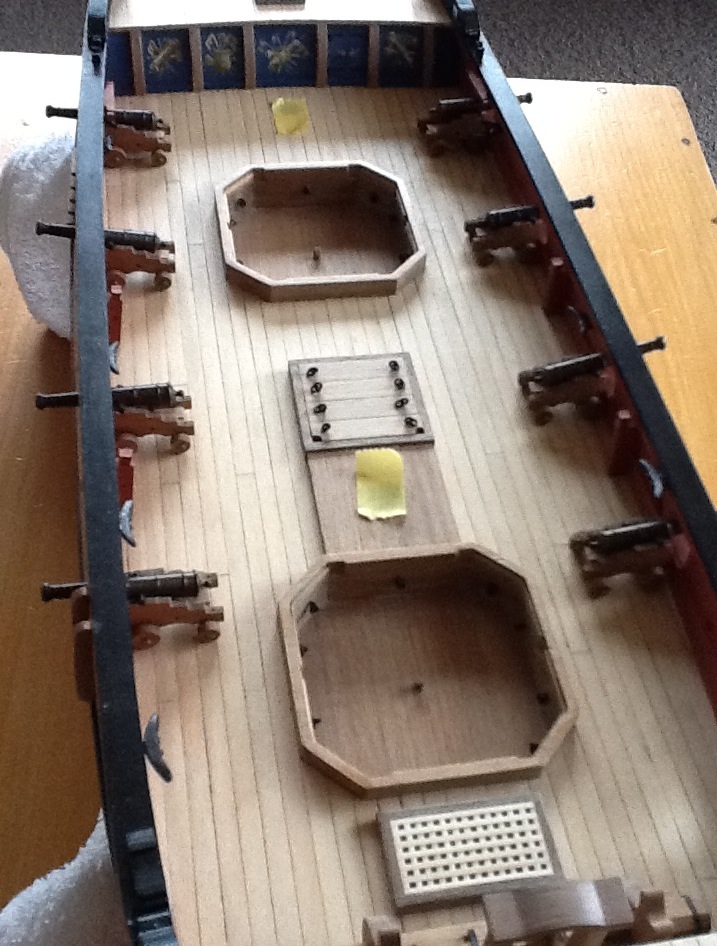
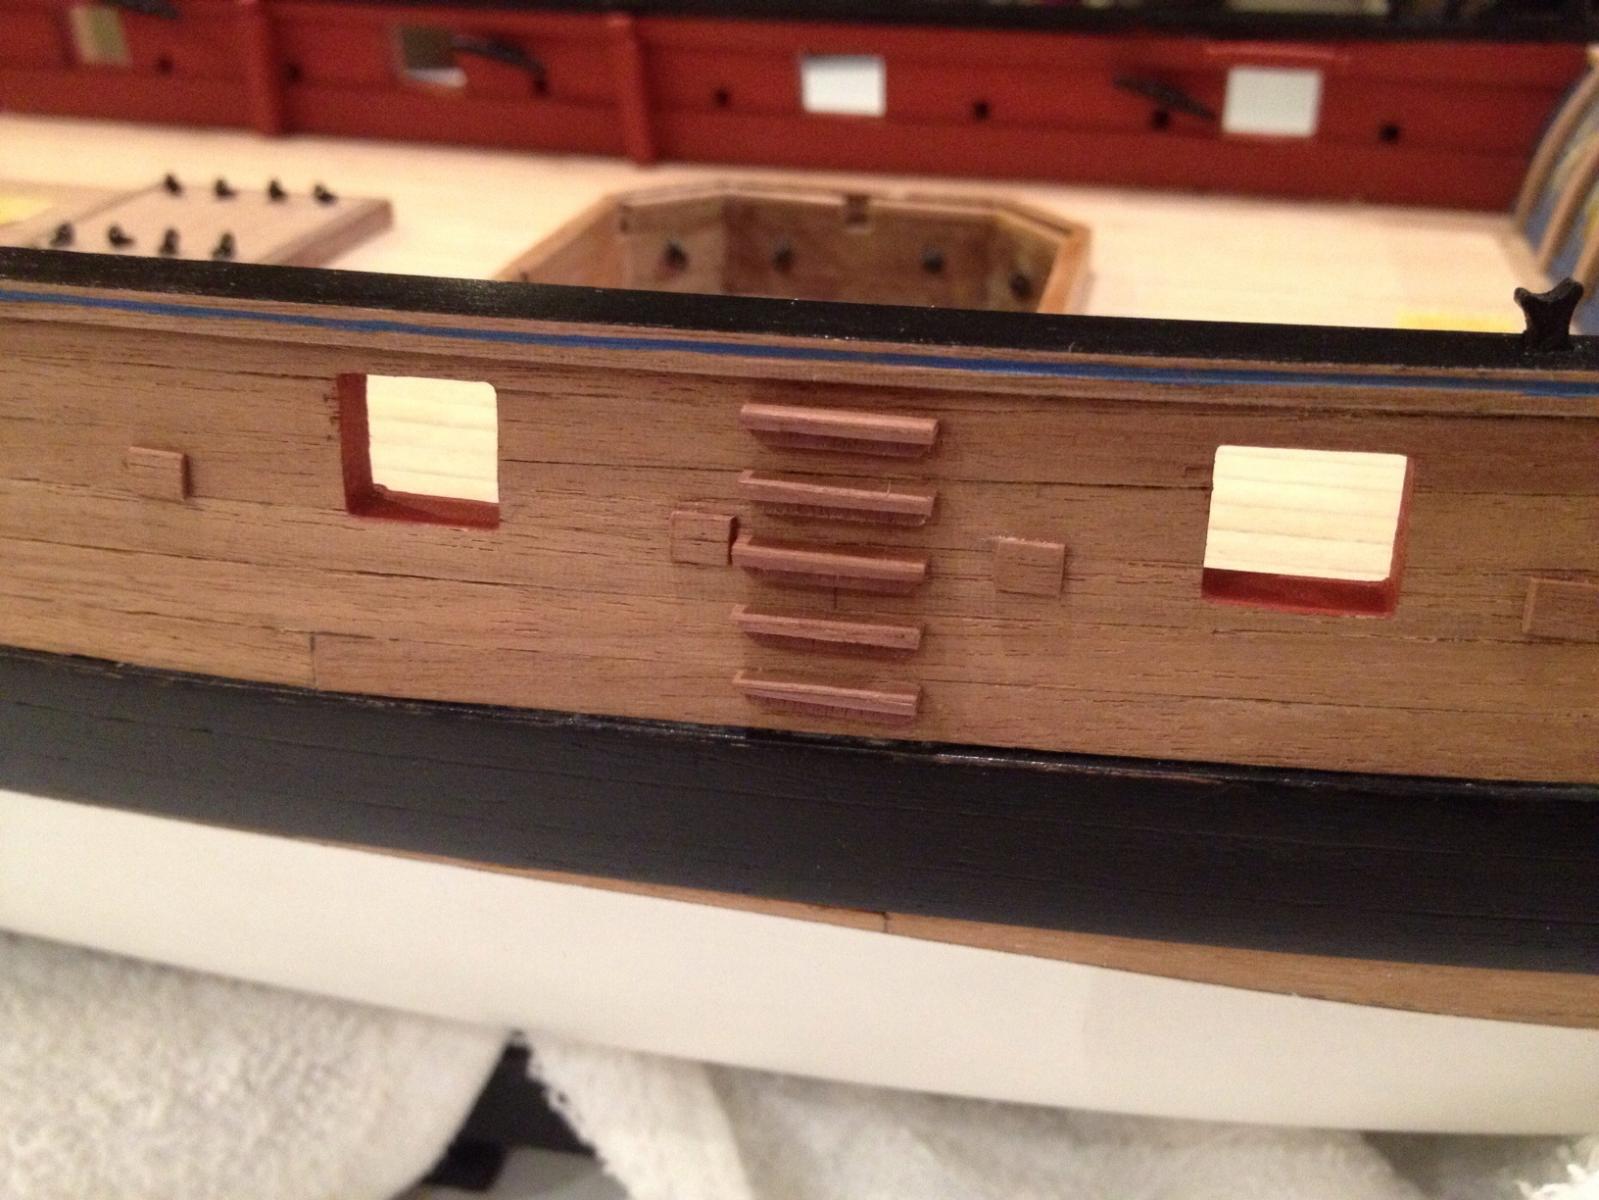
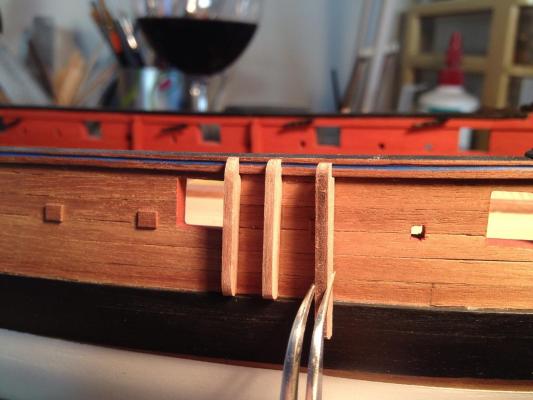
Some small but noticeable items on the hull exterior ...anchor lining, fenders and steps. The kit fenders are ply and have lamination lines down the vertical face which are very noticeable under varnish. New ones were made from walnut stock off one of the kit sheets. Kit part on the right, homemade ones on the left. Likewise the entrance steps have laminations on the top faces. They had a thin veneer of walnut plank added to cover it.
- 366 replies
-
- 6
-

-
- granado
- caldercraft
- (and 1 more)
-
Good suggestion BE. I'll take a look. Alistair. One more post and its up a rank for you. Go on, tell me the chiefs will win tonight and you are there!
-
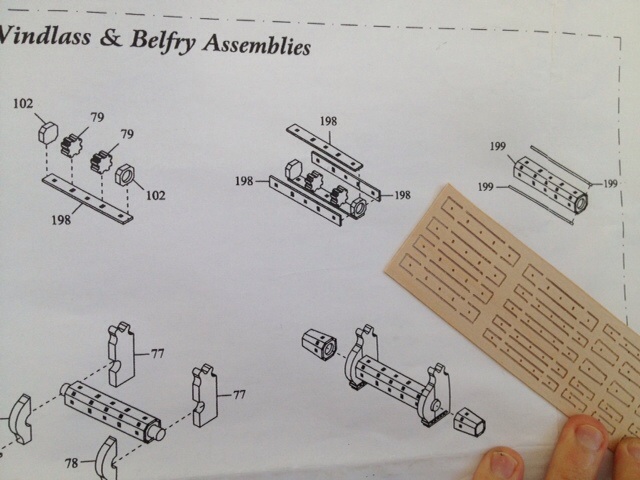
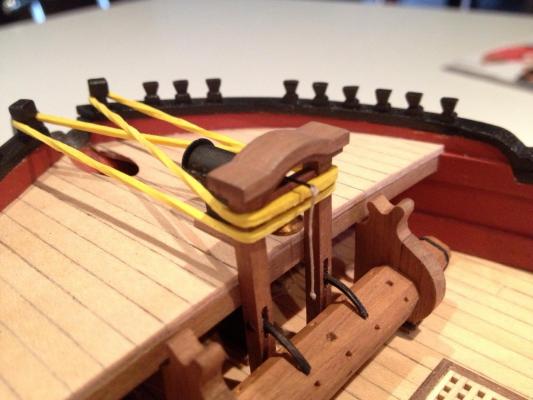
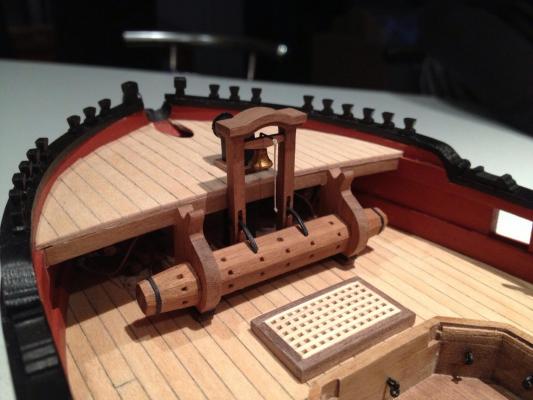
'The path' you say Andy - we'll see. i think I've got at least another year on his majesty's bomb vessel Granado so plenty of time to dither over what to do next. The belfry was held in place with rubber bands while the glue dried. The belfry is made up of ply laminated together which gives some unsightly lamination lines. The top of the belfry was painted a 'walnutty' colour to hide it. I'm not convince over how it looks and might paint the top of the belfry black at a latter stage- we'll see... Finished windlass and belfry installed. The ship's bell is white metal painted. I hollowed out the base but it will never be seen unless you peer through the first open gunport from below the waterline. . A least I know it's there!
- 366 replies
-
- 3
-
-
- granado
- caldercraft
- (and 1 more)
-
Looking good Adrieke, that's going to be a major improvement on the kit.
-
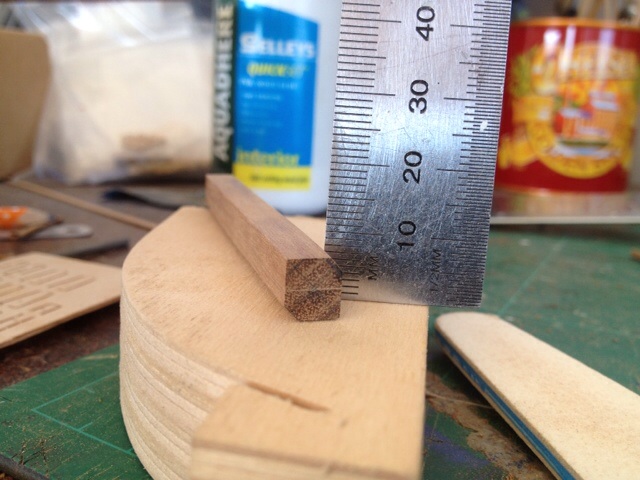
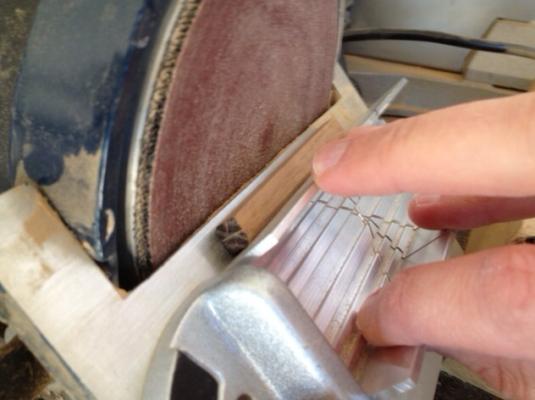
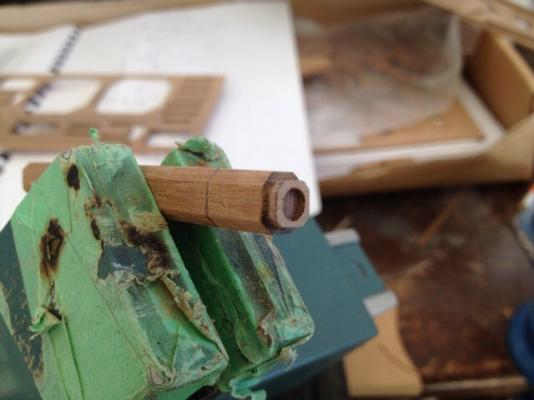
Thanks for the kind words all. Craig, its been an enjoyable build so far so good luck with yours. On to some more building after an absence of a few weeks... The kit would have you knock up the windlass from some ply laid over walnut centres. This doesn't look too flash and also appears extremely fiddly. The chances of me staining it anywhere near the colour of the rest of the walnut timbers is also next to zero after I've lathered glue on. The windlass stock was two lengths of 5mm dowel glued together and sanded back to 8mm square. The octagonal section was then marked on and sanded with aid of a bench sander for a consistent angle. This could be done By a steady hand. Shaped stock next to kit centre section for comparison. The centre action is smaller due to the 1mm ply which would take it to full 8mm width. The centre was just the right size to mark the end of the taper on the windlass. It was stuck on temporarily and starting marks for the taper added in pencil. Taper sanded in. It's just a matter starting at the pencil line and reducing the material to the width of the marker section. The windlass pieces with end width markers removed and cut to length. This worked out well enough that it could have been done in one piece but the lack of a lathe meant turning the axle would have been difficult so out with the saw.


- 366 replies
-
- 3
-
-
- granado
- caldercraft
- (and 1 more)
-
That's looking superb Christian. I hope when one day I can build Diana she looks half as good as yours.
-
Happy birthday Jason
-
Welcome back Christian. A very nice build there with the work to convert to 1794, especially like the extra work on the stern gallery as the pillars and other details added there lift it way above the kit. Yourself and Ray have some great Dianas on the slipway.
-
Clean job on the deck furniture fitting there Slog. Nice camber on the underside on the pieces. I've always struggled with that myself but hopefully the new birthday bench sander will make things easier as they have for you. Those lines to the stern light shutters look great.
-
Just found your log. Nice recovery on the mast Peter and brilliant previous work there.
-
A very nice looking build there Ferit. You've taken the kit way beyond what was in the box with some skillful additions. I look forward to following.
-
Brass Pedestals Installation
Timmo replied to BareHook's topic in Metal Work, Soldering and Metal Fittings
Rule of thirds seems to sit best but you're best to set it up roughly on that measurement and make sure it looks right. I've laid the pedestals on the full size plans to make sure it looks right. it could also depend on other factors like length of bowsprit. It's obviously got nothing to do with supporting the hull but its worth considering I'm building a bomb vessel with a sprit about a third as long again as the vessel and its worth just setting the pedestals either on the plans or under the hull if you've got that far and sticking a dummy pole on the front to make sure it still looks right. -
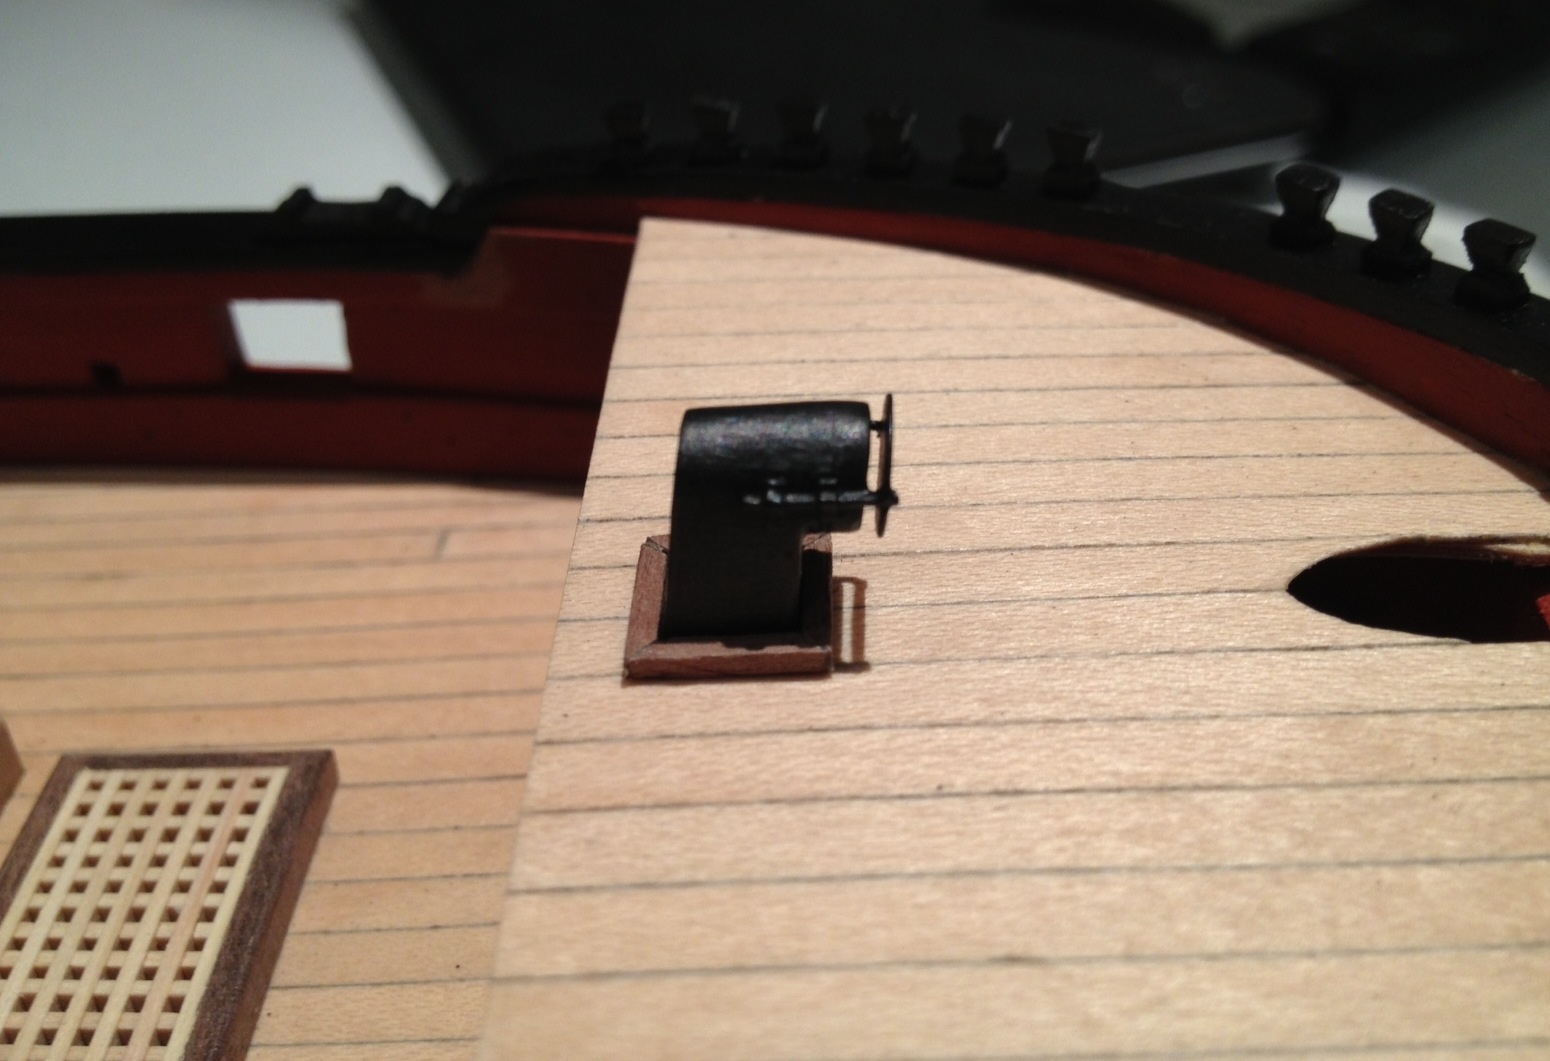
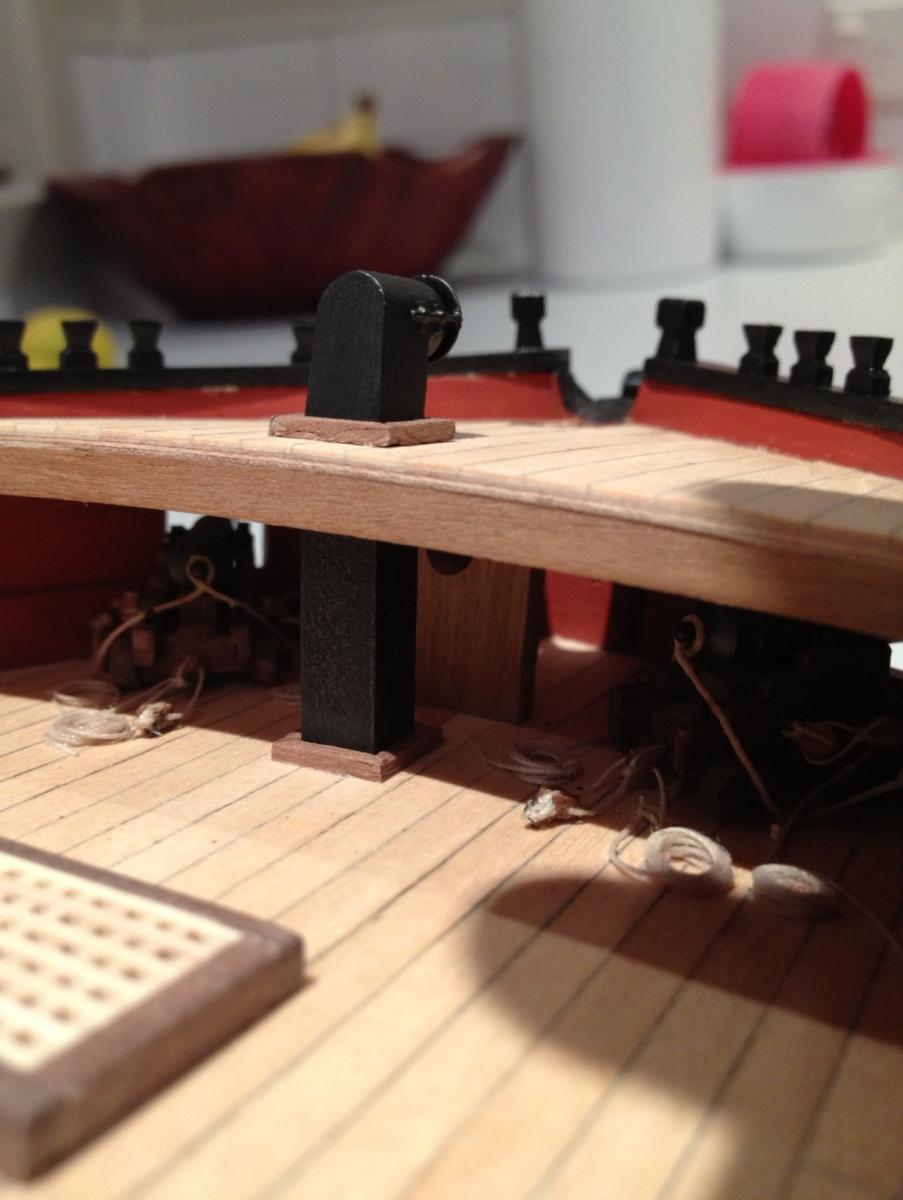
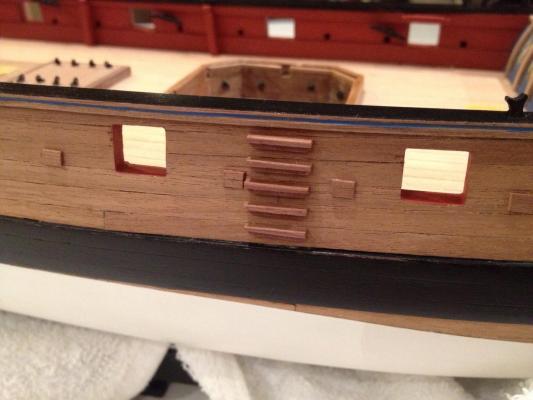
Finished chimney flue. Probably should have airbrushed it but that bit of gear is off on loan and 4 coats of brush paint did the trick. Hard to see on with artificial lighting in these shots but I rub some scraped graphite off a pencil onto larger metal parts like this with a finger. I realise painted ironwork on the real thing would be fairly flat black but I like to display the differences in materials on these vessels otherwise the iron chimney looks the same as the painted wood. The graphite catches the edge and makes the surface look a little more metallic.

- 366 replies
-
- 2
-
-
- granado
- caldercraft
- (and 1 more)
-
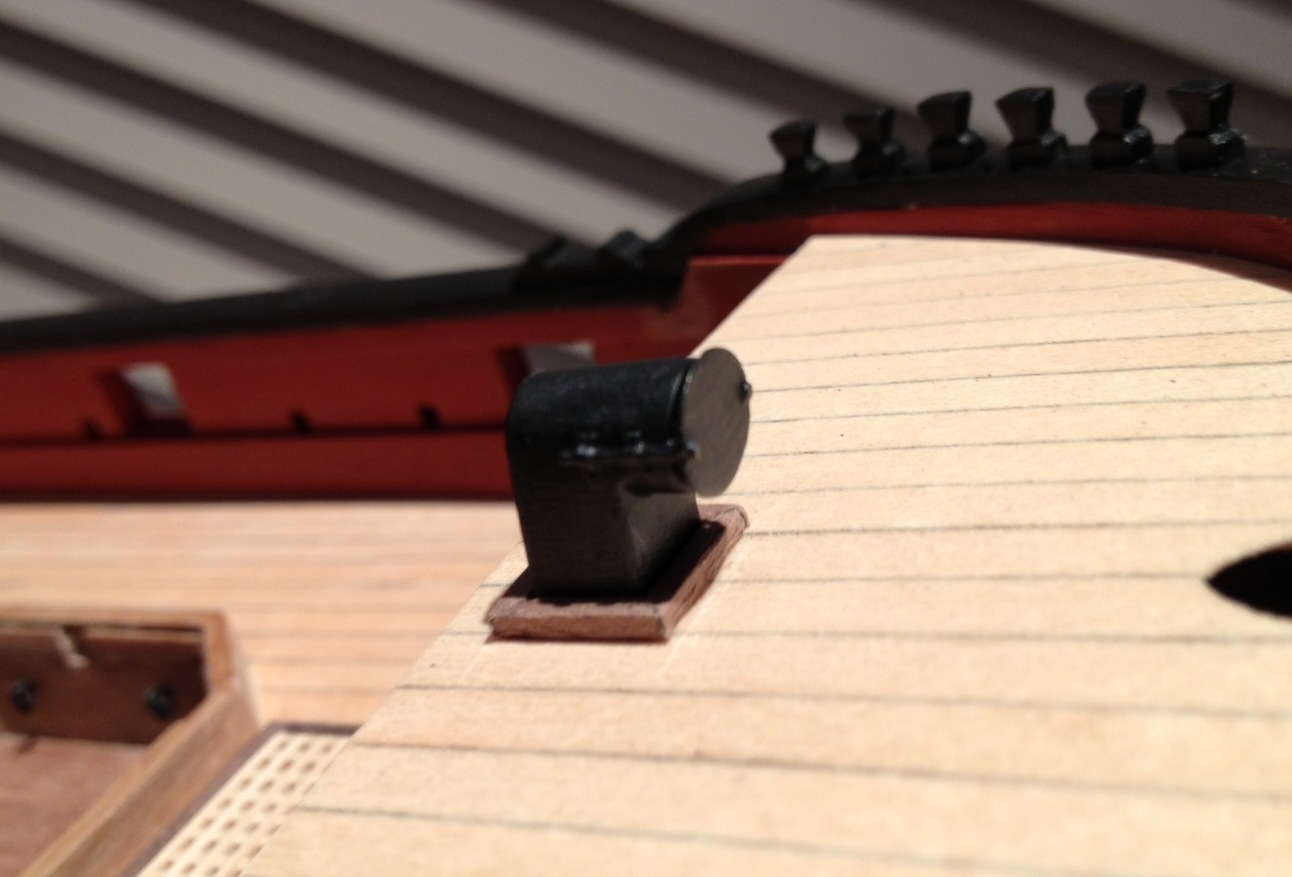
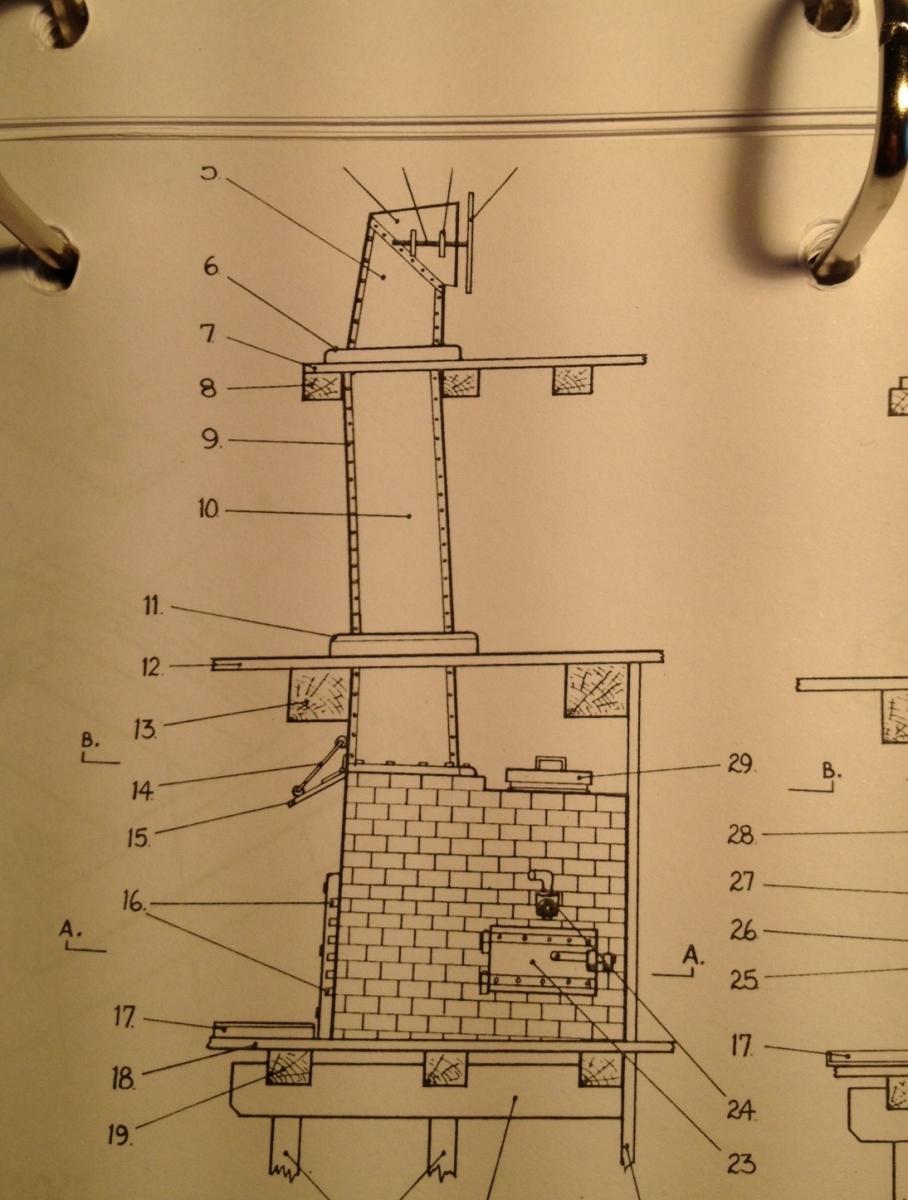
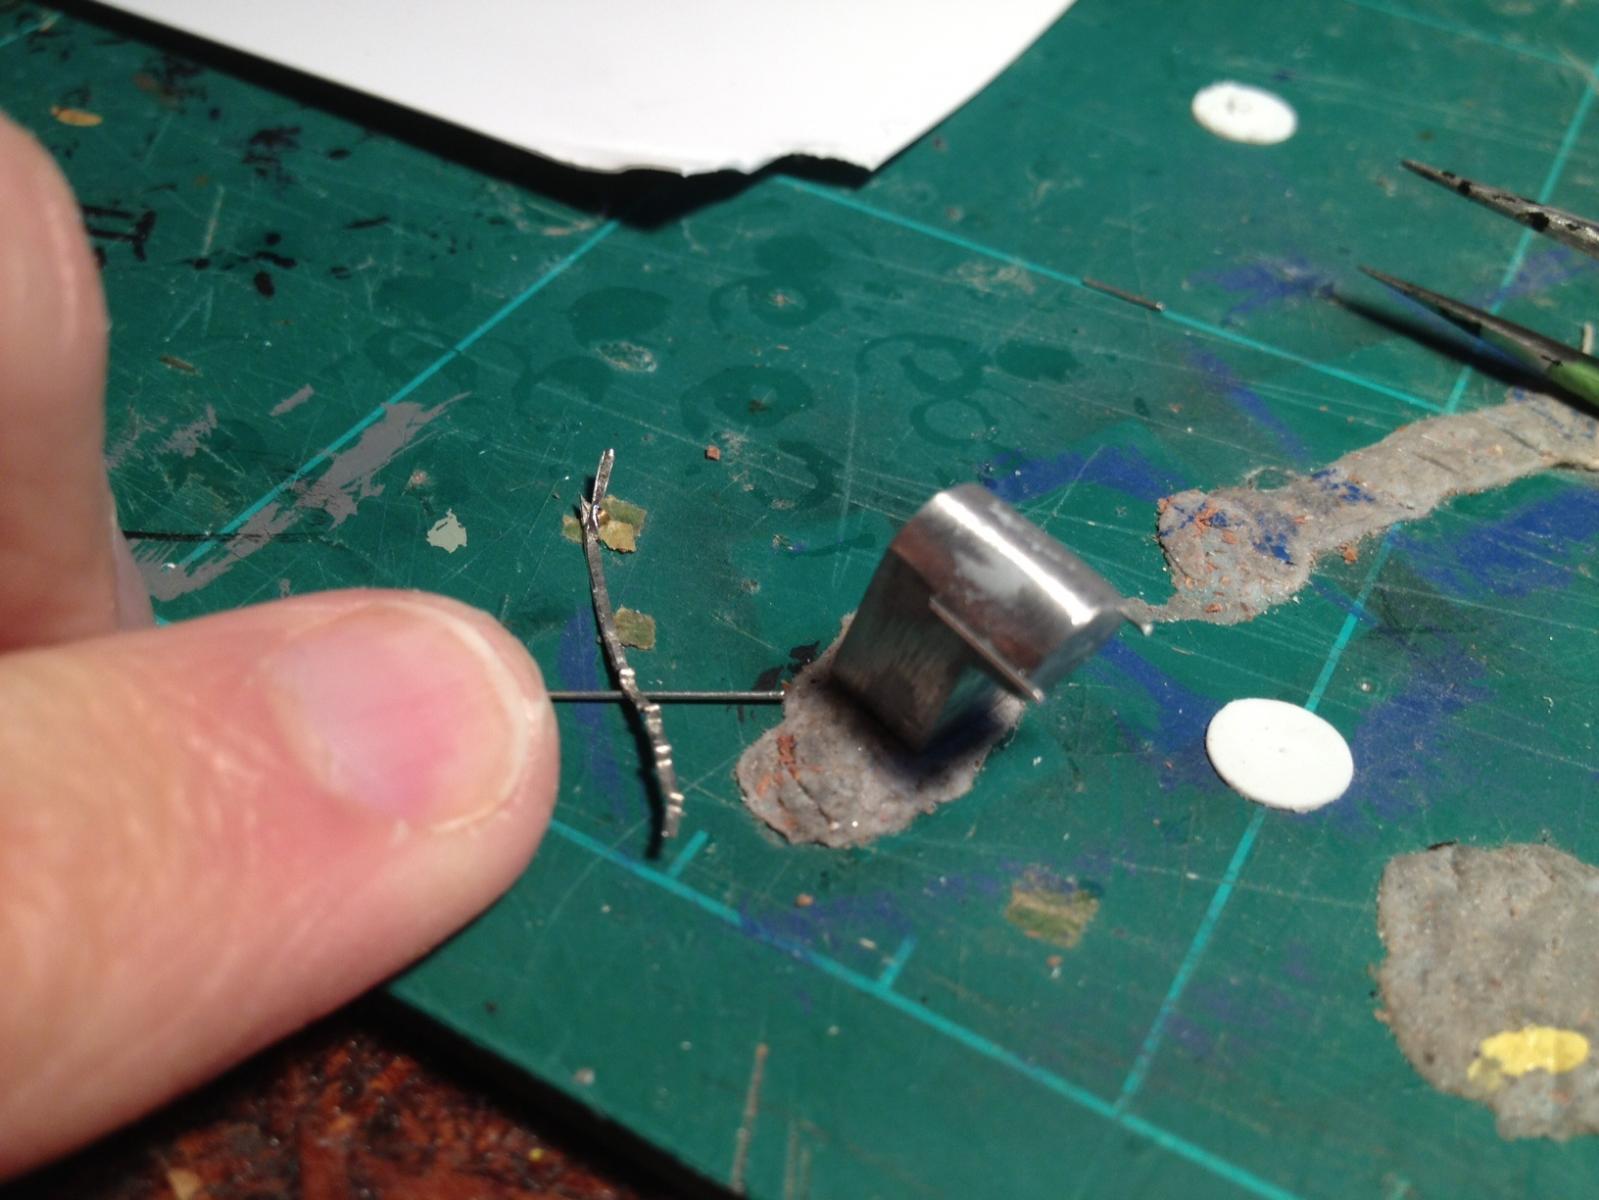
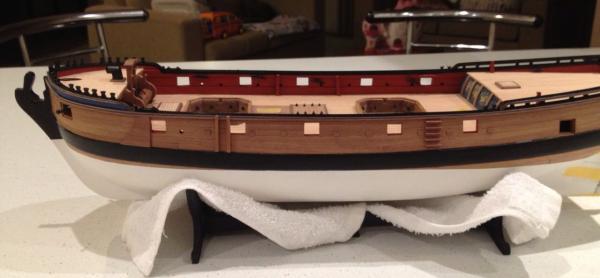
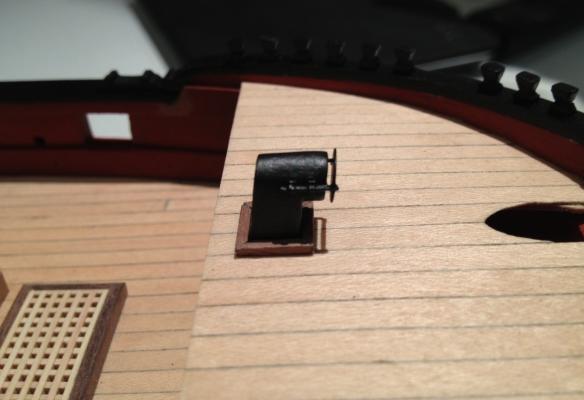
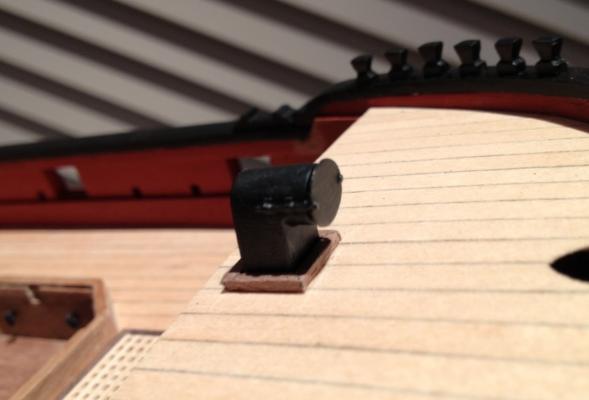
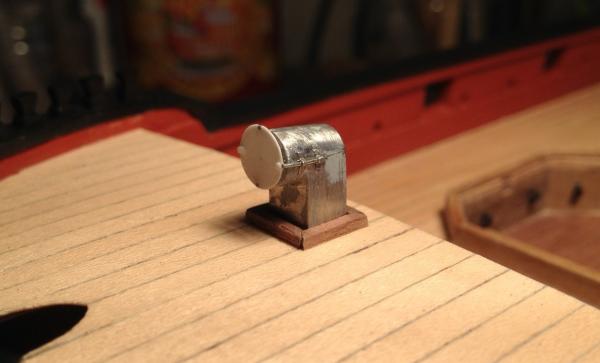
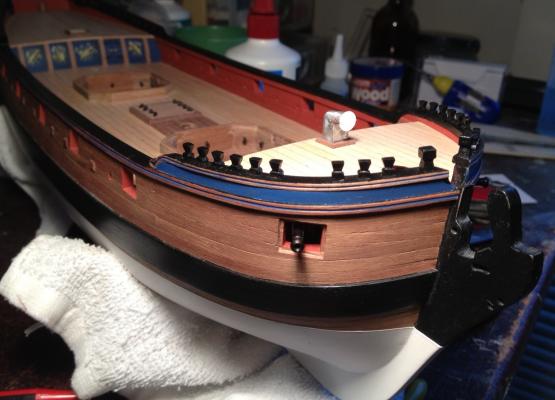
The chimney is next. It's a cast white metal piece that's fine on its own but if you've got a spare couple of hours while the admiral is at work and the children play happily on a rainy day then its worth improvement. Winter is here in that my iPhone forecast says rain until well into next week but its' still warm enough to work in the concrete floor garage/modelling space (carpet under the desk). Here's what AOTS Granado advises. I'm a bit of a hobby cook and am fascinated by what it would be like to cook for upwards of 100 men and then a separate meal befitting gentlemen for the captain and officers, on one of these beasts. But you can only see the chimney flue of this vessel. The main addition is a flue cover. And brackets holding it. Presumably it stops wind and wave coming down the chimney and drowning the cooker as the foc'sle was very exposed. The brackets and rods were added from lead foil and wire respectively and the flu cover itself was cut from sheet styrene from my plastic modelling days. Here it is in place Wider shot of the foc'sle here. The timber heads have also been added. Paint on the chimney is drying so completed pic to follow soon.


- 366 replies
-
- 3
-
-
- granado
- caldercraft
- (and 1 more)
-
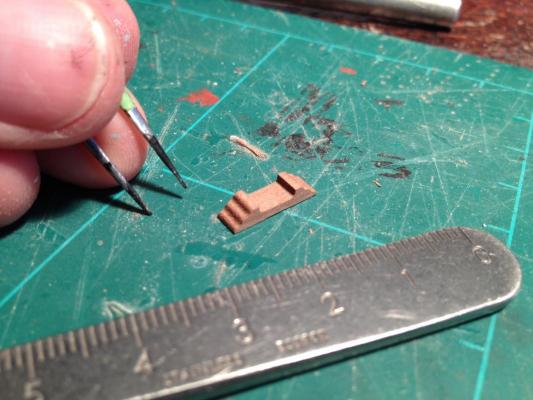
Here's an indication of the quality of this kit. The fish davit cleat pictured below has some rather nice rounded molding work straight from the box. I was expecting some file work would be needed to achieve the profile from AOTS Granado but it's already there. Brilliant.
-
Good move. I don't know why caldercraft persist with mishapen tillers from 2d ply. They always seem to benefit from remaking and it's usually not too difficult.
-
That's looking great Ray.
-
Documentaries of interest to MSW Members - moved by moderator
Timmo replied to Kevin's topic in Nautical/Naval History
Off the topic with a book recommendation but I'd highly recommend 'in the heart of the sea' by Nathaniel Philbrick. It's a very thorough but readable account of the Essex's Demi's and survivors' subsequent struggle with each other and the elements at sea. Gripping stuff.